1
WebBase User’s Guide
Changing the Way
the World Uses the Internet
Version 4.10, Build 56
June 1997
Limited Warranty on Media and Materials
If you discover physical defects in the media on which the software is distributed or in the manuals distributed with the
software, ExperTelligence will replace the media or manuals at no charge to you, provided you return the item to be replaced
with proof of purchase to ExperTelligence or an authorized ExperTelligence dealer during the 90-day period after you
purchased the software. In some countries the replacement period may be different; check with your authorized
ExperTelligence dealer.
ALL IMPLIED WARRANTIES ON THE MEDIA AND MANUAL, INCLUDING IMPLIED WARRANTIES OF
MERCHANTABILITY AND FITNESS FOR A PARTICULAR PURPOSE, ARE LIMITED IN DURATION TO
NINETY (90) DAYS FROM THE DATE OF THE ORIGINAL RETAIL PURCHASE OF THIS PRODUCT.
Even though ExperTelligence has tested the software and reviewed the documentation, ExperTelligence MAKES NO
WARRANTY OR REPRESENTATION, EITHER EXPRESS OR IMPLIED, WITH RESPECT TO THIS
SOFTWARE, ITS QUALITY, PERFORMANCE, MERCHANTABILITY, OR FITNESS FOR A PARTICULAR
PURPOSE. AS A RESULT, THIS SOFTWARE IS SOLD "AS IS," AND YOU THE PURCHASER ASSUME THE
ENTIRE RISK AS TO ITS QUALITY AND PERFORMANCE.
IN NO EVENT WILL EXPERTELLIGENCE BE LIABLE FOR DIRECT, INDIRECT, SPECIAL, INCIDENTAL,
OR CONSEQUENTIAL DAMAGES RESULTING FROM ANY DEFECT IN THE SOFTWARE OR ITS
DOCUMENTATION, even if advised of the possibility of such damages. In particular, ExperTelligence shall have no
liability for any programs or data stored in or used with ExperTelligence products, including the costs of recovering such
programs or data.
THE WARRANTY AND REMEDIES SET FORTH ABOVE ARE EXCLUSIVE AND IN LIEU OF ALL OTHERS,
ORAL OR WRITTEN, EXPRESS OR IMPLIED. No ExperTelligence dealer agent, or employee is authorized to make
any modification, extension, or addition to this warranty.
Some states do not allow the exclusion or limitation of implied warranties or liability for incidental or consequential
damages, so the above limitation or exclusion may not apply to you. This warranty gives you specific legal rights, and you
may also have other rights which vary from state to state.
Copyright: This manual and the software described in it are copyrighted with all rights reserved. Under the copyright laws,
this manual or the software may not be copied, in whole or part, without written consent of ExperTelligence, except in the
normal use of the software or to make a backup copy. The same proprietary and copyright notices must be affixed to any
permitted copies as were affixed to the original. This exception does not allow copies to be made for others, whether or not
sold, but all of the material purchased (with all backup copies) may be sold, given, or loaned to another person. Under the
law, copying includes translating into another language or format.
You may use the software on any single computer owned by you. For some products, a multi-use license may be purchased
to allow the software to be used on more than one computer owned by the purchaser, including a shared-disk system.
(Contact your authorized ExperTelligence dealer for information on multi-use licenses.)
© 1995-7 ExperTelligence, Inc. 203 Chapala St. Santa Barbara, CA 93101 (805) 962-2558
WebBase, ExperTelligence, and the WebBase and ExperTelligence logos are trademarks of ExperTelligence, Inc. Other
brand and product names are trademarks or registered trademarks of their respective holders. Brand and product names are
mentioned for reference purposes only.
ii
WebBase User’s Guide
Table of Contents
Table of Contents ........................................................................................................................................... iii
Chapter 1: What is WebBase?
1
1.1 WebBase Features and Benefits ................................................................................................................. 1
1.2 WebBase vs. CGI ..................................................................................................................................... 3
Chapter 2: Introduction
5
2.1 Basic Terminology ................................................................................................................................... 5
2.2 A WebBase Example................................................................................................................................. 7
2.3 Using the WebBase Language .................................................................................................................. 9
2.4 WebBase Server vs. HTTP Server........................................................................................................... 10
Chapter 3: Installation
11
3.1 System Requirements ............................................................................................................................. 11
3.2 Installing WebBase ................................................................................................................................ 12
WebBase Files on the CD ....................................................................................................................... 12
WebBase Files on the Web ..................................................................................................................... 12
WebBase Files Generated During Installation......................................................................................... 13
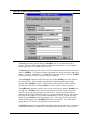
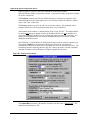
3.3 Standard WebBase Installation............................................................................................................... 14
Parameter Definition .............................................................................................................................. 18
Completing the Installation .................................................................................................................... 19
3.4 Custom WebBase Installation................................................................................................................. 21
3.5 Updating WebBase................................................................................................................................. 23
3.6 Testing the WebBase Installation ........................................................................................................... 24
Possible Installation Problems ................................................................................................................ 25
Testing WebBase Communications ........................................................................................................ 26
Built-in Commands ................................................................................................................................ 26
3.7 Installing ODBC Drivers........................................................................................................................ 27
ODBC Drivers........................................................................................................................................ 27
Installing the ODBC Drivers .................................................................................................................. 28
Setting the ODBC Sources ..................................................................................................................... 28
3.8 Installing WebBase as a Windows NT Service......................................................................................... 31
Installation as a Service.......................................................................................................................... 32
WebBase as a Service and ODBC Configuration .................................................................................... 32
Starting the Service ................................................................................................................................ 32
Stopping the Service............................................................................................................................... 32
Removing the Service Entry ................................................................................................................... 33
Upgrading to Windows-NT .................................................................................................................... 33
3.9 WebBase Support .................................................................................................................................... 34
WebBase User’s Guide
iii
Table of Contents
Chapter 4: Initialization
35
4.1 Parameters .............................................................................................................................................. 35
Windows NT Service Parameters............................................................................................................ 38
Editing WebBase Parameters.................................................................................................................. 38
4.2 Extensions............................................................................................................................................... 39
Editing Extensions ................................................................................................................................. 41
4.3 Aliases .................................................................................................................................................... 42
Editing Aliases....................................................................................................................................... 42
4.4 Multiple Domains .................................................................................................................................. 43
Creating and Editing Multiple Domains ................................................................................................. 44
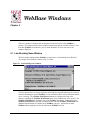
Chapter 5: WebBase Windows
47
5.1 Late Breaking News Window ................................................................................................................. 47
Menu Options ........................................................................................................................................ 48
5.2 WebBase Server Window ....................................................................................................................... 49
WebBase Server Window Menu Bar....................................................................................................... 50
WebServer Menu Options................................................................................................................ 50
Edit Menu Options .......................................................................................................................... 53
Options Menu Options..................................................................................................................... 54
Help Menu Options ......................................................................................................................... 57
WebBase Server Window Status Line..................................................................................................... 57
WebBase Server Window Text Display................................................................................................... 58
5.3 WebBase Transactions Service Window ................................................................................................. 58
WebBase Transactions Menu Bar ........................................................................................................... 59
WebBase Transactions Text Window ..................................................................................................... 62
5.4 WebBase Total View Window ................................................................................................................ 62
WebBase Total View Menu Bar.............................................................................................................. 63
WebBase Total View Options................................................................................................................. 64
WebBase Total View Text Window ........................................................................................................ 64
5.5 WebBase Heartbeat Window .................................................................................................................. 65
WebBase Heartbeat Window Menu Bar .................................................................................................. 66
WebBase Heartbeat Text Window .......................................................................................................... 69
Chapter 6: ODBC & SQL
71
6.1 Open Database Connectivity.................................................................................................................... 71
6.2 Structured Query Language .................................................................................................................... 72
SELECT ................................................................................................................................................ 72
SELECT -- General Usage............................................................................................................... 72
SELECT -- WebBase Usage ............................................................................................................ 74
SELECT – Join Statements.............................................................................................................. 74
INSERT ................................................................................................................................................. 75
INSERT -- General Usage ............................................................................................................... 75
INSERT -- WebBase Usage ............................................................................................................. 76
UPDATE................................................................................................................................................ 76
UPDATE – General Usage .............................................................................................................. 76
UPDATE – WebBase Usage ............................................................................................................ 77
DELETE ................................................................................................................................................ 77
DELETE – General Usage............................................................................................................... 77
DELETE – WebBase Usage............................................................................................................. 77
iv
WebBase User’s Guide
Chapter 7: .htf Files
79
7.1 Editing .htf Files ..................................................................................................................................... 79
7.2 Requesting Input on a Form ................................................................................................................... 80
7.3 Processing Input from a Form ................................................................................................................ 81
Chapter 8: Macros
83
8.1 Overview of WebBase Macros ................................................................................................................ 83
8.2 The WebBase Macros............................................................................................................................. 84
{~ text} {/~} .......................................................................................................................................... 84
{call <path> <args>} {/call} .................................................................................................................. 84
{case <exp>} {match <mArg>} {otherwise} {/case}.............................................................................. 88
{comment} {/comment}......................................................................................................................... 89
{ensure} {onExit} {/ensure} .................................................................................................................. 89
{errorProtect} {onError} {/errorProtect}................................................................................................ 90
{escape <label>} .................................................................................................................................... 90
{exit <args>} ......................................................................................................................................... 91
{f= <exp>}............................................................................................................................................. 92
{f== <exp>} .......................................................................................................................................... 92
{forIndex <indexCtr> <args>} {/forIndex} ............................................................................................ 92
{forRow <currentRow> <optionalArgs>} {/forRow}.............................................................................. 93
{htf} {/htf}............................................................................................................................................. 94
{if <exp>} {else} {/if} ........................................................................................................................... 95
{insert <filename>} ............................................................................................................................... 95
{output <args>} {/output}...................................................................................................................... 96
{parallel} {/parallel}.............................................................................................................................. 97
{reDirect <url>}..................................................................................................................................... 97
{reDirect2 <arg>} {/reDirect2}.............................................................................................................. 98
{remove <varNames>}........................................................................................................................... 98
{removeAll <varNames>}...................................................................................................................... 99
{removeCookie <varNames>}................................................................................................................ 99
{removeGlobal <varNames>} ...............................................................................................................100
{removeHeader <varNames>}...............................................................................................................100
{removeLocal <varNames>} .................................................................................................................100
{removeUser <varNames>}...................................................................................................................100
{return <vals>} .....................................................................................................................................101
{scope} {/scope} ...................................................................................................................................101
{set <var> <val>} .................................................................................................................................103
{setCookie <var> <val>}.......................................................................................................................104
{setGlobal <var> <val>} .......................................................................................................................104
{setHeader <var> <val>} ......................................................................................................................104
{setLocal <var> <val>}.........................................................................................................................105
{setString <var> <options>} {/setString}..............................................................................................105
{setUser <var> <val>} ..........................................................................................................................106
{signalError <error text string>}...........................................................................................................106
{sql <args>} {/sql} ...............................................................................................................................107
{timer id <idVal> <args>} {/timer} ......................................................................................................110
{while <exp>} {/while} ........................................................................................................................111
{with <val>} {/with} ............................................................................................................................112
{writeFile <file> <optionalArgs>} {/writeFile}.....................................................................................113
WebBase User’s Guide
v
Table of Contents
Chapter 9: Variables
115
9.1 Field Variables ......................................................................................................................................116
9.2 Local Variables ......................................................................................................................................118
Local Input Variables ............................................................................................................................118
Set Local Variables ...............................................................................................................................120
Header Local Variables .........................................................................................................................121
Cookie Local Variables .........................................................................................................................121
Creating Cookies ............................................................................................................................122
Receiving Cookies ..........................................................................................................................123
WebBaseID Variable ......................................................................................................................123
9.3 Global Variables....................................................................................................................................124
Editing Global Variables .......................................................................................................................125
9.4 Dynamic Variables.................................................................................................................................126
Operational Variables............................................................................................................................147
Special Variables...................................................................................................................................148
9.5 Displaying Variables .............................................................................................................................155
Chapter 10: User Variables
158
10.1 User Variables......................................................................................................................................158
10.2 User Variable Dictionaries....................................................................................................................159
Special User Variables...........................................................................................................................159
User Variable Dictionary Maintenance ..................................................................................................160
10.3 Using User Variables in WebBase ........................................................................................................160
User Variable Design ............................................................................................................................161
User Variable Example..........................................................................................................................161
Creating User Variables ........................................................................................................................162
Persistent User Variables.......................................................................................................................163
Chapter 11: Expressions
164
11.1 WebBase Expression Components .......................................................................................................164
11.2 RPN Notation......................................................................................................................................165
Building Compound Statements in RPN................................................................................................167
11.2 General Operations..............................................................................................................................169
General Instance Operations..................................................................................................................169
11.3 Numbers...............................................................................................................................................171
Number Instance Operations .................................................................................................................171
11.4 Integers ...............................................................................................................................................175
Integer Instance Operations...................................................................................................................175
Integer Class Operations .......................................................................................................................177
11.5 Floats ..................................................................................................................................................177
Float Instance Operations ......................................................................................................................177
Float Class Operations...........................................................................................................................177
11.6 Fractions .............................................................................................................................................178
Fraction Instance Operations .................................................................................................................178
Fraction Class Operations......................................................................................................................178
11.7 Points ...................................................................................................................................................178
Point Instance Operations......................................................................................................................178
Point Class Operations ..........................................................................................................................180
vi
WebBase User’s Guide
11.8 General Collection Operations.............................................................................................................181
General Collection Instance Operations.................................................................................................181
General Collection Class Operations .....................................................................................................185
11.9 Arrays .................................................................................................................................................185
11.10 Strings...............................................................................................................................................185
String Instance Operations ....................................................................................................................186
String Class Operations.........................................................................................................................196
11.11 Symbols.............................................................................................................................................196
11.12 Ordered Collections...........................................................................................................................197
Ordered Collection Instance Operations ................................................................................................197
Ordered Collection Class Operations .....................................................................................................201
11.13 Ordered Lists.....................................................................................................................................201
11.14 Sorted Collections .............................................................................................................................201
11.15 Sorted Lists .......................................................................................................................................201
Sorted List Class Operations..................................................................................................................202
11.16 Associations ......................................................................................................................................202
Association Instance Operations............................................................................................................202
Association Class Operations ................................................................................................................203
11.17 Dictionaries.......................................................................................................................................203
Dictionary Instance Operations..............................................................................................................203
Dictionary Class Operations ..................................................................................................................205
11.18 Characters .........................................................................................................................................206
11.19 Booleans............................................................................................................................................208
11.20 Dates .................................................................................................................................................209
Date Instance Operations.......................................................................................................................209
Date Class Operations ...........................................................................................................................212
11.21 Times ................................................................................................................................................215
Time Instance Operations......................................................................................................................215
Time Class Operations ..........................................................................................................................216
11.22 Universal Times ................................................................................................................................217
Universal Time Instance Operations......................................................................................................217
Universal Time Class Operations ..........................................................................................................222
11.23 OdbcTimeStamp................................................................................................................................222
11.24 Files ..................................................................................................................................................224
File Instance Operations........................................................................................................................224
File Class Operations ............................................................................................................................225
11.25 Directories.........................................................................................................................................226
Directory Instance Operations ...............................................................................................................226
Directory Class Operations....................................................................................................................228
11.26 Streams .............................................................................................................................................229
Stream Instance Operations...................................................................................................................229
Stream Class Operations .......................................................................................................................232
11.27 Read Streams.....................................................................................................................................232
Read Stream Instance Operations ..........................................................................................................232
Read Stream Class Operations...............................................................................................................232
11.28 Write Streams....................................................................................................................................232
Write Stream Instance Operations .........................................................................................................232
Write Stream Class Operations..............................................................................................................233
WebBase User’s Guide
vii
Table of Contents
11.29 Read-Write Streams...........................................................................................................................233
Read-Write Stream Instance Operations ................................................................................................233
Read-Write Stream Class Operations.....................................................................................................233
11.30 File Streams ......................................................................................................................................234
11.31 OdbcRowObjects ...............................................................................................................................234
11.32 OdbcRowHeaders ..............................................................................................................................238
11.33 Registration Database ........................................................................................................................239
Registration Database Instance Operations ............................................................................................239
Registration Database Class Operations.................................................................................................241
11.34 HttpCommand....................................................................................................................................242
11.35 DatabaseInfo ......................................................................................................................................247
Chapter 12: Features
250
12.1 Logging...............................................................................................................................................250
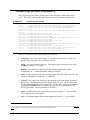
Common Log File Format (LogFormat=3).............................................................................................251
Extended Common Log File Format (LogFormat=2) .............................................................................252
Extended Combined Log File Format (LogFormat=4) ...........................................................................252
Original WebBase (EMWACS) Log File Format (LogFormat=0) ..........................................................253
Extended Original WebBase (EMWACS) Log File Format (LogFormat=1)...........................................254
12.2 Caching...............................................................................................................................................255
Browser-Side Caching...........................................................................................................................255
Forms Caching......................................................................................................................................256
ODBC Connection Caching ..................................................................................................................257
12.3 WHERE Clause & Variable Name Suffixes .........................................................................................258
12.4 ISMAP Features ...................................................................................................................................260
Chapter 13: Security
262
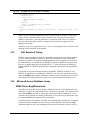
13.1 Basic Authentication ...........................................................................................................................262
13.2 Directory Browsing .............................................................................................................................265
13.3 Firewalls ............................................................................................................................................265
Chapter 14: Database Issues
268
14.1 ODBC Driver/Database Engine Errors ...............................................................................................268
14.2 Database Administration .....................................................................................................................269
Clearing Caches ....................................................................................................................................269
SQL Protect using Global Variables ......................................................................................................270
14.3 SQL Selects & Timing ........................................................................................................................271
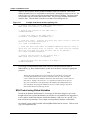
14.4 Microsoft Access Database Issues .......................................................................................................271
ODBC Driver Bug/Workaround ............................................................................................................271
Too Many Client Tasks Error ................................................................................................................274
14.5 Microsoft Excel Database Issues .........................................................................................................276
14.6 FoxPro Database Issues .......................................................................................................................276
Chapter 15: WebBase Q&A
Chapter 16: E-Merge
278
282
16.1 Configuration ......................................................................................................................................282
E-Merge Parameters..............................................................................................................................282
viii
WebBase User’s Guide
The Mail Log ........................................................................................................................................283
Shutting Down WebBase.......................................................................................................................283
16.2 E-Merge Windows...............................................................................................................................283
WebBase Mail Service Window.............................................................................................................283
Menu Options.................................................................................................................................284
WebBase Server Window ......................................................................................................................289
Menu Options.................................................................................................................................289
16.3 WebBase Macros.................................................................................................................................289
{mail <args>} {/mail} ..........................................................................................................................290
16.4 E-Merge Variables ..............................................................................................................................292
Dynamic Variables................................................................................................................................293
Operational Variables............................................................................................................................293
Special Variables...................................................................................................................................293
16.5 E-Merge Operations ............................................................................................................................294
Mail Lists..............................................................................................................................................294
Mail List Instance Operations.........................................................................................................294
Envelopes..............................................................................................................................................295
Envelope Instance Operations.........................................................................................................295
16.6 E-Merge Examples..............................................................................................................................295
Appendix A: Software License Agreement
Appendix B: Special Configuration Issues
296
298
B.1 16-bit Systems .......................................................................................................................................298
Installation ............................................................................................................................................298
Editing Parameters ................................................................................................................................301
Extensions.............................................................................................................................................302
Aliases ..................................................................................................................................................302
Global Variables....................................................................................................................................303
B.2 Editing the System Registry ...................................................................................................................303
Accessing the System Registry ..............................................................................................................303
Parameters ............................................................................................................................................304
Extensions.............................................................................................................................................304
Aliases ..................................................................................................................................................304
Multiple Domains .................................................................................................................................304
Global Variables....................................................................................................................................304
Appendix C: Header Variables
306
HTTP 1.1 Input Header Variables .........................................................................................................306
Appendix D: Obsolete Components
310
D.1 Obsolete macros ....................................................................................................................................310
D.2 Obsolete dynamic variables....................................................................................................................311
D.3 Obsolete variable parameters .................................................................................................................312
Index
WebBase User’s Guide
315
ix
Table of Contents
x
WebBase User’s Guide
What is WebBase?
Chapter 1
"I don’t want to teach myself PERL or other CGIs," said Matt
McWhinney, technical architect at Ameritech Corp., a regional
Bell operating company in Chicago. "WebBase is something I
can pull out of a box and install myself. Besides, our Web has to
be fast and maintainable. "
-- InfoWorld July 17, 1995
WebBase™ is a Web database server that allows you to easily integrate information from
Open Database Connectivity (ODBC) databases into your Web site. It works in cooperation
with any browser, allowing users to hypersearch a database as easily as they navigate
hypertext links in a Web document. With WebBase, if it's contained in a database you can
display it on a Web page!
WebBase provides solutions ranging from simple access, to a real estate listing, to a complex
catalog ordering application. You can make the contents of your database available to anyone
browsing your site, or limit access to a specific audience that you control through password
protection. In addition, you can make existing databases more powerful by adding hypertext
links into reports. This feature allows users to delve into a report in greater detail, while
maintaining the simplicity of a high level view.
1.1
WebBase Features and Benefits
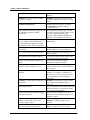
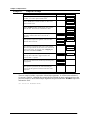
WebBase provides many features for the design and maintenance of Web forms. New
features are also added to each new release of WebBase to improve its functionality; WebBase
users often suggest these new features. The following list identifies some of the interesting
features offered by WebBase, and how you can benefit from using WebBase.
Features
Benefits
WebBase is a full web server.
WebBase is all the software you need to
connect your database to the web. No other
software is required.
WebBase is ODBC compliant.
WebBase works with any ODBC-compliant
database, including ORACLE, Sybase, SQL
Server, and MS Access.
WebBase User’s Guide
1
Chapter 1: What is WebBase?
Easy automatic install.
You can have a web server running in
minutes!
WebBase uses all the features of HTML
(versions 1,2 and 3).
WebBase works with ALL Browsers and
extensions and Internet file types, including
JAVA.
WebBase WebWizard
Utilities and tools to help you get started
with WebBase, including setting up
example web sites.
SQL statements of arbitrary complexity can
be embedded anywhere in HTML
documents.
No programming of ugly scripts. You can
use SQL to populate pop-ups, fill lists, insert
new data, and embed arbitrary SQL
SELECT, JOIN, UPDATE, INSERT and
DELETE. The possibilities are endless!
A full-featured macro language including
if, case, forRow, forIndex statements as
well as math, logic, comparisons, string
manipulation, dates, and more functions.
No CGI code! Your Web pages are easily
maintainable.
WebBase directly reads data in all Internet
file formats.
You can include JAVA, movies, virtual
HTML, pictures, etc. in your Web pages.
An ‘insert’ facility for easy maintenance.
Re-use of forms saves time and keeps you
better organized.
User defined local and global variables.
You can store temporary state values, store
form fields, and store query results.
Session variables that hold state between
pages.
You can easily do online shopping
applications using user variables.
Dozens of dynamic variables including
%date%, %browserAddress%, %os%.
Provide access to predefined operating
system routines that are normally difficult to
access and use.
Supports multiple domains on the same
machine.
One WebBase server can support many
domains. For example, one machine can
host 'www.yyyy.com' and 'www.xxxx.com',
each configured to present information
differently.
WebBase can interrogate the capabilities of WebBase can dynamically decide to return
the browser.
GIF or JPEG or FRAMES or tables or
JAVA, etc.
2
Password protection
Keep your databases secure with user ID and
password protection...even down to security
on a given field of a database!
Custom context sensitive database logging
for each search form.
Know who your customers are or who is
visiting your site including keeping track of
what they wanted.
Can customize response by user/server IP
address- 'Welcome Mr. Jones, you've
visited our page # times'
Personalized pages generated on the fly by
WebBase are displayed back to users'
browsers.
No CGI -- WebBase is the only database
web server that skips external script
The WebBase server connects directly to the
database. With CGI, your server must
WebBase User’s Guide
applications entirely!
launch a script every time a request is made,
and then the script will launch a database
query program. Only ASCII text is
returned, not a list of rows. Another script
must be used to massage the results into
HTML.
Use WebBase intranet applications.
WebBase can be used within your
company's network.
Online reference and documentation.
WebBase has its own home page, where you
can get the latest documentation and newest
releases.
WebBase is a 32-bit application
32 bit is the only way to go!
Desktop development
You can develop your WebBase
applications ‘off-line’ -- work on your laptop
at home or anywhere.
Cache ODBC connections
You can directly control caching to provide
very fast database accesses.
Online support forum
Benefit from the experience of existing
WebBase users
Access multiple databases at the same time
anywhere on the net.
Most real business applications use multiple
databases.
WebBase is a multi-threaded application.
WebBase can handle multiple hits at the
same time.
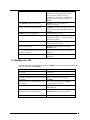
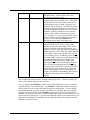
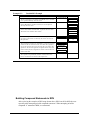
1.2 WebBase vs. CGI
As noted above, no CGI scripts are required in WebBase. Here are some more comparisons
between CGI/PERL and WebBase.
CGI/PERL
WebBase
Very slow
Very fast
Must launch new process every hit
No processes need to get launched
Database connections need to be established
EVERY hit
Database connections are cached by
WebBase
State not retained (‘shopping basket’ apps
are difficult)
State is retained implicitly by WebBase
(‘shopping basket’ built in)
Scripts are complicated to maintain
No scripts; HTML files contain the
embedded SQL
Database queries return only text, scripts
massage the text results into HTML
Database queries return row objects,
WebBase dynamically lays out HTML
Browser ‘cookie’ is tricky
Browser ‘cookie’ is automatic
WebBase User’s Guide
3
Chapter 1: What is WebBase?
4
WebBase User’s Guide
Introduction
Chapter 2
This chapter presents introductory material about WebBase, including general terminology, so
that the user has a better understanding of how WebBase can be used.
2.1 Basic Terminology
Before discussing the specific features of WebBase, it is necessary to define some special
terminology. The section that follows identifies terms that are used in this manual. Review
these definitions carefully and try to understand them completely before reading further in this
manual.
Anchor-- A link from a portion of a web page (e.g., a word or phrase) to another location on
the current web page or a totally different web page.
Browser -- A browser is a client-side program that allows a user to view the pages of
information that others create and offer on the World Wide Web. The user identifies a web
address to the browser, which then issues a request to the HTTP Server at the web address.
The browser then displays the information returned from the server. Synonym: Web Browser.
CGI script -- The Common Gateway Interface, or CGI, is a standard for external gateway
programs to interface with information servers such as HTTP or Web servers. A plain HTML
document that the Web server retrieves is static, which means it exists in a constant state: a
text file that does not change. A CGI program, or script, is executed in real-time, so that it can
output dynamic information.
Cookie -- Cookies are a general mechanism which server side connections can use to both
store and retrieve information on the client side of the connection. The addition of a simple,
persistent, client-side state significantly extends the capabilities of Web-based client/server
applications. When the server returns requested information to a client system, the server may
also send a piece of state information that the client will store. Included in that state object is a
description of the range of URLs for which that state is valid. Any future requests made by the
client which fall in that range will include a transmittal of the current value of the state object
from the client back to the server. The state object is called a cookie, for no compelling
reason.
WebBase User’s Guide
5
Chapter 2: Introduction
Database server -- A machine whose primary purpose is to run database software accessed
by many other machines via some form of network connection.
Domains -- Domains are adminstrative entities that provide decentralized management of host
naming and addressing. The Domain Name System (DNS) is arranged as a hierarchy, both
from the perspective of the structure of the names maintained within the DNS, and in terms of
the delegation of naming authorities. At the top of the hierarchy is the root domain (‘.’) which
is administered by the Internet Assigned Numbers Authority (IANA). Administration of the
root domain gives the IANA the authority to allocate domains beneath the root. The DNS is
implemented as a collection of inter-communicating nameservers. At any given level of the
DNS hierarchy, a nameserver for a domain has knowledge of all the immediate sub-domains of
that domain. The Network Information Center (NIC) is designated by the Defense
Communications Agency (DCA) to provide registry services for the domain-naming system on
the DDN and DARPA portions of the Internet.
GET and POST requests -- A browser communicates with a server via either a GET or
POST request. The string of characters sent to the server begins with the sequence GET or
POST followed by specifics as to the web page being requested, any required parameters, and
various header record information such as the identity of the browser issuing the request. The
initial GET or POST character sequence defines the syntax of the remainder of the request specifically the location and encoding of the optional parameters - and whether these optional
parameters are visible to the user at the browser making the request. The author of an HTML
web page has the ability to specify either a GET or POST request for a form while a default
GET request is generated for anchors used in hypertext linking.
.htf files -- A file system extension that designates WebBase form files that contain standard
HTML syntax plus WebBase macros and variables. Synonyms: WebBase output forms,
WebBase macro forms.
HTML -- Hypertext Markup Language. Web pages are written in HTML so that the
information they present will be displayed the same way by every browser available (in theory,
at least).
HTTP server -- A computer system with a software package that responds to requests from
browsers and returns the requested data. The data returned is generally a specifically
addressed file that may include data generated real-time via a CGI script or the built-in
capabilities of the server itself such as the macro language provided with WebBase. These
software packages are called HTTP servers because their primary purpose is to serve data
using the HTTP protocol. However, Web server is a better term because they often do much
more than just speak a protocol. Synonym: Web server.
Hypertext searching & linking -- Marking portions of a web page with anchors. When a
user selects the anchor, generally by clicking the mouse while over the marked anchor, another
location on the current web page or a totally different web page will be made available to the
user.
Input Forms -- A special type of HTML form. It allows the web page author to request input
from the user via type-in fields, checkboxes, radio buttons, menu selections, buttons, etc.. It
also includes information as to where the collected input is to be directed when the user is
ready to submit his or her input.
IP Address -- An IP (Internet Protocol) address is a 4-byte number that uniquely identifies a
host on the IP network. This address consists of a network number, which is always the same
for every host on a network, and a host number, which must be unique for each host on a
6
WebBase User’s Guide
network. IP addresses are assigned to each computer by appending a unique host number to the
network number. The first byte of an IP address determines the class of the network. IP
addresses are divided into Class A, Class B, and Class C network numbers. The first byte of a
Class A network is in the range of 1-127, and the network address is one byte in length. The
first byte of a Class B network is in the range of 128-191, and the network address is two
bytes in length. The first byte of a Class C network is in the range of 192-254, and the network
address is three bytes in length. For example, 130.57.x.x is a Class B Internet number because
the network number is two bytes in length, and the value of the first byte is between 128 and
191. When you assign an IP address to a device, you can append any host number that is not
already in use by another device. The host number part of the IP address must be unique on the
IP network. At most sites, a network administrator maintains and assigns IP addresses.
ISMAP Image --An image displayed on an HTML page that has the ISMAP attribute set.
This attribute turns the image into a graphically active element in which the user can select
regions of the image by clicking the mouse on them. Clicking on different regions will cause
the server to take different actions.
ODBC database -- A database is ODBC (Open DataBase Connectivity) compliant if it has
an ODBC driver through which one can issue SQL statements. ODBC provides an interface
by which an application program can access any number of different databases via a common
set of SQL statements. The ODBC driver handles the conversion of the SQL statement to
whatever format statement the specific target database recognizes.
Records -- A collection of fields in a database. When one queries a database using an SQL
SELECT statement, one expects to have returned zero, one, or more database records that
match the selection parameters in the SELECT statement. Records can be updated using the
SQL UPDATE statement, or deleted using the SQL DELETE statement. A new record is
created using the SQL INSERT statement.
Splash Screen -- When an application starts up, it will frequently display a logo identifying
the name of the product and possibly some copyright or company information. This screen is
called a splash screen.
SQL -- a standardized query language used to access one of a number of databases which of
themselves might have considerable differences in implementation.
URL -- Uniform Resource Locator. It can be considered a networked extension of the
standard filename concept. Not only can you point to a file in a directory, but that file and that
directory can exist on any machine on the network, can be served via any of several different
methods, and might not even be something as simple as a file. URLs can also point to queries,
documents stored deep within databases, or whatever.
Web page -- A document or file written in HTML that provides instructions to browsers on
how to format and display the text and graphics included in the page. A Web page may
include text, pictures, input forms, and anchors. Synonym: Web document.
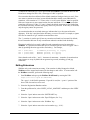
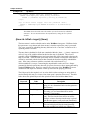
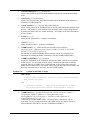
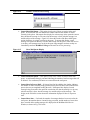
2.2
A WebBase Example
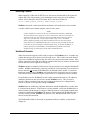
WebBase allows your readers to interact with your databases from a Web browser. Since
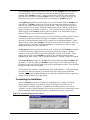
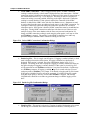
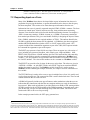
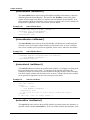
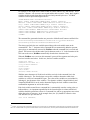
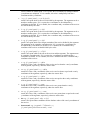
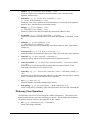
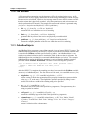
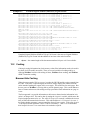
examples speak louder than words, let’s go step-by-step through a simple one. Suppose you
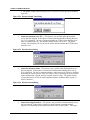
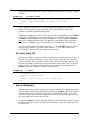
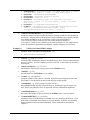
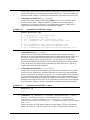
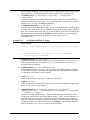
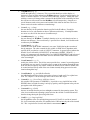
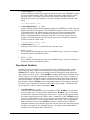
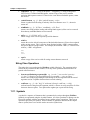
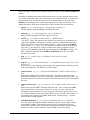
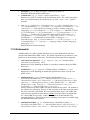
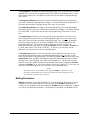
have a Web page with an input form that looks like this:
WebBase User’s Guide
7
Chapter 2: Introduction
Please enter the name to search for: Denny
Submit
When the user enters the desired search name (e.g., ‘Denny’) and clicks on the ‘Submit’
button, a GET request is sent from the browser that looks like:
http://<host-URL>:80/getname.htf?name=Denny
This request is sent to the WebBase server at http://<host-URL>/. The server is configured to
accept requests on port 80, so that is included as part of the address. The WebBase server
will access the form stored in the file getname.htf, and use the information found following the
‘?’ as parameters in the processing of the form.
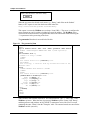
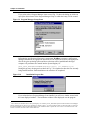
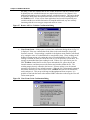
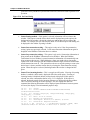
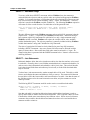
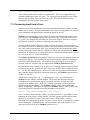
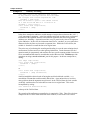
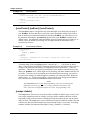
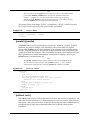
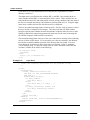
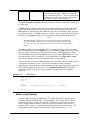
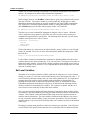
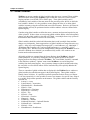
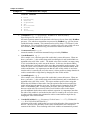
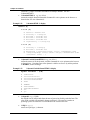
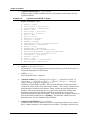
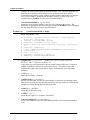
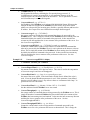
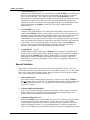
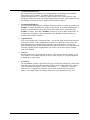
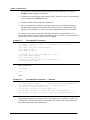
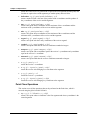
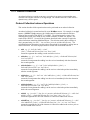
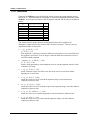
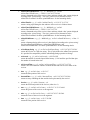
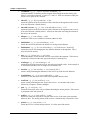
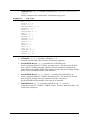
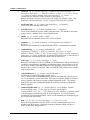
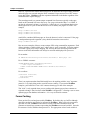
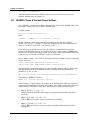
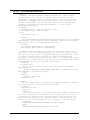
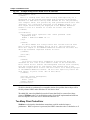
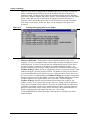
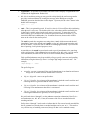
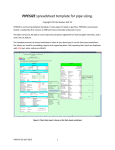
The getname.htf form that is accessed looks like this:
Figure 2.1 The getname.htf form
<HTML>
<HEAD>
{sql to answers source 'aSrc' user 'aUser' password 'aPwd' max 25 }
SELECT * FROM Examples WHERE Name LIKE '%{name sql=true}%'
{/sql}
{if 0 answers size =}
<TITLE> I'm sorry! </TITLE>
</HEAD>
<BODY>
<H2> Search results for: {%search%} </H2>
<HR SIZE=8>
<H2> I'm sorry, I could not find any records that match in the
database.</H2>
{else}
<TITLE> WebBase Demo Results </TITLE>
</HEAD>
<BODY>
<H2> Search results for: {%search%} </H2>
{forRow aRow on answers}<HR><PRE>
Name: <B>{Name}</B>
Company: <B>{Company}</B>
City: <B>{City}</B>
State: <B>{State}</B>
Zip Code: <B>{Zip}</B>
Ph: <B>{Phone}</B>
</PRE>
{/forRow}
{/if}
</BODY>
</HTML>
There are three main sections in the form. The section between ‘{sql …}’ and ‘{/sql}’ is the
WebBase sql macro. When the form is processed, WebBase replaces {name} with ‘Denny’,
and then generates and performs an SQL SELECT statement to retrieve the first 25 records
containing the name ‘Denny’ from the ‘Examples’ table. The returned records are stored in the
WebBase variable {answers}.
8
WebBase User’s Guide
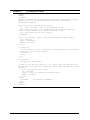
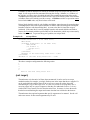
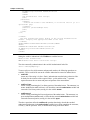
Section 2 on the form starts with ‘{if …}’ and ends with the line above ‘{forRow …}’; this is
the WebBase if macro. The first line of this section -- {if 0 answers size =} -- tests the size of
the {answers} variable. If there are 0 answers, the HTML immediately following the {if ...}
statement is returned. If there is at least 1 record returned, the HTML immediately following
the {else} statement is returned.
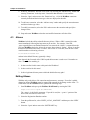
The WebBase forRow macro starts with ‘{forRow …}’ and ends with ‘{/forRow}’. It is used
to loop on the answers returned from the SELECT; the variable aRow takes on each of the
returned results in turn. The fields from the returned record (e.g., {Name}, {Company}) are
substituted where requested.
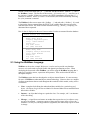
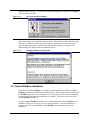
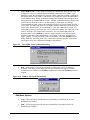
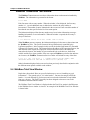
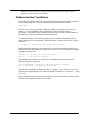
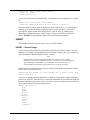
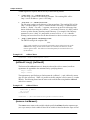
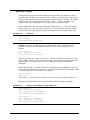
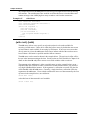
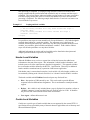
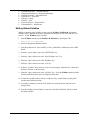
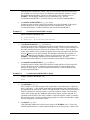
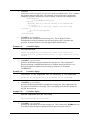
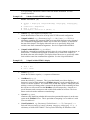
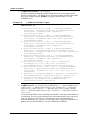
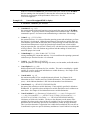
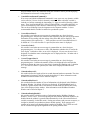
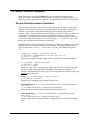
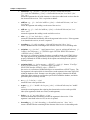
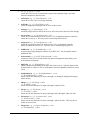
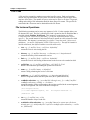
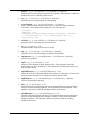
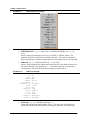
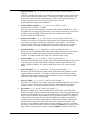
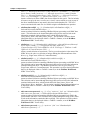
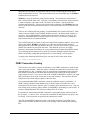
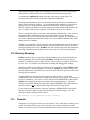
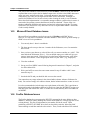
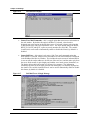
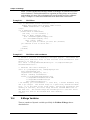
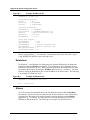
Here is what is displayed on the user’s browser when 2 results are returned from the database:
Search results for: name=Denny
Name: Denny Bollay
Company: ExperTelligence
City: Santa Barbara
State: CA
Zip Code: 93101
Ph: (805) 962-2558
Name: Denny xxxx
Company: Denny's Restaurant
City: Santa Barbara
State: CA
Zip Code: 93101
Ph: (805) 962-xxxx
2.3 Using the WebBase Language
WebBase can be used as a simple Web server, it can be used to provide easy database
accesses, or it can be used to provide flexible and dynamic presentations to users. When
developing the forms used within WebBase, you will be using the WebBase language that is
made up of variables, macros, expressions and operators. These are described in detail in
subsequent chapters.
The WebBase system has been developed to use object-oriented features. It is not necessary
for users of WebBase to understand object-oriented technology. However, there are a number
of object-oriented terms that are used throughout the remainder of this manual, so they will be
covered here.
•
Class - a template for defining the methods and data variables for a particular type of
object. All objects of a given class are identical in form and behavior but contain different
data in their variables.
•
Instance -- an object that belongs to a particular class. For example, ‘abc’ is an instance
of the class String
•
Message -- a signal from one instance to another that requests the receiver object to carry
out one of its methods. A message consists of three parts: the name of the receiver, the
method it is to carry out, and any parameters (arguments) the method may require to fulfill
its charge.
WebBase User’s Guide
9
Chapter 2: Introduction
•
Method -- a procedure or operation that can be performed by an object. In some software
environments, it is referred to as a function or subroutine.
•
Object -- a software packet containing a collection of related data and methods for
operating on that data. Object and instance are used interchangeably.
•
Receiver -- an instance to which a message is sent. A sender object passes a message to
the receiver object, which processes the message and then passes back a return value.
2.4 WebBase Server vs. HTTP Server
WebBase executes on a computer as a Web Server in a fashion similar to Windows-based
servers such as the Netscape Communications Server or Microsoft Internet Information Server
(IIS) with one major difference. Whereas traditional Web Servers are designed to handle
HTML and do not interface with databases, WebBase is designed to interface to databases
without the requirement of developing CGI scripts.
For this reason, many applications developed to take advantage of the database accessing
capabilities of WebBase are, in fact, multiple Web Server applications. They are designed to
use a traditional Web Server to present Home Page screens and top-level introductory
information to the user while directing database queries to the WebBase Server.
WebBase is capable of handling all of the standard HTML features performed by other Web
Servers. Depending on your application and anticipated load, you can have a single host
machine configured with a single WebBase server, or you can have a single host machine with
two servers and two ports, or you can have an extensive collection of hosts, some running
traditional Web Servers and others running WebBase.
10
WebBase User’s Guide
Installation
Chapter 3
This chapter describes the installation procedures for WebBase. The first section describes
the necessary prerequisites that must be met before WebBase can be installed. Subsequent
sections describe the installation of WebBase, the registry parameters required for WebBase
to execute, ODBC installation and configuration, testing the WebBase installation using builtin commands, the optional configuration of WebBase as a Windows NT service, and how to
get updates and support.
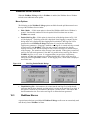
3.1 System Requirements
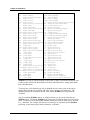
WebBase requires a computer with:
• An Intel processor
• One of the following operating systems:
Windows
Windows
Windows
Windows
•
•
•
•
NT 3.51 or greater
95
3.1 (with Win32s1)
for Workgroups 3.11 (with Win32s1)
TCP/IP software installed and configured2
At least 16MB of memory (32mb recommended)
A network connection -- typically Ethernet
An ODBC compliant database and appropriate ODBC driver(s). See chapter 6 for
information on ODBC databases.
1
WebBase is a 32-bit application primarily designed for 32-bit operating systems such as Windows NT and Windows 95. It will run on 16-bit
systems (Windows 3.1 or Windows for Workgroups 3.11); however, some of the add-on features are not supported under 16-bit systems. All
installation instructions are for 32-bit systems. Instructions for 16-bit systems are found in Appendix B.
2
TCP/IP software is included with Windows NT and Windows-95 systems. For Windows 3.1 and Windows for Workgroup systems, you can get the
Microsoft TCP/IP system files via anonymous ftp to ftp.microsoft.com and change to the softlib\mslfiles directory. The file wfwtcp.exe contains the
updated Microsoft TCP/IP protocol for use with Microsoft Windows for Workgroups version 3.11. The file tcp32b.exe is a 32-bit TCP/IP network
protocol for Windows for Workgroups only.
WebBase User’s Guide
11
Chapter 3: Installation
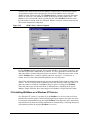
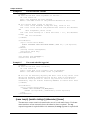
3.2 Installing WebBase
The files for installing WebBase are provided on a CD or on-line on the WebBase Web site at
http://www.expertelligence.com/WebBase/. There are three sets of files provided as part of the
installation:
1. Files to install WebBase
2. Files to install ODBC drivers
3. WebBase documentation files
WebBase Files on the CD
The CD includes a single top-level directory called WebBase. The files and subdirectories
within this directory on the CD are:
•
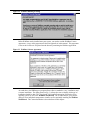
WBSetup.exe – This file is used to install WebBase. After it is executed, all of the
necessary program files are generated. These files are described later in this section.
•
readme.txt – This file describes the contents of this directory, as well as providing some
general installation instructions.
•
docs\ -- This subdirectory contains documentation for both WebBase and WebberActive.
•
docs\webbase\ -- This subdirectory contains the documentation for WebBase. The
associated readme.txt files describe each of the files in this directory as well as any
subdirectories. A copy of this manual is included in this directory in Word 7.0 format. If
you do not have Word, you can view this document using the Word Viewer program that
is provided on the CD or is available as freeware from Microsoft’s web site.
•
MSIE\ -- This subdirectory contains Microsoft Internet Explorer used with WebberActive.
The files in this directory are not required to install or use WebBase.
•
ODBC\ -- This subdirectory contains the ODBC driver packs for the different operating
systems supported by WebBase. ODBC driver installation is covered later in this chapter.
•
OFIP\ -- This subdirectory contains files used by the ExperForms add-on product to
WebBase. The files in this directory are not required to install or use WebBase.
•
WebberA\ -- This subdirectory contains the installation files for the WebberActive
HTML editor provided with WebBase.
WebBase Files on the Web
The installation, documentation and ODBC driver files are also available as downloads from
the WebBase web site at:
http://www.expertelligence.com/WebBase/
Follow the links to the download, documentation or ODBC page and download the appropriate
files. It is recommended that users frequently check the web pages for information on new
features, new versions of WebBase or new add-on products.
12
WebBase User’s Guide
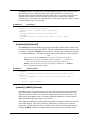
WebBase Files Generated during Installation
After WBSetup.exe has been executed, the following files will be generated in the default
WebBase directory.
•
V32BAS20.dll, V32THK20.dll, V32U202.dll, V32VM20.dll – DLLs required by
WebBase.
•
V32VM20.exe – the ‘Virtual Machine’ code used by WebBase.exe.
•
WebBase.exe – the WebBase executable application.
•
WebBase.ico – the WebBase icon
•
WebBase.bmp – the WebBase splash screen
•
WebBase.bat – a batch file used to start WebBase on Windows NT 4.0 systems only.
•
License.wri – the Software License Agreement for using WebBase
•
Install.log – the results of the installation. This file must be maintained for use by the
WebBase uninstall utility.
•
WebSvStart.bat – a batch file used to start WebBase as a service under Windows NT.
This file is only created on Windows-NT systems.
•
WebSvStop.bat – a batch file used to stop WebBase as a service under Windows NT.
This file is only created on Windows-NT systems.
•
WebSvDel.bat – a batch file used to remove WebBase as a service under Windows NT.
This file is only created on Windows-NT systems.
•
\Logs -- the subdirectory to contain log files. This entry is specified during installation
and is optional.
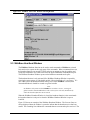
During the installation process, you will be prompted for the name of the directory that
WebBase will look at for forms, including the WebBase WebWizard forms. The default
value for this directory is HTTP at the top level. The WBSetup.exe installation will place the
following in this HTTP directory:
•
\WbWizard – this subdirectory contains the WebBase WebWizard, which provides tools
and utilities to help users learn about WebBase and speed up their forms development.
The WebBase WebWizard features are described in a separate document.
WebBase User’s Guide
13
Chapter 3: Installation
3.3 Standard WebBase Installation
The WBSetup.exe installation program is designed to install all components of the WebBase
application -- ideal for an initial installation -- or only those components you select during the
process. This section describes the standard initial installation of WebBase.
It is recommended that you install WebBase into a ‘WebBase’ directory at the top level on
your system's hard drive. This is the default assumed by the WBSetup.exe installation
program and this documentation. If you choose to place the WebBase application into a
different directory, please take this into account when reading the following.
The WBSetup.exe program will step you through the WebBase installation process with a
series of dialogs requesting necessary information from you, providing you with suitable
defaults for most installations, and providing Help facilities throughout the process should
questions arise. At any stage of the installation process you can ‘Abort’ the installation -- the
installer will remove any WebBase and/or temporary installer files it has already installed.
To start the installation of WebBase, double-click on the WBSetup.exe file. The screen shown
in Fig. 3.1 identifies the current WebBase version and build numbers. A build number is
simply a minor revision number. New builds are generated frequently and made available for
download via the WebBase web site. The build distributed on the CD or currently available
on the WebBase web site may not match the build number described in these instructions.
Note that the installation process detects the type of computer system you are using and will
occasionally display this information on the screens, as in the example below. The displays in
this chapter were taken from a Windows-95 system.
Figure 3.1 Installation - Initial Screen
After pressing the ‘Start’ button, a warning screen is displayed as shown in Fig. 3.2. In an
initial installation of WebBase, this screen can be ignored. Select the ‘Continue’ button to
proceed with the installation.
14
WebBase User’s Guide
Figure 3.2 WebBase Running Warning
Before WebBase can be installed onto your system, you need to read the WebBase License
Agreement. A copy of this agreement is found in Appendix A in this manual. This agreement
is also in the License.wri file placed into the directory containing the WebBase application.
Figure 3.3 WebBase License Agreement
As noted above, the WBSetup.exe program allows either a standard or ‘easy’ installation, and
a custom installation. The dialog shown in Fig. 3.4 allows the user to identify which type of
installation should be done. The ‘Easy Install’ will install all appropriate files for the given
operating system as well as the WebBase WebWizard. The ‘Custom Install’ gives you the
ability to select individual components to install as well as optionally installing the WebBase
WebWizard. The Custom Installation is described later in this chapter.
WebBase User’s Guide
15
Chapter 3: Installation
Figure 3.4 Installation Option Dialog
You are then asked to specify where the software is to be installed on the WebBase Directories
Dialog shown in Fig. 3.5. The recommended defaults are displayed and you have the ability to
use the ‘Browse’ button to locate and specify an appropriate directory if the default is not
suitable.
Figure 3.5 WebBase Directories Dialog
16
WebBase User’s Guide
The ‘Destination Directory’ is where all the WebBase application files will be stored. This
includes the executable programs, virtual machine components, and any utility files. It is
recommended that this be a top-level directory3. All WebBase program components must be
placed into the same directory for the application to execute successfully.
The ‘WebWizard Directory’ specifies where the subdirectory containing the WebBase
WebWizard forms will be placed. This is generally the same directory where all forms are
placed for access by browsers. It is possible to place the WebBase WebWizard forms into
another subdirectory under the root forms directory.
If ‘Make Backups’ is checked, the identified directory is used to back up files that would
otherwise be overwritten during the installation process. In an initial installation of WebBase,
it is not necessary to make backups as there are no files to back up.
Figure 3.6 shows an example of the dialog invoked by the "Browse" button.
Figure 3.6 Example ‘Browse’ Dialog
The drive selector at the bottom of the dialog and the directory listing in the center can be used
to select an existing directory as the desired selection -- or you can type a directory into the text
editor field above the directory list area. Clicking the ‘OK’ button returns the value in the text
edit field while clicking on the ‘Cancel’ button returns no value and therefore leaves the calling
dialog's field unchanged.
3
Due to potential problems in some Windows-95 environments, this directory must be at the top level for the application to execute under Windows95.
WebBase User’s Guide
17
Chapter 3: Installation
Parameter Definition
After the directory information has been entered, the WebBase initialization parameters must
be defined and stored into the System Registry4. Figure 3.7 shows the dialog that prompts for
these parameters and updates the Registry appropriately.
Figure 3.7 WebBase Parameter Registry Values Dialog
The PortNo parameter specifies which port WebBase will use to communicate with a
browser. The default value is set to 80. If you have another Web Server installed and running
on your system, you need to ensure that both WebBase and the other web server(s) have
unique port numbers.
The Directory parameter specifies where in your local directory structure browsers can access
forms via WebBase. This directory location corresponds to a browser referencing ‘http://hostaddress/’. Placing a ‘default.htf’ or ‘default.htm’ file in this directory will cause WebBase to
return that form if a browser references ‘http://host-address/’. If you already have a Web
Server running on your system, you may choose the same directory that server uses to be your
WebBase Directory. It is strongly recommended you not use the ‘Destination Directory’ into
which you installed your WebBase application files as this makes all these files potentially
available to browsers accessing your system with WebBase.
The License parameter specifies the value of your license number. This parameter is required
and must be entered here. If you do not have a license number, contact
[email protected].
4
Appendix B describes parameter specification for 16-bit systems.
18
WebBase User’s Guide
The errorLogFile parameter specifies the name of a file that WebBase can create and write
error messages into. These messages can be helpful in diagnosing problems you might
encounter while WebBase executes. The file need not exist at this time, but the directory
specified must exist before executing WebBase so the file can be created as specified. By
default, the error log file is stored in the directory containing the WebBase log files.
The LogDirectory parameter specifies where in your local directory structure WebBase can
write log files. WebBase creates a log file each day and records the requests it processes.
These files are written into the directory you specify here. These log files can be used with
web site analysis tools to acquire information about number of hits, location of requests, etc.
Details on logging are presented in Chapter 12. You can specify this Log Directory and still
disable logging via the WebBase Options menu if so desired. You cannot enable logging,
however, if you have not specified a Log Directory here.
The Default parameter specifies the name of a file you wish to have displayed when a browser
references your Directory without specifying a file pathname. Multiple defaults can be
specified by entering filenames separated by a comma as in ‘default.htf,default.htm’. When
multiple entries are provided, WebBase will look for the files in the order entered. This is an
optional parameter. If absent, ‘default.htf,default.htm’ is assumed. If you enter an empty
string then no default file will be searched for.
The Extension parameter specifies the name of a file extension you wish WebBase to append
to a filename a browser supplies that does not explicitly supply the extension. Multiple
extensions can be specified by entering them separated by a comma as in ‘htf,htm’. When
multiple entries are provided, WebBase will look for files with the specified extension
appended in the order entered. This is an optional Parameter. If absent, ‘htf,htm’ is assumed.
The LicensedFeatures parameter is an additional license number that enables WebBase addon products. If you have purchased WebBase along with one or more add-on products (e.g.,
ExperForms), then you will also need to enter your LicensedFeatures number. If not specified,
the add-on features will not be enabled.
At the bottom of the window is a button labeled ‘Don’t Update Registry’. This button should
be selected only during an upgrade if you do not want your existing registry parameters
modified. It is strongly recommended that the user allow the installation process to update the
registry parameters during a new installation.
Completing the Installation
After the WebBase parameters are defined, the installation process continues by asking
whether program manager icons should be created. Creating icons will allow you to
conveniently execute these programs. In addition, the installation process will create an
‘Uninstall’ icon in the Program Manager Group you select to allow you to conveniently remove
all the components installed during this process, should that be necessary in the future.
Figure 3.8 Program Manager Icon Creation
WebBase User’s Guide
19
Chapter 3: Installation
If you select to have Program Manager Icons created, Fig. 3.9 shows the dialog on which can
specify the desired name of the Program Manager Group in which the icon(s) will be created.
Figure 3.9 Program Manager Group Name
Following the specification of directories, components, WebBase parameters, and Program
Manager information, the appropriate directories will be created as necessary and appropriate
files for the given operating system and above selections will be installed onto the target
computer. All parameters are entered into the System Registry in5:
HTTP_LOCAL_MACHINE/SOFTWARE/ExperTelligence, Inc./WebBase/4.10/
During this process, the progress bar shown in Fig. 3.10 is updated to show the files currently
being installed and how much installation work remains to be completed.
Figure 3.10
Installation Progress Bar
If you selected to have Program Manager Icons installed, you will see a window created with
the icons displayed within it. The installation window is then displayed over the program
5
Prior to build 56, all WebBase entries in the System Registry were in HTTP_LOCAL_MACHINE/System/CurrentControlSet/ Services/HttpSQL.
Effective with build 56, only the NT service parameters are located in this key. For users upgrading to build 56 or later from build 55 or earlier, the
first time that WebBase is started, all information within the “old” WebBase location is copied to the “new” location. The information in the “old”
location is not deleted; this action is left to each WebBase user.
20
WebBase User’s Guide
manager window, and Fig. 3.11 shows the window indicating that the installation of WebBase
was completed successfully.
Figure 3.11
Successful Installation Display
Many of the dialogs in the installation sequence have a ‘Help’ button on them. The following is
an example of what one of the Help screens looks like. Each Help screen is tailored to the
particular dialog that invoked it and contains information that we hope is helpful in your
understanding of the dialog within the installation process.
Figure 3.12
Example Installation Help Window
3.4 Custom WebBase Installation
When initially installing WebBase, it is strongly recommended that you follow the standard
WebBase installation described in the preceding section. After you have become familiar with
the WebBase application and its components, you may want to perform a custom installation
in which only selected individual components are installed. This section covers how to do a
custom WebBase installation.
As in the standard WebBase installation, it is recommended that you install WebBase into a
‘WebBase’ directory at the top level on your system's hard drive. Once the installation is
complete, make sure to install ODBC so that WebBase can communication with your
database(s).
WebBase User’s Guide
21
Chapter 3: Installation
To start the custom installation of WebBase, double-click on the WBSetup.exe file. When
you get to the ‘Installation Selection’ screen, select the ‘Custom Install’ button. You will be
prompted to enter the directory information for the ‘Destination Directory’, ‘WebWizard
Directory’ and ‘Backup Directory’ as described for the standard installation.
After the directory information is entered, the dialog shown in Fig. 3.13 is displayed. Note that
by default all components are selected for installation. On Windows-NT systems only, there is
an additional checkbox for ‘Windows NT Service Support’. This option allows the utilities
used to start and stop WebBase as a service to be installed.
Figure 3.13
Custom Installation Component Selection Dialog
In addition to allowing you to select specific program components, the custom installation also
gives you the option of whether the WebBase WebWizard should be installed. The dialog
shown in Fig. 3.14 gives you the option of whether they should be installed.
Figure 3.14
22
Custom Install WebWizard Option
WebBase User’s Guide
All the WebBase WebWizard forms and files are installed in the ‘WbWizard’ subdirectory
within the directory specified as the Directory parameter. Details on the WebBase
WebWizard tools and utilities can be found in the WebBase WebWizard User’s Manual.
Another option provided within the custom installation is whether the ‘Uninstall’ option will be
installed, as shown on the dialog below. This utility can be used to uninstall all of the
WebBase product components.
Figure 3.15
Custom Installation UnInstaller Option
The remainder of the custom installation is the same as described above starting with the
definition of the WebBase parameters.
3.5 Updating WebBase
From time to time, updated minor releases of WebBase will be made available on the
WebBase Web site. A build number identifies these releases. For example, the release
occurring after build 56 will be build 57. The version number identifies major releases, and
may require a full re-installation of WebBase.
To upgrade your version of WebBase, download the WBUpdate.exe file from the WebBase
Web site. This file will install the set of application files that contains any improvements to
WebBase. The WBUpdate.exe file is provided as a smaller file that reduces the amount of
time required for downloading. However, it does just update the WebBase application, and not
any of the associated applications. If changes have been made to any of the tools and utilities
provided within the WebBase WebWizard, a full installation must be performed in order to
install these updated forms.
To start the upgrade process, double-click on the WBUpdate.exe program. As in the initial
installation of WebBase, the installation process includes a series of dialogs requesting
necessary information from you, providing you with suitable defaults for most installations,
and providing Help facilities throughout the process should questions arise. At any stage of the
update process you can ‘Abort’ the update -- the installer will remove any WebBase and/or
temporary installer files it has already installed leaving only the WBUpdate.exe file that you
downloaded.
The WebBase update installation starts with a welcome screen very similar to that used in the
standard installation, as shown in Fig. 3.16 below.
WebBase User’s Guide
23
Chapter 3: Installation
Figure 3.16
WebBase Upgrade Installation Screen
Unlike in an initial installation of WebBase, it is important to understand the impact of the
update installation on any currently executing version of WebBase. The warning screen that
is displayed right after the welcome dialog (Fig. 3.2) reminds the user of these ramifications.
If you are currently running WebBase, it is strongly recommended that you stop the currently
executing WebBase application, perform the update installation, and then restart WebBase.
After the warning message and license agreement are displayed, you are given the option of
specifying where the updated WebBase files should be placed. This dialog is very similar to
the WebBase Directory dialog described as part of the initial installation except that the
WebBase Directory is not specified. Default values are displayed. If the ‘Destination
Directory’ entered is different than that currently used, the updated WebBase application files
will be copied to the location but an error message will then be displayed indicating that one or
more files required by WebBase cannot be located. If ‘Make Backups’ is checked, the
corresponding directory is used to backup files that would otherwise be overwritten during the
installation process.
After this directory information is entered, the updated files are copied to the appropriate
directories and the update is complete.
3.6 Testing the WebBase Installation
After completing the above installation steps you are ready to test the new or updated
WebBase application. Before you test an initial installation of WebBase, an excellent way to
ensure you have all the necessary TCP/IP communications configuration in place is to install a
copy of a browser such as Netscape or MSIE. You will need some form of Web browser to
test your WebBase applications, and WebBase requires the same communications support as
does a Netscape or MSIE browser. Being able to install and use a browser can help eliminate
some possible problems with installing WebBase.
24
WebBase User’s Guide
Start the WebBase application using the icon created during installation or using the ‘Start>Program->WebBase’ option6. A WebBase splash screen is initially displayed. If any of the
WebBase required parameters were not entered during installation, then WebBase will shut
down. The PortNo, Directory and License parameters must be entered either during
installation or directly into the System Registry prior to being able to run WebBase.
If WebBase is started successfully, two windows will be displayed. The first window is titled
‘Late breaking news from ExperTelligence’. The second window that is displayed is the
WebBase Server window. Both windows are described in detail in Chapter 5. If the second
window is empty or does not open, review the information in the following section on
installation problems. If the window does open, your WebBase application is up and running.
You should continue to verify that the WebBase installation is correct by following the
instructions in the section below on testing communications.
Error messages may also be displayed in the Late Breaking News window. These error
messages may relate to attempting to access the server at ExperTelligence for news to display,
or they may relate to a configuration problem on your system. Be sure to review this window
for any possible error messages.
To quit WebBase, use the Exit command in the WebServer menu of the WebBase Server
window. You will be prompted to confirm that you want to exit WebBase. If so confirmed,
WebBase will terminate. The ‘Late Breaking News’ window will automatically be closed
when you quit WebBase.
Possible Installation Problems
Many errors caused by improper installation will cause an error message to be generated and
written to the file specified in the errorLogFile parameter and also echoed in the ‘Late
Breaking News’ window as shown below.
" Starting WebBase 4.10 Build 56 Server..."
"ERROR: '<error message text>'"
"SERVER DID NOT START SUCCESSFULLY."
It is very important that you review the information presented in your ‘Late Breaking News’
window to diagnose any installation problems that may have occurred. Below are some
possible installation problems. If you have a problem testing your WebBase installation, check
the following list of symptoms to see if you can identify and correct the problem.
•
Symptom: The launch executes as described above, but no WebBase Server window
appears. The ‘Late Breaking News’ window and error log file specified in the
errorLogFile parameter will typically have an entry of the form: "Error: 'Missing <xxxx>
WebBase parameter(s).".
Possible Solution: The indicated <xxxx> WebBase parameter entry is missing. Review
the information in Chapter 4 about required WebBase parameters. Remember that
parameter names are case sensitive.
•
Symptom: The launch executes as described above, but the WebBase Server window is
missing the ‘Using port: ##’ line and you are immediately presented with the dialog to exit
6
You can also start WebBase by running the WebBase.exe file. However, this is not the recommended approach. On Windows NT 4.0 systems, the
file WebBase.bat is used to start WebBase. Attempting to start WebBase by double clicking on or executing the program WebBase.exe will result in
errors. It is strongly recommended that the WebBase icon be used to start the program as this icon references the appropriate file based on operating
system type.
WebBase User’s Guide
25
Chapter 3: Installation
WebBase as shown in Fig. 5.10. The error log file will have an entry of the form: "Error
10048 WSAEADDRINUSE -- The specified address is already in use".
Possible Solution1: WebBase has determined that the port that it is attempting to
communicate on, the PortNo parameter, is already in use. Assign a different, unique port
number to WebBase and attempt to launch the application again.
Possible Solution2: If you did not explicitly quit the application with the Exit command or
by closing the WebServer window, check the file specified in the errorLogFile parameter
for a message that may indicate why the application shut down. There may be a copy of
WebBase already up and running in your environment. Check the task list for
V32VM20.exe and, if found, kill this task before trying to launch WebBase again.
•
Symptom: As soon as WebBase is launched, it quits with an entry of the form: "Error
11003 WSANO_RECOVERY - No recoverable errors, FORMERR, REFUSED,
NOTIMP
Possible Solution: There is a problem with the TCP/IP or name service communications
software. This problem is generally only seen on 16-bit systems and is due to a TCP/IP
package that is not compatible with WebBase. The 32-bit systems supported by
WebBase include TCP/IP as part of the default operating system, and they do not report
this problem.
Testing WebBase Communications
Now that WebBase is running, you can check that it is communicating as a Web Server using
one of the built-in commands. This can be done before you set up any database interfaces or
begin designing any .htf files. An easy built-in command to use is dateTime. Additional built-in
commands are described in the following section. From a browser, access WebBase by
entering the following URL:
http://<your-host-address>:<your-port-number>/dateTime
where:
•
<your-host-url> is the IP address of the WebBase server machine. You may also use
127.0.0.1 as the address that points to your local system. If you have set up the hosts file
on your system to assign the name ‘localhost’ to the ‘127.0.0.1’ IP address, you may also
substitute ‘localhost’ as the address.
•
<your-port-number> is the port number you defined as your PortNo parameter.
•
dateTime is the built-in WebBase command.
The dateTime query will return your server's current date and time in local format:
Date: Tue, 06 May 1997 09:07:12 PDT
If all appears as described here, your WebBase application is working! At this point, it is
strongly recommended that you visit the WebBase WebWizard to find out about all the
features of WebBase. You’ll also need to review the information presented later in this
chapter about ODBC driver installation.
Built-in Commands
WebBase includes a number of built-in commands that can be sent from a browser. These
commands are listed on the WebServer window that is displayed within WebBase. These
commands are useful for determining whether WebBase is working after an installation.
26
WebBase User’s Guide
The built-in commands are almost equivalent to simple .htf files. For example, one of the
built-in commands is dateTime that displays the current date and time. It would be very
trivial to create a .htf file that performed the same function. However, if a .htf file has been
created with the same name as a built-in command, the .htf file will take precedence over the
built-in command. If a user had created the file dateTime.htf and it was stored in the top-level
forms directory, the file and not the built-in command would be invoked if the user issued a
URL of the form:
http://127.0.0.1:80/dateTime
The following are the WebBase built-in commands and an example of what they display.
•
build -- e.g., WebBase 4.10 build 56
displays the current WebBase version and build number in bold
•
buildString -- e.g., WebBase 4.10 build 56
displays the current WebBase version and build number in standard font
•
dateTime -- e.g., Date: Tue, 06 May 1997 09:07:12 PDT
displays the current date and time
•
elapsedTime -- e.g., Elapsed time: 60ms.
displays the amount of time that has elapsed since processing was begun for this command
by the server
•
gmt -- e.g., Date: Tue, 30 Apr 1996 15:23:43 GMT
displays the current date and time in GMT format
•
milliseconds -- e.g., 30259110
displays the total number of milliseconds since the previous midnight
•
seconds -- e.g., 30312
displays the total number of seconds since the previous midnight
•
title -- e.g., WebBase 4.10
displays the current WebBase version number in bold
•
titleString -- e.g., WebBase 4.10
displays the current WebBase version number in standard font
3.7 Installing ODBC Drivers
It is not required that you install ODBC when WebBase is installed. It is possible to install
WebBase, get it up and running, and experiment with some of the forms and examples without
having ODBC installed. However, before you can access a database, you will have to install
ODBC drivers. It is recommended that you follow this installation procedure, even if you
already have ODBC drivers installed, to ensure that the latest versions of all necessary ODBC
files are available.
ODBC Drivers
The ODBC drivers are used by WebBase to communicate with a database application so that
database information can be retrieved, updated or deleted using WebBase forms. The
WebBase User’s Guide
27
Chapter 3: Installation
WebBase CD and WebBase Web site both provide access to ODBC driver packs that include
drivers for the Microsoft database applications (e.g., Access, SQL Server). There are many
databases other than the Microsoft databases that also have ODBC drivers. These drivers are
generally available from the database vendor or another third-party company.
The ODBC driver packs are operating system-dependent, not database application versiondependent. While it is generally possible to run the latest version of a database on an older
operating system (e.g., Access 97 on NT 3.51), it is not possible to use the latest ODBC
drivers on an older operating system. ODBC database drivers may be installed onto your
system as part of a database installation. If you are running a newer database version with an
older operating system version, it is critical that you re-install the ODBC drivers for your
operating system version after the database installation. The ODBC drivers are not used by
the actual database application; they are only used by secondary applications such as
WebBase which are indirectly accessing the database.
The ODBC drivers on the WebBase CD are found in directories that specify the particular
operating system (e.g., Win95, NT351). The ODBC driver packs on the WebBase web site
are also similarly identified.
It cannot be stressed strongly enough that the proper ODBC drivers for the operating system
version must be used. The majority of problems that users encounter with ODBC and
WebBase are the result of an incorrect match between ODBC database driver and operating
system version.
Installing the ODBC Drivers
The ODBC driver packs included with WebBase include all of the drivers for the standard
Microsoft applications. Before installing the ODBC Driver Packs, be sure to read the End
User License Agreement distributed with the ODBC Driver packs. This document outlines the
terms and conditions under which you may install and use the ODBC drivers. Installation
instructions are also provided with each of the ODBC driver packs.
Setting the ODBC Sources
In order for WebBase to access a database, an ODBC source for that database must be
created. An ODBC source assigns a name and optionally a username and password to a
particular database file. This ODBC source name, username and password are then used by
WebBase to access the database.
Once the ODBC drivers are installed, there will be an ODBC icon or program option that is
used to access the ODBC Administrator. For example, on a Windows-95 system, the 32-bit
ODBC Administrator is started via the ‘Start->Program’ menu. To set up an ODBC source,
start up the ODBC Administrator. A window similar to that shown in Fig. 3.17 is displayed.
The different ODBC driver packs available from Microsoft have each presented this
information in a slightly different display format. However, the basic concepts described here
are applicable to any ODBC source setup. The ODBC Administrator screens displayed in this
section are from Microsoft’s ODBC Driver Pack 3.5.
28
WebBase User’s Guide
Figure 3.17
ODBC Administrator Screen
There are three types of data sources that can be set up:
•
User DSN – A user data source is only visible to the specified user and only on the
specified machine.
•
System DSN – A system data source is visible to all users on the machine, including NT
services.
•
File DSN – A file data source allows you to connect to a data provider. File DSNs can be
shared by users who have the same drivers installed.
For WebBase applications, a System DSN is strongly recommended. If WebBase is to be run
as a service, then any database must be set up using a System DSN. Even if WebBase is not
to be run as a service, databases should be set up as System DSNs. If a user DSN is used,
then only the user who created the DSN will be able to access the database. If another user
starts WebBase and attempts to access a database via a .htf form, errors will result since that
user will not have access to the initial user’s User DSN.
To demonstrate how to create a System DSN, this section will cover the steps necessary to
create and configure the source used to access the Cars Microsoft Access database used with
the database examples accessed via the WebBase WebWizard7. To create a new System
DSN, press the Add button. Figure 3.18 shows the display presented in which you are
prompted to select the ODBC driver to use. Select the appropriate driver and press the
7
This data source is automatically set up as a System DSN when running the database examples if not previously set up. It is used in this case as an
example of how the user will configure their own data sources for their databases.
WebBase User’s Guide
29
Chapter 3: Installation
‘Finish’ button. For this example, the Cars database is an Access database, so the Microsoft
Access Driver is selected.
Figure 3.18
ODBC Source Creation – Driver Selection
After the database driver is selected, it is necessary to specify the name to be assigned to the
source as well as the database file to use. Figure 3.19 shows the screen on which this
information is entered.
Figure 3.19
30
ODBC Source Name Definition
WebBase User’s Guide
The data source name used to access the database is required, and is entered on the top line.
An optional description can be entered on the line below the database name. Select the
database file that will be accessed. The WebBase database examples require the data source
name to be ‘myAccess’; this should be entered on the top line as in the display above. The
database to use is Autos.mdb, which is provided as part of the WebBase installation. After
this information is entered, press the ‘Advanced’ button to set up the username and password.
The window shown below is displayed.
Figure 3.20
ODBC Source Advanced Options
For the WebBase database examples, the username should be ‘fred’ and the password is ‘test’.
Note that the password is hidden when it is entered. It is also important to remember that the
data source name, username and password are case sensitive. When this source name is used
within a WebBase form, it must be explicitly entered as ‘myAccess’. If ‘MyAccess’ is
entered, an error will be returned indicating that this is not a valid source.
After all the information has been entered, close the Advanced Options window and the Setup
window. The list of System DSNs is updated to reflect the data source name just entered. A
data source must be created for each database that you will be accessing using WebBase.
These data sources may use the same driver or different drivers, depending on the type of
database. Simply follow the above steps and give each database a unique data source name.
3.8 Installing WebBase as a Windows NT Service
On a Windows NT system, it is possible to set up WebBase as a service so that it will start
automatically when the system is booted without requiring user logon or any other user action.
It is strongly recommended that you first install WebBase according to the above instructions,
and verify that it has been successfully installed and is communicating. Following this process
will minimize problems in setting up WebBase as a service.
WebBase User’s Guide
31
Chapter 3: Installation
Installation as a Service
During the installation of WebBase under Windows NT, the parameters required to run
WebBase as a service are automatically stored into the System Registry under:
HKEY_LOCAL_MACHINE/System/CurrentControlSet/Services/HttpSQL
The two parameters required to run WebBase as a service are AppDirectory and Application.
These are described in Chapter 4. Note that this registry location is different than where all the
other WebBase parameters are stored. This is to prevent the loss of WebBase parameters,
global variables, extensions, aliases and/or multiple domain information if the user selects to
remove WebBase as a service.
Also during installation, WebBase is assigned the service name of ‘httpSQL’ and is
automatically created as a service that must be started manually8. If you want to have
WebBase start each time your NT system starts up, you must modify the httpSQL service via
the Services Control Panel. that starts when your NT system starts up. By default, the
LocalSystem account is used which does not require a username/password. In addition, the
option to ‘Allow Service to Interact with Desktop’ is also selected. This option will cause
WebBase to start and also the WebBase Late Breaking News and WebBase Server windows
will be opened. If this option is disabled, the windows will not be opened when WebBase is
started.
WebBase as a Service and ODBC Configuration
When WebBase is installed as a service, the ODBC data sources must be specified as System
DSNs. Start up the ODBC Administrator. Select the ‘System DSN’ option. Verify that all
databases to be accessed using WebBase have been set up as System DSNs and not User
DSNs.
Starting the Service
By default, WebBase is configured to automatically start when the Windows NT system is
started. If it has been stopped or if it has been modified to start manually, WebBase can be
started as a service using the file WebSvStart.bat. Simply execute this batch file and WebBase
will start.
Stopping the Service
WebBase was not designed explicitly as a service application, and uses a Microsoft utility to
run as a service. In order to stop WebBase when it is running as a service, you must use the
WebSvStop.bat file that is provided with the WebBase installation. If you stop the httpSQL
service from the Services Control Panel, only the Microsoft utility used to start WebBase is
stopped – WebBase itself is not stopped. To stop WebBase, simply execute WebSvStop.bat
and WebBase will properly terminate.
8
If WebBase does not come up properly as a service and appears to hang, stop it using WebSvStop.bat. Delete the file WebBase.bmp from the
directory in which the WebBase.exe program resides. This file is the splash screen displayed when WebBase launches. Under some circumstances,
this file can cause WebBase to hang and not respond to communications commands although the Services control panel and task list show it to be
running.
32
WebBase User’s Guide
If your NT system goes down unexpectedly and auto-reboots, you do not have to stop and
restart WebBase as a service. You only need to follow the above procedure if you are taking
WebBase down and bringing it back up with the NT system continuing to run.
Removing the Service Entry
To remove WebBase as a service entry, the WebSvDel.bat file is used. This file first attempts
to stop WebBase and then removes it as a service entry. The WebBase application itself is not
affected, and can be started manually by selecting the WebBase icon. However, if you wish to
have WebBase run as a service in the future, you must do another installation in order to set up
the necessary service batch files.
Upgrading to Windows-NT
If you are already running WebBase on a non-Windows NT system and upgrade the operating
system to Windows-NT and wish to run WebBase as a service, you must go through the
installation procedure in order to have WebBase properly set up as a service and the necessary
service batch files generated. Note that this only applies when upgrading to a Windows-NT
environment. If you are already running Windows NT and simply upgrade versions of
Windows-NT, it is not necessary to reinstall WebBase.
WebBase User’s Guide
33
Chapter 3: Installation
3.9
WebBase Support
You can get customer support for WebBase in any of these ways:
•
Review the list of questions and answers at, and post your own questions in the WebBase
Support Forum accessed via the WebBase Web site
•
Read the latest documentation updates on the WebBase Web site
•
Send email to [email protected].
•
Call ExperTelligence at 805/962-2558
When requesting support, please provide the following information:
34
•
WebBase version and build numbers
•
Your operating system and version
•
If the question is database related, the database in use
•
The source for the ODBC you are using (drivers/versions/dates)
WebBase User’s Guide
Initialization
Chapter 4
WebBase uses a number of initialization parameters that are described in this chapter, and
were previously referred to in the chapter on WebBase installation. In addition to these
initialization parameters, WebBase also allows the user to define file extensions and their
handling, directory aliases, and multiple domain support. All this information is stored in the
System Registry on a Windows NT or Windows 95 system. On a Windows 3.1 or Windows
for Workgroups system, *.INI files are used. Although the format is different between the
System Registry and the *.INI files, the required entries are the same. This chapter presents
details on how to modify the System Registry using the WebBase WebWizard Registration
Database utility. Appendix B covers how to set up .INI files as well as how to directly modify
entries in the System Registry.
4.1 Parameters
During the installation of WebBase, the default set of WebBase parameters is displayed and
you are given the option of modifying the parameters. All WebBase parameters described in
this section are extracted from the System Registry9 when WebBase is launched. Changing the
entry for any parameter will have no effect on a running WebBase application. To effect a
change for any entry, you must stop and restart WebBase after editing the parameter.
The name of each parameter is case sensitive and must be entered exactly as shown below. If
a parameter name is entered incorrectly, WebBase will not be able to use its value. The values
for string input fields are not case sensitive.
The following are the WebBase parameters, whether they are required or optional, and their
default value.
•
PortNo-- (required) -- the number (in decimal) of the port used by WebBase to
communicate with browsers. This port number must be unique within your environment
(i.e., not assigned to another application). The default for this parameter is 80, which is
9
All WebBase-related information is stored in the System Registry in HKEY_LOCAL_MACHINE/SOFTWARE/ExperTelligence,
Inc./WebBase/4.10. Prior to build 56, this information was stored in HKEY_LOCAL_MACHINE/System/CurrentControlSet/ Services/httpSQL.
Effective with build 56, only the WebBase parameters required to run WebBase as a service on Windows NT are stored in the latter location.
WebBase User’s Guide
35
Chapter 4: Initialization
the default port used by any HTTP Web server. If you will be running multiple web
servers, each must be assigned a unique port number.
•
Directory -- (required) -- the directory within which the form files are stored. The files
may be within this specific directory, or they may be within subdirectories. During the
WebBase installation, this directory is specified as the ‘HTTP Root Directory’. This
directory location corresponds to a browser referencing ‘http://host-address/’. The default
for this parameter is the device used during installation (e.g., ‘C:\’) and the directory
‘http’.
•
License -- (required) -- the value of your license number. There is no default for this
parameter. The license number must be entered in the format ####-######. The hyphen
in the center of the number is part of the license. If it is not specified, an error message
will be displayed when you try to start WebBase.
•
LogDirectory -- (optional) -- the full pathname of a directory into which WebBase will
write log files for each query made of the system. Each day, WebBase will create a new
log file named WByymmdd.log where yy=year, mm=month, and dd=day. For example,
WB970504.log is the log file for May 4, 1997. These log files will contain one entry for
each query made of WebBase. The format and contents of the file are determined by the
LogFormat parameter described below. If the LogDirectory is not specified, WebBase
will not perform any logging. It is recommended that this parameter always be specified;
logging can then be enabled or disabled via the WebBase Options menu if so desired. It is
not possible to enable logging if the LogDirectory parameter is not specified. During
installation, the default for this parameter is the directory containing program files (e.g.,
‘C:\WebBase’) and the subdirectory ‘Logs’.
•
LogFormat – (optional) –the type of log format records that will be generated in the log
files. There are 5 types of log formats supported by WebBase. The following shows the
LogFormat parameter (0-4) and the corresponding record format:
4
3
2
1
0
–
–
-
Extended Combined Log File Format
Common Log File Format
Extended Common Log File Format
Extended Original WebBase (EMWACS) Log File Format
Original WebBase (EMWACS) Log File Format
If the LogFormat parameter is not specified but the user enables logging, all log records
will be written using the Extended Common Log File Format. Details on logging can be
found in Chapter 12.
36
•
errorLogFile -- (optional) –the full pathname of the error log file created and maintained
by WebBase for reporting operational errors. These messages can be helpful in
diagnosing problems you might encounter while WebBase executes. WebBase will create
the file, but the directory specified must exist before executing WebBase. During
installation, the default for this parameter is the directory containing program files (e.g.,
‘C:\WebBase’) and ‘\Logs\WebError.log’. If not specified, no error log files will be
generated. It is strongly recommended that an error log file be maintained, as this can be
useful information in determining the source of program and application errors. There is
another error file -- error.log -- which may be created in the directory containing the
WebBase.exe application if WebBase crashes due to a program error.
•
Default -- (optional) -- the name of the default file when a directory is referenced. The
defaults are ‘default.htf’ and ‘default.htm’ in that order. This parameter can be specified
WebBase User’s Guide
as a single file name or as a series of files to be searched for in the order presented
(index.htm,index.html) separated by commas. If the parameter is specified with no
filename, then no default file will be used.
•
Extension -- (optional) -- the default extension (or extensions) to append to a file name
should the user enter what appears to be a file reference without an extension. Default
value is ‘htf’,’htm’ in that order. This parameter can be specified as a single extension or
as a series of file extensions to be searched for in the order presented (htm, html) separated
by commas. If the parameter is specified with no extension, then no default extension will
be appended to the file name to attempt to resolve it for the user.
Note:
Only the extension characters are specified; the period preceding the extension is
not included in this parameter.
•
HostName – (optional) – the DNS name identifying the default host system. This is used
to generate the %fullHostName% and %serverHostName% variables if the browser does
not provide a Host header variable. The form designer can use these variables to do
redirects using a DNS name instead of an IP address. It is important to remember that this
name is NOT being used for name resolution of the host name used within a URL -- that is
done by the TCP/IP configuration where the domain name (and possibly multiple domain
names) are set up outside of WebBase. This HostName parameter is only used so that if
the user wants to do a redirect to a particular domain that the name of the domain can be
used in the URL instead of the IP address.
•
HostAddress – (optional) – a string containing a dotted IP address to which the heartbeat
command is to be sent (the heartbeat function is described in chapter 5). If not present,
WebBase uses ‘127.0.0.1’, which should correspond in most systems to the local host.
•
StartupForm – (optional) -- a .htf form that WebBase will automatically run each time
the server is started - and before it begins processing any browser commands. WebBase
runs the Startup Form as if it had been CALLed by the call macro. The only difference is
that the Startup Form is CALLed by the WebBase Server itself and NOT by another .htf
form. This CALLed Startup Form is CALLed as if wait true were indicated - the server
waits for the form to complete before going on to process other forms - and it accepts any
number of returned parameters passed back from either a return or exit macro in the
CALLed Startup Form. Since there is no browser involved in the running of this Startup
Form the output returned from this form is displayed in the WebBase WebServer window.
An example of such output is:
Running StartupForm: 'Startup.htf'.
01: 'OK'
StartupForm: 'Startup.htf' complete.
In the above the Startup Form is identified and the 01: 'OK' was the first (and only)
parameter returned by this form. Additional returns would be displayed as 02: ..., 03: ...
etc. If the CALLed Startup Form would have returned text to a browser (if CALLed from
another .htf form initiated by a browser command) that text will be displayed following the
above in the same WebBase WebServer window. This output can be used to visually
verify that the Startup Form executed as expected. The workaround for Access databases
described in Chapter 14 shows how the startup form can be used.
•
HTTP_Proxy – (optional) – the name of the proxy host system. This parameter is only
used when the user is behind a firewall and wants to receive the “Late Breaking News”
WebBase User’s Guide
37
Chapter 4: Initialization
from ExperTelligence when WebBase is started. This is the name or IP address of the
firewall system that WebBase is able to access.
•
HTTP_ProxyPort – (optional) – the port number of the proxy host system. This
parameter is only used when the user is behind a firewall and wants to receive the “Late
Breaking News” from ExperTelligence when WebBase is started.
Windows NT Service Parameters
The parameters described in this section are only required on Windows-NT systems when
WebBase is to be set up to run as a service. They are automatically set up as part of the
installation of WebBase on Windows-NT systems.
•
AppDirectory -- (required) -- the directory in which the application and related virtual
machine and DLL files reside.
•
Application -- (required) -- the full pathname of where the WebBase.exe file will be found
when setting up WebBase to run as a service.
Editing WebBase Parameters
Adding new parameters or changing existing parameters is done using the WebBase
WebWizard Registration Database utility. If WebBase will not start due to an incorrect
parameter and it is not possible to use the WebBase WebWizard, or if a parameter is to be
deleted, see Appendix B for details on how to directly edit the System Registry. This appendix
also includes information on setting up the .INI files used on 16-bit systems. To edit
WebBase parameters,
1. Start WebBase and open up the WebBase WebWizard by entering the URL:
http://127.0.0.1:<port #>/wbwizard/
The <port #> is the PortNo parameter. If port 80 is used, the ‘:<port #>’ portion of the
above URL can be dropped.
2. Select the Registration Database anchor.
3. From the pull-down list, select ‘HKEY_LOCAL_MACHINE’ and then press the ‘OPEN’
button.
4. Select the ‘Open’ anchor next to the ‘SOFTWARE’ key.
5. Select the ‘Open’ anchor next to the ‘ExperTelligence, Inc.’ key.
6. Select the ‘Open’ anchor next to the ‘WebBase’ key.
7. Select the ‘Open’ anchor next to the version number (e.g., ‘4.10’)10.
8. Select the ‘Open’ anchor next to the ‘Parameters’ key. All of the WebBase parameters
currently defined and their values are displayed in the table.
10
The keys specified in steps 5-8 will exist as long as the user selected to update the System Registry with the WebBase parameters entered during
installation. If any of these keys are not found, select the ‘Add New Key’ anchor and enter the appropriate key name. Then proceed with the
subsequent steps.
38
WebBase User’s Guide
9. To add a new parameter, select the ‘Add new entry’ anchor and specify the parameter
name and desired value. Remember that the parameter name is case sensitive.
10. To modify a parameter, select the ‘Edit’ anchor next to the parameter and specify the
changed value.
11. Stop and restart WebBase so that the new/modified parameters will take effect.
4.2 Extensions
The user can specify how WebBase will handle different types of files, based on the file
extension. There are three options for how a file will be handled by WebBase:
1. Process the file and return the results to the browser
2. Do not process the file; just return the file contents to the browser.
3. Return a ‘404 File Not Found’ error even if the file truly does exist. This is used for
hiding files that one wants to have associated with the files invoking them but ones that
make no sense for a user to try and address directly from a browser.
In addition to specifying whether the file will be processed or just returned by WebBase, the
user also specifies the ‘mime type’. This is used to generate the Content-type header variable
returned to the browser; the browser uses this to determine how to deal with the file upon
receipt. For example, ‘Content-type: text/html’ tells a browser to handle HTML tags within
the document while ‘Content-type: text/plain’ would cause everything to be displayed; i.e., the
<H1> HTML tags would be printed and not processed.
The default file extensions and their mime types supported in WebBase are:
WebBase User’s Guide
39
Chapter 4: Initialization
*
404
abs
audio/x-mpeg
ai
application/postscript
aif
audio/x-aiff
aifc audio/x-aiff
aiff audio/x-aiff
as
application/x-javascript
au
audio/basic
avi
video/x-msvideo
bin
application/octet-stream
bmp
image/x-MS-bmp
class application/octet-stream
cpio application/x-cpio
csh
application/x-sh
doc
application/msword
dvi
application/x-dvi
eps
application/postscript
exe
application/octet-stream
fif
application/fractals
gif
;image/gif
gtar application/x-gtar
gz
application/x-gzip
hqx
application/mac-binhex40
htf
{text/html}
htm
{text/html}
html {text/html}
ice
x-conference/x-cooltalk
ief
;image/ief
jpe
;image/jpeg
jpeg ;image/jpeg
jpg
;image/jpeg
js
application/x-javascript
latex application/x-latex
ls
application/x-javascript
mocha application/x-javascript
mov
video/quicktime
mpe
video/mpeg
mpeg video/mpeg
mpg
video/mpeg
mp2v video/x-mpeg2
mpv2 video/x-mpeg2
mp2 audio/x-mpeg
mpa audio/x-mpeg
mpega audio/x-mpeg
pac application/x-ms-proxy-autoconfig
pbm ;image/x-portable-bitmap
pcd ;image/x-photo-cd
pdf application/pdf
pgm image/x-portable-graymap
pl
application/x-perl
png ;image/x-png
pnm ;image/x-portable-anymap
ppm ;image/x-portable-pixmap
ps
application/postscript
qt
video/quicktime
ra
audio/x-pn-realaudio
ram audio/x-pn-realaudio
ras image/x/cmu/raster
rgb image/x-rgb
rtf application/rtf
sh
application/x-sh
shar application/x-shar
sit application/x-stuffit
snd audio/basic
tar application/x-tar
tcl application/x-tcl
tex application/x-tex
texi application/x-texinfo
text text/plain
tif image/tiff
tiff image/tiff
txt text/plain
wav audio/x-wav
xbm image/x-xbitmap
xpm image/x-xpixmap
xwd image/x-xwindowdump
z
application/x-compress
zip application/x-zip-compressed
WebBase users can go with the defaults as shown above, totally override them with their own,
or indicate they want to take the defaults but override individual entries - change them, delete
them, and add to them.
To specify how a file extension type is to be handled, the user creates a key in the system
registry identifying the file extension. The value of the extension is the mime-type. The
default mime-type for returning an HTML form without WebBase processing would be
‘text/html’.
Any file containing WebBase macros or variables must be set up to be processed by the
WebBase server. By default, WebBase will process any file with an extension of .htf, .htm or
.html. To indicate a file extension that WebBase should processed, the mime-type is enclosed
in { } characters. For example, .htf files have a mime-type of ‘text/html’ but use WebBase
processing, so their mime-type would be defined as ‘{text/html}’.
40
WebBase User’s Guide
To indicate an extension type is to be ignored and that WebBase is to return the 404 File Not
Found error message for such a file, a mime-type of ‘404’ is specified.
If no extensions have been defined, all the default extensions listed previously are used. If the
user wants to continue to use these system defaults but add or modify some additional file
extensions, a file extension of ‘???’ whose value is ‘use all system defaults’ must be specified.
If the user creates one or more extensions but does not include the ‘???’ extension, no default
extensions will be used. If the ‘???’ entry is found, the default extensions are first loaded into
the extensions dictionary, and then the registry entries are processed. If this entry is not found,
only the registry entries are processed.
An extension that has no associated mime-type indicates that it is to be removed from the
dictionary. If the key is not found in the dictionary, no error will result. For example, to ignore
GIF files an extension of ‘gif’ would be created with no value.
The ‘*’ extension is used to specify how any extension not found is to be treated. By default,
this will return the 404 error for any extension not otherwise encoded in the dictionary.
If logging is enabled, a log record is added for each command processed or returned by
WebBase. It is possible to indicate that specific extension types are not to be logged. This is
done by preceding the mime-type with a semicolon (;). For example,
htm = ;text/html
htf = ;{text/html}
htf = {;text/html}
no WebBase processing, no logging
WebBase process, no logging
WebBase process, no logging
Notice that the order of the ‘;’ and ‘{‘ characters do not matter. A number of extensions that
return images are set up by default to not generate log records, including .gif and .jpg
extensions.
Editing Extensions
WebBase only reads extensions at startup. If an extension is added, changed or deleted,
WebBase must be stopped and restarted for the change to take effect. To create and/or edit
the WebBase extensions, perform the following steps:
1. Start WebBase and open up the WebBase WebWizard by entering the URL:
http://127.0.0.1:<port #>/wbwizard/
The <port #> is the PortNo parameter. If port 80 is used, the ‘:<port #>’ portion of the
above URL does not have to be used.
2. Select the Registration Database anchor.
3. From the pull-down list, select ‘HKEY_LOCAL_MACHINE’ and then press the ‘OPEN’
button.
4. Select the ‘Open’ anchor next to the ‘SOFTWARE’ key.
5. Select the ‘Open’ anchor next to the ‘ExperTelligence, Inc.’ key.
6. Select the ‘Open’ anchor next to the ‘WebBase’ key.
7. Select the ‘Open’ anchor next to the version number (e.g., ‘4.10’).
WebBase User’s Guide
41
Chapter 4: Initialization
8. If the key ‘Extensions’ does not exist, create it by selecting the ‘Add New Key’ anchor and
entering ‘Extensions’ as the key name. Remember that this name is case sensitive.
9. Select the ‘Open’ anchor next to the ‘Extensions’ key. All of the WebBase extensions
currently defined and their mime-type values are displayed in the table.
10. To add a new extension, select the ‘Add new entry’ anchor and specify the extension name
and desired mime-type value.
11. To modify an extension, select the ‘Edit’ anchor next to the extension and specify the
changed value.
12. Stop and restart WebBase so that the new/modified extensions will take effect.
4.3
Aliases
WebBase includes the ability to handle directory aliases. When a URL is entered, the node
name immediately following the host name can be an alias. For example, if the URL
‘www.expertelligence.com/foobar/filename.htf’ was entered, the ‘foobar’ is extracted from the
URL and WebBase checks the Aliases for an entry whose name is ‘foobar’. If there is an alias
that has been defined whose name is ‘foobar’ with a value of ‘f:\foo\bar\, then the above URL
would translate to referencing a form at:
f:\foo\bar\filename.htf
and not in the default Directory (generally c:\http).
Note that only the first node of the URL beyond the host name is used to see if it matches an
alias. The order for matching is:
1. Is there an alias for this name at this particular IP address?
2. Is there an alias for this name?
3. Is this a legitimate directory name within the default directory path?
Editing Aliases
WebBase only reads aliases, like extensions and parameters, at startup. If an alias is added,
changed or deleted, WebBase must be stopped and restarted for the change to take effect. To
create and/or edit the WebBase aliases, perform the following steps:
1. Start WebBase and open up the WebBase WebWizard by entering the URL:
http://127.0.0.1:<port #>/wbwizard/
The <port #> is the PortNo parameter. If port 80 is used, the ‘:<port #>’ portion of the
above URL does not have to be used.
2. Select the Registration Database anchor.
3. From the pull-down list, select ‘HKEY_LOCAL_MACHINE’ and then press the ‘OPEN’
button.
4. Select the ‘Open’ anchor next to the ‘SOFTWARE’ key.
42
WebBase User’s Guide
5. Select the ‘Open’ anchor next to the ‘ExperTelligence, Inc.’ key.
6. Select the ‘Open’ anchor next to the ‘WebBase’ key.
7. Select the ‘Open’ anchor next to the version number (e.g., ‘4.10’).
8. If the key ‘Aliases’ does not exist, create it by selecting the ‘Add New Key’ anchor and
entering ‘Aliases’ as the key name. Remember that this name is case sensitive.
9. Select the ‘Open’ anchor next to the ‘Aliases’ key. All of the WebBase aliases currently
defined and their values are displayed in the table.
10. To add a new alias, select the ‘Add new entry’ anchor and specify the alias name and
desired value.
11. To modify an alias, select the ‘Edit’ anchor next to the extension and specify the changed
value.
12. Stop and restart WebBase so that the new/modified aliases will take effect.
4.4 Multiple Domains
WebBase supports multiple domains. One can set up multiple IP addresses in the TCP
interface to reference the same physical machine11. For example, a single machine may be
configured to support addresses: 1.2.3.1, 1.2.3.2, 1.2.3.3 and 1.2.3.4. The machine may also
be known by 127.0.0.1, which is the default ‘local host’ way of addressing the system, but only
from itself. The WebBase %serverAddress% variable returns the IP address based on how the
server was addressed.
Since different behavior may be desired depending on how the server is addressed, WebBase
allows the user to define different domains. Within each domain, it is possible to define the
desired behavior with respect to parameters, aliases and extensions.
The following parameters can be defined for each domain. If not explicitly specified, the
default value of the parameter as described earlier in this chapter is used.
•
Directory -- the directory containing various form files, or subdirectories containing forms
files. This directory is only relevant to a user coming in at this IP address or domain.
•
Default -- the name of the default file when a directory is referenced. The defaults are
default.htf and default.htm in that order. This parameter can be specified as a single file
name or as a series of files to be searched for in the order presented (index.htm,index.html)
separated by commas. If the parameter is specified with no filename, then no default file
will be used.
•
Extension -- the default extension (or extensions) to append to a file name should the user
enter what appears to be a file reference without an extension. Defaults is ‘htf,htm’ in that
order. This parameter can be specified as a single extension or as a series of file extensions
to be searched for in the order presented (htm, html) separated by commas. If the
11
Multiple domain support within the TCP/IP configuration is currently only supported under Windows NT systems. This is an operating system
limitation, not a WebBase limitation.
WebBase User’s Guide
43
Chapter 4: Initialization
parameter is specified with no extension, then no default extension will be appended to the
file name to attempt to resolve it for the user.
•
HostName -- the DNS name identifying the domain. This is used to generate the
%fullHostName% and %serverHostName% variables if the browser does not provide a
Host header variable. The form designer can use these variables to do redirects using a
DNS name instead of an IP address. It is important to remember that this name is NOT
being used for name resolution of the host name used within a URL -- that is done by the
TCP/IP configuration where the domain name(s) are set up outside of WebBase. This
HostName parameter is only used so that if the user wants to do a redirect to a particular
domain that the name of the domain can be used in the URL instead of the IP address.
Creating and Editing Multiple Domains
Each domain to be serviced by WebBase is created as a separate entry within the System
Registry. Under this key are additional subkeys to specify aliases, extensions and other
parameters. If multiple domain information is modified, WebBase must be stopped and
restarted for the change to take effect. To create and/or edit multiple domains in WebBase,
perform the following steps:
1. Start WebBase and open up the WebBase WebWizard by entering the URL:
http://127.0.0.1:<port #>/wbwizard/
The <port #> is the PortNo parameter. If port 80 is used, the ‘:<port #>’ portion of the
above URL does not have to be used.
2. Select the Registration Database anchor.
3. From the pull-down list, select ‘HKEY_LOCAL_MACHINE’ and then press the ‘OPEN’
button.
4. Select the ‘Open’ anchor next to the ‘SOFTWARE’ key.
5. Select the ‘Open’ anchor next to the ‘ExperTelligence, Inc.’ key.
6. Select the ‘Open’ anchor next to the ‘WebBase’ key.
7. Select the ‘Open’ anchor next to the version number (e.g., ‘4.10’).
8. If the key ‘Domains’ does not exist, create it by selecting the ‘Add New Key’ anchor and
entering ‘Domains’ as the key name. Remember that this name is case sensitive.
9. Select the ‘Open’ anchor next to the ‘Domains’ key. All of the WebBase multiple
domains are specified as subkeys in the displayed table.
10. To create a new multiple domain, select the ‘Add New Key’ anchor and enter the IP
address of the domain. This domain must also be set up within the TCP/IP configuration
accessible via the Network option within the Windows Control Panel.
11. Select the ‘Open’ anchor next to the desired multiple domain key. The entries table
indicates whether any parameters have been defined for this domain.
44
WebBase User’s Guide
12. To add a parameter, select the ‘Add new entry’ anchor and specify the parameter name
and desired value. Parameters should only be defined to override the default parameter
value.
13. To modify a parameter, select the ‘Edit’ anchor next to the parameter and specify the
changed value.
14. The subkey table indicates whether any aliases or extensions have been defined for this
domain. To create extensions or aliases, follow steps #8-11 from the preceding sections on
Extensions or Aliases, respectively, to create the subkey within the registry and then define
appropriate extensions or aliases.
15. Stop and restart WebBase so that the new/modified multiple domain information will take
effect.
WebBase User’s Guide
45
Chapter 4: Initialization
46
WebBase User’s Guide
WebBase Windows
Chapter 5
There are a number of windows that are displayed on the host system while WebBase is
running. This chapter describes these windows and the menu options available on them. Note
that when WebBase is installed as a service under Windows NT, there may not be any
windows displayed.
5.1 Late Breaking News Window
The first window displayed when WebBase is started is the ‘Late Breaking News Window’.
An example of this window is shown in Fig. 5.1 below.
Figure 5.1 Late Breaking News Window
The lines shown above are always displayed, and include the copyright statement, the welcome
statement including the current WebBase version and build numbers, and an indication that the
server is starting. The WebBase WebWizard information is displayed as long as the
directory containing the WebBase WebWizard forms can be found on the server system. The
WebBase WebWizard is installed as part of the WebBase installation. Information on the
WebBase WebWizard is provided as readme.txt files with each WebBase WebWizard tool;
additional documentation is available on the WebBase web page. Information on other
WebBase add-on packages can also be found at the WebBase web site.
WebBase User’s Guide
47
Chapter 5: WebBase Windows
Below these lines is the latest news information that is posted frequently by ExperTelligence.
This may include information on new releases, bug fixes, and documentation updates. If you
do not see the news information when you start WebBase, it may be because:
•
Your WebBase server is behind a firewall and cannot access the ‘Late Breaking News’
data. See Chapter 13 for information on firewalls.
•
You are not on the Internet. You can still use WebBase; you will just not see any news in
this window.
•
The ExperTelligence server is unavailable. In this case, the Late Breaking News Window
will display:
News server temporarily not available.
Please request “Current User News” later.
Errors that occur while WebBase is starting or running are also displayed in this window.
During the installation and configuration of WebBase, it is suggested that this window be kept
open to detect if any errors have occurred.
Menu Options
All WebBase windows include a menu bar at the top of the window. The ‘Late Breaking
News Window’ includes several very simple menu options. Each of the menu options are
described below.
48
•
File->Exit -- If this menu option is selected, the ‘Late Breaking News Window’ is closed.
It is possible to run WebBase without this window open. This window is only necessary
to read the latest news about the product.
•
Edit->Copy -- This menu option is only active if an area of text in the window has been
highlighted. If this menu option is selected, the highlighted text is copied into the system’s
paste buffer. It can then be placed into another application (e.g., Word, PowerPoint). The
keyboard shortcut <ctrl>-C (press the Ctrl key and the C key down at the same time) can
also be used to perform a copy operation.
•
Edit->Clear All News -- If this menu option is selected, the news information displayed
below the startup information is cleared. The user may subsequently select to view
updated news by selecting the Help>Current User News option. Clearing the news area is
also useful to easily see if any errors occur since error information is displayed in this
window.
•
Edit->Find -- If this menu option is selected, the Find Dialog shown below in Fig. 5.2 is
displayed. The user must specify the string to be found as well as whether the search will
be forwards or backwards from the current location of the cursor. This dialog also allows
the user to specify whether a case sensitive or insensitive search will be done. Once the
information to be matched is entered, the user selects the ‘Find’ button. If a match is
found, it is highlighted. If no match is found, a dialog indicating that the search string was
not found is displayed. Note that a forwards search will only go to the end of the file; it
does not loop around and start over at the beginning of the file. Likewise, a backwards
search will only go to the beginning of the file; it does not loop around and start over at the
end of the file. The keyboard shortcut <ctrl>-F (press the Ctrl key and the F key down at
the same time) will also cause the Find Dialog to be displayed.
WebBase User’s Guide
Figure 5.2 Find Dialog
•
Edit->Find Again -- If no string has been specified on the Find Dialog, the user is
prompted to enter the search string. Using either this string or the string previously
specified on the Find Dialog, the next occurrence of the string is located and highlighted.
Note that if no string was specified on the Find Dialog, the default search direction
(forward) and type (case insensitive) will be used. If a search string was specified on the
Find Dialog, the search parameters specified on the Find Dialog will be used. The
keyboard shortcut <ctrl>-G (press the Ctrl key and the G key down at the same time) can
also be used to invoke the Find Again function.
•
Help->Current User News -- If this option is selected, the latest news from
ExperTelligence will be retrieved and displayed in the window. Any previous news or
error messages displayed on the window are not cleared. It is recommended that the
Edit>Clear All News option be selected before this option is selected.
5.2 WebBase Server Window
The second window displayed when WebBase is started is the ‘WebBase Server Window’.
The title of this window always indicates the version and build of the WebBase server. An
example of this window is shown in Fig. 5.3 below.
WebBase User’s Guide
49
Chapter 5: WebBase Windows
Figure 5.3 WebBase Server Window
There are three components to this window: the menu bar, the status line, and the text area.
Each of these are described in the following sections.
WebBase Server Window Menu Bar
The menu bar provides four sets of menu options. Each set is described below.
WebServer Menu Options
•
50
Pause Server -- This is a toggle (on/off) option. If the server has been paused, a check
mark is displayed next to the menu option. If the server is not paused, no check mark is
displayed. If this option is selected and the server is active, the confirmation dialog shown
in Fig. 5.4 is displayed. If the user confirms that the server should be paused, the status
line in the window is redisplayed in red and the remainder of the window is displayed in
blue-green. While the server is paused, it will return a “503 The Server is Too Busy”
status code and message back to any requesting browsers. Although some server
resources are required to handle the incoming requests and return the status, they are very
minimal. If this option is selected and the server is paused, the server will be re-activated
without any confirmation from the user. Pausing the server is useful to administer
databases without having to shut down the server and without having to wrap errorProtect
statements around forms that would otherwise generate errors. Alternative approaches to
database administration are presented in Chapter 14.
WebBase User’s Guide
Figure 5.4 Pause Server Confirmation Dialog
•
Close All Connections -- If this option is selected, the confirmation dialog shown in Fig.
5.5 is displayed. If the user confirms that all connections should be closed, all commands
in progress will be closed and the associated communications sockets will be closed. This
option is also provided for trouble-shooting. If your server is not responding properly, you
might try this option first to see if the problem is resolved.
Figure 5.5 Close All Connections Confirmation Dialog
•
Clear All Caches -- If this option is selected, the confirmation dialog shown in Fig. 5.6 is
displayed. If the user confirms that the forms and ODBC connection caches should be
closed, the caches are emptied without altering the status of the caching state as set via the
Options Menu. This is equivalent to selecting both the ‘Clear Forms Cache’ and ‘Clear
ODBC Cache’ menu options.
Figure 5.6 Clear All Caches Confirmation Dialog
•
Remove All User Variables -- If there are no user variables currently defined, an
information window is presented indicating that no action is necessary. If this option is
selected and there is at least one user variable dictionary, the confirmation dialog shown in
Fig. 5.7 is displayed. The total number of user variable dictionaries is specified as part of
WebBase User’s Guide
51
Chapter 5: WebBase Windows
the dialog. If the user confirms that all user variable dictionaries and their contents should
be deleted, the user variable dictionaries are emptied and removed. See Chapter 10 for
additional information on user variables and user variable dictionaries. This option should
be used only during form development and when no users are actively making requests of
the WebBase server. If one or more form applications have been developed using user
variables and the user variable dictionaries are emptied and deleted, any user currently
interacting with the server may get unexpected results or errors.
Figure 5.7 Remove All User Variables Confirmation Dialog
•
Clear Forms Cache -- If this option is selected, the confirmation dialog shown in Fig. 5.8
is displayed. If the user confirms that all the forms in the cache should be cleared, the
forms are removed. Forms caching is enabled via the Options menu (Enable Cache Read)
or by setting the value of %cacheEnabled% to true (default value). Forms caching can be
disabled via menu option or by setting the value of %cacheEnabled% to false. If forms
caching is disabled, no forms will be in the cache so it is not necessary to clear them. It is
strongly recommended that forms caching be used. When a file is specified as part of a
URL, WebBase located the file on disk, opens and reads the file, parses the text into
internal structures, and then processes the macros and variables within the file. The
resulting output stream is returned to the browser. If forms caching is on, the internal
structures built for the file are cached in memory. When the file is subsequently requested,
the internal structures are retrieved from cache. WebBase does not have to find the file,
read it and parse it. This can provide improved throughput and faster response. It is
possible to clear both the forms cache and the ODBC connection cache using the Clear All
Caches menu option.
Figure 5.8 Clear Forms Cache Confirmation Dialog
52
WebBase User’s Guide
•
Figure 5.9
•
Clear ODBC Cache -- If this option is selected, the confirmation dialog shown in Fig. 5.9
is displayed. If the user confirms that all the ODBC connections in the ODBC cache
should be cleared, the connections are removed. ODBC connection caching is enabled via
the Options menu (Cache ODBC Connections) or by setting the value of %cacheODBC%
to true (default value). ODBC connection caching can be disabled via menu option or by
setting the value of %cacheODBC% to false. If ODBC connection caching is disabled, no
connections will be in the cache so it is not necessary to clear them. It is strongly
recommended that ODBC connection caching be used. Each sql macro request specifies a
source name, user name and password. An ODBC database connection is made using the
source name and user name. If %cacheODBC% is true, the connection is cached. If a
subsequent sql macro specifies the same source name and username, the connection in the
cache is used and a new connection is not created. This can significantly reduce the
amount of time it takes WebBase to process a request for the second and subsequent
reference to the same source and username. See Chapter 12 for more information on
ODBC caching. Clearing the ODBC cache will break any locks that WebBase has on
ODBC databases. Releasing these locks is necessary to perform database maintenance.
See Chapter 14 for more information on database maintenance.
Clear ODBC Cache Confirmation Dialog
Exit -- If this option is selected, the confirmation dialog shown in Fig. 5.10 below is
displayed. This dialog is also displayed if the user selects the close option from the
window bar. If so confirmed, all WebBase windows are closed and WebBase processes
stopped.
Figure 5.10 WebBase Exit Confirmation Dialog
Edit Menu Options
•
Copy -- this menu option provides the same functionality as described for the Late
Breaking News Window.
•
Find -- this menu option provides the same functionality as described for the Late
Breaking News Window.
WebBase User’s Guide
53
Chapter 5: WebBase Windows
•
Find Again -- this menu option provides the same functionality as described for the Late
Breaking News Window.
•
Heartbeat -- If this option is selected, a Heartbeat Window is opened. This window is
described later in this chapter. The keyboard shortcut <ctrl>-H (press the Ctrl key and the
H key down at the same time) can also be used to open a Heartbeat window.
•
Total View -- If this option is selected, a Total View window is opened. This window is
described later in this chapter. The keyboard shortcut <ctrl>-T (press the Ctrl key and the
T key down at the same time) can also be used to open a Total View window.
Options Menu Options
•
Enable Transactions Pane -- This is a toggle (on/off) option. If the status line is enabled
(default), a check mark is displayed next to the menu option. If the status line is disabled,
no check mark is displayed. If the user turns the option off, the status line is displayed in
gray and only a copyright statement is displayed within the status line. More information
on the status line is presented later in this chapter.
•
Open Transactions Window -- If this option is selected, a WebBase Transactions
Service Window is opened. This window is described later in this chapter. While the
WebBase Transactions Service window is open, a checkmark appears next to this option.
If the option is selected while there is a check mark next to it, the WebBase Transactions
Service window is brought to the front.
•
Load Global Variables -- If this option is selected, the confirmation dialog shown in Fig.
5.11 is displayed. If the user confirms that the global variable values should be updated,
they are read in from the System Registry. The new values of all the global variables are
displayed on the text area of the WebBase Server window. This option is only used when
a change has been made to a global variable. See Chapter 9 for more information on global
variables. Each time WebBase starts, it automatically reads in all the parameters, global
variables and other information set up in the System Registry. It is important to remember
that only global variables can be reloaded after WebBase has been started. WebBase
parameters, aliases, extensions and multiple domain changes require that WebBase be
stopped and restarted.
Figure 5.11 Load Global Variables Confirmation Dialog
•
54
Enable Cache Read -- This is a toggle (on/off) option. If forms caching is enabled
(default), a check mark is displayed next to the menu option. If forms caching is disabled,
no check mark is displayed. If this option is selected, one of the confirmations shown in
Fig. 5.12 is displayed. The dialog on the left is displayed if caching is currently enabled;
the dialog on the right is displayed if caching is currently disabled. If caching is enabled,
any form that is referenced is read from the file system, the text is parsed, and the resulting
WebBase User’s Guide
information is added to the cache. The advantage of using forms caching is that WebBase
will not have to hit the disk to read the form each time it is accessed and will not have to
parse the text in the file. If the form is subsequently referenced, it will be retrieved from
the cache. This substantially reduces the amount of time it takes WebBase to process a
request for the second and subsequent reference to the same Web page. If this option is
turned off, all output forms will be acquired from the file system even if they are in the
cache. If this option is disabled, the Enable Cache TimeCheck option is also disabled. If a
change to caching is made using this menu option, it will stay in effect until WebBase is
stopped. The variable %cacheEnabled% should be set to make any persistent change to
whether forms caching will be used.
Figure 5.12 Enable Cache Read Confirmation Dialogs
•
Enable Cache TimeCheck -- This option is only active if forms caching is enabled. This
is a toggle (on/off) option. If time-check caching is enabled (default), a check mark is
displayed next to the menu option. If time-check caching is disabled, no check mark is
displayed. If this option is selected, one of the confirmations shown in Fig. 5.13 is
displayed. The dialog on the left is displayed if time-checking is currently enabled; the
dialog on the right is displayed if time-checking is currently disabled. If this option is
enabled, WebBase will check the date of any file in the cache to determine if a more recent
version exists in the file system. If a more recent version is found, the newer version is
displayed and cached. Enabling this feature helps ensure developers are always seeing the
most current form -- they need not be concerned whether the form they are editing has
already been cached or not. If this option is disabled, the cached forms will always be
used even if a more recent form exists in the file system. During production, it is
recommended that this option be turned off, as this will enable throughput. If a change to
time-check caching is made using this menu option, it will stay in effect until WebBase is
stopped. The variable %cacheTimeCheck% should be set to make any persistent change
to whether time-check caching will be used.
Figure 5.13 Enable Cache TimeCheck Confirmation Dialogs
WebBase User’s Guide
55
Chapter 5: WebBase Windows
•
Cache ODBC Connections -- This is a toggle (on/off) option. If ODBC connection
caching is enabled (default), a check mark is displayed next to the menu option. If ODBC
connection caching is disabled, no check mark is displayed. If this option is selected, one of
the confirmations shown in Fig. 5.14 is displayed. The dialog on the left is displayed if
connection caching is currently enabled; the dialog on the right is displayed if connection
caching is currently disabled. If this option is enabled, the connection to the ODBC
database is added to the ODBC cache after the first database access. Statements to send
or retrieve data from this source are addressed to the source via the ODBC connection. By
caching the connection, significant startup and connection operations are avoided on
subsequent queries. If this option is disabled, ODBC connections must be reestablished on
each query. Having ODBC connections cached provides faster access if there are to be
multiple accesses of the same database with the same user/password combination. If a
change to ODBC connection caching is made using this menu option, it will stay in effect
until WebBase is stopped. The variable %cacheODBC% should be set to make any
persistent change to whether ODBC connection caching will be used.
Figure 5.14 Cache ODBC Connections Confirmation Dialogs
•
Enable Log File -- This is a toggle (on/off) option. If logging is enabled (default), a check
mark is displayed next to the menu option. If logging is disabled, no check mark is
displayed. If this option is selected, one of the confirmations shown in Fig. 5.15 is
displayed. The dialog on the left is displayed if logging is currently enabled; the dialog on
the right is displayed if logging is currently disabled. If this option is selected, log files
will be generated for each WebBase transaction if a user has also defined a LogDirectory
as a WebBase parameter. If logging is enabled, a log file is created each day to record
each query made of WebBase. See Chapter 12 for details on logging and log file formats.
If this option is disabled, log files will not be generated. If a change to logging is made
using this menu option, it will stay in effect until WebBase is stopped. The variable
%logEnabled% should be set to make any persistent change to whether logging will be
done.
Figure 5.15 Enable Log File Confirmation Dialogs
•
56
Flush Log File -- This option is only active if logging is enabled. Information to be written
into the log file is buffered until sufficient data has been obtained, at which point it is
WebBase User’s Guide
written to the log file on disk. If this option is selected, any information in the buffer is
written to disk. This ensures that the information the user views in the log file is all that
has been generated.
Help Menu Options
•
Current User News -- this menu option provides the same functionality as described for
the Late Breaking News Window. If the Late Breaking News Windows is not open, it will
automatically be opened and brought to the front.
WebBase Server Window Status Line
The status line displayed beneath the menu bar on the WebBase Server Window provides
information about the current state of the system. The status line is normally displayed in
white when it is active. If the user has turned off the status information by deselecting the
‘Enable Transactions Pane’ option in the Options menu, the WebBase copyright statement is
displayed on a gray background. If the server has been paused, the status line has a red
background.
In normal mode, the status line displays a number of important pieces of information. From
left to right, the data displayed is the command counter, the concurrent commands in process,
and the status. The command counter is separated from the concurrent commands in process
by a ‘/’. The numbers are separated from the status by a ‘::’.
•
command counter -- this value starts at zero when WebBase is launched and is
incremented whenever WebBase processes a command (including the GIFs, JPGs, etc.)
•
concurrent commands in process -- this value is the number of commands that are either
being processed or are waiting to be processed. On most systems, this value will be either
1 or 0. However, if the server is loaded down with a mix of forms including heavy SQL
access, this value may be higher.
•
status -- The status information is either the last command processed or a date/time stamp
with the server’s status. When a request is made of the WebBase server, the status line
will show the requesting browser’s IP address followed by ‘GET’ or ‘POST’ and the
command. For example, if a user is testing WebBase by sending the dateTime command,
the status line would show
1 / 0 :: 127.0.0.1 GET dateTime
Once a minute, a status process runs within WebBase to check to see if any commands are
in process. If there are no commands being processed, the status line is updated to indicate
that the system is idle. The date and time are also displayed, and are updated each minute
so the user can verify that WebBase is still responding. The idle status message looks
like:
2 / 0 :: Thr 13 Mar 1997 12:54:29 - Idle
WebBase User’s Guide
57
Chapter 5: WebBase Windows
WebBase Server Window Text Display
The following sets of information are displayed on the WebBase Server window below the
status line.
•
System Parameters -- The system parameters section starts with the WebBase copyright
statement and identifies the WebBase version and build, the user’s license number, when
WebBase was started, the type of system in use and other network-related information.
•
WebBase Parameters -- This section is a list of all the WebBase startup parameters
defined in the System Registry. Many of these parameters are entered during installation.
If any of these parameters needs to be changed, it is necessary to modify the value in the
System Registry and then stop and restart WebBase. All the WebBase parameters are
defined in Chapter 4.
•
Aliases – This section is only included if the user has defined any aliases in the System
Registry. If so, each alias and its translation are displayed in this section. Alias
information and how to define aliases is found in Chapter 4. If an alias needs to be
changed or added, it is necessary to modify the value in the System Registry and then stop
and restart WebBase.
•
Domains – This section is only included if the user has defined any domains in the System
Registry. If so, each domain and its associated parameters are displayed in this section.
Multiple domain support and how to define multiple domains are found in Chapter 4. If a
parameter within a domain needs to be added or modified or if a domain needs to be added,
it is necessary to modify the information in the System Registry and then stop and restart
WebBase.
•
Commands -- This section lists all the built-in commands that are available in WebBase.
These are described in Chapter 3.
•
Dynamic variables -- This section lists all the WebBase dynamic variables. These are
described in Chapter 9.
•
Global variables -- This section lists all the global variables. If the user selects the ‘Load
Global Variables’ option from the Options menu, the updated global variables are
displayed here.
5.3 WebBase Transactions Service Window
The WebBase Transactions Service Window maintains a queue of messages, the most recent is
displayed at the top. The messages are those that are written out to the standard log file. If
the global variable %transactionsWindow% is created and set to true, this window will
automatically be opened when WebBase is started.
58
WebBase User’s Guide
Figure 5.16 WebBase Transactions Service Window
WebBase Transactions Menu Bar
The following menu options are available on the WebBase Transactions Service Window.
•
File>Exit -- If this option is selected, the WebBase Transactions Service Window is
closed. Closing this window has no effect on other WebBase functions.
•
Edit>Cut -- this menu option is only active if an area of text in the window has been
highlighted. If this menu option is selected, the highlighted text is copied into the system’s
paste buffer and removed from the text area. It can then be placed into another application
(e.g., Word, PowerPoint). The keyboard shortcut <ctrl>-X (press the Ctrl key and the X
key down at the same time) can also be used to perform a cut operation.
•
Edit>Copy -- this menu option provides the same functionality as described for the Late
Breaking News Window.
•
Edit>Clear All -- If this option is selected, all of the information in the text area is
removed.
•
Edit>Find -- this menu option provides the same functionality as described for the Late
Breaking News Window.
•
Edit>Find Again -- this menu option provides the same functionality as described for the
Late Breaking News Window.
•
Edit>Set Lines -- If this option is selected, the Set Lines Dialog shown in Fig. 5.18 below
is displayed. The number of lines of information to be displayed must be between 10 and
10000; the default is 100. The number of lines is displayed in the title bar of the window.
The number of lines specified can affect system performance, as a large number of lines
will require a large memory buffer. The global variable %transactionsMaxLines% can
also be set to specify the number of lines on this window. The keyboard shortcut <ctrl>-S
WebBase User’s Guide
59
Chapter 5: WebBase Windows
(press the Ctrl key and the S key down at the same time) can also be used to perform a cut
operation.
Figure 5.18 Set Lines Dialog
•
Status>Posting enabled -- If this option is selected, information will be written to the
window. If the option is turned off (no check mark is displayed next to the option), the
background of the window is displayed as dark gray and no data will be written to the
window. For example, the user can select the Show TCP/IP Status option and nothing will
be displayed in the window if posting is disable.
•
Status>Start transaction writing -- This option is only active if the ‘Stop transaction
writing’ option was previously selected. It will cause transaction information to again be
displayed in the WebBase Transaction Services window.
•
Status>Stop transaction writing -- This option is only active if transaction information is
being written to the WebBase Transaction Services Window. When the WebBase
Transactions Services Window is opened, transaction information will automatically start
being written to the text area. When debugging a form, one might wish to view and/or
capture some of the messages from the text area without having it scrolled off should other
outside transactions come in. This option allows the user to stop the posting as soon as the
desired trace is shown, and then resume later by selecting the ‘Start transaction writing’
option. When this option is selected, the background of the window is changed to bluegreen.
•
Status>Trace incoming headers -- This is a toggle (on/off) option. If tracing of incoming
headers is enabled, a check mark is displayed next to the menu option. If tracing of
incoming headers is disabled (default), no check mark is displayed. If this option is
selected, one of the confirmations shown in Fig. 5.15 is displayed. If this option is
selected, the header records for the incoming messages are displayed in the text window.
This is useful for checking out cookie messages. If a user requests the dateTime
command, the following information will be displayed (some differences between systems
will occur, the display is for informational purposes only):
19 <=>
in: <CrLf>
18 <=>
in: Cookie: WebBaseID=W14394896E161808318465B;
CookieCounter=1<CrLf>
17 <=>
in: Accept: image/gif, image/x-xbitmap, image/jpeg,
image/pjpeg, */*<CrLf>
16 <=>
in: Host: 127.0.0.1<CrLf>
15 <=>
in: Pragma: no-cache<CrLf>
14 <=>
in: User-Agent: Mozilla/3.0 (Win95; I)<CrLf>
13 <=>
in: Connection: Keep-Alive<CrLf>
12 <=> 2 :: (8) 127.0.0.1 - - [14/Mar/1997:10:49:57 -0800] "GET
/dateTime HTTP/1.0" 200 496 "" "Mozilla/3.0 (Win95; I)"
60
WebBase User’s Guide
•
Status>Trace outgoing headers -- This is a toggle (on/off) option. If tracing of outgoing
headers is enabled, a check mark is displayed next to the menu option. If tracing of
outgoing headers is disabled (default), no check mark is displayed. If this option is
selected, the header records for the outgoing messages are displayed in the text window.
This is useful for checking out cookie messages and Last-Modified header records. If a
user requests the dateTime command, the following information will be displayed (some
differences between systems will occur, the display is for informational purposes only):
34 <=>
out: <CrLf>
33 <=>
out: Content-Length: 120<CrLf>
32 <=>
out: Content-Type: text/html<CrLf>
31 <=>
out: Last-Modified: Tuesday, 01-Jan-1901 01:01:01
GMT<CrLf>
30 <=>
out: Expires: Tuesday, 01-Jan-1901 01:01:01 GMT<CrLf>
29 <=>
out: Pragma: no-cache<CrLf>
28 <=>
out: Date: Friday, 14-Mar-1997 18:52:05 GMT<CrLf>
27 <=>
out: Set-Cookie: CookieCounter=3; path=/<CrLf>
26 <=>
out: License: #######<CrLf>
25 <=>
out: Server: WebBase 4.10 build 56<CrLf>
24 <=>
out: MIME-Version: 1.0<CrLf>
23 <=>
out: Message-ID:
<[email protected]><CrLf>
22 <=>
out: HTTP/1.0 200 OK<CrLf>
21 <=> 3 :: (8) 127.0.0.1 - - [14/Mar/1997:10:52:05 -0800] "GET
/dateTime HTTP/1.0" 200 496 "" "Mozilla/3.0 (Win95; I)"
•
Status>Show Server Status -- If this option is selected, the status of the server is
displayed in the Transactions Service window in the following form:
36 <=> 3 :: Fri 14 Mar 1997 10:54:31Pause Server -> active
The 3 indicates that the WebBase server has processed 3 commands. The 36 is the entry
number within the WebBase Transactions Service window.
•
Status>Show TCP/IP Status -- If this option is selected, the TCP/IP parameters are
displayed in the WebBase Transactions Service window in the following form (the
parameter values are dependent on the system configuration; they are presented here for
illustration only):
53 <=> 0 :: TCP/IP: Fri 14 Mar 1997 11:39:22 valid: true port:
80 descriptor: 7 last return code: 0 status: Running on Windows
95.
52 <=> 0 :: TCP/IP: SoType --> 1
51 <=> 0 :: TCP/IP: SoError --> 0
50 <=> 0 :: TCP/IP: SoDebug --> false
49 <=> 0 :: TCP/IP: SoRcvBuf --> 8192
48 <=> 0 :: TCP/IP: SoSndBuf --> 8192
47 <=> 0 :: TCP/IP: SoOobInline --> false
46 <=> 0 :: TCP/IP: SoKeepAlive --> false
45 <=> 0 :: TCP/IP: SoBroadcast --> false
44 <=> 0 :: TCP/IP: SoLinger --> Onoff = 0, Linger = 0
43 <=> 0 :: TCP/IP: SoDontRoute --> false
42 <=> 0 :: TCP/IP: SoReuseAddr --> false
41 <=> 0 :: TCP/IP: SoDontLinger --> true
40 <=> 0 :: TCP/IP: SoAcceptConn --> true
39 <=> 0 :: TCP/IP: SoTcpNoDelay --> false
38 <=> 0 :: TCP/IP: Microsoft Windows Sockets Version 1.1.
WebBase User’s Guide
61
Chapter 5: WebBase Windows
WebBase Transactions Text Window
The WebBase Transactions text area shows information about each transaction handled by
WebBase. The information is presented in the format:
# <=> data
Each line starts with an entry number. When the window is first displayed, the first entry
number is 1. As each additional entry is added to the window, the entry number is
incremented. The number of entries maintained in the text area will not exceed the number of
lines that the user has specified in the Set Lines menu option.
The information displayed after the entry number may be activation information, messagehandling information, or error information. When the window is opened, the first entry is
always of the form:
1 <=> Service active as of Fri 14 Mar 1997 11:42:29
When WebBase processes requests, the information displayed is the same as that written into
the WebBase log files. The specific format of the log information is controlled by the
LogFormat parameter. In the examples in this section, the default LogFormat of 2 (Extended
Common Log Format) is used. This format displays the address of the requesting browser, the
date and time of the request, the request line received from the browser, the status code
returned to the browser, the number of bytes transferred back to the browser, the Referer
variable and the User-Agent variable. If the user requests WebBase to print the date and time
on a browser, the WebBase Transactions Service window will include an entry of the form:
2 <=> 4 :: (8) 127.0.0.1 - - [14/Mar/1997:11:43:38 -0800] "GET
/dateTime HTTP/1.0" 200 496 "" "Mozilla/3.0 (Win95; I)"
Other information displayed in the text area has been previously described in conjunction with
the different menu options available on the window.
5.4 WebBase Total View Window
People have often asked “How can you tell what browser or server is handling my web
information?”. The general reply is “it's in the header!”. But one does not get to SEE the
header -- it is read and used by your browser and server but the information is kept hidden
from you - the user. The Total View utility has been designed so that users can see the
information contained within a header.
The WebBase Total View Window is displayed when the Total View option in the Edit menu
in the WebBase Server window is selected. An example of the WebBase Total View Window
is shown below.
62
WebBase User’s Guide
Figure 5.19 WebBase Total View Window
From the WebBase Total View Window, the user can reference a web site via an Open
Location command, just like most web browsers. But rather than processing the returned
HTML, WebBase Total View merely displays the returned HTML -- header and all. It is an
extension of the View Source functionality available with most browsers with the additional
feature of not stripping off the header information.
WebBase Total View Menu Bar
The following menu options are available on the WebBase Total View Window.
•
File>New Window -- If this option is selected, a new WebBase Total View Window is
opened. This is equivalent to selecting the Total View option from the Edit menu of the
WebBase Server window.
•
File>Open Location -- If this option is selected, the Open Location Dialog shown in Fig.
5.20 below is displayed. The user is prompted to enter a location to which a request will
be sent. The information entered by the user on the prompt is subsequently displayed in
the ‘Location’ field, which is described below.
Figure 5.20 Open Location Dialog
•
File>Exit -- If this option is selected, the WebBase Total View Window is closed. Closing
this window has no effect on other WebBase functions.
WebBase User’s Guide
63
Chapter 5: WebBase Windows
•
Edit>Cut -- this menu option provides the same functionality as described for the
WebBase Transactions Service Window.
•
Edit>Copy -- this menu option provides the same functionality as described for the Late
Breaking News Window.
•
Edit>Clear All -- this menu option provides the same functionality as described for the
WebBase Transactions Service Window.
•
Edit>Find -- this menu option provides the same functionality as described for the Late
Breaking News Window.
•
Edit>Find Again -- this menu option provides the same functionality as described for the
Late Breaking News Window.
•
Edit>Reload -- If this option is selected, the request is sent to the specified location. This
is equivalent to pressing the ‘Reload’ button in the WebBase Total View Window.
WebBase Total View Options
The WebBase Total View Window presents several input fields and buttons at the top that
allow the user to enter the type of command to be generated and the location it is to be sent to.
•
Reload -- If this button is pressed, the information entered by the user on the input fields
(accept, location) and the type of command are formed into a message and sent to the
specified location. The address, message sent, and the results of the command are
displayed in the text window.
•
GET/POST/HEAD -- These radio buttons identify the type of message that will be sent
to the location. When a button is selected, the selection is displayed in the white area to
the right of the buttons.
•
Accept -- This field contains any information to be included as the ‘Accept’ parameter
passed with the message. Details on this parameter can be found in Appendix C.
•
Location -- This field contains the location of where the message will be sent. It can be in
the form of ‘www.expertelligence.com’ or a numeric address (e.g., 127.0.0.1).
WebBase Total View Text Window
The text part of the WebBase Total View Window displays the results of creating and sending
a message containing the selections made by the user to the specified location. The address
where the message is sent is presented at the top of the window, broken down into host, port
and path. Below this is the message that is sent. Finally, the WebBase Total View Window
displays how many bytes were received and what the information was that was received back.
The results of selecting a ‘GET’ command and sending it to www.expertelligence.com are
shown below.
64
WebBase User’s Guide
Figure 5.21 WebBase Total View Window Showing Results
5.5 WebBase Heartbeat Window
The WebBase Heartbeat function can be used to send commands to WebBase on a timed
basis and receive reports on the reply status of the commands. When a command times out,
the heartbeat function can reset the TCP/IP socket in an attempt to clear the problem and
reissue the command to see if that socket reset has again enabled the communications port.
The WebBase Heartbeat Window reports on the heartbeat commands and replies.
The heartbeat function is only activated if the WebBase Heartbeat Window is opened by
selecting the menu option, or if the global variable %heartbeatWindow% is set to true. If a
user wants to have the heartbeat function always active when WebBase is started, then
%heartbeatWindow% should be created as a global variable.
Note:
On Windows NT systems in which WebBase is started as a service, creating the
global variable %heartbeatWindow% with a value of true is the only mechanism by
which the heartbeat function can be started.
When the WebBase Heartbeat Window is closed, the heartbeat function is also terminated –
the heartbeat function is only active when the WebBase Heartbeat Window is open or
iconified.
Figure 5.22 shows an example of the WebBase Heartbeat Window. The first two lines are
always displayed when the window is opened to indicate that the heartbeat service has been
started. The remaining lines indicate the commands that are sent out and replies received. The
WebBase User’s Guide
65
Chapter 5: WebBase Windows
menu bar indicates the number of lines of information that will be displayed within the
window, as well as how often the commands will be sent out.
Figure 5.22 WebBase Heartbeat Window
The WebBase parameter HostAddress can be used to specify the IP address where the
heartbeat command is to be sent. If the parameter is not defined, it defaults to ‘127.0.0.1’ that
should work in most systems to identify the local host.
If the user sets a parameter that is a different and possibly remote WebBase server, the
heartbeat commands will be sent to this server. However, if a reply time-out occurs, the
TCP/IP restart command will be sent to the local server running the Heartbeat service.
WebBase Heartbeat Window Menu Bar
The following menu options are available on the WebBase Heartbeat Window.
66
•
File>Exit -- If this option is selected, the WebBase Heartbeat Window is closed. Closing
this window has no effect on other WebBase functions. However, the heartbeat is only
functional when this window is open. If the window is closed, the heartbeat will be
stopped.
•
Edit>Cut -- this menu option provides the same functionality as described for the
WebBase Transactions Service Window.
•
Edit>Copy -- this menu option provides the same functionality as described for the Late
Breaking News Window.
•
Edit>Clear All -- This menu provides the same functionality as described for the Late
Breaking News Window.
•
Edit>Find -- this menu option provides the same functionality as described for the Late
Breaking News Window.
•
Edit>Find Again -- this menu option provides the same functionality as described for the
Late Breaking News Window.
WebBase User’s Guide
•
Edit>Set Lines -- this menu option provides the same functionality as described for the
WebBase Transactions Service Window. The global variable %heartbeatMaxLines% can
also be set to specify the number of lines on this window.
•
Status>Posting enabled -- If this option is selected, information will be written to the
window. If the option is turned off (no check mark is displayed next to the option), no data
will be written to the window. For example, if posting is disabled there will be no messages
displayed when a heartbeat command is sent out and a reply received. The background of
the window is darkened when posting is disabled. The global variable
%heartbeatPostingEnable% can also be set to ‘true’ or ‘false’ to enable or disable
posting. If set to ‘false’, it will cause posting into the WebBase Heartbeat Window to be
disabled when the window is opened (either automatically via the %heartbeatWindow%
variable or manually via the Edit menu). Posting uses memory and processor resources, so
it might be desirable in a production system to disable posting. Error messages will
continue to be posted even though posting is marked as disabled. The TCP/IP reset will
also be issued when appropriate regardless of the posting enabled status.
•
Status>Start heartbeat service -- This option is only active if the ‘Stop heartbeat service’
option was previously selected. It will cause a heartbeat to be sent out periodically (the
time interval is set by the Set heartbeat interval menu option or the variable
%heartbeatInterval%) and the replies reported.
•
Status>Stop heartbeat service -- This option is only active if the heartbeat function is
currently active. Note that the heartbeat function is only active when the WebBase
Heartbeat Window is opened, or if it has been stopped and then restarted using the Start
Heartbeat Service available on this menu. If the heartbeat service is stopped, the
background of the WebBase Heartbeat Window is changed to a blue gray color and no
additional information is displayed until the heartbeat service is restarted. The heartbeat
parameters described below can only be changed when the heartbeat service has been
stopped.
•
Status>Set heartbeat interval -- This option is only available when the heartbeat service
has been stopped. If this option is selected, the Heartbeat Interval Dialog shown in Fig.
5.23 is displayed. The user is prompted to specify the interval between commands in
seconds. The value entered must be between 5 and 360 seconds; the default is 15. The
heartbeat interval is displayed in the title bar of the window. The global variable
%heartbeatInterval% can also be used to specify the heartbeat interval.
Figure 5.23 Heartbeat Interval Dialog
•
Status>Set heartbeat reply time -- This option is only available when the heartbeat
service has been stopped. If this option is selected, the Heartbeat Reply Time Dialog
shown in Fig. 5.24 is displayed. The user is prompted to specify the length of time to wait
for a reply in seconds. The value entered must be between 1 and 5 seconds; the default is
WebBase User’s Guide
67
Chapter 5: WebBase Windows
5. The global variable %heartbeatReplyTime% can also be used to specify the heartbeat
reply time.
Figure 5.24 Heartbeat Reply Time Dialog
•
Status>Set heartbeat reset TCP -- This option is only available when the heartbeat
service has been stopped. If this option is selected, the Heartbeat Reset Dialog shown in
Fig. 5.25 is displayed. The user is prompted whether the TCP/IP socket should be reset
when a command times out. The default is that the socket will be reset. The global
variable %heartbeatResetTCP% can also be used to indicate whether the TCP/IP socket
should be reset.
Figure 5.25 Heartbeat Reset Dialog
•
Status>Set heartbeat sound -- This option is only available when the heartbeat service
has been stopped. If this option is selected, the Heartbeat Sound Dialog shown in Fig.
5.26 is displayed. The user is prompted whether a sound is played if a failure is identified.
By default, no sound is played. If the user selects to have a sound played, the user cannot
control which sound is played; the only available sound is a dirge. The global variable
%heartbeatSound% can also be used to indicate whether a sound should be played if a
failure is detected.
Figure 5.26 Heartbeat Sound Dialog
•
68
Status>Issue single heartbeat -- This option is only available when the heartbeat service
has been stopped. If this option is selected, a single heartbeat command and reply
sequence is issued and the results displayed in the text area of the window. This single
WebBase User’s Guide
heartbeat, if it fails, will cause a reset TCP and sound based on the settings of these
parameters, not just a report on the status.
WebBase Heartbeat Text Window
The WebBase Heartbeat Window text area shows information about each heartbeat command
sent out and the reply that is received. The information is presented in the format:
# <=> data
Each line starts with an entry number. When the window is first displayed, the first entry
number is 1. As each additional entry is added to the window, the entry number is
incremented. The number of entries maintained in the text area will not exceed the number of
lines that the user has specified in the Set Lines menu option.
The information displayed after the entry number may be heartbeat command/reply details,
status information, or error information. When the window is opened, the first entry is always
of the form:
1 <=> Service
active as of Fri 14 Mar 1997 15:33:19
When heartbeat commands are sent out and replies received, the information displayed is the
ID of the command, and whether it is being sent or received. Here is an example of a heartbeat
command sent and received:
190 <=>
189 <=>
8
8
id: 7873913
id: 7873913
received: 7873913
sending...
If the heartbeat function detects no response to a command which has been sent out, the
following messages are displayed:
119 <=> Heartbeat - Restarting the TCP/IP Socket Interface.
118 <=> Heartbeat - No response from server.
The bottom line would appear immediately above a “sending…” line. The top line will occur
if the user has indicated that the TCP connection should be restarted if a “no response…” reply
is received.
Other information displayed in the text area has been previously described in conjunction with
the different menu options available on the window.
WebBase User’s Guide
69
Chapter 5: WebBase Windows
70
WebBase User’s Guide
ODBC & SQL
Chapter 6
This chapter provides information about Open Database Connectivity (ODBC) which is the
standard used by WebBase for communicating with databases. This chapter also covers some
of the basics of Structured Query Language (SQL) that is used to create, retrieve and delete
records from a relational database.
6.1
Open Database Connectivity
Open Database Connectivity (ODBC) is a standard devised by Microsoft to enable any
application to communicate with any database manager. ODBC is based on Structured Query
Language (SQL) as a standard for accessing data. This interface provides maximum
interoperability: a single application can access different SQL Database Management Systems
(DBMS) through a common set of code. This enables a developer to build and distribute a
client/server application without targeting a specific DBMS. Database drivers are then added
to link the application to the user's choice of DBMS.
Most key database vendors now provide an ODBC interface, via which the end-user has access
to centrally stored data directly from the database. These interfaces are called ODBC drivers.
Microsoft provides a set of ODBC drivers for their products on their web site; these drivers are
also made available at the WebBase web site. Instructions on acquiring and installing these
ODBC drivers are included in Chapter 3.
The sql macro within WebBase is used to generate a database query. WebBase packages the
query into an ODBC function call that is then passed to the ODBC driver. The driver accepts
the ODBC requests; translates them into internal format recognizable by the database system
(e.g., ODBC to Microsoft Access); manages the communications with the database itself; and
provides the results back to WebBase. WebBase completes processing of the results and they
are then available in the form for subsequent use. The advantage of using ODBC in this
approach is that it allows WebBase to support any ODBC compliant database with no need
for internal knowledge about the specifies of a particular database system.
It is possible to design forms with multiple database queries, and queries of multiple database
systems via different ODBC drivers. For example, it is possible to retrieve information from a
Microsoft Access database and use it to generate a new record in an Oracle database. In the
future if the Oracle database is replaced by a SQL Server database, no change to the WebBase
forms are required!
WebBase User’s Guide
71
Chapter 6: ODBC & SQL
6.2 Structured Query Language
Structured Query Language, or SQL, is a database access language. It is based upon the
relational database model. A relational database is basically a collection of tables of data.
Data is stored in rows in each table. Each row is broken into cells or fields of data; each row
of data within a table has the same number of cells although the contents will usually differ.
It is not the purpose of this chapter to provide extensive information about SQL. However,
database interactions via WebBase are done using SQL statements. The primary SQL
statements are presented here, along with an example of how they would be implemented in
WebBase code.
Users who are unfamiliar with SQL might want to consider finding a good reference book
about SQL usage, or search the Internet for information or tutorials on using SQL. Each
ODBC-compliant database implements many of the SQL statements. The reference materials
provided with a user’s particular database may also provide information about SQL
statements.
SELECT
The SELECT statement is used to retrieve one or more rows of data from a table. This is the
SQL statement most frequently used, both in general database interactions as well as with
WebBase. The table below is a portion of the Cars table provided with WebBase and used in
the WebBase database examples.
Example 6.1
Sample Database Table -- Cars
ID Year
Maker
Model
Trans
Kind
Color
Miles
Price
1
1967
CITROEN
DDS1I
4 Speed
2
Door
Green
100000
3000.00
2
1985
MERCEDES
SE
Automatic
4
Door
White
69000
19500.00
3
1969
PORSCHE
911E
5 Speed
2
Door
Orange
75000
4900.00
SELECT -- General Usage
To retrieve all the records from the table, the following statement would be used:
SELECT * FROM Cars
The ‘SELECT’ indicates the type of database query that will be done, in this case some
records will be selected and returned. The ‘*’ is the wildcard character, and indicates that all
the fields in each record are to be returned. The ‘FROM’ specifies which table the data will be
retrieved from, and is followed by the name of the table.
It is possible to retrieve only some of the fields for each record. To retrieve only the ID, Year
and Maker of the records, the following statement would be used:
72
WebBase User’s Guide
SELECT ID, Year, Maker FROM Cars
It is strongly recommended that only the necessary fields of data be retrieved via a SELECT
statement. This reduces the amount of data to be retrieved from the database and returned to
WebBase via the ODBC driver, resulting in an improvement in performance.
Often, it is necessary to retrieve a set of records based on their contents. These qualifications
are added to the SELECT status using a WHERE clause. In the example above, we might
want to retrieve all the cars that were 2-door. The following example shows how this would be
done:
SELECT * FROM Cars WHERE Kind = ‘2-door’
The WHERE clause contains three components: the field name from the table, a comparison
operator, and a value. In this case, the field name was ‘Kind’, the operator was ‘=’, and the
value was ‘2-door’. It is possible to specify several criteria in a single WHERE clause.
Continuing with the above example, here’s the select statement for all cars that are 2-door and
have less than 100000 miles:
SELECT * FROM Cars WHERE Kind = ‘2-door’ AND MILES < 100000
The OR statement can also be used to select records in which a field value matches one or the
other criteria but not necessarily both. Here’s the SELECT statement for all cars that are 2door or have less than 100000 miles:
SELECT * FROM Cars WHERE Kind = ‘2-door’ OR MILES < 100000
A number of different operators can be used, as shown above. Some of the more frequent
operator are =, <, <=, >, >= and LIKE. The LIKE operator is used to do a case-insensitive
comparison; the = operator does a case-sensitive comparison. When the LIKE operator is
used, it is also possible to use wildcards as part of the value. The ‘%’ is the wildcard
character. It can be added at the beginning of the value, the end of the value, or both. To
select all cars whose transmission is ‘auto’, the following statement would be used:
SELECT * FROM Cars WHERE Trans LIKE ‘%auto%’
This would return matches for cars whose Trans entry was ‘Automatic’, ‘Auto’, and ‘Almost
Automatic’.
The ORDER BY clause is useful to define the sort order of the resulting collection of records.
All of the records in the Cars database can be retrieved and sorted using the following
statement:
SELECT * FROM Cars ORDER BY Year ASC Price DESC
This will return a collection of records in which the years of the car are in ascending
(increasing) order. For any cars with the same year value, their prices will be in descending
order.
There are several other clauses that can be used with the SELECT statement, and are
described in SQL reference materials. Again, it is not the purpose of this section to cover
everything about the SELECT statement. There are many good references available in books
and on the Internet that can provide additional details.
WebBase User’s Guide
73
Chapter 6: ODBC & SQL
SELECT -- WebBase Usage
To use any of the above SELECT statements within a WebBase form, the statement is
enclosed within the sql macro and any explicit values are replaced with appropriate WebBase
variables. Let’s assume that there is a form that asks the user what kind of car they want, and
they can select from several options including ‘2-door’, ‘4-door’ and ‘hatchback’. The user’s
selection is stored in the WebBase variable {kindOfCar}. The following WebBase expression
will return all of the records from the Cars table that are of this particular kind:
{sql to allCars source 'myAccess' user 'fred' password 'test'}
SELECT * FROM Cars WHERE Kind = ‘{kindOfCar sql=true}’
{/sql}
The only difference between the WebBase statement and an explicit SQL statement is that the
explicit value – ‘2-door’ – is replaced by the WebBase variable name. Instead of having to
have separate explicit SQL statements for each kind of car, only a single statement using a
WebBase variable is needed. WebBase will replace the variable with its value, and then
perform the database query. The sql=true parameter is generally included with any WebBase
variable that contains a string and is included in a SQL statement.
The value of a particular field must be clearly identified as part of any SQL statement,
including a SELECT statement. Any text or memo field values must be enclosed in single
quotes, as shown above. Date or date/time field values must be enclosed in ‘#’ signs. An
example using dates is presented with the INSERT statement below. Numeric values need no
enclosing characters.
SELECT – Join Statements
Relational databases allow data to be related across tables; the data does not have to be stored
in each table. Generally, there is one field that contains data that is common to both tables. In
order to retrieve the information from both tables, a table join is done. The result of the table
join is that selected fields from each table may be retrieved, or all the fields from both tables
may be retrieved.
To show how a join statement works, another example table will be used. This table is called
Owners, and contains the names and addresses of the car owners. The common field between
the two tables is ID in the Owners table, and OwnerID in the Cars table. Note that the name of
the field does not have to be the same between the two tables; only the contents are used to
match up records.
The following SELECT statement would be used to retrieve records from both tables.
SELECT ct.Year, ct.Maker, ct.Model, ot.Name, ot.Address
FROM Cars ct, Owners ot
WHERE ct.OwnerID = ot.ID
Note that each table is assigned an abbreviated name and this abbreviated name is used to
specify which fields are used or retrieved from which table. This is required if there are fields
in both tables with the same name that may have different values. If there are no field names
common to the two tables, then the abbreviated names do not have to be used and the above
statement could be written as:
74
WebBase User’s Guide
SELECT Year, Maker, Model, Name, Address
FROM Cars, Owners
WHERE OwnerID = ID
A join is also referred to as an INNER JOIN. An equivalent way of writing the above would
be:
SELECT Year, Maker, Model, Name, Address
FROM Cars INNER JOIN Owners ON Cars.OwnerID = Owners.ID
This latter format is used by database applications such as MS-Access. It is often useful to
create the query within the database application and verify that the query is correct for a
representative sample of data and selection criteria. Once the query is working, many
applications can display the query in SQL format. Join queries will often use the above
format. WebBase can accommodate either of the join formats displayed above.
INSERT
The INSERT statement is used to create a new row of data in a table.
INSERT -- General Usage
It is not necessary that all fields be specified at the time the row of data is created. For most
databases, it is strongly recommended that one field contain a unique value (e.g., primary key).
This field should be defined when the new row is created.
Note:
Some databases include an AutoNumber data type which can create a unique
number for each new record added to the table. For those users just learning about
SQL and databases and WebBase, if your database includes this data type, it is
recommended that an id field using this data type be set up for each table.
If all the field values for the new row will be specified, the following statement can be used to
create a new car record in the table:
INSERT INTO Cars VALUES (4, 1994, SATURN, SL2, 5 Speed, 4 Door, Red,
50000, 13000.00)
A new row is created, and then populated on a column-by-column basis using the information
passed in as VALUES. Often, however, not all of the information to be stored in the fields will
be known when the record is to be created. To create a record in which only some of the fields
will be populated, the following statement is used:
INSERT INTO Cars (ID,
Year,
Make,
Model,
Miles,
Price)
VALUES (4,
1994,
SATURN,
SL2,
50000,
13000.00)
WebBase User’s Guide
75
Chapter 6: ODBC & SQL
All of the fields to be populated are specified immediately after the table name; all of the
values to store into the fields are stored in the same order immediately after VALUES. There
must be a 1:1 correlation between the field names and the values to be stored in them. The
style used above to present the fields and values as columns is not required; all of the
information can be placed in a single line.
INSERT -- WebBase Usage
As with the SELECT statement described earlier, it is very easy to take an explicit INSERT
statement and use it within WebBase. Assume there is a form into which a user enters
information about their car. The car information is stored in the WebBase variables {year},
{make}, {model}, {miles} and {price}. A new record will be created with these variables
using the following:
{sql to allCars source 'myAccess' user 'fred' password 'test'}
INSERT INTO Cars (ID,
Year,
Make,
Model,
Miles,
Price,
RecDate)
VALUES (4,
{year},
‘{make sql=true}’,
‘{model sql=true}’,
{miles},
{price},
#{%dateTime%}#)
A new field is being added into this record called RecDate. This is the date on which the
record was created. Such a field is not required in a table, although it is often found useful to
know when a record was created and/or last updated. The value stored into that field is the
current date and time. Because it is a date/time field, the variable must be enclosed with ‘#’
signs.
UPDATE
The UPDATE statement is used to change data in an existing row or rows, either by adding
new data or modifying existing data.
UPDATE – General Usage
Each UPDATE statement identifies the table in which the row(s) of data to be updated is
found, the field(s) to be updated, the new values for the fields, and possibly a WHERE clause
to identify which particular records will be updated. To update the NumOwners field for all
the Cars in the table to 1, the following statement would be used:
UPDATE Cars SET NumOwners = 1
More than one field can be updated at a time. To update both the NumOwners field to 1 and
also specify that all audio systems are ‘AM/FM’, the following would be used:
UPDATE Cars SET NumOwners = 1, Audio = ‘AM/FM’
76
WebBase User’s Guide
Often, only one or a few records in a table need to be updated. The WHERE clause is used to
specify which particular records will be updated. The format of the WHERE clause is exactly
as described above for the SELECT statement, and can include a single conditional or multiple
conditionals using the AND and/or OR operators. To update the record created using the
INSERT statement above,
UPDATE Cars SET NumOwners = 1, Audio = ‘AM/FM’ WHERE ID = 4
UPDATE – WebBase Usage
The UPDATE statement when used within the sql macro is very similar to an explicit
UPDATE statement as described above. If the number of owners an audio type from the
UPDATE statement in the preceding section were stored in the WebBase variables
{numOwners} and {audioType}, the corresponding UPDATE statement in WebBase would
look like:
{sql to allCars source 'myAccess' user 'fred' password 'test'}
UPDATE Cars SET NumOwners = {numOwners},
Audio = ‘{audioType sql=true}’ WHERE ID = 4
{/sql}
The {numOwners} value is being written into a numeric database field; thus it does not require
any special enclosing characters. The {audioType} value is being written into a text field, so it
is enclosed in single quotes.
DELETE
The DELETE statement is used to delete one or more records from a database12.
DELETE – General Usage
The DELETE statement always specifies a table as well as a WHERE clause to identify the
particular record or records to be deleted. To delete the car record inserted and updated in the
previous sections, the following statement would be used:
DELETE FROM Cars WHERE ID = 4
The WHERE clause can include a single field/value pair, or it can specify several field and
value pairs.
DELETE – WebBase Usage
Deleting a record in a WebBase form is as easy as adding or updating a record. The
appropriate DELETE statement is placed within the sql macro, and any values are replaced by
WebBase variables. The WebBase statement to delete the record added to the cars table in
the database would be:
{sql to allCars source 'myAccess' user 'fred' password 'test'}
DELETE FROM Cars WHERE ID = {carID}
{/sql}
12
Some databases do not actually delete the record from the database. Instead they set a flag that the record is to be deleted; the record is not actually
deleted until the database is compressed. See Chapter 14 for database-specific issues such as this.
WebBase User’s Guide
77
Chapter 6: ODBC & SQL
The WebBase {carID} variable would have been previously determined either by an explicit
entry by the user or as the result of a SELECT statement.
78
WebBase User’s Guide
.htf Files
Chapter 7
WebBase is configured to process any file with an extension of .htf, .htm or .html. It is
recommended that files containing WebBase macros and variables use the .htf file extension.
Any files containing “pure” HTML syntax should use the .htm or .html file extensions.
Chapter 2 presented an example of a file in which WebBase was used to perform a database
query, retrieve the results from the database, and determine how the data should be displayed
at the browser. Because of the importance of forms to WebBase, this example will be
reviewed again.
7.1
Editing .htf Files
WebBase .htf files are text files that can be created with a text editor or with an HTML editor.
The WebberActive HTML editor provided with WebBase13 is a full-featured HTML editor
that is also customized for use with WebBase! You can insert any of the WebBase macros
into your form being edited as easily as adding an HTML tag. You can even preview the page
you’re developing in WebBase within the browser preview capabilities of WebberActive!
There are many other commercial HTML editing packages available; each offers its own level
of customization capabilities. Several of the HTML packages are based on the SGML
specification, and can have problems handling WebBase .htf files due to the use of curly
braces by WebBase macros and variables. Although it is possible to place WebBase
expressions with the <SCRIPT> tag, this can seriously limit the extent of WebBase
functionality that can be added into a form.
Although it is not required that WebBase forms be developed with WebberActive, we have
found that the capabilities provided within WebberActive make it the optimum environment
for developing and testing WebBase forms.
Note:
When a new .htf file is created, the name of the file must contain only alphanumeric
characters. Although operating systems such as Windows NT and Windows 95
support filenames containing spaces, WebBase and browsers do not support .htf
13
WebberActive is a 32-bit application, and is included with the purchase of WebBase effective with build 55. Users who purchased WebBase prior
to build 55 may purchased WebberActive by contacting [email protected]
WebBase User’s Guide
79
Chapter 7: .htf Files
filenames containing spaces. This also applies to directories. It is not possible to
create a URL that includes a subdirectory whose name includes spaces.
7.2 Requesting Input on a Form
Many of the WebBase forms that are developed either request information from the user in
preparation for querying the database, or present information back to the user after the query
has been completed. This section covers forms that request information from the user.
Information from a user is generally requested using the HTML <FORM> construct. The form
element can contain input, selection, and text area tags, along with document structuring
elements. Form elements can be mixed in with document structuring elements. For example, a
<PRE> element may contain a <FORM> element, or a <FORM> element may contain lists
that contain input elements. This gives considerable flexibility in designing the layout of forms.
Each <FORM> statement has one required attribute: ACTION. This attribute identifies the
file/URL to which the form contents will be submitted. A FORM may also have an optional
attribute METHOD that defines whether a GET or a POST request will be made. GET
requests include all the command line arguments as part of the URL; POST requests include
the command line arguments as part of the request.
The INPUT tag represents a form field for user input. These can appear in a wide variety of
types, including text, password, checkbox, radio, submit, reset, image and hidden. Most
INPUT fields will also have a NAME attribute specified. This name and the value entered by
the user into the field are passed as command line arguments and become a WebBase local
variable14. It is also possible to set up a default value for an INPUT field; this is done using
the VALUE attribute. The value of this attribute can be a constant or a WebBase variable.
The SELECT tag provides a list of values for the user to select from. The values are given in
<OPTION> elements. As with INPUT fields, each SELECT tag has an associated NAME
attribute that must be specified. The WebBase variable %varList% is used to create a
WebBase variable containing the multiple selections; see Chapter 9 for more information on
this variable.
The TEXTAREA tag is used to allow a user to type in multiple lines of text. It is usually used
as a free-form message area. The content of the field is used as the default value. The rows and
columns determine the size of the text area.
A FORM will generally include some type of button or other mechanism so that the user can
indicate that their interactions with the form are complete and they are ready for their data to
be processed. When such an indication is provided, the browser builds a URL starting with the
file/URL specified as the ACTION attribute of the FORM statement. It appends name=value
pairs to this URL, one pair for each named tag entity within the FORM. The browser then
sends out the URL to the server for processing.
In the example presented earlier, the GET query generated was:
14
Differences between browsers on the way that empty input fields are handled have been noted. For example, Netscape passes all variables as
command line arguments whether a value is entered or not. MSIE only creates command line arguments for those variables for which the user entered
a value. It is always recommended that form designers check the command line arguments that are received and take appropriate action depending on
which variables are or are not received. It should be noted that the browser behavior described here may change with future versions of the browsers.
80
WebBase User’s Guide
http://<hostURL>/getname.htf?name=Denny
The ACTION attribute of the FORM was “getname.htf”. There was a single INPUT tag
within the FORM whose name was ‘name’. The value typed into the input field was ‘Denny’
(this was also the default value specified for the field). The browser combined all this
information to generate the URL shown above.
7.3 Processing Input from a Form
After the user has entered information into a form and indicated that they wanted to proceed,
another form is invoked. This form should address two issues: verifying that the user entered
proper information, and processing the information entered by the user.
WebBase automatically creates local variables for each of the command line arguments sent
by the browser. Any WebBase variable names specified in the .htf file within curly braces,
e.g., {name}, are automatically replaced by the value of the variable. In the above example,
any references in the file to {name} are replaced by the string ‘Denny’.
The form designer should include some code to verify that appropriate values were entered.
For example, if a field is to contain only numbers, then an error should be returned back to the
user if they entered a non-numeric value. Error checking such as this should be done before
any data processing to ensure that only valid data is being used in computations and database
interactions. It is much easier to correct data before it is stored in the database than to have to
try to correct it once it is stored in the database.
The WebBase WebWizard basic example #7 shows how to do error checking and return error
information to the user. Error checking can also be done using Java applets or JavaScript as
part of the initial FORM statement. An example of using JavaScript for error checking is
provided in the Java examples, also accessible from the WebBase WebWizard table.
Once the data has been validated, it can be processed. Continuing with the example from the
previous section, the file ‘getname.htf’ that is accessed by the GET query is displayed in Fig.
2.1. This file does a database query, checks to see if there are any results returned from the
query, and then displays appropriate information to the user. All WebBase expressions and
variables are in bold.
The sql macro, starting with ‘{sql …}’ and ending with ‘{/sql}’, provides the details
WebBase needs to interface with the database. This includes the data source and login
information that is specified within the sql macro itself. Between the {sql} and {/sql}
keywords is the database query. In this case, a SELECT statement is used to extract the
desired records from the database. The WebBase variable {name} is used within the
SELECT statement. When the form is processed, WebBase replaces {name} with ‘Denny’.
The resulting SELECT statement received by the database will look like:
SELECT * FROM Examples WHERE Name LIKE '%Denny%'
The ‘%’ characters before and after ‘Denny’ are wildcard characters. Any database records
containing the string ‘Denny’ will be returned. The LIKE operator specifies that the match
should be a case insensitive match. Thus, names such as ‘Denny Bollay’, ‘Denny’s
Restaurant’ and ‘photography by denny’ are valid. Only the first 25 records that have a match
will be returned; this is controlled by the max keyword that is part of the sql macro. The
returned records are stored in the WebBase variable answers.
WebBase User’s Guide
81
Chapter 7: .htf Files
NOTE:
Any valid ODBC SQL query statement can be constructed and processed by
WebBase including UPDATE, INSERT and DELETE statements -- queries are not
limited to SELECT statements.
After the data has been retrieved from the database, the WebBase if macro is used to test
conditions. In this example, the if macro starts with ‘{if …}’ and ends with ‘{/if}’. It is used
to determine the action to take based on the number of records returned by the query. The first
line of this section
{if 0 answers size =}
tests the size of the WebBase variable answers. If there are 0 answers, the HTML
immediately following the {if ...} statement is returned. If there is at least 1 record returned,
the HTML immediately following the {else} statement is returned.
In this example, there are 2 records returned from the database. WebBase provides looping
macros to iterate through multiple returns. The forRow macro, starting with ‘{forRow …}’
and ending with ‘{/forRow}’, loops on the records returned by the query and stored in the
variable answers.
Field names defined in the database are referenced in the .htf file as WebBase field variables.
The value of the field returned by the query will be substituted for the field name where it is
used within curly braces. In this example, some of the field names in the database are:
‘Name’, ‘Company’, ‘City’, ‘State’, ‘Zip’ and ‘Phone’. There may be additional field names
in the database records whose contents are not used at this time (e.g.,
‘SocialSecurityNumber’). As each record is processed, the {Name}, {Company}, et al. field
variables take on different values.
As WebBase has been processing the file, it has been building a stream of characters that will
be returned to the browser. These characters are the HTML tags and data to be displayed.
Much of the data to be displayed is the result of evaluating WebBase expressions. The
returned stream does not include any WebBase expressions; it simply includes the results of
evaluating the expressions.
82
WebBase User’s Guide
Chapter 8
Macros
Invariably, one needs to add some intelligence to forms. The WebBase macro language allows
tremendous flexibility in processing files.
Macros within WebBase are the means by which one specifies database SQL statements and
performs logic on variables, including the results of SQL queries, such as IF THEN ELSE
constructs, FOR loop iterations, and CASE statements. The WebBase macro language allows
you to create Dynamic HTML -- web pages that respond to user input as well as database
search results.
8.1 Overview of WebBase Macros
WebBase macros are expressed in one of two formats:
•
Single expression format: The entire macro is expressed within a set of curly braces, e.g.
{insert '../filename.HTF'} or {set counter 3}. This format is similar to the HTML <P> or
<INPUT ...> construct.
•
Start and end expression format: The macro is begun with one single expression statement,
e.g. {if counter 3 =}, and is terminated with a second single expression statement, e.g.
{/if}. This format is similar to the HTML <TITLE> ... </TITLE> construct. Some start
and end expression format macros also have optional intermediate single expression macro
forms that may exist between the beginning and ending macros such as the {else} clause
within the {if...} {/if} range. This is much like the <LI> within a <UL> </UL> range.
With the exception of the comment and output macros, macros may be nested to any desired
depth. Note, however, that forms or variables within curly braces cannot be nested. For
example, the expression {if 0 {variable} =} will produce a syntax error; the correct format is
simply {if 0 variable =}.
The WebBase macros are described below. Some macros have required and/or optional
arguments. Required arguments are explicitly indicated in the macro definition line. Optional
keyword-value pairs are described in a table for each macro; the keyword and value are always
separated by a space. Except for specific cases noted below, any argument or value used in a
WebBase macro can be a constant, a WebBase variable, or an expression. An integer
constant is a collection of the decimal digits with an optional leading + or - sign, e.g., 12345.
WebBase User’s Guide
83
Chapter 8: Macros
A string constant is a collection of characters enclosed in single quotation marks, e.g., ‘string
constant’. Chapter 11 covers WebBase expressions. Unless the only argument to a macro is
an expression (e.g., the f= macro), expressions within macros should be placed within
parentheses, e.g., (1 start +).
8.2 The WebBase Macros
{~ text} {/~}
The brace macro generates a string enclosed in curly braces. This is useful when dynamically
generating other .htf forms to be processed by WebBase. While the same functionality can be
achieved using the set or setString macro and the %leftBrace% and %rightBrace% variables,
the brace macro makes code much easier to read. The tilde (~) character is used to identify the
macro so that ‘brace’ is not considered a reserved word. This reduces the potential for
conflicts when adding this macro to existing forms. The example below generates a string
‘{set foo ‘bar’}’.
Example 8.1
Brace macro example
{~}set foo 'bar'{/~}
{call <path> <args>} {/call}
The call macro essentially calls a subroutine! It starts up a new command as if the user
addressed a different URL, but more than likely this ‘subroutine’ would not be referenced
directly by a user via a URL as it would not be run independently. In principal, it is similar to
the insert macro in that it allows code reuse but in implementation it is quite different. The
insert macro actually inserts the source inline (the internal structures that are built to represent
the macros, etc.). The call macro actually creates a new command, runs it, and if requested
returns information from it to the calling form. The path is required, and specifies the name of
the command or file to execute. See the insert macro below for the format of specifying the
filename. As with most arguments, path can be a constant, variable or expression. The
optional keyword-value pairs for the call macro are shown in the table below.
84
Keyword
return
Value
String
wait
Boolean
output
Boolean
Description
The names of local variables that are to be SET with
the return values from the CALLed command. The
names are separated by spaces; e.g., return ‘value1
val2 finalVal’. The CALLed command will use a
{return val1 val2 val3} macro or {exit val1 val2
val3} macro to specify what is to be returned. The
callee returns n items in positional order; the caller
specifies m variables in positional order. WebBase
places the returned values into the specified variables
from left to right until whichever list runs out first
(both should be the same length).
If true (default), a synchronous call will be done and
WebBase will wait for the return. If false, the return
and output arguments are meaningless and ignored.
If the CALLed form generates output, it would
WebBase User’s Guide
normally be accumulated into the stream being
created and returned to the requesting browser. If
true (default), the calling form inserts any such output
from the CALLed form at the point of the call macro.
If false, the output is not inserted. This is desirable
where the CALLed form is used to compute
something and return results in variables and not in
stream-to-browser output. This eliminates many
blank lines generated by the newlines, tabs and spaces
used to nicely indent and format the macros within the
.htf files.
Arguments are passed into the CALLed routine by specifying them on the lines between the
{call ...} {/call} using the format:
arg1 = value
arg2 = {WebBase variable value}
Note that only one argument can be specified on each line. The argument name is the line up to
the = sign (less any starting or trailing spaces) and the value is the rest of the line (also less any
starting or trailing spaces).
WebBase variables may be used in this argument area and will be replaced with their values
before the argument = value pairing is performed. It is important to understand this ordering
of variable substitution followed by argument processing to insure correct handling of the
arguments to be passed to the CALLed routine.
Since variable substitution occurs first, any = (equal signs) and newlines (carriage return/line
feed sequences) that might exist within a variable’s value become relevant to the argument
processing that follows. Examine the following example:
Example 8.2
Variable Substitution 1
{set temp ‘arg1 = 1
arg2 = 2’}
{call ‘form1.htf’ output false}
{temp}
{/call}
Since variable substitution will occur before the arguments are processed and the variable
{temp} was set to a string that contained both = signs and newlines, the above is identical to:
Example 8.3
Variable Substitution 2
{call ‘form1.htf’ output false}
arg1 = 1
arg2 = 2
{/call}
Embedded = signs and newlines might not always represent argument list formatting
information, however, as in the following:
WebBase User’s Guide
85
Chapter 8: Macros
Example 8.4
Arbitrary Text String
{set temp ‘this is an arbitrary text string;
it may contain carriage returns and line feeds
and it might also contain expressions like
variable = some value
that one wishes to pass to the CALLed routine
as a text block and NOT as a collection of
argument = value lines!’}
{call ‘form1.htf’ output false}
testField = {temp}
{/call}
In the above example the call macro would attempt to interpret the text between the {call ...}
{/call} statements as argument = value lines which would result in either errors or premature
termination of the argument structure with undesired arguments and values being passed.
Arbitrary text, including = signs and/or newlines, may be passed as the value of an argument
by the call macro. In this case, the information must first be “encoded” so as to replace these
characters before the lines are processed as argument lines. Within the CALLed form, the
variable is “decoded” to return the data to its original state.
The easiest way of performing this encoding and decoding is to use the same technique that is
used between a browser and server when passing information. Certain characters like the ?
(question mark), & (ampersand), and newlines also have specific meaning within a browser-toserver command and thus must be encoded when used within text fields. WebBase provides
operations on strings, encode and decode, just for this purpose. In the last example above,
writing:
{set temp1 temp encode}
{call ‘form1.htf’ output false}
testField = {temp1}
{/call}
or:
{call ‘form1.htf’ output false}
testField = {temp encode=true}
{/call}
would accomplish the desired result of having the text block within the variable {temp}
encoded into a format that would essentially hide all the = signs and newlines so as to not
cause problems when the arguments are processed. In the CALLed form, the local variable
{testField} would now have to be decoded to return it to its original state. This can be
accomplished by writing:
{set testField testField decode}
at the top of the CALLed form.
The example of the call macro presented below is contained in 3 files. These files also show
examples of the exit macro when used with return variables, as well as the return macro.
86
WebBase User’s Guide
Example 8.5
The calling form: call1.htf
<HTML>
<BODY>
{comment}
Assume variables UserId and Password were input and contain strings.
Check if the user id and password are valid in a specified
id/password database.
The valid routine returns three values,
1st = true or false - okay on the database access
2nd = true or false - if 1st was okay, this indicates that the
user's id and password were found as entered or not
3rd = the error text if 1st is false.
{/comment}
{call './valid.htf' return 'okay yesorno message' output false}
id = {UserId}
pass = {Password}
dbase = 'FileOne'
{/call}
{if okay not}
{! we received an error - message in variable message do something
- then tell user file not found. !}
{%err404%}
{exit}
{/if}
{if yesorno}
<P>Okay, you were found!
{! Now log the activity offline - i.e. don't make the user wait for
the sql call that does the logging to receive HTML output back at the
browser. !}
{call './logger.htf' wait false}
id = {UserId}
trans = 'Some log transaction message here'
dbase = 'LogOne'
{/call}
{else}
{%err404%} {! not found in database !}
{/if}
</BODY>
</HTML>
WebBase User’s Guide
87
Chapter 8: Macros
Example 8.6
The first called file: valid.htf:
{comment}
We were called with three arguments as follows...
id = the user's id
pass = the password the user entered
dbase = the ODBC source of the password database we are to use
We will return three values as follows...
1st = true if the database lookup was okay, false if not
2nd = true if the user id and password were found in the database
and
were acceptable, false if not
3rd = the error message if 1 above was false - i.e., the database
lookup
was not successful.
{/comment}
{errorProtect}
{sql to valid source dbase}
SELECT PASSWORD FROM PASSTABLE WHERE [USER ID] = {id sql=true}
{/sql}
{onError}
{set msg %error% messageText}
{exit false false msg}
{/errorProtect}
{set success pass PASSWORD =}
{return true success ''}
Example 8.7
The second called file: logger.htf:
{comment}
We were called with three variables,
id = the user's id
trans = some text to be logged to the log database
dbase = the ODBC source name of the log database
We will not be returning anything and don't care if any errors occur
during the database transactions but we will wrap an errorProtect
around the entire process so that if any errors do occur we will
immediately skip out without bothering WebBase to return error data.
{/comment}
{errorProtect}
{sql to ignore source dbase}
INSERT INTO LOGTABLE (ID,WHEN,WHAT)
VALUES ({id sql=true},{%dateTime%},{trans sql=true})
{/sql}
{/errorProtect}
{case <exp>} {match <mArg>} {otherwise} {/case}
The case macro causes control to be transferred to one of several match clauses. Each case
macro must have at least one match clause; the otherwise clause is optional. The exp
expression argument is required with the case statement; the mArg argument is required with
88
WebBase User’s Guide
each match statement. The case macro evaluates exp and compares it to the values for each
associated match clause. When the match clause value equals the case value, the text
following that match clause until the next match, otherwise, or /case clause is processed. The
otherwise clause contains a block of text that is processed if no match clause condition
evaluates to true. If no match clause matches the case value and no otherwise clause is present,
the macro returns no text for processing.
Example 8.8
case Macro
{case results size}
{match 0} {! no results returned !}
<H2>Sorry but I couldn't find a match</H2>
{match 1}
<H2>Wow! Exactly one match was found!</H2>
{otherwise}
<h2>There were {f= results size} matches found...</H2>
{/case}
{comment} {/comment}
The comment macro allows the developer to insert commentary into the .htf files that will not
be sent to the browsers as part of the HTML. The text contained between the {comment} and
{/comment} is skipped as WebBase processes the file. Another valid comment macro format
is {! comment statement !}. The latter is useful for short in-line comments within a .htf form.
Note:
Since the purpose of the comment macro is to insert text that is to be skipped,
WebBase does not parse the information within the {comment} ... {/comment} or {!
… !} area. For this reason, after encountering the opening {comment} or {!,
WebBase scans for the first occurrence of an ending {/comment} or !}. WebBase
does not support nested comment blocks.
Example 8.9
comment Macro
{comment}
This is commentary on this file and is not to be sent to the
browser as
is <!-- commentary --> so as never to be seen by the user!
{/comment}
{! This is a short comment !}
{ensure} {onExit} {/ensure}
The ensure macro is very similar to the errorProtect macro, in that it is used to ensure that
some action is taken regardless of whether the ‘protected’ block terminates normally or not.
With the errorProtect macro, one executes the onError clause only if an error occurs. The
onExit clause of the ensure macro is executed regardless of whether the code preceding the
onExit statement completed normally or with an error.
The example presented below ensures that the file opened for reading is closed even if an error
occurs while reading. This can be particularly problematic on exclusive-access open for
writing files. Without using this macro, if an error occurs the file will remain open until you
terminate WebBase, as there is no handle to the file or stream by which it could be closed.
WebBase User’s Guide
89
Chapter 8: Macros
Example 8.10
ensure Macro
{ensure}
{set filestream 'foo.txt' %File% pathNameReadOnly:}
... read from the stream ...
{onExit}
{f== filestream close}
{/ensure}
{errorProtect} {onError} {/errorProtect}
The errorProtect macro is designed to trap errors that might occur during the processing of
your WebBase .htf form and allow you to return a more meaningful message to the browser
than the default error information ordinarily returned by WebBase. Any error that occurs in
the statements following the {errorProtect} keyword will cause WebBase to branch to the
onError clause. All statements within the onError clause will then be processed. If there is no
onError clause, the default error message will be suppressed and no information will be
returned to the browser.
Example 8.11
errorProtect Macro
{errorProtect}
{sql ...}
SELECT * WHERE ...
{/sql}
{onError}
<H2>Sorry, database not available. Please try later.</H2>
{/errorProtect}
A common usage for the errorProtect macro is around {sql ...} ... {/sql} blocks as shown
above. If the sql macro and SELECT statement generate an error, the onError clause returns a
message to the effect that “the database is temporarily down for maintenance ... please try
again later”. This allows you to perform maintenance on the database without having to shut
down your WebBase server, which might also be interacting with other databases that are still
accessible. To insure you are not masking errors that should not be occurring, you can have
the actual error message you masked logged to a database to be analyzed off-line. Within the
onError clause, {f= %error% messageText} will provide the error message that would have
been sent to the browser had the errorProtect macro not been used.
NOTE:
The errorProtect macro will not catch programming errors such as leaving off the
ending macro keyword (e.g., {/if}) or using a parenthesis instead of a curly
brace. The macro is designed to capture user errors, not programming errors.
{escape <label>}
The escape macro allows one to escape from within a forIndex or forRow loop. It can be used
as an escape mechanism when, for example, your logic finds a condition within one of these
loops under which you do not want to continue processing the loop but do not want to exit the
entire .htf form. The escape macro can be called based on specific conditions within a loop and
references the label associated with the loop from which the escape is to be made. Processing
continues with the first statement following the closing {/forIndex} or {/forRow}.
90
WebBase User’s Guide
If forIndex or forRow structures are nested, an enclosed escape can escape from any level of
depth. It will escape to the first statement following the closing {/forIndex} or {/forRow} of
the forIndex or forRow macro for which the label value matches the argument in the escape.
The label required argument must be identical to the value of the label keyword in the forIndex
or forRow macro out of which you wish to escape. A WebBase variable or expression cannot
be used as the label value; only literal values can be used.
Unique labels should be used for each forIndex and forRow macro that may be nested together.
The escape macro starts at the topmost forIndex or forRow and looks through the subsequent
branches to find one with the matching label. As soon as the label is found, the escape is
performed. If the same label is used on multiple branches with nested forIndex and forRow
macros, the first branch with the specified label will be branched to, which may not necessarily
be the correct branch. To prevent this type of problem, use unique labels.
Example 8.12
escape Macro
{forIndex anIxA from 1 to 20 label foo1}
<BR>{anIxA}
{forIndex anIxB from 1 to 20 label foo2}
<BR>{anIxB}
{if anIxB 5 =}
{escape foo1}
{/if}
{/forIndex}
<H3>Here is the next thing after foo2...</H3>
{/forIndex}
<H3>Here is the next thing after foo1...</H3>
The above example would generate the following results:
1
2
3
4
5
Here is the next thing after foo1...
{exit <args>}
The exit macro exits the entire .htf form when encountered. It can be used as an escape
mechanism when, for example, your logic finds an error in the input data the user supplied. It
can be used within the onError clause of the errorProtect macro to exit the form after
encountering an {sql} or other logic error. It is also very useful in verifying that a user is
accessing a page only in a proper sequence or that they are authorized to access. It is very
similar to the escape macro, but exits from the entire form. In essence, it closes the stream
that has been accumulating the output and returns what has been collected to the browser.
The exit macro takes optional arguments that specify arguments to be returned. See the call
and return macros for how return arguments may be used.
WebBase User’s Guide
91
Chapter 8: Macros
Example 8.13
exit Macro
{forIndex anIx from 1 to 20 label foo}
<BR>{anIx}
{if anIx 5 =}
</BODY>
</HTML>
{exit}
{/if}
{/forIndex}
<H3>Here is the next thing...</H3>
The above example would return the following results to the browser:
1
2
3
4
5
{f= <exp>}
The f= macro evaluates the given expression and prints the result in place of the {f= ...}
statement. The only valid argument with the f= macro is a WebBase expression; constants or
variables cannot be used. Note that there is no space between the ‘f’ and ‘=‘ but there IS a
space between the f= and the subsequent expression terms. If the expression is written as {f =
<exp>}, an error will result.
Example 8.14
f= Macro
{! add 3 to the number of results returned !}
{f= 3 results size +}
{f== <exp>}
This is very similar to the f= macro. The f= macro is designed to evaluate an expression and
return the results to be printed at the browser. The f== macro is designed to evaluate the
expression but return an empty string so as not to alter the browser output by its inclusion in a
form. This is particularly for use in expressions like the example below, which returns a file
object that is typically of no use to the user. The only valid argument with the f== macro is a
WebBase expression; constants or variables cannot be used. Note that there is no space
between the ‘f’ and ‘==‘ but there IS a space between the f== and the subsequent expression
terms. If the expression is written as {f == <exp>}, an error will result.
Example 8.15
f== Macro
{f== ‘foo.EXE’ %File% execute:}
{forIndex <indexCtr> <args>} {/forIndex}
The forIndex macro iterates over the enclosed text a specified number of times, updating an
index variable with the value of the current counter for each iteration. The first argument,
indexCtr, is required and is a variable name for the index counter. The optional keyword-value
pairs for the forIndex macro are described in the table below.
92
WebBase User’s Guide
Keyword
from
Value
Integer
to
Integer
by
Integer
label
Literal value only
Example 8.16
Description
The starting value of the index. The default value is
1.
The maximum or ending value of the index. The
default value is 1. If not specified, the forIndex loop
will execute only 1 time.
The value by which the index is incremented on each
iteration through the macro. The default value is 1.
Used in conjunction with the escape macro to exit the
macro.
forIndex Macro
{forIndex anIndexVar from 3 to 17 by 2}
The current forIndex loop counter is {anIndexVar}
{/forIndex}
{forRow <currentRow> <optionalArgs>} {/forRow}
The forRow macro iterates over the enclosed text once for each result in a collection, including
one that contains results from an sql query. The first and a required argument is a variable
name which will receive the current entry in the collection during each iteration of the loop. If
the collection contains the results of a sql query, this variable will hold an OdbcRowObject. If
the collection is a Dictionary, the variable will contain an Association. Finally, if the collection
is any other type of Collection, the variable will be the entry in the collection. The optional
keyword-value pairs for the forRow macro are shown in the table below.
Keyword
on
String
from
Integer
max
Integer
label
Literal value only
order
‘asc’, ‘desc’,
‘reverse’
counter
String
WebBase User’s Guide
Value
Description
The name of the variable that contains the collection
to be processed. If the on argument is missing, the
variable %results% that contains the results from the
last sql macro issued will be used.
The starting element within the list of results specified
by the on argument; it defaults to 1.
The number of iterations of the loop to be processed;
it defaults to infinite which means that all rows will be
processed.
Used in conjunction with the escape macro to exit the
macro.
Specifies whether the collection is sorted in ascending
or describing order or processed in reverse order.
Only the specified strings (whether stored as
constants, variables or expressions) are valid.
The name of the variable that will hold the integer
representing the number of the current row being
processed. If not specified, the variable
%rowCounter% holds the current row number.
Note that this row number is merely the sequential
number of rows that have been processed; it is not
93
Chapter 8: Macros
data that is actually stored as part of the database
record.
Example 8.17
forRow Macro
{set counter 1}
{! return no more than 10 answers !}
{! print the Name and Address fields from the database !}
{forRow aRow on someAnswers max 10}
Entry number {counter} is {Name} at {Address}.
{set counter counter 1 +}
{/forRow}
{htf} {/htf}
The htf macro prevents values surrounded by curly braces in HTML from being processed by
WebBase. This is useful if you want to include JavaScript within your form and not have
WebBase try to process it.
Another use of this macro is to construct your own WHERE clause from information provided
via FORM INPUT by creating the clause as the value of a hidden variable. The example
below is extracted from Basic Example #9 that is accessed via the WebBase WebWizard.
Example 8.18
htf Macro – form 1
<PRE><FORM METHOD="GET" ACTION="Wbact9.htf">
<B>
Name: </B><INPUT NAME="name" SIZE="32">
<B>
Category: </B><SELECT NAME="category">
<OPTION>Manager
<OPTION>Programmer
<OPTION>Operator
</SELECT>
<B>Minimum Age: </B><INPUT NAME="age" VALUE="21" SIZE="3">
<B>
Work: </B><SELECT NAME="work">
<OPTION>Easy
<OPTION>Moderate
<OPTION>Hard
</SELECT>
<B>
Misc: </B><INPUT NAME="misc">
<INPUT TYPE="HIDDEN" NAME="myWhere"
VALUE="{htf} category = '{category}'
AND misc LIKE '%{misc sql=true}%'
AND work LIKE '%{work}%'
AND age {%GE%} {age}{/htf}">
<INPUT TYPE="SUBMIT" VALUE="SUBMIT">
</FORM>
</PRE>
The htf macro surrounding the information in the VALUE field above ‘quotes’ the contents so
that WebBase does not PROCESS the fields contained within curly braces (e.g., ‘{category}’,
‘{misc sql=true}’) at this time. Instead, the ‘myWhere’ hidden variable is passed to
Wbact9.htf, where WebBase will then process it.
94
WebBase User’s Guide
The Wbact9.htf form called when you submit the above example uses the ‘myWhere’ variable
as follows:
Example 8.19
htf Macro – form 2
{sql to answers source 'myData' user 'me' password 'secret'}
SELECT * FROM myTable WHERE {f= myWhere %cmd% asHTF:}
{/sql}
The {f= myWhere %cmd% asHTF:} expression parses the contents of the {myWhere}
variable, first removing any surrounding {htf} {/htf} macros and then evaluating the
{variable} referenced contained within the string.
The htf macro would not be necessary if the input form was being handled by a non-WebBase
server, since a non-WebBase server will not attempt to process anything within curly braces.
If WebBase is used to handle the input form, the htf macro is simply a signal to WebBase to
not process everything within the macro. The htf macro was designed so that, when used as
shown above, a WebBase server or a non-WebBase server could use the exact same form.
The %GE% variable used in the example generates a ‘>=‘ when WebBase expands it. Some
browsers end the <INPUT> tag if the VALUE contains a ‘>‘, even if the contents of the
VALUE field are correctly enclosed in double quotation marks.
{if <exp>} {else} {/if}
The if macro evaluates its expression argument which returns a result of either true or false. If
the result is true, the text following the {if} up to the {/if} keyword or the {else} keyword if
present is processed. If the expression evaluates to false, the text following the optional {else}
keyword is processed if present. If the expression evaluates to false and no {else} keyword is
present, no text is returned by the if macro. The only valid argument with the if macro is a
WebBase expression; constants or variables cannot be used.
Example 8.20
if Macro
{if 0 results size =}
<H2>Sorry, no results.</H2>
{else}
<H2>Hey, we got {f= results size} replies!</H2>
{/if}
{insert <filename>}
The insert macro allows one to insert other .htf files at the location of the {insert} keyword as
if the text from the inserted file existed inline at that location. WebBase macros and variables
within the inserted file are handled as in any .htf file. The insert macro allows one to write
small .htf files that can be more easily understood and allows one to develop segments of .htf
logic that could be used in many other .htf files.
The argument filename is required, and is the name of the file to be inserted. It can be a string,
a variable containing a string, or an expression that generates a string. The valid formats for
the filename are:
WebBase User’s Guide
95
Chapter 8: Macros
•
‘/file.htf’ -or- ‘/subdir\file.htf’
appends the filename string to the Directory parameter. This format specifies a filename
that is relative to the Directory parameter. If multiple domains are specified, this is the
Directory parameter for the current domain in use.
•
‘:file.htf’ -or- ‘:subdir\file.htf’
appends the filename string to the Directory parameter. This format specifies a filename
that is relative to the Directory parameter. If multiple domains are specified, this is the
default Directory parameter specified in the HttpSQL/Parameters key – not the Directory
parameter for the current domain in use. If multiple domains are not in use, this format is
equivalent to the previous format.
•
‘file.htf’ -or- ‘subdir\file.htf’
appends the filename to the directory of the current form. This format specifies a filename
that is relative to the directory in which the current form (the one that contains the insert
macro) exists. A variation on this format is ‘..\file.htf’. For each ‘..\’ sequence, one moves
up one level of directory from that in which the form doing the {insert…} was located.
•
‘c:\dir\subdir\file.htf’
uses the filename string as the complete pathname for accessing the inserted file. This
format specifies a filename that is absolute.
Note: forward slash / (URL syntax) and backslash \ (DOS) characters can be used
interchangeably within .htf when referencing local files. WebBase will convert all / characters
to \ as necessary to access files within the Windows host environment.
Example 8.21
insert Macro
{set fileone '../address.htf'}
{insert fileone}
{output <args>} {/output}
WebBase does not process the text contained within the output macro, but inserts it into the
output HTML exactly as encountered. Variables and other macro keywords are not processed
but are output with their enclosing { } characters as entered in the .htf file. The optional
keyword-value pairs supported by this macro are described in the table below.
96
Keyword
convert
Value
Boolean
insert
String
Description
If true, all < and > characters are converted to the
character sequences < and > respectively, so
that HTML forms can be printed as part of the text
rather than being interpreted by the browser. If false
(default), no character conversion is done.
The name of another file to be output without
processing. This allows one to output the contents of
a file rather than including the file to be processed by
WebBase. See the insert macro for the formats of
the argument.
WebBase User’s Guide
Note:
Since the purpose of the output macro is to insert text that is to be printed and not
processed by WebBase, WebBase does not parse the information within the
{output} ... {/output} area. For this reason, after encountering the opening
{output} keyword, WebBase scans for the first occurrence of an ending {/output}
keyword. WebBase does not support nested output blocks.
The example below would output <TITLE> {systemName} </TITLE> at the browser and
NOT set the browser’s title to the value of the variable systemName.
Example 8.22
output Macro
{output convert true}
<TITLE> {systemName} </TITLE>
{/output}
{parallel} {/parallel}
The parallel macro sets up a placeholder for a semaphore. Within the {parallel} {/parallel}
statements, one can have multiple {fork} statements, each of which forks off a separate
process within WebBase and ties their completion to the semaphore of the enclosing parallel
structure. Logically picturing it, one starts off all these fork blocks, then sits and waits at the
{/parallel} for them all to complete. This was primarily developed to allow multiple GET and
POST operations to be running simultaneously, waiting until all complete. However, the
parallel macro is not limited to that use.
Note:
The parallel and fork statements form a static structure and the fork statements
must be within the top-level scope of the parallel statement; i.e., they cannot be
within another nested structure within the parallel like a forRow or forIndex.
Example 8.23
parallel Macro
{parallel}
{fork}
{set var1 ...
any general WebBase stuff here
Could be SQL calls, maybe ones that reference
databases on a remote machine
{fork}
another set of WebBase macros, etc.
again, possibly {SQL - }
{fork}
and yet more...
{/parallel}
{reDirect <url>}
The reDirect macro causes a redirect instruction to be sent to the browser; the argument is sent
as the new location. Most browsers will automatically access the new location. Some browsers
may display a link to the new location. All .htf form processing stops when a reDirect macro is
encountered and any reply data accumulated at that point is replaced with the redirect
information.
WebBase User’s Guide
97
Chapter 8: Macros
The url argument is required, and can use any of the following formats:
•
‘/file.htf’ -or- ‘/subdir\file.htf’
The file string is relative to the Directory parameter. The resulting URL will be
‘http://<server IP address>:<port #>/file string’.
•
‘file.htf’ -or- ‘subdir\file.htf’
The file string is relative to the directory of the current form. The resulting URL will be
‘http://<server IP address>:<port #>/<current location>/file string’. A variation on this
format is ‘..\file.htf’. For each ‘..\’ sequence, one moves up one level of directory from
that in which the form doing the {reDirect…} was located. However, it is NOT possible
to move up in the directory structure past the Directory. For example, if the Directory
parameter is set to ‘c:\http’, it is not possible to access a file in ‘c:\’ or ‘c:\otherDir’.
Aliasing can be used to access files in other directories or devices on the server system.
•
‘http://www.mySite.com/default.htm’
The URL/file string is the complete URL.
Note:
If any cookie variables are set using the {setCookie} macro in the form prior to the
redirect macro being invoked, these cookies are returned to the browser, but the
browser ignores them. The cookies will not subsequently be returned to the server
by the browser.
Example 8.24
reDirect Macro
{reDirect 'http://www.Mysite.com/'}
{reDirect2 <arg>} {/reDirect2}
The format of the reDirect2 macro is identical to that of the reDirect macro, but allows
arguments to be appended to the command line by specifying them as
arg1 = value
arg2 = value
The arguments are specified one per line between the {reDirect2 ...} and {/reDirect2} macros
(just as in the call macro). While it is possible to do this using the reDirect macro, it is rather
difficult. The following shows how the same result would be done using both the reDirect2
and reDirect macros.
Example 8.25
reDirect2 Macro
{reDirect2 './abc.htf'}
name=John Q Public
id = 12.34
{/reDirect2}
{reDirect './abc.htf?name=John+Q+Public&id=12%3E34'}
{remove <varNames>}
The remove macro removes the variable with the specified varName from the topmost scope
(see scope macro) or local variable if found. If no variable is found in either the scope or local
98
WebBase User’s Guide
variables, no error is returned. The argument is one or more variable names. If one variable is
to be removed, the format is:
{remove aVar}
If multiple variables are to be removed, the format is:
{remove aVar bVar cVar}
Example 8.26
remove Macro
{set myVar ‘abcdef’}
{! Now set up scoping and create a variable !}
{scope}
{set scopeVar 12345}
... more WebBase statements ...
{remove myVar scopeVar}
{/scope}
{removeAll <varNames>}
The removeAll macro removes all scope and local variables of the given name. If no variables
by this name exist within the current scope(s) or as a local variable, no error is returned. One
or more variables can be specified as arguments; see the remove macro for more details.
Example 8.27
removeAll Macro
{set aVar ‘abcdef’}
{! Now set up scoping and create a variable of the same name !}
{scope}
{set aVar 12345}
... more WebBase statements ...
{removeAll aVar}
{/scope}
{removeCookie <varNames>}
For each name in the <varNames> list, the removeCookie macro creates a cookie by the
specified name and sets its value to “deleted”. The expiration tag for the cookie is set to
Tuesday, 01-Jan-1901 01:01:01 GMT. The cookie is added to the output cookies, and is
returned to the browser when the form processing is completed. If a cookie by the specified
name exists on the browser, it should be deleted. If the user has just created the cookie
variable using the setCookie macro and then deletes it, the information is still returned to the
browser which should do nothing since no cookie by that name exists on the browser.
Example 8.28
removeCookie Macro
{! create and remove a cookie variable !}
{setCookie cVar ‘abcdef’}
{removeCookie cVar}
{! remove a cookie variable that probably already exists !}
{removeCookie WebBaseID}
WebBase User’s Guide
99
Chapter 8: Macros
{removeGlobal <varNames>}
The removeGlobal macro removes the specified global variable(s) from memory; it does not
delete them from the System Registry. The next time that WebBase is started, the global
variable will once again exist unless it is explicitly removed from the System Registry. If no
global variable with the specified name exists, no error is returned. One or more variables can
be specified as arguments; see the remove macro for more details.
Example 8.29
removeGlobal Macro
{! create and remove a global variable !}
{setGlobal gVar ‘myCompanyName’}
... more WebBase statements ...
{removeGlobal gVar}
{removeHeader <varNames>}
The removeHeader macro removes the specified header variable that was created using the
setHeader macro. If no header variable with the specified name exists, no error is returned.
One or more variables can be specified as arguments; see the remove macro for more details
Example 8.30
removeHeader Macro
{! create and remove a header variable !}
{setHeader Expires %UniversalTime% now asString}
... more WebBase statements ...
{removeHeader Expires}
{removeLocal <varNames>}
The removeLocal macro removes the specified local variable(s). If scoping is not being used,
this is equivalent to the remove macro. If scoping is being used, this will remove the
variable(s) from the local context, but will not affect any scoping variables of the same name.
If no local variable with the specified name exists, no error is returned. One or more variables
can be specified as arguments; see the remove macro for more details.
Example 8.31
removeLocal Macro
{! create a local variable !}
{set lVar ‘test1’}
{scope}
{set lVar ‘test2’}
... more WebBase statements ...
{removeLocal lVar}
{! the value of ‘lvar’ is still ‘test2’ within the scope !}
{/scope}
{! the local ‘lvar’ no longer exists !}
{removeUser <varNames>}
The removeUser macro removes the specified variable(s) from the current user dictionary, as
specified with the variable %userName%. If no user variable with the specified name exists,
100
WebBase User’s Guide
no error is returned. One or more variables can be specified as arguments; see the remove
macro for more details.
Example 8.32
removeUser Macro
{! create a user dictionary and user variable !}
{set %userName% ‘userVars’}
{setUser uVar ‘Employee Name’}
... more WebBase statements ...
{removeUser uVar}
{return <vals>}
The return macro, designed to be used within a CALLed form, posts the indicated values so
that they can be read by the caller when the CALLed form completes (see the call macro for an
example of how the return macro is used). The return macro writes its values to the call, it
does not append them. If there is more than one return macro in a CALLed form, the last one
executed is what gets returned.
The return macro can also be used within insert files that are designed to operate like
subroutines; an example is presented below with the scope macro. The values posted by the
return macro can be accessed via the %returns% dynamic variable. For example,
{return true varName 3}
{f= 1 %returns% at:}
{f= 2 %returns% at:}
{f= 3 %returns% at:}
-> true
-> value of varName variable
-> 3
The value fields in the macro line are evaluated before being written; thus variable names are
allowed, their values will be returned. The return macro does not terminate processing of the
form it occurs in, it merely writes the return values so any output being generated for the
browser following the return macro will still be processed.
{scope} {/scope}
The scope macro is used to create a variable context that is in existence for a specified amount
of processing, namely for all statements within the {scope}…{/scope} keywords. Scope
variables override local variables for the duration of the scope. The scope macro creates a
‘topmost’ scope variables dictionary that is searched before any other already-existing scope
dictionaries. Then the local variables, user variables, etc. are searched as necessary. As soon
as the {/scope} keyword is encountered, the scope dictionary for that particular scope is
removed so those scope variables are no longer accessible in subsequent processing of the
form.
It is possible to nest scopes to create nested levels of scope dictionaries – all of which might be
searched when looking for a particular variable. The innermost scope is the first to be
searched, followed by the next scope, followed by any other scopes, and then finally the local
variables, user variables, global variables and dynamic variables. Field variables within a
scope will still take precedence over any other variables.
The scope macro example below shows how insert files work great as subroutines. This
particular insert file creates a directory whose pathname is passed in as the variable "DIR_".
WebBase User’s Guide
101
Chapter 8: Macros
It will check to see if any intermediate levels of directory are required and if so make a
directory at each level.
The scope macro is used because the variables DIR_1 and DIR_2 are created with the set
macro, and the variable DIR_3 is created with the forRow macro. These variables have no
value outside this insert file, and could possible override existing variables of the same name if
this file were inserted into existing code without one realizing what was in it. Using the scope
macro, these variables will not exist after the insert file is completed.
There are two other interesting features in this insert file. First, the setString macro is used at
the top to act like a %output% off/on wrapper. This effectively turns off output without
having to explicitly know whether the main form had the %output% status set to true or false.
Nothing is added to the output being generated for the browser as the result of inserting this
file, and the %output% variable status is not affected.
The second interesting feature is the use of the return macro that is returning values indicating
success or failure of this routine. If it is successful, two values are returned; 1=the Boolean
true and the second the pathname passed in of the directory that was created. If an error
occurs during the create process, three return values are returned; 1=false, 2=pathname,
3=error message string. To query the returns from an “insert” subroutine such as this, the
%returns% variable can be used as in the following:
{if %returns% first}
successful
{else}
error = {f= 3 %returns% at:}
{/if}
Example 8.33
scope Macro
{! create the necessary directories for the pathname in DIR_
!}
{scope}
{errorProtect}
{if DIR_ %Directory% exists: not}
{set DIR_1 $\ DIR_ pathnameDOS parseAt:}
{set DIR_2 ''}
{forRow DIR_3 on DIR_1}
{if DIR_2 isNull}
{set DIR_2 DIR_3}
{else}
{set DIR_2 DIR_3 '\' DIR_2 , ,}
{/if}
{if DIR_2 %Directory% exists: not}
{f== DIR_2 %Directory% create:}
{/if}
{/forRow}
{/if}
{return true DIR_}
{onError}
{return false DIR_ (%error% messageTextBasic)}
{/errorProtect}
{/scope}
102
WebBase User’s Guide
{set <var> <val>}
The set macro creates a local variable whose name is specified by var, and whose value is
specified by val. If val is an expression, the value of var is set to the result of evaluating the
expression. The val argument may also be another variable name or a constant. The variable
created will be a local scoping variable if within a {scope}…{/scope} statement. Local
variables can be removed using the remove, removeAll or removeLocal macros.
In the example below, the first statement sets the variable counter to 3. The next statement
sets the variable xxx to the value of the variable name. The last statement sets the variable
uName to the result of applying the asUppercase method to the value of the variable name.
Example 8.34
set Macro
{set counter 3}
{set xxx name}
{set uName name asUppercase}
WebBase also allows for indirection when setting variables. If the second argument is
specified as @myVar, the first argument is set to the value of the variable myVar. For
example:
{set counter 3}
{set oldCounter ‘counter’}
{set newCounter @oldCounter}
The first expression sets counter to a value of 3. The next expression sets oldCounter to the
string ‘counter’, which is also the name of a variable. The last expression @oldCounter says
set the variable newCounter to the value of the variable whose name can be found in
oldCounter.
If the indirection sign @ is placed in front of the variable that is being updated or created (i.e.,
the first argument), this means to treat this as an existing variable name whose contents is what
we actually want here in the set macro. For example,
{set foo 'bar'}
{set @foo 3}
will set bar to 3. The value of the variable foo is ‘bar’, but the value of the variable bar is 3.
Multiple variable indirection is also possible as shown in the following two examples:
Example 8.35
set Macro and Multiple Variable Indirection
{set
{set
{set
{set
counter 3}
oldCounter ‘counter’}
olderCounter ‘oldCounter’}
newCounter @@olderCounter}
{set
{set
{set
{set
counter 3}
oldCounter ‘counter’}
olderCounter ‘@counter’}
newCounter @olderCounter}
WebBase User’s Guide
103
Chapter 8: Macros
{setCookie <var> <val>}
The setCookie macro operates exactly as does the set macro except that it will store its namevalue pair in a cookie dictionary. A cookie dictionary is very similar to the user dictionaries
described in Chapter 10. However, there is only a single cookies dictionary used by WebBase.
The cookies dictionary gets written out as a header variable and sent back to the browser.
Unlike other variables, the value of the cookie specified by the user is combined with other data
before being stored in its dictionary. The cookie value and the current values of
%cookiePath%, %cookieDomain% and %cookieExpires% are all concatenated together, and
then the value is stored into the dictionary. This allows the user to create some cookies that are
transitory and others that are persistent – all within the same form. The example below shows
how to set the value of %cookieExpires% to create a persistent cookie that will exist for
approximately 2 years.
Chapter 9 includes additional information on cookie variables. Cookie variables can be
removed using the removeCookie macro.
Example 8.36
setCookie Macro
{set %cookieExpires% 700 %UniversalTime% now addDays:}
{setCookie myCookieVar ‘test’}
Variable indirection is possible using cookie variables, but should be used with caution. The
following example shows how indirection can be done. Note that the setCookie macro is only
the last macro used. As noted above, when a name-value pair is entered into the cookies
dictionary, additional information is appended to the variable name. Thus, it is not possible to
retrieve a value from the cookie dictionary for use in indirection.
Example 8.37
setCookie Macro and Multiple Variable Indirection
{set counter 3}
{set oldCounter ‘counter’}
{setCookie newCounter @oldCounter}
{setGlobal <var> <val>}
The setGlobal macro will create a name-value pair as a global variable in memory only.
Unless the System Registry is modified, the next time that WebBase is started this global
variable will not exist. Global variables created either with the setGlobal macro or within the
System Registry can be removed from memory using the removeGlobal macro. It is important
to remember that both the setGlobal and removeGlobal macros only make in-memory changes.
All permanent changes to global variables must be done in the System Registry.
Example 8.38
setGlobal Macro
{setGlobal myGlobalVar ‘test’}
{setHeader <var> <val>}
The setHeader macro allows users to specify header values that will be returned to the
browser. For example, the user can specify the Expires: header information using this variable
104
WebBase User’s Guide
instead of using the %expires% dynamic variable. If a browser receiving the header variable
and value does not recognize or support the header variable, it will normally just ignore it.
Example 8.39
setHeader Macro
{setHeader Expires %UniversalTime% now asString}
{setLocal <var> <val>}
The setLocal macro is designed for use only with the scope macro to create a local variable
that will exist after the scope macro is completed. If scoping is not in effect, this is equivalent
to the set macro.
Example 8.40
setLocal Macro
{scope}
{setLocal localVar ‘test’}
... more WebBase statements ...
{/scope}
{! the local variable ‘localVar’ still has a value of ‘test’ !}
{setString <var> <options>} {/setString}
The setString macro creates a variable containing a string; the string value is specified on one
or more statements within the {setString}…{/setString} keywords. This macro provides an
alternative to using the set or f= macros with multiple concatenation operations; it allows the
user to see very clearly how text and variable values will be put together into the resulting
variable. var is any valid variable name.
The setString macro supports a number of options that determine the type of variable to be
created as well as how the resulting string value will be handled. Each of these options can be
specified as a constant, variable or parenthesized expression; however, they must resolve to a
string of the specified option name. The valid options are:
•
‘collapse’ -- replaces all control characters and multiple spaces in the string within the
{setString}…{/setString} with a single space character. This reduces the string to the
barest minimum for sending to the browser. This is desirable as it eliminates extraneous
whitespace when doing a view source at the client browser.
•
‘trim’ – replaces leading and trailing spaces and newlines, but does not modify embedded
formatting. This is less severe than the ‘collapse’ option above.
•
‘local’ – the resulting variable is stored as a local variable.
•
‘global’ – the resulting variable is stored as a global variable in memory only. When
WebBase is restarted, the global variable will not exist unless the System Registry file is
edited.
•
‘user’ – the resulting variable is stored in the user variable dictionary specified by the
%userName% variable.
WebBase User’s Guide
105
Chapter 8: Macros
•
‘cookie’ – the resulting variable is stored as a cookie variable that will be returned to the
browser when form processing is completed.
If the type of the variable is not specified, the resulting variable will be a local variable within
the current scope. If scoping is used, that means that the variable will not exist once the
{/scope} keyword is encountered.
The ‘collapse’ option can be used in conjunction with any one of the other options. If two or
more of ‘local’, ‘global’, ‘user’ and ‘cookie’ are specified, then resolution is done based on the
order local, user, global and cookie.
Example 8.41
setString Macro
{setString imageFiles 'collapse'}
Image1.gif;Image1.gif,
Image2.gif;Image2.gif
{/setString}
{setUser <var> <val>}
The setUser macro operates exactly as does the set macro except that it will store its namevalue pair in a user dictionary. See Chapter 10 for information on user variables and user
dictionaries. The same variable indirection described above for the set macro can also be used
for the setUser macro.
Example 8.42
setUser Macro
{set %userName% ‘myUserDict’}
{setUser xx ‘test’}
{signalError <error text string>}
The signalError macro signals an error that results in the argument being displayed as shown
below. This macro can be helpful in simulating situations which could return errors under
some circumstances. It allows you to develop appropriate {errorProtect} ... {/errorProtect}
constructs and/or error logging procedures without having to force actual error conditions.
As with other errors, this error can be caught in the errorProtect macro to prevent the message
from reaching the user but allowing one to ‘escape’ to the {onError} clause within the
errorProtect macro.
The first example below shows the error message that will be displayed on the browser if the
error is not trapped using the errorProtect macro. The second example shows the use of the
errorProtect macro to redirect the user to a form instead of displaying the error message.
106
WebBase User’s Guide
Example 8.43
signalError Macro – no error trapping
{signalError 'You should not be here!'}
The following is then displayed on the user’s browser:
An error occurred processing your request
Merging data into macro form
'You should not be here!
Example 8.44
signalError Macro – with error trapping
{errorProtect}
{if answer isNull}
{signalError 'x'}
{/if}
{onError}
{reDirect 'GetAnsr.htf'}
{/errorProtect}
{sql <args>} {/sql}
The sql macro identifies the database that is to be queried, allows for specifying a variable into
which it can return its query results, and defines the text block that constitutes the actual
ODBC query statement. The optional keyword-value pairs supported by the sql macro are
listed in the following table:
Keyword
to
String
source
String
user
String
password
String
WebBase User’s Guide
Value
Description
The variable name into which the results will be
placed. If this argument is omitted, the variable
%results% will be used. The value of this keyword
must be a variable name, it cannot be an expression or
constant.
The ODBC source name. If this argument is omitted,
the variable %source% will be used.
The user id for logging into the ODBC source. If this
argument is omitted, the variable %user% will be
used. Note that some ODBC drivers do not require a
username and password; this is a database-specific
issue. It is recommended that even though a username
and password may not be required by the current
ODBC driver, that they be specified as part of the sql
macro statement in case they are required by future
ODBC drivers.
The required password for logging into the ODBC
source. If this argument is omitted, the variable
%password% will be used. Note that some ODBC
drivers do not require a username and password; this
is a database-specific issue. It is recommended that
even though a username and password may not be
required by the current ODBC driver, that they be
specified as part of the sql macro statement in case
107
Chapter 8: Macros
108
buffer
Integer
cache
Boolean
max
Integer
start
Integer
they are required by future ODBC drivers.
The maximum buffer length for ODBC to use to
return data from the database to WebBase. The
default is 8192 bytes. If one requests a record from
the database and the buffer is not long enough, some
of the data will be truncated. This is typically some
text from a long memo field but it can be entire fields
as the data is returned in the order requested
(SELECT field1, field2, field3, ...). If field1 is by
itself longer than the buffer, the rest will be lost. See
the operations available for ODBCRowObject in
Chapter 11 that include detecting if a message about
data truncation was received.
If set to false, the ODBC connection will not be added
to the cache of ODBC connections after the operation
and, if previously in the ODBC cache, will be
removed as a side effect of the operation. This
parameter in no way affects the setting of the ODBC
connections cache. If caching is disabled, this
parameter has no effect. Setting this parameter to true
will not cause this connection to be cached if caching
is disabled. The value of the ‘Cache ODBC
Connections’ menu option set via the WebBase
Service window always takes precedence. The default
is true which means the connection will be cached if
caching is enabled. This keyword/value pair is useful
to selectively keep a database from being cached. It
can also be used to remove a cached connection at the
end of a form that possibly hit the database multiple
times and cached the connection earlier so that nonWebBase access of the database can be made. Once
WebBase caches a connection, the database has
WebBase as a user with exclusive, read/write or read
only access -- however the ODBC source was
specified. This prevents the user from accessing the
database with exclusive access for maintenance
purposes. If this database is thus accessed on a
routine basis, it is possible the user might wish to not
leave the connection cached while wanting cached
connections for other databases.
The maximum number of records the query is to
return. By default, all records matching the query
specifications are returned. The WebBase
WebWizard Database Example #4 shows how to
implement ‘More’ and ‘Previous’ buttons using this
keyword.
The number of the first matching record to be
returned (i.e., skip the first start - 1 matching records).
The WebBase WebWizard Database Example #4
shows how to implement ‘More’ and ‘Previous’
buttons using this keyword.
WebBase User’s Guide
rowCount
String
error
String
keepHandle
Boolean
The name of the variable that will hold the number of
INSERTED rows. If this variable name is not
specified, %rowCount% is used.
The name of the variable that will hold any error
messages reported by the ODBC driver. This can be
used to determine exactly the nature of the error if
specialized processing is needed. In general, users
should not require this option. This does not prevent
the macro from generating an error, the user should
still wrap the sql macro with the errorProtect macro.
Within the {onError} branch, the user can use the
contents of this variable to determine the explicit
error. Using the {f= %error% messageText} within
the error branch returns the ODBC error message to
the user, as well as all of the WebBase error
information (macro dump, stack dump, etc.).
The only purpose for this keyword is to address a
problem with Microsoft Access 7.0 and greater
databases and the associated ODBC driver. If false
(default), the handle is not kept following the {sql}
statement, unless of course the handle is cached in the
ODBC connection cache. If true, the handle allocated
for the ODBC connection to the data source will not
be free following its use. In addition, even if one has
the ‘Cache ODBC Connections’ menu option enabled,
the connection handle associated with this {sql}
statement will not be placed in the ODBC cache
following use but will be disconnected but not freed.
This will ensure that the handle does not cause any
General Protection Fault (GPF) errors to occur either
by executing the {sql} statement or by clearing the
ODBC cache explicitly or on server shutdown. See
Chapter 14 for details on implementing this keyword
to address the Microsoft Access/ODBC driver
problem.
Only a single SQL statement can be included within the sql macro. However, multiple sql
macros can be placed within the same .htf form.
It is very important that WebBase variables used in SQL statements be set up to match the
expected data type in the database table. Any WebBase variable that contains a string and
will be written to a text or memo field must be enclosed in single quotes. It is also strongly
recommended that the parameter {sql=true} be added to all text fields; this ensures that any
apostrophes in the string stored in the WebBase variable will be properly inserted into the
database. Any numeric value must be entered without single quotes. A date or date/time value
must be entered by placing the ‘#’ sign before and after the variable. In the example below, the
Name field in the database is specified to be a text field; the Salary field is numeric, and the
StartDate is a dateTime field.
WebBase User’s Guide
109
Chapter 8: Macros
Example 8.45
sql Macro
{sql source 'mySQL' user 'me' password 'test'}
INSERT INTO Employees (Name,Salary,StartDate)
VALUES ('{LastName sql=true}',{Salary},#{theDate}#)
{/sql}
{sql to aCltn source 'mySQL' user 'me' password 'test'}
SELECT * FROM Employees WHERE StartDate <= #{%dateTime%}#
{/sql}
Note:
The ODBC drivers do NOT return the number of records returned by a SELECT
statement – the user must determine this information by asking the size of the to
variable.
{timer id <idVal> <args>} {/timer}
The timer macro is used to schedule entries on the WebBase timer queue. WebBase checks
this queue once every minute and, when an entry’s time has expired, the entry is processed.
The <args> provide for scheduling the entry that can be for a “one time” execution or for a
repeated, periodic execution.
The entry that is scheduled is all the text contained within the {timer ...} {/timer} construct as
well as a copy of all variables defined at the time the entry is scheduled. This text will
generally consist of WebBase macros and expressions that will be interpreted at the time the
entry is executed. Since the timer queue entry will be executed at some point in the future it
will not be associated with the browser that executed the form that originally scheduled the
entry. If the entry references variables associated with such a browser (e.g.
%browserAddress%, Accept, Content-length), unpredictable results can occur. Output
generated by the timer queue entry does not get sent to a browser as does output generated by
standard WebBase forms. However, output to files using any of the WebBase file access
mechanisms and output to a database via the sql macro will be properly processed.
The id keyword is also required, as is its value which is either an integer or string which is
used to identify this entry in a ‘remove from timer queue’ operation if necessary. The table
below shows the optional keyword-value pairs that can be used with the timer macro.
110
Keyword
date
Value
Date/String
time
Time/String
period
Integer
title
String
Description
The date on which the entry is to be executed. If a
string, it is in a format that can be used to generate a
Date instance.
The time of day on which the entry is to be executed.
If a string, it is in a format that can be used to
generate a Time instance.
The number of minutes between execution of the
entry. The first time the form will be run will be
<Integer> minutes from the time the entry is placed
onto the timer queue; it will not be run immediately.
The function of the entry added to the timer queue.
This can be displayed using the timerQueueSQL
operation available on %cmd% (see Chapter 11).
WebBase User’s Guide
count
Integer
The number of times the entry should be run before it
is removed from the queue. If date is specified, this
value is automatically set to 1. It can be used to allow
periodic entries to run every <Integer> minutes for a
count number of times, then be removed.
The above date, time and period entries are interpreted as follows to control the scheduling of
the timer entry.
If a date argument is supplied, the entry will be executed only once on the date indicated (or
today if the date has already passed) based on the values of any additional arguments. If a
time argument is indicated along with a date, the entry will be executed once at the specified
time on the given date. If no time argument is specified, a time of 00:00:00 on the given date
is assumed. The period argument has no effect on the scheduling when date is specified.
Note:
Both date and time arguments are processed as being equal to or less than the
current date and time. When the entry is checked it will be executed if the date is
the current date or a prior date and the time is the current time or has already
expired.
If no date argument is specified, the entry will be executed periodically until it is explicitly
removed from the queue or the WebBase server is terminated. If a time argument is provided,
the entry will be executed once per day at the specified time. The period argument has no
effect when time is specified. If the time argument is specified and a period argument is also
provided, the entry will be executed once every period minutes. If no date, time or period
argument is provided, the entry will be queued but will never be executed.
The removeTimer: operation (see HttpCommand section in Chapter 11) can be used to remove
a timer queue entry based on its id. There are no operations currently provided for
manipulating or inquiring into the scheduling parameters (date, time or period) of a timer entry
once it has been placed on the timer queue. The WebBase WebWizard More Examples
includes an example of how to use the timer macro to schedule a form to be regularly
processed.
Example 8.46
Timer macro
{timer id 3 time ...}
{set var ...}
{sql ...}
...
{/sql}
{comment} any WebBase scripting here ... {/comment}
...
{/timer}
{while <exp>} {/while}
As long as exp returns true, the while macro will continue looping and executing all the
statements contained within the macro. When exp returns false, control passes to the first
statement following the {/while}. The variable %whileLimit% can be created and set to a
positive integer to limit the number of times one will loop regardless of the state of the
condition. This is useful as a safeguard during development to prevent infinite loops. The
local variable %whileCounter% is automatically set to the loop count (e.g., 1, 2, 3).
WebBase User’s Guide
111
Chapter 8: Macros
The example below uses the while macro to wait for a given length of time before processing
will continue. The variable pauseTime would be set before this macro is invoked and would
contain an integer value identifying how many seconds to wait from the current time.
Example 8.47
while Macro
{set startTime %seconds%}
{set stopTime pauseTime startTime +}
{set now startTime}
{while now stopTime >}
{set %priority% 0}
{set now %seconds%}
{if now startTime >}
{set stopTime 86400 stopTime -}
{/if}
{/while}
{with <val>} {/with}
The with macro allows one to specify an sql result set that is to be made available for
accessing via field names. Unless one is within the forRow macro, by default the most recent
sql macro data is made available for accessing by field names. If one were to use more than
one sql macro in a form, the with macro allows one to indicate which of the result sets are to
be used when a field name is specified outside a forRow construct.
The with macro can be nested as shown in the example below. The result set in effect will be
the one in the innermost nesting at the time. See the section on Field Variables in Chapter 9 for
details on how the with and forRow macros access field variables within a result set.
The argument to the with macro is either a variable name (as in the example below), or an
expression that must evaluate to either a collection of records returned from a {sql} SELECT
or a single OdbcRowObject instance. If the argument is a collection or records, only the first
will be handled within the with macro. Generally, a single item from a collection will be the
argument to the with macro. If one wished to address the last row of data returned by the first
sql macro in the example below, one could write
{with set1 last}
or the third row of data returned in set2 would be
{with 3 set2 at:}
112
WebBase User’s Guide
Example 8.48
with Macro
{sql to set1 ...}
SELECT NAME, ADDRESS, ...
{/sql}
...
{sql to set2 ...}
SELECT MODEL, ...
{/sql}
...
{with set1}
...
{NAME}
{with set2}
{MODEL}
{/with}
...
{ADDRESS}
{/with}
{writeFile <file> <optionalArgs>} {/writeFile}
The writeFile macro surrounds text that is first processed by WebBase to substitute for
variables and expressions. The resulting string is then written to the indicated file. The file can
be specified in any of the formats as described for the insert macro. The optional keywordvalue pairs for this macro are shown in the table below.
Keyword
append
Example 8.49
Value
Boolean
Description
If true, the resulting string will be appended to the
specified file. If false (default), the data in the file
will be overwritten.
writeFile Macro
{writeFile './myfile.txt' append true}
I am going to add this text to the end of the file 'myfile.txt'.
It will include the current (%dateTime%} and the address of the
browser {%browserAddress%} that called me along with some other
interesting WebBase variables, etc.
{/writeFile}
WebBase User’s Guide
113
Chapter 8: Macros
114
WebBase User’s Guide
Variables
Chapter 9
WebBase variables let you access, store, and display data within a WebBase .htf file.
Browser GET or POST requests might include input variables, the author can define local
variables and access global variables, and database queries will result in field variables.
WebBase also has a number of dynamic variables that can be used in the .htf form.
Variables are expressed as alphanumeric names, e.g., counter. They are distinguished from
string constants by the fact that string constants are enclosed in single quote marks, e.g.,
‘counter’. All WebBase variable names must start with an alphabetic character or a ‘%’. The
dynamic variables and global variables provided by WebBase all start with a ‘%’. It is
recommended that users create their variable names starting with alphabetic characters so it is
easy to differentiate between user-created and system-provided variables.
A WebBase variable name cannot be the same as a WebBase reserved word; the
%reservedWords% dynamic variable is a collection of all the WebBase reserved words. It is
also important to remember that variables are CASE SENSITIVE -- i.e., counter and Counter
are two different variables.
The search order for WebBase variables is
1.
2.
3.
4.
5.
Field variables
Local variables
User variables
Global variables
Dynamic variables
Notice that Local variables override User variables, and User variables take precedence over
Global variables, and Global variables override Dynamic variables. Because of this
precedence order, it is strongly recommended that you carefully select the names of any
variables to ensure proper precedence. For example, preface all user variables with a U (e.g.,
{setUser Uname name}).
WebBase User’s Guide
115
Chapter 9: Variables
9.1 Field Variables
Field variables are variables whose names correspond to fields within a database record
definition. Variables representing database record field names must be specified exactly as the
field names are returned by the ODBC driver for that particular database. With many
databases, the ODBC database driver returns the field names exactly as specified by the user
when doing the record definition. For example, the user specifies ‘Last Name’ in the database
development interface and the ODBC database driver returns ‘Last Name’.
However, some ODBC database drivers return the field names in other forms (e.g., ‘LAST
NAME’). To determine how your specific ODBC driver returns the field names, it is
recommended that you use the ‘Data Sources’ tool available from the WebBase WebWizard
window. Select the ‘Data Sources’ anchor, and then select to view your available data
sources. This will present a table of all the data sources you currently have defined on your
system, as well as the driver associated with them. Select the desired source. A list of the
tables within this database is displayed, along with information such as the path specification
for the database file. Select the desired table, and a table showing all the fields in the table is
displayed. The first column in this table lists all the fields within the database. The field
names within this column can be used as field variables within WebBase forms. Again, be
very sure on the spelling and case of each field variable name because all variable names are
case sensitive.
When a database query is issued and data is returned, fields within the returned record are
accessed using the field name as a variable. Multiple records will often be returned as the
result of a query. The individual records can be accessed using the with or forRow macro. As
each record is processed within the macro, the field variables within the macro take on the
value of the field within the record being processed.
The forRow macro is useful for iterating through multiple records returned from a database
and using field variables to access the data values within the record currently being processed.
The with macro is useful for accessing field variables in a single record of data.
When a forRow or with macro is encountered in a form, any references to field variables will
be resolved against the record set specified as the argument to the macro. In the forRow
macro, this will be the current record within its record collection. In the with macro, this will
be the argument if it is an OdbcRowObject, or it will be the first entry in the collection if the
argument is a collection.
A potentially confusing situation can arise when a second set of records is acquired via an
{sql} call within a forRow or with macro. It is not possible to access the field variables of this
new data collection unless they are also accessed within a forRow or with macro. The result
set used to resolve field variables is that for the current forRow or with macro.
Field variables can also be specified outside the forRow or with macros. In this case, the first
record in the last collection of data records returned by an {sql} call is used. It is strongly
recommended that field variables only be used within the forRow or with macros, and that the
forms developer not rely on the result set received from the last {sql} macro.
The following two examples show how to improperly use field variables, as well as how to
properly use field variables for multiple collections.
116
WebBase User’s Guide
Example 9.1
Incorrect use of field variables
{sql to cltn1 source ‘aSrc’ user ‘aUser’ password ‘aPwd’}
SELECT * FROM Table1
{/sql}
{forRow aRow on cltn1}
{FieldVar1}
{sql to cltn2 source ‘aSrc’ user ‘aUser’ password ‘aPwd’}
SELECT * FROM Table2 WHERE ID = {FieldVar2}
{/sql}
{! The following line will generate an error because only the field
variables from the records in cltn1 are accessible. If not within
the ‘forRow’ macro, this would work. !}
{VarFromCltn2}
{/forRow}
Example 9.2
Correct use of field variables
{sql to cltn1 source ‘aSrc’ user ‘aUser’ password ‘aPwd’}
SELECT * FROM Table1
{/sql}
{forRow aRow on cltn1}
{FieldVar1}
{sql to cltn2 source ‘aSrc’ user ‘aUser’ password ‘aPwd’}
SELECT * FROM Table2 WHERE ID = {FieldVar2}
{/sql}
{with cltn2 first}
{! The following line will correctly display the field value
VarFromCltn2 since the field variables for the recordSet of the
‘with’ macro are now being processed. Note that if ‘FieldVar1’ were
used in the ‘with’ macro, an error would result since it is not part
of the current result set being used to determine field variables !}
{VarFromCltn2}
{/with}
{/forRow}
Database table and field names can often include spaces. In order to use a table name with a
space as part of an SQL statement (e.g., INSERT, SELECT), the table name must be enclosed
in double quotes as in:
{sql to cltn source ‘aSrc’ user ‘aUser’ password ‘aPwd’}
SELECT * FROM “My Table”
{/sql}
Field names that contain a space must also be referenced as field variables using double
quotes15, as shown in the following:
{“File No”}
Only field variables can include embedded spaces. All other WebBase variables must consist
of characters other than the space character.
15
Some database applications such as Access allow the use of square brackets to specify table or field names that include spaces. Square brackets can
be used with table and field names in WebBase, but the SQL standard is to use double quotes.
WebBase User’s Guide
117
Chapter 9: Variables
Note:
Many databases also have reserved words such as Date, Time, Order, etc. These
reserved words can be used in sql statements such as SELECT only if they are
enclosed in double quotes. Double quotes can be used around any field name, with
or without spaces and reserved word or not, without generating problems..
WebBase provides two operations on strings for handling field names. The asFieldName
operation adds double quotes around the specified string. The asFieldNameName operation
removes double quotes from the specified string. Examples of these operations are found in
Chapter 11.
As noted above, field variables are at the top of the precedence order. If you are using a local
variable called {Name} and retrieve records from a database in which there is a field called
Name, the field variable Name will take precedence over the local variable. This can cause
unexpected errors in form processing.
9.2 Local Variables
Local variables are in existence for the duration of the form that is being processed. As soon
as the WebBase server completes the processing of the form and returns the output stream to
the browser, all local variables cease to exist. Maintaining state across multiple forms can be
done using user variables, as described in Chapter 10.
Local variables can be created four ways:
•
by passing arguments into a form via the command line
•
by explicitly setting them using a WebBase macro
•
from the header information on the request from the client
•
from the cookies sent from a cookie-enabled browser to the server
Local Input Variables
Local input variables are created from command line arguments that are passed in from one
form to another. A full URL GET request including command line arguments uses the format:
http://<IP address>:<port>/dirSpec/fileName.Type?arg1=val1
&arg2=val2&arg3=val3
Each command line argument and value are separated by an ‘=’. The first argument/value pair
following the filename is preceded by a ‘?’. All subsequent argument/value pairs are separated
from the previous by an ‘&’.
There are several ways in which command line arguments can be created. The most common
way to create command line arguments is to set up an HTML <FORM> that includes one or
more <INPUT> statements. Some <INPUT> statements allow the user to make or enter
selections, such as text field or check boxes. Other <INPUT> statements are buttons which
signal that a user wants some type of action to be taken. And finally other <INPUT>
statements allow hidden data to be passed to the next form to be invoked.
118
WebBase User’s Guide
For example, a user might create a form to enter in a name, address, city, state and zip. There
would be 2 buttons – one to create a new record and the other to cancel. Lastly, there might be
a hidden variable passed along that was an ID previously entered by the user. A FORM
construct for these input fields might look like:
<FORM METHOD="GET" ACTION="form2.htf">
Name: <INPUT TYPE="TEXT" NAME="name" SIZE=15 VALUE="">
Address: <INPUT TYPE="TEXT" NAME="address" SIZE=15 VALUE="">
City: <INPUT TYPE="TEXT" NAME="city" SIZE=15 VALUE="">
State: <INPUT TYPE="TEXT" NAME="state" SIZE=15 VALUE="">
Zip Code: <INPUT TYPE="TEXT" NAME="zip" SIZE=15 VALUE="">
<INPUT TYPE="SUBMIT" NAME="button" VALUE="Make Record">
<INPUT TYPE="SUBMIT" NAME="button" VALUE="Cancel">
<INPUT TYPE="HIDDEN" NAME="id" VALUE="12345">
</FORM>
The command line generated when the user presses the ‘Make Record’ button would look like:
form2.htf?name=my+name&address=123+Main+St.&city=Santa+Barbara&
state=CA&zip=93101&id=12345&button=Make+Record16
The values typed in by the user would be passed along with each variable name on the
command line. The ‘+’ characters in the command line are automatically added to represent
spaces; they are automatically removed by WebBase when the command line is received and
parsed. The browser also encodes other special characters such as ‘%’ in the formation of the
URL sent to the server; WebBase automatically decodes these characters also.
When the WebBase server receives this command, it parses all the argument and value pairs
into local variables and values. In this case, the local variables would be:
{name}=’my name’
{address}=’123 Main St.’
{city}=’Santa Barbara’
{state}=’CA’
{zip}=’93101’
{id}=’12345’
{button}=’Make Record’
WebBase stores the names of all the local variables received via the command line in the
variable %theArgs%. The form designer can use this variable to determine which local
variables are a result of command line input. The values of the variables are not included in
%theArgs%, just the names of the variables. The dynamic variables %inputVariables% and
%inputVariablesHTML% can be used to determine/display the local variables created from
command line arguments as well as their values.
Each local variable created from a command line is automatically stored as a string value, as
indicated above. An important responsibility for the forms designer is to know which local
variables should be passed into a form via a command line, and set up appropriate conversions
of the data values if necessary. In the example above, the {id} should be a numeric value.
This should be set up in the form as:
{set id id asNumber}
16
A “POST” request passes the command line arguments to the receiving form in a similar fashion, but the arguments are not displayed as part of the
URL. This is often desirable as it presents a cleaner interface to the user at the browser, and it may also hide information that the user should not see.
WebBase User’s Guide
119
Chapter 9: Variables
Another way to create command line arguments is to explicitly include them in the creation of
anchors. An example of an anchor using command line arguments is:
<A HREF=”file2.htf?id={id}&name={name encode=true}” Page 2 </A>
In this example, there are two WebBase variables that are going to be passed from the current
form into ‘file2.htf’. The {name} variable is a text field and may include spaces or other
punctuation characters that need to be specially encoded as part of the HTML command line.
The ‘encode=true’ parameter indicates that the variable is a string that should be encoded.
After WebBase processes this URL and sets up the anchor, it will look like:
<A HREF=”file2.htf?id=12345&name=my+name” Page 2 </A>
The final way to create command line arguments is using the redirect2 macro. Unlike the
redirect macro that simply points to a new URL, the redirect2 macro can be used to pass
command line arguments to the specified file. The following shows how the {id} and {name}
variables can be passed via a redirect2 macro.
{redirect2 ‘file2.htf’}
id={id}
name={name}
{/redirect2}
Unlike with anchors, it is not necessary to indicate that the {name} variable is a text field and
needs to be encoded. The redirect2 macro will automatically handle this and generate a URL
that looks like:
http://…/file2.htf?id=12345&name=my+name
Local variables created from command line arguments are indistinguishable from other local
variables that may have been created by the set or setLocal macro, or may have been read in as
header and cookie variables. Because of the variable precedence order and the several ways in
which local variables can be created, it is very important that the form designer take care in the
selection of variable names.
Set Local Variables
The author of an .htf form can define variables within the file using the set or setLocal macro.
Writing {set counter 3} will create a local variable named counter and assign it the value 3. If
a local variable by this name already exists, its value will be updated to be 3. It is important to
remember that local variables can be created by both setting them as described here, by
inputting them to the form, as described in the preceding section, or from header or cookie
information sent from the client browser to the server as described in the following sections.
All these variables are considered local variables. The creation of a variable with the set or
setLocal macro can override any of these other local variables.
The scope macro has been designed for those situations in which some local variables need to
be created for a specified amount of processing, but which should not interfere with other local
variables. This situation is often encountered when using insert files to perform actions as
would be done by subroutines. The local variables created and used within the scope macro
are only in existence until the ending {/scope} keyword is encountered. The local variables
created within the scope macro can override any other local variables, but only for the duration
of the scope.
If scoping is not being used, then the set and setLocal macros are equivalent – both will cause
a local variable of the specified name and value to be created that will be in duration until the
120
WebBase User’s Guide
form processing is completed. If scoping is being used, the set macro will create a local
scoping variable with the specified name and value that is only in existence until the scope is
completed. The setLocal macro, when used within a scoping context, will create or override a
local non-scoping variable that will be in existence beyond the scope macro and until form
processing is completed. The following example shows how the set and setLocal macros can
be used with the scope macro.
Example 9.3
Scoping and local variables
{scope}
{! The following variable will only exist within the scope !}
{set sVar ‘abc’}
{! The following variable will exist outside the scope !}
{setLocal lVar true}
{/scope}
It is possible to nest scopes to create nested levels of scope dictionaries – all of which might be
searched when looking for a particular variable. The innermost scope is the first to be
searched, followed by the next scope, followed by any other scopes, and then finally the local
variables, user variables, global variables and dynamic variables. Field variables within a
scope will still take precedence over any other variables.
Additional information on scoping and local variables can be found in the description and
example presented with the scope macro in Chapter 8.
Header Local Variables
When the WebBase server receives a request from a client, the browser has added some
information to the start of the request. This information is called ‘header information’, and
includes some or all of the entries that are described in Appendix C. This appendix includes
the set of header variables defined by the HTTP/1.1 specification. There may be additional
header variables created and sent by a particular client browser application.
Each header entry is extracted and created as a local variable. All of the header variables can
be examined by looking at the %headerVariables% or %headerVariablesHTML% variables.
The header variables which WebBase forms developers may find useful are:
•
Host – host portion of URL entered by user. This can be used to provide different
responses based on different host designations. This is an alternative to multiple domain
support.
•
Referer – this variable is only included when a page is displayed via an anchor, redirect or
<FORM> construct; it is not provided if the user explicitly types in a URL. It identifies
the previous URL from which the current form was invoked.
•
User-Agent – defines the browser in use
Cookie Local Variables
Cookies are a special type of header variable that are not supported by the current HTTP/1.1
specification, but are provided by many of the main browser applications such as Netscape and
Microsoft Internet Explorer.
WebBase User’s Guide
121
Chapter 9: Variables
Cookies are a general mechanism which servers can use to both store and retrieve information
from clients. A server, when returning an HTTP object to a client, may also send a piece of
state information that the client will store. Included in that state object is a description of the
range of URLs for which that state is valid. Any future HTTP requests made by the client
which fall in that range will include a transmittal of the current value of the state object from
the client back to the server. The state object is called a cookie, for no compelling reason.
Cookies are very useful for maintain state across multiple forms, as well as across time.
However, not all browsers support cookies and some users may not have cookie support
enabled at their browser. To maintain state through multiple forms, WebBase provides user
variables that are described in the next chapter.
Creating Cookies
Cookies are created using the setCookie macro. Any “outbound” cookies created using this
macro are sent to the browser when the form is returned to the browser for display. The
browser may or may not do anything with the cookies, depending on the level of cookie support
enabled at the browser.
A number of parameters can be specified with cookies that determine which domains they are
valid for, and whether they will be persistent or memory-resident in the browser:
122
•
Name -- This string is a sequence of characters excluding semi-colon, comma and white
space. It must also adhere to the WebBase variable standard, which requires the first
character to be alphabetic or ‘%’.
•
expires – The attribute specifies a date string that defines the valid life time of that cookie.
Once the expiration date has been reached, the cookie will no longer be stored or given out.
If not specified, the cookie will expire when the user’s browser session ends (e.g., they shut
down their browser application). To cause a cookie to be persistent on the client side, the
form designer must specify an expiration time. This attribute is set using the
%cookieExpires% variable, which by default is not specified.
•
domain -- when searching the cookie list for valid cookies, a comparison of the domain
attributes of the cookie is made with the Internet domain name of the host from which the
URL will be fetched. If there is a tail match, then the cookie will go through path matching
to see if it should be sent. "Tail matching" means that domain attribute is matched against
the tail of the fully qualified domain name of the host. A domain attribute of "acme.com"
would match host names "anvil.acme.com" as well as "shipping.crate.acme.com". This
attribute is set using the %cookieDomain% variable, which by default is not specified.
•
path -- used to specify the subset of URLs in a domain for which the cookie is valid. If a
cookie has already passed domain matching, then the pathname component of the URL is
compared with the path attribute, and if there is a match, the cookie is considered valid and
is sent along with the URL request. The path "/foo" would match "/foobar" and
"/foo/bar.html". The path "/" is the most general path. If the path is not specified, it as
assumed to be the same path as the document being described by the header that contains
the cookie. This attribute is set using the %cookiePath% variable, which by default is set
to ‘/’.
WebBase User’s Guide
Receiving Cookies
When requesting a URL from an HTTP server, the browser will match the URL against all
cookies and if any of them match, a line containing the name/value pairs of all matching
cookies will be included in the HTTP request. Here is the format of that line:
Cookie: NAME1=OPAQUE_STRING1; NAME2=OPAQUE_STRING2 ...
WebBase extracts the cookies from this line and makes each cookie name a local variable.
A cookie variable can be deleted using the removeCookie macro.
NOTE:
Cookie variables are sensitive to the way in which the host machine is addressed.
To ensure that the server properly receives cookie values, make sure your links are
consistent in the way they reference your host machine. Referencing your host as
‘http://www.yourSite.com/’ in one instance and as ‘http://1.2.3.4’ in another
instance might be pointing to the same host machine but will cause the Cookies
connection to be re-established the first time you switch from one mode of reference
to the other. If you consistently use the host name string, or the host IP address, or
relative references (recommended), you should have no problems with cookie
variables being received properly from cookie-enabled browsers..
WebBaseID Variable
When a browser that supports cookies sends a request to the WebBase server, it includes any
cookies that have previously been received from the server. If the cookies sent to the browser
by the server included an expiration date, the cookies may be persistent on the browser. If the
cookies sent to the browser did not include an expiration date, they are memory resident on the
browser until the browser application is stopped.
WebBase attempts to maintain a link between a browser and the server using the WebBaseID
variable. WebBase automatically creates this variable for each request that is received from a
browser that does not include the WebBaseID as an inbound cookie variable. For browsers
that do not support cookies, WebBase will create this cookie each time it receives a request.
This behavior can be modified using the %skipCookies% or %skipAutoCookies% variables.
It is preferable to use the WebBaseID cookie variable instead of the browser’s IP address to
maintain a link between the user's browser and the WebBase server. This is because a
browser's address can change from one screen to the next when a user is sitting behind a
firewall or network service provider talking to WebBase.
WebBase does not include any expiration information with the WebBaseID as a cookie when
it is returned to the browser. If the browser is cookie-enabled, it will return WebBaseID as a
cookie variable until the browser is stopped. When the browser is subsequent restarted and a
connection established with WebBase, the browser will not send out the WebBaseID since it
was only memory resident. WebBase will generate a new WebBaseID and return it to the
browser on the first interaction.
The WebBaseID variable is often used in conjunction with user variables, as described in
Chapter 10.
WebBase User’s Guide
123
Chapter 9: Variables
9.3 Global Variables
WebBase can access a number of global variables when the server is started. These variables
differ from those defined within WebBase forms in that their values are set in the System
Registry and not via an HTML GET or POST query. These global variables can be
overridden by local variables of the same name for the processing of the .htf file in which the
local variable is defined. It is also possible to create, change the value of, or delete global
variables in memory using the setGlobal and removeGlobal macros. However, the values for
global variables will only be persistent when the variables and their values are defined in the
System Registry.
Consider using global variables to define the source, username and password required as part
of the sql macro. If these values are set up using global variables and the values subsequently
change, only the global variable’s value has to be edited – not multiple forms. Any sql macros
that reference these variables will now work successfully.
Global variables should be used to hold information that is used in multiple forms and that
changes very infrequently. Some suggested uses of global variables are image directories (e.g.
myPix -> ‘http://www.myCompany.com/images/gifs/’), e-mail addresses (e.g., eMailAddr ->
‘[email protected]’), and copyright statements (e.g., copyright -> ‘©1997
MyCompany, Inc.’). Should your system configuration(s) change and your WebBase server be
moved to a different site or machine, you would need only to alter a few variables in one
location and not edit numerous forms.
All global variables are extracted from the System Registry when WebBase is launched.
Unlike parameters, it is possible to change the value of a global variable in the System
Registry and have the change reflected in WebBase. The ‘Load Global Variables’ command
in the WebServer window’s ‘Options’ menu causes WebBase to re-read all the global
variables from the System Registry. Any in-memory changes to global variables made using
the setGlobal or removeGlobal macros will be lost unless they were explicitly added to the
System Registry.
There are a number of global variables that are displayed in the WebBase Server window as
global variables, but which do not appear in the System Registry. These global variables
identify classes of objects. It is possible to perform operations on these classes (see Chapter
11 for class operations); it is also possible to create a new instance of a specific class, assign it
to a variable, and perform operations on the instance. The global variables and the class they
represent are:
• %Array% = Array
• %Association% = Association
• %DatabaseInfo% = DatabaseInfo
• %Date% = Date
• %Dictionary% = Dictionary
• %Directory% = Directory
• %File% = File
• %Float% = Float
• %Fraction% = Fraction
• %Integer% = Integer
• %Number% = Number
• %OrderedCollection% = OrderedCollection
• %OrderedList% = OrderedList
• %Point% = Point
• %ReadStream% = ReadStream
124
WebBase User’s Guide
•
•
•
•
•
•
•
•
%ReadWriteStream% = ReadWriteStream
%RegistrationDatabase% = RegistrationDatabase
%SortedCollection% = SortedCollection
%SortedList% = SortedList
%String% = String
%Time% = Time
%UniversalTime% = UniversalTime
%WriteStream% = WriteStream
Editing Global Variables
Adding or changing global variables is done using the WebBase WebWizard Registration
Database utility. Appendix B includes information on setting up the .INI files used on 16-bit
systems. To edit WebBase global variables,
1. Start WebBase and open up the WebBase WebWizard by entering the URL:
http://127.0.0.1/wbwizard/
2. Select the Registration Database anchor.
3. From the pull-down list, select ‘HKEY_LOCAL_MACHINE’ and then press the ‘OPEN’
button.
4. Select the ‘Open’ anchor next to the ‘SOFTWARE’ key.
5. Select the ‘Open’ anchor next to the ‘ExperTelligence, Inc.’ key.
6. Select the ‘Open’ anchor next to the ‘WebBase’ key.
7. Select the ‘Open’ anchor next to the ‘4.10’ key.
8. If the key ‘Variables’ does not exist, create it by selecting the ‘Add New Key’ anchor and
entering ‘Variables’ as the key name.
9. Select the ‘Open’ anchor next to the ‘Variables’ key. All of the WebBase global variables
currently defined and their values are displayed in the table.
10. To add a new global variable, select the ‘Add new entry’ anchor and specify the global
variable name and desired value.
11. To modify a parameter, select the ‘Edit’ anchor next to the parameter and specify the
changed value.
12. From the WebBase Server Window, select the ‘Load Global Variables’ option to reload
the global variables.
WebBase User’s Guide
125
Chapter 9: Variables
9.4 Dynamic Variables
Dynamic variables are similar to the global variables described above in that they are available
for use in any .htf form. However, unlike global variables in which the user defines their
value, WebBase sets the values of dynamic variables. A user can override the value of a
dynamic value by creating a global variable of the same name following the procedures
described in the previous section, or creating a local variable of the same name in a form.
A list of the WebBase dynamic variables is displayed in the WebBase Server window when
WebBase is started. Some variables displayed on this list are for WebBase add-on products,
which are documented separately. Other dynamic variables in the list are considered obsolete
and are described in Appendix D. The WebBase dynamic variables, an example of their
contents, and their descriptions are:
•
%allUserVariables% e.g., (Dictionary(('UW14259281E161808318469B' ==>
Dictionary(('%%altered%%' ==> true) ('%%expires%%' ==> 60) ('Usite1name' ==>
'Personnel Directory Service') …)))))
a dictionary of the dictionaries of user variables. The keys to the top-level dictionary are
the names of the different user variable dictionaries that have been created. The values in
the top-level dictionary are the dictionaries containing user variables. The
%userVariables% dynamic variable shows all the user variables defined for the user
variable dictionary currently specified in %userName%. This variable shows the user
variable dictionaries for all user variable dictionary names, including that specified in
%userName%. Details on user variables can be found in Chapter 10.
•
%allUserVariablesHTML% e.g., (see below)
formats all the dictionaries containing user variables for a nice printout on the browser.
The %userVariablesHTML% dynamic variable shows all the user variables defined for
the user variable dictionary currently specified in %userName%. This variable shows the
contents of the user variable dictionaries for all user variable dictionary names, including
that specified in %userName%. Details on user variables can be found in Chapter 10. The
example below shows the information generated by this dynamic variable as displayed on a
browser. This particular display was generated by accessing the ‘Sample Sites’ option
under the WebBase WebWizard window, as it uses user variables to set up the
necessary sample sites.
Example 9.4
%allUserVariablesHTML% display
User Variables - UW14259281E161808318469B (17)
• %%accessed%% = (03/10/97 05:46:49 AM)
• %%altered%% = true
• %%created%% = (03/10/97 05:46:44 AM)
• %%expires%% = 60
• Udirpath = c:\http\WB-ShowMe
• Ulogpath = c:\http\WB-ShowMe\WBSM_Log
• UMSAdriver = Dictionary(('FileExtns' ==> '*.mdb') ('FileUsage'
==> '2') ('Driver' ==> 'C:\WINDOWS\SYSTEM\odbcjt32.dll')
('ConnectFunctions' ==> 'YYN') ('APILevel' ==> '1')
('ConectFunctions' ==> 'YYN') ('UsageCount' ==> 1) ('SQLLevel'
==> '0') ('Setup' ==> 'C:\WINDOWS\SYSTEM\odbcjt32.dll')
('DriverODBCVer' ==> '02.50') )
• UmyDir = c:\http\wbwizard\showme
• UodbcDriver = Microsoft Access Driver (*.mdb)
• UodbcPaths = Dictionary(('pds' ==> 'PDS.MDB') ('videos' ==>
'VIDEOS.MDB') ('cars' ==> 'CARS.MDB') )
126
WebBase User’s Guide
•
•
•
•
•
•
•
•
UodbcSources = Dictionary(('pds' ==> 'Web_Start_Pds') ('videos'
==> 'Web_Start_Videos') ('cars' ==> 'Web_Start_Cars') )
UserToken = UW14259281E161808318469B
Usite1name = Personnel Directory Service
Usite2name = Used Cars Site
UsiteDict = Dictionary(('pds' ==> 'Personnel Directory
Service') ('videos' ==> 'On Line Videos') ('cars' ==> 'Used
Cars Site') )
UsitesDir = c:\http\wbwizard\showme\sit
UsubDirs = SortedCollection(('\http\wbwizard\showme\sit\cars'
'cars') ('\http\wbwizard\showme\sit\pds' 'pds')
('\http\wbwizard\showme\sit\videos' 'videos') )
%allUserVarNamesHTML% e.g., (see below)
formats the names of all user variable dictionaries currently created for a nice printout on
the browser. Only the names of the dictionaries are presented here; the contents of all the
user variable dictionaries can be viewed using %allUserVariablesHTML% or
%userVariablesHTML% for the specific user variable dictionary defined in
%userName%. Details on user variables can be found in Chapter 10. The example below
shows the information generated by this dynamic variable as displayed on a browser.
Example 9.5
%allUserVarNamesHTML% display
Current User Variable Dictionaries (1)
•
UW14259281E161808318469B
•
%base% e.g. (http://127.0.0.1/)
returns the URL including the directory and subdirectories where the form requested by the
browser is located. The server address specified in the URL is that which was used in the
form request.
•
%browserAddress% e.g. (127.0.0.1)
the IP address of the browser issuing a query to the WebBase server.
•
%build% e.g. (56)
the build number of the WebBase server software.
•
%cmd% e.g. (an HttpGetN)
returns the instance of the internal ‘command’ object that is processing the current form.
See Chapter 11 for the details on how to send messages to this variable.
•
%command% e.g., (GET /getname.htf?name=Denny)
the command line that was sent in from the browser, including the type of request (e.g.,
GET, POST), the path to the file to be processed, and any command line arguments.
•
%commandCounter% e.g. (123)
the count of the number of queries processed by WebBase since it was last started.
•
%commandsHTML% e.g. (see below)
formats the names of all the build-in commands for a nice printout on the browser. Each
of the built-in commands in the display are set up as anchors, so that the corresponding
built-in command can be executed immediately. These commands are described in
Chapter 3.
WebBase User’s Guide
127
Chapter 9: Variables
Example 9.6
%commandsHTML% display
Internal Commands
•
•
•
•
•
•
•
•
•
128
build
buildString
dateTime
elapsedTime
gmt
milliseconds
seconds
title
titleString
•
%comment% e.g. ‘<!-- Processed by: WebBase 4.10 build 56 (TM) by
ExperTelligence, Inc. 04/17/97 21:55:31 -->‘
the header comment returned in the data back to the browser for any form which WebBase
processes. Files which are returned but not processed by WebBase (e.g., gif files) do not
include this header comment. This comment can be seen by doing a ‘View Source’ at the
client browser. The %skipHeaderComment% variable can be set to true, which will cause
this comment to not be included on any processed forms returned to the browser.
•
%concurrentUsers% e.g. (4)
returns the number of concurrent commands being serviced by WebBase.
•
%cookieDomain% e.g., ()
if this variable is set, it becomes part of the cookie that is sent to the browser. When one
does a {setCookie ...}, this variable along with %cookieExpires% and %cookiePath% are
appended to the value of the ‘cookie’. The default value of this variable is an empty string
so it is not included in any cookie sent to the browser. In this case, the domain address
used at the browser is the host name of the server that generated the cookie response. The
section on Cookie Local Variables earlier in this chapter provides additional details about
cookies and domains. It is important to note that the value of this variable is used at the
time the cookie is created by the setCookie macro; it is thus possible to change domains for
cookies created within a single form by changing the value of this variable.
•
%cookieExpires% e.g., ()
if this variable is set, it becomes part of the cookie that is sent to the browser. When one
does a {setCookie ...}, this variable along with %cookieDomain% and %cookiePath% are
appended to the value of the ‘cookie’. The expires attribute specifies a date string that
defines the valid lifetime of that cookie. Once the expiration date has been reached, the
cookie will no longer be stored or given out. The date string is formatted as Wdy, DDMon-YY HH:MM:SS GMT. If not specified, the cookie will expire when the user’s
browser session ends. The section on Cookie Local Variables earlier in this chapter
provides additional details about cookies and their expiration. It is important to note that
the value of this variable is used at the time the cookie is created by the setCookie macro;
it is thus possible to change the expiration for cookies created within a single form by
changing the value of this variable.
•
%cookieInVariables% e.g., (Dictionary(('CookieCounter' ==> '17') ('WebBaseID'
==> 'W14259214E161808318465B') ))
a dictionary of the cookie variables that were received in the header of the request from the
browser. The keys to the dictionary are the cookie variable names; the values are the
contents of the cookies. These incoming cookie local variables are automatically created
WebBase User’s Guide
when the header variables are created. They are not returned to the browser unless they
are modified via a setCookie macro. The dictionary returned by this variable is a copy;
thus modifying this dictionary will have no effect on the cookie variables active in
WebBase. This dictionary should be used for information only. See also
%cookieInVariablesHTML%, %cookieVariables% and %cookieVariablesHTML%.
•
%cookieInVariablesHTML% e.g., (see below)
formats the names of all the cookie local variables received in the header of the request
from the browser for a nice printout on the browser as shown below. See also
%cookieInVariables%, %cookieVariables% and %cookieVariablesHTML%.
Example 9.7
%cookieInVariablesHTML% display
Input Cookie Variables (2)
•
•
CookieCounter = 17
WebBaseID = W14259214E161808318465B
•
%cookieOutVariables% e.g., (Dictionary())
a dictionary of the cookie variables that have been created with the setCookie macro for
return to the browser at the completion of form processing. The keys to the dictionary are
the cookie variable names; the values are the contents of the cookies. These outgoing
cookie local variables will be returned as input cookies in the next request from the same
browser if the browser is cookie enabled. The dictionary returned by this variable is a
copy; thus modifying this dictionary will have no effect on the cookie variables active in
WebBase. This dictionary should be used for information only. See also
%cookieOutVariablesHTML%, %cookieVariables% and %cookieVariablesHTML%.
•
%cookieOutVariablesHTML% e.g., (see below)
formats the names of all the cookie local variables created with the setCookie macro for
return to the browser at the completion of form processing for a nice printout on the
browser as shown below. See also %cookieOutVariables%, %cookieVariables% and
%cookieVariablesHTML%.
Example 9.8
%cookieOutVariablesHTML% display
Output Cookie Variables (0)
NONE
•
%cookiePath% e.g., (/)
if this variable is set, it becomes part of the cookie that is sent to the browser. When one
does a {setCookie ...}, this variable along with %cookieDomain% and %cookieExpires%
are appended to the value of the ‘cookie’. The path attribute is used to specify the subset of
URLs in a domain for which the cookie is valid. The section on Cookie Local Variables
earlier in this chapter provides additional details about cookies, domains and path. It is
important to note that the value of this variable is used at the time the cookie is created by
the setCookie macro; it is thus possible to change paths for cookies created within a single
form by changing the value of this variable.
•
%cookies% e.g. (true)
a flag indicating whether the browser sent a cookie to the WebBase server. If true, this
indicates that the browser is cookie enabled and the server previously sent a cookie to this
WebBase User’s Guide
129
Chapter 9: Variables
browser. If false, this either indicates the browser is not cookie enabled or no cookies have
been sent to the browser from the server, and thus none have been returned. On the first
interaction with a browser, WebBase creates a cookie variable called WebBaseID that is
returned to the browser. If the browser is cookie enabled, all subsequent requests from this
browser will include this cookie. If the browser is not cookie enabled, the server will
receive no cookies.
•
%cookieVariables% e.g. (Dictionary(('CookieCounter' ==> '17') ('WebBaseID' ==>
'W14259214E161808318465B') ))
returns a dictionary of all the cookie variables, both incoming and outgoing. The keys to
the dictionary are the names of the variables; the values are the values of the cookie
variables. Note that there is no indication within the dictionary of which cookie variables
were received from the browser and which have been created via the setCookie macro for
return to the browser. Modifying this dictionary will have no effect on the cookie variables
active in WebBase. See also %cookieVariablesHTML%, %cookieInVariables%,
%cookieOutVariables%, %cookieInVariablesHTML% and
%cookieOutVariablesHTML%.
•
%cookieVariablesHTML% e.g., (see below)
formats all the incoming and outgoing cookie variables and their values for a nice printout
on the browser as shown in the example below. See also %cookieVariables%,
%cookieInVariables%, %cookieOutVariables%, %cookieInVariablesHTML% and
%cookieOutVariablesHTML%.
Example 9.9
%cookieVariablesHTML% display
Input Cookie Variables
•
•
CookieCounter = 17
WebBaseID = W14259214E161808318465B
Output Cookie Variables
NONE
130
•
%copyright% e.g. (‘Copyright - © 1995-7 ExperTelligence, Inc.’)
the system copyright string.
•
%date% e.g., (03/10/97)
the current date. It is accessed from the operating system and cached once per form the
first time it is referenced. Although most forms are processed very quickly, there are some
database queries that can take some time. This introduces the possibility that the form
could start processing on ‘today’, and complete ‘tomorrow’. If the processing of a form
will take some time and date information is critical, the forms designer should create a
local variable using an expression like {set curDate %Date% today} each time the date is
needed instead of using %date%. This will eliminate any problems with the caching of
%date% and ensure the proper date is used.
•
%dateTime% e.g., (03/10/97 06:01:54)
the date and time. It is accessed from the operating system and cached once per form the
first time it is referenced. The time is in the local time. Although most forms are processed
very quickly, there are some database queries that can take some time. If the processing of
a form will take some time and date/time information is critical, the forms designer should
WebBase User’s Guide
create a local variable using an expression like {set curDate %UniversalTime% now} each
time the date and time are needed instead of using %dateTime%. This will eliminate any
problems with the caching of %dateTime% and ensure the proper date and time are used.
•
%defaultExtensionsHTML% e.g., (see below)
formats all the extensions specified for the WebBase server for a nice printout on the
browser as shown below. Chapter 4 includes information on the system-supplied
extensions, as well as how to override or set up additional extensions. Both systemsupplied and user-defined extensions are included in this display.
Example 9.10
%defaultExtensionsHTML% display
Default Extensions (82)
•
•
•
•
…
•
•
•
= a MimeUnknown ( 'text/html' true)
* = a MimeError (* 404 true)
abs = a MimeReturn (abs 'audio/x-mpeg' true)
ai = a MimeReturn (ai 'application/postscript' true)
xwd = a MimeReturn (xwd 'image/x-xwindowdump' true)
z = a MimeReturn (z 'application/x-compress' true)
zip = a MimeReturn (zip 'application/x-zip-compressed' true)
•
%domainDirectory% e.g., (c:\http)
identifies the root directory for the IP address specified in the command. If multiple
domains are in effect, each different domain can have a different root directory where files
are located. It is not required that each domain has a different root directory. If the
particular IP address maps to a domain but there is no root directory specified for the
domain, then the default root domain is used. If multiple domains are not being used, this
is the root directory as specified in the System Registry under Parameters. Chapter 4
includes information on multiple domains.
•
%domainExtensionsHTML% e.g., (see below)
formats all the extensions for the IP address specified in the command for a nice printout
on the browser as shown below. If multiple domains are in effect, each different domain
can have a different set of extensions it supports. It is not required that each domain have a
set of extensions specified. If the particular IP address maps to a domain but there are no
extensions specified for the domain, then the default set of extensions is used. If multiple
domains are not being used, this is the set of extensions as specified in the System Registry
under Extensions. Chapter 4 includes information on multiple domains and extensions.
Example 9.11
%domainExtensionsHTML% display
Extensions (0)
None
•
%domains% e.g., (Domain for: 1.2.3.4 Default = default.htf Directory = c:\http\et
Error401 = error401.htf Error403 = error403.htf Error404 = error404.htf
LogDirectory = c:\http\log1 Domain for: 1.2.3.5 Directory = c:\http\p Error403 =
error403.htf Extensions = Dictionary(('xpm' ==> a MimeReturn (xpm 'image/x-xpixmap'
true) )...etc...))
returns a dictionary of all the domains that the user has defined. The key is the domain
address, the values are a collection of the key/value pairs specified for this domain (e.g.,
WebBase User’s Guide
131
Chapter 9: Variables
extensions). Chapter 4 includes information on multiple domains. See also
%domainsHTML%.
•
%domainsHTML% e.g. (see below)
returns the multiple domain information formatted for a nice printout on the browser as
shown below. See also %domains%.
Example 9.12
%domainsHTML% display
Domains (2)
1.2.3.4 (6)
•
•
•
•
•
•
Default = default.htf
Directory = c:\http\et
Error401 = error401.htf
Error403 = error403.htf
Error404 = error404.htf
LogDirectory = c:\http\log1
1.2.3.5 (4)
•
•
•
•
•
Directory = c:\http\p
Error403 = error403.htf
Extensions = Dictionary(('xpm' ==&;gt; a MimeReturn (xpm
'image/x-xpixmap' true)) ('html' ==&;gt; a MimeProcess (html
'text/html' true)) … )
%dynamicVariableNamesHTML% e.g. (see below )
returns the names of all the dynamic variables formatted for a nice printout on the browser
as shown below. Note that some of the dynamic variables are for use by add-on products
to WebBase, such as E-Merge.
Example 9.13
%dynamicVariableNamesHTML% display
Dynamic Variables - (138)
•
•
•
•
•
…
•
•
•
•
•
132
%adminTime%
%allUserVariables%
%allUserVariablesHTML%
%allUserVarNamesHTML%
%AOL%
%WHERE%
%whereAndOr%
%whereMultiAndOr%
%x%
%y%
•
%elapsed% e.g., (12080)
the elapsed time in milliseconds from the start of processing for this particular form. The
value of the variable will continually change each time it is accessed as it makes an
operating system call each time it is referenced for the current clock time.
•
%EQ% e.g. (=)
returns an equal sign (=) character.
WebBase User’s Guide
•
%error%
used by the errorProtect macro, it is only set if an error condition occurs. If so, it contains
the exception that caused the error. The particular error message can be displayed by
sending the operation ‘messageText’ to the exception, as shown in the example below:
{errorProtect}
... some WebBase scripting ...
{onError}
<H2>Sorry but we could not satisfy your request</H2>
{if %local% =}
{! browser is on the host, display the error that
occurred !}
{f= %error% messageText}
{/if}
{/errorProtect}
•
%err401% e.g. (see below)
generates the 401 Unauthorized error message text. This is displayed if Basic
Authentication is being used and the user does not properly enter a username and
password, or the user’s browser does not support Basic Authentication.
Example 9.14
%err401% display
401 Unauthorized
Proper authorization is required for this area. Either your
browser does not perform authorization, or your authorization has
failed.
•
%err403% e.g. (see below)
generates the 403 Browsing not permitted error message text. This is displayed if
directory browsing is enabled but the directory or filename entered by the user is in a
directory that has been marked for no browsing by inclusion of a file named
‘NOBROWSE’.
Example 9.15
%err403% display
403 Access to the requested file or directory is not permitted
Access to the requested file or directory is not permitted
•
%err404% e.g. (see below)
generates the 404 requested URL not found error message text. This is displayed if the
user enters a filename that is not found. This is also displayed if a directory included in
the URL does not exist.
Example 9.16
%err404% display
404 The requested URL was not found
The requested URL was not found
•
%err500% e.g. (see below)
generates the 500 internal server error message text. This is not used by WebBase but can
be used by a forms developer to indicate that some type of error has occurred.
WebBase User’s Guide
133
Chapter 9: Variables
Example 9.17
%err500% display
500 Internal server error
Internal server error
•
%err501% e.g. (see below)
generates the 501 not implemented error message text. This is not used by WebBase but
can be used by a forms developer to indicate that an option is not currently implemented.
Example 9.18
%err501% display
501 Not implemented
Not implemented
•
%err503% e.g. (see below)
generates the 503 server too busy error message text. This is displayed if a request is
received from a browser but the server has currently been paused using the Pause Server
option on the WebBase server window.
Example 9.19
%err503% display
503 The server is too busy
The server is too busy
134
•
%expire% e.g. (0)
the value of %expire% in seconds is added to the current time in GMT and returned to the
browser in the header as the Expires parameter, e.g., Expires: Fri, 12 Jan 1996 05:39:40
GMT This is the time at which the form is to be considered expired so that the browser
will no longer display the results from its own cache but reissue the query to the WebBase
server for updating. This value defaults to 0 and should be overridden by the user with
either a global variable of the same name or a local variable for the specific form. If the
value is set to -1, the Expires parameter will not be set. If the value is set to -2, the
Expires parameter is set to 12:00:01 on January 1, 1900. The time used to set the
Expiration is that of the server system. The browser’s clock may differ, slightly or
substantially, from that of the server. In order to ensure that a form is expired, setting
%expire% to a value of -2 is recommended. Experience with most current browsers shows
this expiration is honored for pages that were accessed via POST requests and not those
acquired via GET requests. See Chapter 12 for tips on how to handle browser-side caching
of forms.
•
%filler% e.g. ( )
returns the space ( ) character and is used as the default pad character when specifying a
size=<nn> parameter tag within a variable display - e.g. {varname size=7}.
•
%form% e.g. (test.htf)
returns the current form name. This is equivalent to {f= %cmd% path}.
•
%formDirectory% e.g., (/wbwizard/)
returns the name of the directory in which the form specified in the URL is located.
Within this form, additional files may be inserted using the insert macro. These insert files
WebBase User’s Guide
may be in other directories. The %formDirectory% is the directory of the main form, not
the inserted form. A backslash character is always included at the end of the value.
•
%FORMScache% e.g., (Dictionary(('c:\http\ test.htf' ==> an OutputForm
'c:\http\test.htf') ))
a dictionary containing all the forms which are currently cached. If %cacheEnabled% is
disabled, this dictionary will be empty. See %cacheEnabled% for details on why caching
should be used. See also %FORMScacheHTML%.
•
%FORMScacheHTML% e.g., (see below)
returns the list of forms which are currently cached. If %cacheEnabled% is disabled, there
will be no forms in the cache. See %cacheEnabled% for details on why caching should be
used. For each form in the cache, there are 5 items displayed: the full file specification, the
date and local time it was cached by WebBase, the date and time it was last modified on
disk, and the time in milliseconds for when the file was cached. See also
%FORMScache%.
Example 9.20
%FORMScacheHTML% display
Forms cache
''form'' (size cached_date/time file_system_date/time <ms-clock>)
1)
•
"c:\http\test.htf" ( 472 bytes at: 03/10/97 10:04:46 AM
03/10/97 05:39:24 <36286250> )
•
%fullHostAddress% e.g., (1.2.3.4:80)
the IP address and port number that the request from the browser was received on. If the
address entered by the user was alphabetic (e.g., www.expertelligence.com), this will
reflect the numeric IP address.
•
%fullHostName% e.g., (www.mydomain.com:80)
the HostName parameter if specified. One can provide a HostName parameter and that
will be returned by this variable along with the port number. If HostName is not specified
as a parameter, the IP address will be returned.
•
%GE% e.g. (>=)
returns the greater than or equal to (>=) sequence of characters.
•
%gfmt% e.g. (JPG)
a variable that returns the string JPG if the browser reports that it supports the Jpeg image
display or GIF if it does not so indicate.
•
%globalVariables% e.g. (Dictionary(('%SortedList%' ==> SortedList)
('%OrderedCollection%' ==>OrderedCollection) ('%ReadStream%' ==> ReadStream)
. . . ('%String%' ==> String) ) )
a dictionary of all the global variables. The keys to the dictionary are the names of the
variables; the values are the values of the global variables. This is useful to determine if a
particular global variable has been defined. The dictionary returned by this variable is a
copy of the dictionary containing all the global variables. Thus, modifying this dictionary
will have no effect on the global variables active in WebBase. This dictionary should be
used for information only. See also %globalVariablesHTML%.
WebBase User’s Guide
135
Chapter 9: Variables
•
%globalVariablesHTML% e.g. (see below)
formats the global variables and their values for a nice printout on the browser. See also
%globalVariables%.
Example 9.21
%globalVariablesHTML% display
Global Variables (23)
•
•
•
•
•
•
•
•
•
•
•
•
•
•
•
•
•
•
•
•
•
•
•
136
%Array% = Array
%Association% = Association
%DatabaseInfo% = DatabaseInfo
%Date% = Date
%Dictionary% = Dictionary
%Directory% = Directory
%File% = File
%Float% = Float
%Fraction% = Fraction
%Integer% = Integer
%Number% = Number
%OrderedCollection% = OrderedCollection
%OrderedList% = OrderedList
%Point% = Point
%ReadStream% = ReadStream
%ReadWriteStream% = ReadWriteStream
%RegistrationDatabase% = RegistrationDatabase
%SortedCollection% = SortedCollection
%SortedList% = SortedList
%String% = String
%Time% = Time
%UniversalTime% = UniversalTime
%WriteStream% = WriteStream
•
%gmt% e.g. (03/10/97 18:35:12)
the current time. It is accessed from the operating system once per form the first time it is
referenced, and displayed in GMT format.
•
%GT% e.g. (>)
returns the greater than (>) character.
•
%headerVariables% e.g. (Dictionary(('User-Agent' ==> 'Mozilla/3.0 (Win95; I)')
('Connection' ==> 'Keep-Alive') ('Host' ==> ‘127.0.0.1’) ('Accept' ==> 'image/gif,
image/x-xbitmap, image/jpeg, image/pjpeg, */*') ) )
a dictionary of all the header variables. The keys to the dictionary are the names of the
variables; the values are the values of the header variables. This is useful to determine if a
particular header variable has been defined. Header variables are also considered local
variables. This variable allows the user to see specifically which local variables came
from header information. The dictionary returned by this variable is a copy of the
dictionary containing all the header variables. Thus, modifying this dictionary will have no
effect on the header variables active in WebBase. This dictionary should be used for
information only. See also %headerVariablesHTML%.
•
%headerVariablesHTML% e.g. (see below)
formats the header variables and their values for a nice printout on the browser, as shown
below. Header variables are also considered local variables. This display allows the user
WebBase User’s Guide
to see specifically which local variables came from header information. See also
%headerVariables%.
Example 9.22
%headerVariablesHTML% display
Header Variables (4)
•
•
•
•
Accept = image/gif, image/x-xbitmap, image/jpeg, image/pjpeg,
*/*
Connection = Keep-Alive
Host = 127.0.0.1
User-Agent = Mozilla/3.0 (Win95; I)
•
%host% e.g. (myComputer.myCompany.com)
returns the host name of the server as set up in the TCP/IP network configuration.
•
%inputVariables% e.g., (Dictionary(('arg2' ==> 'abc') ('now' ==> '32254') ))
a dictionary containing any arguments which were passed into the form on the command
line. Command line arguments are another way to create local variables, as described at
the start of this chapter. This display allows the user to see specifically which local
variables came from command line arguments. See also %inputVariablesHTML%.
•
%inputVariablesHTML% e.g. (see below)
formats the command line arguments and their values for a nice printout on the browser, as
shown below. Command line arguments are another way to create local variables, as
described at the start of this chapter. This display allows the user to see specifically which
local variables came from command line arguments. See also %inputVariables%.
Example 9.23
%inputVariablesHTML% display
Input Variables (2)
•
•
arg2 = abc
now = 32254
•
%LE% e.g. (<=)
returns the less than or equal to (<=) sequence of characters.
•
%leftBrace% e.g. ({)
returns the left brace ({) character. This is provided should you wish to display a {
character in your .htf form and not have WebBase interpret it as the opening character of
a macro or variable construct. It is similar to the HTML < sequence. Setting this name
with the set macro will change what is returned for the duration of the containing .htf form
but will have no effect on the fact that WebBase will still interpret the { character as a
special character used to start macro and variable fields within an .htf form. The brace
macro can also be used to add braces around strings.
•
%local% e.g. (true)
a Boolean value identifying whether the browser that generated the request is on the same
system as the WebBase server. This is equivalent to comparing %serverAddress% with
%browserAddress%.
•
%localVariables% e.g. (Dictionary(('CookieCounter' ==> '2') ('%accepts%' ==>
OrderedCollection('image/gif, image/x-xbitmap, image/jpeg, image/pjpeg, */*' )) …))
a dictionary of all the local variables. The keys to the dictionary are the names of the
WebBase User’s Guide
137
Chapter 9: Variables
variables; the values are the values of the local variables. This is useful to determine if a
particular local variable has been defined. Local variables include input variables
(command line arguments), cookie variables, header variables, and variables set using the
set or setLocal macros. Modifying this dictionary will have no effect on the local
variables active in WebBase. See also %localVariablesHTML%.
•
%localVariablesHTML% e.g. (see below)
formats the local variables and their values for a nice printout on the browser. This
information is appended to most error messages returned by WebBase to aid in debugging
the form being developed. See also %localVariables%.
Example 9.24
%localVariablesHTML% display
Local Variables (15)
•
•
•
•
•
•
•
•
•
•
138
%accepts% = OrderedCollection('image/gif, image/x-xbitmap,
image/jpeg, image/pjpeg, */*' )
%search% = now=32254 AND arg2=abc
%theArgs% = OrderedList('arg2' 'now' )
Accept = image/gif, image/x-xbitmap, image/jpeg, image/pjpeg,
*/*
Connection = Keep-Alive
Cookie = WebBaseID=W14263151E161808318465B; CookieCounter=2
CookieCounter = 2
Host = 127.0.0.1
User-Agent = Mozilla/3.0 (Win95; I)
WebBaseID = W14263151E161808318465B
•
%logRecord% e.g. (127.0.0.1 - - [10/Mar/1997:11:19:55 -0800] "GET /test
HTTP/1.0" 200 0 "" "Mozilla/3.0 (Win95; I)")
a copy of the log record generated for the request that referenced this form. If logging is
enabled, an identical record will be written to the log file. The actual format of the
%logRecord% and the data written into the log file is determined by the LogFormat
parameter.
•
%LT% e.g. (<)
returns the less than (<) character.
•
%milliseconds% e.g. (61480122)
the time in milliseconds from the previous midnight as returned by the operating system.
This value is accessed from the operating system each time the variable is referenced and
will therefore change during the processing of the form.
•
%name% e.g. (WebBase)
returns the product name string.
•
%NEQ% e.g. (!=)
returns the not equal to (!=) sequence of characters.
•
%newAscendingList% e.g. (SortedList())
returns a new sorted list object into which added elements will be sorted into ascending
order.
WebBase User’s Guide
•
%newDescendingList% e.g. (SortedList())
returns a new sorted list object into which added elements will be sorted into descending
order.
•
%newList% e.g. (OrderedList())
returns a new list object into which added elements will be maintained in the sequence in
which they are added to the list.
•
%nextCookieId% e.g., (W14264278E161808318467B)
returns a string similar to the WebBaseID that is used for initial interactions with the client
browser. This variable is useful when the form developer wants a unique string that can
be used as the name of the user variable dictionary. See Chapter 10 for more information
on user variables.
•
%NGT% e.g. (!>)
returns the not greater than (!>) sequence of characters.
•
%NLT% e.g. ( !<)
returns the not less than (!<) sequence of characters.
•
%ODBCcache% e.g., (OrderedCollection(an OdbcConnectionCache
('myAccess'/'fred'/' ' ('Microsoft Access Driver (*.mdb)' 1 03/10/97 12:22:58 PST
03/10/97 12:22:58 PST 0 +0:0:13)) ))
the collection of connection handles that are currently cached. See Chapter 12 for
information on caching and ODBC connections. See also %ODBCcacheHTML%.
•
%ODBCcacheHTML% e.g., (see below)
formats the information on the connections stored in the ODBC cache for a nice printout
on the browser. For each connection, the source, username and password are initially
specified. The type of ODBC driver is then indicated, as well as how many times the
handle has been used, when it was created, when it was last used, when it was cached, and
how long it has been since it was used. See also %ODBCcache%.
Example 9.25
%ODBCcacheHTML% display
ODBC Cache
'source'/'user'/'password' ('driver' 'count' created lastused
time_cached time_idle)
(1)
•
•
'myAccess'/'fred'/' ' ('Microsoft Access Driver (*.mdb)' 1
03/10/97 12:22:58 PST 03/10/97 12:22:58 PST 0 +0:0:13)
%ODBCdrivers% e.g. (SortedCollection('Microsoft Access Driver (*.mdb)' ==>
('UsageCount=6809923' 'APILevel=1' 'ConnectFunctions=YYN'
'DriverODBCVer=02.50' 'FileUsage=2' 'FileExtns=*.mdb' 'SQLLevel=0'
'ConectFunctions=YYN') … etc …))
a collection of available ODBC drivers. The entries in the collection are each an
association. The key to each association is the ODBC driver, the value is a string of
interest attributes of the driver. See also %ODBCdriversHTML%.
WebBase User’s Guide
139
Chapter 9: Variables
•
%ODBCdriversHTML% e.g. (see below)
formats the information about the available ODBC drivers for a nice printout on the
browser as shown below. The ODBC drivers in this list are those provided in the ODBC
driver pack available from the WebBase web page or from Microsoft. See also
%ODBCdrivers%
Example 9.26
%ODBCdriversHTML% display
ODBC Drivers (9)
•
•
•
•
•
•
•
•
•
•
140
Microsoft Access Driver (*.mdb) = ('UsageCount=6809923'
'APILevel=1' 'ConnectFunctions=YYN' 'DriverODBCVer=02.50'
'FileUsage=2' 'FileExtns=*.mdb' 'SQLLevel=0'
'ConectFunctions=YYN')
Microsoft dBase Driver (*.dbf) = ('UsageCount=6809923'
'APILevel=1' 'ConnectFunctions=YYN' 'DriverODBCVer=02.50'
'FileUsage=1' 'FileExtns=*.dbf,*.ndx,*.mdx' 'SQLLevel=0'
'ConectFunctions=YYN')
Microsoft Excel Driver (*.xls) = ('UsageCount=6809923'
'APILevel=1' 'ConnectFunctions=YYN' 'DriverODBCVer=02.50'
'FileUsage=1' 'FileExtns=*.xls' 'SQLLevel=0'
'ConectFunctions=YYN')
Microsoft FoxPro Driver (*.dbf) = ('UsageCount=6809923'
'APILevel=1' 'ConnectFunctions=YYN' 'DriverODBCVer=02.50'
'FileUsage=1' 'FileExtns=*.dbf,*.cdx,*.idx,*.ftp' 'SQLLevel=0'
'ConectFunctions=YYN')
Microsoft Paradox Driver (*.db ) = ('UsageCount=6809923'
'APILevel=1' 'ConnectFunctions=YYN' 'DriverODBCVer=02.50'
'FileUsage=1' 'FileExtns=*.db' 'SQLLevel=0'
'ConectFunctions=YYN')
Microsoft Text Driver (*.txt, *.csv) = ('SQLLevel=0'
'FileExtns=*.asc,*.csv,*.tab,*.txt' 'FileUsage=1'
'DriverODBCVer=02.50' 'ConectFunctions=YYN' 'APILevel=1')
Microsoft Text Driver (*.txt; *.csv) = ('UsageCount=6809923'
'APILevel=1' 'ConnectFunctions=YYN' 'DriverODBCVer=02.50'
'FileUsage=1' 'FileExtns=*.,*.asc,*.csv,*.tab,*.txt,*.csv'
'SQLLevel=0')
SQL Server = ('UsageCount=6809923' 'SQLLevel=1' 'FileUsage=0'
'DriverODBCVer=02.50' 'ConnectFunctions=YYY' 'APILevel=2')
Visigenic 32-bit Oracle Driver = ('UsageCount=6809923'
'SQLLevel=1' 'FileUsage=0' 'DriverODBCVer=02.50'
'ConnectFunctions=YYY' 'APILevel=1')
%ODBCsources% e.g. (SortedCollection('dBASE Files' ==> 'Microsoft dBase Driver
(*.dbf)' 'excel1' ==> 'Microsoft Excel Driver (*.xls)' 'FoxPro Files' ==> 'Microsoft
FoxPro Driver (*.dbf)' 'myAccess' ==> 'Microsoft Access Driver (*.mdb)' 'Paradox
Files' ==> 'Microsoft Paradox Driver (*.db )' 'Text Files' ==> 'Microsoft Text Driver
(*.txt; *.csv)')
a collection of the ODBC sources which have been defined. Each entry in the collection is
an association. The key to each association is the source name and the value is the driver
used (e.g., MS Access, SQL Server). Note that some sources have database files
associated with them (e.g., ‘myAccess’), while other sources are generic and do not have
database files associated with them. See also %ODBCsourcesHTML%.
WebBase User’s Guide
•
%ODBCsourcesHTML% e.g. (see below)
formats the information about the available ODBC sources for a nice printout on the
browser as shown below. See also %ODBCsources%.
Example 9.27
%ODBCsourcesHTML% display
ODBC Sources (6)
•
•
•
•
•
•
dBASE Files = Microsoft dBase Driver (*.dbf)
excel1 = Microsoft Excel Driver (*.xls)
FoxPro Files = Microsoft FoxPro Driver (*.dbf)
myAccess = Microsoft Access Driver (*.mdb)
Paradox Files = Microsoft Paradox Driver (*.db )
Text Files = Microsoft Text Driver (*.txt; *.csv)
•
%os% e.g. (Windows 4.0)
returns the operating system name and version as a string.
•
%output% e.g., (true)
a Boolean value that specifies whether output being generated by forms is added to the
stream that is being constructed to go back to the browser. The default is true. Setting
%output% to false stops all forms from outputting to the stream being constructed. The
variable is changed using {set %output% <true-or-false>}. The <true-or-false> argument
can be a constant, variable, or any expression that evaluates to true or false. If the
expression does NOT evaluate to a true or false, the value of true is used without
generating an error. This variable should be used to limit the whitespace (carriage returns,
line feeds) returned to the browser. Each carriage return encountered within a form is
added to the output stream, even if it is just at the end of a WebBase statement. If the
expression {set %output% false} is placed around WebBase processing that does not
generate anything to be displayed at the browser, less information will be returned to the
browser.
•
%priority% e.g. (3)
a number (4=high 3=medium 2=low 0=yield) that is the priority of the current command.
The statement {set %priority% 4} does not actually set the variable but changes the
priority of the command. 0 does not change the priority number but forces the command to
yield the CPU to give another process access to it.
•
%random% e.g. (a Random)
an instance of a random number generator object. Random numbers are in the range
between 0.0 and 1.0. There are only two operations that can be used with %random%:
‘next’ and ‘integerBelow:’. The operation ‘next’ returns the next random number, as
shown in the following example:
Example 9.28
%random% next usage
{! Generate a random number and save it in the variable ‘rand’ !}
{set rand %random% next}
If you want to choose among a set number of items randomly, you can use the
integerBelow: operation. As shown in the example below, the returned value will be in the
range 0 to the integer below the give argument inclusively.
WebBase User’s Guide
141
Chapter 9: Variables
Example 9.29
%random% integerBelow: usage
{! Pick a random entry from a list of returned answers !}
{set limit answers size}
{! Add 1 since indexing is 1 based but integerBelow: returns
values from 0 through the limit - 1 !}
{set rand 1 limit %random% integerBelow: +}
{! Make random selection !}
{set selection rand answers at:}
•
%reservedWords% e.g., SortedList('!' 'ascending' 'call' 'case' 'changed' 'class'
'comment' 'commit' 'concat' 'copy' 'debug' 'dependents' 'descending' 'dll' 'edit' 'else'
'encode' 'ensure' 'errorprotect' 'escape' 'evaluate' 'exit' 'f=' 'f==' 'false' 'forindex' 'fork'
'forrow' 'free' 'get' 'grow' 'halt' 'hash' 'htf' 'if' 'include' 'insert' 'inspect' 'invoke' 'mail'
'match' 'match' 'munge' 'nil' 'no' 'onerror' 'onexit' 'otherwise' 'output' 'parallel' 'parse'
'patternmatch' 'post' 'print' 'quote' 'redirect' 'redirect2' 'release' 'remove' 'removeall'
'removecookie' 'removeglobal' 'removelocal' 'removeuser' 'repeat' 'return' 'rollback'
'scope' 'sender' 'set' 'setcookie' 'setglobal' 'setlocal' 'setstring' 'setuser' 'shoppingitem'
'signalerror' 'size' 'species' 'sql' 'timer' 'transact' 'true' 'value' 'verity' 'while' 'with'
'writefile' 'yes' 'yourself'))
the reserved words within WebBase that should not be used for variable names as errors
will result. The reserved words include all WebBase macro names, as well as several
operation names that can be applied to any WebBase data type. If the user attempts to
create a local variable using any of the set* macros, an error will be displayed. However,
it is also possible to create variables using command line arguments or field names.
Database fields with the same name as a reserved work can be used by enclosing the field
name in double quotes. A general rule-of-thumb is to take great care in selecting any
variable name. See also %reservedWordsHTML%.
•
%reservedWordsHTML% e.g., (see below)
formats the list of WebBase reserved words for a nice printout on the browser as shown
below. See also %reservedWords%.
Example 9.30
%reservedWordsHTML% display
Reserved Words (89)
• !
• ascending
• call
• case
. . .
• with
• writefile
• yes
• yourself
142
•
%results% e.g. ()
a default variable into which the sql macro places its results if a to keyword/value pair is
not included.
•
%returns% e.g., (OrderedCollection())
the values returned by the last return macro. This is equivalent to {f= %cmd% returns}.
WebBase User’s Guide
•
%rightBrace% e.g. (})
returns the right brace (}) character. This is provided should you wish to display a }
character in your .htf form and not have WebBase interpret it as the closing character of a
macro or variable construct. It is similar to the HTML > sequence. Setting this name
with the set macro will change what is returned for the duration of the containing .htf form
but will have no effect on the fact that WebBase will still interpret the } character as a
special character used to close macro and variable fields within an .htf form. The brace
macro can also be used to add braces around strings.
•
%root% e.g., (c:\http)
the root directory for the particular domain specified in the IP address. If multiple
domains are in use, each domain can have a different root directory. If multiple domains
are not in use, this will be the same as %rootDirectory%.
•
%rootDirectory% e.g., (c:\http)
the root directory for WebBase. If multiple domains are in use, each domain can have a
different root directory. If no root directory is specified for a domain, it will default to the
root directory for WebBase.
•
%rowCount% e.g. (10)
contains the value of the ODBC statement's ‘row count’ field following the execution of
the sql statement. The value returned for this variable is ODBC driver dependent and is
typically NOT provided as a result of a SELECT statement. In general it does indicate the
number of rows affected by NON-SELECT sql statements (INSERT, UPDATE, ...).
Again, it is important to note that this field is very DRIVER DEPENDENT and users need
to experiment with their particular ODBC driver to determine under what conditions this
value is meaningful.
•
%rowCounter% e.g., (1)
used by the forRow macro. The forRow macro provides for a ‘counter’ keyword argument
by which the user may specify a variable to keep a count of the iterations through the loop.
If the user does not specify any counter variable, the default %rowCounter% variable will
be created and used to keep track of the row element currently being processed on each
iteration through the loop.
•
%rowHeader% e.g. (an OdbcRowHeader)
the OdbcRowHeader object for the most recent sql macro issued or nil if no sql has been
used. See Chapter 11 for the messages which can be sent to this object.
•
%search% e.g., ('first=George AND Last=Jones')
this variable is the precursor to %WHERE%. It provides a very simplified form of the
WHERE clause in which all testing is strictly by equality, and all argument/value pairs are
put together with AND operators.
•
%seconds% e.g. (61480)
the time in seconds from the previous midnight as returned by the operating system. This
value is accessed from the operating system each time the variable is referenced and will
therefore change during the processing of the form.
•
%self% e.g. (c:\http\testfile.htf)
the full pathname of the file currently being processed. If %self% is used in an inserted
file, it will contain the path of the file contained in the URL and not the path of the inserted
file. This is equivalent to %root% and %form% concatenated together.
WebBase User’s Guide
143
Chapter 9: Variables
•
%selfDirectory% e.g. (c:\http\)
the full path to the directory containing the file currently being processed. If
%selfDirectory% is used in an inserted file, it will contain the directory of the file
contained in the URL and not the path of the inserted file. This is equivalent to %root%
and %formDirectory% concatenated together.
•
%serverAddress% e.g. (127.0.0.1)
the IP address of the WebBase server in dotted 000.000.000.000 format. When one has
multiple IP addresses assigned to the WebBase port, this allows one to detect which
address was referenced by the incoming query and take a possibly different path based on
IP address. See Chapter 4 for more information on multiple domain support.
•
%serverAverage% e.g., (7.07680945)
the average number of seconds that each command has taken to be processed by the
WebBase server. This is simply the amount of time WebBase has been running since last
launched divided by the number of commands it has processed. It does not take into
account any idle time and therefore is not a measure of the performance of the server. See
also %serverAverageHTML%.
•
%serverAverageHTML% e.g., (7.07680945 seconds per command)
formats the current statistic on the average number of seconds that each command has
taken to be processed by the WebBase server for a nice printout on the browser as shown
below. This is simply the amount of time WebBase has been running since last launched
divided by the number of commands it has processed. It does not take into account any
idle time and therefore is not a measure of the performance of the server. See also
%serverAverage%.
Example 9.31
%serverAverageHTML% display
7.07680945 seconds per command.
144
•
%serverElapsedTime% e.g., (a TimeDifference ( -1:19:51 ))
the amount of time that the server has been active. This value is used in the computation
of %serverAverage% and %serverThroughput%.
•
%serverHostName% e.g., (http://www.expertelligence.com)
the name of the server system. If the local header variable Host is defined, the value is
used. If not, the domain HostName parameter is used. If this parameter is not defined,
then the server IP address is used. Any of these values are concatenated with ‘http://’ to
generate the full server host name.
•
%serverStartTime% e.g., (Monday, 10-Mar-1997 14:12:40 GMT)
the date and time when the WebBase server was started.
•
%serverThroughput% e.g., (8.47839699)
the average number of commands that are being processed by the WebBase server. This is
simply the number of commands WebBase has processed divided by the amount of time
WebBase has been running since last launched. It does not take into account any idle time
and therefore is not a measure of the performance of the server. See also
%serverThroughputHTML%.
•
%serverThroughputHTML% e.g., (see below)
formats the current statistic on the average number of commands processed by the
WebBase server for a nice printout on the browser as shown below. This is simply the
WebBase User’s Guide
number of commands WebBase has processed divided by the amount of time WebBase
has been running since last launched. It does not take into account any idle time and
therefore is not a measure of the performance of the server. See also
%serverThroughput%.
Example 9.32
%serverThroughputHTML% display
8.47839699 commands per minute
•
%statistics% e.g., (4/1)
the current contents of the small statistics pane just under the menu bar in the WebBase
Server window. It typically contains a string with the total command count / concurrent
commands in process :: the most recent command string or a date/time - Idle message.
•
%time% e.g., (12:23:14 PM)
the current local time. It is accessed from the operating system and cached once per form
the first time it is referenced. Although most forms are processed very quickly, there are
some database queries that can take some time. If the processing of a form will take some
time and time information is critical, the forms designer should create a local variable
using an expression like {set curTime %Time% now} each time the time is needed instead
of using %time%. This will eliminate any problems with the caching of %time% and
ensure the proper time is used.
•
%timeStamp% e.g., (Mon 10 Mar 1997 12:23:10)
a string containing the current date and time. It is accessed from the operating system and
cached once per form the first time it is referenced.
•
%title% e.g. (‘WebBase 4.10 build 56’)
returns the product’s title string consisting of its name, version number, and build number.
•
%userExpires% e.g., (60)
default expiration time in minutes for User variables. This can be overridden by a global
variable, or it can be set for each individual user variable dictionary. See Chapter 10 for
information on user variables.
•
%userLimit% e.g., (0)
the maximum number of User variable dictionaries allowed. See Chapter 10 for
information on User Variables and User Variable Dictionaries. This variable returns 0
(zero) -- which indicates that there is NO limit to the number of user dictionaries.
•
%userName% e.g., (W14263151E161808318465B)
the name of the current user variable dictionary. If not explicitly specified, it defaults to
WebBaseID. It is possible to have multiple user variable dictionaries in use within one or
more forms. See Chapter 10 for information on user variable dictionaries.
•
%userVariables% e.g. (Dictionary(('%%altered%%' ==> true) ('%%expires%%'
==> 60) ('%%created%%' ==> (03/10/97 04:42:25 PM)) ('%%accessed%%' ==>
(03/10/97 04:42:26 PM)) ('UserToken' ==> 'UW14269116E161808318480B')))
a dictionary of all the user variables. The keys to the dictionary are the names of the
variables; the values are the values of the user variables. If no user variables have been
defined for the user dictionary specified by %userName%, returns an empty dictionary.
This is useful to determine if a particular user variable has been defined. One can also set
%userName% to point to a specific dictionary and then use %userVariables% to dump the
WebBase User’s Guide
145
Chapter 9: Variables
contents. The dictionary returned by this variable is a copy of the dictionary containing all
the user variables. Thus, modifying this dictionary will have no effect on the user
variables active in WebBase. This dictionary should be used for information only. See
also %userVariablesHTML%, %allUserVariables%, %allUserVariablesHTML% and
%allUserVarNamesHTML%.
•
%userVariablesHTML% e.g. (see below)
formats the user variables and their values for a nice printout on the browser. See also
%userVariables%, %allUserVariables%, %allUserVariablesHTML% and
%allUserVarNamesHTML%.
Example 9.33
%userVariablesHTML% display
User Variables - W14263151E161808318465B (5)
•
•
•
•
•
%%accessed%% = (03/10/97 04:42:26 PM)
%%altered%% = true
%%created%% = (03/10/97 04:42:25 PM)
%%expires%% = 60
UserToken = UW14269116E161808318480B
•
%version% e.g., (4.10)
the program’s version number as reported in the WebBase Server window title bar.
•
%WHERE%
a string of the form
WHERE xxx = yyy AND ...
The %WHERE% variable can be used in an SQL statement to identify a particular record
or set of records based on command line arguments. For each command line
argument/value pair, the ‘xxx’ specifies the name of the command line variable and the
‘yyy’ specifies the value of the variable. The advantage of the %WHERE% clause is that
it is not generated until actually used within the sql statement. It is thus possible to modify
the variables and values to be used in the %WHERE% variable before it is generated. For
example, users may want to ensure that a given value is numeric and not a string of
numbers, or that the string value of a variable is all in uppercase alpha characters. This
can be done using statements like:
{set xxx xxx asNumber}
{set xxx xxx asUppercase}
The %WHERE% variable generates and returns a string each time it is called. This means
that if one were to use the %WHERE% variable more than once in the same form, one
could change the contents of a variable used within the %WHERE% after one access and
receive a different string with the subsequent access. If you want to use the same
%WHERE% string more than once in a single form, store the variable in a local variable
with a statement like this:
{set where %WHERE%}
This not only ensures that the value does not change, but also reduces the overhead in not
having to reconstruct the same %WHERE% string each time. More details on the use of
the %WHERE% variable can be found in Chapter 12.
146
WebBase User’s Guide
•
%whereAndOr% e.g., (AND)
specifies whether the command line argument/value pairs used in the %WHERE% variable
will be put together with the AND or OR operator. By default, %whereAndOr% returns
the string ‘AND’. If you want to replace the AND operators with OR operators, the
following will create a local variable to override this dynamic variable to return the ‘OR’
string.
{set %whereAndOr% 'OR'}
•
%whereMultiAndOr% e.g., (OR)
specifies whether multiple valued components used in the %WHERE% variable will be put
together with AND or OR operators. The %WHERE% dynamic variable uses the value of
%whereMultiAndOr% to indicate the logical operator to use when collecting multiple
valued values (e.g. a collection of checkboxes all given the same variable name). By
default, %whereMultiAndOr% returns the string ‘OR’. If you want to replace the OR
operators with AND operators, the following will create a local variable to override this
variable to return the ‘AND’ string.
{set %whereMultiAndOr% 'AND'}
•
%whileCounter% e.g., (1)
used by the while macro, it is automatically set to the loop count.
•
%x% e.g. (123)
the x coordinate sent when the user clicks over an ISMAP image -- returns 0 if referenced
outside the context of an ISMAP reference.
•
%y% e.g. (132)
the y coordinate sent when the user clicks over an ISMAP image -- returns 0 if referenced
outside the context of an ISMAP reference.
Operational Variables
A global, user or local variable can override any of the above WebBase dynamic variables.
The following dynamic variables can be modified by accessing the Options menu on the
WebBase Server window. However, the changes made by selecting these menu options are
only valid for the current session. When WebBase is stopped and restarted, the default values
will be restored. If you want to permanently change the values of any of these variables, it is
recommended that you add global variables with the desired values following the instructions
earlier in this chapter. If a global variable is created to override the value of one or more of
these dynamic variables, WebBase must be stopped and restarted for the change to take effect.
The values of these operational variables are only used at system startup. The default value
for each dynamic variable is shown in parentheses.
•
%cacheEnabled% e.g. (true)
a Boolean value which defaults to true, that indicates whether WebBase is to read forms
from its internal cache. Each form that is handled by the WebBase server is first parsed
to build internal structures identifying the macros in use. The form is then processed and
the results returned to the browser. When a form is identified in a URL, WebBase checks
to see if %cacheEnabled% is true. If so, it checks its internal cache to see if the form has
already been processed. If so, the internal structures are re-used. This can significantly
reduce the amount of time it takes WebBase to process a request for the second and
subsequent reference to the same Web page since only the process step and not the parsing
step has to be completed. For production systems, it is strongly recommended that this
variable be left in its default mode, which is true.
WebBase User’s Guide
147
Chapter 9: Variables
•
%cacheTimeCheck% e.g. (true)
a Boolean value which defaults to true, that indicates whether WebBase is to check the file
date of its forms against the file date stored in its internal cache to ensure it is using the
latest version of the form. This variable is only used if %cacheEnabled% is true.
During forms development, setting this variable to true helps ensure developers are always
seeing the most current form -- they need not be concerned whether the form they are
editing has already been cached or not. During production, however, disabling this feature
improves throughput as WebBase will not have to do any file modification date
determinations.
•
%cacheODBC% e.g. (true)
a Boolean value which defaults to true, that indicates that ODBC connections are to be
cached within WebBase. Each sql macro request specifies a source name, user name and
password. The username and password default to empty strings if not explicitly specified.
An ODBC database connection is made using the source name and user name. If
%cacheODBC% is true, the connection is cached. If a subsequent sql macro specifies the
same source name and username, the connection in the cache is used and a new connection
is not created. This can significantly reduce the amount of time it takes WebBase to
process a request for the second and subsequent reference to the same source and
username. See Chapter 12 for more information on ODBC caching.
•
%logEnabled% e.g. (true)
indicates that the log file functionality of WebBase is to be enabled. If a global or local
variable sets this to false, logging will be disabled. Logging can be temporarily enabled or
disabled using the WebBase server window menu options. It is strongly recommended
that logging be enabled, and then only temporarily disabled if necessary. Many Web
analysis tools can use the log information. See the section on Logging in Chapter 12 for
more information.
Special Variables
The variables described in this section do not exist unless specified by the user. There is a
default value associated with each of them, but it is not possible to query for or use this default
value. Any of these special variables, unless otherwise specified, can be created as a global,
user or local variable to override the default value.
148
•
%directoryBrowse%
This variable controls whether directory browsing is supported. By default, WebBase
does not support directory browsing. To enable directory browsing, a global variable must
be created with a value of ‘true’. It is not possible to enable directory browsing with a
user or local variable.
•
%disableAllInternalCommands%
If set to true, all built-in (internal) commands are disabled. If this variable is created as a
global variable, a user would not be able to send the dateTime command to the server.
Instead, the 404 file not found error would be returned.
•
%dumpVariablesOnError%
By default, WebBase acts as if this variable were set to false. When set to true, the system
will dump the local, header, cookie and user variables plus a list of available ODBC
sources and drivers to the browser whenever an error message is generated. This can be
helpful in debugging .htf forms. It is recommended that this variable be created and its
value set to true during forms development. Once the forms have been debugged, the forms
WebBase User’s Guide
designer should remove any statements setting this variable to true to prevent displaying
this information on browsers visiting their site.
•
%enablePrivateInternalCommands%
If set to true and %disableAllInternalCommands% is not set to true, any dynamic variable
can be called as if it were a built-in (internal) command. When a dynamic variable is
invoked as a built-in command, the surrounding ‘%’ signs are removed from the variable
name. Thus, localVariablesHTML, allUserVariablesHTML, reservedWordsHTML, etc.
can be invoked directly from a browser without having to write a form to return them.
This can be useful during forms development on a development machine. It is not
recommended that this variable be enabled on a production system.
•
%errorMacroLines%
this variable is used when an error message is generated due to a form’s designer
programming error. It defines the number of lines beginning with the start tag of the macro
and number of lines ending with the end tag of the macro that will be displayed. The
center portion will be replaced by ‘…’ if the total lines exceed 2*%errorMacroLines*+1.
It defaults to 5. If a value less than 2 is specified, the entire macro is displayed.
•
%errorUseColor%
this variable is used when an error message is generated due to a form’s designer
programming error. It is either true or false, and determines whether color is used in the
error display. It defaults to false, so no color is displayed. If set to true, the error line is
displayed in red and the macro containing the error is displayed in blue. All other code is
displayed in black.
•
%errorWrapperLines%
this variable is used when an error message is generated due to a form’s designer
programming error. It defines the number of lines to be displayed before and after the
macro that contains the error to give more help in locating the offending code. It defaults
to 3. If a value less than 2 is specified, the entire form is displayed within the error
message.
•
%heartbeatInterval%
this variable defines the length of time in seconds between heartbeat commands. The value
entered must be between 5 and 360 seconds; the default is 15. More information on the
WebBase Heartbeat Window can be found in Chapter 5.
•
%heartbeatMaxLines%
this variable defines the number of lines of information to be displayed in the WebBase
Heartbeat Window. By default, 100 lines are displayed. If %heartbeatMaxLines% is
created as a global variable with a value between 10 and 10000, this defines how many
lines will be displayed in the window. More information on the WebBase Heartbeat
Window can be found in Chapter 5.
•
%heartbeatPostingEnable%
this variable enables or disables posting of information into the WebBase Heartbeat
Window. If set to ‘false’, it will cause posting into the WebBase Heartbeat Window to be
disabled when the window is opened (either automatically via the %heartbeatWindow%
variable or manually via the Edit menu). Posting uses memory and processor resources, so
it might be desirable in a production system to disable posting. Error messages will
continue to be posted even though posting is marked as disabled. The TCP/IP reset will
also be issued when appropriate regardless of the posting enabled status.
WebBase User’s Guide
149
Chapter 9: Variables
150
•
%heartbeatReplyTime%
this variable defines the length of time the heartbeat function will wait for a reply in
seconds. The value must be between 1 and 5 seconds; the default is 5. More information
on the WebBase Heartbeat window can be found in Chapter 5.
•
%heartbeatResetTCP%
this variable is either true or false, and defines whether the TCP/IP socket will be reset
when a heartbeat command times out. If not specified, the default value is true. More
information on the WebBase Heartbeat window can be found in Chapter 5.
•
%heartbeatSound%
this variable is either true or false, and defines whether a sound is played if a heartbeat
failure is identified. If not specified, the default value is false. More information on the
WebBase Heartbeat window can be found in Chapter 5.
•
%heartbeatWindow%
this variable determines whether a WebBase Heartbeat Window is opened when WebBase
is started. By default, the window is not opened. If %heartbeatWindow% is created as a
global variable with a value of true, the window will be opened each time WebBase is
started. Note that if WebBase is started as a service under Windows NT, no windows
may be displayed. More information on the WebBase Heartbeat window can be found in
Chapter 5.
•
%lastModified%
When the processed information is returned back to the browser, additional header
information is attached to the message. One of the fields returned by the server is LastModified. This field indicates the date and time at which the server believes the file was
last modified. This is not always meaningful because many forms are dynamic: they
contain data taken from a database, etc. Thus, what the user sees is not really the .htf form
itself but what the form caused to be generated and returned to the browser. The user can
set %lastModified% to any of 3 values: a UniversalTime, true or false. If the user sets
%lastModified% to %dateTime% or any other UniversalTime, that is the date and time
that will be returned in the header. If %lastModified% is set to true, then the current
%dateTime% value is returned in the header. If %lastModified% is set to false, the LastModified: header entry is not returned by the server. If the user does not set the value of
%lastModified%, the date the file was last modified is returned to the browser.
•
%max%
the maximum number of records to be returned in a query by the {sql} macro. This can be
created as a global, user or local variable, or overridden explicitly in the sql macro using
the max keyword argument. This defaults to 0, which means that all records will be
returned by the query.
•
%mimeType%
this variable identifies what will be stored in the Content-type: header entity that is
returned to the browser. For standard .htf files, this defaults to ‘text/html’. Each file
extension has an associated mime type, as described in Chapter 4. Since a .htf file is
already being processed and will ship something back to the browser for display, the only
other type of %mimeType% that one might want to set is ‘text/plain’. This means the
browser ignores all the HTML tags and just displays the text - including all the <H2>
controls, etc.
•
%password%
the name of the password to be used by the sql macro. This can be created as a global,
WebBase User’s Guide
user or local variable, or overridden explicitly in the sql macro using the password
keyword argument. This defaults to an empty string.
•
%skipAutoCookies%
This is less drastic than turning off cookie support completely by setting %skipCookies%
to true. If set to true, WebBase will not send any of the default WebBase cookies to the
browser. Any cookies created by the user using the setCookie macro will be sent to the
browser. If %skipCookies% is set to true, the value of this variable is ignored.
•
%skipCookies%
By default, WebBase will always try and establish a ‘cookie connection’ with the browser.
If it receives a cookie from the browser, it will return that cookie on the next write. If it
does not receive a cookie, it will generate a new one and send it to the browser. If this
variable is set to true, WebBase will not send a cookie to the browser regardless of
whether one was received or not.
•
%skipHeaderComment%
When WebBase processes a file, it accumulates all the information to be returned to the
browser in a stream. Once the processing is completed, the header information is created
and added to the start of the stream. By default, WebBase also includes a comment line at
the start of the stream indicating that the stream was generated by WebBase as well as the
current date and time. The comment information is stored in the %comment% variable.
This starting comment in the HTML returned to the browser is only seen if the user does a
‘View Source’ at their browser. If this variable is set to true, the %comment% value is not
included in data returned to the browser.
•
%source%
the name of the data source to be used by the sql macro. This can be created as a global,
user or local variable, or overridden explicitly in the sql macro using the source keyword
argument. It defaults to an empty string.
•
%sqlBufferSize%
the maximum buffer length for ODBC to use to return data from the database to
WebBase. This can be created as a global, user or local variable, or overridden explicitly
in the sql macro using the buffer keyword argument. This defaults to 8192 bytes.
•
%start%
the number identifying the first matching record to be returned by the sql macro. This can
be created as a global, user or local variable, or overridden explicitly in the sql macro
using the start keyword argument. This defaults to 1.
•
%statusCode%
this variable is used to change the default status code that is returned as part of the header
message. All servers use the same status numbers. For example, 200 means ‘OK’ and
404 means ‘file not found’. The variable should be set to an integer or begin with a 3-digit
status value. If the variable is set to a string, the first 3 characters must be one of the
valid status codes listed below. Any additional text provided with the variable is not used.
The valid status codes are:
Example 9.34
100
101
200
201
202
WebBase User’s Guide
%statusCode% values
Continue
Switching Protocols
OK
Created
Accepted
151
Chapter 9: Variables
203
204
205
206
300
301
302
303
304
305
400
401
402
403
404
405
406
407
408
409
410
411
412
413
414
415
500
501
502
503
504
505
Non-Authoritative Information
No Content
Reset Content
Partial Content
Multiple Choices
Moved Permanently
Moved Temporarily
See Other
Not Modified
Use Proxy
Bad Request
Unauthorized
Payment Required
Forbidden
Not Found
Method Not Allowed
Not Acceptable
Proxy Authentication Required
Request Time-out
Conflict
Gone
Length Required
Precondition Failed
Request Entity Too Large
Request-URI Too Large
Unsupported Media Type
Internal Server Error
Not Implemented
Bad Gateway
Service Unavailable
Gateway Time-out
HTTP Version not supported
The actual message displayed may vary by browser. Browsers are not required to
understand the meaning of all these status codes. However, browsers must understand the
class of any status code, as indicated by the first digit, and treat any unrecognized response
as being equivalent to the x00 status code of that class.
•
%theArgs%
this variable contains the names of all command line arguments that were specified as part
of the URL. This variable is in fact a local variable but, as it is created dynamically for
each form that is processed by WebBase, its description is included here. The variable is
used in the construction of the %WHERE% variable if used within the form. A form
designer can also use this variable to determine input arguments and their values.
It is possible to modify the list of variable names found in %theArgs% and thus impact the
resulting %WHERE% variable. For example, one could use the following:
{set newArg.GE 13}
{set %theArgs% 'newArg.GE' %theArgs% add:}
to add the variable named newArg.GE to the list of arguments stored in %theArgs%. The
resultant %WHERE% variable would now include the following test along with the
arguments provided via the command line.
... newArg >= 13 ...
152
WebBase User’s Guide
•
%transactionsMaxLines%
this variable defines the number of lines of information to be displayed in the WebBase
Transactions Service window. By default, 100 lines are displayed. If
%transactionsMaxLines% is created as a global variable with a value between 10 and
10000, this defines how many lines will be displayed in the window. More information on
the WebBase Transactions Service window can be found in Chapter 5.
•
%transactionsWindow%
this variable determines whether a WebBase Transactions Service window is opened when
WebBase is started. By default, the window is not opened. If %transactionsWindow% is
created as a global variable with a value of true, the window will be opened each time
WebBase is started. Note that if WebBase is started as a service under Windows NT, no
windows may be displayed. More information on the WebBase Transactions Service
window can be found in Chapter 5.
•
%updateStats%
If set to false, disables the ‘Transactions Pane’ - the one line band just below the menu bar
in the server window. If the %updateStats% variable is not defined or is set to true, this
pane will display the command counter and most recent command line. The user can
enable/disable this pane via the Transactions Pane menu item in the server's Options menu.
Providing a global variable %updateStats% set to false will cause this pane to initially
come up as disabled.
•
%user%
the name of the user to be used by the sql macro. This can be created as a global, user or
local variable, or overridden explicitly in the sql macro using the user keyword argument.
It defaults to an empty string.
•
%varList%
The %varList% variable is specified by the user in conjunction with having a form return
more than one variable using the same name. This is common when a form may contain a
series of checkboxes using the <SELECT MULTIPLE ...> ... </SELECT> construct,
where the user is requested to select none, one, or many items as desired to satisfy a
request. An example form with multiple checkboxes is presented below in Fig. 9.36.
WebBase User’s Guide
153
Chapter 9: Variables
Example 9.35
Example form with multiple checkboxes
<B>Select a body style</B><P>
You can select as many different body styles as you like. <P>
<PRE>
<FORM METHOD="GET" ACTION="test.htf">
<INPUT TYPE="checkbox" NAME="modtype" value="convertible">
Convertible
<INPUT TYPE="checkbox" NAME="modtype" value="minivan"> Minivan
<INPUT TYPE="checkbox" NAME="modtype" value="truck"> Truck
....
<INPUT TYPE="submit" VALUE="Submit Query">
</PRE>
The resultant GET command for such a list, should the user select multiple checkboxes,
might appear as
GET test.htf?modtype=convertible&modtype=minivan& modtype=truck
The normal way in which WebBase would parse the command string would be to assign
the value 'convertible' to the variable named 'modtype', then assign the value 'minivan' to
the variable named 'modtype' (overwriting the first value), then on with 'truck' and so forth.
The result would be a variable named 'modtype' with a value of the last "modtype=xxx"
entry found in the command string.
The %varList% variable is used to inform WebBase that there are multiple entries in the
command string with the same name and that all values associated with these entries are
desired. This variable is created using a hidden variable, as in the following expression:
<INPUT TYPE=HIDDEN NAME="%varList%" VALUE="modtype">
Placing this input field before the fields named modtype causes WebBase to set up a list
for collecting the modtype values as they are encountered in the command string. With
this entry in the command string, the 'modtype' variable would return a list of the
accumulated values as
{modtype} → OrderedList('convertible' 'minivan' 'truck')
The size method can be sent to modtype (e.g. {case modtype size} ...) to determine the
number of entries and the {forRow oneValue on modtype} ... {oneValue} ... {/forRow}
construct could be used to iterate over the collected entries.
If the input form were to contain more than one variable that is to be repeated in the
command string, one must specify all the variables that can appear multiple times in the
%varList% variable. This is done by listing all the variable names as the value of
%varList%, separated by commas. For example, if the above form had a list of
manufacturers, styles and colors as well as model types to select from, the following
expression would be used:
<INPUT TYPE=HIDDEN NAME="%varList%" VALUE="manufacturer,
modtype,style,color">
•
154
%whileLimit%
used by the while macro, it limits the number of times the macro will loop regardless of the
state of the condition. This is useful as a safeguard during development to prevent infinite
loops.
WebBase User’s Guide
9.5 Displaying Variables
The value of a WebBase variable can be displayed in HTML by enclosing the variable name
in curly braces, e.g. {counter}. Parameters can be used to control the format in which
variables will be displayed within the HTML resulting from WebBase processing the .htf file.
Variable parameters are specified following the variable name and within the braces using the
format parameterName=value. One or more parameters can be specified with each variable
name. However, parameters can only be used when the variable name only is within the
braces. Parameters cannot be used with variables in an expression. The following is a valid
WebBase variable expression:
{counter size=5 align=right prefix=$}.
The following is an invalid expression using variables and parameters:
{set myCntr counter size=5 align=right prefix=$}
Parameter names are not case sensitive. Supported parameters and their allowable values are
described below.
Note:
Some of the parameters allow the user to insert spaces into a field (align, padchr,
etc.). Recall that browsers replace multiple spaces with a single space character
except within the <PRE> ... </PRE> construct.
•
align
specifies the alignment of the field within the specified size area. Valid values are left,
center, right, and currency. If currency is specified, the alignment is right justified and the
numeric value is displayed with two decimal places and a comma character inserted for
every group of three digits to the left of the decimal point. Default value is left for strings
and right for numbers.
•
comma
allows for redefinition of the comma character. The default value is the comma character
(‘,’).
•
currency
allows for redefinition of the currency character. The default value is $.
•
decimal
allows for redefinition of the decimal point character. This is useful to change monetary
values in which a comma should separate values instead of a decimal point. The default
value is the period character (‘.’).
•
encode
specifies that the value of the variable is to be explicitly encoded in the same fashion as the
browser automatically encodes its command string when sending it to the server. Browsers
encode the command string by:
1) replacing all spaces with plus (+) signs
2) encoding most non-alphanumeric characters as a sequence of three characters: a
percent (%) sign followed by two hexadecimal digits representing the original ASCII
character's numerical equivalent.
WebBase User’s Guide
155
Chapter 9: Variables
The browser provides any necessary encoding for the command line arguments generated
by the <FORM> </FORM> construct. WebBase will handle any necessary encoding on
arguments passed via the redirect2 macro. However, it is the responsibility of the form
designer to properly set up any arguments and values used on anchors and their associated
HREFs. The general rule-of-thumb is that any WebBase variable containing text and
used as an argument on an anchor must include the encode=true parameter. For example,
<A HREF=”file2.htf?numArg={nArg}&strArg={sArg encode=true}”> </A>
HTTP command line processing stops at the first space character. If the encode=true
parameter is not used on a variable containing a string, some of the string value may be
lost. Any variables and values following the space will also not be set up as variables.
•
nonempty
When nonempty=true is specified, a ‘ ’ Non Breaking Space sequence will be
returned in place of a nil or empty string value. This is helpful when formatting table
fields as most browsers do not display a border for a field that has no value to display.
The   sequence constitutes a displayable value and thus the border is properly
displayed.
•
padchr
a single character to be used as a padding character when aligning values in a field where
the specified size is greater than the size of the value. The default value is a space.
•
prefix
a series of characters that will be prepended to the value of the variable, preceded by one
or more pad characters if the field requires padding.
•
size
specifies the field width as an integer. Results larger than the specified size will be
truncated on the right while results shorter than the size will be aligned as specified by the
align parameter, and padded with the indicated padchr as necessary to fill out the field.
•
sql
indicates that the variable will be used in a statement within an sql macro and must be
checked for the inclusion of an apostrophe character. SQL statements must have strings
enclosed within apostrophes -- thus any strings that contain apostrophes must have these
enclosed apostrophes represented by two consecutive apostrophe characters. To
accomplish this within a variable's value without requiring the user to enter two
apostrophes for each one desired, one must specify the parameter as in:
{VarName sql=true}
As a general rule-of-thumb, forms designers should always include the sql=true parameter
on any WebBase variable containing a text string that is used in a statement within the sql
macro. Although one might not expect a variable to contain an apostrophe, users will
sometimes do the unexpected and enter an apostrophe. A little extra effort during form
design will generate forms that are much more robust and less likely to have runtime
errors.
•
156
suffix
a series of characters that will be appended to the variable's value, followed by one or
more pad characters if the field requires padding.
WebBase User’s Guide
WebBase User’s Guide
157
Chapter 10: User Variables
User Variables
Chapter 10
The previous chapter described the general principles behind variables and how field variables,
local variables, global variables, and dynamic variables are used within WebBase forms. This
chapter describes an additional type of variable, called a user variable, and its intended use
within WebBase.
Local variables provide the .htf form author with the ability to obtain information from the
user, change information, and return information to the user. Local variables can be read and
written by the form designer, but their lifetime is the duration of processing of one form.
Global and dynamic variables have a much longer life span: they exist as long as WebBase is
up and running. They can be overridden by a local variable, but again this change is only for
the duration of a single form.
The type of variable that is missing is one that can be both read and written by the forms
designer and whose lifetime can span the processing of a series of .htf forms:
•
variables that could be set by one form and read by a subsequent form,
•
variables that could maintain ‘state’ information for a user who is browsing a number of
related and/or disjoint forms,
•
variables whose ‘state’ information could influence the content of the ‘next’ form a user
would visit.
10.1 User Variables
User variables are simply variables that can be both read and written by an .htf form. They
are created using the setUser macro. When a local variable is created using the set or setLocal
macro, the local variable and its value are stored into a dictionary that is maintained as part of
the form being processed. As soon as the command is completed, the local dictionary ceases to
exist. When a user variable is created, the user variable and its value are stored in a user
variable dictionary that is maintained as part of the WebBase server – not part of the form
being processed. The data in the user variable dictionary is available to other forms being
processed, thus allowing state information to be maintained through multiple pages within a
session.
158
WebBase User’s Guide
10.2 User Variable Dictionaries
The WebBase server maintains a list of all the user variable dictionaries that have been
created. This list and the dictionaries reside in memory and are accessible by any number of
requests sent to WebBase. The implementation and use of user variables and user variable
dictionaries is up to each form designer.
WebBase supports multiple user dictionaries. For example, the user variable {UserVar} might
have the value ‘Denny’ in one user dictionary while it has the value ‘Denny Smith’ in another
user dictionary. The variable %userName% identifies which user variable dictionary is
currently in use. It is possible to use several user variable dictionaries – all within a single
form!
The default value for this variable is the value of the local variable WebBaseID. As described
previously, the WebBaseID variable is created for each request received from a browser that
does not include WebBaseID as a cookie variable. On the first interaction between a browser
and the WebBase server, WebBase will generate this variable and return it as a cookie. If the
browser supports cookies, the variable will be returned on any subsequent requests from the
browser until the browser is shut down.
It is important to note that user variable dictionary names should be unique for each user
accessing the dictionary. The information stored in user variables is generally information that
has been entered by a specific user, and should be considered sensitive. Under no circumstance
should it be made available to other users accessing the same form. If a user dictionary name
is created which is not unique to each user, information may be improperly displayed to other
users.
For example, let’s create a user variable dictionary whose name is set to ‘theUserDict’. The
first form requests a user to enter their name, address and social security number. If there are
user variables for the name, address and social security number, they are displayed. If there
are no user variables yet defined, the fields are blank. The first user accesses the form, sees all
blank fields, and enters their name, address, and social security number. This information is
stored as user variables in the user variable dictionary whose name is ‘theUserDict’. The
second user accesses the form. However, this second user sees a form on which is displayed
the first user’s name, address and social security number. This is definitely not desirable!
The WebBaseID and %nextCookieId% variables have been set up specifically for use with
user variables – to ensure that a unique value can be used as the name of the user variable
dictionary.
Special User Variables
The user variable dictionary is not actually created when the name of the dictionary is specified
in %userName%. The user dictionary is created when the setUser macro is processed and the
appropriate user dictionary is not found in WebBase memory.
When a new user variable dictionary is created, a number of special user variables are
automatically written into the dictionary as follows:
•
%%created%%
contains a timestamp of when the dictionary was created
WebBase User’s Guide
159
Chapter 10: User Variables
•
%%accessed%%
contains a timestamp of the most recent read or write access to the dictionary
•
%%expires%%
the number of minutes that the dictionary should be maintained in memory since last
accessed (%%accessed%% value). This variable is initialized with the contents of the
dynamic variable %userExpires%, the default value of which is 60 minutes. Setting this
value to 0 will cause the dictionary and its contents to immediately be removed. A form or
set of forms can specify how long a user dictionary should be allowed to exist following
the last access by setting this variable to an appropriate value. For example,
{setUser %%expires%% 15}
will cause the dictionary to be removed if it has not been accessed in 15 minutes. Each
time %%expires%% is set, it updates the %%accessed%% variable also.
All of the above special variables can be read from the user variable dictionary, but only the
%%expires%% variable can be written using the setUser macro. There is one other special
user variable that is not written into the user dictionary as a result of its appearance in a
setUser macro but that will have side effects on the maintenance of the dictionary.
•
{setUser %%remove%% dictionaryName}
tells WebBase to remove the dictionary named dictionaryName (specified by a string
constant such as ‘myDictionary’ or as the value of a variable such as %userName%). This
is equivalent to setting this dictionary’s %%expires%% variable to 0 except that it
operates on a specifically named dictionary rather than on the current dictionary referenced
by %userName%. If the dictionary name is specified as the string constant ‘%%all%%’,
WebBase will remove all user dictionaries from memory.
User Variable Dictionary Maintenance
WebBase periodically performs maintenance on user variable dictionaries to ensure memory is
managed in a reasonable fashion. It will check the %%accessed%% and %%expires%%
values of all dictionaries once per minute and remove those that have expired.
In addition, a WebBase administrator can limit the number of user dictionaries that can exist
at a single time. The variable %userLimit% can be overridden to indicate the total number of
dictionaries that can be created. WebBase will remove the least recently accessed dictionaries
that exceed this limit regardless of their expiration status. By default, there is no limit on the
number of user dictionaries.
From the host server, the administrator has one Options menu items to interact with the user
dictionaries within WebBase. The Remove All User Variables menu item causes WebBase
to remove all user dictionaries regardless of their expiration status. This last option should be
used with great care. If there are users interacting with forms in which user variables are used,
the users may get unexpected results or errors if all the user variable dictionaries are removed.
10.3 Using User Variables in WebBase
The initial concept of cookie support on browsers was to allow state to be maintained in a
session between a browser and a server. Not all browsers support cookies, and some users
disable cookie support on their browsers due to security considerations. Another alternative
160
WebBase User’s Guide
needed to be found to allow state between forms. WebBase provides user variables to
maintain state information without the necessity of cookies!
User Variable Design
If the form designer is setting up user variables, the default value of WebBaseID for
%userName% can certainly be used. However, this requires all accessing browsers to be
cookie enabled. In some Intranet configurations, this may be acceptable. However, as noted
above, not all browsers support cookies and some may not have cookie support enabled. If the
forms designer relies on the default value of WebBaseID for the value of %userName% and
the browser does not return cookies to the server, a new WebBaseID will be created for each
request received from the browser. All user variables created on the first form will be stored in
a user variable dictionary associated with the first WebBaseID. Any user variables needed or
created on the second form will be stored in a user variable dictionary associated with the
second WebBaseID. Form #2 will not have access to any of the user variables from form #1,
because it does not have the same WebBaseID as used on form #1.
There is an easy solution to this problem. The form designer can create a token as a local
variable using the value of WebBaseID or %nextCookieId%. For example,
{set myToken WebBaseID ‘App-‘ ,}
will generate a local variable called myToken whose value will be something like AppW14263151E161808318465B. The forms designer can then set this local variable to be the
name of the user variable dictionary using:
{set %userName% myToken}.
Any user variables created via the setUser macro within this form will automatically go into
this user variable dictionary. This local variable is also passed to any other forms that will be
displayed, either via a FORM statement, anchor or redirect2macro (the redirect2 macro
supports passing arguments; the redirect does not). Those subsequent forms would set this
local input variable to be the name of the user variable dictionary. These forms would then
have access to the user variables created in the first form. They would also be able to modify
or create new user variables. Because there is only one dictionary of user variables, any form
that receives the local variable myToken and sets it to be the user variable dictionary name can
access any of the user variables in the dictionary.
User Variable Example
The WebBase WebWizard Basic Example #7 shows how user variables can be used to pass
information between two forms. The first form requests the user to enter several pieces of
information, some of which are required or have specific requirements as to the contents. The
second form verifies that all input requirements have been met. If any requirements are
lacking, the information entered by the user is passed back to the first form and redisplayed
with a request to correct it.
One of the big advantages of using user variables is that the amount of information to be
passed between forms can be substantially reduced. In Example #7, a number of command
line arguments are passed from the first form to the second to indicate the values the user
entered into the input fields. After the error checking has been completed, it may be necessary
for the user to correct some of the entered information.
WebBase User’s Guide
161
Chapter 10: User Variables
If user variables were not used, the FORM, redirect or anchors used on the second page to
return back to the first page would have to include all of the input arguments and their values.
This is a lot of information to be set up properly by the form designer. In addition, all the
information must be sent as part of the browser request that can generate a large request.
Instead, user variables are used. The first forms create a {token} local variable using
WebBaseID. It passes this as a hidden variable to the second form, along with all the other
variables generated from the input statements. On the second form, the {token} local variable
is received and set up as the name of the user variable dictionary. All the other input local
variables, such as name and address, are stored as user variables. The error checking is
performed, and the error information is stored as a user variable. Finally, the anchors and
FORM statements are set up to return {token} to the first form. No other local variables need
to be passed back to the first form!
The first form is redisplayed with the error information at the top, and the values – as entered
by the user the first time – redisplayed in the input fields. All of this is possible using a local
variable {token} and storing information in the user variable dictionary. Plus, there is no
dependence on whether a browser supports cookies or not. The form designer uses the initial
value of WebBaseID – or any other unique value – to create a token. The form designer then
passes that token to any other forms to be accessed.
Creating User Variables
User variables are created via the setUser macro. The setUser macro operates exactly as does
the set macro except that it will store its name-value pair in the appropriate user variable
dictionary as described above.
The following expression will create a user variable called xx whose value will be the string
‘test’:
{setUser xx ‘test’}
Using the variable {xx} in a subsequent form using the same user variable dictionary will
return the value ‘test’.
User variables are accessed as are any other WebBase variables by merely specifying their
name within curly braces, e.g. {UserVar}, and the value of the variable will be substituted in
the form at that point. Since user variables are stored in a user dictionary, the containing .htf
form must specify the name of the user dictionary currently in effect before the variable is
referenced.
The search order for WebBase variables is
1. Field variables
2. Local variables
3. User variables
4. Global variables
5. Dynamic variables
Notice that local variables can be used to mask user variables, user variables can be used to
mask global variables, and global variables in turn can be used to mask dynamic variables.
162
WebBase User’s Guide
Persistent User Variables
User variable dictionaries provide state across multiple forms. In general, however, they will
eventually expire and be removed from memory in typical WebBase installations. If the form
designer wishes to make the contents of a user dictionary persistent, the variables in the
dictionary can be written to a database using the sql macro. In like fashion, a user dictionary
can be created and populated with the results of reading a database via .htf SQL.
For example, imagine an application that requests information from the user such as their
name, address and e-mail address. Once this information is entered, it is stored in user
variables. A unique token is created as the name of the user variable dictionary; this token is
sent to the browser as a cookie. An expiration date is also specified for the cookie so that it
will not expire and be removed from the browser for 1 year. If the browser does not support
cookies, this information is just discarded. If the browser does support cookies, this
information will be stored on disk and loaded into memory each time the browser starts up.
In addition to storing the information as user variables, it is also written into a database table
that contains fields for name, address, e-mail, tokenID and browserAddress. The tokenID is
the unique token returned to the browser as a cookie and used as the user variable dictionary
name. The browserAddress is set to %browserAddress%, the IP address of the client browser.
Several days later, the user again visits the same site. Instead of again having to fill in his
name, address and e-mail address, he is greeted by name! There are two reasons this is
possible.
First, if the user’s browser supports cookies, the initial cookie which was sent from WebBase
to his browser was stored by the browser and was returned to the WebBase server as part of
the request. A simple SQL SELECT statement was used to query the database to see if there
were any records for this unique ID. If a match is found, then the information in the database
is loaded into a user variable dictionary with the specified unique name.
If no matches are found, it may be because the user has never visited the site or because his
browser does not support cookies. In this case, another SQL SELECT query is made to see if
a match can be found based on the incoming %browserAddress%. If a match is found, then
again the user variable dictionary is set up and populated with the information from the
database. If no match is found, then the blank form is displayed and the user has to re-enter
his information. This situation may occur if the user is on another system, is behind a firewall,
or is going through a provider that generates different IP addresses for each session.
Once the user enters the information again, yet another SQL SELECT query can be done.
This time, the query checks to see if a match exists between the e-mail address entered by the
user and entries in the database. E-mail addresses are also quite unique and can be used to
help identify a user. If a match is found in this fashion, then once again the user variable
dictionary is created, populated, and the user can resume his interactions with the forms.
A judicial use of user variable dictionaries and SQL maintenance of these dictionaries in a
database provides a very wide range of capabilities with respect to developing Web pages that
are highly interactive and carefully tailored to a given user's needs.
WebBase User’s Guide
163
Chapter 11: Expressions
Expressions
Chapter 11
Expressions are used in macros for math tests, string manipulation and more. WebBase
expressions are in a ‘FORTH-Like’ or Reverse Polish Notation (RPN) format. This chapter
provides a description of RPN and how it is used in expressions. The remaining sections cover
all the different types of WebBase data types, the operations that can be performed on them
within WebBase expressions and examples of their use.
11.1 WebBase Expression Components
Each WebBase operation is performed on a receiver. For example, to determine how many
characters are in a string, the operation would be size and the receiver would be ‘myString’.
Some operations require arguments. For each ‘:’ (colon) in the operation, an argument must be
provided17. For example, to determine if a date is between two other dates, the operation
would be between:and:, the receiver would be date1, and the arguments would be date2 and
date3. In RPN notation, the receiver always immediately precedes the operation. Any
arguments will precede the receiver; the arguments are in order left to right within the RPN
statement.
Each operation returns some type of result. In some cases, a new instance is returned. For
example, the result of adding 3 and 5 is 8. The receiver is 3, the operation is ‘+’, the argument
is 5 and the result is 8. As another example, when ‘abc’ and ‘xyz’ are concatenated together, a
new string -- ‘abcxyz’ -- is returned.
In other operations, the receiver is returned. The receiver may or may not have been modified,
depending on the purpose of the operation. For example, {f= 2 3 ‘BC’ ‘abcdef’
replaceFrom:to:with:} returns the original string but it has now been modified to be ‘aBCdef’.
In some other operations, a copy of the receiver is returned and the original receiver is left
unmodified. For example, {f= 2 3 ‘BC’ ‘abcdef’ copyReplaceFrom:to:with:} returns a new
string -- ‘aBCdef’; the receiver is unmodified -- it is still ‘abcdef’.
17
There are a number of operations that do not include a ‘:’ (colon) but do require an operator including +, -, =, <, >. The information included with
each operation description identifies argument requirements.
164
WebBase User’s Guide
The descriptions and examples provided below for the operations supported for each WebBase
data type clearly identify the type of data returned. It is important to understand what is
returned because unexpected errors can result.
Sound confusing? It can be. The following section presents several examples of how to
develop expressions using RPN.
11.2 RPN Notation
A WebBase expression is written using the RPN format which is easy for the computer to
understand but is difficult to read and frequently difficult to write. For example, to see if the
contents of the variable counter is equal to the constant 3, one would write
{f= counter 3 =}
To determine if the number of results returned in the variable results from a database query is
greater than zero, one would write
{f= 0 results size >}
There are three types of components within an expression: constants (e.g., integers, characters,
strings), variables and operators. WebBase works from left to right in evaluating the
information in the expression. If a constant is encountered, it is put directly onto the stack. If
a variable is found, the value of the variable is put onto the stack. If an operator is found, the
receiver of the operator is retrieved from the stack -- it will be the last item placed on the stack.
If the operation has arguments, the necessary arguments will be retrieved from the stack. The
result of the operation will be computed and placed onto the stack.
We will go through two examples of expressions in RPN notation to see how each of these
types of components is handled.
The first example we will examine is:
{f= Shipping Total TaxRate * +}
When the expression is parsed from left to right and evaluated, the following actions occur.
The information on the stack at each step is displayed in the right column.
WebBase User’s Guide
165
Chapter 11: Expressions
Example 11.1
Simple RPN Example
Action
Computations
Stack
The first component encountered is Shipping which is a
variable, so its value is placed onto the stack.
{Shipping}
Next is Total which is another variable; its value is also
placed onto the stack.
{Total}
{Shipping}
Next is TaxRate, another variable whose value is placed
onto the stack. The stack now contains three values.
{TaxRate}
{Total}
{Shipping}
The next component is the ‘*’ operator. The top value on
the stack is removed; this is the receiver for the ‘*’
operation.
{TaxRate}
{Total}
{Shipping}
This operation requires one argument, so the next value
from the stack is removed.
{TaxRate}
{Shipping}
*
{Total}
The operation is performed on the receiver and argument,
the result is placed back onto the stack. There are now two
values on the stack -- the original value of Shipping and
the product of Total and TaxRate.
{TR*T}
{Shipping}
The last component in the expression is the ‘+’ operator.
The top value on the stack is popped off; this is the
receiver of the ‘+’ operator.
{TR*T}
The next value on the stack (and the only remaining value)
is popped off.
{TR*T}
{Shipping}
+
{Shipping}
The operation is performed; the result of summing the
receiver and the argument is returned as the value of the
expression.
The next example includes a operation with multiple arguments. It will determine whether 15
is between 10 and 20. Although this example does not include as many stack operations as the
previous example, it shows how multiple arguments are placed within the WebBase expression
and onto the stack.
{f= 10 20 15 between:and:}
166
WebBase User’s Guide
Example 11.2
Detailed RPN Example
Action
Computations
Stack
The first component encountered is 10 which is a constant,
so it is placed directly onto the stack.
10
Next is 20 which is another constant; its is also placed
directly onto the stack.
20
10
Next is 15, another constant that is placed onto the stack.
The stack now contains three values.
15
20
10
The next component is the ‘between:and:’ operator. The
top value on the stack is removed; this is the receiver for
the operation.
This operation requires two arguments, so the two previous
values on the stack areremoved. Note that the arguments
are on the stack in the reverse of how they are used in the
operation: the second argument is highest in the stack and
removed first; the first argument is lower in the stack and
removed second.
15
20
10
15
between:
10
and:
20
The operation is performed; and the result (in this case,
true) is returned as the value of the expression.
Building Compound Statements in RPN
After reviewing the examples of RPN usage shown above, RPN can still be difficult to use
especially when attempting to build compound statements. When attempting to build a
compound ‘if’ statement in RPN, we recommend:
WebBase User’s Guide
167
Chapter 11: Expressions
1. Set the values of each of the individual components of the compound ‘if’ as a unique
WebBase variable using the set statement.
2. Combine the results using the required and/or logical. Again do it one at a time setting the
result to another local WebBase variable.
3. Test the resultant variable within the compound if.
4. Once you get the above working, cut the expression from one set statement and paste it
into the following statement where that variable name was used. Continue back up the
sequence of set statements, etc. until you've eliminated the need for the local variables.
For example, how would a user go about building a statement to do something IF var1 is
greater than 5 and the string str1 contains the substring 'abc' or variable var2 is greater than 10
but less than 20. Here’s how the RPN would be developed.
Example 11.3
Developing RPN Statements
{! cond1 is set true if var1 > 5, otherwise it is set false !}
{set cond1 5 var1 >}
{set cond2 'abc' str1 containsString:}
{set cond3 10 var2 >}
{set cond4 20 var2 <}
{! the and-ing of var2 > 10 AND var2 < 20 !}
{set cond5 cond3 cond4 &}
{set cond6 cond1 cond2 &}
{! the solid vertical bar is the OR operator !}
{set cond7 cond5 cond6 ¦}
Now you can write...
{if cond7}
......
{/if}
Then,
Example 11.4
{if
{if
{if
{if
{if
{if
{if
...
Developing RPN Statements -- Continued
cond5 cond6 ¦} ... replacing cond7 by its expression,
cond3 cond4 & cond6 ¦} ... replacing cond5 by its expression,
cond3 cond4 & cond1 cond2 & ¦} ... and so forth...
10 var2 > cond4 & cond1 cond2 & ¦} ...
10 var2 > 20 var2 < & cond1 cond2 & ¦} ...
10 var2 > 20 var2 < & cond1 'abc' str1 containsString: & ¦} ...
10 var2 > 20 var2 < & 5 var1 > 'abc' str1 containsString: & ¦}
Just go through the process one step at a time! The sequence of set’s and the {if cond7} will
work just fine. They do add a little bit of overhead in the creation of the temp variables but
they make it that much easier to understand.
168
WebBase User’s Guide
11.2 General Operations
The remainder of this chapter covers the different types of operations that can be performed on
WebBase data types. The user is encouraged to read through the different operations
available to become familiar with the various data types as well as the types of operations that
can be performed upon and with them. For each data type, there are operations that can be
performed upon an instance of the data type. There may also be operations that can be
performed upon the class itself.
There are several WebBase expression operators that are represented by special characters:
,
&
|
=
=
=
concatenation
logical AND
logical OR
General Instance Operations
The operations described in this section may be used with an instance of any type of WebBase
data (e.g., numbers, strings, collections).
•
asString
returns a string representing the information stored in the receiver. Each WebBase data
can represent itself differently as a string.
•
copy
returns a copy of the receiver which can subsequently be modified without affecting the
receiver.
•
hasMessage
returns false unless the receiver is an ODBCRowObject which has an associated message
or if the receiver is a collection and one of the members of the collection is an
ODBCRowObject which has an associated message.
•
isArray
returns true if the argument is an array, otherwise false
•
isAssociation
returns true if the argument is an association, otherwise false
•
isBoolean
returns true if the argument is a Boolean (e.g., true or false), otherwise false
•
isCharacter
returns true if the argument is a character, otherwise false
•
isCollection
returns true if the receiver is a collection; otherwise false. Note that strings, dictionaries
and lists are types of collections.
•
isDictionary
returns true if the receiver is a dictionary; otherwise false.
WebBase User’s Guide
169
Chapter 11: Expressions
170
•
isDirectory
returns true if the receiver is a directory; otherwise false.
•
isFloat
returns true if the receiver is a floating point number; otherwise false
•
isFraction
returns true if the receiver is a fractional number (represented as n/m); otherwise false
•
isInteger
returns true if the receiver is an integer; otherwise false
•
isList
returns true if the receiver is a list; otherwise false
•
isNil
returns true if the receiver is non-existent; use this to test for a non-existent variable or
field
•
isNull
returns true if the receiver is non-existent or if it is a collection (e.g., string, list or
dictionary) and does not have any contents
•
isNumber
returns true if the receiver is a number (e.g., integer, fraction, float); otherwise false
•
isPoint
returns true if the receiver is a point; otherwise false.
•
isSortedList
returns true if the receiver is a sorted list; otherwise false
•
isStream
returns true if the receiver is a stream; otherwise false
•
isString
returns true if the receiver is a string; otherwise false
•
isSymbol
returns true if the receiver is a symbol; otherwise false
•
notNil
returns true is the receiver exists; equivalent to isNil not
•
notNull
returns true is the receiver exists; equivalent to isNull not
•
printOn:
return the receiver, which is not modified. Adds the appropriate representation of the
receiver to the argument, which must be a stream.
WebBase User’s Guide
11.3 Numbers
There are three different kinds of numbers supported within WebBase: integers (e.g., 12345),
floats (e.g., 123.45) and fractions (1/2).
Number Instance Operations
This section covers all the operations that can be performed on any type of number.
Operations specific to integers or floats or fractions are described in subsequent sections. In
general, numbers are always instances. There are no class operations that can be performed on
numbers.
•
-e.g., {f= 3 6 -} → 3
returns the difference of the receiver and an argument
•
* e.g.,{f= 3 3 *} → 9
returns the product of the receiver and an argument
•
/ e.g., {f= 3 10.0 /} → 3.33333333
returns a number generated by dividing the receiver by the argument. If both numbers are
integers, returns either an integer or a fraction. If either number is a float, returns a float.
•
// e.g., {f= 3 10.0 //} → 3
returns an integer generated by dividing the two arguments; the result is truncated
•
\\ e.g., {f= 3 10.0 \\} → 1
returns the integer remainder after dividing the receiver by the argument; the result is
truncated
•
+ e.g., {f= 3 3 +} → 6
returns the sum of the receiver and an argument
•
< e.g., {set Price 29.95} {f= 100 Price <} → true
returns true if the receiver is less than the argument, otherwise false
•
<= e.g., {set Price 29.95} {f= 100 Price <=} → true
returns true if the receiver is less than or equal to the argument, otherwise false
•
= e.g., {set Price 29.95} {f= 100 Price =} → false)
returns true if the receiver is equal to the argument, otherwise false
•
> e.g., {set Price 29.95} {f= 100 Price >} → false
returns true if the receiver is greater than the argument, otherwise false
•
>= e.g., {set Price 29.95} {f= 100 Price <} → false
returns true if the receiver is greater than or equal to the argument, otherwise false
•
abs e.g., {f= -10 abs} → 10
returns the absolute value of the receiver
•
alignDollar: e.g., {f= 7 123.45 alignDollar: } → ‘$123.45’
returns a string representing the receiver as a dollar amount. The argument defines the
number of characters to be contained in the resulting string; spaces are added on the left
for padding if necessary. If the total number of digits plus the $ sign are more than the
WebBase User’s Guide
171
Chapter 11: Expressions
specified field width argument, the returned string will be longer than the specified value;
truncation is not performed.
172
•
arcCos e.g., {f= 0 arcCos} → 1.57079633
returns the arc-cosine, an angle in radians, of the receiver
•
arcSin e.g., {f= 0.5 arcSin} → 0.52359878
returns the arc-sin, an angle in radians, of the receiver
•
arcTan e.g., {f= 1/4 arcTan} → 0.24497866
returns the arc-tangent, an angle in radians, of the receiver
•
asBoolean: e.g., {f= 0 0.0 asBoolean: } → false
{f= 0 1/2 asBoolean: } → true
returns true if the receiver is zero, otherwise false. The argument is required but ignored
internally so any value can be used.
•
asInteger e.g., {f= 13.6 asInteger} → 14
returns an integer representing the receiver as an integer; equivalent to rounded
•
asNumber e.g., {f= -13.6 asNumber} → -13.6
returns the receiver
•
between:and: e.g., {f= 5 25 20 between:and: } → true
returns true if the value of the receiver is between the first and second arguments,
otherwise false
•
ceiling e.g., {f= 12.7 ceiling} → 13
{f= 12.3 ceiling} → 13
returns an integer that is rounded up to the next highest integer from the receiver
•
containsInteger e.g., {f= -13 containsInteger} → true
{f= 13.7 containsInteger} → false
returns true if the receiver is an integer or a string representation of an integer, otherwise
false
•
containsNumber e.g., {f= -13.7 containsNumber} → true
returns true if the receiver is a number or a string representation of a number, otherwise
false
•
cos e.g., {f= 1 cos} → 0.54030231
returns the cosine, an angle in radians, of the receiver
•
degreesToRadians e.g., {f= 360 degreesToRadians} → 6.28318531
returns a number representing the receiver converted from degrees to radians
•
denominator e.g., {f= 17.3 denominator} → 1
{f= 3/10 denominator} → 10
returns the denominator of the receiver. For most numbers, this is 1. For fractions, it will
be the denominator within the fraction
•
even e.g., {f= 11 even} → false
returns true if the receiver is an even number, otherwise false
WebBase User’s Guide
•
exp e.g., {f= 5 exp} → 148.413159
returns a float that is the exponential of the receiver
•
floor e.g., {f= 12.7 floor} → 12
{f= 12.3 floor} → 12
returns an integer that is rounded down to the preceding integer from the input
•
format: e.g., {set phoneNumber 1234567890} {f= '(000) 000-0000' phoneNumber
format:} →(123) 456-7890
returns a string in which any digits in the control string argument have been replaced with
the next corresponding character from the receiver - all other characters in the control
string print as entered. Processing stops when the end of the receiver or control string is
reached. There must be a good match between the receiver and control stream. In the
example shown above, if the variable phoneNumber did not have an area code, the string
returned would be (456) 789-0, which is probably not what was intended.
•
integerCos e.g., {f= 0.3 integerCos} → 100
returns the integer cosine of the receiver angle, measured in degrees, scaled by 100
•
integerSin e.g., {f= 3.6 integerSin} → 7
returns the integer sine of the receiver angle, measured in degrees, scaled by 100
•
ln e.g., {f= 17 ln} → 2.83321334
returns the natural log of the receiver
•
log: e.g., {f= 2 17 log:} → 4.08746284
returns the log of the argument in the base specified by the receiver
•
max: e.g., {f= 22 25 max:} → 25
returns the maximum of the receiver or the argument
•
min: e.g., {f= 22 25 min:} → 22
returns the minimum of the receiver or the argument
•
negated e.g., {f= 12.7 negated} → -12.7
returns the negative value of the receiver
•
negative e.g., {f= 11 negative} → false
returns true if the receiver is a negative number, otherwise false
•
numerator e.g., {f= 17.3 numerator} → 17.3
{f= 3/10 numerator} → 3
returns the numerator of the receiver. For most numbers, this is the value of the receiver.
For fractions, it will be the numerator within the fraction.
•
odd e.g., {f= 11 odd} → true
returns true if the receiver is an odd number, otherwise false
•
positive e.g., {f= 11 positive} → true
returns true if the receiver is a positive number, otherwise false
•
printDollars e.g., {f= 29.95 printDollars} →‘$29.95’
returns a string representing the receiver as a dollar value. If the receiver contains more
than 2 decimal places, it is rounded.
WebBase User’s Guide
173
Chapter 11: Expressions
174
•
printFraction: e.g., {f= 3 0.52399327 printFraction:} → '0.524'
returns a string representing the receiver in which it has been truncated and rounded to the
number of decimal places specified by the argument
•
printFraction:decimalSeparator: e.g.,{f= 3 ‘,’ 0.52399327
printFraction:decimalSeparator:} → '0,524'
returns a string representing the receiver in which it has been truncated and rounded to the
number of decimal places specified by the first argument and the second argument (a
string) is used as the decimal separator.
•
printRounded: e.g., {f= 3 0.52399327 printRounded:} → '0.524'
returns a string representing the receiver in which it has been rounded to the number of
decimal places specified by the first argument.
•
printWholeDollars e.g., {f= 29.95 printWholeDollars} →‘$30’
returns a string representing the receiver as a dollar value. If necessary, the receiver is
rounded.
•
quo: e.g., {f= 3.2 17.6 quo:} → 5
returns the integer quotient generated by dividing the receiver by the argument; the result is
truncated toward zero.
•
radiansToDegrees e.g., {f= 3.14159265 radiansToDegrees} → 180.0
return a number representing the receiver converted from radians to degrees
•
raisedTo: e.g., {f= 3 5 raisedTo:} → 125.0
returns a float representing the receiver raised to the power specified by the argument
•
raisedToInteger: e.g., {f= 3 5 raisedToInteger:} → 125
returns a number representing the receiver raised to the power specified by the argument.
This differs from raisedTo: in that the argument must be an integer.
•
reciprocal e.g., {f= 4.0 reciprocal} → 0.25
returns a number representing 1 divided by the receiver
•
rem: e.g., {f= 6 17 rem:} → 5
returns the integer remainder generated by dividing the receiver by the argument
•
rounded e.g., {f= 12.7 rounded} → 13
{f= 12.3 rounded} → 12
returns the nearest integer to the receiver
•
roundTo: e.g., {f= 5 17 roundTo:} → 15
returns a number representing the receiver rounded to the nearest multiple of the argument
•
sign e.g., {f= 12 sign} → 1
{f= -12 sign} → -1
returns 1, -1 or 0 identifying whether the receiver is positive, negative or zero, respectively
•
sin e.g., {f= 1 sin} → 0.84147098
returns the sine, an angle in radians, of the receiver
•
sqrt e.g., {f= 25 sqrt} → 5.0
returns a number representing the square root of the receiver
WebBase User’s Guide
•
squared e.g., {f= 5 squared} → 25
returns a number representing the square of the receiver
•
strictlyPositive e.g.,{f= 3 strictlyPositive} → true
{f= 0 strictlyPositive} → false
returns true if the receiver is greater than zero, otherwise false
•
tan e.g., {f= 30 tan} → -6.4053312
returns the tangent, an angle in radians, of the receiver
•
timesTwoPower: e.g., {f= 3 5 timesTwoPower:} → 40.0
returns the result of multiplying the receiver by 2 to the exponent identified by the
argument
•
truncated e.g., {f= 12.7 truncated} → 12
{f= 12.3 truncated} → 12
returns the integer portion of the receiver; any fraction is dropped.
•
truncateTo: e.g., {f= 6 17 truncateTo:} → 12
returns an integer that is the receiver truncated to the nearest multiple of the argument
11.4 Integers
This section describes all the operations that can be performed on integers. Integers can also
perform any of the operations described in the General Number Operations section above.
Integer Instance Operations
Integers are always instances of the class Integer, which is accessed via the variable
%Integer%. The Integer class operations that can be done are described in the following
section.
•
and: e.g., {f= 12 23 and:} → 4
returns an integer representing the receiver bits ANDed with the argument.
•
asBoolean e.g., {f= 0 asBoolean} → false
{f= 3 asBoolean} → true
returns true if the receiver is non-zero.
•
asCharacter e.g., {f= 123 asCharacter} → ${
returns the character whose ASCII value matches the value of the receiver.
•
asFloat e.g., {f= 13 asFloat} → 13.0
returns a float representing the receiver as a floating point value.
•
asUnsigned e.g., {f= -12345 asUnsigned} → 4294954951
{f= 12345 asUnsigned} → 12345
returns a number representing the receiver as a 32-bit unsigned number.
•
authEncode e.g., {f= 123 authEncode} → $w
returns a character representing the receiver that has been encoded for use in the Basic
Authorization capabilities within WebBase.
WebBase User’s Guide
175
Chapter 11: Expressions
176
•
bitInvert e.g., {f= 123 bitInvert} → -124
returns an integer whose bit values are the inverse of the bit values of the receiver.
•
bitShift: e.g., {f= 2 12345 bitShift:} → 49380
{f= -2 12345 bitShift:} → 3086
returns an integer which is the receiver shifted left the number of bit positions specified by
the argument if the argument is positive, or shifted right the number of bit positions
specified by the argument negated if the argument is negative.
•
factorial e.g., {f= 8 factorial} → 40320
returns the factorial of the receiver.
•
gcd: e.g., {f= 180 255 gcd:} → 15
returns the greatest common divisor between the receiver and the argument.
•
intSqrt e.g., {f= 144 intSqrt} → 12
returns the integer square root of the receiver.
•
lcm: e.g., {f= 180 255 lcm:} → 3060
returns the least common multiple between the receiver and the argument.
•
printOn:base: e.g., {set strm %String% new %WriteStream% on:} {f== strm 3 25
printOn:base:} {f= strm contents} → 3r221
appends the ASCII representation of the receiver with radix specified by the second
argument to the stream specified in the first argument.
•
printOn:base:showRadix: e.g., {set strm %String% new %WriteStream% on:} {f==
strm 3 false 25 printOn:base:showRadix:} {f= strm contents} → 221
appends the ASCII representation of the receiver with radix specified by the second
argument to the stream specified in the first argument.
•
printPaddedTo: e.g., {f= 5 123 printPaddedTo:} → ' 123'
returns a string representing the receiver padded on the left with blanks to be at least the
number of characters as specified in the argument.
•
printPaddedWith:to:base: e.g., {f= $% 6 9 123 printPaddedWith:to:base:} →
'%%%146'
returns a string representing the receiver padded on the left with the character specified by
the first argument to be at least the number of characters as specified in the second
argument. The third argument specifies the base of the result.
•
printStringRadix: e.g., {f= 3 529 printStringRadix:} → '3r201121'
returns a string containing a text description of the receiver with the radix specified by the
argument.
•
radix: e.g., {f= 3 529 radix:} → '3r201121'
returns a string representing the receiver with radix specified by the argument.
•
radix:showRadix: e.g., {f= 3 true 529 radix:showRadix:} → '3r201121'
{f= 3 false 529 radix:showRadix:} → '201121'
returns a string representing the receiver with radix specified by the argument. If the
second argument is true, include the radix prefix.
WebBase User’s Guide
Integer Class Operations
The Integer class is accessed using the variable %Integer%. The following operations can be
performed on this class.
•
readFrom: e.g., {f= ‘123’ asStream %Integer% readFrom:} → 123
reads an integer from the stream (argument) and returns the integer. Note that the
argument must be a stream, and not a string.
11.5 Floats
This section describes all the operations that can be performed on floating point numbers.
Floats can also perform any of the operations described in the General Number Operations
section above.
Float Instance Operations
Floating point numbers are always instances of the class Float, which is accessed via the
variable %Float%. The Float class operations that can be done are described in the following
section.
•
asFloat e.g., {f= 13.5 asFloat} → 13.5
returns the receiver.
•
exponent e.g., {f= 423.543 exponent} → 8.0
returns a float whose value is the exponent part of the floating point representation of the
receiver.
•
printOn:decimalSeparator: e.g., {set strm %String% new %WriteStream% on:} {f==
strm ',' 123.45 printOn:decimalSeparator:} {f= strm contents} → ‘123,45’
appends the ASCII representation (maximum of 8 digits) of the receiver to the stream
identified in the first argument using the second argument as the decimal separator. Note
that the second argument must be a string.
•
significand e.g., {f= 423.543 significand} → 1.65446484
return a float whose value is the significand part of the floating point representation of the
receiver.
Float Class Operations
The Float class is accessed using the variable %Float%. The following operations can be
performed on this class.
•
fromInteger: e.g., {f= 123 %Float% fromInteger:} → 123.0
returns a floating point representation of the integer argument.
•
fromString: e.g., {f= ‘-0.593’ %Float% fromString:} → 0.593
returns a floating point conversion of the string argument. The argument is expected to be
a sequence of the form [(+|-)][digits][decSep [digits]] [(E|e)[(+|-) digits]].
•
fromString:decimalSeparator: e.g., {f= ‘-0.593’ $, %Float%
fromString:decimalSeparator:} → -0,593
WebBase User’s Guide
177
Chapter 11: Expressions
returns a floating point conversion of the first argument, using the second argument as the
decimal separator. See fromString: for the format of the first argument.
•
pi e.g., {f= %Float% pi} → 3.14159265
return the floating point representation of pi.
11.6 Fractions
This section describes all the operations that can be performed on fractions. A fraction is
represented by two integers and a ‘/’ (e.g., 1/2). Fractions can also perform any of the
operations described in the General Number Operations section above.
Fraction Instance Operations
Fractions are always instances of the class Fraction, which is accessed via the variable
%Fraction%. The Fraction class operations that can be done are described in the following
section.
•
asFloat e.g., {f= 13/5 asFloat} → 2.6
returns the receiver.
Fraction Class Operations
The Fraction class is accessed using the variable %Fraction%. The following operations can
be performed on this class.
•
numerator:denominator: e.g., {f= 15 28 %Fraction% numerator:denominator:} →
15/28
returns a new instance of fraction with the numerator specified in the first argument and
the denominator specified in the second argument.
11.7 Points
A Point represents a position in two dimensions (e.g., the cursor’s position on a screen). It
consists of a pair of numbers, x and y, representing the horizontal and vertical coordinates
respectively.
Point Instance Operations
This section covers all the operations that can be performed on a point. Two example points
are used in the following and are generated using {set point1 3 5 %Point% x:y:} and {set
point2 4 6 %Point% x:y:}.
178
•
- e.g., {f= point1 point2 -} → 1@1
returns a new point which is the difference between the receiver and the argument. The
argument can be a number or another point. If it is a point, the x-coordinates are
subtracted and the y-coordinates are subtracted. If it is a number, the value is subtracted
from both the x-coordinate and the y-coordinate.
•
* e.g., {f= point1 point2 *} → 12@30
returns a new point which is the product of the receiver and the argument. The argument
WebBase User’s Guide
can be a number or another point. If it is a point, the x-coordinates are multiplied and the
y-coordinates are multiplied. If it is a number, the value is multiplied by both the xcoordinate and the y-coordinate.
•
/ e.g., {f= point1 point2 /} → (4/3) @ (6/5)
returns a new point which is the receiver divided by the argument. The argument can be a
number or another point. If it is a point, the x-coordinates are divided and the ycoordinates are divided. If it is a number, the x-coordinate and y-coordinate of the receiver
are both divided by the value.
•
// e.g., {f= point1 point2 //} → 1@1
returns a new point which is the receiver divided by the argument. The argument can be a
number or another point. If it is a point, the x-coordinates are divided and the ycoordinates are divided. If it is a number, the x-coordinate and y-coordinate of the receiver
are both divided by the value.
•
\\ e.g., {f= point1 point2 \\} → 1@1
returns a new point which is the integer remainder of the receiver divided by the argument.
The argument can be a number or another point. If it is a point, the x-coordinates are
divided and the y-coordinates are divided. If it is a number, the x-coordinate and ycoordinate of the receiver are both divided by the value.
•
+ e.g., {f= point1 point2 +} → 7@11
returns a new point which is the sum or the receiver and the argument. The argument can
be a number or another point. If it is a point, the x-coordinates are added and the ycoordinates are added. If it is a number, the value is added to both the x-coordinate and ycoordinate of the receiver.
•
< e.g., {f= point1 point2 <} → false
returns true if the x and y coordinates of the receiver are less than the x and y coordinates
of the argument, respectively, otherwise answer false.
•
<= e.g., {f= point1 point2 <=} → false
returns true if the x and y coordinates of the receiver are less than or equal to the x and y
coordinates of the argument, respectively, otherwise answer false.
•
= e.g., {f= point1 point2 =} → false
returns true if the x and y coordinates of the receiver are equal to the x and y coordinates
of the argument, respectively, otherwise answer false.
•
> e.g., {f= point1 point2 >} → true
returns true if the x and y coordinates of the receiver are greater than the x and y
coordinates of the argument, respectively, otherwise answer false.
•
>= e.g., {f= point1 point2 >=} → true
returns true if the x and y coordinates of the receiver are greater than or equal to the x and
y coordinates of the argument, respectively, otherwise answer false.
•
abs e.g., {f= point1 point2 - abs} → 1@1
returns a new point whose coordinates are the absolute values of the x and y coordinates of
the receiver.
•
between:and: e.g., {set point3 5 7 %Point% x:y:}
{f= point1 point3 point2 between:and:} → true
WebBase User’s Guide
179
Chapter 11: Expressions
returns true if the receiver is greater than or equal to the first argument (another point) and
less than or equal to the second argument (yet another point); otherwise false.
•
dotProduct: e.g.,{f= point1 point2 dotProduct:} → 42
returns a number which is the sum of the product of the x-coordinates and the product of
the y-coordinates of the receiver and the argument.
•
max: e.g.,{f= point1 point2 max:} → 4@6
returns a new point whose coordinates are the maximum of the x-coordinates and the
maximum of the y-coordinates of the receiver and the argument.
•
min: e.g.,{f= point1 point2 min:} → 3@5
returns a new point whose coordinates are the minimum of the x-coordinates and the
minimum of the y-coordinates of the receiver and the argument.
•
negated e.g.,{f= point1 negated} → -3@-5
returns a new point with the x and y coordinates of the receiver negated.
•
rounded e.g.,{f= point1 rounded} → 3@5
returns a new point which has the receiver coordinates rounded to integers.
•
transpose e.g.,{f= point1 transpose} → 5@3
returns a new point with x-coordinate equal to the receiver’s y-coordinate and y-coordinate
equal to the receiver’s x-coordinate.
•
truncated e.g.,{f= point1 truncated} → 3@5
returns a new point which has the receiver coordinates truncated to integers.
•
x e.g.,{f= point1 x} → 3
returns the receiver’s x-coordinate
•
x: e.g.,{f== 4 point1 x:} {point1} → 4@5
returns the receiver after changing its x-coordinate to the argument.
•
y e.g.,{f= point1 y} → 5
returns the receiver’s y-coordinate
•
y: e.g.,{f== 6 point1 y:}{point1} → 3@6
returns the receiver after changing its y-coordinate to the argument.
Point Class Operations
This section covers all the operations that can be performed on the Point class, which is
accessed using the global variable %Point%.
•
180
x:y: e.g.,{f= 3 5 %Point% x:y:} → 3@5
returns a new point whose x-coordinate is the first argument and whose y-coordinate is the
second argument.
WebBase User’s Guide
11.8 General Collection Operations
Many of the objects used within WebBase are a type of collection, including Arrays,
OrderedCollections, OrderedLists, SortedCollections, SortedLists, Strings and Symbols. A
Dictionary is also a collection, but its structure is enough different that it is covered separately.
General Collection Instance Operations
This section describes all the operations that can be performed on an instance of any type of
collection. Subsequent sections will cover the operations that are specific to a given type of
collection. Several of the operations described apply only to numeric values within a
collection. If the collection contains no numeric values, a result of 0 is returned. If there are a
mix of numbers and non-numbers in the collection, only the numeric values are used for
computations. The examples shown for these operations are a list that contains the integers (1
2 3) generated using the expression {set numCltn #asInteger ',' '1,2,3' parseAt: map:}. Note
that any type of numbers can be included in collections.
Although ordered collections and strings are both types of collections, examples of each will be
presented for each of the operations below for clarification. The example collection used is
cltn1, generated using: {set cltn1 ‘,’ ‘one,two,three’ parseAt:}. The example string used is
‘abc’.
•
, (comma) e.g., {set cltn2 ‘,’ ‘four,five,size’ parseAt:}
{f= cltn2 cltn1 ,} → OrderedList(‘one’ ‘two’ three’ ‘four’ ‘five’ ‘six’}
{f= ‘xyz’ str1 ,} →‘abcxyz’
returns a new collection with the contents of the two collections concatenated together.
•
= e.g., {set cltn2 ‘,’ ‘four,five,size’ parseAt:}
{f= cltn2 cltn1 =} → false
{f= ‘xyz’ str1 =} → false
returns true if the receiver and argument are equal, otherwise false. Each element within
the receiver must exactly match the corresponding element within the argument. For
example, if the arguments are strings, the receiver and argument are compared using a case
sensitive string comparison.
•
asArray e.g., {f= cltn1 asArray} → (‘one’ ‘two’ ‘three’)
{f= str1 asArray} → ($a $b $c)
returns an array containing all the elements of the receiver.
•
asOrderedCollection e.g., {f= cltn1 asOrderedCollection} → OrderedCollection(‘one’
‘two’ ‘three’)
{f= str1 asOrderedCollection} → OrderedCollection($a $b $c)
returns an ordered collection containing all the elements of the receiver.
•
asSortedCollection e.g., {f= cltn1 asSortedCollection} → SortedCollection(‘one’
‘three’ ‘two’)
{f= str1 asSortedCollection} → SortedCollection($a $b $c)
returns a sorted collection containing all the elements of the receiver sorted in ascending
order.
WebBase User’s Guide
181
Chapter 11: Expressions
182
•
atAllPut: e.g., {f= ‘new’ cltn1 atAllPut:} →(‘new’ ‘new’ ‘new’)
{f= $p str1 atAllPut:} →‘ppp’
returns the receiver after each element has been replaced with the value in the argument.
•
average e.g., {f= numCltn average} → 2
returns the average of all the numbers in the collection. Only numeric values in the
collection will be processed; non-numeric values will be skipped and not counted in
determining the number of items over which the average is taken.
•
concat e.g., {f= cltn1 concat} → 'onetwothree'
{f= str1 concat} → 'abc'
returns a string consisting of all the elements in the collection concatenated together. The
items in the collection must all be strings.
•
concatWith: e.g., {f= $, cltn1 concatWith:} → 'one,two,three'
{f= $, str1 concatWith:} → 'a,b,c'
returns a string consisting of all the elements in the collection concatenated together and
separated with the specified separator character. The elements in the collection must all be
strings.
•
concatFrom:to: e.g., {f= 1 2 cltn1 concatFrom:to:} → 'onetwo'
{f= 1 2 str1 concatFrom:to:} → 'ab'
returns a new string made of the elements in the receiver from the start index (first
argument) to end index (second argument) concatenated together. The elements in the
collection must all be strings.
•
concatFrom:to:with: e.g., {f= 1 2 $, cltn1 concatFrom:to:with:} → 'one,two'
{f= 1 2 $, str1 concatFrom:to:with:} → 'a,b'
returns a new string made of the elements in the receiver from the start index (first
argument) to end index (second argument) concatenated together with the given separator
string (third argument). The elements in the collection must all be strings.
•
copyFrom:to: e.g., {f= 1 2 cltn1 copyFrom:to:} →('one’ ‘two')
{f= 1 2 str1 copyFrom:to:} → 'ab'
returns a new collection containing the elements between the starting index (first argument)
and ending index (second argument)
•
copyReplaceFrom:to:with: e.g., {set newCltn ‘,’ ‘eight,nine’ parseAt:}
{f= 1 2 newCltn cltn1 copyReplaceFrom:to:with:} →(‘eight’ ‘nine’ ‘three’)
{f= 1 2 ‘st’ str1 copyReplaceFrom:to:with:} → 'stc'
returns a new collection containing all the elements in the receiver with entries indexed
from start (first argument) through stop (second argument) being replaced by the elements
in the collection (third argument). Note that the replacement collection may be less than or
greater than the number of elements to be replaced.
•
copyWith: e.g., {f= ‘four’ cltn1 copyWith:} →(‘one’ ‘two’ ‘three’ ‘four’)
{f= $d str1 copyWith:} → 'abcd'
returns a new collection containing a copy of the receiver with the element in the argument
added to the collection.
•
copyWithout: e.g., {f= ‘one’ cltn1 copyWithout:} →(‘ two’ ‘three’)
{f= $c str1 copyWithout:} → 'ab'
returns a new collection containing a copy of the receiver with the first element that exactly
WebBase User’s Guide
matches the argument omitted. If there is no element in the receiver that matches the
argument, a copy of the receiver is returned.
•
first e.g., {f= cltn1 first} →‘ one’
{f= str1 first} → $a
returns the first element of the collection. For strings, the value returned is a character. In
order to return the first character of a string as a string, you must use:
{f= 'Hello' first asString} → 'H'
•
hasMessage e.g., {f= cltn1 hasMessage} → false
returns true if one or more of the members of the receiver is an ODBCRowObject which
has an associated message.
•
includes: e.g., {f= ‘two’ cltn1 includes:} → true
{f= $d str1 includes:} → false
returns true if the collection includes the specified element, otherwise false.
•
indexOf: e.g., {f= ‘two’ cltn1 indexOf:} → 2
{f= $d str1 indexOf:} → 0
returns an integer defining the index position of the specified element (argument) within the
receiver. If no such element is found, return 0.
•
indexOfCollection: e.g., {f= cltn2 cltn1 indexOfCollection:} → 0
{f= ‘bc’ str1 indexOfCollection:} → 2
returns an integer defining the index position of the first occurrence of the collection
(argument) within the receiver. If no such collection is found, return 0.
•
isEmpty e.g., {f= cltn1 isEmpty} → false
{f= '' isEmpty} → true
returns true if the receiver does not contain any elements, otherwise false
•
last e.g., {f= cltn1 last} →‘ three’
{f= str1 last} → $c
returns the last element of the collection. For strings, the value returned is a character. In
order to return the last character of a string as a string, you must use:
{f= 'Hello' last asString} → 'o'
•
map: e.g., {f= #asInteger ',' '1,2,3' parseAt: map:} →(1 2 3)
{f= #asUppercase str1 map:} →‘ABC’
returns a new collection in which each element in the receiver has had the operation in the
argument performed on it. This is useful for converting a collection of strings identifying
numbers into a collection of numbers. The argument must be a symbol (i.e., preceded by
the ‘#’ sign).
•
map:for: e.g., {f= #< 2 numCltn map:for:} → false false true)
returns a new collection generated by applying the given method (first argument) to the
target (second argument) and taking each member of the receiver in turn as an argument.
The example is for illustration only; the receiver does not have to be a collection containing
only numbers.
•
map:with: e.g., {f= #+ 5 numCltn map:with:} → 6 7 8)
returns a new collection in which each element in the receiver has had the operation in the
first argument performed on it. The operation in the first argument requires an additional
WebBase User’s Guide
183
Chapter 11: Expressions
argument, which is specified in the second argument. The example is for illustration only;
the receiver does not have to be a collection containing only numbers.
184
•
max e.g., {f= numCltn max} → 3
returns the largest number in the collection. Only numeric values in the collection will be
processed;
non-numeric values will be skipped.
•
min e.g., {f= numCltn min} → 1
returns the smallest number in the collection. Only numeric values in the collection will be
processed;
non-numeric values will be skipped.
•
notEmpty e.g., {f= cltn1 notEmpty} → true
{f= '' notEmpty} → false
returns true if the receiver does contains any elements, otherwise false. Equivalent to
isEmpty not
•
nums e.g., {f= numCltn nums} → 3
returns the number of list items that are numbers.
•
occurrencesOf: e.g., {f= ‘two’ cltn1 occurrencesOf:} → 1
{f= $A str1 occurrencesOf:} → 0
returns the number of elements contained in the receiver that are equal to the element
specified in the argument.
•
replaceFrom:to:with: e.g., {set newCltn ‘,’ ‘eight,nine’ parseAt:} {f= 1 2 newCltn cltn1
replaceFrom:to:with:} →(‘eight’ ‘nine’ ‘three’)
{f= 1 2 ‘st’ str1 replaceFrom:to:with:} → 'stc'
returns the receiver with the elements from the start index (first argument) to the end index
(second argument) replaced with the elements in the specified collection (third argument).
The number of elements being replaced must be the same as the number of elements in the
third argument. This is very similar to copyReplaceFrom:to:with, except that this
operation returns the modified receiver and the copyReplaceFrom:to:with: operation
returns a new collection and leaves the receiver unmodified.
•
replaceFrom:to:with:startingAt: e.g., {set newCltn ‘,’ ‘eight,nine,ten’ parseAt:} {f= 1
2 newCltn 2 cltn1 replaceFrom:to:with:startingAt:} →(‘nine’ ‘ten’ ‘three’)
{f= 2 3 ‘jkl’ 2 str1 replaceFrom:to:with:startingAt:} → 'akl'
returns the receiver with the elements from the start index (first argument) to the end index
(second argument) replaced with the elements in the specified collection (third argument).
The replacement elements are selected starting at the index specified in the fourth
argument.
•
replaceFrom:to:with:startingWith: e.g., {set newCltn ‘,’ ‘eight,nine,ten’ parseAt:} {f=
1 2 newCltn 2 cltn1 replaceFrom:to:with:startingWith:} →(‘nine’ ‘ten’ ‘three’) {f= 2 3
‘jkl’ 2 str1 replaceFrom:to:with:startingWith:} → 'akl'
returns the receiver with the elements from the start index (first argument) to the end index
(second argument) replaced with the elements in the specified collection (third argument).
The replacement elements are selected starting at the index specified in the fourth
argument. This is almost the same as replaceFrom:to:with:startingAt: except that it has
improved error handling.
•
replaceFrom:to:withObject: e.g., {f== 1 2 ‘four’ cltn1 replaceFrom:to:withObject:}
{cltn1} →(‘four’ ‘four’ ‘three’)
{f== 2 3 $L str1 replaceFrom:to:withObject:} {str1} → 'aLL'
WebBase User’s Guide
returns the replacement element (third argument). The receiver is modified by replacing
the elements from the start index (first argument) to the end index (second argument) with
the element specified in the third argument).
•
reverse e.g., {f= cltn1 reverse} →(‘three’ ‘two’ ‘one’)
{f= str1 reverse} → 'cba'
returns a new collection in which the elements in the receiver have been reversed (i.e., the
first element in the receiver is the last element in the returned collection). This can also be
written as reversed.
•
size e.g., {f= cltn1 size} → 3
{f= ‘‘ size} → 0
returns an integer defining the number of elements in the collection
•
sum e.g., {f= numCltn sum} → 6
returns the sum of all the numbers in the collection. Only numeric values in the collection
will be processed; non-numeric values will be skipped.
General Collection Class Operations
This section describes all the operations that can be performed on an of the collection classes
accessed using the variables %Array%, %OrderedCollection%, %OrderedList%,
%SortedCollection%, %SortedList% and %String%.
•
with: e.g., {f= ‘one’ %Array% with:} →(‘one’)
returns a new collection with only one element, the argument
•
with:with: e.g., {f= ‘one’ ‘two’ %OrderedCollection% with:with:} →
OrderedCollection(‘one’ ‘two’)
returns a new collection with two elements, the first and second arguments
•
with:with:with: e.g., {f= ‘one’ 2 3.0 %Array% with:with:with:} →(‘one’ 2 3.0)
returns a new collection with three elements, the first, second and third arguments
•
with:with:with:with: e.g., {f= ‘one’ ‘two’ ‘three’ ‘four’ %SortedList%
with:with:with:with:} → SortedList(‘one’ ‘two’ ‘three’ ‘four’)
returns a new collection with four elements, the first, second, third and fourth arguments
11.9 Arrays
An array is a collection of any objects accessed through a fixed range of integer indices
(representing the positions of the elements within the array). Note that the size of an array
cannot grow. There are no operations that are specific to arrays. All of the general collection
instance operations above are applicable to an array. Likewise, the general collection class
operations described above are valid when sent to the variable %Array%.
11.10 Strings
Strings are a collection of characters that are enclosed in single quotes. To include a single
quote mark within a string, put two quote marks together. A string and a character within
WebBase are different types of data. See the section on Characters for the representation and
use of characters within WebBase. The following operations can be performed on any string.
WebBase User’s Guide
185
Chapter 11: Expressions
String Instance Operations
This section describes all the operations that can be performed on a string.
NOTE:
The inclusion of a ‘}’ or ‘{‘ in a string may cause unexpected results because
WebBase may interpret it as an opening or closing to a macro instead of part of a
string. Instead of using these characters in strings in a form, the user should use
the WebBase dynamic variables %leftBrace% and %rightBrace% and concatenate
them with the string at the appropriate place(s). For example, {set strBuf 'my
output' %leftBrace% asString , } will set the variable strBuf to ‘{my output’.
NOTE:
The operations asFloat, asInteger and asNumber return a numerical value -- if the
argument is a string that is not a representation of a number, the value returned
will be 0.0, 0, or 0 respectively. Note that preceding or trailing blanks will cause
what otherwise might appear as a number to be treated as non-numeric and a 0 or
0.0 will be returned. trimBlanks can be used to remove any leading or trailing
blanks. Use containsNumber or containsInteger to test a string before conversion if
it might NOT be a representation of a number and the resultant value of 0 would
cause problems with your logic.
186
•
< e.g., {f= 'Goodbye' 'Hello' <} → false
returns true if the receiver is less than the argument using a case insensitive string
comparison, otherwise false
•
<= e.g., {f= 'Goodbye' 'Hello' <=} → false
returns true if the receiver is less than or equal to the argument using a case insensitive
string comparison, otherwise false
•
> e.g., {f= 'Goodbye' 'Hello' >} → true
returns true if the receiver is greater than the argument using a case insensitive string
comparison, otherwise false
•
>= e.g., {f= 'Goodbye' 'Hello' >=} → true
returns true if the receiver is greater than or equal to the argument using a case insensitive
string comparison, otherwise false
•
align: e.g., {f= 5 ‘abc’} → 'abc '
returns a new string containing the receiver and enough blanks necessary on the right to
pad it out to the number of characters specified in the argument. If the total number of
digits is more than the specified field width argument, the returned string will be truncated.
•
alignDollar: e.g., {f= 5 '123' alignDollar:} → ' $123'
{f= 8 '123.45' alignDollar:} → ' $123.45'
returns a new string representing the receiver as a dollar amount. If the total number of
digits plus the $ sign are more than the specified field width argument, the returned string
will be truncated.
•
alignLeft: e.g., {f= 5 'abc' alignLeft:} → 'abc '
returns a new string containing the receiver and enough blanks necessary on the right to
pad it out to the number of characters specified in the argument. If the total number of
digits is more than the specified field width argument, the returned string will be truncated.
WebBase User’s Guide
•
alignLeft:fill: e.g., {f= 5 $# 'abc' alignLeft:fill:} → 'abc##'
returns a new string containing the receiver and enough fill characters specified in the
second argument necessary on the right to pad it out to the number of characters specified
in the first argument. If the total number of digits is more than the specified field width
argument, the returned string will be truncated.
•
alignRight: e.g., {f= 5 'abc' alignRight:} → ' abc'
returns a new string containing the receiver and enough blanks necessary on the left to pad
it out to the number of characters specified in the argument. If the total number of digits is
than the specified field width argument, the returned string will be truncated.
•
alignRight:fill: e.g., {f= 5 $# 'abc' alignRight:fill:} → '##abc'
returns a new string containing the receiver and enough fill characters specified in the
second argument necessary on the left to pad it out to the number of characters specified in
the first argument. If the total number of digits is more than the specified field width
argument, the returned string will be truncated.
•
appendFilename: e.g., {set a ‘c:\dir’} {set b ‘file.htf’} {f= b a appendFilename:} →
'c:\dir\file.htf'
returns a new string in which the receiver is combined with the argument to generate a
pathname including the correct number of ‘\’ characters between each directory and
filename (i.e., always one and not two ‘\’ or no ‘\’ characters).
•
appendFilenameDOS: e.g., {set a ‘c:\dir’} {set b ‘file.htf’} {f= b a
appendFilenameDOS:} → 'c:\dir\file.htf'
returns a new string in which the receiver is combined with the argument to generate a
pathname including the correct number of ‘\’ characters between each directory and
filename (i.e., always one and not two ‘\’ or no ‘\’ characters). This is equivalent to
appendFilename:, and ensures that the DOS directory separation character (‘\’) is used.
•
appendFilenameUNIX: e.g., {set a ‘\dir’} {set b ‘file.htf’} {f= b a
appendFilenameUNIX:} → '/dir/file.htf'
returns a new string in which the receiver is combined with the argument to generate a
pathname including the correct number of ‘/’ characters between each directory and
filename (i.e., always one and not two ‘/’ or no ‘/’ characters). This ensures that the
UNIX directory separation character (‘/’) is used.
•
asArrayOfSubstrings e.g., {f= ‘roses and daisies’ asArrayOfSubstrings} →(‘roses’
‘and’ ‘daisies’)
returns an array of substrings from the receiver. The receiver is divided into substrings at
the occurrences of one or more space characters.
•
asArrayOfSubstringsSeparatedBy: e.g., {f= $- ‘555-11-5555’
asArrayOfSubstringsSeparatedBy:} → (‘555’ ‘11’ ‘5555’’)
returns an array of substrings from the receiver. The receiver is divided into substrings at
the occurrences of one or more of the input argument, which is a character.
•
asBoolean: e.g., {f= 0 ‘yes’ asBoolean:} → true
{f= 0 ‘maybe’ asBoolean:} → 0
{f= 0 ‘0’ asBoolean:} → false
returns true if the first character of the receiver is a ‘t’ or ‘T’ or ‘y’ or ‘Y’ or if the receiver
converted to a number is not zero. Returns false if the first character of the receiver if a ‘f’
or ‘F’ or ‘n’ or ‘N’ or if the receiver converted to a number is zero. If none of these are
satisfied, returns the argument.
WebBase User’s Guide
187
Chapter 11: Expressions
188
•
asCapitalized e.g., {f= ‘aBc123xYz’ asCapitalized} → ‘Abc123xyz’
returns a new string in which the first character is capitalized and any subsequent
alphabetic characters are lowercase.
•
asCharacter e.g., {f= ‘a’ asCharacter} → $a
returns the first character of string. This functionality is now obsolete since a character
can be defined using the format $a; it is maintained for compatibility with previous
versions of WebBase.
•
asCodedHtml e.g., {f= '#$%' asCodedHtml} → '#$%'
returns a copy of the receiver with all non-alphanumeric characters encoded as per the
HTML Coded Character set definitions, &#n where n is the integer number of the ASCII
character e.g. '&' -> $#38;.
•
asDate e.g., {f= '29 March 1997' asDate} → 03/29/97
returns a date representing the date described by the receiver. The receiver can be in any
of these formats: ‘Jan 2, 1990’, ‘2 Jan, 1990’ or ‘02-01-90’ with any sequence of nonalphanumeric characters between the month, day and year.
•
asDoubleQuoteString e.g., {f= 'string with "quotes"' asDoubleQuoteString} → 'string
with ""quotes""'
returns a new string in which each occurrence of a double quote character has been
doubled. In SQL one often uses formats like xx = '{something}' so the asSqlString routine
is used to double the single quotes within {something sql=true} to prevent syntax
problems. A similar situation exists when creating HTML forms. One writes <INPUT
NAME="name" VALUE="{value}"> - if {value} contains any double quotes the same
type of syntax problem occurs - embedded "-s need to be doubled.
•
asFieldName e.g., {f= 'Goodbye Hello' asFieldName} →‘”Goodbye Hello”’
if the receiver contains any space character, returns a new string containing the receiver
enclosed in double quotes. If the receiver does not contain any space characters, returns
the receiver
•
asFieldNameName e.g., {f= '”Field One”' asFieldNameName} →‘Field One’
if the receiver is enclosed in double quotes, returns a new string with the starting and
ending double quotes removed. If the receiver is not enclosed in double quotes, returns the
receiver
•
asFloat e.g., {f= '-13.6' asFloat} → -13.6
{f= 'not a number' asFloat} → 0.0
returns a float value if the string is the representation of a number, otherwise returns 0.0
•
asInteger e.g., {f= '-13' asInteger} → -13
{f= 'not a number' asInteger} → 0.0
returns an integer value if the string is the representation of a number, otherwise returns
0.0
•
asLowercase e.g., {f= 'Hi There' asLowercase} → 'hi there'
returns a new string in which all the characters of the receiver have been converted to
lowercase. This can also be written using asLowerCase.
•
asNonEmptyString e.g., {f= 'Hi’ asNonEmptyString} →‘Hi’
{f= ‘’ asNonEmptyString} →‘ ’
WebBase User’s Guide
returns the receiver if the receiver is not an empty string; otherwise returns a non-breaking
HTML space.
•
asNumber e.g., {f= '-13.6' asNumber} → -13.6
{f= 'not a number' asNumber} → 0.0
returns a number if the string is the representation of a number, otherwise returns 0.0
•
asOptions: e.g., {f= ‘banana’ ‘apple;banana;cherry’ asOptions:} →
'<OPTION>apple<OPTION SELECTED>banana<OPTION>cherry</SELECT>'
the receiver is a string of options as would be found on an HTML list box. Each option is
separated from the other by a semi-colon. The input argument is the option which is
currently selected. A string is returned that is properly formatted for HTML to identify all
the options and which particular option is currently selected.
•
asPrintableHTML e.g., {f= '&and' asPrintableHTML} → '&and'
returns the receiver with any occurrences of ‘&’, ‘>‘ or ‘<‘ replaced with ‘&’, ‘>’
and ‘<’, respectively.
•
asSqlString e.g., {f= 'O''Brien' asSqlString} → 'O''''Brien'
returns a new string in which all single quote marks within the string have been doubled.
This is required syntax for sql statements where the value is enclosed within single quotes
and the value might contain a single quote character
•
asStream e.g., {f= 'my data for a stream' asStream} → a ReadWriteStream
returns a stream (read-write) containing the receiver. The contents of the stream are the
receiver, and the stream is positioned at the beginning for any subsequent operations.
•
asSymbol e.g., {f= 'myString' asSymbol} → #myString
returns a symbol whose characters are the same as the receiver
•
asTime e.g., {f= '10:30:00 AM' asTime} → 10:30:00 AM
returns a time as specified in the receiver. Note that the receiver must be in the time
format in use by the operating system (e.g., 12-hour or 24-hour).
•
asUppercase e.g., {f= 'Hi There' asUppercase} → 'HI THERE'
returns a new string in which all the characters of the argument have been converted to
uppercase. This can also be written using asUpperCase.
•
asUseableHTML e.g., {f= '& < >’ asUseableHTML} → '& < >’'
returns the receiver after replacing any occurrences of ‘&’ with ‘&’, ‘<’ with ‘<’,
and ‘>’ with ‘>’.
•
at: e.g., {f= 2 'Hello' at:} → $e
returns the character at the position specified within the string. An error occurs if the
index is out of range for the string size.
•
at:put: e.g., {f= 1 $H 'hello' at:put:} → $H
returns the second argument after placing it within the receiver at the index specified in the
first argument. Note that the modified string is NOT returned, but that if the string had
been saved in a variable, the value of the variable would reflect the change.
•
authDecode e.g., {f= 'Basic bXlOYW1lOm15UGFzc3dvcmQ=' authDecode} →
'myName:myPassword'
returns a new string representing the receiver that has been decoded per RFC 1421.
WebBase User’s Guide
189
Chapter 11: Expressions
190
•
authEncode e.g., {f= 'myName:myPassword' authEncode} → 'Basic
bXlOYW1lOm15UGFzc3dvcmQ='
returns a new string representing the receiver that has been encoded per RFC 1421 for use
in the Basic Authorization capabilities within WebBase.
•
authPassword e.g., {f= 'Basic bXlOYW1lOm15UGFzc3dvcmQ=' authPassword} →
'myPassword'
returns a new string containing the password portion of the RFC 1421 encoded string (see
authEncode)
•
authUserName e.g., {f= 'Basic bXlOYW1lOm15UGFzc3dvcmQ=' authUserName} →
'myName'
returns a new string containing the user name portion of the RFC 1421 encoded string (see
authEncode)
•
authValid e.g., {f= 'Basic bXlOYW1lOm15UGFzc3dvcmQ=' authValid} → true
returns true if the receiver begins with 'Basic ' and contains at least one ':' character - as
required by RFC 1421 (see authEncode); otherwise false
•
base64decodeFileTo: e.g., {f= ‘c:\temp\encoded.htf’ ‘c:\temp\decoded.htf’
base64decodeFileTo:} →‘c:\temp\encoded.htf’
returns the argument after decoding the contents of the file whose pathname is the receiver
to a file whose pathname is the argument. See also base64EncodeFile:to:. These
operations are used by the mail macro and setting up mail attachments to be sent.
•
base64EncodeFile:to: e.g., {f= ‘c:\temp\encoded.htf’ ??tagArg
‘c:\http\wbwizard\Wizard’ base64EncodeFile:to:} →‘c:\temp\encoded.htf’
returns the path to the file created by encoding the file whose pathname is the receiver
using base-64 encoding. The first argument is either an integer or a Boolean. If an
integer, it defines the number of base64 encoded characters to output before inserting a
newline sequence (carriage return/line feed). If it is a boolean, true means to automatically
insert the newline sequence after 64 characters. If false, no newline sequences are inserted.
See also base64DecodeFileTo:. These operations are used by the mail macro and setting
up mail attachments to be sent.
•
characterConstant e.g., {f= '$w' characterConstant} → $w
{f= 'w' characterConstant} → nil
returns the character constant if and only if the first character of the string was a $,
otherwise returns nil.
•
classBaddr e.g., {f= '123.45.6.78' classBaddr} → '123.45'
returns the class B address portion of the receiver if it is formatted as an IP address,
otherwise returns an empty string
•
classCaddr e.g., {f= '123.45.6.78' classCaddr} → '123.45.6'
returns the class C address portion of the receiver if it is formatted as an IP address,
otherwise returns an empty string
•
collapse e.g., {f= ‘ a space and tab’ collapse} →‘a space and tab’
returns a copy of the receiver with all control characters replaced by a single blank and all
multiple blanks replaced by a single blank. This is useful for removing multiple spaces or
other characters (e.g., tabs) that the browser will consolidate into a single space character
unless within the <PRE> construct.
WebBase User’s Guide
•
containsAnyString: e.g., {set cltn1 ‘,’ ‘one,two,three’ parseAt: asOrderedCollection}
{f= cltn1 ‘threes’ containsAnyString:} → true
returns true if any item in the receiver collection contains the string specified in the
argument; otherwise false. Matches are case sensitive. Note that the receiver collection
should contain strings.
•
containsAnyStringIgnoreCase: e.g., {set cltn1 ‘,’ ‘one,two,three’ parseAt:
asOrderedCollection} {f= cltn1 ‘THREES’ containsAnyStringIgnoreCase:} → true
returns true if any item in the receiver collection contains the string specified in the
argument; otherwise false. Matches are case insensitive. Note that the receiver collection
should contain strings.
•
containsInteger e.g., {f= '-13' containsInteger} → true
{f= '13.7' containsInteger} → false
returns true if the receiver is a string representation of an integer, otherwise false
•
containsNumber e.g. {f= -13.7 containsNumber} → true
returns true if the receiver is a string representation of a number, otherwise false
•
containsString: e.g., {f= 'ello' 'Hello' containsString:} → true
returns true if the receiver contains the argument; this method does a case sensitive
comparison
•
containsStringChecked: e.g., {f= ‘apple’ ‘fruit’ containsStringChecked:} →‘’
{f= ‘apple’ ‘apple’ containsStringChecked:} →‘CHECKED’
returns an empty string if the receiver does not contain the argument; otherwise returns the
string ‘CHECKED’. This is useful for determining which check boxes on a form have
been selected by a user.
•
containsStringIgnoreCase: e.g., {f= 'ELLO' 'Hello' containsStringIgnoreCase:} → true
returns true if the receiver contains the argument; this method does a case insensitive
comparison
•
decode e.g., {f= 'String+%28Sample%29' decode} → 'String (Sample)'
returns a new string decoded from the receiver that was encoded as a browser would when
returned as part of a <Form>...</FORM> block
•
encode e.g., {f= 'String (Sample)' encode} → 'String+%28Sample%29'
returns a new string encoded as a browser would when returned as part of a
<FORM>...</FORM> block
•
equals: e.g., {f= 'hello' 'Hello' equals:} → false
returns true if the receiver and argument are equal when doing a case sensitive string
comparison, otherwise false. This is the same as using ‘=‘.
•
equalsIgnoreCase: e.g. {f= 'hello' 'Hello' equalsIgnoreCase:} → true
returns true if the receiver and argument are equal when doing a case insensitive string
comparison, otherwise false
•
fileExtension e.g. {f= 'c:\mydir\aSubDir\myFile.txt' fileExtension} → 'txt'
returns a new string containing the three characters that follows the receiver’s last period
(‘.’) character.
WebBase User’s Guide
191
Chapter 11: Expressions
192
•
fileFullExtension e.g. {f= 'c:\mydir\aSubDir\myFile.text' fileFullExtension} → 'text'
returns a new string containing the characters that follows the receiver’s last period (‘.’)
character. This supports file extensions longer than 3 characters.
•
fileName e.g. {f= 'C:\mydir\aSubDir\myFile.txt' fileName} → 'c:\mydir\aSubDir\myFile'
returns a new string containing the characters of the receiver up to the last period (‘.’)
character.
•
fileNameLessPath e.g. {f= 'C:\mydir\aSubDir\myFile.txt' fileNameLessPath} →
'myFile.txt'
returns a new string containing the unqualified file name of the receiver (file name and
extension without drive or directory path).
•
fileNamePath e.g. {f= 'c:\mydir\aSubDir\myFile.txt' fileNamePath} →
'c:\mydir\aSubDir'
returns a new string containing the directory path of the receiver path name (without the
file name and extension).
•
format: e.g., {set phoneNumber '1234567890'} {f= '(000) 000-0000' phoneNumber
format:} →(123) 456-7890
returns a new string in which any digits in the control string argument have been replaced
with the next corresponding character from the receiver - all other characters in the control
string print as entered. Processing stops when the end of the receiver or control string is
reached. There must be a good match between the receiver and control stream. In the
example shown above, if the variable phoneNumber did not have an area code, the string
returned would be (456) 789-0, which is probably not what was intended.
•
indexOfString: e.g., {f= 'ello' 'Hello' indexOfString:} → 2
returns an integer defining the starting position of the argument within the receiver. If the
receiver does not contain the argument, returns 0
•
indexOfString:startingAt: e.g., {f= 'ello' 4 'Mello Yellow' indexOfString:startingAt:} →
8
returns an integer representing the starting position of the substring (first argument) found
after the starting index (second argument) within the receiver. If the substring is not
found, returns 0.
•
isValidDirectory e.g., {f= 'c:\HTTP\Wbwizard\' isValidDirectory} → true
returns true if the string represents the pathname of a directory that exists on the host
system, otherwise false
•
isValidFile e.g., {f= 'c:\HTTP\Wbwizard\default.htf' isValidFile} → true
returns true if the string represents the pathname of a file that exists on the host system,
otherwise false
•
isValidIPaddr e.g., {f= '1.2.3.4’ isValidIPaddr} → true
returns true if the string represents an IP address of the form #.#.#.# where each
component is a numeric value that is less than 256.
•
nonempty e.g., {f= ‘Hello’ nonempty} →‘Hello’
{f= ‘’ nonempty} → ' '
if the receiver is empty, returns the non-breaking space sequence. If the receiver is not
empty, returns the receiver.
WebBase User’s Guide
•
onlyDigits e.g., {f= '1 and 2 and 3’ onlyDigits} → ‘123’
returns a new string containing only the numeric values contained within the receiver.
•
parseAt: e.g., {f= ',' 'one,two,three' parseAt:} → OrderedList('one' 'two' 'three')
returns an ordered list of items generated by parsing the receiver using the parse character
argument. If the receiver does not contain the parse character, returns an empty list. This
process is reversible using the concat* operations described above. Note that the argument
can be either a string or a character.
•
parseAt:into: e.g., {set cltn ',' 'one,two,three' parseAt:} {f= ',' cltn 'four,five,six'
parseAt:into:} → OrderedList('one' 'two' 'three' ‘four’ ‘five’ six’)
returns the second argument which is an ordered list. The receiver is parsed using the first
argument and the result(s) are appended to the collection in the second argument. If the
receiver does not contain the parse character, returns the second argument. Note that the
first argument can be either a string or a character.
•
parseAtAny: e.g., {f= ',:' 'one,two:three' parseAtAny:} → OrderedList('one' 'two’
'three')
returns an ordered list of items generated by parsing the receiver using any of the
characters found in the input argument. If the receiver does not contain any of the parse
characters, returns an empty list.
•
parseAtAny:into: e.g., {set cltn ',' 'one,two,three' parseAt:} {f= ',:' cltn 'four:five:six'
parseAtAny:into:} → OrderedList('one' 'two' 'three' ‘four’ ‘five’ six’)
returns the second argument which is an ordered list. The receiver is parsed using the
parse characters found in the first argument which is a string. The result(s) are appended
to the collection in the second argument. If the receiver does not contain any of the parse
characters, returns the second argument.
•
passEncode: e.g., {f= ‘myUsername’ 'myPassword' passEncode:} →
'mR)UR:Q,H`'':c$m'
returns a new string containing an encoded password based on the receiver (initial
password) and argument (user name).
•
pathnameDOS e.g., {f= '/dir1/subdir1/myfile.txt' pathnameDOS} →
'\dir1\subdir1\myfile.txt'
returns a new string in which all the ‘/’ characters in the receiver have been converted to '\'
•
pathnameUNIX e.g., {f= '\dir1\subdir1\myfile.txt' pathnameUNIX} →
'/dir1/subdir1/myfile.txt'
returns a new string in which all the ‘\’ characters in the receiver have been converted to '/
•
quote e.g., {f= 'String' quote} → '''String'''
returns a new string in which a single quote mark has been added to the beginning and end
of the receiver. For example, suppose you want to use a string value in an SQL statement:
SELECT * FROM Table WHERE name = '{varname sql=true}'
If one were to construct the SELECT statement dynamically, one would need to surround
the {varname} value with single quotes as well as process any enclosed single quote
marks. The following statement accomplishes both of these requirements.
WebBase User’s Guide
193
Chapter 11: Expressions
{set var varname asSqlString quote}
•
readFromFile e.g. {f= 'c:\temp\message.txt' readFromFile}
The readFromFile allows one to read text from a file in the file system and either display
that text as part of the returned HTML or store that text into a WebBase variable and
manipulate it as with any other text string. The readFromFile message is sent to a string
that contains a pathname for the file to be read. The pathname string is NOT relative to the
Directory parameter as is used for .htf forms but must be a full pathname for the host
machine's file system. The read is protected such that if an error occurs in locating and/or
reading the file an empty string ('') will be returned rather than an error. The isValidFile
message can first be sent to the same pathname string to determine if the file does exists.
Note that this readFromFile message reads and returns the entire contents of the file as a
string so users should be aware of the possible memory constraints of reading a very large
file. Also note that if the string being read is to be displayed by a browser, any HTML in
the file WILL be processed by the browser but any WebBase macros or variables WILL
NOT be recursively processed by WebBase -- they will be simply returned as text. This is
not another way of accomplishing what the insert macro does.
•
rejectComments e.g., {f= ‘Here is a “comment” within a string’ rejectComments} →
‘Here is a within a string’
returns a new string in which all of the embedded comments in the receiver have been
deleted. A comment is indicated by double quotes.
•
rejectControls e.g., {f= '
a tab and cr
and another tab' rejectControls} → ' a tab and cr and another tab'
returns a new string representing the receiver with all of the embedded control characters
replaced by space characters - multiple contiguous controls being replaced by a single
space.
194
•
rejectHTML e.g., {f= ‘Here is an HTML <INPUT> statement’ rejectHTML} → ‘Here
is an HTML statement’
returns a new string in which all of the embedded <HTML> tags in the receiver have been
deleted.
•
removeString: e.g., {f= ‘Hi’ 'Hi there' removeString:} → ' there'
returns a copy of the receiver with the argument removed
•
removeStringIgnoreCase: e.g., {f= ‘hi’ 'Hi there' removeStringIgnoreCase:} → ' there'
returns a copy of the receiver with the argument removed. Note that the case of the
receiver and argument do not have to match.
•
replace:with: e.g., {f= 2 'hE' 'Hello' replace:with:} → 'hEllo'
returns the receiver after replacing the number of characters specified in the first argument
with the characters in the collection in the second argument.
•
replaceCharacter:from:to:withString: e.g. {f= $l 1 5 'Xx' 'Hello'
replaceCharacter:from:to:withString:} → 'HeXxXxo'
extracts the substring between the starting and ending positions. Replaces any occurrences
of the specified character with the specified string. Returns the modified substring.
WebBase User’s Guide
NOTE:
The resulting string may be longer than the original string if the replacement string
is longer than a single character. The resulting string may be shorter than the
original string if the starting and ending positions do not include the entire original
string.
•
replaceCharacter:with: e.g. {f= $l 75 'Hello' replaceCharacter:with:} → 'HeKKo'
Replaces any occurrences of the specified character within the receiver and returns the
modified receiver. The second argument may be a string, character, integer or any other
non-nil object. If it is an integer, the character value associated with that integer is used,
not the string representation of the integer.
NOTE:
The resulting string may be longer than the original string if the replacement string
is longer than a single character.
•
replaceCharacter:withString: e.g. {f= $l 'Xx' 'Hello' replaceCharacter:withString:} →
'HeXxXxo'
Replaces any occurrences of the specified character within the receiver and returns the
modified receiver.
NOTE:
The resulting string may be longer than the original string if the replacement string
is longer than a single character.
•
replaceNewlinesWithString: e.g., {set longText ‘Here is
some text with
carriage returns
and line feeds
in it’}
{f= ‘*CR*’ longText replaceNewlinesWithString:} → Here is*CR*some text
with*CR*carriage returns*CR*and line feeds*CR*in it
returns a new string containing the receiver after all carriage returns have been removed
and all linefeeds have been replaced with the string identified in the argument.
•
replaceString:with: e.g., {f= ‘ll’ ‘LL’ 'hello' replaceString:with:} → 'heLLo'
returns a copy of the receiver with the string specified in the first argument replaced by the
string specified in the second argument.
•
sortAscendingAt: e.g., {f= $, 'George,Bev,Robert' sortAscendingAt:} →
'Bev,George,Robert'
returns a new string of items that have been sorted. The receiver is a set of substrings that
are separated by the parsing character specified as the input argument. The receiver is
converted into a sorted list using ascending order, and then converted back into a string.
See also parseAt: and concatWith:
•
sortDescendingAt: e.g., {f= $, 'George,Bev,Robert' sortDescendingAt:} →
'Robert,George,Bev’
returns a new string of items that have been sorted. The receiver is a set of substrings that
are separated by the parsing character specified as the input argument. The receiver is
converted into a sorted list using descending order, and then converted back into a string.
See also parseAt: and concatWith:
WebBase User’s Guide
195
Chapter 11: Expressions
•
stripQuotes e.g., {f= ‘” string in dbl quotes”’ stripQuotes} →‘string in dbl quotes’
if the receiver is enclosed in double quotes, returns a copy of the receiver with the
enclosing double quotes removed. If the receiver is not enclosed in double quotes, returns
the receiver.
•
symbolConstant e.g., {f= '#foo' symbolConstant} → #foo
returns a symbol from the string if and only if the first character was a '#' -, otherwise
returns nil.
•
trimBlanks e.g., {f= ' Hi There ' trimBlanks} → 'Hi There'
returns a new string with the leading and trailing blanks (spaces) of the receiver removed.
Note that any embedded blanks are not removed.
•
upTo: e.g., {f= $l 'Hello' upTo:} → 'He'
returns a copy of the receiver up to the specified character.
•
withCrs
returns the receiver after all occurrences of the backslash character ($\) have been replaced
with a carriage return. This is effective when displayed within a <PRE> construct where
the browser honors carriage returns. For example, the statement <PRE>{f= 'One\Per\Line'
withCrs} </PRE> will generate:
One
Per
Line
•
zapCrs
returns a copy of the receiver with all carriage return characters removed
String Class Operations
The string class is accessed using the WebBase variable %String%. The operations in this
section can be performed on this variable, as can any of the operations described above for
general collection classes.
•
fromArrayOfSubstrings:separatedBy: e.g., {set cltn ',' 'one,two,three' parseAt:}
{f= cltn $: %String% fromArrayOfSubstrings:separatedBy:} →‘one:two:three’
returns a new string by appending all of the strings in the first argument with the second
argument used as a separator character between each substring.
•
readFrom: e.g., {f= ‘abc’’defg’’hi’ asStream %String% readFrom:} →‘defg’
read and return a string from the argument, which is a stream. A string comprises all of the
characters between quotes. Two quote marks together put a quote into the string.
11.11 Symbols
A symbol is a sequence of characters that is guaranteed to be unique throughout WebBase.
Symbols are represented using the #symbol notation. All of the operations for Strings can also
be used for symbols, with the exception of at:put: and the replace* operations. There are no
operations specifically for symbols. While a number of operations described in this chapter
return a symbol, there is no variable used to access the Symbol class.
196
WebBase User’s Guide
11.12 Ordered Collections
An ordered collection is similar to an array, except that it can grow to accommodate more
elements if the original collection is not big enough. An ordered collection is often used as a
dynamic array, stack or queue.
Ordered Collection Instance Operations
This section describes all the operations that can be performed on an ordered collection.
An ordered collection is created and used by some WebBase macros. For example, in an {sql
to xxx ...} SELECT{/sql} construct, the variable xxx will contain an ordered collection
following the execution of the SELECT via ODBC. The collection may be empty (if no
matching data records were found) or may contain a number of ODBC row objects -- the
results of the SELECT. Several of the operations described below can only be applied to
ordered collections containing OdbcRowObjects. The collection used in these examples is
cltn1, generated using {set cltn1 ',' 'one,two,three' parseAt: asOrderedCollection}. The
asOrderedCollection operation is used to convert the ordered list generated by parsing into an
ordered collection. All of the displayed behavior would work for ordered lists also.
•
add: e.g., {f= 'end' cltn1 add:} → 'end'
{cltn1} → OrderedCollection('one' 'two' 'three' 'end')
returns the argument after adding it to the end of the receiver.
•
add:after: e.g., {f== 'end' ‘two’ cltn1 add:after:} {cltn1} → OrderedCollection('one'
'two' 'end' 'three')
returns the first argument after adding it to the receiver immediately after the element in
the second argument.
•
add:afterIndex: e.g., {f== 'end' 2 cltn1 add:afterIndex:} {cltn1} →
OrderedCollection('one' 'two' 'end' 'three')
returns the first argument after adding it to the receiver at the index position immediately
after the second argument.
•
add:before: e.g., {f== 'end' ‘two’ cltn1 add:before:} {cltn1} → OrderedCollection('one'
‘end’ 'two' 'three')
returns the first argument after adding it to the receiver immediately before the element in
the second argument.
•
add:beforeIndex: e.g., {f== 'end' 2 cltn1 add:beforeIndex:} {cltn1} →
OrderedCollection('one' ‘end’ 'two' 'three')
returns the first argument after adding it to the receiver at the index position immediately
before the second argument.
•
addAll: e.g., {set cltn2 ',' ‘four,five,six’ parseAt: asOrderedCollection} {f== cltn2 cltn1
addAll:} {cltn1} → OrderedCollection('one' 'two' 'three' ‘four’ ‘five’ ‘six’)
returns the argument after all of the elements in it have been added to the receiver.
•
addAllFirst: e.g., {set cltn2 ',' ‘four,five,six’ parseAt: asOrderedCollection} {f== cltn2
cltn1 addAllFirst:}{cltn1} → OrderedCollection(‘four’ ‘five’ ‘six’ 'one' 'two' 'three')
returns the argument after all of the elements in it have been added to the receiver prior to
the first element in the receiver.
WebBase User’s Guide
197
Chapter 11: Expressions
198
•
addAllLast: e.g., {set cltn2 ',' ‘four,five,six’ parseAt: asOrderedCollection}
{f== cltn2 cltn1 addAllLast:} {cltn1} → OrderedCollection('one' 'two' 'three' ‘four’
‘five’ ‘six’)
returns the argument after all of the elements in it have been added to the receiver after the
last element in the receiver. This is equivalent to addAll:
•
addFirst: e.g., {f== 'end' cltn1 addFirst:} {cltn1} → OrderedCollection( ‘end’ 'one'
'two' 'three')
returns the argument after adding it to the start of the receiver.
•
addLast: e.g., {f== 'end' cltn1 addLast:} {cltn1} → OrderedCollection('one' 'two'
'three' ‘end’)
returns the argument after adding it to the end of the receiver.
•
after: e.g., {f= 'two' cltn1 after:} → 'three'
returns the element that immediately follows the argument in the receiver. If the argument
is not found in the receiver, an error is reported.
•
ascending e.g., {f= cltn1 ascending} → SortedCollection('one' 'three' 'two')
returns a SortedCollection containing all the elements of the receiver in ascending order
•
asOptions: e.g., {set cltn2 ‘,’ ‘apple,banana,cherry’ parseAt: asOrderedCollection} {f=
‘banana’ cltn2 asOptions:} → '<OPTION>apple<OPTION SELECTED>banana
<OPTION>cherry</SELECT>'
the receiver is a collection of strings of options as would be found on an HTML list box.
The input argument is the option which is currently selected. A string is returned that is
properly formatted for HTML to identify all the options and which particular option is
currently selected.
•
asOptions:field: e.g., {sql to answers …} SELECT … {/sql} {f= ‘banana’ ‘FruitType’
answers asOptions:field:} → '<OPTION>apple<OPTION
SELECTED>banana<OPTION>cherry </SELECT>'
the receiver is a collection of ODBCRowObjects as returned from a SELECT query. The
first argument is the option which is selected; the second argument is the name of the field
within the database record. Returns a new string that is properly formatted for HTML
identifying all the options as read from the specified field within the database, and which
particular option is currently selected.
•
at: e.g., {f= 2 cltn1 at:} → 'two'
returns the item at the specified index
•
at:put: e.g., {f== 2 'middle' cltn1 at:put:} {cltn1} → OrderedCollection('one' 'middle'
'three')
returns the second argument after replacing the element in the receiver at the specified
index (first argument) with the new value (second argument).
•
before: e.g., {f= 'two' cltn1 before:} → 'one'
returns the element that immediately precedes the argument in the receiver. If the
argument is not found in the receiver, an error is reported.
•
descending e.g., {f= cltn1 descending} → SortedCollection(‘two’ ‘three’ 'one')
returns a SortedCollection containing all the elements of the receiver in descending order
WebBase User’s Guide
•
describeVHTMLTable e.g., {sql to answers …} SELECT … {/sql} {f= answers
describeVHTMLTable} → <see below>
returns a string that displays a <TABLE> for each entry in the collection. The table
shows the field name, field size, field type and value within the field. The example below
shows a single record from the cars database provided with the WebBase WebWizard
examples.
Example 11.5
describeVHTMLTable example
•
describeVHTMLTable: e.g., {sql to answers …} SELECT … {/sql} {f= ‘Cars
Database’ answers describeVHTMLTable}
returns a string that displays a <TABLE> for each entry in the collection. The table
shows the field name, field size, field type and value within the field. This is the same as
the describeVHTMLTable operation described above, except that the title of the table can
also be specified.
•
printHTMLTable e.g., {sql to answers ...} SELECT ... {/sql} {f= answers
printHTMLTable}
returns a string representing the receiver in tabular form using a <TABLE> </TABLE>
block. This only works on collections that contain OdbcRowObjects returned from an sql
select. Column headers are taken from the database table's column names as returned by
the ODBC call. Limited formatting is done to allow for the indicated field widths as
specified in the database. This operation does not include any way to specify sizes in any
of the <TH> or <TD> generated. If you need to perform more details formatting (like
size=), you will need to write a {forRow ...} loop and do the <TABLE> ... </TABLE>
manually. As a starting point, you can use printHTMLTable in your form, view the
source from your browser, and copy and paste the <TR><TH> header row and one of the
<TR><TD> data rows to your .htf form, and then add the appropriate size, border,
alignment, etc. formatting tags to achieve the desired results. The WebBase WebWizard
database example #2 uses printHTMLTable.
•
printPRETable e.g., {sql to answers ...} SELECT ... {/sql} {f= answers printPRETable}
returns a string representing the receiver in tabular form using a <PRE> </PRE> block.
This only works on collections that contain OdbcRowObjects returned from an sql select.
WebBase User’s Guide
199
Chapter 11: Expressions
Column headers are taken from the database table's column names as returned by the
ODBC call. Limited formatting is done to allow for the indicated field widths as specified
in the database. The WebBase WebWizard database example #2 uses printPRETable.
•
printTable e.g., {sql to answers …} SELECT … {/sql} {f= printTable}
returns a string representing the receiver in tabular form using a <TABLE> construct
block if the browser supports it, or in a <PRE> construct if the browser does not support
tables. This only works on collections that contain OdbcRowObjects returned from an sql
select. See printHTMLTable and printPRETable for details on how the tables may be
displayed.
•
printVHTMLTable e.g., {sql to answers ...} SELECT ... {/sql} {f= answers
printVHTMLTable}
This is very similar to the printHTMLTable operation, but prints the table vertically with
labels on the left (right justified), a colon, then values on the right (left justified).
Name: John Q. Public
Address: 123 State St.
Telephone: (123) 456-7890
This operation should be used when there are a lot of fields (horizontal table would require
a lot of horizontal scrolling) and especially when there is only a single row to be displayed.
The operation does iterate over all the rows in the collection it is sent to. This only works
on collections that contain OdbcRowObjects returned from an sql select.
200
•
printVHTMLTable: e.g., {sql to answers ...} SELECT ... {/sql} {f= ‘Employees in
Company X’ answers printVHTMLTable:}
This is the same as printVHTMLTable except that it allows a title to be specified. When
the table is displayed, the title is displayed centered over the table. This only works on
collections that contain OdbcRowObjects returned from an sql select.
•
remove: e.g., {f== 'two' cltn1 remove:} {cltn1} → OrderedCollection('one' 'three')
returns the argument after it has been removed from the receiver.
•
removeAll e.g., {f= cltn1 removeAll} → OrderedCollection( )
returns the receiver after all of the elements in it have been removed.
•
removeAll: e.g., {set cltn2 ',' ‘one,two’ parseAt: asOrderedCollection}
{f== cltn2 cltn1 removeAll:} {cltn1} → OrderedCollection('three')
returns the argument after all of the elements in it have been removed from the receiver.
•
removeFirst e.g., {f= cltn1 removeFirst} → 'one'
returns the first element in the receiver after it is removed from the receiver.
•
removeIndex: e.g., {f= 2 cltn1 removeIndex:} → OrderedCollection('one' 'three')
returns the receiver after the element at the index position specified in the argument is
removed.
•
removeLast e.g., {f= cltn1 removeLast} → 'three'
returns the last element in the receiver after it is removed from the receiver.
WebBase User’s Guide
Ordered Collection Class Operations
The OrderedCollection class can be accessed using the variable %OrderedCollection% (note
there is no space between Ordered and Collection in either the variable or class name). This
section covers those operations that are sent to the %OrderedCollection% variable. The
operations described above for general collection classes are also applicable for this variable.
•
new e.g., {f= %OrderedCollection% new} → OrderedCollection ( )
returns a new empty ordered collection capable of holding 12 elements. When the number
of elements in the collection exceeds the collection size, the collection is “grown” by
creating a new larger empty ordered collection and copying all the elements from the small
collection into the larger collection. Depending on the sizes of the collections, this can be a
performance issue. If the size of the collection to be created is known when the collection
is created, the new: operation should be used to optimize performance.
•
new: e.g., {f= 25 %OrderedCollection% new:} → OrderedCollection ( )
returns an empty ordered collection capable of holding the number of elements specified in
the argument. See the description of the new operation above for usage tips.
11.13 Ordered Lists
An ordered list is almost the same as an ordered collection. All of the operations described for
ordered collections apply to ordered lists. There are no operations specific to ordered lists.
However, an ordered list and a sorted list are the only WebBase data types that will return true
to the isList operation. The %OrderedList% WebBase variable can be used with the general
collection and ordered collection class operations described above. There are no class
operations specific to the OrderedList class.
An ordered list can be created in WebBase by parsing a string (see parseAt: above), or via the
dynamic variable %newList%. Typically, one would assign a list to a variable, then send
messages to that variable to manipulate the contents of the list as appropriate for the
application.
11.14 Sorted Collections
A sorted collection contains elements sorted according to the elements sort order (which is how
they respond to the < method. All of the operations that can be performed on ordered
collections can also be performed on sorted collections. However, ordered collection
operations which add a new element to a specific location within the collection (e.g., addFirst:,
removeLast:) cannot be used on sorted collections. The %SortedCollection% WebBase
variable can be used with the general collection and ordered collection class operations
described above. There are no class operations specific to the SortedCollection class.
11.15 Sorted Lists
A sorted list is almost the same as a sorted collection. All of the operations described for
sorted collections apply to sorted lists. There are no operations specific to sorted lists.
However, an ordered list and a sorted list are the only WebBase data types that will return true
to the isList operation. In addition, a sorted list is the only WebBase data type that returns
true to the isSortedList operation.
WebBase User’s Guide
201
Chapter 11: Expressions
Sorted lists can be created in WebBase via the dynamic variables %newAscendingList% or
%newDescendingList%. Typically, one would assign a list to a variable, then send messages
to that variable to manipulate the contents of the list as appropriate for the application.
Sorted List Class Operations
The %SortedList% variable is used to create a new sorted list using the class operations
described below. The operations described above for general collection and ordered collection
classes are also applicable for this variable.
•
newAscending e.g., {f= %SortedList% newAscending} → SortedList ()
returns an empty sorted list whose sort order for elements is ascending.
•
newDescending e.g., {f= %SortedList% newDescending} → SortedList ()
returns an empty sorted list whose sort order for elements is descending.
11.16 Associations
An association associates two objects known as the key/value pair. Association objects are
used to store information into dictionaries.
Association Instance Operations
This section describes all the operations that can be performed on an association. There are
two examples associations used in the following examples: assoc1 and assoc2. They are
generated using: {set assoc1 ‘Version’ %version% %Association% key:value:} and {set
assoc2 ‘Build’ %build% %Association% key:value:}. Although both of these examples
include strings as the keys and values, it is possible to have any data type as a key or a value.
However, it is recommended that keys be strings or symbols whenever possible.
202
•
< e.g., {f= assoc2 assoc1 <} → false
returns true if the receiver key is less than the argument key; otherwise false. Note that the
argument must also be an association.
•
<= e.g., {f= assoc2 assoc1 <=} → false
returns true if the receiver key is less than or equal to the argument key; otherwise false.
Note that the argument must also be an association.
•
= e.g., {f= assoc2 assoc1 =} → false
returns true if the receiver key and the argument key are the same, otherwise false
•
> e.g., {f= assoc2 assoc1 >} → true
returns true if the receiver key is greater than the argument key; otherwise false. Note that
the argument must also be an association.
•
>= e.g., {f= assoc2 assoc1 >=} → true
returns true if the receiver key is greater than or equal to the argument key; otherwise
false. Note that the argument must also be an association.
•
between:and: e.g., {set assoc3 ‘Title’ %comment% %Association% key:value:} {f=
assoc2 assoc1 assoc3 between:and:} → true
returns true if the receiver is between the first and second arguments, otherwise false.
WebBase User’s Guide
Note that the arguments must be associations, and the comparison is done based on the
keys.
•
key e.g., {f= assoc1 key} →‘Version’
returns the key of the receiver
•
max: e.g., {f= assoc2 assoc1 max:} → 'Version' ==> '4.10'
returns the maximum of the receiver or the argument
•
min: e.g., {f= assoc2 assoc1 min:} → 'Build' ==> '56'
returns the minimum of the receiver or the argument
•
value e.g., {f= assoc1 value} → '4.10'
returns the value of the receiver
Association Class Operations
The Association class is accessed using the %Association% WebBase variable. This section
describes all the operations that can be performed on the Association class.
•
key: e.g., {f= ‘Version’ %Association% key:} → 'Version' ==> nil
returns a new association whose key is set to the first argument (the value is left as nil).
•
key:value: e.g., {f= ‘Version’ %version% %Association% key:value:} → 'Version'
==> '4.10'
returns a new association whose key is set to the first argument and whose value is set to
the second argument.
11.17 Dictionaries
A dictionary is a collection of key/value pairs of objects. The keys in a dictionary are unique,
whereas values may be duplicated. A dictionary may be searched either by key or by value.
Key searches use hashing for efficiency.
Dictionary Instance Operations
This section describes all the operations that can be performed on a dictionary. For the
examples in the following, we will use an example dictionary dict1 containing the two example
associations used in the preceding section. This dictionary is created using {set dict1
%Dictionary% new} {f== assoc1 dict1 add:} {f== assoc2 dict1 add:} {dict1} →
Dictionary('56' '4.10' )
•
add: e.g., {set assoc3 ‘Title’ %title% %Association% key:value:} {f== assoc3 dict1
add:} {dict1} → Dictionary('WebBase 4.10 Build 56' '56' '4.10' )
returns the argument after adding it to the receiver. Note that the argument is an
association.
•
addAll: e.g., {set assoc3 ‘Title’ %title% %Association% key:value:} {set assoc4
‘Company’ ‘ExperTelligence, Inc.’ %Association% key:value:} {set cltn1 assoc3 assoc4
%OrderedCollection% with:with:}
{f== cltn1 dict1 addAll:} {dict1} → Dictionary(('Title' ==> 'WebBase 4.10 build 56')
('Build' ==> '56') ('Company' ==> 'ExperTelligence,Inc.') ('Version' ==> '4.10') )
WebBase User’s Guide
203
Chapter 11: Expressions
returns the argument after adding all the elements in it to the receiver. Note that the
elements in the argument collection are associations.
204
•
addDictionary: e.g., {set assoc3 ‘Title’ %title% %Association% key:value:} {set
assoc4 ‘Company’ ‘ExperTelligence, Inc.’ %Association% key:value:} {set dict2
%Dictionary% new} {f== assoc3 dict2 add:} {f== assoc4 dict2 add:} {f== dict2 dict1
addDictionary:} {dict1} → Dictionary(('Title' ==> 'WebBase 4.10 build 56') ('Build'
==> '56') ('Company' ==> 'ExperTelligence,Inc.') ('Version' ==> '4.10') )
returns the receiver after adding all the associations in the argument to the receiver.
•
asArray e.g., {f= dict1 asArray} →('56' '4.10')
returns an array containing all the associations in the receiver.
•
asKeys e.g., {f= dict1 asKeys} → OrderedList('Build' 'Version' )
returns an ordered list containing all of the keys in the receiver.
•
asOrderedCollection e.g., {f= dict1 asOrderedCollection} → OrderedCollection('56'
'4.10')
returns an ordered collection containing all the associations in the receiver.
•
asPairs e.g., {f= dict1 asPairs} → OrderedList('Build' ==> '56' 'Version' ==> '4.10' )
returns an ordered list containing all the associations in the receiver.
•
associationAt: e.g., {f= ‘Version’ dict1 associationAt:} → 'Version' ==> '4.10'
returns the association whose key is the same as the argument. If not found, an error is
reported.
•
asSortedCollection e.g., {f= dict1 asSortedCollection} → SortedCollection('56' '4.10')
returns a sorted collection containing all the associations in the receiver sorted in ascending
order.
•
asValues e.g., {f= dict1 asValues} → OrderedList('56' '4.10' )
returns an ordered list containing all the values in the receiver. Note that if there are
multiple associations with the same value, there will be multiple entries in the ordered list
that are the same value.
•
at: e.g., {f= ‘Version’ dict1 at:} → '4.10'
returns the value of the association whose key equals the argument. If not found, an error
is reported.
•
at:put: e.g., {f== ‘Build’ ‘57’ dict1 at:put:} {dict1} → Dictionary(('Build' ==> '57')
('Version' ==> '4.10') )
returns the second argument. If the receiver contains the association whose key is the same
as the first argument, replaces the value of the association with the second argument. If
the receiver does not contain an association whose key is the same as the first argument,
creates a new association whose key is the first argument and whose value is the second
argument and adds it to the receiver.
•
elementsEqual: e.g., {set assoc3 ‘Title’ %title% %Association% key:value:} {set
assoc4 ‘Company’ ‘ExperTelligence, Inc.’ %Association% key:value:} {set dict2
%Dictionary% new} {f== assoc3 dict2 add:} {f== assoc4 dict2 add:} {f= dict2 dict1
elementsEqual:} → false
returns true if the receiver has exactly those elements in the argument; otherwise false.
WebBase User’s Guide
•
includes: e.g., {f= %version% dict1 includes:} → true
returns true if the receiver contains an association whose value is the same as the
argument; otherwise false.
•
includesKey: e.g., {f= ‘Version’ dict1 includesKey:} → true
{f= ‘version’ dict1 includesKey:} → false
returns true if the receiver contains an association whose key is the same as the argument;
otherwise false. Note that the key must match exactly.
•
isEmpty e.g., {f= dict1 isEmpty} → false
{f= %Dictionary% new isEmpty} → true
returns true if the receiver does not contain any associations, otherwise false
•
keyAtValue: e.g., {f= ‘4.10’ dict1 keyAtValue:} →‘Version’
returns the key for the association whose value equals the argument. If not found, returns
nil.
•
notEmpty e.g., {f= dict1 notEmpty} → true
{f= %Dictionary% new notEmpty} → false
returns true if the receiver does contains any associations, otherwise false. Equivalent to
isEmpty not
•
occurrencesOf: e.g., {f=’4.10’ dict1 occurrencesOf:} → 1
returns the number of associations in the receiver whose value is the same as the argument.
•
removeAll e.g., {f= dict1 removeAll} → Dictionary( )
returns the receiver after all of the associations within it have been removed.
•
removeAssociation: e.g., {f= assoc1 dict1 removeAssociation:} → Dictionary(('Build'
==> '56') )
returns the receiver after the specified association has been removed from it. If the
association is not in the receiver, reports an error.
•
removeKey: e.g., {f== ‘Version’ dict1 removeKey:} {dict1} → Dictionary(('Build' ==>
'56') )
returns the receiver after the association whose key is the same as the argument is removed
from it. If an association is not found, an error is reported.
•
size e.g., {f= dict1 size} → 2
returns the number of elements contained in the receiver.
•
urlArgString e.g., {f= dict1 urlArgString} → Build=56&Version=4.10
returns a string of key=value&key=value entries that can be used on a URL command line.
Dictionary Class Operations
The Dictionary class can be accessed using the variable %Dictionary%. This section covers
those operations that are sent to the %Dictionary% variable. The operations described above
for general collection classes are also applicable for this variable.
•
new e.g., {f= %Dictionary% new} → Dictionary( )
returns a new empty dictionary.
WebBase User’s Guide
205
Chapter 11: Expressions
11.18 Characters
Characters in WebBase are specified using the format $a where the actual character desired
follows the ‘$’. Note that characters and strings are represented and handled differently within
WebBase. Several special characters, their description, and their ASCII value are available as
follows:
$cr
$lf
$ff
$bs
$esc
$tab
$space
$null
$bell
carriage return
line feed
form feed
backspace
escape
tab
space
null
bell
13
10
12
8
27
9
32
0
7
This section describes all the character related operations that can be applied to the
character(s) extracted from string variables and/or character constants. There are no class
operations available for characters.
206
•
- e.g., {f= $A $Z -} → 25
{f= 25 $Z -} → 65
If the argument is a character, returns the difference between the receiver's asciiValue and
the argument’s asciiValue; if it is an integer, returns the difference between the receiver's
asciiValue and the argument.
•
, (comma) e.g., {f= $B $A ,} →‘AB’
{f= ‘bc’ $A ,} →‘Abc’
returns a string generated by concatenating the receiver with the argument, which is either
a character or a string.
•
+ e.g., {f= 25 $A +} → $Z
returns a character whose asciiValue is the sum of the receiver's asciiValue and the
argument (or its asciiValue)
•
< e.g., {f= $e $f =} → false
returns true if the receiver is less than the argument using a sort-order character
comparison, otherwise false
•
<= e.g., {f= $e $f =} → false
returns true if the receiver is less than or equal to the argument using a sort-order character
comparison, otherwise false
•
= e.g., {f= $e 2 'Hello' at: =} → true
returns true if the receiver and the argument are the same character, otherwise false
•
> e.g., {f= $e $f =} → true
returns true if the receiver is greater than the argument using a sort-order character
comparison, otherwise false
WebBase User’s Guide
•
>= e.g., {f= $e $f =} → true
returns true if the receiver is greater than or equal to the argument using a sort-order
character comparison, otherwise false
•
asCharacter e.g., {f= $X asCharacter} → $X
returns the receiver since it is already a character
•
asciiValue e.g., {f= $X asciiValue} → 88
returns an integer representing the ASCII value for the receiver
•
asInteger e.g., {f= $X asInteger} → 88
returns the integer ASCII value for the receiver; this is the same as the asciiValue message
•
asLowercase e.g., {f= $X asLowercase} → $x
returns the lowercase character for the receiver if it is an alphabetic character, otherwise
returns the receiver as is. This may also be written using asLowerCase.
•
asUppercase e.g., {f= $x asUppercase} → $X
returns the uppercase character for an the receiver if it is an alphabetic character,
otherwise returns the receiver as is. This may also be written using asUpperCase.
•
authDecode e.g., {f= $w authDecode} → 48
return an integer representing the character as per RFC 1421. See the number method
authEncode also.
•
between:and: e.g., {f= $A $Z $X between:and:} → true
returns true if the receiver is between the first and second arguments when doing a sortorder character comparison
•
digitValue e.g., {f= $W digitValue} → 32
returns a number corresponding to the digit value of the receiver. Only the characters $0$9 and $A-$Z are valid as a receiver (note that the lowercase alphabetic characters are not
valid).
•
isAlphaNumeric e.g., {f= $X isAlphaNumeric} → true
{f= $$ isAlphaNumeric} → false
returns true for the characters for letters a through z, A through Z and digits 0 through 9,
otherwise false
•
isDigit e.g., {f= $X isDigit} → false
{f= $2 isDigit} → true
returns true for the characters for digits 0 through 9, otherwise false
•
isLetter e.g., {f= $X isLetter} → true
{f= $2 isLetter} → false
returns true for the characters for letters a through z and A through Z, otherwise false
•
isLowercase e.g., {f= $x isLowercase} → true
{f= $X isLowercase} → false
returns true for the characters for letters a through z, otherwise false. This may also be
written as isLowerCase.
•
isSeparator e.g., {f= $space isSeparator} → true
{f= $X isSeparator} → false
WebBase User’s Guide
207
Chapter 11: Expressions
returns true for the characters for Space, Tab, Carriage Return, Line Feed, and Form Feed
characters; otherwise false
•
isUppercase e.g., {f= $X isUppercase} → true
{f= $x isUppercase} → false
returns true for the characters for letters A through Z, otherwise false. This may also be
written as isUpperCase.
•
isVowel e.g., {f= $X isVowel} → false
{f= $A isVowel} → true
returns true for the characters a, A, e, E, i, I, o, O, u and U; otherwise false
•
isWhitespace e.g., {f= $space isWhitespace} → true
{f= $X isWhitespace} → false
returns true for Space or control characters, otherwise false
•
max: e.g., {f= $A $X max:} → $X
returns the larger character when doing a sort-order character comparison
•
min: e.g., {f= $A $X min:} → $A
returns the smaller character when doing a sort-order character comparison
•
validHtmlChar e.g., {f= $A validHtmlChar} → true
{f= $% validHtmlChar} → false
returns true or false depending on if the receiver needs to be converted for HTML use. All
alphanumeric characters and some punctuation characters return true. Any character that
must be encoded for use in a command line argument will return false.
11.19 Booleans
There are only two instances of Boolean - true and false. There are many Boolean operations
in the other sections that return a true or false value depending on the result of the
computation. These operations require the receiver to be a Boolean. There are no class
operations available for Booleans.
208
•
& e.g., {f= 'yes' 'yes' = 'no' 'no' = &} → true
returns the logical AND of the receiver and argument
•
| e.g., {f= 'yes' 'no' = 'no' 'yes' = | } → false
returns the logical OR of the receiver and argument
•
asBoolean: e.g., {f= false 1 1 = asBoolean:} → true
returns the receiver and ignores the argument. This is provided for compatibility with the
asBoolean: operation available on strings.
•
asSqlString e.g., {f= 1 1 = asSqlString} →‘True’
returns the string ‘True’ if the receiver is true, or the string ‘False’ if the receiver is false.
•
eqv: e.g., {f= 'yes' 'no' = 'no' 'yes' = eqv:} → true
returns true if the receiver is equivalent to the argument, otherwise false.
•
not e.g., {f= 'yes' 'no' = not} → true
returns the inverse of the receiver.
WebBase User’s Guide
•
xor: e.g., {f= 'yes' 'no' = 'no' 'yes' = xor:} → false
returns true if the receiver is not equivalent to the argument, otherwise false.
11.20 Dates
A date represents a particular day since the start of the Julian calendar. The dynamic variable
%date% returns the current date.
Date Instance Operations
The following messages can be sent to any WebBase variable containing a date. For the
following examples, assume %date% → 3/18/97.
•
< e.g., {set date1 '2/10/97' asDate } {f= %date% date1 <} → true
returns true if the receiver is less than the argument, otherwise false
•
<= e.g., {set date1 '2/10/97' asDate } {f= %date% date1 <=} → true
returns true if the receiver is less than or equal to the argument, otherwise false
•
= e.g., {set date1 '2/10/97' asDate } {f= %date% date1 =} → false
returns true if the receiver and argument are the same date, otherwise false
•
> e.g., {set date1 '2/10/97' asDate } {f= %date% date1 >} → false
returns true if the receiver is greater than the argument, otherwise false
•
>= e.g., {set date1 '2/10/97' asDate} {f= %date% date1 >=} → false
returns true if the receiver is greater than or equal to the argument, otherwise false
•
addDays: e.g., {f= 20 %date% addDays:} → 04/07/97
returns a new date that is ‘n’ number of days after the specified date, where ‘n’ is the input
argument.
•
asSeconds e.g., {f= %date% asSeconds} → 3036096000
returns the number of seconds elapsed from January 1, 1901 until the specified date
•
between:and: e.g., {set date1 '12/10/97' asDate } {set date2 '2/10/97' asDate} {f= date2
date1 %date% between:and:} → true
returns true if the receiver is between the two dates specified as arguments
•
day e.g., {f= %date% day} → 35140
returns the number of days elapsed from January 1, 1901 until the specified date
•
dayIndex e.g., {f= %date% dayIndex} → 2
returns the index for the day of the week, 1=Mon, 7=Sun
•
dayName e.g., {f= %date% dayName} → #Tuesday
returns the symbol identifying the day of the week
•
dayOfMonth e.g., {f= %date% dayOfMonth} → 18
returns an integer from 1 to 31 specifying the day number within the month
•
dayOfYear e.g., {f= %date% dayOfYear} → 77
returns an integer from 1 to 365 identifying the day number within the year
WebBase User’s Guide
209
Chapter 11: Expressions
210
•
daysInMonth e.g., {f= %date% daysInMonth} → 31
returns an integer identifying the number of days in the month
•
daysInYear e.g., {f= %date% daysInYear} → 365
returns an integer identifying the number of days in the year
•
daysLeftInMonth e.g., {f= %date% daysLeftInMonth} → 12
returns an integer specifying how many days remain in the month
•
daysLeftInYear e.g., {f= %date% daysLeftInYear} → 288
returns an integer specifying how many days remain in the year
•
elapsedDaysSince: e.g., {set date1 '2/10/97' asDate} {f= date1 %date%
elapsedDaysSince:} → 36
returns an integer specifying the number of days between the receiver and the argument.
•
elapsedMonthsSince: e.g., {set date1 '2/10/97' asDate} {f= date1 %date%
elapsedMonthsSince:} → 1
returns an integer specifying the number of months between the receiver and the argument.
•
elapsedSecondsSince: e.g., {set date1 '2/10/97' asDate} {f= date1 %date%
elapsedSecondsSince:} → 3110400
returns an integer specifying the number of seconds between the receiver and the argument.
•
firstDayInMonth e.g., {f= %date% firstDayInMonth} → 60
returns an integer specifying the number of the first day in the month from the beginning of
the year
•
firstDayOfMonth e.g., {f= %date% firstDayOfMonth} → 03/01/97
returns a new date representing the first of the month
•
firstSundayIn: e.g., {f= 3 %date% firstSundayIn:} → 61
returns the number of days after the start of the year for the first Sunday within the month
for the specified index.
•
firstSundayInMonth e.g., {f= %date% firstSundayInMonth} → 61
returns the number of days after the start of the year for the first Sunday in the current
month
•
lastSundayIn: e.g., {f= 3 %date% lastSundayIn:} → 89
returns the number of days after the start of the year for the last Sunday within the month
for the specified index.
•
lastSundayInMonth e.g., {f= %date% lastSundayInMonth} → 89
returns the number of days after the start of the year for the last Sunday in the current
month
•
max: e.g., {set date1 ‘2/10/97’ asDate} {f= date1 %date% max:} → 03/18/97
returns the maximum (more recent) of the receiver or the argument.
•
min: e.g., {set date1 ‘2/10/97’ asDate} {f= date1 %date% min:} → 03/18/97
returns the minimum (less recent) of the receiver or the argument.
WebBase User’s Guide
•
monthIndex e.g., {f= %date% monthIndex} → 3
returns the number of the month
•
monthName e.g., {f= %date% monthName} → #March
returns the symbol identifying the name of the month
•
previousWeekday: e.g., {f= #Tuesday %date% previousWeekday:} → 03/11/95
returns a Date reflecting the most recent day name represented by the argument preceding
the receiver. The argument must be a symbol; valid entries are Sunday, Monday,
Tuesday, Wednesday, Thursday, Friday and Saturday. The ‘#’ denotes that the argument
is a symbol.
•
printInFormat:twoDigitYear: e.g., {f= 2 false %date% printInFormat:twoDigitYear:}
→ 1997/03/18
returns a string representing the receiver in the form specified by the first argument. The
first argument is an integer as noted below:
0 = Month-Day-Year
1 = Day-Month-Year
2 = Year-Month-Day
The second argument is a Boolean that specifies whether the year should be printed in 2
digits or 4. See also printOn:inFormat:twoDigitYear:.
•
printOn:inFormat:twoDigitYear: e.g., {set strm %String% new %WriteStream% on:}
{f== strm 2 false %date% printOn:inFormat:twoDigitYear:} {f= strm contents} →
1997/03/18
appends a string representing the receiver in the form specified by the second argument to
the stream identified in the first argument. The third argument is a Boolean that specifies
whether the year should be printed in 2 digits or 4. See also printInFormat:twoDigitYear:.
•
printOn:inFormat:twoDigitYear:dateSeparator: e.g., {set strm %String% new
%WriteStream% on:} {f== strm 2 false ‘*’ %date%
printOn:inFormat:twoDigitYear:dateSeparator:} {f= strm contents} → 1997*03*18
appends a string representing the receiver in the form specified by the second argument to
the stream identified in the first argument. The third argument is a Boolean that specifies
whether the year should be printed in 2 digits or 4; the fourth argument is a string used to
separate the month, day and year portions of the date.
•
printOn:withPicture: e.g., {set strm %String% new %WriteStream% on:} {f== strm
‘MMM dd yyyy’ %date% printOn:withPicture:} {f= strm contents} →‘Mar 18 1997’
appends a string representing the receiver in the form specified by the second argument to
the stream identified in the first argument. See printWithPicture: for format information.
•
printWithPicture: e.g., {f= ‘MMM dd yyyy’ %date% printWithPicture:} → Mar 18
1997'
returns a formatted string displayed according to the argument. The receiver will be
printed with the substitutions listed below taking place. Note that there must be a
separation character between the ‘M’, ‘d’ and ‘y’ characters; the separation character will
be displayed in the output. (e.g., MM/dd/yy → 01/24/96)
♦ Every single M (uppercase M) will be replaced by the number of the month as a single
or two-digit value.
WebBase User’s Guide
211
Chapter 11: Expressions
♦ Every two consecutive MM’s (uppercase MM’s) will be replaced by the number of the
month as a two-digit (zero left filled if necessary) value.
♦ Every three consecutive MMM’s (uppercase MMM’s) will be replaced by a threeletter ABBREVIATION for the month -- e.g., 03 → Mar.
♦ Every four consecutive MMMM’s (uppercase MMMM’s) will be replaced by the full
NAME of the month -- e.g., 03 → March.
♦ Every single d (lowercase d) will be replaced by the number of the day as a single or
two-digit value
♦ Every two consecutive dd’s (lowercase dd’s) will be replaced by the number of the day
as a two-digit (zero left filled if necessary) value
♦ Every three consecutive ddd’s (lowercase ddd’s) will be replaced by a three-letter
ABBREVIATION for the day of the week -- e.g., Sun.
♦ Every four consecutive dddd’s (lowercase dddd’s) will be replaced by the full NAME
of the day of the week -- e.g., Sunday.
♦ Every two consecutive yy’s (lowercase yy’s) will be replaced by the last two digits of
the year -- e.g., 97
♦ Every occurrence of a single y - or multiple (but not 2) yyyy’s (lowercase y) will be
replaced by the four-digit value of the year -- e.g., 1997
•
subtractDate: e.g., {set date1 ‘2/10/97’ asDate} {f= date1 %date% subtractDate:} →
36
returns the number of days between the receiver and the date specified in the argument.
•
subtractDays: e.g., {f= 20 %date% subtractDays:} → 02/26/97
returns a new date that is ‘n’ number of days before the specified date
•
year e.g., {f= %date% year} → 1997
returns an integer specifying the year
Date Class Operations
The %Date% variable allows the Date class to be accessed. This class has many useful
operations to create, compare and compute dates.
•
212
calendarForMonth:year: e.g., {f= #April 1997 %Date% calendarForMonth:year:} →
<see below>
returns a string containing the formatted calendar for the month whose name is the symbol
specified in the first argument, and the year is specified in the second argument. The
results of the above example are:
WebBase User’s Guide
Su Mo Tu
1
6 7 8
13 14 15
20 21 22
27 28 29
We
2
9
16
23
30
Th
3
10
17
24
Fr
4
11
18
25
Sa
5
12
19
26
•
dateAndTimeNow e.g., {f= %Date% dateAndTimeNow} →(03/18/97 02:03:27 PM)
returns an array containing two elements: a date representing the current date and a time
representing the current time.
•
day:month:year: e.g., {f= 25 5 97 %Date% day:month:year:} → 05/25/97
returns a new date defined by the day (first argument), month (second argument) and year
(third argument).
•
dayNames e.g., {f= %Date% dayNames} → Dictionary((Fri ==> 5) (Sunday ==> 7)
(Wednesday ==> 3) (Friday ==> 5) (Sat ==> 6) (Tue ==> 2) (Saturday ==> 6)
(Monday ==> 1) (Thr ==> 4) (Tuesday ==> 2) (Thursday ==> 4) (Wed ==> 3) (Mon
==> 1) (Sun ==> 7) )
returns a dictionary. The key of each association is the day name as a symbol and the
value is the index of the day (1=Monday). Note: there is an association for the full name
and the short name of each day of the week (e.g., Mon, Monday).
•
dayOfWeek: e.g., {f= #Mon %Date% dayOfWeek:} → 1
returns an integer from 1 to 7 indicating the weekday number for the symbol argument
(1=Monday, 7=Sunday). Note: the argument may be the symbol for either the short or full
name of the day.
•
daysInMonth:forYear: e.g., {f= #April 1997 %Date% daysInMonth:forYear:} → 30
returns the total number of days for the month specified with the symbol in the first
argument in the year specified in the second argument.
•
daysInYear: e.g., {f= 1997 %Date% daysInYear:} → 365
returns the total number of days for the year specified in the argument.
•
fromDays: e.g., {f= 1000 %Date% fromDays:} → 09/28/03 (note this is 1903, not
2003!)
{f= -1000 %Date% fromDays:} → 04/06/98 (note this is 1898, not 1998!)
returns a date that is the number of days specified in the argument before or after January
1, 1901. If the argument is negative, the date will be computed before January 1. If the
argument is positive, the date will be computed for after January 1, 1901.
•
fromString: e.g., {f= 'May 6, 1997' %Date% fromString:} → 05/06/97
returns the date specified by the argument, which must represent a date in one of three
formats:
♦
♦
♦
‘Jan 2, 1990’
‘2 Jan, 1990’
‘02-01-90’
The delimiters between the month, day and year can be any sequence of non-alphanumeric
characters.
•
indexOfMonth: e.g., {f= #April %Date% indexOfMonth:} → 4
returns an integer from 1 to 12 indicating the month index for the symbol argument
WebBase User’s Guide
213
Chapter 11: Expressions
214
•
leapYear: e.g., {f= 1996 %Date% leapYear:} → 1
{f= 1997 %Date% leapYear:} → 0
returns 1 if the year specified in the argument is a leap year; otherwise 0
•
leapYearsTo: e.g., {f= 1996 %Date% leapYearsTo:} → 23
returns the number of leap years from 1901 to the year before the year specified in the
argument
•
monthNameFromString: e.g., {f= 'May' %Date% monthNameFromString:} → #May
returns the symbol for the month name corresponding to the argument
•
monthNames e.g., {f= %Date% monthNames} → Dictionary((Jul ==> 7) (July ==> 7)
(Oct ==> 10) (Feb ==> 2) (March ==> 3)(December ==> 12) (November ==> 11)
(Mar ==> 3) (February ==> 2) (Jan ==> 1) (January ==> 1) (August==> 8) (Dec
==> 12) (October ==> 10) (Nov ==> 11) (April ==> 4) (September ==> 9) (Sep
==> 9) (Aug ==>8) (Apr ==> 4) (May ==> 5) (Jun ==> 6) (June ==> 6) )
returns a dictionary. The key of each association is the month name as a symbol, the value
is the month index. Note: there is an association for the full name and the short name of
each month (e.g., Jan, January).
•
nameOfDay: e.g., {f= 3 %Date% nameOfDay:} → #Wednesday
returns the weekday name as a symbol corresponding to the integer argument (Monday for
1, Sunday for 7).
•
nameOfMonth: e.g., {f= 3 %Date% nameOfMonth:} → #March
returns the month name as a symbol corresponding to the integer argument (January for 1,
December for 12).
•
newDay:month:year: e.g., {f= 15 #June 1997 %Date% newDay:month:year:} →
06/15/97
returns a date with the day specified in the first argument, the month in the second
argument, and the year specified in the third argument. The day and year are specified as
integers; the month is a symbol.
•
newDay:year: e.g., {f= 89 1997 %Date% newDay:year:} → 03/30/97
returns a date with the day specified in the first argument and the year specified in the
second argument. The date is an integer representing the number of days since the first of
the year.
•
pathToday: e.g., {f= %Date% today %Date% pathToday:} → 970318
returns a six-digit string in the format yymmdd using the date specified in the argument.
•
shortNameOfDay: e.g., {f= 2 %Date% shortNameOfDay:} → #Tue
returns the short weekday name as a symbol corresponding to the weekday index integer
argument (Mon for 1, Sun for 7).
•
shortNameOfMonth: e.g., {f= 2 %Date% shortNameOfMonth:} → #Feb
returns the short month name as a symbol corresponding to the month index integer
argument (Jan for 1, Dec for 12).
•
today e.g., {f= %Date% today} → 03/18/97
returns a date representing the current date
WebBase User’s Guide
11.21 Times
A time represents a particular time of day to the nearest second. The dynamic variable
%time% returns the current time.
Time Instance Operations
The following messages can be sent to any WebBase variable containing a time. For the
following examples, assume %time% → 01:30:00 PM.
•
< e.g., {set time1 '8:00:00 PM' asTime} {f= %time% time1 <} → false
returns true if the receiver is less than the argument, otherwise false
•
<= e.g., {set time1 '8:00:00 PM' asTime} {f= %time% time1 <=} → false
returns true if the receiver is less than or equal to the argument, otherwise false
•
= e.g., {set time1 '8:00:00 PM' asTime} {f= %time% time1 =} → false
returns true if the receiver and argument are the same time, otherwise false
•
> e.g., {set time1 '8:00:00 PM' asTime} {f= %time% time1 >} → true
returns true if the receiver is greater than the argument, otherwise false
•
>= e.g., {set time1 '8:00:00 PM' asTime} {f= %time% time1 >=} → true
returns true if the receiver is greater than or equal to the argument, otherwise false
•
addTime: e.g., {set twoHoursInSeconds 60 60 2 * *} {set time1 twoHoursInSeconds
%Time% fromSeconds:} {f= time1 %time% addTime:} → 03:30:00 AM
returns a new time in which the amount of time specified in the argument (a time) has been
added to the receiver time.
•
asSeconds e.g., {f= %time% asSeconds} → 48600
returns the number of seconds from midnight until the specified time
•
between:and: e.g., {set time1 '8:00:00 AM' asTime} {set time2 '8:00:00 PM' asTime}
{f= time1 time2 %time% between:and:} → true
returns true if the input time is between the receiver and the argument
•
hours e.g., {f= %time% hours} → 13
returns the number of hours from midnight until the specified time
•
max: e.g., {set time1 ‘3:30:00 AM’ asTime} {f= time1 %time% max:} → 01:30:00 PM
returns the greater of the receiver or the argument.
•
min: e.g., {set time1 ‘3:30:00 AM’ asTime} {f= time1 %time% min:} → 03:30:00 AM
returns the lesser of the receiver or the argument.
•
minutes e.g., {f= %time% minutes} → 30
returns the number of minutes past the hour
•
printOn12Hr: e.g., {set strm %String% new %WriteStream% on:} {f== strm %time%
printOn12Hr:} {f= strm contents} → 01:30:00 PM
WebBase User’s Guide
215
Chapter 11: Expressions
appends a string representing the receiver time to the stream specified in the argument.
The time is in 12-hour plus AM/PM format.
•
printOn24Hr: e.g., {set strm %String% new %WriteStream% on:} {f== strm %time%
printOn24Hr:} {f= strm contents} → 13:30:00
appends a string representing the receiver time to the stream specified in the argument.
The time is in 24-hour clock format.
•
seconds e.g., {f= %time% seconds} → 0
returns the number of seconds past the minute
•
subtractTime: e.g., {set oneHourInSeconds 60 60 *} {set time1 oneHourInSeconds
%Time% fromSeconds:} {f= time1 %time% subtractTime:} → 12:30:00 PM
returns a new time in which the amount of time specified in the argument (a time) has been
subtracted from the receiver time.
Time Class Operations
The %Time% variable allows the Time class to be accessed. This section covers the
operations that the Time class can do.
216
•
dateAndTimeNow e.g., {f= %Time% dateAndTimeNow} →(03/19/97 09:38:17 AM)
returns an array of two elements containing the current date and the current time. Note
that the array returned by the Date class is the same as the array returned by this
operation.
•
fromSeconds: e.g., {f= 4500 %Time% fromSeconds:} → 01:15:00 AM
returns a time which represents the number of seconds in the argument after midnight.
•
fromString: e.g., {f= ‘11:29:00 PM’ %Time% fromString:} → 11:29:00 PM
returns a time for the value given by the argument. The argument must be in the form
specified by the current system time format (e.g., 12-hour or 24-hour format).
•
fromString12: e.g., {f= ’3:30:00 PM’ %Time% fromString12:} → 03:30:00 PM
returns a time for the value given by the argument. The argument must be in 12 hr
AM/PM format.
•
fromString24: e.g., {f= ’15:30:00’ %Time% fromString24:} → 03:30:00 PM
returns a time for the value given by the argument. The argument must be in 24 hr clock
format.
•
hours:minutes:seconds: e.g., {f= 11 29 00 %Time% hours:minutes:seconds:} →
11:29:00 AM
returns a time which represents the given number of hours (first argument), minutes
(second argument) and seconds (third argument) after midnight of the current day.
•
millisecondClockValue e.g., {f= %Time% millisecondClockValue} → 34697800
returns the number of milliseconds from midnight of the current day to the current time.
•
now e.g., {f= %Time% now} → 09:38:17 AM
returns a time representing the current time in seconds
WebBase User’s Guide
•
totalSeconds e.g., {f= %Time% totalSeconds} → 34697
returns the number of seconds from midnight of the current day to the current time.
11.22 Universal Times
The dynamic variable %dateTime% returns the current date and time as a UniversalTime
object.
Universal Time Instance Operations
The following messages can be sent to any WebBase variable containing a UniversalTime.
Note that these messages also include those which can be sent to dates or times.
•
< e.g., {set dateTime1 '2/10/97' %dateTime% dateFromString: } {set dateTime2
'2/11/97' %dateTime% dateFromString: } {f= dateTime1 dateTime2 <} → false
returns true if the receiver is less than the argument, otherwise false
•
<= e.g., {set dateTime1 '2/10/97' %dateTime% dateFromString: } {set dateTime2
'2/11/97' %dateTime% dateFromString: } {f= dateTime1 dateTime2 <=} → false
returns true if the receiver is less than or equal to the argument, otherwise false
•
= e.g., {set dateTime1 '2/10/97' %dateTime% dateFromString: } {set dateTime2
'2/11/97' %dateTime% dateFromString: } {f= dateTime1 dateTime2 =} → false
returns true if the receiver and argument are the same date and time, otherwise false
•
> e.g., {set dateTime1 '2/10/97' %dateTime% dateFromString: } {set dateTime2
'2/11/97' %dateTime% dateFromString: } {f= dateTime1 dateTime2 >} → true
returns true if the receiver is greater than the argument, otherwise false
•
>= e.g., {set dateTime1 '2/10/97' %dateTime% dateFromString: } {set dateTime2
'2/11/97' %dateTime% dateFromString: } {f= dateTime1 dateTime2 >=} → true
returns true if the receiver is greater than or equal to the argument, otherwise false
•
addDays: e.g., {f= 4 %dateTime% addDays:} → 03/23/97 11:23:16
returns a new UniversalTime with the indicated number of days added to the receiver.
Note that the number of days can be negative.
•
addSeconds: e.g., {f= 360 %dateTime% addSeconds:} → 03/19/97 11:29:16
returns a new UniversalTime with the indicated number of seconds added to the date and
time of the receiver. Note that the number of seconds can be negative.
•
asCookieDateTime e.g., {f= %dateTime% asCookieDateTime} → Wednesday, 19-Mar1997 11:23:16 GMT
returns a string containing the current date and time in a format acceptable as the cookie
expiration time used when doing a setCookie.
•
asDate e.g., {f= %dateTime% asDate} →‘03/19/97’
returns a string representing the date portion of the receiver.
•
asDateTime e.g., {f= %dateTime% asDateTime} →‘03/19/97 11:23:16 AM’
returns a string representing the date and time of the receiver. Uses the OS to determine
12-hour or 24-hour format
WebBase User’s Guide
217
Chapter 11: Expressions
218
•
asDateTimewithPicture: e.g., {f= ‘MMM dd yyyy’ %dateTime%
asDateTimewithPicture:} →‘Mar 19 1997 11:23:16 AM’
returns a formatted string of the receiver’s date and time with the ‘date’ portion displayed
according to the argument. The ‘time’ portion will be formatted as in the asDateTime
method. See Date--printWithPicture: for the formatting details. See also
asDateTime12withPicture: and asDateTime24withPicture:.
•
asDateTime12 e.g., {f= %dateTime% asDateTime12} →‘03/19/97 11:23:16 AM’
returns a string representing the date and time of the receiver 12-hour format
•
asDateTime12withPicture: e.g., {f= ‘MMM dd yyyy’ %dateTime%
asDateTime12withPicture:} →‘Mar 19 1997 11:23:16 AM’
returns a formatted string of the receiver’s date and time with the ‘date’ portion displayed
according to the argument. The ‘time’ portion will be formatted as in the asDateTime12
method. See Date--printWithPicture: for the formatting details. See also
asDateTimewithPicture:, asDatewithPicture:.
•
asDateTime24 e.g., {f= %dateTime% asDateTime24} →‘03/19/97 11:23:16’
returns a string representing the date and time of the receiver in 24-hour format
•
asDateTime24withPicture: e.g., {f= ‘MMM dd yyyy’ %dateTime%
asDateTime24withPicture:} →‘Mar 19 1997 11:23:16’
returns a formatted string of the receiver’s date and time with the ‘date’ portion displayed
according to the argument. The ‘time’ portion will be formatted as in the asDateTime24
method. See Date--printWithPicture: for the formatting details. See also
asDateTimewithPicture:, asDatewithPicture:.
•
asDatewithPicture: e.g., {f= ‘MMM dd yyyy’ %dateTime% asDatewithPicture:} →
‘Mar 19 1997’
returns a formatted string of the receiver’s date displayed according to the argument. See
Date—printWithPicture: for the formatting details.
•
asHeaderDateTime e.g., {f= %dateTime% asHeaderDateTime} → Wednesday, 19Mar-1997 11:23:16 GMT
returns a string containing the receiver’s date and time in a format acceptable for use in a
header
•
asLogFileTimeStamp e.g., {f= %dateTime% asLogFileTimeStamp} →
[19/Mar/1997:11:23:16 -0800]
returns a string displaying the date and time in the format used in the log file records.
•
asMailDateTime e.g., {f= %dateTime% asMailDateTime} → Fri, 19 Mar 1997
13:20:30
returns a string containing the receiver’s date and time in a format acceptable for use in the
mail utility. This operation can only be used if the user has purchased the E-Merge add-on
option, which is described in Chapter 16.
•
asSeconds e.g., {f= %dateTime% asSeconds} → 3036647206
returns the number of seconds elapsed from January 1, 1901 until the specified date plus
the number of seconds in the time.
•
asTime e.g., {f= %dateTime% asTime} →‘11:23:16 AM’
returns a string representing the time of the receiver. Uses the OS to determine 12-hour or
24-hour format
WebBase User’s Guide
•
asTime12 e.g., {f= %dateTime% asTime12} →‘11:23:16 AM’
returns a string representing the time of the receiver in 12-hour format
•
asTime24 e.g., {f= %dateTime% asTime24} →‘11:23:16’
returns a string representing the time of the receiver in 24-hour format
•
between:and: e.g., {set dateTime1 '8:00:00 AM' %dateTime% timeFromString:} {set
dateTime2 '8:00:00 PM' %dateTime% timeFromString: }
{f= dateTime1 dateTime2 %dateTime% between:and:} → true
returns true if the receiver is between the two arguments
•
date e.g., {f= %dateTime% date} → 03/19/97
returns the date portion of the receiver
•
dateAndTime e.g., {f= %dateTime% dateAndTime} →(03/19/97 11:23:16 AM 'PST')
returns an array containing 3 elements: the date, the time, and the name of the timezone.
•
dateFromString: e.g., {f= '2/10/97' %dateTime% dateFromString:} → 02/10/97
11:23:16
returns a new Universal time in which the date is as specified in the input string. The time
is the same as the time in the receiver. Acceptable date string formats are:
'mm/dd/yy'
(mm=month, dd=day, yy=year)
'FEB 10 96'
'10 FEB 96')
•
day e.g., {f= %dateTime% day} → 35140
returns the number of days elapsed from January 1, 1901 until the specified date. This is
equivalent to {f= %dateTime% date day}.
•
dayIndex e.g., {f= %dateTime% dayIndex} → 2
returns the index for the day of the week, 1=Mon, 7=Sun. This is equivalent to {f=
%dateTime% date dayIndex}.
•
dayName e.g., {f= %dateTime% dayName} → #Tuesday
returns the symbol identifying the day of the week. This is equivalent to {f= %dateTime%
date dayName}.
•
dayOfMonth e.g., {f= %dateTime% dayOfMonth} → 18
returns an integer from 1 to 31 specifying the day number within the month. This is
equivalent to {f= %dateTime% date dayOfMonth}.
•
dayOfYear e.g., {f= %dateTime% dayOfYear} → 77
returns an integer from 1 to 365 identifying the day number within the year. This is
equivalent to {f= %dateTime% date dayOfYear}.
•
daysInMonth e.g., {f= %dateTime% daysInMonth} → 31
returns an integer identifying the number of days in the month. This is equivalent to {f=
%dateTime% date daysInMonth}.
•
daysInYear e.g., {f= %dateTime% daysInYear} → 365
returns an integer identifying the number of days in the year. This is equivalent to {f=
%dateTime% date daysInYear}.
WebBase User’s Guide
219
Chapter 11: Expressions
220
•
daysLeftInMonth e.g., {f= %dateTime% daysLeftInMonth} → 12
returns an integer specifying how many days remain in the month. This is equivalent to {f=
%dateTime% date daysLeftInMonth}.
•
daysLeftInYear e.g., {f= %dateTime% daysLeftInYear} → 288
returns an integer specifying how many days remain in the year. This is equivalent to {f=
%dateTime% date daysLeftInYear}.
•
elapsedDaysSince: e.g., {set date1 25 %date% subtractDays:} {set dt1 date1 asString
%dateTime% dateFromString:} {f= dt1 %dateTime% elapsedDaysSince:} → 25
returns an integer specifying the number of days between the receiver and the argument.
Only the date portion of the receiver and argument are used; both receiver and argument
must be UniversalTimes.
•
elapsedMonthsSince: e.g., {set date1 25 %date% subtractDays:} {set dt1 date1
asString %dateTime% dateFromString:} {f= dt1 %dateTime% elapsedMonthsSince:} →
1
returns an integer specifying the number of months between the receiver and the argument.
Only the date portion of the receiver and argument are used; both receiver and argument
must be UniversalTimes.
•
firstDayInMonth e.g., {f= %dateTime% firstDayInMonth} → 60
returns an integer specifying the number of the first day in the month from the beginning of
the year. This is equivalent to {f= %dateTime% date firstDayInMonth}.
•
firstDayOfMonth e.g., {f= %dateTime% firstDayOfMonth} → 03/01/97
returns a new date representing the first of the month. This is equivalent to {f=
%dateTime% date firstDayOfMonth}.
•
firstSundayIn: e.g., {f= 3 %dateTime% firstSundayIn:} → 61
returns the number of days after the start of the year for the first Sunday within the month
for the specified index. This is equivalent to {f= 3 %dateTime% date firstSundayIn:}.
•
firstSundayInMonth e.g., {f= %dateTime% firstSundayInMonth} → 61
returns the number of days after the start of the year for the first Sunday in the current
month. This is equivalent to {f= %dateTime% date firstSundayInMonth}.
•
gmt e.g., {f= %dateTime% gmt} → 03/19/97 19:23:16
returns a new UniversalTime with the date and time in the GMT time zone
•
hours e.g., {f= %dateTime% hours} → 13
returns the number of hours from midnight until the specified time. Only the time portion
of the receiver is used; this is equivalent to {f= %dateTime% time hours}.
•
lastSundayIn: e.g., {f= 3 %dateTime% lastSundayIn:} → 89
returns the number of days after the start of the year for the last Sunday within the month
for the specified index. This is equivalent to {f= 3 %dateTime% date lastSundayIn:}.
•
lastSundayInMonth e.g., {f= %dateTime% lastSundayInMonth} → 89
returns the number of days after the start of the year for the last Sunday in the current
month. This is equivalent to {f= %dateTime% date lastSundayInMonth}.
WebBase User’s Guide
•
max: e.g., {set dt1 3 %dateTime% addDays:} {f= dt1 %dateTime% max:} → 04/14/97
09:35:21
returns the greater of the receiver or the argument.
•
min: e.g., {set dt1 3 %dateTime% addDays:} {f= dt1 %dateTime% min:} → 04/11/97
09:35:21
returns the lesser of the receiver or the argument.
•
minutes e.g., {f= %dateTime% minutes} → 30
returns the number of minutes past the hour. Only the time portion of the receiver is used;
this is equivalent to {f= %dateTime% time minutes}.
•
monthIndex e.g., {f= %dateTime% monthIndex} → 3
returns the number of the month. This is equivalent to {f= %dateTime% date
monthIndex}.
•
monthName e.g., {f= %dateTime% monthName} → #March
returns the symbol identifying the name of the month. This is equivalent to {f=
%dateTime% date monthName}.
•
seconds e.g., {f= %dateTime% seconds} → 0
returns the number of seconds past the minute. Only the time portion of the receiver is
used; this is equivalent to {f= %dateTime% time seconds}.
•
time e.g., {f= %dateTime% time} → 11:23:16 AM
returns the time portion of the receiver
•
timeFromString: e.g., {f= '8:00:00 PM' %dateTime% timeFromString:} → 03/19/97
20:00:00
returns a new Universal time in which the time is as specified in the input string. The date
is the same as the date in the receiver. The time string MUST be in the format of the
system clock. If the system is set to a 12-hour format, the time string must be in a 12 hour
format with an uppercase AM or PM. If the system is set to a 24-hour format, the time
string must be in a 24 hour format. Because of these restrictions, it is recommended you
use one either timeFromString12: or timeFromString24:.
•
timeFromString12: e.g., {f= '8:00:00 PM' %dateTime% timeFromString12:} →
03/19/97 20:00:00
returns a new Universal time in which the time is as specified in the input string. The date
is the same as the date in the receiver. The time string MUST be in 12-hour format with
AM or PM regardless of the format of the system clock.
•
timeFromString24: e.g., {f= '20:00:00 PM' %dateTime% timeFromString24:} →
03/19/97 20:00:00
returns a new Universal time in which the time is as specified in the input string. The date
is the same as the date in the receiver. The time string MUST be in 24-hour format
regardless of the format of the system clock.
•
year e.g., {f= %dateTime% year} → 1997
returns an integer specifying the year. This is equivalent to {f= %dateTime% date year:}.
•
zoneName e.g., {f= %dateTime% zoneName} → PST
returns the time zone name of the receiver
WebBase User’s Guide
221
Chapter 11: Expressions
Universal Time Class Operations
The value of the %UniversalTime% WebBase variable is the UniversalTime class, which can
perform any of the following operations.
•
gmt e.g., {f= %UniversalTime% gmt} → 03/19/97 19:23:17
returns a new universal time representing the current date and current time as GMT.
•
now e.g., {f= %UniversalTime% now} → 03/19/97 11:23:17
returns a new universal time representing the current date and time.
11.23 OdbcTimeStamp
The value contained within a DateTime field in an ODBC database is returned to WebBase as
an OdbcTimeStamp. It is made up of 3 components: the date, the time, and a fraction. The
date time value is displayed as: 07/11/96 02:37:38 PM.0. The date is displayed first, followed
by the time. The ‘.0’ at the end is the fraction, and is either a 0 or a 1.
The following operations can be sent to any instance of an OdbcTimeStamp returned as the
value in a DateTime field in a database. For the examples below, the variable otsVar1 will
contain the OdbcTimeStamp representing the date and time: 03/11/97 02:37:38 PM.0. The
variable otsVar2 will contain the OdbcTimeStamp representing the date and time: 03/12/97
11:23:35 AM.0.
222
•
< e.g., {f= otsVar1 otsVar2 <} → false
returns true if the receiver is less than the argument, otherwise false
•
<= e.g., {f= otsVar1 otsVar1 <=} → false
returns true if the receiver is less than or equal to the argument, otherwise false
•
= e.g., {f= otsVar1 otsVar2 =} → false
returns true if the receiver and argument are the same date and time, otherwise false
•
> e.g., {f= otsVar1 otsVar2 >} → true
returns true if the receiver is greater than the argument, otherwise false
•
>= e.g., {f= otsVar2 otsVar2 >=} → true
returns true if the receiver is greater than or equal to the argument, otherwise false
•
asDateTime e.g., {f= otsVar1 asDateTime} →‘03/11/97 02:37:38 PM’
returns a string representing the date and time of the receiver. Uses the OS to determine
12-hour or 24-hour format
•
asDateTimeWithPicture: e.g., {f= ‘MMM dd yyyy’ otsVar1 asDateTimeWithPicture:}
→ ‘Mar 11 1997 02:37:38 PM’
returns a formatted string of the receiver’s date and time with the ‘date’ portion displayed
according to the ‘picture string’. The ‘time’ portion will be formatted as in the
asDateTime method. See Date--printWithPicture: for the formatting details. See also
asDateTime12withPicture: and asDateTime24withPicture:.
•
asDateTime12 e.g., {f= otsVar1 asDateTime12} →‘03/11/97 02:37:38 PM’
returns a string representing the date and time of the receiver 12-hour format
WebBase User’s Guide
•
asDateTime12WithPicture: e.g., {f= ‘MMM dd yyyy’ otsVar1
asDateTime12WithPicture:} →‘Mar 11 1997 02:37:38 PM’
returns a formatted string of the receiver’s date and time with the ‘date’ portion displayed
according to the ‘picture string’. The ‘time’ portion will be formatted as in the
asDateTime12 method. See Date--printWithPicture: for the formatting details.
•
asDateTime24 e.g., {f= otsVar1 asDateTime24} →‘03/11/97 14:37:38’
returns a string representing the date and time of the receiver in 24-hour format
•
asDateTime24WithPicture: e.g., {f= ‘MMM dd yyyy’ otsVar1
asDateTime24WithPicture:} →‘Mar 11 1997 14:37:38’
returns a formatted string of the receiver’s date and time with the ‘date’ portion displayed
according to the ‘picture string’. The ‘time’ portion will be formatted as in the
asDateTime24 method. See Date--printWithPicture: for the formatting details.
•
asDateWithPicture: e.g., {f= ‘MMM dd yyyy’ otsVar1 asDateWithPicture:} →‘Mar 11
1997’
returns a formatted string of the receiver’s date displayed according to the ‘picture string’.
See also asDateTimeWithPicture:, asDateTime12WithPicture: and
asDateTime24WithPicture:. See Date--printWithPicture: for the formatting details.
•
asNonEmptyString e.g., {f= otsVar1 asNonEmptyString} →‘03/11/97 02:37:38 PM’
returns the receiver as a date time string. This is equivalent to the asDateTime operation.
It is provided for compatibility with the asNonEmptyString operation on Strings.
•
asSeconds e.g., {f= otsVar1 asSeconds} → 3035543858
returns the number of seconds elapsed from January 1, 1901 until the specified date plus
the number of seconds in the time.
•
asUniversalTime e.g., {f= otsVar1 asUniversalTime} → 03/11/97 14:37:38
returns a new UniversalTime instance in which the date and time are set to those of the
receiver.
•
date e.g., {f= otsVar1 date} → 03/11/97
returns the date portion of the receiver.
•
dateAndTime e.g., {f= otsVar1 dateAndTime} →(03/11/97 02:37:38 PM)
returns an array containing the date and the time represented by the receiver.
•
fraction e.g., {f= otsVar1 fraction} → 0
returns the fractional portion of the receiver (either 0 or 1).
•
max: e.g., {f= otsVar1 otsVar2 max:} → 03/12/97 11:23:35 AM.0
returns the greater of the receiver or the argument.
•
min: e.g., {f= otsVar1 otsVar2 min:} → 03/11/97 02:37:38 PM.0
returns the lesser of the receiver or the argument.
•
time e.g., {f= otsVar1 time} → 02:37:38 PM
returns the time portion of the receiver.
WebBase User’s Guide
223
Chapter 11: Expressions
11.24 Files
A file provides sequential or random access to the host file system. Each read operation
answers one page (maximum 2k bytes) of the file with the exception of the last page which
may have fewer bytes. The number of bytes to write may be from 1 to 2k bytes. In general,
reading and writing of file information should be done using a file stream. The specific file
associated with a file stream can be obtained from the file stream.
File Instance Operations
The following operations can be sent to any instance of a file. For the examples below, two
file instances are used. The first is called myFile1 and is opened on the file default.htf that is
provided with the WebBase WebWizard. This instance is created using {set fileDir
'c:\http\wbwizard\’ %Directory% pathName:} {set myFile 'default.htf' fileDir %File%
open:in:}. The second instance is called myFile2 and is opened on a non-existent file called
fileExam.htf. This instance is created using {set fileDir 'c:\http\wbwizard\’ %Directory%
pathName:} {set myFile 'fileExam.htf' fileDir %File% open:in:}. The myFile1 instance is
used for read access; the myFile2 instance is used for write access.
•
close e.g., {f= myFile1 close} → a File on: 'default.htf'
returns the receiver after closing the file
•
directory e.g., {f= myFile1 directory} → a Directory on: 'c:\http\wbwizard\'
returns the directory which contains the receiver
•
flush e.g., {f= myFile1 flush} → a File on: 'default.htf'
returns the receiver after forcing all data written to the receiver to be recorded on disk
•
getFileTime e.g., {f= myFile1 getFileTime} → 02/26/97 15:22:40
returns a universal time representing the system time of the file
•
name e.g., {f= myFile1 name} →‘default.htf’
returns a string containing the receiver’s file name
•
pathName e.g., {f= myFile1 pathName} →‘c:\http\wbwizard\default.htf’
return a string that contains the entire path name (drive:/path/filename.ext).
•
readBuffer:atPosition: e.g., {set strBuf 100 %String% new:} {f== strBuf 1 myFile1
readBuffer:atPosition:} {strBuf} → <see below>
returns the number of bytes read starting at the position specified in the second argument
into the first argument. The result of the above example is:
{set %output% false}
{!- © 1997 ExperTelligence, Inc.
All Rights Reserved. -!}
{reDirect2 ('Wi
224
•
size e.g., {f= myFile1 size} → 184
returns the number of bytes in the file.
•
writeBuffer:ofSize:atPosition: e.g., {set strBuf ‘Data to be written into a file that is
already open’} {f= strBuf strBuf size 1 myFile2 writeBuffer:ofSize:atPosition:} → a File
on: 'fileExam.htf'
WebBase User’s Guide
returns the receiver after writing the number bytes specified in the second argument of the
first argument into the receiver file at the position specified in the third argument.
File Class Operations
The %File% variable provides access to the File class, which includes a number of useful
operations, as described below.
•
changeModeOf:to: e.g., {f= 'c:\http\wbwizard\default.htf' #r %File%
changeModeOf:to:} → File
{f= 'c:\http\wbwizard\default.htf' #n %File% changeModeOf:to:} → File
change the attributes of the file named in the first argument to those of the attribute in the
second argument. Valid types of attributes are #r - read only, #h - hidden, #s - system, #a
- archive. All attributes can be unset by specifying an attribute other than r, h, s or a; this
is shown in the second example above.
•
copy:to: e.g., {f= 'c:\http\wbwizard\default.htf' 'c:\http\wbwizard\default.htm' %File%
copy:to:} → true
copy the file named in the first argument to the new file named in the second argument.
Return true if the copy is successful, otherwise false.
•
drive:path:file: e.g., {f= $c '\http\wbwizard\' 'default.htf' %File% drive:path:file:} →
‘c:\http\wbwizard\default.htf’
returns the file path name of the file name. Note that the drive must be a character; the
path and file are strings.
•
execute: e.g., {f= 'c:\msoffice\access\msaccess.exe' %File% execute:} → File
execute the file named in the argument (a .exe or .pif file). To run a batch file, specify
‘command.com /c xxx.bat’.
•
exists: e.g., {f= 'c:\http\wbwizard\default.htf' %File% exists:} → true
returns true if the file or subdirectory specified by the string argument exists; otherwise
false.
•
exists:in: e.g., {set fileDir 'c:\http' %Directory% pathName:} {f= 'example.htf' fileDir
%File% exists:in:} → false
returns true if the file or subdirectory specified by the string argument exists in the
specified directory (second argument); otherwise false. Note that the second argument
must be a directory, not a string identifying a directory.
•
fileName:extension: e.g., {f= 'aLongFilename' 'aLongFileType' %File%
fileName:extension:} → aLngFlnm.aLo
returns a string which is a file name abbreviated from the first and second arguments.
Lowercase vowels are dropped from the right of the first argument until it is less than or
equal to 8 characters.
•
fullPathName: e.g., {f= 'webbase.exe' %File% fullPathName:} →
C:\WEBBASE\WebBase.exe
returns the full path name of the file name specified in the argument
•
newFile: e.g., {f= 'testFile.dat' %File% newFile:} → a FileStream on: 'testFile.dat'
returns a file stream with path name specified by the argument
WebBase User’s Guide
225
Chapter 11: Expressions
•
newFile:in: e.g., {set fileDir 'c:\http' %Directory% pathName:}
{f= 'example.dat' fileDir %File% newFile:in:} → a FileStream on: 'example.dat'
returns a file stream with path name specified by the first argument in the directory
specified in the second argument.
•
open:in: e.g., {set fileDir 'c:\http\wbwizard\' %Directory% pathName:}
{f= 'default.htf' fileDir %File% open:in:} → a File on: 'default.htf'
returns a file opened on the file named in the first argument in the directory specified in the
second argument. Note that this operation returns a file; most of the other operations
return a file stream.
•
pathName: e.g., {f= 'c:\http\wbwizard\default.htf' %File% pathName:} → a FileStream
on: 'default.htf'
returns a file stream on the path named by the first argument
•
pathName:in: e.g., {set fileDir ‘c:\http\wbwizard\’ %Directory% pathName:} {f=
’default.htf’ fileDir %File% pathName:in:} → a FileStream on: 'default.htf’
returns a file stream on the path named by the first argument with the default directory
specified in the second argument..
•
pathNameReadOnly: e.g., {f= 'c:\http\wbwizard\default.htf' %File%
pathNameReadOnly:} → a FileStream on: 'default.htf'
returns a file stream on the path named by the argument; the file stream allows only read
access.
•
pathNameReadOnly:in: e.g., {set fileDir 'c:\http\wbwizard\' %Directory% pathName:}
{f= 'c:\http\wbwizard\default.htf' fileDir %File% pathNameReadOnly:in:} → a
FileStream on: 'default.htf'
returns a file stream on the path named by the first argument in the directory specified in
the second argument; the file stream allows only read access.
•
remove: e.g., {f= 'c:\http\wbwizard\default.xxx’ %File% remove:} → File
erase the file named in the argument
•
rename:to: e.g., {f= 'c:\http\wbwizard\default.htm' 'c:\http\wbwizard\default.xxx'
%File% rename:to:} → File
rename the file named in the first argument to have the name in the second argument.
11.25 Directories
A directory represents a disk directory with a volume string and a path name string. Files are
generally described in terms of a directory and a file name.
Directory Instance Operations
The following operations can be sent to any instance of a directory. An example directory dir1
is used in the following descriptions. It is generated using {set dir1 ‘c:\http\wbwizard\'
%Directory% pathName:}.
•
226
= e.g., {set dir2 'c:\webbase\ ' %Directory% pathName:} {f= dir2 dir1 =} → false
returns true if the argument and receiver are the same directory; otherwise false
WebBase User’s Guide
•
create e.g., {set dir2 'c:\myNewDir\ ' %Directory% pathName:}
{f= dir2 create} → a Directory on: 'C:\myNewDir\'
returns the receiver after creating a directory on the disk for it
•
drive e.g., {f= dir1 drive} → $C
returns the disk drive letter of the receiver
•
drivePathName e.g., {f= dir1 drivePathName} →‘C:\http\wbwizard\’
returns a string representing the drive and path name of the receiver.
•
drivePrefix e.g., {f= dir1 drivePrefix} →‘C:’
returns a string that contains the logical drive (e.g., <drive>: for real drives, or
‘\\SERVER\ALIAS’ for network drive names).
•
file: e.g., {f= 'default.htf' dir1 file:} → a FileStream on: 'default.htf'
returns a file stream for the file named by the argument in the current directory. If the file
does not exist, it will be created.
•
fileReadOnly: e.g., {f= 'default.htf' dir1 fileReadOnly:} → a FileStream on: 'default.htf'
returns a file stream for the file named by the argument in the receiver directory. If the file
does not exist, it will be created and opened for read only access.
•
filesNamed: e.g., {f= '*.txt' dir1 filesNamed:} →('testfile.txt')
returns a collection of file names from the receiver, filtered using the argument (e.g.,
‘*.TXT’).
•
formatted e.g., {f= dir1 formatted} → OrderedCollection(('wizard.gif' 432 '06/28/95
12:24:58' 'a' 517759773) ('wizard.htf' 332 '02/19/97 08:40:44' 'a' 575907094)
('testfile.txt' 0 '03/21/97 03:25:46' 'a' 578124599) ('default.htf' 184 '02/26/97 03:22:40' ''
576355028) ('expere2.gif' 170 '06/02/95 06:36:26' 'a' 516043917) ('experli.gif' 875
'02/24/97 08:34:12' 'a' 576209990) ('ii_secur.hti' 314 '02/19/97 09:25:34' 'a'
575884081) ('ii_anchr.hti' 260 '02/20/97 07:29:54' 'a' 575945659) … etc. )
returns a collection of arrays of file information for the receiver. Each array has five
entries: file name, size, date/time, attributes and internal date/time representation.
•
formatted: e.g., {f= ‘*.txt’ dir1 formatted:} → OrderedCollection(('testfile.txt' 0
'03/21/97 03:25:46' 'a' 578124599) )
returns a collection of arrays of file information for the receiver, filtered using the
argument, e.g., ‘*.TXT’. Each array has five entries: file name, size, date/time, attributes
and internal date/time representation.
•
freeDiskSpace e.g., {f= dir1 freeDiskSpace} → 394625024
returns the number of bytes of free space on the disk containing the current directory (not
necessarily the receiver).
•
fullDirName e.g., {f= dir1 fullDirName} → ‘C:\http\wbwizard\’
returns a string representing the path name of the receiver, including drive letter. There is
always a \ at the end.
•
hasNetworkName e.g., {f= dir1 hasNetworkName} → false
returns true if the drive specifier is a string representing a network drive (e.g.,
‘\\SRV\ALIAS’), otherwise false.
WebBase User’s Guide
227
Chapter 11: Expressions
•
hasSubdirectory e.g., {f= dir1 hasSubdirectory} → true
returns true if the receiver has a subdirectory
•
makeCurrent e.g., {f= dir1 makeCurrent} → a Directory on: 'C:\http\wbwizard\'
returns the receiver after making it the current directory
•
newFile: e.g., {f= 'testFile.txt' dir1 newFile:} → a FileStream on: 'testFile.txt'
returns a file stream for the file named by the argument in the receiver directory. If the file
exists, it will be removed and a new file will be created.
•
pathName e.g., {f= dir1 pathName} →‘\http\wbwizard\’
returns a string representing the path name of the receiver (drive letter not included).
•
remove e.g., {set dir2 'c:\myNewDir\ ' %Directory% pathName:} {f= dir2 remove} → a
Directory on: 'C:\myNewDir\'
returns the receiver after removing the directory represented by it from the disk
•
subdirectories e.g., {set dir2 'c:\webbase' %Directory% pathName:} {f= dir2
subdirectories} → SortedCollection(('\webbase\docs' 'docs') ('\webbase\logs' 'logs')
('\webbase\odbtalk' 'odbtalk') ('\webbase\support' 'support') )
returns an ordered collection of arrays, where each array contains the complete pathname
and the file name of a subdirectory of the receiver
•
valid e.g., {f= dir1 valid} → true
returns true if the receiver is valid; otherwise false
•
validDrive e.g., {f= dir1 validDrive} → true
returns true if the receiver’s drive is valid; otherwise false
•
validFile: e.g., {f= 'xxx.dat’ dir1 validFile:} → false
returns true if the file name in the argument is a file or subdirectory in the receiver.
•
volumeLabel e.g., {f= dir1 volumeLabel} → WILLIE
returns the volume label of the disk containing the receiver
Directory Class Operations
The value of the %Directory% variable is the Directory class. The operations that can be
performed on this class are described below.
228
•
create: e.g., {f= ‘c:\myNewDir’ %Directory% create:} → Directory
creates a directory on the disk with the complete path name specified in the argument
•
current e.g., {f= %Directory% current} → a Directory on: 'C:\http\wbwizard\'
returns a directory representing the current directory
•
currentDisk e.g., {f= %Directory% currentDisk} → 2
returns the current default drive (0=A, 1=B, etc.).
•
drives e.g., {f= %Directory% drives} →('a:' 'c:' 'd:' 'e:')
returns the pathname strings of all the known drives.
WebBase User’s Guide
•
exists: e.g., {f= 'c:\webbase’ %Directory% exists:} → true
returns true if the directory specified by the argument exists; otherwise false.
•
pathName: e.g., {f= 'c:\webbase' %Directory% pathName:} → a Directory on:
'C:\webbase\'
returns a directory described by the complete path name in the input argument.
•
remove: e.g., {f= 'c:\myNewDir' %Directory% remove:} → Directory
removes the directory with the path name specified in the input argument. The directory
must be empty before it can be removed.
•
removeAll: e.g., {f= 'c:\myNewDir' %Directory% removeAll:} → true
removes the directory with the path name specified in the input argument by first removing
any files or subdirectories within the directory, and then removing the directory. Returns
true if the directory removal was successful; false otherwise.
11.26 Streams
A stream is used for accessing files, devices and internal objects as a sequence of characters or
other objects. A stream has an internal record of its current position. It has access messages
to get or put the object(s) at the current position and cause the position to be advanced.
Messages are defined for changing the stream position, so that random access is possible.
Stream Instance Operations
The following methods can be sent to an instance of any type of stream. Be sure to review the
use of the ensure macro when using these methods. It is important that any files opened also
be properly closed. In the examples below, the stream in use will be a file stream on the file
‘c:\http\wbwizard\default.htf’ generated using {set strm ‘c:\http\wbwizard\default.htf’ %File%
pathNameReadOnly:}.
•
atEnd e.g., {f= strm atEnd} → false
returns true if the receiver is positioned at the end (beyond the last object); otherwise false.
•
close e.g., {f= strm close} → a FileStream on: 'default.htf'
returns the receiver after closing it.
•
contents e.g., {f= strm contents} → <see below>
returns the collection over which the receiver is streaming. The contents of the example
file are:
{set %output% false}
{!- © 1997 ExperTelligence, Inc.
All Rights Reserved. -!}
{reDirect2 ('Wizard.htf' %base% appendFilename: pathnameUNIX)}
now = {%seconds%}
{/reDirect2}
•
copyFrom:to: e.g., {f= 15 42 strm copyFrom:to:} → false}
{!- © 1997 ExperTel
returns the subcollection of the collection over which the receiver is streaming, from the
starting position (first argument) to the ending position (second argument).
WebBase User’s Guide
229
Chapter 11: Expressions
230
•
countBlanks e.g., {f= ' 3spaces' asStream countBlanks} → 3
returns the number of character position skipped when reading the stream starting with
where it is currently positioned. A space is 1, a tab is 4. If the next character read by the
stream is not a space or tab, returns 0.
•
indexOf: e.g., {f= 'htf' strm indexOf:} → 106
returns the position of the first occurrence of the collection in the argument in the receiver.
If no such collection is found, return 0.
•
indexOfLowercase: e.g., {f= ‘unix’ strm indexOfLowercase:} → 142
returns the position of the first occurrence of the collection in the argument in the receiver.
If no such collection is found, return 0. All tests are done after converting the contents of
the receiver to lowercase.
•
isEmpty e.g., {f= strm isEmpty} → false
returns true if the receiver contains no elements, otherwise false.
•
lineDelimiter e.g., {f= strm lineDelimiter} → $cr
returns the current line delimiter, the default is a carriage return character.
•
lineDelimiter: e.g., {f= $cr strm lineDelimiter:} → a FileStream on: 'default.htf'
returns the receiver after changing the line delimiter character to the argument. This is
only valid for file streams.
•
next: e.g., {f= 10 strm next:} → {set %outp
returns the number of items from the receiver as specified in the argument. The items are
returned in a collection of the same type as the stream is streaming over.
•
nextInteger e.g., {f= strm nextInteger} → 0
returns the next integer from the receiver; the value may include a radix. In the example, 0
is returned because there were no integers to read from the file.
•
nextLine e.g., {f= strm nextLine} →‘{set %output% false}’
returns a string containing the characters of the receiver up to the next line delimiter.
•
nextMatchFor: e.g., {f= ${ strm nextMatchFor:} → true
returns true if the next object is the same as the argument; otherwise false
•
nextWord e.g., {f= strm nextWord} →‘set’
returns a string containing the next work in the receiver. A word starts with a letter,
followed by a sequence of letters and digits.
•
peek e.g., {f= strm peek} → ${
returns the next object in the receiver without advancing the stream position. If the stream
is positioned at the end, returns nil
•
peekFor: e.g., {f= $> strm peekFor:} → false
returns true if the next object to be accessed in the receiver is the same as the argument;
otherwise false. The stream position of the receiver is advanced only if the answer is true.
•
position e.g., {f= strm position} → 0
returns the receiver’s current stream position. 0 is at the start of the stream.
WebBase User’s Guide
•
position: e.g., {f= 25 strm position:} → a FileStream on: 'default.htf'
returns the receiver after setting its position to the argument. If the argument is outside the
bounds of the receiver collection, reports an error.
•
reset e.g., {f= strm reset} → a FileStream on: 'default.htf'
returns the receiver after positioning it to the beginning
•
reverseContents e.g., {f= strm reverseContents} → <see below>
returns a collection of the same type of the receiver’s collection, with the contents in
reverse order. The contents of the example file, in reverse order, are:
}2tceriDer/{
}%sdnoces%{ = won
})XINUemanhtap :emaneliFdneppa %esab% 'fth.draziW'( 2tceriDer{
}!- .devreseR sthgiR llA .cnI ,ecnegilleTrepxE 7991 © -!{
}eslaf %tuptuo% tes{
•
setToEnd e.g., {f= strm setToEnd} → a FileStream on: 'default.htf'
returns the receiver after setting its position to the end
•
size e.g., {f= strm size} → 184
returns the number of objects in the receiver stream
•
skip: e.g., {f= 10 strm skip:} → a FileStream on: 'default.htf'
returns the receiver after incrementing its position by the argument
•
skipSeparators e.g., {f= strm skipSeparators} → a FileStream on: 'default.htf'
skip over any separators
•
skipTo: e.g., {f= $r strm skipTo:} → true
returns true if the argument is found, otherwise false. If the argument is found, the
position of the receiver is advanced to it. If the argument is not found, the position is put
at the end of the stream.
•
skipToWhitespace e.g., {f= strm skipToWhitespace} → true
advance the receiver’s position beyond the next occurrence of whitespace, or if none, to the
end of the stream. Return true if a whitespace occurred; otherwise false.
•
skipWhitespace e.g., {f= strm skipWhitespace} → aFileStream on: ‘default.htf’
skip over any whitespace characters.
•
upTo: e.g., {f= $t strm upTo:} → {se
returns the collection of objects from the receiver starting with the next accessible object
and up to but not including the argument. Set the position beyond the argument. If the
argument is not present, returns the remaining elements of the stream.
•
upToWhitespace e.g., {f= strm upToWhitespace} → {set
returns the collection of objects from the receiver starting with the next accessible object
and up to but not including the next whitespace character. Set the position beyond the
whitespace character. If no whitespace character is present, returns the remaining
elements of the stream.
WebBase User’s Guide
231
Chapter 11: Expressions
Stream Class Operations
The following methods can be sent to any type of stream class. The stream classes that are
available are %ReadStream%, %WriteStream% and %ReadWriteStream%.
•
crString e.g., {f= %WriteStream% crString} → <CR><LF> characters
returns a string containing a carriage return and line feed characters. This is equivalent to
the cr operation available on WriteStreams. It does not add the string to a stream; it
merely returns it.
•
on: e.g., {f= ‘a string to read’ %ReadStream% on:} → a ReadStream
{f= %String% new %WriteStream% on:} → a WriteStream
return a new instance of the receiver stream class whose contents are the argument (a
collection).
11.27 Read Streams
A read stream allows streaming over an indexed collection of objects for read access, but not
write access.
Read Stream Instance Operations
All of the operations described above for streams can also be performed on read streams. The
following operations are specifically for read streams.
•
next e.g., { f= ‘c:\http\wbwizards\default.htf’ %File% pathNameReadOnly: next} → ${
returns the next object accessible by the receiver and advances the stream position. If the
receiver is at the end, returns an error.
Read Stream Class Operations
The %ReadStream% variable represents the ReadStream class, which can use the stream class
operations described above. There are no class operations specifically for this class.
11.28 Write Streams
A write stream allows streaming over an indexed collection of objects for write access, but not
read access.
Write Stream Instance Operations
All of the operations described above for streams can also be performed on write streams. The
following operations are specifically for write streams. Write streams are particularly useful
for concatenating a large number of strings together. Although the same result can be achieved
with the ‘,’ operator, it is more efficient to create a write stream on an empty string, add in all
of the desired strings, and then use the contents of the stream. The stream used in the
following examples is generated using {set wstrm %String% new %WriteStream% on:}.
•
232
cr e.g., {f= wstrm cr} → a WriteStream
returns the receiver after writing the line terminating character (carriage return and linefeed) to it.
WebBase User’s Guide
•
nextPut: e.g., {f= $a wstrm nextPut:} → $a
returns the argument after writing it to the receiver stream. For write streams on strings,
the argument must be a character.
•
nextPutAll: e.g., {f= ‘abc’ wstrm nextPutAll:} →‘abc’
returns the argument (a collection) after writing each of the objects in it to the receiver.
For write stream son strings, the argument can be a substring.
•
space e.g., {f= wstrm space} → a WriteStream
returns the receiver after writing the space character to it. This is equivalent to {f= wstrm
nextPut: $space}.
•
tab e.g., {f= wstrm tab} → a WriteStream
returns the receiver after writing the tab character to it. This is equivalent to {f= wstrm
nextPut: $tab}.
•
tab: e.g., {f= 5 wstrm tab:} → a WriteStream
returns the receiver after writing the number of tab characters specified in the argument to
it.
Write Stream Class Operations
The %WriteStream% variable represents the WriteStream class, which can use the stream
class operations described above. There are no class operations specifically for this class.
11.29 Read-Write Streams
A read-write stream allows streaming over an indexed collection of objects for read and write
access.
Read-Write Stream Instance Operations
All of the operations described above for streams and write streams can also be performed on
read-write streams. The following operations are specifically for read-write streams.
•
next e.g., {set strm 'This is an example string' %ReadWriteStream% on:} {f= strm next}
→ $T
returns the next object accessible by the receiver and advances the stream position. If the
receiver is at the end, returns an error.
•
truncate e.g., {set strm 'This is an example string' %ReadWriteStream% on:} {f== 15
strm position:} {f== strm truncate} {f= strm contents} →‘This is an exam’
returns the receiver after setting the size of its stream to its current position
Read-Write Stream Class Operations
The %ReadWriteStream% variable represents the ReadWriteStream class, which can use the
stream class operations described above. There are no class operations specifically for this
class.
WebBase User’s Guide
233
Chapter 11: Expressions
11.30 File Streams
A file stream allows streaming over the characters of files for read and write access. A file
stream accesses its file in pages, and streams across the string containing the current file page.
Because writes are buffered, a flush or close message must be sent to the file stream to ensure
that the written data is physically recorded. All of the operations on read write streams can
also be performed on file streams. The example file stream used in below is generated using
{set fstrm ‘c:\http\wbwizard\default.htf’ %File% pathName:}.
•
file e.g., {f= fstrm file} → a File on: 'default.htf'
returns the file over which the receiver is streaming.
•
flush e.g., {f= fstrm flush} → a File on: 'default.htf'
guarantee that any writes to the receiver are physically recorded on disk
•
pathName e.g., {f= fstrm pathName} →‘C:\http\wbwizard\default.htf’
returns the complete pathname of the file over which the receiver is streaming
11.31 OdbcRowObjects
An OdbcRowObject represents a row of data returned via an sql macro SELECT request. The
OdbcRowObjects generated by the SELECT request are placed into an ordered collection that
is stored in the WebBase variable specified in the sql macro. An OdbcRowObject is very
similar to an ordered collection since it contains the fields for the row that is represents. An
OdbcRowObject also can identify its associated OdbcRowHeader (see below). The example
OdbcRowObject used in the following operations is retrieved from the database examples
provided with the WebBase WebWizard. The data is retrieved using this sql macro:
{sql to answers source 'myAccess' user 'fred' password 'test'}
SELECT * FROM Cars ORDER BY Year DESC, Price
{/sql}
After the SELECT is complete, the matching rows have been stored in the WebBase variable
{answers} as OdbcRowObjects. The first of these will be used: {set examORO answers first}.
234
•
alignDollar: e.g., {f= ‘123’ examORO alignDollar:} → '$123'
returns a string in which the argument has been properly formatted to represent a dollar
value (e.g., a ‘$’ at the start). The alignDollar: operation provided by String is more
useful since it allows a width of the resulting string to be specified.
•
at: e.g., {f= 1 examORO at:} → 26
returns the value of the field at the specified key (argument). The argument may be a
string or symbol or number.
•
colTypeOf: e.g., {f= 1 examORO colTypeOf:} → 4
returns the column Sql type of the field at the specified key (argument).
•
columnNames e.g., {f= examORO columnNames} →('ID' 'Year' 'Maker' 'Model'
'Cylinders' 'Transmission' 'Kind' 'Color' 'Mileage' 'Price' 'Air' 'Cruise' 'Category'
'Country')
returns a collection of the column names.
WebBase User’s Guide
•
columnSqlTypes e.g., {f= examORO columnSqlTypes} →(4 5 12 12 -6 12 12 12 4 8 -7 7 12 12)
returns a collection of the column names. The different sql types are:
Example 11.6
SQL Types
BIT ==> -7
TINYINT ==> -6
BIGINT ==> -5
LONGVARBINARY ==> -4
VARBINARY ==> -3
BINARY ==> -2
LONGVARCHAR ==> -1
CHAR ==> 1
NUMERIC ==> 2
DECIMAL ==> 3
INTEGER ==> 4
SMALLINT ==> 5
FLOAT ==> 6
REAL ==> 7
DOUBLE ==> 8
DATE ==> 9
TIME ==> 10
TIMESTAMP ==> 11
VARCHAR ==> 12
DEFAULT ==> 99
•
colWidthOf: e.g., {f= 1 examORO colWidthOf:} → 11
returns the column width of the field at the specified key (argument).
•
describeHTMLRecord e.g., {f= examORO describeHTMLRecord}
returns a string that displays a <TABLE> about the receiver. The table shows the field
name, field size, field type and value within the field. The example presented with the
OrderedCollection describeVHTMLTable operation uses this operation to display multiple
tables; one for each OdbcRowObject in the collection.
•
describeHTMLRecord: e.g., {f= ‘Record 1’ examORO describeHTMLRecord:}
returns a string that displays a <TABLE> about the receiver. The table shows the field
name, field size, field type and value within the field. This is the same as
describeHTMLRecord, but includes a title at the top of each table.
•
fullHTMLRecord e.g., {f= examORO fullHTMLRecord} → <see below>
returns the receiver in a <TABLE></TABLE> format. No title is added to the table. The
results of the example are:
WebBase User’s Guide
235
Chapter 11: Expressions
Example 11.7
fullHTMLRecord example
•
fullHTMLRecord: e.g., {f= ‘Data Table’ examORO fullHTMLRecord:} → <see
above>
returns a string representing the receiver in a <TABLE></TABLE> format. The
argument specified is the title that is included in the table. The results are identical to
those presented above, with the exception that the title is displayed at the top of the table.
•
fullRecord e.g., {f= examORO fullRecord} → <see below>
returns a string containing the column names and values for all the fields in the receiver.
The names and values are separated by a ‘:’. Each name/value pair is separated by a
carriage return. The results from the above example are shown below:
Example 11.8
fullRecord example
ID:
Year:
Maker:
Model:
Cylinders:
Transmission:
Kind:
Color:
Mileage:
Price:
Air:
Cruise:
Category:
Country:
•
236
26
92
BMW
318 IS
4
5 Speed
2 Door
Red
3000
22900.0
true
false
Passenger
European
getMessage e.g., {f= examORO getMessage} →‘’
returns any message associated with this receiver. This may occur if the buffer was
insufficient to hold all the data which was subsequently truncated. The hasMessage
WebBase User’s Guide
returns true if there is a message to retrieve. If there is no message to retrieve, an empty
string is returned.
•
hasMessage e.g., {f= examORO hasMessage} → false
returns true if there is a message associated with the receiver. This may occur if the buffer
was insufficient to hold all the data which was subsequently truncated. The getMessage
operation is used to retrieve the actual message.
•
header e.g., {f= examORO header} → an OdbcRowHeader
returns the row header of the receiver.
•
indexFor: e.g., {f= ‘Price’ examORO indexFor:} → 10
returns the integer index of the field with the name specified in the argument. The name
may be either a string or a symbol.
•
isCurrencyCol: e.g., {f= ‘Price’ examORO isCurrencyCol:} → false
returns true if the column with the name specified in the argument has a type of Currency;
otherwise false.
•
isNumeric: e.g., {f= ‘Price’ examORO isNumeric:} → true
returns true if the column with the name specified in the argument has a type of Number;
otherwise false.
•
isYesNo: e.g., {f= ‘Price’ examORO isYesNo:} → false
returns true if the column with the name specified in the argument has a type of Yes/No;
otherwise false.
•
printField:on: e.g., {set stream %String% new %WriteStream% on:} {f== 1 stream
examORO printField:on:} {stream contents} → 26
returns the receiver after adding the properly formatted description of the field specified in
the first argument to the stream specified in the second argument.
•
printHRecord e.g., {f= examORO printHRecord} → ‘<tr><td>26</td>
<td>92</td><td>BMW</td><td>318 IS</td><td>4</td><td>5 Speed</td> <td>2
Door</td><td>Red</td><td>3000</td><td>22900.0</td>
<td>true</td><td>false</td><td>Passenger</td><td>European</td></tr>’
returns a string containing all the field values properly formatted (see printField:on:).
•
printRecord e.g., {f= examORO printRecord} →
26 92 BMW
318 IS
4 5 Speed
2 Door
Red
3000
22900.0 true false
Passenger
European
returns a string containing all the field values properly formatted.
•
printTHColumnNamesOn: e.g., {set stream %String% new %WriteStream% on:} {f=
stream examORO printTHColumnNamesOn} → <tr><th>ID</th>
<th>Year</th><th>Maker</th><th>Model</th><th>Cylinders</th>
<th>Transmission</th><th>Kind</th><th>Color</th><th>Mileage</th>
<th>Price</th><th>Air</th><th>Cruise</th><th>Category</th>
<th>Country</th></tr>’
returns a string containing the column names as HTML <TH> headings.
•
tableWidth e.g., {f= examORO tableWidth} → 167
returns an integer representing the width of all the columns in the receiver.
WebBase User’s Guide
237
Chapter 11: Expressions
•
valueAt: e.g., {f= 1 examORO valueAt:} →‘26’
returns a string representing the value of the field specified in the argument. The argument
can be an integer, string or symbol identifying the field.
11.32 OdbcRowHeaders
The OdbcRowHeader contains a number of OrderedCollection slots - each collection the size
of the number of fields returned for that sql statement. The header contains things like column
(field) names, column widths, column types, etc. The example OdbcRowHeader is accessed
via the OdbcRowObject used above: {set examORH examORO header}.
238
•
at: e.g., {f= #ID examORH at:} → 1
returns the number of the column specified by the argument which must be a symbol.
•
colTypeOf: e.g., {f= 1 examORH colTypeOf} → 4
returns an integer representing the sql type of the column specified in the argument. The
argument must be an integer. The different sql types are described as part of the
OdbcRowObject columnSqlTypes operation.
•
columncbColDefs e.g., {f= examORH columncbColDefs} →(10 5 15 15 3 10 15 15 10
15 1 1 15 10)
returns an array of column definitions.
•
columnDisplaySizes e.g., {f= examORH columnDisplaySizes} →(11 6 15 15 3 10 15 15
11 22 1 1 15 10)
returns an ordered collection of the display sizes of each field in the row
•
columnLengths e.g., {f= examORH columnLengths} →(4 2 15 15 1 10 15 15 4 8 1 1 15
10)
returns an ordered collection of the length of each field in the row
•
columnNames e.g., {f= examORH columnNames} →('ID' 'Year' 'Maker' 'Model'
'Cylinders' 'Transmission' 'Kind' 'Color' 'Mileage' 'Price' 'Air' 'Cruise' 'Category'
'Country')
returns an ordered collection of the names of each field in the row
•
columnSqlTypes e.g., {f= examORH columnSqlTypes} →(4 5 12 12 -6 12 12 12 4 8 -7 7 12 12)
returns an ordered collection of the SQL types of each field in the row. The different sql
types are described as part of the OdbcRowObject columnSqlTypes operation.
•
isNumeric: e.g., {f= 1 examORH isNumeric:} → true
returns true if the column specified in the argument has a type of Number; otherwise false.
The argument must be an integer.
•
isYesNo: e.g., {f= 1 examORO isYesNo:} → false
returns true if the column specified in the argument has a type of Yes/No; otherwise false.
The argument must be an integer.
•
printColumnDashes e.g., {f= examORH printColumnDashes} →‘----------- ------ -------------- --------------- --------- ------------ --------------- --------------- ----------- --------------------- ----- ------ --------------- ----------‘
returns a string that prints enough dashes for columnLengths with one space between each
WebBase User’s Guide
group of dashes. This is used when formatting tabular output but not using features like
the <TABLE> construct.
•
printColumnNames e.g., {f= examORH printColumnNames} →‘
ID Year Maker
Model
Cylinders Transmission Kind
Color
Mileage
Price Air Cruise Category
Country ‘
returns a string containing the names of the columns in a format similar to
printColumnDashes.
11.33 Registration Database
The Registration Database can be used on 32-bit systems to access the System Registry. The
System Registry is organized like a Dictionary, and the RegistrationDatabase is very similar to
a dictionary. There are several top-level keys in the System Registry, including
HKEY_CLASSES_ROOT, HKEY_CURRENT_USER, HKEY_LOCAL_MACHINE and
HKEY_USERS. The value associated with each of these keys is another dictionary (or
RegistrationDatabase) containing keys and values. Each key/value pair in the System Registry
also can have name/value pairs associated with it. Each key/value pair has a default
name/value pair automatically created for it; the name is ‘(Default)’ and the value is ‘(value
not set)’.
In the following, the terms ‘keys’, ‘values’ and ‘name/value pair’ will be used to specifically
identify the type of data being accessed in a registration database.
Registration Database Instance Operations
The examples in the following will use a RegistrationDatabase instance set up using the
following:
{set regDB 'SOFTWARE\ExperTelligence, Inc.\WebBase\4.10\Parameters'
%RegistrationDatabase% localMachine at:}.
•
add: e.g., {set assoc ‘exampleKey’ ‘exampleValue’ %Association% key:value:} {f==
assoc regDB add:} {set strm %String% new %WriteStream% on:} {f== strm regDB
printHierarchyOn:} {f= strm contents} → exampleKey - exampleValue
returns the argument after adding it to the receiver. The argument must be an association.
Note that this creates a key in the specified registration database; the default value within
this key is specified as the association value (e.g., ‘exampleValue’). This does NOT add a
new name/value pair into the specified registration database. To add a new name/value
pair into a registration database:
{f=’SOFTWARE\ExperTelligence, Inc.\WebBase\4.10\Parameters’ assoc
%RegistrationDatabase% localMachine at:put:}
•
at: e.g., {f= ’SOFTWARE\ExperTelligence, Inc.\WebBase\4.10\Parameters’
%RegistrationDatabase% localMachine at:} → aRegistrationDatabase
returns a new RegistrationDatabase which spans out from the node named by the
argument. If the node does not exist, an error is generated. The following code will
display all of the WebBase parameters, as shown below the code:
{set strm %String% new %WriteStream% on:} {set aCltn regDB
entryValues}
{forRow aRow on aCltn}
{f== aRow asString strm nextPutAll:}
{f== strm cr}
WebBase User’s Guide
239
Chapter 11: Expressions
{/forRow}
{f= strm contents}
The results of the above are:
'PortNo' ==> 80
'LogDirectory' ==> 'C:\WebBase\LOGS'
'Directory' ==> 'C:\HTTP'
'errorLogFile' ==> 'C:\WebBase\LOGS\WebError.log'
'LogFormat' ==> 2
•
at:put: e.g., {set assoc ‘exampleKey’ ‘exampleValue’ %Association% key:value:} {f=
’SOFTWARE\ExperTelligence, Inc.\WebBase\4.10\Parameters’ assoc
%RegistrationDatabase% localMachine at:put:} → 'exampleKey' ==> 'exampleValue'
returns the second argument after setting the value of the node named in the first argument
to the value in the second argument. This is used to set (create/update) a name/value pair
within the specific registration database identified in the first argument.
•
entryValues e.g., {f= regDB entryValues} → Dictionary(('PortNo' ==> 80)
('LogDirectory' ==> 'C:\WebBase\LOGS') ('Directory' ==> 'C:\HTTP') ('errorLogFile'
==> 'C:\WebBase\LOGS\WebError.log') ('LogFormat' ==> 2))
returns a dictionary containing the name/value pairs of the receiver.
•
includesKey: e.g., {f= ‘Parameters’ ‘SOFTWARE\ExperTelligence,
Inc.\WebBase\4.10’ %RegistrationDatabase% localMachine at: includesKey:} → true
returns true if the receiver contains a subkey named by the argument; otherwise false.
Note that this finds keys within a registration database. To determine if a name in a
name/value pair is in a registration database, use:
{f= ‘Directory’ regDB entryValues includesKey:}
240
•
keyName e.g., {f= regDB keyName} → ’SOFTWARE\ExperTelligence,
Inc.\WebBase\4.10\Parameters’
returns the name of the receiver up to but not including the top-level registry key. The
keyName for any top-level registry key is a numeric value. It is not possible to rename any
of the keys in the System Registry.
•
keys e.g., {f= ’SOFTWARE\ExperTelligence, Inc.\WebBase\4.10’
%RegistrationDatabase% localMachine at: keys} → OrderedCollection('Parameters'
'Variables' 'Extensions' 'Aliases' )
returns a collection of the keys of the receiver, including any Windows reserved keys.
•
printHierarchyOn: e.g., {set strm %String% new %WriteStream% on:} {f== strm
'SOFTWARE\ExperTelligence, Inc.\WebBase\4.10' %RegistrationDatabase%
localMachine at: printHierarchyOn:}
{f= strm contents} → <see below>
returns the receiver after adding its hierarchical representation to the stream specified in
the argument. The default value, if one is specified, follows each key name. The results of
the above are:
WebBase User’s Guide
Parameters exampleKey - exampleValue
Variables Extensions Aliases -
•
printHierarchyOn:indent: e.g., {set strm %String% new %WriteStream% on:} {f==
strm ‘*******’ 'SOFTWARE\ExperTelligence, Inc.\WebBase\4.10'
%RegistrationDatabase% localMachine at: printHierarchyOn:indent:} {f= strm
contents} → <see below>
returns the receiver after adding its hierarchical representation to the stream specified in
the first argument. The second argument defines the initial indentation; each subsequent
level will indent 3 more spaces.
*******Parameters ******* exampleKey - exampleValue
*******Variables *******Extensions *******Aliases -
•
publicKeys e.g., {f= 'SOFTWARE\ExperTelligence, Inc.\WebBase\4.10'
%RegistrationDatabase% localMachine at: publicKeys} →
OrderedCollection('Parameters' 'Variables' 'Extensions' 'Aliases' )
returns a collection of the keys of the receiver; Windows reserved keys are not included.
•
removeKey: e.g., {f= ’exampleKey’ regDB removeKey:} → aRegistrationDatabase
returns the receiver after removing the subkey named in the argument.
•
value e.g., {set assoc ‘exampleKey’ ‘exampleValue’ %Association% key:value:} {f==
assoc regDB add:} {f= ‘SOFTWARE\ExperTelligence,
Inc.\WebBase\4.10\Parameters\exampleKey’ %RegistrationDatabase% localMachine at:
value} →‘exampleValue’
returns the value of the receiver if a default value has been set; otherwise returns an empty
string.
•
value: e.g., {set assoc ‘exampleKey’ ‘exampleValue’ %Association% key:value:} {f==
assoc regDB add:} {f= ‘newExampleValue’ ‘SOFTWARE\ExperTelligence,
Inc.\WebBase\4.10\Parameters\exampleKey’ %RegistrationDatabase% localMachine at:
value:} → aRegistrationDatabase
returns the receiver after settings its value to the argument.
•
values e.g., {f= ‘SOFTWARE\ExperTelligence, Inc.\WebBase\4.10’
%RegistrationDatabase% localMachine at: values} → OrderedCollection('' '' '' '' )
returns a collection of the values corresponding to all the keys of the receiver. If no default
value is specified for a key, returns an empty string in the appropriate location within the
collection.
Registration Database Class Operations
The %RegistrationDatabase% variable represents the RegistrationDatabase class. The
following operations can be sent to this class.
•
classesRoot e.g., {f= %RegistrationDatabase% classesRoot} → aRegistrationDatabase
returns a new instance of the receiver corresponding to the HKEY_CLASSES_ROOT
WebBase User’s Guide
241
Chapter 11: Expressions
predefined key. The keyName for top-level registration databases is a number (e.g.,
2147483652) that uniquely identifies this top-level RegistrationDatabase.
•
copyFrom:in:to:in: e.g., {f= ‘SOFTWARE\Company’ #currentUser
‘SOFTWARE\Company’ #localMachine %RegistrationDatabase% copyFrom:in:to:in:}
→ aRegistrationDatabase
copy the key and all subkeys from one location in the registry to another. An error is
generated if the input key is absent, the output key will be created or overwritten.
•
currentUser e.g., {f= %RegistrationDatabase% currentUser} →
aRegistrationDatabase
returns a new instance of the receiver corresponding to the HKEY_CURRENT_USER
predefined key. The keyName for top-level registration databases is a number (e.g.,
2147483652) that uniquely identifies this top-level RegistrationDatabase.
•
localMachine e.g., {f= %RegistrationDatabase% localMachine} →
aRegistrationDatabase
returns a new instance of the receiver corresponding to the HKEY_LOCAL_MACHINE
predefined key. The keyName for top-level registration databases is a number (e.g.,
2147483652) that uniquely identifies this top-level RegistrationDatabase.
•
new e.g., {f= %RegistrationDatabase% new} → aRegistrationDatabase
returns a new instance corresponding to the HKEY_CLASSES_ROOT predefined key.
•
new: e.g., {f= ‘Access.Database\CurVer’ %RegistrationDatabase% new:} →
aRegistrationDatabase
returns a new instance which spans out from the hierarchy node specified in the argument.
The argument must be a subtree within HKEY_CLASSES_ROOT; it can specify one
subtree or a full specification.
•
printHierarchy e.g., {f= %RegistrationDatabase% printHierarchy} →‘ … ‘
returns a String containing a hierarchical representation of the complete System Registry
hierarchy. Because the System Registry contains many entries in its hierarchy, the results
are not presented here.
•
printHierarchyOn: e.g., {set strm %String% new %WriteStream% on:} {f= strm
%RegistrationDatabase% printHierarchyOn:} → RegistrationDatabase
returns the receiver after appending a hierarchical representation of the complete System
Registry hierarchy to the stream specified in the argument. Because the System Registry
contains many entries in its hierarchy, the results are not presented here.
•
users e.g., {f= %RegistrationDatabase% users} → aRegistrationDatabase
returns a new instance of the receiver corresponding to the HKEY_ USERS predefined
key. The keyName for top-level registration databases is a number (e.g., 2147483652)
that uniquely identifies this top-level RegistrationDatabase.
11.34 HttpCommand
The %cmd% variable is an instance of HttpCommand that is created within WebBase to
process the specific GET or POST request being handled. Some of the WebBase macros and
variables already described are directly associated with this command instance -- e.g., the
%browserAddress% variable contains the IP address of the browser from which the GET or
242
WebBase User’s Guide
POST was issued -- therefore each command instance will have its own %browserAddress%
variable.
In addition to standard macros and variables that are tied to a given command instance, there
are a number of operations that can be sent directly to the command instance. In general this is
not encouraged as one can alter the contents of the command instance to the point where
WebBase can no longer process it without generating an error. There are, however, a few
methods that can be useful in the development of .htf forms that will be described here.
•
argList e.g., {f= %cmd% argList} →‘httpcmd?arg1=abc&arg2=1’
The full argument string including the command (file) name.
•
argString e.g., {f= %cmd% argString} → arg1=abc&arg2=1
Returns just the arguments part of the argList (see above).
•
asHTF: e.g., {f= myWhere %cmd% asHTF:} → WHERE clause
The asHTF: ‘parses’ the contents of the variable, first removing any surrounding {htf}
{/htf} macros and then evaluating the {variable} references contained within the string.
NOTE: the asHTF: message only processes variables -- it does not evaluate WebBase
macros like the {if ...}, {case ...} etc. The characters immediately following the opening
curly brace ({) are taken to be a field or variable name and any parameters (such as
sql=true) will be handled as described in the documentation of WebBase variables. The
basic example #9 included with the WebBase WebWizard shows how the asHTF:
operation can be used.
•
beep e.g., {f= %cmd% beep} → a HttpGetN (causes a beep to sound)
Beeps the server.
•
beep:for: e.g., {f= 3 50 %cmd% beep:for:} → a HttpGetN (causes 3 beeps every 50 ms
at the server)
Beeps the server at the frequency specified in the first argument for the duration specified
in the second argument. The duration is in milliseconds.
•
cacheFreeForm: e.g., {f= ‘c:\http\wbwizard/default.htf’ %cmd% cacheFreeForm:} →
false
Removes the indicated form from the forms cache. The argument must be the fully
qualified form pathname - not just the ‘default.htf’ portion as referenced via a URL. This
operation returns true if the form was found in the cache and removed; false if not found in
the cache.
•
cacheFreeSource:user: e.g., {f= ‘myAccess’ ‘fref’ %cmd% cacheFreeSource:user:} →
false
Removes the specified ODBC connection from the cache. This is similar to the cache
keyword used on the sql macro described earlier. A user can create a .htf form for
maintenance purposes that merely clears out specific cache entries whenever the form is
run. The first argument is the name of the ODBC source, the second is the username. If
no username was assigned by the ODBC administrator, an empty string (‘ ‘) must be
specified for the second argument.
•
cacheMenuItemCheck e.g., {f= %cmd% cacheMenuItemCheck} → a HttpGetN
Force the menu items under the WebBase WebServer Option’s menu to agree with the
current state of caching. This should be used if the user is modifying the value of
%cacheOdbc% within a form to ensure that subsequent interactions with the WebBase
WebServer window accurate reflect the status of ODBC connection caching.
WebBase User’s Guide
243
Chapter 11: Expressions
244
•
canAccept e.g., {f= %cmd% canAccept} → OrderedCollection('Connection' ==>
'Keep-Alive' 'User-Agent' ==> 'Mozilla/3.0 (Win95; I)' 'Host' ==> '127.0.0.1' 'Accept'
==> 'image/gif, image/x-xbitmap, image/jpeg, image/pjpeg, */*' 'Cookie' ==>
'WebBaseID=W14696994E161808318465B; CookieCounter=5' )
Returns an ordered collection of associations of the header keys and their values. The
operation is a bit misnamed since ‘Accept’ is only one of the keys that is returned.
•
clearFormsCache e.g., {f= %cmd% clearFormsCache} → a HttpGetN
Clears all the forms from the forms cache.
•
clearOdbcCache e.g., {f= %cmd% clearOdbcCache} → a HttpGetN
Clears all the connections from the ODBC connection cache. This should be used when
trying to release a database file for external modifications.
•
cmdStr e.g., {f= %cmd% cmdStr} →‘GET’
Returns the type of command issued - GET, POST, or HEAD
•
command e.g., {f= %cmd% command} →‘GET /httpcmd?arg1=abc&arg2=1
HTTP/1.0’
Returns the full command up to and including the HTTP 1.0 command line terminator.
•
commandString e.g., {f= %cmd% commandString} → GET
/httpcmd?arg1=abc&arg2=1 HTTP/1.0 Connection: Keep-Alive User-Agent:
Mozilla/3.0 (Win95; I) Host: 127.0.0.1 Accept: image/gif, image/x-xbitmap, image/jpeg,
image/pjpeg, */* Cookie: WebBaseID=W14696994E161808318465B; CookieCounter=5
Returns the full command plus header variables sent by the browser.
•
cookieTags e.g., {f= %cmd% cookieTags} →‘; path=/’
Returns the accumulation of the %cookiePath%, %cookieDomain% and %cookieExpires%
variables as a string that gets appended to all outgoing cookies. Because the user can set
any of these variables, the results displayed will vary depending on the current values of
the above three %cookie*% variables. Only %cookiePath% has a default which is shown
in the example above.
•
cookieWebBaseId e.g., {f= %cmd% cookieWebBaseId} →
’WebBaseID=W14697403E161808318469B; path=/’
This is a default cookie that WebBase always generates and sends out to the browser to
see if it can establish a cookie connection. This value is used as the default %userName%
for user variables if the browser responds with the WebBaseID cookie. The example
above defines the cookie WebBaseID and has the cookieTag (with the %cookiePath%
default) appended.
•
enumerateHTML:titled: e.g., {f= %localVariables% ‘Local WebBase Variables’
enumerateHTML:titled:} → <See output of %localVariablesHTML%>
Creates an HTML <UL> <LI> ... </UL> bulleted list of the dictionary or collection which
is the first argument with the title being the second argument. It is used by dynamic
variables like %localVariablesHTML%, and is a useful formatting tool for displaying any
type of collection or dictionary.
•
flash: e.g., {f= 'this is a test' %cmd% flash:} →’:: Flash: this is a test’
Writes the string argument to the little ‘flash’ or current command pane in the server
window below the menu bar. Returns the contents of that pane (which will have a '::
Flash: ' prefixing the string passed in).
WebBase User’s Guide
•
fromVars:default: e.g., {f= {set var1 'var' 'default' %cmd% fromVars:default:} →
’default’
Looks for a variable whose name is specified in the first argument (a string containing one
or more space-separated variable names). If the variable is found, returns it value. It is
does not exist, then returns the second argument. This is useful to help determine if a
variable exists and if not, create it and set its initial value. See also
fromNonNullVars:default: and variableExists:.
•
fromNonNullVars:default: e.g., {f= {set var1 'var' 'default' %cmd%
fromNonNullVars:default:} →’default’
This is the same as fromVars:default:, except that if the variable is found but its value is
null (either nil or an empty string), then treat it as if it does not exist and go on to the next
variable or return the default if at the end of the list of variable names. See also
fromVars:default: and variableExists:.
•
getAnyLocalVariable: e.g., {f= ‘myLocalVar’ %cmd% getAnyLocalVariable:} →’’
returns the value of the first scope/local variable whose name matches the argument. The
local scoping variables are checked first, and then the local variables. If no match is
found, returns nil and does not continue looking for another match in the user, global or
dynamic variables. If a match is found whose value is nil, returns an empty string.
•
getGlobalVariable: e.g., {f= ‘aGlobalVar’ %cmd% getGlobalVariable:} →’’
returns the value of the global variable whose name matches the argument. If no match is
found, returns nil and does not continue looking for another match in the dynamic
variables. If a match is found whose value is nil, returns an empty string.
•
getLetVariable: e.g., {f= ‘myLocalVar’ %cmd% getLetVariable:} →’’
returns the value of the first scope variable whose name matches the argument. If no match
is found, returns nil and does not continue looking for another match in the local, user,
global or dynamic variables. If a match is found whose value is nil, returns an empty
string.
•
getLocalVariable: e.g., {f= ‘myLocalVar’ %cmd% getLocalVariable:} →’’
returns the value of the first local variable whose name matches the argument. No local
scoping variables are checked. If no match is found, returns nil and does not continue
looking for another match in the user, global or dynamic variables. If a match is found
whose value is nil, returns an empty string.
•
getUserVariable: e.g. {f= 'myVar' %cmd% getUserVariable:} →’’
returns the value of the first user variable whose name matches the argument. If no match
is found, returns nil and does not continue looking for another match in the global or
dynamic variables. If a match is found whose value is nil, returns an empty string.
•
getVariable: e.g. {f= 'myVar' %cmd% getVariable:} →’’
Returns the contents of the variable requested or nil if the variable is not found. This
differs from simply using the variable which would result in an error being generated if the
variable were not defined. One can wrap the variable usage in the errorProtect macro but
often it is more convenient to use the above form to test for the existence of a variable in
situations where it may often be non-existent. In addition, the argument may itself be a
variable name (not enclosed in single quotes) in which case the contents of that variable
(which must be a string) will be used as the name of the variable to be fetched. This
allows for a level of dynamic indirection in accessing variables. If one uses a variable to
provide the variable name and the variable does not exist, WebBase will generate an error.
If the variable exists but does not contain a string, WebBase will return a value of nil.
WebBase User’s Guide
245
Chapter 11: Expressions
246
•
isTrue32bit e.g., {f= %cmd% isTrue32bit} → true
Returns true or false identifying whether the server is a 32-bit or 16-bit operating system.
•
logRecord e.g., {f= %cmd% logRecord} → ‘127.0.0.1 - - [23/Mar/1997:19:15:56 0800] "GET /httpcmd?arg1=abc&arg2=1 HTTP/1.0" 200 0 "" "Mozilla/3.0 (Win95; I)"
‘
Returns the default record that will be written to the default log file if logging is enabled.
Note: this record is always available by reading logRecord on %cmd% even if writing it to
a file is disabled or was never enabled in the first place.
•
mime e.g., {f= %cmd% mime} →‘text/html’
Returns the current mime type string. If the user has set up a extension to process a
command and return something other than the default "text/html" mime type, this would
return whatever was set up.
•
name e.g., {f= %cmd% name} → a HttpGetN for: httpcmd
Returns the type of command created (either HttpGetN, HttpPost, HttpHead, or HttpError)
and the command name.
•
nextCookieId e.g., {f= %cmd% nextCookieId} → W14697403E161808318469B
Returns the unique value as used in the default cookie that WebBase always generates and
sends out to the browser to see if it can establish a cookie connection.
•
removeTimer: e.g., {f= anId %cmd% removeTimer:} → anHttpGet
Removes the timer queue entry whose id is equal to the value of anId (may be a constant
integer or string or a variable name of a variable whose value is an integer or a string). If
no such timer queue entry is found, no error is indicated. If multiple timer queue entries
have the same id value, only the first such entry will be removed. Entries are created and
added to the timer queue using the timer macro.
•
search e.g., {f= %cmd% search} →‘arg1=abc AND arg2=1’
This operation is now obsolete and is maintained for compatibility with forms developed
under previous versions. It is a precursor to the current %WHERE% variable. It returned
the arguments as a string of arg=value with the intervening & replaced with ' AND '.
•
startTime e.g., {f= %cmd% startTime} → 28739920
The number of milliseconds between the previous midnight and when current command
was started. It is used by %elapsed% to determine elapsed time to the point where
%elapsed% is executed.
•
text e.g., {f= %cmd% text}
Returns the text for the command. This is the entire file being processed. Any insert files
are not included in this string.
•
timerQueueSQL e.g., {f= %cmd% timerQueueSQL} →‘OrderedCollection(
anODBCRowObject anODBCRowObject)
Returns a collection of SQL-like OdbcRowObjects that contain the following fields: ‘id’,
‘title’, ‘created’, ‘period’, ‘date’, ‘time’, ‘count’, ‘minutes’, ‘ranDate’ and ‘ranTime’. The
‘id’, ‘title’, ‘period’, ‘date’ and ‘time’ fields are those specified as keyword/value
arguments to the timer macro. The ‘created’ is the date/time when the entry was created
and initially put onto the timer queue. The ‘count’ is the number of times the form will yet
be run before it is removed from the queue. The ‘minutes’ is the number of minutes
remaining before a periodic entry will be executed again. The ‘ranDate’ and ‘ranTime’ are
the last date/time the entry was executed.
WebBase User’s Guide
•
userAgent e.g. {f= %cmd% userAgent} → Mozilla/3.0 (Win95; I)
Returns the string that identifies the browser.
•
variableExists: e.g., {f= ‘myVar’ %cmd% variableExists:} → true
Returns true or false if a variable by the specified name exists. The variable precedence
order is used to determine if the variable exists (e.g., field -> local -> user -> global ->
dynamic).
•
vars e.g., {f= %cmd% vars} → Dictionary(('arg1' ==> 'abc') ('CookieCounter' ==>
'5') ('%cookieDomain%' ==> '') ('%cmd%' ==> a HttpGetN) ('%resultLimit%' ==> 0)
('%accepts%' ==> OrderedCollection('image/gif, image/x-xbitmap, image/jpeg,
image/pjpeg, */*' )) ('%resultOffset%' ==> 1) ('User-Agent' ==> 'Mozilla/3.0 (Win95;
I)') ('%resultCount%' ==> 0) ('%cookiePath%' ==> '/') ('%repeatCount%' ==> 1)
('Cookie' ==> 'WebBaseID=W14696994E161808318465B; CookieCounter=5')
('%resultStart%' ==> 1) ('Connection' ==> 'Keep-Alive') ('Host' ==> '127.0.0.1')
('WebBaseID' ==> 'W14696994E161808318465B') ('%theArgs%' ==>
OrderedList('arg1' 'arg2' )) ('%browserAddress%' ==> '127.0.0.1') ('arg2' ==> '1')
('%cookieExpires%' ==> '') ('Accept' ==> 'image/gif, image/x-xbitmap, image/jpeg,
image/pjpeg, */*') )
Returns the local variables dictionary.
11.35 DatabaseInfo
%DatabaseInfo% is a global variable that allows access to the DatabaseInfo class that
provides information about ODBC sources. No instance operations are provided as it is not
possible to create an instance of this class. The following class operations are supported:
•
canConnect:user:password: e.g., {f= ‘myAccess’ ‘fred’ ‘test’ %DatabaseInfo%
canConnect:user:password:} → true
Returns true or false depending on whether it is possible to connect to the given ODBC
data source.
•
isValidSource: e.g., {f= ‘myAccess’ %DatabaseInfo% isValidSource:} → true
Returns true or false depending on whether the specified source name is set up as an
ODBC source.
•
odbcDataSources e.g., {f= %DatabaseInfo% odbcDataSources} →
SortedCollection('dBASE Files' ==> 'Microsoft dBase Driver (*.dbf)' 'excel1' ==>
'Microsoft Excel Driver (*.xls)' 'FoxPro Files' ==> 'Microsoft FoxPro Driver (*.dbf)'
'myAccess' ==> 'Microsoft Access Driver (*.mdb)' 'Paradox Files' ==> 'Microsoft
Paradox Driver (*.db )' 'Text Files' ==> 'Microsoft Text Driver (*.txt; *.csv)'
'textExample' ==> 'Microsoft Text Driver (*.txt, *.csv)’ )
returns a collection of all the ODBC data sources defined on the system. The contents of
the collection are associations. The key of each association is the name of the data source;
the value is the name of the ODBC driver associated with the source. The ODBC data
sources that are returned are those that are probably associated with an actual database
file. Some ODBC drivers create “virtual” sources that do not have database files
associated with them. The full list of sources, including virtual sources is available using
the odbcDataSourcesRaw operation.
•
odbcDataSourcesRaw e.g., {f= %DatabaseInfo% odbcDataSourcesRaw} →
SortedCollection('dBASE Files' ==> 'Microsoft dBase Driver (*.dbf)' 'Excel Files' ==>
'Microsoft Excel Driver (*.xls)' 'excel1' ==> 'Microsoft Excel Driver (*.xls)' 'FoxPro
WebBase User’s Guide
247
Chapter 11: Expressions
Files' ==> 'Microsoft FoxPro Driver (*.dbf)' 'MS Access 7.0 Database' ==> 'Microsoft
Access Driver (*.mdb)' 'myAccess' ==> 'Microsoft Access Driver (*.mdb)' 'Paradox
Files' ==> 'Microsoft Paradox Driver (*.db )' 'Text Files' ==> 'Microsoft Text Driver
(*.txt; *.csv)' 'textExample' ==> 'Microsoft Text Driver (*.txt, *.csv)' )
returns a collection of all the ODBC data sources defined on the system. This list includes
all sources set up by the user, as well as any “virtual” sources which are set up as part of
the driver installation but are not actually associated with a database file. The list of
sources associated with actual files is available using the odbcDataSources operation.
248
•
odbcDataSourcesSQL e.g., {f= %DatabaseInfo% odbcDataSourcesSQL} →
OrderedCollection(an OdbcRowObject … )
returns an ordered collection containing OdbcRowObjects representing each ODBC data
source. This collection can be iterated through the using forRow macro to look at the
information contained within each data source, which includes the fields
‘Data_Source_Name’ and ‘Data_Source_Driver’. This operation is useful to obtain
information that is to be displayed within a <TABLE> construct, as in the WebBase
WebWizard ODBC Viewer utility.
•
odbcDrivers e.g., {f= %DatabaseInfo% odbcDrivers} → SortedCollection('Microsoft
Access Driver (*.mdb)' ==> ('UsageCount=6811003' 'APILevel=1'
'ConnectFunctions=YYN' 'DriverODBCVer=02.50' 'FileUsage=2' 'FileExtns=*.mdb'
'SQLLevel=0' 'ConectFunctions=YYN') … )
returns a sorted collection of associations. The key to each association is the name of the
ODBC driver; the value is a collection of strings defining the different attributes of the
driver (e.g., UsageCount, APILevel, ConnectFunctions).
•
odbcDriversSQL e.g., {f= %DatabaseInfo% odbcDriversSQL} →
OrderedCollection(an OdbcRowObject … )
returns an ordered collection containing OdbcRowObjects representing each ODBC driver.
This collection can be iterated through the using forRow macro to look at the information
contained within each driver. The attributes of each driver are set up as fields (e.g.,
UsageCount, APILevel, ConnectFunctions). This operation is useful to obtain information
that is to be displayed within a <TABLE> construct, as in the WebBase WebWizard
ODBC Viewer utility.
•
odbcDriversSQL2 e.g., {f= %DatabaseInfo% odbcDriversSQL2} →
OrderedCollection(an OdbcRowObject … )
returns an ordered collection containing OdbcRowObjects representing each ODBC driver.
This collection can be iterated through the using forRow macro to look at the information
contained within each driver, which includes the fields ‘Data_Source_Driver’ and
‘Data_Source_Driver_Attributes’. This operation is useful to obtain information that is to
be displayed within a <TABLE> construct, as in the WebBase WebWizard ODBC
Viewer utility.
•
table:source:user:password: e.g., {f= ‘Cars’ ‘myAccess’ ‘fred’ ‘test’ %DatabaseInfo%
table:source:user:password:} → OrderedCollection(an OdbcRowObject … )
returns an ordered collection containing OdbcRowObjects representing each field in the
specified table and source. This collection can be iterated through the using forRow macro
to look at the information contained within each field. This operation is useful to obtain
information that is to be displayed within a <TABLE> construct, as in the WebBase
WebWizard ODBC Viewer utility.
•
tablesIn:user:password: e.g., {f= ‘myAccess’ ‘fred’ ‘test’ %DatabaseInfo%
tablesIn:user:password:} →
WebBase User’s Guide
OrderedCollection(OrderedCollection('C:\HTTP\WbWizard\DBEx\autos' nil 'Cars'
'TABLE' nil ) OrderedCollection('C:\HTTP\WbWizard\DBEx\autos' nil 'LogData'
'TABLE' nil ) )
return an ordered collection of database tables for the given ODBC source. Each entry in
the collection is another ordered collection containing the path of the database file, owner
qualifier, the name of the table, table type, name qualifier.
•
tableSource:user:password: e.g., {f= ‘myAccess’ ‘fred’ ‘test’ %DatabaseInfo%
tableSource:user:password:} → OrderedCollection(an OdbcRowObject … )
returns an ordered collection containing OdbcRowObjects representing each table in the
specified source. This collection can be iterated through the using forRow macro to look at
the information contained within each table, including the fields ‘table_name’,
‘table_owner’ and ‘table_qualifier’. This operation is useful to obtain information that is
to be displayed within a <TABLE> construct, as in the WebBase WebWizard ODBC
Viewer utility
WebBase User’s Guide
249
Chapter 12: Features
Features
Chapter 12
This chapter contains descriptions of the features of WebBase. It is suggested that you
occasionally check the WebBase Web site for new tips and techniques. Valuable information
can also be obtained on the WebBase Support Forum, also accessible at the WebBase Web
site.
12.1 Logging
WebBase stores information about every command that it processes or returns, unless logging
has been disabled in general or for a particular file extension. Logging can be enabled or
disabled on the WebBase Server window; by default it is enabled.
The log information is stored within files in the directory specified as the LogDirectory
parameter. If this parameter is not specified, then logging cannot be enabled. It is strongly
recommended that this parameter be created, and then logging be enabled or disabled via the
WebBase Server window.
A new log file is created each day named Wbyymmdd.log where yy=year, mm=month, and
dd=day. For example, WB970504.log is the log file for May 5, 1997. These log files will
contain one entry for each query made of WebBase, and will contain information based on the
LogFormat selected. Details on each log format are included later in this section.
There are five LogFormat types supported by WebBase. The LogFormat parameter (0-4) and
the corresponding format type are shown below:
4
3
2
1
0
------
Extended Combined Log File Format
Common Log File Format
Extended Common Log File Format (Default)
Extended Original WebBase (EMWACS) Log File Format
Original WebBase (EMWACS) Log File Format
The five logging formats and examples of each are presented below. The example text file for
each was generated by running the first two basic examples provided with WebBase.
250
WebBase User’s Guide
Common Log File Format (LogFormat=3)
The Common Log File Format is used by many of the commonly available Web analysis
tools18. The text file containing the output in Common Log File Format is shown below:
Example 12.1
Common Log File Format
0.0.0.0 - - [26/Mar/1997:08:02:32 -0800] "none Start_Log HTTP/1.0" - 0.0.0.0 - - [26/Mar/1997:08:02:33 -0800] "none Pause_Server_->_paused HTTP/1.0" - 0.0.0.0 - - [26/Mar/1997:08:02:34 -0800] "none Pause_Server_->_active HTTP/1.0" - 127.0.0.1 - - [26/Mar/1997:08:03:41 -0800] "GET /wbwizard/Wizard.htf?now=28700
HTTP/1.0" 200 6136
127.0.0.1 - - [26/Mar/1997:08:03:44 -0800] "GET /wbwizard/BasicEx?now=29021 HTTP/1.0"
200 491
127.0.0.1 - - [26/Mar/1997:08:03:45 -0800] "GET
/wbwizard/basicex/Wbexams.htf?now=29024 HTTP/1.0" 200 7783
127.0.0.1 - - [26/Mar/1997:08:03:47 -0800] "GET
/wbwizard/basicex/WBexam1.HTF?now=29025040&useBACKbutton.XX=doUSEit HTTP/1.0" 200 1033
127.0.0.1 - - [26/Mar/1997:08:03:48 -0800] "GET
/wbwizard/basicex/WBexams.htf?now=29027020 HTTP/1.0" 200 7783
127.0.0.1 - - [26/Mar/1997:08:03:50 -0800] "GET
/wbwizard/basicex/WBexam2.HTF?now=29028830&useBACKbutton.XX=doUSEit HTTP/1.0" 200 1395
127.0.0.1 - - [26/Mar/1997:08:03:52 -0800] "GET
/wbwizard/basicex/WBexams.htf?now=29030430 HTTP/1.0" 200 7783
0.0.0.0 - - [26/Mar/1997:08:03:59 -0800] "none Pause_Server_->_paused HTTP/1.0" - 0.0.0.0 - - [26/Mar/1997:08:04:00 -0800] "none Quitting HTTP/1.0" - 0.0.0.0 - - [26/Mar/1997:08:04:00 -0800] "none Stop_Log HTTP/1.0" - -
There are seven pieces of information displayed on each line:
•
remotehost – the remote host IP number. For general server entries (e.g., Start_Log,
Quitting, Stop_Log), this value is entered as ‘0.0.0.0’.
•
rfc931 – the remote logname of the user. This information is not currently retrieved by
WebBase, so a dash (‘-‘) is output.
•
authuser – the username as which the user has authenticated himself via Basic
Authentication or ‘-‘ if authentication has not been performed
•
[date] – the date and time of the request with timezone offset from GMT at the end. The
format is: [DD/Mon/YYYY:hh:mm:ss [+/-]HHMM]
•
“request” – the request line exactly as it came from the client in the format “method file
httpversion”. The method could be GET, HEAD, POST, or none. The file contains the
full file path and arguments of the requested file. The file path is relative to the directory
containing the WebBase forms. The httpversion specifies the version number of the
HTTP specification. This will generally be ‘HTTP/1.0’.
•
status – the HTTP status code returned to the client (three digits) or ‘-‘ if not available.
This is generally 200, indicating OK.
•
bytes – the content-length of the document transferred in bytes or ‘-‘ if not available.
18
No web analysis tools are provided by ExperTelligence or as part of the WebBase application. There are a number of web analysis tools from other
vendors available via the web that support one or more of the log file formats provided by WebBase.
WebBase User’s Guide
251
Chapter 12: Features
Extended Common Log File Format (LogFormat=2)
The Extended Common Log File Format is also acceptable to many of the commonly available
Web analysis tools. If no LogFormat parameter is specified, this is the default log format
style. The text file containing the output in Extended Common Log File Format is shown
below:
Example 12.2
Extended Common Log File Format
0.0.0.0 - - [26/Mar/1997:07:58:09 -0800] "none Start_Log HTTP/1.0" - - "" ""
0.0.0.0 - - [26/Mar/1997:07:58:10 -0800] "none Pause_Server_->_paused HTTP/1.0" - "" ""
0.0.0.0 - - [26/Mar/1997:07:58:10 -0800] "none Pause_Server_->_active HTTP/1.0" - "" ""
127.0.0.1 - - [26/Mar/1997:07:58:20 -0800] "GET /wbwizard/ HTTP/1.0" 200 527 ""
"Mozilla/3.0 (Win95; I)"
127.0.0.1 - - [26/Mar/1997:07:58:21 -0800] "GET /wbwizard/Wizard.htf?now=28700
HTTP/1.0" 200 6135 "" "Mozilla/3.0 (Win95; I)"
127.0.0.1 - - [26/Mar/1997:07:58:24 -0800] "GET /wbwizard/BasicEx?now=28700 HTTP/1.0"
200 490 "http://127.0.0.1/wbwizard/Wizard.htf?now=28700" "Mozilla/3.0 (Win95; I)"
127.0.0.1 - - [26/Mar/1997:07:58:25 -0800] "GET
/wbwizard/basicex/Wbexams.htf?now=28704 HTTP/1.0" 200 7782
"http://127.0.0.1/wbwizard/Wizard.htf?now=28700" "Mozilla/3.0 (Win95; I)"
127.0.0.1 - - [26/Mar/1997:07:58:27 -0800] "GET
/wbwizard/basicex/WBexam1.HTF?now=28705050&useBACKbutton.XX=doUSEit HTTP/1.0" 200 1032
"http://127.0.0.1/wbwizard/basicex/Wbexams.htf?now=28704" "Mozilla/3.0 (Win95; I)"
127.0.0.1 - - [26/Mar/1997:07:58:29 -0800] "GET
/wbwizard/basicex/WBexams.htf?now=28707790 HTTP/1.0" 200 7782
"http://127.0.0.1/wbwizard/basicex/WBexam1.HTF?now=28705050&useBACKbutton.XX=doUSEit"
"Mozilla/3.0 (Win95; I)"
127.0.0.1 - - [26/Mar/1997:07:58:31 -0800] "GET
/wbwizard/basicex/WBexam2.HTF?now=28709720&useBACKbutton.XX=doUSEit HTTP/1.0" 200 1394
"http://127.0.0.1/wbwizard/basicex/WBexams.htf?now=28707790" "Mozilla/3.0 (Win95; I)"
127.0.0.1 - - [26/Mar/1997:07:58:41 -0800] "GET
/wbwizard/basicex/WBexams.htf?now=28711690 HTTP/1.0" 200 7783
"http://127.0.0.1/wbwizard/basicex/WBexam2.HTF?now=28709720&useBACKbutton.XX=doUSEit"
"Mozilla/3.0 (Win95; I)"
0.0.0.0 - - [26/Mar/1997:07:58:52 -0800] "none Pause_Server_->_paused HTTP/1.0" - "" ""
0.0.0.0 - - [26/Mar/1997:07:58:54 -0800] "none Quitting HTTP/1.0" - - "" ""
0.0.0.0 - - [26/Mar/1997:07:58:54 -0800] "none Stop_Log HTTP/1.0" - - "" ""
Extended Common Log File Format is the same as Common Log File Format with the addition
of two items at the end of each line:
•
refer – the referer to this page (Referer) or “-“ if none.
•
user-agent – the browser requesting this page (User-Agent) or “-“ if not available
Extended Combined Log File Format (LogFormat=4)
The Extended Combined Log File Format is also acceptable to many of the commonly
available Web analysis tools. The text file containing the output in Extended Combined Log
File Format is shown below:
252
WebBase User’s Guide
Example 12.3
Extended Combined Log File Format
0.0.0.0 - - [26/Mar/1997:08:14:14 -0800] "none Start_Log HTTP/1.0" - - "" ""
0.0.0.0 - - [26/Mar/1997:08:14:15 -0800] "none Pause_Server_->_paused HTTP/1.0" - "" ""
0.0.0.0 - - [26/Mar/1997:08:14:16 -0800] "none Pause_Server_->_active HTTP/1.0" - "" ""
127.0.0.1 127.0.0.1 - [26/Mar/1997:08:14:48 -0800] "GET /wbwizard/ HTTP/1.0" 200 473
"" "Mozilla/3.0 (Win95; I)"
127.0.0.1 127.0.0.1 - [26/Mar/1997:08:14:49 -0800] "GET /wbwizard/Wizard.htf?now=29688
HTTP/1.0" 200 6136 "" "Mozilla/3.0 (Win95; I)"
127.0.0.1 127.0.0.1 - [26/Mar/1997:08:14:51 -0800] "GET /wbwizard/BasicEx?now=29689
HTTP/1.0" 200 491 "http://127.0.0.1/wbwizard/Wizard.htf?now=29688" "Mozilla/3.0
(Win95; I)"
127.0.0.1 127.0.0.1 - [26/Mar/1997:08:14:52 -0800] "GET
/wbwizard/basicex/Wbexams.htf?now=29691 HTTP/1.0" 200 7783
"http://127.0.0.1/wbwizard/Wizard.htf?now=29688" "Mozilla/3.0 (Win95; I)"
127.0.0.1 127.0.0.1 - [26/Mar/1997:08:14:54 -0800] "GET
/wbwizard/basicex/WBexam1.HTF?now=29692500&useBACKbutton.XX=doUSEit HTTP/1.0" 200 1033
"http://127.0.0.1/wbwizard/basicex/Wbexams.htf?now=29691" "Mozilla/3.0 (Win95; I)"
127.0.0.1 127.0.0.1 - [26/Mar/1997:08:14:56 -0800] "GET
/wbwizard/basicex/WBexams.htf?now=29694800 HTTP/1.0" 200 7783
"http://127.0.0.1/wbwizard/basicex/WBexam1.HTF?now=29692500&useBACKbutton.XX=doUSEit"
"Mozilla/3.0 (Win95; I)"
127.0.0.1 127.0.0.1 - [26/Mar/1997:08:14:58 -0800] "GET
/wbwizard/basicex/WBexam2.HTF?now=29696340&useBACKbutton.XX=doUSEit HTTP/1.0" 200 1395
"http://127.0.0.1/wbwizard/basicex/WBexams.htf?now=29694800" "Mozilla/3.0 (Win95; I)"
127.0.0.1 127.0.0.1 - [26/Mar/1997:08:14:59 -0800] "GET
/wbwizard/basicex/WBexams.htf?now=29698100 HTTP/1.0" 200 7783
"http://127.0.0.1/wbwizard/basicex/WBexam2.HTF?now=29696340&useBACKbutton.XX=doUSEit"
"Mozilla/3.0 (Win95; I)"
0.0.0.0 - - [26/Mar/1997:08:15:05 -0800] "none Pause_Server_->_paused HTTP/1.0" - "" ""
0.0.0.0 - - [26/Mar/1997:08:15:06 -0800] "none Quitting HTTP/1.0" - - "" ""
0.0.0.0 - - [26/Mar/1997:08:15:06 -0800] "none Stop_Log HTTP/1.0" - - "" ""
Extended Combined Log File Format is the same as Extended Common Log File Format
except that the ‘rfc931’ entry has been replaced with the server address.
•
serverAddress – the server's IP address. This can be useful if multiple domains are being
used as the log records applicable to a particular domain can be identified.
Original WebBase (EMWACS) Log File Format (LogFormat=0)
The Original WebBase (EMWACS) Log File Format was derived from the EMWACS HTTP
Server. This format is not compatible with many of the Web analysis tools. This format is
provided for compatibility with previous releases of WebBase; it may not be supported in
future releases. It is strongly recommended that the Common Log File Format, Extended
Common Log File Format or Extended Combined Log File Format be used. The text file
containing the output in Original WebBase (EMWACS) Log File Format is shown below:
WebBase User’s Guide
253
Chapter 12: Features
Example 12.4
Original WebBase (EMWACS) Log File Format
Wed 26 Mar 1997 08:24:07 0.0.0.0 0.0.0.0 ***** Start Log *****
Wed 26 Mar 1997 08:24:08 0.0.0.0 0.0.0.0 ***** Pause Server -> paused *****
Wed 26 Mar 1997 08:24:08 0.0.0.0 0.0.0.0 ***** Pause Server -> active *****
Wed 26 Mar 1997 08:24:36 127.0.0.1 127.0.0.1 GET /wbwizard/ HTTP/1.0
Wed 26 Mar 1997 08:24:36 127.0.0.1 127.0.0.1 GET /wbwizard/Wizard.htf?now=30276
HTTP/1.0
Wed 26 Mar 1997 08:24:39 127.0.0.1 127.0.0.1 GET /wbwizard/BasicEx?now=30277 HTTP/1.0
Wed 26 Mar 1997 08:24:40 127.0.0.1 127.0.0.1 GET
/wbwizard/basicex/Wbexams.htf?now=30279 HTTP/1.0
Wed 26 Mar 1997 08:24:42 127.0.0.1 127.0.0.1 GET
/wbwizard/basicex/WBexam1.HTF?now=30280250&useBACKbutton.XX=doUSEit HTTP/1.0
Wed 26 Mar 1997 08:24:43 127.0.0.1 127.0.0.1 GET
/wbwizard/basicex/WBexams.htf?now=30282450 HTTP/1.0
Wed 26 Mar 1997 08:24:45 127.0.0.1 127.0.0.1 GET
/wbwizard/basicex/WBexam2.HTF?now=30283820&useBACKbutton.XX=doUSEit HTTP/1.0
Wed 26 Mar 1997 08:24:47 127.0.0.1 127.0.0.1 GET
/wbwizard/basicex/WBexams.htf?now=30285420 HTTP/1.0
Wed 26 Mar 1997 08:24:57 0.0.0.0 0.0.0.0 ***** Pause Server -> paused *****
Wed 26 Mar 1997 08:24:58 0.0.0.0 0.0.0.0 ***** Quitting *****
Wed 26 Mar 1997 08:24:58 0.0.0.0 0.0.0.0 ***** Stop Log *****
There are four pieces of information displayed on each line:
•
date – the date and time of the request.
The format is: XXX MMM DD YYYY HH:MM:SS
•
server – the server’s IP number. For general server entries (e.g., Start_Log, Quitting,
Stop_Log), this value is entered as 0.0.0.0.
•
remoteHost – the remote host IP number. For general server entries (e.g., Start_Log,
Quitting, Stop_Log), this value is entered as 0.0.0.0.
•
request – the request line exactly as it came from the client in the format
method file httpversion. The method could be GET, HEAD, POST, or none. The file
contains the full file path and arguments of the requested file. The file path is relative to
the directory containing the WebBase forms. The httpversion specifies the version
number of the HTTP specification. This will generally be HTTP/1.0.
Extended Original WebBase (EMWACS) Log File Format
(LogFormat=1)
The Extended Original WebBase (EMWACS) Log File Format is the same as the Original
WebBase (EMWACS) Log File Format with the addition of a single extra value in each line.
This format is not compatible with many of the Web analysis tools. This format is provided
for compatibility with previous releases of WebBase; it may not be supported in future
releases. It is strongly recommended that the Common Log File Format, Extended Common
Log File Format or Extended Combined Log File Format be used. The text file containing the
output in Extended Original WebBase (EMWACS) Log File Format is shown below:
254
WebBase User’s Guide
Example 12.5
Extended Original WebBase (EMWACS) Log File Format
Wed 26 Mar 1997 08:26:56 0.0.0.0 0.0.0.0 ***** Start Log *****
Wed 26 Mar 1997 08:26:56 0.0.0.0 0.0.0.0 ***** Pause Server -> paused *****
Wed 26 Mar 1997 08:26:57 0.0.0.0 0.0.0.0 ***** Pause Server -> active *****
Wed 26 Mar 1997 08:27:02 0.0.0.0 0.0.0.0 ***** Pause Server -> paused *****
Wed 26 Mar 1997 08:27:03 0.0.0.0 0.0.0.0 ***** Quitting *****
Wed 26 Mar 1997 08:27:03 0.0.0.0 0.0.0.0 ***** Stop Log *****
Wed 26 Mar 1997 08:27:12 0.0.0.0 0.0.0.0 ***** Start Log *****
Wed 26 Mar 1997 08:27:13 0.0.0.0 0.0.0.0 ***** Pause Server -> paused *****
Wed 26 Mar 1997 08:27:13 0.0.0.0 0.0.0.0 ***** Pause Server -> active *****
Wed 26 Mar 1997 08:27:32 127.0.0.1 127.0.0.1 GET /wbwizard/ HTTP/1.0 <473>
Wed 26 Mar 1997 08:27:33 127.0.0.1 127.0.0.1 GET /wbwizard/Wizard.htf?now=30453
HTTP/1.0 <6136>
Wed 26 Mar 1997 08:27:36 127.0.0.1 127.0.0.1 GET /wbwizard/BasicEx?now=30453 HTTP/1.0
<491>
Wed 26 Mar 1997 08:27:36 127.0.0.1 127.0.0.1 GET
/wbwizard/basicex/Wbexams.htf?now=30456 HTTP/1.0 <7783>
Wed 26 Mar 1997 08:27:38 127.0.0.1 127.0.0.1 GET
/wbwizard/basicex/WBexam1.HTF?now=30456620&useBACKbutton.XX=doUSEit HTTP/1.0 <1033>
Wed 26 Mar 1997 08:27:39 127.0.0.1 127.0.0.1 GET
/wbwizard/basicex/WBexams.htf?now=30458430 HTTP/1.0 <7783>
Wed 26 Mar 1997 08:27:40 127.0.0.1 127.0.0.1 GET
/wbwizard/basicex/WBexam2.HTF?now=30459810&useBACKbutton.XX=doUSEit HTTP/1.0 <1395>
Wed 26 Mar 1997 08:27:42 127.0.0.1 127.0.0.1 GET
/wbwizard/basicex/WBexams.htf?now=30460850 HTTP/1.0 <7783>
Wed 26 Mar 1997 08:27:46 0.0.0.0 0.0.0.0 ***** Pause Server -> paused *****
Wed 26 Mar 1997 08:27:47 0.0.0.0 0.0.0.0 ***** Quitting *****
Wed 26 Mar 1997 08:27:47 0.0.0.0 0.0.0.0 ***** Stop Log *****
Extended Original WebBase (EMWACS) Log File Format is the same as Original WebBase
(EMWACS) Log File Format with the addition of one item at the end of each line:
•
<bytes> – the content-length of the document transferred in bytes or 0 if not available.
12.2 Caching
Caching is storing information into local memory so that if the information needs to be used in
the future it will be readily accessible. There are several variables of caching used by or
affecting WebBase: browser-side caching of forms, WebBase forms caching, and WebBase
ODBC Connection caching.
Browser-Side Caching
When a browser sends a URL to a server, it caches the full URL and the results returned from
the URL. If the URL is requested again, the browser simply displays the contents from the
cache instead of making the request of the server again. This works fine for static pages. But
the true power of WebBase is in being able to provide dynamic pages. This section addresses
how to circumvent browser-side caching to always provide the latest information on a page to
a user.
The first approach is to provide information to the browser about when the information in its
cache is no longer valid. This can be done by setting the %expire% variable, which causes the
Expires header parameter to be set. The value of %expire% in seconds is added to the current
time in GMT and returned to the browser. This value defaults to 0. If %expire% is set to -1,
the Expires header parameter is not generated; the form will never expire. If the value is set to
-2, the Expires header parameter is set to 12:00:01 on January 1, 1900. It is recommended
that %expire% be set to -2 to cause forms to be marked as expired.
WebBase User’s Guide
255
Chapter 12: Features
However, experience has shown that most browsers do not honor this Expire header parameter
unless the page was accessed using the POST command. Pages accessed via a GET seem to
ignore this feature. WebBase sends the expiration information in the header regardless of the
command used to request the page.
The second approach is to generate unique command lines. Browsers typically cache pages
based on the command line sent to the server. For a page referenced as http://<x>/foo.htf, it
can also be referenced via http://<x>/foo.htf?x=1 where the x=1 is an argument that the page
should ignore but it is part of what the browser uses to identify the pages in its cache. For
example,
http://<addr>/foo.htf
http://<addr>/foo.htf?x=1
http://<addr>/foo.htf?x=2
would all be considered different pages as far as the browser's cache is concerned. If the page
is not dependent upon the argument x, they should all return the same result as
http://<addr>/foo.htf
Here are some examples of how to create a unique URL using command line arguments. Each
of these includes a variable called “now” whose value is set to %seconds%. Since the number
of seconds is going to be always changing, this will keep the form from being cached at the
browser so the latest information will always be retrieved and displayed for your users.
For an anchor:
<A HREF="form2.htf?arg1=val1&now={%seconds%}" Next page </A>
For a <FORM> construct:
<FORM METHOD="GET" ACTION="form2.htf">
...some input statements...
<INPUT TYPE="HIDDEN" NAME="now" VALUE="{%seconds%}">
</FORM>
For a redirect:
{redirect2 form2.htf}
now={%seconds%}
{/redirect2}
There is no requirement that form2.htf actually has to do anything with the “now” argument
passed in. It is simply being used to override browser caching. If you run the WebBase
examples, you'll notice this "now=###" construct showing up on lots of the examples.
This "trick" is only required when you are working with dynamic pages whose contents are
expected to change. But since that's what WebBase is designed for -- allowing a user to create
dynamic pages from database information -- it's a very useful trick to master.
Forms Caching
Forms are the files read and processed by WebBase. By default, they are .htf files although
other files can also be specified to be processed by WebBase. When a file to be processed is
specified in a URL, WebBase locates the file on disk, reads the information into it, and
generates an internal tree structure representing the WebBase macros and variables. Once the
tree structure is built, WebBase then processes it. The appropriate value of each variable is
256
WebBase User’s Guide
substituted, any operations are performed, and the results are added into the stream that is
finally returned to the browser. This stream contains only text and HTML tags; all WebBase
constructs have been removed.
WebBase is set up by default to perform forms caching. The internal tree structure that is
built is placed into the form cache. If the file is subsequently referenced, the internal structure
is removed from the cache and re-used. The forms are re-entrant – only the associated
variables and fields differ. This provides a performance advantage is that WebBase does not
have to hit the disk to read the form each time it is accessed, nor does it have to parse the text
each time.
There are two variables affecting caching: %cacheEnabled% and %cacheTimeCheck%. Both
of these can be modified via the WebBase WebServer menus. By default, both variables are
set to true. The %cacheEnabled% variable indicates that forms caching is to be used. It is
strongly recommended that this variable always be set to true, as it provides a performance
improvement with no associated limitations.
The %cacheTimeCheck% variable is only active when forms caching is enabled. If set to true,
which is the default, WebBase will check to see if the form on disk has been modified
subsequent to the version that was added to the cache. If so, the form on disk is opened, read
and the new contents are placed into the cache. This should be set to true in a highly
interactive development environment. In a pure production environment this should be turned
off as checking the time stamp involves open file overhead, although less than allocating
buffers and actually reading and reparsing the file as when caching is off all together.
Creating a form containing the following line can clear all of the forms in the cache:
{f= %cmd% clearFormsCache}
ODBC Connection Caching
The first time a user makes a request of a database, a new ODBC connection is made for that
source name and username. When the request is finished, the connection is put into the cache
and marked that it is idle. If multiple users are accessing the same database at the same time,
then multiple connections will be made and cached since each connection can only handle a
single request at a time. If you were to look at the %ODBCcacheHTML% variable, you might
find several entries in the cache for the same source and username. These are there because
multiple users have been making requests at the same time.
It is recommended that ODBC connection caching be enabled to improve performance. If
ODBC caching is disabled, each database query will take longer to be made since a new
connection has to be created. After the query is complete, the connection goes away. You can
turn caching off by creating a global variable %cacheODBC% and setting its value to false. If
you have multiple databases, this will turn caching off for all of them.
It is possible to control when an ODBC connection is generated using the cache keyword on
the sql macro. A value of ‘false’ will cause the connection for that particular sql query to not
be cached. If the keyword is not specified, the connection is cached.
All of the current ODBC connections can be cleared either using the Clear ODBC Cache
option on the WebBase WebServer window, or by creating a form containing the following
line:
WebBase User’s Guide
257
Chapter 12: Features
{f= %cmd% clearOdbcCache}
Additional information about the ODBC connection cache in included in the section on
Database Administration in Chapter 14.
12.3 WHERE Clause & Variable Name Suffixes
The %WHERE% variable was designed to automatically create an SQL WHERE clause from
the variables found in the GET or POST command string.
A simple example:
GET test.htf?ID=1234&name=George
yields
{%WHERE%} → WHERE ID = 1234 AND name = 'George'
The ID= and name= fields in the command line would typically come from <INPUT
NAME="ID" VALUE...> elements in a form. One could also specify this information in an
anchor as <A HREF="test.htf?ID={val1}&name={val2}"> ...
It may not always be desirable to have all of the fields in a command line be used in the
creation of the WHERE clause nor will all the tests be the = (equal) operator. WebBase has
taken this into account by providing a scheme for encoding a suffix on the variable name field
to alter the way in which the %WHERE% variable is constructed.
Here is another example. The <INPUT> statements within the <FORM> construct requesting
variable values are:
<INPUT TYPE=”TEXT” NAME=”ID.GT” VALUE=”1234”>
<INPUT TYPE=”TEXT” NAME=”NAME.%LIKE%” VALUE=”George”>
The command line generated using these two input variables and their values is shown below.
Note that the browser has performed the necessary encoding on the non-alphanumeric
characters (e.g., the ‘%’ and ‘.’):
GET test.htf?ID%3EGT=1234&name%3E%25LIKE%25=George& code%3EXX=wxyz
The resulting %WHERE% variable is:
WHERE ID > 1234 AND name LIKE '%George%'
In this example, a > (greater than) test was done on the ID field and a LIKE (case-insensitive
comparison) test on the name field using wild carding. The variable name suffixes that can be
used to modify a %WHERE% clause, their functions and an example of their usage are:
258
•
.EQ e.g. ID.EQ=123 → ID = 123
adds the field to the WHERE clause using an equal operator (the default if no suffix is
specified).
•
.EQN e.g. ID.EQN=123 → ID = 123
same as .EQ but coerces the value to a number using asNumber.
•
.EQS e.g. ID.EQS=123 → ID = '123'
same as .EQ but coerces the value to a string using asString and encloses the field in
single quotes.
WebBase User’s Guide
•
.GE e.g. ID.GE=123 → ID >= 123
adds the field to the WHERE clause using a greater than or equal operator.
•
.GEN e.g. ID.GEN=123 → ID >= 123
same as .GE but coerces the value to a number using asNumber.
•
.GES e.g. ID.GES=123 → ID >= '123'
same as .GE but coerces the value to a string using asString and encloses the field in
single quotes.
•
.GT e.g. ID.GT=123 → ID > 123
adds the field to the WHERE clause using a greater than operator.
•
.GTN e.g. ID.GTN=123 → ID > 123
same as .GT but coerces the value to a number using asNumber.
•
.GTS e.g. ID.GTS=123 → ID > '123'
same as .GT but coerces the value to a string using asString and encloses the field in
single quotes.
•
.LE e.g. ID.LE=123 → ID <= 123
adds the field to the WHERE clause using a less than or equal operator.
•
.LEN e.g. ID.LEN=123 → ID <= 123
same as .LE but coerces the value to a number using asNumber.
•
.LES e.g. ID.LES=123 → ID <= '123'
same as .LE but coerces the value to a string using asString and encloses the field in single
quotes.
•
.LIKE e.g. name.LIKE=George → name LIKE 'George'
adds the field to the WHERE clause with a LIKE operator. This is very similar to using
‘=‘. However, the value of LIKE is when the user is allowed to type in the % character as
part of the input: thus positioning the ‘wildcard’ somewhere in the input text rather than
just at the beginning and/or the end of the string. Even if the wildcard character is to be at
the beginning or the end, the user who is entering the text has control over where the %
character is located and not the developer of the Web page.
•
.%LIKE% e.g. name.%LIKE%=George → name LIKE '%George%'
adds the field to the WHERE clause with a LIKE operator and includes wild carding at
both ends of the string.
•
.%LIKE e.g. name.%LIKE=George → name LIKE '%George'
adds the field to the WHERE clause with a LIKE operator and includes wild carding at the
beginning of the string.
•
.LIKE% e.g. name.LIKE%=George → name LIKE 'George%'
adds the field to the WHERE clause with a LIKE operator and includes wild carding at the
end of the string.
•
.LT e.g. ID.LT=123 → ID < 123
adds the field to the WHERE clause using a less than operator.
•
.LTN e.g. ID.LTN=123 → ID < 123
same as .LT but coerces the value to a number using asNumber.
WebBase User’s Guide
259
Chapter 12: Features
•
.LTS e.g. ID.LTS=123 → ID < '123'
same as .LT but coerces the value to a string using asString and encloses the field in single
quotes.
•
.NEQ e.g. ID.NEQ=123 → ID != 123
adds the field to the WHERE clause using a not equal operator.
•
.NEQN e.g. ID.NEQN=123 → ID != 123
same as .NEQ but coerces the value to a number using asNumber.
•
.NEQS e.g. ID.NEQS=123 → ID != '123'
same as .NEQ but coerces the value to a string using asString and encloses the field in
single quotes.
•
.NLT e.g. ID.NLT=123 → ID !< 123
adds the field to the WHERE clause using a not less than operator.
•
.NLTN e.g. ID.NLTN=123 → ID !< 123
same as .NLT but coerces the value to a number using asNumber.
•
.NLTS e.g. ID.NLTS=123 → ID !< '123'
same as .NLT but coerces the value to a string using asString and encloses the field in
single quotes.
•
.NGT e.g. ID.NGT=123 → ID !> 123
adds the field to the WHERE clause using a not greater than operator.
•
.NGTN e.g. ID.NGTN=123 → ID !> 123
same as .NGT but coerces the value to a number using asNumber.
•
.NGTS e.g. ID.NGTS=123 → ID !> '123'
same as .NGT but coerces the value to a string using asString and encloses the field in
single quotes.
•
.XX e.g. code.XX=sample →
skips this field name when constructing the WHERE clause.
12.4 ISMAP Features
WebBase can handle ISMAP images but does not make use of a .MAP file. The HREF
specified in the anchor surrounding the ISMAP image is not a .MAP file but simply another
.htf file. This file can access the variables %x% and %y% to determine the x and y coordinates
returned when the user clicked over the ISMAP image. Using the {if ...}{else}{/if} or {case
...}{match...}{/case} features of WebBase, one can determine how to respond to a click at a
given x,y coordinate and either present information directly from the current pseudo-.MAP
form or use the reDirect macro to point the user to another location to handle that coordinate
mouse click.
The example presented below in Fig. 12.6 tests for the x coordinate being between 100 and
150 and the y coordinate being between 200 and 300. If this condition is true the user is
redirected to another web page. Inline HTML can also be returned as part of the appropriate
if/else/end-if structure.
260
WebBase User’s Guide
Fig. 12.6
Example ISMAP image code
{if 100 150 %x% between:and: 200 300 %y% between:and: &}
{reDirect 'url...'}
{/if}
A more detailed example using an ISMAP image is presented with the WebBase WebWizard
More Examples table.
WebBase User’s Guide
261
Chapter 13: Security
Security
Chapter 13
This chapter discusses how WebBase forms can be made secure using Basic Authentication
and directory browsing. Information on configuring firewalls to allow WebBase access is also
presented.
13.1 Basic Authentication
Basic Authentication is used by browsers for authenticating access to files and/or directories.
Upon receipt of an unauthorized request for a URL, the server responds with a challenge
requesting authorization. To receive authorization, the client sends a user name and password.
If an improper or invalid user name/password pair is sent to the server, an error code of ‘401,
Unauthorized’ is returned by the server.
Before addressing how authorization should be set up using WebBase, the user must first
decide which page(s) require authorization before the user can view them. Any page requiring
authorization should include something similar to the code presented in Fig. 13.1 at the top of
each page:
Fig. 13.1 Example code checking for authorization
{set %output% false}
{if 'Authorization' %cmd% getVariable: isNil}
{reDirect 'login.htf'}
{exit}
{/if}
The user must specify the file referenced by the redirect macro; there is no requirement that it
be called ‘login.htf’ as in the example code above. This authorization check can be included in
a separate insert file (e.g., checkAuth.htf), so that only the following would have to be added
on each page requiring authorization:
{insert ‘checkAuth.htf’}
Figure 13.2 is an example of a form that requests authentication via the browser:
262
WebBase User’s Guide
Fig. 13.2
Form requesting authentication
{comment}
Check if authentication has been performed yet. The variable
‘Authorization’ will be nil if authentication has not yet been
performed. When the variable ‘Authenticate’ is set to hold a nonempty string, WebBase will inform the browser that authentication
should be performed. The string associated with the Authenticate
variable, along with the entered IP address, is used in the
authentication window.
{/comment}
{if 'Authorization' %cmd% getVariable: isNil}
{set Authenticate 'User Verify'}
{else}
{set Authenticate ''}
{comment}
The authUserName and authPassword operations extract the username
and password from the Authorization variable; these are the entries
made by the user in the authentication process.
{/comment}
{set thename Authorization authUserName}
{set thepass Authorization authPassword}
{comment} Check the database to see if a match was found. The
specific source, user and password must be set up by each user site.
Note that the {sql} macro is wrapped within the {errorProtect} macro
in case a problem occurs accessing the table of usernames and
passwords. The specific action to be taken is site-specific; in this
case the user is redirected to the form ‘error.htf’ which may simply
indicate that the site is currently unavailable.
{/comment}
{errorProtect}
{sql to results source 'users' user 'db_username' password
'db_password'}
SELECT * FROM USER_TABLE WHERE USER_NAME = '{thename sql=true}'
AND USER_PWD = '{thepass sql=true}'
{/sql}
{onError}
{reDirect 'error.htf'}
{/errorProtect}
{comment}
Use the {case} macro to determine the next form based on whether
the user entered a valid username and password.
{/comment}
{case results size}
{match 0}
{comment}
User does not exist. This will cause the browser to inform the
user that authentication failed and see if they want to try again.
If they cancel at this point, the text within this portion of the
case block is displayed. The specific HTML to be displayed to the
user on cancel is user-specific; the following is just an example.
{/comment}
<HTML><HEAD><TITLE>LOGIN FAILED!</TITLE></HEAD>
<BODY>
<CENTER><H1>LOGIN HAS FAILED!</H1><P></P>
WebBase User’s Guide
263
Chapter 13: Security
<A HREF="login.htf">TRY AGAIN</A><P></P>
</BODY>
</HTML>
{set Authenticate 'User Verify'}
{exit}
{otherwise}
{comment}
A match was found in the database, so allow the user to go to a
“protected” page
{/comment}
{reDirect 'protectedPage.htf'}
{exit}
{/case}
{/if}
{comment}
The user pressed the Cancel button on the initial Authentication
window. Display some appropriate HTML to the user.
{/comment}
<HTML><HEAD><TITLE>LOGIN FAILED!</TITLE></HEAD>
<BODY>
<CENTER><H1>LOGIN HAS FAILED!</H1><P></P>
<A HREF="login.htf">TRY AGAIN</A><P></P>
</BODY>
</HTML>
Setting the variable 'Authenticate' tells WebBase to send the browser:
HTTP/1.0 401 Unauthorized
WWW-Authenticate: Basic realm="User Verify"
The value returned by authentication in the variable 'Authorization' looks like
'Basic VG9ktDptDWplx3Q='
To more easily test for valid username and password matches, the following operations are
available. These would all be sent to the variable Authorization created as outlined above.
•
authValid
returns true if the string is in fact a ‘Basic’ authentication encoded string, otherwise false.
It checks for the existence of the required ‘Basic ‘ prefix and the colon ‘:’ separator
required between the user name and password portions of the returned data.
•
authUserName
returns a string containing the User Name portion of the authorization. The statement {set
uname Authorization authUserName} will decode the returned Authorization variable and
extract the User Name portion, storing it in the variable uname.
•
authPassword
returns a string containing the Password portion of the authorization. The statement {set
upass Authorization authPassword} will decode the returned Authorization variable and
extract the Password portion, storing it in the variable upass.
The above operations utilize the authDecode operation that simply decodes the encoded
authorization information in the Authorization variable into a string containing the username,
a colon (:), and the password. Thus, an Authorization string of the form 'Basic
264
WebBase User’s Guide
GdkLkkdn34e9dkLkdj6' might yield an authDecode string of the form 'Joe User:password';
authUserName would return 'Joe User' and authPassword would return 'password'.
A complimentary authEncode method exists that, when sent to a string such as 'Joe
User:password' would return the string 'Basic GdkLkkdn34e9dkLkdj6'.
The storage and maintenance of the user ids and passwords used for Basic Authentication is
entirely at the discretion of each user. It is recommended that a database be created with at
least two fields; one for the username and one for the password. Using an appropriate
SELECT statement, the database is queried using the username and password entered by the
user. If a match is found, access is granted. If no match is found, access is denied.
There is a caveat that needs to be stressed when using Basic Authentication. Once a browser
has performed Basic Authentication, the browser will continue to send authentication
information to the server with each request until the browser is stopped. It is not possible to
clear out the authentication information so that a user can be authenticated differently within
another portion of a database.
Although it is possible for a user to create their own user authentication form, an advantage of
using Basic Authentication is that the username and password entered by the user are sent in
an encrypted format to the server. WebBase does not currently support any other mechanism
for having information generated at the browser sent to the server in an encrypted fashion.
13.2 Directory Browsing
WebBase can allow directory browsing of files and subdirectories in the path defined by the
Directory parameter of the machine hosting WebBase. By default, directory browsing is
disabled. To enable this feature, a global variable %directoryBrowse% must be created with
the value ‘true’. See Chapter 9 for information on adding and editing global variables.
Setting this variable to true enables the directory browsing capability within WebBase. When
the user references a directory pathname via a browser, WebBase will return a listing of the
files and subdirectories in that directory if it does not find a default file present to return and if
browsing has been enabled.
To enable directory browsing but restrict access to specific directories, a file named
‘NOBROWSE’ (note: no extension) is created in the directory to be restricted. The contents of
this file are immaterial -- the existence of a file with the name NOBROWSE is what restricts
WebBase from displaying the directory contents of the containing directory. The parent
directory entry and any subdirectory entries that contain NOBROWSE files within them will
cause these entries to not be shown in the listing of the directory being browsed.
If a user should explicitly reference a directory containing a NOBROWSE file and general
directory browsing is enabled via the %directoryBrowse% variable being set ‘true’, the
following message is displayed at the browser:
403 Browsing is not permitted in that directory
13.3
Firewalls
The purpose of a firewall is to limit access to a network. This is often done by limiting access
to ports. If multiple HTTP servers will be used and access to users outside the firewall is
desired, it is necessary for the site network administrator to modify the firewall to allow access
WebBase User’s Guide
265
Chapter 13: Security
to each port that is used by an HTTP server. For example, if WebBase is using port 8000 and
Microsoft Internet Information System is using port 80, the firewall must be modified to allow
access to port 80 and 8000.
The Late Breaking News window shows information about new releases, bug fixes, and
documentation updates available from ExperTelligence. The information comes from a server
at ExperTelligence. If your WebBase server is behind a firewall, you can allow WebBase to
get through the firewall by adding the following parameters:
•
HTTP_Proxy: firewall proxy host name
•
HTTP_ProxyPort: firewall proxy port number
If these parameters are defined when you launch WebBase, the query to get Late Breaking
News passes through the indicated firewall.
266
WebBase User’s Guide
WebBase User’s Guide
267
Chapter 14: Database Issues
Database Issues
Chapter 14
This chapter presents information about database and ODBC issues. It also includes sections
on specific databases that have unique characteristics.
14.1
ODBC Driver/Database Engine Errors
It is possible to send requests to an ODBC driver and/or database engine that will result in an
error occurring within that driver or engine - not actually within the WebBase application code
itself. This error will be reported back as an “ODBC/driver/database” error with the
corresponding sql macro provided as part of the error text. This is done to help indicate
specifically which macro call was involved should there be more than one in the pertinent form.
Some situations are handled gracefully within the ODBC driver and/or database engine and
result in an error message being returned to WebBase that WebBase then presents to the user.
Other error conditions result in an Operating System error which, although returned to
WebBase, does not necessarily leave the ODBC driver and/or the database engine in a state to
allow the server to continue. Some such errors are ‘Protection Violation’ and ‘GPF’ (general
protection fault) errors. If one were to examine the error.log file created in the directory
containing the WebBase.exe application, one would see a traceback indicating an ODBCDLL
API call was made just prior to the error.
It is impossible for WebBase itself to prevent errors such as the ‘Protection Violation’ or
‘GPF’ errors noted above. However, WebBase will not terminate with such errors. Rather, it
will ‘trap’ these errors and report them to the user in a graceful manner that allows for
continued operation of the server.
We have been able to reproduce some ‘Protection Violation’ and ‘GPF’ errors in house. One
particular way to generate the error was to request a very large amount of data be processed by
the database - in one case approximately 40 million records. Although the specific sql macro
specified a max of 10 records be returned, the SELECT statement specified a WHERE clause
that all the records in the database satisfied - and an ORDER BY clause that requested the
ODBC driver sort all these records before returning the first 10 results. Detailed debugging of
this situation determined that the ‘Protection Violation’ that occurred was during the execution
of the SELECT statement - the ODBC driver was called with the indicated query and
ultimately returned the ‘Protection Violation’. In this case the database was simply overloaded
268
WebBase User’s Guide
in trying to sort all the records in the database to be able to respond to the SELECT request
and return only the desired 10 records.
WebBase itself has no concept of what is being requested by an sql macro - the enclosed text
is merely processed for WebBase variables and then passed to the ODBC driver. Nor does it
have any concept of the structure and size of the database being addressed. Because of this,
WebBase cannot prevent such conditions that result in these ODBC driver and/or database
engine errors. In some cases, properly screening input from the user before substituting such
values into the sql macro can minimize the possibility of these types of errors occurring. The
above in-house situation had a WHERE FIELD LIKE ‘%%’ clause in its SELECT statement
meaning any value in the FIELD column would satisfy the request. If the form had required all
input fields to contain values, this error could have been prevented.
WebBase specifically identifies errors of this type as being “ODBC/driver/database” errors
and provides the full query that was passed into the ODBC driver as part of the error message
text. If such errors are encountered, the user should be able to better analyze such situations
and redesign the queries, where possible, to avoid such error situations.
14.2 Database Administration
In many implementations of WebBase, the database files will be accessed and updated
primarily via forms developed for and processed by WebBase. However, there are occasions
when it is necessary to edit the database directory or even completely replace the database file.
If ODBC caching is enabled, this can cause error messages to be displayed to the user when
they attempt to edit or replace the database.
Database administration is a very delicate operation, and becomes even more so if it is to be
done remotely. If it is desired to replace the existing database file with a new one, between the
time that the database file is copied to your location, any necessary editing changes made, and
the file returned back to the server system, people may have added new records to the database.
These will then be lost when the new version is copied onto the server.
Clearing Caches
If ODBC connection caching is disabled, then access to the database file should not present
any problems. However, it is recommended that ODBC connection caching be used if at all
possible with WebBase to improve performance. If ODBC connection caching is enabled, all
connections to the database must be released before the database is accessible.
Chapter 12 provides details about ODBC connection caching, including how to clear the
cache. In order to update a file, it is necessary to turn caching off as well as clear the cache.
If you clear the cache without turning caching off, then any connections currently in use are
restored to the cache when the request is completed. Because these connections are in use
(either active or back in the cache), you will not be able to access the database. In addition,
any users making new requests of pages that access the particular source/username will have
new connections generated and cached. This again prevents database modifications from being
made.
During form development, changes to a database will often need to be made. With ODBC
connection caching enabled, these connections can be cleared out by simply doing selecting to
‘Clear ODBC Cache’ via the WebBase WebServer window. The database can be edited and
then form development and testing can continue.
WebBase User’s Guide
269
Chapter 14: Database Issues
There are also occasions when a production database needs to be modified. This is more
difficult to handle since it is not possible to control who is attempting to access a web site. The
code in Figure 14.1 can be used to provide forms-based control of caching. This form would
be executed to turn off caching and clear the cache. Any necessary database modifications
would be done. Then the form would be re-executed to turn caching back on.
Figure 14.1
Example forms-based database updating code
{! Display the state of the ODBC cache upon entry !}
ODBC Cache state before: {%cacheODBC%}
{! Display the contents of the ODBC cache !}
{%ODBCcacheHTML%}
{! Toggle the state of the ODBC cache !}
{setGlobal %cacheODBC% %cacheODBC% not}
{! Clear the cache. Toggling the state only sets a flag; it does not
remove any existing connections !}
{f== %cmd% clearOdbcCache}
{! Force the menu items under the WebBase WebServer Option’s menu to
agree with the current state of caching. The cache flag was changed
above but this does not cause the menu item to be updated !}
{f== %cmd% cacheMenuItemCheck}
{! Display the new state of the caching flag !}
ODBC Cache state after: {%cacheODBC%}
{! Should display that the cache is now empty !}
{%ODBCcacheHTML%}
It is strongly recommended that forms such as these be protected with some form of
authorization (e.g., Basic Authentication), so that access to them is restricted to appropriate
personnel.
Note:
Turning the cache off does not prevent someone else from hitting your site and
accessing that database after you have turned the cache off - they will simply
create a connection to the database and release that connection as soon as they are
done with it. Timing is the issue here - it is possible for someone to hit your site
after you've turned the cache off but before the database file modifications have
been completed. Protecting the database from access while caching is off can be
done as described in the following section.
SQL Protect using Global Variables
In order to do database administration, it is necessary for the forms designer to give some
thought to how best to protect the database yet still allow it to be modified. One suggestion is
to use a global variable that indicates whether the database is OK to use in a sql call. If so,
then execute the sql statement. If not, output a message that the database is unavailable.
For example, create a global variable called myDBAvailable and set it to true. Then on each
{sql} call, implement it like:
270
WebBase User’s Guide
Fig. 14.2
Example code to test database availability
{if myDBAvailable}
{errorProtect}
{sql source ...}
INSERT/SELECT statement
{/sql}
{onError}
Oops! A database error occurred.
{/errorProtect}
{else}
Sorry, database is currently unavailable.
{/if}
Please try again later.
When it is time to perform maintenance on the file, either locally or remotely, set the global
variable to false, reload the global variables, and then users will get the message that the
database is unavailable. After the maintenance is completed, which can be in 1 minute or 1
hour, the value of the global variable is changed to true and users can again access the
database successfully.
Think of it as sort of an "sql protect" macro -- you're not checking for errors as much as you're
checking for the availability of the database.
14.3
SQL Selects & Timing
If ODBC connection caching is used, as is the default, it has been discovered that a problem
can occur when an INSERT, UPDATE or DELETE of the database is done immediately
followed by a SELECT in which the changed information is to be reflected. Users who force
the connection to be closed following the INSERT, UPDATE or DELETE consistently find
their new or updated data in the subsequent SELECT. Closing the connection flushes any
pending INSERT or UPDATE operations that are apparently performed in an asynchronous
fashion.
It is possible to close the connection following an INSERT, UPDATE or DELETE (or a
SELECT for that matter) by including the ‘cache false’ keyword value pair in the sql macro.
This tells WebBase that regardless of whether a cached or a new connection was used for the
SQL statement, the connection that was used is to be closed and released following its use.
14.4
Microsoft Access Database Issues
ODBC Driver Bug/Workaround
The ODBC driver for MS Access included in ODBC Driver Pack #3 for Windows-NT and
Windows-95 systems has a bug that Microsoft is working on correcting. The symptom of this
bug is that WebBase will crash or simply quit with no error indication whatsoever. If you
experience these problems, are running on Windows NT 4.0, and are using Microsoft Access,
it is recommended that you implement this workaround.
Accessing an MS Access database via ODBC while running under Windows NT 4.0 presents
a problem when one attempts to free the memory associated with the first allocated ODBC
connection handle. In most cases attempting to free this area of memory results in a GPF or
WebBase User’s Guide
271
Chapter 14: Database Issues
Protection Violation error. This may not occur the first time, but it will usually occur within
the first three or four times that same memory area is allocated and freed.
WebBase uses ODBC to access its databases and must allocate a connection handle when first
connecting to a database. Under default conditions, this handle is retained in the WebBase
ODBC cache after its allocation and remains in cache until the WebBase server is shut down
or the user explicitly clears the ODBC cache. Under either of these conditions it is probable
that the above-described GPF error will then occur. If a user has disabled the ODBC cache, it
is highly likely that the GPF will occur as soon as a WebBase .htf form that accesses an
Access database is processed.
The solution to the above problem is in allocating the first connection handle, then closing the
connection and not freeing the handle. This is deliberately creating a small memory leak by
leaving the handle's memory allocated. This not only prevents the GPF from occurring on this
first handle allocation but makes this area of memory unavailable for reuse in subsequent
ODBC calls and thus prevents the GPF from occurring on any of these calls. The problem
seems to be very specifically related to the first and only the first allocated ODBC connection
handle.
For users of the WebBase server this means that one must
1. have a way of specifying that the connection handle associated with an sql macro call
NOT be freed after use
2. have a way of ensuring such an sql macro call will be made before any other sql macro
call to an Access database can occur. In other words, there must be a way to ensure this is
the first allocated connection handle that is being marked for NOT being released.
Item #1 is accomplished through the use of the new keepHandle keyword on the sql macro.
The only purpose of this keyword is to support this workaround. It is anticipated that once
Microsoft corrects this problem and a new ODBC driver pack is available that this keyword
and workaround will be eliminated. By default the value of the keepHandle keyword is false;
the handle is NOT kept following the SQL statement (unless, of course, the handle is being
cached in the ODBC connection cache).
Setting the keyword keepHandle to true indicates that the handle allocated for the ODBC
connection to the Data Source is not to be freed following use. In addition, even if the ODBC
cache is enabled, the connection handle associated with this SQL statement will NOT be
placed in the ODBC cache following use but will be disconnected but NOT freed. This will
ensure that this handle will not cause a GPF as a result of this SQL statement. It will also
ensure that a GPF will not be caused as a result of clearing the ODBC cache in the future
either explicitly or as a result of the cleanup action taken when the server is shut down.
For this keepHandle keyword to be effective against the GPF problem it must be associated
with the first ODBC connection made to the database. For this reason the SQL statement
containing this option must be executed before any other SQL statement can be executed.
Item #2 is accomplished through the specification of a startup form. To ensure that the above
SQL statement is executed before any other WebBase .htf form is run that might contain an
SQL statement, a Startup Form is used. The Startup Form is a .htf form that WebBase will
automatically run each time that the server is started and before it begins processing any
browser commands.
272
WebBase User’s Guide
WebBase runs the Startup Form as if it had been CALLed by the call macro. The only
difference is that the Startup Form is CALLed by the WebBase Server itself and NOT by
another .HTF form. This CALLed Startup Form is CALLed as if wait true were indicated; the
server waits for the form to complete before going on to process other forms. It accepts any
number of returned parameters passed back from either a return or exit macro in the CALLed
Startup Form.
Since there is no browser involved in the running of this Startup Form, the output returned
from this form is displayed in the WebBase WebServer window. An example of such output is:
Running StartupForm: 'Startup.htf'.
01: 'OK'
StartupForm: 'Startup.htf' complete.
The Startup Form is identified and the 01: 'OK' was the first (and only) parameter returned by
this form. Additional returns would be displayed as 02: ..., 03: ... etc.) If the CALLed Startup
Form would have returned text to a browser (if CALLed from another .HTF form initiated by
a browser command) that text will be displayed following the above in the same WebBase
WebServer window. This output can be used to visually verify that the Startup Form executed
as expected. An example is shown below using an errorProtect macro sending both normal and
error return codes back to the server as appropriate.
WebBase will run a Startup Form each time it is launched if one is specified as a WebBase
parameter and the specified file exists at the indicated location within the server's Directory
structure.
If the StartupForm parameter is not specified when WebBase is launched or if no file is found
at the indicated location, then the Startup Form will not be executed. If StartupForm parameter
is specified but the file cannot be found, a message to that effect will be posted to the WebBase
WebServer window. The absence of the file will not cause processing to stop or any other
error to be indicated.
Since each user will have their own ODBC Data Sources, it is necessary for each user to
provide an SQL statement that will connect to one of these sources using the new keepHandle
keyword. This allocates the connection handle in a way that will ensure it is not released
following the ODBC call. To insure this specific call is made each time WebBase is launched
before any .htf form containing an SQL statement addressing an Access database is processed
the {sql ... keepHandle true ...} macro should be placed in a Startup Form as described above.
It is not necessary to make a specific type of SQL statement (SELECT, INSERT, UPDATE,
or DELETE) nor is it necessary to submit/retrieve any data to/from the database. The most
efficient way of utilizing this workaround is to specify a SELECT that will return no matches.
It is merely the act of connecting to and not releasing the connection handle after disconnecting
from the database that circumvents the problem.
Below is a sample Startup Form used to solve this problem. The referenced database is the
WebBase Autos.mdb Used Cars example database that we distribute with WebBase. The
Autos.mdb file itself is an MS Access 2.0 file but if one was to access it using the MS Access
7.0 ODBC driver under Windows NT 4.0, it becomes a candidate for generating the GPF error
described above.
WebBase User’s Guide
273
Chapter 14: Database Issues
Fig. 14.3
Example Startup Form to handle Access Workaround
{set %output% false}
{comment}
This is a startup form. This form is being used explicitly as a
workaround for the problem associated with accessing an MS Access
database via ODBC while running under Windows NT 4.0. The preceding
{set %output% false} will prevent any text generated within this form
(newlines, etc.) from being sent back to the WebBase server - all
such output would normally be displayed in the WebBase WebServer
window in lieu of a browser as is done for normal .htf forms.
{/comment}
{errorProtect}
{sql to temp source 'myAccess' user 'fred' password 'test'
keepHandle true}
SELECT * FROM Cars WHERE ID = 0
{/sql}
{comment}
The above SELECT will always return zero records since we know
that no entry in the database has an ID of 0. The following exit
macro will report to the WebBase WebServer window the fact that the
above SQL statement completed without an error.
{/comment}
{exit 'OK'}
{onError}
{comment}
If an error occurs while attempting to process the above SQL
statement we will come to this onError clause of the errorProtect
macro. Below we will extract the messageText from the error instance,
turn the %output% back on, and display that message text in the
"browser output" which in this case will result in it being displayed
in the WebBase WebServer window. We will also explicitly return the
word 'Error' in place of the 'OK' as done above.
{/comment}
{set text %error% messageText}
{set %output% true}
Error: {text}
{return 'Error'}
{/errorProtect}
We believe the above workaround is a reasonable solution for a problem that we hope will be
fixed by a future ODBC and/or Windows NT 4.0 Service Pack.
The added SQL macro keepHandle keyword will more than likely be removed in a future
release of WebBase when it is confirmed that such a fix has been implemented and sufficient
time has elapsed to allow our users to obtain and install the fix.
Too Many Client Tasks Error
WebBase was designed so that database connections would be cached to improve
performance. When a sql macro is processed, the ODBC connection cache is checked to see if
274
WebBase User’s Guide
there is a connection handle for the specified source and username. If so, the handle is reused.
If not, a connection handle is created and then stored in the cache after the sql call is
completed.
The following error may occur when caching is enabled:
"ODBC API call: 'connect:' returned the following error message: '
[Microsoft][ODBC Microsoft Access 7.0 Driver] Too many client
tasks."
The above error has been noted by a number of WebBase users and is based upon the fact that
Microsoft's Jet database engine versions 1.1, 2.0, and 2.5 can only be used by 10 client
applications simultaneously on any one machine. WebBase, to boost database performance,
caches ODBC connections by default and can quickly cause more than 10 simultaneous
connections to be established with MS databases using this Jet database engine.
Note again, this limitation is with the total number of simultaneous connections via the Jet
database engine, not to any one data source. This Jet database engine is used for MS Access,
MS dBase, MS Excel, MS FoxPro, MS Paradox, and MS Text ODBC Driver interfaces so
any combination of the above data sources are included in this limitation.
We have confirmed that this is not an issue with the Microsoft ODBC Desktop Driver Pack
3.0 (Jet 3.0). During testing, we were able to access many more than 10 data sources via this
driver with simultaneous (cached) connections in WebBase!
Microsoft ODBC Desktop Driver Pack 3.0 (and later releases), however, are targeted for
Windows 95 and Windows NT 4.0 Operating Systems only. User's running earlier versions
(Windows 3.1, Windows for Workgroups or Windows NT 3.5x) cannot take advantage of this
fix.
To assist WebBase users on these earlier operating systems, WebBase has been modified to
alleviate (although not totally eliminate) this "Too many client tasks" limitation without
requiring users to disable the ODBC Connections Cache.
Users facing this "Too many client tasks" limitation can set a variable called
%clearCacheAndRetryOnConnectionError% to true (the default condition is to assume this
variable is set to false including when the variable itself does not exist). This may be a local
variable defined within a given .htf form or a global variable set in the System Registry or
WebVars.ini file. If set as a local variable, the condition will apply for that one form only; if
as a global variable, for all forms (unless overridden locally).
When WebBase attempts to make a new ODBC connection because it did not find an
available, appropriate connection in its ODBC Connections Cache, the above "Too many client
tasks" error is returned when this limit is reached. At this time, if
%clearCacheAndRetryOnConnectionError% is found to be set to true, WebBase will clear the
ODBC Connections Cache of all cached connections and try making the requested new
connection a second time. Assuming the ODBC Connections Cache contained at least one idle
connection to an ODBC source serviced by the Jet database engine, clearing the cache will
make available the needed connection and the second attempt should succeed. If either the
variable %clearCacheAndRetryOnConnectionError% was not found to be set to true or the
second attempt at connecting to the data source fails, the error will be returned to the user as
are all other ODBC API errors.
WebBase User’s Guide
275
Chapter 14: Database Issues
This process does introduce some inefficiency in that WebBase is unaware of the fact that the
requested data source requires the Jet database engine since all it has is the ODBC data source
name, user name, and password values. It does not attempt to interrogate the cached
connections to see if they are Jet-engine-based ODBC driver connections. Although it is
possible for WebBase to be a bit more selective when clearing the cache, it was felt that the
above-described implementation is a reasonable attempt to address a problem that in essence is
associated with operating systems that Microsoft itself has obsoleted. The net effect is to
introduce additional disconnect and connect overhead only when triggered by the "Too many
client tasks" error and not for every data source access as required when ODBC Connections
Cache is totally disabled.
14.5
Microsoft Excel Database Issues
Microsoft Excel spreadsheets can also be accessed via WebBase and ODBC drivers.
However, it’s a bit more involved than with other databases. Here's how to go about setting up
ODBC access of Excel spreadsheets:
1. You can only have 1 sheet in a workbook.
2. The sheet must be set up so that row 1 contains all the field names, rows 2-n contain the
data records.
3. Once you have your data set up, select all the cells you want to consider as a “table”. This
must include the field names in row 1. You can include empty rows which will give you
room to insert new records. Within Excel, from the Insert pull-down menu, select Name
and then select Define. Enter an appropriate name for your “table” (e.g., Employees).
4. Close the workbook.
5. Set up your Excel ODBC source following the general instructions in Chapter 3, and point
it to the workbook file.
6. Write your htf file to access the source name entered in step #5 and the “table” name
entered in step #3.
7. Invoke the htf file and you should be able to access the records!
You cannot have any empty columns in the selected table (columns without a field name for
them). You can have empty cells within a column, but the column must have a name in row #1.
It is also recommended to include empty rows at the bottom of the table. This is equivalent to
having null records in the database that can be filled in at a later date WITHOUT having to go
back into Excel and redefine the “table” to contain new records that may have been added via
an INSERT.
14.6 FoxPro Database Issues
The FoxPro database does not support the DELETE command in the same fashion as other
databases. Instead of actually deleting the record from the database, it simply flags the record
as being deleted. This flag is implemented as just another field in the record. When
performing a SELECT, the ODBC driver does not check this particular ‘delete-flag-field’
when returning records that match the select criteria. Thus, records which have been marked
276
WebBase User’s Guide
for delete may be returned as part of a collection retrieved via a SELECT statement. The
database needs to be compressed before “deleted” records are actually removed.
WebBase User’s Guide
277
Chapter 15: WebBase Q&A
WebBase Q&A
Chapter 15
This chapter includes some frequently asked questions and their answers. Installation
problems are addressed in Chapter 3. Additional information may be found on the WebBase
Web site and in the WebBase Support Forum on the WebBase Web site.
278
•
How do I upgrade?
Check the WebBase Web site for instructions on how the latest version of WebBase can
be acquired.
•
I launch WebBase and try the dateTime command to test the program but get a 404
The requested URL was not found error.
For any file name or internal command sent to WebBase, WebBase will first try and
locate the directory specified in the Directory parameter. If WebBase cannot locate the
directory, it reports the ‘404 - file not found’ error. Check your startup parameters to
verify that the Directory parameter specified actually exists.
•
Why can’t I get the database examples to run? I see the source of Dbexam1.htf form
when I open this file.
This happens when you do an open file on Dbexam1.htf. Many browsers allow you to
view local file system files - and this is what you are doing. To process the file you must
do an Open Location using a URL and not merely an Open File using the file pathname.
Also, the Database Examples require that you have set up the Autos.mdb database file to
be accessible via ODBC; see Chapter 3 for instructions on how to set up the data source,
username and password for this example.
•
How can I display images or pictures from a database?
WebBase does not currently support retrieving binary data from database fields. As there
are many people interested in being able to save and retrieve images, the solution that we
provide is to store the binary image information in external files in a defined location and
then identify the location within the database field. For example, a local, user or global
variable could be defined such as:
WebBase User’s Guide
{set imagesDir 'images\'}
This directory would be relative to the directory containing forms, which is normally
c:\http. Within the database, there would be a field to contain the location of the image
file. An entry in this field would look something like:
{imagesDir}JBOX3A.GIF
The curly braces are used to indicate that the 'imagesDir' is a variable name. When the
record containing this field is retrieved, the image can be displayed using:
<IMG SRC="{f= PictureField %cmd% asHTF:}">
The 'asHTF:' operation causes the {imagesDir} variable to be resolved into 'images\'.
Thus, the source of the image to be displayed is 'images\jbox3a.gif'. Absolute path
references can also be used, including accessing the image files via another server! For
example, you might want to have both IIS and WebBase running on your site. WebBase
could handle any forms needing database processing. Any image files could be returned
via IIS. To handle this, you would simply create your variable using something like:
{set imagesDir 'http://www.yourSite.com:8000/images/'}
•
How do I replace a database when users are actively posting requests?
There is not a way to put WebBase into a ‘non-service’ state but you might consider
simply protecting all your database accesses. Chapter 14 presents details on how to do
Database Administration.
•
How can I find out the type of browser accessing WebBase?
The header variable User-Agent is passed in from the browser and identifies the type and
version of the browser in use. For example, a Netscape 3.0 browser on a Windows-95
system will return:
Mozilla/3.0 (Win95; I)
A MSIE 3.0 browser on the same system will return:
Mozilla/2.0 (compatible; MSIE 3.01; Windows 95)
•
Can you use stored procedures in WebBase?
WebBase provides you a means of issuing an SQL statement via ODBC to your database.
If the query language supports stored procedures and the ODBC driver supports stored
procedures, then WebBase will support stored procedures. The ‘text’ between the {sql ...}
and {/sql} macros is defined by the ODBC SQL - you should be able to access your stored
procedures as defined by the SQL query language for your database. For example, if there
is a stored query called qryQuery1, it would be used in WebBase as:
{sql to lstquery1 source 'ODBC Connect' user "" password ""}
SELECT * FROM qryQuery1
{/sql}
However, WebBase does not currently support passing parameters into stored procedures.
WebBase User’s Guide
279
Chapter 15: WebBase Q&A
•
Can I use a formatted text file with WebBase and ODBC?
The ODBC Driver packs provided with WebBase include a Microsoft Text Driver. Via
ODBC you select MS Text File Driver, and specify a directory in which your text file
resides. Specify the file type if necessary. Select the ‘Define Format’ option within the
ODBC Text Driver Setup window, and select the text file to be used. Identify the type of
delimiters, and set up the column information. The result is a Schema.ini file. You can
then write an .htf file that accesses this source and perform database interactions as with
other relational databases.
•
Any suggestions on improving performance when using WebBase?
The most expensive part of the ODBC interface process is the ‘binding’ of the returned
results to the WebBase data structures. You should only retrieve the fields to be used in
computations/display within a SELECT statement. If all fields are retrieved, more
complex data structures have to be built within WebBase that require both time and
memory. If you avoid bringing back some fields by specifying exactly what fields you
want instead of using the "*" you should see a performance improvement. The bigger the
gap between what you are asking for versus what you would get with "*", the bigger the
improvement.
•
How can I make database search results clickable references?
Simply wrap a <A HREF=...> </A> around the field you are displaying. You can include
information in the HREF string to specifically identify the field being clicked on. For
example, assume the field name is in {fName}
<A HREF="someForm.htf?item={fName encode=true}">{fName}</A>
Now when one clicks on the value displayed by {fName}, the form someForm.htf will be
called and it will have a local variable named item with the value of {fName}. The
encode=true is necessary only if fName might contain non-alphanumeric characters since
browsers do not encode the HREF strings like they do the values of <INPUT ...> items
within a <FORM ...> which is how one usually calls other forms passing in arguments.
The encode=true will NOT hurt anything if the fName field does NOT contain any special
characters or spaces so in general it is a good idea to use it when including {...} fields
within an HREF string.
In a similar fashion, it is possible to create graphical or text-based buttons to perform the
submit and reset functions just like a post or get. Just place an anchor - <A HREF=...> ...
</A> - around your button and include the same information that would be in the
command line were a submit button used. For example,
HREF="form.htf?value1=this&value2=that&..."
•
How can I use the logging feature?
If the user has enabled the WebBase logging feature, information on each command
processed or returned by WebBase is written to a log file. The greatest power of
WebBase is its database access facilities. Given this, one of the best way of performing
‘log analysis’ at a WebBase supported site is to use WebBase to log your "hits" to a
database rather than using the default flat log files.
You can set up any number of log databases, each specifically designed to collect that data
that might be relevant to a particular web page or collection of web pages a user visits.
280
WebBase User’s Guide
You can then use WebBase .htf forms to read these databases and provide you with
meaningful statistics relative to that database. These can be run from any browser so you
can perform your analysis from a remote site (with appropriate logon authorization to keep
users out of these forms).
You can create a single file for one log database that performs the database write and
insert or call this file from each page that you wish to have logged. Thus you do not add a
lot of code to each of your pages. In addition, if you have a very busy site, you can create
a User Variables dictionary into which you accumulate log information, then write this
information out to disk every <nn> times the dictionary is accessed to reduce the required
disk accesses. Again, all this can be done in a single file so very little needs be done to
each of your web pages besides an insert of or call to this file.
The WebBase WebWizard Database Example #3 provided with WebBase performs
automatic logging of each database query to another database.
The Web analysis tools that are now available as shareware or commercial systems can be
used with the log files generated by WebBase. These tools are useful for determining the
number of hits to a site, as well as much more information.
WebBase User’s Guide
281
Chapter 16: E-Merge
E-Merge
Chapter 16
WebBase E-Merge is an add-on product to WebBase that allows a webmaster to search a
database and send mail-merge letters that are individualized and customized by criteria. Fields
from the database can be merged into e-mails, and paragraphs can be conditioned on
calculations. E-mails may also be sent to arbitrary selections of the database as the result of
an event, and even queued for delayed delivery. WebBase E-Merge supports normal and
timed e-mail, as well as attachments. An additional licensed features key is required before a
user can use E-Merge. Contains [email protected] for information on obtaining this
LicensedFeatures key.
16.1
Configuration
WebBase E-Merge does not require a separate installation; the necessary software is included
when WebBase is installed. Before WebBase E-Merge can be used, the user must specify
several initialization parameters as described below.
E-Merge Parameters
As with the WebBase initialization parameters, the WebBase E-Merge initialization
parameters are stored in the System Registry. Adding in or changing the E-Merge parameters
will have no effect on a running WebBase application. To effect a change for any entry, you
must stop and restart WebBase after editing the parameter.
The name of each parameter is case sensitive and must be entered exactly as shown below. If
a parameter name is entered incorrectly, WebBase will not be able to access it or use its value.
The values for string input fields are not case sensitive.
The following are the required WebBase E-Merge parameters. They should be added to the
System Registry following the instructions provided in Chapter 4 for adding or editing
parameters.
LicensedFeatures -- a LicensedFeatures key is similar to the License parameter. The License
parameter enables WebBase; the LicensedFeatures key enables different add-on options within
WebBase. If you purchase a new add-on option, you will receive a new LicensedFeatures key
that has to be installed. WebBase E-Merge or any other add-on product will not work until
the appropriate LicensedFeatures parameter is entered.
282
WebBase User’s Guide
SMTP_Server -- identifies the host machine that is to process the mail you wish to send via
WebBase E-Merge. This entry is either a fully qualified name accessible via a Domain Name
Server (e.g. mail.myhost.com), or the IP address of the mail server host (e.g. 11.22.33.44)
The Mail Log
The Mailer maintains a log of all mail processed and any error messages encountered while
trying to process that mail. This log is similar to the standard WebBase log in that daily log
files are created in the location specified in the LogDirectory parameter just as is done for
WebBase. The mail log files are preceded with the prefix WM (for WebBase Mail) rather
than the WB used for the default WebBase logs.
Menu items in the WebBase Server window's Option menu allow the user to enable/disable the
mail log and flush the mail log.
Note:
One must specify a LogDirectory parameter to have mail logging available. One
can provide such a parameter, then disable normal logging if only mail logging is
desired.
Shutting Down WebBase
If WebBase is shut down, either normally or abnormally, any messages in the mail queue that
have not yet been delivered will be lost. The mail queue is strictly a memory-only queue with
no backup to disk support. If you are going to frequently generate mail messages within
WebBase that must be delivered, it is recommended that your messages be queued in the mail
queue as well as saved within a database. After a message has been sent, it can be removed
from the database. If WebBase terminates, your messages are saved in the database. You can
then write appropriate WebBase forms to determine if any messages need to be requeued after
WebBase is restarted. This is a good example of the type of functionality that can be included
in a WebBase startup form.
16.2
E-Merge Windows
WebBase Mail Service Window
The Mailer is the process within WebBase that manages the accumulation and sending of mail
at the appropriate time. The Mailer is represented by the WebBase Mail Service Window that
displays some mail status information and has menu items to exit the mail process, start and
stop (suspend) the mailing of queued mail messages, and flush the mail queue.
The WebBase Mail Service Window is displayed by selecting the Mailer option from the Edit
menu on the WebBase WebServer Window. The WebBase Mail Service Window is also
automatically opened each time the Mailer detects that there is a mail message in the queue
that needs to be sent. An example of the WebBase Mail Server Window is shown below.
WebBase User’s Guide
283
Chapter 16: E-Merge
Figure 16.1
WebBase Mail Service Window
If the WebBase Mail Service Window is explicitly closed, it will be reopened the next time a
message is to be sent. The sockets interface used by mail to send messages is internally
connected to the WebBase Mail Service Window. If the window is closed, processing
overhead is required to re-establish the sockets interface. It is recommended that the window
be left open and iconified.
When a mail message is submitted to the queue for immediate delivery or if the delivery date of
an envelope in the queue has arrived, an entry is made on the WebBase Mail Service Window:
Starting Mail Service #
The # specified is the unique process number assigned to handle the piece of mail; it may be
displayed with other information in the window (e.g., if messages are being traced). This
identification number is automatically assigned to the process. Once the process is completed,
subsequent processes may reuse the number.
Menu Options
The following are the options available from the pull-down menu bar at the top of the
WebBase Mail Service Window.
284
•
File->Exit -- if this menu option is selected, the WebBase Mail Service Window is closed.
The WebBase Mail Service Window will automatically be opened whenever a message
from the Mail Queue is removed and sent. If the window is explicitly closed, it will be
reopened the next time a message is to be sent. It is recommended that the window be
kept open and iconified to reduce the processing overhead required to set up the sockets
interface associated with the window and the sending of mail messages.
•
Edit>Cut -- this menu option provides the same functionality as described for the
WebBase Transaction Service Window.
•
Edit->Copy -- this menu option provides the same functionality as described for the Late
Breaking News Window.
WebBase User’s Guide
•
Edit>Clear All -- this menu option provides the same functionality as described for the
WebBase Transaction Service Window. Note that this only clears the display and does not
have any effect on entries in the MailQueue.
•
Edit->Find -- this menu option provides the same functionality as described for the Late
Breaking News Window.
•
Edit->Find Again -- this menu option provides the same functionality as described for the
Late Breaking News Window.
•
Edit>Set Lines -- this menu option provides the same functionality as described for the
WebBase Transactions Service Window. The global variable %mailMaxLines% can also
be set to specify the number of lines on this window.
•
Status>Posting enabled -- If this option is selected, information will be written to the
window. If the option is turned off (no check mark is displayed next to the option), no data
will be written to the window. For example, the user can select the Show Stats option and
nothing will be displayed in the window if posting is disabled. However, mail will still be
sent and, if mail logging is enabled, log records will be written to disk. The display below
shows the information displayed on the WebBase Mail Service Window when the Posting
Enabled option is turned off and then back on. The variable %mailPostingEnable% can be
used to control whether Posting is enabled or disabled; by default it is enabled. If the user
is logging to disk and not actually sitting at the server, there is probably no need to post
mail transactions and the variable can be set to false to disable posting. Posting does add
overhead because of the I/O required to display information on the window.
Figure 16.2
Enabling/Disabling Posting Display
•
Status>Start Mailer -- This option is only available if the Stop Mailer option was
previously selected. If selected, the checking of mail in the queue is resumed.
•
Status>Stop Mailer -- this option is only available if the mail service is currently active.
If selected, the checking of mail in the queue is stopped. Any in-process mail is completed.
This option does not affect the status of writing to the WebBase Mail Service Window. If
one stops the service, any mail in process will continue being sent and any messages being
posted as a result of this in-process mail will continue to be written to the window if
Posting is enabled. The mail service can be resumed by using the Start Mailer option.
WebBase User’s Guide
285
Chapter 16: E-Merge
However, if the Mailer is stopped and the WebBase Mail Service Window is closed, the
Mailer is automatically started the next time the WebBase Mail Service Window is
manually opened. The display below shows the information displayed on the WebBase
Mail Service Window when the Stop Mailer option is selected followed by the Start Mailer
option. Notice that two lines of information are displayed when the mail service is
restarted – one to indicate the status of the service and the other to provide information
about what is in the queue. In this case, there were no messages in the queue to be
processed.
Figure 16.3
•
286
Starting and Stopping Mail Service Display
Status>Set Mail Limit -- If this option is selected, the dialog shown in Fig. 16.4 is
displayed. The user is prompted to enter a number that how many mail processes will be
created and used. If 0 (zero) is entered, there are unlimited mail processes. Each time a
new mail message is generated, a mail process is created to handle the sending. It is
possible to saturate a mail server by sending it hundreds of simultaneous mail messages.
WebBase E-Merge handles mail in an asynchronous fashion, so each mail message is sent
without waiting for a previous message to finish. The number of mail processes must be
set to accommodate the specific mail server in use. If the parameters of your mail server
are set up to restrict its input handling but WebBase E-Merge does not have a limit on the
number of mail processes (or the number is too large), the WebBase Mail Service Window
will show numerous error replies that the server is too busy. When this happens,
WebBase E-Merge requeues each mail that has not been delivered, resends it, gets
another ‘too busy’ error, requeues the message, and so on. Setting a limit of concurrent
mail in process eliminates these problems. If you are not familiar with your mail server’s
capabilities, experiment with the server and the mail process limit. Too big a number of
processes when sending a large volume of mail will result in the WebBase Mail Service
Window reporting many error returns from the server. The variable
%concurrentMailLimit% defines the number of mail processes; it defaults to 0 which
means unlimited.
WebBase User’s Guide
Figure 16.4
•
Number of Mail Processes Dialog
Status>Show Mail Queue -- This option is only active if there are entries in the mail
queue. If selected, the first line added to the window indicates the number of entries
currently in the queue. Subsequent lines display for each message in the queue the current
date, the date the message is to be sent, who the message is from, who the message is to
and the subject of the message. Figure 16.5 shows the results of the Show Mail Queue
option when there is a single envelope in the queue. To present this display, a mail
message was queued for delivery at a later date to keep it in the queue. If the mail service
is not busy, mail messages may not be in the queue long enough to see them as they are
immediately sent from WebBase E-Merge to the mail service for processing.
Figure 16.5
Show Mail Queue Display
•
Status>Flush Mail Queue -- This option is only active if there are entries in the mail
queue. A confirmation dialog is presented indicating the number of mail messages that will
be deleted. If so confirmed, all entries are removed from the mail queue.
•
Status>Show In Process Mail -- If selected, the first line added to the window indicates
the number of entries currently being processed (mail processes have been created but the
process has not yet completed sending the mail). Subsequent lines display for each
message being processed in the queue the current date, the date the message is to be sent,
who the message is from, who the message is to and the subject of the message. The
display at the end of this section shows the information displayed if there is in-process
mail.
•
Status>Show Stats -- if selected, the number of messages that have been received in the
mail queue, the number that are currently being processed, and the number of errors that
have occurred while sending messages are displayed in the WebBase Mail Service
Window, as shown in Fig. 16.6 below.
WebBase User’s Guide
287
Chapter 16: E-Merge
Figure 16.6
•
Status>Trace Mail Commands -- this is a toggle option that turns on trace information in
the mail window. By default, this option is disabled. If selected, a check mark is
displayed next to this option on the pull-down menu. If selected, it shows each write that
is done and the reply code received from the server. The writes include things like HELO,
RECP TO, DATA, and QUIT; replies are merely numbers like 200 (OK). The variable
%mailTrace% can be used to automatically enable or disable this feature; by default it is
disabled.
•
Status>Full Trace -- this option is only active if the Trace mail commands option has
been enabled. If selected, extensive trace information on each mail transaction is displayed
in the WebBase Mail Service Window. This includes the entire stream of information that
is sent out (all the send to addresses, the full text of the mail, etc.) and the entire reply from
the server which usually is quite lengthy and includes server name, status, id numbers, etc.
The display below shows the results of a full trace for a message. The information
returned by the mail server has been removed from the display; it is normally displayed on
the window. The variable %mailFullTrace% can be used to automatically enable or disable
this feature; by default it is disabled.
Figure 16.7
288
Mail Statistics Display
Full Mail Trace of Single Message
WebBase User’s Guide
WebBase Server Window
When the WebBase E-Merge utility in WebBase is enabled, the WebBase Server Window
includes some additional menu options.
Menu Options
The following are the WebBase E-Merge options available from the pull-down menu bar at
the top of the WebBase Server window.
•
Edit->Mailer -- If this menu option is selected, the WebBase Mail Service Window is
opened. Note that this window will also be opened if mail has been sent out since
WebBase was started.
•
Enable Mail Log File -- If this option is selected, one of the dialogs shown in Fig. 16.8
will be displayed. The dialog on the left is displayed if mail logging is currently on; the
dialog on the left is displayed if there logging has been disabled. Mail log files will be
generated for each WebBase E-Merge transaction if a user has also defined the
LogDirectory parameter. If logging is enabled, a mail log file is created each day to record
all mail activity with WebBase. Each log entry contains a timestamp, the date the
message was to be sent, who the message is from, who the message is to, and the subject
of the message. The actual text of the message is not included. If this option is turned off,
mail log files will not be generated. Note that it is possible to have mail log files but not
WebBase log files, or vice versa. It is suggested that you specify the LogDirectory
parameter, and then turn logging on or off either dynamically via this menu item or by
setting the %mailLogEnabled% variable. If mail logging is on, a check mark is displayed
next to this item.
Figure 16.8
•
16.3
Mail Log Enable/Disable Dialogs
Flush Mail Log File -- Information to be written into the mail log file is buffered until
sufficient data has been obtained, at which point it is written to the mail log file on disk. If
this option is selected, any information in the buffer is written to disk. This ensures that
the information the user views in the mail log file is all that has been generated.
WebBase Macros
A special macro has been provided with WebBase E-Merge to allow one to conveniently send
mail directly from a WebBase .htf form.
WebBase User’s Guide
289
Chapter 16: E-Merge
{mail <args>} {/mail}
The mail macro allows the user to send mail from a WebBase .htf form. Keywords in the
mail macro specify information about when and where the mail is to be sent while the text
between the {mail ...} and the {/mail} statements becomes the text or body of the mail
message. Note that the text provided may contain WebBase variables, macros, and database
field references so one can dynamically construct the body of the mail message just as one can
dynamically construct Web pages with WebBase.
The mail macro contains a number of required and optional keywords used to direct the
sending of the mail message. Each keyword is followed by a single value, either a string
constant (with the exception of the send keyword as described below), a WebBase variable or
a WebBase expression.
•
to -- This keyword is required and is the address or addresses of where the mail message is
to be sent. It will appear in the header of the message as
“To: ‘ ... ‘ “
The format for this value (and the from, cc, and bcc fields below with exceptions as noted)
is a string such as ‘[email protected]’. As noted above, this value may be specified
explicitly as a string, or as the value of a variable or the result of evaluating an expression.
Multiple addresses can be specified by separating each with a comma.
•
from -- This keyword is also required. It is the address of the sender of the message; the
location to which a reply would be sent if appropriate. Unlike the to, cc, and bcc values,
this field will accept only a single address value. This value will appear in the header of
the message as:
“From: ‘ ... ‘ “
•
subject -- an optional keyword, this identifies the subject of the message. It is a string that
will be placed in the header of the message as:
“Subject: ‘ ... ‘ “
•
attach – this keyword is optional and specifies attachments to be included with the mail
message. The value must be a constant, variable, or expression that evaluates to a string
that can be parsed at space, comma or semicolon into a collection of strings, or a collection
of strings. Each string must be a fully qualified DOS pathname of a locally accessible file
to be sent as an attachment.
•
cc -- this keyword is optional and is the address or addresses of where copies of the mail
message are to be sent. The format of the cc value is the same as that of the to value. It
will appear in the header of the message as:
“Cc: ‘ ... ‘ “
290
•
bcc -- an optional keyword that is the address(es) of where copies of the mail message are
to be sent that will not appear in the header of the message. The format of the bcc value is
the same as that of the to value.
•
reply – an optional keyword that is the address to be included in the Reply-To: header
field. The format of the reply value is the same as that of the from value.
WebBase User’s Guide
•
organization – an optional keyword that is the name of the company or organization to be
included in the Organization: header field.
•
id -- this is an arbitrary string you may provide to help identify the mail message and/or
provide a search mechanism for locating the message on the MailQueue using the
findByID: operation described later in this chapter. If present, this id value is shown in the
header of the message as
“ID: ‘ ... ‘ “
•
send -- This is an optional keyword. If used, its value is a UniversalTime object indicating
when the mail is to be sent. The default value is the value that would be returned by the
%dateTime% variable at the time the mail macro is processed. To queue the mail for
future sending, set a variable to the current time plus some number of seconds, e.g. {set
time 600 %dateTime% addSeconds:} for 10 minutes from now, then use this variable
name as the value for the send keyword.
The send keyword also recognizes two string values, ‘now’ which means send the mail
immediately (same as the default), and ‘queue’ (or just ‘q’) which means queue the mail
but do not send it. In fact, the mail is marked for sending approximately 1 year from the
date of queuing, for all practical purposes, never.
As noted above, the attach keyword can be used to specify attachments to be sent along
with e-mail message. If the pathname has an extension of txt, htf, or hti, it will be sent as
a text attachment; all others will be sent as a base64 encoded (binary) attachment.
Fully qualified pathnames may be preceded by a flag to specify some error and encoding
information, using the format i@ where i is a single digit integer between 0 and 7. For
example,
'3@c:\http\... .txt'
The prefix flags are:
•
no prefix - an error is generated if the specified attachment is not found at mail macro
merge time or at mail send time and the mail is not sent.
•
0@ -or- 4@ prefix - same as no prefix above.
•
1@ -or- 5@ prefix - the existence of the attachment is checked at mail send time and
if missing an error is generated and the mail is not sent.
•
2@ -or- 6@ prefix - the existence of the attachment is checked at mail send time and
if missing a text attachment to that effect is sent instead.
•
3@ -or- 7@ prefix - the existence of the attachment is checked at mail send time and
if missing the attachment is ignored (as if never specified).
No prefix and values 0 through 3 use the pathname extension to determine if the file is a
text attachment (.txt, .htf, .hti). If not, the contents of the file are encoded in base64
encoding and sent.
Prefix values 4 through 7 can be used to indicate that for files sent as base64 encoded files,
the file contents have already been so encoded and thus can be sent ‘as is’. This can be a
very efficient way of attaching a non-text (binary) file that is to be attached to many
WebBase User’s Guide
291
Chapter 16: E-Merge
emails. It can be encoded once and the overhead of encoding it for each and every email
can be eliminated. The base64encodeFile:to: operation on String allows one to perform
such encoding of a source file to a destination file specifying the two files as pathname
strings. Example 16.2 shows how attachments can be done within a mail macro.
Example 16.1
Mail Macro
{sql to addressees source 'business' ...}
SELECT Email,Name,Title,Product FROM clients
WHERE OrderStatus = 'IN_HOUSE'
{/sql}
{if 0 addressees size >}
{forRow aRow on addressees}
{set subj ' is in!' Product ,}
{mail to Email subject subj
from '[email protected]'
bcc '[email protected]'}
Dear {Title} {Name},
We're glad to inform you that the {Product}
you ordered is now in stock and ...
{/mail}
{/forRow}
{/if}
Example 16.2
Mail Macro with Attachments
{! Encode a gif file for sending to multiple people. This makes the
sending more efficient since it does not have to be encoded for each
person it is sent to !}
{f== false ‘c:\http\wbwizard\Wizard.gif’ ‘c:\temp\encoded.gif’
base64encodeFile:to:}
{! Generate the e-mail messages !}
{mail to '[email protected], [email protected]'
from '[email protected]'
organization 'Company B, Inc.'
subject 'sending attachments'
attach 'c:\http\wbwizard\default.htf
c:\http\wbwizard\dbex\autos.mdb
c:\http\wbwizard\Wizard.gif
4@c:\temp\encoded.gif'}
I am sending you 4 attachments - 1 text file, 1 Access database file,
and 2 gif images. The second image is a "previously base64 encoded"
file. It is the same as the first image. During the processing and
sending of the mail, the first image would be encoded EACH time it
was sent out. The second image was encoded prior to the mail macro
and does not have to be encoded with each sending.
{/mail}
16.4
E-Merge Variables
There are a number of dynamic variables specifically for WebBase E-Merge that are
described below
292
WebBase User’s Guide
Dynamic Variables
The WebBase E-Merge dynamics variables are included on the list of the WebBase dynamic
variables displayed in the WebBase Server window when WebBase is started. The WebBase
E-Merge dynamic variables include:
•
%MailerStatus% e.g. (idle)
returns one of the following values as a string:
♦ unavailable - the WebBase E-Merge feature is not available because it has not been
enabled via a valid LicensedFeatures parameter
♦ inactive - mailer has not been started or was exited by the user
♦ idle - mailer was started but is currently idle (no envelopes on the queue)
♦ stopped - mailer was stopped by the user
♦ active - mailer is currently active (sending mail from the queue)
•
%MailQueue% e.g. (MailList())
the actual mail queue. A MailList is a special type of SortedList that responds to specific
messages related to mail. The queue contains envelopes relating to mail that is waiting to
be sent. %MailQueue% responds to the size message, returning the number of envelopes
currently on the queue. It can also be placed in a {forRow ... } loop to process the
individual envelope entries.
Operational Variables
The following WebBase E-Merge dynamic variable can be modified by accessing the Options
menu on the WebServer window. However, the change made by selecting this menu option is
only valid for the current session. When WebBase is stopped and restarted, the default value
will be restored. If you want to permanently change the value of this variable, it is
recommended that you add a global variable with the desired value following the instructions in
Chapter 9. The default value is shown in parentheses.
•
%mailLogEnabled% e.g. (true)
indicates that the mail log file functionality of WebBase is to be enabled. This variable is
very similar to the %logEnabled% WebBase parameter. It is suggested that you specify
the WebBase LogDirectory parameter, and then turn mail logging on or off by setting this
variable or using the menu option on the WebBase Server window.
Special Variables
•
%mailMaxLines% e.g., (100)
this variable defines the number of lines of information to be displayed in the WebBase
Mail Service Window. By default, 100 lines are displayed. If %mailMaxLines% is
created as a global variable with a value between 10 and 10000, this defines how many
lines will be displayed in the window.
•
%mailPostingEnable% e.g., (true)
this variable enables or disables posting of information into the WebBase Mail Service
Window. If set to ‘false’, it will cause posting into the WebBase Mail Service Window to
be disabled when the window is opened (either automatically when a mail message is
processed manually via the Edit menu).
•
%concurrentMailLimit% e.g., (0)
this variable determines the number of concurrent mail processes that will be created. The
WebBase User’s Guide
293
Chapter 16: E-Merge
default value of 0 indicates that there is no limit on the number of processes. Some mail
servers have a limit on the number of mail requests they can handle. See the previous
section for more information on mail processes.
•
%mailTrace% e.g., (false)
this variable determines whether each mail command processed will have trace information
displayed in the WebBase Mail Service window. By default, tracing is disabled.
•
%mailFullTrace% e.g., (false)
this variable works in conjunction with %mailTrace%. If %mailTrace% is disabled, then
this value is not used. If %mailTrace% is true, then the value of this variable determines
how much trace information will be displayed.
16.5
E-Merge Operations
There are two classes provided with WebBase E-Merge: Mail Lists and Envelopes. The
operations that users can make use of within forms development are described below.
Mail Lists
A mail list is a special type of sorted collection that contains only envelopes, each holding a
mail message.
Mail List Instance Operations
In addition to the operations that can be performed by sorted lists, the following messages can
be sent to the %MailQueue% or any other variable holding a Mail List. Each message below
will return a MailList object with 0, 1 or many entries depending on how many envelopes
match the specified criteria.
294
•
findByDate: e.g., {f= %dateTime% %MailQueue% findByDate:}
returns a Mail List containing entries whose ‘send’ field matches the date in the argument.
Note: the send field expects a Universal Time such as is returned by the %dateTime%
global variable.
•
findByFrom: e.g., {f= ‘[email protected]’ %MailQueue%
findByFrom:}
returns a Mail List containing entries whose ‘from’ field matches the argument.
•
findByID: e.g., {f= ‘anID’ %MailQueue% findByFrom:}
returns a Mail List containing entries whose ‘id’ field matches the argument.
•
findByTo: e.g., {f= ‘[email protected]’ %MailQueue% findByTo:}
returns a Mail List containing entries whose ‘to’ field matches the argument.
•
findBySubject: e.g., {f= ‘New Product Announcement’ %MailQueue% findBySubject:}
returns a Mail List containing entries whose ‘subject’ field matches the argument.
WebBase User’s Guide
Envelopes
An envelope contains a mail message that has been queued in a mail list. It contains the mail
message along with all the necessary addressing and time-to-be-sent information accumulated
from both the mail macro and the body of the mail message.
Envelope Instance Operations
The following operations can be sent to any entry in a Mail List.
16.6
•
mailID e.g., {f= %MailQueue% first mailID}
returns the value of the ‘id’ field of the mail message.
•
mailTo e.g., {f= %MailQueue% first mailTo}
returns the value of the ‘to’ field of the mail message.
•
mailCC e.g., {f= %MailQueue% first mailCC}
returns the value of the ‘cc’ field of the mail message.
•
mailBCC e.g., {f= %MailQueue% first mailBCC}
returns the value of the ‘bcc’ field of the mail message.
•
mailFrom e.g., {f= %MailQueue% first mailFrom}
returns the value of the ‘from’ field of the mail message.
•
mailSubject e.g., {f= %MailQueue% first mailSubject}
returns the value of the ‘subject’ field of the mail message.
•
mailDate e.g., {f= %MailQueue% first mailDate}
returns the value of the ‘send’ field of the mail message.
E-Merge Examples
The WebBase WebWizard includes several examples showing how to queue a message using
E-Merge, as well as how to query the mail queue and delete messages from the mail queue.
WebBase User’s Guide
295
Appendix A: Software License Agreement
Appendix A
Software License
Agreement
WebBase™ Software License Agreement
This agreement is a legal contract. Please read it carefully before installing your copy of the
WebBase software. Completion of the installation process indicates acceptance of the terms
of this agreement.
Upon acceptance of the terms of this agreement, you are hereby authorized to receive and use a
single copy of the computer software package known as WebBase ("the Program"), which
includes (1) object code computer software and (2) related end-user documentation. All right,
title, and interest in and to the Program is retained by ExperTelligence, Inc. ("Company"), and
is disclosed to you only for use in accordance with the terms of this agreement.
1. You are granted a personal, nonassignable, nonexclusive, fully revocable license to install
the Program in a single server.
2. The Program is a commercially valuable, proprietary product of Company, the design and
development of which reflect the efforts of development experts and the investment of
considerable time and money. The Program is based on substantial trade secrets of
Company, and Company claims and reserves all rights and benefits afforded under federal
copyright law and international copyright treaties in the Program as published work.
3. You are required to devote your best efforts to prevent any use or disclosure of the
Program or of any trade secret embodied or reflected in the Program. You agree that no
copies shall be made of the Program or any portion thereof and that you shall not reverse
engineer or decompile the object code of the Program into source code. It is understood
that the foregoing shall not apply to information that (1) is in the public domain through no
fault of your own at the time of its disclosure to you, (2) is independently developed by you
or others without reliance on the information, media, and materials provided to you
hereunder, or (3) subsequent to disclosure hereunder, is disclosed to you without restriction
by a person having the right to make such a disclosure without breach of an obligation of
confidentiality.
4. The terms of this agreement regarding the protection and security of the Program shall
remain in full force and effect for so long as you continue to use, process, or have access
to the Program, including any trade secrets embodied or reflected therein.
296
WebBase User’s Guide
5. The Program is provided and COMPANY SHALL HAVE NO LIABILITY FOR ANY
WARRANTY, TRAINING, OR INSTALLATION SERVICES, OR USE OF THE
PROGRAM OR ITS OUTPUT.
© 1995-7, ExperTelligence, Inc. All Rights Reserved.
WebBase User’s Guide
297
Appendix B: Special Configuration Issues
Appendix B
B.1
Special
Configuration
Issues
16-bit Systems
This section provides details on how to set up WebBase parameters, extensions, aliases and
global variables in their respective initialization files. This information is only applicable to
16-bit systems running Windows 3.1 and Windows for Workgroups 3.11. This information
for 32-bit systems (Windows NT, Windows-95) is provided in Chapter 4 and Chapter 9.
Installation
For 16-bit systems, WebBase accesses its parameters from a WebBase.ini file. WebBase uses
this file to access information about the environment in which it will be executing. Chapter 4
describes these parameters in detail; the remainder of this appendix covers how the
WebBase.ini file can be edited. During installation, Figure B.1 prompts for these parameters
and creates the WebBase.ini file in the ‘Destination Directory’.
298
WebBase User’s Guide
Figure B.1 WebBase Parameters Dialog
The PortNo parameter specifies which port WebBase will use to communicate with a
browser. This port must be unique within your Windows environment (i.e., not assigned to
another application). The default value is set to 80.
The Directory parameter specifies where in your local directory structure browsers can access
forms via WebBase. This directory location corresponds to a browser referencing ‘http://hostaddress/’. Placing a ‘default.HTF’ or ‘default.HTM’ file in this directory will cause WebBase
to return that form if a browser references ‘http://host-address/’.
The errorLogFile parameter specifies the name of a file that WebBase can create and write
error messages into. These messages can be helpful in diagnosing problems you might
encounter while WebBase executes. The file need not exist at this time, but the directory
specified must exist before executing WebBase so the file can be created as specified.
The LogDirectory parameter specifies where in your local directory structure WebBase can
write log files. WebBase creates a log file each day and records the requests it processes.
These files are written into the directory you specify here. Log files are named using the
following scheme: WByymmdd.LOG where yy=year, mm=month, and dd=day. For example,
the log file for November 23, 1995 would be named WB951123.LOG. Leaving this entry
blank will cause WebBase to skip the logging process. You can specify this Log Directory
and still disable logging via the WebBase Options menu if so desired. You cannot enable
logging, however, if you have not specified a Log Directory here.
The Default parameter is the name of the default file to be used when a directory is referenced.
The automatic defaults are ‘default.HTF’ and ‘default.HTM’ in that order. You can enter a
WebBase User’s Guide
299
Appendix B: Special Configuration Issues
single file name, or a series of files to be searched for in the order presented
(index.HTM,index.HTML) separated by commas. If you enter an empty string then no default
file will be searched for.
The Extension parameter specifies the default extension (or extensions) to append to a file
name should the user enter what appears to be a file reference without an extension. Default
value is ‘htf’,’htm’ in that order.
The License parameter specifies the value of your license number. This parameter will be
prompted for the first time the application starts unless it is provided here.
At the bottom of the window is a button labeled ‘Don’t Create .INI File’. This button should
be selected only during an upgrade so that your WebBase.INI file will not be modified or if
you want to manually edit this file to set up all the necessary parameters at a later date. It is
strongly recommended that the user allow the WebBase.INI file to be created or updated
during the installation process.
Since Windows 3.1 and Windows for Workgroups do not provide for time zone support, you
must provide WebBase some information about your time zone for it to effectively
communicate with browsers which may be executing in a time zone different from yours. The
information entered in the dialog shown in Fig. B.2 is being requested in a format compatible
with that of Windows NT and Windows 95 Registry support for time zones.
Figure B.2 TimeZone Parameters
The standardBias parameter is the number of minutes your time zone is behind GMT. The
default for this parameter is 360.
300
WebBase User’s Guide
The daylightBias is the number of minutes Daylight Savings Time in your local area is behind
Standard Time. In most areas, Daylight Savings Time differs from Standard Time by 1 hour,
so the default value of -60 is acceptable. If your locale does not adjust for Daylight Savings
Time, enter 0.
The daylightStartMonth parameter is the month in which Daylight Savings Time begins in
your locale. Months are represented by an integer: 1 for January through 12 for December. If
you locale does not observe Daylight Savings Time, enter a 0 (zero) here.
The standardStartMonth is the month in which Daylight Savings Time ends and Standard
Time begins again in your locale. Months are represented by an integer: 1 for January through
12 for December. If your locale does not observe Daylight Savings Time, enter a 0 (zero)
here.
The standardName parameter is the name typically used to identify the time zone in your
locale during either that time of the year when Daylight Savings Time is not in effect or the
entire year if your locale does not adjust to Daylight Savings Time. Examples of Standard
Time Zone names from the USA are Eastern Standard Time, Central Standard Time and
Pacific Standard Time. The first letters of these names are accessed to produce an
abbreviation attached to the result of sending the dateTime built-in command to WebBase, as
in: ‘Date: Mon, 04 Dec 1995 02:48:11 PM CST’. If you wish, you may enter just the
abbreviation for your locale here with no embedded spaces.
The daylightName parameter is the name typically used to identify the time zone in your
locale during either that time of the year when Daylight Savings Time is in effect. If your
locale does not adjust to Daylight Savings Time, this field should contain the same value as the
standardName field. Examples of Daylight Savings Time names from the USA are Eastern
Daylight Time, Central Daylight Time, and Pacific Daylight Time. The first letters of these
names are accessed to produce an abbreviation attached to the result of sending the dateTime
command to WebBase, as in: ‘Date: Mon, 08 Apr 1996 02:48:11 PM EDT’. If you wish, you
may enter just the abbreviation for your locale here with no embedded spaces.
NOTE:
If the above time zone information is not supplied, WebBase will operate as if the
local time is GMT and no time conversion will take place when sending the current
time and forms expiration time to browsers.
Editing Parameters
WebBase parameters are provided for Windows 3.1 and Windows for Workgroups in the file
WebBase.ini. This file must reside in the same directory as the WebBase application (e.g.,
c:\webbase). The WebBase.ini file must contain the WebBase parameters described in Chapter
4, as well as the parameters listed above. The following is an example of a WebBase.ini file.
WebBase User’s Guide
301
Appendix B: Special Configuration Issues
Figure B.3
Example WebBase.ini file
[WebBase 4.10 INI file]
[Required Parameters]
PortNo
= 80
Directory
= c:\WebBase
License
= 12345-67890
[Optional Parameters]
LogDirectory = c:\WebBase
errorLogFile = c:\WebBase\WebError.log
Default
= default.htf,default.htm
Extension
= htf,htm
HostAddress
= 1.2.3.4
[Time Zone Support]
standardBias
=
daylightBias
=
standardName
=
daylightName
=
daylightStartMonth =
standardStartMonth =
360
-60
Central Standard Time
Central Daylight Time
3
10
Items in square brackets, [ ], are comments. The parameter name to the left of the = sign is
CASE SENSITIVE while the value to the right is not.
Extensions
For Windows 3.1 and Windows for Workgroups, the optional WebExtns.ini file defines the
extensions within the WebBase environment. If no extensions are to be defined by the user,
then this file does not have to exist. When extensions are defined, the WebExtns.ini file must
be located in the directory containing the WebBase application (e.g., c:\webbase). The same
format is used in the WebExtns.ini file as in the WebBase.ini file shown above. The following
is an example of a WebExtns.ini file.
Figure B.4
Example WebExtns.ini file
[WebBase 4.10 WebExtns.INI file]
htf = ;{text/html}
Aliases
For 16-bit systems, the optional WebAlias.ini file defines the aliases within the WebBase
environment. If aliases are not to be used, then this file does not have to exist. When aliases
are defined, the WebAlias.ini file must be located in the same directory as the WebBase
application (e.g., c:\webbase). The same format is used in the WebAlias.ini file as in the
WebBase.ini file shown above. The following is an example of a WebAlias.ini file.
302
WebBase User’s Guide
Figure B.5
Example WebAlias.ini File
[WebBase 4.10 Alias file]
foobar = f:\foo\bar
Global Variables
Global variables on Windows 3.1 and Windows for Workgroups are defined in the file
WebVars.ini. This file is optional; the user should create it only if global variables are to be
defined. The WebVars.ini file must be located in the same directory as the WebBase
application (e.g., c:\webbase). The same format is used in the WebVars.ini file as in the
WebBase.ini file shown above. The following is an example of a WebVars.ini file.
Figure B.6
Example WebVars.ini File
[WebBase 4.10 WebVars.INI file]
%directoryBrowse%=true
%whereAndOr%=‘AND’
B.2
Editing the System Registry
The 32-bit systems store WebBase parameters, extensions, aliases, multiple domains and
global variables in the System Registry. This is a Windows utility that is used by many
different applications. In general, it is recommended that the WebBase WebWizard
Registration Database option be used to add or modify WebBase entries in the System
Registry. However, if it is not possible to start WebBase or if an entry needs to be deleted,
that can only be done by directly editing the System Registry. This section includes details on
how to access and edit the registry.
Accessing the System Registry
All of the WebBase parameters, aliases, etc. are maintained in the same location within the
System Registry. The following steps should be taken regardless of what type of WebBase
information is to be added, edited or deleted in the registry.
1. Run the Registry Editor. On Windows NT this is REGEDT32.EXE; on Windows 95 this
is REGEDIT.EXE.
2. Open HKEY_LOCAL_MACHINE\SOFTWARE\ExperTelligence,
Inc.\WebBase\4.10\
3. All WebBase parameters are stored within this key. If this full path does not exist, create
each key using the exact information presented above.
WebBase User’s Guide
303
Appendix B: Special Configuration Issues
Parameters
1. Select the Parameters entry19. Enter any new WebBase parameters as a string or
DWORD (integer) value. Each parameter name is spelling and case sensitive, so be sure
to enter them exactly as described in Chapter 4. The value of any parameter can also be
modified. Parameters can also be deleted, but care should be taken before deleting a
parameter as it may affect the ability of WebBase to be restarted.
Extensions
1. If no extensions have been defined, create ‘Extensions’ as a New Key. Note that the key
must be entered exactly as indicated.
2. Select the Extensions entry. Create any new extensions as String Values, with the
appropriate key (extension type) and value (mime type). Existing extensions may be edited
or deleted. Any changes to extensions will not take effect until WebBase is stopped and
restarted.
Aliases
1. If no aliases have been defined, create ‘Aliases’ as a New Key. Note that the key must be
entered exactly as indicated.
2. Select the Aliases entry. Create any new extensions as String Values, with the appropriate
key (alias name) and value (pathname). Existing aliases may be edited or deleted. Any
changes to aliases will not take effect until WebBase is stopped and restarted.
Multiple Domains
1. If no domains have been defined, create ‘Domains’ as a New Key. Note that the key must
be entered exactly as indicated.
2. Select the Domains entry. Create a New Key for each desired domain address. This key
must be the IP address of the domain (e.g., 1.2.3.4).
3. Select the new IP address subkey. Any parameters specific to this domain are entered
within this key. Any extensions or aliases for this domain are entered in subkeys called
‘Extensions’ and ‘Aliases’, respectively. Chapter 4 provides details on the parameters that
can be specified for each domain, as well as how to define extensions and aliases for
multiple parameters. Existing multiple domain parameters, extensions or aliases may be
edited or deleted. Any changes to multiple domains will not take effect until WebBase is
stopped and restarted.
Global Variables
1. If no aliases have been defined, create ‘Variables’ as a New Key. Note that the key must
be entered exactly as indicated.
19
The ‘Parameters’ entry will exist if the user selected to store the WebBase parameters entered during installation into the System Registry (default).
If thi skey does not exist, create it as a New Key. Note that the spelling and case must be exact.
304
WebBase User’s Guide
2. Select the Variables entry. Create any new global variables as String or Dword Values,
with the appropriate key (global variable name) and value. Existing global variables may
be edited or deleted. Unlike with WebBase parameters, extensions, aliases and multiple
domains, it is possible to update a running WebBase application with global variable
modifications. From the WebBase WebServer window, select the ‘Load Global Variables’
option.
WebBase User’s Guide
305
Appendix C: Header Variables
Header Variables
Appendix C
This appendix describes the header variables that may be included with a request from a client
browser. These header variables are defined in the HTTP 1.1 specification. If new
specifications are approved, additional header information may be defined. The actual header
variables received from a client browser are dependent on the implementation of HTTP
supported by the browser. It is always best to determine if a header variable is received from a
browser before expecting it to be there.
WebBase does not currently support all the HTTP 1.1 functionality. However, incoming
header parameters that are part of the HTTP 1.1 specification will still be received by
WebBase and created as local header variables.
HTTP 1.1 Input Header Variables
306
•
Accept –can be used to specify certain media types that are acceptable for the response.
Accept headers can be used to indicate that the request is specifically limited to a small set
of desired types, as in the case of a request for an in-line image. If no Accept header field
is present, then it is assumed that the client accepts all media types. If an Accept header
field is present, and if the server cannot send a response that is acceptable according to the
combined Accept field value, then the server SHOULD send a 406 (not acceptable)
response.
•
Accept-Charset –can be used to indicate what character sets are acceptable for the
response. This field allows clients capable of understanding more comprehensive or
special-purpose character sets to signal that capability to a server that is capable of
representing documents in those character sets. The ISO-8859-1 character set can be
assumed to be acceptable to all user agents. If no Accept-Charset header is present, the
default is that any character set is acceptable. If an Accept-Charset header is present, and
if the server cannot send a response which is acceptable according to the Accept-Charset
header, then the server SHOULD send an error response with the 406 (not acceptable)
status code, though the sending of an unacceptable response is also allowed.
•
Accept-Encoding –similar to Accept, but restricts the content-coding values which are
acceptable in the response. If no Accept-Encoding header is present in a request, the
server MAY assume that the client will accept any content coding. If an Accept-Encoding
WebBase User’s Guide
header is present, and if the server cannot send a response that is acceptable according to
the Accept-Encoding header, then the server SHOULD send an error response with the 406
(Not Acceptable) status code.
•
Accept-Language – similar to Accept, but restricts the set of natural languages that are
preferred as a response to the request.
•
Authorization -- A user agent that wishes to authenticate itself with a server--usually, but
not necessarily, after receiving a 401 response--MAY do so by including an Authorization
request-header field with the request. The Authorization field value consists of credentials
containing the authentication information of the user agent for the realm of the resource
being requested. See the section on Basic Authentication for more information on
authentication and authorization.
•
Cache-Control -- used to specify directives that MUST be obeyed by all caching
mechanisms along the request/response chain. The directives specify behavior intended to
prevent caches from adversely interfering with the request or response. These directives
typically override the default caching algorithms. Note – this variable does not impact
WebBase caching.
•
Connection -- allows the sender to specify options that are desired for that particular
connection and MUST NOT be communicated by proxies over further connections.
•
Date -- the date and time at which the message was originated. An example is
Date: Tue, 15 Nov 1994 08:12:31 GMT
•
From -- if given, this field SHOULD contain an Internet e-mail address for the human user
who controls the requesting user agent. This header field MAY be used for logging
purposes and as a means for identifying the source of invalid or unwanted requests. It
SHOULD NOT be used as an insecure form of access protection. An example is:
From: [email protected]
•
Host -- specifies the Internet host and port number of the resource being requested, as
obtained from the original URL given by the user or referring resource (generally an
HTTP URL). The Host field value MUST represent the network location of the origin
server or gateway given by the original URL. This allows the origin server or gateway to
differentiate between internally-ambiguous URLs, such as the root "/" URL of a server for
multiple host names on a single IP address.
•
If-Match -- used with a method to make it conditional. A client that has one or more
entities previously obtained from the resource can verify that one of those entities is
current by including a list of their associated entity tags in the If-Match header field. The
purpose of this feature is to allow efficient updates of cached information with a minimum
amount of transaction overhead. It is also used, on updating requests, to prevent
inadvertent modification of the wrong version of a resource.
•
If-Modified-Since -- used with the GET method to make it conditional: if the requested
variant has not been modified since the time specified in this field, an entity will not be
returned from the server; instead, a 304 (not modified) response will be returned without
any message-body.
•
If-None-Match -- used with a method to make it conditional. A client that has one or more
entities previously obtained from the resource can verify that none of those entities is
WebBase User’s Guide
307
Appendix C: Header Variables
current by including a list of their associated entity tags in the If-None-Match header field.
The purpose of this feature is to allow efficient updates of cached information with a
minimum amount of transaction overhead. It is also used, on updating requests, to prevent
inadvertent modification of a resource that was not known to exist.
•
If-Range -- if a client has a partial copy of an entity in its cache, and wishes to have an
up-to-date copy of the entire entity in its cache, it could use the Range request-header with
a conditional GET (using either or both of If-Unmodified-Since and If-Match.) However, if
the condition fails because the entity has been modified, the client would then have to make
a second request to obtain the entire current entity-body.
•
If-Unmodified-Since -- used with a method to make it conditional. If the requested
resource has not been modified since the time specified in this field, the server should
perform the requested operation as if the If-Unmodified-Since header were not present.
•
Max-Forwards -- may be used with the TRACE method to limit the number of proxies or
gateways that can forward the request to the next inbound server. This can be useful when
the client is attempting to trace a request chain that appears to be failing or looping in midchain.
•
Pragma -- used to include implementation-specific directives that may apply to any
recipient along the request/response chain. All pragma directives specify optional behavior
from the viewpoint of the protocol; however, some systems MAY require that behavior be
consistent with the directives.
•
Proxy-Authorization -- allows the client to identify itself (or its user) to a proxy that
requires authentication. The Proxy-Authorization field value consists of credentials
containing the authentication information of the user agent for the proxy and/or realm of
the resource being requested.
•
Range -- HTTP retrieval requests using conditional or unconditional GET methods may
request one or more sub-ranges of the entity, instead of the entire entity, using the Range
request header, which applies to the entity returned as the result of the request.
•
Referer -- allows the client to specify, for the server's benefit, the address (URI) of the
resource from which the Request-URI was obtained (the "referrer", although the header
field is misspelled.) The Referer request-header allows a server to generate lists of backlinks to resources for interest, logging, optimized caching, etc. It also allows obsolete or
mistyped links to be traced for maintenance. Example:
Referer: http://www.webbase.org/default.htf
308
•
Transfer-Encoding -- indicates what (if any) type of transformation has been applied to
the message body in order to safely transfer it between the sender and the recipient. This
differs from the Content-Encoding in that the transfer coding is a property of the message,
not of the entity.
•
Upgrade -- allows the client to specify what additional communication protocols it
supports and would like to use if the server finds it appropriate to switch protocols.
•
User-Agent -- contains information about the user agent originating the request. This is
for statistical purposes, the tracing of protocol violations, and automated recognition of
user agents for the sake of tailoring responses to avoid particular user agent limitations.
User agents SHOULD include this field with requests. The field can contain multiple
WebBase User’s Guide
product tokens and comments identifying the agent and any subproducts that form a
significant part of the user agent.
•
Via -- used by gateways and proxies to indicate the intermediate protocols and recipients
between the user agent and the server on requests, and between the origin server and the
client on responses. It is intended to be used for tracking message forwards, avoiding
request loops, and identifying the protocol capabilities of all senders along the
request/response chain.
WebBase User’s Guide
309
Index
Appendix D
Obsolete
Components
This appendix describes macros, variables and parameters which are still supported by
WebBase but are considered obsolete. These macros, variables and parameters may
be dropped from future versions of WebBase. It is recommended that forms designers
review any existing forms to ensure that these macros, variables and parameters are
not used.
D.1
Obsolete macros
•
{include file}
The include macro serves the same purpose as the insert macro. Its syntax is
slightly different in that when the filename is not presented as a string (enclosed in
single quotes), it is treated as a filename as, for example, file.HTF -orsubdir/file.HTF.
{include '../address.htf'}
•
{print <args>} {/print}
The text contained within the print macro is not processed by WebBase but is
inserted into the output HTML exactly as encountered. Variables and other macro
keywords are not processed but are printed with their enclosing { } characters as
entered in the .htf file. This macro has been superseded by the output macro.
If the optional argument convert is specified, all < and > characters are converted
to the character sequences < and > respectively, so that HTML forms can be
printed as part of the text rather than being interpreted by the browser.
An optional keyword/value argument include filename indicates that the print
macro is to take its text from another file (see the include macro for a description
of the filename specification options). This facility allows one to print the contents
of an included file rather than including the file to be processed by WebBase.
Note: since the purpose of the print macro is to insert text that is to be printed
and not processed by WebBase, WebBase does not parse the information within
the {print} ... {/print} area. For this reason, after encountering the opening
{print} keyword, WebBase scans for the first occurrence of an ending {/print}
keyword. WebBase does not support nested print blocks.
310
WebBase User’s Guide
The example below would print <TITLE> {systemName} </TITLE> at the
browser and NOT set the browser’s title to the value of the variable systemName.
{print convert}
<TITLE> {systemName} </TITLE>
{/print}
D.2
Obsolete dynamic variables
•
%AOL%
a Boolean indicator of whether the calling browser is accessing the server through
AOL. If a user needs to present information for a specific type of browser, it is
recommended that the User-Agent header variable be examined to determine the
browser type.
•
%debugAddresses%
returns the same value as %serverAddress%
•
%errorVariableNotFound%
By default, if the user accesses a variable that has not been defined, an error is
generated and an error message is returned to the browser. In most cases, this is
the desired action while the user is developing .htf files. There are some
circumstances, however, when .htf files must determine if a variable does exist and
take appropriate action if it does not rather than returning an error message.
Setting this variable to false as shown above will suppress the error message and
allow the user to query variables with an isNull or notNull message.
Several operations are available for the user to test to see if a variable is in
existence. Instead of using %errorVariableNotFound%, the user should explicitly
check for a value of a variable if there is the possibility that it will not exist. To
check for the value of a variable, use:
{if ‘varName’ %cmd% variableExists:}
This returns either true or false, which can cause the appropriate branch within the
{if} macro to be invoked. Other operations on HttpCommand that can be used are
fromVars:default and fromNonNullVars:default.
•
%Microsoft%
a Boolean indicator of whether the calling browser is Microsoft Internet Explorer.
If a user needs to present information for a specific type of browser, it is
recommended that the User-Agent header variable be examined to determine the
browser type. While this dynamic variable can be used, the information returned
in the User-Agent variable may change as new versions of browsers become
available. This dynamic variable also does not indicate version information (e.g.,
MSIE 2.0 or 3.0).
•
%Netscape%
a Boolean indicator of whether the calling browser is a Netscape browser. If a user
needs to present information for a specific type of browser, it is recommended that
the User-Agent header variable be examined to determine the browser type. While
this dynamic variable can be used, the information returned in the User-Agent
variable may change as new versions of browsers become available. This
dynamic variable also does not indicate version information (e.g., Netscape 2.0 or
3.0).
WebBase User’s Guide
311
Index
D.3
Obsolete variable parameters
•
at
specifies an index into a table of rows returned by a database query. This is used
in conjunction with the in parameter. For example, using the collection of records
returned by a SELECT statement and stored in the variable myCltn, a specific
field could be retrieved using:
NameField in=myCltn at=1
This could also be used within a forRow macro and the value of the at parameter
would be a variable with an integer value indexing into the collection.
The recommended alternative to this parameter is to use the forRow or with
macros to identify particular records or fields, and then use field variables to
display the desired information.
•
312
in
specifies the name of a row variable from a forRow macro that contains the data
from a row of a database query result. This notation allows for nesting of forRow
macro statements where the rows returned from 2 or more simultaneous database
queries may contain the same field name. Using the notation NameField
in=RowOne ... and NameField in=RowTwo ... allows for explicit accessing of the
correct field and row.
WebBase User’s Guide
WebBase User’s Guide
313
Index
Index
- · 172, 179, 207
$
$bell · 207
$bs · 207
$cr · 207
$esc · 207
$ff · 207
$lf · 207
$null · 207
$space · 207
$tab · 207
%
%%accessed%% · 161
%%all%% · 161
%%created%% · 160
%%expires%% · 161
%%remove%% · 161
%allUserVariables% · 126
%allUserVariablesHTML% · 126
%allUserVarNamesHTML% · 127
%AOL% · 312
%Array% · 124, 186
%Association% · 124, 204
%base% · 127
%browserAddress% · 127, 164
%build% · 127
%cacheEnable% · 258
%cacheEnabled% · 52, 55, 135, 147
%cacheODBC% · 53, 56, 148, 258
%cacheTimeCheck% · 55, 148, 258
%cmd% · 127, 244
%command% · 127
%commandCounter% · 127
%commandsHTML% · 127
%comment% · 128
%concurrentMailLimit% · 287, 294
%concurrentUsers% · 128
%cookieDomain% · 104, 122, 128
314
%cookieExpires% · 104, 122, 128
%cookieInVariables% · 128
%cookieInVariablesHTML% · 129
%cookieOutVariables% · 129
%cookieOutVariablesHTML% · 129
%cookiePath% · 104, 123, 129
%cookies% · 130
%cookieVariables% · 130
%copyright% · 130
%DatabaseInfo% · 124, 248
%date% · 210
%Date% · 124, 214
%dateTime% · 218
%debugAddresses% · 312
%defaultExtensionsHTML% · 131
%Dictionary% · 124, 207
%Directory% · 124, 230
%directoryBrowse% · 148, 266
%disableAllInternalCommands% · 149
%domainDirectory% · 131
%domainExtensionsHTML% · 131
%domainsHTML% · 132
%dumpVariablesOnError% · 149
%dynamicVariableNamesHTML% · 132
%enablePrivateInternalCommands% · 149
%EQ% · 133
%err401% · 133
%err403% · 133
%err404% · 133
%err500% · 134
%err501% · 134
%err503% · 134
%error% · 90, 133
%errorMacroLines% · 149
%errorUseColor% · 149
%errorVariableNotFound% · 312
%errorWrapperLines% · 149
%expire% · 134, 256
%File% · 124, 226
%filler% · 135
%Float% · 124, 178
%form% · 135
%formDirectory% · 135
%FORMScache% · 135
%FORMScacheHTML% · 135
%Fraction% · 124, 179
%fullHostAddress% · 135
%fullHostName% · 37, 44, 135
WebBase User’s Guide
%GE% · 95, 135
%gfmt% · 135
%globalVariables% · 136
%globalVariablesHTML% · 136
%gmt% · 136
%GT% · 136
%headerVariables% · 121, 136
%headerVariablesHTML% · 121, 137
%heartbeatInterval% · 67, 149
%heartbeatMaxLines% · 67, 149
%heartbeatPostingEanble% · 67
%heartbeatPostingEnable% · 150
%heartbeatReplyTime% · 68, 150
%heartbeatResetTCP% · 68, 150
%heartbeatSound% · 68, 150
%heartbeatWindow% · 65, 150
%host% · 137
%inputVariables% · 137
%inputVariablesHTML% · 137
%Integer% · 124, 176, 178
%lastModified% · 150
%LE% · 137
%leftBrace% · 84, 137
%local% · 138
%localVariables% · 138
%localVariablesHTML% · 138
%logEnabled% · 56, 148, 294
%logRecord% · 138
%LT% · 138
%MailerStatus% · 294
%mailFullTrace% · 295
%mailLogEnabled% · 290, 294
%mailMaxLines% · 286, 294
%mailPostingEnable% · 286, 294
%MailQueue% · 294, 295
%mailTrace% · 295
%max% · 150
%Microsoft% · 312
%milliseconds% · 138
%mimeType% · 151
%name% · 138
%NEQ% · 139
%Netscape% · 312
%newAscendingList% · 139, 203
%newDescendingList% · 139, 203
%newList% · 139
%nextCookieId% · 139
%nextCookieID% · 160
%NGT% · 139
%NLT% · 139
%Number% · 124
%ODBCcache% · 139
%odbcCacheHTML% · 258
%ODBCcacheHTML% · 139
%ODBCdrivers% · 139
%ODBCdriversHTML% · 140
%ODBCsources% · 140
%ODBCsourcesHTML% · 141
%OrderedCollection% · 124, 186, 202
%OrderedList% · 125, 186, 202
WebBase User’s Guide
%os% · 141
%output% · 102, 141
%password% · 107, 151
%Point% · 125, 181
%priority% · 141
%random% · 141
%ReadStream% · 125, 233, 234
%ReadWriteStream% · 125, 233, 235
%RegistrationDatabase% · 125, 243
%reservedWords% · 115, 142
%resevedWordsHTML% · 142
%results% · 93, 107, 143
%returns% · 143
%rightBrace% · 84, 143
%root% · 143
%rootDirectory% · 143
%rowCount% · 109, 143
%rowCounter% · 93, 143
%rowHeader% · 143
%search% · 143
%seconds% · 143
%self% · 144
%selfDirectory% · 144
%serverAddress% · 43, 144
%serverAverage% · 144
%serverAverageHTML% · 144
%serverElapsedTime% · 144
%serverHostName% · 37, 44, 144
%serverStartTime% · 144
%serverThroughput% · 144
%serverThroughputHTML% · 145
%skipCookies% · 151
%skipHeaderComment% · 128, 151
%SortedCollection% · 125, 186, 202
%SortedList% · 125, 186, 203
%source% · 107, 151
%sqlBufferSize% · 151
%start% · 151
%statistics% · 145
%statusCode% · 152
%String% · 125, 186, 197
%theArgs% · 152
%time% · 145, 216
%Time% · 125, 217
%timeStamp% · 145
%title% · 145
%transactionsMaxLines% · 59, 153
%transactionsWindow% · 58, 153
%UniversalTime% · 125, 223
%updateStats% · 153
%user% · 107, 153
%userExpires% · 145, 161
%userLimit% · 145, 161
%userName% · 145, 160
%userVariables% · 146
%userVariablesHTML% · 146
%varList% · 153
%version% · 146
%WHERE% · 146, 259
%whereAndOr% · 147
315
Index
%whereMultiAndOr% · 147
%whileCounter% · 112, 147
%whileLimit% · 111, 154
%WriteStream% · 125, 233, 234
%x% · 147, 261
%y% · 147, 261
// · 172, 180
&
|
& · 170, 209
| · 170, 209
*
+
* · 172
+ · 172, 180, 207
,
<
, · 170, 182, 207
< · 172, 180, 187, 203, 207, 210, 216, 218, 223
<= · 172, 180, 187, 203, 208, 210, 216, 218, 223
<FORM> · 80, 118
<INPUT> · 80, 118
<SELECT> · 80, 153
<TEXTAREA> · 80
.
.%LIKE · 260
.%LIKE% · 260
.EQ · 259
.EQN · 259
.EQS · 259
.GE · 260
.GEN · 260
.GES · 260
.GT · 260
.GTN · 260
.GTS · 260
.LE · 260
.LEN · 260
.LES · 260
.LIKE · 260
.LIKE% · 260
.LT · 260
.LTN · 260
.LTS · 261
.NEQ · 261
.NEQN · 261
.NEQS · 261
.NGT · 261
.NGTN · 261
.NGTS · 261
.NLT · 261
.NLTN · 261
.NLTS · 261
.XX · 261
/
/ · 172, 180
316
\
\ · 172, 180
=
= · 172, 180, 182, 203, 208, 210, 216, 218, 223, 228
>
> · 172, 180, 187, 204, 208, 210, 216, 218, 224
>= · 172, 180, 187, 204, 208, 210, 216, 218, 224
4
404 File Not Found · 39, 41
5
503 The Server is Too Busy · 50
A
abs · 172, 180
Accept · 64, 307
Accept-Charset · 307
Accept-Encoding · 307
Accept-Language · 308
add: · 198, 205, 241
add:after: · 198
add:afterIndex: · 198
WebBase User’s Guide
add:before: · 198
add:beforeIndex: · 198
addAll: · 199, 205
addAllFirst: · 199
addAllLast: · 199
addDays: · 210, 219
addDictionary: · 205
addFirst: · 199
addLast: · 199
addSeconds: · 219
addTime: · 216
after: · 199
Aliases · 42
Aliases · 45, 58, 303, 305
align parameter · 155
align: · 187
alignDollar: · 172, 187, 236
alignLeft: · 188
alignLeft:fill: · 188
alignRight: · 188
alignRight:fill: · 188
Anchor · 5
Anchors · 120, 156
AND operation · 170
and: · 176
AppDirectory parameter · 38
appendFilename: · 188
Application parameter · 38
arcCos · 173
arcSin · 173
arcTan · 173
argList · 244
argString · 244
asArray · 182, 205
asArrayOfSubstrings · 188
asArrayOfSubstringsSeparatedBy: · 188
asBoolean · 176
asBoolean: · 173, 189, 210
asCapitalized · 189
ascending · 199
asCharacter · 176, 189, 208
asciiValue · 208
asCodedHtml · 189
asCookieDateTime · 219
asDate · 189, 219
asDateTime · 219, 224
asDateTime12 · 219, 224
asDateTime12withPicture: · 219
asDateTime12WithPicture: · 224
asDateTime24 · 219, 224
asDateTime24withPicture: · 219
asDateTime24WithPicture: · 224
asDateTimewithPicture: · 219
asDateTimeWithPicture: · 224
asDatewithPicture: · 219
asDateWithPicture: · 224
asDoubleQuoteString · 189
asFieldName · 118, 189
asFieldNameName · 118, 189
asFloat · 176, 178, 179, 189
WebBase User’s Guide
asHeaderDateTime · 219
asHTF: · 95
asHTF: · 244
asInteger · 173, 189, 208
asKeys · 205
asLogFileTimeStamp · 220
asLowercase · 190, 208
asMailDateTime · 220
asNonEmptyString · 190, 224
asNumber · 173, 190
asOptions: · 190, 199
asOptions:field: · 199
asOrderedCollection · 182, 205
asPairs · 205
asPrintableHTML · 190
asSeconds · 210, 216, 220, 224
associationAt: · 205
asSortedCollection · 182, 205
asSqlString · 190, 210
asStream · 190
asString · 170
asSymbol · 190
asTime · 190, 220
asTime12 · 220
asTime24 · 220
asUniversalTime · 224
asUnsigned · 176
asUppercase · 190, 208
asUseableHTML · 190
asValues · 205
at parameter · 313
at: · 190, 199, 205, 236, 239, 241
at:put: · 190, 199, 205, 241
atAllPut: · 183
atEnd · 231
authDecode · 191, 208, 265
authEncode · 177, 191, 266
Authorization · 308
authPassword · 191, 265
authUserName · 191, 265
authValid · 191, 265
average · 183
B
base64decodeFileTo: · 191
base64EncodeFile:to: · 191
Basic Authentication · 263
beep · 244
beep:for: · 244
before: · 200
Benefits · 1
between:and: · 173, 181, 204, 208, 210, 217, 220
bitInvert · 177
bitShift: · 177
brace macro · 84
Browser · 5
Browser Caching · 256
317
Index
Build · 47, 49, 58
build built-in command · 27
buildString built-in command · 27
Built-in Commands · 58
C
Cache ODBC Connections (Menu Option) · 56
Cache-Control · 308
cacheFreeForm: · 244
cacheFreeSource:user: · 245
cacheMenuItemCheck · 245
Caching · 256
calendarForMonth:year: · 214
call macro · 84, 101
canAccept · 245
canConnect:user:password: · 248
case macro · 88
ceiling · 173
CGI · 3, 5, 10
changeModeOf:to: · 226
characterConstant · 191
Class · 9
classCaddr · 191
classesRoot · 243
Clear All (Menu Option) · 59, 66, 286
Clear All Caches (Menu Option) · 51
Clear All News (Menu Option) · 48
Clear All(Menu Option) · 64
Clear Forms Cache (Menu Option) · 52
Clear ODBC Cache (Menu Option) · 53, 258, 270
clearFormsCache · 245
clearOdbcCache · 245
close · 225, 231
Close All Connections (Menu Option) · 51
cmdStr · 245
collapse · 192
colTypeOf: · 236, 239
columncbColDefs · 239
columnDisplaySizes · 239
columnLengths · 239
columnNames · 236, 239
columnSqlTypes · 236, 240
colWidthOf: · 237
comma operator · 170
comma parameter · 155
command · 245
command counter · 57
Command line arguments · 81, 98, 118, 137, 257
commandString · 245
comment macro · 89
Common Geteway Interface · See CGI
Common Log File Format · 36, 252
concat · 183
concatenation · 170
concatFrom:to: · 183
concatFrom:to:with: · 183
concatWith: · 183
318
concurrent commands in process · 57
Connection · 308
containsAnyString: · 192
containsAnyStringIgnoreCase: · 192
containsInteger · 173, 192
containsNumber · 173, 192
containsString · 192
containsStringChecked: · 192
containsStringIgnoreCase · 192
contents · 231
Content-type · 39
Cookie · 5
Cookie variables · 99, 104, 122
cookieTags · 245
cookieWebBaseId · 245
copy · 170
Copy (Menu Option) · 48, 53, 59, 64, 66, 285
copy:to: · 226
copyFrom:in:to:in: · 243
copyFrom:to: · 183, 231
copyReplaceFrom:to:with: · 183
copyWith: · 183
copyWithout: · 183
cos · 173
countBlanks · 231
cr · 234
create · 228
create: · 230
crString · 233
currency parameter · 155
current · 230
Current User News (Menu Option) · 49, 57
currentDisk · 230
currentUser · 243
Cut (Menu Option) · 59, 64, 66, 285
D
Data types · 165
Data Types
Numbers · 172
Database Administration · 270
Database field names · 117
Database server · 6
date · 220, 225
Date · 308
date fields · 74, 109
dateAndTime · 220, 225
dateAndTimeNow · 214, 217
dateFromString: · 220
dateTime built-in command · 26, 27
day · 211, 220
day:month:year: · 214
dayIndex · 211, 220
dayName · 211, 221
dayNames · 214
dayOfMonth · 211, 221
dayOfWeek: · 214
WebBase User’s Guide
dayOfYear · 211, 221
daysInMonth · 211, 221
daysInMonth:forYear: · 214
daysInYear · 211, 221
daysInYear: · 214
daysLeftInMonth · 211, 221
daysLeftInYear · 211, 221
decimal parameter · 155
decode · 86, 192
Default parameter · 19, 36, 43
default.htf · 36, 43
default.HTF · 228, 235
default.htm · 36, 43
default.HTM · 226
degreesToRadians · 173
DELETE · 7, 77, 82
denominator · 173
descending · 200
describeHTMLRecord · 237
describeHTMLRecord: · 237
describeVHTMLTable · 200
describeVHTMLTable: · 200
Destination Directory · 17
digitValue · 208
directory · 225
Directory Browsing · 266
Directory parameter · 18, 36, 43
DNS · 6
Domains · 6
dotProduct: · 181
drive · 228
drive:path:file: · 226
drivePathName · 228
drivePrefix · 228
drives · 230
Dynamic HTML · 83
Dynamic variables · 115
Dynamic Variables · 58, 126, 294
E
elapsedDaysSince: · 211, 221
elapsedMonthsSince: · 211, 221
elapsedSecondsSince: · 211
elapsedTime built-in command · 27
elementsEqual: · 206
E-Merge · 283
Enable Cache Read (Menu Option) · 54
Enable Cache TimeCheck (Menu Option) · 55
Enable Log File (Menu Option) · 56
Enable Mail Log File (Menu Option) · 290
Enable Transactions Pane (Menu Option) · 54
encode · 86, 192
encode parameter · 120, 155
ensure macro · 89
entryValues · 241
enumerateHTML:titled: · 246
equals: · 192
WebBase User’s Guide
equalsIgnoreCase: · 193
eqv: · 210
Error handling · 81
error.log · 36
errorLogFile parameter · 19, 36
errorProtect macro · 89, 90, 91, 106
escape macro · 90, 91
even · 173
execute: · 226
exists: · 226, 230
exists:in: · 227
Exit (Menu Option) · 48, 53, 59, 63, 66, 285
exit macro · 86, 91
exp · 174
Expires · 134, 256
exponent · 178
Expressions · 165
Extended Combined Log File Format · 36, 253
Extended Common Log File Format · 36, 253
Extended Original WebBase (EMWACS) Log File
Format · 36, 255
Extension parameter · 19, 37, 43
Extensions · 39, 45, 303, 305
F
f= macro · 92
f== macro · 92
factorial · 177
False · 209
Features · 1
Field variables · 82, 115, 116
file · 235
File DSN · 29
File Streams
Instance Operations · 235
file: · 228
fileExtension · 193
fileFullExtension · 193
fileName · 193
fileName:extension: · 227
fileNameLessPath · 193
fileNamePath · 193
fileReadOnly: · 228
filesNamed: · 228
Find (Menu Option) · 48, 53, 59, 64, 66, 286
Find Again (Menu Option) · 49, 54, 59, 64, 67, 286
findByDate: · 295
findByFrom: · 295
findByID: · 295
findBySubject: · 295
findByTo: · 295
Firewalls · 37, 38, 48, 266
first · 184
firstDayInMonth · 211, 221
firstDayOfMonth · 211, 221
firstSundayIn: · 211, 221
firstSundayInMonth · 212, 222
319
Index
flash: · 246
floor · 174
flush · 225, 235
Flush Log File (Menu Option) · 57
Flush Mail Log File (Menu Option) · 290
Flush Mail Queue (Menu Option) · 288
forIndex macro · 91, 92
format: · 174, 193
formatted · 228
Formatted Text Files · 281
formatted: · 229
Forms cache · 54, 55, 148, 257
Forms Cache · 51, 52
forRow macro · 9, 82, 91, 93, 116
FoxPro · 277
fraction · 225
freeDiskSpace · 229
From · 308
fromArrayOfSubstrings:separatedBy: · 197
fromDays: · 214
fromInteger: · 178
fromNonNullVars:default: · 246
fromSeconds: · 217
fromString: · 178, 215, 217
fromString:decimalSeparator: · 179
fromString12: · 218
fromString24: · 218
fromVars:default: · 246
Full Trace (Menu Option) · 289
fullDirName · 229
fullHTMLRecord · 237
fullHTMLRecord: · 237
fullPathName: · 227
fullRecord · 237
G
gcd: · 177
GET · 6, 57, 64, 80, 97, 115, 124, 244, 245, 259
getAnyLocalVariable: · 246
getFileTime · 225
getGlobalVariable: · 246
getLetVariable: · 246
getLocalVariable: · 246
getMessage · 238
getUserVariable: · 247
getVariable: · 247
Global variables · 54, 100, 104, 115, 124, 304
Global Variables · 58, 305
gmt · 222, 223
gmt built-in command · 27
H
hasMessage · 170, 184, 238
hasNetworkName · 229
hasSubdirectory · 229
320
HEAD · 64
header · 238
Header variables · 121
HeartBeat (Menu Option) · 54
HKEY_CLASSES_ROOT · 240
HKEY_CURRENT_USER · 240
HKEY_LOCAL_MACHINE · 240
HKEY_USERS · 240
Host · 37, 121, 144, 308
HostAddress parameter · 37, 66
HostName parameter · 37, 44, 135
hours · 217, 222
hours:minutes:seconds: · 218
HREF · 281
htf Files · 6
htf macro · 94
HTML · 6, 10, 63, 155
HTML Editor · See WebberActive
HTTP Root Directory · 17, 36
HTTP server · 6, 10
HTTP_Proxy · 267
HTTP_Proxy parameter · 37
HTTP_ProxyPort · 38, 267
Hypertext Markup Language · See HTML
I
if macro · 9, 82, 95
If-Match · 308
If-Modified-Since · 308
If-None-Match · 308
If-Range · 309
If-Unmodified-Since · 309
in parameter · 313
include macro · 311
includes: · 184, 206
includesKey: · 206, 241
indexFor: · 238
indexOf: · 184, 231
indexOfCollection: · 184
indexOfLowercase: · 231
indexOfMonth: · 215
indexOfString: · 193
indexOfString:startingAt: · 193
Indirection · See Variable indirection
Initialization · 35
Input Forms · 6, 80
INSERT · 7, 75, 82
insert macro · 84, 95
Install.log · 13
Installation
Custom · 22
NT Service · 32
ODBC Drivers · 28
ODBC Sources · 28
Standard · 14
Testing · 25
Instance · 9
WebBase User’s Guide
integerCos · 174
integerSin · 174
intSqrt · 177
IP address · 43, 57, 135
IP Address · 6
isAlphaNumeric · 208
isArray · 170
isAssociation · 170
isBoolean · 170
isCharacter · 170
isCollection · 170
isCurrencyCol: · 238
isDictionary · 170
isDigit · 208
isDirectory · 171
isEmpty · 184, 206, 231
isFloat · 171
isFraction · 171
isInteger · 171
isLetter · 209
isList · 171
isLowercase · 209
isLowerCase · 209
ISMAP · 7, 147, 261
isNil · 171
isNull · 171, 312
isNumber · 171
isNumeric: · 238, 240
isPoint · 171
isSeparator · 209
isSortedList · 171
isStream · 171
isString · 171
Issue single heartbeat (Menu Option) · 68
isSymbol · 171
isTrue32bit · 247
isUppercase · 209
isUpperCase · 209
isValidDirectory · 193
isValidFile · 193
isValidIPaddr · 194
isValidSource: · 249
isVowel · 209
isWhitespace · 209
isYesNo: · 238, 240
J
JavaScript · 94
JOIN · 74
K
key · 204
key: · 204
key:value: · 204
keyAtValue: · 206
WebBase User’s Guide
keyName · 241
keys · 242
L
last · 184
LastModified · 150
lastSundayIn: · 212, 222
lastSundayInMonth · 212, 222
Late Breaking News Window · 47
lcm: · 177
leapYear: · 215
leapYearsTo: · 215
License · 58
License Agreement · 15
License parameter · 18, 36
License.wri · 13
LicensedFeatures parameter · 19, 283
lineDelimiter · 231
lineDelimiter: · 231
ln · 174
Load Global Variables (Menu Option) · 54, 124
Local variables · 81, 99, 100, 103, 105, 115, 118
localMachine · 243
Location · 64
log: · 174
LogDirectory parameter · 19, 36, 251, 294
LogFormat parameter · 36, 62
LogFormat Parameter · 251
Logging · 56, 251
Mail · 284, 290
logical AND · 170
logical OR · 170
logRecord · 247
M
Macro format · 83
Mail · See E-Merge
mail macro · 291
mailBCC · 296
mailCC · 296
mailDate · 296
Mailer · 284
Mailer (Menu Option) · 290
mailFrom · 296
mailID · 296
mailSubject · 296
mailTo · 296
makeCurrent · 229
map: · 184
map:for: · 184
map:with: · 184
max · 185
max: · 174, 181, 204, 209, 212, 217, 222, 225
Max-Forwards · 309
Message · 9
321
Index
Method · 10
Microsoft Access · 272
Microsoft Excel · 277
millisecondClockValue · 218
milliseconds built-in command · 27
mime · 247
min · 185
min: · 174, 181, 204, 209, 212, 217, 222, 225
minutes · 217, 222
monthIndex · 212, 222
monthName · 212, 222
monthNameFromString: · 215
monthNames · 215
Multiple Domains · 43, 58, 305
N
name · 225, 247
nameOfDay: · 215
nameOfMonth: · 215
negated · 174, 181
negative · 174
new · 202, 207, 243
New Window (Menu Option) · 63
new: · 202, 243
newAscending · 203
newDay:month:year: · 215
newDay:year: · 215
newDescending · 203
newFile: · 227, 229
newFile:in: · 227
next · 233, 235
next: · 231
nextCookieId · 247
nextInteger · 231
nextLine · 232
nextMatchFor: · 232
nextPut: · 234
nextPutAll: · 234
nextWord · 232
nonempty · 194
nonempty parameter · 156
not · 210
notEmpty · 185, 206
notNil · 171
notNull · 171, 312
now · 218, 223
numerator · 174
numerator:denominator: · 179
numeric fields · 74, 109
nums · 185
O
Object · 10
occurrencesOf: · 185, 206
ODBC · 7, 71
322
ODBC connection cache · 53, 56, 148, 270
ODBC Connection Cache · 51, 258
ODBC Drivers · 28, 269, 272
ODBC Sources · 28
odbcDataSources · 249
odbcDataSourcesRaw · 249
odbcDataSourcesSQL · 249
odbcDrivers · 249
odbcDriversSQL · 249
odbcDriversSQL2 · 250
OdbcRowObjects · 198
odd · 174
on: · 233
onlyDigits · 194
Open DataBase Connectivity · See ODBC
Open Location (Menu Option) · 63
Open Transactions Window (Menu Option) · 54
open:in: · 227
Operations · 165
OR operation · 170
ORDER BY clause · 73
Original WebBase (EMWACS) Log File Format · 36,
254
output macro · 96
P
padchr parameter · 156
parallel macro · 97
Parameters · 35, 305
parseAt: · 194
parseAt:into: · 194
parseAtAny: · 194
parseAtAny:into: · 194
passEncode: · 194
pathName · 226, 229, 235
pathName: · 227, 230
pathName:in: · 227
pathnameDOS · 194
pathNameReadOnly: · 227
pathNameReadOnly:in: · 227
pathnameUNIX · 194
pathToday: · 216
Pause Server (Menu Option) · 50
peek · 232
peekFor: · 232
pi · 179
PortNo parameter · 18, 35
position · 232
position: · 232
positive · 174
POST · 6, 57, 64, 80, 97, 115, 124, 244, 245, 259
Posting enabled (Menu Option) · 60, 67, 286
Pragma · 309
prefix parameter · 156
previousWeekday: · 212
print macro · 311
printColumnDashes · 240
WebBase User’s Guide
printColumnNames · 240
printField:on: · 238
printFraction: · 174, 175
printFraction:decimalSeparator: · 175
printHierarchy · 243
printHierarchyOn: · 242, 243
printHierarchyOn:indent: · 242
printHRecord · 238
printHTMLTable · 200
printInFormat:twoDigitYear: · 212
printOn: · 171
printOn:base: · 177
printOn:base:showRadix: · 177
printOn:decimalSeparator: · 178
printOn:inFormat:twoDigitYear: · 212
printOn:inFormat:twoDigitYear:dateSeparator: · 212
printOn:withPicture: · 213
printOn12Hr: · 217
printOn24Hr: · 217
printPaddedTo: · 177
printPaddedWith:to:base: · 177
printPRETable · 201
printRecord · 239
printRounded: · 175
printStringRadix: · 177
printTable · 201
printTHColumnNamesOn: · 239
printVHTMLTable · 201
printVHTMLTable: · 201
printWithPicture: · 213
Proxy-Authorization · 309
publicKeys · 242
Q
Quitting WebBase · 284
quo: · 175
quote · 195
R
radiansToDegrees · 175
radix: · 177
radix:showRadix: · 177
raisedTo: · 175
raisedToInteger: · 175
Range · 309
readBuffer:atPosition: · 226
readFrom: · 178, 197
readFromFile · 195
Receiver · 10, 165
reciprocal · 175
Records · 7
reDirect macro · 97
reDirect2 macro · 98, 120
Referer · 121, 309
Registry Editor · 304
WebBase User’s Guide
rejectComments · 195
rejectControls · 195
rejectHTML · 195
Relational database · 72
Reload · 64
Reload (Menu Option) · 64
rem: · 175
remove · 229
Remove All User Variables (Menu Option) · 51, 161
remove macro · 98
remove: · 201, 227, 230
removeAll · 201, 206
removeAll macro · 99
removeAll: · 201, 230
removeAssociation: · 206
removeCookie macro · 99, 123
removeFirst · 201
removeGlobal macro · 100, 124
removeHeader macro · 100
removeIndex: · 202
removeKey: · 206, 242
removeLast · 202
removeLocal macro · 100
removeString: · 195
removeStringIgnoreCase: · 195
removeTimer: · 247
removeUser macro · 100
rename:to: · 228
replace:with: · 196
replaceCharacter:from:to:withString: · 196
replaceFrom:to:with: · 165, 185
replaceFrom:to:with:startingAt: · 185
replaceFrom:to:with:startingWith: · 185
replaceFrom:to:withObject: · 185
replaceNewlinesWithString: · 196
replaceString:with: · 196
reset · 232
return macro · 86, 101
reverse · 186
reverseContents · 232
rounded · 175, 181
roundTo: · 175
RPN · 165, 166, 168
S
scope macro · 98, 101, 120
Scope variables · 99, 101
search · 247
seconds · 217, 222
seconds built-in command · 27
SELECT · 7, 72, 90, 110, 153, 195, 200, 201, 235
Set heartbeat interval (Menu Option) · 67
Set heartbeat reply time (Menu Option) · 67
Set heartbeat reset TCP (Menu Option) · 68
Set heartbeat sound (Menu Option) · 68
Set Lines (Menu Option) · 59, 67, 286
set macro · 103, 120
323
Index
Set Mail Limit (Menu Option) · 287
setCookie macro · 104, 122
setGlobal macro · 104, 124
setHeader macro · 105
setLocal macro · 105, 120
setString macro · 105
setToEnd · 232
setUser macro · 106, 163
shortNameOfDay: · 216
shortNameOfMonth: · 216
Show In Process Mail (Menu Option) · 288
Show Mail Queue (Menu Option) · 288
Show Server Status (Menu Option) · 61
Show Stats (Menu Option) · 288
Show TCP/IP Status (Menu Option) · 61
sign · 175
signalError macro · 106
significand · 178
sin · 175
size · 186, 206, 226, 232
size parameter · 156
skip: · 232
skipSeparators · 232
skipTo: · 232
skipToWhitespace · 233
skipWhitespace · 233
SMTP_Server parameter · 284
Software License Agreement · 297
sortAscendingAt: · 196
sortDescendingAt: · 197
space · 234
Splash Screen · 7
SQL · 7, 72
sql macro · 8, 71, 81, 90, 107, 235, 258
sql parameter · 109, 156
sqrt · 176
squared · 176
Start heartbeat service (Menu Option) · 67
Start Mailer (Menu Option) · 286
Start Transaction Writing (Menu Option) · 60
startTime · 248
StartupForm parameter · 37
status · 57
Stop heartbeat service (Menu Option) · 67
Stop Mailer (Menu Option) · 286
Stop Transaction Writing (Menu Option) · 60
Stored procedures · 280
strictlyPositive · 176
stripQuotes · 197
Structured Query Language · See SQL
subdirectories · 229
subtractDate: · 213
subtractDays: · 213
subtractTime: · 217
suffix parameter · 157
sum · 186
symbolConstant · 197
System DSN · 29, 33
System Parameters · 58
324
System Registry · 35, 38, 304
T
tab · 234
tab: · 234
table:source:user:password: · 250
tablesIn:user:password: · 250
tableSource:user:password: · 250
tableWidth · 239
tan · 176
text · 248
text fields · 74, 109
time · 222, 225
timeFromString: · 222
timeFromString12: · 223
timeFromString24: · 223
timer macro · 110, 247
timerQueueSQL · 248
timesTwoPower: · 176
title built-in command · 27
titleString built-in command · 27
today · 216
Total View (Menu Option) · 54
totalSeconds · 218
Trace Incoming Headers (Menu Option) · 60
Trace Mail Commands (Menu Option) · 289
Trace Outgoing Headers (Menu Option) · 61
Transfer-Encoding · 309
transpose · 181
trimBlanks · 197
True · 209
truncate · 235
truncated · 176, 181
truncateTo: · 176
U
Uniform Resource Locator · See URL
UPDATE · 7, 76, 82
Upgrade · 309
upTo: · 197, 233
upToWhitespace · 233
URL · 7, 84, 207, 263
urlArgString · 207
User DSN · 29
User variable dictionaries · 159
User variables · 52, 101, 106, 115, 124, 159
userAgent · 248
User-Agent · 121, 280, 309
users · 244
V
V32BAS20.dll · 13
V32THK20.dll · 13
WebBase User’s Guide
V32U202.dll · 13
V32VM20.dll · 13
V32VM20.exe · 13, 26
valid · 229
validDrive · 229
validFile: · 229
validHtmlChar · 209
value · 204, 242
value: · 242
valueAt: · 239
values · 243
Variable indirection · 103
Variable Name Suffixes · 259
Variable Precedence Order · 115, 163
variableExists: · 248
vars · 248
Version · 47, 49, 58
Via · 310
volumeLabel · 230
W
Warranty · ii
WBSetup.exe · 12
WBUpdate.exe · 23
Web Browser · See Browser
Web document · See Web page
Web page · 7
Web server · See HTTP server
WebAlias.ini · 303
WebBase Data Types
Arrays · 186
Associations · 203
Booleans · 209
Characters · 207
Collections · 182
DatabaseInfo · 248
Dates · 210
Dictionaries · 204
Directories · 228
Envelopes · 296
File Streams · 235
Files · 225
Floats · 178
Fractions · 179
HttpCommand · 244
Integers · 176
Mail Lists · 295
ODBCRowHeaders · 239
ODBCRowObjects · 235
OdbcTimeStamp · 223
Ordered Collections · 198
Ordered Lists · 202
Points · 179
Read Streams · 233
Read Write Streams · 235
WebBase User’s Guide
Registration Database · 240
Sorted Collections · 202
Sorted Lists · 203
Streams · 230
Strings · 186
Symbols · 198
Times · 216
Universal Times · 218
Write Streams · 234
WebBase Heartbeat Window · 65
WebBase macro forms · See htf Files
WebBase Mail Service Window · 284
WebBase output forms · See htf Files
WebBase Parameters · 58
WebBase Server · 10
WebBase Server Window · 49, 290
WebBase Total View Window · 62
WebBase Transactions Service Window · 58
WebBase WebWizard · 13, 22
Basic Examples · 94, 162
Data Sources · 116
Database Examples · 108, 282
Java Examples · 81
Registration Database · 35, 38, 41, 42, 44, 125
Sample Sites · 126
starting · 47
WebBase.bat · 13
WebBase.bmp · 13
WebBase.exe · 13
WebBase.ico · 13
WebBase.ini · 302
WebBaseID · 123, 160
WebberActive · 79
WebExtens.ini · 303
WebVars.ini · 304
WHERE clause · 73, 77, 94
WHERE Clause · 259
while macro · 111
Windows NT Service Parameters · 38
with macro · 112, 116
with: · 186
with:with: · 186
with:with:with: · 186
with:with:with:with: · 186
withCrs · 197
writeBuffer:ofSize:atPosition: · 226
writeFile macro · 113
WSAEADDRINUSE · 26
WSANO_RECOVERY · 26
X
x · 181
x: · 181
x:y: · 181
xor: · 210
325
Index
Y
Z
y · 181
y: · 181
year · 214, 223
zapCrs · 197
zoneName · 223
326
WebBase User’s Guide