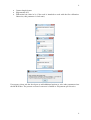
1
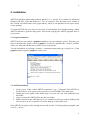
ADT-3D
User manual
version 1.3.2
11 January 2012
2
Table of contents
1. Introduction ........................................................................................................................3
2. Installation ..........................................................................................................................5
2.1 Gnuplot installation.......................................................................................................5
2.2 ADT3D installation .......................................................................................................5
3. A few words about the ADT experiment .............................................................................6
4. TIF2MRC data converter ....................................................................................................7
5. Starting ADT3D – the program philosophy .......................................................................10
6. 2D viewer .........................................................................................................................12
7. 2D functions .....................................................................................................................13
7.1. Data binning .............................................................................................................. 13
7.2. Pattern centering ........................................................................................................14
7.3. Tilt axis determination / rotation to the tilt axis ..........................................................16
7.4. Reconstruction of the volume data .............................................................................18
8. The 3D viewer ..................................................................................................................19
9. 3D functions .....................................................................................................................25
9.1. Peak search ................................................................................................................25
9.2. Manual assessment of the unit cell vectors .................................................................28
9.3. Automatic unit cell determination ..............................................................................29
9.4. Example: clustering parameter tuning ........................................................................ 32
9.5. Clustering parameter tuning: statistical approach........................................................34
10 Difference vector space viewer ........................................................................................36
11 Transformation of the unit cell .........................................................................................39
12 Extraction of HKL Intensity data set ................................................................................41
13. Appendices .....................................................................................................................45
13.1 ADT3D keyboard shortcuts and mouse keys .............................................................45
13.2. MRC file format as used in the software...................................................................46
13.3 CELL file format ...................................................................................................... 51
13.4 Diffraction pattern calibration ...................................................................................52
2
3
1. Introduction
The ADT3D software package is designed to process data collected from electron
crystallographic experiments using the Automated Diffraction Tomography (ADT) technique
(Kolb et al. Ultramicroscopy (2007), Kolb et al. Ultramicroscopy (2008), Mugnaioli et al.
Ultramicroscopy (2009).) The program has several basic functions. First, it is able to
reconstruct a reciprocal space volume from a set of tilted diffraction pattern (tilt series)
allowing the user to validate the quality of the data and thereby identify any complications as
twinned crystals, superstructures, incommensurate structures, or errors in data collection and
reconstruction. The program has an extensive set of functions to identify basis unit cell
vectors. Using the selected unit cell vectors it can index and integrate the intensities within the
collected 3D reciprocal volume. These intensities can then be used for structure solution using
any structure analysis approach (direct methods, simulated annealing, etc.).
The ADT methodology brings a new level of improved data quality and quantity to the field
of electron crystallography and greatly improves the chances of success structure solution
from electron crystallographic data. ADT3D is intended to make the process of data
extraction from raw diffraction images to hkl intensity file for structure analysis, as quick and
easy as possible. For an experienced user using a modern PC with ample memory capacity
(we recommend 4 GB) and a reasonable data set quality this process can be as fast as 15
minutes.
Our wish is that ADT3D will help make the ADT technique accessible to as many researchers
as possible, even those who would not have dared to attempt electron crystallography in the
past. Our guiding philosophy has been to make the user interface and experience as simple as
possible, while remaining flexible and adaptable for the user to deal with challenging data
sets. We are grateful for any feedback which can improve the program.
The ADT3D package contains the following:
Tiff 2mrc converter
ADT3D
Example data sets: Barite, Natrolite
GnuPlot 4.2
Thank you for purchasing our software,
The ADT3D development team.
Centre for High Resolution Transmission Electron Microscopy
Institute for Physical Chemistry
Johannes Gutenberg-University
Welderweg 11
55099 Mainz
Germany
3
4
Institute for Informatics
Staudingerweg 9
55099 Mainz
Germany
The program is distributed via
NanoMEGAS SPRL
Blvd Edmond Machtens 79,
B-1080,
Brussels
BELGIUM
4
5
2. Installation
ADT3D is platform independent software based on C++ and Qt. It is available for Microsoft
Windows XP SP3, Vista and Windows 7. For 3d viewing it uses the open source variant of
the Coin3D and SIMVoleon scene graph library, which is encapsulated in our open source
viewer package.
To install ADT3D only two steps are necessary. First install the free Gnuplot package, which
ADT3D enabled to generate many plots, and second copying the ADT3D program files to
your system.
2.1 Gnuplot installation
ADT3D will not run without a gnuplot installation on your computer system. Therefore you
have to download the actual version of gnuplot (Version 4.2 patchlevel6), extract it, install it
where you want and add the binary folder to your system path.
Test the installation by opening a console / command prompt and type wgnuplot.exe. If the
gnuplot window appears, gnuplot is ready to use.
2.2 ADT3D installation
1. Create a new folder called ADT3D somewhere (e.g. C:\Program Files\ADT3D or
D:\ADT3D) on your system, where you have a least 200 MB of free disk space.
2. Change the access rights of this folder, that every user can read, write and delete into
this folder
3. Copy or extract the ADT3D files into this new folder.
4. Make a shortcut to the ADT3dAnalysis.exe available for all users on their desktops (the
easiest way to do it is to put the icon on the desktop of the public user).
Start ADT3D, keep tabs on the starting process and test the 3d viewing and your graphic card
via File-> 3d test.
5
6
3. A few words about the ADT experiment
In ADT experiment electron diffraction patterns are collected through a tilt around the
primary goniometer axis. Usually the patterns are collected using equidistant tilt steps
although principally arbitrary tilt steps can be used (at present the TIF2MRC converter can
only deal with the equidistant tilt steps, but can be adopted on demand).
The ADT experiment can be done either using nano-diffraction or selected area diffraction.
The operator must ensure that the diffraction patterns are collected from the same crystal.
Other crystals eventually appearing in the field of view may disturb the analysis but are not
crucial if there are only a few. Several points must be taken into account while making the
experiment:
The operator should take care that the patterns are roughly centered on CCD.
The possible largest fraction of the available dynamic range of the CCD should be
used: the reflections should not be saturated – this would spoil their intensity, but they
also should not be too weak. The central beam can be saturated (if the CCD can
tolerate it).
For an attempt of a complete structure analysis largest possible tilting range should be
covered (±60° or even larger), for unit the cell parameters determination a much
shorter tilt sequence can be sufficient (±30° or less, depending on the data quality).
The success of a structure analysis procedure is especially enhanced when precession
electron diffraction is used (especially for inorganic materials).
The use of a beam stopper to blank the transmitted beam is tolerated by the program as
long as there are some diffraction patterns with clear Friedel pairs and the shift vector
of different patterns in the tilt series is similar (see the centering routine).
6
7
4. TIF2MRC data converter
At the moment the program can only read electron diffraction tilt series as MRC files (the file
format description can be found in the specified appendix). MRC is a standard file format for
3D data used in tomography and there are plenty converting possibilities existing (IMOD,
2dx, ImageJ, etc.). We nevertheless recommend to use the converter delivered together with
ADT3D for the following reasons: electron diffraction patterns typically (and hopefully) have
a very high dynamical range which should be treated in a certain manner when converting to
signed 16-bit MRC format, and essential experimental information should be written in the
heater which is typically not used in image-based tomography.
As default TIFF2MRC converter is delivered. EMI2MRC (TIA) and DM32MRC (Digital
Micrograph) possibilities also exist and can be compiled into a stand-alone program on
demand.
Installation of the Converter:
Copy the ADT_tiff2mrc_pkg.exe to a new folder and make sure to have installation
(administrator) rights.
Double click on the ADT_tiff2mrc_pkg.exe, follow the instructions.
Double click on ADT_tiff2mrc.exe to run the converter program.
Prior to the converting procedure, the input TIFF files should be sorted according to their tilt
angle position and have names numbered sequentially using the scheme:
Generic name counter . tif
For example, the files can be named Barite1.tif, Barite2.tif, … Barite10.tif, Barite11.tif. It is
assumed that the files are sorted from negative tilt angle values going into the positive
direction and the software makes the assumption that the tilt steps are always the same size
(i.e. the tilt positions are equidistant). Once a diffraction pattern for a certain tilt position is
missing – it can be substituted by a blank TIFF file having the same size in pixels as the other
diffraction patterns and the corresponding name.
When the converter is started the user is asked to pick up the first TIFF file of a stack. The file
name is analyzed, the last digit (1) is considered as a counter and the rest of the name as a
generic name. It is assumed that all diffraction patterns have the same size in pixels, the same
diffraction acquisition parameters, and the same orientation of the tilt axis (diffraction
rotation).
7
8
After the first file has been selected, the program asks for the generic name (the name without
the counter and extension). Note, that in this case the generic name includes the underscore
symbol.
Most of the CCD cameras save the data in unsigned 16-bit tif format, meaning that
intensities can range from 0 to 65,535. MRC files contain 16-bit signed data. If within
original tif file the intensities are below 32,767, the data can be directly transformed into
positive part of the MRC file. If the counts are above the 32,767 level, two possibilities
offered by the program: divide by 2 or truncate.
the
the
the
are
Typically high counts belong to the central transmitted beam or originate from hot spots and
these intensities are not important. In this case the counts higher than 32,767 can be neglected
(set to 32,767) using the truncate option. If the user decides to keep the intensity ratio also for
the strong counts – all number can be divided by 2 in order to fit into the 0-32,767 range.
Negative counts are allowed by should not comprise a major fraction of a pattern – this may
cause problems in intensity integration procedure.
After all diffraction patterns are packed in the the 3D data stack, the essential information
about the experimental data is written into the MRC header. The user is prompted by the
program to input the relevant values.
Starting tilt position (please use negative to positive tilting direction. If you collected
the data in the other way, still use the positive tilt step direction – at the end it will
only flip the data).
Tilt step (should be positive, see above. Only equidistant tilt positions are supported at
the moment).
Pixel size in 1/nm
8
9
Camera length in mm
High tension (kV)
Diffraction lens value in % (if the used is intended to work with the fine calibration.
Otherwise, this parameter is irrelevant).
If necessary please ask the developers to add additional options to wire other parameters into
the MCR header. The present version of converter is limited to 500 patterns per tilt series.
9
10
5. Starting ADT3D – the program philosophy
Currently only MRC files with the format declared in the Appendix are read and processed by
ADT3D. MRC diffraction data stacks can be created from TIFF files using the converter
supplied with the ADT-3D package.
Two types of MRC files are used by the program, Stack data (tilt series) and Volume data.
Stack data: A file which contains a series of electron diffraction patterns/images acquired
during the tomographic tilting of a crystal. The x and y dimensions are the size of the image in
pixels, (all diffraction patterns within a tilt series must have the same number of pixels) and z
comprises the total number of patterns.
Volume data: An MRC file containing the 3D diffraction volume in Cartesian coordinates.
All diffraction pattern processing is done within stack data files, while 3D operations like
lattice vectors determination are performed within volume data.
The description of MRC file format used here can be found in the appendix.
Tilt series MRC files must have an extended MRC header containing the information about
the tilt sequence, pixel size, diffraction camera length, etc. This information is essential for
subsequent volume reconstruction and processing.
The following is a brief outline of steps used to go from raw images to extracted intensities.
Load Data: Assumes a MRC stack of your data is available, otherwise it can be
created from a stack of TIF images using TIF2MRC converter provided together with
the package.
Inspect in 2D viewer: check for blank images, or data which looks to be bad or
corrupted
Shift diffraction patterns to a common origin
Find tilting axis
Rotate data to the Tilting axis
Bin data: to save memory space, 3D volume is only a visualization tool.
Create 3D volume
Inspect data in 3D volume
Find reflections: default parameters estimated for your data should give roughly 1000
reflections
Find unit cell: optimize clustering parameters if necessary
Extract intensities
In order to open an MRC tilt series click on File>Open MRC file. A dialog window allowing
you to browse through your data will appear. Select the target file and press the Open button.
Alternatively the Open file icon can be used. A progress window will appear as the data stack
is being loaded.
10
11
Once the data is loaded a Data Inspector window will appear (on the left side) showing the
type of the data (in this case TILT_SERIES), file name, image size (2D size in pixels of a
single diffraction pattern), image count (the number of diffraction patterns in a stack), and the
tilt range (read from the extended header). On the right side a corresponding Properties
window will appear with more detailed information, the MRC header are summarized in the
Properties area. The info panel presents the information on the data type, file name, data path,
memory used by the loaded file and pixel size in reciprocal units within diffraction patterns.
The MRC header panel lists data available from the basic MRC header. The parameters
within the MRC header cannot be edited from the MRC header panel.
Once a file of TILT_SERIES type has been loaded a number of 2d functions become
available. Loading or creating a volume file (MRCVOLUME type) activates 3d functions in
the menu bar.
Multiple MRC files can be loaded simultaneously. However, because the 3D volume files can
be very large, the developers advise loading only the necessary files for processing one data
set at a time. This will help avoid any memory capacity issues.
11
12
6. 2D viewer
2D viewer becomes active once a tilt series is open in the program ( ). 2D viewer allows
visualization of the recorded diffraction patterns. Within the 2D viewer additional navigation
possibilities are available, like going to the first (<<), previous (<), next (>), last (>>) patterns,
as well as resizing of the visualization window (Original Size, Fit to Window).
Diffraction data is visualised on an 8-bit scale, additionally features such as histogram
linearization (HistEqual) display the image with the highest available contrast. The HistEqual
mode can be switched off by clicking on the diffraction pattern area.
3D-plot button opens an extra window with the current diffraction pattern presented as a
surface plot based on the intensity values in each pixel. A particular reflection can be selected
by clicking on the diffraction pattern. A bounding box is placed around the reflection. A 3D
plot of the reflection within the bounding box can be visualized by clicking the 3D-plot
(bounding box) button. Intensity variation of the selected reflection through the tilt series can
be visualized by pressing Rocking Curve function. In the rocking curve intensities integrated
within bounding boxes of different size are shown. The largest box is 41x41 pixels, the
smallest is 5x5. The rocking plots are however more precise after some pre-processing stages
like pattern centering are done. It is essential for rocking curves that the shift between the
diffraction patterns is either minimal due to special precautions during the acquisition
procedure or has already been corrected for.
12
13
7. 2D functions
7.1. Data binning
Most of the tasks do not require high resolution data as it is recorded. The purpose of binning
is to save memory capacity while doing operations which do not require the full data volume.
Therefore, for large diffraction patterns the binning (Rebin MRC data icon) is recommended
at early stages of the processing and the corresponding function is included into the Standard
functions menu. The binning is especially useful prior to the reconstruction of the reciprocal
volume. The binning procedure creates a new MRC file with the suffix “_bi”.
The binning is done in the additive way – like it is done on a CCD chip – by simple addition
of 4 neighboring pixel values.
The newly created file can be saved by either using the Save MRC file icon, or File>Save
MRC file menu. At this point if the original file is not needed for the processing anymore it is
recommended to close it in order to free memory space.
13
14
7.2. Pattern centering
During the tilt series collection the position of the central beam and therefore the complete
pattern may shift. The shift may occur for a variety of reasons – one of the most common
reasons is the diffraction pattern shift associated with the image shift, which would occur
when tracking the crystal during data acquisition. It can also be caused by occasional use of
diffraction shift knobs during the tilt acquisition.
The centering function is called either by pressing the Pattern centering icon ( ) or by
clicking 2D functions>Pattern Centering menu. For each diffraction pattern of a tilt series the
centre of the pattern is found and the pattern is shifted in order to bring it exactly in the
middle of the frame.
There are several options of pattern centering procedure. The default method of patterns
centering is based on the analysis of the central beam. The routine is launched by clicking on
the “run centering” button in the top right corner. After the patterns are centered, the original
diffraction patterns are placed on the left side, and the shifted patterns are on the right. At the
bottom of the window two bar plots appear – the shift vector x and y coordinates. The user
can scroll through the tilt sequence using the slide bar at the low part of the window,
monitoring the centered patterns at the right hand side.
At the bottom of the shifted tilt series area there is a button selecting the interaction mode.
The default interaction mode is 1: zooming. Diffraction patterns can be zoomed in using the
right mouse button.
If some patterns appear shifted wrongly, using the automatic procedure, this can be corrected
by manually setting the central beam position. First it is recommended to zoom a diffraction
pattern to ensure the correct positioning of a marker. Then the interaction mode should be
changed to 2: mark beam center. In this mode the user can set the pattern center by left button
mouse click on the appropriate position. Once a position is selected – a yellow cross appears
at the point. If, by error, several positions are marked, the last given will be taken as active.
This (active) position is listed in the manual center points tab.
In order to take the selected positions into account – in the general tab, manual input selection
area, use manual central points box has to be checked. Then the run centering button will call
the centering routine which would center all patterns based on the transmitted beam shape,
expect for the patterns with the yellow marked central points.
14
15
If during diffraction data collection a beam stopper was used – the user cannot set the position
of the central beam precisely. In this case for the centering symmetry equivalent reflections –
Friedel pairs – should be used. The interaction mode should be changed to 3: mark Friedel
pairs. Then a pair of symmetry equivalent reflection should be selected by left button mouse
click (a green cross appears at the marked position). Simultaneously a list of marked
reflections appears in the Friedel pairs tab. In the general tab use manual Fridel points box
has to be checked. With this set of parameters all patterns will be centered using the central
beam except for the pattern where the equivalent reflections we selected. In order to propagate
the shift vector from one frame to the complete tilt series use beam stopper mode should be
checked. Now, having the beam stopper mode active and only one Friedel pair selected, the
run centering will shift all patterns using the same shift vector calculated from the Friedel
pair.
Usually the approach of the shift vector propagation through the complete tilt series is a valid
strategy for manually collected diffraction data. The patterns typically do not move much as
long as a pattern was not intentionally or erroneously shifted by the user during the data
acquisition. In this case an additional Friedel pair can be selected at the slice corresponding to
the first pattern of the new shift vector and the centering procedure run as described with the
use beam stopper mode checked.
If no beam stopper mode is used, and manual center points as well as Friedel pairs are present
in one pattern, both being checked, manual center points will override the Friedel-pair
centering.
Once the user is satisfied with the centering results accept button should be selected at the
bottom right area of the window. A new MRC data stack is created, which is reflected in the
Data Inspector field (on the left). The file name is extended by a “_sh” suffix. If necessary
this file can be saved, otherwise it will be used for further processing and deleted after the
program will be closed.
15
16
7.3. Tilt axis determination / rotation to the tilt axis
To ensure accurate 3D reconstruction of the data the precise azimuthal position of the tilt axis
within electron diffraction patterns is necessary. Caution: it is assumed that the tilt axis
position within a tilt series is the same for all diffraction patterns.
The procedure of the tilt axis determination is called by clicking the icon Refine Tilt Axis or
from the menu 2D functions>Refine Tilt Axis. On the click a dialog window Search or rotate
to tilt axis appears. The position of the tilt axis is measured from the horizontal (is a standard
Cartesian coordinate system X to the horizontal axis, and Y to the vertical). i.e. 356° means 4°
below the horizontal.
The tilt axis position can be stored and recalled from MRC header. A user can freely select a
reasonable value for the tilt axis and put it into the manual input box. When the exact position
is not known or needed to be refined, search for the tilt axis routine has to be started. A user is
more flexible using the manual search routine, where the whole search can be confined to
reasonable ranges and searching steps. Automatic search routine uses specific preset
parameters and may take longer.
The search for the tilt axis is based on the assumption that for the correct tilt axis value
(correct diffraction geometry for 3D reconstruction) the reciprocal volume should contain a
coherent 3D lattice. The coherent lattice should produce a clear well-defined pattern in
stereographic projection. If the position of the tilt axis is wrong, the 3D reciprocal lattice is
twisted, and the stereographic projection is blurred. Therefore the “sharpness” and the
“brightness” of the stereographic projection can be used as criteria for the tilt axis search.
16
17
The three stereographic projection above show in (a) a blurred image for a complete wrong
tilt axis, in (b) a tilt axis not far away (here 10°) from the correct axis and in (c) a clear lattice
for the correct tilt axis. 1
a)
b)
c)
You find all stereographic projection images in JPEG format in a folder called
FILE_NAME_tilt_angle_search next to your MRC input file. The result of your manual or
automated search is shown in the plot below.
Actually we take the highest value of the variance profile. If you have more than one clear
peak in the plot or the maximum profile differs from the variance profile, please start manual
searches in all regions and compare the stereographic projections to each other.
After a tilt series is rotated to make the tilt axis vertical, a new MRC file with the suffix
“_ro***” with the tilt axis position is created.
1
The images were taken from a strong BaSO4 dataset. If you have few, weak reflections the stereographic
projection might be not so detailed but still accurate enough for the search process.
17
18
7.4. Reconstruction of the volume data
Centering and in-plane rotation to the tilt axis steps prepare the data for the diffraction volume
reconstruction. The data volumes are often very large and can cause memory issues, it is often
appropriate to bin the data before creating a diffraction volume.
The reconstruction of the volume is done by pressing the Interpolate 3D icon, or selecting in
the menu 2D functions > Interpolate 3D command. A volume MRC file is then produced with
the suffix “_re” (originating from “reconstructed”).
18
19
8. The 3D viewer
For the reconstructed volume file 3D functions become available: 3D viewer, find peaks, find
cell, and integrate reflections. The 3D viewer opens four windows with the volume data
projected along different directions. In the menu bar of the 3D viewer a user can select
Experimental Data, Found reflections, Cell, and View functions.
Each of the windows show a different projection of the diffraction volume. Orientation of the
volume within upper left, lower left and lower right windows are predefined directions. The
volume shown in the upper right window can be rotated freely using the left mouse button.
Within the preset orientation windows the image can be zoomed by clicking the left mouse
button and while keeping it pressed moving the mouse towards the centre of the image or in
the opposite direction. Alternatively the images can be zoomed by rotating the mouse wheel.
Within the non-orientation preset window (upper right) the image can only be zoomed by the
mouse wheel. The user can toggle between the four windows view and one large window
view by placing the mouse cursor over the desired window and pressing the space bar of the
keyboard.
Experimental Data
The Experimental Data drop-down menu offers the visualization options choice for the 3D
data. ADT3D supports volume rendering, which can be configured via the Experimental Data
-> Volume Rendering menu.
For each dataset a transfer function (grey values or colored) can be saved, loaded or changed.
The default transfer function is grey scaled and should fit mostly all experimental dataset. Via
Experimental Data -> Volume Rendering -> Edit -> Load / Save Transfer Function (TF) you
can load some other transfer functions or save your own transfer functions.
19
20
Experimental Data -> Volume Rendering -> Adjust -> Windowing allows you to change the
view on your data. On the left hand side you see the default settings, where the complete
value range [0, 5699} is transferred to [0,256] for viewing. Since in this example almost all
values over 2000 are null, you can reduce the right border of the range using the right mouse
button. This will map the new range in a better way to [0,256] and you will get more contrast
in the 3d space.
Experimental Data -> Volume Rendering -> Adjust -> Transfer allows you to change the hue,
saturation, value or alpha value for each map value [0, 256]. First, try to change the alpha
value. If you see all the necessary information, enhance the visualization change or add new
hue values.
20
21
Found reflections
The Found reflections drop-down menu offers the visualization options choice for the
reflections. The two first parameters – min distance cut off and max distance cut off are related
to the find reflections parameters.
Found elfections can be shown in different ways: show reflections full option colors all areas
assigned to as reflections. The centers of the flectrion can be visualized using different
positions: center positions corresponding tohe maximal intensity values, geometrical
reclection centers (geometrical mean coordinates), and weighted geometrical mean values.
21
22
Show reflections full
Max value
Mean value
Weighted mean value
22
23
Cell
The Cell drop-down menu sets the visualization options for the unit cell vectors once they are
found. Two cells can be shown simultaneously using the second cell display option. Cell
coordinate system option visualizes cell basic vectors color-coded as a* (red), b* (green) and
c* (blue). Multicell option allows visualizing a reciprocal lattice built using the defined vector
basis. The number or repetition vectors in each direction can be specified using the configure
multicell option.
23
24
View
The View option allows toggling between the orthographic and perspective projection of the
diffraction volume.
24
25
9. 3D functions
When a volume MRC file is created or opened a selection of 3D functions – peak search, cell
determination and peak integration become active. These routines should be performed in the
presented order – one after the other.
9.1. Peak search
The automatic cell search procedure starts with a search of peaks in 3 dimensions. The
function can be called by pressing the Find peaks icon, or from the menu pressing the 3D
functions > Find Reflections.
Found reflections dropdown menu of the 3D viewer correlates with the Find peaks function
of the main window menu and Options > Find reflection parameters panel. The parameters in
the reflection parameters panel can be input either in pixels or (given the correct pixel size in
reciprocal Angstroms is available from the MRC header) in Angstroms. The area around the
transmitted central beam in electron diffraction patterns is usually not reliable for reflection
determination and therefore it is advised to exclude this area for the reflection search
procedure (cut off zero beam). Activated show min. dist of cut off option of the 3D viewer >
Found reflection menu marks the omitted area as a semi-transparent red sphere around the
central beam.
25
26
Certain tasks may require excluding high-resolution (in terms of diffraction) areas during the
reflection search procedure. This is achieved by activating the limit resolution box within the
main window menu Options > Find reflection parameters panel. The used resolution range is
then green colored.
Reflections are defined as objects having more than min. volume adjacent voxels and having
total intensity higher than a certain threshold. The values for the min. volume and the
threshold can be set within the Find reflection parameters panel. When the options of the
reflection search procedure are defined, the procedure can be started by clicking on the Find
Peaks icon of the main window menu.
In the bottom log panel of the main window the number of reflections found is displayed. For
the case presented 985 reflections were found. When the show reflections full option is
switched on reflections are shown in the 3D viewer with blue markers.
The next processing step includes calculation of difference vectors for the found reflections.
The number of difference vectors can be estimated as n2 of the number of the reflections
found. Generally 1000-1500 reflections producing around a million difference vectors should
be enough to deliver unit cell vectors. Therefore if the number of found reflections is too
large, the user should go back to Find reflection parameters panel and either increase the min.
volume value, or the threshold value. Both actions are working in the same direction –
reducing the number of reflections.
Reflections are found as sets of adjacent voxels with a total intensity above a certain
threshold. In principle there are different ways to calculate the coordinates of these
26
27
reflections: just taking the voxel with the highest intensity out of the set, taking geometrically
mean value of the set, or weighted (through the intensities) mean value. 3D viewer offers
displaying reflection centres found according to these different approaches by selecting the
appropriate option in Found reflections > reflection centres menu. Normally, these
coordinates do not differ significantly.
Sometimes several strong reflections are placed one next to each other, so the simple intensity
threshholding considers them as a single reflections. This may be problematic for the
subsequent unit cell parameters determination procedure as these reflections will deliver false
coordinates not belonging to the lattice. Alternatively, very small strong spots can be a refult
of a hot spot, thus also diminishing the data quality. To exclude these reflections an additional
option is available – set maximal and minimal volume for a reflection.
27
28
9.2. Manual assessment of the unit cell vectors
The three reciprocal vectors are coded as red, green and blue colours. These correspond to the
reciprocal unit cell vectors a*, b* and c*. The information about the unit cell directions
appears in the properties area (right side) under the header information. As default the vectors
are set to x, y, and z directions. In the free rotation window (upper right) the user can select a
specific orientation and set this orientation to the a* reciprocal vector by pressing shift+a
button combination on the keyboard. Consequently, the volume in the lower left window (red
vector projection) will orient along the selected direction. Consequently in the base vectors
coordinates list the first vector coordinates are changed. Applying the same strategy to the b*
and c* directions (rotate within the free rotation window and press shift +b, shift+c) the user
can define three vectors of the unit cell. The vectors coordinates in pixels are presented in the
cell information panel.
Within the reciprocal space panel the user can switch between the pixel and Angstrom
representation of the vector lengths. Cell parameter lengths in the reciprocal space (and
therefore consequently in pixels or in reciprocal Angstroms) and the angles are presented in
the panel. These values of the vector lengths can be changed freely; the coordinates of the cell
vectors are adjusted accordingly. The length of the three vectors can be scaled by a selected
factor by pressing the Scale button. The overlap of the created unit cell vector set and the
diffraction volume can be visualized by pressing the Show button at the bottom of the cell
information panel.
The unit cell can by displayed within the diffraction volume data as a single cell having the
View > Cell display option of the 3D viewer active, or as a lattice by activating the View >
MultiCell option.
As soon as an appropriate unit cell vectors set is created it can be saved by clicking the Save
CELL file icon in the main menu. Cell vectors are saved in a file with the “.cell” extension
(see Appendix for file format description).
28
29
9.3. Automatic unit cell determination
The approach described above demonstrated a manual cell parameter determination procedure
based on the visual selection of the appropriate reciprocal space directions. In this section the
automated cell parameter determination routine is described in details.
Pressing the Find Cell icon of the main window starts the automatic unit cell parameters
determination based on the found set of peaks. After the procedure is finished, a Difference
vector space viewer window opens showing a half of the difference space volume (the other
half is symmetry equivalent) and found coloured clusters within the volume. The centres of
detected clusters are marked by small red spheres. These spheres represent nodes of the
reciprocal lattice. Three shortest non-coplanar vectors towards cluster centres are found
automatically and are marked as a* (red), b* (green) and c* (blue).
Find cell options can be set in Options > Cell calculation parameters menu of the main
window. The length can be represented either in pixels or in Angstroms. Difference vector
definition parameters allow selecting between the found reflection sets – the user can use
either the reflection centres defined by the maximal value within the reflection, geometrical
centre of mass or weighted centre of mass. The shortest difference vectors correspond to the
shortest distances in the reciprocal lattice. Very short difference vectors are usually omitted
because they are normally artifacts of calculation. The cut off can be set by activating the cut
off centre option together with the input of the threshold. Difference vectors are calculated
between all reflections. Some of them may be very long. Working with all difference vectors
is a very computationally intensive an unnecessary task. Therefore, only difference vectors
within a certain shell are considered further for unit cell vectors calculation. The size of this
shell is defined by the limit resolution distance (either in pixels of in Angstroms).
This parameter is very important for the unit cell vector determination. Below a situation is
demonstrated when the distance is set to a too low value (left side). The increase of the
distance (middle and right images) covers larger volume and therefore gives more flexibility
for the unit cell vectors determination.
29
30
Two parameters are used for the clustering routine analysing the different vector space
combined in the neighbourhood definition group: radius and min. points. As the reflections
are not distributed homogeneously, but sit mostly on the nodes of a 3D lattice, the difference
vector space must have the same periodicity, but strongly enhanced, especially for short
vectors. In a way, the difference vector space can be considered as an autocorrelation of the
reciprocal lattice. The three shortest non-coplanar vectors found in the difference vector space
should correspond to the primitive unit vector set of the original lattice. Due to geometrical
uncertainty of the reflection position (slicing error during the data acquisition, physical size of
reflection, etc.) difference vectors are organized in a lattice, but each node of the lattice is
smeared out. Data clustering should group vectors into sets corresponding (ideally) to each
node.
In ADT 3D package the clustering procedure is done using the following algorithm. Two
parameters are used to cluster the data: radius and min. points. Below the definition of the
parameters is presented schematically. Radius defines the size of the neighborhood, min.
points tells how many points should present within the neighborhood for the point to be
assigned to a cluster.
Each data set may have different distribution of the points given by size of the unit cell
(distance between the clusters), true reflection shape, crystal bending, etc. These parameters
should be adjusted for each data set. Using too large radius may lead to fusion of separate
clusters; too short radius may lead to cluster splitting. If min. points is set to a too high value,
it may happen that no clusters will be found at all as the cluster definition is not satisfied. If
the value is set too low, only a few large clusters will be found likely consisting of several
lattice nodes. It is strongly recommended to change radius and min points parameters
separately, as they strongly influence each other.
Refine cluster option was introduced in order to make the cluster more clear once they were
found correctly. Data points assigned to a cluster but placed on the outer shell of the cluster
30
31
are omitted using the given threshold (in per cent). The new centre of the cluster is then
recalculated. This procedure especially improves the coherency of the cluster lattice when the
clusters have irregular shape. Below two cluster sets are presented – originally found (left
side) and recalculated after the refine cluster procedure (right side).
31
32
9.4. Example: clustering parameter tuning
Below a data set is presented with a strong difference in the unit cell vectors. This is a case
when careful tuning of clustering parameters is needed.
Parameters set: radius 3, min points 20.
Case: Clusters along the reciprocal rods are
not resolved. Several rods are assigned to the
same cluster.
Solution: reduce min points to separate the
rods.
Parameters set: radius 3, min points 30.
Case: all rods are assigned to separate
clusters now. Clusters along the reciprocal
rods are still not resolved.
Solution: further reduce min points.
32
33
Parameters set: radius 3, min points 40.
Case: enlargement of the min points
parameter did not cause any improvement.
The rods are clearly separated though.
Solution: reduce radius.
Parameters set: radius 2, min points 40.
Case: clusters along the rows start to
separate, the neighbourhood radius is still too
large – some clusters are fused.
Solution: further reduce radius.
Parameters set: radius 1, min points 40.
Case: clusters along the rows are separated –
it is possible now to define the unit cell
vectors.
33
34
9.5. Clustering parameter tuning: statistical approach
The clustering parameters can also be selected using a systematical approach. The behaviour
of the parameters can be visualized using Options > Visualization of the menu bar. Three
different plots are allowed for visual inspection.
Below all statistical plots are presented and described.
Cluster size distribution plot
On the horizontal axis all found clusters are presented.
So, in this case 69 clusters were found. The clusters are
sorted according to their size (in voxels). The size is
plot on the vertical axis. This plot should show a
homogeneous smooth monotone trend. The smallest
clusters appearing at the beginning of the plot are those
clipped by the difference vector resolution limiting
sphere. Only a small fraction of clusters are sliced by
the by the resolution limiting sphere, and therefore they
do not hamper the unit cell vectors determination.
Radius variation plot
Since the two clustering parameters – radius and min
points are inter-dependent; one is varied while keeping
the other constant. Radius plot shows distribution of
difference vectors while keeping min points fixed (in
this case 20) and varying the radius. For each point
while keeping the constant min peaks, the radius is
varied until the point falls into a neighbourhood of a
certain cluster (based on the assumed min points
criterion). It is seen from the plot that a lot of vectors
can be assigned to a cluster with the neighbourhood
radius of approximately 1. This region of the plot
represents dense regions of the difference vector space,
i.e. points likely belonging to clusters. The outer region
of the plot covers the points which need a very large
radius to fall into a cluster group. Therefore these
points are attributed as noise. The proper choice of the
radius for the selected min points is then given by the
34
35
inflection point (around 1).
Minimum points variation plot
Minimum points plot shows distribution of difference
vectors while keeping radius fixed (in this case to 3)
and varying minimum points. For each point within a
fixed radius number of points is calculated. The initial
region of the plot corresponds to low-density regions
where within the defined area only a few points are
met. After the inflation point the plateau is observed
representing area of true clusters – a lot of difference
vectors having a similar high number of min points
sitting inside the defined radius. Therefore for the
clustering procedure, the number close to the inflection
point should be taken.
It should be noted again, that the two parameters radius and min points are dependent, and changing
them will change the behaviour of the plots.
35
36
10 Difference vector space viewer
Difference Vector Space Viewer visualizes the part of the difference vector space used for the
unit cell vectors determination. Difference vectors are shown as grey points if they are not
assigned to a cluster and threated as noise, and coloured (in random sequence) if they are
assigned to a cluster. Three automatically defined unit cell vectors are shown as red (a*),
green (b*) and blue (c*) lines crossing at the coordinate origin.
The File menu of the Difference Vector Space Viewer offers possibilities to save the found
cell file and send the cell to 3D viewer. The text field shows the unit cell parameters for the
current cell vectors. The vector lengths are shown in pixels for the reciprocal space vector set
and in Angstroms in the direct space if the units are set to Angstroms.
In the View menu of the Difference Vector Space Viewer the user can select different
visualization options. Cluster points option colour all difference vectors assigned to found
clusters. Activation of Noise points visualize all difference vectors (grey points) which were
not assigned to any cluster and represent noise in the data. Cluster option shows centres of
found clusters as small red spheres. Additional cluster option visualizes extra clusters created
by the user – at the beginning there are only automatically found clusters, therefore no
additional clusters exist.
In the Difference Vector Space Viewer the volume can be rotated using left mouse button.
Pressing Escape button on the keyboard changes the visualisation mode into editing mode. In
the editing mode the clusters can be added, deleted etc. Whenever there is a need to rotate the
volume, by pressing the Esc button the mode can be switch back to rotation. The mode can
also be changed by pressing the view > toggle mode button.
A certain cluster can be selected (a 3D box is placed around it) by clicking on it. It is easier to
handle the clusters when only cluster points and noise points are blacked out. Keeping Shift
button of the keyboard pressed several clusters can be selected. When two clusters are
36
37
selected an additional text box appears in the menu bar on the right side, showing the distance
between the two selected clusters and the angle between the corresponding vectors. When the
third vector is selected, parameters of the unit cell build on these three vectors are shown in
the text box. Any three selected vectors can be defined as a new basis set by pressing the tools
< set cell button. Pressing the tools < find cell button recalls the automatic cell determination
routine for the available cluster set and delivers the initial cell vector basis.
A selection of tools is provided in the tools drop-down menu. Tools menu of the Difference
Vector Space Viewer can be best used in the editing mode. The origin of the basis vector set
can be shifted to any cluster, by selecting the cluster and choosing Tools > Centring > Set to
Centre option. The back sift of the origin is achieved by Tools > Centring > Centre to Origin
command.
A list of options allows adding reciprocal lattice nodes to the existing cluster set. All these
functions are available from Tools > Add Clusters menu.
“1/2”: creates a node in the middle between two selected existing nodes;
“1/3”: creates two nodes between two selected existing nodes spaced equidistantly;
“double”: creates a node with a double distance from the lattice origin along the
direction given by a selected node;
“invert”: creates a node with the coordinates opposite by sing to a selected node;
“add family”: adds a nodes set to the cluster set with the origin on a selected cluster;
“undo all”: removes all newly created nodes leaving only found clusters.
37
38
38
39
11 Transformation of the unit cell
The three basis vectors of the unit cell are found automatically based on the cluster set as
three linear independent vectors with the shortest distance from the origin. Niggli cell
reduction procedure is performed on these vectors. In the example presented below the
primitive unit cell has a metric of 14.08A, 12.70A, 5.50A, 102.1°, 90.5°, 101.9°. Based on
this metric a higher symmetry than triclinic is possible. Possible cell transformations can be
found in the Tools < analysis < conventional settings drop-down menu.
Possible cells are listed sorted according to the figure of merit (based only on the unit cell
metric, no reflection symmetry is infolved at this point). The first set of vectors has a figure of
merit 0 – this is the cell as it originally found by the programm. The next line represents the
triclinic cell in the standard settings – with the lengths of the vectors sorted and all angles
under 90°. The following line shows a centered monoclinic unit cell with the lattice
parameters of 24.83A, 5.51A, 14.08A, 90.5°, 102.3°, 89.6°. Thus, the final cell has a
monoclinic metric and C-centered lattice.
Below the centered unit cell vactors are ploted within the difference vectors of the centered
lattice: the thrue vecors do not point to a cluster.
39
40
Even if the lattice is centered it is recommended to first index refelctions using the primitive
lattice and then recalculate the indices of the refelctions within hkl file.
Once the correct/centered cell is found it can be sent to the 3D viewer, it can be saved.
Subcequent indexation of the refelctions will be done using the currently selected unit cell
basis.
40
41
12 Extraction of HKL Intensity data set
Once the unit cell basis vectors are defined, the set of found reflections can be indexed and
intensities assigned to reflections can be extracted. A lattice is built based on the basis cell
vectors. When a lattice node comes close to a found reflection – it is given the nodes indices.
The intensity is calculated as a sum of all voxel intensities assigned to the reflection. Note, at
the moment only found reflections are integrated. So, after you found unit cell vectors for a
selected set of reflections you may consider researching for reflections in order to include
also weak spots for subsequent integration.
The most critical parameters for the reflection indication and therefore proper integration can
be found in the options < indexing parameters menu. In this menu the user can set the
acceptable indexing error for each crystallographic direction in terms of fraction of the unit
cell vector length. The default values are 15% in all three vector directions.
The indexing and intensity integration procedure can be called by pressing the Integrate
reflections (HKL) icon of the main window menu. Two windows pop up after the integration
procedure. The first window represents the evaluation charts of the indexed reflections. The
top left chart (Indexed) shows percentage of the reflections indexed sorted according to the
volume of the reflections. Here, the indexing procedure performed a medium quality job –
less than 70% of total number of found reflections was indexed (color-coded yellow – from
60 to 80 % bar). Among them very small reflections with the volumes fewer than 40 voxels
were indexed particularly poor – only 60 % out of them were assigned an index. On the
contrary the largest reflections with the volume of more than 80 voxels more than 80% of
reflections were indexed (color-coded green).
41
42
Different displacement plots are shown for the indexed reflections. The prots show the
indicated and not indicated reflections plot versus the displacement. In the plots below most
indexed reflections have short displacements from the exact position of the lattice node. The
threshhold for this displacement was defined in the indexing parametr menu.
Generally at this point the user should take care that most of reflections are indexed,
especially those placed close to a lattice node. Here the user should observe a fading plot
showing that there are only few reflections with a high displacement.
42
43
Together with the evaluation charts a window showing the reflection intensity appears. In this
window h k l Intensity and sigma (estimated as a square root of the intensity value) are
represented.
In order to save the hkl file the user should select the save standard HKL file option from the
File menu of the main window.
Intensity data is written out in a standard crystallographic 3i4, 2f8.2 format. When the data set
contains high intensity values which go over 8 digits, the program automatically changes
format into 3i4, 2f8.1 format to avoid clipping of strong reflections. When further space is
needed to write out the intensities, the format is automatically changed to 3i4, 2f8.0. Further
reduction can be done by division by 10, 100, etc. If a format has to be changed a message
appears in the log panel. Below an example of hkl file is shown. This filed can be used as
input for crystallographic structure solution programs like SIR, provided the atomic scattering
factors for electrons are available.
43
44
An extended hkl file does not follow the standard crystallographic format and includes
additional information about the reflections.
The user is generally free to select any cell defined by reciprocal basis vectors, but for
crystallographic computations it is necessary that the reciprocal vector basis is right handed
(i.e. the determinant of the vector matrix is positive). When the matrix is no positive a
warning appears in the log panel:
It is then the responcibility of the user to bring the cell to the correct settings.
44
45
13. Appendices
13.1 ADT3D keyboard shortcuts and mouse keys
The following table gives an overview on all available keyboard shortcuts and mouse
interactions.
Ctrl + O
Ctrl + S
Ctrl + Q
Ctrl + A
Ctrl + B
Ctrl + W
Shift + F4
Ctrl + M
Ctrl + B
Ctrl + R
Ctrl + 2
…
3D Viewer
Esc
Space
A
B
C
Alt + A
Alt + B
Alt + C
Shift + A
Shift + B
Shift + C
3D Viewer move mode
middle mouse button
left mouse button
mouse wheel
3D Viewer select mode
left mouse button
Open a MRC file
Save active MRC file
Quit ADT3D without saving / prompt
Show ADT3D About dialog
Show Qt about dialog
Close the current dataset
Close current window
Show MRC header info in the right properties window
Rebinning the active image stack
downsample the active image stack using a Gaussian filter
Open the 2D viewer for the active dataset
…
Toggle between move mode and select mode
Toggle between four window and single window view
rotate scene to view along cell vector 1 (red)
rotate scene to view along cell vector 2 (green)
rotate scene to view along cell vector 3 (blue)
save the actual marked reflex as cell vector 1 (red)
save the actual marked reflex as cell vector 2 (green)
save the actual marked reflex as cell vector 3 (blue)
store actual view direction as cell vector 1 (red)
store actual view direction as cell vector 2 (green)
store actual view direction as cell vector 3 (blue)
move the scene
rotate the scene
zoom in / out
select a reflex
45
46
13.2. MRC file format as used in the software
The MRC file is a file with extension .mrc. It contains a primary header and an extended
header as described below, followed by the data. The file format is derived from the MRC file
format which was originated at the Medical Research Council in Cambridge, England.
The MRC format can contain a series of images in a single file. The format consists of:
A primary header. A 1024 byte section.
An extended header. Additional information about the individual images.
Image data.
Note: There are two versions of the file format. The shorter version is not completely
adhering to SI units (meters, radians), the longer version has as added value whether SI
Units are adhered to.
The primary header. Important values for TrueImage are high-lighted.
Data type
Name
Byte
position
Comment
integer (4-byte)
nx
0
number of colums
integer
ny
4
number of rows
integer
nz
8
number of sections (i.e. images)
integer
mode
12
data type, 1 = pixel value stored as short
integer
integer
nxstart
16
lower bound of colums
integer
nystart
20
lower bound of rows
integer
nzstart
24
lower bound of sections
integer
mx
28
cell size in Angstroms (pixel
spacing=xlen/mx)
integer
my
32
integer
mz
36
4-byte floating point xlen
40
4-byte floating point ylen
44
4-byte floating point zlen
48
46
47
4-byte floating point alpha
52
4-byte floating point beta
56
4-byte floating point gamma
60
integer
mapc
64
integer
mapr
68
integer
maps
72
4-byte floating point amin
76
4-byte floating point amax
80
4-byte floating point amean
84
2-byte integer
ispg
88
space group number (0 for images)
2-byte integer
nsymbt
90
number of bytes used for storing symmetry
operators
4-byte integer
next
92
number of bytes in extended header. This is
an important number. It defines the offset to
the first image.
2-byte integer
dvid
96
creator id
char (byte)
extra[30]
98
extra 30 bytes data (not used)
2-byte integer
numintegers 128
number of bytes per section in extended
header
2-byte integer
numfloats
130
number of floats per section in extended
header
2-byte integer
sub
132
2-byte integer
zfac
134
4-byte floating point min2
136
4-byte floating point max2
140
4-byte floating point min3
144
4-byte floating point max3
148
cell angles in degrees
mapping colums, rows, sections on axis
(x=1,y=2,z=3)
extra 28 bytes data
47
48
4-byte floating point min4
152
4-byte floating point max4
156
2-byte integer
idtype
160
2-byte integer
lens
162
2-byte integer
nd1
164
2-byte integer
nd2
166
2-byte integer
vd1
168
2-byte integer
vd2
170
4-byte floating point
tiltangles[9] 172
For TrueImage the identification is 257
divide by 100 to get float value
used to rotate model to match rotated image
4-byte floating point zorg
208
origin of image; used to auto translate model
4-byte floating point xorg
212
to match a new image that has been
translated
4-byte floating point yorg
216
4-byte integer
nlabl
220
char
data[10][80] 224
number of text labels with useful data (0-10)
10 text labels with 80 characters
The extended header. Total number of extended headers (one for each image) is 1024.
Please note: Some values have rather odd numbering. That is because prior usage determined
that certain values were fixed too low and the addition of more types dictated the necessity for
numbers below, while 0 is generally avoided. The 0 is typically an undefined number.
Numbers for microscope aberration between parentheses give the level of the aberration.
Name
Byte
position
Comment
a tilt
0
Alpha tilt in degrees
b tilt
4
Beta tilt in degrees
x stage
8
Stage position in um
y stage
12
z stage
16
x shift
20
y shift
24
Image shift position in um
48
49
defocus
28
Defocus in nanometers (note, in MRC standard it is
micrometers)
exposure time
32
mean intensity
36
tilt axis angle
40
pixel size
44
magnification
48
Microscope type
52
Tecnai 10 = -2, Tecnai 12 = -1, Tecnai 20 = 1, Tecnai 30 =
2, for Titan add 10 to HT equivalent
Gun type
56
W = -2, Lab6 = -1, FEG = 1
Lens type
60
HC = -3, BioTWIN = -2, TWIN = -1, STWIN = 1,
UTWIN = 2, XTWIN = 3, CryoTWIN = 4
D number of
microscope
64
High tension (kV)
68
Focus spread /
diffraction lens
value
72
MTF
76
Starting Df
80
nm in non-SI, M in SI
Focus step
84
nm in non-SI, M in SI
DAC setting
88
Spherical
aberration
92
mm in non-SI, m in SI
Semi-convergence
96
mrad in non-Si, rad in SI
Info limit
100
nm-1 for non-SI, m-1 for SI
Number of images
104
Image number in
series
108
Coma (3) X
112
nm in non-SI, m in SI
Coma (3) Y
116
nm in non-Si, m in SI
Astigmatism (2) X
120
nm in non-SI, m in SI
Astigmatism (2) Y
124
nm in non-Si, m in SI
Astigmatism (3) X
128
nm in non-SI, m in SI
Image pixel size in nanometers
Focus spread for TrueImage acquisition /
Diffraction lens value in percent, for diffraction
tomography
49
50
Astigmatism (3) Y
132
nm in non-Si, m in SI
Camera type
number
136
Camera position
140
WA = 1, MSC = 2, GIF = 3
Spherical
Aberration (4)
144
m
Star Aberration (4)
X
148
m
Star Aberration (4)
Y
152
m
Astigmatism (4) X
156
m
Astigmatism (4) Y
160
m
Coma (5) X
164
m
Coma (5) Y
168
m
Three Lobe (5) X
172
m
Three Lobe (5) Y
176
m
Astigmatism (5) X
180
m
Astigmatism (5) Y
184
m
Spherical
Aberration (6)
188
m
Star Aberration (6)
X
192
m
Star Aberration (6)
Y
196
m
Rosette Aberration
(6) X
200
m
Rosette Aberration
(6) Y
204
m
Astigmatism (6) X
208
m
Astigmatism (6) Y
212
m
SI Units
216
0 if false, 1 if true
50
51
13.3 CELL file format
At the moment two different cell file format are supported: binary and ascii. The binary cell is
a 3x3 matrix with pixel coordinates (floating point 32 bits precision) in reciprocal space in the
a *x a * y a *z
format: b *x b * y b *z
c *x c * y c *z
The cell coordinates in the ascii file format are much more intuitive and can be read by user
directly. The format is:
# ADTCELLVERSION 2
# reciprocal space cell vectors (pixels)
a1* a2* a3*
b1* b2* b3*
c1* c2* c3*
# reciprocal space cell (pixels, deg)
|a*| |b*| |c*|
* * *
# direct space cell (A, deg)
|a| |b| |c|
51
52
13.4 Diffraction pattern calibration
It is generally assumed that once the camera length has been calibrated using a known
standard material, the pixel size (in 1/nm) can be calculated for every diffraction pattern
acquired at this camera length. This holds as long as the convergence of the electron beam
used for diffraction experiment is either the same or is being accounted for. In selected area
diffraction experiments the electron beam is usually parallel enough to neglect the
convergence effects. However, in nano electron diffraction mode, the diameter of the beam
fallen onto the sample is usually between 20 and 100 nm. In this regime certain convergence
of the beam is introduced, and as the result, diffraction patterns appear out of focus. These
patterns are then additionally focused using diffraction lens. Additional focusing of diffraction
patterns often causes rotation and expansion/contraction of the whole pattern. As a result the
effective camera length and pixel size in 1/nm determined for the parallel beam conditions
cannot be used for nano beam diffraction. The error in dhkl measurement from a diffraction
pattern acquired at strongly convergent conditions can be as large as 15%.
The value of pattern expansion/contraction depends on the effective convergence of the beam.
It is rather difficult to measure the semi-convergence angle. It appeared that the convergence
and therefore the effective camera length are strongly correlated with the settings of the
diffraction lens used to additionally focus the pattern. Therefore, a fine camera length
calibration procedure can be performed correlating the diffraction lens excitation and the
effective pixel size.
Below a plot showing dhkl of a selected reflection plotted against the different values used for
diffraction lens excitation is presented. These values show a linear trend in a large region.
Therefore, now, knowing the nominal camera length and diffraction lens setting for an
arbitrary pattern, the correct pixel size in 1/nm can be found using the linear trend.
It is handy to perform these calibrations for different camera lengths and fit in linear trend
lines. The plots should correlate the effective pixel size in 1/nm with the diffraction lens
current. The data is then can be arranged into a table as shown below.
# camera length (mm) | gradient | y cut off
52
53
250 0.0367 2.683
300 0.0314 2.198
380 0.0279 1.581
560 0.0192 0.936
750 0.0157 0.654
1000 0.0087 0.604
ADT3D package has a possibility to perform fine calibration based on this table. The data has
to be measured for the microscope used and input into the fineCalibration.txt file which
should be in the same folder where the main executable ADT3D file is. When the fine
calibration file is not available, the pixel size in 1/nm read from the MRC header will be used.
The information about the diffraction lens current can be stored in and recalled from MRC
header.
53