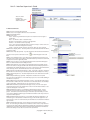
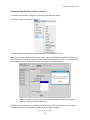
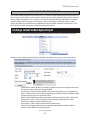
1
Interfase
Supervisors Guide
Revised August 2009
advanced solutions for career services offices
TRADEMARKS & REGISTERED PRODUCTS
The following products are registered and/or trademarked to the listed companies:
Microsoft is a registered trademark, and Internet Information Server, Internet Explorer, Windows and
Windows NT are trademarks of Microsoft Corporation.
NetScape is a trademark of NetScape, Inc.
All other names are registered trademarks of their respective companies.
CONVENTIONS
The following conventions are used in this manual:
CSO represents CSO Research, Inc.
WWW represents the World Wide Web
URLs and e-mail addresses are printed in blue and underlined.
LICENSING
With the purchase of Interfase, you are authorized to install the Interfase software on one (1) machine
for the period of one (1) year (12 months). Continued use of the Interfase software beyond this
period requires the payment of a yearly (every 12 months) license and maintenance fee. Refer to your
purchase agreement for more details about this fee.
SUPPORT
Every attempt has been made to make this documentation complete. If questions or problems do
arise, you can get technical support from CSO Research, Inc.
CSO Research, Inc.
P.O. Box 340819
Austin, TX 78734
(866) 705-4201 (toll free); ext. 1
[email protected]
Unit 1—Tools
TABLE OF CONTENTS
1.1 Activity Log........................................................................................................................................................................6
Audit Log (History)...................................................................................................................................................6
Delete Log...................................................................................................................................................................7
E-mail Log....................................................................................................................................................................8
1.2 Record Merge....................................................................................................................................................................9
1.3 Resource Library..............................................................................................................................................................11
Creating a New Resource.....................................................................................................................................11
Managing the Resource Library.........................................................................................................................13
Unit 2—Configuration & Setup Options
2.1 Setup Menu......................................................................................................................................................................16
Setup Menu Grid.....................................................................................................................................................16
Codes...........................................................................................................................................................................18
Memos.........................................................................................................................................................................20
Menus...........................................................................................................................................................................22
Forms...........................................................................................................................................................................23
Roles............................................................................................................................................................................25
Permissions...............................................................................................................................................................27
Settings.......................................................................................................................................................................28
Templates...................................................................................................................................................................35
Interview Schedules-Timeline Templates.......................................................................................................37
Interview Schedules-Timeslots..........................................................................................................................38
Document Categories...........................................................................................................................................40
Default Sorts.............................................................................................................................................................40
Key Management....................................................................................................................................................41
Work-Study Award Periods...................................................................................................................................41
Job Menu Categories.............................................................................................................................................42
Custom Fields............................................................................................................................................................43
Localization...............................................................................................................................................................45
Appointment Types................................................................................................................................................46
MonsterTrak Features............................................................................................................................................49
Check-In......................................................................................................................................................................55
Unit 3—Uploading Data
3.1 Firewall Upload...............................................................................................................................................................60
3.2 Upload...............................................................................................................................................................................62
Student Upload Format.......................................................................................................................................62
Job Upload Format................................................................................................................................................64
Job Import Format.................................................................................................................................................65
Payroll Upload Format..........................................................................................................................................65
Scheduling an Upload to Run............................................................................................................................66
3.3 Custom Student Upload..............................................................................................................................................67
Creating a Custom Student Upload Project..................................................................................................67
Running a Custom Upload Project...................................................................................................................68
Unit 4—Login & Authentication Options
4.1 Student Passthrough Authentication....................................................................................................................70
4.2 External Login.................................................................................................................................................................75
4.3 Shibboleth.......................................................................................................................................................................77
BLANK PAGE
1
Tools
Sections
Unit 1
1.1 Activity Log
Unit 1 of the Supervisor’s Guide will contain information
on the Activity Log, Record Merges and the Resource
Library.
1.2 Record Merge
1.3 Resource Library
Unit 1—Interfase Supervisor’s Guide
1.1 Activity Log
To access the Activity Log go to Tools > Activity Log. The Activity Log menu includes access to three (3)
activity logs:
·· Audit Log - for searching and viewing audit records (history).
·· Delete Log - for viewing logged information about the deletion of main records by admins.
·· Email Log - for viewing logged information about any emails sent from within Interfase.
To View and Search the Activity Logs
Audit Log (History)
The Audit Log function allows administrators to search and view the audit (history) records of main
records. Interfase logs many types of activities in Interfase that are not logged in some other fashion. For
instance, a student submitting a referral to a job is recorded as a referral so that activity is not additionally
recorded in the audit log. But, if a student simply views a job listing this activity is recorded in the audit
log. This function will basically provide a historical record of activity in your system.
Audit Activity Examples:
·· Creating and editing of all
main records
·· Students viewing jobs
·· Employers viewing
students
·· When a user logs in
·· When students view
both main records and
on-line application
Employer websites.
2
3
1
What does the audit log record contain?
Each audit log record consists of:
1. A source (who did the activity),
2. An action performed (what was done), and
3. A target (to whom the activity was performed on).
Optional
(Copyright © CSO Research, Inc. )
6
CSO Research, Inc.
There are 2 ways an Admin can access the Audit Logs:
·· Download Audit Logs - As administrator, you can search and download all audit log entries in the system.
1. Go to Tools > Activity Logs. By default, the Audit Log tab is selected.
2. Select your search criteria by selecting the Action Source (Students), Action Performed (Viewed) and Action Target (Jobs).
3. Choose a Start and/or End Date range, if necessary.
4. Click Retrieve Log.
5. A CSV file is created with the requested audit log entries that you can download and use in other applications.
Note: The Audit Log Download only pulls historical audit records. This means the results will not include any records from the current day.
··
Per Record – As an administrator, you can view the audit log for any main record in the system by clicking the A under Activity for that record. Viewing the audit log for a specific record will show both the log entries for which that record is the source and the target. For example, the audit log for a specific student might show a log entry that an Administrator (source) edited the student (target) and an entry that the student (source) viewed a job (target).
Note: When viewing audit information for a record you will initially only see the last seven days worth. You must click [History] at the bottom of the Audits section to view audit information beyond the last seven days. This information will not include any records from the current day.
Student Search Results Page:
Click the
A view the
Audit Log.
Delete Log
The Delete Log function allows administrators to search and view logged information about the
deletion of main records. Each main record that is deleted in Interfase is logged in the Delete Log. It
logs the record ID and a main piece of information about the record that was deleted. It also logs the
date the record was deleted, the Administrator who deleted the record and the counts of any linked
records that were deleted along with the main record.
(Last edited August 2009)
7
Unit 1—Interfase Supervisor’s Guide
3. A CSV file is created with the requested delete log entries that you can download and use in
other applications.
E-mail Log
The Email Log function allows administrators to search and view logged information about any e-mails
sent from within Interfase.
Each e-mail sent in the system is logged in the Email Log including packet e-mails, system event
e-mails and mass e-mails. It logs the date the e-mail was sent, the function the e-mail was generated
from (reason), who it was to, from whom it was sent, the subject of the e-mail and some additional
information regarding whether the email was processed, when and any errors encountered.
To access the Email Log,
1. Go to Tools > Activity Log and select the Email Log tab.
2. Enter a Start Date, End Date and/or Reason if necessary and click Generate Log.
3. A CSV file is created with the requested email log entries that you can download and use in
other applications.
WARNING! Clear E-mail Log:
The Clear Email Log function
allows an Administrator to
delete the entire contents
of the Email Log. This can be
useful, for instance, at the end
of each semester or the end of
a year to start with a clean log
making it easier and less time
consuming to search through.
Clear Email Log will clear all
processed entries in the log. Any
unprocessed entries will remain
because they may be related
to e-mails that are currently
queued and waiting to be sent.
(Copyright © CSO Research, Inc. )
8
CSO Research, Inc.
1.2 Record Merge
The Record Merge setup tool allows an Administrator to create Record Merge templates to easily
merge the data from a single record. For example if an Administrator wanted to print a particular
job for a student, instead of printing the Job Profile (which would include everything on the screen screening options, control information, contact information, and so on), the Administrator could select
a job template and merge/print only the relevant job information for the student.
Note: For information on creating record merge documents please see the information contained on
the Record Merge screen in your Interfase system.
To upload a new merge template go to Tools > Record Merge.
To Upload, Update, Download, or Remove Record Merge Report Templates.
STEP 1: In the Template Category section, choose a template category.
STEP 2: In the Create New Template section, type in the name of the template in the Template Name
field.
STEP 3: In the Merge File field, click the Browse button to locate the merge document that will be
uploaded and click [Upload].
(Last edited August 2009)
9
Unit 1—Interfase Supervisor’s Guide
STEP 4: Select Users. Check Admins, Students, and/or Employers to make this merge template
available to each of those respective user types.
STEP 5: Select Generate PDF (if applicable). When a record merge is generated it will by default be
produced as a Word document. If you check Generate PDF, the Word document will be converted into
a PDF document before it is presented to the user.
STEP 6: Click the Add button. The template will now appear in the Available Templates section.
Running a Record Merge from the Job Profile:
Step 1: Click the arrow
next to Print Forms to
view selections.
Step 2: Select the
template you wish to use.
Your merged report
opens in another browser
window.
Note: Along with the Admins, Students and Employers user setting in each record merge template,
permissions also play a part in which users have access to Record Merge. The users setting in each
template defines when a particular user type will have access to that template at all. But, permissions
can control whether Record Merge is available for a specific groups of user and a specific record type.
For example, you have a job record merge template that has Employers checked for users. Unless a
given employer has the permission for the “Function: Print Forms – View” for a specific record type
then even though the employer technically has access to the template they still can’t run it because
they cannot access the Print Forms link. This gives you the ability to make a record merge template
only available to particular groups of admins, students or employers.
To assign permissions for record merge functions, go to Permissions and select Forms - <form type>
(such as Job, Student, etc). In each you will see a “Function: Print Forms – View” which can be turned
on for specific roles. See the Permissions section in this guide for more information on permissions.
(Copyright © CSO Research, Inc. )
10
CSO Research, Inc.
1.3 Resource Library
The Resource Library is a function that allows administrators to upload, categorize and manage a
library of information that can be available to students and/or employers. This is a library of static
resources that can provide information about your programs, hiring or employment guidelines, forms
for various purposes or even a map to your office. You can maintain any information here that may
need to be posted and available for your students or employers.
For admins, students and employers, the Resource Library will appear as an additional section on the
Home page.
To View the Resource Library
as a Student or and Employer
Step 1: Login as a student or
employer
Step 2: In the Resource
Library section on the Home
page, click the + next to any
folder you wish to expand.
Once you have located the
desired resource click it.
Step 3: A new browser
window opens displaying the
resource.
Student Home Page – Resource Library:
The organization of resources within the library is managed by creating categories in which
documents can be stored. These categories appear in a tree, like majors and can be nested to create
main and sub-categories with documents contained in each if necessary.
TURN ON/OFF RESOURCE LIBRARY
TOOLS > SETUP > PERMISSIONS
For Admins: Menus > Administrator > Tools; For Students/Employers/Admins:
Forms>Home NOTE: The permissions for the Resource Library are on by default for
administrators but off by default for students and employers.
Creating a New Resource
To Upload, Categorize and Manage a
Library of Information (Documents)
(Last edited August 2009)
11
Unit 1—Interfase Supervisor’s Guide
STEP 1: Enter the Resource Title. In the Add Resource Item section, enter the name of the resource in
the Resource Title field. This is the name that will be displayed.
STEP 2: Select who the document will be available to. Check Student if the resource should only
be available to students. Check Contact if the resource should only be available to contacts. Select
Admin, Student, Faculty and Contact if the resource should be available to all.
STEP 3: Identify folder category. Select the folder (category) the resource will appear in by either
selecting an existing folder from the “Add To Folder” drop-down list or by entering the name of a new
folder in “Create New Folder.”
STEP 4: Click the Add Resource button.
STEP 5: Browse for document. Enter the path of the document or click the Browse button to locate the
document that will be uploaded into the Resource Library. Accepted document types are Microsoft Word
(.doc), Microsoft Excel (.xls), Microsoft PowerPoint (.ppt) or a PDF. You may also choose to enter a web address.
STEP 6: Click the Upload button.
New Resource Tip:
When a new folder is created, it will initially appear at the root level of the tree. To nest a folder,
select it and drag and drop it in the desired location. See “To re-organize an existing or folder” in the
Managing the Resource Library section for more information on organizing the Resource Library.
Once you have completed the process of creating a new resource, the resource is available in the
Manage Resource Library section under the applicable folder. It is also immediately available to
students and/or Employer contacts in Resource Library on the respective Home pages.
(Copyright © CSO Research, Inc. )
12
CSO Research, Inc.
Managing the Resource Library
Managing the Resource Library consists of editing and re-organizing existing resources and folders.
To edit a resource or folder in the Resource Library go to Tools > Resource Library.
To Upload, Categorize and Manage a Library of Information (Documents).
STEP 1: In the Manage Resource Library section, select the folder or click the “+” next to the folder
category to select the resource that you wish to edit.
STEP 2: Make the necessary changes.
a. Resource - When editing an existing resource you have the ability to change the resource title and the Available To: options. You can use the Action links to [View] the resource, [Upload] an updated document for this resource or [Delete] the resource altogether.
Use the counter
to manage how
many views
your resources
get. You may
also choose
to reset the
counter at any
point.
You cannot edit
permissions for
items in the Email
Attachments
folder.
b. Folder - When editing an existing folder you have the ability to change the folder name. You can use the Action links to [Delete] the folder altogether.
Important: If you delete a folder that has resources in it or has other folders nested underneath it,
everything contained in that folder and everything contained in any folders underneath are deleted.
To re-organize an existing resource or folder, simply select the resource or folder and drag and drop
it into the desired location. For instance, if you wanted to nest one folder underneath another simply
click the folder you want to nest and drag it on top of the folder you want to nest it underneath. This
same action applies to resources as well.
The “Sample
Resumes” folder
category was
dragged and
dropped into the
“Office Policies”
category. Now it is a
sub-category.
(Last edited August 2009)
13
Unit 1—Interfase Supervisor’s Guide
BLANK PAGE
(Copyright © CSO Research, Inc. )
14
2
Configuration & Setup Options
Sections
Unit 2
2.1 Setup Menu
Unit 2 of the Supervisors Guide will contain information
on the Configuration and Setup of your site.
Unit 2—Interfase Supervisor’s Guide
2.1 Setup Menu
Setup allows an Administrator to edit all options available in the system. In the grid below, the setup
menu items are listed including what setup functions are modified for each and an example of each item.
Note: Not all the Setup items listed below are on by default in Interfase. The grid below lists all the available
Setup options in the system. Any item you do not currently have access to can be turned on in Permissions –
Menus – Admin – Tools – Setup.
Setup Menu
Grid
Used To
Menu Item
Codes
Memos
Menus
Forms
Roles
Permissions
Example
Create a list of values (codes) for dropdown and multi-select fields.
Create instructions/messages for a given
page/section on the site.
Add a new Major or Status value.
Edit the text on the Student Login Page
to include your office phone number and
email address.
Rename menus and add tool tips.
Rename the Schedules menu to Oncampus Interviews.
Rename a field. Make a field required.
Change “Overall GPA” to read just, “GPA”
Assign validation to a field. Provide
Make the field required and have the
error message if field format is filled out
system make sure students fill out the
incorrectly.
field using a number that is 4.0 or under.
Create a new Role.
GuestStudentRole – this role might be
used to grant limited access to the site.
Turn on/off permissions to view/edit Fields, Menu Turn on the Resume Books menu tab, so
Tabs, Search Criteria, Search Results or other info. that Employers can access Resume Books.
(Copyright © CSO Research, Inc. )
16
CSO Research, Inc.
Setup Menu
Grid
Manage global system settings that affect
Settings
Templates
Timelines
(Interview
Schedules)
Timeslots
(Interview
Schedules)
Document
Categories
Default Sorts
how your system works overall.
Customize the cover pages of the various
resume packets, as well as the System
Event emails.
Create timeline templates to use on
interview schedules with common
timeline configurations. Each template
can be made up of any number of
timeline entries and you can have as many
templates as are necessary.
Create timeslots templates to use on
interview schedules with common
timeslot configurations. Each template
can be made up of any number of
timeslots and an unlimited number of
timeslots templates may be created.
Create additional document categories
and setup permissions and document
forwarding on those categories.
Set the default sort of the various search
results pages.
Key
* Determine how long a session is active
before system times out.
* Make a resume required for registration.
* Allow students to self-register.
* Turning on or off the completeness
check to see that students filled out all
required fields and/or uploaded a resume
during registration.
Turn on the system email that alerts the
Administrators that a student cancelled
an interview timeslot.
When creating a new interview schedule,
a timeline template can be selected to
automatically populate the timeline
section with predetermined sign-up
methods and corresponding dates, based
on the interview date.
When creating a new session you
can import a timeslot template to
automatically populate the interview
session with timeslots.
For example, 8am, 9am, 10am, 11am,
1pm, 2pm, 3pm, 4pm
Create a new category called Cover
Letters. Students then select a cover
letter and resume to submit to a job or
schedule.
Change the default sort for the Job
Search Results page for students -- you
want them to see the jobs listed in
descending order by the Expire date.
View the existing encryption key.
Generate a new encryption key if
needed.
The typical work-study award period
would correspond to either the dates for
an academic year or for each semester/
quarter.
Manage the encryption key information
used with student pass-through
authentication.
Work-Study
Create and manage work-study award
Award
periods. Each period consists of a Start
Periods
and an End date that defines a timeframe
for work-study awards. When work-study
awards are entered they will be linked to a
specific period.
CollegeRecruiter Manage which blog categories will appear Turn off the Financial Aid blog category if it
does not apply to your students.
under CollegeRecruiter
Cell Phone
Add, Edit or Remove Cell Phone Carriers
Cricket is a popular carrier in your area
Carriers
but is not on the carrier list, add it here!
Change
Submit Resume to Drop Resume
Localization
Change various icon or button names.
MonsterTrak
Turn on/off features, adjust mapping
Adjust mapping for Job Categories
Features
Appointment Add new appointment types, edit existing types You have a new type of appointment you
Types
would like to add.
Note: Work-Study Award Periods is only available in Student Employment module.
(Last edited August 2009)
17
Unit 2—Interfase Supervisor’s Guide
Setup Menu
Grid
Defines Job Menu Categories for the
Jobs Menu
Categories
Custom
Fields
student job search. You can have up to 10
separate categories. Each category will
appear as a separate menu option under
Jobs on the student main menu.
Examples: All Jobs; Co-op Jobs; WorkStudy Jobs
Job Menu Categories are defined based
on applicant type. For a job to appear
within a Job Menu Category, the job must
contain at least one of the applicant types
defined in the category.
Create a new field. Set the type of data
Create a new field in the student profile
entered in the field. Set requirements,
called “Are you willing to travel for work?”.
validation and permissions for these fields. Set the options for the field as Yes/No
and set it to be required.
Codes
Codes are the values in the drop-down and multi-select fields that are seen throughout the system.
Majors, skills, statuses, classification, states, ethnicity and qualifiers are all examples of fields whose
codes can be modified in Interfase.
To add a new code or modify an existing code for a drop-down or multi-select field, go to
Tools>Setup>Codes.
To view all of the available drop-down and multi-select fields click the Code Type drop-down menu.
All of the drop-down and multi-select fields (with some exceptions) in Interfase are listed.
When you select a field from the Code Type drop-down menu, the values that have been created for
this field will be displayed in the Values box.
Important: The Refresh button at the top of every Setup screen is used to apply any changes you
make in Setup to your Interfase system. Clicking Refresh on any Setup screen applies all changes
made in any Setup function. All examples listed below include clicking Refresh as a step although if
you are making multiple changes in Setup this is only required once when you are finished with all
changes.
(Copyright © CSO Research, Inc. )
18
CSO Research, Inc.
Example #1-Adding New
Values to Admin Status:
Step 1: Select the field
from the Code Type dropdown list that is to be
added.
Step 2: In the Code
Display Text box, type in
the name of the value (to
add) as it should appear in
the drop-down list.
Step 3: Select the Role
that the status will be
assigned to
Step 4: Click the Add as
New Code button.
Step 5: Click the Refresh
button.
Administrator Status Field:
Codes>Majors:
Example #2- Adding
New Majors:
Step 1: Type new major
in Code Short Name
and Code Long Name
Step 2: Make sure
Code is Active Box is
checked.
Step 3: Choose which
category the new
major will be under of
type in a new one in
Add to a New Category.
Step 4: Click Add as
New Code
(Last edited August 2009)
19
Unit 2—Interfase Supervisor’s Guide
Codes>Majors: Arrange Category Hierarchy
Example #3Rearranging Category
Hierarchy
Step 1: Open categories
Step 2: Drag-and-drop
to arrange category
hierarchy. For example,
drag College of
Communication on to
All Majors to have it submenued.
Memos
Memos are customizable text fields that appear on each page/section in Interfase.
Memos are generally used to provide instructional information about that page for the users. For
example, the student login page would have informative text on how to successfully login to the
system.
Important: The Refresh button at the top of every Setup screen is used to apply any changes you
make in Setup to your Interfase system. Clicking Refresh on any Setup screen applies all changes
made in any Setup function. All examples listed below include clicking Refresh as a step although if
you are making multiple changes in Setup this is only required once when you are finished with all
changes.
(Copyright © CSO Research, Inc. )
20
CSO Research, Inc.
Memo: Student Login Page
Example #5-Editing
Student Login Page Memo:
Step 1: Select the Role.
Where is the memo
located?
Step 2: Select the Memo
(page or section you want
to edit)
Step 3: Enter the text that
will appear in the memo.
Step 4: Click the Save
button.
Step 5: Click the REFRESH
button.
You can enter raw HTML code
in the text box or edit the
HTML code created by the
editor if you click the HTML
tab. You also have the option
to preview your Memo by
clicking the Preview Tab.
Student Login Page:
Memo: Student
Login Page
(Last edited August 2009)
21
Unit 2—Interfase Supervisor’s Guide
Menus
Select the Menus option from the Setup menu to access the Manage Menus tool. This is where an
Administrator can rename any menu and add tool tips to menus. Tool tips will be displayed when the
mouse pointer hovers over that menu.
Important: The Refresh button at the top of every Setup screen is used to apply any changes you make
in Setup to your Interfase system. Clicking Refresh on any Setup screen applies all changes made in any
Setup function. All examples listed below include clicking Refresh as a step although if you are making
multiple changes in Setup this is only required once when you are finished with all changes.
EXAMPLE #6 – Renaming
Schedules Menu &
Adding Tool Tip:
The Manage Menus tool
is divided into the five (5)
user groups of the system.
Any menu that a group
sees can be renamed.
STEP 1: Select the menu
that should be renamed
or that tool tips should be
added to.
STEP 2: In the Menu
Information box, the
menu’s current Menu
Name and Tool Tip are
displayed. These are
modified here as well.
STEP 3: Click the Save
button to save your
changes.
STEP 4: Don’t forget to
click the REFRESH button
to update the Interfase
system!
(Copyright © CSO Research, Inc. )
22
CSO Research, Inc.
Forms
The Forms option is the where an Administrator can manage each field (form item) on a form. These
changes are global. An Administrator can decide on the following options:
··
··
··
··
··
Display Text – The field name on the form (How will the field name read?).
Validation – An expression that limits the values that can be entered by a user in that field.
Failure Message – If the information entered in a field is not in the correct format, this message appears.
Required – Determine whether or not a field must be completed before a section is saved.
Required Message – If a required item is not completed, this message appears.
Important: The Refresh button at the top of every Setup screen is used to apply any changes you
make in Setup to your Interfase system. Clicking Refresh on any Setup screen applies all changes
made in any Setup function. All examples listed below include clicking Refresh as a step although if
you are making multiple changes in Setup this is only required once when you are finished with all
changes.
EXAMPLE #7 – Renaming/Validating/
Requiring the Post Date Field in the Job
Profile.
STEP 1: In the Display Text box, enter the
name of the field as it should read in the Job
Profile.
STEP 2: In the Help Tip Text, enter any tips to
assist your users in what kind of information
you would like them to enter in this field.
STEP 3: In the Validation drop down list,
select the appropriate validation for the field.
STEP 4: Enter the message that the user
receives if the field is not completed in the
proper format.
STEP 5: In the Required drop-down list, select
“Yes” to make the field required.
STEP 6: In the Required Message box, enter
the message the user receives if this field is
not completed.
STEP 7: Click the Save button.
STEP 8: Click the REFRESH button.
Post date Help Tip text will appear once a mouse is scrolled over the question mark next to the
post date:
The help tip will
show to all users
(admins, students,
employers, etc.) who
can view this field.
(Last edited August 2009)
23
Unit 2—Interfase Supervisor’s Guide
Post Date Field entered in the wrong format-Failure Message:
Post Date Field left blank-Required Message:
EXAMPLE #8 – Turning on
Password Security Field in
Student Profile (password will
show up as dots/asterisks)
In the example, we will not walk
you through the validation and
required options. See Example #7
for those steps.
STEP 1: Go to Tools > Setup >
Forms and select Student (Form
Type) and Password (Form Item)
STEP 2: Check the Password
Security box.
STEP 3: Click the Save button.
STEP 4: Go to Tools >
Setup > Permissions. Open
Student and select Personal
Information.
STEP 5: Click [Edit] next to
Confirm Password – View.
STEP 6: Check each Role that
should see this field and then
click the [Update] link.
STEP 7: Click the REFRESH
button.
(Copyright © CSO Research, Inc. )
24
CSO Research, Inc.
Password shows up as dots/astericks in Student Profile:
With the Password
(confirm) field turned on,
Interfase will verify that
the student entered the
same password into both
Password fields when
saving the record.
NOTE: Even
Administrators will see
the password as dots/
asterisks.
Roles
Roles can best be described as user groups. Each role (user group) contains its own set of permissions
in the system. Permissions are essentially the rights and access levels to each item in the system. An
Administrator can create additional roles for any group (administrator, student, employer, faculty, or
mentor). To create a new role, the Administrator first selects an existing role to copy. This creates a
clone of the existing role. The Administrator must then go into Permissions and modify the new role’s
permissions.
Important: The Refresh button at the top of every Setup screen is used to apply any changes you
make in Setup to your Interfase system. Clicking Refresh on any Setup screen applies all changes
made in any Setup function. All examples listed below include clicking Refresh as a step although if
you are making multiple changes in Setup this is only required once when you are finished with all
changes.
(Last edited August 2009)
25
Unit 2—Interfase Supervisor’s Guide
By default,
··
··
··
··
··
Administrators have two roles - Supervisor (AdminRole) and Staff (AdminStaffRole)
Employer contacts have four roles - Full Access (EmployerContactRole), Jobs and Students (JobsStudentContactRole), Jobs Only (JobsOnlyContactRole) and Pending status (PendingContactRole)
Students have three roles - Full-time (StudentRole), Co-op (CoopStudentRole) and Pending status (PendingStudentRole)
Faculty has three roles – Full Access (FacultyRole), Employers/Jobs Only (FacultyJobsRole), Students Only (FacultyStuRole)
Mentor has one role – (MentorRole)
Administrative Roles-Tools Menu Option:
By default, the following is the submenu an Administrator with a Supervisor Access level (AdminRole)
would be able to access when clicking the Tools menu option.
(Copyright © CSO Research, Inc. )
26
CSO Research, Inc.
By default, the following is the submenu an Administrator with a Staff Access level (AdminStaffRole)
would be able to access when clicking the Tools menu option.
Permissions
As discussed in the Roles section, each role contains an independent set of permissions (rights).
Permissions are divided into four (4) categories.
Turn on/off menus
Turn on/off fields or entire sections; make fields read-only
Turn on/off fields for the search criteria or search results screens
Turn on/off Activity records (placements, referral, observation, etc.)
Important: The Refresh button at the top of every Setup screen is used to apply any changes you
make in Setup to your Interfase system. Clicking Refresh on any Setup screen applies all changes
made in any Setup function. All examples listed below include clicking Refresh as a step although if
you are making multiple changes in Setup this is only required once when you are finished with all
changes.
Turning Off Fields
The student profile has a field labeled “Career Goal,” which is located in the Additional Information
section. If you do not want this field available, you can turn it off from the student view.
To turn the Career Goal field off, go to TOOLS > SETUP > PERMISSIONS, click the “+” sign next to Forms
and click the “+” sign next to Student. All of the sections within the Student Form are displayed. Select
Additional Information. Once selected, this section turns bold to indicate where you are in Permissions
(on the left side).
(Last edited August 2009)
27
Unit 2—Interfase Supervisor’s Guide
Each field permission
is listed twice, one with
an Edit option and
the other with a View
option.
EDIT: To make a field or
section read-only, just
take away the role’s
permission to Edit.
VIEW: To turn off a field
or section, take away
the role’s permission to
View AND Edit.
Roles
The Section
permissions
are for the
section you
are in. (For this
screenshot, you
are in Student
Additional
Information
section).
Note: If you wish to turn off an entire section or make it view only, you only need to change the
permission setting for the Section permission. You do not need to change the permissions for every
field in the section.
Settings
The Settings setup tool allows an Administrator to manage the global system settings. Click the [Edit]
link next to the setting name to see a description of the function.
Important: The Refresh button at the top of every Setup screen is used to apply any changes you
make in Setup to your Interfase system. Clicking Refresh on any Setup screen applies all changes
made in any Setup function. All examples listed below include clicking Refresh as a step although if
you are making multiple changes in Setup this is only required once when you are finished with all
changes.
Edit a System Setting
STEP 1: Click the [Edit] link
to view a description of the
setting.
STEP 2: Enter a value in the text
box. The description of the
setting contains information on
what values are applicable for
each setting.
STEP 3: Click the [Update] link.
STEP 4: Click the REFRESH
button.
(Copyright © CSO Research, Inc. )
28
CSO Research, Inc.
Settings Defined:
Admin:
•
•
•
•
Admin - Career Events - Registration E-mail Address: Enter LinkedContact or RegistrationContact. This determines what e-mail address will be used when an administrator sends an e-mail from a career event registration.
Admin - Disable Required Fields Default: Enter True or False. True will automatically check the Disabled Required Fields function.
Admin - Home - Maximum Number of Last Viewed Records (per category): Enter a number of records to keep of last viewed profiles.
Admin - Session Timeout: Enter a number of minutes. This equals the amount of time the system will allow an open session to sit idle before automatically logging out.
Employer:
•
•
•
•
•
Employer - Job Posting Payment - Fiscal Year Start: Enter the Month that your fiscal year begins. Valid entry is a number that equates to a month - 1 to 12. This value is used for job payment check requests. A check request is allowed once per quarter and this value is used to determine the dates for these quarters.
Employer - Job Posting Payment - Use CSO CC Processing: Enter True or False.
Employer - Job Posting Payment Amount: Amount charged for each job posting.
Employer - Job Posting Payment Methods: Payment types allowed for employers. (Options - Cash|Check|Credit Card|P.O.
Employer - Jobs - Self-Referral Employer E-mail Address: Enter LinkedContact or JobContact. This function tells the system which e-mail address to use for sending the employer e-mail. LinkedContact will use the e-mail address contained in the profile of the contact linked to a job. JobContact will use the e-mail address contained in the contact information section that is part of the job profile. This function if not valid unless Self-
Referral Employer E-mail is set to True.
(Last edited August 2009)
29
Unit 2—Interfase Supervisor’s Guide
•
•
•
•
•
•
•
•
•
Employer - Login URL: Enter the employer URL for your system. The employer URL for your system should be the employer root address of your Interfase system (ie. http://www.
myinterfase.com//employer).
Employer - Registration - Allow Self-Registration: Enter True or False. True will turn this function on and False turns it off.
Employer - Registration - Click here to register text: Enter text to be used as registration link.
Employer - Registration - Completeness Check: Enter True or False. True will turn this function on and False turns it off. This function will require an employer to complete the required fields in their profile before they can submit it to your office.
Employer - Searching Students - Resume Required for Inclusion: Enter True or False. True will turn this function on and False turns it off. This determines whether students available to employers in a student search must have a resume.
Employer - Session Timeout: Enter a number of minutes. This equals the amount of time the system will allow an open session to sit idle before automatically logging out.
Employer - Status Change - Employer Closes Job: Enter the exact text of the Job Status you want a job to be set to when an employer uses the Close Job function to close a job. This setting is only valid if the Close Job function has been turned on for employers using permissions.
Employer - Status Change - Employer Edits Job: Enter the exact text of the Job Status you want a job to be set to when an employer saves edits. If you leave this field blank, a job will retain it’s current status following an employer edit.
Employer - Status Change - Employer Edits Profile: Enter the exact text of the Contact Status you want a contact to be set to when the contact edits their profile. If you leave this field blank, a contact will retain it’s current status following an edit.
•
•
•
•
Faculty - Login URL: Enter the faculty login url for your system.
Faculty - Screen Jobs by Major: Enter True or False. True will turn this function on and False turns it off.
Faculty - Screen Students by Major: Enter True or False. True will turn this function on and False turns it off.
Faculty - Session Timeout: Enter a number in minutes.
•
•
•
•
•
Mentor - Login URL: Enter the mentor login url for your site.
Mentor - Registration - Allow Self-Registration: Enter True or False. True will turn this function on and False turns it off.
Mentor - Registration - Click here to register text: Enter text to be used as registration link.
Mentor - Session Timeout: Enter a number of minutes. This equals the amount of time the system will allow an open session to sit idle before automatically logging out.
Mentor - Status Change - Mentor Edits Profile: Enter the exact text of the Mentor Status you want a mentor to be set to when a mentor edits their profile. If you leave this field blank, a mentor will retain it’s current status following an edit.
Faculty:
Mentor:
(Copyright © CSO Research, Inc. )
30
CSO Research, Inc.
Room Reservations:
•
•
•
•
Student:
Room Reservations - Adminstrator Email Address: Enter the administrator email address for contact purposes.
Room Reservations - Enabled: Enter True or False. True will turn this feature on and False turns it off.
Room Reservations - Maximum Room Allotment: Enter a number of maximum rooms an employer can select for a given date.
Room Reservations - Require Approval: Enter True or False. True will require approval of room reservations before use.
•
•
•
•
Student - Activity - Allow Student View of Self-Referrals Only: Enter True or False. True will turn this function on and False turns it off. If on, this function will only allow a student to view their self-referrals instead of viewing all referrals for that student.
Student - Guest Student Login: Enter the Student Record ID (numbers only) you wish to use as the Guest Student Login. Leave blank if you do not wish to use as the Guest student. When this student logs into Interfase they will get the permissions assigned to the GuestStudentRole rather than those associated with the applicant types set in that student profile.
Student - Jobs - Screen Events Upon Job Search: Enter True or False. True will turn this function on and False turns it off. The function will allow the job search to apply all screening options upon performing the search so that jobs in the Job Search will only show related events that the student is qualified for. If false, this function will show a student all job events.
Student - Jobs - Screen Jobs Upon Job Search: Enter True or False. True will turn this function on and False turns it off. The function will allow the job search to apply all screening options upon performing the search so that all jobs viewed by a student in Job Search are only those they qualify for. If false, this function will show a student all jobs but once the job is accessed it will inform them they do not qualify and not allow any further capability.
(Last edited August 2009)
31
Unit 2—Interfase Supervisor’s Guide
•
•
•
•
•
•
•
•
•
•
•
•
•
•
•
•
•
Student - Jobs - Screen Jobs Upon Screen Only Search: Enter True or False. True will turn this function on and False turns it off. The function will allow the job screen to apply all screening options upon performing the search so that all jobs viewed by a student in Job Search are only those they qualify for. If false, this function will show a student all jobs but once the job is accessed it will inform them they do not qualify and not allow any further capability.
Student - Jobs - Screen Schedules Upon Job Search: Enter True or False. True will turn this function on and False turns it off. The function will allow the job search to apply all screening options upon performing the search so that jobs in the Job Search will only show related schedules that the student is qualified for. If false, this function will show a student all job schedules.
Student - Login URL: Enter the student URL for your system. The student URL for your system should be the student root address of your Interfase system (ie. http://www.
myinterfase.com//student).
Student - Mentors - Monthly Mentor Contacts: Enter the number of mentor contacts each
student is allowed per month
Student - Registration - Allow Self-Registration: Enter True or False. True will turn this function on and False turns it off.
Student - Registration - Click here to register text: Enter text to be used as registration link.
Student - Registration - Completeness Check: Enter True or False. True will turn this function on and False turns it off. This function will require a student to complete the required fields in their profile before they can submit it to your office.
Student - Registration - Completeness Check Require Documents: Enter True or False. True will turn this function on and False turns it off. This function will require that a student upload a default resume before they can submit their profile to your office. This function is not valid unless Student Registration Completeness Check is set to True.
Student - Schedules - Allow Multiple Signups For Shared Sessions: Enter True or False.
Student - Schedules - Allow Signup for Waitlist Without Full Schedule: Enter True or False. True will turn this function on and False turns it off. This function would allow a student to signup on the waitlist for any schedule that has a waitlist at any time during the signup regardless of whether all timeslots are full or not.
Student - Schedules - Require Future Schedule to contain a future session: Enter True or False. True will turn this function on and False turns it off. This determines if the Future Schedules function for students shows schedules that do not contain any sessions with future dates.
Student - Schedules - Submission Limits Duration: Enter ‘daily’ or ‘weekly’.
Student - Schedules - Submission Limits Enabled: Enter True or False. True will enable Submission Limits for students.
Student - Schedules - Submissions Limit: Enter a number of activity items a student can take when signing up for a timeslot or requesting an interview.
Student - Session Timeout: Enter a number of minutes. This equals the amount of time the
system will allow an open session to sit idle before automatically logging out.
Student - Show Non Qualifying Criteria When Alerting: Enter True or False. True will turn this function on and False turns it off. When a student views a job or schedule they do not qualify for this function will show the student each screening criteria for which they do not qualify. For example, if a student did not qualify for a job that was screening on gpa because their gpa was too low it would tell the student they didn’t qualify because of gpa.
Student - Status Change - Student Edits Profile: Enter the exact text of the Student Status you want a student to be set to when the student edits their profile. If you leave this field blank, a student will retain it’s current status following an edit.
(Copyright © CSO Research, Inc. )
32
CSO Research, Inc.
System:
• System - Activity Log - New Event: Enter a number of minutes. This equals the number of minutes that must elapse between edits in order for the action to be considered a new log entry.
• System - Appointments - Future Signup Days Allowed for Administrators: Enter a number of days to allow for appointment slot generation. Maximum value is 30.
• System - Appointments - Future Signup Days Allowed For Students: Enter a number of days to allow for appointment slot generation for students. Maximum value is 30.
• System - Base URL: Enter the base URL for your system. The base URL for your system should be the root address of your Interfase system (ie. http://www.myinterfase.com/).
• *System - Check-In - Enable swipe/scan: Enter True or False. True will enable swip/scan for the student check-in system
• *System - Checkin - Event Id for 2nd Quick Checkin: Enter Event Record Id for 2nd Quick Checkin.
• *System - Checkin - Event Id for 3rd Quick Checkin: Enter Event Record Id for 3rd Quick Checkin.
• * System - Checkin - Event Id for 4th Quick Checkin: Enter Event Record Id for 4th Quick Checkin.
• * System - Checkin - Event Id for 5th Quick Checkin: Enter Event Record Id for 5th Quick Checkin.
• * System - Checkin - Event Id for Quick Checkin: Enter Event Record Id for Quick Checkin.
• *System - Check-In - Print name tags during event checkin: Enter True or False. True will print student name tags when they checkin to a career event. Requires Dymo label printer attached to Kiosk.
• *System - Check-In - Print student graduation date on name tags: Enter True or False. True will print the additional information of student graduation date on the name tags.
* Available only for those using the Check-In Module.
• *System - Check-In - Print student major on name tags: Enter True or False. True will print the additional information of student major on the name tags.
• *System - Check-In - Student Profile Field: Select Profile Field
• System - Daylight Savings / Summer Time: Enter -1, 1, or 2. -1 will cause this site to ignore Daylight Savings/Summer Time, 1 will use U.S. Daylight Savings Time, and 2 will use E.U. Summer Time.
(Last edited August 2009)
33
Unit 2—Interfase Supervisor’s Guide
•
•
•
•
•
•
•
•
•
•
•
•
•
•
•
•
•
•
•
•
•
•
System - Email - Body - View DocumentsTimed Out: Enter the text you wish to appear in the email that will be sent to a user if a request to view documents times out. The email will contain a link to the documents.
System - Email - FROM - View Documents Timed Out: Enter the FROM address you wish to appear in the email that will be sent to a user if a request to view documents times out.
System - Email - Subject - View Documents Timed Out: Enter the subject you wish to appear in the email that will be sent to a user if a request to view documents times out.
System - Employer Search Wildcard: Enter True or False. If true, this setting will automatically add a wildcard (%) to the beginning of any employer organization name search criteria. If false, it not automatically add it but it can be added manually.
System - Enable Major Category Selection: Enter True or False. True will turn this function on and false with turn this function off.
System - External Services - CollegeRecruiter: Enter True or False. True will enable CollegeRecruiter links and images to appear for students.
System - Jobs - New Job Expiration Default: Enter the number of days from today’s date that new jobs should expire. This option will default the Post Date to today’s date and the Expiration Date to the date that corresponds to the number of days entered. Leave this option blank to disable this functionality.
System - Login - Allow Reset of Forgotten Password: Enter True or False. True will turn this function on and False turns it off. This will allow users to reset their own passwords for themselves if they forget what it is. It will create a new randomly generated password for them and email it to the main email address in their profile.
System - Login - Failed Login Account Inactivation: Enter True or False. True will turn this function on and False turns it off. If on, this function will only allow a valid user 3 attempts at logging in before it will temporarily inactivate their account. Once inactivated their account will be automatically re-
activated at midnight the following day or can be re-activated manually by an administrator.
System - Login - Password Reset E-mailText: Enter the text to be sent as the body of password reset emails.
System - Mass Email - Default Create Observations: Enter 0 to default to Text Only, No Observations. Enter 1 to default to Text Only, With Observations. Enter 2 to default to HTML/Text Only, No Observations.
System - Mass Email - Display Name for Constructed Email Address: Enter a display name for the sent email.
System - Mass Email - Use Constructed Email Address as FROM Address: Enter True or False. True will set the specified “FROM” email address as the reply-to email address and use a constructed email address as the new “FROM” email address.
System - Number of Record Per Page in Search Results: Enter a number between 0 and 40. This is the number of records that will appear per page in the search results for all main records.
System - Organization Name: Enter the organization name to be recorded during credit card transactions.
System - Payroll - Payroll Alert Threshold: Enter a dollar amount. This amount will be used as a threshold for payroll that will trigger a warning when a student’s accumulated payroll exceeds their work-
study award by the amount of the threshold. If a positive amount is entered the warning will show when the difference between accumulated payroll and the work-study award is within that amount. If a negative amount is entered the warning will trigger when accumulated payroll exceeds the award by that amount.
System - Require Login to View Document Links: Enter True or False
System - Site Id: Enter your Site Id
System - Status Change - Expired Jobs: Enter the exact text of the inactive Job Status you want a job to be set to when the job expiration date passes. This change is made by an automatic nightly routine.
System - Status Change - National Trigger Job Status: Enter the exact text of the Job Status to be triggered by the national date.
System - Time Zone: Select the local timezone for your site.
System - Use Mass Email System for All Email Links: Enter True or False
(Copyright © CSO Research, Inc. )
34
CSO Research, Inc.
Student Login Page-Password Reset:
Templates
There are two types of templates - Packet and System Events.
Packet templates include the cover pages for resume packets and the Career Event Invoice and
Receipt. There is a separate template for each type of packet in the system.
Important: The Refresh button at the top of every Setup screen is used to apply any changes you
make in Setup to your Interfase system. Clicking Refresh on any Setup screen applies all changes
made in any Setup function. All examples listed below include clicking Refresh as a step although if
you are making multiple changes in Setup this is only required once when you are finished with all
changes.
(Last edited August 2009)
35
Unit 2—Interfase Supervisor’s Guide
Click the Word icon
view the template.
to
Click the Excel icon
to
view the data source fields.
Customize a Template:
STEP 1: Click the Word icon
then the Excel icon
both.
and
and save them
STEP 2: Open the saved Word
template and connect it to the Excel
data source.
STEP 3: Make necessary changes to
the Word template AND save.
STEP 4: Click the [Edit] link under
the Action column for the applicable
template.
STEP 5: Click the [Upload] link and
upload the saved Word document
template.
STEP 6: The custom icon
now
appears next to the template name.
Each packet template contains the following options:
·· From (Default) – If a packet is e-mailed by an administrator Note: If you have uploaded a custom
or employer the e-mail will sent using the e-mail address in the template, you can use the [Clear]
function in template to remove it.
administrator’s or employer’s profile as the From address unless Once remove the template will revert
the profile does not contain an e-mail address then it will use to using the default Word doc.
this address.
·· Subject – This is the default subject that will be used if a packet is e-mailed.
·· Body – This is the default text that will be used in body of the e-mail if a packet is e-mailed. You can used the HTML editor controls to add formatting such as bold and italics, bulleted lists, or inserting web links.
The events listed in the Manage System Events section are system emails. Each event listed is an email
that is sent by the system based on when that event occurs and certain options in that event.
To turn on
a system
event email,
check the box
next to the
Enabled field.
An asterisk
appears next
to the event
name to
indicate that
the system
email is
enabled.
(Copyright © CSO Research, Inc. )
36
CSO Research, Inc.
Each system event template may contain the following options:
·· From (Default) – If the system event is triggered by a user action the e-mail will sent using System the e-mail address in the user’s profile as the From address unless the profile does not Events are
plain text contain an e-mail address then it will use this address. For example, if a student submits and cannot
a Job Referral for a job and the Employer – Job Referral Submitted system event is contain
active then a e-mail will be sent to the applicable employer and the From address will logos.
be the student’s e-mail address from their profile unless they do not have one.
Note: Any system event noted as (nightly) is not generated by a user action. They are generated every night at midnight based on certain dates that relate to the event. The e-mails sent for these events will always use the e-mail address in the From (Default) field.
·· BCC – Any e-mail address entered here will be entered as a BCC on any e-mail generated for an event.
·· Subject – This is the default subject that will be used for the generated e-mail.
·· Enabled – Check this to turn on a system event. If Enabled is not checked no e-mail will be generated for a given event. Any system event that is Enabled will have an asterisk next to it’s name.
·· Lag Days – Some nightly system events have a Lag Days option. This option determines how many days prior to an event occurring will the e-mail for this event be sent. For example, in the graphic above the Student – Schedule Approaching Interview system event sends a reminder e-mail to students signed up on an interview schedule when the interview date is approaching. The lag days setting (in this example it’s 2) tells Interfase to send this reminder e-mail 2 days prior to the interview date.
Note: The body text for a system event e-mail is the contents of the Word doc template associated
with a system event. This Word doc is a merge document as the e-mail can contain data merged in
from Interfase. However, system event e-mails are sent as text only e-mails therefore you should
not include any formatting (bold, italics, etc) in the Word doc as it will not appear in the e-mail that
is generated for an event.
Interview Schedules-Timeline Templates
Timeline templates can be setup so an Administrator can easily create new schedules with common
timeline configurations. Each template can be made up of any number of timeline entries and you can
have as many templates as are necessary.
Create a new Timeline Template
Step 1: Enter a name for the template in New Timeline.
Step 2: Click Create.
Add Timeline entries to a template
Note: When you create a schedule timeline and you select a template to use you will enter a schedule
date. This date will be used in conjunction with the options below to determine the dates for each
timeline entry.
(Last edited August 2009)
37
Unit 2—Interfase Supervisor’s Guide
Step 1: Click Add.
Step 2: Select Options:
·· Signup Method – Select a signup method for the timeline entry.
·· Weeks Before – Enter a number that corresponds with the number of weeks prior to the schedule date this signup period should occur.
·· Target Day – Select the target day on which this signup period will occur.
Note: Refer to the example graphic below to see how each of these settings are applied.
Interview Schedules-Timeslots
Timeslot templates can be setup so an Administrator can easily create new sessions with common
timeslot configurations. Each template can be made up of any number of timeslots and an unlimited
number of templates can be created.
Create a New Timeslot Template
Step 1: Enter a name for the template in New Timeslot Template.
Step 2: Click Create.
Add Timeslot Entries to a Template
There are two methods for entering timeslots into a template:
Add Manual Entries (Manage Timeslots)
Step 1: Click Add New Timeslot.
Step 2: Enter a time.
Step 3: If the time will be available for sign-up leave Reserved Slot blank. If you wish to reserve this
timeslot for something like a break or lunch enter the reason in Reserved Slot.
Step 4: Click Update.
(Copyright © CSO Research, Inc. )
38
CSO Research, Inc.
Add Multiple Entries (Configure Timeslots)
Step 1: Enter an Interview Duration. This entry is the number of minutes each interview will last.
Step 2: Enter a Timeslot Break Period. This entry is the number of minutes that will be additionally
given for each timeslot but is not included in the length of the interview. For example, if Interview
Duration is 30 and Timeslot Break Period is 5 each timeslot will be 35 minutes in length but the
interview duration will only be noted as 30 minutes.
Step 3: Enter the First Timeslot Start Time and Last Timeslot Start Time. These times will be used in
conjunction as a range in which the timeslots will be created. For example, if First Timeslot Start Time
is 8:00 AM and Last Timeslot Start Time is 4:00 PM and the number of minutes for each timeslot is 35
then these setting will create the timeslots as 8:00 AM, 8:35 AM, 9:10AM, etc with the last timeslot
starting no later than 4:00 PM.
Step 4: Click Add Timeslots.
Note: Once timeslots are created in the template using Configure Timeslots the Manage Timeslots
section can be used to make any individual changes or additions to the template.
To reserve a timeslot
for Lunch or a Break,
simply click the [Edit]
link and type in the
Reserved Slot’s name.
Click the [Update] link
when done.
(Last edited August 2009)
39
Unit 2—Interfase Supervisor’s Guide
Document Categories
Document Categories can be setup so that student documents can be organized into different
employment and non-employment related categories. When applying to a job or schedule a student
can select one document from each employment related category that is setup in your system. If an
Administrator wants the students to be able to select a resume and a cover letter, set up a document
category for each.
Confidential:
Checking the confidential box will not allow the
student to see the document, but allow them to
submit it to a job. This is usually used by schools
for evaluations that students can submit to a
job for the employer to see without the student
being able to see the document. The student
must have the category permission to view. (See
screenshot for Letters of Recommendations).
Changing Category Permissions:
To change the Administrator or Student’s
permissions to the category, click the [Edit]
link. Click the [Update] link when done.
Document Forwarding:
An Administrator can enable three (3)
document forwarding emails per category. For
example, an Administrator can have the system
email the student a copy of the resume as soon
as it is uploaded.
Note: For detailed information on all the options for Document Categories refer to the information on
the Document Categories screen in your Interfase system.
Default Sorts
Default Sorts can be changed under this menu. An Administrator can change the sorting order on any
of the Search Results screens. For example, an Administrator can change the Job Search Results page
for students to display jobs in ascending order by expiration date.
Important: The Refresh button at the top of every Setup screen is used to apply any changes you make
in Setup to your Interfase system. Clicking Refresh on any Setup screen applies all changes made in any
Setup function. All examples listed below include clicking Refresh as a step although if you are making
multiple changes in Setup this is only required once when you are finished with all changes.
CHANGING THE DEFAULT SORT ORDER:
STEP 1: From the Search Type list, select the Search Results page
you want to change the default sort order of.
STEP 2: Under the Action column, click [Edit] next to the user you
want to change the default soft for.
STEP 3: Select the Default Sort option (all columns available
will be listed) and the Default Direction option (Ascending or
Descending).
STEP 4: Click [Update] to save your changes
STEP 5: Click the Refresh button.
(Copyright © CSO Research, Inc. )
40
CSO Research, Inc.
Key Management
The Key Management function is used in conjunction with student passthrough authentication. This
function can only be turned on by contacting CSO Research Support.
Key Management provides access to each site’s unique AES key. This key is generated through the
Interfase system. This page contains the current Key and Initialization Vector (IV). The key and IV are
displayed over an SSL connection to prevent them being intercepted by a third party. The key and IV
are used for encryption/decryption purposes for data that is passed to Interfase through passthrough
authentication.
The key management page also has a ‘Generate New Key’ function. CSO recommends that the schools
create a process to change their key and IV at set intervals. Once the key is changed, the school must
change their passthrough code to encrypt using the new key.
For more information see the Student Passthrough Authentication section in this guide.
Work-Study Award Periods
This function allows an administrator to define work-study award periods for the system. Each period
equates to the date span for which you would grant a single work-study award to a student. Most
institutions use either academic years or semesters/quarters as the work-study award periods. You
must have work-study award periods set up in order to enter work-study award records for students as
the entry of a work-study award requires the selection of a work-study award period.
You can create as many work-study award periods as you wish assuming you know the exact dates for
each period. Additional periods can be set up at any time.
Please note that not all Interfase sites are enabled with the Student Employment module. This
feature requires fees in addition to the Interfase license fee. The Work Study menu item will be
turned on to offices utilizing this feature.
(Last edited August 2009)
41
Unit 2—Interfase Supervisor’s Guide
Note: The dates entered in each work-study award period must not overlap any other period. Interfase
will prevent you from creating this situation.
Important: The Refresh button at the top of every Setup screen is used to apply any changes you make
in Setup to your Interfase system. Clicking Refresh on any Setup screen applies all changes made in any
Setup function. All examples listed below include clicking Refresh as a step although if you are making
multiple changes in Setup this is only required once when you are finished with all changes.
Setup a work-studey
award period.
Step 1: Enter a Start
Date and End Date in
Add New Award Period
section.
Step 2: Click Add
Period.
Step 3: Click the
Refresh button.
Job Menu Categories
This function allows you to define Job Menu Categories for student job search. You can have up to 10
separate categories. Each category appears as a separate menu option under Jobs on the student
main menu. Job menu categories will allow you have different student roles see a separate set of jobs.
Important: The Refresh button at the top of every Setup screen is used to apply any changes you
make in Setup to your Interfase system. Clicking Refresh on any Setup screen applies all changes
made in any Setup function. All examples listed below include clicking Refresh as a step although if
you are making multiple changes in Setup this is only required once when you are finished with all
changes.
To create a Job Menu Category, go to Tools > Setup > Job Menu Categories
(Copyright © CSO Research, Inc. )
42
CSO Research, Inc.
Setup a Job Menu Category
Step 1: Select the menu item to edit
Step 2: Enter the display text. This is the text that is shown on
the menu.
Step 3: Select the other options: Screen Only and Work-Study.
Step 4: Select the Applicant Type(s) that the jobs must have
in order to be shown under this menu.
Step 5: Click the Save button.
Step 6: Click the Refresh button to post these changes to the system.
Note: For detailed information on each job menu option refer to the
information on the Job Menus Category screen in your Interfase system.
Setup a Historical Jobs Menu Item:
Step 1: Select the menu item to edit
Step 2: Enter the display text. This is the text that is show on
the menu. Consider using “Historical Jobs”.
Step 3: Select the other options: Screen Only and Work-Study.
Step 4: Select the Applicant Type(s) that the jobs must have in order
to be shown under this menu under Job Non Active Statuses
Step 5: Click the Save button.
Step 6: Click the Refresh button to post these changes to the system.
Note: Once you have completed the set up of a job menu category you must use Permissions to turn
that category on for applicable student roles. They are located in Menus – Student - Jobs in Permissions.
Custom Fields
This function allows for the setup of an unlimited number of customized fields in Interfase. Every
aspect of these from what type of data it collects to where it appears on a screen can be customized.
(Last edited August 2009)
43
Unit 2—Interfase Supervisor’s Guide
These are all the
Custom Field
databases that can be
added in Interfase.
To Add a Custom Field:
STEP 1: Go to Tools>Setup>Custom Fields
STEP 2: Select a record type for which to add a custom field
STEP 3: Click Add New Field
STEP4: Select a Type
·· Code – show a set, predefined list of options to select from. Can be single or
multi-select.
·· Date – can allow for a date or date/time entry
·· Decimal – used mostly for a currency or gpa type field
·· Number – can allow for numeric only entry
·· Text – can be a basic text field allowing a single line of entry or can be a text area
field where it allows for multiple lines of entry
·· Yes/No – shows Yes and No option to select from. Only one can be selected.
STEP 5: Enter a Display Name – this entry will be used as the field label when the field is
viewed in a profile.
STEP 6: Enter a Help Tip (optional) – any text entered here will show for this field when
the user’s mouse pointer is hovered over the
icon that will appear next to the
field.
STEP 7: Select a Display Position – this setting shows all fields for the selected record
type that can be used for custom fields. Select the field that you want this custom field
to appear next to in the applicable profile.
STEP 8: Select a Location – this setting will determine if the custom field will appear
before or after the field selected in Display Position.
STEP 9: Order (optional) – this setting is only applicable if there are multiple custom
fields for the same record type that have the same field selected in Display Position so
that multiple custom fields will appear in one spot. In this case the order will determine
what order they show in. Order will default to 0 for most custom fields.
STEP 10: Control (only if Custom Field Type = Text) – select Text or Text Area. If Text, the
field will allow one line of entry. If Text Area, the field will allow multiple lines of entry.
STEP 11: Required (optional) – check the Required box if a user should be forced to fill
out this field.
STEP 12: Required Message (optional) – if Required is checked enter a required
message. This text will appear to a user when they try to save a record without filling in
this field as it is required.
STEP 13: Multi-select (only if Custom Field Type = Code) – check this box if the custom
field should be a multi-select code. This means a user would be able to select multiple
options in the fields. If unchecked a user can only select one option.
STEP 14: Allowed Values (only if Custom Field Type = Code) – for each code option
that should appear in the custom field enter a value. Each value that should be a code
option should appear on its own line.
STEP 15: Validation (optional – not available for all Custom Field Types) – select a
validation type if you wish the entry for this field to be validated against a certain
pattern. For instance, if the desired entry for a field were a phone number you could
select a Phone Number validation type and Interfase would force the entry to match a
set phone number pattern.
STEP 16: Validation Message (optional – not available for all Custom Field Types) – if a
validation type is selected enter a validation message. This text will appear to a user
when they try to save a record and the entry for this field does not match the validation
type selected.
STEP 17: View/Edit/Search Roles – these settings are the permissions for custom
fields. For each setting the available roles in Interfase can be selected. Any role that is
selected in each setting will have that ability regarding this custom field. For example,
if AdminRole is selected in View, Edit and Search then all administrators with that role
will have the ability to view, edit and search on this custom field.
(Copyright © CSO Research, Inc. )
44
CSO Research, Inc.
Note: Some Custom Field record types do not have Search options for custom fields. For example,
Search Roles can not be set for a Referral custom field because there is no search screen for Referrals.
After a custom field has been created all settings for it can be edited except for the Type. If a custom
field was created originally as the wrong type it must be removed and recreated. Please contact
support if you have been using this field and do not want to lose the data collected.
Localization
This function allows an administrator to change the names of certain icons and buttons.
Editing Schedule Interview Request Button
Step 1: Click edit next to Schedule Interview Request Button
Step2: Change the text to desired language
Step 3: Click Update
(Last edited August 2009)
45
After making changes in the
setup menu, always hit the
Refresh button so the changes
will be immediately updated to
all servers.
Unit 2—Interfase Supervisor’s Guide
Appointment Types
This function is to be used in conjunction with the appointment scheduler. In appointment types you will be
able to add all of the different types of appointments your offices conducts with various ranges of length.
Create a New Appointment Type
Appointment Type is a specific reason as to why a student might want to make an appointment
with your office. You may wish to create different appointment types that include Resume Review,
Cover Letter Review, Job Counseling, Changing Major, Graduate School Counseling, Career Planning
etc. When a student selects this Appointment Type the administrator will be notified of the
scheduled appointment including the appointment type, student name, date and time. To setup an
Appointment Type follow these instructions below.
Step One: Go To Tools>Setup>Appointment Types
Step Two: Click [Add New]
Step Three: Fill out the Appointment Type form
(Copyright © CSO Research, Inc. )
46
CSO Research, Inc.
Type Definition Explained:
Title: This is the name that appears in the single select code box when an admin or a student select the
type of appointment they want to schedule. This also becomes the Subject of the Observation note.
Appointment Duration (minutes): This is the length of time in minutes of the appointment that
is scheduled on the Administrator Appointment Calendar. The admin can enter the minutes in an
increment of five minutes.
Appointment Duration Displayed to Students (minutes): This is the length of time in minutes of the
appointment that a student and admin see when they schedule an appointment. When a student
views their Appointment Activity and receive the confirmation appointment email, it will display
this time, not the total Appointment Duration. This allows the admin to set the displayed minutes
less than the appointment duration. Example: The admin could set the Appointment Duration to 30
minutes but the Duration Displayed to Students as 20 minutes, thus leaving the admin 10 minutes to
create an observation note. The admin can enter the minutes in an increment of five minutes.
Lead Period (minutes): This is the length of time in minutes that allows a student to see an available
appointment before the appointment happens. Example: If an appointment is at 10:00 AM and the
Lead Period is 30 minutes, the student can only see the available appointment until 9:30 AM. Past 9:30
the student will no longer see the 10:00 AM as available.
Freeze Period (hours): This is the length of time in hours that allows a student or admin to cancel the
appointment. Example: If a student has an appointment at 10:00 AM and the Free Period is 2 hours,
then the student or admin cannot cancel the appointment after 8:00 AM.
Email Definition Explained:
From Address: This is the default From address in the email if the administrator that the appointment
is made with does not have an email address in their admin profile.
Subject: After an appointment is made an email is sent to the student and to the administrator tied to
the appointment, this is the subject line of the email.
Lag Days: This is used to send a reminder email to the student when the appointment is a number of
days away.
Memos Explained:
Slot Display Memo: This is a memo of text that will appear above the available timeslots after an
admin or student selects an Appointment Type:
(Last edited August 2009)
47
Unit 2—Interfase Supervisor’s Guide
Confirmation Memo: This is a customizable memo that will appear in two places:
1. After the Admin or Student has selected a time. This text appears in the site on the Appointment Confirmation page
2. This Confirmation Memo also appears in the Confirmation Email that is sent to the student
along with the Appointment Type, Date, Time and Description:
Confirmation Email text:
Step Four: Click Save
Note: The administrator will receive an email that an appointment has been made with the
student information.
(Copyright © CSO Research, Inc. )
48
CSO Research, Inc.
MonsterTrak Features
Integrated Job Stream Setup is located in Tools > Setup > MonsterTRAK Jobs
To setup MonsterTRAK Site Definition:
1. Click [Edit Setting]
2. Select your school from the drop down list.
3. Click Save.
(Last edited August 2009)
49
Unit 2—Interfase Supervisor’s Guide
To turn on the Integrated Job Stream Feature:
Note: The Job Stream option will not function in any Job Menu Category for which you have checked
“Screen Only”.
Before turning on the Integrated Job Stream, check the Job Menu Category settings in your site:
1. Go to Tools > Setup > Job Menu Categories.
As shown below, the “MonsterTRAK Jobs” option will be not be available if you have the “Screen Only”
option checked.
(Copyright © CSO Research, Inc. )
50
CSO Research, Inc.
Once you have confirmed that the “Screen Only” option is not checked.
1. Go to Tools > Setup > MonsterTRAK Jobs.
2. Click “Turn Feature On” beneath “Job Stream Feature”.
To setup the Cover Letter Document Category:
By default a student can select from resume category, but TRAK also has the option of accepting cover
letters. Resumes and cover letters are the only two document categories that can be selected from for
MonsterTRAK Jobs.
1. If you want to allow cover letters to be submitted, click “Edit Setting”.
2. Select the appropriate Cover Letter Document Category from the drop-down.
3. Click Save.
(Last edited August 2009)
51
Unit 2—Interfase Supervisor’s Guide
Code Mapping - Code Mapping allows specific job codes in your Interfase site to be mapped
to corresponding codes in MonsterTrak. (If you use the Consortium module, please note that
MonsterTRAK code mapping works just like Consortium code mapping.)
There is one TRAK code for Job Stream:
1. To map your codes, click “Edit Occupation Code Mapping”.
NOTE: You can link one MT code to multiple CSO codes.
Career Ad Network (CAN) Setup is located in Tools > Setup > MonsterTrak Features
To turn on the Career Ad Network (CAN):
1. Click “Turn Feature On”
(Copyright © CSO Research, Inc. )
52
CSO Research, Inc.
ADVANCED SETUP OPTIONS-Job Menu Categories:
To control which Job Menu Categories in which MonsterTRAK Jobs appear:
Go to Tools > Setup > Job Menu Categories.
For each Job Menu Category there is an option called “Show MonsterTrak Jobs”.
Note: The Job Stream MUST be turned on to see this option. Additionally, the Job Stream option will
not function in any Job Menu Category for which you have checked “Screen Only”. The “MonsterTRAK
Jobs” option will not be available if you have the “Screen Only” option checked.
2. Select the Job Menu Item(s) under which you’d like the MonsterTRAK Jobs to appear.
3. Check the “Show MonsterTRAK Jobs” box.
EXAMPLE: You may decide to show the MonsterTRAK Jobs in “Full Time” and “Part Time” Job Menu
Categories, but have it turned off in the “Work Study” Job Menu Category.
(Last edited August 2009)
53
Unit 2—Interfase Supervisor’s Guide
Student Roles
To control the Student Roles that can view the MonsterTRAK Jobs:
1.
2.
3.
4.
5.
6.
Go to Tools > Setup > Permissions
Go to Searches > Search Results > Job
Click [Edit] next to “MonsterTRAK Job Search Results”.
Select the Student Roles you wish to view the MonsterTRAK Jobs.
Click [Update].
Click “Refresh”.
(Copyright © CSO Research, Inc. )
54
CSO Research, Inc.
Check-In
Please note that not all Interfase sites are enabled with the Check-In module. This feature
requires fees in addition to the Interfase license fee. The Check-In menu item will be turned on
to offices utilizing this feature.
As an administrator you can setup 5 different Visit Reason types that will allow for students to check-in
for a variety or reasons. Below are the 5 types of reasons:
Reason Types:
1. Career Events – Only 1 Career Event Reason Type can be created. Any student can Check-
In for a Career Event Reason Type, whether they have RSVP’d for the event or not.
2. Interview Schedules – Only 1 Interview Schedules Reason Type can be created. Only students who have signed up on an interview session timeslot can check-in.
3. Information Sessions – (Limited to an Interview Schedule) Only 1 Information Session Reason Type can be created. Only students who have RSVP’d for the Information Session can check-in. If a student has not RSVP’d for the event it will not display to them at Check-In.
4. Appointments – Only 1 Appointment Type can be created. Only students who have scheduled an Appointment using the Appointment Scheduler can Check-In for an appointment.
5. Miscellaneous – Unlimited Miscellaneous Reason Types can be created. A student does not need to have taken any previous action to check-in for this type.
Creating Visit Reasons:
1. Log into your Interfase site as a Supervisor Administrator
2. Go to Tools > Setup > Check In
(Last edited August 2009)
55
Unit 2—Interfase Supervisor’s Guide
Reason Name: The text you type here will correspond to the drop down box students will see when the Check-In.
For example:
•
•
•
•
•
Career Events Reason Type may be called “Job Fairs and Workshops”
Interview Schedules Reason Type may be called “On-Campus Interviews”
Information Session Reason Type may be called “Company Information Sessions”
Appointment Type may be called ‘Scheduled Appointment”
Miscellaneous Reason Types may be called “Career Exploration,” “Use the Career Resource Library” and many more.
Message: Students will see this text after they select their Reason Type
This is how this visit reason will appear to students:
Creating Miscellaneous Visit Reasons:
The purpose of this worksheet is to create all the additional reasons a student may come to your office
that you would like to have a student Check-In for data that is not in your system. The example below
is if a student is about to Check-In for a non scheduled Counselor Appointment:
This is the Reason Name
This is the Message.
Creating Miscellaneous Visit Reasons:
1. Log into your Interfase site as a Supervisor Administrator
2. Go to Tools > Setup > Check In
3. Reason Type = Miscellaneous
(Copyright © CSO Research, Inc. )
56
CSO Research, Inc.
Now that the Check-In module has
been enabled in your system, you now
have a new field in your Administrator
profile called
Admin Type.
Go to each Administrator’s profile and
select the Admin Type if you want that
Admin to appear in the list of Counselors. When the Admin Type is selected
in the Visit Reason it will display a list of
Administrators to students.
**When Miscellaneous Visit Reasons are not linked to a database they create an Observation note in
the student’s activity. Therefore when setting up the Miscellaneous Visit Reason you can default some
of the observation field selections. In the observation note the submit date/time is your students
Check-In date/time.
Reason Name: The text you type here will correspond to the drop down box students will see when
the Check-In for an event.
Other examples:
• Use the Career Resource Library
• Walk-In Resume Critique
• Practice Interview
Admin Type: This field matches a field in the Administrator profile called Admin type. Whichever
administrators have this selected in their profile will appear to students when they select this miscellaneous visit reason. Students will see a list of your Administrators and once checked in an e-mail will be
sent notifying them the student has checked-in.
If no Admin Types are selected the students will not see a list of Administrators, only a text box to type
in notes that will appear in the Observation note.
Adding Administrators to the Check-In list: If you want an administrator to appear in the Counselor
list go to the administrators profile and add it to their profile:
• Databases > Admin > Search
• Click [Edit] in the Control Information
Private Type: This is your Observation Private Type field that determines which Administrators will see
which Observation Notes. See the user’s manual for more info. Note: If you need more information or
are unsure If Obs Private Type is activated in your site, contact [email protected]. The support
team can help you to turn this on in permissions or add any codes that you may need.
(Last edited August 2009)
57
Unit 2—Interfase Supervisor’s Guide
BLANK PAGE
(Copyright © CSO Research, Inc. )
58
3
Uploading Data
Sections
Unit 3
3.1 Firewall Upload
Unit 3 of the Supervisor’s Guide will contain information
on the firewall and uploading data to the Firewall as
well as general uploads for Students, Jobs and Checkin*.
3.2 Uploads: Student, Job, Payroll, Check-In
3.3 Custom Student Upload
3.4 Secure FTP Transfer for Custom Student
Upload
*Only for offices that use the check-in module.
Unit 3—Interfase Supervisor’s Guide
3.1 Firewall Upload
With Interfase, an Administrator can allow new students (that is, students who do not have a student
record) to register (create a new record). However, an Administrator may want to control which
students are allowed to self-register. This can be done with the Student Firewall tool.
To Search the Student Firewall and add individual entries
To Clear/Delete All Students in the Firewall
To Import a New List of Students (Appends to Existing List)
The Student Firewall is separate from the student database and will verify two things before allowing
the student to register:
··
··
That the student is in the Student Firewall (matches with the SSN/Student ID field only).
That the student does not have a record in the Student database already (matches with the SSN/Student ID field only).
Note: SSN as it is mentioned above is purely a reference to the original name of the field being referenced. The entries in the student firewall do not have to specifically be student SSN. They could be any unique student ID.
How is the Firewall populated? There are two ways:
·· An Administrator can easily mass populate the firewall by using the student firewall import. The import routine appends the entries from the import file to the entries already in the firewall (if there are any) and disregards any duplicates. An Administrator can also delete all entries in the firewall before importing the newest firewall file using the Clear Firewall function.
The firewall import file format is: ssn, student first name, student last name. This must be a CSV
(comma-delimited) file and does not require column headers.
(Copyright © CSO Research, Inc. )
60
CSO Research, Inc.
·· An Administrator can add students on an individual basis. All that is needed is the student ID (or SSN), first name and last name.
·· An Administrator can Edit or Remove the Firewall entry too.
TO IMPORT STUDENTS INTO THE FIREWALL
TOOLS > FIREWALL > IMPORT
TO ADD INDIVIDUAL STUDENTS INTO THE FIREWALL
TOOLS > FIREWALL > SEARCH: Add Firewall Entry
How do you search the Firewall? To search the Firewall, go to Tools>Firewall>Search
Should I clear the Firewall befoe uploading my latest student file? Clearing the Firewall before doing
a new upload will depend on your office’s processes. Some schools decide to clear their firewall and
upload all students who are registered for the semester. Other schools choose to simply continue
adding to their firewall to ensure alumni can still register even after they are enrolled. If you have any
questions about what process your office should use, contact support at [email protected].
(Last edited August 2009)
61
Unit 3—Interfase Supervisor’s Guide
3.2 Upload
The Upload function allows Administrators to upload student, job and/or payroll data from an outside
source into Interfase on a scheduled basis. Uploads run automatically at midnight (Central Time) on
the date you specify.
In order to upload student, job, or payroll data, you will need to extract data from the desired source and
put it in a comma delimited (CSV) file in a specified format. Below are the CSV formats for the student,
job, and payroll uploads. CSO Support can provide you with a sample csv file, if desired.
Upload Tip!
It is important that the uploaded file
and its data be in the proper format
for the upload process to function
correctly. It would be advisable to let
CSO Research Support review the first
upload file to make sure the format
and data in the file is correct and
ensure a successful import.
Student Upload Format
There are two student upload formats that can be used for importing student data. The second format
listed below is the same as the first option plus some additional fields. If are using Interfase to handle
student employment and you want to import work-study information for student use format 2. If not,
use format 1.
FORMAT 1:
Overwrite,Match,SetStatus,GeneratePasswords
<options data>
FirstName,MiddleName,LastName,UserName,StudentID,EMail,BirthDate,Passwor
d,LocalAddress.Address1,LocalAddress.Address2,LocalAddress.City,LocalAddress.
State,LocalAddress.ZipCode,LocalAddress.Country,LocalPhone,LocalPhone2,PermanentA
ddress.Address1,PermanentAddress.Address2,PermanentAddress.City,PermanentAddress.
State,PermanentAddress.ZipCode,PermanentAddress.Country,PermanentPhone,PermanentPhone2,Cit
izenship,Classification,ExpectedGraduationDate,ExpectedDegree,Major,GPA,Advisor,AppType
<upload data>
(Copyright © CSO Research, Inc. )
62
CSO Research, Inc.
FORMAT 2:
Overwrite,Match,SetStatus,GeneratePasswords,AwardDate
<options data>
FirstName,MiddleName,LastName,UserName,StudentID,EMail,BirthDate,Passwor
d,LocalAddress.Address1,LocalAddress.Address2,LocalAddress.City,LocalAddress.
State,LocalAddress.ZipCode,LocalAddress.Country,LocalPhone,LocalPhone2,PermanentA
ddress.Address1,PermanentAddress.Address2,PermanentAddress.City,PermanentAddress.
State,PermanentAddress.ZipCode,PermanentAddress.Country,PermanentPhone,PermanentPhone2,Cit
izenship,Classification,ExpectedGraduationDate,ExpectedDegree,Major,GPA,Advisor,AppType,IsFullTim
e,IsGraduate,IsDependant,FamilyAGI,FamilyContribution,InitialFederalAward,InitialStateAward,Eligible
StartDate,EligibleEndDate
<upload data>
The first row in the formats will be exactly as above and defines the global options that exist for each upload.
The second row will consist of the selected entries for each of the global options. The options are:
1. Overwrite - this option defines whether the upload will overwrite data in existing records that match records in the upload file with any changed data in the file. The entry for this option is Y or N. Y would mean it should overwrite with data in the upload. N would mean that it should not.
Note: Even with Overwrite set to Y the upload will never overwrite passwords for existing records.
2. Match - this option defines how the upload process will match records in the upload file with records in the system when it tries to determine if a record currently exists. The entry for this option is “username” or “studentid”. The username option defines that the upload should look for an existing student record by matching the username in the file with the usernames in the student database. The studentid option defines that the upload should look for an existing student record by matching the studentid in the file with the student ids in the student database. Student ID in Interfase CS is called SSN by default but it is the same field.
3. SetStatus - this option defines what student status each uploaded student record will be set to by default. The entry for this option needs to exactly match the text of an existing Student Status code in Interfase CS including case. This means that if the code you want to use is Active with a capital A that needs to be the entry for this option.
4. GeneratePasswords - this option is primarily used if you are using the student upload to populate student records for use with pass through authentication. The entry for this option is Y or N. Y means the upload should set a randomly generated password for each new student record created by the upload. N means that it should not generate passwords and should set the password to whatever is entered in the password column in each record in the file.
5. AwardDate – this option only appears in format 2 as it relates specifically to work-study. The entry for AwardDate should be a date (mm/dd/yyyy). This date will correspond to a Work-study Award Period so the upload knows which period to link the initial awards to that are being uploaded in this file.
(Last edited August 2009)
63
Unit 3—Interfase Supervisor’s Guide
The third row in the file will consist of the column headings as exactly defined above. No column
headings should be removed or re-arranged. Additional columns can not be added to either format.
The fourth row is the first row for data records.
Note: Each row must consist of columns that correspond to each column header regardless of
whether there is data for that column for a given record or not. If there is not data for a column just
leave it blank but the placeholder for the column must be there.
Important: If you are using format 2 there are some student employment fields that require at least a
default entry in the import file. The fields below are all Yes/No fields so they require a Y or N entry.
IsFullTime
IsGraduate
IsDependant
FamilyContribution
The fields below are monetary fields therefore they require at least an entry of 0 if there not is an
actual entry for these fields.
FamilyAGI
InitialFederalAward
InitialStateAward
Job Upload Format
The job import function allows for jobs to be created and updated in Interfase from an outside source
on a scheduled basis. Uploads run automatically at midnight (Central Time) on the date you specify.
The job import can do a number of different things with the data. Below are the rules for the job import:
··
··
··
··
Job import first checks to see if the organization name for the record matches the organization name in an existing employer record. If it does, this employer will be used for the corresponding jobs. If not, a new employer record will be created.
Existing employer records are not updated with data from job import. Employer records are only created.
If the job record in the import file has a job reference number entry, job import will try to match that job reference number with the job reference number of an existing job. If it finds a match, it will update that job with the data. If not, it will create a new job.
Any fields left blank will be skipped in import. This means that instead of importing a blank entry it just skips the field.
Note: Each record in your file should contain at least an organization name and a job title.
In order to upload job data, you will need to extract data from the desired source and put it in a
comma delimited (CSV) file in a specified format. Below is the CSV format for the job upload. CSO
Research Support can provide you with a sample csv file, if desired.
(Copyright © CSO Research, Inc. )
64
CSO Research, Inc.
Job Import Format
NewEmpStatus,NewJobStatus
<options data>
EmployerName,EmployerLocation,EmployerWebsite,EmployerCategory,EmployerAddress.
Address1,EmployerAddress.Address2,EmployerAddress.City,EmployerAddress.State,EmployerAddress.
ZipCode,EmployerAddress.Country,EmployerPhone,EmployerFax,EmployerProfile,EmployerO
nlineAppAddress,EmployerMajors,AllowStudentViewing,ContactFirstName,ContactMiddleN
ame,ContactLastName,ContactAddress.Address1,ContactAddress.Address2,ContactAddress.
City,ContactAddress.State,ContactAddress.ZipCode,ContactAddress.Country,ContactPhone,ContactFa
x,ContactEmail,ContactAddress.Website,JobTitle,JobReferenceNum,NumOpenings,WorkSchedule,Hou
rsPerWeek,WageSalary,StartDate,EndDate,Supervisor,JobDescription,Qualifications,ApplicationInstruc
tions,JobLocation,JobCategory,PositionType,ApplicantType,MinimumGPA,Citizenship,GradStart,GradE
nd,Classification,Degrees,Majors,PostDate,ExpireDate,ShowContactInfo,AllowOnlineReferrals
<upload data>
The first row in the format will be exactly as above and defines the global options that exist for each upload.
The second row will consist of the selected entries for each of the global options. The options are:
1. NewEmpStatus - this option defines what employer status each new employer record created by import will be set to by default. The entry for this option needs to exactly match the text of an existing Employer Status code in Interfase including case. This means that if the code you want to use is Active with a capital ‘A’ that needs to be the entry for this option.
2. NewJobStatus - this option defines what job status each new job record created by import
will be set to by default. The entry for this option needs to exactly match the text of an existing Job Status code in Interfase including case. This means that if the code you want to use is Active with a capital ‘A’ that needs to be the entry for this option.
The third row in the file will consist of the column headings as exactly defined above. No column
headings should be removed or re-arranged. Additional columns can not be added to the format.
The fourth row is the first row for data records.
Note: Each row must consist of columns that correspond to each column header regardless of
whether there is data for that column for a given record or not. If there is no data for a column just
leave it blank but the placeholder for the column must be there.
Payroll Upload Format
This upload only creates new payroll records based on the data in the upload file. It will not edit
existing payroll records. The format for the payroll upload is:
ssn,fund,paydate,wages,hours
<upload data>
Note: There is no options header row or option selections row like there is in the student and job
formats in the payroll format.
(Last edited August 2009)
65
Unit 3—Interfase Supervisor’s Guide
Scheduling an Upload to Run
To upload a data file go to Tools > Upload.
Uploading a File
Step 1: Enter a Task Name. It is just used for
reference and does not have any bearing on the
import iteself.
Step 2: Enter the e-mail address in the Report
E-mail field if you wish to be notified when the
import is complete.
Step 3: In the Upload File field, enter the path to
your upload file.
Step 4: Select Student, Job, Payroll, or Check-in*.
Step 5: Enter a process date. This date must be in
the future. Your upload will automatically run at
midnight on the date entered.
Step 6: Click Upload.
*Check-In is an option only for sites utilizing the
check-in module.
Available only for
sites using the
Check-In module
After an import has run successfully, it will be marked with a green check mark. You can then click
the Task Name and see details about the import including the import log. The log will show you
information regarding any errors or exceptions encountered during the import.
(Copyright © CSO Research, Inc. )
66
CSO Research, Inc.
3.3 Custom Student Upload
The Custom Student Upload allow administrators to create a Student Upload Project that can be used
over and over again. Once a custom student upload project has been created it can easily be selected
when creating an upload task to actually run an upload so that the file being uploaded is associated
with the project and the settings and mappings saved in that project. Unlike the regular student
upload, this allows the administrator to upload into almost any field, including custom fields. It also
allows for files that do not require specific formatting and headers.
Creating a Custom Student Upload Project
To create a Custom Student Upload project, go to Tools>Upload>Student Custom Upload Projects.
Create a Custom Student Upload Project by selecting the options you want to use for the upload.
Select the file format you will be using
for each upload of this project type.
Then map each column to a field in the
student profile.
•
•
•
•
•
•
•
•
Project Name- Name the project something generic that you will recognize each time. For instance, Spring Semester Student Upload.
Upload Type- Choose between Update and Create, Create New Only, or Update Only.
Status- Choose the Status that will be applied to each record. Choose whether to check
the box to Apply Status to New Records Only.
Match- Choose whether to match on Username or SSN (most commonly, this is Student ID).
Generate Passwords- Choose whether to check the box to generate passwords
Date Format- Choose the correct date format.
Report Email- Choose who the report email will be sent to.
Select File for Mapping: Browse for your upload template/file to map the column headers to each field in the student profile.
(Last edited August 2009)
67
Unit 3—Interfase Supervisor’s Guide
Running a Custom Student Upload
After a custom student upload project has been created, you can upload a file based on it. To do this go to
Tools>Upload>Upload Tasks.
To run a custom upload, type a Task Name and fill in the Report Email. Browse and upload your file, then choose the
Upload Type of Custom Student Import. You can then choose from the projects that have been created under Student
Custom Upload Projects.
Choose Custom Student Import
Choose the project you want to use
3.4 Secure FTP Transfer for Custom Student Upload
With the basic student upload, an administrator must manually upload when they wish to run it. This additional
option, however, allows you to securely FTP files to CSO automatically. Your tech person would simply
programmatically create a script/process to automatically pull the data and then FTP it directly to CSO to upload.
This option is ideal because your tech person would only need to initially set it up and then it would run without
intervention from that point forward.
Contact [email protected] for more information on Secure FTP.
(Copyright © CSO Research, Inc. )
68
4
Login & Authentication Options
Sections
Unit 4
4.1 Student Passthrough Authentication
Unit 4 contains information you may need regarding
External Login, Passthrough and Shibboleth.
4.2 External Login
4.3 Shibboleth
Passthrough Authentication and Shibboleth single signon Authentication allows a school to first authenticate
users through their university or college system (i.e.
Portal login system or Student registrations system).
External Login HTML provides you with the HTML to
move your username and password boxes to your Career Services main website.
Unit 4—Interfase Supervisor’s Guide
4.1 Student Passthrough Authentication
Overview
This authentication functionality is designed to allow a school to authenticate students with their local
campus system. After the student has authenticated with the campus system they can be seamlessly
directed into the Interfase site without a second login. The pass-through authentication provides
the feel of a single portal solution for the students. Each student will use only one user name and
password to enter the campus system and Interfase.
The pass-through is designed to only send the student’s user name to Interfase. Passwords and other
sensitive credentials never leave the school’s system. The school can use the new Student Upload
feature to populate the student database with student data. The only requirement for the passthrough authentication is that the user name in the campus system and the user name in Interfase
match.
Technical Details
The pass-through authentication is accomplished through the use of an encrypted query string token.
The token is encrypted using the AES (Rijndael) block cipher algorithm. The AES algorithm is very
secure and has been recommended by security analysts as a replacement for the 3DES algorithm that
is used extensively in banking and finance applications.
The encrypted token contains two values separated by a hexadecimal delimiter. The first value is
the student user name. This user name should be the campus user name and needs to match the
user name in Interfase. The second value is a timestamp formatted as MM/DD/YYYY HH:MM:SS,
representing a 2 digit month and day, 4 digit year, and 24 hour 6 digit time of the day. All timestamps
are compared to CST time. The values combined should look like:
<user name><0x08><MM/DD/YYYY HH:MM:SS>
This entire query string is then encrypted using the AES block cipher. The resulting cryptographic
array of bytes is then base 64 encoded to a string. Finally, the base 64 string is html encoded so that it
can safely be passed in the query string c_id value.
Once the encrypted query string c_id token has been generated, the token will only be good for 10
seconds. The short lifetime of the token prevents malicious users from retrieving tokens contained in
proxy and web server logs and using them to automatically authenticate as the student. The redirect
should be formatted:
http://…/student/school_login.aspx?c_id=<token>
Key and IV
The key and IV are generated in each Interfase site and are used for encryption/decryption of
passthrough data. See the Key Management section in this guide for more information on how to
obtain or change your key and IV.
The key and IV for Interfase need to be rigorously protected by the campus system. If a malicious user
(Copyright © CSO Research, Inc. )
70
CSO Research, Inc.
were to steal the key and IV, they could determine the token format and login as any student by brute
force guessing of user names. For this reason the school must use caution in storing and protecting
the key. If the key is ever stolen, an Administrator can quickly enter Interfase and generate a new key
to prevent the old key from being used.
Encryption Settings
Block size: Feedback Size: Key Size: Mode: Padding: 128 bits
128 bits
256 bits
CBC
PKCS7
Time Synchronization for CSO Hosted Sites
Clients hosting their Interfase application on CSO’s production servers will need to synchronize the
clock on the machine creating the timestamp with our domain. CSO uses NTP to keep all of our
servers in sync with time.nist.gov.
Troubleshooting Passthrough Authentication
Message: “An error has occurred on this page…”
This message indicates one of the following problems:
The timestamp is not synchronized with the time.nist.gov NTP server
The timestamp is not sent using the central time zone
The encrypted token is not valid
Message: “Either your session has timed out, or you have requested a secure page without logging in.
Please log in and try again.”
This message can occur if the Interfase site is launched within a frame in the school’s portal. The
Interfase site should be launched in a new window or should be used as a redirect from the portal.
Code Samples
The following samples show how to generate the login link in different languages:
C# Sample Code
The following sample code shows how to use the Microsoft .NET framework v1.1 to create the query
string token.
//retrieve the key and iv from our protected storage
byte[] key = Convert.FromBase64String(Application[“_setting_key”].ToString());
byte[] iv = Convert.FromBase64String(Application[“_setting_iv”].ToString());
//create the AES transform
RijndaelManaged crypt = new RijndaelManaged();
ICryptoTransform tx = crypt.CreateEncryptor(key, iv);
(Last edited August 2009)
71
Unit 4—Interfase Supervisor’s Guide
//create the stream storage for encrypting
using( MemoryStream mem = new MemoryStream() )
using( CryptoStream cstream = new CryptoStream(mem, tx, CryptoStreamMode.Write
) )
using( StreamWriter writer = new StreamWriter(cstream) )
{
//write the <user name><0x08><timestamp> into the encryption stream
writer.Write(“student_user name” + Convert.ToChar(0x08).ToString() +
DateTime.Now.ToString());
writer.Flush();
cstream.Flush();
cstream.FlushFinalBlock();
mem.Position = 0;
//read the encrypted bytes
using( BinaryReader reader = new BinaryReader(mem) )
{
//the data[] byte array contains the encrypted bytes
byte[] data = reader.ReadBytes((int)mem.Length);
//convert the byte array into a base 64 string
string sData = Convert.ToBase64String(data);
//url encode the string to remove invalid query string characters
sData = System.Web.HttpContext.Current.Server.UrlEncode(sData);
//build the final pass through link
string sLink = “http://www.myinterfase.com/demo/student/school_login.
aspx?c_id=” + sData;
}
}
VB.Net Sample
Private Function CreateToken(ByVal user As String) As String
Dim
Dim
Dim
Dim
Dim
Dim
crypt As System.Security.Cryptography.RijndaelManaged = Nothing
tx As ICryptoTransform = Nothing
mem As MemoryStream = Nothing
cstream As CryptoStream = Nothing
writer As StreamWriter = Nothing
reader As BinaryReader = Nothing
Try
‘****************************************************************
‘securely load these keys with your values
Dim key(16) As Byte
Dim iv(16) As Byte
key
key = Convert.FromBase64String(“rn0tI4aWbjdBhgGRHyWURg==”)
iv = Convert.FromBase64String(“R2tRSd/VlfNT//rjB23F3Q==”)
iv
(Copyright © CSO Research, Inc. )
72
CSO Research, Inc.
‘****************************************************************
crypt = New System.Security.Cryptography.RijndaelManaged
tx = crypt.CreateEncryptor(key, iv)
mem = New MemoryStream
cstream = New CryptoStream(mem, tx, CryptoStreamMode.Write)
writer = New StreamWriter(cstream)
writer.Write(user & Convert.ToChar(8).ToString() & DateTime.Now.
ToString(“MM/dd/yyyy HH:mm:ss”))
writer.Flush()
cstream.Flush()
cstream.FlushFinalBlock()
mem.Position = 0
reader = New BinaryReader(mem)
Dim data(mem.Length) As Byte
data = reader.ReadBytes(CInt(mem.Length))
Dim sData As String
sData = Convert.ToBase64String(data)
sData = System.Web.HttpUtility.UrlEncode(sData)
CreateToken = sData
Catch ex As Exception
MsgBox(“error - “ & ex.Message)
Finally
crypt = Nothing
tx.Dispose()
tx = Nothing
mem.Close()
cstream.Close()
writer.Close()
reader.Close()
mem = Nothing
cstream = Nothing
writer = Nothing
reader = Nothing
End Try
End Function
Java Sample
Add the following imports
(Last edited August 2009)
73
Unit 4—Interfase Supervisor’s Guide
import
import
import
import
import
import
java.security.*;
javax.crypto.*;
javax.crypto.spec.*;
java.io.*;
java.util.*;
java.security.spec.AlgorithmParameterSpec;
public static void main(String[] args) {
try{
Security.addProvider( new com.sun.crypto.provider.SunJCE() );
//TODO: replace with your specific “key” and “iv”
byte[] myKey = Base64.decode(“key”);
byte[] myIV = Base64.decode(“iv”);
//**********************
AlgorithmParameterSpec paramSpec = new IvParameterSpec(myIV);
SecretKeySpec key = new SecretKeySpec(myKey, “AES”);
byte[] keyBytes = key.getEncoded();
String keyFormat = key.getFormat();
Cipher cipher = Cipher.getInstance(“AES/CBC/PKCS5Padding”);
cipher.init(Cipher.ENCRYPT_MODE, key, paramSpec);
//TODO: replace sInput with the student data and current
//timestamp
String sInput = “student”;
sInput = sInput + (char)8;
sInput = sInput + “08/18/2004 14:55:05”;
byte[] input = sInput.getBytes(“ASCII”);
//**********************
byte[] outputFinal, outputRegular;
outputFinal = cipher.doFinal(input);
String sBase64 = Base64.encodeBytes( outputFinal );
String sToken = java.net.URLEncoder.encode(sBase64);
//TODO: replace “myschool” with your site name
System.out.println(“http://www.myinterfase.com/myschool/student/school_
login.aspx?c_id=” + sToken );
}
catch(Exception e) {
System.out.println(e.getMessage()); }
(Copyright © CSO Research, Inc. )
74
CSO Research, Inc.
4.2 External Login
The process for creating an external login page for each user type in Interfase is a straightforward
HTML solution. In any external HTML page the following code could be added for each user type to
enable it to serve as an external login page for Interfase.
Sample HTML
Here is some basic HTML code to create the necessary login boxes as well as the registration and
reset password links if desired. This sample is for student login but contains comments for creating
necessary page for student, employer, faculty or mentor:
<!DOCTYPE html PUBLIC “-//W3C//DTD XHTML 1.0 Transitional//EN” “http://www.
w3.org/TR/xhtml1/DTD/xhtml1-transitional.dtd”>
<html xmlns=”http://www.w3.org/1999/xhtml” >
<head>
<title>Offsite Login</title>
<style>
div.panelRow {clear: both; }
div.panelRow span.panelLabel {float: left;width: 115px;textalign:right;font-size: 10pt;font-family: verdana, arial, helvetica, sansserif; }
div.panelRow span.panelFormw {float: right;width: 150px;text-align:
right; }
</style>
</head>
<body>
<!—NOTE:replace <site> with your site and change user to applicable type
(student, employer, mentor, faculty)-->
<form method=”post” action=”https://www.myinterfase.com/<site>/student/home.
aspx”>
<input type=”hidden” name=”offsite” id=”offsite” value=”1” />
<div id=”container”>
<div id=”main” style=”width: 400px;”>
<div class=”panelRow”>
<span class=”panelLabel”>User Name:</span>
<span class=”panelForw”><input type=”text” id=”username”
name=”username” /></span>
</div>
<div class=”panelRow”>
<span class=”panelLabel”>Password:</span>
<span class=”panelForw”><input type=”password” id=”pwd” name=”pwd”
/></span>
</div>
<div style=”padding-left:115px;”><input type=”Submit” id=”submit”
value=”Login” /></div>
<div style=”padding-left:115px;padding-top:10px;font-size: 10pt;fontfamily: verdana, arial, helvetica, sans-serif;”>
<!—NOTE:replace <site> with your site and change page to applicable reg page
(studentregistration.aspx, contact registration.aspx, mentor_reg.aspx-->
<a href=”https://www.myinterfase.com/<site>/studentregistration.
aspx”>Click here to register</a>
(Last edited August 2009)
75
Unit 4—Interfase Supervisor’s Guide
</div>
<div style=”padding-left:115px;padding-top:8px;font-size: 10pt;
font-family: verdana, arial, helvetica, sans-serif;”>
<!—NOTE:replace <site> with your site and change ?ac= to applicable noted
below-->
<!--student: ac=274 mentor: ac=174 employer: remove ?ac= completely faculty:
ac=074 -->
<a href=”https://www.myinterfase.com/<site>/passwordreset.
aspx?ac=274”>Forgot Password?</a>
</div>
</div>
</div>
</form>
</body>
</html>
(Copyright © CSO Research, Inc. )
76
CSO Research, Inc.
4.3 Shibboleth
The Shibboleth integration allows for the creation and update of student data in CSO Interfase based
on data attributes passed during the Shibboleth interaction. Shibboleth provides a secure and
standardized structure for the passing of data in a single sign-on scenario.
If you use Shibboleth, you would not need to upload student data, as you would with the regular
Student Passthrough Authentication. This option can be setup to update data when a student logs in
each time and also automatically fill out data fields if the student is registering for the first time.
Shibboleth is very customized to each school, please contact your account manager for further
information about this feature.
(Last edited August 2009)
77
advanced solutions for career services offices
CSO Research, Inc.
P.O. Box 340819 • Austin, TX 78734
(866) 705-4201 (toll free); Press 1 for Support
[email protected]