1
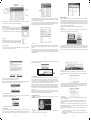
Dock Area
Amkette FlashLink Suite Virtual Drive
User Manual
Introduction
The Flash Link Suite program is used to transfer data between two computers. It has
several useful functions for you to view or manage files on two computers at the same
time.
Connect with two PCs
Go! Bridge
The Go! Bridge is used to transfer data between the two PCs. Click on Go! Bridge when
the FlashLink Suite is launched.
The overview of the Go! Bridge Window
(1) Connect the USB Flash Drive to your computer. You should see three removable disk
drives: Flash Link Suite Virtual Drive , USB DISK Drive and Virtual Link.
(2) Connect the USB Flash Drive to the other computer through its mini-USB port with
the USB cable, you should see Flash Link Virtual Drive and Virtual Link (without the USB
DISK Drive).
Launch FlashLink Suite
Users only need to launch FlashLink Suite on your PC;
the other PC will launch FlashLink Suite automatically
when it connects to your PC via the USB cable. Firstly,
connect the USB cable between two PCs.
Note: If two PCs are not connected, the warning as in
the figure on the right will pop-up to remind users.
Double click on the title bar of GO! Bridge and you will be able to enlarge Window Mode
of GO! Bridge to the maximum window. Left double click it again; the window will
switch back to its previous size.
Double click on the device icon ( ) on Window Mode; you will be able to switch it to the
Icon Mode of the other PC, and vice versa.
If the USB transfer cable has been connected to both the computers and yet FlashLink
Suite program hasn’t been launched; please run FlashLink Suite from the disk drive
Manage the File list
Right click on the file of the file list; the pull-down menu will be shown promptly. You
can Open, Add to Dock, Copy, Paste, and Delete the files you selected on the file list.
Right click the “ ” icon to view the pull-down menu. Select “Open Dock” to open the
Dock Area.
Right click the file on Dock Area; a pop-up menu will appear for user to select. Users can
able to choose "Copy", "Paste", "Remove from Dock" or "Select All" files.
File Transfer
There are three ways to transfer files on GO! Bridge.
1. GO! Bridge allows user to transfer files via the dock area for once.
2. You can transfer files directly via copying the file from the source to the destination
you wish to paste on the file list on Window Mode of the other PC.
3. User can simply drag the file and drop it on Icon Mode ( ) of the other PC; however,
it only allows you to transfer the file to the desktop of the other PC. A progress
Information window will pop up to notify you that the file transfer is in progress; press
"Cancel" if you wish to abort the file transfer.
Folder Sync
Folder Sync is an application for two PCs to sync data in the shortest time via a USB
Cable. Users can sync folders and IE My Favorites via Folder Sync. To follow the
advantage of easy to use of FlashLink Suite series, it not only allow the beginnersto use
this program easily but also meets the need of advanced users.
FlashLink Suite
-1-
-2-
-3-
(1) Add a task. Press button on the top left corner of the main panel to add a task.
(2) Input the task name.
(3) Select Task Type. Select the task type you wish to sync. Users are allowed to sync
folders or IE my favorites.
(4) Select Sync Contents. Select the sync contents by pressing the
directions by pressing the
button.
icon and the sync
(4) Execute Outlook Sync.
After the steps above, press “Next” to start Outlook Sync.
Sync data two ways
Sync data from this PC to the other PC
Sync data from the other PC to this PC
(5) After the steps above, users can sync all tasks on the task list while clicking “Sync all”
on the top-left corner of the main panel or select “Sync This Task” on the top right
corner of the main panel to sync single task on the task list. After you select the sync
type, the program will start to sync and compare the data. Click “Cancel” if you wish to
abort the sync task.
(1) Sync Setup. Please click the “Setup” button on the bottom-left corner of the main
panel to configure mail and default items to sync.
The contents include “To replace the existing items from the source PC or not” and “The
configuration of this PC’s Mail Server.
(6) Sync Records. After the sync tasks are completed, a pop-up window will ask if you
want to view the sync records immediately. Click “Yes” to view it promptly; click “No” to
abort it. However, if you wish to view the sync records anytime, you can simply select
sync records in the settings menu located on the top right corner of the main panel.
GO! Finder
GO! Finder is a revolutionary file management application on the Flash Drive. It
overturns your stereotype of Flash Drives as it cannot only be the media transmission
but also the storage platform for the important data.
(2) Set up the Sync Direction.
Outlook Sync
Folder Sync is an application for two PCs to sync Outlook mail and items including
“Contact”, “Inbox”, “Calendar”, “Journal”, “Task”, “Note” and “Sent Items” via a USB Cable.
Note: Make sure both PCs have the same version of Microsoft Outlook installed.
Otherwise Outlook Sync may not work properly.
-4-
After the synchronization is completed, the following figure will pop up to remind users
of the completion of Microsoft Outlook Sync.
There are two sync directions for users to select. Users can choose “Sync data from the
other PC” or “Sync data from this PC”.
With the Go! Finder, you can manage your files stored on the Flash Drive.
The Overview of Window Mode
(3) The Configuration of Sync items.
Users can not only select seven default sync items as “Contact”, “Inbox”,
“Calendar”, “Task”, “Notes” and “Sent Items” but can also “Sync other folders”.
-5-
-6-
Drag and drop files into Device Icon of Window Mode; you are able to copy the files to
the root directory of the device, and start to write the files in.
In File List, different files may be marked as different suite symbols; To mark the suit
symbol of single file, you right click on the selected file or directly click the first column
of each file to choose its suite symbol.
User can define and edit search the suit symbol via “add filter” button and choose the
suit symbol you wish to sort on “Suit Symbol Contain” option. It will help you sort the
file with the suit symbol you wish. Please refer to the following figure.
Manage the File List
Right click the file list to show a pop-up menu. With the
menu, you can explore and edit the file list with options
such as Open, Show In Windows Explorer, Rename, Copy,
Cut, Paste, Duplicate and Delete the root directory you
View Menu
Music, Video, and 24 hours for user’s convenience. Press
to launch View Menu. Select the filtering types you wish to
search, and GO! Finder will list all matched files via the filter.
Suite Symbol Menu
You are able to choose the default icons of Suit Symbol of the playing cards. The default
icons are heart, club, diamond and spade.
Remote Share
If your computer doesn’t have Internet access nor CD Drive, how can you use these two
essential features from other computers? Or you wish to share CD Drive or Internet
access with other computers, what can you do about it? Remote Share is the best
solution. Remote Share is a user-friendly application which allows you to share and use
Internet or data on the CD Drive with the other computer via a simple high-speed USB
transfer cable connecting both computers.
Note: The Remote Share function is not supported by Windows 2000 OS.
How to use
After FlashLink Suite is connected successfully to both computers, you can simply click
“Remote Share” on the operation panel of FlashLink Suite.
Icon Mode
Double click on the device icon of Window Mode; it will switch to Icon Mode. Press the
device icon; you can move it to anywhere on the window and it’s always on top of the
window,
Drag and drop files or folders to Device Icon; you are able to copy files to the root
directory of the Flash Drive. Double click on the device icon of Icon Mode; it will switch
to Window Mode. Move the cursor on Icon Mode, it will show the space available space
of the Flash Drive.
A warning window will pop up to remind you to close the antivirus program of your
computer first and then execute “share and use Internet or data on the CD Drive with
the other computer”. Select “Do not display this message next time” if you don’t want to
see this message again. Press “Continue” to execute Remote Share. Press “Exit” to abort
it.
-8-
-9-
-7-
the powerful function of “CD Drive Share” of “Remote Share” is to use the CD Drive of the
computer which has CD Drive.
Exit Remote Share
Click “X” on the the top right corner of the main panel of Remote Share, a dialogue
window will pop up” Do you want to exit Remote Share?”. Click “Yes” to close Remote
Share.
2. Share Internet :
The steps of executing Remote Share are as followings:
Make the connection between two computers
Press “Remote Share” to start the communication with the other computer and wait for
the response. Select “Cancel the connection”, if you wish to abort it.
Features of Remote Share
Once Remote Share is connected to both computers, you can press use/share CD Drive
or share/use Internet of the other computer.
If your computer is connected to the Internet, you can press “I will share my Internet” to
share the Internet with the other computer which is disconnected from the Internet.
If your computer is not connected to the Internet & the other computer is connected to
the Internet, and its OS is higher than Windows 2000, press “I will use remote Internet
resource” to use Internet of the other PC which is connected to Internet.
If the computer which is connected to Internet is Windows 2000,it doesn’t support
Internet share, so that the other computer cannot use Internet share feature, either.
When Internet is being shared, the system tray will show the status of Internet sharing.
Once Internet share is launched successfully, the selection of “Internet resource” will
disappear.
E.g.: If you travel with your NB and wish to use Internet without wireless services nor
LAN cable, Internet Resource Share of Remote Share can help you easily use the other
computer’s Internet resource via the connection between two PCs.
3. About Remote Share
Click on the top right corner of the main panel of Remote Share, the version of
Remote Share is shown here.
Powerful function of Remote Share
1. Use CD Drive:
Click “I will use CD Drive of the other computer” to open the data such as movies, music,
photos, etc of the remote CD Drive by “ Open Windows Explorer“ which shows as “The
other computer’s CD Drive” in my computer. If the other computer doesn’t have CD
Minimize
Click on the top right corner of the main panel of Remote Share, to minimiseit to the
systemtray. You can click its icon to launch it again.
- 10-
- 11 -
Then, both computers will switch to FlashLink Suite main panel; meanwhile, a dialogue
window will pop up “You are ready to use FlashLink Suite now”. If the main panel of
FlashLink Suite does not open automatically, please re-plug in the cable or open “My
Computer” and double click “GO Suite” drive to start it.
Supplementary
1. If both computers are connected to each other, unplug USB transfer cable, Remote
Share will close promptly.
2. If both computers are connected successfully, re-plug in the USB transfer cable, a
pop-up window of “Try to recover the connection with the other computer” will
remind you.
3. If it fails to connect to both PCs, Remote Share will ask you to re-plug in the USB
transfer cable. Make sure the panel of Remote Share disappear first and then re-plug in
the USB transfer cable to both PCs.
4. If either of or both computers are restarted or re-logged in, two conditions may
occur:
a. The USB transfer cable still connected to both computers; a warning window
“resume connection” will pop up.
b. If the transfer cable is disconnected from both computers, Remote Share will exit
automatically.
- 12 -