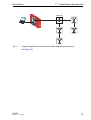
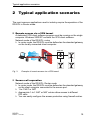
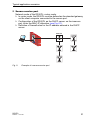
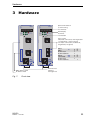
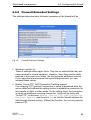
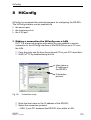
1
User Manual
Management
Industrial ETHERNET Rail Router ETHERNET Powerlink
RR-EPL TX/TX, RR-EPL TX/MM SC
x
RR-EPL
P
1
2
RR-EPL
P
FAULT
STATUS
LS/DA
1
x
1
2
2 V.24
R
1
2 V.24
R
EPL
IP-ADDRESS
EPL
IP-ADDRESS
FAULT
STATUS
LS/DA
1
1
2
2
V.24
RR-EPL
Release 1.0 01/06
+24V (P2)
0V
0V
+24V (P1)
FAULT
g
Aufkleber MAC-Adresse
+24V (P2)
FAULT
0V
0V
+24V (P1)
Aufkleber MAC-Adresse
g
V.24
Technical Support
[email protected]
The naming of copyrighted trademarks in this manual, even when not specially indicated, should
not be taken to mean that these names may be considered as free in the sense of the trademark
and tradename protection law and hence that they may be freely used by anyone.
© 2006 Hirschmann Automation and Control GmbH
Manuals and software are protected by copyright. All rights reserved. The copying, reproduction,
translation, conversion into any electronic medium or machine scannable form is not permitted,
either in whole or in part. An exception is the preparation of a backup copy of the software for
your own use.
The performance features described here are binding only if they have been expressly guaranteed in the contract. This publication has been created by Hirschmann Automation and Control
GmbH according to the best of our knowledge. Hirschmann reserves the right to change the
contents of this manual without prior notice. Hirschmann can give no guarantee in respect of the
correctness or accuracy of the details in this publication.
Hirschmann can accept no responsibility for damages, resulting from the use of the network
components or the associated operating software. In addition, we refer to the conditions of use
specified in the license contract.
Printed in Germany (1.2.06)
Hirschmann Automation and Control GmbH
Stuttgarter Straße 45-51
72654 Neckartenzlingen
Tel. +49 1805 141538
039 506-001-01-0106
Content
Content
Safety instructions
7
1
Introduction
13
1.1
Requirement and solution
14
1.2
Product features
16
1.3
Device models
18
2
Typical application scenarios
19
3
Hardware
23
3.1
Display
3.1.1 Device status
3.1.2 Port status
3.1.3 Function state
24
24
26
26
3.2
Recovery button
27
4
Installation and startup procedure
29
4.1
Device installation
4.1.1 6-pin terminal block
4.1.2 Assembly
4.1.3 Interfaces
4.1.4 Disassembly
30
30
31
33
36
4.2
Startup operation
37
4.3
Basic settings
4.3.1 System configuration via HiDiscovery
4.3.2 System configuration via V.24
38
39
40
RR-EPL
Release 1.0 01/06
3
Content
5
Configuration
41
5.1
Setting up a local configuration connection
5.1.1 Web-based administrator interface
5.1.2 After a successful connection setup
42
42
44
5.2
Remote configuration
5.2.1 Remote configuration via LAN
5.2.2 Remote configuration via modem
47
47
48
6
Web-based management
53
6.1
Overview
54
6.2
System menu
6.2.1 System:Configurations-Profiles
6.2.2 System:Configuration Pull
6.2.3 System:Reboot
6.2.4 System:Logs - Display
6.2.5 System:HiDiscovery
6.2.6 System:Signal contact
55
55
58
59
60
61
62
6.3
Ports menu
6.3.1 Ports:Configuration Table
64
64
6.4
Ethernet Powerlink menu
6.4.1 Ethernet Powerlink:Setup
6.4.2 Ethernet Powerlink:Reset
6.4.3 Ethernet Powerlink:SDO Access
6.4.4 Protecting the EPL segment
6.4.5 Ethernet Powerlink:Logs - Display
66
66
68
68
71
71
6.5
Network menu
6.5.1 Network:Base
6.5.2 Network:Router
6.5.3 Network:PPPoE
6.5.4 Network:PPTP
6.5.5 Network:Extended Settings
6.5.6 Network:Status
72
72
76
78
79
81
82
6.6
Configuring the firewall
6.6.1 Firewall:Incoming
6.6.2 Firewall:Outgoing
6.6.3 Firewall:Port Forwarding
6.6.4 Firewall:NAT
83
84
86
88
90
4
RR-EPL
Release 1.0 01/06
Content
6.6.5 Firewall:1-to-1 NAT
6.6.6 Firewall:Extended Settings
6.6.7 Firewall:Logs - Display
93
95
96
6.7
Setting up a VPN connection
6.7.1 VPN:Connections
6.7.2 VPN:Machine Certificate
6.7.3 VPN:L2TP
6.7.4 VPN Configuration, IPsec Status - Display
6.7.5 VPN:L2TP Status - Display
6.7.6 VPN:VPN Logs - Display
97
98
111
114
115
116
116
6.8
Services menu
6.8.1 Services:DNS
6.8.2 Services:DynDNS Monitoring
6.8.3 Services:DynDNS registration
6.8.4 Services:DHCP Intern (trusted port)
6.8.5 Services:DHCP Extern (untrusted port)
6.8.6 Services:LLDP
6.8.7 Services:NTP
6.8.8 Services:Remote Logging
6.8.9 Services:SNMP Traps
117
117
120
121
123
125
128
129
131
133
6.9
Access menu
6.9.1 Access:passwords
6.9.2 Access:Language
6.9.3 Access:HTTPS
6.9.4 Access:SSH
6.9.5 Access:SNMP
6.9.6 Access:Serial Port/Modem
136
136
138
139
142
145
148
6.10
Features menu
6.10.1 Features:Local Update
6.10.2 Features:Online Update
6.10.3 Features:Software Information - Display
6.10.4 Features:Hardware information
151
151
152
154
155
6.11
Support menu
6.11.1 Support:Snapshot
6.11.2 Support:Status - Display
156
156
157
6.12
CIDR (Classless InterDomain Routing)
160
6.13
Example of a network
162
RR-EPL
Release 1.0 01/06
5
Content
7
The Recovery button
165
7.1
Performing a restart
166
7.2
Executing the recovery procedure
7.2.1 Aim
7.2.2 Action
167
167
167
7.3
Flashing the firmware
7.3.1 Requirements for flashing the firmware
7.3.2 Installing the DHCP and tftp server under Windows
7.3.3 Installing DHCP and TFTP servers under Linux
168
170
171
173
8
HiConfig
175
A
Appendix
183
A.1
FAQ
184
A.2
Based specifications and standards
185
A.3
SNMP traps
187
A.4
Certifications
189
A.5
Technical data
190
A.6
Copyright of integrated software
194
B
Glossar
195
C
Reader's comments
203
D
Index
205
Hirschmann Competence
209
6
RR-EPL
Release 1.0 01/06
Safety instructions
Safety instructions
U Supply voltage
The devices are designed for operation with a safety extra-low voltage.
They may only be connected to the supply voltage connections and to
the signal contact with PELV circuits or alternatively SELV circuits with
the voltage restrictions in accordance with IEC/EN 60950.
The supply voltage is electrically isolated from the housing.
V Never start operation with damaged components!
V Relevant for North America:
The subject unit is to be suppplied by a Class 2 power source
complying with the requirements of the National Electrical Code, table
11(b). If power is redundant supplied (two individual power sources)
the power sources together should comply with the requirements of
the National Electrical Code, table 11 (b).
V Relevant for North America:
Use 60/75°C or 75°C copper(CU)wire only.
V Relevant für Nordamerika:
Power, input and output (I/O) wiring must be in accordance with
Class I, Division 2 wiring methods [Article 501-4(b) of the National
Electrical Code, NFPA 70] and in accordance with the authority having
jurisdiction.
U Shielding ground
The shielding ground of the connectable twisted pair lines is connected
to the front panel as a conductor.
V Beware of possible short circuits when connecting a cable section with
conductive shielding braiding.
RR-EPL
Release 1.0 01/06
7
Safety instructions
U Housing
Only technicians authorized by Hirschmann are permitted to open the
housing.
The device is grounded via the separated ground screw. It is located on
the bottom of the front panel.
V Make sure that the electrical installation meets local or nationally
applicable safety regulations.
V The ventilation slits must not be covered to ensure free air circulation.
V The distance to the ventilation slots of the housing has to be a
minimum of 10 cm.
V Never insert pointed objects (thin screwdrivers, wires, etc.) into the
inside of the subrack! Failure to observe this point may result in injuries
caused by electric shocks.
V The housing has to be mounted in upright position.
V If installed in a living area or office environment, the device must be
operated exclusively in switch cabinets with fire protection
characteristics according to EN 60950.
U Environment
The device may only be operated in the listed maximum surrounding air
temperature range at the listed relative air humidity range (noncondensing).
V The installation location is to be selected so as to ensure compliance
with the climatic limits listed in the Technical Data.
V To be used in a Pollution Degree 2 environment only.
U Qualification requirements for personnel
Qualified personnel as understood in this manual and the warning signs,
are persons who are familiar with the setup, assembly, startup, and
operation of this product and are appropriately qualified for their job. This
includes, for example, those persons who have been:
D trained or directed or authorized to switch on and off, to ground and to
label power circuits and devices or systems in accordance with current
safety engineering standards;
D trained or directed in the care and use of appropriate safety equipment
in accordance with the current standards of safety engineering;
D trained in providing first aid.
8
RR-EPL
Release 1.0 01/06
Safety instructions
U General Safety Instructions
This device is electrically operated. Adhere strictly to the safety
requirements relating to voltages applied to the device as described in
the operating instructions!
Failure to observe the information given in the warnings could result in
serious injury and/or major damage.
V Only personnel that have received appropriate training should operate
this device or work in its immediate vicinity. The personnel must be
fully familiar with all of the warnings and maintenance measures in
these operating instructions.
V Correct transport, storage, and assembly as well as careful operation
and maintenance are essential in ensuring safe and reliable operation
of this device.
V These products are only to be used in the manner indicated in this
version of the manual.
V Any work that may have to be performed on the electrical installation
should be performed by fully qualified technicians only.
Warning!
LED- or LASER components according to IEC 60825-1 (2001):
CLASS 1 LASER PRODUCT.
LIGHT EMITTING DIODE - CLASS 1 LED PRODUCT.
U National and international safety regulations
V Make sure that the electrical installation meets local or nationally
applicable safety regulations.
RR-EPL
Release 1.0 01/06
9
Safety instructions
U Note on the CE marking
The devices comply with the regulations contained in the following
European directives:
89/336/EEC
Directive of the council for standardizing the regulations of member
states on electromagnetic compatibility (changed by RL 91/263/EEC, 92/
31/EEC and 93/68/EEC).
In accordance with the above-named EU directives, the EU conformity
declaration will be at the disposal of the relevant authorities at the
following address:
Hirschmann Automation and Control GmbH
Stuttgarter Straße 45-51
D-72654 Neckartenzlingen
Germany
Phone ++49 7127 14 1480
The product can be used in living areas (living area, place of business,
small business) and in industrial areas.
D Interference immunity: EN 61000-6-2:2001
D Emitted interference: EN 55022:1998 + A1 2000 Class A
Warning!
This is a class A device. This device can cause interference in living
areas, and in this case the operator may be required to take appropriate
measures.
The assembly guidelines provided in these instructions must be strictly
adhered to in order to observe the EMC value limits.
10
RR-EPL
Release 1.0 01/06
Safety instructions
U FCC note:
Appropriate testing has established that this device fulfills the
requirements of a class A digital device in line with part 15 of the FCC
regulations.
These requirements are designed to provide sufficient protection against
interference where the device is being used in a business environment.
The device creates and uses high frequencies and can radiate same,
and if it is not installed and used in accordance with this operating
manual, it can cause radio transmission interference. The use of this
device in a living area can also cause interference, and in this case the
user is obliged to cover the costs of removing the interference.
U Recycling note:
After usage, this product must be disposed of properly as electronic
waste in accordance with the current disposal regulations of your county
/ state / country.
RR-EPL
Release 1.0 01/06
11
Safety instructions
12
RR-EPL
Release 1.0 01/06
Introduction
1 Introduction
Today, Ethernet is the most widely used type of communications technology.
It has become the de facto standard in an office environment. Ethernet
technology is also gaining significance in the field of industrial automation.
In addition to the advantages of using a standardized form of communication,
Ethernet allows for a seamless infrastructure that extends from the office all
the way to the machine or sensor. Consequently, not only are process and
production data available on the field level, but they also integrate
seamlessly with interdepartmental data acquisition systems.
Despite these advantages there are new issues that must be solved to be
able to operate the installations securely and reliably. A top-priority issue is
that of security which is determined by the factors: authentication,
authorization, confidentiality, availability and data integrity.
RR-EPL
Release 1.0 01/06
13
Introduction
1.1 Requirement and solution
1.1 Requirement and solution
Increasing standardization and networking in the field of automation will lead
to increased vulnerability of these networks. The threat emanates from
dangers which office users have been exposed to for quite some time and
which they have been attempting to ward off with popular security solutions
-- with mixed success.
The greatest danger is not only from hackers and is often not intentional.
Fusing the office and production network makes for easy prey when it comes
to the risks posed by worms. Furthermore, machine and production cells are
often unprotected against intrusions (for example, faulty addressing or faulty
program code) from the production network.
Today this no longer has to be the case:
The industrial firewall and virtual private network (VPN) system RR-EPL
monitors with an "eagle's eye" the security of networks across company
borders. The RR-EPL provides secure access to a real-time ETHERNET
Powerlink network segment. It also supports the ETHERNET Powerlink
protocol V2.0 at the EPL port. The RR-EPL works as a Controlled Node (CN)
and performs the tasks of a type 1 ETHERNET Powerlink router.
Migration is performed in existing networks for secure and insecure ports via
twisted pair and F/O connections. Furthermore, a V.24 port is available for
configuration and for connecting a modem.
The scaleable security function featuring a
D Pure firewall or a
D Firewall and VPN function
provides customized protection.
In router mode, subnetworks can be separated from the main network.
You can use the simple 1-to-1 NAT or NAT configuration and the stateful
inspection firewall to realize secure access protection on different
ETHERNET Powerlink segments in the factory network.
The integrated DHCP server makes it easy and safe to set up service ports
for employees in the field.
By providing a login procedure (internal and external), it is possible to
analyze and thus optimize the data traffic.
14
RR-EPL
Release 1.0 01/06
Introduction
1.1 Requirement and solution
RH2-TX
x
EAGLE
P
1
2
FAULT
STATUS
LS/DA
1
2 V.24
R
IP-ADDRESS
k
1
2
+24V (P2)
Aufkleber MAC-Adresse
+24V (P1)
0V
0V
FAULT
g
V.24
Fig. 1:
A typical application scenario (for further application scenarios,
see Page 19)
RR-EPL
Release 1.0 01/06
15
Introduction
1.2 Product features
1.2 Product features
The state-of-the-art security system secures the authentication, fuse
protection, and confidentiality of the communication in production networks:
In combination with the RR-EPL, firewalls, VPNs and scaleable security
functions provide the highest possible level of protection for industrial
networks and prevent inadvertent and uncontrolled data manipulation.
D Scalability of the security function:
- pure firewall
- firewall with VPN function
D Creation of subnetworks:
- router mode
D The router mode and the 1-to-1 NAT or NAT allow access to different
similarly structured EPL segments.
D Easy starting operation:
- HiDiscovery support
- support for the AutoConfiguration adapter
D Remote access to the network:
- dial-in access via V.24
D Extensive diagnostics:
- Web-based management
- status LEDs
- signal contact
- logging in to the SysLog server
- integration with HiVision
D Migration to existing networks:
Twisted pair and F/O links for secure port
D Design suitable for industrial use:
- redundant 24 V power supply
- can be mounted to a top-hat rail
- IP 20 without fan
D VLAN
D MAC filter rules
D 1-to-1 NAT
D Sortable firewall rules
16
RR-EPL
Release 1.0 01/06
Introduction
1.2 Product features
D LLDP (802.1AB)
D DHCP Relay and Option 82
RR-EPL
Release 1.0 01/06
17
Introduction
1.3 Device models
1.3 Device models
The RR-EPL is available in 2 different models:
RR-EPL TX/Medium
Insecure port
Secure port (EPL)
Firewall with VPN function
Device name
Fig. 2:
Device identifier:
Device type
TP ports
10/100
RR-EPL TX/TX
RR-EPL TX/MM SC
2
1
F/O port
multimode
100 MBit/s
1
Table 1: Device models
18
RR-EPL
Release 1.0 01/06
Typical application scenarios
2 Typical application scenarios
The most common applications used in industry require the operation of the
RR-EPL in Router mode.
U Remote access via a VPN tunnel
A dedicated VPN client software program must be running on the single
computer. Windows 2000/XP contains the VPN client software.
Network mode of the RR-EPL: router
D In router mode, the RR-EPL must be defined as the standard gateway
on the locally connected client computer.
RH2-TX
x
1
2
1
FAULT
STATUS
2 V.24
R
IP-ADDRESS
k
1
2
FAULT
+24V (P2)
Aufkleber MAC-Adresse
g
+24V (P1)
VPN
P
LS/DA
0V
0V
unsecure
network
EAGLE
V.24
Fig. 3:
Example of remote access via a VPN tunnel
U Secure cell separation
Network mode of the RR-EPL: Router mode
D In router mode, the RR-EPL must be defined as the standard gateway
on the client computer connected to the secure port.
D 1-to-1 NAT or NAT
D Appropriate 1-to-1 NAT or NAT entries allow access to different
EPL cells.
D You can easily configure the access protection using firewall entries.
RR-EPL
Release 1.0 01/06
19
Typical application scenarios
Cell /
Subnet 3
Cell /
Subnet 2
RH2-TX
RH2-TX
x
x
EAGLE
EAGLE
P
1
2
1
1
2
FAULT
STATUS
LS/DA
FAULT
STATUS
1
2 V.24
R
2 V.24
R
k
IP-ADDRESS
k
IP-ADDRESS
P
LS/DA
1
1
2
FAULT
+24V (P2)
0V
0V
+24V (P1)
+24V (P2)
Aufkleber MAC-Adresse
+24V (P1)
FAULT
g
0V
0V
g
Aufkleber MAC-Adresse
2
V.24
V.24
MICE
RS2-…
Industrial Backbone /
Subnet 1
RS2-…
MACH 3002
Fig. 4:
20
Example of secure cell separation
RR-EPL
Release 1.0 01/06
Typical application scenarios
U Secure service port
Network mode of the RR-EPL: router mode.
D In router mode, the RR-EPL must be defined as the standard gateway
on the client computer connected to the secure port.
D Configuration of the RR-EPL as the DHCP server: on the insecure
port, enter the MAC-IP allocation (see Fig. 61).
D Definition of firewall rules for the IP address entered in the DHCP
server.
RH2-TX
x
EAGLE
P
1
2
FAULT
STATUS
LS/DA
1
2 V.24
R
IP-ADDRESS
k
1
2
Aufkleber MAC-Adresse
+24V (P2)
0V
0V
+24V (P1)
FAULT
g
V.24
Fig. 5:
Example of a secure service port
RR-EPL
Release 1.0 01/06
21
Typical application scenarios
U Secure connection of networks
Network mode of the RR-EPL: Router
D In router mode, the RR-EPL must be defined as the standard gateway
on the client computer connected to the secure port.
D If you use a DSL modem, make the PPPoE settings
(see “Network:PPPoE” on page 78).
MACH 3002
MACH 3002
Industrial Backbone
Industrial Backbone
FAULT
STATUS
2 V.24
R
IP-ADDRESS
k
1
unsecure
network
x
EAGLE
P
1
2
FAULT
STATUS
LS/DA
1
2 V.24
R
k
1
2
2
Aufkleber MAC-Adresse
V.24
Fig. 6:
22
g
+24V (P1)
Aufkleber MAC-Adresse
+24V (P2)
0V
0V
+24V (P1)
FAULT
g
FAULT
2
1
+24V (P2)
1
IP-ADDRESS
EAGLE
P
LS/DA
0V
0V
x
V.24
Example of a secure connection of networks
RR-EPL
Release 1.0 01/06
Hardware
3 Hardware
x
RR-EPL
P
1
2
RR-EPL
P
FAULT
STATUS
LS/DA
1
x
1
2
1
2 V.24
R
reset button
1
Port 1 and 2
TX (RJ45 connection, autonegotiaton
+ autopolarity + autocrossing)
or FX (SC connection; multimode,
singlemode, longhoul)
EPL
IP-ADDRESS
IP-ADDRESS
EPL
LED display
elements
FAULT
STATUS
LS/DA
2 V.24
R
6pin terminal block
(screw locking
mechanism)
1
V.24
MAC address field
IP address field
Fig. 7:
MM
MM
x
x
TX
g
+24V (P2)
0V
0V
+24V (P1)
FAULT
g
Aufkleber MAC-Adresse
+24V (P2)
FAULT
0V
0V
+24V (P1)
Aufkleber MAC-Adresse
g
Port 1
EPL
(EPL)
RR-EPL TX/TX
RR-EPL TX/MM SC
Port 2
(untrusted)
RR-EPL TX/TX
RR-EPL TX/MM SC
TX
2
2
x
x
V.24
V.24 interface
external
management
Front view
RR-EPL
Release 1.0 01/06
23
Hardware
3.1 Display
3.1 Display
x
RR-EPL
P
1
2
FAULT
STATUS
LS/DA
1
Fig. 8:
2 V.24
R
Display
3.1.1 Device status
These LEDs provide information about statuses which affect the function of
the entire RR-EPL.
U P1 - Power 1 (Green LED)
Display
lit
not lit
24
Meaning
Supply voltage 1 is present.
Supply voltage 1 is less than 9.6 V.
RR-EPL
Release 1.0 01/06
Hardware
3.1 Display
U P2 - Power 2 (Green LED)
Display
lit
not lit
Meaning
Supply voltage 2 is present.
Supply voltage 2 is less than 9.6 V.
U FAULT - Failure (Red LED)
Display
lit
not lit
Meaning
The indicator contact is open, i.e. incorrect EPL status.
The indicator contact is closed, i.e. EPL without error.
If the “Operational supervision” on page 62 is active for the signal
contact, then the error display is independant of the signal contact
position.
U STATUS - Device status (Yellow/green LED)
Display
flashes green
not lit
flickers green
flashes once a second green
flashes twice a second green
flashes three times a second green
lit green
Meaning
Initialization of the device.
EPL not active.
BASIC-ETHERNET mode
Managing node looking for subscribers.
EPL subscribers found.
EPL initialization complete.
EPL active.
U AutoConfiguration Adapter ACA
The “STATUS” and “V.24” LEDs display memory operations of the
ACA 11.
Display
flashing alternatively:
LEDs flash simultaneously; twice a second
LEDs flash simultaneously; once a second
RR-EPL
Release 1.0 01/06
Meaning
Error in memory operation.
Loading the configuration from the ACA.
Saving the configuration to the ACA.
25
Hardware
3.1 Display
3.1.2 Port status
These LEDs display port-related information.
U LS/DA 1, 2 and V.24 - Data, Link status (green/yellow LED)
Display
not lit
lit green
flashes yellow
running light
Meaning
No valid link.
Valid link.
Receiving data.
Initialization phase after a reset.
3.1.3 Function state
These displays go together with the Recovery button (refer to “The Recovery
button” on page 165).
26
RR-EPL
Release 1.0 01/06
Hardware
3.2 Recovery button
3.2 Recovery button
The Recovery button is used to set the device into the following states:
D Restart (refer to “Performing a restart” on page 166),
D Recovery procedure (refer to “Executing the recovery procedure” on page
167),
D Flashing the firmware (refer to “Flashing the firmware” on page 168)
RR-EPL
Release 1.0 01/06
27
Hardware
28
3.2 Recovery button
RR-EPL
Release 1.0 01/06
Installation and startup procedure
4 Installation and
startup procedure
The RR-EPL industrial firewall/VPN system has been developed for practical
applications in a harsh industrial environment. Accordingly, the installation
process has been kept simple. The few configuration settings required for
operation are described in this chapter.
Note: For security reasons, change the root and the administrator passwords
when you initially change the configuration.
RR-EPL
Release 1.0 01/06
29
Installation and startup procedure
4.1 Device installation
4.1 Device installation
4.1.1 6-pin terminal block
The supply voltage and the signal contact are connected via a 6-pin terminal
block with snap lock.
Warning!
The devices are designed for operation with safety extra-low voltage.
Thus, they may only be connected to the supply voltage connections and to
the signal contact with PELV circuits or alternatively SELV circuits with the
voltage restrictions in accordance with IEC/EN 60950.
U Supply voltage
The supply voltage can be connected redundantly. Both inputs are
uncoupled. There is no distributed load. With redundant supply, the
transformer supplies the device alone with the higher output voltage.
The supply voltage is electrically isolated from the housing.
U Signal contact
The signal contact monitors proper functioning of the device,
thus enabling remote diagnostics.
A break in contact is reported via the potential-free signal contact
(relay contact, closed circuit):
D The failure of at least one of the two supply voltages (supply voltage 1
or 2 < 9,6 V).
D A continuous malfunction in the device (internal 3.3 VDC voltage).
D The defective link status of at least one port. With the device the
indication of link status can be masked by the management for each
port. Link status is not monitored in the delivery condition.
D Error during self-test.
30
RR-EPL
Release 1.0 01/06
Installation and startup procedure
+24 V (P1)
4.1 Device installation
0V
0V
+24 V (P2)
Fault
Fig. 9:
Pin assignment of the 6-pin terminal block
V Pull the terminal block off the device and connect the power supply and
signal lines.
4.1.2 Assembly
On delivery, the device is ready for operation.
V Attach the upper snap-in guide of the device into the top-hat rail and press
it down against the top-hat rail until it snaps into place.
RR-EPL
Release 1.0 01/06
31
Installation and startup procedure
Fig. 10:
4.1 Device installation
Assembly
Note: The front panel of the housing is grounded via a ground connection.
Note: The housing must not be opened.
Note: The shielding ground of the industrial connectable twisted pair lines is
connected to the front panel as a conductor.
32
RR-EPL
Release 1.0 01/06
Installation and startup procedure
4.1 Device installation
4.1.3 Interfaces
U 10/100 Mbit/s connection
10/100 Mbit/s ports (8-pin R45 socket) enable the connection of terminal
devices or independent network segments in compliance with the
IEEE 802.3 100BASE-TX / 10BASE-T standards. These ports support:
D auto-negotiation
D autocrossing (when autonegotiation is switched off)
D autopolarity
D 100 Mbit/s half duplex mode
D 100 Mbit/s full duplex mode
D 10 Mbit/s half duplex mode
D 10 Mbit/s full duplex mode
State on delivery: Autonegotiation activated. Alternative to the Webbased interface (see “Ports:Configuration Table” on page 64), the
HiConfig interface (see “HiConfig” on page 175) allows you to change
this setting. While you have access to the Web-based interface of the
RR-EPL via the secure and insecure port, you can also reach the
HiConfig interface via the V.24 port.
The socket housings are electrically connected to the front panel.
n.c.
n.c.
TDn.c.
n.c.
TD+
RDRD+
Fig. 11:
Pin 8
Pin 7
Pin 6
Pin 5
Pin 4
Pin 3
Pin 2
Pin 1
Pin assignment of a TP/TX interface in MDI-X mode, RJ45 socket
RR-EPL
Release 1.0 01/06
33
Installation and startup procedure
4.1 Device installation
U 100 Mbit/s F/O connection
100 MBit/s F/O ports (DSC sockets) enable the connection of terminal
devices or independent network segments in compliance with the
IEEE 802.3 100BASE-FX standard. These ports support:
D full and half duplex mode.
State on delivery: full duplex. This configuration is required to form
redundant structures.
U V.24 interface (external management)
A serial interface is provided on the RJ11 socket (V.24 interface) for the
local connection of
D an external management station (VT100 terminal or PC with
appropriate terminal emulation).
D a modem (via PPP).
D an ACA 11 AutoConfiguration Adapter.
VT-100 terminal settings in state on delivery:
- Speed:
9,600 baud
- Data:
8 bit
- Stopbit:
1 bit
- Handshake:
off
- Parity:
none
The socket housing is electrically connected to the lower covering of the
device.
The signal lines are electrically isolated from the supply voltage (60 V
insulation voltage) and the front panel.
RJ11
DB9
Pin 5
Pin 8
Pin 6
Pin 1
Pin 1
CTS
n.c.
TX
GND
RX
RTS
Fig. 12:
34
1
2
3
4
5
6
2
3
5
Pin assignment of the terminal cable
RR-EPL
Release 1.0 01/06
Installation and startup procedure
RJ11
4.1 Device installation
DB9
Pin 1
Pin 7
Pin 6
Pin 1
Pin 5
CTS
n.c.
TX
GND
RX
RTS
Fig. 13:
1
2
3
4
5
6
1
2
3
4
5
6
7
8
9
Pin assignment of the modem cable
V Install the signal lines and, if necessary, the terminal/modem cable.
V Attach the ground cable to the ground screw.
RR-EPL
Release 1.0 01/06
35
Installation and startup procedure
4.1 Device installation
4.1.4 Disassembly
V In order to remove the device from the top-hat rail, move the screwdriver
horizontally under the chassis in the locking gate, pull this down — without
tilting the screwdriver — and fold the device up.
Fig. 14:
36
Disassembly
RR-EPL
Release 1.0 01/06
Installation and startup procedure
4.2 Startup operation
4.2 Startup operation
When the supply voltage is connected via the terminal, start up the device.
RR-EPL
Release 1.0 01/06
37
Installation and startup procedure
4.3 Basic settings
4.3 Basic settings
In its state on delivery, the device operates as a type 1 ETHERNET Powerlink
router. In the BASIC ETHERNET mode, the RR-EPL is accessed via the
IP address 192.168.100.254 with the network mask 255.255.255.0 on the
EPL port.
The firewall has been preconfigured so that all IP traffic from the secure
network is possible and traffic from the insecure network to the secure one
is possible.
The RR-EPL provides 4 options for configuring the IP address of the
unsecure port:
D
D
D
D
38
Entry by HiDiscovery protocol,
Entry via the Web-based management (via EPL port),
Entry via the V.24 port,
DHCP.
RR-EPL
Release 1.0 01/06
Installation and startup procedure
4.3 Basic settings
4.3.1 System configuration via HiDiscovery
The HiDiscovery protocol enables you to assign IP parameters to the device
via the unsecure network.
You can easily configure additional parameters with the “Web-based
management” on page 53.
Install the HiDiscovery software on your PC. The software is on the CD
supplied with the device.
V To install it, you start the installation program on the CD.
Note: The installation of HiDiscovery involves installing the WinPcap
Version 3.0 software package.
If an earlier version of WinPcap is already installed on the PC, then you must
first uninstall it. A newer version remains intact when you install HiDiscovery.
However, this can not be guaranteed for all future versions of WinPcap.
In the event that the installation of HiDiscovery has overwritten a newer
version of WinPcap, then you uninstall WinPcap 3.0 and then re-install the
new version.
V Start the HiDiscovery program.
Fig. 15:
HiDiscovery
When HiDiscovery is started, it automatically searches the network for those
devices which support the HiDiscovery protocol.
HiDiscovery uses the first PC network card found. If your computer has
several network cards, you can select these in HiDiscovery on the toolbar.
RR-EPL
Release 1.0 01/06
39
Installation and startup procedure
4.3 Basic settings
HiDiscovery enables you to identify the devices displayed.
V Select a device line.
V Click on the symbol with the two green dots in the tool bar to set the LEDs
for the selected device flashing. To switch off the flashing, click on the
symbol again.
By double-clicking a line, you open a window in which you can enter the
device name and the IP parameter.
Fig. 16:
HiDiscovery - assigning IP parameters
Note: For security reasons, switch off the HiDiscovery function for the device
in the Web-based management, after you have assigned the IP parameters
to the device.
4.3.2 System configuration via V.24
Connect your PC with the RR-EPL as described in “Making a connection to
HiConfig over a V.24 port.” on page 177.
For entering IP parameters see “IP parameter configuration in transparent
mode” on page 181.
40
RR-EPL
Release 1.0 01/06
Configuration
5 Configuration
Requirements
D For local configuration:
The computer with which you make the configuration must be either
– directly connected to the device,
– or it must be connected to it via the local network.
D For remote configuration on the insecure port:
The RR-EPL must be configured in such a way that it allows remote
configuration.
D The RR-EPL must be switched on, i.e. must be connected to a power
supply unit so that it is supplied with current.
D The RR-EPL must be connected, i.e. the required connections must
function properly.
RR-EPL
Release 1.0 01/06
41
Configuration
5.1 Setting up a local configuration connection
5.1 Setting up a local
configuration connection
5.1.1 Web-based administrator interface
The RR-EPL is configured with the Web browser that runs on the
configuration computer (for example MS Internet-Explorer starting with
version 5.0 or Netscape Communicator staring with version 4.0)
Hinweis: The Web browser must support SSL (i.e. https).
Depending on the network mode (operating mode) in which the RR-EPL is
in, it can be reached at the one of the following addresses according to the
factory setting:
Mode
EPL
unsecure port
Address
https://192.168.100.254/
https://IP addres (see “Basic settings” on page 38)
Table 2: Address line of the browsers
Proceed as follows:
V Start a Web browser.
(For example, MS Internet Explorer Version 5.0 or later or Netscape
Communicator Version 4.0 or later; the Web browser must support SSL
(i.e. https).)
42
RR-EPL
Release 1.0 01/06
Configuration
5.1 Setting up a local configuration connection
V Make certain that the browser does not automatically setup a connection
when it starts, because otherwise the connection startup to the RR-EPL
could be impaired.
In MS Internet Explorer, you can prevent this with the following setting:
In the Extras menu, select Internet Options... and click on
the Connections tab. Make certain that "Never dial a connection" is
selected under Dial-up and Virtual Private Network settings.
V Enter the complete address of the RR-EPL into the browser's address
field.
Afterwards:
The RR-EPL's Administrator Web page will be displayed. The security
notice shown on the next page will displayed.
Note: If the Administrator Web page is not displayed...
If - even after repeated attempts - the browser still reports that the page
cannot be displayed, try the following:
D Check if both ports have a network connection.
D Try disabling any existing firewall.
D Make certain that the browser does not use a proxy server.
In MS Internet Explorer (Version 6.0), you can prevent this with the
following setting: In the Extras menu, select Internet Options...
and click on the Connections tab. Under LAN Settings click on the
Properties... button and, in the Local Area Network (LAN)
Settings dialog, check to make certain that Use a proxy server for
your LAN (under Proxy server) is not activated.
D If any other LAN connection is active on the system, deactivate it until the
configuration has been completed.
Under the Windows Start menu:Settings:Control
Panel:Network Connections or Network and Dial-up
Connections, right click on the associated icon and select Disable in
the pop-up menu.
RR-EPL
Release 1.0 01/06
43
Configuration
5.1 Setting up a local configuration connection
5.1.2 After a successful connection setup
After the connection has been successfully setup, the following security
notice will be displayed (MS Internet Explorer):
Since administrative tasks can
only be performed when a secure
(encrypted) access has been
established to the device, a signed
(by the device) certificate will be
returned.
Fig. 17:
Security notice dialog
V Acknowledge the associated security notice by clicking on Yes.
Afterwards:
Once you have entered the correct user name (Login) and password,
the Administrator Web page of the RR-EPL will be displayed.
Name
Login
Passwort
Entry
admin
private
Table 3: Factory settings for login name and password
Note: These entries are case-sensitive!
44
RR-EPL
Release 1.0 01/06
Configuration
Fig. 18:
5.1 Setting up a local configuration connection
Administrator website start screen
To configure the device, proceed as follows:
V Call up the desired dialog - see “Web-based management” on page 53.
V Make the desired settings on the associated page
V Once you have confirmed the changes by clicking on OK, the new settings
will be activated on the device.
You may receive a message from the system (confirmation).
If the changes are not shown when you open the page again, because the
browser has loaded the page from a cache, reload the page to refresh the
display. To do so, click on the appropriate icon in the browser toolbar.
RR-EPL
Release 1.0 01/06
45
Configuration
5.1 Setting up a local configuration connection
Note: Depending on how you configure the RR-EPL, you may also need to
modify the network interface settings of the locally connected system or
network accordingly.
46
RR-EPL
Release 1.0 01/06
Configuration
5.2 Remote configuration
5.2 Remote configuration
Prerequisites:
The RR-EPL must be configured via the unsecure port. For reasons of
security, remote configuration is disabled by default.
For information on how to enable remote configuration, see “Access:HTTPS”
on page 139.
5.2.1 Remote configuration via LAN
To configure the RR-EPL from a remote computer, first establish a
connection between it and the local RR-EPL.
Proceed as follows:
V Start a Web browser (e.g. MS Internet Explorer Version 5.0 or later or
Netscape Communicator Version 4.0 or later; the Web browser must
support SSL (i.e. https) on the remote system.
V As the URL, enter: the IP address under which the remote site can be
reached via the Internet or WAN, plus the port number.
Example:
If this RR-EPL can be found in the Internet at the address 192.144.112.5 and
the Port Number 443 has been set as the port for remote access, you must
enter the following address in the Web browser's address field on the remote
system: 192.144.112.5
(If a different Port Number is used, this must be appended to the IP address,
e.g.: 192.144.112.5:442)
Hinweis: For reasons of security, we recommend that you change the
default Root and Administrator passwords during the first configuration - see
“Access:passwords” on page 136.
RR-EPL
Release 1.0 01/06
47
Configuration
5.2 Remote configuration
5.2.2 Remote configuration via modem
The V.24 port allows you to,
D perform remote maintenance in transparent mode RR-EPL
D perform remote maintenance on the RR-EPL in router mode and on
the secure network behind it
via a modem (e.g. INSYS modem 56K small).
Access to the secure network is subject to the firewall rules in this dialog.
U Local installation:
V Connect your modem on the one end to the telephone network and
on the other end to the V.24 port of the RR-EPL via the mode cable
(see “Accessories” on page 193).
U Remote installation:
V Connect your PC to the telephone network via the built-in or external
modem.
RH2-TX
x
EAGLE
INSYS
P
1
2
FAULT
STATUS
LS/DA
1
IP-ADDRESS
k
1
2
+24V (P2)
Aufkleber MAC-Adresse
+24V (P1)
FAULT
g
0V
0V
Telephone line
2 V.24
R
V.24
Modem
unsecure
network
Fig. 19:
48
Example of a modem connection
RR-EPL
Release 1.0 01/06
Configuration
5.2 Remote configuration
Example of establishing a modem connection under Windows 2000:
V Choose:
Start:Settings:Network and Dial-Up Connections:Make
New Connection
and continue with the Network Connection Wizard (see the following
two figures). Enter the phone number at which you can reach the
modem.
Fig. 20:
Network connection type, phone number
Select "Properties" to
check the settings for
the connection (see the
following two figures).
Fig. 21:
Establishing a connection
RR-EPL
Release 1.0 01/06
49
Configuration
5.2 Remote configuration
Fig. 22:
General connection properties
Fig. 23:
Connection properties: Options, security and network
50
RR-EPL
Release 1.0 01/06
Configuration
5.2 Remote configuration
After a connection has been set up, the connection symbol will appear in
the task bar tray at the bottom right.
V Left-click the connection symbol and select Status.
V In the status window click the register card "Details".
This register card contains the
IP address of the RR-EPL (= server IP address).
V Enter htpps:// followed by this IP address in the address bar of your
browser to establish the connection to the RR-EPL's Web-based
administrator user interface.
Requirement: Configuration of the serial interface (see the following
figure).
Fig. 24:
Configuring the serial interface
RR-EPL
Release 1.0 01/06
51
Configuration
52
5.2 Remote configuration
RR-EPL
Release 1.0 01/06
Web-based management
6 Web-based management
The RR-EPL supports both SNMP management and Web-based
management and can thus offer
D extensive diagnostic and configuration functions for fast startup and
D extensive network and device information.
The RR-EPL supports the TCP/IP protocol family.
The user-friendly Web-based interface gives you the option of managing the
MICE from any location in the network via a standard browser such as the
Netscape Navigator/Communicator or the Microsoft Internet Explorer.
The Web-based interface allows you to graphically configure the RR-EPL.
U Editing tables
A number of dialogs contain tables. The tables are all used in the
same way.
Creating a new table entry:
V Click on a “downward arrow” symbol on the left side of the table.
You thus create an entry below the symbol you clicked on.
Moving an existing table entry:
V Select a row on the left side of the table below the “X” symbol.
V By clicking on a “downward arrow” symbol you move the row to below
the clicked symbol.
Deleting an existing table entry:
V Select the row to be deleted on the left side of the table below the
“X” symbol.
V You click on the “X” symbol to delete the selected row.
Editing the comment column:
You can use the fields in the comment column to add remarks for every
table entry.
RR-EPL
Release 1.0 01/06
53
Web-based management
6.1 Overview
6.1 Overview
The Overview dialog shows you a graphic display of the RR-EPL and the
system data:
D Name: any name you wish to assign to the RR-EPL for easier
identification.
D Location: Location of this RR-EPL.
D Power supply 1/2: Status of the power supply units.
D Uptime: Time that has elapsed since the RR-EPL was last restarted.
D Temperature, displays the temperature inside the RR-EPL. Enter the
lower and upper temperatures as alarm thresholds.
Fig. 25:
54
System data
RR-EPL
Release 1.0 01/06
Web-based management
6.2 System menu
6.2 System menu
6.2.1 System:Configurations-Profiles
You can save the configuration settings as a configuration profile under any
name in the RR-EPL. You can create and save multiple configuration
profiles. You can then select and activate the configuration profile
appropriate at the time, if you use the RR-EPL in different operating
environments.
Furthermore, you can also save configuration profiles as files on the
configuration system. Naturally, these configuration files can then be read
back into the RR-EPL and activated.
Furthermore, you can restore the RR-EPL to the factory settings at any time.
Note: Passwords and user names are not saved in the configuration profiles.
Note: With Save Current Configuration to ACA 11 you save the
current configuration on the ACA 11, if it is connected. Enter the valid root
password.
Fig. 26:
Configuration profiles
RR-EPL
Release 1.0 01/06
55
Web-based management
6.2 System menu
U Saving the current configuration in the RR-EPL as a profile
V In the Name for the new profile: field, enter the desired name.
V Click on the Save Current Configuration to Profile button.
Stored
configuration
profile
Fig. 27:
Example of a stored configuration profile
U Display / Activate / Delete a configuration profile stored in
the RR-EPL
Requirement: At least one configuration profile has been created and is
stored in the RR-EPL (see above).
D Display the configuration profile:
Click the name of the configuration profile.
D Activate the configuration profile:
Click the Restore button next to the right of the respective
configuration profile.
D Delete the configuration profile:
Click the Delete button to the right of the respective configuration
profile.
56
RR-EPL
Release 1.0 01/06
Web-based management
6.2 System menu
U Factory default settings - displaying / activating
The default setting is stored in the RR-EPLas configuration profile under
the name Factory Default.
D Displays: Click the name Factory Default.
D Activate: Click the Restore button next to the name Factory
Default.
It is not possible to delete the configuration profile Factory
Default.
U Saving a configuration profile as a file on a hard disk
V Click on the Download button at the right of the name of the
configuration profile.
V Enter the filename and folder (where the configuration profile should
be saved) in the displayed dialog. You can give the file any name
desired.
U Uploading a configuration profile from a hard disk to the
RR-EPL
Prerequisite: Naturally, you must stored (as described above) at least
one configuration profile as a file on the hard disk of the configuration
system.
V In the Name for the new profile field, enter the name that should
be assigned to configuration profile uploaded from the disk.
V Click on Choose and then select the file.
V Click on the Upload Configuration to Profile button.
Afterwards: The uploaded configuration will now be displayed in the
list of configuration profiles.
V If you want to activate the uploaded configuration profile, click on the
Restore button next to the name.
Note: If the restore procedure involves changing from the transparent
mode to another network mode, the RR-EPL will be restarted. If the
ACA 11 is connected, the RR-EPL will obtain the configuration data
from the ACA 11.
RR-EPL
Release 1.0 01/06
57
Web-based management
6.2 System menu
6.2.2 System:Configuration Pull
This dialog allows you to specify when the RR-EPL automatically downloads
a configuration from a server and continues working with this configuration.
Parameter
Pull schedule
Meaning
Period after which the RR-EPL downloads a configuration from a server.
Possible:
- Never (state on delivery)
- Once at boot
- Every 15 min
- Every 30 min
- Every 1 h
- Every 2 h
- Every 6 h
- Every 12 h
- Every 24 h
Server
Path and file name of the configuration file to be loaded.
Login
Login name for the server.
Password
Password for the login name.
Server certificate Certificate for checking the validity of the configuration file.
Table 4: Settings for automatically pulling a configuration
58
RR-EPL
Release 1.0 01/06
Web-based management
6.2 System menu
6.2.3 System:Reboot
At the end of restart, the text appears “Restarted.”
A reboot can be initiated by switching the device off and then back again or
by pressing the Recovery button (see “Performing a restart” on page 166).
Fig. 28:
Reboot
RR-EPL
Release 1.0 01/06
59
Web-based management
6.2 System menu
6.2.4 System:Logs - Display
Displays all recorded log entries (overall system log). For a selection of
specific log entries, see the respective dialogs (see for example “VPN:VPN
Logs - Display” on page 116).
The format of the log corresponds to that common under Linux
Special analysis programs are available which can be used to present the
information from the log in a more readable format.
You can send the logged entries to an external server (see “Services:Remote
Logging” on page 131).
Fig. 29:
60
Logs
RR-EPL
Release 1.0 01/06
Web-based management
6.2 System menu
6.2.5 System:HiDiscovery
The HiDiscovery protocol allows you to assign the RR-EPL an IP address
based on its MAC address. Activate the HiDiscovery protocol if you want
to assign an IP address to the RR-EPL from your PC with the enclosed
HiDiscovery software (setting on delivery: active).
Note: For security reasons, the RR-EPL HiDiscovery function supports only
the secure port
Fig. 30:
HiDiscovery
U Local HiDiscovery Support
(unsecure port only)
D Enabled, local IP address assignment via HiDiscovery possible.
D Read-Only, HiDiscovery can read local parameters.
D Disabled, no HiDiscovery access to local parameters possible.
RR-EPL
Release 1.0 01/06
61
Web-based management
6.2 System menu
6.2.6 System:Signal contact
The signal contact is for
D manual setting the signal contact.
D monitoring proper functioning of the RR-EPL and enables remote
diagnostics.
U Signal contact
Setting the function of the signal contact:
D Operational supervision
D Manual setting
U Operational supervision
A break in contact is reported via the zero-potential signal contact
(relay contact, closed circuit):
D the failure of at least one of the two supply voltages (power supply
voltage 1 or 2 < 9,6 V).
Note: With a non-redundant supply of the supply voltage, the RR-EPL will
report a supply power failure. You can prevent this by
– feeding the supply voltage over both inputs or
– by selecting “Ignore redundant power supply”.
D the defective link status of at least one port. The link status message
can be masked for
– Ignore: no link monitor
– Supervise only internal port (trusted): EPL port
– Supervise only external port (untrusted)
– Supervise both ports
Link status is not monitored in the delivery condition.
62
RR-EPL
Release 1.0 01/06
Web-based management
6.2 System menu
U Manual settings
This mode gives you the option of remote switching the signal contact.
V Select Open (Alarm) to open the contact.
V Select Closed to close the contact.
Application options:
D Simulation of an error during SPS error monitoring.
D Remote control of a device via SNMP, such as switching on a camera.
Fig. 31:
Signal contact
RR-EPL
Release 1.0 01/06
63
Web-based management
6.3 Ports menu
6.3 Ports menu
6.3.1 Ports:Configuration Table
This table allows you to configure every port of the RR-EPL.
Fig. 32:
Port configuration
U Automatic Configuration
In the “Automatic Configuration” (Autonegotiation) column, you can
activate the automatic selection of a port's operating mode by marking
the appropriate field. After the au-tonegotiation has been switched on,
it takes a few seconds for the oper-ating mode to be set.
U Manual Configuration
In the “Manual Configuration” column, you set the operating mode for
this port. The choice of operating modes depends on the media module.
The possible operating modes are:
64
RR-EPL
Release 1.0 01/06
Web-based management
D
D
D
D
6.3 Ports menu
10 Mbit/s half duplex (HDX),
10 Mbit/s full duplex (FDX),
100 Mbit/s HDX and
100 Mbit/s FDX.
Note: The active automatic configuration has priority over the manual
configuration.
U Switching a port on and off
With the “Port on” column, you can switch a port on and off.
RR-EPL
Release 1.0 01/06
65
Web-based management
6.4 Ethernet Powerlink menu
6.4 Ethernet Powerlink menu
6.4.1 Ethernet Powerlink:Setup
This dialog allows you to configure the RR-EPL as an Ethernet Powerlink node.
Fig. 33:
Ethernet Powerlink Setup
U Enable Ethernet Powerlink Stack
With „Enable Ethernet Powerlink Stack“ you enable/disable the function.
Default setting: Yes.
U EPL Node ID
Here you enter the EPL node ID under which the managing node will
address the RR-EPL.
Specification Object: 0x1F93 Sub-Index: 2.
Default setting: 254.
66
RR-EPL
Release 1.0 01/06
Web-based management
6.4 Ethernet Powerlink menu
U EPL NMT State
In this line the RR-EPL displays the status of the NMT state machine.
Possible values:
D NMT_CS_PRE_OPERATIONAL_1
D NMT_CS_PRE_OPERATIONAL_2
D NMT_CS_READY_TO_OPERATE
D NMT_CS_OPERATIONAL
D NMT_CS_STOPPED
D NMT_CS_BASIC_ETHERNET
U EPL Cycle Time (µs)
Here you enter the EPL cycle time in microseconds.
Specification: Object 0x1006.
Default setting: 10000.
Note: When you select “OK”, the RR-EPL saves these settings in the
configuration. To transfer the settings to the EPL stack, you use Ethernet
Powerlink:Reset to reset the EPL stack or execute the NMT command
ResetConfiguration.
RR-EPL
Release 1.0 01/06
67
Web-based management
6.4 Ethernet Powerlink menu
6.4.2 Ethernet Powerlink:Reset
This dialog allows you to reset the EPL stack and restart it with the saved
configuration.
This may be necessary in order to reset the status
NMT_CS_PRE_OPERATIONAL_1, which is taken from the RR-EPL in the
case of managing node failure, in accordance with the EPL specification,
back to the NMT_CS_BASIC_ETHERNET mode.
Fig. 34:
Ethernet Powerlink Reset
6.4.3 Ethernet Powerlink:SDO Access
With this dialog you can enter settings for the SDO access. SDO (Service
Data Object) provides the access to all the variables in a CANopen device.
68
RR-EPL
Release 1.0 01/06
Web-based management
6.4 Ethernet Powerlink menu
U Enable SDO remote access
If you wish to enable SDO remote access, set this switch to Yes.
Note: Ensure that in this case the firewall rules on this end have been set
so that it is possible to access the RR-EPL from an external terminal.
U Port for SDO conections (remote administration only)
Standard: 3819
You can set another port.
The remote terminal that performs the remote access must add the port
number defined here to the end of the IP address when it assigns the
address.
Example:
If this RR-EPL can be reached at the address 192.144.112.5 over the
Internet, and if port number 3819 has been set for remote access, this
port number does not have to be specified in the SDO client.
U Firewall rules to accept external SDO access
Lists the firewall rules that have been established. They apply to the
incoming data packets of an SDO remote access connection.
D Editing rule
Define the desired rule (see above) and click OK.
D From IP
Enter the address(s) of the computer(s) which is/are permitted remote
access.
The following entry options are available:
– IP address: 0.0.0.0/0 means all addresses. To indicate a range,
use the CIDR notation - see “CIDR (Classless InterDomain Routing)”
on page 160.
D Interface
external (fixed)
RR-EPL
Release 1.0 01/06
69
Web-based management
6.4 Ethernet Powerlink menu
D Action
Options: Accept / Reject / Drop
Action
Accept
Reject
Drop
Meaning
the data packets are permitted to pass through.
the data packets are rejected, and the sender is notified that the data was
rejected.
In transparent mode, Reject has the same effect as Discard, see above.
the data packets are not permitted to pass through. They are “swallowed”,
and the sender is not notified about what happened to the data.
Table 5: Actions for HTTPS access
D Log
For each individual firewall rule you can decide if, when the rule
is applied,
– the event should be logged – set Log to Yes
– or not – set Log to No (factory default setting).
Fig. 35:
70
Ethernet Powerlink SDO Access
RR-EPL
Release 1.0 01/06
Web-based management
6.4 Ethernet Powerlink menu
6.4.4 Protecting the EPL segment
In the basic setting, every station in the legacy Ethernet can access the
EPL cell. You can restrict this access by means of corresponding firewall
rules. Entries can be made in the following menus to restrict the access to
the EPL cell:
D Firewall > Incoming (untrusted port)
Here you can include or exclude stations or parts of the network from
accessing the EPL segment.
It can also be useful for you to restrict the access to the RR-EPL itself,
using the following menus:
D
D
D
D
Access > HTTPS
Access > SSH
Access > SNMP
Ethernet Powerlink > SDO Access
6.4.5 Ethernet Powerlink:Logs - Display
Displays the LOG entries specific to the Ethernet Powerlink which the
RR-EPL makes for various EPL events.
RR-EPL
Release 1.0 01/06
71
Web-based management
6.5 Network menu
6.5 Network menu
6.5.1 Network:Base
The RR-EPL must naturally be set to the Network Mode (= operating mode)
that matches its connection to the local computer or network (see “Typical
application scenarios” on page 19).
Fig. 36:
Network:Base
Variable
in router mode (at EPL port)
in PPPoE mode
Local netmask
IP address
192.168.100.254
192.168.100.254
255.255.255.0
Table 6: The RR-EPLs preset local IP address
Note: When the Network Mode has been changed, the device will reboot
automatically.
72
RR-EPL
Release 1.0 01/06
Web-based management
6.5 Network menu
Note: If you change the address of the RR-EPL (e.g. by changing the
Network Mode from Router to PPPoF), the device will be immediately, after
a restart, only accessible at the new address.
Note: If you set the Network Mode to Router, PPPoE or PPTP and then
change the internal IP address and/or the local netmask, make very certain
that you enter the correct values. Otherwise, the RR-EPL will no longer be
accessible.
U Network mode
D Router mode
This is the normal mode of the RR-EPL.
The security functions firewall and VPN are available.
Note: If the RR-EPL is operated in router mode, a locally connected client
computer of the RR-EPL must be defined as the standard gateway, i.e.
the address of the standard gateway must be set to the internal IP
address of the RR-EPL (see “IP configuration for the Windows clients” on
page 127.)
Note: If the RR-EPL is operated in Router mode and is used to establish
the connection to the Internet, you should activate NAT to allow access
to the Internet from the local network (see “Firewall:NAT” on page 90).
If NAT is not activated, the device will only allow VPN connections.
D PPPoE mode
The PPPoE mode corresponds to router mode with DHCP – with one
difference: To connect to an external network (Internet, WAN) the
PPPoE protocol is used – as in Germany – which is used by many
DSL modems (for DSL Internet access). The external IP address,
at which the RR-EPL can be reached from a remote terminal, is
determined dynamically by the provider.
Address of the device (for configuration purposes):
IP address: 192.168.1.1
Local network mask: 255.255.255.0
Note: If the RR-EPL is operated in PPPoE mode, a locally connected
client computer of the RR-EPL must be defined as the standard gateway,
i.e. the address of the standard gateway must be set to the internal IP
address of the RR-EPL (see “IP configuration for the Windows clients” on
page 127.)
RR-EPL
Release 1.0 01/06
73
Web-based management
6.5 Network menu
Note: If the RR-EPL is in PPPoE mode, NAT must be activated to enable
access to the Internet (see “Firewall:NAT” on page 90). If NAT is not
activated, the device will only allow VPN connections.
D PPTP Mode
This mode is similar to PPPoE mode. In Austria, for example,
PPTP is used instead of the PPPoE protocol for DSL connections.
PPTP is the protocol, which was originally used by Microsoft for
VPN connections.
Note: If the RR-EPL is operated in PPTP mode, you must set it as the
standard gateway in the locally connected client computers. In other
words, the address entered for the standard gateway must be the internal
IP address of the RR-EPL (see “IP configuration for the Windows clients”
on page 127).
Note: If the RR-EPL is in PPTP mode, NAT must be activated to enable
access to the Internet (see “Firewall:NAT” on page 90). If NAT is not
activated, the device will only allow VPN connections.
U Internal IPs
Router / PPPoE / PPTP mode
Internal IPs is the IP address, under which the RR-EPL can be
accessed from the locally connected LAN.
Default setting:
IP address: 192.168.100.254
Lokal Netmask: 255.255.255.0
VLAN: no
VLAN ID: 1
You can also specify other addresses, under which the RR-EPL can be
accessed by devices on the locally connected network. This can be
useful, for example, if the locally connected network is divided into
subnetworks. In this case, multiple units on different subnetworks can
access the RR-EPL under different addresses (multinetting).
V If you wish to define another internal IP, click the arrow down.
V If you wish to delete an internal IP, select the line and click the „X“
symbol.
The first IP address in the list cannot be deleted.
74
RR-EPL
Release 1.0 01/06
Web-based management
6.5 Network menu
U Additional Internal Routes
Router / PPPoE / PPTP mode
If the locally connected network includes subnetworks, you can define
additional routes.
Also see “Example of a network” on page 162.
V If you wish to define another route to a subnetwork, click on New.
Enter:
– the IP address of the subnetwork (network), plus
– the IP address of the gateway through which the subnetwork is
connected.
You can define any number of internal routes.
V If you wish to delete an internal route, click the „X“ symbol.
Note: If additional internal routers are defined, these have no effect in
transparent mode.
RR-EPL
Release 1.0 01/06
75
Web-based management
6.5 Network menu
6.5.2 Network:Router
Requirement: The RR-EPL has been set to the network mode Router.
Fig. 37:
Network:Router
U External interface
Obtain external configuration via DHCP: Yes / No.
V If the RR-EPL obtains the configuration data per DHCP (Dynamic Host
Configuration Protocol) from the DHCP server, set Yes. No other
information is necessary.
V If the RR-EPL does not obtain the data via DHCP (Dynamic Host
Configuration Protocol) from the DHCP server, set No.
The RR-EPL must then operate in the network mode Router
(see “Router mode” on page 73). You must then make provide
further information:
76
RR-EPL
Release 1.0 01/06
Web-based management
6.5 Network menu
U External networks (connected to the insecure port)
External IPs (untrusted port)
At these external IP addresses, the RR-EPL can be reached by devices
of the external network (connected to the Ethernet socket of the RREPL). They form the interface to other parts of the LAN or to the Internet.
If the gateway to the Internet is here, the IP address are then determined
by the Internet service provider (ISP).
V If you wish to provide an additional external IP, click “New”.
V If you wish to delete one of the external IPs, click the “X” symbol.
Additional External Routes
In addition to the default route (see below) you can define other
external routes.
V If you wish to provide an additional external route, click the arrow
down.
V If you wish to delete one of the additional external routes, click the “X”
symbol.
See also “Example of a network” on page 162.
U Default Gateway
Default of default gateway
Is determined by the Internet service provider (ISP), when the RR-EPL
sets up the gateway to the Internet. If the RR-EPL is used within the
LAN, the route from the network administrator is specified.
Note: If the local network is not known to the external router, e.g. in the
case of configuration by DHCP, enter the address of your local network
under Firewall:NAT, in other words 0.0.0.0/0
(see “Firewall:NAT” on page 90).
RR-EPL
Release 1.0 01/06
77
Web-based management
6.5 Network menu
6.5.3 Network:PPPoE
Requirement: The RR-EPL has been set to the network mode PPPoE.
(see “PPPoE mode” on page 73).
User name (login) and password are requested by the Internet Service
Provider (ISP), when you wish to establish a connection with the Internet.
Fig. 38:
Network:PPPoE
U PPPoE Login
In this field, enter the user name (Login), which is expected by your
Internet Service Provider when you setup a connection to the Internet.
U PPPoE Password
In this field, enter the password, which is expected by your Internet
Service Provider when you setup a connection to the Internet.
78
RR-EPL
Release 1.0 01/06
Web-based management
6.5 Network menu
6.5.4 Network:PPTP
Requirement: The RR-EPL has been set to the network mode PPTP
(see “PPTP Mode” on page 74).
User name (Login) and password are requested by the Internet service
provider (ISP), when you wish to establish a connection with the Internet.
Fig. 39:
Network:PPTP
U PPTP Login
In this field, enter the user name (Login), which is expected by your
Internet Service Provider when you setup a connection to the Internet.
U PPTP Password
In this field, enter the password, which is expected by your Internet
Service Provider when you setup a connection to the Internet.
RR-EPL
Release 1.0 01/06
79
Web-based management
6.5 Network menu
U Set local IP
Via DHCP
If the address data for access to the PPTP server is supplied by the
Internet service provider per DHCP, select via DHCP.
You do not have to make an entry under Local IP.
Modem IP. This is the address of the PPTP server of the Internet Service
Provider.
static (following field)
If the address data for accessing the PPTP server is not supplied by the
Internet service provider per DHCP, the IP address must be specified as
a local IP address for the PPTP server.
Local IP. IP address, at which the RR-EPL can be reached from the
PPTP server.
Modem IP. This is the address of the PPTP server of the Internet Service
Provider.
80
RR-EPL
Release 1.0 01/06
Web-based management
6.5 Network menu
6.5.5 Network:Extended Settings
U ARP Timeout
Specify in seconds how long ARP waits for a response before the query
is seen to have failed.
U MTU of the internal interface
MTU (Maximum Transmission Unit) is the maximum length of an
IP datagram.
Longest IP datagram that the internal interface accepts.
U MTU of the internal interface for VLAN
Longest IP datagram that the internal interface accepts for VLANs.
U MTU of the external interface
Longest IP datagram that the external interface accepts.
U MTU of the external interface for VLAN
Longest IP datagram that the external interface accepts for VLANs.
U MTU of the management interface
Longest IP datagram that the internal management interface accepts.
U MTU of the managementi Interface for VLAN
Longest IP datagram that the internal management interface accepts
for VLANs.
RR-EPL
Release 1.0 01/06
81
Web-based management
6.5 Network menu
6.5.6 Network:Status
U Network mode
Displays the current operating mode of the RR-EPL: router, PPPoE or
PPTP (see “Network:Base” on page 72).
U External IP
The IP address of the RR-EPL at its connection for the insecure network
(WAN or Internet).
If the RR-EPL is assigned an IP address dynamically, you can look up
the currently valid IP address here.
U Default gateway
The default gateway address is shown here that is entered in the
RR-EPL.
Fig. 40:
82
Network:Status
RR-EPL
Release 1.0 01/06
Web-based management
6.6 Configuring the firewall
6.6 Configuring the firewall
The RR-EPL contains a stateful packet inspection firewall. The connection
data of an active connection are recorded in a database (referred to as
connection tracking). Rules only need to be defined for one direction; data
from the opposite direction of a connection and only this data is automatically
passed through. A side effect is that existing connections are not interrupted
during reconfiguration, even if a new connection can no longer be set up.
Factory settings for the firewall:
D All incoming connections will be accepted.
D The data packets of all outgoing connections will be passed through.
Note: VPN connections are not subject to the firewall rules defined under
this menu item. You can define firewall rules for each each individual VPN
connection in the menu “VPN:Connections” on page 98.
Note: If multiple firewall rules are set, they will be searched in the order
in which they are listed (from top to bottom) until a suitable rule is found.
This rule will then be applied. If further down in the list there are other rules,
which would also fit, they will be ignored.
RR-EPL
Release 1.0 01/06
83
Web-based management
6.6 Configuring the firewall
6.6.1 Firewall:Incoming
Lists the firewall rules that have been set. They apply to incoming data
packets that are initiated externally.
Note: If no rule has been set, all incoming connections (except for VPN)
are rejected.
Note: With the protocol setting “All”, the port settings are ignored.
Fig. 41:
84
Firewall:Incoming
RR-EPL
Release 1.0 01/06
Web-based management
6.6 Configuring the firewall
U Editing a rule
The following options are available:
D Protocol: All means: TCP, UDP, ICMP and other IP protocols.
Note: If you select All, the RR-EPL ignores the port settings (from port,
to port).
D IP address: 0.0.0.0/0 means all addresses. To indicate a range,
use the CIDR notation - see “CIDR (Classless InterDomain Routing)”
on page 160.
D Port:
(is only evaluated for the protocols TCP and UDP)
any refers to any port.
startport:endport (e. g. 110:120) refers to a port range.
Individual ports can be specified either with the port number or with the
respective service name: (e. g. 110 for pop3 or pop3 for 110). A list of
the most commonly used port numbers can be found at http://
www.iana.org/assignments/port-numbers.
D Action:
Accept means the data packets are permitted to pass through.
Reject means that the data packets are not accepted, and the sender
is notified that the data was rejected. I transparent mode, Reject
has the same effect as Discard.
Discard means the data packets are not permitted to pass through.
They are discarded, and the sender is not notified about what
happened to the data.
Note: In Transparent mode Reject is supported if the local IP address
is entered correctly.
D Log
For each individual firewall rule you can decide if, when the rule is
applied,
– the event should be logged – set Log toYes
– or not – set Log to No (factory default setting).
D Log entries for unknown connection attempts
This logs all connection attempts that are not recorded by the
preceding rules.
RR-EPL
Release 1.0 01/06
85
Web-based management
6.6 Configuring the firewall
6.6.2 Firewall:Outgoing
Lists the firewall rules that have been established. They apply to outgoing
data connections that are initiated internally. The default setting allows all
packets to pass through.
With the default rule, all outgoing connections are permitted to pass through.
Note: With the protocol setting “All”, the port settings are ignored.
Fig. 42:
86
Firewall:Outgoing
RR-EPL
Release 1.0 01/06
Web-based management
6.6 Configuring the firewall
U Editing a rule
The following options are available:
D Protocol: All means: TCP, UDP, ICMP, and other IP protocols.
Note: If you select All, the RR-EPL ignores the port settings (from port,
to port).
D IP address: 0.0.0.0/0 means all addresses. To indicate a range,
use the CIDR notation - see CIDR (Classless InterDomain Routing) see “CIDR (Classless InterDomain Routing)” on page 160.
D Port:
any refers to any port.
startport:endport (e. g. 110:120) refers to a port range.
Individual ports can be specified either with the port number or with
the respective service name: (e. g. 110 for pop3 or pop3 for 110).
D Action:
Accept means the data packets are permitted to pass through.
Reject means that the data packets are not accepted, and the sender
is notified that the data was rejected. I transparent mode, Reject
has the same effect as Discard.
Discard means the data packets are not permitted to pass through.
They are “swallowed”, and the sender is not notified about what
happened to the data.
Note: In Transparent mode Reject is supported if the local IP address
is entered correctly.
D Log
For each individual firewall rule you can decide if, when the rule is
applied,
– the event should be logged – set Log to Yes
– or not – set Log to No (factory default setting).
D Log entries for unknown connection attempts
This logs all connection attempts that are not recorded by the
preceding rules.
RR-EPL
Release 1.0 01/06
87
Web-based management
6.6 Configuring the firewall
6.6.3 Firewall:Port Forwarding
Lists the rules that have been defined for port forwarding.
The following takes place when during port forwarding: The headers of the
incoming data packets from the external network that are addressed to the
external IP address (or to one of the external IP addresses) of the RR-EPL
as well as to a specific port of the RR-EPL are translated in such a way that
they are forwarded to the internal network to a particular computer and to a
particular port of this computer. This means that the IP address and port
number in the header of the incoming data packets are changed.
This procedure is also referred to as Destination NAT.
Note: These rules do apply in router mode.
Note: The rules established here have priority over the settings under
“Firewall:Incoming” on page 84.
Fig. 43:
88
Firewall:Port Forwarding
RR-EPL
Release 1.0 01/06
Web-based management
6.6 Configuring the firewall
U Editing a rule
The following options are available:
D Protocol
Enter the protocol which the rule is to refer to.
D From IP
Here you enter the source IP address from which the data packets
come, to which you want to apply the rule.
D From Port
Here you enter the source port from which the data packets come, to
which you want to apply the rule.
D Incoming for IP:
Enter the external IP address (or one of the external IP addresses)
of the RR-EPL.
OR
In case there is a dynamic change of the external IP addresses of the
RR-EPL so that you can enter the address, use the following variable:
%external.
D Incoming for port:
Original destination port that is specified in the incoming data packets.
D Forward to IP:
IP address to which data packets are to be forwarded and into which
the original destination addresses are to be translated.
D Forward to port:
Port to which data packets are to be forwarded and into which the
original port information is to be translated.
Ports can be specified either with the port number or with
the respective service name: (e. g. 110 for pop3 or pop3 for 110).
D Log
For each individual port forwarding rule you can decide if, when the
rule is applied,
– the event should be logged – set Log toYes
– or not – set Log to No (factory default setting).
RR-EPL
Release 1.0 01/06
89
Web-based management
6.6 Configuring the firewall
6.6.4 Firewall:NAT
For outgoing addresses the RR-EPL can translate the specified sender IP
addresses from its internal network (in the example below: 192.168.x.x)
into its own external address (in the example below: 148.218.112.7 or
149.218.112.8). The RR-EPL can break down the assignment of the
incoming data packets using the logical ports.
This method is used if the internal addresses cannot or should not be
routed externally, for example, because a private address range such
as 192.168.x.x is being used or the internal network structure is to be
concealed.
This procedure is also referred to as IP masquerading.
The dialog lists the defined rules for NAT (Network Address Translation).
U Principle of IP masquerading
For addressing purposes, TCP/IP uses so-called port numbers
(UDP, TCP) for the source and destination in addition to the IP
addresses.
Masquerading makes use of this feature.
If the RR-EPL receives a data packet in router mode at a secure port,
it will then enter the IP address of the sender (source) and the port in
an internal table. The RR-EPL assigns this table entry its own IP port
address and a random port number as new source information. The RREPL then forwards the data packet with this new information at the
insecure port.
This is how the receiver sends its reply to this data packet to the RREPL. The RR-EPL in turn forwards the reply back to the original address
using its internal address.
This method permits a communication request from the the secure to the
insecure network, for example, for one computer located in cell 3 to a
computer in the industrial backbone (see the figure below).
90
RR-EPL
Release 1.0 01/06
Web-based management
6.6 Configuring the firewall
.100.4
.100.4
Cell 3
Cell 2
192.168.x.x
.100.3
192.168.x.x
.100.1
.100.1
.100.2
.100.3
.100.2
RH2-TX
RH2-TX
x
x
EAGLE
EAGLE
1
2
FAULT
STATUS
1
2 V.24
R
IP-ADDRESS
k
148.218.112.7
P
1
2
FAULT
STATUS
LS/DA
1
2 V.24
R
k
IP-ADDRESS
P
LS/DA
1
1
2
+24V (P2)
Aufkleber MAC-Adresse
FAULT
+24V (P1)
FAULT
g
+24V (P2)
0V
0V
+24V (P1)
Aufkleber MAC-Adresse
g
0V
0V
148.218.112.6
2
V.24
V.24
148.218.112.8
148.218.112.9
MICE
Industrial Backbone
Fig. 44:
RS2-…
Example of a masquerading application: two identically structured
production cells
Note: If the RR-EPL is operating in PPPoE/PPTP mode, NAT must be
activated to obtain access to the Internet. If NAT is not activated, only VPN
connections can be used.
Factory setting: There is no NAT.
RR-EPL
Release 1.0 01/06
91
Web-based management
Fig. 45:
6.6 Configuring the firewall
Firewall:NAT
U Editing a rule
The following entry options are available:
D From IP:
0.0.0.0/0 means all addresses. In other words, all internal IP
addresses are subject to the NAT procedure. To indicate a range,
use the CIDR notation - see “CIDR (Classless InterDomain Routing)”
on page 160.
Example:
For the IP address range 192.168.0.33 to 192.168.0.64 enter:
192.168.0.1.33/27.
92
RR-EPL
Release 1.0 01/06
Web-based management
6.6 Configuring the firewall
6.6.5 Firewall:1-to-1 NAT
Bi-directional NAT is supported in pure router mode. A 1-to-1 conversion
takes place here between IP addresses/subnetworks in the secure network
and the defined IP addresses/subnetworks of the insecure IP interface.
A typical 1-to-1 NAT application is the joining of two identical production cells
(see Fig. 44). In contrast to IP masquerading, a communication request is
possible here from both directions.
Note: The firewall rules are only applied after the addresses are converted.
For this reason, you use the addresses that are actually present in the
firewall rules.
Note: In RR-EPL Release 1.02 there is no ARP resolution for the converted
IP addresses.
Cell 1
(secure network)
192.168.0.1/32
192.168.0.2/32
192.168.0.3/32
192.168.0.4/32
External network
(unsecure network)
149.218.112.101/32
149.218.112.102/32
149.218.112.103/32
149.218.112.104/32
Cell 2
(unsecure network
192.168.0.1/32
192.168.0.2/32
192.168.0.3/32
192.168.0.4/32
External network
(unsecure network)
149.218.112.201/32
149.218.112.202/32
149.218.112.203/32
149.218.112.204/32
Table 7: Address translation table for the two RR-EPL (see Fig. 44)
V When you enter address ranges, enter the same address range for the
internal and the external networks.
Example:
Secured network: 192.168.0.16/28
Unsecured network: 149.218.112.32/28
RR-EPL
Release 1.0 01/06
93
Web-based management
Fig. 46:
94
6.6 Configuring the firewall
Firewall:1-to-1 NAT
RR-EPL
Release 1.0 01/06
Web-based management
6.6 Configuring the firewall
6.6.6 Firewall:Extended Settings
The settings determine what the basic responses of the firewall will be.
Fig. 47:
Firewall:Extended Settings
D Maximum number of ...
These 5 settings define upper limits. They are so selected that they are
never reached in normal operation. However, since they can be easily
reached in the event of an attack, the limits provide additional security.
If your operational environment has special requirements, you can
increase these values.
D Enable “Active FTP” NAT/Connection Tracking support
If an outgoing FTP (protocol) connection is setup to download data, the
server called will callback the calling system to establish a connection for
this transfer of data. In other words, for the calling client, the connection
is simply an additional incoming connection, which will be setup with
“Active FTP”. In this case, Enable “Active FTP” NAT/Connection
Tracking support must be set to Yes so that the firewall will pass the
data through (factory setting). Without this function, the unit only permits
passive FTP.
RR-EPL
Release 1.0 01/06
95
Web-based management
6.6 Configuring the firewall
D Enable “IRC” NAT/Connection Tracking support
This is similar to “Active FTP”: When the IRC protocol is used for chatting
in the Internet, incoming connections must also be permitted after the
connection has been established actively. In this case, Enable “IRC”
NAT/Connection Tracking support must be set to Yes so that the
firewall will permit these connections (factory setting).
D Enable “PPTP” NAT/Connection Tracking support
This need only be set to Yes under the following condition:
if a local system should establish a VPN connection via PPTP to an
external system without help from the RR-EPL.
The factory setting is No.
D ICMP from extern to RR-EPL
With this setting you can specify how the RR-EPL reacts to ICMP queries
in the router mode:
Drop: the RR-EPL rejects incoming ICMP packets
Allow ping requests: the RR-EPL responds to ping queries.
Allow all ICMPs: the RR-EPL reacts to all ICMP packets.
6.6.7 Firewall:Logs - Display
If the logging of events was activated (Log = Yes) on the firewall rules page,
you can view the log with all of the recorded events here.
The format of the log corresponds to that common under Linux.
Special analysis programs are available which can be used to present the
information from the log in a more readable format.
96
RR-EPL
Release 1.0 01/06
Web-based management
6.7 Setting up a VPN connection
6.7 Setting up a VPN connection
Prerequisites for a VPN connection:
The main prerequisite for a VPN connection is that the IP address of the
VPN partner is known and accessible. See “Services:DynDNS Monitoring”
on page 120.
D To successfully set up an IPsec connection, the VPN remote terminal
must support IPsec with the following configuration:
D Authentication via Pre-Shared Key (PSK) or X.509 certificate
Note: The Hirschmann Competence Center creates and manages
safety certificates.
D ESP
D Diffie-Hellman Groups 2 and 5
D DES, 3DES or AES encryption
D MD5 or SHA-1 hash algorithms
D Tunnel or Transport mode
D Quick Mode
D Main Mode
D SA Lifetime (1 second to 24 hours; standard: 8 hours)
If the system at the remote site is running Windows 2000, the Microsoft
Windows 2000 High Encryption Pack or Service Pack 2 must also be
installed.
D If the remote site is behind a NAT router, it must support NAT-T or the
NAT router must support the IPsec protocol (IPsec/VPN Passthrough).
In either case, for technical reasons, only IPsec Tunnel connections are
supported.
RR-EPL
Release 1.0 01/06
97
Web-based management
6.7 Setting up a VPN connection
6.7.1 VPN:Connections
Lists the VPN connections that have been setup.
All of the listed connections may be active at the same time.
Fig. 48:
VPN:Connections
U Setting up new a VPN connection
V Click “New”.
V Assign a name to the connection and click “Edit”.
V Make the desired or required settings (see below).
V Afterwards, click OK.
U Editing the VPN connection
V Click the button “Edit” next to the respective connection.
V Make the desired or required settings (see below).
V Afterwards, click OK.
98
RR-EPL
Release 1.0 01/06
Web-based management
Fig. 49:
6.7 Setting up a VPN connection
VPN:Connections:Connection
U Deleting a connection
V Click “Delete” next to the respective entry. Then “OK”.
U Any name for the VPN connection
You can give the connection any name you wish.
U Active
Determine if the connection is to be active (=Yes) or not (= No).
RR-EPL
Release 1.0 01/06
99
Web-based management
6.7 Setting up a VPN connection
U Address of the remote site's VPN gateway
D What is meant is the address of the access (gateway) to the private
network in which the remote communication partner can be found
(see Fig. 50).
D If you wish to have the RR-EPL actively initiate and setup the
connection to the remote site or if the device is in Stealth mode,
enter the IP address of the remote site here. The remote site must
have a fixed and known IP address. Instead of entering an IP address,
you can enter a hostname (i.e. a domain name in the URL syntax www.xyz.de).
If the remote site's VPN gateway does not have a fixed and known
IP address, you can use the DynDNS Service to simulate a fixed and
known address. See “Services:DynDNS Monitoring” on page 120.
D If the RR-EPL is ready to accept the connection that initiates and
establishes a remote terminal active to the local RR-EPL with random
IP address, then enter: %any
In this case, the local RR-EPL can be “called” by a remote site, which
has been dynamically assigned its IP address (by the Internet Service
Provider), i.e. which has an IP address that changes. In this scenario,
you may only enter an IP address when this is the fixed and known
IP address of the remote “calling” site.
100
RR-EPL
Release 1.0 01/06
Web-based management
6.7 Setting up a VPN connection
RH2-TX
x
1
2
1
FAULT
STATUS
2 V.24
R
IP-ADDRESS
k
1
2
+24V (P2)
Aufkleber MAC-Adresse
FAULT
g
0V
0V
VPN
P
LS/DA
+24V (P1)
unsecure
network
192.168.100.1
EAGLE
V.24
192.168.206.10
192.168.208.11
192.168.100.1
Fig. 50:
192.168.100.2
Devices and addresses of the remote site
Dialog
Network:Base
Network:Router
VPN:L2TP
Setting
Internal IP
Netmask
Network Mode
DHCP
External IP
Netmask
Start L2TP Server for L2TP
Local IP for L2TP connections
Assignment of IPs for L2TP remote site
VPN:Connections Active
VPN:IPsec State Gateway
Value
192.168.100.254
255.255.255.0
Router
No
192.168.206.11
255.255.255.0
Yes
10.106.106.2
10.106.106.2
10.106.106.254
Yes
192.168.206.11
Table 8: Example to devices and addresses of the remote site
RR-EPL
Release 1.0 01/06
101
Web-based management
6.7 Setting up a VPN connection
U Connection type
Connection type
Tunnels
(Network <––> Network)
annotation
This type of connection is not only suitable in every case,
but also the most secure. In this mode, the IP datagrams are
completely encrypted before they are sent with a new header
to the remote site‘s VPN gateway – the “tunnel end”. There the
transferred datagrams are decypted to restore the original
datagrams. These are then passed on to the destination
system.
Transport (Host <––> Host) In this type of connection, the device only encrypts the data of
the IP packets. The IP header information remains in the clear
(unencrypted).
Transport
If this type of connection is activated on the remote system, the
(L2TP Microsoft Windows) RR-EPL will also take this setting - Transport (L2TP
Microsoft Windows) - and will function accordingly.
In other words, the L2TP/PPP protocol will create a tunnel
within the IPsec transport connection. The locally connected
L2TP system will be assigned its IP address dynamically.
If you select the connection type Transport (L2TP
Microsoft Windows), set Perfect Forward
Secrecy (PFS) to No (see below). As soon as the IPsec/
L2TP connection is started under Windows, a dialog will appear
to prompt you to enter your user name and password. You can
make any entry that you want in this dialog, since the X.509
certificate has already provided your authentication, the RREPL will ignore these entries.
Transport
If this type of connection is activated on the locally connected
(L2TP SSH Sentinel)
system, the RR-EPL will also take this setting - Transport
(L2TP SSH Sentinel) - and will function accordingly. In other
words, the L2TP/PPP protocol will create a tunnel within the
IPsec transport connection. The locally connected L2TP system
will be assigned its IP address dynamically.
Table 9: Connections types
102
RR-EPL
Release 1.0 01/06
Web-based management
6.7 Setting up a VPN connection
U Initiating a connection
There are 2 options:
– Start a connection to the remote side
– Wait for the remote side [to setup a connection]
D Start a connection to the remote side
In this case, the local RR-EPL sets up the connection to the remote
side. The fixed IP address or domain name of the remote side must
be entered in Address of the remote site's VPN gateway
(see above) field.
D Wait for the remote side [to setup a connection]
In this case, the local RR-EPL is ready to accept a connection, which
a remote site actively initiates and sets up to the local RR-EPL.
The entry in the Address of the remote site's VPN gateway
(see above) field may be: %any.
If the RR-EPL should only accept a connection initiated by a specific
remote site (which has a fixed IP address), enter its IP address or
hostname to be on the safe side.
RR-EPL
Release 1.0 01/06
103
Web-based management
6.7 Setting up a VPN connection
U Authentication method
There are 2 options:
– X.509 Certifikate and
– Pre-Shared Key
D X.509 Certificate
This method is supported by most of the newer IPsec implementations
and is currently considered the most secure. In this case, the RR-EPL
uses the public key of the remote site (filename *.cer or *.pem) to
encrypt the authentication datagram before it sends to the remote site,
the “tunnel end”. (You must have received this *.cer or *.pem file
from the operator at the remote site - perhaps on a diskette or attached
to an e-mail).
To make this public key available to the RR-EPL, proceed as follows:
Requirement: You have saved the *.cer- or *.pem file on the
computer.
– Click Configure.
Result: The screen VPN:connections:connection xyz:X.509 certificate
appears. (“xyz” represents the name of the connection.)
– Search... click and select the file.
– Click Import.
After the import, the contents of the new certificate is displayed see the following figure. For an explanation of the information
displayed, see the Chapter “VPN:Machine Certificate” on page 111.
Fig. 51:
104
Public key
RR-EPL
Release 1.0 01/06
Web-based management
6.7 Setting up a VPN connection
D Pre-Shared Key (PSK)
This procedure is particularly supported by older IPsec implementations.
Here, the RR-EPL encrypts the datagrams that it sends to the remote
terminal, the “end of the tunnel”, with the public key of the remote
terminal (filename *.cer or *.pem).
To make the arranged key available to the RR-EPL, proceed as
follows:
– Click Configure.
Result: The main screen appears.
Fig. 52:
Pre-Shared Secret Key
– Enter the string arranged in the entry field Pre-Shared Key
(PSK). To achieve a security level that is equivalent to 3DES,
the string should be approx. 30 characters that are made up of
upper and lower case letters and digits.
– Click Back.
Note: The Pre-Shared Key cannot be used with dynamic (%any)
IP addresses; fixed IP addresses are required at both ends of the tunnel.
RR-EPL
Release 1.0 01/06
105
Web-based management
6.7 Setting up a VPN connection
U ISAKMP SA (key exchange)
D Encryption algorithm
– Make arrangements with the administrator at the remote terminal as
to which encryption procedure is to be used.
3DES-168 is the most frequently used procedure and for this reason
is the default setting.
The following principles apply: The more bits an encryption algorithm
has, indicated by the number at the end, the higher level of security it
offers. The relatively new procedure AES-256 is regarded as the most
secure, but has not yet been widely implemented.
The encryption procedure takes longer, the longer the key is.
This aspect is irrelevant for the RR-EPL, since it operates with
hardware-based encryption. This could, however, play a role for
the remote terminal.
The algorithm named “Null” offers no encryption whatsoever.
D Checksum algorithm/Hash
Keep the setting on All algorithms. Then it makes no difference
if the remote terminal operates with MD5 or SHA-1.
U IPsec SA (data exchange)
In contrast to ISAKMP SA (key exchange) (see above), the procedure
for exchanging data is defined here. It can differ from the keys of the key
exchange, but this is not mandatory.
D Encryption algorithm
See above.
D Checksum algorithm/Hash
See above.
106
RR-EPL
Release 1.0 01/06
Web-based management
6.7 Setting up a VPN connection
U Perfect Forward Secrecy (PFS)
Procedure for increasing security in data transmissions. With IPsec the
keys for exchanging data are renewed at specific intervals. With PFS
new random numbers are negotiated with the remote station instead of
deriving them from previously arranged random numbers.
Select Yes only if the remote terminal supports this procedure.
When you select the connection type Transport (L2TP Microsoft
Windows), set Perfect Forward Secrecy (PFS) to No.
U Tunnel settings
D The address of the local network
D The related network mask
These entries specify the address of the client (network or computer),
that is directly connected to the secure port of the RR-EPL which the
RR-EPL is protecting. The address designates the local endpoint of
the connection.
MACH 3002
MACH 3002
Industrial Backbone
Industrial Backbone
FAULT
STATUS
2 V.24
R
IP-ADDRESS
k
1
unsecure
network
x
EAGLE
P
1
2
FAULT
STATUS
LS/DA
1
2 V.24
R
k
1
2
2
Aufkleber MAC-Adresse
V.24
Tunnel: The address of the
local network. (can also be
an individual computer)
Fig. 53:
g
+24V (P1)
+24V (P2)
Aufkleber MAC-Adresse
+24V (P1)
0V
0V
FAULT
g
+24V (P2)
2
1
FAULT
1
IP-ADDRESS
EAGLE
P
LS/DA
0V
0V
x
V.24
to the remote
terminal
Local devices and addresses
RR-EPL
Release 1.0 01/06
107
Web-based management
6.7 Setting up a VPN connection
Example:
If the computer connected to the RR-EPL is the one you are using to
configure the device, the entries could then be:
Address of the local network: 192.168.1.1
The related network mask: 255.255.255.0
See also “Example of a network” on page 162.
D Tunnel: Remote network address
D Tunnel: The appropriate remote netmask
With these two entries, you specify the address of the network in
which the remote communication partner can be found. This address
can also be that of a computer, which is connected directly to the
VPN gateway.
MACH 3002
MACH 3002
Industrial Backbone
Industrial Backbone
FAULT
STATUS
2 V.24
R
IP-ADDRESS
k
1
unsecure
network
x
EAGLE
P
1
2
FAULT
STATUS
LS/DA
1
2 V.24
R
k
1
2
2
Aufkleber MAC-Adresse
V.24
The address of the
VPN gateway of the
remote terminal
Fig. 54:
108
g
+24V (P1)
FAULT
+24V (P2)
0V
0V
+24V (P1)
Aufkleber MAC-Adresse
g
+24V (P2)
2
1
FAULT
1
IP-ADDRESS
EAGLE
P
LS/DA
0V
0V
x
V.24
Tunnel: The address of the
network on the opposite end.
(can also be an single computer)
Devices and address of the remote terminal
RR-EPL
Release 1.0 01/06
Web-based management
6.7 Setting up a VPN connection
U Firewall incoming, Firewall outgoing
While the settings made in the Firewall menu only affect non-VPN
connections (see “Firewall:Incoming” on page 84), these settings affect
just the VPN connection defined here. What this means is that: If you
have defined multiple VPN connections, you can restrict the outgoing
or incoming access individually for each connection. You can have any
attempts made to bypass these restrictions logged.
Note: According to the factory setting, the VPN firewall is set up in such
a way that everything is permitted for the VPN connection.
The extended firewall settings, which are defined and explained at the top
(see “Firewall:Extended Settings” on page 95), apply nonetheless for
each individual VPN connection independent of each other.
Note: If multiple firewall rules are set, they will be searched in the order
in which they are listed (from top to bottom) until a suitable rule is found.
This rule will then be applied. If further down in the list there are other
rules, which would also fit, they will be ignored.
V To set or delete a firewall rule, proceed as described in the earlier
sections (see “Firewall:Incoming” on page 84 and “Firewall:Outgoing”
on page 86).
As there, you have the following entry options:
D Protocol: All means: TCP, UDP, ICMP and other IP protocols.
D IP address: 0.0.0.0/0 means all addresses. To enter an address
space, use the CIDR notation (see “CIDR (Classless InterDomain
Routing)” on page 160).
D Port: (is only evaluated for the protocols TCP and UDP)
any designates any port.
startport:endport (e. g. 110:120) designates a port range.
Individual ports can be specified either with the port number or with
the respective service name: (e. g. 110 for pop3 or pop3 for 110).
D Action:
Accept means the data packets are permitted to pass through.
Reject means that the data packets are not accepted, and the sender
is notified that the data was rejected. (In transparent mode, Reject has
the same effect as Discard, see above)
Discard means the data packets are not permitted to pass through.
They are “swallowed”, and the sender is not notified about what
happened to the data.
RR-EPL
Release 1.0 01/06
109
Web-based management
6.7 Setting up a VPN connection
Log
For each individual firewall rule you can decide if, when the rule is
applied,
– the event should be logged – set Log to Yes
– or not – set Log to No (factory default setting).
Log entries for unknown connection attempts
If this is set to Yes, all attempts to establish a connection, which were not
covered by the rules defined above, will be logged.
Note: In Transparent mode Reject is supported if the local IP address
is entered correctly.
Note: If multiple firewall rules have been set, these will be processed in
the order that they were entered.
110
RR-EPL
Release 1.0 01/06
Web-based management
6.7 Setting up a VPN connection
6.7.2 VPN:Machine Certificate
Fig. 55:
Machine Certificate
RR-EPL
Release 1.0 01/06
111
Web-based management
6.7 Setting up a VPN connection
U Certificate
Display the currently imported X.509 certificate with which the RR-EPL
identifies itself to other VPN gateways. The following information is
displayed:
Info
subject
issuer
MD5, SHA1 Fingerprint
notBefore, notAfter
Meaning
The owner to whom the certificate is issued.
The point of authentication that signed the certificate.
C : Country
ST: State
L : City
O : Organization
OU: Department (organization unit)
CN: Hostname, common name
Fingerprint of the certificate so that it, for example,
can be compared with others on the phone. Here,
Windows displays the fingerprint in the SHA1 format.
Validity period of the certificate. Is ignored by the RREPL since it does not have a built-in clock.
Table 10: Certificate information
In addition to the information provided above, the imported certificate file
(filename extension *.p12 or *.pfx) contains, both keys: the public key for
encryption and the private one for decryption. The associated public key
can be assigned to any number of connection partners, allowing them to
send encrypted data.
Dependant on the remote terminal, the certificate must be made
available to the operator of the remote terminal as a .cer or .pem file - for
example, by giving it to the operator personally or sending it as an e-mail.
If you do not have access to a secure transmission path, you should
compare the fingerprint displayed by the RR-EPL over a secure path.
Only one certificate file (PKCS#12 file) can be imported into the device.
To import a (new) certificate, proceed as follows:
112
RR-EPL
Release 1.0 01/06
Web-based management
6.7 Setting up a VPN connection
U New certificate
Requirement:
The certificate file (filename = *.p12 or *.pfx) is generated and stored on
the connected computer.
V Click Search... to select the file.
V Enter the password with which the private key of the PKCS#12 file is
protected into the field.
V Click Import.
V Afterwards, click OK.
V After the import a system message will appear:
Fig. 56:
System message
RR-EPL
Release 1.0 01/06
113
Web-based management
6.7 Setting up a VPN connection
6.7.3 VPN:L2TP
Fig. 57:
VPN:L2TP
U Start L2TP Server for IPsec/L2TP? Yes / No
If you wish to permit an L2TP connection, set this switch to Yes.
Within the IPsec transport connection, the L2TP connection contains
in turn a PPP connection. This results in a type of tunnel between two
networks. In doing so, the RR-EPL informs the remote terminal about
the addresses that are used: for itself and for the remote terminal.
U Local IP for L2TP connections
With the setting shown in the screenshot above, the RR-EPL will inform
the remote site that it's address is 10.106.106.1.
U Assignment of IPs for the L2TP remote site
With the settings shown in the screenshot above, the RR-EPL will inform
the remote site that it has been assigned addresses starting from
10.106.206.2 (in the case of a single system) all the way to
10.106.206.254 (in the case of multiple systems).
114
RR-EPL
Release 1.0 01/06
Web-based management
6.7 Setting up a VPN connection
6.7.4 VPN Configuration, IPsec Status - Display
Provides information about the status of the IPsec connections.
The names of the VPN connections are listed on the left. Their current
statuses are displayed on their right.
D GATEWAY designates the communicating VPN gateways
D TRAFFIC designates the computers or networks that communicate via
VPN gateways.
D ID
designates the distinguished name (DN) of a X.509 certificate.
D ISAKMP status (Internet Security Association and Key Management
Protocol) has the value “established”, if both participating VPN gateways
have set up a channel for exchanging keys. In this case, they can contact
each other and thus all entries, including “ISAKMP SA” on the
configuration end of the connection were correct.
D IPsec status has the value “established”, if the IPsec encryption is
activated for communication. In this case, the values under “IPsec SA”
and “Tunnel Settings” were also correct.
Should you encounter problems, we recommend that you take a look at the
VPN logs of the computer to which the connection was set up. For security
reasons, the initiating computer will not be sent any detailed error messages.
If the display shows:
ISAKMP SA established, IPsec State: WAITING
This means that:
The authentication was successful, but the other parameters are not correct.
Do the connection types (Tunnel, Transport) match?
If Tunnel has been selected, do the network address areas match on at both
ends of the connection?
If the display shows:
IPsec State: IPsec SA established
This means that:
The VPN connection has been successfully setup and can be used. If this is
not the case, there must be a problem with the remote VPN gateway. In this
case, click on the connection name and then on OK to setup the connection
again.
RR-EPL
Release 1.0 01/06
115
Web-based management
6.7 Setting up a VPN connection
6.7.5 VPN:L2TP Status - Display
Shows information about the L2TP status, when this type of connection has
been selected. See “VPN:L2TP” on page 114).
6.7.6 VPN:VPN Logs - Display
Lists all VPN events.
The format of the log corresponds to that common under Linux.
Special analysis programs are available which can be used to present the
information from the log in a more readable format.
116
RR-EPL
Release 1.0 01/06
Web-based management
6.8 Services menu
6.8 Services menu
6.8.1 Services:DNS
If the RR-EPL is to set up a connection to a remote terminal (for example
VPN gateway or NTP server), it must know the IP address of the remote
terminal. If the address is provided as a domain address (i. e. in the
format www.abc.xyz.de), the device must first look up which IP address
this resolves to on the domain nameserver.
If the RR-EPL is not in transparent mode, you can configure the locally
connected clients, so that they can use the RR-EPL to resolve the
hostnames into IP addresses (see “IP configuration for the Windows clients”
on page 127).
Fig. 58:
Services:DNS
RR-EPL
Release 1.0 01/06
117
Web-based management
6.8 Services menu
U Hostname mode
With hostname mode and hostname you can assign the RR-EPL
a name. It will be displayed when someone logs in with SSH. A name
environment simplifies the administration of several RR-EPLs.
D User defined (see below)
(Standard) The name entered in the field hostname is set as the
name for the RR-EPL.
Note: If the RR-EPL is operating in transparent mode, the option User
defined must be selected as the hostname mode.
D Provider defined (e. g. via DHCP)
If the network mode permits the hostname to be set externally,
such as with DHCP, the name transmitted by the provider will then
be set for the RR-EPL.
U Hostname
If the option User defined is selected under hostname mode, then enter
the name here that is to be given to the RR-EPL.
If the option Provider (e. g. via DHCP) is selected under Hostname
mode, an entry in this field will be ignored.
U Domain search path
This entry make it easier for the user to specify a domain name: If the
user enters the domain name in an abbreviated form, the RR-EPL will
extend the entry by appending the domain suffix, which is defined here
in the Domain search path.
U Used nameserver
Options:
– Root Nameserver
– Provider defined
– User defined
118
RR-EPL
Release 1.0 01/06
Web-based management
6.8 Services menu
D Root Nameserver
Requests are sent to the root nameserver in the Internet whose
IP addresses are stored in the RR-EPL. These addresses seldom
change. This setting should only be selected if the alternative settings
do not function.
D Provider defined
With this setting, the device will use the Domain nameserver of
the Internet Service Provider, which is used to access the Internet.
You can select this setting, when the RR-EPL will be operated in
PPPoE or Router mode with DHCP active (see “Services:DHCP Intern
(trusted port)” on page 123).
D User defined
If this setting is selected, the RR-EPL sets up a connections with the
domain nameservers that are listed in User-defined nameserver.
In transparent mode only the first two entries are evaluated in this list.
U User defined nameservers
You can record the IP addresses of domain nameservers in this list.
If one of these should be used by the RR-EPL, specify this under
Servers to query.
Note: If you have selected User defined, you must configure the locally
connected clients to use the address of the RR-EPL to retrieve the
IP address associated with a hostname (see “IP configuration for the
Windows clients” on page 127).
RR-EPL
Release 1.0 01/06
119
Web-based management
6.8 Services menu
6.8.2 Services:DynDNS Monitoring
When setting up aVPN connection between two locations, it is assumed
that the IP address of at least one location is known and thus can be defined.
Many Internet service providers (ISP) assign IP addresses dynamically.
This means that the IP addresses of the computers or networks that access
the Internet always change.
To solve the problem of assigning IP address dynamically, so-called
DynsDNS services can be used. Such a service makes it possible for the RREPL to reach a fixed domain name regardless of the IP address it is currently
using. Each time the IP address changes, the RR-EPL reports the new IP
address to the DynDNS server so that the current IP address is always
correctly assigned to the domain name on the DNS server (see “Glossar” on
page 195).
For further information, contact Hirschmann support.
Fig. 59:
DynDNS monitoring
U Monitoring hostnames from VPN remote terminals
If the address of the VPN remote terminal is specified to the RR-EPL as
the hostname (see “VPN:Connections” on page 98), and if this domain
name is assigned by a DynDNS service, then the RR-EPL can poll if
changes have been made at the respective DynDNS.
120
RR-EPL
Release 1.0 01/06
Web-based management
6.8 Services menu
U Polling interval
Standard: 300 (seconds)
6.8.3 Services:DynDNS registration
To set up VPN connections at least the IP address of one of the partners
must be known, so that the partners can communicate with each other.
This is not case if both participants are assigned IP addresses dynamically
from their Internet service providers. In such a case, a DynDNS service,
such as the one from the Hirschmann Competence Center or DNS4BIZ.com
can help. With the DynSNS service, the currently valid IP address is
registered under a fixed name (see “Services:DynDNS registration” on
page 121).
Provided that you are registered for one of the DynDNS services supported
by the RR-EPL, you can make the proper entries in the dialog box.
Fig. 60:
DynDNS registration
RR-EPL
Release 1.0 01/06
121
Web-based management
6.8 Services menu
U Register this RR-EPL at a DynDNS Service?
Select Yes, if you have registered with a DynDNS Service provider and
the RR-EPL should utilize this service. In this case, the RR-EPL will
report its current IP address - the one assigned for its own Internet
access by its Internet Service Provider - to the DynDNS Service.
U Refresh Interval
Standard: 420 (seconds)
Whenever the IP address of its own Internet access is changed, the RREPL will inform the DynDNS Service of its new IP address. For additional
reliability, the device will also report its IP address at the interval set here.
U DynDNS provider
The providers made available for selection support the same protocol
that the RR-EPL supports.
Enter the name of the provider where you are registered, for example
DynDNS.org.
U DynDNS server
Name of the server of the DynDNS providers selected above,
for example: dyndns.org.
U DynDNS Login
Enter the user name that you have been assigned here.
U DynDNS Password
Enter the password that you have been assigned here.
122
RR-EPL
Release 1.0 01/06
Web-based management
6.8 Services menu
U DynDNS Hostname
The hostname selected at DynDNS service for this RR-EPL- provided
that you use a DynDNS service and have made the proper settings
above.
6.8.4 Services:DHCP Intern (trusted port)
DHCP Internal has three operating modes:
D Deactivated:
DHCP is switched off at this port.
D Server:
The DHCP server (Dynamic Host Configuration Protocol) of the RR-EPL
assigns the clients connected to the RR-EPL automatically
D the IP addressed defined in the DHCP range and subnet masks or
D the statically entered IP addresses.
Note: It is possible to configure the RR-EPL as a DHCP client in router
mode (see “External interface” on page 76).
Option:
If the DHCP server is activated, you can enter the network parameters to
be used by the clients during dynamic assignment:
Parameter
Enable dynamic IP
address pool
DHCP lease time
DHCPrange start
DHCPrange end:
Local netmask:
Broadcast address
Meaning
If no static assignment applies, then the RR-EPL assigns an IP
address from the dynamic address pool.
Time in seconds after which the assigned IP address becomes
invalid and the client makes a new DHCP query.
Beginning and end of the address range from which the DHCP
server of the RR-EPL is to assign IP addresses to the locally
connected clients.
The default setting is: 255.255.255.0
Specifies the broadcast address of the client.
Table 11: Client network parameters
RR-EPL
Release 1.0 01/06
123
Web-based management
Parameter
Default gateway:
DNS server:
WINS server
6.8 Services menu
Meaning
Determines which IP address for the client is to be used as the
standard gateway.
Determines from where the clients are to obtain the IP addresses
resolved from hostnames. If the DNS service of the RR-EPL is
activated, this can be the local IP address of the RR-EPL.
The Windows Internet Name Service determines from where the
clients obtain the resolution of NetBIOS names in IP addresses.
Table 11: Client network parameters
Note: Only one DHCP server per subnet may be used.
Note: When you start the DHCP server of the RR-EPL, you must
configure the locally connected clients in such a way that they
automatically obtain their IP addresses.
V Set this switch DHCP mode to Server, if you wish to activate this
function.
V Enter the parameters for the dynamic address assignment (see Table
11 on page 123) or
enter the static MAC IP address assignment.
If you enter static addresses, then static addresses are assigned, otherwise dynamic ones.
D Relay
The static IP address assignment via the classic DHCP protocol is based
on the device to be configured, which means that a particular IP address
is assigned to the MAC address of a known device.
The static IP address assignment via Option 82 is based on the network
topology. This procedure gives you the option of always assigning a
particular IP address to any device which is connected to a particular
location (port of a switch) on the LAN. The RR-EPL can take over the
function of a DHCP relay agent. If this function is activated, then what is
known as an Option 82 field is added to the DHCP query if the query does
not already have an Option 82 field. The Option 82 field contains
information about the switch (port, device ID) to which the querying device
is connected.
V Enter the IP addresses of the DHCP server to which you want to
forward DHCP queries.
V You switch on the DHCP relay option by setting “Append Relay Agent
Information (Option 82)” to “Yes”.
124
RR-EPL
Release 1.0 01/06
Web-based management
6.8 Services menu
Statically entered
MAC/IP address pairs
Fig. 61:
Services:DHCP
6.8.5 Services:DHCP Extern (untrusted port)
DHCP External has three operating modes:
D Deactivated:
DHCP is switched off at this port.
D Server:
The DHCP server (Dynamic Host Configuration Protocol) of the RR-EPL
assigns the clients connected to the RR-EPL automatically
D the IP addressed defined in the DHCP range and subnet masks or
D the statically entered IP addresses.
Note: It is possible to configure the RR-EPL as a DHCP client in router
mode (see “External interface” on page 76).
RR-EPL
Release 1.0 01/06
125
Web-based management
6.8 Services menu
Option:
If the DHCP server is activated, you can enter the network parameters to
be used by the clients during dynamic assignment:
Parameter
Enable dynamic IP
address pool
DHCP lease time
DHCPrange start
DHCPrange end:
Local netmask:
Broadcast address
Default gateway:
DNS server:
WINS server
Meaning
If no static assignment applies, then the RR-EPL assigns an IP
address from the dynamic address pool.
Time in seconds after which the assigned IP address becomes
invalid and the client makes a new DHCP query.
Beginning and end of the address range from which the DHCP
server of the RR-EPL is to assign IP addresses to the locally
connected clients.
The default setting is: 255.255.255.0
Determines which IP address for the client is to be used as the
standard gateway.
Determines from where the clients are to obtain the IP addresses
resolved from hostnames. If the DNS service of the RR-EPL is
activated, this can be the local IP address of the RR-EPL.
The Windows Internet Name Service determines from where the clients obtain the resolution of NetBIOS names in IP addresses.
Table 12: Client network parameters
Note: Only one DHCP server per subnet may be used.
V Set the switch „DHCP mode“ to Yes, if you wish to activate this
function.
V Enter the parameters for the dynamic address assignment (see Table
11 on page 123) or
enter the static MAC IP address assignment.
If you enter static addresses, then static addresses are assigned,
otherwise dynamic ones.
D Relay
The static IP address assignment via the classic DHCP protocol is based
on the device to be configured, which means that a particular IP address
is assigned to the MAC address of a known device.
The static IP address assignment via Option 82 is based on the network
topology. This procedure gives you the option of always assigning a
particular IP address to any device which is connected to a particular
location (port of a switch) on the LAN. The RR-EPL can take over the
126
RR-EPL
Release 1.0 01/06
Web-based management
6.8 Services menu
function of a DHCP relay agent. If this function is activated, then what is
known as an Option 82 field is added to the DHCP query if the query does
not already have an Option 82 field. The Option 82 field contains
information about the switch (port, device ID) to which the querying device
is connected.
V Enter the IP addresses of the DHCP server to which you want to
forward DHCP queries.
V You switch on the DHCP relay option by setting “Append Relay Agent
Information (Option 82)” to “Yes”.
U External server (untrusted port)
V Set the Start DHCP server switch to on, to activate this function.
V Enter the parameters for the dynamic address assignment (see Table
11 on page 123) or
enter the static MAC IP address assignment.
U IP configuration for the Windows clients
In Windows XP, proceed by clicking
Start:Control Panel:Network Connections,
Right-click the LAN adapter icon and select Properties in the context
menu.
In the dialog box Properties of LAN connection Local Network
on the tab General under “Components checked are used by this
connection”, select the entry Internet protocol (TCP/IP)
and then the click the button Properties.
In the dialog box Internet Protocol (TCP/IP Properties)
select the option Obtain an IP address automatically.
RR-EPL
Release 1.0 01/06
127
Web-based management
6.8 Services menu
6.8.6 Services:LLDP
IEEE 802.1AB describes the Link Layer Discovery Protocol (LLDP). LLDP
enables the user to have automatic topology recognition for his LAN.
A device with active LLDP
D Distributes its connection and management information to the
neighboring devices of the shared LAN, once these devices have also
activated LLDP.
D Receives connection and management information from neighboring
devices of the shared LAN, once these devices have also activated LLDP.
D Sets up a management information schema and object definition for saving connection information of neighboring devices with active LLDP.
V Use the “Mode” switch to switch on the LLDP function.
V Set the LLDP parameters separately for each
– secure area port and
– insecure area port.
Parameter
Mode
Chassis ID
Port description
System name
Meaning
Switch LLDP function on/off.
In Hirschmann devices, the device ID corresponds to the
MAC address.
Port description that the RR-EPL adds to its LLDP
information.
The system name of the connected device.
Table 13: LLDP parameters
128
RR-EPL
Release 1.0 01/06
Web-based management
6.8 Services menu
6.8.7 Services:NTP
The network time protocol (NTP) allows you to synchronize the system time
within your network. NTP has a hierarchical structure. The NTP server
makes the UTC (Universal Time Coordinated) available. The NTP client
obtains the UTC from the SNTP server.
Fig. 62:
Network time protocol
U Current system time (UTC)
Displays the current system time in Universal Time Coordinates (UTC).
If the Enable NTP time synchronisation not yet activated
(see below) and Time stamp in filesystem is deactivated, the clock will
start with 1 January 2000.
U Current system time (local time)
If the possibly differing current local time should be displayed, you must
make the corresponding entry under Timezone in POSIX.1
notation... (see below).
RR-EPL
Release 1.0 01/06
129
Web-based management
6.8 Services menu
U NTP State
Displays the current NTP state.
U Enable NTP time synchronization: Yes / No
Once the NTP is enabled, the RR-EPL takes the time from the Internet
and displays this as its current system time. The synchronisation can
take several seconds.
If this option is set to Yes and at least one time server is specified under
NTP servers to synchronize to (see below), the current system
time will be made available.
U NTP servers to synchronize to
Under this option, enter one or more time servers from which the RREPL should obtain the current time. If you enter multiple time servers, the
RR-EPL will automatically connect with all of them to determine the
current time.
Note: If you enter a hostname, e.g. pool.ntp.org, instead of an IP address,
a DNS server must also be specified (see “Services:DNS” on page 117).
Note: If the RR-EPL is operating in Transparent mode and multiple time
servers are entered, the RR-EPL will only use the first two time servers in
the list.
Note: If the RR-EPL is operating in Router, PPPoE or PPTP mode, it will
also make the NTP time available to the connected systems.
U Timezone in POSIX.1 Notation...
If the Current system time above should display your current
local time instead of the current Greenwich time (if it is different to the
Greenwich time), you must enter the number of hours (plus or minus)
that your local time differs from Greenwich time.
Examples:
In Berlin, the time is one hour earlier than in Greenwich. Therefore,
enter: CET-1.
130
RR-EPL
Release 1.0 01/06
Web-based management
6.8 Services menu
In the entry, the characters preceding the -1, -2 or +1 etc. are not
considered. Only the numerical difference is important. The characters
preceding the numerical difference may be “CET” or any other acronym
that you find useful.
If you wish to display Central European Time (for example for Germany)
and have it automatically switch to/from daylight saving time, enter:
CET-1CEST,M3.5.0,M10.5.0/3
U Time stamp in filesystem (2h granularity): Yes / No
If this option is set to Yes, the RR-EPL will save the current system time
to its memory every two hours.
Afterwards: If the RR-EPL is switched off and back on, a time from this
two hour period of time will be displayed when the RR-EPL is switched
on and not (the factory setting) a time on 1 January 2000.
6.8.8 Services:Remote Logging
All log entries are recorded in the RR-EPL´s memory. Once the memory
available for the log has been filled, the oldest log entry will be overwritten.
Furthermore, if the RR-EPL is switched off all log entries are deleted.
If you wish to keep a copy of the log, the log entries can be sent to an
external system. This is particularly useful if you wish to have centralised
administration of the logs.
RR-EPL
Release 1.0 01/06
131
Web-based management
Fig. 63:
6.8 Services menu
Remote Logging
U Activate remote UDP Logging: Yes / No
If all log entries should be sent to an external (specified below)
Log Server, set this option to Yes.
U Log Server IP address
Enter the IP address of the log server to which the log entries should be
sent via UDP.
Note: This entry must be an IP address - not a hostname! This function
does not support hostnames, since, if it did, it would not be possible to
log the loss of a DNS server.
U Log Server port
Enter the port of the log server to which the log entries should be sent via
UDP. Standard: 514.
132
RR-EPL
Release 1.0 01/06
Web-based management
6.8 Services menu
6.8.9 Services:SNMP Traps
This dialog allows you to determine which events trigger an alarm (trap) and
where these alarms should be sent.
In the state on delivery, all the alarms are selected (does not apply for an
update) .
When you switch on the SNMPv3 or SNMPv1/2 (see “Access:SNMP” on
page 145) and define SNMP trap destinations (see below), the RR-EPL can
send the selected traps.
Fig. 64:
SNMP traps
U Enable Authentication traps
The RR-EPL sends an authentication alarm, if it rejects an unauthorized
access.
U Enable link Up/Down traps
The RR-EPL sends a link status alarm if the connection to the connected
network has been interrupted or re-established.
RR-EPL
Release 1.0 01/06
133
Web-based management
6.8 Services menu
U Enable coldstart traps
The RR-EPL sends a cold reset alarm after it has been switched on.
U Enable Admin traps
The RR-EPL sends a SecurityGateway alarm if one of the following
events has occurred:
– HTTPS login: There was a login attempt via HTTPS.
– Shell login: There was a login attempt via the shell.
– DHCP NewClient: The DHCP server has received a request from an
unidentified client.
U Enable chassis traps
The RR-EPL sends a chassis alarm if one of the following events has
occurred:
– Power Supply: The status of a supply voltage has changed.
– Signaling relay: The status of the signal contact has changed.
U Enable agent traps
The RR-EPL sends an agent alarm if one of the following events has
occurred:
– Temperature: The temperature has exceeded / fallen below the set
threshold values.
– AutoConfigAdapter: The Auto Configuration adapter, ACA, has been
added or removed.
U Activate traps when virus search patters have been
updated (successfully)
The RR-EPL sends an update alarm when the virus search patterns
have been updated successfully.
134
RR-EPL
Release 1.0 01/06
Web-based management
6.8 Services menu
U Activate traps if there are update or virus scan problems
The RR-EPL sends a problem alarm if problems occur
– when updating virus search patterns or
– during virus scanning.
U Activate traps if a virus is found or files are not checked
The RR-EPL sends a virus alarm if
– a virus was detected or
– a file was not checked.
U SNMP trap destinations
Destination IP: Enter the IP address of the recipient here, to which
the traps are to be sent.
Destination name: Here you can enter a name of your choice for
each recipient.
Destination community: The community with which the RR-EPL
sends a trap. Enter the community here that the trap recipient is
expecting.
RR-EPL
Release 1.0 01/06
135
Web-based management
6.9 Access menu
6.9 Access menu
6.9.1 Access:passwords
The RR-EPL supports 3 levels of user authorization. To login at a specific
level of authorization, the user must enter the corresponding password for
the level.
Fig. 65:
Access:Password
U Authorization level root
Offers all rights for all parameters of the RR-EPL.
Note: Only this authorization level allows you to connect to the device via
SSH so that you can render the entire system useless by making faulty
configurations. The system can then only be returned to its delivery state
by flashing the firmware (see “Flashing the firmware” on page 168).
Default root password: root
136
RR-EPL
Release 1.0 01/06
Web-based management
6.9 Access menu
To change the password, proceed as follows:
V Enter the currently valid root password in the field Old Password.
V Enter the new password twice in the fields New Password and New
Password (Repeat).
U Authorization level Administrator
If you login at this level (password), you will be granted all the rights
required for the configuration options that are accessible via the Webbased Administrator interface.
Default user name: admin
Default password: private
The user name admin cannot be changed.
To change the password, enter the desired new password twice in each
of the corresponding entry fields.
U Authorization level User
If a user password has been defined and activated, the user must after every restart of the RR-EPL - enter this password to enable a VPN
connection when he or she first attempts to access any HTTP URL.
If you wish to use this option, enter the desired user password once in
each of the corresponding entry fields. Then set Enable User
Password to Yes. (Stat on delivery: No).
To define one, enter the desired password twice in both entry fields.
RR-EPL
Release 1.0 01/06
137
Web-based management
6.9 Access menu
6.9.2 Access:Language
If you select “(Automatic)” from the list of languages, the device will use the
language setting of the system's browser.
Fig. 66:
138
Setting the language
RR-EPL
Release 1.0 01/06
Web-based management
6.9 Access menu
6.9.3 Access:HTTPS
If HTTPS remote access is activated, the RR-EPL can be configured via
its Web-based administrator interface from a computer connected to the
insecure port. This means that a browser is used on the remote computer
to configure the local RR-EPL.
This option is enabled by default.
Fig. 67:
Access:HTTPS
IMPORTANT: If you enable remote access, make sure that a secure root and
administrator password have been defined.
To prevent HTTPS remote access, make the following settings:
RR-EPL
Release 1.0 01/06
139
Web-based management
6.9 Access menu
U Disable HTTPS remote access
If you wish to prevent HTTPS, set this switch to No.
Note: Ensure that in this case the firewall rules on this end have been set
so that it possible to access the RR-EPL from an external terminal.
U Port for incomming HTTPS connections
(remote administration only)
Standard: 443
You can set another port.
The remote terminal that performs the remote access must add the port
number defined here to the end of the IP address when it assigns the
address.
Example:
If this RR-EPL can be reached at the address 192.144.112.5 over the
Internet, and if port number 443 has been set for remote access, this port
number does not have to be added to the end of the address in the Web
browser at the remote terminal.
When using a different port number, this number must be added to the
end of the IP address, e.g.: 192.144.112.5:442.
U Firewall rules to accept external HTTPS access
Lists the firewall rules that have been set up. They apply to the incoming
data packets of an HTTP remote access attempt.
D Editing rule
Define the desired rule (see above) and click OK.
D From IP
Enter the address(s) of the computer(s) which is/are permitted remote
access.
The following entry options are available:
– IP address: 0.0.0.0/0 means all addresses. To indicate a range,
use the CIDR notation - see “CIDR (Classless InterDomain Routing)”
on page 160.
D Interface
external (fixed)
140
RR-EPL
Release 1.0 01/06
Web-based management
6.9 Access menu
D Action
Options: Accept / Reject / Drop
Action
Accept
Reject
Drop
Meaning
the data packets are permitted to pass through.
the data packets are rejected, and the sender is notified that the data was
rejected.
In transparent mode, Reject has the same effect as Discard, see above.
the data packets are not permitted to pass through. They are “swallowed”,
and the sender is not notified about what happened to the data.
Table 14: Actions for HTTPS access
Note: In Transparent mode Reject is supported if the local IP address
is entered correctly.
D Log
For each individual firewall rule you can decide if, when the rule is
applied,
– the event should be logged – set Log to Yes
– or not – set Log to No (factory default setting).
RR-EPL
Release 1.0 01/06
141
Web-based management
6.9 Access menu
6.9.4 Access:SSH
If SSH remote access is activated, the RR-EPL can be configured by the
computer connected to the insecure port by making an entry on the
command line.
This option is enabled by default.
Fig. 68:
Access:SSH
IMPORTANT: If you enable remote access, make sure that a secure root and
administrator password have been defined.
To restrict SSH remote access, make the following settings:
U Disable SSH remote access
If you wish to prevent SSH remote access, set this switch to No.
Note: Ensure that in this case the firewall rules on this end have been set
so that it is possible to access the RR-EPL from an external terminal.
142
RR-EPL
Release 1.0 01/06
Web-based management
6.9 Access menu
U Port for incomming SSH conections
(remote administration only)
Standard: 22
You can set another port.
The remote terminal that performs the remote access must add the port
number defined here to the end of the IP address when it assigns the
address.
Example:
If this RR-EPL can be reached at the address 192.144.112.5 over the
Internet, and if port number 22 has been set for remote access, this port
number does not have to be specified in the SSH client.
This must be specified for another port number (e.g. 22222), for example:
ssh -p 22222 192.144.112.5
U Firewall rules to accept external SSH access
Lists the firewall rules that have been established. They apply to the
incoming data packets of an SSH remote access connection.
D Editing rule
Define the desired rule (see above) and click OK.
D From IP
Enter the address(s) of the computer(s) which is/are permitted remote
access.
The following entry options are available:
– IP address: 0.0.0.0/0 means all addresses. To indicate a range,
use the CIDR notation - see “CIDR (Classless InterDomain Routing)”
on page 160.
D Interface
external (fixed)
RR-EPL
Release 1.0 01/06
143
Web-based management
6.9 Access menu
D Action
Options: Accept / Reject / Drop
Action
Accept
Reject
Drop
Meaning
the data packets are permitted to pass through.
the data packets are rejected, and the sender is notified that the data was
rejected.
In transparent mode, Reject has the same effect as Discard, see above.
the data packets are not permitted to pass through. They are “swallowed”,
and the sender is not notified about what happened to the data.
Table 15: Actions for HTTPS access
Note: In Transparent mode Reject is supported if the local IP address
is entered correctly.
D Log
For each individual firewall rule you can decide if, when the rule
is applied,
– the event should be logged – set Log to Yes
– or not – set Log to No (factory default setting).
144
RR-EPL
Release 1.0 01/06
Web-based management
6.9 Access menu
6.9.5 Access:SNMP
SNMP (Simple Network Management Protocol) is mainly used in more
complex networks to monitor the status and operation of devices.
SNMP is available in several releases: SNMPv1/SNMPv2 and SNMPv3.
The older versions SNMPv1/SNMPv2 do not use encryption and are not
considered to be secure. We therefore recommend that you do not use
SNMPv1/SNMPv2.
As far as security is concerned, SNMPv3 is considerably better, but not all
management consoles support it.
Note: When you use SNMPv1, set up a VPN connection between the
management station and the RR-EPL. The SNMPv1 passwords will then
be transmitted invisibly.
Fig. 69:
Access:SNMP
RR-EPL
Release 1.0 01/06
145
Web-based management
6.9 Access menu
U Disable SNMPv3 access
If you wish to prevent monitoring of the RR-EPL via SNMPv3, set this
switch to No.
Unlike SNMPv1/v2 no login data is required, since the protocol itself
organises a secure authentication.
The factory setting for access via SNMPv3, requires an authentication
with a login and password. These entries are:
Login: admin
Password: private
MD5 is supported for the authentication; DES is supported for
encryption.
U Disable SNMPv1/2 access
If you wish to prevent monitoring of the RR-EPL via SNMPv1/v2, set this
switch to No.
In addition, you must enter the following login data:
– SNMPv1 and SNMPv2 read-write Community String
– SNMPv1 and SNMPv2 read-only Community String
Enter the required login data in these two fields.
U Port for incoming ANMP connections
(external interface only)
Standard: 161
U Firewall rules to accept external SNMP access
Lists the firewall rules that have been set. These apply for the incoming
data packets of an SNMP remote access.
D Editing rule
Define the desired rule (see above) and click OK.
D From IP
Enter the address(s) of the computer(s) on which SNMP monitoring
is permitted.
The following options are available:
– IP address: 0.0.0.0/0 means all addresses. To indicate a range,
use the CIDR notation - see “CIDR (Classless InterDomain Routing)”
on page 160.
146
RR-EPL
Release 1.0 01/06
Web-based management
6.9 Access menu
D Interface
external (fixed)
D Action
Options: Accept / Reject / Drop
Action
Accept
Reject
Drop
Meaning
the data packets are permitted to pass through.
the data packets are rejected, and the sender is notified that the data was
rejected.
In transparent mode, Reject has the same effect as Discard, see above.
the data packets are not permitted to pass through. They are “swallowed”,
and the sender is not notified about what happened to the data.
Table 16: Actions for HTTPS access
Note: For security reasons, the RR-EPL responds exclusively to ICMP
echo requests (ping) from computers that are permitted access via
SNMP.
D Log
For each individual firewall rule you can decide if, when the rule is
applied,
– the event should be logged – set Log to Yes
– or not – set Log to No (factory default setting).
RR-EPL
Release 1.0 01/06
147
Web-based management
6.9 Access menu
6.9.6 Access:Serial Port/Modem
This dialog allows you to configure the dial-in access via amodem.
In transparent mode (SCT/MCT) you can access the RR-EPL directly via
a modem.
In router mode you can also access the secured network according to the
firewall rules in this dialog.
Note: Use the Hirschmann modem cable to connect the modem
(see “Accessories” on page 193).
The socket housing is electrically connected to the front panel of the device.
The signal lines are electrically isolated from the supply voltage (60 V insulation
voltage) and the front panel.
State on delivery:
- Speed:9600 Baud
- Data:8 bit
- Stopbit:1 bit
- Handshake:off
- Parity:none
Fig. 70:
148
Serial Port/Modem
RR-EPL
Release 1.0 01/06
Web-based management
6.9 Access menu
U Serial connection, modem, PPP
D Baud rate
Select the same baud rate as the modem.
Note: A change in the baud rate has an effect on terminal operation.
D MODEM (PPP)
Enable access for the modem. An enabled modem prevents access
to the terminal.
D Hardware handshake RTS/CTS
Select the same baud rate as for the modem.
U PPP dial-in options
D Local IP
IP address of the RR-EPL for the serial port.
D Remote IP
IP address of the device connected to the serial port.
D PPP Login name
D PPP Password
U Firewall Incoming (PPP interface)
Lists the firewall rules that have been established. They apply to the
incoming data packets of a remote access connection from a modem
in the direction of the secured network.
D Editing rule
Define the desired rule (see above) and click OK.
D From IP
Enter the address(s) of the computer(s) on which modem monitoring
is permitted.
The following options are available:
– IP address: 0.0.0.0/0 means all addresses. To indicate a range,
use the CIDR notation - see “CIDR (Classless InterDomain Routing)”
on page 160.
RR-EPL
Release 1.0 01/06
149
Web-based management
6.9 Access menu
D From port
If you wish to set a new rule, click Arrow down.
Define the desired rule (see above) and click ok.
D To IP
If you wish to set a new rule, click arrow down.
Define the desired rule (see above) and click ok.
D To port
If you wish to set a new rule, click arrow down.
Define the desired rule (see above) and click OK.
D Action
Options: Accept / Reject / Drop
Action
Accept
Reject
Drop
Meaning
the data packets are permitted to pass through.
the data packets are rejected, and the sender is notified that the data was
rejected.
In transparent mode, Reject has the same effect as Discard, see above.
the data packets are not permitted to pass through. They are “swallowed”,
and the sender is not notified about what happened to the data.
Table 17: Actions for modem access
Note: In Transparent mode Reject is supported if the local IP address
is entered correctly.
D Log
For each individual firewall rule you can decide if, when the rule is
applied,
– the event should be logged – set Log to Yes
– or not – set Log to No (factory default setting).
U Internal server (trusted port)
Lists the firewall rules that have been established. They apply to the
outgoing data packets of a remote access connection from a modem.
150
RR-EPL
Release 1.0 01/06
Web-based management
6.10 Features menu
6.10 Features menu
6.10.1 Features:Local Update
Prerequisite: You must have a current software package saved locally on
your configuration system.
Note: For information as to whether or not and, if so, in which manner you
can obtain a software update, please contact Hirschmann.
Fig. 71:
Local Update
If you have saved a current software update on your configuration computer,
proceed as follows:
V Please read the README file!
V Click on Browse... and then select the file.
RR-EPL
Release 1.0 01/06
151
Web-based management
6.10 Features menu
V Click installed packets to load them into the device.
This procedure can take several minutes depending on the size of the
update.
If a reboot is required after the system update, this will be displayed.
6.10.2 Features:Online Update
Prerequisite: You must have a current software package available from a
remote server.
Note: Ask your distributor or check the Hirschmann website to see whether,
and how, you can obtain a software update.
Fig. 72:
152
Local Update
RR-EPL
Release 1.0 01/06
Web-based management
6.10 Features menu
If you have saved a current software update on your configuration computer,
proceed as follows:
V Enter the name for the “package set”. You can obtain this name from your
distributor or on the Hirschmann website. The name is in the form: update-1.02-03.0.00.tar.gz
V Select the protocol you want to use for the update.
V Enter the server address under “Update Server”.
Example: update.rr-epl.hirschmann.com
V If you have selected https as the transfer protocol, then you also enter the
login name and the password. The Hirschmann server uses http without
password.
V Click “OK”, to load the update.
This procedure can take several minutes, depending on the size of the update. If a reboot is required after the system update, this will be displayed.
RR-EPL
Release 1.0 01/06
153
Web-based management
6.10 Features menu
6.10.3 Features:Software Information - Display
This page lists the software modules (packages) currently loaded in the
device. Each of these is called a package.
The purpose of this page is to provide the information required prior to
making an update: Compare the displayed package version numbers with
those of the corresponding current packages. For the relevant information.
please contact your distributor.
If new versions are available, you can update the software in the device
(see “Features:Local Update” on page 151).
Fig. 73:
154
Software Information
RR-EPL
Release 1.0 01/06
Web-based management
6.10 Features menu
6.10.4 Features:Hardware information
Only for experienced system administrators or Support.
Fig. 74:
Hardware information
RR-EPL
Release 1.0 01/06
155
Web-based management
6.11 Support menu
6.11 Support menu
6.11.1 Support:Snapshot
This function creates a compressed file (in the tar format), which contains
all current configuration settings and log entries, that are relevant for error
diagnostics. This file does not contain any private information such as the
private machine certificate or passwords. However, any pre-shared keys
used for VPN connections are included in the snapshots. If requested,
please provide this file to Hirschmann-Support.
Fig. 75:
Snapshot
To create a snapshot, proceed as follows:
V Click Download.
V Save the file under the name snapshot.tar.gz
V Please make the file available to Hirschmann Support, if so requested.
156
RR-EPL
Release 1.0 01/06
Web-based management
6.11 Support menu
6.11.2 Support:Status - Display
Displays a summary of various status information for support purposes:
Fig. 76:
Support:Status
U Network mode
The RR-EPL's mode of operation
D Transparent (SCT/MCT)
D Router
D PPPoE
D PPTP
U Externe IP
The IP address of the RR-EPL at its connection for the network
(WAN or Internet) connected to the insecure port.
In transport mode, the RR-EPL takes on the local IP address.
RR-EPL
Release 1.0 01/06
157
Web-based management
6.11 Support menu
U Default gateway
The default gateway address is shown here that is entered in the RREPL.
U VPN
Supports:
D Total: Total number of VPN connections setup
D Used: Number of VPN connections used
D Up: Number of VPN connections currently active
U DynDNS registration
Supports:
D none: no DynDNS server specified
D DynDNS Server: Address of the DynDNS server, at which the RR-EPL
should register.
D failure: The RR-EPL has unsuccessfully attempted to setup a
connection to the DynDNS server.
D trying: The RR-EPL is currently attempting to setup a connection to the
DynDNS server.
U HTTPS remote access
Possible settings
D no
D yes
U SSH remote access
Possible settings
D no
D yes
158
RR-EPL
Release 1.0 01/06
Web-based management
6.11 Support menu
U NTP Status
Options:
D synchronized: The RR-EPL receives the current time from a time
server (Greenwich time) via the Network Time Protocol.
D not synchronized: The RR-EPL is not connected to a time server
and can thus not provide the current time.
U Software version
Shows the version of the software installed in the RR-EPL
U System Uptime
This shows how much time has elapsed since the last time that the RREPL was started.
U Language
This field shows the currently selected language.
RR-EPL
Release 1.0 01/06
159
Web-based management
6.12 CIDR (Classless InterDomain Routing)
6.12 CIDR (Classless InterDomain
Routing)
IP netmasks and CIDR are notations, which define an address space
containing multiple IP addresses. In this case, an address space in which
the addresses follow one another sequentially is treated as a network.
CIDR reduced the e.g. routing tables stored in routers to a network postfix
in the IP address. With this postfix, an aggregate of many networks can be
identified. The method is described in RFC 1518.
To define a range of IP addresses for the RR-EPL e.g. when configuring the
firewall, it may be necessary to use the CIDR notation to specify the address
space. The following table presents the IP netmask on the left and the
corresponding CIDR notation on the right.
160
RR-EPL
Release 1.0 01/06
Web-based management
6.12 CIDR (Classless InterDomain Routing)
IP binary CIDR
255.255.255.25511111111
255.255.255.25411111111
255.255.255.25211111111
255.255.255.24811111111
255.255.255.24011111111
255.255.255.22411111111
255.255.255.19211111111
255.255.255.12811111111
255.255.255.011111111
255.255.254.011111111
255.255.252.011111111
255.255.248.011111111
255.255.240.011111111
255.255.224.011111111
255.255.192.011111111
255.255.128.011111111
255.255.0.011111111
255.254.0.011111111
255.252.0.011111111
255.248.0.011111111
255.240.0.011111111
255.224.0.011111111
255.192.0.011111111
255.128.0.011111111
255.0.0.011111111
254.0.0.011111110
252.0.0.011111100
248.0.0.011111000
240.0.0.011110000
224.0.0.011100000
192.0.0.011000000
128.0.0.010000000
11111111
11111111
11111111
11111111
11111111
11111111
11111111
11111111
11111111
11111111
11111111
11111111
11111111
11111111
11111111
11111111
11111111
11111110
11111100
11111000
11110000
11100000
11000000
10000000
00000000
00000000
00000000
00000000
00000000
00000000
00000000
00000000
11111111
11111111
11111111
11111111
11111111
11111111
11111111
11111111
11111111
11111110
11111100
11111000
11110000
11100000
11000000
10000000
00000000
00000000
00000000
00000000
00000000
00000000
00000000
00000000
00000000
00000000
00000000
00000000
00000000
00000000
00000000
00000000
11111111
11111110
11111100
11111000
11110000
11100000
11000000
10000000
00000000
00000000
00000000
00000000
00000000
00000000
00000000
00000000
00000000
00000000
00000000
00000000
00000000
00000000
00000000
00000000
00000000
00000000
00000000
00000000
00000000
00000000
00000000
00000000
32
31
30
29
28
27
26
25
24
23
22
21
20
19
18
17
16
15
14
13
12
11
10
9
8
7
6
5
4
3
2
1
0.0.0.000000000 00000000 00000000 00000000 0
Example: 192.168.1.0 / 255.255.255.0 corresponds to 192.168.1.0/24 in
CIDR notation.
RR-EPL
Release 1.0 01/06
161
Web-based management
6.13 Example of a network
6.13 Example of a network
The diagram below illustrates how in a local network with subnetworks the
IP address could be distributed, what the resulting network addresses would
be, and how an additional internal router would be specified.
Internet
Internet
External addresses e.g.: 80.81.192.37
(assigned by the Internet service provider)
RR-EPL in the network mode router
Internal address of the RR-EPL: 192.168.11.1
x
EAGLE
P
1
2
FAULT
STATUS
LS/DA
1
2 V.24
R
IP-ADDRESS
k
1
A1
A2
A3
A4
2
162
+24V (P2)
V.24
MACH 3002
MACH 3002
=
Fig. 77:
+24V (P1)
Aufkleber MAC-Adresse
Router
IP external:
192.168.15.1
IP internal:
192.168.27.254
Network mask:
255.255.255.0
0V
0V
Router
IP external:
192.168.11.2
IP internal:
192.168.15.254
Network mask:
255.255.255.0
FAULT
g
additional
internal route
B1
C1
B2
C2
B3
C3
B4
C4
A5
Network A
Network
address:
192.168.11.0/24
Network mask:
255.255.255.0
Network B
Network
address:
192.168.15.0/24
Network mask:
255.255.255.0
Network C
Network
address:
192.168.27.0/24
Network mask:
255.255.255.0
Network example
RR-EPL
Release 1.0 01/06
Web-based management
6.13 Example of a network
Computer
A1
A2
A3
A4
A5
IP address
192.168.11.3 192.168.11.4 192.168.11.5 192.168.11.6 192.168.11.7
Network mask 255.255.255.0 255.255.255.0 255.255.255.0 255.255.255.0 255.255.255.0
Table 18: Network A
Computer
B1
B2
B3
B4
IP address
192.168.15.2 192.168.15.3 192.168.15.4 192.168.15.5
Network mask 255.255.255.0 255.255.255.0 255.255.255.0 255.255.255.0
Table 19: Network B
Computer
C1
C2
C3
C4
IP address
192.168.27.1 192.168.27.2 192.168.27.3 192.168.27.4
Network mask 255.255.255.0 255.255.255.0 255.255.255.0 255.255.255.0
Table 20: Network C
Network
192.168.15.0/24
192.168.27.0/24
Gateway
192.168.11.2
192.168.11.2
Table 21: Additional internal routes for RR-EPL (see “Network:Base” on page 72)
RR-EPL
Release 1.0 01/06
163
Web-based management
164
6.13 Example of a network
RR-EPL
Release 1.0 01/06
The Recovery button
7 The Recovery button
The Recovery button enables you to,
D perform a restart,
D perform the Recovery procedure and
D to flash the firmware.
RR-EPL
Release 1.0 01/06
165
The Recovery button
7.1 Performing a restart
7.1 Performing a restart
The RR-EPL offers several ways of performing a restart.
D Restart with Recovery button
V To perform a restart, press the Recovery button longer than
1.5 seconds and less than 7 seconds until the STATUS LED
goes out and the FAULT LED lights up red.
D The supply of current is temporarily interrupted.
D Management Web interface
See “System:Reboot” on page 59.
D Management SNMP
with the MIB object hmSecAction.
166
RR-EPL
Release 1.0 01/06
The Recovery button
7.2 Executing the recovery procedure
7.2 Executing the recovery
procedure
7.2.1 Aim
The recovery procedure sets all the parameters to the state on delivery,
with the exception of the passwords.
Possible reasons for executing the recovery procedure:
D The RR-EPL is in router or PPPoE mode,
D The device address of the RR-EPL has been configured differently than
the default setting.
D You do not know the current IP address of the device,
D You have no way of making this setting from a V.24 terminal.
7.2.2 Action
V Perform a restart - see “Performing a restart” on page 166.
V Wait until the STATUS-LED is continuously green-lit. This lasts about
30 seconds.
V Press the Recovery button slowly 6 times.
Result:
The RR-EPL responds after about 2 seconds:
The STATUS LED blinks 6 times yellow and then green.
V Press the Recovery button 6 times again within the next 60 seconds.
Result:
The device performs a restart and is reset to the state on delivery, with the
exception of the passwords.
RR-EPL
Release 1.0 01/06
167
The Recovery button
7.3 Flashing the firmware
7.3 Flashing the firmware
Aim
The entire RR-EPL software is to be loaded into the device.
Note: All configured settings will be deleted. The RR-EPL is reset to its
default values (state on delivery).
Possible reasons to flash the firmware:
D You have lost or forgotten the administrator password.
D The firewall rules have been set in such a way that the administrator no
longer has access.
Action
Prerequisites:
D You have copied the software of the RR-EPL from the RR-EPL CD or
obtained it from Hirschmann support and have saved it on the
configurations computer.
D The DHCP and tftp server are installed on the same computer
(see “Requirements for flashing the firmware” on page 170).
Proceed as follows:
V Keep the Recovery button pressed until the recovery status starts as
follows:
The RR-EPL is restarted (after 1.5 seconds). After approx. 7 seconds
the RR-EPL switches to recovery status.
Status display of the recovery status: All ports and STATUS LEDs are
green-lit.
V Release the Recovery switch no more than 1 second after the device has
entered its recovery state.
Note: If you do not release the Recovery quickly enough, the RR-EPL will
restart again.
168
RR-EPL
Release 1.0 01/06
The Recovery button
D
D
D
D
7.3 Flashing the firmware
Result:
The RR-EPL starts the recovery system. It searches for the DHCP server
via the computer connected to the secure port or via the connected
network in order to obtain an IP address from it.
Status display: The STATUS LED blinks.
The file install.p7s is loaded from the tftp server. It contains the
electronically signed control procedure for the installation procedure.
Only files that have been signed by Hirschmann are loaded.
The control procedure then deletes the flash memory and prepares the
reinstallation of the software.
Status display: Die 3 port LEDs form a sequential light.
The software jffs2.img.p7s is then downloaded from the tftp server
and stored in the flash memory. This file contains the actual RR-EPLoperating system and is electronically signed. Only files that have been
signed by Hirschmann are accepted.
Status display: Die 3 port LEDs form a sequential light.
It takes about 3 to 5 minutes to delete and store the file.
The RR-EPL is the then restarted automatically.
The new software is then unpacked and configured.
This takes about 5 minutes.
Status display: The STATUS LED blinks.
Once the procedure has ended, all port LEDs blink green simultaneously.
V Restart the RR-EPL.
To do this, press the Recovery button until the STATUS LED goes out.
or
Disconnect the device from power supply and then reconnect it.
Result:
The RR-EPL is in the delivery state. Reconfigure it (see “Setting up a
local configuration connection” on page 42).
RR-EPL
Release 1.0 01/06
169
The Recovery button
7.3 Flashing the firmware
7.3.1 Requirements for flashing the firmware
To flash the firmware, a DHCP and tftp server must be installed on the locally
connected computer or network computer.
(DHCP = Dynamic Host Configuration Protocol; tftp = Trivial File Transfer
Protocol)
V Install the DHCP and tftp server, if needed (see below).
Note: If you install a second DHCP server in a network, this can affect the
configuration of the entire network!
170
RR-EPL
Release 1.0 01/06
The Recovery button
7.3 Flashing the firmware
7.3.2 Installing the DHCP and tftp server under
Windows
Install the software for the tftp server and DHCP server, that is located on
the CD. Proceed by following the steps below:
V If the Windows system is connected to network, disconnect it.
V Copy the software into any empty folder on the Windows system.
Start the program TFTPD32.EXE.
The image files are also found on the CD-ROM, which was included in
the package.
Fig. 78:
Start screen of the TFTPD32 program
V The server IP must be set to: 192.168.10.1
This must also be the address of the network adapter.
Click on the Browse button to switch to the folder in which the RR-EPL
image files have been saved: install.p7s, jffs2.img.p7s
RR-EPL
Release 1.0 01/06
171
The Recovery button
7.3 Flashing the firmware
V Click on the tftp Server or DHCP Server tab and then click on
the Settings button to open the dialog shown below. Then set the
parameters as shown:
Fig. 79:
172
Settings
RR-EPL
Release 1.0 01/06
The Recovery button
7.3 Flashing the firmware
7.3.3 Installing DHCP and TFTP servers under
Linux
All current Linux distributions include DHCP and TFTP servers. Install the
corresponding packages in accord with the instructions for the respective
distribution.
V Configure the DHCP server by making the following settings in the
/etc/dhcp file:
subnet 192.168.134.0 netmask 255.255.255.0 {
range 192.168.134.100 192.168.134.119;
option routers 192.168.134.1;
option subnet-mask 255.255.255.0;
option broadcast-address 192.168.134.255;}
This sample configuration makes 20 IP addresses (.100 to .119)
available. It is assumed that the DHCP server has the address
192.168.134.1 (settings for ISC DHCP 2.0).
The required TFTP server is configured in the following file:
/etc/inetd.conf
V In this file, insert the appropriate lines or set the necessary parameter for
the TFTP service (the directory for data is: /tftpboot)
tftp dgram udp wait root /usr/sbin/in.tftpd -s /tftpboot/
V Then restart the inetd process to activate the modified configuration.
If you use a different mechanism, e.g. xinetd, please read the
corresponding documentation.
RR-EPL
Release 1.0 01/06
173
The Recovery button
174
7.3 Flashing the firmware
RR-EPL
Release 1.0 01/06
HiConfig
8 HiConfig
HiConfig is a command-line oriented program for configuring the RR-EPL.
The HiConfig interface can be reached via
D the secure port,
D the insecure port or
D the V.24 port.
U Making a connection the HiConfig over a LAN
PuTTY is a terminal program with which you can establish a secure
connection to the HiConfig interface of the RR-EPLfrom your PC over
the LAN.
V Copy the putty.exe file from the enclosed CD to your PC's hard disk.
V Start PuTTY by doubleclicking this file.
Host name or
IP address of
the RR-EPL
Connection
protocol
Fig. 80:
Connection setup
V Enter the host name or the IP address of the RR-EPL.
V Select the connection protocol.
– SSH, if your PC accesses the RR-EPL from within a LAN.
RR-EPL
Release 1.0 01/06
175
HiConfig
V Click Open.
PuTTY establishes a connection to the RR-EPL and
opens the login window.
V Press the Enter key.
The RR-EPL operating system will prompt you to enter the username
(admin or root).
V Enter the username.
The RR-EPL operating system will prompt you to enter the password
(private or root).
V Enter the password.
The RR-EPL operating system responds with the “$” prompt
(for admin) or “#” (for root).
V Enter hiconfig (please note that entries are case-sensitive)
and press the Enter key.
HiConfig responds by displaying a list of valid commands.
delete the current row
--delete-all-rows
delete all rows
--silent
DON'T reconfigure services
(the gaid session daemon isn't required when option is used)
--get-all
dump all configuration data to stdout
--set-all
read all configuration data from stdin
--cache <file>
alternative location for the cache file
--socket <file>
use an alternative unix domain socket
Examples:
hiconfig --set ROUTERMODE router
hiconfig --set VPN.1.GATEWAY 192.168.1.1
hiconfig --goto VPN.0 --set .GATEWAY %any --set .ENABLED no
hiconfig --goto VPN --add-row --set .NAME tokyo --set .GATEWAY
146.215.5.34
hiconfig --goto VPN.2 --delete-row
#
Fig. 81:
176
HiConfig start page
RR-EPL
Release 1.0 01/06
HiConfig
U Making a connection to HiConfig over a V.24 port.
The V.24 port allows you to configure the RR-EPL, in the event access
via the LAN ports is not possible. The cause for this can be: failed
autonegotiations, faulty firewall configuration, etc.
V Using the terminal cable, connect your PC to the V.24 port of the RREPL.
Example of establishing a terminal connection under Windows 2000:
V Choose:
Start:Programs:Accessories:Communication:
HyperTerminal
Enter a name of
your choice for
this connection.
Fig. 82:
Setting up the terminal connection
Click OK.
Fig. 83:
Terminal connection without phone number
RR-EPL
Release 1.0 01/06
177
HiConfig
Enter the connection
settings and click OK.
Fig. 84:
Properties of the terminal connection
V Press the Enter key.
The RR-EPL operating system will prompt you to enter the username
(admin or root).
V Enter the username.
The RR-EPL operating system will prompt you to enter the password
(private or root).
V Enter the password.
The RR-EPL operating system responds with the “$” prompt
(for admin) or “#” (for root).
V Enter hiconfig (please note that entries are case-sensitive)
and press the Enter key.
HiConfig responds by displaying a list of valid commands.
178
RR-EPL
Release 1.0 01/06
HiConfig
delete the current row
--delete-all-rows
delete all rows
--silent
DON'T reconfigure services
(the gaid session daemon isn't required when option is used)
--get-all
dump all configuration data to stdout
--set-all
read all configuration data from stdin
--cache <file>
alternative location for the cache file
--socket <file>
use an alternative unix domain socket
Examples:
hiconfig --set ROUTERMODE router
hiconfig --set VPN.1.GATEWAY 192.168.1.1
hiconfig --goto VPN.0 --set .GATEWAY %any --set .ENABLED no
hiconfig --goto VPN --add-row --set .NAME tokyo --set .GATEWAY
146.215.5.34
hiconfig --goto VPN.2 --delete-row
#
Fig. 85:
HiConfig start page
RR-EPL
Release 1.0 01/06
179
HiConfig
U Port Configuration
To set the port configuration you will need the following parameters:
Designation
EPL port
Insecure port
Enable port
Disable port
Autonegotiation on
Autonegotiation off
10 Mbit/s, halfduplex
10 Mbit/s, fullduplex
100 Mbit/s, halfduplex
100 Mbit/s, fullduplex
Value
ETH1
ETH0
ENABLE
DISABLE
AUTONEG yes
AUTONEG no
FIXEDSETTING
FIXEDSETTING
FIXEDSETTING
FIXEDSETTING
10hd
10fd
100hd
100fd
Table 22: Port configuration parameters
The command hiconfig --set and the proper parameters allow you
to configure the ports.
The command hiconfig --get-all | more displays all the
configured parameters one page at a time.
Example:
Set the secure port to 10 Mbit/s halfduplex:
hiconfig --set ENABLE_ETH1_AUTONEG no
hiconfig --set ETH1_FIXEDSETTING 10hd
Set the secure port to Autonegotiation on:
hiconfig -- set ENABLE_ETH1_AUTONEG yes
180
RR-EPL
Release 1.0 01/06
HiConfig
U IP parameter configuration in transparent mode
V Disable DHCP-Client protocol:
$ hiconfig --set MGUARD_ROUTER_DHCP no
V IP address of the untrusted port:
$ hiconfig --set MY_ROUTER_IP 149.218.112.55
V Networkmask of the untrusted port:
$ hiconfig --set MY_ROUTER_NET 255.255.255.0
V Enter the gateway address as follows:
$ hiconfig --set DEFAULT_GW 148.218.112.199
The IP addresses and the network mask refer to the entries in the
HiDiscovery example (see Fig. 16).
RR-EPL
Release 1.0 01/06
181
HiConfig
182
RR-EPL
Release 1.0 01/06
Appendix
A Appendix
RR-EPL
Release 1.0 01/06
183
Appendix
FAQ
FAQ
Answers to frequently asked questions can be found at the product page of
the Hirschmann Web site:
www.hirschmann.com
For detailed information on all services offered by the Hirschmann
Competence Center, please visit the Web site http://www.hicomcenter.com/.
184
RR-EPL
Release 1.0 01/06
Appendix
Based specifications and standards
Based specifications and
standards
U List of norms and standards:
D EN 61000-6-2:2001 Basic standard - interference resistance in
industry
D EN 55022:1998 + A1 2000 + A2 2003 - Interference characteristics for
IT systems
D EN 60950:2001 - Security in IT systems
D EN 61131-2:2003 - Programmable Logic Controllers
D FCC 47 CFR Part 15:2003 – Code of Federal Regulations
D Germanischer Lloyd, Rules for Classification and Construction VI - 7 3 Part 1, Ed. 2003.
D cUL 508:1998 – Safety for Industrial Control Equipment
D cUL 1604 Electrical Equipment for Use in Class I and Class II, Div.2
and Class III Hazardous (Classified) Locations
D cUL 60950 Safety for Information Technoloy Equipment.
Certified devices are marked with a certification identifier.
U IEEE standards
IEEE 802.1 D
Switching, GARP, GMRP, Spanning Tree
IEEE 802.1 Q
Tagging
IEEE 802.3
Ethernet
RR-EPL
Release 1.0 01/06
185
Appendix
Based specifications and standards
U Supported MIBs
Private MIBs:
D hmprivate
D hmSecurityGateway-MIB
Standard MIBs:
D IF-MIB
D MAU-MIB
D RFC1155-SMI
D RFC1213-MIB
D SNMPv2-MIB
D SNMPv2-SMI
D SNMPv2-TC
The private MIBs are located on the enclosed RR-EPL CD-ROM.
186
RR-EPL
Release 1.0 01/06
Appendix
SNMP traps
SNMP traps
U Private MIB:
hmSecHTTPSLoginTrap
is sent, if a login attempt was made via HTTPS.
hmSecShellLoginTrap
is sent if a login was made via the security shell or the V.24 terminal.
hmSecDHCPNewClientTrap
is sent if the DHCP server receives a request from an unknown client.
hmTemperatureTrap
is sent if the temperature exceeds / falls below the set threshold values.
hmPowerSupply
is sent if the status of the voltage supply changes.
hmSignallingRelay
is sent if the status of the signal contact changes.
hmAutoconfigAdapterTrap
is sent if the AutoConfiguration adapter ACA 11 is removed or plugged
in again.
U Standard traps:
coldStart
is sent during the boot process after successful management
initialization following a cold or warm start.
linkUp
is sent if the link to a port is re-established.
linkDown
is sent if the link to a port is interrupted.
RR-EPL
Release 1.0 01/06
187
Appendix
SNMP traps
authenticationFailure
is sent if a station attempts to access an agent without permission.
188
RR-EPL
Release 1.0 01/06
Appendix
Certifications
Certifications
The following table lists the certification status of the
RR-EPL product family.
Certified devices are marked with a certification identifier.
Standard
EN 61131-2
CE
FCC 47 CFR Part 15
cUL 508 / CSA C22.2 No.142
cUL 1604 / CSA C22.2 No.213
Germanischer Lloyd
RR-EPL
In preparation
In preparation
In preparation
In preparation
In preparation
fulfilled
Table 23: Certifications, for the current status, visit www.hirschmann.com
RR-EPL
Release 1.0 01/06
189
Appendix
Technical data
Technical data
RR-EPL
Dimensions W x H x D
Weight
Top-hat rail fastener
Power supply
Operating voltage
Power consumption
with 2 TX ports
with 1 TX port and 1 FX port
with 2 FX ports
Overload current protection at input
Environment
Ambient temperature
Storage temperature
Air humidity
Atmospheric pressure
Pollution Degree
Protection classes
Laser protection
Protection class
190
46 x 131 x 111 mm
1.8 in x 5.2 in x 4.4 in
340 g, 0.75 lb
in line with IEC 60715:1981 + A1:1995
24 V DC, -25 % +33 %
Nec Class 2 power source,
safety extra-low voltage (SELV/PELV)
redundant inputs uncoupled
7.2 W maximum at 24 V DC
24.6 BTU/h
8.4 W maximum at 24 V DC
28.7 BTU/h
9.6 W maximum at 24 V DC
32.8BTU/h
non-changeable thermal fuse
Surrouding air:
0 °C to 60 °C (32 °F to 140 °F)
Surrouding air:
-20 °C to +70 °C (-4 °F to 158 °F)
10 % to 95 % (non-condensing)
Suitable for operation at up to
2000 m (6561 ft), 795 hPa
2
Class 1 conforming to EN 60825-1
(2001)
IP 20
RR-EPL
Release 1.0 01/06
Appendix
EMC interference immunity
EN 61000-4-2
EN 61000-4-3
EN 61000-4-4
EN 61000-4-5
EN 61000-4-6
EMC emitted immunity
EN 55022
FCC 47 CFR Part 15
Germanischer Lloyd
Stability
Vibration
Shock
RR-EPL
Release 1.0 01/06
Technical data
electrostatic discharge
contact discharge:
test level 3 (6 kV)
air discharge:
test level 3 (8 kV)
electromagnetic field
test level 3
(10 V/m; 80 - 2000 MHz)
fast transients (burst)
test level 3
(2 kV power line, 1 kV data line)
surge voltage
power line
symmetric: test level 2 (1kV)
asymmetric: test level 3 (2kV);
data Line: test level 2 (1kV)
cable-based RF faults: test level 3
10 V (150 kHz - 80 MHz)
Class A
Class A
Rules for Classification and
Construction VI - 7 - 3 Part 1, Ed. 2003
IEC 60068-2-6 Test FC, testing level
in line with IEC 61131-2 E2 CDV and
Germanischer Lloyd Guidelines for
the Performance of Type Tests Part 1
IEC 60068-2-27 Test Ea, testing level
in line with IEC 61131-2 E2 CDV
191
Appendix
Interfaces
Signal contact
V.24 port
2 type depending ports
Technical data
1 A maximum, 24 V
external management, modem
TX ports with RJ-45 socket,
FX ports with DSC socket
Network size TX port 10BASE-T/100BASE-TX/1000BASE-TX
Length of a TP segment
100 m (328 ft) max.
Network size F/O ports 100BASE-FX
System attenuation
50/125 µm fiber, multimode
0-8 dB
62.5/125 µm fiber, multimode
0-11 dB
Example for F/O line length
50/125 µm fiber, multimode
62,5/125 fiber, multimode
192
5 km/16,400 ft max.
data of fiber: 1 dB/km, 800 MHz*km
4 km/13,120 ft max.
1 dB/km, 500 MHz*km
RR-EPL
Release 1.0 01/06
Appendix
Scope of delivery
RR-EPL Firewall/VPN System incl.
Order number
RR-EPL TX/TX
RR-EPL TX/MM SC
Technical data
terminal block for power supply
RR-EPL manual on CDROM
Description and operating instructions
943 011-021
943 011-022
Accessories
Manual: “Basics of
Industrial ETHERNET and TCP/IP”280720-834
ACA Auto Configuration Adapter
943 751-001
Terminal cable
943 301-001
6-pin terminal block (50 pieces)
943 845-002
Rail Power Supply RPS 30
943 662-003
Rail Power Supply RPS 60
943 662-001
Rail Power Supply RPS 120
943 662-011
Network Management Software
HiVision
943 471-100
RR-EPL
Release 1.0 01/06
193
Appendix
Copyright of integrated software
Copyright of integrated software
The RR-EPL incorporates certain free and open software. The license terms
associated with this software require that we give copyright and license
information. These informations can be found on the enclosed CD-ROM.
For free software under the terms of the GPL/LGPL we also provide source
code according to Subsection 3b of the GPL or Subsection 6b of the
LGPL,respectively.
Please contact your Hirschmann contract partner.
194
RR-EPL
Release 1.0 01/06
Glossar
B Glossar
D 3DES / DES
This symmetrical encryption algorithm was developed by IBM and chekked by the NSA. DES (“Symmetrical encryption” on page 201) was set in
1977 by the American National Bureau of Standards, which was the predecessor of the National Institute of Standards and Technology (NIST), as
the standard for American governmental institutions. Since this was the
very first standardized encryption algorithm, it quickly won acceptance by
industry even outside of America.
DES uses a 56 bit long key, which is no longer considered secure as the
processing power available has greatly increased since 1977.
3DES is a variant of DES. It uses keys that are three times as long, i.e.
168 bits long. 3DES is still considered to be secure and is also included
in the IPsec standard
D Asymmetrical encryption
In the case of asymmetrical encryption, data is encrypted with one key
and decrypted with a second key. Either key may be used for encryption
or decryption. One of the keys is kept secret by its owner (Private Key),
the other is made available to the public (Public Key), i.e. possible communication partners.
A message encrypted with the public key can only be decrypted and
read by the receiver who has the associated private key. A message
encrypted with the private key can only be decrypted and read by a
receiver who has the associated public key. The fact that the message
was encrypted with the private key proves that the owner of the associated public key actually sent the message. Therefore, the expression
"digital signature" is also often used.
However, asymmetrical encryption techniques such as RSA are both
slow and susceptible to certain types of attack and are therefore frequently combined with some form of symmetrical encryption (“Symmetrical encryption” on page 201). On the other hand, there are concepts
which avoid the additional work of administering symmetrical keys.
D AES
Advanced Encryption Standard. This encryption standard was developed
by NIST (National Institute of Standards and Technology) in cooperation
with the industry. This “Symmetrical encryption” on page 201 was developed to replace the earlier DES standard. AES specifies three different
key sizes (128, 192 and 256 bits).
RR-EPL
Release 1.0 01/06
195
Glossar
In 1997, NIST started the AES initiative and announced its conditions for
the algorithm. From the many proposed encryption algorithms, NIST
selected a total of five algorithms for closer examination - the MARS,
RC6, Rijndael, Serpent and Twofish algorithms. In October 2000, the
Rijndael algorithm was adopted as the standard's encryption algorithm.
D Certificate (X.509)
A type of "Seal", which certifies the authenticity of a public key (“Asymmetrical encryption” on page 195) and the associated data.
To enable the user of the public key, which will be used to encrypt the data, to be sure that the public key that he/she has received is really from its
issuer and thus from the instance, which should later receive the data, it
is possible to use certification. A Certification Authority – CA certifies the
authenticity of the public key and the associated link between the identity
of the issuer and his/her key. The certification authority will verify authenticity in accordance with its rules, which may, for example, require that the
issuer of the public key appear before it in person. Once authenticity has
be successfully certified, the certification authority will add its digital signature to the issuer’s public key. The result is a Certificate.
An X.509(v3) Certificate thus includes a public key, information about the
key owner (given as it Distinguished Name (DN)), the authorized usage
etc. and the signature of the certification authority.
The signature is created as follows: The certification authority creates an
individual bit sequence, which is known as the HASH value, from the bit
sequence of the public key, the information about its owner and other data. This sequence may be up to 160 bits long. The certification authority
encrypts this with its own private key and then adds it to the certificate.
The encryption with the certification authority's private key proves the authenticity of the certificate, i.e. the encrypted HASH string is the certification authority's digital signature. If the certificate's data is altered, this
HASH value will no longer be correct with the consequence that the certificate will be worthless.
The HASH value is also known as the fingerprint. Since it is encrypted
with the certification authority's private key, anyone who has the public
key can decrypt the bit sequence and thus verify the authenticity of this
fingerprint or signature.
The usage of a certification authority means it is not necessary for each
owner of a key to know every other owner. It is enough for them to know
the certification authority. The additional information about the key further
simplifies the administration of the key.
X.509 certificates are used, e.g. for e-mail encryption, in S/MIME or IPsec.
196
RR-EPL
Release 1.0 01/06
Glossar
D Client / Server
In a client-server environment, a server is a program or computer, which
accepts and answers queries from client programs or computers.
In data communication, a computer which establishes a connection to a
server (or host) is also called a client. In other words, the client is the
calling computer and the server (or host) is the computer called.
D Datagram
In the TCP/IP protocol, data is sent in the form of data packets, which are
know as IP datagrams. An IP datagram has the following structure:
IP-Header
TCP, UDP, ESP etc. Daten (Payload)
Header
The IP header contains:
– the IP address of the sender (source IP address)
– the IP address of the receiver (destination IP address)
– the protocol number of the protocol of the next higher protocol layer (in
accord with OSI [seven layer] model)
– the IP header checksum used to check the integrity of the received
header.
The TCP/UDP header contains the following information:
– the sender's port (source port)
– the recipient's port (destination port)
– a checksum covering the TCP header and some information from the
IP header (among others the source and destination IP addresses)
D DynamicDNS provider
Every computer, which is connected to the Internet, has an IP address (IP
= Internet Protocol). An IP address consists of a maximum of 4 three-digit
numbers, which are each separated by a dot. If the computer accesses its
Internet Service Provider (ISP) via a modem on a phone line, ISDN or
ADSL, its ISP will assign it a dynamic IP address. In other words, it will be
assigned a different address for every online session. If the computer is
online 24 hours a day without interruption (e.g. in the case of a flat rate
access), the IP address will even change during the session.
If a local computer should be accessible via the Internet, it must have an
address that is known to the remote system. Unless this is true, no connection can be established between the remote system and the local
computer. If the local computer's address is constantly changing, no connection can be setup. Unless, of course, the operator of the local computer has an account with a Dynamic DNS provider (DNS = Domain Name
Server).
In this case, he/she can define a domain name in URL format (URL - Uniform Resource Locator) at this Dynamic DNS provider under which comRR-EPL
Release 1.0 01/06
197
Glossar
puter should be accessible in the future, e.g.: www.xyz.abc.de. The
Dynamic DNS provider also supplies a small program, which must be installed and run on this local computer. At each new Internet session, this
tool will inform the Dynamic DNS provider which IP address the local computer has currently been assigned. This Domain Name Server will register
the current assignment of Domain Name « IP Address and will also inform
the other Domain Name Servers in the Internet.
If a remote system now attempts to establish a connection the local computer, which is register with the DynamicDNS provider, the remote system
can use the host name of the local system as its address. This will setup
a connection to the responsible DNS (Domain Name Server) to lookup the
IP address that is currently registered for this domain name. The corresponding IP address will now be sent back from the DNS to the remote
system, which can then use this as the destination address. The remote
system can now directly address the desired local computer.
In principle, all Internet addresses are based on this procedure: First, a
connection will be established to a DNS to lookup the IP address
assigned for the domain name. Once that has been accomplished, this
"looked up" IP address will be used to setup a connection the desired
remote site, which could be any site in the Internet.
D IP address
Every host or router in the Internet or an Intranet has a unambiguous IP
address (IP = Internet Protocol). The IP address is 32 bits (= 4 bytes) long
and is written as 4 three-digit numbers (each in the range from 0 to 255),
which are separated by a dot.
An IP address consists of 2 parts: the network address and the host
address.
Netzwork address Host address
Each host [or workstation] in a network has the same network address,
but a different host address. Depending on the size of the respective network - networks are categorized as Class A, B or C networks, which are
each different in size - the two parts of the address differ in length:
1. Byte
Class A
Class B
Class C
198
2. Byte
Netz-Adr.
3. Byte
4. Byte
Host-Adr.
Netz-Adr.
Netz-Adr.
Host-Adr.
Host-Adr.
RR-EPL
Release 1.0 01/06
Glossar
Whether the IP address of a device in a network is Class A, B or C can
be seen in the first byte of the IP address. The following has been
specified:
Wert des
1. Byte
Bytes f r die
Netz-Adresse
Bytes f r die
Host-Adresse
Class A
1-126
1
3
Class B
128-191
2
2
Class C
191-223
3
1
As you can see, there can be a worldwide total of 126 Class A networks
and each of these networks can have a maximum of 256 x 256 x 256
hosts (3 bytes of address space). There can be 64 x 256 Class B networks and each of these networks can have up to 65,536 hosts (2 bytes
address space: 256 x 256). There can be 32 x 256 x 256 Class C networks and each of these networks can have up to 256 hosts (1 bytes
address space).
Subnet Mask see “Subnet Mask” on page 201.
D IPsec
IP Security (IPsec) is a standard, which uses encryption to verify the
authenticity of the sender and ensure the confidentiality and integrity of
the data in IP datagrams (–> Datagram, page 197). The components of
IPsec are the Authentication Header (AH), the Encapsulating Security
Payload (ESP), the Security Association (SA) and the Internet Key Exchange (IKE).
To begin communication, the computers at both ends negotiate the mode
to be used: Transport Mode or Tunnel Mode.
In Transport Mode, an IPsec header will be inserted between the
IP header and the TCP or UDP header in each IP datagram. Since the
IP header remains unchanged, this mode is only suitable for a host- tohost connection.
In Tunnel Mode, an IPsec header and a new IP header will be added in
front of the entire IP datagram. As a consequence, the original datagram
will be encrypted in its entirety and sent as the payload of the new
datagram.
The Tunnel Mode is used in VPN applications: The devices at the tunnel
ends ensure that the datagrams are encrypted before they pass through
the tunnel so the actual datagrams are completely protected while being
transferred over the public network.
RR-EPL
Release 1.0 01/06
199
Glossar
D NAT (Network Address Translation)
Using Network Address Translation (NAT) – which is also often called IPMasquerading – an entire network is “hidden” behind a single device,
which is known as a NAT router. The internal computers in the local network with their IP addresses will remain hidden, if you communicate with
the outside via a NAT router. The remote system outside will only see the
NAT router with its own IP address.
If the internal computers are to directly communicate with external systems (in the Internet), the NAT router must modify the IP datagrams that
are passed back-and-forth between the internal computers and the remote sites.
If an IP datagram is sent from the internal network to a remote site, the
NAT router will modify the IP and TCP headers of the outgoing datagrams. It replaces the source IP address and port with its own official IP
address and its - thus far unused - port. It maintains a table in which the
original values listed together with the corresponding new ones.
When a reply datagram is received, the NAT router will recognize that it
is actually for an internal computer from the datagram’s destination port.
Using the table, the NAT router will replace the destination IP address and
port and pass the datagram on via the internal network.
D Port Number
The Port Number field is a 2 byte field in the UDP and TCP header. Port
Numbers are used to identify the various data streams that are processed
simultaneously by the UDP/TCP. The entire exchange of data between
the UDP/TCP and the application processes is regulated via port numbers. The assignment of the port numbers to the application processes is
dynamic and random. Fixed port numbers are assigned for certain,
frequently used application processes. These are called "Assigned
Numbers".
D PPPoE
The acronym for Point-to-Point Protocol over Ethernet. This protocol is
based on the PPP and Ethernet standards. PPPoE defines how to connect users via Ethernet with the Internet via a jointly used broadband medium such as DSL, a Wireless LAN or a cable modem.
D PPTP
The acronym for Point-to-Point Tunneling Protocol. This protocol was developed in a cooperation between Microsoft, U.S. Robotics and others to
securely transfer data between VPN nodes (“VPN (Virtual Private Network)” on page 202) via a public network.
200
RR-EPL
Release 1.0 01/06
Glossar
D Protocol, communication protocol
Devices, which communicate with each other, must follow the same rules.
They must "speak the same language". Such rules and standards are called protocols or communication protocols. Some of the more frequently
used protocols include, for example, IP, TCP, PPP, HTTP and SMTP.
TCP/IP is the general term for all protocols based on IP.
D Service Provider
Service providers are companies or institutions, which offer users access
to Internet or an online service.
D Spoofing, Anti-Spoofing
In Internet terminology, spoofing means supplying a false address. With
the false Internet address, the user can create the illusion of being an authorized user.
Anti-Spoofing is term for mechanisms, which detect or prevent spoofing.
D Subnet Mask
Normally, a company's network - with access to the Internet - is only
officially assigned a single IP address, e.g. 134.76.0.0. Based on the first
byte of this sample address, one can see that this company network is a
Class B network and therefore the last 2 bytes are free to be used for
host addresses. With a Class B network, the company network has
address space for up to 65,536 hosts (256 x 256).
Obviously, such huge network is not practical. At this point, one can see
a need for subnetworks. The standard answers this need with the Subnet
Mask. Like an IP address, this mask is 4 bytes long. The bytes, which
represent the network address, are each assigned the value 255. The
main purpose of the mask is to "borrow" a portion of the host address
which can then be used to address the subnetworks. As an example, by
using the subnet mask 255.255.255.0 in a Class B network (2 bytes for
the network address, 2 bytes for the host address), the third byte, which
was actually intended for host addressing, can now be used for subnet
addressing. With this configuration, the company's network could support 256 subnetworks that each have 256 hosts.
D Symmetrical encryption
In the case of symmetrical encryption, the same key is used to encrypt
and decrypt the data. Two examples of symmetrical encryption algorithms are DES and AES. They are fast, but as the number of users
increases the administration becomes rather involved.
RR-EPL
Release 1.0 01/06
201
Glossar
D TCP/IP (Transmission Control Protocol/Internet Protocol)
This is a network protocol. It is used to connect two computers in the Internet.
IP ist das Basisprotokoll.
UDP is based on IP and sends individual packets. The packets may arrive
at the recipient in an order different from that in which they were sent or
they may even be lost.
TCP secures the connection and ensures, for example, that data packets
are passed on the application in the right order.
UDP and TCP add the Port Numbers 1 to 65535 to the IP addresses. The
various services offered by the protocols may be distinguished by these
Port Numbers.
A number of additional protocols are based on UDP and TCP, e.g. HTTP
(HyperText Transfer Protocol), HTTPS (Secure HyperText Transfer Protocol), SMTP (Simple Mail Transfer Protocol), POP3 (Post Office Protocol, Version 3) and DNS (Domain Name Service)..
ICMP is based on IP and adds control messages.
UDP is based on IP and sends individual packets.
SMTP is an e-mail protocol that is based on TCP.
IKE is an IPsec protocol that is based on UDP.
ESP is an IPsec protocol that is based on IP.
On a Windows PC, the WINSOCK.DLL (or WSOCK32.DLL) handles both
protocols.
(see datagram, page 197)
D VPN (Virtual Private Network)
A Virtual Private Network (VPN) connects several separate private
networks (subnets) together via a public network, e.g. the Internet, to
form a single joint network. A cryptographic protocol is used to ensure
confidentiality and authenticity. A VPN thus offers an economical
alternative to using dedicated lines to build a nationwide corporate
network.
202
RR-EPL
Release 1.0 01/06
Reader's comments
C Reader's comments
What is your opinion of this manual? We are always striving to provide as
comprehensive a description of our product as possible, as well as important
information that will ensure trouble-free operation. Your comments and
suggestions help us to further improve the quality of our documentation.
Your assessment of this manual:
excellent
good
satisfactory
mediocre
poor
Accuracy
O
O
O
O
O
Readability
O
O
O
O
O
Comprehensibility
O
O
O
O
O
Examples
O
O
O
O
O
Structure/Layout
O
O
O
O
O
Completeness
O
O
O
O
O
Graphics
O
O
O
O
O
Drawings
O
O
O
O
O
Tables
O
O
O
O
O
Did you discover an error in the manual?
If so, on what page?
.......................................................................................................................
.......................................................................................................................
.......................................................................................................................
.......................................................................................................................
.......................................................................................................................
.......................................................................................................................
.......................................................................................................................
RR-EPL
Release 1.0 01/06
203
Reader's comments
Suggestions for improvement and additional information:
.......................................................................................................................
.......................................................................................................................
.......................................................................................................................
.......................................................................................................................
General comments:
.......................................................................................................................
.......................................................................................................................
.......................................................................................................................
.......................................................................................................................
Company / Department
..........................................................................................................
Name / Telephone number ..........................................................................................................
Street
..........................................................................................................
Zip code / City
..........................................................................................................
Date / Signature
..........................................................................................................
Dear User,
Please fill out and return this page
− by fax to the number +49 (0)7127/14-1798 or
− by mail to
Hirschmann Electronics GmbH & Co. KG
Department AMM
Stuttgarter Str. 45- 51
72654 Neckartenzlingen
Germany
204
RR-EPL
Release 1.0 01/06
Index
D Index
Numerics
1-to-1 NAT
3DES
3DES-168
Cryptographic protocol
19
105, 195
106
A
ACA
34, 134
Administration
118
Administrator interface
137
Administrator password
29
Administrators
155
ADSL
197
AES
97, 195
AES-256
106
Agent alarm
134
AH
199
Air humidity
8
Air temperature
8
Alarm
133
American National Bureau of Standard 195
Anti-Spoofing
201
Assigned Numbers
200
Asymmetrical encryption
195
Authentication
104, 146
Authentication Header
199
Authenticity
196, 199, 202
Authorization level
136
Auto Configuration Adapter
34, 134
Automatic Configuration
64
Autonegotiation
33
B
Browser
C
53, 138
CA
196
Cache
45
CANopen
68
CE
10
Certification Authority
196
Chassis alarm
134
Checksum
197
Checksum algorithm
106
CIDR 69, 85, 87, 92, 140, 143, 146, 149, 160
Class A
198
Client
19, 21, 22, 107, 123, 125, 197
Climatic
8
Communication protocol
201
Configuration
41, 64
Configuration setting
156
RR-EPL
Release 1.0 01/06
202
D
Datagram
104
DES
146, 195
Destination IP address
197, 200
Destination NA
88
Destination port
197
DHCP
73, 76, 80, 118, 123, 125, 134, 173
DHCP client
123, 125
DHCP server
134, 168, 170, 172, 173
Digital signature
195, 196
Distinguished Name
196
DN
196
DNS
117, 197, 198, 202
Domain address
117
Domain name
120, 197
Domain nameserver
117
Domain suffix
118
DSL
200
Dynamic DNS provider
197
Dynamic IP address
197
DynamicDNS
197
DynDNS Login
122
DynDNS Password
122
DynDNS server
120, 122, 158
DynDNS Service
100
E
Electromagnetic compatibility
EMC
Encapsulating Security Payload
Encryption
ESP
ESP-Header
EU conformity declaration
F
Factory setting
FCC
Fingerprint
Firewall
Firmware
Flat rate
Forward
G
Gateway
Ground
Ground cable
10
10
199
195, 199
199, 202
197
10
42, 91
11
196
43, 83
165
197
89
100, 115, 158
8, 32
35
205
Index
Ground screw
H
Hardware
Hash
Hash algorithms
HCP server
Header
HiDiscovery
Host address
Hostname
Hostname mode
HTTP
HTTPS
HTTPS login
HTTPS Remote Access
35
155
106, 196
97
124, 126
88
39, 61
198, 201
118
118
137
42, 47, 202
134
139, 158
I
IANA
85
ICMP
85, 87, 202
IKE
199, 202
Indicator contact
25
Internet Key Exchange
199
Internet Service Provider
78, 79, 100, 120
IP
85, 87, 202
IP address
100, 198
IP datagram
197
IP header
199
IP masquerading
90
IP Security
199
IP-Header
197
IP-Masquerading
200
IPsec
97, 105, 114, 195, 196, 199
IPsec connection
97
IPsec header
199
IPsec Status
115
ISAKMP
106, 115
ISDN
197
ISP
78, 79, 120, 197
K
Key exchange
L
106
L2TP
102, 107
L2TP status
116
Language
138, 159
Language setting
138
Link Layer Discovery Protocol
128
Linux
173
LLDP
128
Local configuration
41
Login
44, 78, 79, 118
206
M
Main Mode
MARS
MD5
Modem
Modem cable
Monitoring proper functioning
MS Internet Explorer
97
196
97, 106, 146
48, 197
35
62
43
N
NAT
19, 90, 97, 200
NAT router
97, 200
National Institute of Standards and Technology
195
NAT-T
97
Netmask
108
Network address
198, 201
Network Address Translation
90, 200
Network mask
73, 107
Network Time Protocol
129
NIST
195
Norms
185
NSA
195
NTP
129
O
Online service
Operating mode
Operating system
201
64
169
P
Password
44, 78, 79, 146
PELV
7
Perfect Forward Secrecy
107
PFS
102, 107
Phone line
197
Phone number
49
Point-to-Point Protocol
200
Point-to-Point Tunneling Protocol
200
Pollution Degree
8
POP3
85, 87, 202
Port number
47, 85, 140, 200
Power Supply
134
PPP
102, 200
PPP connection
114
PPPoE
157, 200
PPPoE Login
78, 79
PPPoE mode
73, 91
PPPoE Password
78, 79
PPTP
157, 200
Pre-Shared Key
104, 105
Private Key
195
Private network
202
Profile
56
RR-EPL
Release 1.0 01/06
Index
Protocol
Provider
Provider defined
Proxy server
PSK
Public Key
Public network
Q
Quick Mode
R
RC6
Reboot
Recovery
Recovery button
Recovery procedure
Recovery status
Recovery switch
Recycling
Redundant power supply
Refresh Interval
Relay contact
Remote configuration
Remove
Restart
RFC 1518
Rijndael
Root
Root password
Router
Router mode
RSA
S
S/MIME
SA
SA Lifetime
Safety certificates
Safety regulations
SDO
Security
Security Association
Security notice
SELV
Serpent
Server
Service Data Object
Service names
Service Provider
SHA-1
Shell login
Shielding ground
Signal contact
RR-EPL
Release 1.0 01/06
201
73, 118
118
43
105
104, 195, 196
202
97
196
152
27
168
165
168
165
11
62
122
62
41
36
166, 167
160
196
136
29, 136
157, 198
73
195
196
199
97
97
9
68
134
199
44
7
196
197
68
85
201
97, 106
134
7
30, 62
Signature
196
Simple Network Management Protocol 145
SMTP
202
Snap-in guide
31
Snapshot.tar.gz
156
SNMP
145
Software module
154
Software version
159
Source IP address
197
Source port
197
Spoofing
201
SSH
118, 136
SSH remote access
142, 158
SSL
42, 47
Standard gateway
73
Standards
185
State on delivery
136, 169
Stateful Packet Inspection
83
Stealth mode
100
Subnet
201, 202
Subnet mask
123, 125, 201
Subnetwork
124, 126
Supply voltage
7, 24, 25, 30
Support
155
Surrounding air temperature
8
Symmetrical encryption
195
System time
129
System update
152
System Uptime
159
T
TCP
85, 87, 202
TCP header
199, 200
TCP/IP
53, 127, 197
TCP-Header
197
Telephone network
48
Temperature
8, 134
Terminal block
31
Terminal cable
35
TFTP
173
TFTP server
168, 170, 172, 173
TFTP service
173
Traffic
115
Transparent 85, 87, 110, 141, 144, 150, 157
Transparent mode
85, 87
Transport Mode
199
Trap
133
Tunnel Mode
199
Tunnels
105
Twofish
196
U
UDP
UDP header
85, 87, 200, 202
197, 199
207
Index
Update
URL
User defined
User name
User password
V
V.24 interface
V.24 port
Virtual Private Network
VLAN
VLAN ID
VPN
VPN application
VPN client
VPN connection
VT100
W
WAN
Web browser
Windows system
Wireless
X
X.509
208
152
197
118
44, 78, 79
137
34
48
202
74
74
200, 202
199
19
83, 91, 97, 120, 158
34
47, 73, 157
42, 47, 140
171
200
104, 196
RR-EPL
Release 1.0 01/06
Hirschmann Competence
Hirschmann Competence
In the longterm, product excellence alone is not an absolute guarantee of a
successful project implementation. Comprehensive service makes a difference worldwide. In the current scenario of global competition, the Hirschmann Competence Center stands head and shoulders above the
competition with its comprehensive spectrum of innovative services:
D Consulting incorporates comprehensive technical advice, from system
evaluation through network planning to project planning.
D Training offers you an introduction to the technological fundamentals,
product briefing and user training with certification.
D Support ranges from commissioning through the standby service to maintenance concepts.
With the Hirschmann Competence Center, you firmly rule out any compromise: the client-specific package leaves you free to choose the service components that you will use.
Internet:
http://www.hicomcenter.com
RR-EPL
Release 1.0 01/06
209