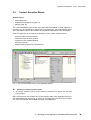
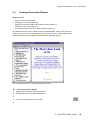
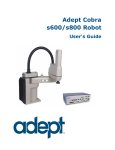
1
SigmaLink Workbench
User Guide
SigmaLink 1.101
M2121 - M2126
July 1999
Table of Contents
1
Introduction
7
1.1
SigmaLink Workbench . . . . . . . . . . . . . . . . . . . . . . . . . . . . . . . . . . . . . . . . . . . . . . . . . . . . . . . 9
1.2
Terms. . . . . . . . . . . . . . . . . . . . . . . . . . . . . . . . . . . . . . . . . . . . . . . . . . . . . . . . . . . . . . . . . . . . 12
2
SigmaLink Workbench User Interface
2.1
Personal Desktop . . . . . . . . . . . . . . . . . . . . . . . . . . . . . . . . . . . . . . . . . . . . . . . . . . . . . . . . . . 17
2.2
Hierarchy Window . . . . . . . . . . . . . . . . . . . . . . . . . . . . . . . . . . . . . . . . . . . . . . . . . . . . . . . . . 18
2.3
Metadata Window . . . . . . . . . . . . . . . . . . . . . . . . . . . . . . . . . . . . . . . . . . . . . . . . . . . . . . . . . . 19
2.4
Toolbar . . . . . . . . . . . . . . . . . . . . . . . . . . . . . . . . . . . . . . . . . . . . . . . . . . . . . . . . . . . . . . . . . . 21
2.5
The Publishing Project Drop Down List . . . . . . . . . . . . . . . . . . . . . . . . . . . . . . . . . . . . . . . . 24
2.6
The Quick Search Box . . . . . . . . . . . . . . . . . . . . . . . . . . . . . . . . . . . . . . . . . . . . . . . . . . . . . . 25
2.7
Workflow Bar . . . . . . . . . . . . . . . . . . . . . . . . . . . . . . . . . . . . . . . . . . . . . . . . . . . . . . . . . . . . . 26
2.8
Statusline . . . . . . . . . . . . . . . . . . . . . . . . . . . . . . . . . . . . . . . . . . . . . . . . . . . . . . . . . . . . . . . . 27
15
3
Working in the SigmaLink Workbench Environment
3.1
Menus . . . . . . . . . . . . . . . . . . . . . . . . . . . . . . . . . . . . . . . . . . . . . . . . . . . . . . . . . . . . . . . . . . . 29
28
3.2
Context Sensitive Menus . . . . . . . . . . . . . . . . . . . . . . . . . . . . . . . . . . . . . . . . . . . . . . . . . . . . 30
3.3
SLWB Keyboard Shortcuts . . . . . . . . . . . . . . . . . . . . . . . . . . . . . . . . . . . . . . . . . . . . . . . . . . 31
3.4
Dialogs. . . . . . . . . . . . . . . . . . . . . . . . . . . . . . . . . . . . . . . . . . . . . . . . . . . . . . . . . . . . . . . . . . . 32
4
Using Containers
4.1
Creating Containers . . . . . . . . . . . . . . . . . . . . . . . . . . . . . . . . . . . . . . . . . . . . . . . . . . . . . . . . 35
4.2
Renaming Containers . . . . . . . . . . . . . . . . . . . . . . . . . . . . . . . . . . . . . . . . . . . . . . . . . . . . . . 37
4.3
Deleting Containers . . . . . . . . . . . . . . . . . . . . . . . . . . . . . . . . . . . . . . . . . . . . . . . . . . . . . . . . 38
5
Creating Information Objects
5.1
Creating Information Objects with Content . . . . . . . . . . . . . . . . . . . . . . . . . . . . . . . . . . . . . 40
5.2
Creating Planned Objects . . . . . . . . . . . . . . . . . . . . . . . . . . . . . . . . . . . . . . . . . . . . . . . . . . . 41
6
Importing Files
6.1
Importing Files as New Information Objects . . . . . . . . . . . . . . . . . . . . . . . . . . . . . . . . . . . . 44
6.2
Importing a File into a Planned Object . . . . . . . . . . . . . . . . . . . . . . . . . . . . . . . . . . . . . . . . . 46
7
Editing SigmaLink Information Objects
7.1
Checking Information Objects out . . . . . . . . . . . . . . . . . . . . . . . . . . . . . . . . . . . . . . . . . . . . 49
7.2
Checking Information Objects in . . . . . . . . . . . . . . . . . . . . . . . . . . . . . . . . . . . . . . . . . . . . . 50
7.3
Undo Check Out . . . . . . . . . . . . . . . . . . . . . . . . . . . . . . . . . . . . . . . . . . . . . . . . . . . . . . . . . . . 51
7.4
Editing Information Objects . . . . . . . . . . . . . . . . . . . . . . . . . . . . . . . . . . . . . . . . . . . . . . . . . 52
7.5
The Adept•Editor SigmaLink Menu. . . . . . . . . . . . . . . . . . . . . . . . . . . . . . . . . . . . . . . . . . . . 55
8
Printing Information Objects
58
9
The STEP SGML Viewer
59
9.1
Viewing Information Objects . . . . . . . . . . . . . . . . . . . . . . . . . . . . . . . . . . . . . . . . . . . . . . . . . 60
9.2
Search in the viewer . . . . . . . . . . . . . . . . . . . . . . . . . . . . . . . . . . . . . . . . . . . . . . . . . . . . . . . . 63
9.3
Navigating in the Viewer . . . . . . . . . . . . . . . . . . . . . . . . . . . . . . . . . . . . . . . . . . . . . . . . . . . . 66
33
39
43
48
Table of Content
2
SigmaLink Workbench 1.101 - User Guide
9.4
Editing an Information Object from within the Viewer . . . . . . . . . . . . . . . . . . . . . . . . . . . . 70
9.5
Printing from the Viewer . . . . . . . . . . . . . . . . . . . . . . . . . . . . . . . . . . . . . . . . . . . . . . . . . . . . 71
9.6
Showing and Hiding Parts of the Viewer Interface . . . . . . . . . . . . . . . . . . . . . . . . . . . . . . . 73
10
Split and Join
10.1
Splitting Information Objects . . . . . . . . . . . . . . . . . . . . . . . . . . . . . . . . . . . . . . . . . . . . . . . . 76
10.2
Joining Information Objects . . . . . . . . . . . . . . . . . . . . . . . . . . . . . . . . . . . . . . . . . . . . . . . . . 78
11
Properties of Information Objects
11.1
Attributes of Information Objects . . . . . . . . . . . . . . . . . . . . . . . . . . . . . . . . . . . . . . . . . . . . . 80
11.2
Properties of Metadata . . . . . . . . . . . . . . . . . . . . . . . . . . . . . . . . . . . . . . . . . . . . . . . . . . . . . . 81
11.3
Properties of Annotations . . . . . . . . . . . . . . . . . . . . . . . . . . . . . . . . . . . . . . . . . . . . . . . . . . . 82
11.4
Properties of Links . . . . . . . . . . . . . . . . . . . . . . . . . . . . . . . . . . . . . . . . . . . . . . . . . . . . . . . . . 83
11.5
Properties of Versions . . . . . . . . . . . . . . . . . . . . . . . . . . . . . . . . . . . . . . . . . . . . . . . . . . . . . . 84
11.6
Properties of Reuse . . . . . . . . . . . . . . . . . . . . . . . . . . . . . . . . . . . . . . . . . . . . . . . . . . . . . . . . 85
12
Metadata
12.1
Creating and Editing Metadata . . . . . . . . . . . . . . . . . . . . . . . . . . . . . . . . . . . . . . . . . . . . . . . 87
12.2
Changing the Display of Metadata . . . . . . . . . . . . . . . . . . . . . . . . . . . . . . . . . . . . . . . . . . . . 88
12.3
Printing Metadata . . . . . . . . . . . . . . . . . . . . . . . . . . . . . . . . . . . . . . . . . . . . . . . . . . . . . . . . . . 89
12.4
Saving and Loading Metadata . . . . . . . . . . . . . . . . . . . . . . . . . . . . . . . . . . . . . . . . . . . . . . . . 90
13
Annotations to Information Objects
93
14
Links
97
74
79
86
14.1 Link Categories. . . . . . . . . . . . . . . . . . . . . . . . . . . . . . . . . . . . . . . . . . . . . . . . . . . . . . . . . . . . 99
14.1.1 Assigning Link Categories . . . . . . . . . . . . . . . . . . . . . . . . . . . . . . . . . . . . . . . . . . . . . . . . . . . 100
14.1.2 Using Link Categories . . . . . . . . . . . . . . . . . . . . . . . . . . . . . . . . . . . . . . . . . . . . . . . . . . . . . . 101
14.2
14.2.1
14.2.2
14.2.3
14.2.4
14.2.5
Creating Links. . . . . . . . . . . . . . . . . . . . . . . . . . . . . . . . . . . . . . . . . . . . . . . . . . . . . . . . . . . . 102
Object to Object Links . . . . . . . . . . . . . . . . . . . . . . . . . . . . . . . . . . . . . . . . . . . . . . . . . . . . . . 103
Object to Content Links . . . . . . . . . . . . . . . . . . . . . . . . . . . . . . . . . . . . . . . . . . . . . . . . . . . . . 104
Content to Object Links . . . . . . . . . . . . . . . . . . . . . . . . . . . . . . . . . . . . . . . . . . . . . . . . . . . . . 106
Content to Content Links . . . . . . . . . . . . . . . . . . . . . . . . . . . . . . . . . . . . . . . . . . . . . . . . . . . . 108
Document Internal Links . . . . . . . . . . . . . . . . . . . . . . . . . . . . . . . . . . . . . . . . . . . . . . . . . . . . . 110
14.3
14.3.1
14.3.2
14.3.3
Following Links . . . . . . . . . . . . . . . . . . . . . . . . . . . . . . . . . . . . . . . . . . . . . . . . . . . . . . . . . . 112
Following Links from the Metadata Window . . . . . . . . . . . . . . . . . . . . . . . . . . . . . . . . . . . . . . 113
Following Links in the Viewer . . . . . . . . . . . . . . . . . . . . . . . . . . . . . . . . . . . . . . . . . . . . . . . . . 115
Following Links in the Editor . . . . . . . . . . . . . . . . . . . . . . . . . . . . . . . . . . . . . . . . . . . . . . . . . . 118
14.4
Cancelling Links . . . . . . . . . . . . . . . . . . . . . . . . . . . . . . . . . . . . . . . . . . . . . . . . . . . . . . . . . . 119
14.5 Deleting Links . . . . . . . . . . . . . . . . . . . . . . . . . . . . . . . . . . . . . . . . . . . . . . . . . . . . . . . . . . . . 120
14.5.1 Deleting Links in the Metadata Window . . . . . . . . . . . . . . . . . . . . . . . . . . . . . . . . . . . . . . . . . 121
14.5.2 Deleting Links in the Editor . . . . . . . . . . . . . . . . . . . . . . . . . . . . . . . . . . . . . . . . . . . . . . . . . . . 123
15
Reusing Information Objects
124
16
Search and Retrieval
126
16.1
Metadata Search . . . . . . . . . . . . . . . . . . . . . . . . . . . . . . . . . . . . . . . . . . . . . . . . . . . . . . . . . . 127
16.2
Structured Fulltext Search. . . . . . . . . . . . . . . . . . . . . . . . . . . . . . . . . . . . . . . . . . . . . . . . . . 130
16.3
Combined Search . . . . . . . . . . . . . . . . . . . . . . . . . . . . . . . . . . . . . . . . . . . . . . . . . . . . . . . . . 133
16.4
Saving and Loading Queries . . . . . . . . . . . . . . . . . . . . . . . . . . . . . . . . . . . . . . . . . . . . . . . . 134
16.5
Native Search . . . . . . . . . . . . . . . . . . . . . . . . . . . . . . . . . . . . . . . . . . . . . . . . . . . . . . . . . . . . 136
•
3
SigmaLink Workbench 1.101 - User Guide
16.6
Predefined Queries. . . . . . . . . . . . . . . . . . . . . . . . . . . . . . . . . . . . . . . . . . . . . . . . . . . . . . . . 138
16.7
Quick Search. . . . . . . . . . . . . . . . . . . . . . . . . . . . . . . . . . . . . . . . . . . . . . . . . . . . . . . . . . . . . 140
16.8
Saving and Loading Search Result Lists . . . . . . . . . . . . . . . . . . . . . . . . . . . . . . . . . . . . . . 142
17
SigmaLink Version Control
17.1
Creating Versions . . . . . . . . . . . . . . . . . . . . . . . . . . . . . . . . . . . . . . . . . . . . . . . . . . . . . . . . . 146
17.2
Setting an Old Version . . . . . . . . . . . . . . . . . . . . . . . . . . . . . . . . . . . . . . . . . . . . . . . . . . . . . 148
145
17.3
Viewing a Previous Version of an Information Object . . . . . . . . . . . . . . . . . . . . . . . . . . . 149
17.4
Deleting Versions of an Information Object. . . . . . . . . . . . . . . . . . . . . . . . . . . . . . . . . . . . 150
17.5
Comparing Versions of an Information Object . . . . . . . . . . . . . . . . . . . . . . . . . . . . . . . . . 151
18
Referenced Objects
18.1
Including Links . . . . . . . . . . . . . . . . . . . . . . . . . . . . . . . . . . . . . . . . . . . . . . . . . . . . . . . . . . . 154
153
18.2
Subdocument References . . . . . . . . . . . . . . . . . . . . . . . . . . . . . . . . . . . . . . . . . . . . . . . . . . 157
19
Workflow
19.1
Setting a Workflow State . . . . . . . . . . . . . . . . . . . . . . . . . . . . . . . . . . . . . . . . . . . . . . . . . . . 161
19.2
Showing the Workflow State of an Information Object. . . . . . . . . . . . . . . . . . . . . . . . . . . 162
20
Integrated Staffware Workflow Engine
163
21
Customizing the User Interface
168
21.1
Adding and Deleting Symbols on the Personal Desktop . . . . . . . . . . . . . . . . . . . . . . . . . 169
21.2
Showing and Hiding Parts of the User Interface . . . . . . . . . . . . . . . . . . . . . . . . . . . . . . . . 170
21.3
Changing the Column Width in the Metadata Window . . . . . . . . . . . . . . . . . . . . . . . . . . . 172
22
Switching between Online and Offline Modes
22.1
Terms in Online and Offline Modes . . . . . . . . . . . . . . . . . . . . . . . . . . . . . . . . . . . . . . . . . . 174
22.2
Online to Offline . . . . . . . . . . . . . . . . . . . . . . . . . . . . . . . . . . . . . . . . . . . . . . . . . . . . . . . . . . 175
22.3
Offline to Online . . . . . . . . . . . . . . . . . . . . . . . . . . . . . . . . . . . . . . . . . . . . . . . . . . . . . . . . . . 183
22.4
Available Features in Offline Mode . . . . . . . . . . . . . . . . . . . . . . . . . . . . . . . . . . . . . . . . . . . 184
23
Configuration
23.1
General Settings . . . . . . . . . . . . . . . . . . . . . . . . . . . . . . . . . . . . . . . . . . . . . . . . . . . . . . . . . . 187
159
173
186
23.2 Configuring Applications. . . . . . . . . . . . . . . . . . . . . . . . . . . . . . . . . . . . . . . . . . . . . . . . . . . 188
23.2.1 Associating an Object Type with the Integrated Editor or Viewer. . . . . . . . . . . . . . . . . . . . . . 189
23.2.2 Associating an Object Type with an External Editor or Viewer. . . . . . . . . . . . . . . . . . . . . . . . 190
23.3
Configuring Create and Import Options . . . . . . . . . . . . . . . . . . . . . . . . . . . . . . . . . . . . . . . 192
23.4
Configuring Referenced Objects and Entities . . . . . . . . . . . . . . . . . . . . . . . . . . . . . . . . . . 194
23.5
Changing the User Group . . . . . . . . . . . . . . . . . . . . . . . . . . . . . . . . . . . . . . . . . . . . . . . . . . 196
23.6
Configuring the User Interface . . . . . . . . . . . . . . . . . . . . . . . . . . . . . . . . . . . . . . . . . . . . . . 197
23.7
IO Property Sheet . . . . . . . . . . . . . . . . . . . . . . . . . . . . . . . . . . . . . . . . . . . . . . . . . . . . . . . . . 199
23.8
Check Out Directories . . . . . . . . . . . . . . . . . . . . . . . . . . . . . . . . . . . . . . . . . . . . . . . . . . . . . 201
23.9
Version Control Settings . . . . . . . . . . . . . . . . . . . . . . . . . . . . . . . . . . . . . . . . . . . . . . . . . . . 203
23.10
Container Settings. . . . . . . . . . . . . . . . . . . . . . . . . . . . . . . . . . . . . . . . . . . . . . . . . . . . . . . . 204
23.11
Dialog Settings . . . . . . . . . . . . . . . . . . . . . . . . . . . . . . . . . . . . . . . . . . . . . . . . . . . . . . . . . . 206
•
4
SigmaLink Workbench 1.101 - User Guide
24
The User Help Desk
207
A
Keyboard Shortcuts
209
B
GLOSSARY
211
C
Index
216
•
5
SigmaLink Workbench 1.101 - User Guide
Copyright
Both text and illustrations of this userguide have been worked out with greatest care.
STEP can, however, take neither a juridical responsibility nor any kind of liability for possibly remaining mistakes and their consequences.
This publication is protected by copyright. All rights remain reserved. Without a written approval by STEP Stürtz Electronic Publishing GmbH no part of this publication may be reproduced or duplicated in any form by photocopying, microfilming or other processes.
The software and hardware names mentioned in this publication are, in most cases, registered trademarks of their owners and are therefore subject to the legal requirements.
•
6
SigmaLink Workbench 1.101 - User Guide
1
Introduction
Related Topics:
• SigmaLink Workbench User Interface (page 15)
• Working in the SigmaLink Workbench Environment (page 28)
• Using Containers (page 33)
• Creating Information Objects (page 39)
• Importing Files (page 43)
• Editing SigmaLink Information Objects (page 48)
• Printing Information Objects (page 58)
• The STEP SGML Viewer (page 59)
Topics in this Unit:
•
SigmaLink Workbench (page 9)
•
Terms (page 12)
Information management ranges from the analysis of information requirements, planning
of projects and architecture of data to aquisition and implementation of information technology to organizational processes and the controlling of the provision of corporate information.
SigmaLink is a document management system that manages information as objects of
any format, subjects them to workflows and keeps them available for processing. Edited
documents are subject to version control making all versions quickly and accurately
available when needed. Authors can use the SigmaLink Workbench Offline or Online.
At the same time SigmaLink satisfies all the requirements of an editorial system. It supports the editorial staff in planning editions, creating and editing articles, grouping objects
for productions and controlling workflow processes. SigmaLink is suitable for creating any
kind of production on any media. The integrated workflow component assigns specific tasks to the team members and checks the progress within the production process.
SigmaLink manages data in any format. The fundamental properties of any document management and editorial system such as the single source concept and reuse of information in different contexts are optimized for SGML based text objects.
SigmaLink Workbench
SigmaLink provides the user with a client – SigmaLink Workbench – that controls access
to the information base (Infopool). This client includes an SGML editor, an SGML viewer
and a retrieval interface for fulltext and relational database searching.
Every user works with a number of information objects presented in a tree structure – similar to the Windows Explorer – much like files in directories. These information objects
are booked into a relational database and indexed for fulltext retrieval. This guarantees
security for all accesses and transactions. A user works exclusively with such objects. He
1 • Introduction
7
SigmaLink Workbench 1.101 - User Guide
or she uses them in different contexts, views them, edits them, assigns metadata to them
or triggers workflow processes that send objects to other team members.
SigmaLink Workbench Features
– Creation and maintenance of the Infopool
– Creation of new information objects
– Generation of information objects by importing existing data
– Editing of information objects
– Search and navigation in the information base
– Access to the Infopool for productions
– Checking information objects in and out in order to prevent inconsistencies caused by
parallel editing of objects.
– Triggering automated processes.
SigmaLink Workbench is geared specifically towards SGML based information objects.
– Parsing of information objects
– Splitting of information objects into several units that can be individually processed
– Composition of information objects, e.g. for productions
– Viewing in an SGML viewer with useful navigation and search features
– Editing in a configurable SGML editor
– Generation of a versatile link system including link verification
– Reuse of information objects in different contexts
– Search and retrieval across the entire information pool (full text) and across the administrative data
– Possibility of transformation in other output formats
– Integrating an automated workflow engine
Most work with SigmaLink Workbench is done online, i.e. while the Workbench is connected to the server. Access to the database is subject to several control mechanisms to ensure authorized access.
In addition SigmaLink Workbench offers the option to work offline. Keeping most tasks independent from the server makes it possible to efficiently work in this mode as well. Information created offline is sent back to the server after completion of the tasks, parsed and
then returned to the database and workflow. Providing authors with a server independent
Workbench to work externally guarantees a high degree of flexibility for work distribution.
1 • Introduction
8
SigmaLink Workbench 1.101 - User Guide
1.1
SigmaLink Workbench
Related Topics:
• Terms (page 12)
SigmaLink provides all the features necessary for editorial processes. At the same time
SigmaLink can be used as a pure management tool. A business which only receives information from an external source, manages this information and creates publications for
the World Wide Web or CD-ROM with the information would have little need for the authoring features of SigmaLink.
Authors are responsible for anything related to the content of the Infopool. This includes
planning, creating, correcting and revising documents as well as retrieval (e.g. for reuse)
and linking to other documents and eventually checking the objects back into the database.
Planning Information Units
Planning information units and possibly planning the relation between information units is
not always a management task. It is often the job of the authors.
An author plans by creating and organizing information objects. SigmaLink for example
supports creating a large unit that is then split into smaller units manually or automatically
(split and join function) to allow parallel processing of information objects.
Writing and Proof Reading
SigmaLink Workbench can launch an external text editor for every type of information object. The full range of features, however, is available only for SGML based data. SigmaLink Workbench comes with an integrated SGML editor – the ADEPT•Editor.
Regardless of why an author requests an information object from SigmaLink – the object
is reserved exclusively for the author. It is checked out from the database; all other users
are barred from editing it. SigmaLink checks to make certain that an author has the appropriate authorization in his or her assigned role to access the document. If the object is
not reserved elsewhere it is downloaded from the server and loaded in the tool associated
with the task such as an SGML editor. As long as an object is checked out it cannot be
edited by another user. Parallel editing of individual information objects is not possible.
This is necessary to prevent inconsistencies at check in.
Check out and
check in of information objects
Example:
An author can and should save his or her work at regular intervals. This operation, however, occurs only locally, SigmaLink is not effected yet. Other users do not have access to
the changing data while the object is being edited. Only the previous version of an object
is visible to other users until the check in process generates a new version of the object.
By checking the object in after completion of the task the author triggers the workflow module which then generates the next task. This check in process makes the new version of
the object visible to other users. In connection with the workflow, however, it is visible only
to those users responsible for the following tasks. In order to use an object in a publication
it must be released by such a check in process.
Customizable editing tools can assist authors in their work through key mapping or by largely automating the insertion of graphics or links in a document. Some of these features
1 • Introduction
9
SigmaLink Workbench 1.101 - User Guide
are incorporated in SigmaLink, some can be implemented depending on the document
type and the user’s specific requirements.
An author’s Workbench does not have to be connected to the server via LAN. Since SigmaLink uses an HTTP interface to communicate with the server the employee can be located wherever an internet or phone (ISDN with or without callback) connection exists.
This feature is limited only by security requirements, not by technical feasibiliy.
Independence
from the work location
With this feature SigmaLink fully supports the new concepts of extranets – such as global
co-authoring. Data transfer across networks and phone lines is minimized by maintaining
a high degree of independence between the client and the server. Connection to the server is made only when a Workbench request is generated. Any client request to the server
can be cancelled to avoid excessively long transmission times when network traffic is
high. This feature can be helpful when receiving or transmitting large amounts of data.
Data can also be created and maintained by authors outside of the SigmaLink environment. They would simply operate the SigmaLink Workbench offline. When offline, no client requests are sent to the server. Actions taken by the user are “buffered” and
committed to the online Infopool after the Workbench switches back online. In this mode,
naturally, some features are not available such as access to the central database and
operations that depend on database and server logic like certain types of links and direct
integration of the central workflow.
Nevertheless SigmaLink has features to provide tasks to external authors, to receive the
completed tasks, parse them and return them to the integrated workflow.
Revising
SigmaLink features full support of revision processes. These processes can be automatically triggered by a workflow status or manually by a team member. Old versions are
kept by SigmaLink and remain available when needed.
New versions of objects are kept as complete instances of the original rather than in the
form of delta information about the last version. This is done to maximize transperancy
and performance – information objects must be easily and quickly evaluated. Backtracking changes to information objects by way of revision histories does not satisfy the
requirements of a modern document management and editorial system.
An application for viewing the differences in two versions of an information object can be
integrated in SigmaLink.
Search and Retrieval
Collecting information and organizing it according to its importance requires effective search and retrieval mechanisms. SigmaLink tracks information such as (among other):
– Where can I find what?
– What depends on what?
– Where can I link to?
– What can I use?
– Who is using the object?
– What is the history of the object?
The author can quickly and effectively navigate through the Infopool. SigmaLink offers the
following means of accessing information:
1 • Introduction
10
SigmaLink Workbench 1.101 - User Guide
– through a full text database that can be updated either regularly in certain time intervals or automatically by selected actions
– through a relational database search of metadata
– through a combination of fulltext and relational search
– through a native search using command line SQL statements
– an interface to administrative data, such as accessing an object by following a link to it
– determining the context in which information is used. An object can be reached in any
context in the hierarchy and, conversely, any context in which an object is used can
be reached as well
Use and Reuse of Information
An author can retrieve needed objects using the mechanisms mentioned and place them
in a different context by pasting them as links in another publication. SigmaLink supports
this by allowing the user to split an SGML document and reuse parts or all of it elsewhere.
Use and reuse of parts of split objects is subject to the limitations of the document type of
the SGML documents involved and the permissions set by the SigmaLink administration.
SigmaLink features several types of links for linking information objects and parts thereof.
Combining Objects for Productions
Information objects in SigmaLink Workbench are combined for various purposes and for
any output media. SigmaLink Workbench exports the data in order to process it with a
type setting system for example. A conversion process can be triggered by the export
function to create a different data format.
1 • Introduction
11
SigmaLink Workbench 1.101 - User Guide
1.2
Terms
Related Topics:
• SigmaLink Workbench (page 9)
This chapter provides an explanation of frequently used terms.
Online and Offline
Authors can use the SigmaLink Workbench Online or Offline to allow corporations to create and manage their information from remote locations while maintaining a centralized database from which users can download documents (objects) for editing or viewing.
Annotations, metadata and information regarding various link types and references are
also available to the author in offline mode. Any changes made to information objects offline are automatically committed to the online Infopool after switching online.
Archiving
SigmaLink provides an interface for archiving tools. Archiving processes can be automatically triggered by workflow status or by version control.
Configuration
SigmaLink offers a wide array of configuration options. The SigmaLink Workbench, for example, can be configured to associate external applications with information objects for
viewing or editing. The standard configuration is stored on the server and can be changed
by the users locally, provided the configuration files allow this and the user has the necessary permissions. The local modifications to the configuration files are stored on the local
hard disk. Users can, of course, reload the standard configuration at any time.
Container
Information objects are grouped and organized based on certain criteria, i.e. containers
group information objects that are related to each other in one way or another. A container
might, for example, include all articles published in the same edition of a periodical. There
are no restrictions as to how container can be used to group and organize information objects.
Containers compare to the directories in a file system. Each information object can be
used in one or more containers. Reused objects need not be duplicated physically. They
can be pasted as links to the original. A container can, of course, include other containers.
1 • Introduction
12
SigmaLink Workbench 1.101 - User Guide
At least one container (the root container) must be defined in SigmaLink. This root container includes the hierarchical structure of the Infopool.
Infopool
The Infopool consists of information objects. It comprises all documents, files etc. maintained and managed within SigmaLink. The Infopool has an hierarchical structure achieved by grouping information objects in containers or publishing projects.
Information Object
The smallest unit of data used by SigmaLink is an information object. Ideally such an information object is an SGML document instance – but it can also be a Word document,
an image file or a video clip. As a document management system SigmaLink supports all
formats from CCITT to pdf and mpeg, from SGML to HTML and XML.
Information object type
There are no restrictions in SigmaLink regarding the various types of information objects
that can be configured for use. The relationship between the information object and the
information object type can be compared to that of a document instance and its corresponding document type. Examples of information object types are Bitmap, Word document, FrameMaker document, SGML document of a particular DTD or plain ASCII text.
1 • Introduction
13
SigmaLink Workbench 1.101 - User Guide
Metadata
SigmaLink associates configurable metadata with each information object.
All documents or information objects managed in the database have such metadata. This
metadata contains information about a particular information object. Metadata can be defined independently from each other to reflect project related or format related information.
This metadata is used for search and retrieval across the relational database.
Typical metadata of an information object are:
– Author/owner (checked out by)
– Date last modified
Publishing project
Every publishing project is described by unique metadata such as the number of authors
involved, tasks involved or its various workflows and processes. In SigmaLink the structure of the metadata can be individually optimized for every publishing project.
Version Management
A new version of an information object is created at every check in. The old versions are
retained in the database. The degree to which old versions are kept can be configured by
the SigmaLink administrator.
Workflow
The integrated workflow component describes and utilizes clearly defined workflow processes for every publishing project. This workflow can be configured without restriction
allowing users to maintain flexibility and to respond quickly to changed or new requirements in a project.
All information relevant to the corporation’s workflow processes can be called up. The
workflow component, for example,
– provides information about the workflow status of a task
– shows which object is being worked on at which location or
– warns of upcoming deadlines.
1 • Introduction
14
SigmaLink Workbench 1.101 - User Guide
2
SigmaLink Workbench User Interface
Related Topics:
• Introduction (page 7)
• Working in the SigmaLink Workbench Environment (page 28)
• Using Containers (page 33)
• Creating Information Objects (page 39)
• Importing Files (page 43)
• Editing SigmaLink Information Objects (page 48)
• Printing Information Objects (page 58)
• The STEP SGML Viewer (page 59)
Topics in this Unit:
•
Personal Desktop (page 17)
•
Hierarchy Window (page 18)
•
Metadata Window (page 19)
•
Toolbar (page 21)
•
The Publishing Project Drop Down List (page 24)
•
The Quick Search Box (page 25)
•
Workflow Bar (page 26)
•
Statusline (page 27)
The user interface of SigmaLink is the SigmaLink Workbench.
Fig. 1: SigmaLink’s graphical user interface
2 • SigmaLink Workbench User Interface
15
SigmaLink Workbench 1.101 - User Guide
The interface’s title bar contains the name of the application and its manufacturer. The
menubar beneath lists all menus and the commands available in them. These commands
represent functions in SigmaLink. The Edit menu, for example, contains the command
View. Selecting this menu option starts the integrated viewer and loads the highlighted
object. Frequently used commands and functions are also available as buttons in the toolbar.
In the default configuration the interface is divided into three main regions. All the way to
the left is the Personal Desktop, the center window is the Hierarchy Window and the
right window is the Metadata Window. Information objects are displayed with increasing
detail from left to right.
The status line at the bottom of the workbench displays limited information and explanations for users.
2 • SigmaLink Workbench User Interface
16
SigmaLink Workbench 1.101 - User Guide
2.1
Personal Desktop
Related Topics:
• Hierarchy Window (page 18)
• Metadata Window (page 19)
• Toolbar (page 21)
• The Publishing Project Drop Down List (page 24)
• The Quick Search Box (page 25)
• Workflow Bar (page 26)
• Statusline (page 27)
The symbols on the Personal Desktop give a fast and easy overview of the information in
the Infopool. Such a symbol represents an “access point” in the Infopool. Doubleclicking
a symbol on the Personal Desktop causes the corresponding container, project or information object to be displayed as the root element in the Hierarchy Window.
This feature is designed to ease navigation in the Infopool. Reaching an information object in a deeply structured Infopool can be a lengthy process if the user has to 'click' through numerous levels in the hierarchy. SigmaLink Workbench allows the user to insert a
container, project or information object on the Personal Desktop as a symbol for quick and
easy access to the relevant information in the Infopool. Figure 1 shows the symbol Infopool, the default root element on the Personal Desktop which represents the entire Infopool. The symbol Literature represents the container Literature in the Hierarchy Window.
By doubleclicking this symbol the root element Infopool in the Hierarchy Window is replaced by the container Literature. The structure of the Infopool “above” it is no longer visible.
There are two kinds of symbols on the Personal Desktop:
– Yellow symbols represent containers which contain either information objects or additional containers. They constitute the user’s personal view of the Infopool.
– Green symbols represent predefined database queries of the Infopool.
2 • SigmaLink Workbench User Interface
17
SigmaLink Workbench 1.101 - User Guide
2.2
Hierarchy Window
Related Topics:
• Personal Desktop (page 17)
• Metadata Window (page 19)
• Toolbar (page 21)
• The Publishing Project Drop Down List (page 24)
• The Quick Search Box (page 25)
• Workflow Bar (page 26)
• Statusline (page 27)
The Hierarchy Window employs a tree structure to make navigation and orientation in the
system’s information base easier. Structure is created using containers represented by
the container symbol
. Containers are similar to the directories in a file system.
The Hierarchy Window always displays the root element whose symbol is selected on the
Personal Desktop.
2 • SigmaLink Workbench User Interface
18
SigmaLink Workbench 1.101 - User Guide
2.3
Metadata Window
Related Topics:
• Personal Desktop (page 17)
• Hierarchy Window (page 18)
• Toolbar (page 21)
• The Publishing Project Drop Down List (page 24)
• The Quick Search Box (page 25)
• Workflow Bar (page 26)
• Statusline (page 27)
The Metadata Window displays the content of a container: the information objects. In addition to the name (title) of an information object this can include the following:
Configurable metadata
– the author
– the date of creation
– the date of publication
– current status of an IO in the Staffware Workflow
– any other desired information
System metadata
– who an IO is checked out by
– the date an IO was checked out
– the date an IO was last changed
– who last changed an IO
– current status of an IO in the SigmaLink Workflow
– object type id in the database
– filename of IO before import
Metadata is the basis for search and retrieval from the relational database. In SigmaLink
metadata can be individually defined for each project or object type. The Metadata Window therefore may show different metadata for different publishing projects.
Containers in the Metadata Window are represented by the same symbol as in the Hierarchy Window (
). Information objects are represented by a small book symbol
(
). The symbol’s background colour indicates the status of the information object:
Symbol
Meaning
The information object is available. The background color is yellow.
The information object is checked out by the local user. The background
color is green.
The information object is checked out by another user. The background
color is red.
2 • SigmaLink Workbench User Interface
19
SigmaLink Workbench 1.101 - User Guide
Symbol
Meaning
Planned object (object without content). The background color is
white.
The symbol for link source indicates that a link points from this object to
another. All background colours are possible.
The symbol link target indicates that a link points from another object to
this one. All background colours are possible.
This symbol indicates that this object is link source as well as a link target. All background colours are possible.
2 • SigmaLink Workbench User Interface
20
SigmaLink Workbench 1.101 - User Guide
2.4
Toolbar
Related Topics:
• Personal Desktop (page 17)
• Hierarchy Window (page 18)
• Metadata Window (page 19)
• The Publishing Project Drop Down List (page 24)
• The Quick Search Box (page 25)
• Workflow Bar (page 26)
• Statusline (page 27)
The toolbar provides buttons for frequently used commands and functions:
Fig. 2: SigmaLink Workbench toolbar (the quickhelp for the version control button is visible)
2 • SigmaLink Workbench User Interface
21
SigmaLink Workbench 1.101 - User Guide
Button
Function
Disconnects the client from the server (switches the client offline).
Connects the client to the server (switches the client online).
Interupts the current request to the server.
Opens the Search dialog window.
Loads the highlighted object into the viewer.
Checks the highlighted object out of the database and loads it into the
editor.
Checks the highlighted object back into the database. The object is
then available to other users.
Checks the highlighted object out of the database. The object is
available only to the local user.
Shows a listing of all versions of the highlighted information object.
Creates or shows annotations to the highlighted information object.
Opens the Link control dialog window.
Starts a link (source) from the highlighted information object.
Completes a link (target) at the highlighted information object.
Shows SigmaLink Workbench help topics.
2 • SigmaLink Workbench User Interface
22
SigmaLink Workbench 1.101 - User Guide
Button
Function
Shows help topics about the selected window or button.
Sends an e-mail to the STEP User Help Desk.
Tbl. 1: Buttons and the functions represented by them
Positioning the mouse pointer over a button for approximately 1.5 seconds displays the
corresponding quickhelp.
2 • SigmaLink Workbench User Interface
23
SigmaLink Workbench 1.101 - User Guide
2.5
The Publishing Project Drop Down List
Related Topics:
• Personal Desktop (page 17)
• Hierarchy Window (page 18)
• Metadata Window (page 19)
• Toolbar (page 21)
• The Quick Search Box (page 25)
• Workflow Bar (page 26)
• Statusline (page 27)
Beneath the toolbar or inline with it a drop down box lists all publishing projects that are
configured in SigmaLink. The user can navigate to the different projects by selecting them
from this list. The drop down list can be moved by dragging it with the mouse pointer.
Fig. 3: The Publishing Project drop down list
2 • SigmaLink Workbench User Interface
24
SigmaLink Workbench 1.101 - User Guide
2.6
The Quick Search Box
Related Topics:
• Personal Desktop (page 17)
• Hierarchy Window (page 18)
• Metadata Window (page 19)
• Toolbar (page 21)
• The Publishing Project Drop Down List (page 24)
• Workflow Bar (page 26)
• Statusline (page 27)
Two drop down lists beneath the toolbar or inline with it allow the user to execute fast searches across the metadata in the current publishing project. The quick search drop down
lists can be moved by dragging them with the mouse pointer.
Fig. 4: The two drop down lists for quick search: the search term and the field searched.
2 • SigmaLink Workbench User Interface
25
SigmaLink Workbench 1.101 - User Guide
2.7
Workflow Bar
Related Topics:
• Personal Desktop (page 17)
• Hierarchy Window (page 18)
• Metadata Window (page 19)
• Toolbar (page 21)
• The Publishing Project Drop Down List (page 24)
• The Quick Search Box (page 25)
• Statusline (page 27)
The workflow bar contains symbols that represent the status of information objects and
tasks in a defined workflow process.
Fig. 5: Workflow bar with sample task symbols
2 • SigmaLink Workbench User Interface
26
SigmaLink Workbench 1.101 - User Guide
2.8
Statusline
Related Topics:
• Personal Desktop (page 17)
• Hierarchy Window (page 18)
• Metadata Window (page 19)
• Toolbar (page 21)
• The Publishing Project Drop Down List (page 24)
• The Quick Search Box (page 25)
• Workflow Bar (page 26)
The statusline at the bottom of the SigmaLink Workbench user interface displays a short
description of the selected command or function from a menu or toolbar button on the left.
The right side of the statusline displays the number of highlighted information objects and
the total number of information objects in the current container.
Fig. 6: Statusline
2 • SigmaLink Workbench User Interface
27
SigmaLink Workbench 1.101 - User Guide
3
Working in the SigmaLink Workbench Environment
Related Topics:
• Introduction (page 7)
• SigmaLink Workbench User Interface (page 15)
• Using Containers (page 33)
• Creating Information Objects (page 39)
• Importing Files (page 43)
• Editing SigmaLink Information Objects (page 48)
• Printing Information Objects (page 58)
• The STEP SGML Viewer (page 59)
Topics in this Unit:
•
Menus (page 29)
•
Context Sensitive Menus (page 30)
•
SLWB Keyboard Shortcuts (page 31)
•
Dialogs (page 32)
This chapter explains the different means of accessing information and using applications
in the SigmaLink Workbench.
3 • Working in the SigmaLink Workbench Environment
28
SigmaLink Workbench 1.101 - User Guide
3.1
Menus
Related Topics:
• Context Sensitive Menus (page 30)
• SLWB Keyboard Shortcuts (page 31)
• Dialogs (page 32)
The SigmaLink Workbench user interface provides the following menus:
Menu
Content
Application
Contains options for server connection, print and print setup
and exiting the Workbench.
Edit
Contains options for viewing, editing, importing and exporting
information objects as well as options to perform a number of
actions on information objects.
Search
Contains the search and retrieval functions of the SigmaLink
Workbench.
Information object
Contains options for check out, check in, creating links,
undoing check out, saving and loading search result lists as
well as marking information objects for read only downloadobjects. Switching between Online and Offline Mode (page 173)
Result List
Contains options for saving and loading search result lists and
editing options for result lists.
Workflow
Provides the connection to the integrated workflow engine
(Staffware) and lists every defined workflow state and its corresponding options.
Desktop
Contains options to add or remove symbols from the desktop
and lists all symbols on the Personal Desktop.
View
Controls the display of the user interface by providing options
to show or hide parts of it.
Tools
Contains options for configuring the SigmaLink Workbench and
for reporting errors etc. to the STEP User Help Desk.
Window
Contains options for closing different application windows.
Help
Contains options for the online help.
Most menu items are also available by other means such as context sensitive menus or
toolbar buttons.
Not all features are found in the menubar. Some features like split and join are found only
in the context sensitive menus of the Metadata Window.
3 • Working in the SigmaLink Workbench Environment
29
SigmaLink Workbench 1.101 - User Guide
3.2
Context Sensitive Menus
Related Topics:
• Menus (page 29)
• SLWB Keyboard Shortcuts (page 31)
• Dialogs (page 32)
The context sensitive menus contain menu items that are available in certain object environments only. The availability is determined by the object type, user authorization, status
of the information object in the workflow and the offline/online status of the Workbench.
Several components of the SigmaLink Workbench have context sensitive menus:
– symbols on the Personal Desktop,
– containers in the hierarchy window,
– containers in the metadata window,
– information objects
– workflow state symbols in the workflow bar.
Fig. 7: The context sensitive menu in the Metadata Window
Ð
1
Showing a context sensitive menu
All context sensitive menus are accessed by clicking on an object with the right
mouse button.
Menu items that are not available due to the workflow state of the highlighted object or
user authorization are grayed out. An object, for example, that is checked out by another
user cannot be opened with the Edit command in the Edit menu.
3 • Working in the SigmaLink Workbench Environment
30
SigmaLink Workbench 1.101 - User Guide
3.3
SLWB Keyboard Shortcuts
Related Topics:
• Menus (page 29)
• Context Sensitive Menus (page 30)
• Dialogs (page 32)
SigmaLink Workbench provides a number of keyboard shortcuts for frequently used commands. The available keyboard shortcuts are listed next to the menu items in the corresponding menus. There is also a complete listing of keyboard shortcuts in the appendix
of this manual.
3 • Working in the SigmaLink Workbench Environment
31
SigmaLink Workbench 1.101 - User Guide
3.4
Dialogs
Related Topics:
• Menus (page 29)
• Context Sensitive Menus (page 30)
• SLWB Keyboard Shortcuts (page 31)
Note:
Certain elements in the Dialog windows will not be in english unless the installed Windows
version is english as well. This affects dialogs for drive and file selection, file type selection
and the Cancel buttons in the dialogs.
Items followed by three dots (...) in the menus have a dialog window associated with them.
Further options and entries can be specified in the dialog windows. Dialog windows that
cover more than one subject are divided by tabs. The dialog window for the SigmaLink
Workbench search settings for example contains tabs for Predefined search, Metadata
search, Fulltext search and Combined search.
The dialogs are accessed by clicking on their tab.
Fig. 8:
Index card Combined search in the SigmaLink Workbench
Search settings dialog window
3 • Working in the SigmaLink Workbench Environment
32
SigmaLink Workbench 1.101 - User Guide
4
Using Containers
Related Topics:
• Introduction (page 7)
• SigmaLink Workbench User Interface (page 15)
• Working in the SigmaLink Workbench Environment (page 28)
• Creating Information Objects (page 39)
• Importing Files (page 43)
• Editing SigmaLink Information Objects (page 48)
• Printing Information Objects (page 58)
• The STEP SGML Viewer (page 59)
Topics in this Unit:
•
Creating Containers (page 35)
•
Renaming Containers (page 37)
•
Deleting Containers (page 38)
Containers group information objects according to criteria specified by the user. They contain information objects that are related to each other in some way or another. A container
could, for example, contain all articles that appeared in the same volume of a publication.
Containers represent the hierarchical structure of the publishing project. They define an
appropriate container structure consisting of 'subcontainers'. The publishing project for an
encyclopaedia, for example, might consist of 26 containers for the entries from A to Z.
In SigmaLink containers are assigned object typesThe only difference from a technical
point of view between containers and information objects is that containers may contain
information objects and subcontainers while information objects are the 'smallest' unit of
data in SigmaLink. Aside from that containers are treated just like information objects in
that they can be checked out or have metadata, etc..
The administrator configures a list of object types that will be allowed in any given container. The type of information object (SGML document type, general image or image of
a particular format such as *.gif) which can be used in a container in the workbench is
therefore determined by the container type the user is in. SigmaLink does not allow objects to be placed in containers for which they were not defined and helps the user to
maintain the consistency of the containers.
4 • Using Containers
33
SigmaLink Workbench 1.101 - User Guide
The figure below shows the Hierarchy Window and Metadata Window with their container
structure.
Fig. 9: Containers and their hierarchical structure
Most users should be familiar with the structure of the SigmaLink Infopool.
4 • Using Containers
34
SigmaLink Workbench 1.101 - User Guide
4.1
Creating Containers
Related Topics:
• Renaming Containers (page 37)
• Deleting Containers (page 38)
Containers are comparable to directories in a file system and are represented by a yellow
folder symbol (
). They can contain other containers and information objects. Containers are defined by container types which are specified by the user when a container is
created. The container type determines which type of information object can be placed in
the container. The choices allowed for new containers are determined by the configuration of the current publishing project. Publishing projects are configured by the SigmaLink
administrator. The corresponding configuration is stored in the database.
Ð
1
Creating new containers
Highlight a container in which to create a new container.
Note:
The new container will be placed beneath the container/object currently highlighted
in the metadata window.
Fig. 10: Highlighted container White Paper
2
3
Select Edit from the menubar.
Click on New in the Edit menu.
4 • Using Containers
35
SigmaLink Workbench 1.101 - User Guide
4
Select Container to open the New container dialog window.
Fig. 11: The New container dialog window
5
6
Enter a name for the new container in the Name of container field in the dialog window.
Select a type from the Valid container types list.
Note:
This selection determines which object types will be allowed in the container. The
container type cannot be changed later.
7
Confirm your selection with OK.
4 • Using Containers
36
SigmaLink Workbench 1.101 - User Guide
4.2
Renaming Containers
Related Topics:
• Creating Containers (page 35)
• Deleting Containers (page 38)
Container names can change repeatedly in the life cycle of a container. In SigmaLink
Workbench containers can be renamed without restrictions. This has no effect on their
content or the metadata (except title) associated with them.
Ð
1
Renaming containers
Click on the container (right mouse button) and select Rename from the context sensitive menu.
Fig. 12: Rename dialog
2
Enter the new name for the container and confirm the entry with the ENTER key.
4 • Using Containers
37
SigmaLink Workbench 1.101 - User Guide
4.3
Deleting Containers
Related Topics:
• Creating Containers (page 35)
• Renaming Containers (page 37)
Ð
1
2
Deleting containers
Click (right mouse button) on the container and select Delete from the context sensitive menu. SigmaLink requests a confirmation for the action.
Select Yes in the dialog window Are you sure you want to delete the selected information object? to delete the object. Select No to cancel the operation and retain
the container.
Note:
Containers must be empty to be deleted. If any information objects or other containers
remain in the selected container they must be moved or deleted before the selected container can be deleted.
4 • Using Containers
38
SigmaLink Workbench 1.101 - User Guide
5
Creating Information Objects
Related Topics:
• Introduction (page 7)
• SigmaLink Workbench User Interface (page 15)
• Working in the SigmaLink Workbench Environment (page 28)
• Using Containers (page 33)
• Importing Files (page 43)
• Editing SigmaLink Information Objects (page 48)
• Printing Information Objects (page 58)
• The STEP SGML Viewer (page 59)
Topics in this Unit:
•
Creating Information Objects with Content (page 40)
•
Creating Planned Objects (page 41)
Planning Information Objects
One of the prerequisites of creating information objects is careful planning, primarily planning the hierarchical structure of the information to be held in objects and planning the
structure and hierarchy of the individual information objects. In SGML based applications
the structure and hierarchy of an information object will be accomplished with SGML means. The more semantically oriented a DTD (document type definition) is the easier it will
be to guide the author through the authoring process.
There are generally two types of information objects: with content and planned objects. If
the content of the new information object is available or will be created immediately, the
new information object is created with content. It is represented in the Metadata Window
by a small book symbol with a yellow, green or red background depending on its status
(
). If the content of the new object is unavailable at the time of creation but will be
delivered at a later date, the new information object is created without content. It is represented by a small book symbol without background colour (
). These information objects are called Planned objects. Planned objects can be managed just like any other
object and can be subject to workflow processes. This feature makes it possible to compose information objects into complete publications or projects even if parts of the content
do not yet exist.
SigmaLink maintains and manages metadata (page 86) both for information objects and
for planned objects.
5 • Creating Information Objects
39
SigmaLink Workbench 1.101 - User Guide
5.1
Creating Information Objects with Content
Related Topics:
• Creating Planned Objects (page 41)
New information objects of a specific object type (such as an SGML based document or
a Word document) are created as an information object with content and can be edited
immediately after creation.
Ð
1
2
3
Creating new information objects with content
Highlight the information object in the Metadata Window beneath which the new object is to be placed.
Select New from the Edit menu.
Select Information object from the submenu.
Fig. 13: The New information object dialog window
4
5
6
7
Enter the name of the new object in the field Name in the New information object
dialog window.
Under Create object ... select the option with content.
Select an object type from the Valid information object types list, e.g. HTML document.
Confirm entries with OK.
Note:
The Edit metadata dialog window opens if this option has been set in the options of
the SigmaLink Workbench tools menu.
The editor associated with the object type is started automatically if this option has
been set in the options of the SigmaLink Workbench tools menu.
5 • Creating Information Objects
40
SigmaLink Workbench 1.101 - User Guide
5.2
Creating Planned Objects
Related Topics:
• Creating Information Objects with Content (page 40)
A situation may arise where the content of an information object does not yet exist. This
can occur, for example, if an information object needs to be included in the management
of a project and/or workflow but will be created by an external author in the course of the
project. In this case the object is created without content (as a planned object).
Ð
1
2
3
Creating objects without content
Highlight the information object in the Metadata Window beneath which the planned
object is to be placed.
Select New from the Edit menu.
Select Information object from the submenu.
Fig. 14: The New Information object dialog window with option without content
4
5
6
Enter the name of the new object in the field Name in the New information object
dialog window.
Under Create object ... select the option without content.
Select an object type from the Valid information object types list.
Note:
The type of the information object created determines which type of document can
imported into the planned object later. If a planned object of the type SGML Report
is created the system will not allow an HTML file to be imported into it.
The planned object type cannot be changed after creation.
7
Confirm entries with OK.
5 • Creating Information Objects
41
SigmaLink Workbench 1.101 - User Guide
Note:
The Edit metadata dialog window opens if this option has been set in the options of
the SigmaLink Workbench tools menu.
5 • Creating Information Objects
42
SigmaLink Workbench 1.101 - User Guide
6
Importing Files
Related Topics:
• Introduction (page 7)
• SigmaLink Workbench User Interface (page 15)
• Working in the SigmaLink Workbench Environment (page 28)
• Using Containers (page 33)
• Creating Information Objects (page 39)
• Editing SigmaLink Information Objects (page 48)
• Printing Information Objects (page 58)
• The STEP SGML Viewer (page 59)
Topics in this Unit:
•
Importing Files as New Information Objects (page 44)
•
Importing a File into a Planned Object (page 46)
SigmaLink Workbench allows files to be imported from local drives and network drives.
The two types of import functions in SigmaLink Workbench are
1. importing a file as a new object and
2. importing a file into a planned object
6 • Importing Files
43
SigmaLink Workbench 1.101 - User Guide
6.1
Importing Files as New Information Objects
Related Topics:
• Importing a File into a Planned Object (page 46)
Importing one or more files as new objects causes SigmaLink Workbench to create information objects with content.
Ð
1
2
Importing files as new information objects
Highlight the information object in the Metadata Window beneath which the imported
object is to be placed.
Select Import from the Edit menu.
Fig. 15: The Import data dialog window
3
4
5
Select as new objects in the Advanced options section of the Import data dialog
window.
If desired, select Import including links.
If desired, select Delete original files.
Caution:
Files deleted with the import option Delete original files cannot be restored by the
workbench.
6
7
8
Select the source drive and/or directory in the Browse field.
Select a file extension from the Files of type drop down menu to limit the files in the
display window to files of a specific type.
Highlight the file(s) to be imported and select Import or doubleclick the selected file
(single file only). Use the Ctrl and/or Shift keys to select multiple objects.
6 • Importing Files
44
SigmaLink Workbench 1.101 - User Guide
Note:
1. Drag & drop may also be used to import (a) file(s). Simply drag the selected file(s)
from the Windows Explorer into the SigmaLink Workbench Metadata Window.
2. The imported file must be of an object type allowed in the current container.
3. The Edit metadata dialog window opens if this option has been set in the options
of the SigmaLink Workbench tools menu.
4. The editor associated with the object type is started automatically if this option has
been set in the options of the SigmaLink Workbench tools menu.
6 • Importing Files
45
SigmaLink Workbench 1.101 - User Guide
6.2
Importing a File into a Planned Object
Related Topics:
• Importing Files as New Information Objects (page 44)
Objects created without content (planned objects) are filled with content by importing a file
of the corresponding type into the planned object.
Note:
Only single files can be imported into planned objects.
Ð
Importing a file into a planned object
Note:
Only a single file can be imported into a planned object.
The imported file must correspond to the object type specified when the planned object
was created. If it doesn’t the import will fail.
1
2
Highlight the planned object into which a file is to be imported.
Select Import from the Edit menu.
Fig. 16: The Import data dialog window
3
4
In the Advanced section under Import file(s) ... select the option into the selected
object.
If desired, select Import including links.
6 • Importing Files
46
SigmaLink Workbench 1.101 - User Guide
5
If desired, select Delete original files.
Caution:
Files deleted with the import option Delete original files cannot be restored by the
workbench.
6
7
8
Select the source drive and/or directory in the Look in: field.
Select a file extension from the Files of type drop down menu to limit the files in the
display window to files of a specific type. Confirm with Enter.
Highlight the file(s) to be imported and select Import or doubleclick the selected file
(single file only).
Note:
1. The Edit metadata dialog window opens if this option has been set in the options
of the SigmaLink Workbench tools menu.
2. The editor associated with the object type is started automatically if this option has
been set in the options of the SigmaLink Workbench tools menu.
6 • Importing Files
47
SigmaLink Workbench 1.101 - User Guide
7
Editing SigmaLink Information Objects
Related Topics:
• Introduction (page 7)
• SigmaLink Workbench User Interface (page 15)
• Working in the SigmaLink Workbench Environment (page 28)
• Using Containers (page 33)
• Creating Information Objects (page 39)
• Importing Files (page 43)
• Printing Information Objects (page 58)
• The STEP SGML Viewer (page 59)
Topics in this Unit:
•
Checking Information Objects out (page 49)
•
Checking Information Objects in (page 50)
•
Undo Check Out (page 51)
•
Editing Information Objects (page 52)
•
The Adept•Editor SigmaLink Menu (page 55)
Writing and Proof reading
In SigmaLink Workbench information objects must be checked out to be edited. This ensures that only one user can edit an object at a time. All other users including those with
write permission on the object can view the object but not edit it. SigmaLink Workbench
will deny other users access to the object except for viewing.
Checking in the object releases it to other users. Check in also causes SigmaLink to
create a new version of the object. The extent to which SigmaLink creates and retains old
versions of an information object is configured by the SigmaLink administrator. Check in
can be automatically triggered by workflow processes.
SGML based information objects are edited with an SGML based editor. SGML based
editors parse information objects to ensure compliance with the document type definition
(DTD) and with the SGML syntax.
7 • Editing SigmaLink Information Objects
48
SigmaLink Workbench 1.101 - User Guide
7.1
Checking Information Objects out
Related Topics:
• Checking Information Objects in (page 50)
• Undo Check Out (page 51)
• Editing Information Objects (page 52)
• The Adept•Editor SigmaLink Menu (page 55)
There are two ways to check out an information object in SigmaLink Workbench:
1. by selecting the appropriate option from the Information object menu, the context
sensitive menu, or by clicking on the Check out button in the toolbar
2. or by opening an information object in the editor in which case it is checked out automatically by SigmaLink Workbench.
Information objects are reserved exclusively for the user who checked them out and
cannot be edited by other users. The current version in the database can be viewed by
other users.
SigmaLink Workbench uses the small book symbol with a green background to denote
that an object is checked out (
). The background colour of this symbol changes to
red (
) if the object is checked out by another user.
Ð
Checking information objects out
Note:
Only available information objects can be checked out. Checked out information objects
must be checked back into the database on the machine on which they were initially chekked out, as SigmaLink stores a checked out object as a copy of the original on the local
hard drive.
Alternately, a network drive can be used to store checked out information objects if configured by the SigmaLink administrator. In this case this limitation does not apply.
1
2
Highlight the information object(s) to be checked out (Use the Ctrl and/or Shift keys
to select multiple objects).
Select Check out from the Information object menu.
7 • Editing SigmaLink Information Objects
49
SigmaLink Workbench 1.101 - User Guide
7.2
Checking Information Objects in
Related Topics:
• Checking Information Objects out (page 49)
• Undo Check Out (page 51)
• Editing Information Objects (page 52)
• The Adept•Editor SigmaLink Menu (page 55)
Information objects in SigmaLink Workbench must be available to be edited, i.e. checked
out objects must be checked in by a user before another user can edit them.
Ð
1
2
Checking information objects in
Highlight the reserved information object(s) to be checked in (Use the Ctrl and/or
Shift keys to select multiple objects).
Select Check in from the Information object menu.
Note:
Checked out information objects are stored on the users local harddrive. Therefore
they cannot be checked in from a machine other than the machine they were checked
out on. Information objects cannot be checked in if the hard drive on which the objects
were originally stored is no longer available. In this case the users only option is to
Undo Check Out.
Only the user who checked out an information object can undo the check out. This
feature is not available to other users. Contact your administrator if another users
check out must be undone.
7 • Editing SigmaLink Information Objects
50
SigmaLink Workbench 1.101 - User Guide
7.3
Undo Check Out
Related Topics:
• Checking Information Objects out (page 49)
• Checking Information Objects in (page 50)
• Editing Information Objects (page 52)
• The Adept•Editor SigmaLink Menu (page 55)
A situation may arise were it is not possible to check in an information object (i.e., local
hard drive damaged beyond repair). The SigmaLink Workbench features an Undo Check
Out option to allow the last (but not the current) version of the affected information objects
to be retrieved in order for the check out flag which reserves the objects to be cleared as
this flag prevents users from editing the objects or rolling back the objects’ versions using
the version control.
Warning:
All changes made to an information object since the last check out will be lost if
Undo Check Out is performed by the user or if the administrator clears the check
out flag in the database. A check in at a later time will not be possible.
Ð
1
2
3
Undoing check out
Select the information object(s) for which check out is to be undone
Select Undo Check Out from the Information Object menu
The workbench prompt the user for confirmation:
Fig. 17: Dialog to confirm Undo Check Out
7 • Editing SigmaLink Information Objects
51
SigmaLink Workbench 1.101 - User Guide
7.4
Editing Information Objects
Related Topics:
• Checking Information Objects out (page 49)
• Checking Information Objects in (page 50)
• Undo Check Out (page 51)
• The Adept•Editor SigmaLink Menu (page 55)
Any information object can be edited in SigmaLink Workbench provided there is an editing
tool associated with its type. SigmaLink provides an integrated SGML editor to edit SGML
based information objects. SGML editors support some of the concepts of information management, such as links and references between documents.
Note:
Editing non SGML objects requires an external application that must be installed on the
client machine (not included with SigmaLink).
Fig. 18: TheAdept*Eitor, shown here with the SigmaLink menu and the Properties submenu
Ð
1
Opening information objects
There are four ways to open an information object for editing in SigmaLink Workbench:
1. by selecting the appropriate option from the Information object menu,
7 • Editing SigmaLink Information Objects
52
SigmaLink Workbench 1.101 - User Guide
2. by selecting the appropriate option from the context sensitive menu in the Metadata Window,
3. by clicking on the Edit button in the toolbar
4. or by highlighting the object and pressing Ctrl+Enter
Fig. 19: The context sensitive menu in the SigmaLink Workbench
Once an information object is opened in an editor all features supported by the editor are
available to the user. In addition to this SigmaLink Workbench provides a menu with options for internal and external linking of objects and for checking objects into the database
from within the editor.
All changes made to a document in the editor should be saved frequently.
Ð
Saving changes during the editing process
Note:
The following instructions refer to the Adept•Editor from ArborText.
1
Select Save from the editor's File menu.
SigmaLink Workbench provides two alternative means to check an information object into
the database:
Ð
Closing and checking in information objects
Note:
The following instructions refer to the Adept•Editor from ArborText.
1
Select Close from the File menu in the editor.
7 • Editing SigmaLink Information Objects
53
SigmaLink Workbench 1.101 - User Guide
2
In the SigmaLink Workbench select Check in from the Information object menu.
or:
1
Select Check in from the SigmaLink menu in the integrated editor. SigmaLink Workbench saves the document, checks it into the database and closes the document in
the editor.
7 • Editing SigmaLink Information Objects
54
SigmaLink Workbench 1.101 - User Guide
7.5
The Adept•Editor SigmaLink Menu
Related Topics:
• Checking Information Objects out (page 49)
• Checking Information Objects in (page 50)
• Undo Check Out (page 51)
• Editing Information Objects (page 52)
The Adept•Editor included with the SigmaLink Workbench has been customized to integrate directly with the SigmaLink database. These features are available through a menu
in the editors main menu bar. The individual menu items are explained in depth in the units
dealing with the corresponding topics in other parts of this userguide.
The available menu items are introduced in this unit. Please refer to the corresponding
units for detailed information on how to use the editors SigmaLink menu options.
The integrated Adept•Editor features a customized menu in the main menu bar that integrates a number of SigmaLink features in the editor.
SigmaLink Menu Options
– Link options
– Search options
– Check in
– Navigation
– Properties
7 • Editing SigmaLink Information Objects
55
SigmaLink Workbench 1.101 - User Guide
Fig. 20: The SigmaLink menu of the Adept•Editor
Link options in the editor’s SigmaLink menu
Start link
Starts a Content to Content Link or a Content to Object Link.
Start including link
Starts an including link (Including Links).
Target link
Completes a Content to Content Link or an Object to Content Link.
Cancel link
Cancels a linking operation.
Follow a link
Follows a link and loads the linked object into the viewer (Following
Links).
Delete a link
Deletes a link. All Links created from within the editor must be deleted
using this option (Deleting Links).
7 • Editing SigmaLink Information Objects
56
SigmaLink Workbench 1.101 - User Guide
External edit
Loads a referenced object (including “link”), generally a graphics file, into
its associated editor.
Search options
Title search
Performs a search across the metadata for title. The highlighted text
is used as the search term. To include wildcards, place a percent sign (%)
before or after the search term and highlight it along with the search term.
The search term need not be inside a title element for this search to produce hits. Information objects will be found if their metadata title corresponds to the search term regardless of the content of any title elements
they may contain.
Change search domain
Allows the user to select a different publishing project or the entire Infopool for the title search.
Fig. 21: The Change search domain dialog window.
Check in
This feature allows the user to check an information object into the database without having to save change and leave the editor.
Navigation
Next document
Loads the information object preceeding the current one in the metadata
window into the editor.
Previous document
Loads the information object succeeding the current one in the metadata
window into the editor.
Properties
This option opens the Properties dialog of the SigmaLink Workbench (Properties of Information Objects (page 79)).
7 • Editing SigmaLink Information Objects
57
SigmaLink Workbench 1.101 - User Guide
8
Printing Information Objects
Related Topics:
• Introduction (page 7)
• SigmaLink Workbench User Interface (page 15)
• Working in the SigmaLink Workbench Environment (page 28)
• Using Containers (page 33)
• Creating Information Objects (page 39)
• Importing Files (page 43)
• Editing SigmaLink Information Objects (page 48)
• The STEP SGML Viewer (page 59)
External applications can be set up to print information objects in SigmaLink. A list of
available external applications is configured by the administrator and can be accessed by
the user in the Options submenu of the Tools menu. Associating an Object Type with an
External Editor or Viewer (page 190)
Ð
1
Printing Information Objects
Select Print setup if the printer needs to be setup.
Note:
A printer must be installed on your system and a print capable application must be
associated with the object type to print objects. See Associating an Object Type with
an External Editor or Viewer (page 190) for more information.
2
Select Print from the Edit menu in the workbench
or:
Selct Print from the context sensitive menu in the metadata window
8 • Printing Information Objects
58
SigmaLink Workbench 1.101 - User Guide
9
The STEP SGML Viewer
Related Topics:
• Introduction (page 7)
• SigmaLink Workbench User Interface (page 15)
• Working in the SigmaLink Workbench Environment (page 28)
• Using Containers (page 33)
• Creating Information Objects (page 39)
• Importing Files (page 43)
• Editing SigmaLink Information Objects (page 48)
• Printing Information Objects (page 58)
Topics in this Unit:
•
Viewing Information Objects (page 60)
•
Search in the viewer (page 63)
•
Navigating in the Viewer (page 66)
•
Editing an Information Object from within the Viewer (page 70)
•
Printing from the Viewer (page 71)
•
Showing and Hiding Parts of the Viewer Interface (page 73)
Information objects can be viewed during and after the editing process. Information objects are available for viewing to all users. Changes made to information objects are not
visible until the objects have been checked in.
SigmaLink Workbench provides an SGML viewer that supports multiple style sheets for
SGML based information objects. The installed style sheets are selected in the viewers
Style menu.
The integrated SGML viewer also supports multiple navigators. The installed navigators
are selected from the Navigator menu in the menubar within the viewer. The navigator
window of the viewer presents a hierarchical view of an SGML document and is generated
by the viewer based on the hierarchical structure of the document instance. The SigmaLink administration defines and configures style sheets and navigators for the clients.
The STEP SGML Viewer includes a print feature that allows the user to select a style
sheet and navigator for printout, provided style sheet and navigator have been defined
and installed.
It is possible to search for terms (or strings) in the viewer. The search can be limited to
certain element contexts in the document. Search and retrieval are available for all information objects of any given document type definition, even if only one such object has
been loaded into the viewer (external search).
The integrated STEP SGML Viewer only displays SGML based objects. However, any
viewer can be associated with object types managed in SigmaLink Workbench.
The integrated SGML viewer is described in this manual.
9 • The STEP SGML Viewer
59
SigmaLink Workbench 1.101 - User Guide
9.1
Viewing Information Objects
Related Topics:
• Search in the viewer (page 63)
• Navigating in the Viewer (page 66)
• Editing an Information Object from within the Viewer (page 70)
• Printing from the Viewer (page 71)
• Showing and Hiding Parts of the Viewer Interface (page 73)
Any SGML document can be viewed using the integrated SGML viewer. If there are integrated style sheets for the corresponding document type they are automatically loaded.
Otherwise the document is displayed unformatted (in “typewriter layout”).
Fig. 22: SGML document in the integrated SGML viewer
Ð
1
2
Viewing information objects
Highlight the information object to be viewed.
Select View from the context sensitive menu.
or:
1
Click on the Viewer button in the toolbar.
or:
9 • The STEP SGML Viewer
60
SigmaLink Workbench 1.101 - User Guide
1
Doubleclick on the information object to be viewed in the Metadata Window.
Several different “views” of a document can be defined by creating different styles for different purposes (text only, abstracts of the document, etc.). Styles and navigators are defined and configured by the SigmaLink administration and supplied to the clients by the
server.
Ð
Selecting styles
Note:
Only styles configured and installed in SigmaLink can be selected by the client.
1
Select a style from the list of available styles in the Style menu.
Information objects are not reserved (checked out) when they are loaded into the viewer.
Any authorized user can edit objects while they are loaded in the viewer elsewere. Changes made to an information object are not visible until the object has been checked in. The
check in process generates a new version of the object, which is then available to all
users for viewing.
Ð
1
2
Viewing the most recent version an information object
Check the information object in.
Select Reload from the File menu.
Note:
Reloading the information object in the viewer will have no effect if the information
object has not been checked in since the last changes were made.
Information objects in the viewer can be closed. The viewer displays an empty navigator
and document windows in this case.
Ð
1
Closing an information object in the viewer
Select Close from the File menu.
9 • The STEP SGML Viewer
61
SigmaLink Workbench 1.101 - User Guide
Generally all SGML based documents can be viewed in the STEP SGML Viewer including
documents not managed by SigmaLink, provided the viewer is configured to display them.
The integrated viewer will show any document whose SGML structure is valid. Styles and
navigators for the viewer must be configured for every document type if it is to show
anything other than “typewriter style”.
Ð
1
Opening external documents in the viewer
Select Open from the File menu.
Fig. 23: The Open dialog window
2
3
Select a directory in the Browse drop down list.
Doubleclick on a file or highlight a file and select Open.
9 • The STEP SGML Viewer
62
SigmaLink Workbench 1.101 - User Guide
9.2
Search in the viewer
Related Topics:
• Viewing Information Objects (page 60)
• Navigating in the Viewer (page 66)
• Editing an Information Object from within the Viewer (page 70)
• Printing from the Viewer (page 71)
• Showing and Hiding Parts of the Viewer Interface (page 73)
The viewer’s search features are not limited to documents opened in the viewer. The integration of the viewer with SigmaLink makes it possible to expand a search to all information objects managed by SigmaLink (external search, full text) or to all information
objects that contain the search string in the same context (element).
The STEP SGML Viewer displays a hitbar that shows all occurrences of the search string
in the information object.
Option
Description
In element
A drop-down list provides a list of elements to which the search
can be limited.
Case sensitive
Limits the search result to occurrences with identical spelling
with regards to lower and upper case letters.
Automatic search
This option causes SigmaLink to automatically execute the
search for every information object opened in the viewer. The
option remains active after the viewer is closed until it is deactivated by the user.
Search in
Limits the search to the current document or searches the
entire Infopool.
Note:
The SigmaLink Workbench search and retrieval interface provides extended options for
search and retrieval in SigmaLink.
9 • The STEP SGML Viewer
63
SigmaLink Workbench 1.101 - User Guide
Ð
1
Searching in the STEP SGML Viewer
Select the Search option in the Search menu.
Fig. 24: The Search dialog window
2
Enter the search string in the Search for field.
Note:
A drop down list shows all recently used search strings for quick reference.
3
Search options
Activating In element limits the search to a particular context. Select the element
context from the drop down list.
Selecting Case sensitive causes SigmaLink to consider letter case in the search
term.
Selecting Automatic search causes SigmaLink to automatically execute the search
every time an information object is opened in the viewer. All hits in the document are
highlighted. In addition the viewer displays a hitbar on the right side of the document
window which shows the locations of the hits in the document. Click on a horizontal
line in the hitbar to jump to the location of the corresponding hit in the document.
Selecting document in the Search in field limits the search to the opened document.
Selecting Infopool searches across the entire Infopool.
9 • The STEP SGML Viewer
64
SigmaLink Workbench 1.101 - User Guide
4
Confirm the entries and start the search with OK.
A successful search across the entire Infopool will produce a search result window
listing all information objects that contain the search term, if applicable, in the given
context.
Fig. 25: Search results shown in the document window and the hitbar
Note:
A search across the entire Infopool will not produce a hitbar in the information objects
when they are opened in the viewer from the search result window unless Automatic search has been specified in the search options.
9 • The STEP SGML Viewer
65
SigmaLink Workbench 1.101 - User Guide
9.3
Navigating in the Viewer
Related Topics:
• Viewing Information Objects (page 60)
• Search in the viewer (page 63)
• Editing an Information Object from within the Viewer (page 70)
• Printing from the Viewer (page 71)
• Showing and Hiding Parts of the Viewer Interface (page 73)
The STEP SGML Viewer supports navigators. Navigators can be compared to tables of
content and are generated from the document instance when an information object is
loaded into the viewer. Clicking on an entry in the navigator causes the viewer’s display
in the document window to jump to that location. The SigmaLink administrator designs
and installs the navigators used in the viewer. Navigators (can) represent the structure
and hierarchy of SGML based information objects by adding certain elements of the document instance (chapter titles, section titles, etc.) to the navigator tree allowing quick and
easy navigation through long or complex information objects.
Fig. 26: The STEP SGML Viewer is divided into two windows: the navigator which reflects the document structure and hierarchy and the document window.
The STEP SGML Viewer supports multiple navigators for each document type permitting
different views on information objects for various purposes. The default navigator available for all document types is the SGML tree. It is generated from the element structure of
9 • The STEP SGML Viewer
66
SigmaLink Workbench 1.101 - User Guide
the information object and shows every element used in the object. The navigator window
can be hidden to increase the size of the document window.
Ð
1
2
Selecting and deselecting navigators
Open the Navigator menu in the main menubar within the viewer.
To select a navigator, choose one from the list of available navigators in the navigator
menu.
Fig. 27: Navigator menu with a selected navigator (note the checkmark next to it)
9 • The STEP SGML Viewer
67
SigmaLink Workbench 1.101 - User Guide
3
Select SGML tree to navigate the documents SGML structure.
Fig. 28: The SGML tree of a document in the navigator window
4
Ð
1
2
Select none to hide the navigator window.
Using navigators
Click on an entry in the navigator window to jump to the corresponding location in the
document.
Click on the symbol preceding an entry to expand the navigator display. The symbols
preceding the navigator entries indicate nested subentries beneath the entry.
Nested entries can be expanded or collapsed and are indicated by the following symbols:
Symbol
Function
Indicates that there are subentries nested in this entry. Clicking on the
symbol will expand it one level. The symbol changes:
Indicates that the entry is expanded. Clicking on this symbol will collapse
it. The symbol changes back:
Indicates that there are no more entries nested beneath this one.
Indicates the current position in the document.
The viewer has an undo/redo feature allowing the user to move back and forth between
parts of a document and between documents. This feature corresponds to the back/forward feature accessed by the buttons arrow left and arrow right in the toolbar.
9 • The STEP SGML Viewer
68
SigmaLink Workbench 1.101 - User Guide
Ð
Using Undo and Redo in the viewer
Note:
The options Undo and Redo are not available until the user has navigated through one
or more documents.
1
2
3
Activate the context sensitive menu by clicking with the right mouse button.
Select Undo to return either to the last document viewed or to the last location visited
in the current document (i.e. backtracking through the document).
Select Redo to skip further down the document (i.e. browsing forward to locations
previously visited).
9 • The STEP SGML Viewer
69
SigmaLink Workbench 1.101 - User Guide
9.4
Editing an Information Object from within the Viewer
Related Topics:
• Viewing Information Objects (page 60)
• Search in the viewer (page 63)
• Navigating in the Viewer (page 66)
• Printing from the Viewer (page 71)
• Showing and Hiding Parts of the Viewer Interface (page 73)
SGML based documents can be loaded into the editor directly from the viewer preventing
the user from being interrupted in his/her work. Corrections to documents can be made
while it is being proof read in the viewer, for example.
Ð
1
Loading a document into the editor from within the viewer
Open the object in the STEP SGML Viewer
Fig. 29: The Edit menu in the STEP SGML Viewer
2
3
Select Edit in the Active Window from the Edit menu.
Select Edit in a New Window from the Edit menu if another object is already loaded
in an instance of the editor and do not want it replaced by the object currently displayed in the viewer.
9 • The STEP SGML Viewer
70
SigmaLink Workbench 1.101 - User Guide
9.5
Printing from the Viewer
Related Topics:
• Viewing Information Objects (page 60)
• Search in the viewer (page 63)
• Navigating in the Viewer (page 66)
• Editing an Information Object from within the Viewer (page 70)
• Showing and Hiding Parts of the Viewer Interface (page 73)
SGML based information objects can be printed in the viewer if this is needed.
Ð
1
2
3
Printing from within the viewer
Select Print from the viewer’s File menu.
Make the appropriate entries in the Print Document dialog window.
Select a style sheet from the list of available style sheets in the Stylesheet field.
Note:
You can preview a style by selecting it in the viewer first.
4
Select a navigator from the list of available navigators.
Note:
You can preview a navigator by selecting it in the viewer first.
5
6
Ð
1
Select footers and headers as required.
Select Print to start printing the document.
Changing printers
Select Print setup from the File menu.
Fig. 30: The Select Printer dialog window
2
Select a printer from the drop down list in the Select Printer dialog window.
9 • The STEP SGML Viewer
71
SigmaLink Workbench 1.101 - User Guide
Note:
Printers must be installed in your operating system to be available in this dialog window. Contact your system administration for more information.
3
Confirm the entries with OK.
9 • The STEP SGML Viewer
72
SigmaLink Workbench 1.101 - User Guide
9.6
Showing and Hiding Parts of the Viewer Interface
Related Topics:
• Viewing Information Objects (page 60)
• Search in the viewer (page 63)
• Navigating in the Viewer (page 66)
• Editing an Information Object from within the Viewer (page 70)
• Printing from the Viewer (page 71)
The user can choose not to display a navigator if his/her work does not require one. Tags,
hitbar, toolbar etc. can be turned off as well.
The View menu lists all parts of the viewer interface that can be toggled on or off.
– Show tags
– Hitbar
– Toolbar
– Status Line
A check mark is shown next to an entry indicating that that particular item is on. Simply
click on any option in the menu to clear the check mark or to check an option that is turned
off.
The markup of SGML based information objects can be toggled on or off by checking or
clearing the option Show tags.
Images in a document can be automatically shrunk to fit in the document window with the
Shrink graphics option.
The viewer itself can be toggled on or off in the SigmaLink Workbench.
Ð
1
2
Toggling the viewer on or off
Select Viewer from the workbench View menu or
Press F7 on the keyboard.
Either action will toggle the viewer on if it is minimized or off if it is maximized.
9 • The STEP SGML Viewer
73
SigmaLink Workbench 1.101 - User Guide
10
Split and Join
Related Topics:
• Properties of Information Objects (page 79)
• Metadata (page 86)
• Annotations to Information Objects (page 93)
• Links (page 97)
• Reusing Information Objects (page 124)
• Search and Retrieval (page 126)
• SigmaLink Version Control (page 145)
• Referenced Objects (page 153)
• Workflow (page 159)
Topics in this Unit:
•
Splitting Information Objects (page 76)
•
Joining Information Objects (page 78)
Planning and Organizing Information Objects
Note:
The SigmaLink split/join function is not to be confused with Adept function of the same
name which splits and joins only elements within an SGML instance provided the DTD
permits this.
Efficiently planning and organizing editorial projects depends to a large part on an efficient
structure of the material used in the project. This structure is represented both by the hierarchy of the project's information pool (by creating a container structure) and, in the case
of SGML based information objects, by the structure and hierarchy in the individual document instances themselves.
SigmaLink provides a feature called split and join to support the (possibly frequent) need
to structure and restructure the information pool of a project. The features split and join
utilize the SGML structure of information objects and are available only for SGML based
information objects.
Split causes an information object to split along its internal structure into several smaller
information objects, the fragmented objects as they are called, that can be reused in other
projects or contexts. The original information object is replaced by a fragment container
indicated by the container symbol with a red line through its center (
). The metadata
originally associated with the information object is now associated with the fragment container. SigmaLink uses an hierarchical approach to split and join operations: all SGML elements with the same hierarchical level in the information object are converted to
independent fragments of that information object.
10 • Split and Join
74
SigmaLink Workbench 1.101 - User Guide
Independent fragments in the fragment container are treated as regular information objects. They can be split again provided the objects’ structure supports this. The degree to
which objects can be repeatedly split is configured by the SigmaLink administration. SigmaLink administration configures:
– which levels of hierarchy existing in the document type are used for split and join and
– whether recursive splitting is to be permitted.
Note:
Information objects cannot be split if their DTD defines marked sections, exclusions or
inclusions.
Join is the opposite of split. When a fragment container is joined all information objects
(fragments) it contains are joined to form the next higher level in the hierarchy of the original information object or fragment.
The following conditions must be met before the join item can be used:
1. The SGML structure of every fragment must be valid,
2. there can be no fragments or information objects that are not allowed at the next higher
level of hierarchy and
3. no fragments were deleted, moved or added.
Currently SigmaLink allows only fragments to be joined that were created with its split
feature.
Example
An older version of a user manual is to be republished. It consists of parts one through
four, each part in turn contains several chapters. The individual chapters are to be updated by different authors.
The first split operation splits the manual into four parts. A second set of split operations
splits each part into its chapters. The tasks of editing the individual fragments can now be
assigned to different authors and submitted to the integrated workflow. The authors can
change the content and the SGML structure of each fragment (as the DTD permits). After
all fragments have been checked back into the database a set of join operations recreates
parts one through four and a final join recreates the user manual.
The previous version of the manual is retained by the version control.
10 • Split and Join
75
SigmaLink Workbench 1.101 - User Guide
10.1
Splitting Information Objects
Related Topics:
• Joining Information Objects (page 78)
Splitting information objects creates new independent information objects called fragments. They are placed in a fragment container and can be edited as information objects
(e.g. in the editor). The content of a fragment container, as the content of an information
object, can be displayed in the viewer.
Ð
Splitting information objects
Note:
An information object cannot be split if
– the information object is checked out,
– the type of the information object is not SGML
– the information object contains marked sections, inclusions or exclusions
– the SGML structure of the information object is invalid
– the SGML structure of the information object does not support hierarchical splitting, i.e.
the structure permits either #PCDATA (text) or markup to be inserted at the highest
level of the hierarchy. This would leave unwrapped #PCDATA in the resulting fragmented information objects.
1
2
In the Metadata Window, click on the information object intended to be split (right
mouse button).
In the context sensitive menu, click on Split. The information object becomes a fragment container (preceded by
). The created fragments are displayed in the Metadata Window.
Fig. 31: Content of an information object after split
10 • Split and Join
76
SigmaLink Workbench 1.101 - User Guide
Ð
1
2
Displaying the content of a fragment container in the viewer
In the Metadata Window, click on the fragment container intended to be displayed
(right mouse button).
In the context sensitive menu, click on View. The content of the fragment container
is displayed in the viewer.
10 • Split and Join
77
SigmaLink Workbench 1.101 - User Guide
10.2
Joining Information Objects
Related Topics:
• Splitting Information Objects (page 76)
With the join item information objects created by split can be put together. The fragment
container is replaced by the new information object.
Ð
Joining information objects
Note:
An information object cannot be joined if
– the SGML structure of one or more of the fragments is invalid
– one or more of the fragments are checked out
one or more of the fragments were deleted.
1
2
In the Metadata Window, click on the fragment container containing the information
objects intended to be joined by using the right mouse button.
In the context sensitive menu, click on Join. An information object with the content of
the former fragment container is created and displayed in the Metadata Window.
Fig. 32: The Join item in the context sensitive menu
10 • Split and Join
78
SigmaLink Workbench 1.101 - User Guide
11
Properties of Information Objects
Related Topics:
• Split and Join (page 74)
• Metadata (page 86)
• Annotations to Information Objects (page 93)
• Links (page 97)
• Reusing Information Objects (page 124)
• Search and Retrieval (page 126)
• SigmaLink Version Control (page 145)
• Referenced Objects (page 153)
• Workflow (page 159)
Topics in this Unit:
•
Attributes of Information Objects (page 80)
•
Properties of Metadata (page 81)
•
Properties of Annotations (page 82)
•
Properties of Links (page 83)
•
Properties of Versions (page 84)
•
Properties of Reuse (page 85)
The properties of information objects can be accessed with the Properties submenu in
the Information Object menu or the context sensitive menu in the metadata window. The
Properties submenu provides access to the following properties:
1. Attributes
2. Metadata
3. Annotations
4. Versions
5. Links
6. Reuse
While attributes will be covered in this unit the remaining five properties will be covered in
more detail in individual units. However, all properties available from this dialog will be introduced in this unit.
11 • Properties of Information Objects
79
SigmaLink Workbench 1.101 - User Guide
11.1
Attributes of Information Objects
Related Topics:
• Properties of Metadata (page 81)
• Properties of Annotations (page 82)
• Properties of Links (page 83)
• Properties of Versions (page 84)
• Properties of Reuse (page 85)
SigmaLink stores some information regarding information objects in attributes. These attributes can be viewed by the user.
Fig. 33: The Attributes tab in the Properties dialog
The following information is available to the user in the attributes sheet installed with SigmaLink:
1. SL_TR_ID: This is the SigmaLink internal unique identifier for the information object.
2. IO Type: Identifies whether the object is container (node) or an information object
(leaf)
3. Object type: Identifies the ID of the object type (such as GIF, TIFF, HTML or Word
document). The ID is a numerical value greater than zero.
4. Workflow status: Identifies the status of the object in the SigmaLink workflow (default)
or the integrated Staffware workflow (if configured).
5. Content file name: Always corresponds to SL_TR_ID and is appended an extension
depending on the object type to form the file name that will be used to store a checked
out object in the Workbenches InUse and Cache directories. This file name will also
be the default file name if the object is exported and no other file name was configured
for export. In addition to this it forms the basis of the file names in the version control
- each version will have this file name as its base name plus a suffix (numerical value
by default) seperated by an underscore and preceding the extension.
The SigmaLink administrator can configure additional attributes for display.
11 • Properties of Information Objects
80
SigmaLink Workbench 1.101 - User Guide
11.2
Properties of Metadata
Related Topics:
• Attributes of Information Objects (page 80)
• Properties of Annotations (page 82)
• Properties of Links (page 83)
• Properties of Versions (page 84)
• Properties of Reuse (page 85)
The Metadata tab in the Properties dialog provides access to all metadata that is changeable by the user. Several factors determine whether metadata is changeable or not:
1. Configuration of the metadata
2. User permissions
3. Workflow status of the IO in question
Fig. 34: The Metadata tab in the Properties dialog
For more detailed information Creating and Editing Metadata (page 87)
11 • Properties of Information Objects
81
SigmaLink Workbench 1.101 - User Guide
11.3
Properties of Annotations
Related Topics:
• Attributes of Information Objects (page 80)
• Properties of Metadata (page 81)
• Properties of Links (page 83)
• Properties of Versions (page 84)
• Properties of Reuse (page 85)
The Annotations tab in the Properties dialog lists all annotations to an information object.
Fig. 35: The Annotations tab in the Properties dialog
For more detailed information Annotations to Information Objects (page 93)
11 • Properties of Information Objects
82
SigmaLink Workbench 1.101 - User Guide
11.4
Properties of Links
Related Topics:
• Attributes of Information Objects (page 80)
• Properties of Metadata (page 81)
• Properties of Annotations (page 82)
• Properties of Versions (page 84)
• Properties of Reuse (page 85)
The Links tab of the Properties dialog lists all links to and from information objects. Referenced objects (Including “links”) are also available from this dialog.
Fig. 36: The Links tab in the Properties dialog
For more detailed information Links (page 97) and Including Links (page 154)
11 • Properties of Information Objects
83
SigmaLink Workbench 1.101 - User Guide
11.5
Properties of Versions
Related Topics:
• Attributes of Information Objects (page 80)
• Properties of Metadata (page 81)
• Properties of Annotations (page 82)
• Properties of Links (page 83)
• Properties of Reuse (page 85)
The Versions tab in the Properties dialog lists all existing Versions of an information object.
Fig. 37: The Versions tab in the Properties dialog
For more detailed information SigmaLink Version Control (page 145)
11 • Properties of Information Objects
84
SigmaLink Workbench 1.101 - User Guide
11.6
Properties of Reuse
Related Topics:
• Attributes of Information Objects (page 80)
• Properties of Metadata (page 81)
• Properties of Annotations (page 82)
• Properties of Links (page 83)
• Properties of Versions (page 84)
The Reuse tab in the Properties dialog lists an information object in every production, in
which it is used. The container path is listed along with the IO title
Fig. 38: The Reuse tab in the Properties dialog
For more detailed information Reusing Information Objects (page 124).
11 • Properties of Information Objects
85
SigmaLink Workbench 1.101 - User Guide
12
Metadata
Related Topics:
• Split and Join (page 74)
• Properties of Information Objects (page 79)
• Annotations to Information Objects (page 93)
• Links (page 97)
• Reusing Information Objects (page 124)
• Search and Retrieval (page 126)
• SigmaLink Version Control (page 145)
• Referenced Objects (page 153)
• Workflow (page 159)
Topics in this Unit:
•
Creating and Editing Metadata (page 87)
•
Changing the Display of Metadata (page 88)
•
Printing Metadata (page 89)
•
Saving and Loading Metadata (page 90)
Metadata is information about information objects and is managed separately from the
content of the information object it is associated with. The SigmaLink configuration defines a set of optional or required metadata for every information object in the database.
Optional and required metadata can be configured differently for various publishing projects and object types.
SigmaLink differentiates between two types of metadata – system metadata (always required) and user defined metadata (may be optional or required, depending on the configuration). System metadata is not configurable but it can be included or excluded from the
display in the metadata window. System metadata is automatically generated when information objects are created or imported and cannot be altered by the user. User defined
metadata can be generated automatically when an information object is created or imported or it can be entered by hand at a later time. In addition, user defined metadata can be
edited at any time unless the user does not have write permission on metadata.
Search and retrieval across the relational database is based on metadata. Efficiency and
effectivity of relational search and retrieval in SigmaLink depend primarily on the quality
of the metadata. All metadata can be configured to be available for relational search, regardless of whether it is visible in the metadata window or not.
12 • Metadata
86
SigmaLink Workbench 1.101 - User Guide
12.1
Creating and Editing Metadata
Related Topics:
• Changing the Display of Metadata (page 88)
• Printing Metadata (page 89)
• Saving and Loading Metadata (page 90)
Metadata may include information such as the name of an information object, its current
version, its current user or the number of images contained in it.
Depending on the configuration some of the metadata is generated automatically when
information objects are created or imported, while other metadata is created by hand
using the Edit metadata dialog.
Ð
1
2
Editing metadata
Select Properties from the Information Object menu.
Select the Metadata tab from the Properties dialog.
Fig. 39: The Properties dialog window with the Metadata tab
3
Enter the appropriate information in the Metadata tab of the dialog window.
Note:
The option Properties dialog is available from the context sensitive menu in the Metadata Window of SigmaLink Workbench as well. Highlight the information object
using the right mouse button in the metadata window. Select Properties in the context sensitive menu with the left mouse button.
4
Confirm the entries with Apply. Additional properties may be accessed at this time.
or:
Confirm the entries with OK to close the dialog.
The dialog window lists all metadata entries that can be edited by the user. Only optional
entries may be left blank. Omitting or deleting a required entry results in a corresponding
error message. Which entries can be edited by the user depends on the permissions they
have been assigned by the administrator and on the information object’s status in the
workflow.
12 • Metadata
87
SigmaLink Workbench 1.101 - User Guide
12.2
Changing the Display of Metadata
Related Topics:
• Creating and Editing Metadata (page 87)
• Printing Metadata (page 89)
• Saving and Loading Metadata (page 90)
The metadata associated with information objects is displayed in the Metadata Window.
The order information objects are listed in can be toggled between ascending and descending order (alphabetically or numerically, as applicable).
Ð
1
2
Changing the order of information objects
Click on any column header in the Metadata Window to open a new window listing
the information objects in the current container.
In the new window click on the column header to sort the objects.
Fig. 40: Alphabetically sorted information objects (ascending order, by title)
3
Click on the same column header to reverse the sorting order (from ascending to descending and vice versa)
or:
Click on a different column header to sort the information objects by another criteria.
12 • Metadata
88
SigmaLink Workbench 1.101 - User Guide
12.3
Printing Metadata
Related Topics:
• Creating and Editing Metadata (page 87)
• Changing the Display of Metadata (page 88)
• Saving and Loading Metadata (page 90)
The metadata displayed in the Metadata Window can be printed.
Note:
SigmaLink may keep and manage more metadata than is displayed in the Metadata Window. The administrator defines and configures SigmaLink to display some, all or none of
the metadata maintained in the system. Metadata that is not displayed in the Metadata
Window cannot be printed by SigmaLink Workbench. “Invisible” metadata can still be configured to be available for relational search.
Ð
1
2
Printing metadata
Highlight an information object and open the context sensitive menu (right mouse
click).
Select Print metadata from the context sensitive menu or from the Application
menu.
Note:
A printer must be installed on your PC for print services to be available.
An external application must also be installed on the client and configured to handle
the print jobs for each information object types. By Default, SGML objects are printed
by the STEP SGML Viewer.
The SigmaLink administrator configures external applications for printing. The user
can select which one to use through the Options submenu of the Tools menu if more
than one application is available to handle the print job.
12 • Metadata
89
SigmaLink Workbench 1.101 - User Guide
12.4
Saving and Loading Metadata
Related Topics:
• Creating and Editing Metadata (page 87)
• Changing the Display of Metadata (page 88)
• Printing Metadata (page 89)
The information from the Metadata window and the search result windows is written to cache on the client. This information is updated every time the user performs a search or
changes a container. This information can be saved to a file for future use in either a SigmaLink table format (SGML) or as Comma Separated Value (CSV). CSV can be used to
import the metadata into other applications such as Microsoft Excel in order to perform
statistical operations on it provided the metadata is suited for statistical operations.
The entire content of the metadata window and the search window or a range of information objects in the windows can be saved to file. These result lists can be loaded into the
workbench or external applications.
Ð
1
Saving Metadata as an SGML Table
Highlight a range of information objects, if desired, whose metadata is to be saved to
a file.
Note:
The entire content of the metadata window will be saved to file if no range of information objects is selected.
Use Shift+Mouseclick or Ctrl+Mouseclick to make multiple selections of information objects.
2
3
Select Save Result List as ... from the Result List menu.
Enter a file name or accept the default generated by SigmaLink in the Save Result
List as ... dialog window.
Fig. 41: The Save Result List as ... dialog window
12 • Metadata
90
SigmaLink Workbench 1.101 - User Guide
4
5
6
7
Use the Browse option to save result lists at locations other than the default directory
ResultList in the SigmaLink Workbench directory.
Select SigmaLink Table DI from the file type drop down list.
The option Selected is available if a range of information objects had been highlighted prior to calling up the dialog window.
Activate the Selected button if only the highlighted information objects is to be saved
to file.
Confirm the entries with Save or cancel the operation with the Cancel button.
Metadata can also be saved in CSV format - Comma Separated Value. This format is supported, for example, by Microsoft Excel. If certain numeric metadata has been configured,
this format can be used to perform statistical analyses of information objects managed in
SigmaLink.
Ð
1
Saving Metadata as Comma Separated Value
Highlight a range of information objects, if desired, whose metadata is to be saved to
a file.
Note:
The entire content of the metadata window will be saved to file if no range of information objects is selected.
Use Shift+Mouseclick or Ctrl+Mouseclick to make multiple selections of information objects.
2
3
Select Save Result List as ... from the Result List menu.
Enter a file name or accept the default generated by SigmaLink in the Save Result
List as ... dialog window.
Fig. 42: The Save Result List as ... dialog window
4
5
6
Use the Browse option to save result lists at locations other than the default directory
ResultList in the SigmaLink Workbench directory.
Select CSV (Comma delimited) from the file type drop down list.
The option Selected is available if a range of information objects had been highlighted prior to calling up the dialog window.
12 • Metadata
91
SigmaLink Workbench 1.101 - User Guide
7
Ð
1
2
Activate the Selected button if only the metadata of the highlighted information objects is to be saved to file.
Confirm the entries with Save or cancel the operation with the Cancel button.
Loading Metadata from Result Lists
Select Load Result List from the Result List menu.
Enter a file name or select a result list from the Load Result List dialog window.
Fig. 43: The Save Result List as ... dialog window
3
4
5
Select SigmaLink Table DI or CSV (Comma delimited) from the file type drop down
list. This selection filters the list of result lists files in the dialog. The display will show
only *.tbl or *.csv files respectively.
Use the Browse option to retrieve result lists from locations other than the default directory ResultLists in the SigmaLink Workbench directory.
Confirm the entries with Load or cancel the operation with the Cancel button.
12 • Metadata
92
SigmaLink Workbench 1.101 - User Guide
13
Annotations to Information Objects
Related Topics:
• Split and Join (page 74)
• Properties of Information Objects (page 79)
• Metadata (page 86)
• Links (page 97)
• Reusing Information Objects (page 124)
• Search and Retrieval (page 126)
• SigmaLink Version Control (page 145)
• Referenced Objects (page 153)
• Workflow (page 159)
In addition to metadata SigmaLink Workbench allows the user to keep annotations about
information objects. Furthermore the author is able to add individual annotations about the
content or the current status of the information object. An information object with an annotation is represented by the annotation symbol:
. Annotations can be viewed, edited or deleted at any time.
It is also possible to categorize annotations into types. This is customized on the server
by the SigmaLink administrator. An example would be to configure annotation types that
correspond to the user groups involved in the editorial processes of a publishing project,
such as Authors Annotation, Editors Annotation or Administrative Annotation.
Ð
1
2
3
Adding an annotation to an information object
In the Metadata Window, highlight the information object you wish to add an annotation to.
In the toolbar select the annotation icon. This opens the dialog window Properties of
[name of information object] with the annotations tab active. Proceed to step 5.
or:
In the menubar select Information object.
From the Information object menu select the Properties submenu.
Note:
The option Properties dialog is available from the context sensitive menu in the Metadata Window of SigmaLink Workbench as well. Highlight the information object
using the right mouse button in the metadata window. Select Properties in the context sensitive menu with the left mouse button.
4
Select Annotation. This opens the dialog window Properties of [name of information object] with the annotations tab active.
13 • Annotations to Information Objects
93
SigmaLink Workbench 1.101 - User Guide
Fig. 44: The Annotations dialog window
5
6
7
Select New.... The new annotation is added to the list of existing annotations.
Enter the text of the annotation in the field Current annotation text.
Select an annotation type from the list of available types.
Note:
Please note that even though a type may be listed in the dialog you may not have the
permissions to create it. Permission to create, view and edit annotation is based on
group membership.
8
Click on Apply to confirm the entries. The information object is now preceded by
in the Metadata Window. Additional annotations can now be created.
or:
Click on OK to confirm the entries and close the dialog. The information object is now
preceded by
in the Metadata Window.
Note:
To show the most recent information select Refresh in the Properties Dialog.
Ð
Editing or deleting annotations to information objects
Caution:
Deleted annotations cannot be restored (no undo!).
1
In the Metadata Window, highlight the information object whose annotation is to be
edited/deleted.
13 • Annotations to Information Objects
94
SigmaLink Workbench 1.101 - User Guide
2
3
In the toolbar select the annotation icon. This opens the dialog window Properties of
[name of information object] with the annotations tab active. Proceed to step 5.
or:
In the menubar select Information object.
From the Information object menu select the Properties submenu.
Note:
The option Properties dialog is available from the context sensitive menu in the Metadata Window of SigmaLink Workbench as well. Highlight the information object
using the right mouse button in the metadata window. Select Properties in the context sensitive menu with the left mouse button.
4
Select Annotation. This opens the dialog window Properties of [name of information object] dialog with the annotations tab active.
Fig. 45: The Annotations dialog window
5
Highlight the annotation to be edited/deleted.
Note:
An annotation type must be selected if one or more annotation types have been configured. This selection will filter the display of annotations in the annotation list. Only
annotations of the selected type will be shown in the list.
Keep in mind that while you may be able to select an annotation you may not have
the permissions to edit or delete it. These permissions are based on group membership.
6
To edit click on the Allow Edit button. Make the appropriate changes to the annotation text.
To delete the annotation click on Delete.
13 • Annotations to Information Objects
95
SigmaLink Workbench 1.101 - User Guide
Caution:
Delete cannot be undone.
7
8
Click on Apply to confirm the entries. Other annotations can now be edited, deleted
or added.
Click on OK to confirm the entries and close the dialog.
13 • Annotations to Information Objects
96
SigmaLink Workbench 1.101 - User Guide
14
Links
Related Topics:
• Split and Join (page 74)
• Properties of Information Objects (page 79)
• Metadata (page 86)
• Annotations to Information Objects (page 93)
• Reusing Information Objects (page 124)
• Search and Retrieval (page 126)
• SigmaLink Version Control (page 145)
• Referenced Objects (page 153)
• Workflow (page 159)
Topics in this Unit:
•
Link Categories (page 99)
•
Creating Links (page 102)
•
Following Links (page 112)
•
Cancelling Links (page 119)
•
Deleting Links (page 120)
SigmaLink supports five categories of link mechanisms:
1. Object to object links
2. Object to content links
3. Content to object links
4. Content to content links
5. Document internal links
All link mechanisms rely on the SGML structure of the information objects with the exception of the object to object links. These are controlled entirely by SigmaLink and do not
affect the content of the information objects.
SigmaLink offers a link concept that utilizes SGML link technology and guides the user
through the process of placing links.
SGML based links are created and edited in the editor. Object to object links are created
in the Metadata Window of SigmaLink Workbench.
All links in SigmaLink are bidirectional. All link targets “know” the source of the link and all
link sources “know” where they are pointing to. Information objects, or the SGML elements in them, can be target of several links or target and source of different links (multiple links).
SigmaLink uses small arrows in the information object symbol to indicate source (
and target (
) of a link.
)
14 • Links
97
SigmaLink Workbench 1.101 - User Guide
The functions Reusing information objects (’Paste as link’) and Referenced objects should
not be confused with the five categories of links listed above as these functions are not
links in the strict sense of the word.
Links can be grouped into categories. This is a customization that is done on the server
by the SigmaLink administrator. An example of a link category would be object to object
links between an SGML based information object that is the result of a conversion process
and its source in MS Word format. This link category might be called Manuscript Link.
Another example of a link category might describe an SGML based information object and
graphics objects used in it and could be called Graphics Link.
14 • Links
98
SigmaLink Workbench 1.101 - User Guide
14.1
Link Categories
Related Topics:
• Creating Links (page 102)
• Following Links (page 112)
• Cancelling Links (page 119)
• Deleting Links (page 120)
Topics in this Unit:
•
Assigning Link Categories (page 100)
•
Using Link Categories (page 101)
Links can be grouped into categories. This is a customization that is done on the server
by the SigmaLink administrator. An example of a link category would be object to object
links between an SGML based information object that is the result of a conversion process
and its source in MS Word format. This link category might be called Manuscript Link.
Another example of a link category might describe an SGML based information object and
graphics objects used in it and could be called Graphics Link.
14 • Links
99
SigmaLink Workbench 1.101 - User Guide
14.1.1 Assigning Link Categories
Related Topics:
• Using Link Categories (page 101)
Link categories are assigned automatically by SigmaLink if they have been configured by
the administrator. The selection of the category that is assigned by Sigmalink is based on
a number of preconfigured characteristics:
– Object type of the source IO
– Object type of the target IO
– Name of link anchor element within the source IO (if applicavble)
– Name of link target element within the target IO (if applicable)
The last two characteristics will be ignored if the link does not involve content, such as an
object to object link.
There is no user action required or possible to control the assignment of link categories
when creating a link.
Whenever the user creates a link for which a matching set of defining characteristics has
been configured by the administrator that link is automatically assigned the corresponding
category.
14 • Links 100
SigmaLink Workbench 1.101 - User Guide
14.1.2 Using Link Categories
Related Topics:
• Assigning Link Categories (page 100)
All defined link categories are listed in the Links tab of the Properties dialog. Selecting a
category will filter the list of source and target IOs in the IO list of the dialog. Only links of
the corresponding category will be displayed.
Placing Links of a Particular Category
This description is an example based on the following assumptions:
The link category Person Link has been configured and represents links from an author
of a biography to an encyclopedia entry with information about the author.
Factors
– content to content link
– source object type “BIOGRAPHY”
– link anchor element “AUTHOR”
– target object type “ENCYCLOPEDIA”
– link target element “ENTRY”
The above information will be used by SigmaLink to assign the category Person Link automatically to any content to content link placed between an IO of the type “BIOGRAPHY”
in anchor element “AUTHOR” and an IO of the type “ENCYCLOPEDIA” in target element
“ENTRY”.
In order for the user to be able to choose whether to use a link category or not and which
category to use, the document type would have to be customized to provide alternative
link elements for which no category or a different catagory has been defined.
Ð
1
2
3
Selecting a Link Category in the Link Control
From the menu Information object select the Properties submenu.
Select Links ... from the Properties submenu.
Select one of the defined categories from the category list by double clicking its entry.
The list of IOs in the link control is now limited to links of the specified category.
14 • Links 101
SigmaLink Workbench 1.101 - User Guide
14.2
Creating Links
Related Topics:
• Link Categories (page 99)
• Following Links (page 112)
• Cancelling Links (page 119)
• Deleting Links (page 120)
Topics in this Unit:
•
Object to Object Links (page 103)
•
Object to Content Links (page 104)
•
Content to Object Links (page 106)
•
Content to Content Links (page 108)
•
Document Internal Links (page 110)
SigmaLink groups links into 5 types (object to object, object to content, content to object,
content to content and document internal ) each of which will be covered in a subunit of
this unit.
This unit will not cover including links and subdocument references as these are not links
in the strict sense of the word. The topics will be covered in two other units:
1. Including Links (page 154)
2. Subdocument References (page 157)
14 • Links 102
SigmaLink Workbench 1.101 - User Guide
14.2.1 Object to Object Links
Related Topics:
• Object to Content Links (page 104)
• Content to Object Links (page 106)
• Content to Content Links (page 108)
• Document Internal Links (page 110)
Object to object links use information objects both for the link source and for the link target. Object to object links do not depend on the object type of the information objects linked. All object types can be linked to one another (Word document to SGML document,
for example).
Object to object links are used to indicate a general relationship between information objects.
Showing Object to Object Links in the Metadata Window
The Metadata Window shows the individual information objects of a container along with
their metadata. Each information object is preceded by a symbol. Arrows in these symbols
indicate whether an object is the target of a link, the source of a link or both.
The link source is indicated by a right arrow (
The link target is indicated by a left arrow (
).
)
If an information object is both source and target of a link its symbol has an arrow pointing
both left and right (
).
Ð
1
2
3
4
5
Creating object to object links
In the Metadata Window highlight the information object intended to become the link
source.
Select Link source from the Information object menu or from the context sensitive
menu or click on the corresponding Link source button in the toolbar. The name of
the information object is now preceded by
.
If the information object is also a link target, the following symbol is used:
.
After the link source has been defined you can navigate throughout the Infopool to
select the intended target.
Highlight the information object intended to become the link target.
Select Link target from the Information object menu, the context sensitive menu or
click on the button Link target in the toolbar. The name of the information object is
now preceded by
.
If the object is also a link source the bidirectional arrow is generated (
).
The link symbols are not displayed until after both link source and target have been
specified.
The arrows only indicate that the information object contains a link to or from another object. The Link control displays a complete list of all links to or from an information object.
The link control can be accessed either through the Information object menu or by
clicking on the corresponding Link control button in the toolbar.
14 • Links 103
SigmaLink Workbench 1.101 - User Guide
14.2.2 Object to Content Links
Related Topics:
• Object to Object Links (page 103)
• Content to Object Links (page 106)
• Content to Content Links (page 108)
• Document Internal Links (page 110)
Object to content links point from an object to a selected part of the content of another
information object. They are used to link one information object to a relevant part of
another information object. Elements to be used for this type of link must be defined in the
document type definition (DTD) to support the link concepts of SigmaLink. Usually such
elements are called xref, link, startlink, targetlink etc. with the necessary attributes assigned to them in the DTD. The elements can, of course, have any name. The link mechanisms in SigmaLink use the attributes of link elements.
An object to content link could, for example, link an object containing an article about Wolfgang Amadeus Mozart to a position within an opera guide with information about “The Magic Flute”.
Ð
1
2
3
4
5
Creating object to content links
Highlight the source object of the link in the Metadata Window of SigmaLink Workbench.
Select Link source from the Information object menu or click on the Link source
button in the toolbar.
Highlight the target object of the link in the Metadata Window.
Select Edit from the Edit menu or the context sensitive menu or click on the Edit button in the toolbar. The integrated editor starts and the object is opened for editing.
Insert the element defining a link target at the appropriate position in the document.
Note:
The command Cancel Link in the SigmaLink menu of the editor can be used to cancel the procedure.
6
7
8
Position the cursor inside the target element. If the element is an empty element (element without content, often used for graphics) place the cursor to the right of the element.
Select Target link from the SigmaLink menu.
SigmaLink generates the necessary attribute values and completes the link.
To check the information object in either select Check in from the SigmaLink menu
or
save the object in File menu within the editor, close the editor and select Check in
from the Information object menu in SigmaLink Workbench.
Note:
All links except for object to object links must be deleted from the editor, because deleting
such links requires changes to be made to document instance. Place the cursor inside the
14 • Links 104
SigmaLink Workbench 1.101 - User Guide
link element and select Delete a link from the SigmaLink menu. Care should also be taken to delete the link element as well if it is no longer needed.
If an SGML based link is deleted in any other way it will prevent deletion of any source or
target information objects in the workbench because the server will consider the links still
active.
14 • Links 105
SigmaLink Workbench 1.101 - User Guide
14.2.3 Content to Object Links
Related Topics:
• Object to Object Links (page 103)
• Object to Content Links (page 104)
• Content to Content Links (page 108)
• Document Internal Links (page 110)
Content to object links point from a selected part of the content of an information object to
another information object. Links from the content of an information object to other information objects can only be created if the link source is an SGML document instance. Elements to be used for this type of link must again be defined in the document type definition
to support the link concepts of SigmaLink. Frequently such elements are called xref, link,
startlink, targetlink etc. with the necessary attributes assigned to them in the DTD.
A content to object link can, for example, be used to point from a headword “The Magic
Flute” to an information object containing a list of all the works of Wolfgang Amadeus Mozart.
Ð
1
2
3
4
5
Creating content to object links
Highlight the information object you want to create the link source in and click on Edit
in the context sensitive menu. The information object is being loaded into the editor.
Insert the element you want to use for the link source (e.g. Link start) in the appropriate position.
Position the cursor inside the source element. If you cannot do this because the element is displayed as a “box”, position the cursor after the element. Such an element
cannot be filled with any content, it is called an empty element.
In the menubar of the editor, click on SigmaLink.
Select Start Link from the SigmaLink menu.
Note:
If you want to cancel the creation of the link, select Cancel Link from the SigmaLink
menu.
6
7
8
9
Keep the editor open and make the SigmaLink Workbench user interface the active
window. In the Metadata Window highlight the target object.
Click on Link target in the Information object menu or in the context sensitive
menu.
or
select the Link target button from the toolbar.
The link is being connected.
Save the information object in the editor. The link is now created.
To check the information object in again select Check in in the SigmaLink menu inside the editor window
or
save the document, close the editor and select Check in in the Information object
menu inside the editor.
14 • Links 106
SigmaLink Workbench 1.101 - User Guide
Note:
All links except for object to object links must be deleted from the editor, because deleting
such links requires changes to be made to document instance. Place the cursor inside the
link element and select Delete a link from the SigmaLink menu. Care should also be taken to delete the link element as well if it is no longer needed.
If an SGML based link is deleted in any other way it will prevent deletion of any source or
target information objects in the workbench because the server will consider the links still
active.
14 • Links 107
SigmaLink Workbench 1.101 - User Guide
14.2.4 Content to Content Links
Related Topics:
• Object to Object Links (page 103)
• Object to Content Links (page 104)
• Content to Object Links (page 106)
• Document Internal Links (page 110)
Content to content links point from a selected part of the content of an information object
to a selected part of the content of another information object. Content to content links are
based on SGML structures and can therefore only be created if the type of both information objects is SGML.
This kind of link could for example be used to link an artists name in an article to an appropriate entry with information about the artist in an encyclopaedia.
The ArborText Adept•Editor, which is integrated in SigmaLink Workbench, supports the
creating of links. It is, however, necessary that the SGML elements intended to be used
are declared in the document type definition. This configuration is normally made when
document type is designed and installed on the server.
The information object a user wants to insert a link into must be checked out by the user
before creating the link and must be checked in afterwards. For checking an information
object out the information object must be “available”, i.e. it must not have already been
checked out by another user. In addition the user must have permission to check the object out and check out must allowed in the object's current workflow status.
Content to content links are created in the SGML editor. Elements to be used for this type
of link must be defined in the document type definition. Frequently such elements are called xref, link, startlink, targetlink etc. with the necessary attributes assigned to them in
the DTD.
Ð
1
2
3
4
Creating content to content links
Highlight the information object you want to create the link source in and click on Edit
in the context sensitive menu. The information object is loaded into the editor.
Insert the element intended to be used for the link source (e.g. Link start) at an appropriate position in the document.
Position the cursor inside the source element. If you cannot do this because the element is displayed as a “box”, position the cursor after the element. Such an element
cannot be filled with any content and is called an “empty” element.
Select Start Link from the SigmaLink menu. The link source is now created.
Note:
Occasionally the Adept•Editor will not show the required menu items as being available. This is because the editor must “see” a suitable link element in order to manipulate its attribute values. The Adept•Editor “looks” to the right of the current cursor
position for this element. If Track context has been enabled in the editor's Options
menu the status line at the bottom of the editor window will show the current position
in the document's hierarchy. If it does not list the intended link element move the cursor back and forth with the arrow keys. The element will then be listed and the corresponding menu items become active.
14 • Links 108
SigmaLink Workbench 1.101 - User Guide
Start link can be cancelled by selecting Cancel Link in the SigmaLink menu.
5
Load the information object you want to create the link target in into the editor by selecting Edit in new window from the context sensitive window. In the editor two windows are open now.
Note:
Selecting Edit rather than Edit in new window will cause Adept to close the first window. If this occurs it is important to select Yes when prompted to save the first object
so that the process of placing the link can be restarted. Otherwise all unsaved the information entered in the first object will be lost and the link cannot be completed.
Insert the element intended for creating the link target in (e.g. Link target) in the appropriate position.
7 Position the cursor inside the target element. If you cannot do this because the element is displayed as a “box”, position the cursor after the element. Such an element
cannot be filled with any content, it is called an empty element.
8 Select Target Link from the SigmaLink menu.
The link is being connected.
9 Save both information objects. The link is now created.
10 To check the information objects in select Check in from the SigmaLink menu
or
save the information objects, close the editor, and select Check in from the Information object menu inside SigmaLink Workbench.
6
Note:
All links except for object to object links must be deleted from the editor, because deleting
such links requires changes to be made to document instance. Place the cursor inside the
link element and select Delete a link from the SigmaLink menu. Care should also be taken to delete the link element as well if it is no longer needed.
If an SGML based link is deleted in any other way it will prevent deletion of any source or
target information objects in the workbench because the server will consider the links still
active.
14 • Links 109
SigmaLink Workbench 1.101 - User Guide
14.2.5 Document Internal Links
Related Topics:
• Object to Object Links (page 103)
• Object to Content Links (page 104)
• Content to Object Links (page 106)
• Content to Content Links (page 108)
Document internal links can be regarded as a special case of content to content links. Document internal links, however, have both their source and target inside the same information object. They are based on SGML structures and can therefore only be created if
the type of the information object is SGML.
SigmaLink includes a customized feature for the ArborText Adept•Editor supporting both
the creation of links and the definition of identifiers. The document type definition must
include definitions of the elements used as link sources or targets. The customization of
the DTD is done when SigmaLink is installed and configured on the server.
Fig. 46: ADEPT•Editor with a document internal link (ID IDREF)
Ð
1
2
3
Creating document internal links
Highlight the information object you want to create the link in and select Edit from the
context sensitive menu. The information object is being loaded into the editor.
Insert the element you want to use for the link source in the appropriate position.
Position the cursor inside the source element. If you cannot do this because the element is displayed as a “box”, position the cursor after the element. Such an element
cannot be filled with any content, it is called an empty element.
14 • Links 110
SigmaLink Workbench 1.101 - User Guide
4
5
The cursor being positioned properly you can select Start Link from the SigmaLink
menu.
Click on Start Link in the SigmaLink menu. The link source is now created.
Note:
If you decide not to create the link select Cancel Link from the SigmaLink menu.
6
7
8
9
Insert the element intended to become the link target.
Position the cursor inside the target element. If you cannot do this because the element is displayed as a “box”, position the cursor after the element. Such an element
cannot be filled with any content, it is called an empty element.
In the SigmaLink menu select Target Link. SigmaLink Workbench will automatically
insert the identifiers necessary for the link.
Save the information object, close the editor and select Check in from the Information object menu inside SigmaLink Workbench.
Note:
All links except for object to object links must be deleted from the editor, because deleting
such links requires changes to be made to document instance. Place the cursor inside the
link element and select Delete a link from the SigmaLink menu. Care should also be taken to delete the link element as well if it is no longer needed.
If an SGML based link is deleted in any other way it will prevent deletion of any source or
target information objects in the workbench because the server will consider the links still
active.
14 • Links 111
SigmaLink Workbench 1.101 - User Guide
14.3
Following Links
Related Topics:
• Link Categories (page 99)
• Creating Links (page 102)
• Cancelling Links (page 119)
• Deleting Links (page 120)
Topics in this Unit:
•
Following Links from the Metadata Window (page 113)
•
Following Links in the Viewer (page 115)
•
Following Links in the Editor (page 118)
Ther are several ways to follow a link in the SigmaLink Workbench:
1. from the link control dialog in the Metadata window
2. from the context sensitive menu in the Metadata window
3. from the SGML viewer
4. from the SGML editor
The following units will describe the various means of following links in detail.
14 • Links 112
SigmaLink Workbench 1.101 - User Guide
14.3.1 Following Links from the Metadata Window
Related Topics:
• Following Links in the Viewer (page 115)
• Following Links in the Editor (page 118)
The link control dialog provides a complete list of existing links to or from any information
object in. All five link types can be displayed in this dialog and the source and target objects can be viewed or edited from the link control. The link control is accessed through
the properties dialog in the Information object menu.
In the Metadata window the information objects in the containers are displayed together
with their corresponding metadata. The name of an information object is always preceded
by a book symbol which will have arrows in it if the information object is a link source or a
link target or both.
The link source is indicated by a right arrow (
The link target is indicated by a left arrow (
).
).
If an information object is both source and target of a link, its symbol has an arrow pointing
both left and right (
).
The Link control dialog lists all links pointing to or from an information object, the link types and defined link categories.
Ð
1
2
Opening the Link control dialog window
Highlight an information object containing a link source or target in the Metadata window.
Select Properties from the menu Information objects or from the context sensitive
menu
14 • Links 113
SigmaLink Workbench 1.101 - User Guide
3
Select the Links tab in the properties dialog
or
select the Link control button from the toolbar.
Fig. 47: The Links tab in the Properties dialog window
Note:
To show the most recent information select Refresh in the Properties Dialog.
The field Direction provides a choice to display either sources or targets of links in the object list. Switching between Link source and Link target will display the sources and targets respectively.
The field Type lists the five link types in SigmaLink. They can be selected or deselected
individually.
The category list displays all link categories that have been defined. Undefined is displayed if no categories exist.
Individual links that are highlighted in the object list can be edited by selecting Edit Target
from the Links tab of the dialog window.
Individual links that are highlighted in the object list can be viewed by selecting View Target from the Links tab of the dialog window.
To delete a link, highlight the information object in the object list and select Delete Link.
Only object to object links can be deleted in the link control dialog. SGML based links have
to be deleted in the SGML editor.
The Edit, View and Refresh buttons beneath the Links tab are part of the properties dialog window and affect the information object highlighted in the metadata window, not the
information object highlighted in the object list of the Links tab.
14 • Links 114
SigmaLink Workbench 1.101 - User Guide
14.3.2 Following Links in the Viewer
Related Topics:
• Following Links from the Metadata Window (page 113)
• Following Links in the Editor (page 118)
SigmaLink features an integrated viewer for SGML objects. This viewer displays information objects according to styles defined for the different document types. These style
sheets, as they are called, can be customized to suit the users needs. The SigmaLink administrators or document designers provide the style sheets for the various document types managed in SigmaLink.
There are several alternatives to start the viewer.
Ð
1
2
Ð
1
2
3
4
Starting the viewer
Highlight an information object in the Metadata window.
Click on View in the Edit menu.
Alternatives for starting the viewer
Highlight an information object and click on View in the toolbar
Click on the information object with the right mouse button and select View from the
context sensitive menu.
Doubleclick on the information object to be displayed in the viewer.
Highlight an information object and hit Enter on the keyboard.
Showing Links
The SGML based link mechanisms available in SigmaLink are supported by the viewer.
Frequently the text in the links will be underlined or it may simply appear in a different color. Empty elements that represent links are symbolized by blue arrows or “radio buttons”.
Font size, color etc. of the links depend on the stylesheet definitions and can be customized.
14 • Links 115
SigmaLink Workbench 1.101 - User Guide
In the example below a content to content link is used to link the title of the english version
of a brochure to its german counter part.
Fig. 48: Example for the display of link sources and targets in the STEP SGML viewer (in this case a content
to content link is displayed)
14 • Links 116
SigmaLink Workbench 1.101 - User Guide
If there is a target for a link source, this will be indicated by
Ð
1
2
in the viewer.
Following a link in the viewer
Click on the link with the mouse.
The target document of the link is loaded into the viewer.
14 • Links 117
SigmaLink Workbench 1.101 - User Guide
14.3.3 Following Links in the Editor
Related Topics:
• Following Links from the Metadata Window (page 113)
• Following Links in the Viewer (page 115)
Ð
1
2
Starting the editor
Highlight an information object in the Metadata Window.
Select Edit from the Edit menu or from the context sensitive menu.
or:
Ð
1
2
Alternate means to start the editor
Highlight an information object in the Metadata Window.
Click on the Edit button in the toolbar.
or
Highlight an information object and press Ctrl+Enter on the keyboard.
From the SGML editor links can be followed by selecting Follow Link in the SigmaLink
menu.
Ð
1
2
Following a link in the editor
Position the cursor inside the link element. For empty elements position the cursor to
the right of the element. It may be neccessary to move the cursor back and forth once
using the arrow keys for the editor to “see” the element because the editor “looks” to
the right of the current cursor position.
Select Follow Link from the SigmaLink menu within the editor.
The information object is loaded into the viewer.
14 • Links 118
SigmaLink Workbench 1.101 - User Guide
14.4
Cancelling Links
Related Topics:
• Link Categories (page 99)
• Creating Links (page 102)
• Following Links (page 112)
• Deleting Links (page 120)
Link operations started by the user can be cancelled by selecting Cancel link from the
editor’s SigmaLink menu. This automatically deselects the link icon in the toolbar as well.
Cancelling applies only to incomplete linking operations. If a link has already been completed, delete it using the Delete a link option in the same menu (Deleting Links (page
120)).
14 • Links 119
SigmaLink Workbench 1.101 - User Guide
14.5
Deleting Links
Related Topics:
• Link Categories (page 99)
• Creating Links (page 102)
• Following Links (page 112)
• Cancelling Links (page 119)
Topics in this Unit:
•
Deleting Links in the Metadata Window (page 121)
•
Deleting Links in the Editor (page 123)
Only object to object links can be deleted in the Metadata Window, all other link types
must be deleted in the integrated SGML editor using the SigmaLink menu. This is necessary to insure consistency between link IDs stored in the document instance and the corresponding link information stored in the SigmaLink database.
14 • Links 120
SigmaLink Workbench 1.101 - User Guide
14.5.1 Deleting Links in the Metadata Window
Related Topics:
• Deleting Links in the Editor (page 123)
Ð
1
Deleting an object to object link
Select Link control from the Information object menu or from the context sensitive
menu.
or:
Click on the Link control button in the toolbar to open the Link control dialog window.
Fig. 49: The Link control dialog window
Note:
To show the most recent information select Refresh in the Properties Dialog.
The field Direction provides a choice to display either sources or targets of links in the object list. Switching between Link source and Link target will display the sources and targets respectively.
The field Type lists the five link types in SigmaLink. They can be selected or deselected
individually.
Individual links that are highlighted in the object list can be edited by selecting Edit Target
from the Links tab of the dialog window.
Individual links that are highlighted in the object list can be viewed by selecting View Target from the Links tab of the dialog window.
14 • Links 121
SigmaLink Workbench 1.101 - User Guide
To delete a link, highlight the information object in the object list and select Delete Link.
Only object to object links can be deleted in the link control dialog. SGML based links have
to be deleted in the SGML editor.
Ð
1
2
Deleting a link from the Metadata Window
Highlight the information object in the object list of the Link control dialog.
Click on Delete Link.
Note:
The Delete button is only activated if the link is an object to object link. SGML based
links can only be deleted in the editor.
3
Click on OK to close the dialog window.
14 • Links 122
SigmaLink Workbench 1.101 - User Guide
14.5.2 Deleting Links in the Editor
Related Topics:
• Deleting Links in the Metadata Window (page 121)
SGML based links can only be deleted in the SGML editor.
To delete links created in the integrated editor follow this procedure:
Ð
1
2
3
Deleting an SGML link in the integrated editor
Load the information object that contains the link into the editor.
Position the cursor inside the link element. For empty elements position the cursor to
the right of the element. It may be necessary to move the cursor back and forth once
using the arrow keys for the editor to “see” the element because the editor looks forward from the current cursor position.
Click on Delete Link in the SigmaLink menu of the editor. The link will be deleted.
The corresponding link elements are kept in the SGML document instance and can be
used for creating new links. It is recommended to delete the link elements in the editor if
they are no longer needed.
Note:
The following description refers to the ArborText Adept•Editor. If another SGML editor is
used refer to its manual for information on how to delete links.
Ð
1
2
3
Deleting link elements in the editor
Position the cursor inside the element you want to delete.
Click on Select Element in the Edit menu.
Select Delete Markup from the Markup menu. The SGML element is deleted while
its content is retained by the editor.
14 • Links 123
SigmaLink Workbench 1.101 - User Guide
15
Reusing Information Objects
Related Topics:
• Split and Join (page 74)
• Properties of Information Objects (page 79)
• Metadata (page 86)
• Annotations to Information Objects (page 93)
• Links (page 97)
• Search and Retrieval (page 126)
• SigmaLink Version Control (page 145)
• Referenced Objects (page 153)
• Workflow (page 159)
In this documentation reuse of information objects is referred to as paste as link. This is
an alternative to the copy function. Information objects used in different contexts are often
copied and pasted to another position, which is not only a problem of space on the affected harddrive but, more importantly, a problem of redundancy since it requires considerable resources in manpower to maintain the information. In case the content of a document
changes, those changes have to be made to where ever the document happens to be
used.
Copy and Paste as Link
SigmaLink makes it possible to insert copied information as links in another position. There is actually only a single information object that is used in various containers. Reused
information objects are treated much like links rather than physically copying objects to
other locations.
Reused information objects are preceded by
in the Metadata Window. This symbol
preceeds both the “original” and the “copy” of the information object. There is no difference between the two. The pasted object can be viewed and edited in every location
where it is used, provided the users have the proper permissions to do so. Obviously
changes to one “copy” will affect all copies throughout the system.
Ð
1
2
3
4
5
Pasting an information object as a link
Highlight the information object to be copied.
Select Copy from the context sensitive menu or from the Edit Menu.
Select the position in the container tree where the information object is to be pasted
as a link.
Select Paste as link from the context sensitive menu or from the Edit menu.
The information object is inserted as a link. Both the “original” information object and
the “copy” are preceded by
.
15 • Reusing Information Objects 124
SigmaLink Workbench 1.101 - User Guide
Managing Reused Objects
The Reuse tab in the Properties dialog lists all occurances of an information object in SigmaLink. The information objects title and the container path is given.
Fig. 50: The Reuse tab in the Properties dialog
Ð
1
2
3
Deleting Reused Information Objects
Select the Reuse tab in the Properties dialog
Highlight the reused object with the container path from which it is to be removed.
Select Delete
Note:
Only the highlighted Reused information object is deleted. The remaining reused information objects are not affected.
Note:
The list of reused information objects is not updated automatically once the dialog has
been opened. The list will not reflect new reused objects pasted in the Workbench until it
has been refreshed.
Ð
1
2
Refreshing the Reused Information Object list
Select the Reuse tab in the Properties dialog
Select Refresh
15 • Reusing Information Objects 125
SigmaLink Workbench 1.101 - User Guide
16
Search and Retrieval
Related Topics:
• Split and Join (page 74)
• Properties of Information Objects (page 79)
• Metadata (page 86)
• Annotations to Information Objects (page 93)
• Links (page 97)
• Reusing Information Objects (page 124)
• SigmaLink Version Control (page 145)
• Referenced Objects (page 153)
• Workflow (page 159)
Topics in this Unit:
•
Metadata Search (page 127)
•
Structured Fulltext Search (page 130)
•
Combined Search (page 133)
•
Saving and Loading Queries (page 134)
•
Native Search (page 136)
•
Predefined Queries (page 138)
•
Quick Search (page 140)
•
Saving and Loading Search Result Lists (page 142)
Information Retrieval in the SigmaLink Database
One of the critical factors for the successful completion of tasks and work processes in a
company is the timely and adequate distribution of information. Mechanisms that allow
fast and effective navigation in and retrieval of corporate information are continually gaining importance.
SigmaLink supports several concepts:
– Search across administrative data (metadata) to retrieve information
– Structured fulltext search
– Combined fulltext and relational search
– Predefined and reusable queries
– Native queries using command line SQL statements
– Showing multiple use of information objects
Optimized support of search and retrieval is instrumental for improving efficiency and the
first step in avoiding redundancy.
16 • Search and Retrieval 126
SigmaLink Workbench 1.101 - User Guide
16.1
Metadata Search
Related Topics:
• Structured Fulltext Search (page 130)
• Combined Search (page 133)
• Saving and Loading Queries (page 134)
• Native Search (page 136)
• Predefined Queries (page 138)
• Quick Search (page 140)
• Saving and Loading Search Result Lists (page 142)
Metadata forms the basis of the management of information objects in SigmaLink. Search
and retrieval across metadata provides the most important mechanism of navigating the
information pool in addition to the ability to move through the various levels of the Infopool
using the hierarchical display of the structure in Hierarchy Window.
Ð
Searching across metadata
Note:
Searching in the relational database (or any other database, for that matter) requires an
online connection to the server.
1
2
Select Metadata search from the Search menu.
Make the necessary entries in the Metadata search dialog window (see options below).
Fig. 51: Metadata tab in the Search dialog window
16 • Search and Retrieval 127
SigmaLink Workbench 1.101 - User Guide
3
Start the search with Start search or cancel with Close.
Options for Metadata Search
The Metadata search dialog window in the SigmaLink Workbench allows multiple search
values. Each search value is associated with a field in which the metadata to be searched
must be specified. A drop down list displays all available metadata fields.
The administrator configures the drop down lists to include or exclude metadata for search and retrieval. The drop down lists do not necessarily contain all the metadata maintained by SigmaLink but they may (and usually do) contain more entries than are visible
in the Metadata Window or the Metadata tab of the Properties dialog.
The individual search values can be combined with Boolean operators to improve the
accuracy of the search result:
Operator
Function
IN
A string must be found within a selected field to produce a
hit.
NOT IN
A string must not be found within the selected field to produce a hit.
LT (less than)
The content of the selected field must be smaller than the
search item to produce a hit.
GT (greater than)
The content of the selected field must be greater than the
search item to produce a hit.
LE (less or equal)
The content of the selected field must be smaller than or
equal to the search item to produce a hit.
GE (greater or equal)
The content of the selected field must be greater than or
equal to the search item to produce a hit.
Operator
Function
AND
The preceding and the following condition must both be met
to produce a hit.
OR
Either the preceding or the following condition must be met
to produce a hit.
ANDNOT
The first condition must be met and the following condition
must NOT be met to produce a hit.
NOT
The following condition must NOT be met to produce a hit.
In addition, by activating or deactivating the appropriate radio buttons in the Search in...
field, the scope of the search operation can
– be limited to the current container,
16 • Search and Retrieval 128
SigmaLink Workbench 1.101 - User Guide
– be limited to the current publishing project or
– be extended to the entire Infopool.
It is possible to limit the maximum number of hits to avoid excessively long search times
or to produce a sample of the hits found in the Infopool by checking the corresponding
option in the dialog window (click a second time to clear the check mark).
SigmaLink’s integrated search engine supports the use of wildcards. In the metadata search the percent sign (%) can be used to substitute one or more subsequent characters
in the search value. The search value “Tool%” could produce the following result:
– Toolbar
– Toolbox
– Toolshed
– Tools
The search results are displayed in the Search result window. Information objects can be
viewed and edited from this window. The context sensitive menu (right mouse click) lists
all available items.
Fig. 52: The context sensitive menu in the Search result window
16 • Search and Retrieval 129
SigmaLink Workbench 1.101 - User Guide
16.2
Structured Fulltext Search
Related Topics:
• Metadata Search (page 127)
• Combined Search (page 133)
• Saving and Loading Queries (page 134)
• Native Search (page 136)
• Predefined Queries (page 138)
• Quick Search (page 140)
• Saving and Loading Search Result Lists (page 142)
A structured fulltext search makes it possible to limit the search to certain elements in the
document instance. It may be undesirable to find every occurrence of Miller if you are only
interested in the beverage ’Miller’. Limiting a search to an element <beverage> drastically improves the accuracy of the search result (the document type must, of course, include such an element).
Ð
Fulltext search and retrieval
Note:
Full text search requires an online connection to the server.
1
2
Select Fulltext search from the Search menu.
Make the appropriate entries in the Full text search dialog (see options below).
16 • Search and Retrieval 130
SigmaLink Workbench 1.101 - User Guide
Fig. 53: The Fulltext tab in the Search dialog window
3
Start the search with Start search or cancel the search with Close.
Options for Fulltext Search
The fulltext search dialog in SigmaLink Workbench allows multiple search values. Each
search value is associated with a Element name. A drop down list displays all available
element names.
The administrator configures the drop down lists to include or exclude elements for search
and retrieval. The drop down lists do not necessarily contain all the elements defined in
the document type definition (DTD).
The individual search values can be combined with Boolean operators to improve the
accuracy of the search result:
Operator
Function
AND
The preceding and the following condition must both be met to produce
a hit.
OR
Either the preceding or the following condition must be met to produce
a hit.
ANDNOT
The preceding condition must be met and the following condition need
not be met to produce a hit.
16 • Search and Retrieval 131
SigmaLink Workbench 1.101 - User Guide
In addition, by activating or deactivating the appropriate radio buttons in the Search in...
field, the scope of the search operation can
– be limited to the current publishing project or
– be extended to the entire Infopool.
It is possible to limit the maximum number of hits to avoid excessively long search times
or to produce a sample of the hits found in the Infopool by checking the corresponding
option in the dialog window (click a second time to clear the check mark).
SigmaLink’s integrated search engine supports the use of wildcards. In the metadata search the asterisk (*) can be used to substitute two or more subsequent characters, and
the question mark (?) can be used to substitute one character in the search value. The
search value “Tool*” could produce the following result:
– Toolbar
– Toolbox
– Toolshed
– Tools
Under the same conditions, however, the search value “Tool?” would produce only the result Tools.
The search results are displayed in the Search result window. Information objects can be
viewed and edited from this window. The context sensitive menu (right mouse click) lists
all available operations and commands.
16 • Search and Retrieval 132
SigmaLink Workbench 1.101 - User Guide
16.3
Combined Search
Related Topics:
• Metadata Search (page 127)
• Structured Fulltext Search (page 130)
• Saving and Loading Queries (page 134)
• Native Search (page 136)
• Predefined Queries (page 138)
• Quick Search (page 140)
• Saving and Loading Search Result Lists (page 142)
The two primary means of searching for and retrieving information in SigmaLink can be
combined to provide an even greater accuracy of the retrieval process. The combined search dialog provides four fields that can be used for structered fulltext and/or metadata
search simultaneously by selecting either the metadata mode or the fulltext mode for each
of the four fields.
Ð
1
2
3
Using the combined search feature
Select Combined Search from the Search menu.
Enter the search criteria in two or more of the four fields.
Select the desired mode (either Metadata or Fulltext) in the fifth column for each of
the fields used.
Fig. 54: The Combined Search tab in the Search dialog
4
Start the search by pressing the Start search button.
16 • Search and Retrieval 133
SigmaLink Workbench 1.101 - User Guide
16.4
Saving and Loading Queries
Related Topics:
• Metadata Search (page 127)
• Structured Fulltext Search (page 130)
• Combined Search (page 133)
• Native Search (page 136)
• Predefined Queries (page 138)
• Quick Search (page 140)
• Saving and Loading Search Result Lists (page 142)
Queries specified by the user in a combined search can be saved for repeated use. There
is no limit to the number of queries a user can save. All queries saved are available in the
Combined Search tab of the Search dialog.
Ð
1
2
3
Saving a query
Select Combined Search from the Search menue.
Enter the search criteria in two or more of the four fields.
Select the desired mode (either Metadata or Fulltext) in the fifth column for each of
the fields used.
Fig. 55: The Combined Search tab in the Search dialog
4
Ð
1
2
Save the query by pressing the Save button.
Loading a query
Select Combined Search from the Search menue.
Access the list of stored queries by pressing the Load button.
16 • Search and Retrieval 134
SigmaLink Workbench 1.101 - User Guide
3
Select the desired query.
Fig. 56: The list of available queries in the Load saved query dialog
16 • Search and Retrieval 135
SigmaLink Workbench 1.101 - User Guide
16.5
Native Search
Related Topics:
• Metadata Search (page 127)
• Structured Fulltext Search (page 130)
• Combined Search (page 133)
• Saving and Loading Queries (page 134)
• Predefined Queries (page 138)
• Quick Search (page 140)
• Saving and Loading Search Result Lists (page 142)
Experienced users have the option to search the database (relational or fulltext) using
command line SQL statements. The command line in the Combined Search tab of the
SigmaLink Workbench search settings is limited to select statements. It is not possible
to enter data in database fields or to manipulate the database tables directly using this
command line.
Since not all metadata fields and not all of the markup in SGML objects may be available
in the different search dialogs this feature allows a user to search metadata or fulltext
structure that has not been configured for search in corresponding configuration files for
fulltext and relational search.
This is an advanced search feature that requires some knowledge of SQL and the data
model employed by SigmaLink and most users will probably never use it.
Specifying a native search statement
The following assumes that there is a metadata called “Total number of versions” in the
database table “METADATA” with a database field name “TotNumV” containing the total
number of versions of an object (and that has not been configured for metadata search).
1
2
Select Combined Search from the Search menu.
Enter the SQL statement in the command line.
Example:
select * from SL_PPRJ_METADATA where TotNumV > 10
PPRJ in this case woulöd have to be replaced by the publishing projects shortname.
16 • Search and Retrieval 136
SigmaLink Workbench 1.101 - User Guide
3
Select the desired mode (either Metadata or Fulltext, Metadata in the example above) from the drop down list.
Fig. 57: The Native Search in the Combined Search tab
4
This statement will provide a list of all information objects of which there are more
than 10 versions in the SigmaLink version control.
Start the search by pressing the Start search button.
16 • Search and Retrieval 137
SigmaLink Workbench 1.101 - User Guide
16.6
Predefined Queries
Related Topics:
• Metadata Search (page 127)
• Structured Fulltext Search (page 130)
• Combined Search (page 133)
• Saving and Loading Queries (page 134)
• Native Search (page 136)
• Quick Search (page 140)
• Saving and Loading Search Result Lists (page 142)
Search procedures across the database can be considered personalized views of the Infopool. Predefined queries, optionally placed on the Personal Desktop for easy access,
could for example produce a list of
– information objects that are checked out by the user,
– information objects that are checked out by other users,
– information objects that were created after or before a certain date or
– information objects that must be checked in before the end of the workday.
The search criteria can also be combined to produce a list of information objects created
after a certain date that must be checked in before the end of the workday. A single window could combine information objects that might be used in numerous containers and
publishing projects.
Predefined queries can be defined independently for every publishing project and also for
every user group.
Ð
1
2
Using predefined queries
Select Predefined search from the Search menu.
Highlight the appropriate query from the list of available predefined queries in the
Stored database queries dialog window.
Fig. 58: Stored database queries tab in the SigmaLink Workbench search settings dialog window
16 • Search and Retrieval 138
SigmaLink Workbench 1.101 - User Guide
Note:
Since stored database queries can be defined for each publishing project it is possible that there are no predefined queries available in the current position in the Hierarchy Window.
3
It is possible to limit the maximum number of hits to avoid excessively long search
times or to produce a sample of the hits found in the Infopool by checking the corresponding option in the dialog window (click a second time to clear the check mark).
Note:
Predefined queries can also be placed on the Personal Desktop (page 17). The administrator configures SigmaLink Workbench to define and include or exclude searches on the Personal Desktop.
The Search result dialog is shown where all hits are listed.
16 • Search and Retrieval 139
SigmaLink Workbench 1.101 - User Guide
16.7
Quick Search
Related Topics:
• Metadata Search (page 127)
• Structured Fulltext Search (page 130)
• Combined Search (page 133)
• Saving and Loading Queries (page 134)
• Native Search (page 136)
• Predefined Queries (page 138)
• Saving and Loading Search Result Lists (page 142)
The SigmaLink Workbench features a quick search option that is available from the workbench interface (Showing and Hiding Parts of the User Interface (page 170). It allows the
user to specify simple terms and search for them across the metadata.
Note:
If the quick search list is not visible toggle its display on in the View menu.
Ð
1
Specifying a quick search
In the first field enter the term to be searched for
or:
select a term from the drop down list.
Note:
The term <EMPTY> is preconfigured to find objects where this metadata field is left
blank. An object will not be found if this field contains anything (such as a blank space).
Fig. 59: The Term field in quick search
16 • Search and Retrieval 140
SigmaLink Workbench 1.101 - User Guide
2
Select the metadata fields that are to be searched for the term specified in step 1.
Fig. 60: The Metadata field in quick search
3
With the metadata display name still active (highlighted) in the drop down list press
the Enter key.
Note:
Pressing the Enter key will have context sensitive results. For example, if the metadata title in the quick list is not highlighted but an information object in the metadata
window is, pressing the Enter key will not start the quick search but will load the object into its associated Viewer.
16 • Search and Retrieval 141
SigmaLink Workbench 1.101 - User Guide
16.8
Saving and Loading Search Result Lists
Related Topics:
• Metadata Search (page 127)
• Structured Fulltext Search (page 130)
• Combined Search (page 133)
• Saving and Loading Queries (page 134)
• Native Search (page 136)
• Predefined Queries (page 138)
• Quick Search (page 140)
The information from the Metadata window and the search result windows is written to cache on the client. This information is updated every time the user performs a search or
changes a container. This information can be saved to a file for future use in either a SigmaLink table format (SGML) or as Comma Separated Value (CSV). CSV can be used to
import the metadata into other applications such as Microsoft Excel in order to perform
statistical operations on it provided the metadata is suited for statistical operations.
The entire content of the search result window or a range of information objects in the window can be saved to file. These result lists can be loaded into the workbench or external
applications.
Ð
1
Saving Search Results as an SGML Table
Highlight a range of information objetcs, if desired, whose metadata is to be saved to
a file.
Note:
The entire content of the metadata window will be saved to file if no range of information objects is selected.
Use Shift+Mouseclick or Ctrl+Mouseclick to make multiple selections of information objects.
2
Select Save Result List as ... from the Result List menu.
16 • Search and Retrieval 142
SigmaLink Workbench 1.101 - User Guide
3
Enter a file name or accept the default generated by SigmaLink in the Save Result
List as ... dialog window.
Fig. 61: The Save Result List as ... dialog window
4
5
6
7
Use the Browse option to save result lists at locations other than the default directory
ResultList in the SigmaLink Workbench directory.
Select SigmaLink Table DI from the file type drop down list.
The option Selected is available if a range of information objects had been highlighted prior to calling up the dialog window.
Activate the Selected button if only the highlighted information objects are to be saved to file.
Confirm the entries with Save or cancel the operation with the Cancel button.
Metadata can also be saved in CSV format Comma Separated Value. This format is supported, for example, by Microsoft Excel. If the proper numeric metadata has been configured, this format could be used to perform statistical analyses of information objects
managed in SigmaLink.
Ð
1
Saving Search Results as Comma Separated Value
Highlight a range of information objetcs, if desired, whose metadata is to be saved to
a file.
Note:
The entire content of the metadata window will be saved to file if no range of information objects is selected.
Use Shift+Mouseclick or Ctrl+Mouseclick to make multiple selections of information objects.
2
3
Select Save Result List as ... from the Result List menu.
Enter a file name or accept the default generated by SigmaLink in the Save Result
List as ... dialog window.
16 • Search and Retrieval 143
SigmaLink Workbench 1.101 - User Guide
Fig. 62: The Save Result List as ... dialog window
4
5
6
7
Ð
1
2
Use the Browse option to save result lists at locations other than the default directory
ResultList in the SigmaLink Workbench directory.
Select CSV (Comma delimited) from the file type drop down list.
The option Selected is available if a range of information objects had been highlighted prior to calling up the dialog window.
Activate the Selected button if only the highlighted information objects is to be saved
to file.
Confirm the entries with Save or cancel the operation with the Cancel button.
Loading Search Results from Result Lists
Select Load Result List from the Result List menu.
Enter a file name or select a result list from the Load Result List dialog window.
Fig. 63: The Save Result List as ... dialog window
3
4
5
Select SigmaLink Table DI or CSV (Comma delimited) from the file type drop down
list. This selection filters the list of result lists files in the dialog. The display will show
only *.tbl or *.csv files respectively.
Use the Browse option to retrieve result lists from locations other than the default directory ResultLists in the SigmaLink Workbench directory.
Confirm the entries with Load or cancel the operation with the Cancel button.
16 • Search and Retrieval 144
SigmaLink Workbench 1.101 - User Guide
17
SigmaLink Version Control
Related Topics:
• Split and Join (page 74)
• Properties of Information Objects (page 79)
• Metadata (page 86)
• Annotations to Information Objects (page 93)
• Links (page 97)
• Reusing Information Objects (page 124)
• Search and Retrieval (page 126)
• Referenced Objects (page 153)
• Workflow (page 159)
Topics in this Unit:
•
Creating Versions (page 146)
•
Setting an Old Version (page 148)
•
Viewing a Previous Version of an Information Object (page 149)
•
Deleting Versions of an Information Object (page 150)
•
Comparing Versions of an Information Object (page 151)
A new version of an information object is created whenever the information object is chekked in. This means that when the information object is updated its state before the last
check out is saved as the latest version in the version control. The current version is the
one checked into the database.
The SigmaLink server can also be configured by a property not to automatically create
new versions at check in. In this case the user will be promted to confirm the creation and
to specify a version label if this has been enabled in the Workbench's Version Control Settings (page 203).
SigmaLink Workbench manages the different versions of an information object individually and allows the user access to each existing version. This has several advantages:
– Access to the version of an object that has a status other than the current status in the
project.
– Recreating past versions of an object.
– Securing a history of an information object (maintaining all previous states of an object
rather than merely keeping a history of the changes to the object).
The differences between two versions can be displayed if an application has been installed for this purpose. The SigmaLink Workbench does not include such an application.
17 • SigmaLink Version Control 145
SigmaLink Workbench 1.101 - User Guide
17.1
Creating Versions
Related Topics:
• Setting an Old Version (page 148)
• Viewing a Previous Version of an Information Object (page 149)
• Deleting Versions of an Information Object (page 150)
• Comparing Versions of an Information Object (page 151)
Version 1 of an information object is not created at import or when creating a new information object but after the first check in after making changes to the object. There is no
point in creating a version that is identical to the version available in the Metadata Window.
Note:
Versions are created automatically at check in and do not require any user action if the
server property sigmalink.version.creation.automatic has been set to true by
the administrator. If it is set to false the Workbench Version Control Settings (page 203)
will determine which user action is required for the creation of new versions.
The following assumes that the server property specifies no automatic creation and the
user settings specify to prompt for confirmation.
A new version of the information object is added to the list at every check in if the user
confirms the creation in the Version labeling dialog at check in. If no label is specified the
objects are numbered in increments of 1 starting at 1.
Ð
Creating a new Version
1
2
Select Check in for an object that is checked out.
In the Version labeling dialog place a check mark in Create new version:
3
4
Specify a label (optional) in the edit field.
Click on OK to continue the check in and create the new version.
Old versions of an information object cannot be edited in SigmaLink unless a Set Version
is performed by the user first (permission required).
Caution:
Setting an old version as the new current version discards all changes made to the object
since that version was created. The old version replaces the current version in the database. Since the recent current version itself becomes a version in the version control it is
17 • SigmaLink Version Control 146
SigmaLink Workbench 1.101 - User Guide
possible to perform a Set Version after a Set Version but this might create quite some
“chaos” in the object's version list. Care should be taken not to perform Set version unnecessarily.
17 • SigmaLink Version Control 147
SigmaLink Workbench 1.101 - User Guide
17.2
Setting an Old Version
Related Topics:
• Creating Versions (page 146)
• Viewing a Previous Version of an Information Object (page 149)
• Deleting Versions of an Information Object (page 150)
• Comparing Versions of an Information Object (page 151)
Ð
1
2
Using Set Version to retrieve a previous version of an information object
Highlight the information object to be “rolled back” in the metadata window.
Select Versions from the Properties option in the Information object menu or the
contecxt sensitive menu
or
select the Version control icon in the toolbar.
The Versions tab in the Properties dialog shows all existing versions of an information object.
Fig. 64: The Versions tab in the properties dialog window
3
Highlight the version to be made the current version in the object list.
Caution:
All changes made to the object since the highlighted version was created will no longer be available the Metadata Window.
4
Select Set version in the Versions tab.
Note:
To show the most recent information select Refresh in Properties Dialog.
17 • SigmaLink Version Control 148
SigmaLink Workbench 1.101 - User Guide
17.3
Viewing a Previous Version of an Information Object
Related Topics:
• Creating Versions (page 146)
• Setting an Old Version (page 148)
• Deleting Versions of an Information Object (page 150)
• Comparing Versions of an Information Object (page 151)
The different versions can be viewed in the STEP SGML Viewer (SGML based objects)
or an external application depending on the object type as well as edited in the integrated
editor.
Ð
1
2
Viewing a previous version of an information object
Highlight an information object in the Metadata Window.
Select Versions from the Properties option in the Information object menu or the
context sensitive menu
or
select the Version control icon in the toolbar.
The Versions tab in the Properties dialog shows all existing versions of an information object.
Fig. 65: The Versions tab in the properties dialog window
3
4
5
Highlight the version in the object list dialog window.
Select View to load the version in the associated viewer.
Close the dialog window with OK.
17 • SigmaLink Version Control 149
SigmaLink Workbench 1.101 - User Guide
17.4
Deleting Versions of an Information Object
Related Topics:
• Creating Versions (page 146)
• Setting an Old Version (page 148)
• Viewing a Previous Version of an Information Object (page 149)
• Comparing Versions of an Information Object (page 151)
Versions no longer required can be deleted from the list.
Ð
1
2
Deleting versions of an information object
Highlight an information object in the Metadata Window.
Select Versions from the Properties option in the Information object menu or the
contecxt sensitive menu
or
select the Version control icon in the toolbar.
The Versions tab in the Properties dialog shows all existing versions of an information object.
Fig. 66: The Versions tab in the properties dialog window
3
Highlight a version from the object list in the Version tab.
Note:
To show the most recent information select Refresh in Properties Dialog.
4
5
Select Delete to delete the version from the list.
Close the dialog window with OK.
17 • SigmaLink Version Control 150
SigmaLink Workbench 1.101 - User Guide
17.5
Comparing Versions of an Information Object
Related Topics:
• Creating Versions (page 146)
• Setting an Old Version (page 148)
• Viewing a Previous Version of an Information Object (page 149)
• Deleting Versions of an Information Object (page 150)
It is possible to configure an external application to compare two versions of an information object.
Ð
1
2
Displaying the difference between two versions
Highlight an information object in the Metadata Window.
Select Versions from the Properties option in the Information object menu or the
context sensitive menu
or
select the Version control icon in the toolbar.
The Versions tab in the Properties dialog shows all existing versions of an information object.
Fig. 67: The Versions tab in the properties dialog window
3
Highlight a version from the object list in the Version tab.
Note:
To show the most recent information select Refresh in the Properties Dialog.
4
Select Difference.
The highlighted version in the object list will be compared to the current version in the
database.
Note:
For this an external application has to be installed that is capable of comparing two
files. SigmaLink does not provide such an application. If no such application has been
17 • SigmaLink Version Control 151
SigmaLink Workbench 1.101 - User Guide
configured, the Workbench will respond with an error message when this feature is
selected.
17 • SigmaLink Version Control 152
SigmaLink Workbench 1.101 - User Guide
18
Referenced Objects
Related Topics:
• Split and Join (page 74)
• Properties of Information Objects (page 79)
• Metadata (page 86)
• Annotations to Information Objects (page 93)
• Links (page 97)
• Reusing Information Objects (page 124)
• Search and Retrieval (page 126)
• SigmaLink Version Control (page 145)
• Workflow (page 159)
Topics in this Unit:
•
Including Links (page 154)
•
Subdocument References (page 157)
Referenced objects are used to insert graphics, information objects or parts of information
objects into other information objects. They appear as part of the object they were inserted
into. Referenced objects can only be inserted into SGML document instances, while information objects or parts of them to be inserted may be of any type. The elements that referenced objects are intended to be used in must be defined in the document type
definition (DTD) of the information object. Referenced objects in SigmaLink are similar to
external file entities in SGML. Referenced objects are also referred to as including links.
They are listed in the Links tab of the Properties dialog.
18 • Referenced Objects 153
SigmaLink Workbench 1.101 - User Guide
18.1
Including Links
Related Topics:
• Subdocument References (page 157)
Including links are created in the SGML editor. The Adept•Editor in the SigmaLink Workbench has been customized to support including links. The document type definition of
the information object must be customized to include the elements which will referenc the
objects, e.g. graphic elements or link elements. Generally, this is customization is done
when SigmaLink installed and configured or when a new object type is configured for the
system.
Ð
1
2
3
4
Creating Including Links
In order to insert an including links, the information object referenced must be managed by SigmaLink. If this is not the case, import the information object.
Load the information object you want to insert the referenced object in into the editor
(Editing Information Objects (page 52)) by selecting Edit e.g. in the context sensitive
menu.
In the position where you want the object to be referenced, insert the appropriate
SGML element, e.g. graphic.
Position the cursor within this element. If you cannot do this because the element is
displayed as a “box”, position the cursor after the link element. It may be necessary
to move the cursor back and forth using the arrow keys if the SigmaLink menu items
are not available.
18 • Referenced Objects 154
SigmaLink Workbench 1.101 - User Guide
Fig. 68: Positioning the cursor when creating a referenced object
5
6
7
When the cursor is positioned properly Start Including Link is active in the SigmaLink menu.
Select Start Including Link.
Keep the editor open.
Caution:
Do not check the object in at this point! SigmaLink must set several attribute values
for the corresponding element in the object for the reference to become effective.
Switch to the SigmaLink Workbench user interface. In the Metadata Window highlight the target object.
8 Select Link target from the context sensitive menu or click on the corresponding Link
target button in the toolbar. SigmaLink Workbench will automatically insert the identifiers (IDs) needed to set the reference to the target object.
9 Save the information object in the editor (check in if appropriate) .
10 In order to check the information object in again either select Check in from the SigmaLink menu or save the document, close the editor and select Check in in the Information object menu within the Workbench.
18 • Referenced Objects 155
SigmaLink Workbench 1.101 - User Guide
Note:
When an information object including referenced objects is checked out, only this information object is checked out and other referenced information objects are not. If it is neccessary to make changes to the referenced information objects, they must be checked out
separately.
18 • Referenced Objects 156
SigmaLink Workbench 1.101 - User Guide
18.2
Subdocument References
Related Topics:
• Including Links (page 154)
Subdocument references are created in the SGML editor. The Adept•Editor in the SigmaLink Workbench has been customized to support subdocument references. The document type definition of the information object must be customized to include the elements
in which referenced objects may occur. These elements are referred to as wrapper elements. Generally, these customizations are done when SigmaLink is installed and configured or when a new object type is configured for the system.
Ð
1
2
3
4
Creating Subdocument References
In order to insert a subdocument reference, the information object referenced must
be managed by SigmaLink. If this is not the case, import the information object.
Load the information object you want to insert the referenced object into in the editor
(Editing Information Objects (page 52)) by selecting Edit e.g. in the context sensitive
menu.
In the position where you want the object to be referenced, insert the appropriate
SGML element, e.g. sectionref.
Position the cursor within this element.
Fig. 69: Positioning the cursor when creating a subdocument reference
18 • Referenced Objects 157
SigmaLink Workbench 1.101 - User Guide
5
6
7
When the cursor is positioned properly Subdocument is active in the SigmaLink
menu.
Select Subdocument.
Keep the editor open.
Caution:
Do not check the object in at this point! SigmaLink must set several attribute values
for the corresponding element in the object for the reference to become effective.
Switch to the SigmaLink Workbench user interface. In the Metadata Window highlight the target object.
8 Select Link target from the context sensitive menu or click on the corresponding Link
target button in the toolbar. SigmaLink Workbench will automatically insert the identifiers (IDs) needed to set the reference to the target object.
9 Save the information object in the editor (check in if appropriate) .
10 In order to check the information object in again either select Check in from the SigmaLink menu or save the document, close the editor and select Check in in the Information object menu within the Workbench.
Note:
When an information object including referenced objects is checked out, only this information object is checked out and other referenced information objects are not. If it is neccessary to make changes to the referenced information objects, they must be checked out
separately.
18 • Referenced Objects 158
SigmaLink Workbench 1.101 - User Guide
19
Workflow
Related Topics:
• Split and Join (page 74)
• Properties of Information Objects (page 79)
• Metadata (page 86)
• Annotations to Information Objects (page 93)
• Links (page 97)
• Reusing Information Objects (page 124)
• Search and Retrieval (page 126)
• SigmaLink Version Control (page 145)
• Referenced Objects (page 153)
Topics in this Unit:
•
Setting a Workflow State (page 161)
•
Showing the Workflow State of an Information Object (page 162)
Workflow systems control work procedures in enterprises. Workflow systems help coordinate the tasks of authors, editors or any other user. Their purpose is to increase the
transparency of working processes, guide users through tasks, ensure timely completion
of tasks, to guarantee that documents can be accessed in every state of a work process
and much more. Reliable workflows are also necessary for certification in accordance with
ISO 9000 (Quality Management).
Workflow systems reflect the routines in an enterprise's task flow. The structure of a workflow system depends on both the field of activity of the enterprise and the purpose of the
workflow. The workflow process of a publishing house, for example, will be different from
the workflow process of a software company.
Fig. 70: Workflow states shown in the workflow window
A possible workflow in a publishing house
1. importing or creating information objects
2. writing
3. editing
4. proof reading
5. production
6. publication
19 • Workflow 159
SigmaLink Workbench 1.101 - User Guide
A possible workflow in a software company
1. analysis of requirement
2. draft version
3. specification by the dataprocessing department
4. production
5. integration test
6. stabilization
7. use
Example:
After the analysis of requirement is finished, the project is transferred from the workflow
state analysis of requirement to the state draft version.
The available workflow states are defined according to the requirements of the company
when SigmaLink is installed on the server. They can be different for every publishing project.
19 • Workflow 160
SigmaLink Workbench 1.101 - User Guide
19.1
Setting a Workflow State
Related Topics:
• Showing the Workflow State of an Information Object (page 162)
SigmaLink integrates an automated workflow system (Staffware) which will be covered in
the next unit of this manual. SigmaLink also features a workflow window in the Workbench
which is a “downscaled” workflow engine for simple processes and, more importantly,
constitutes an interface that can be used to trigger automated processes on the server by
setting an object to the corresponding status in the workflow window.
Every information object in SigmaLink Workbench can be associated with a workflow status representing a certain process.
Ð
1
2
3
Setting the workflow state of an information object
Highlight the information object you want to assign to a certain workflow state.
Select the appropriate workflow state in the Workflow menu and click on Set in the
submenu
or
click on the workflow state symbol in the workflow bar using the right mouse button.
Select Set in the context sensitive menu.
The fastest way for assigning an information object to a workflow state is dragging
the object from the Metadata Window onto the workflow state symbol in the workflow
bar (drag & drop function).
Note:
There are two conditions to setting a status:
1. The user must have the required permissions to set workflow states and
2. the object type must have been configured to allow the particular transition between
states.
Example: A user has the right to set the status Draft, Correction and Review but he cannot
set the status from Review back to Draft because that transition is not allowed.
Further possibilities of configuration
The integration of the Staffware Workflow Engine is one status in the Workbench's Workflow window. Additional status icons could be configured to implement special export features, conversions from SGML to HTML, etc.
19 • Workflow 161
SigmaLink Workbench 1.101 - User Guide
19.2
Showing the Workflow State of an Information Object
Related Topics:
• Setting a Workflow State (page 161)
The assignment of information objects to the different workflow states can be shown as
an overall view in certain windows. For instance, all information objects with the status
draft version can be shown in a window.
Ð
Showing a list with all the information objects assigned to a certain workflow
state
1
2
Click on the symbol corresponding to the workflow state you want to make an overview of (right mouse button). A context sensitive menu is shown.
In the context sensitive menu, click on Search. A window is shown containing the information objects assigned to the selected workflow state.
Fig. 71: Overview of the information objects associated with the workflow state 'Import'.
List of commands in the Workflow menu
Command
Description
Set
Assigns the highlighted information object a workflow state. SigmaLink checks both the users permissions and verifies that the transition is allowed. If the user doesn’t have the required permissions or
the transition is not defined the command is not executed and an error
message is given out.
Search
Opens a window containing a list of the information objects assigned
to the selected workflow state.
19 • Workflow 162
SigmaLink Workbench 1.101 - User Guide
20
Integrated Staffware Workflow Engine
Related Topics:
• Customizing the User Interface (page 168)
• Switching between Online and Offline Modes (page 173)
• Configuration (page 186)
• The User Help Desk (page 207)
Workflow systems control work procedures in enterprises. Workflow systems help coordinate the tasks of authors, editors or any other user. Their purpose is to increase the
transparency of working processes, guide users through tasks, ensure timely completion
of tasks, to guarantee that documents can be accessed in every state of a work process
and much more. Reliable workflows are also necessary for certification in accordance with
ISO 9000 (Quality Management).
Workflow systems reflect the routines in an enterprise’s task flow. The structure of a workflow system depends on both the field of activity of the enterprise and the purpose of the
workflow. The workflow process of a publishing house, for example, will be different from
the workflow process of a software company.
Terms and Definitions
Work queue
List of tasks to be carried out.
Procedure
General definition of a workflow process (working routine).
Case
Instance of a workflow process. It may consist of several steps.
Case number
Serial number assigned to a case.
Step
A step of a workflow process. The tasks belonging to a step are displayed
in a form.
Form
Dialog window from which the user completes his or her tasks.
The Staffware workflow engine is integrated in the SigmaLink environment according to
the customers’ needs. Integration may include, for example, the automatic start of Staffware controlled workflow processes whenever data is imported so that an employee will
carry his/her tasks out according to the Staffware work queue.
The steps within the work queues are different depending on the tasks to be carried out.
Therefore, in the following, both the general structure and the operating of the work
queues are described.
20 • Integrated Staffware Workflow Engine 163
SigmaLink Workbench 1.101 - User Guide
Login into the Staffware Environment
Ð
1
2
3
Logging into Staffware
In the Workflow menu select Workflow interface.
Type in the user name and password. If the field server is empty select Browse.
Staffware will produce a list of all configured Staffware servers from which the appropriate one must be chosen.
If the input is correct, a list of available programs is opened. These programs are represented by the following icons:
Fig. 72: Main group of Staffware programs
Command
Function
Case Start
Selecting Case start you are shown a list with all defined procedures. Procedures can also be started with Start.
Audit Trail
Audit trails give a detailed overview over all transactions of a
certain case. A case is a process gone through within a workflow, for example, with a certain document or information
object. In a case an information object is worked on according
to a defined process.
Staffware Help
Selecting Staffware Help you are shown the help program
including a glossary.
Workflow Definer
The workflow definer is used for displaying processes while
they are worked out.
Update Queues
When selecting Update the work queue is updated. Generally
a work queue is updated automatically after a step is completed.
4
If certain processes are not yet completed, the work queue is opened. Otherwise a
work queue is displayed according to the configuration, e.g. when data is imported
into SigmaLink Workbench or when the workflow state is changed.
20 • Integrated Staffware Workflow Engine 164
SigmaLink Workbench 1.101 - User Guide
Work Queue
The work queue contains all processes (cases) to be carried out.
Fig. 73: A work queue of a user in the Staffware environment
In the work queue several information items can be shown:
– the name of a procedure (Procedure)
– the description of a procedure
– the number of a case (Case)
– the description of a case (Case Description)
– the name of a form (Form)
– the description of a form (Form Description)
– the deadline
Each case is identified by an unambiguous case number which is created automatically.
A case can be divided into several steps. For each step a form can be drawn up by which
the necessary tasks can be started.
20 • Integrated Staffware Workflow Engine 165
SigmaLink Workbench 1.101 - User Guide
Form
In the following, an example for a form is shown.
A form showing fields and texts is used as a mask for the user. The input made in the fields
defines the following step. In the example shown, the workflow branches depending on
whether the question Are the corrections ok? is answered by Yes or No.
The upper area of the form is called status area. The icon Unreleased in the right margin
shows whether the form has to be completed or it can be passed on with the icon Released.
The user writes data to the designed fields. Forms can consist of the following fields:
Field Type
Description
Text
alphanumerical, length min. 1, max. 80
Number
Numbers, +,-, decimal point, length min. 1, max. 80
Date
Date (default DD/MM/YYYY)
Time
Time (hh:mm)
Memo
Defines a text field without a maximum length.
20 • Integrated Staffware Workflow Engine 166
SigmaLink Workbench 1.101 - User Guide
If you need other field types look them up in the Staffware user guide.
The following table shows buttons which may occur in Staffware forms:
Icon
Function
An icon with a blue frame indicates that the corresponding
field is optional.
A green right arrow beside an icon indicates that the corresponding file can be opened with an SGML viewer or
another tool.
An icon with a red frame indicates that the corresponding
field is a necessary field. If a down arrow is placed beside
the icon a list with all valid values can be shown by
clicking on the down arrow.
20 • Integrated Staffware Workflow Engine 167
SigmaLink Workbench 1.101 - User Guide
21
Customizing the User Interface
Related Topics:
• Integrated Staffware Workflow Engine (page 163)
• Switching between Online and Offline Modes (page 173)
• Configuration (page 186)
• The User Help Desk (page 207)
Topics in this Unit:
•
Adding and Deleting Symbols on the Personal Desktop (page 169)
•
Showing and Hiding Parts of the User Interface (page 170)
•
Changing the Column Width in the Metadata Window (page 172)
The appearance of SigmaLink Workbench can be modified according to the user's preferences. Several components of the user interface can be shown or hidden.
21 • Customizing the User Interface 168
SigmaLink Workbench 1.101 - User Guide
21.1
Adding and Deleting Symbols on the Personal Desktop
Related Topics:
• Showing and Hiding Parts of the User Interface (page 170)
• Changing the Column Width in the Metadata Window (page 172)
The Personal Desktop can contain several kinds of symbols:
Yellow symbols represent shortcuts to containers which can be found in the hierarchy window. Every user can create a personal environment by adding or deleting such shortcuts.
These preferences are managed by SigmaLink Workbench, and saved to a file on the server when a user logs out from his/her Workbench. This file is read by the client at the next
login. This way the users have their configuration regardless of which machine they use
to work. This does not apply to the configuration for external applications. These are tied
to the clients IP address since there is no way for the server to know where the applications are installed on the client.
Green symbols represent predefined queries (page 138) which are not configured in SigmaLink Workbench but on the server.
In SigmaLink Workbench generally only (yellow) symbols representing hierarchical structures can be added, while queries predefined (green symbols) can only be added or removed by the SigmaLink administrator.
Ð
1
2
3
Placing a yellow symbol for a container on the Personal Desktop
Highlight a container in the Hierarchy or Metadata Window.
Drag the selected container on the Personal Desktop using the mouse (drag&drop
function)
or
select Insert object in the Desktop menu.
On the Personal Desktop the container is shown as a yellow symbol.
All symbols shown on the Personal Desktop are listed in the Desktop menu. Selecting
one of these entries you will be shown a list of all executable commands. These commands can also be called up in the context sensitive menu.
Command
Description
Show
Shows the content of the marked symbol in the Metadata
Window.
(activated only with yellow integration symbols)
Execute
Starts the predefined query.
(activated only with green
integration symbols)
Rename
Changes the name of the marked integration symbol.
Remove
Removes the marked integration symbol from the Personal Desktop.
21 • Customizing the User Interface 169
SigmaLink Workbench 1.101 - User Guide
21.2
Showing and Hiding Parts of the User Interface
Related Topics:
• Adding and Deleting Symbols on the Personal Desktop (page 169)
• Changing the Column Width in the Metadata Window (page 172)
All areas of the user interface which can be hidden or shown are listed in the View menu.
The following is a list of areas of the graphical user interface that the user can choose to
turn on or off:
– Desktop
– Toolbar
– Status line
– Workflow
Fig. 74: SigmaLink Workbench user interface with open menu View
If, for example, the Workflow bar is shown, the Workflow item is preceded by a check
mark. To hide this bar click on the Workflow item. The check mark is deleted and the bar
is hidden. If you want to show the Workflow bar again, click on Workflow again.
Besides you can hide or show the editor, the viewer and a search results window. These
commands are activated if the corresponding application or window is open.
Ð
Hiding or showing windows and applications
Note:
Shown windows or applications are preceded by a check mark in the View menu.
1
In the View menu select Viewer or Editor respectively, depending on what you want
to show/hide.
21 • Customizing the User Interface 170
SigmaLink Workbench 1.101 - User Guide
2
The window or application previously shown is now hidden. In the View menu the respective item is no longer preceded by a check mark.
21 • Customizing the User Interface 171
SigmaLink Workbench 1.101 - User Guide
21.3
Changing the Column Width in the Metadata Window
Related Topics:
• Adding and Deleting Symbols on the Personal Desktop (page 169)
• Showing and Hiding Parts of the User Interface (page 170)
Ð
1
2
3
Changing the column width in the Metadata Window
Position the mouse pointer over the boundary seperating the columns in the title bar
of the Metadata Window.
If the column width can be changed the mouse pointer is replaced by the arrow symbol.
To change the column width drag the arrow symbol left or right.
Note:
The column width changes back to the default value when the user switches between containers or publishing projects.
The default column width and display sequence can be changed permanently (and for all
members of a user group) by the administrator.
21 • Customizing the User Interface 172
SigmaLink Workbench 1.101 - User Guide
22
Switching between Online and Offline Modes
Related Topics:
• Integrated Staffware Workflow Engine (page 163)
• Customizing the User Interface (page 168)
• Configuration (page 186)
• The User Help Desk (page 207)
Topics in this Unit:
•
Terms in Online and Offline Modes (page 174)
•
Online to Offline (page 175)
•
Offline to Online (page 183)
•
Available Features in Offline Mode (page 184)
This chapter explains how to switch the SigmaLink Workbench from Online mode to Offline mode and back. An overview of the features available in each mode is provided as
well.
22 • Switching between Online and Offline Modes 173
SigmaLink Workbench 1.101 - User Guide
22.1
Terms in Online and Offline Modes
Related Topics:
• Online to Offline (page 175)
• Offline to Online (page 183)
• Available Features in Offline Mode (page 184)
The following is a list of terms as they are used with regards to switching the SigmaLink
Workbench online and offline. The individual tasks involved with switching modes are explained in the succeeding chapters.
Online
Working with the Workbench with either a permanent connention to the
server (network) or with a connection that is activated automatically when
the client issues a request (no further action by the user is required).
Offline
Working with the Workbench with no connection to the server. All actions
taken by the user are committed after switching online (user action required). The client remains offline until the user switches online.
Download (read and write)
Copying an information object to the local hard drive. Check out will immediately download an object to the hard drive. These objects are read
and write. This feature is independent from the online to offline switching.
Checked out objects are downloaded regardless of whether the user switches offline or not.
Download control list
This list is generated by selecting Download in the Information object
menu. Objects on this list are downloaded when switching offline. These
objects will be copied to the local hard drive during the switch online to
offline. The information objects from this list are read only. They remain
on the download control list until they are removed from it by the user. Objects on this list from previous downloads are not downloaded again during later switches unless the user chooses to refresh them. The list can
be viewed and edited by the user in the download control during the
switch to offline mode.
Download (read only)
Switching offline after adding information objects to the download control
list. The objects from the download control list will be copied to the local
hard drive during the switch online to offline. These objects are read only.
Upload
Using the check in function while offline causes SigmaLink to check an
object in after the switch offline to online. Information objects that remain
checked out are not uploaded but remain on the local hard drive.
22 • Switching between Online and Offline Modes 174
SigmaLink Workbench 1.101 - User Guide
22.2
Online to Offline
Related Topics:
• Terms in Online and Offline Modes (page 174)
• Offline to Online (page 183)
• Available Features in Offline Mode (page 184)
General concepts
SigmaLink Workbench can be operated either offline or online to accomodate the different
requirements encountered in document management and editing, such as
• environments in which a permanent network or intranet connection is not possible,
• environments in which a permanent network or intranet connection is not practical due
to excessive network traffic,
• environments in which users work in remote locations and require online access only
to download or upload information objects.
The SigmaLink Workbench can be switched from online mode to offline mode by little
more than a mouse click. The process of switching offline automatically downloads any
information objects selected by the user. There is no feature that allows downloading information objects while the clients remains online (with the exception of check out, of course). The Offline switch icon in the toolbar is used to disconnect the client from the server.
During the download the info tree stucture is downloaded only if the user was positioned
properly when the switch was initiated. Only the info tree information of the structure beneath the users current position is downloaded. If information objects from several containers or even publishing projects are to be downloaded the user must change into a
container (or info tree folder) that is above the containers/publishing projects from which
objects are to be downloaded.
Fig. 75: Active container “SigmaLink Information”
22 • Switching between Online and Offline Modes 175
SigmaLink Workbench 1.101 - User Guide
The figure above shows a part of an info tree with information objects selected from two
containers below “SigmaLink Information”. The switch was initiated while the container
“SigmaLink Information” was the active container.
Fig. 76: The info tree after switching offline
The figure above shows the entire info tree from “SigmaLink Information” downward after
the switch to offline mode.
Fig. 77: In this case the active container was “Userguide”
In the figure above the same information objects in the same containers were selected for
read only download but the active container before the switch was “Userguide”, not “SigmaLink Information”.
22 • Switching between Online and Offline Modes 176
SigmaLink Workbench 1.101 - User Guide
Fig. 78: Only the tree information from “Userguide” downward was downloaded
The figure above shows that the information objects that were selected for download are
available only if they were lower in the info tree than “Userguide”. The information objects
from the other containers in “SigmaLink Information” are not available in offline mode in
this case even though they had been selected for read only download.
Note:
It is not possible to switch offline from the system's primary root (Usually Infopool or MainInfopool) or from an Info Tree Folder. This restriction was implemented to prevent the
downloading of the entire SigmaLink info tree structure.
There are principally two possibilities to download information objects: read only and
checked out. Information objects which are checked out are downloaded immediately and
cannot be edited by other users while they are downloaded on the users PC. Information
objects that are downloaded read only can still be edited by other users as they are not
checked out from the database. The download takes place when the user switches to offline mode. Naturally, information objects downloaded read only cannot be edited but only
viewed on the local PC. The reserved IO icon (
) indicates their read only status while
the user works offline.
In addition to downloading information objects the user can also choose to download metadata and annotations as well as information regarding including links (referenced objects) and SigmaLink links.
The Switch to Offline Mode Dialog
During the download procedure the user can select and deselect certain types of data for
download. The graphic below shows the dialog with which the user makes his choices:
22 • Switching between Online and Offline Modes 177
SigmaLink Workbench 1.101 - User Guide
Fig. 79: The Switch to Offline Mode dialog
Options for Download
The following options can be set by the user to control system behaviour during download:
Get metadata of checked out IOs
Checking this option will cause SigmaLink Workbench to check out the metadata of all information objects that the user checked out prior to downloading. The objects and the metadata can be edited.
Get metadata of downloaded IOs
Checking this option will cause SigmaLink Workbench to check out the metadata of all information objects that the user marked for read only download prior to downloading. The
objects and the metadata cannot be edited.
Get annotations of checked out IOs
Checking this option will cause SigmaLink Workbench to check out the annotations of all
information objects that the user checked out prior to downloading. The annotations, objects and the metadata can be edited.
Get annotations of downloaded IOs
Checking this option will cause SigmaLink Workbench to check out the annotations of all
information objects that the user marked for read only download prior to downloading. The
annotations, objects and the metadata cannot be edited.
Get including link information for all IOs
Checking this option will cause SigmaLink Workbench to get all available information
about objects referenced (using the including link mechanism) by the information objects
that the user either marked for read only download or that the user checked out prior to
downloading. The objects themselves are downloaded only if they were also selected for
22 • Switching between Online and Offline Modes 178
SigmaLink Workbench 1.101 - User Guide
download. If the referenced objects themselves are not downloaded the setting of this option is ignored.
Get subdocument link information for all IOs
Checking this option will cause SigmaLink Workbench to get all available information
about objects referenced by the information objects that the user either marked for read
only download or that the user checked out prior to downloading. The objects themselves
are downloaded only if they were also selected for download. If the referenced objects
themselves are not downloaded the setting of this option is ignored.
Get normal link information for all IOs
Checking this option will cause SigmaLink Workbench ...
Download control
The Download control button will open a dialog window which lists all information objects
that will be downloaded read only if the process continues as well as objects which have
been downloaded in a previous session. Previously downloaded objects are not downloaded again unless the user refreshes them.
Fig. 80: The Download Control dialog window
Note:
Information objects remain in the Download Control list until they are removed by highlighting them and using the Remove button in the Download Control. Selecting Remove
also deletes the files from the users local hard drive.
Warning:
The Remove button deletes the copy of any highlighted information object from the
users local hard drive immediately! This action cannot be undone by selecting Cancel in the Download Control! To undo, removed objects must be reselected for read
only download.
22 • Switching between Online and Offline Modes 179
SigmaLink Workbench 1.101 - User Guide
Information objects can be excluded from the download operation by selecting Remove
from the Download Control dialog.
Note:
The option Remove in the Download control dialog refers to the IO’s entry in the dialog
list. The information object in the database itself is not affected by this option.
Note:
All checked out information objects are immediately downloaded at the time of check out.
They are not listed in the download control.
Use a metadata search for YOUR_USER_NAME in the field Checked out by to obtain a
complete list of all IOs that will be downloaded by switching offline. Note that whether these objects will be available in offline mode depends on which container was active when
the switch was initiated. Also, once offline switching starts, the Download Control dialog
lets the user deselect IOs marked for read only download that are to be excluded from the
download. Selecting Remove also deletes the copies from the users local hard drive.
Warning:
The Remove button deletes the copy of any highlighted information object from the
users local hard drive immediately! This action cannot be undone by selecting Cancel in the Download Control! To undo, removed objects must be reselected for read
only download.
Information objects that have been selected for read only download can be loaded into
the STEP SGML Viewer by selecting Show in the Download Control.
The Download Control dialog also lists information objects that the user downloaded
read only during a previous session. The option Refresh will, if an object is selected,
download the current versions of this object, refreshing the versions on the users hard
drive.
Switching offline
In the following paragraphs the procedures for downloading data (write or read only) as
well as uploading data is explained in detail:
Ð
1
2
Switching offline and downloading data for writing
Using the hierarchy and metadata windows, select the information objects to be
downloaded read only by highlighting them in the metadata window (use CTRL and
SHIFT keys for multiple selections).
Check out the selected information objects.
22 • Switching between Online and Offline Modes 180
SigmaLink Workbench 1.101 - User Guide
Note:
All checked out information objects are immediately downloaded at the time of check
out. They are not listed in the download control.
3
4
Use a metadata search for YOUR_USER_NAME in the field Checked out by to obtain
a complete list of all IOs that will be downloaded by switching offline. Note that whether these objects will be available in offline mode depends on which container was
active when the switch was initiated. Also, once offline switching starts, the Download
Control dialog lets the user deselect IOs marked for read only download that are to
be excluded from the download. Selecting Remove also deletes the copies from the
users local hard drive.
Click on the Offline switch.
In the Switch to Offline Mode dialog, select the options as required.
Note:
Use the Download Control to obtain a list of information objects that will be downloaded and to refresh, remove or view these objects.
5
Click on Start switch.
SigmaLink transfers all selected information objects to the users local hard drive.
Ð
1
2
Downloading data read only
Highlight the information objects to be downloaded in the metadata window.
Select Download in the Information Object menu. The information object is added
to the download list.
Note:
Information objects remain on the Download Control list after online/offline switching until they are removed by the user.
3
4
Click on the Offline switch.
In the Switch to Offline Mode dialog, select the options as required.
Note:
Use the Download Control to obtain a list of information objects that will be downloaded and to refresh, remove or view these objects.
5
Ð
1
2
Click on Start switch.
Refreshing previously downloaded IOs
Click on the Offline switch in the toolbar
In the Switch to Offline Mode dialog, select Download Control. The Download
Control shows a list of information objects that are either selected for download in
the current session or that have been downloaded in previous sessions.
22 • Switching between Online and Offline Modes 181
SigmaLink Workbench 1.101 - User Guide
3
4
Ð
1
2
3
4
In the Download Control dialog highlight those information object that are to be refreshed.
Click on Refresh to select previously selected IOs for renewed download.
Removing selected IOs from the Download List
Click on the Offline switch in the toolbar
In the Switch to Offline Mode dialog, select Download Control. The Download
Control shows a list of information objects that are either selected for download in
the current session or that have been downloaded in previous sessions.
In the Download Control dialog highlight those information object that are to be removed from the download list.
Click on Remove to deselect information objects not to be downloaded.
Warning:
The Remove button deletes the copy of any highlighted information object from the
users local hard drive immediately! This action cannot be undone by selecting Cancel in the Download Control! To undo, removed objects must be reselected for read
only download.
Ð
1
2
3
4
Viewing selected IOs in the Download List
Click on the Offline switch in the toolbar
In the Switch to Offline Mode dialog, select Download control. The Download
Control shows a list of information objects that are either selected for download in
the current session or that have been downloaded in previous sessions.
In the Download control dialog highlight those information object that are to be
viewed from the download list.
Click on Show to load the selected IO in the STEP SGML Viewer or an associated
external application (non SGML objects).
22 • Switching between Online and Offline Modes 182
SigmaLink Workbench 1.101 - User Guide
22.3
Offline to Online
Related Topics:
• Terms in Online and Offline Modes (page 174)
• Online to Offline (page 175)
• Available Features in Offline Mode (page 184)
Ð
1
2
Switching online and uploading data
Close any open information objects in the editor
Click on the Online/Offline switch
SigmaLink commits all changes made to information objects to the online information pool
including checking them into the database.
Note:
Information objects are not automatically checked into the database unless check in was
selected while offline.
Information objects remain in the Download Control list until they are removed from it by
the user.When switching offline only new information objects on the Download Control
list are actually downloaded. Information objects on the list from previous downloads are
downloaded again only if they are refreshed by the user prior to download.
22 • Switching between Online and Offline Modes 183
SigmaLink Workbench 1.101 - User Guide
22.4
Available Features in Offline Mode
Related Topics:
• Terms in Online and Offline Modes (page 174)
• Online to Offline (page 175)
• Offline to Online (page 183)
This unit provides a list of features that are either available in offline mode or that can be
used in offline mode and will be committed to the online infopool after switching back online.
Feature
Not avail
Avail
Edit IO
X2
Edit fragment of split IO
X2
Edit split IO
X
Edit metadata
X5
View IO
X
View fragment of split IO
X
View split IO
Avail1
X
View metadata
X5
Print
X4
Print metadata
X4
Cut
X2
Copy
X
Paste (as link only)
X
Delete
X
Rename
X
Split IO
X
Join IO
X
Check in
X
Check out
X3
Fulltext search
X
Metadata search
X
22 • Switching between Online and Offline Modes 184
SigmaLink Workbench 1.101 - User Guide
Predefined search
X
Integrated Workflow
X
Set workflow state
X
Object to object link
X
All other links
X
Annotation
X
New object
X
Import
X
Export
X
Place node on personal desktop
X
Options - General settings
X
Options - Create/Import
X
Options - External applications
X
Options - User groups
X
Email to [email protected]
X1,6
Notes to table above:
1. Request is executed automatically after switching back online
2. Requires IO to be checked out prior to switching offline
3. Available if a check in was performed while offline
4. Requires access to a printer
5. Requires metadata was retrieved prior to switching offline
6. Requires internet access
22 • Switching between Online and Offline Modes 185
SigmaLink Workbench 1.101 - User Guide
23
Configuration
Related Topics:
• Integrated Staffware Workflow Engine (page 163)
• Customizing the User Interface (page 168)
• Switching between Online and Offline Modes (page 173)
• The User Help Desk (page 207)
Topics in this Unit:
•
General Settings (page 187)
•
Configuring Applications (page 188)
•
Configuring Create and Import Options (page 192)
•
Configuring Referenced Objects and Entities (page 194)
•
Changing the User Group (page 196)
•
Configuring the User Interface (page 197)
•
IO Property Sheet (page 199)
•
Check Out Directories (page 201)
•
Version Control Settings (page 203)
Users can configure certain SigmaLink Workbench functions such as editor, viewer or import options. These preferences control the behaviour of the corresponding tools or
functions and can be edited or returned to the standard configuration by the user at any
time. Preferences made by the user are kept until they are changed.
23 • Configuration 186
SigmaLink Workbench 1.101 - User Guide
23.1
General Settings
Related Topics:
• Configuring Applications (page 188)
• Configuring Create and Import Options (page 192)
• Configuring Referenced Objects and Entities (page 194)
• Changing the User Group (page 196)
• Configuring the User Interface (page 197)
• IO Property Sheet (page 199)
• Check Out Directories (page 201)
• Version Control Settings (page 203)
The General Settings dialog lists general information about the SigmaLink server and the
logged in user.
Setting
Meaning
Description
The description of the server
Server name
The server name specified in SLStartup.cfg
Server path
Server path for java
Server port
The port on which the Workbench communicates with the SigmaLink server
Server version
The version of the SigmaLink server
Client address
The IP address of the client machine as specified in SLStartup.cfg
User name
The short name of the user currently logged in.
23 • Configuration 187
SigmaLink Workbench 1.101 - User Guide
23.2
Configuring Applications
Related Topics:
• General Settings (page 187)
• Configuring Create and Import Options (page 192)
• Configuring Referenced Objects and Entities (page 194)
• Changing the User Group (page 196)
• Configuring the User Interface (page 197)
• IO Property Sheet (page 199)
• Check Out Directories (page 201)
• Version Control Settings (page 203)
Topics in this Unit:
•
Associating an Object Type with the Integrated Editor or Viewer (page 189)
•
Associating an Object Type with an External Editor or Viewer (page 190)
SigmaLink Workbench provides integrated tools for viewing and editing of SGML based
information objects. It is also possible to associate any information object with external applications for viewing, editing and printing. The external application is automatically started by selecting Edit, View or Print from the context sensitive menu within the Metadata
Window or from the Edit menu.
23 • Configuration 188
SigmaLink Workbench 1.101 - User Guide
23.2.1 Associating an Object Type with the Integrated Editor or Viewer
Related Topics:
• Associating an Object Type with an External Editor or Viewer (page 190)
The integrated editor and viewer communicate directly with SigmaLink Workbench which
makes it possible to perform certain actions like Check in, Start link, Follow link or Delete link from within the application. SGML based object types should always be associated with the integrated applications provided by SigmaLink Workbench.
Ð
1
2
Associating an object type with the integrated editor or viewer
In the Tools menu click on Options.
Select the External applications index card in the SigmaLink Workbench settings
dialog window.
Fig. 81: External applications index card in the SigmaLink Workbench settings dialog window
3
4
To select an object type from the list of installed object types highlight either its Edit
or its View entry in the Action column.
Activate the check box to the left of Integrated application to associate the selected
object type and function with the integrated application. If the Edit entry is highlighted
the object type is associated with the integrated editor for editing, if the View entry is
highlighted it is associated with the integrated viewer for viewing.
Note:
Only SGML based information objects can be associated with the integrated Editor/
Viewer.
5
Confirm the choices with OK.
23 • Configuration 189
SigmaLink Workbench 1.101 - User Guide
23.2.2 Associating an Object Type with an External Editor or Viewer
Related Topics:
• Associating an Object Type with the Integrated Editor or Viewer (page 189)
External editors as well as external viewers are automatically started by selecting either
Edit, View or Print from the SigmaLink Workbench menus. External applications do not
communicate directly with SigmaLink Workbench and it is generally not possible to incorporate SigmaLink options in their menus.
Ð
1
2
3
4
Associating an object type with an external editor or Viewer
Select Options from the Tools menu.
Highlight the External applications index card from the SigmaLink Workbench dialog window.
To select an object type from the list of installed object types highlight either its Edit,
View or Print entry in the Action column.
Enter the full path to the external application’s executable file in the field Application
to start.
Note:
For the Print option to be available the external application must be capable of processing the /p parameter when it is started with a filename.
In many cases this will not automatically print the IO but bring up the associated applications print setup dialog instead.
Note:
If the executable file’s location is not known click on Search to browse the file system
using the Select external application dialog window. Highlight the executable and
23 • Configuration 190
SigmaLink Workbench 1.101 - User Guide
select Open to automatically enter the path and file name in the field Application to
start.
5
Confirm the selection with OK.
23 • Configuration 191
SigmaLink Workbench 1.101 - User Guide
23.3
Configuring Create and Import Options
Related Topics:
• General Settings (page 187)
• Configuring Applications (page 188)
• Configuring Referenced Objects and Entities (page 194)
• Changing the User Group (page 196)
• Configuring the User Interface (page 197)
• IO Property Sheet (page 199)
• Check Out Directories (page 201)
• Version Control Settings (page 203)
Ð
1
2
Configuring create and import options
Select Options from the Tools menu.
Highlight the Create/Import index card from the SigmaLink Workbench settings
dialog window.
Fig. 82: Index card Create/Import in the SigmaLink Workbench settings dialog window
23 • Configuration 192
SigmaLink Workbench 1.101 - User Guide
3
The following options can be set:
Option
Function
Configuring default values for settings in the Import data dialog window
Delete original file
Sets the default in the Import data dialog window to
Delete original file. Leaving this option set during import
causes SigmaLink to automatically delete original files
from the local drive or network drive after importing them.
The default value for this setting should be off (not selected) unless it is absolutely certain that imported files are
not to be retain in their original locations. Select this option
on a case by case basis in the Import data dialog window
to delete individual files during import.
Show the Edit Metadata dialog after creating or importing IOs
Opens the Edit Metadata dialog after importing a file allowing the user to edit the data (depending on the user’s
authorization).
Automatically
open
the IO for editing after
creation
Automatically starts the editor and opens the information
object for editing.
Import target:
Import as new IO after
the selected one
Sets the default in the Import data dialog window to as
new objects. Select this option if you generally do not
import files into planned objects.
Import into the selected IO (single file only)
Sets the default in the Import data dialog window to into
the selected object. Select this option if you generally
import files into planned objects.
SGML parsing options:
Parse imported SGML
files
Parses the SGML data imported as new or into existing
SGML-based information objects.
Import even in case of
warning
Continues the import process even if the parser reports
warnings (for example for possibly mixed content).
Import even in case of
error
Continues the import process even if the parser reports an
SGML error. The default value for this option should be off
(not selected). The imported files must be corrected and
validated after import.
4
Click on OK to confirm the settings.
23 • Configuration 193
SigmaLink Workbench 1.101 - User Guide
23.4
Configuring Referenced Objects and Entities
Related Topics:
• General Settings (page 187)
• Configuring Applications (page 188)
• Configuring Create and Import Options (page 192)
• Changing the User Group (page 196)
• Configuring the User Interface (page 197)
• IO Property Sheet (page 199)
• Check Out Directories (page 201)
• Version Control Settings (page 203)
Object references, referred to as Including Links in SigmaLink Workbench, can be displayed when an object containing such references is loaded into the viewer or editor. The
defaults for displaying entities and object references are configured in the Links tab of the
SigmaLink Workbench settings dialog window in the Tools menu.
The following options can be set:
Option
Function
download all included entities
Causes all file entities included in the object to be resolved in
the editor/viewer. Referenced objects are also resolved.
download included
entities on demand
Causes entities referenced in an object to be displayed on
demand. Entities are represented, for example, by a blue
arrow in the viewer. Clicking on this arrow causes SigmaLink
to launch the appropriate application to display the object.
In the editor an included entity is accessed by selecting the
Follow Link command in the SigmaLink menu.
23 • Configuration 194
SigmaLink Workbench 1.101 - User Guide
Option
Function
do not download
included entities
Causes file entities in SGML instances to be ignored and not
displayed in the editor or viewer.
Check for included
entities
when
importing files
Causes SigmaLink to also import any included entities when
importing a file. The graphical entities are converted to including links.
Allow fast link creation in the editor by
tag insertion
Delete anchor tag
after deleting link
Causes an automatic deletion of an element after deleting a
link.
Automatically
refresh after creation of link with
type...
Causes SigmaLink to Check in after each link creation.
23 • Configuration 195
SigmaLink Workbench 1.101 - User Guide
23.5
Changing the User Group
Related Topics:
• General Settings (page 187)
• Configuring Applications (page 188)
• Configuring Create and Import Options (page 192)
• Configuring Referenced Objects and Entities (page 194)
• Configuring the User Interface (page 197)
• IO Property Sheet (page 199)
• Check Out Directories (page 201)
• Version Control Settings (page 203)
The user group membership determines permissions, authorizations and workflow window configuration of individual team members within SigmaLink. A user’s permissions
and authorizations as well as workflow window configuration may vary in the different user
groups or projects and can be configured by the SigmaLink administrator.
Every user is assigned to at least one user group. Users who belong to more than one
user group can select their group status and change it if required.
Ð
1
2
3
Selecting a new user group
Select Tools from the menubar.
Click on Options in the Tools menu.
Select the User groups index card from the SigmaLink Workbench settings dialog
window.
Fig. 83: The User groups tab in the SigmaLink Workbench settings dialog window
4
5
Highlight the appropriate user group.
Click on Set to confirm the selection.
23 • Configuration 196
SigmaLink Workbench 1.101 - User Guide
23.6
Configuring the User Interface
Related Topics:
• General Settings (page 187)
• Configuring Applications (page 188)
• Configuring Create and Import Options (page 192)
• Configuring Referenced Objects and Entities (page 194)
• Changing the User Group (page 196)
• IO Property Sheet (page 199)
• Check Out Directories (page 201)
• Version Control Settings (page 203)
The configuration of the user interface determines whether to create new windows under
certain circumstances or whether existing windows will be used instead.
Ð
1
Controlling new windows in SigmaLink
Select the User Interface tab from the Options dialog in the Tools menu.
Fig. 84: The User Interface tab in the SigmaLink Workbench settings dialog window.
2
The following options are available:
3
Option
Function
When displaying search results...
reuse the old window
and combine search
results using the operator
Causes SigmaLink to combine two or more result lists
using the chosen operator.
23 • Configuration 197
SigmaLink Workbench 1.101 - User Guide
Option
Function
reuse the old window
Causes SigmaLink to overwrite the previous result list.
open a new window
for each search
Causes SigmaLink to insert the result list into a new window.
Sort order ...
Default
tings
server
set-
Sort order is by IOID of objects
Derived from search
criteria
Order of controls in the search query lines
value, operator, field
specify value followed by operator and field
field, operator, value
specify field and operator followed by value
23 • Configuration 198
SigmaLink Workbench 1.101 - User Guide
23.7
IO Property Sheet
Related Topics:
• General Settings (page 187)
• Configuring Applications (page 188)
• Configuring Create and Import Options (page 192)
• Configuring Referenced Objects and Entities (page 194)
• Changing the User Group (page 196)
• Configuring the User Interface (page 197)
• Check Out Directories (page 201)
• Version Control Settings (page 203)
Ð
1
Controlling IO Properties Display in SigmaLink
Select the IO Properties tab from the Options dialog in the Tools menu.
Fig. 85: The IO Properties tab in the SigmaLink Workbench settings dialog window.
2
The following options are available:
Option
Function
When displaying IO properties...
reuse the old IO Property Sheet
Only one window will be open at any time
open a new IO Property Sheet for every
IO
A new window will be opened for the properties of every
IO.
23 • Configuration 199
SigmaLink Workbench 1.101 - User Guide
Option
Function
update automatically
The content of the property window will be updated automatically if a new IO is selected. (Effective only in conjunction with reuse ...)
When editing IO...
do not synchronize IO
properties
show IO properties if
the IO is already open
open IO and show
properties
The IO properties will be displayed whenever an IO is
loaded into the editor.
23 • Configuration 200
SigmaLink Workbench 1.101 - User Guide
23.8
Check Out Directories
Related Topics:
• General Settings (page 187)
• Configuring Applications (page 188)
• Configuring Create and Import Options (page 192)
• Configuring Referenced Objects and Entities (page 194)
• Changing the User Group (page 196)
• Configuring the User Interface (page 197)
• IO Property Sheet (page 199)
• Version Control Settings (page 203)
By default the Workbench will store checked out objects locally in a directory called InUse.
One of the disadvantages of doing this is that a user cannot edit an IO he or she previously
checked out from another client machine as the Workbench will attempt to load such an
IO from its own InUse directory rather than the other clients InUse directory where the IO
was placed when it was checked out.
To alleviate this situation the user can specify an additional directory on a network drive
to be used to store checked out IO’s. The checked out IO’s will then be accessible from
any client machine provided the same directory is specified on all client machines. Please
be advised that the checked out IO’s are still only available to the user who ’owns’ them
(i. e. who checked them out initially).
Any number of additional directories may be specified for this purpose. The user can
switch between them by selecting their display title in the check out directories dialog.
Note:
Specifying network drives to store checked out IO’s may cause IO’s to be inaccessible during offline mode if the specified drive and directory is not available offline!
Ð
1
Specifying SigmaLink Check Out Directory Settings
Select the Check Out Directories tab from the Options dialog in the Tools menu.
23 • Configuration 201
SigmaLink Workbench 1.101 - User Guide
Fig. 86: The Check Out Directories tab in the SigmaLink Workbench settings dialog window.
2
3
4
5
Click on Add New
Specify a display title for this directory.
Specify the drive and directory path where checked out IO’s are to be stored.
Click on OK to confirm and complete the action.
23 • Configuration 202
SigmaLink Workbench 1.101 - User Guide
23.9
Version Control Settings
Related Topics:
• General Settings (page 187)
• Configuring Applications (page 188)
• Configuring Create and Import Options (page 192)
• Configuring Referenced Objects and Entities (page 194)
• Changing the User Group (page 196)
• Configuring the User Interface (page 197)
• IO Property Sheet (page 199)
• Check Out Directories (page 201)
Note:
Please note that the settings made here have no effect on version creation unless the SigmaLink server property sigmalink.version.creation.automatic has been set to
false by the administrator.
Option
Function
When creating new versions...
1
automatically create a
new version at every
check out
The user will not be prompted to confirm the creation of new versions. The new versions will be
created automatically.
2
always ask the user
The user will be prompted to confirm the creation
and to specify a version label. The user may
choose not to create a version.
3
do not create new versions
The user will not be prompted for confirmation to
create a new version and no version will be created.
4
create versions when
Shift is pressed during
check in
A new version will be created only if the Shift
button is pressed while performing the check in.
5
ask for a version label
Determines whether the user is to be prompted for
a version label if option 4 above has been set.
23 • Configuration 203
SigmaLink Workbench 1.101 - User Guide
23.10 Container Settings
Related Topics:
• Dialog Settings (page 206)
This unit describes the preferences that can be set in the Workbench with regards to copy
and move operations on containers.
Fig. 87: The dialog Containers in the Tools menu.
Option
Delete
recursively
Description
containers
Allows the deletion of containers that still contain objects.
Note: Any object within the container will be deleted as
well!
Copy options
Deep copy content
Recursively copies the content of a container along with the
container itself.
Copy metadata
Copy the metadata of the container along with the container.
Copy annotations
Copy the annotations of the container along with the container.
Show this page before
copying a container
Allws the user to change the settings here before applying
them to a copy action.
Link options
23 • Configuration 204
SigmaLink Workbench 1.101 - User Guide
Copy complete links
On: Copy the link but not the target and anchor objects
themselves
Off: Do not copy the link
Object: Copy the link and the target and anchor objects
Copy entering links
On: Copy the link but not the anchor object itself
Off: Do not copy the link.
Object: Copy the link and the anchor object.
Copy leaving links
On: Copy the link but not the target object itself.
Off: Do not copy the link.
Object: Copy the link and the target object.
23 • Configuration 205
SigmaLink Workbench 1.101 - User Guide
23.11 Dialog Settings
Related Topics:
• Container Settings (page 204)
This unit describes the preferences that can be set in the Workbench with regards to dialogs during drag & drop operations.
Fig. 88: The dialog Dialogs in the Tools menu.
Option
Description
Export dialog setting
Enables the Save as dialog when exporting objects
Drag & Drop dialog
Prompts the user to confirm drag & drop operations such
as move or copy.
23 • Configuration 206
SigmaLink Workbench 1.101 - User Guide
24
The User Help Desk
Related Topics:
• Integrated Staffware Workflow Engine (page 163)
• Customizing the User Interface (page 168)
• Switching between Online and Offline Modes (page 173)
• Configuration (page 186)
In case of technical problems at the users site, SigmaLink Workbench provides an automated e-mail system which allows direct communication either with the SigmaLink administration at the installation site or with STEP, the developer of SigmaLink.
This e-mail system should be used to report malfunctions in SigmaLink or any integrated
application. Several different topics can be selected to specify the general nature of the
problem. The available topics can be configured by the administrator.
Ð
1
Sending a message to the User Help Desk
Click on E-Mail to STEP User Help Desk in the Tools menu. The dialog window
Message to STEP User Help Desk is being opened.
Fig. 89: The Message to STEP User Help Desk dialog window
2
Select one of the following options:
– Inside the Type area, click on Question, if you have rather general questions
about SigmaLink Workbench.
Click on Error if appropriate.
– Inside the Category field, click on the topic that represents the general nature of
your message. Your message will automatically be sent to the appropriate place.
24 • The User Help Desk 207
SigmaLink Workbench 1.101 - User Guide
– The fields Error-ID and Request contain identification numbers of the last error
message. Do not edit these fields, even if you are sure that these entries are incorrect. In this case make a note of this fact in the body of your message.
– In the Title field, give a short description of your question or error.
– In the Description field, put in your question or write a detailed account of the
circumstances under which the mistake occurred. Please also include your name,
phone number and e-mail adress if available.
3
Click on Send to send your message to the User Help Desk. The selection of the recipient is made automatically.
24 • The User Help Desk 208
SigmaLink Workbench 1.101 - User Guide
A
Keyboard Shortcuts
Keyboard shortcuts for the working with menus
Edit
Ctrl+E
Cut
Ctrl-X
Copy
Ctrl-C
Paste as link
Ctrl-V
Check out
Ctrl-O
Check in
Ctrl-I
Properties Attributes
Ctrl-T
Properties Metadata
Ctrl-M
Properties Annotations
Ctrl-N
Properties Versions
Ctrl-S
Properties Links
Ctrl-L
Properties Reuse
Ctrl-R
Predefined Queries
Ctrl-F3
Metadata Search
Ctrl-Shift-F3
A • Keyboard Shortcuts 209
SigmaLink Workbench 1.101 - User Guide
Fulltext Search
Alt-F3
Combined Search
F3
Quick Search
Shift-F3
Refresh Metadata Window
F5
Toggle Viewer
F7
Toggle Editor
F8
Toggle Last Result List
F9
Selecting the previous or next item inside the menu
DOWN-ARROW-KEY or RIGHT-ARROW-KEY
Changing between a submenu and the respective main menu
LEFT-ARROW-KEY or RIGHT-ARROW-KEY
Renaming an IO
F12
Activating the menubar
F10
Keyboard shortcuts for the working with the user interface
Switching between several windows inside the user interface
Ctrl+Tab
Switching between containers and information objects in the Metadata Window
DOWN-ARROW-KEY or UP-ARROW-KEY respectively
A • Keyboard Shortcuts 210
SigmaLink Workbench 1.101 - User Guide
B
GLOSSARY
Archiving
A manual, automatic or semi-automatic process for long-term storage.
CCITT
Comité Consultatif International Télégraphique et Téléphonique.
CCITT-IV
Standardized format by the CCITT for fax data.
Check in
Check in is the reversal to check out. With check in an information object is transferred to the database with the last changes made before. After check in an information object can be opened by other users, for
example, for editing.
Check out
Check out is the reversal to check in. By check out the topic version of
an information object is transferred to the user for editing. Checked out
objects are locked in the database, i.e. they cannot be edited by other
users. The topic version of checked out objects can, however, be viewed
in the viewer.
Client
The part of the software users interact with. The client is installed on a
computer with a graphical user interface.
Configuration
Some options are defined on the SigmaLink server while others can be
modified by the user. The configuration of SigmaLink includes providing
and assigning applications, the behaviour during import or export operations, assigning users to certain usergroups etc.
Container
A “box” where information objects are grouped according to certain parameters.
Container type
The container type defines which types of information objects may be put
into the container, e.g. documents of the type article, graphic files of the
type *.gif etc.
Content to content link
A link referencing out of an information object into another one. Two text
passages can, for example, be linked together.
Content to object link
A link referencing out of an information object to another one. A passage
can, for example, refer to a table stored as an information object.
Context sensitive menu
A menu which is activated by clicking with the right mouse button. The
content of this menu depends on the context in which it is called up.
Dialog window
In dialog windows called up by certain menu items the user can select options and preferences. Such items can be identified by three dots (...) af-
B • GLOSSARY 211
SigmaLink Workbench 1.101 - User Guide
ter the item name. The Print setup...item, for example, opens a dialog
window for print options.
Document internal link
Link between two passages within the same document, e.g. a link from a
piece of text to a table.
Document type
A class of documents with an identical or similar structure. The hierarchical structure of these documents can either give detailed semantic information or be completely optional. For SGML documents the document
structure is defined in the document type definition (DTD). A document
type can, for example, be user’s manual, encyclopedia entry or statute
book.
DTD
Document type definition: Syntactical rules characterizing the hierarchical structure of a document type. SGML documents (document instances) are structured according to the rules of a document type.
Empty element
Empty elements are “elements without content” declared in the DTD.
They can, for example, be used for links whose text is to be generated by
the output application. In the SGML editor empty elements are displayed
as “boxes”.
Extranet
The extension of a company's intranet out onto the Internet, e.g. to allow
selected customers, suppliers and mobile workers to access the company's private data and applications via the World-Wide Web.
File entity
This term belongs to the SGML standard terminology. The declaration of
a file entity is made within an SGML document. A file entity is inserted into
a document as a “place marker” until it is replaced with text, markup or a
graphic by the output application.
Fragment container
A fragment container groups fragmented information objects (fragments)
produced by a split operation. It is possible to edit single fragmented IOs.
In a fragment container the content of an information object is saved in
the state which was the topic one before the split. The content of a fragmented information object can be displayed in the viewer.
Hierarchy Window
The Hierarchy Window is the component of the SigmaLink Workbench in
which the hierarchical structure of the Infopool is displayed similar to a directory.
HTML
Hypertext Markup Language. A document type definition used for creating documents in the WWW (World Wide Web).
HTML document
A HTML document contains data structured according to a HTML DTD
with markup representing the semantic hierarchy of the document.
HyTime
ISO Standard 10744 for electronically linking information. This standard
is based on SGML.
B • GLOSSARY 212
SigmaLink Workbench 1.101 - User Guide
Index card
By clicking on an index card you can select a certain topic within a dialog
window.
Infopool
In the Infopool all information objects managed by SigmaLink are stored.
The Infopool consists of publishing projects containing information objects. Information objects can be grouped by containers.
Information object
The smallest unit of information that can be managed by SigmaLink. The
format for storing information objects is completely optional (e.g. tiff,
ASCII, SGML document instance, mpeg). In SigmaLink Workbench information objects can be edited and viewed.
Information object type
A class of information objects belonging to a certain storage format (e.g.
bitmap graphics, mpeg video clips or SGML documents of a certain
document type).
Intranet
An ’internal net’, whose pages are available only on a local server. An organization can use Web technology, such as browsers, servers, and editors to share information among its members or employees, but not make
this information accessible over the www.
Join
The join function creates a single information object out of fragments produced by a former split process.
Keyboard shortcut
A combination of keys (normally of the CTRL or ALT key together with
another key) by which items can be called up.
Link
Generally a connection between several (two or more) parts which can
be e.g. text passages, graphics, tables or entire information objects.
Markup
A notation enhancing certain text passages. SGML documents are structured by the markup according to a certain definition, the DTD.
Metadata
Information items for the management of every single information object.
This information can, depending on the configuration, either be generated
automatically or be entered by the user.
mpeg
A frequently used format for video files.
Navigator
A hierarchical table of contents displayed in a viewer built by links between single text passages.
Object to content link
A link from an information object into another one.
Object to object link
A link from an information object to another one.
Offline mode
Operating the SigmaLink Workbench without a permanent connection to
the server is referred to as Offline Mode. Server functions are not availa-
B • GLOSSARY 213
SigmaLink Workbench 1.101 - User Guide
ble until the Workbench has been switched back online. User actions that
require server functions are saved and committed to the online Infopool
after the server connection is reestablished by switching online.
Online mode
Operating the SigmaLink Workbench with a permanent connection to the
server is referred to as online mode. All server functions are immediately
available upon request.
Options
Preferences which can be activated or deactivated by clicking with the
mouse within a dialog window.
Paste as link
Physically an information object is stored only once and is referenced by
a “link” from within other containers (Paste as link). Thus, reusing information objects in different contexts is made possible. Changes made in
one place have an effect on all places where the information object is referenced.
pdf
Portable Document Format. A proprietary format for page layout by Adobe.
Personal Desktop
A component (sub-window) of SigmaLink Workbench. The user is given
an overview of the available information by the symbols on the Personal
Desktop. Each symbol represents a starting point from which the stock of
information is accessed.
Planned object
A planned object is an information object not being assigned to an object
type because the content of the planned object either is not yet known or
will be delivered later.
Publishing project
A publishing project is a project which is, with workflows, user entitlements etc. of its own, configured on the server. In SigmaLink Workbench
it is represented by a symbol on the Personal Desktop.
Quickhelp
A short description of the function of a button in the toolbar. It is displayed
whenever the mouse pointer is placed on the button.
Redundancy
The fact that the same piece information is stored two or more times, for
instance in different contexts. Redundancy is likely to multiply work in the
case of necessary changes apart from causing inconsistency within a
project. SigmaLink Workbench includes strategies by which redundancy
can be avoided.
Referenced object
A referenced object is a kind of place marker which is put where information objects, parts of them or graphics are inserted into an information object later on. Referenced objects can only be inserted into SGML
document instances, while information objects or parts of them to be inserted into another information object can belong to any object type.
Rollback
With rollback you can make one of the prior versions the topic version.
B • GLOSSARY 214
SigmaLink Workbench 1.101 - User Guide
Search result window
A window all hits of a search in SigmaLink are displayed in.
Server
The part of the software which stores and updates the data. The server
runs on the main computer your SigmaLink Workbench is connected to.
SGML
ISO standard 8879 – Standard Generalized Markup Language. A language for formally describing document structures or documents if a markup
is added to them according to the SGML rules.
SGML document
Data structured according to the accompanying DTD and with hierarchically structured markup added to it.
SGML parser
A program checking whether the syntax of the DTD is correct and whether the SGML document is built according to the rules of the DTD. A parser may be part of another program or a program of its own.
Single source concept
The fact that all possible using or transforming of a document including
CD ROM applications, Internet etc. is supplied from a single source.
Split
In SigmaLink Workbench SGML documents can be divided into fragmented information objects (fragments).
Staffware
The workflow application by Staffware is integrated in SigmaLink Workbench, which makes it possible to modify and represent all the editorial
processes and routines within an enterprise specifically for every project.
Style sheet
A layout rule for displaying documents in an SGML viewer.
Version management
The management of the accessable versions of an information object. In
SigmaLink Workbench versions are generated whenever an information
object is changed and checked in afterwards.
Wildcard
Wildcards are place markers representing unknown characters or variables in search processes.
Workflow
A defined working routine within an enterprise.
Workflow engine
An application by which processes and working routines within an enterprise can be modified and represented or new processes and working
routines can be defined. The employees of an enterprise are guided
through the different workflow steps automatically.
Workflow system
Workflow systems support controlled working routines within an enterprise.
XML
Extensible Markup Language, a developing WWW standard.
B • GLOSSARY 215
SigmaLink Workbench 1.101 - User Guide
C
Index
A
Adding
annotation , 93
symbol on the Personal Desktop , 169
Adept•Editor
SigmaLink Menu , 55
Annotations , 93
adding , 93
deleting , 94
editing , 94
properties , 82
representation by symbols , 93
Applications
configuration , 188
hiding or showing , 170
Archiving , 12
Assigning
link categories , 100
Associating
object type with external editor or viewer , 190
object type with integrated editor or viewer , 189
C
Cancel
creating content to content link , 109
creating content to object link , 106
creating document internal link , 111
creating object to content link , 104
Changing
display of metadata , 88
Check in , 9
creating version , 146
example , 9
Check in, explicit , 57
Check out , 9 , 9
C • Index 216
SigmaLink Workbench 1.101 - User Guide
undo , 51
Check out, automatical , 49
Check out, explicit , 49
Checking in
information object , 50 , 53
Checking out
information object , 49
Client , 7
Closing
information object in the viewer , 61
Combined search
selecting mode , 133
Combining
productions , 11
Comparing
version , 151
Configuration , 186
applications , 188
create options , 192
explanation , 12
general settings , 187
import options , 192
links , 194
referenced objects , 194
reused information objects , 194
user group , 196
user interface , 197
Container , 17
creating , 35
deleting , 38
explanation , 12
hierarchical structure , 33
organizing projects , 74
placing on the Personal Desktop as symbol , 169
renaming , 37
representation by symbol , 17 , 18
representation in the Metadata Window , 19
showing in the Metadata Window , 19
using , 33
working with , 33
Container type , 35
Container types
C • Index 217
SigmaLink Workbench 1.101 - User Guide
valid container types , 36
Container: fragment container , 74 , 76 , 78
Content
viewing content of information object , 60
Content to content link
overview , 108
Copy and paste as link , 124
Create options
configuring , 192
Creating
container , 35
content to content link , 108
content to object link , 106
document internal link , 110
including links , 154
information object , 39
information object with content , 40
link , 102
metadata , 87 , 87
object to content link , 104
object to object link , 103
planned object , 41
Subdocument references , 157
D
Database, relational , 7
retrieving information , 126
search and retrieval , 19
Deleting
annotation , 94
container , 38
link , 114 , 120 , 122
link element , 123
object to object link , 121 , 122
reused information object , 125
SGML based link , 123
symbol on the Personal Desktop , 169
version , 150
Dialog window
working with , 32
Display of metadata
changing , 88
C • Index 218
SigmaLink Workbench 1.101 - User Guide
Document management system , 7
Document type , 60 (-> see also: siehe auch Information object type)
installation , 108
Document type definition , 39
Download , 177
downloading read only , 181
options , 178
refreshing IOs , 181
removing IOs from download list , 182
viewing IOs from the download list , 182
Download control , 179
E
Editing
annotation , 94
information object , 48 , 52
information object from within the viewer , 70
metadata , 87 , 87
saving changes , 53
Editor
closing information object , 53
creating including links , 154
creating referenced object , 157
editing new version , 145
opening information object , 52
retrieving link , 118
starting , 118
Editor, external , 190
associating object type , 190
Editor, integrated , 189 , 189
Editorial system , 7
Entities
configuration , 194
Entities: file entities , 194
Extranet , 10
C • Index 219
SigmaLink Workbench 1.101 - User Guide
F
File
importing , 43
Fragment , 76
Fragment container , 74 , 76 , 78
showing content in the viewer , 76 , 77
Fragmented object , 74
Fulltext search
options , 131
Fulltext search, structured , 130
expanding search , 63
G
Generation of metadata, automatic , 87
Graphics
inserting into information object , 153
shrinking , 73
H
Hiding
parts of user interface , 170
tags , 73
viewer , 73
windows and applications , 170
Hierarchical structure
by using containers , 33
Hierarchy Window
structure , 18
I
Import
as new information object , 44 , 44
creating metadata , 86
deleting original files , 44 , 47
importing files , 43
including links , 44 , 46
into selected object , 46
using drag & drop , 45
C • Index 220
SigmaLink Workbench 1.101 - User Guide
Import options
configuring , 192
Including links
creating , 154
Customization of the DTD , 154
Index cards , 32
Infopool
creation and maintenance , 8
displaying root element , 18
explanation , 13
Information object
adding annotation , 93
annotations , 93
attributes , 80
checking in , 9 , 50 , 53
checking out , 9 , 49
closing in the editor , 53
closing in the viewer , 61
comparing versions , 151
creating , 9 , 39
creating new , 40
deleting annotation , 94
deleting version , 150
editing , 48 , 52
editing annotation , 94
editing from within the viewer , 70
explanation , 13
fragmented object , 74
inserting into other information object , 153
joining , 74 , 78
metadata , 86
navigating in , 66
opening for editing , 52
paste as link , 124 (-> see also: Reusing information object)
planning , 9 , 39
printing from the viewer , 71
proof reading , 9 , 48
properties , 79
reloading , 61
representation in the Metadata Window , 19
reusing , 11 , 124
revising , 10
saving changes , 9 , 53
showing in the Metadata Window , 19
showing structure , 66
splitting , 74 , 76
version control , 145
versions , 10
viewing , 60 , 60
viewing version , 49 , 149
writing , 48
C • Index 221
SigmaLink Workbench 1.101 - User Guide
Information object type , 33 , 40
associating with external editor or viewer , 190
associating with integrated editor or viewer , 189
explanation , 13
of new information object , 39
Information object with content , 39
creating , 40
Information object without content , 39
Information object, available , 19
Information object, checked in , 19
Information object, checked out , 19 , 19
Information object, new
importing file as , 44
Information object, SGML based , 8
Information object: fragment , 76
Information object: planned object , 39 , 41
Installation , 108
J
Join
conditions , 78
example , 75
joining information objects , 74 , 78
K
Keyboard shortcuts , 31 , 209
menus , 209
user interface , 210
L
Link , 97
calling ’Link control’ dialog window up , 121
cancel creating link , 119
creating , 97 , 102
deleting , 114 , 120 , 122
editing , 97
opening link control dialog window , 113
placing link of particular category , 101
C • Index 222
SigmaLink Workbench 1.101 - User Guide
retrieving , 112
retrieving from the Metadata Window , 113
retrieving in the editor , 118 , 118
retrieving in the viewer , 115
showing in the Metadata Window , 20
showing in the viewer , 115
Link categories , 97 , 99
assigning , 100
using , 101
Link concept , 97
Link control
Link control dialog window , 113
selecting link category , 101
Link element
deleting , 123
Link mechanisms , 97
Link options , 56
Link properties , 83
Link source , 97
symbol , 103
Link target , 97 , 103
Link, bidirectional , 97
Link, content to content
adaptation of the DTD , 108 , 108
cancel creating link , 109
checking information object in , 108 , 109
checking information object out , 108
creating , 108
deleting link element , 123
Link, content to object
adaptation of the DTD , 106
cancel creating link , 106
checking information object in , 106
creating , 106
deleting link element , 123
inserting link element , 106
overview , 106
Link, document internal
adaptation of the DTD , 110
allocation of identifiers , 110
C • Index 223
SigmaLink Workbench 1.101 - User Guide
cancel creating link , 111
creating , 110
deleting link element , 123
inserting identifiers , 111
overview , 110
Link, multiple , 97
Link, object to content
adaptation of the DTD , 104
cancel creating link , 104
checking information object in , 104
creating , 104
deleting link element , 123
inserting link element , 104
overview , 104
Link, object to object
creating , 103
deleting , 121 , 122
navigating , 103
overview , 103
showing in the Metadata Window , 103
showing link source , 103
showing link source and target , 103
showing link target , 103
Link, SGML based
deleting , 123
Loading
metadata , 90
M
Managing
reused object , 125 (-> see: siehe Reused information object)
Menu, context sensitive
showing , 30
working with , 30
Menu, SigmaLink
checking in , 57
link options , 56
navigation , 57
Properties dialog , 57
search options , 57
Menus , 29
keyboard shortcuts , 209
Message
C • Index 224
SigmaLink Workbench 1.101 - User Guide
sending to User Help Desk , 207
Metadata , 86
automatic generation , 87
changing display in the Metadata Window , 88
creating , 87 , 87
defining , 19 , 86
editing , 40 , 42 , 45 , 47 , 87 , 87
explanation , 14
loading , 90
loading from result list , 92
order for sorting , 88
printing , 89
properties , 81
saving , 90
saving as comma separated values , 91
saving as SGML table , 90
showing in the Metadata Window , 19 , 19
Metadata Window
changing column width , 172
changing display of metadata , 88
retrieving link , 113
showing information object , 88
showing metadata , 19
structure , 19
symbols: overview , 19
Metadata, configurable , 19
Metadata, system , 19 , 86
Metadata, user defined , 86
N
Navigating
in the Infopool , 10 , 17
in the viewer , 66
selecting navigator , 67
Navigation , 126 , 127
from SigmaLink menu , 57
using navigator , 68
Navigator
previewing style , 71
symbols in the navigator window , 68
O
Object type , 103 (-> see: siehe Information object type)
C • Index 225
SigmaLink Workbench 1.101 - User Guide
object types , 33
Online and Offline , 12 , 173
’Switch to Offline mode’ dialog , 177
download control , 179
downloading information objects , 177
downloading IOs read only , 181
features in offline mode , 184
general concepts , 175
refreshing downloaded IOs , 181
removing downloaded IOs , 182
Switching offline , 175
switching offline , 180
switching online , 183
terms , 174
viewing IOs from download list , 182
Opening
SGML document in the viewer , 62
Options , 32
P
Paste as link , 124
Personal Desktop
adding symbol , 169
creating personal environment , 169
deleting symbol , 169 , 169
executing query , 169
placing a container as symbol on , 169
renaming symbol , 169
showing content , 169
structure , 17
symbols , 17
Planned object , 20 , 39
creating new , 41
importing file into , 46
Planning
information object , 39
projects , 74
Preferences
Container options , 204 , 206
Printing
information object from the viewer , 71
metadata , 89
selecting printer , 71
with external applications , 58
C • Index 226
SigmaLink Workbench 1.101 - User Guide
Productions
combining , 11
Proof Reading , 9
information object , 48
Properties dialog , 57
Publishing project , 35
explanation , 14
selecting from drop down list , 24
Q
Query, predefined , 138
representation on Personal Desktop , 169
Query, specified by the user , 134
Questions
message to User Help Desk , 207
Quick search box , 25
R
Redo , 69
Redundancy , 124 , 126
Referenced object
overview , 153
showing all included entities , 194
showing included entities on demand , 194
Referenced objects
allow fast link creation , 195
checking for included entities , 195
not showing included entities , 195
Reloading
information object , 61
Renaming
container , 37
Retrieval , 126
fulltext , 7
interface , 7
Retrieving , 10
from relational database , 19
C • Index 227
SigmaLink Workbench 1.101 - User Guide
information objects , 126
link , 112
link from the Metadata Window , 113
link in the editor , 118 , 118
link in the viewer , 115
structured in fulltext , 130
Reused information object
deleting , 125
refreshing reused information object list , 125
Reused object
managing , 125
Reusing information object , 11
overview , 124
Paste as link , 124
properties , 85
symbol , 124
Revising information object , 10
S
Saving
information object , 9 , 53
metadata , 90
Search , 126
Search and retrieval , 86
combined search , 133
loading query , 134
metadata search , 127
Native search , 136
predefined queries , 138
quick search , 140
saving and loading search result lists , 142
saving query , 134
structured fulltext search , 130
Search options , 57 , 64
Search result
loading from result list , 144
saving as SGML table , 142
saving in CSV format , 143
Search, automatic , 63
Search, case sensitive , 63
Search, context sensitive , 63
C • Index 228
SigmaLink Workbench 1.101 - User Guide
Searching , 10
defining search area , 63
in the viewer , 63 , 64
limiting search , 63
with relational database , 19
Searching across metadata
displaying search result , 129
in the current container , 128
in the current publishing project , 129
in the entire Infopool , 129
operators: overview , 128
options , 128
starting search , 127
wildcards , 129
Searching with native search
specifying statement , 136
Searching with predefined queries
combining search criteria , 138
limiting search , 139
starting search , 138
symbols , 17
Searching with quick search
specifying a quick search , 140
Searching with structured fulltext search
in the current publishing project , 132
in the entire Infopool , 132
limiting to certain SGML elements , 130
operators , 131
showing search result , 132
starting search , 130
wildcards , 132
Security , 7
Server , 8
SGML document
opening in the viewer , 62
SGML link technology , 97
SGML viewer , 59 (-> see: siehe Viewer) , 60
Shortcuts
representation on Personal Desktop , 169
Showing
’Link control’ dialog window , 121
fragment container in the viewer , 76 , 77
link in the viewer , 115
C • Index 229
SigmaLink Workbench 1.101 - User Guide
parts of user interface , 170
tags , 73
viewer , 73
windows and applications , 170
workflow state , 162
SigmaLink menu
check in , 57
link options , 56
navigation , 57
options , 55
properties , 57
search options , 57
SigmaLink Workbench
features , 8 , 9
general , 28
menus , 29
offline mode , 10
user interface , 15
work with , 7
Split
conditions , 76
example , 75
splitting information object , 74 , 76
Split, automatic , 9
Split, hierarchical , 74
Split, manual , 9
Starting
editor , 118
viewer , 115
Starting the editor
automatically at creation or import , 40 , 45 , 47
Statusline
structure , 27
Structuring information , 74
Styles
selecting in the viewer , 61
Subdocument references
creating , 157
customization of the DTD , 157
Switching offline
downloading objects , 12
read only download , 29
C • Index 230
SigmaLink Workbench 1.101 - User Guide
Symbol
annotation symbol , 93
green , 169
in the Metadata Window , 19
on the Personal Desktop , 17
placing on the Personal Desktop , 169
yellow , 169
T
Tags
hiding , 73
showing , 73
Toolbar
buttons: overview , 21
structure , 21
U
Undo , 69
User group , 196
User Help Desk
sending message , 207
User interface
commands , 16
configuring , 197
context sensitive menus , 30
hiding parts , 170
Hierarchy Window , 16 , 18
installing , 168
keyboard shortcuts , 210
menubar , 16
Metadata Window , 16 , 19
Personal Desktop , 16 , 17
Publishing Project drop down list , 24
quick search box , 25
showing parts , 170
status line , 16 , 27
structure , 15
symbol , 17
title bar , 16
tool bar , 21
workflow bar , 26
Using
link categories , 101
C • Index 231
SigmaLink Workbench 1.101 - User Guide
V
Version , 10
comparing , 151
creating new , 146
deleting , 150
properties , 84
viewing , 49 , 149
Version control , 145
displaying differences , 151
retrieving previous version , 148
set version , 148
Version management
explanation , 14
Viewer
closing information object , 61
deselecting navigator , 67
deselecting parts of viewer interface , 73
editing an information object , 70
moving back and forth , 68
navigating , 66
navigators , 59
opening SGML document , 62
printing information object , 71
redo , 69
reloading an information object , 61
retrieving link , 115
search options , 64
searching , 63 , 64
selecting navigator , 67
selecting parts of viewer interface , 73
selecting printer , 71
selecting styles , 61
showing fragment container , 76 , 77
starting , 115
style sheets , 59
toggling display , 73
undo , 69
using navigator , 68
Viewer interface
deselecting parts , 73
selecting parts , 73
Viewer, external , 190
associating object type , 190
Viewer, integrated , 189 , 189
C • Index 232
SigmaLink Workbench 1.101 - User Guide
Viewing
information object , 60
version , 49 , 149
W
Windows
hiding or showing , 170
Work location , 10
Work queue , 165
Workflow
connection to integrated workflow engine , 163
defining workflow states , 160
explanation , 14
overview , 159
setting workflow state , 161
showing workflow state , 162
workflow process , 26
Workflow bar
structure , 26
Workflow engine, integrated , 14
form , 166
logging into Staffware environment , 164
work queue , 165
Workflow state
commands , 162
defining , 160
represented by button , 26
setting , 161
showing , 162
Workflow system , 159 , 163
Working routine , 159 , 163
Writing , 9
information object , 48
C • Index 233