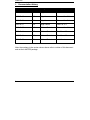
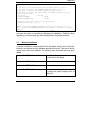
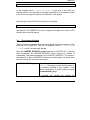
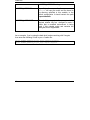
1
LxNETES User's Manual P.O: Box 1103 Kueferstrasse 8 Tel. +49 (7667) 908-0 [email protected] • • • • D-79200 Breisach, Germany D-79206 Breisach, Germany Fax +49 (7667) 908-200 http://www.fsforth.de LxNETES Copyright 2003: FS Forth-Systeme GmbH Postfach 1103, 79200 Breisach, Germany Release of Document: Filename: Author: Program Version: October 31, 2003 LxNETES.doc M. Pietrek / N. James 2.3 All rights reserved. No part of this document may be copied or reproduced in any form or by any means without the prior written consent of FS Forth-Systeme GmbH. 2 LxNETES Table of Contents 1. Documentation History ...................................................................................6 2. Preface...........................................................................................................7 3. Features .........................................................................................................8 4. Requirements .................................................................................................9 4.1. Free Space ..........................................................................................9 4.2. Applications..........................................................................................9 4.3. Serial Port Nomenclature .....................................................................9 4.4. LxNETES CD .....................................................................................10 4.4.1. doc..........................................................................................10 4.4.2. images....................................................................................10 4.4.3. images_digi ............................................................................10 4.4.4. images_unc20 ........................................................................10 4.4.5. images_unc20_rescue............................................................11 4.4.6. software..................................................................................11 5. Installation ....................................................................................................12 5.1. Minimal Installation.............................................................................13 5.2. Full Installation ...................................................................................14 5.3. Configuring The Network On The Host...............................................14 5.4. Environment Variables .......................................................................15 6. Getting Started .............................................................................................17 6.1. DHCP.................................................................................................17 6.2. Testing the System ............................................................................18 6.3. Demonstration Of The Standard System............................................19 7. Building A Project .........................................................................................21 7.1. Directory Structure .............................................................................22 7.2. Kernel ................................................................................................23 7.3. Applications........................................................................................23 7.4. RootFS...............................................................................................23 7.5. JFFS2 ................................................................................................24 7.6. CVS ...................................................................................................24 3 LxNETES 7.7. Rescue Kernel................................................................................... 24 8. Updating Flash............................................................................................. 26 8.1. On A Running System ....................................................................... 26 8.2. On A Corrupted System..................................................................... 28 9. Modifying The Default Kernel Configuration ................................................. 29 9.1. Default Configuration......................................................................... 29 9.2. Kernel Configuration (xconfig) ........................................................... 30 9.3. RootFS .............................................................................................. 31 9.3.7. CRAMFS................................................................................ 31 9.3.8. NFSROOT ............................................................................. 32 9.3.9. JFFS2 .................................................................................... 33 9.4. Using Flash instead of Serial EEPROM............................................. 33 10. Adding Applications To Your Project ............................................................ 34 11. The Kernel Boot Process ............................................................................. 36 11.1.Overview ........................................................................................... 36 11.2.Phases .............................................................................................. 36 12. User Boot Process ....................................................................................... 37 13. Debugging Applications ............................................................................... 38 13.1.Common Setup ................................................................................. 38 13.2.gdbserver .......................................................................................... 38 13.3.Using Abatron’s BDI2000 ................................................................. 40 13.3.10. ................................................................................ Installation 13.3.11. ................................................................................ Debugging 14. Building The Toolchain................................................................................. 43 15. Applications ................................................................................................. 45 15.1.busybox ............................................................................................. 45 15.2.eraseall.............................................................................................. 45 15.3.telnetd ............................................................................................... 46 15.4.inetd .................................................................................................. 46 15.5.thttpd ................................................................................................. 46 15.6.ftp server ........................................................................................... 46 4 40 40 LxNETES 15.7.ftp client .............................................................................................46 15.8.eeprom...............................................................................................47 15.9.update_flash ......................................................................................48 15.10.dbgapp .............................................................................................49 15.11.hello_c..............................................................................................49 15.12.hello_cc ............................................................................................49 15.13.Watchdog .........................................................................................49 15.14.Date and Time..................................................................................50 15.15.LCD Demo .......................................................................................50 15.16.PPP..................................................................................................50 16. What’s new in LxNETES v2.3? .....................................................................51 16.1.New Features.....................................................................................51 16.2.Minor Enhancements .........................................................................51 17. What’s new in LxNETES v2.2? .....................................................................51 17.1.New Features.....................................................................................51 17.2.Minor Enhancements .........................................................................52 17.3.Bug Fixes...........................................................................................52 17.4.Known Issues.....................................................................................53 18. FAQs ............................................................................................................54 EEPROM................................................................................................ 55 19. Links.............................................................................................................55 20. Abbreviations................................................................................................56 5 LxNETES 1. Documentation History Date Version Responsible Description 2003-10-31 2.3 Nigel James Beta1 for v2.3 2003-06-13 2.2 Nigel James Released for v2.2 2003-03-21 2.1 Nigel James Released for v2.1 2003-02-27 2.0 Nigel James Beta1 for v2.1 2002-10-25 1.0 Markus Pietrek Released for v2.0 2002-10-11 0.3 Markus Pietrek Beta2 for v2.0 2002-09-24 0.2 Markus Pietrek Beta1 for v2.0 2002-09-09 0.1 Markus Pietrek Initial Version Note: the numbers in the version column above refer to revision of this document and not the LxNETES package. 6 LxNETES 2. Preface The LxNETES package enables users to easily develop application software under uClinux for the UNC20 and ModNET50 Developer’s Kits from FS ForthSysteme GmbH and the Digi Connect 50 from Digi International, Inc. In general, this document describes LxNETES as it applies to both the UNC20 Developer’s Kit and the ModNET50 Developer’s Kit. In those cases where something only applies to one of the Developer’s Kits it will be explicitly stated. This document assumes that the reader has basic knowledge of Linux. In addition, it is recommended that the reader has experience with compiling a standard Linux on the host. 7 LxNETES 3. Features With LxNETES the user has a platform with the following features: • uCLinux 2.4.20 kernel • uClibc 0.9.19 for user applications • C and C++ supported for application development • pre-built gdb, busybox and other applications • Ethernet, flash and EEPROM support • fast booting with reduced serial output possible • root file system may be NFS, CRAMFS, JFFS2 or extfs2 (for CompactFlash) • project-oriented workflow kernel configuration, rootfs setup and applications are separated from the kernel sources and the tool chain and library sources, thus making it possible to maintain the project in a revision control system. • all building can be done without any root access. 8 LxNETES 4. Requirements For development, a Linux x86 host with a recent distribution is required. This documentation is based on a SuSE distribution installation, but it should work with minor changes on the other distributions, too. 4.1. Free Space For installation and building, the following free space is required on the partitions: /usr/local 350 MB /targets/LxNETES 60 MB /targets/LxNETES/ewp 560 MB (only with full installation) 4.2. Applications A full host development toolchain (make, gcc, binutils) is required for building the project or the toolchain and Tcl/Tk is required for configuring the kernel and installation of the packages. If a standard Linux 2.4 can be compiled on the development platform, then all the required applications will have been installed already. For the serial console, a terminal client like "minicom" or "seyon" has to be installed and configured for 38400 baud. 4.3. Serial Port Nomenclature A word on the serial port nomenclature since this can be confusing! The NET+ARM family of microcontrollers has 2 serial ports. These physical ports on the Developer’s Kits are referred to as COM A and COM B. COM A is always connected to Port A of the NET+ARM; COM B is connected to Port B on the 9 LxNETES NET+50 microcontroller and Port C on the NS7520 chip (the NS7520 doesn’t have a Port B). On the ModNET50 Developer’s Kit both serial ports, COM A and COM B, are available. The console, /dev/ttyS0, is on COM A and a second console, ttyS1, is on COM B. As delivered from the factory, the UNC20 Developer’s Kit only has 1 serial interface, COM B, and this is used for the console /dev/ttyS0. The other serial port, COM A, can be implemented in the wire-wrap area. Refer to the UNC20 Developer’s Kit User Manual on how to do this. Summary: there is a fixed link between COM A/B and the pins of the UNC20 or ModNET50 module. The console, /dev/ttyS0, can be assigned to either COM A or COM B. Refer to section 9.2 “Kernel Configuration (xconfig)” on how to do this. 4.4. LxNETES CD The CD contains all the software and documentation needed for LxNETES. 4.4.1. doc This User’s Manual as a PDF file and additional HOWTOs. 4.4.2. images All pre-built images for the ModNET50, for example "linux.bin" and "jffs2.img". 4.4.3. images_digi All pre-built images for the Digi Connect 50, for example "linux.bin" and "jffs2.img". 4.4.4. images_unc20 All pre-built images for "jffs2.img". 10 the UNC20, for example "linux.bin" and LxNETES 4.4.5. images_unc20_rescue A rescue image, “linux.bin”. 4.4.6. software All software related specifically to the LxNETES. This can be installed by calling "install.tcl" from the root directory of the CD. 11 LxNETES 5. Installation The installation script provided on the CD will install the LxNETES kernel, toolchain and sources in /usr/local/LxNETES-2.3 and the project directories in /targets/LxNETES. We recommend that you install as the default user, since then it will not be necessary to do any builds as root. However, you have to be root to create a sub-directory in "/usr/local" or to create the non-existing "/targets" directory. So create these directories as superuser, change the owner to the default user, and then do the installation as default user. $ su Password: # mkdir /usr/local/LxNETES-2.3 /targets # chown username:group /usr/local/LxNETES-2.3 /targets # exit Since there will be many compilations done in "/targets" and its subdirectories, it is recommended to have it as a partition of its own so as to reduce fragmentation of the root file system. Insert the LxNETES CD into the CD ROM drive and enter mount /cdrom cd /cdrom ./install.tcl The script will ask you whether you'd like to have a full or minimal installation. After selecting the type it calculates the estimated disk consumption for the installation and then asks to continue. If yes, it copies and unpacks the files to your hard disk. 12 LxNETES ***** LxNETES Installer ***** Do you want a full installation with toolchain sources (y/n)? n Do you want to install the ModNET50 template project (y/n)? y Do you want to install the UNC20 template project (y/n)? y Do you want to install the DIGI Connect 50 template project (y/n)? y Estimated disk usage: /usr/local : 350 MB /targets/LxNETES : 60 MB /targets/LxNETES/ewp : 560 MB You need to have write access to the directories Proceed installation (y/n)? y gunzip -c software/LxNETES_distribution.tgz|(cd /usr/local; tar xf -) Don't forget to set LXNETES_NFSROOT if you want to use NFS as a rootfs Have fun Note that a check is made whether /targets/LxNETES/project* already exists and you have the option of overwriting or aborting the installation. Therefore, when upgrading, you should save any work already done in the project directory. 5.1. Minimal Installation A minimal installation is recommended if the developer doesn't want to build the toolchain, the libraries and the standard applications himself. This should be the normal case. After the installation, the following new directories will have been added: /usr/local/LxNETES-2.3/arm-elf Toolchain with compiler, libraries and include files for the target /usr/local/LxNETES-2.3/apps The pre-built target applications /usr/local/LxNETES-2.3/linux The kernel sources /usr/local/LxNETES-2.3/bin Non-toolchain host applications needed to create the project images such as mkfs.jffs2 13 LxNETES /targets/LxNETES/project The default project for the ModNET50 /targets/LxNETES/project_unc20 The default project for the UNC20 /targets/LxNETES/project_digi The default project for the Digi Connect 50 5.2. Full Installation A full installation is necessary if the toolchain or the applications have to be rebuilt, either because there are older or newer system libraries installed than on SuSE 7.2 or the host platform is not an x86. This will create, in addition to the minimal installation, the following directories: /targets/LxNETES/ewp Contains unpatched kernel sources, the standard toolchain, libraries and applications as archives /targets/LxNETES/ewp/LxNETES All patches and files necessary to create the minimal installation out of the standard applications downloaded from the internet. 5.3. Configuring The Network On The Host To simplify debugging on the target, we recommend using NFS so that application directories can be mounted with read/write permissions on the target. This requires the host to have an NFS server installed. The configuration details are beyond the scope of this User’s Manual and are very specific to the various distributions, therefore this Manual only describes the modifications necessary for hosts running SuSE distributions. For exporting a directory per NFS, "/etc/exports" must be modified to specify the directory to be exported and to whom it should be exported. 14 LxNETES /exports/bootdir 192.168.42.7(rw,all_squash) In the example above, "/exports/bootdir" is the path of the NFS root directory which is only exported to the target (specified as an IP address). Refer to the Linux man pages for exports for a definition of the options. After saving the file the NFS server needs to be restarted. # /etc/rc.d/nfsserver restart See section 9.3.8 NFSROOT on how to configure the target so it uses an NFS directory as the root file system. 5.4. Environment Variables There are three environment variables which slightly modify the behavior of the build flow of the LxNETES. They can be added to the file "~/.profile" or "~/.bash_profile" for permanent storage. Note that LXNETES_NFSROOT_project was new in LxNETES v2.2. It has the same functionality as LXNETES_NFSROOT, which remains for reasons of compatibility, and takes precedence over LXNETES_NFSROOT. The reason it was added is to allow an NFSROOT directory for each project, for those users who are working with more than one project. LXNETES_NFSROOT_project If specified, a "make all" or "make installnfsroot" will copy the rootfs and the kernel to the directory specified in this variable. In the default configuration it should contain the path /exports/bootdir_proj1 If specified, this variable will override the 15 LxNETES LXNETES_NFSROOT setting. LXNETES_NFSROOT If specified, a "make all" or "make installnfsroot" will copy the rootfs and the kernel to the directory specified in this variable. In the default configuration it should contain the path /exports/bootdir LXNETES_NOPROMPT When building a project, the prompt and the terminal window title are changed to make it visible that a modified environment is being used. If this variable exists and contains the value yes, this is suppressed. As an example, if you’re using the bash shell, and are working with 2 targets, then enter the following 2 lines in your ~/.bashrc file. export LXNETES_NFSROOT_project_unc20=/exports/unc20boot export LXNETES_NFSROOT_project_digi=/exports/digiboot 16 LxNETES 6. Getting Started The Developer’s Kits are delivered with an image pre-installed in Flash on the module. After the target is plugged in, boot messages are printed on the console (38400Bd). Then after about 10 to 15s the kernel has been initialized and the user may enter commands in the shell. console=/dev/console init started: BusyBox v0.60.3 (2003.03.14-12:32+0000) multi-call binary Starting pid 9, console /dev/console: '/etc/init.d/rcS' Setting hostname ... Mounting other filesystems ... Starting pid 23, console /dev/console: '/usr/bin/lcd_demo' Starting pid 24, console /dev/console: '/sbin/inetd' Starting pid 25, console /dev/console: '/sbin/thttpd' Starting pid 26, console /dev/console: '/sbin/agetty' BusyBox v0.60.3 (2003.03.14-12:32+0000) Built-in shell (msh) Enter 'help' for a list of built-in commands. # 6.1. DHCP Per factory default the target tries to obtain an IP address via a DHCP request. If a DHCP server cannot be found, the boot process will forever sit in a loop waiting for a reply from the DHCP server. To break this loop do the following: on the UNC20 Developer’s Kit hold the Port C4 button down while resetting the board on the ModNET50 Developer’s Kit switch SW10 to on before resetting the target PortC4/SW10 may only be released after the target has finished booting and is awaiting commands on the shell This will allow LxNETES to boot and the Ethernet interface will have taken the default IP address as defined by the kernel command line options (see section 17 LxNETES 9.2). Then you should switch DHCP off by modifying the eeprom contents. Enter the command “eeprom –d no”. Other options for the eeprom command can be found in section 15.8. At the same time you can set the default IP address to suit your network. 6.2. Testing the System One of the first things you’ll want to do is verify that your system is working ok. If you have a prompt on the serial console, then you can enter some commands. Below are some useful commands and their typical output. # ls bin etc jffs mnt proc sbin dev htdocs lib nfs ram usr # mount rootfs on / type rootfs (rw) /dev/root on / type cramfs (ro) none on /dev type devfs (rw) proc on /proc type proc (rw) ramfs on /ram type ramfs (rw) # eeprom Current EEPROM contents: Checksum: 154 Use DHCP: no MAC Address: 00:04:f3:00:00:eb IP Address: 192.168.42.7 Subnet Mask: 255.255.255.0 Gateway: 192.168.42.1 DNS: 0.0.0.0 Environment variables: NFSMOUNT=192.168.42.1:/exports/bootdir JFFSMOUNT=yes # If you don’t have a prompt on the screen, then there could be a problem with either the serial cable or the configuration of the terminal client (minicom, seyon, screen). Per factory default, an LED test is enabled. On the UNC20 this is called bas_test. Pressing a button (other than Reset!!) causes the corresponding LED to light. The LED is lit for as long as the button is held down. This test can be disabled by entering “eeprom –x BASTEST” at the prompt (and later re-enabled by entering “eeprom –a BASTEST=yes”). 18 LxNETES Note: please allow sufficient time for the system to boot, ca. 15 secs, before pressing the buttons, otherwise the action could be mistaken for “Invalidate EEPROM contents” in the case of PortC4 or “Allow debugger to attach” in the case of PortC0. On the ModNET50 this test is called eva_test and has a similar functionality except that there are now 4 buttons and 4 LEDs. Pressing all 4 buttons simultaneously ends this test. Caution: as with every Unix system, "halt" or "reboot" should be run before turning power off if any file system is mounted read-write. Only if all file systems are mounted read-only may the system be turned off immediately. 6.3. Demonstration Of The Standard System LxNETES comes with a configuration that should demonstrate the use of • kernel modules • EEPROM usage • JFFS2 • web server and ftp server The demonstration requires the target to be attached to a network and configured with a valid IP address. A web browser is required on the host. Target (shell) Host (web browser) # eeprom -x "JFFSMOUNT" # reboot # ls /htdocs/jffs2 index.html # mount /dev/root on / type cramfs (ro) none on /dev type devfs proc on /proc type proc open "http://192.168.42.7/jffs2/index.html" Note that no JFFS2 file system is 19 LxNETES ramfs on /ram type ramfs installed. # eeprom -a "JFFSMOUNT=yes" # reboot # ls /htdocs/jffs2 doc index.html # ls /htdocs/jffs2/doc README.html # mount /dev/root on / type cramfs none on /dev type devfs proc on /proc type proc ramfs on /ram type ramfs /dev/mtdblock/3 on /htdocs/jffs2 type jffs2 # cat >/htdocs/jffs2/doc/hello.txt Hello World # reboot reload "http://192.168.42.7/jffs2/index.html" Now with a JFFS2 installed a document link is visible which points to a directory "doc/" containing the file "README.html" Reload "http://192.168.42.7/jffs2/doc/" "hello.txt" should still be visible and readable # eeprom -e "" # reboot After a reload the page should not be visible. Also included in the webpage is a CGI demonstration which allows any file on the target to be displayed in the browser. Per default the file “/proc/cpuinfo” is entered. Changing this to “/proc/version” will display the kernel version, for example: Linux version 2.4.20-uc0-fs6. 20 LxNETES 7. Building A Project You probably started by using the default kernel image of the CD. The next step is to rebuild it on the development host to familiarize yourself with the build process. Before doing that, some project specific environment variables have to be set. To do so, change into the project directory "/targets/LxNETES/project", or "/targets/LxNETES/project_unc20" if using the UNC20 Developer’s Kit, and enter ". LxNET.sh". The space between the dot and "LxNET.sh" is important. Csh users should enter “LxNET.csh”. Note: sourcing LxNET.sh will change the prompt. If you don’t want this, make sure that the variable LXNETES_NOPROMPT is set beforehand. After that, the kernel and the application may be rebuilt by just entering "make". tom@forth:~$ cd /targets/LxNETES/project tom@forth:/targets/LxNETES/project$ . LxNET.sh Starting LxNETES Configuration ============================ $LXNETES_PROJECT $LXNETES_KERNEL_PATH $LXNETES_TOOLCHAIN_PATH $LXNETES_BIN_PATH $LXNETES_APPS_PATH $CC $CXX $AS $GDB = = = = = = = = = /targets/LxNETES/project /usr/local/LxNETES/linux /usr/local/arm-elf /usr/local/LxNETES/bin /usr/local/LxNETES/apps arm-elf-gcc arm-elf-g++ arm-elf-as arm-elf-gdb tom@forth!project:/targets/LxNETES/project$ make The build may take some minutes and will create a file "bin/linux.bin" with the kernel and the embedded root file system and a second file "bin/jffs2.img" with a journaling flash file system. If the environment variable LXNETES_NFSROOT is specified, the rootfs and the image are also copied to that path. This can be enforced by doing "make install-nfsroot". 21 LxNETES 7.1. Directory Structure The project consists of some files and directories. LxNET.sh LxNET.csh Shell script to configure environment variables. Makefile Rules to build the kernel, the applications, the rootfs and install it to the destination directories. bin/ Contains all files necessary for booting, such as the kernel image and separate root file systems. build.sh Script needed to build the rootfs. etc/ The etc/ directory of the rootfs. htdocs/ Sample web server documents for "thttpd". jffs2/ Files to be stored in the JFFS2 file system. linux/ Kernel configuration and object files. prepare.sh After unpacking LxNETES_project.tgz or checking out a project module from CVS, this script has to be called to update the symbolic links. rootfs/ The rootfs is temporarily created in this directory. apps/NAME/src/ The source files for the NAME user application. 22 LxNETES 7.2. Kernel The kernel alone may be built by doing "make build-linux". The resulting kernel image will be placed in the "bin" directory. A successful compilation will be indicated by the following output: [...] Everything: 1468 kilobytes Super block: 76 bytes CRC: 160a2def 12+0 records in 12+0 records out cp linux/linux.cramfs bin/linux.bin or something similar. To be able to debug the kernel it must be built with the –g flag, so that it contains debug info. To do this, modify the kernel configuration as described in section 9.2 “Kernel Configuration (xconfig)” 7.3. Applications The project-specific applications, which are located under "apps/", can be rebuilt using the command "make build-subdirs". 7.4. RootFS The rootfs is included in the kernel by default. It may, however, be desirable to have the rootfs in a separate directory "rootfs/". This can be achieved with the command "make build-rootfs". Currently this does not include building a JFFS or standalone CRAMFS image. Alternatively, the file "bin/rootfs.img" can be manually created by calling "sh build.sh rootfs_image". This file may then be copied into a flash partition and mounted as root. 23 LxNETES 7.5. JFFS2 The additional JFFS2 image "bin/jffs2.img" containing example HTML files may be created with "make build-jffs2". The file has to be separately copied to the flash. 7.6. CVS If the project is being stored in CVS or any other revision control system not maintaining symbolic links, then after each checkout "./prepare.sh" has to be called in order to recreate the links to the kernel. 7.7. Rescue Kernel Starting with v2.3 a rescue kernel was implemented for the UNC20 project to avoid having to re-program the Flash via the JTAG interface should your new kernel not boot. Note however, that the rescue kernel can only be activated if the new kernel gets past the first few instructions (see console output below). If the new kernel is completely corrupted, then you will have to resort to the JTAG interface (see section 8.2). To activate the rescue kernel on a UNC20, hold the PortC0 button pressed while the board is reset. LxNETES Bootloader $Revision: 1.18 $ ABCDEFGH *** Using Rescue Image *** INO@00001618 Bootstrap: 03ff Linux version 2.4.20-uc0-fs8 (mpietrek@forkis) (gcc version 2.95.3 20010315 (release)(ColdFire patches - 20010318 from http://fiddes.net/coldfire/)(-msep-data patches)) #1 Mon Oct 27 18:48:44 CET 2003 Processor: ARM/VLSI ARM 7 TDMI revision 0 24 LxNETES NetSilicon Chip Revision: 0x29 (NS7520) Architecture: UNC20 The first 2 lines of console output above are from the new kernel, meaning that it has to at least get this far. The line “*** Using Rescue Image ***” means that it has recognized that the PortC0 button was asserted and is now copying the rescue kernel from MTD partition 5 into RAM. The default image, as delivered with the Developer’s Kit already contains a rescue kernel in MTD partition 5. If you have deleted your rescue image, probably by programming the complete Flash instead of just the kernel in partition 1, then you can program the rescue kernel into Flash using the following command (assuming you have an NFS file system mounted – see section 0): # update_flash –f –q –c –t ram nfs/linux_r.bin 5 First copy the rescue kernel from the CD into the NFS directory. Here it has been renamed to linux_r.bin so both images can reside in the NFS directory. If you want to create you own rescue kernel, then you need to unpack the project from the CD and install manually (it’s not done in the normal installation) and then run the prepare script. # cd /targets/LxNETES # tar xvzf /media/cdrom/software/LxNETES_project_unc20_rescue.tgz # ./prepare.sh 25 LxNETES 8. Updating Flash After the compilation has succeeded, it's time to update the kernel or the rootfs on the target. 8.1. On A Running System To use the running kernel for faster updating, it is required that an NFS directory on your host is mounted by the target. If the default mount line is not correct because a different IP address is being used, then the mount can be done manually by entering mount -o nolock -t nfs 192.168.42.1:/exports/bootdir /nfs Replace "192.168.42.1" with the IP address of the NFS Server and "/exports/bootdir" with the exported path. It is possible to automatically mount an NFS directory on booting by issuing eeprom -e "NFSMOUNT=192.168.42.1:/exports/bootdir" If a JFFS2 file system already exists on MTD partition 4, then this can also be mounted on booting with the following eeprom command: eeprom -e "NFSMOUNT=192.168.42.1:/exports/192.168.42.7\\aJFFSMOUNT=yes" For the next step the compiled kernel (linux.bin) has to be copied to your $LXNETES_NFSROOT directory as explained in chapter 7 “Building A Project”. Now the kernel may be updated with the tool "update_flash" (the parameters are explained in section 15.9 ). # update_flash -f –q -v -r -t ram nfs/linux.bin 1 nfs/jffs2.img 3 Processing nfs/linux.bin for /dev/mtd/1 Copying to ram/linux.bin 26 LxNETES File copied: 1548 kB Verifying ram/linux.bin to linux.bin File verified: OK Erased 2048 kB @ 0 -- 100% complete. Copying to /dev/mtd/1 File copied: 1548 kB Verifying /dev/mtd/1 to ram/linux.bin File verified: OK Processing jffs2.img for /dev/mtd/3 Copying to ram/jffs2.img File copied: 1 kB Verifying ram/jffs2.img to jffs2.img File verified: OK Erased 512 kB @ 0 -- 100% complete. Copying to /dev/mtd/3 File copied: 1 kB Verifying /dev/mtd/3 to ram/jffs2.img File verified: OK Done The system is going down NOW !! Sending SIGTERM to all processes. Terminated Sending SIGKILL to all processes. Please stand by while rebooting the system. This copies the file "nfs/linux.bin" to the temporary directory "ram/" and, if successful, erases the flash partition 1 and copies "linux.bin" from the temporary directory to the flash. Then the same is done with the JFFS2 image which is copied to partition 4. Then the machine is rebooted. If the kernel image is larger than the MTD partition 1, then the MTD partition 0 can also be used. But this erases the complete flash and destroys all other partitions as well. In this case, the parameter "nfs/jffs2.img 3" must be omitted and the image must be copied separately to the flash after a reboot. "update_flash" is not restricted to the kernel and can be used to update different partitions not only for the kernel but for flash file systems or other data as well. Take a look at section 15.9 “update_flash” for parameters which improve the speed of programming. 27 LxNETES Another method is to enter: # eraseall /dev/mtd/1 Erased 1536 Kbyte @ 0 -- 100% complete. # cp /nfs/linux.bin /dev/mtd/1 # However, this method is not recommended for the kernel since a network failure while transferring data may result in a corrupted system. And if the rootfs has been included in the kernel image, erasing this partition and trying to use it afterwards may fail because the current rootfs has been destroyed. Actually this small example only works due to the fact that cp is part of the running busybox. But this may not always be the case. After flashing a JFFS2 image the first boot may take longer since unused flash partition nodes need to be marked as unused. 8.2. On A Corrupted System If the flash has become corrupted, so that the system cannot boot, then the flash must be re-programmed using the JTAG interface. For the UNC20 Developer’s Kit use the on-board Parallel Port JTAG adapter which will take several minutes to program a 1.6MB linux.bin image. Alternatively the JTAG Booster can be used which will boost the programming speed by a factor of approximately 8. 28 LxNETES 9. Modifying The Default Kernel Configuration 9.1. Default Configuration The default configuration for LxNETES is: • serial baudrate 38400 bps • console messages from kernel enabled • Ethernet enabled • use EEPROM for TCP/IP configuration • rootfs is CRAMFS • MTD partitions for the flash as follows: (partition 0 being the full flash device) partition 1 with 2048 Kbytes for the kernel, partition 2 with 2044 Kbytes mapped into the kernel for the rootfs, partition 3 with 512 Kbytes for the JFFS2 file system and partition 4 with 6656 Kbytes (partition 4 is currently unused). • uses devfs per default • start inetd (for telnetd), thttpd and mount an NFS directory $NFSMOUNT if the variable has been stored in eeprom. • JFFS2 is supported by the loadable module "/lib/modules/jffs2.o" only. • if $JFFSMOUNT is "yes", /dev/mtdblock/3 is mounted to "/htdocs/jffs2" • if $CUSTOMSCRIPT is set to a script name, then that script is executed 29 LxNETES The default configuration is made up of 3 layers: 1. Kernel configuration (lowest priority) 2. Kernel command line parameters 3. EEPROM contents (highest priority) The kernel configuration can be modified using the menu-driven xconfig. Thereafter the kernel is rebuilt. Kernel command line parameters can be used to overwrite some configurations. However, in the absence of a bootloader, the only way they can be entered is by compiling them into the kernel. Finally, there are the EEPROM parameters which will override kernel configurations. For example, “Use DHCP” is disabled in the default kernel configuration but enabled in EEPROM (factory default). 9.2. Kernel Configuration (xconfig) To modify the kernel configuration, change from the project directory, e.g. /targets/LxNETES/project_unc20, into the subdirectory "./linux/" and run "make xconfig clean dep". After that, go back into the project directory and build the kernel as usual (simply enter “make”). To build a kernel without an embedded CRAMFS, in "Makefile" change the variable KERNEL_IMAGE to "linux.bin" and in the kernel configuration menu "System Type/Include CRAMFS in kernel" to no. To build a kernel which includes debugging information you must set “Include debugging information in kernel binary” to yes under “Kernel hacking”. 30 LxNETES Compared to the standard uClinux kernel, unsupported kernel configuration entries from "make xconfig" have been removed and new ones have been added. 9.3. RootFS 9.3.7. CRAMFS The compressed ROM file system is the most flash-efficient file system suitable for use as a root file system. The file system occupies about 1/3 of the space of a non-compressing file system using the default installation. It is also possible to include the CRAMFS in the kernel image, meaning there is no need to place the file system in its own partition which must start at the beginning of a flash sector. This can save up to 64 Kbytes. Flash partition 2 has to be mapped into the kernel partition at the start address of the CRAMFS. The disadvantage is that access to files on the CRAMFS takes longer than when using ROMFS, since the files have to be decompressed. Another disadvantage of compressed file systems is that a single bit memory error often results in the whole image not being readable, since it is no longer possible to decompress it. To make use of CRAMFS, enable the following in the kernel configuration: • "System Type"/"Include CRAMFS in Kernel" • "Memory Technology Devices"/"Caching block device access to MTD devices" • "File systems"/"Compressed ROM file system support" • the kernel command line must contain an entry "root=/dev/mtdblock2" Then the kernel may be built either in the project directory with "make" or in the "linux/" subdirectory with "make linux.cramfs" If CRAMFS is not to be included in the kernel, disable the “Include CRAMFS in Kernel” flag and then in the project directory do the following: 31 LxNETES cd linux make linux linux.bin cd .. build.sh rootfs_image This creates the file "bin/rootfs.img" which may be copied to the rootfs partition. 9.3.8. NFSROOT During development it may be more comfortable to use an NFS directory as root file system. This avoids unnecessary flash erases, which on a power failure will result in the need to re-program the kernel into flash. It also increases the lifetime of the module as the flash has a limited number of erase cycles. Initialization scripts may be quickly modified since a failure will not result in an unusable system, because it can be fixed on the host and the target just needs to be reset. On the down side, the booting and launching of applications is much slower. The configuration files, or the eeprom, have to be modified so as not to mount that directory a second time by NFS. To enable NFSROOT, configure the kernel to • enable "File systems"/"Network File Systems"/"NFS file system support", "Provide NFSv3 client support" and "Root file system on NFS" • add "nfsroot=192.168.42.1:/exports/bootdir" to the kernel command line and set "root=/dev/nfs". The kernel command line can be modified by disabling “System Type”/”Default bootloader kernel arguments” and adding your changes in the line below. • in the Makefile in the project directory, change the default KERNEL_IMAGE to linux.bin. • enter “make” in the project directory and the new kernel will be built. 32 LxNETES The root file system is installed to "/exports/bootdir" with "make installnfsroot" in the project directory. The kernel has to be flashed and then the target should boot from NFS. 9.3.9. JFFS2 JFFS2 is not recommended for use as a root file system. It is not completely failsafe, therefore a power failure may destroy the files required for booting. So it should be used only for files that have to be changed frequently. It should also be as small as possible because mounting a JFFS2 file system takes a long time compared to other file systems since the journal information has to be read. 9.4. Using Flash instead of Serial EEPROM By default the serial EEPROM is used for storing parameters such as the IP address, etc. However, it is also possible to use the Flash for storing these parameters, so freeing up the EEPROM, or alternatively not having to assemble an EEPROM on your board. There are other advantages to doing this: • Kernel parameters can be passed without having to rebuild the kernel • Boot time is reduced The only disadvantage is that the last sector of Flash is not available for the application program. To enable the Flash to store parameters, configure the kernel to • enable "Character devices"/"Flash EEPROM” • optionally enable the “Kernel Command Line in EPROM” • enter “make” in the project directory and the new kernel will be built. 33 LxNETES 10. Adding Applications To Your Project The default project contains sample applications: "hello_world", "pthread_test", “cgi-bin”, “stl_example” and some which are Developer’s Kit dependent; “eva_test” for the ModNET50 and “lcd_demo” and “simple_driver” for the UNC20. They are located under "./project/apps/eva_test/" and "./project_unc20/apps/lcd_demo/". Each directory contains the following: Makefile The central Makefile that controls in which subdirectory binaries must be compiled. Makefile.in This is an include Makefile that contains all the project dependencies that are common to all build targets. src/ This subdirectory contains all C and C++ source files for the project. lxnet/ This directory holds all object and binary files that are created for the LxNETES target. The Makefile includes the application specific Makefile.in and applications global Makefile_arm.in lxnet_debug/ This directory holds all debug object and binary files for the LxNETES target. It is the same as lxnet/ with the exception that some CFLAGS and LDFLAGS have been modified. host/ To improve application development speed, this optional directory is intended to contain object and binary files executable on the host. 34 LxNETES Note that "eva_test" only runs on the target since it uses the target’s hardware interfaces, whereas the “hello world” applications run on the target (both in the lxnet/ and lxnet_debug/ directories) and host. Note that “lcd_demo” only runs on the UNC20 Developer’s Kit with an external Character Display connected. The environment variable LCDDISPLAY=yes must be set in order to load the device driver module. The directories in lxnet and lxnet_debug contain binaries built with the standard and very compact uClibc-0.9.8. More complex applications using pthreads or network functions will use uClibc-0.9.19. These applications will be much larger than the default ones. A new application may be added by copying the subdirectory "hello_world" to a new directory "my_app" and modifying the well-documented makefiles "my_app/Makefile" and "my_app/Makefile.in". The applications are created in the project directory "./project/" with "make build-subdirs". To include the applications in the rootfs image, the script "./project/build.sh" has to be modified. Open it with an editor and in the function "copy_files" add the files you want included. # **** add user files here **** cp src/eva_test/lxnet/eva_test rootfs/usr/bin cp src/hello_world/lxnet/hello_cc rootfs/usr/bin cp src/hello_world/lxnet_debug/hello_c rootfs/usr/bin cp src/my_app/lxnet/my_app rootfs/usr/bin Then create a new rootfs which will include the applications. Use the script build.sh or refer to section 7.4 RootFS for other means to create rootfs. 35 LxNETES 11. The Kernel Boot Process 11.1. Overview The NET+ARM processor begins execution in Flash ROM at address 0x0000_0000. The first module of the kernel code executed is the bootloader which is entered at _start. Control proceeds from start to the other higher-level modules until all initializations are completed and the "init" kernel thread is running. When tailoring the kernel to a specific hardware platform, the implementation-specific files are most likely to require changes, the NET+ARM generic files less likely, the ARM specific file less likely still and the kernel generic files are least likely to require modification. The purpose and function of the modules likely to require modification is documented below. 11.2. Phases _start The bootloader code performs four basic functions: configures memory, configures serial debug, relocates kernel to RAM and initializes a temporary stack. The default mapping of memory on the development board is depicted in the table below. Once the memory is mapped correctly, the kernel code and data are relocated to RAM and executed from there. The serial ports are configured for the default baudrate (38400 bps). A temporary stack space is set aside so that the C language kernel routines have temporary variable space available. This temporary stack is only used until memory is sized and then the kernel manages it's own stack space, reclaiming the temporary space. Once all conditions are met, the kernel entry point "start_kernel" is called. Base Address 0x02000000 0x00000000 0x04000000 0x06000000 0x08000000 36 Size 0x02000000 0x02000000 0x02000000 0x02000000 0x02000000 Chip Select CS0 CS1 CS2 CS3 CS4 Mapped Type FLASH ROM SDRAM SRAM + CAN controller Memory mapped IO Memory mapped IO LxNETES setup_arch Once start_kernel is called, it immediately calls "setup_arch”, which is responsible for sizing memory, turning on the kernel serial console, and programming the MAC address into the Ethernet controller. Additionally, "setup_arch" processes the default values for the kernel which are normally specified on the command line. init The "init" system thread is the main thread of the Linux kernel. All other processes are started as a result of the "init" thread. Typically the application functionality of the system will be loaded from the file system. A much more detailed description can be found in the book "Linux Device Drivers" published by O'Reilly. 12. User Boot Process Once the kernel has booted and mounted the root file system, the "init" thread can take several paths to start a running system. By default it will look for a program called init ("/sbin/init", "/etc/init") and runs that. If the program init fails or completes it will execute the shell script "/etc/rc". If the rc script completes, the system will spawn a console shell using "/bin/sh". Any of these applications can be customized to achieve the desired functionality. 37 LxNETES 13. Debugging Applications Debugging applications on an MMU-less target is more complicated than debugging on the host. There are two main differences compared to debugging on a host • The target is debugged remotely via the Ethernet or JTAG port. When using Ethernet this is managed by the gdbserver; when using JTAG, a development tool such as Abatron’s BDI2000 is required to connect the host to the JTAG port on the target. • Virtual addresses are the same as physical addresses in uClinux. Since the host doesn't know the virtual address on the target, the host has to be informed manually about the address relocation using "dbgapp". 13.1. Common Setup Ensure that there is a working console on ttyS0 and that a second shell is available, either on ttyS1 or via telnet. Then go into the directory "./project/apps/hello_world/lxnet_debug" and type "make" to build the debug flat binary "hello_c" and elf binary "hello_c.gdb". Then copy "hello_c" to your "/exports/bootdir/" directory. If the standard makefiles haven't been changed, then this step can be ignored since a debug flat binary "hello_c" is already in the rootfs on the target in "/usr/bin/". 13.2. gdbserver The gdbserver, which is included in "/usr/local/LxNETES/apps/bin", is the preferred method for debugging applications when no JTAG debug tool, such as the Abatron BDI2000, is available. The gdbserver runs on the target and communicates with gdb on the host using the gdb protocol running over serial or Ethernet. For example, to debug the “hello_c” application using gdbserver over the serial interface, enter the following on the target: 38 LxNETES gdbserver /dev/ttyS1 /usr/bin/hello_c To debug the “hello_c” application using gdbserver over the Ethernet interface enter the following on the target: gdbserver 192.168.42.7:2001 /usr/bin/hello_c On the host, create the file "gdbinit_lxnet50" in the directory where your hello_c.gdb is, and edit the file so it contains the lines: set remotebaud 38400 target extended-remote /dev/ttyS1 if you want to debug via the serial interface, or target extended-remote 192.168.42.7:2001 for debugging via Ethernet, where the IP address is that of the target which is connected to the host via Ethernet. Then on the host the debugger can be started with arm-elf-gdb hello_c.gdb to use the command line debugger, or ddd –debugger arm-elf-gdb hello_c.gdb to use DDD as the graphical user interface to gdb. Note: On the UNC20 Developer’s Kit there is only one serial interface, /dev/ttyS0, which is normally the console. To use gdbserver over this interface the console needs to be disabled. In the file /etc/inittab comment out the line “::respawn:/sbin/agetty /dev/ttyS0 /bin/sh -1”. 39 LxNETES 13.3. Using Abatron’s BDI2000 13.3.10. Installation If Abatron’s BDI2000 is being used for debugging, then some additional configuration files have to be manually installed. They are to be found on the CD in "/software/LxNETES_abatron.tgz". Please unpack this archive into the tftpboot directory used by the BDI2000 (for example "/tftpboot"). Then configure the BDI2000 to use these settings. For example: $ bdisetup -c -p/dev/ttyS0 -b57 -i192.168.42.113 -h192.168.42.1 fabatron/modnet50t.cfg where 192.168.42.113 is the IP address of the BDI2000. The BDI2000 should be connected to the Developer’s Kit with the 20-pin JTAG connector. Note. When using the BDI2000, make sure that the JTAG Booster is not connected. Both devices use the processor’s JTAG interface and must not be connected at the same time. On the UNC20 Developer’s Kit, jumper J1 must be inserted in order to use JTAG. Then modify the configuration file "~/.gdbinit_lxnet50" for "arm-elf-gdb" to contain the following line: target remote 192.168.42.113:2001 If available, this file is automatically read by "arm-elf-gdb" on startup and connects the debugger to the BDI2000. 13.3.11. Debugging Launch the application to be debugged, here "hello_c", either from the rootfs or with "nfs/hello_c" from the host. Don't press enter yet. 40 LxNETES Now, on the second shell (ttyS1 or telnet session), run "dbgapp" to get the address information. On the host in the "lxnet_debug/" directory, run "arm-elf-gdb". This reads the file "~/.gdbinit_lxnet50" and connects to the BDI2000, so the target is now stopped, probably somewhere in the kernel code (if the initial connection fails, then the BDI2000 needs to be reset). 41 LxNETES Now copy the output from "dbgapp", beginning with "add-symbol-file", to the gdb input line and press enter. Confirm changing of address relocation with "y" (this question is avoided when the file "~/.gdbinit_lxnet50" contains the line "set confirm off"). Set a breakpoint with "br printMessage" which is the next command executed after waiting for input (as of "../src/hello_c.c"). Continue execution on the target with "c". Now, on ttyS0 press Enter so the application can continue. The debugger now stops and you may inspect variables and step through the code. When the debug session has ended, don't quit "arm-elf-gdb" from the command line but kill the "arm-elf-gdb" process to keep the target running. 42 LxNETES 14. Building The Toolchain If a full installation has been performed, it is possible to rebuild the compiler toolchain, the target libraries, the applications and some helper applications on the host. This should only be necessary if • there are library incompatibilities between the installation host and the prebuilt binaries • the development host is not an x86-based system • patches must be installed for the toolchain, the libraries or the applications • the busybox has to be reconfigured to support different "applets" The compilation may be started by entering: $ cd /targets/LxNETES/ewp/LxNETES $ . LxNET.sh Starting LxNETES Configuration [...] $ make This will use the directory "/targets/LxNETES/ewp/build" for compilation and after that will install the toolchain, libraries and applications to "/usr/local/arm-elf" and "/usr/local/LxNETES". The contents of these directories are not erased first. In addition, the default project image and rootfs will be created in "/targets/LxNETES/ewp/build/project". The compilation error messages will be logged in the file "build.log" which should be sent to FS Forth-Systeme GmbH if errors have occurred ([email protected]). After building, the distribution package files can be installed in a different directory, eg. for creating a CD image, by entering 43 LxNETES $ ./build.sh install /targets/install *** Installing packages to /targets/install/software **** [...] $ 44 LxNETES 15. Applications All applications except "eeprom", "update_flash" and “dbg_app” are standard Linux applications. The detailed documentation on them is located in the "/targets/LxNETES/build/apps" directory which will only be present if you have done a full installation and build, so the alternative is to unpack this by hand. The following short descriptions explain only the most common uses. 15.1. busybox The "busybox" includes all standard shell applications like "cat", "chmod", "echo", "mount", "sh" and some more. They are all linked into one static application to save flash memory, at the cost of a larger RAM footprint for each application, so this is not recommended for daemons. LxNETES has stripped off the less important applications in order to obtain a small busybox binary. But the user may change that by modifying "apps/busybox-0.60.3/Config.h" and using that binary instead of the precompiled one. 15.2. eraseall "eraseall" from the MTD utils has been added to the busybox. It erases a full flash partition, for example "eraseall /dev/mtd/1" erases the kernel partition. Usage: eraseall flash_device [-q] eraseall erases a flash partition. Options: -q, --quiet don't display progress messages --silent same as --quiet --help display this help and exit --version output version information and exit 45 LxNETES 15.3. telnetd A simple telnet daemon is launched by "inetd" as configured "/etc/inetd.conf". No usernames and passwords are used for login. 15.4. in inetd "inetd" launches other network daemons in case someone wants to connect to it. This way only those network daemons are running that are really being used. It is configured by the file "/etc/inetd.conf" 15.5. thttpd A small and simple web server. It cannot be launched by "inetd", therefore it is launched from "/sbin/init" after each reboot. This can be turned off in the file "/etc/inittab". 15.6. ftp server The troll-ftpd, which provides anonymous login, is available and per default is started by “/etc/inetd.conf”. 15.7. ftp client In order to have access to network services without NFS having to be enabled, the ftp client program can be installed on the target for use by the console or by telnet. As the ftp client is still very large, it is not copied to the root file system per default. To enable this, edit the file "build.sh" in the project directory and uncomment the line #cp $LXNETES_APPS_PATH/bin/ftp rootfs/bin 46 LxNETES 15.8. eeprom This tool is used to display or modify the contents of the EEPROM. If used without any arguments, it displays the contents. Otherwise it modifies the given fields in the EEPROM. eeprom [-d yes|no] [-m mac] [-i ip] [-g ip] [-n ip] [-s ip] [-e env] [-a env] [-x env] [-c mode] [-r app] eeprom v1.2 Copyright FS Forth-Systeme GmbH. Dumps or modifies the contents of the builtin EEPROM Options: -d : enable DHCP (yes|no) -m : set MAC address (xx:xx:xx:xx:xx:xx) -i : set IP address (ddd.ddd.ddd.ddd) -g : set gateway IP address (ddd.ddd.ddd.ddd) -n : set DNS IP (ddd.ddd.ddd.ddd) -s : set subnet mask (ddd.ddd.ddd.ddd) -c : configures the ethernet mode (auto|(<bps>:<duplex>)) mode for either auto-negotiation or <bps>:<duplex> mode with <bps> is one of "10" or "100" and <duplex> is "half" or "full" -e : stores the environment variables in EEPROM -a : appends the environment variables to EEPROM -x : removes the environment variable starting with apps from EEPROM -r : reads the environment variables from EEPROM and runs the application It is also possible to store environment variables in the EEPROM with the option "-e". An empty string as argument will clear existing environment variables, otherwise the specified environment variables are stored. Multiple environment variables are separated with "\a". Note that for the shell "\" must also be masked with "\". So to store two environment variables NFSMOUNT and JFFSMOUNT, use eeprom -e "NFSMOUNT=192.168.42.1:/exports/192.168.42.7\\aJFFSMOUNT=yes" 47 LxNETES The environment variables may be used by running "eeprom -r <script>" where "script" is a shell script or an application using those environment variables. This is necessary since a process cannot modify the environment variables of the process which has called it. 15.9. update_flash This tool provides an interface to update the flash. It may flash one or more partitions, independent of whether devfs is used or not. It checks whether the images fit into the partitions, optionally copies them from the network to a temporary directory and may reboot the target. The command line syntax is #update_flash BusyBox v0.60.3 (2003.03.14-12:32+0000) multi-call binary Usage: update_flash [-f] [-v] [-r] [-q] [-c] [-t dir] <file> <part> [<file> <part>] update_flash v1.1 Copyright FS Forth Systeme GmbH. Copies one or more files to flash partitions The partitions are erased before doing the copy and the filesize is being checked -f : erases the complete flash partition -v : verify copying -r : reboot after copying the files -t : copy file to temp directory before doing an erase -q : quick mode, copy only sectors modified -c : create a 32-bit checksum and print it file : file to be copied to flash part : flash partition to be copied to (only number) # To copy a JFFS2 image to a flash partition it is recommended to use "-f" in order to erase the full partition. Otherwise it may be omitted and will save erase time. 48 LxNETES 15.10. dbgapp "dbgapp" prints all process information that is necessary to tell gdb how to remap debug binaries of the application. The only accepted parameter is the process name (without the path). For example: # dbgapp hello_c hello_c (pid=28): add-symbol-file hello_c.gdb 0xe84040 -s .data 0xe85e50 -s .bss 0xe87f68 pid is the process id of the application, all text after the colon must be copied and pasted to the "arm-elf-gdb". 15.11. hello_c This is a sample "hello world" C application that has been compiled with debugging enabled. It just waits until ENTER is pressed and then exits. This application is included in the project under "./project/src/hello_world/src/hello_c.c" 15.12. hello_cc This is a sample "hello world" C++ application. It creates some static and dynamic instances and tests exception throwing. The source is stored under "./project/src/hello_world/src/hello_cc.cc". 15.13. Watchdog The watchdog device driver is a module and will be loaded if the environment variable WATCHDOG=yes is set. The factory default sets the watchdog timeout to 10s after which a reset is generated. 49 LxNETES 15.14. Date and Time The date and time can be set with the command “date –s MMDDHHMMYYYY”. For example, “date –s 032109502003” sets date and time to March 21, 2003 09:50. This time can then be stored in the Real-Time Clock (RTC) on the ModNET50 module with the command “hwclock –systohc”. 15.15. LCD Demo The UNC20 Developer’s Kit has a header which allows a simple character display, e.g. 20 chars by 2 lines, to be connected. LxNETES contains a device driver module which is loaded if the environment variable LCDDISPLAY=yes is set. 15.16. PPP PPP support is a relatively large application at 280kB. The pppd just needs to be started with the following command on the host: #pppd crtscts lock 192.168.41.1:192.168.41.7 /dev/cua0 115200 and the following command on the target: #pppd crtscts lock 192.168.41.7:192.168.41.1 /dev/ttyS0 115200 Where 192.168.41.7 is the desired IP address on the target (note that this should be a different IP address to that used on the Ethernet interface) and /dev/ttyS0 is the serial interfac used on the target. On a UNC20 this will be /dev/ttyS0 since there is only one assembled. It is therefore best to disable the console on this serial interface by commenting out the following line in /etc/inittab “::respawn:/sbin/agetty /dev/ttyS0 /bin/sh –1” Once a connection has been established, it is possible to ping the host from the target and vice-versa. 50 LxNETES 16. What’s new in LxNETES v2.3? 16.1. New Features Added support for a new target, the Digi Connect 50. Added basic support for the UNCBAS_FP baseboard. Added a rescue image for the UNC20 project. Flash can be used instead of serial EEPROM. Standard Template Library (STL) supported, which includes support for iostreams. 16.2. Minor Enhancements The update_flash routine has an option to calculate and print a 32-bit checksum. 17. What’s new in LxNETES v2.2? 17.1. New Features Added support for UNC20 rev.1 (P/N 352 and 355). Code starts in big-endian mode and switches to little-endian. PPP support now enabled nohup added CGI progam display added to thttpd rdate now included in busybox More than 1 telnet connection allowed to telnet daemon. 51 LxNETES LxNETES is now installed in /usr/local/LxNETES-2.2 and arm-elf toolchain now installed under this directory. Updated toolchain to support setjmp/longjmp. 17.2. Minor Enhancements On UNC20 disabled serial hardware handshake as default Now only use CFI chip driver for flash devices Adjusted memory chip selects so that they are all 32MB in size. Flash base address now 0x0400_0000 Memory test now performed by default. New kernel version numbering scheme to clearly show which version of uClinux patches is being used, e.g. kernel version 2.4.20-uc0-fs6. 17.3. Bug Fixes On UNC20 fixed Ethernet race condition. Fixed endless DHCP requests (Bug_ID#185) Fixed DHCP requests (Bug_ID#203) IrDA utils and drivers fixed for kernel v2.4.20 Fixed kernel’s ptrace function for gdbserver On ModNET50 fixed Ethernet link LED usage 52 LxNETES 17.4. Known Issues When numerical values in the kernel configuration are changed (e.g. the flash size), they are reset to zero the next time the configuration menu is called. 53 LxNETES 18. FAQs Mounting Issues Q Why does it take so long to mount an NFS directory? A The lock daemon is not running on the target. Add the option "-o nolock" to the mount command line to prevent locking of files. Q Why does mounting an MTD partition return the error message "cramfs: wrong magic"? A You are probably trying to mount a JFFS partition. To mount a JFFS partition, first load the module "/lib/modules/jffs2.o" and then mount using the option "-t jffs2" Network Problems Q Why do I have problems with my Ethernet network after connecting the running target to a different switch or host? A The running hardware doesn't recognize changes from full-duplex to halfduplex and vice versa. The target has to be rebooted. Serial Port Q How can I access both serial ports on a ModNET50 Developer’s Kit? A "COM A" may be accessed with "/dev/ttyS0" and "COM B" with "/dev/ttyS1". After booting they are both configured for the same baudrate. "COM B" doesn't support any hardware handshake at all and "COM A" only if not a console, otherwise the target wouldn't boot if no terminal were attached. Q How do I get rid of the shell on "/dev/ttyS1"? A Edit "/etc/inittab" and remove the entry ::respawn:/sbin/agetty /dev/ttyS1 /bin/sh -l Q Why is Ctrl-C no longer working in the session? A You may have pressed Ctrl-C while in the shell. The shell has a bug which disables Ctrl-C after the first time on the command line. Ctrl-\ (Kill) will continue to work. 54 LxNETES Compilation Q Why do the kernel images differ in size if compiled from different locations or at different times? A Some files include bug messages that refer to its absolute filename or a compilation time. Q Where can I find the math library "libm.a"? A Use uClibc-0.9.19. EEPROM Q Why do I see this message after copying the new image to a target where LxNETES v1.x was previously installed? Environment string too long. At max 254 bytes with zeros A The new default image checks for environment variables in the EEPROM (which wasn't possible in LxNETES v1.x) resulting in random data being recognized. Run the following command to initialize the environment variables. eeprom -e "" 19. Links These links represent the current status as of the printing of this documentation and may have changed when you read this. http://www.unc20.net UNC20 home page for more FAQs http://www.fsforth.de Manufacturer ModNET50 http://www.uclinux.org Home page of the uClinux port of Linux for embedded systems of UNC20 and 55 LxNETES http://www.uclibc.org Home page of the user library and user applications http://www.abatron.ch Manufacturer of the debugging via JTAG http://www.netsilicon.com Manufacturer of NET+ARM processors BDI2000 for If you have a Support Contract, please send any requests for technical support to [email protected] 20. Abbreviations RootFS Root File system DHCP Dynamic Host Configuration Protocol (RFC 2131) CRAMFS Compressed ROM File system JFFS Journaling Flash File system NFS Network File system 56