1
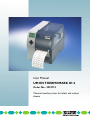
User Manual
UM EN THERMOMARK X1.2
Order No.: 2910774
Thermal transfer printer for labels and marker
sleeves
User manual
English
Thermal transfer printer for labels and marker sleeves
2014-02-24
Designation:
UM EN THERMOMARK X1.2
Revision:
c01
Order No.:
-
This user manual is valid for:
Designation
THERMOMARK X1.2
103938_ia_01
Version
Order No.
5146231
PHOENIX CONTACT
THERMOMARK X1.2
Please observe the following notes
User group of this manual
The use of products described in this manual is oriented exclusively to qualified electricians
or persons instructed by them, who are familiar with applicable standards and other regulations regarding electrical engineering and, in particular, the relevant safety concepts.
Explanation of symbols used and signal words
This is the safety alert symbol. It is used to alert you to potential personal injury
hazards. Obey all safety measures that follow this symbol to avoid possible injury or death.
There are three different categories of personal injury that are indicated with a
signal word.
DANGER
This indicates a hazardous situation which, if not avoided, will result in death or serious injury.
WARNING
This indicates a hazardous situation which, if not avoided, could
result in death or serious injury.
CAUTION
This indicates a hazardous situation which, if not avoided, could
result in minor or moderate injury.
This symbol together with the signal word NOTE and the accompanying text
alert the reader to a situation which may cause damage or malfunction to the
device, hardware/software, or surrounding property.
This symbol and the accompanying text provide the reader with additional information or refer to detailed sources of information.
How to contact us
Internet
Up-to-date information on Phoenix Contact products and our Terms and Conditions can be
found on the Internet at:
phoenixcontact.com
Make sure you always use the latest documentation.
It can be downloaded at:
phoenixcontact.net/products
Subsidiaries
If there are any problems that cannot be solved using the documentation, please contact
your Phoenix Contact subsidiary.
Subsidiary contact information is available at phoenixcontact.com.
Published by
PHOENIX CONTACT GmbH & Co. KG
Flachsmarktstraße 8
32825 Blomberg
GERMANY
Should you have any suggestions or recommendations for improvement of the contents and
layout of our manuals, please send your comments to:
[email protected]
PHOENIX CONTACT
103938_ia_01
THERMOMARK X1.2
General terms and conditions of use for technical documentation
The receipt of technical documentation (in particular user documentation) does not constitute any further duty on the part of Phoenix Contact to furnish information on modifications
to products and/or technical documentation. You are responsible to verify the suitability and
intended use of the products in your specific application, in particular with regard to observing the applicable standards and regulations. All information made available in the technical
data is supplied without any accompanying guarantee, whether expressly mentioned, implied or tacitly assumed.
In general, the provisions of the current standard Terms and Conditions of Phoenix Contact
apply exclusively, in particular as concerns any warranty liability.
This manual, including all illustrations contained herein, is copyright protected. Any
changes to the contents or the publication of extracts of this document is prohibited.
Phoenix Contact reserves the right to register its own intellectual property rights for the
product identifications of Phoenix Contact products that are used here. Registration of such
intellectual property rights by third parties is prohibited.
Other product identifications may be afforded legal protection, even where they may not be
indicated as such.
103938_ia_01
PHOENIX CONTACT
English
Phoenix Contact reserves the right to alter, correct, and/or improve the technical documentation and the products described in the technical documentation at its own discretion and
without giving prior notice, insofar as this is reasonable for the user. The same applies to any
technical changes that serve the purpose of technical progress.
THERMOMARK X1.2
PHOENIX CONTACT
103938_ia_01
Table of Contents
2
3
4
Safety and the environment .................................................................................................... 1-1
1.1
Description of the THERMOMARK X1.2.............................................................1-1
1.2
Intended use.......................................................................................................1-1
1.3
Safety notes........................................................................................................1-2
1.4
Notes on the print head.......................................................................................1-3
1.5
Storing the printer ...............................................................................................1-3
1.6
Help in the event of malfunctions ........................................................................1-4
1.7
Environmentally friendly disposal .......................................................................1-4
Connection and printing.......................................................................................................... 2-1
2.1
Unpacking the THERMOMARK X1.2 .................................................................2-1
2.2
Setting up the THERMOMARK X1.2 ..................................................................2-1
2.3
Connecting the THERMOMARK X1.2 ................................................................2-2
2.3.1
Connecting to the power supply ..........................................................2-2
2.3.2
Connecting to a computer via USB .....................................................2-3
2.3.3
Ethernet interface ................................................................................2-3
2.4
Loading Media and Printing ................................................................................2-4
2.4.1
Notes on the print head .......................................................................2-4
2.4.2
Loading the ink ribbon .........................................................................2-5
2.4.3
Loading media ....................................................................................2-6
2.4.4
Printing ................................................................................................2-8
Description of the operating elements..................................................................................... 3-1
3.1
Layout of the control panel..................................................................................3-1
3.2
Indicators during printing ....................................................................................3-2
3.3
Modifying the language setting ...........................................................................3-3
3.4
Setting the date and time ...................................................................................3-3
3.5
Configuring the Ethernet interface .....................................................................3-5
Maintenance and troubleshooting........................................................................................... 4-1
103938_ia_01
4.1
Maintenance and cleaning..................................................................................4-1
4.1.1
Maintenance plan ................................................................................4-1
4.1.2
Tools and cleaning agents ..................................................................4-1
4.1.3
Cleaning the print head .......................................................................4-1
4.1.4
Cleaning the pressure roller ................................................................4-2
4.1.5
Replacing the pressure rollers .............................................................4-2
4.2
Troubleshooting..................................................................................................4-4
4.2.1
Solving problems ................................................................................4-4
4.2.2
Error messages ...................................................................................4-4
PHOENIX CONTACT
i
English
1
THERMOMARK X1.2
5
A
B
ii
Fitting and cleaning the cutter (accessory) ............................................................................. 5-1
5.1
Fitting the cutter ..................................................................................................5-1
5.2
Cleaning the cutter..............................................................................................5-2
5.2.1
Adjusting the cutter after cleaning .......................................................5-3
Technical appendix................................................................................................................. A-1
A1
Technical data .................................................................................................. A-1
A2
Ordering data.................................................................................................... A-4
A3
Declaration of conformity .................................................................................. A-6
Index....................................................................................................................................... B-1
PHOENIX CONTACT
103938_ia_01
Safety and the environment
1
Safety and the environment
1.1
Description of the THERMOMARK X1.2
With thermal transfer printing, heat from the print head causes the color layer of a transfer
ribbon to be transferred to the print media.
The THERMOMARK X1.2 is equipped with all common interfaces in order to ensure
problem-free connection to computers and networks. The printer can be connected to
100 V to 240 V AC mains networks without any type of adapter.
Notes on print media
The printing result essentially depends on a suitable combination of media and ink ribbon.
NOTE: Use suitable print media
A low-quality ink ribbon can lead to premature wear on the print head and result in a poor
print image. Use only print media from Phoenix Contact. See "Ordering data" on
page A-4.
1.2
Intended use
The THERMOMARK X1.2 is a state-of-the-art device which complies with recognized
safety-related rules and regulations. Despite this, risk of injury or death could occur for users
or third parties, and the THERMOMARK X1.2 or other property could be damaged while
operating the device.
WARNING: Danger to health due to incorrect usage
The THERMOMARK X1.2 may only be used while in proper working order and only for
the intended purpose. Users must act safely, be aware of potential dangers, and comply
with the operating instructions. Faults, in particular those which affect safety, must be
eliminated immediately.
WARNING: Explosion hazard
The THERMOMARK X1.2 must not be used in potentially explosive areas.
NOTE: Damage to equipment due to the use of unsuitable media
The THERMOMARK X1.2 is intended solely to print suitable media approved by the
manufacturer. Any other or additional use is not intended. The manufacturer/supplier is
not liable for damage resulting from misuse. Any misuse is at the risk of the user.
Intended use includes observing the operating instructions, including maintenance
recommendations/instructions specified by the manufacturer.
103938_ia_01
PHOENIX CONTACT
1-1
English
The THERMOMARK X1.2 is an industrial thermal transfer printer for printing continuous
media (labels or marker sleeves).
THERMOMARK X1.2
1.3
Safety notes
WARNING: Danger - mains voltage
Do not open the housing of the THERMOMARK X1.2.
WARNING: Notes on power supply connection
Connect the THERMOMARK X1.2 only to an outlet with the correct voltage. The
THERMOMARK X1.2 is designed for alternating voltage from 100 V to 240 V. (The
electrical connection conditions must comply with the details on the rating plate.)
Before establishing or disconnecting connections, switch off all affected devices
(computer, printer, accessories).
WARNING: Risk of burns
The print mechanism can become hot during printing. Do not touch during operation and
let the printer cool down before changing materials or cleaning.
WARNING: Danger to health due to incorrect usage
Only carry out the actions described in these operating instructions. Other tasks may only
be performed by trained personnel or service engineers.
Incorrect access to electronic components and their software can result in errors. In
addition, any other incorrect operation or modifications to the device can endanger
operational safety.
Various warning labels are attached to the device, which inform the user of hazards. Do
not remove any warning labels, as otherwise users cannot be informed of the relevant
hazards.
WARNING: Danger of crushing from the cover
Make sure you do not crush yourself with the cover.
NOTE: Device faults due to moisture
Only operate the THERMOMARK X1.2 in a dry environment and do not expose it to any
moisture (spray, mist, etc.).
1-2
PHOENIX CONTACT
103938_ia_01
Safety and the environment
1.4
Notes on the print head
NOTE: Print head wear
The print head is the most sensitive part of your printer. If used incorrectly, the print head
can be damaged very quickly.
Clean NOTE: print head appropriately
–
–
–
Do not use sharp objects (knives, screwdrivers, etc.) to clean the print head.
Clean the print head with a cotton bud that has been soaked with alcohol.
The print head has a red protective glass layer at the top. Do not touch this protective
layer with your hand.
NOTE: Use the correct materials
During printing, always make sure that there is no dirt on the media as this could be pulled
underneath the print head, which could cause damage.
NOTE: Open the print head if it is not to be used for a longer period of time
If the THERMOMARK X1.2 is not used for several days, the print head must be opened.
This increases the service life of the print head.
NOTE: Use suitable ink ribbon
The ink ribbon must be at least 5 mm wider than the media. Direct contact between the
print head and the media can lead to increased wear on the print head.
1.5
Storing the printer
The following must be observed when storing the printer:
–
–
–
103938_ia_01
Only store the THERMOMARK X1.2 in dry surroundings.
Store the printer in such a way as to avoid damage.
Store the printer together with all individual parts and accessories to avoid
important parts becoming lost and being unavailable when it is used at a later
date.
PHOENIX CONTACT
1-3
English
Please observe the following notes:
THERMOMARK X1.2
1.6
Help in the event of malfunctions
Please contact our customer service department immediately if any malfunctions should
occur (hotline 0800/4 31 05 30). Never attempt to carry out repair work yourself.
Changes and/or modifications to the THERMOMARK X1.2 may only be carried out
following written permission from Phoenix Contact.
1.7
Environmentally friendly disposal
Dispose of used devices correctly
Used devices contain valuable recyclable materials, which should be utilized.
Dispose of used devices separately from other waste, i.e., via an appropriate collection
site.
The modular design of the THERMOMARK X1.2 means that it can easily be disassembled
into its component parts in order for them to be taken for recycling.
The PCB of the THERMOMARK X1.2 is equipped with a lithium battery. Dispose of this
battery in a collection container for old batteries at a store or with the public waste disposal
authority.
1-4
PHOENIX CONTACT
103938_ia_01
Connection and printing
Connection and printing
2.1
•
•
Unpacking the THERMOMARK X1.2
Lift the THERMOMARK X1.2 out of the box.
Check the THERMOMARK X1.2 for damage which may have occurred during
transport.
Check delivery for completeness.
•
English
2
Scope of supply
–
–
–
–
–
–
THERMOMARK X1.2-PRINTER thermal transfer printer
Mains cable (Europe and US)
USB cable
empty cardboard core (if necessary, ready-mounted on the ink ribbon take-up hub)
CD-ROM with this manual and drivers
CD-ROM with marking software
Retain the original packaging for subsequent transport.
2.2
Setting up the THERMOMARK X1.2
Select installation location
NOTE: The device and the print media can be damaged by humidity and water.
The THERMOMARK X1.2 may only be set up in a dry location protected from spray.
The following are not suitable:
– Damp or dusty locations
– Environments that are subject to increased heat, direct sunlight or low temperatures
(operating range: 10 °C to 35 °C).
Place the THERMOMARK X1.2 on a level, stable surface. The room must be dry, free of
frost, and well-ventilated.
Removing the transportation safeguards
Removing the
transportation safeguards
103938_ia_01
•
•
•
Set up the THERMOMARK X1.2 on a level surface.
Open the cover of the THERMOMARK X1.2.
Remove the foam transportation safeguards near the print heads.
PHOENIX CONTACT
2-1
THERMOMARK X1.2
2.3
Connecting the THERMOMARK X1.2
Mains and computer connections
ʾ
ʿ
ˀ
ˁ
˂
˃
˄
˅
Figure 2-1
1
2
3
4
5
6
7
8
Mains and computer connections
Mains switch
Mains female connector
Not supported (slot for Cardbus or Type II PC card)
Not supported (slot for Compact Flash memory card)
Ethernet 10/100 Base-T
Not supported (USB interface for keyboard or scanner)
USB high-speed slave interface
V.24 (RS-232-C) serial interface
2.3.1
Connecting to the power supply
The THERMOMARK X1.2 is equipped with a wide-range power supply unit. The device can
be operated with a mains voltage of 230 V AC/50 Hz or 100 V AC/60 Hz without any
adjustments or modifications.
NOTE: Device can be damaged by undefined inrush currents.
Before connecting to the mains, set the mains switch (1) to "O".
•
•
2-2
PHOENIX CONTACT
Insert the mains cable in the mains connection socket (2).
Insert the mains cable connector into a grounded socket.
103938_ia_01
Connection and printing
2.3.2
Connecting to a computer via USB
A printer driver must be installed if a USB interface is to be used for connection. You will find
the appropriate printer driver for your device on the CD-ROM that was supplied with the
printer or on the Internet at phoenixcontact.net/products.
• Switch on the computer.
• Exit all programs that are currently running.
• Switch on the THERMOMARK X1.2.
• Connect the computer and THERMOMARK X1.2 using the USB cable supplied.
• Insert the CD-ROM with driver software into the CD-ROM drive.
• The Windows Installation wizard is started automatically.
• Follow the on-screen instructions.
• If the "Has not passed Windows logo testing" error message appears during
installation, continue with the installation anyway.
Following successful installation, an icon for the THERMOMARK X1.2 appears in the
Windows "Printer" system folder.
CLIP PROJECT advanced
Next, set up the THERMOMARK X1.2 in the CLIP PROJECT advanced planning and
marking software.
• Select the THERMOMARK X1.2 printer in CLIP PROJECT advanced under
"File... Printer setup...“.
2.3.3
Ethernet interface
See "Configuring the Ethernet interface" on page 3-5.
103938_ia_01
PHOENIX CONTACT
2-3
English
NOTE: Errors during operation due to insufficient or missing grounding
Make sure that all computers and connecting cables connected to the
THERMOMARK X1.2 are grounded.
THERMOMARK X1.2
2.4
2.4.1
Loading Media and Printing
Notes on the print head
NOTE: Use the correct materials
During printing, always make sure that there is no dirt on the media as this could be pulled
underneath the print head, which could cause damage.
NOTE: Open the print head if it is not to be used for a longer period of time
If the THERMOMARK X1.2 is not used for several days, the print head must be opened.
This increases the service life of the print head.
NOTE: Use suitable ink ribbon
The ink ribbon must be at least 5 mm wider than the media. Direct contact between the
print head and the media can lead to increased wear on the print head.
2-4
PHOENIX CONTACT
103938_ia_01
Connection and printing
2.4.2
Loading the ink ribbon
ʾ
ʿ
English
ˀ
ˁ
˂
˃
˄
Figure 2-2
Loading the ink ribbon
•
•
•
Feed path of the ink ribbon
Turn lever (1) counter clockwise to lift the print head.
Slide the ink ribbon reel (3) onto the ribbon supply hub (4) so that the color coating of
the ribbon faces downwards when being unwound.
Centrally align the ink ribbon with the help of the printed scales.
Hold the ink ribbon reel (3) and turn the knob on the ribbon supply hub (4) counter
clockwise until the ink ribbon reel is secured.
If the "Out of ribbon" error message is displayed, this may mean that the ink ribbon reel or
ink ribbon winder has not been correctly secured.
•
Slide and secure an empty ink ribbon reel onto the ink ribbon winder (2).
Always retain the empty ink ribbon core.
•
•
•
•
103938_ia_01
Guide ink ribbon through the print unit as shown in Figure 2-2.
Secure the starting end of the ink ribbon to the ribbon take-up hub (2) with adhesive
tape. Ensure counter clockwise direction of the ribbon take-up hub here.
Tighten the ink ribbon path feed.
Turn lever (1) clockwise to lock the print head.
PHOENIX CONTACT
2-5
THERMOMARK X1.2
2.4.3
Loading media
Positioning labels or continuous media on the media hub
ʾ
ʿ
ˀ
ˁ
ˁ
˃
˂
˂
ˀ
Figure 2-3
Inserting roll material
•
•
•
•
•
•
2-6
PHOENIX CONTACT
Inserting roll material
Open the cover.
Remove margin stop. To do this, turn the adjustable ring (5) counter clockwise so that
the arrow (6) points to the
symbol.
Remove margin stop (4) from the media hub (3).
Push material roll (2) onto the media hub so that the side to be printed is facing
upwards.
Place the margin stop (4) onto the media hub (3) and push until both margin stops
(1, 4) are adjacent on the material roll and further pushing is resisted.
Clip marginal stops to the media hub. To do this, turn the adjustable ring (5) clockwise
so that the arrow (6) points to the
symbol.
103938_ia_01
Connection and printing
ʾˁ
ʾʿ
English
ˆ
ʾˀ
˅
˅
ʾʾ
˄
ʾʿ
ʾʾ
ʾʽ ˆ ˅ ˄
Figure 2-4
Inserting material into the
print head
•
•
•
•
•
•
•
•
103938_ia_01
Inserting roll material
Turn lever (12) counter clockwise to lift the print head.
Turn the button (11), move the guides (8) apart so that the media can fit in between.
Push the media under the deflection roller (7) and between the guides (8).
Guide the strip so far through the label edge sensor (9) so that it exits the printing unit
between the print head and print roller.
Move the guides (8) close to the media edges. The media must be fed in exactly, in
such a way that it does not jam.
Close the print head.
Normally the label sensor (10) can remain in the centered position (to the outer edge).
If label recognition is to be carried by another position, remove the knurled screw and
push the sensor into the appropriate position.
The THERMOMARK X1.2 is now ready to print.
PHOENIX CONTACT
2-7
THERMOMARK X1.2
2.4.4
Printing
The THERMOMARK X1.2 is ready for operation when all connections have been
established, media and ink ribbon are inserted and the print head is locked.
In the case of continuous media, pressing the feed button before starting a print job will
result in an error message.
If the printer is still set for printing labels, it will look for the gap between the labels after the
feed button is pressed and output an error message.
However, the printer is still set to continuous media after a print job has been started.
Tear-off edge
Once printed, the media strips are torn off by hand. The printer is equipped with a tear-off
edge for this purpose.
A cutter (THERMOMARK X1-CUTTER, Order No. 5145290) is available as an accessory
for automatic label cutting. This blade is also suitable for processing continuous label
media.
A perforator and cutter (THERMOMARK W2-CUTTER/P, Order No. 5146244) is available
for marker sleeves.
2-8
PHOENIX CONTACT
103938_ia_01
Description of the operating elements
3
Description of the operating elements
3.1
ʾ
Layout of the control panel
The button functions depend on the current printer status:
– active functions are indicated by the illuminated labels and symbols on the buttons of
the navigator pad.
– During printing, active functions are illuminated in white (e.g. "menu" or "feed").
– In the offline menu, active functions are illuminated in orange (arrows, ↵ button).
Function of buttons in the offline menu
ʿ
–
–
–
Arrows: Move up, down, left or right in the menu tree
↵ button: Enter a parameter in the menu, call help information in the event of an error
Press and hold down (> 2 s) the ↵ button in order to jump back to printing mode without
applying new parameter settings.
Button functions in printing mode
Table 3-1
Button functions in printing mode
Display
Button
"Ready"
"menu"
ON
Function
Changes to the offline menu
"Ready"
"feed"
ON
Media feed
"Ready"
"pause"
ON
Pauses the print job
"Printing label"
"Pause"
Continues print job
Flashing
"Ready"
"cancel"
Continues print job
ON
"Printing Label"
Press briefly: Cancels current print job
"Pause"
Press and hold: Cancels current and
deletes all other print jobs
(page 3-2)
(page 3-2)
Flashing
↵
103938_ia_01
ON
Calls up help
PHOENIX CONTACT
3-1
English
The user can influence operation of the printer via the control panel:
– Pause, continue or cancel print jobs
– Set printer parameters, e. g. language and time (see page 3-3)
– Configure the Ethernet interface (see page 3-5)
THERMOMARK X1.2
3.2
Table 3-2
Indicators during printing
Operating states
Cause/meaning
"Ready"
The printer is in the Ready state and can receive data.
and configured symbol displays,
such as time
and date
.
"Printing Label"
The printer is carrying out a print job.
Data transmission is possible for a new print job.
"Pause"
The print job has been temporarily interrupted by the operator.
and the symbol
and error type
and the number of items to be printed
An error has occurred that can be corrected without canceling
the print job.
You can continue the print job afterwards.
The "pause" button flashes,
the "cancel" and ↵ buttons light up
and error type
and the number of items to be printed
An error has occurred that cannot be corrected without
canceling the print job.
The "cancel" button flashes and ↵ lights up
and the error type.
An error occurred during system startup.
• Switch the printer off and on again at the mains switch or
• Press the "cancel" button.
If the error continues to occur, inform Phoenix Contact
Button illumination has been switched off.
3-2
PHOENIX CONTACT
If the printer is not used for some time, it switches to energysaving mode automatically.
• Press any button to cancel.
103938_ia_01
Description of the operating elements
3.3
Modifying the language setting
English
The display language is set to English (UK) by default. To select a different language,
proceed as follows:
• Press the "menu" button.
• Press the ▶ button until you access the "Setup"
item.
• Press ▼ to confirm your selection.
• Press the ▶ button until you access the "Local Settings"
item.
• Press ▼ to confirm your selection.
• Press the ▶ button until you access the "Country"
item.
• Press ▼ to confirm your selection.
• Press the ▶ ◀ buttons to select the desired language.
• Press ↵ to confirm your selection.
Use the ▲ button to return to the higher menu level.
At the top menu level, press ◀ several times to switch from the offline menu to the "Ready"
state.
3.4
Setting the date and time
NOTE: The offline menu contains several levels of setting options. The "Local settings"
item can be used to set the language, date, and time.
All other settings are set to optimum settings and must not be modified.
•
•
•
•
•
•
•
•
Press the "menu" button.
Press the ▶ button until you access the "Settings"
item.
Press ▼ to confirm your selection.
Press the ▶ button until you access the "Local settings"
item.
Press ▼ to confirm your selection.
Press the ▶ button until you get to the desired item. Confirm selection by pressing ▼.
Select the desired setting with the ▶ and ◀ keys.
Press ↵ to confirm your selection.
Pressing and holding the ↵ button (> 2 s) switches from the offline menu to the "Ready"
state.
103938_ia_01
PHOENIX CONTACT
3-3
THERMOMARK X1.2
Table 3-3
Parameters of the "Settings" > menu "local settings".
Parameter
Meaning
Default
"Country"
Sets the display language and the country-specific time and date formats.
UK
"Timezone"
Adjusts the time display of the printer to the time zone in relation to UTC
(Universal Time Coordinated).
UTC + 1
"Daylight saving"
Selects the daylight saving regulation that is valid for the region. The time is then
changed automatically.
EU
"Set date"
Sets the system date in the format DD.MM.YYYY (DD: day, MM: month,
YYYY: year). The printout of the date is in the format set via the "Country"
parameter.
–
"Set time"
Sets the system time in the format HH:MM:SS. When changing the time, ensure
that the "Timezone", "Daylight saving" and "Set date" parameters are set
correctly.
–
The time can also be synchronized automatically via the Internet using the
Ethernet interface. The printout of the time is in the format set via the "Country"
parameter.
3-4
PHOENIX CONTACT
103938_ia_01
Description of the operating elements
3.5
Configuring the Ethernet interface
NOTE: The offline menu contains several levels of setting options. The Ethernet interface
can be configured under "Settings" > "Interfaces".
All other settings are set to optimum settings and must not be modified.
English
The integrated Ethernet interface allows operation of the printer in a network. Interface
settings are made on the printer.
The following parameters are necessary for operation of the printer in a network. If
necessary contact your network administrator.
– IP address
– Subnet mask
– or gateway
Alternatively, the Ethernet configuration can be obtained via a DHCP server. Make sure that
the same configuration is always transferred.
Setting the Ethernet interface on the printer
•
•
•
•
•
•
•
•
•
•
103938_ia_01
Press the "menu" button.
Press the ▶ button until you access the "Settings"
item.
Press ▼ to confirm your selection.
Press the ▶ button until you access the "Interfaces"
item.
Press ▼ to confirm your selection.
Press the ▶ button until you reach the "Ethernet"
item.
Confirm the selection by pressing ▼.
Select the desired setting with the ▶ and ◀ keys.
Press ↵ to confirm your selection.
Use the ▲ button to return to the higher menu level.
At the top menu level, press ◀ several times to switch from the offline menu to the
"Ready" state.
PHOENIX CONTACT
3-5
THERMOMARK X1.2
3-6
PHOENIX CONTACT
103938_ia_01
Maintenance and troubleshooting
4
Maintenance and troubleshooting
4.1
Maintenance and cleaning
4.1.1
Table 4-1
English
The print mechanism can become hot during printing. Do not touch them during operation
and allow them to cool down before changing the media or before removal or adjustment.
Maintenance plan
Maintenance plan
When
Maintenance task
See
When the print image and media feed are adversely affected
Clean the print head
page 4-1
Clean the pressure roller
page 4-2
Replace the pressure rollers
page 4-2
Clean the cutter
page 5-2
As necessary (if a cutter has been fitted)
4.1.2
Tools and cleaning agents
For adjustments and easy installation, use the hexagonal wrench provided, which is
located in the bottom section of the print unit (see Figure 4-1 on page 4-2, item 2). No
other tools are required for the work described here.
4.1.3
Cleaning the print head
Substances may accumulate on the print head during printing and adversely affect the print
image, e.g. differences in contrast or vertical stripes.
NOTE: Clean print head correctly
–
–
•
•
•
•
•
•
103938_ia_01
Do not use sharp objects (knives, screwdrivers, etc.) to clean the print head.
The print head has a protective glass layer at the top. Do not touch this protective
layer with your hand.
Switch off the THERMOMARK X1.2.
Make sure that the print mechanism has cooled down.
Turn lever (1, Figure 2-2 on page 2-5) counter clockwise to lift the print head.
Remove labels and ink ribbon from the printer.
Clean the print head surface with a cotton swab dipped in pure alcohol.
Allow print head to dry for 2 to 3 minutes before starting up the printer.
PHOENIX CONTACT
4-1
THERMOMARK X1.2
4.1.4
•
•
•
•
•
•
•
•
Cleaning the pressure roller
Switch off the THERMOMARK X1.2.
Make sure that the print mechanism has cooled down.
Turn lever (item 1, Figure 4-1 on page 4-2) counter clockwise to lift the print head.
Remove labels and ink ribbon from the printer.
Remove deposits with the help of pure alcohol and a cloth.
If the roller appears to be damaged, replace it.
Push the hexagonal wrench (4) back into its holder.
Reload the labels and ink ribbon (see "Loading Media and Printing" on page 2-4).
4.1.5
Replacing the pressure rollers
Poor quality printing may result if the pressure roller appears to be damaged or shows signs
of wear. In this case, the pressure roller must be replaced.
If large amounts of sleeve material are to be processed, it may lead to denting in the
pressure roller that will cause a poor quality printing on labels. The pressure roller often
recovers after a few hours.
We recommend using separate pressure rollers for sleeves and labels.
1
6
2
3
5
4c
Figure 4-1
Removing the side plate
•
•
•
•
•
•
•
•
4-2
PHOENIX CONTACT
4b
4a
Removing the side plate
Switch off the THERMOMARK X1.2
Make sure that the print mechanism has cooled down.
Remove the cutter by loosening the knurled screw and pulling the cutter toward you.
Turn lever (1) counter clockwise to lift the print head.
Remove labels and ink ribbon from the printer.
Loosen the screws (5) and the plate (6) with the hexagonal wrench (2) provided and
remove the plate (6).
Remove the screws (4abc) on the side plate (3) with the hexagonal wrench.
Remove side plate (3).
103938_ia_01
Maintenance and troubleshooting
English
Removing and fitting the pressure roller
2
1
Figure 4-2
Removing and fitting the
pressure roller
•
•
•
•
103938_ia_01
Removing and fitting the pressure roller
Remove the pressure roller (1) from the shaft (2) in the housing.
Place the new pressure roller ("Ordering data" on page A-4) onto the shaft and gently
turn it until the hexagon flange of the shaft slots into the hexagonal socket-head of the
pressure roller.
Mount the side plate (pos. 3, Figure 4-1), secure with screws (item 4abc, Figure 4-1)
and tighten in the following order: b–a–c.
Mount the plate (item 6, Figure 4-1) and tighten the screws (item. 5, Figure 4-1) with the
hexagonal wrench.
PHOENIX CONTACT
4-3
THERMOMARK X1.2
Table 4-2
4.2
Troubleshooting
4.2.1
Solving problems
Problem solving
Problem
Cause
Remedy
Print image is blurred or
missing in places
Print head is dirty
See "Cleaning the print head" on page 4-1.
Pressure roller is dirty
See "Cleaning the pressure roller" on
page 4-2.
Pressure roller worn out/damaged
See "Replacing the pressure rollers" on
page 4-2.
Ink ribbon not loaded correctly
Check feed path of the ink ribbon and
orientation of the coated side and correct, if
necessary.
Printer advances the labels but
does not print.
4.2.2
Table 4-3
Error messages
Error correction
Error message
Cause
Remedy
"Out of ribbon"
Ink ribbon used up
Load new ink ribbon
Ink ribbon melted through during printing
Cancel print job.
Clean print head (see page 4-1).
Replace ink ribbon (see page 2-5).
Restart print job.
Ink ribbon supply roll is not secured to the
ribbon supply hub
Secure ink ribbon reel (see page 2-5).
There are labels missing on the media.
Press the "pause" button repeatedly until
printer recognizes the next label on the
media.
The label size defined in the format sent to
the printer does not match the actual media
size.
Cancel print job.
Change label format in software.
Restart print job.
"Head open"
Print head not locked
Lock print head.
"Head too hot"
Print head excessively warm
The print job continues automatically after a
pause.
"Out of paper"
Label roll/marker sleeves used up
Load media (see page 2-6)
Error in media flow
Check media flow.
"No label"
4-4
PHOENIX CONTACT
103938_ia_01
Fitting and cleaning the cutter (accessory)
5
Fitting and cleaning the cutter (accessory)
5.1
Fitting the cutter
There are two types of cutters available as accessories:
– A cutter for labels (THERMOMARK X1-CUTTER, Order No. 5145290)
– A perforator and cutter for marker sleeves (THERMOMARK W2-CUTTER/P,
Order No. 5146244)
English
Both cutters are fitted in the same way.
Notes on the cutter
WARNING:
The cutter may only be fitted and removed when the printer is switched off.
The blades of the cutter are sharp. Risk of injury, especially when carrying out
maintenance work.
Only operate the cutter when it is mounted on the printer.
Do not cut any media that is wider or thicker than indicated in the specification.
Do not reach into the area of the moving blades during operation.
Mounting the cutter
1
2
Figure 5-1
Fitting the cutter
•
•
•
•
Mounting the cutter
Switch off the THERMOMARK X1.2.
Insert the cutter (1) with the pins in the catch holes of the printer.
Press the cutter against the printer. When you do this, the connector attached to the
cutter makes contact with the I/O connection of the printer.
Secure the cutter (1) with the screw (2).
You should not press the feed button directly after fitting the cutter since a large amount
of material will be advanced. Start a print task directly afterward.
The printer will be configured to continuous material during the first print task.
•
103938_ia_01
Select the appropriate setting in the marking software for printing with the cutting or
perforation function.
PHOENIX CONTACT
5-1
THERMOMARK X1.2
5.2
Cleaning the cutter
During operation, dust particles accumulate, especially in the area of the blades. Remove
these particles regularly with a soft brush or a vacuum cleaner.
Special maintenance work is necessary when you cut directly into the label material and not
into the gap between labels. In such a case, adhesive residue accumulates on the blades.
When working with backfeed in cutting mode, adhesive particles also accumulate on the
pressure roller. For this reason, the pressure roller and the blades of the cutter should be
cleaned at regular intervals (refer to "Cleaning the pressure roller" on page 4-2).
WARNING: Risk of injury
The blades of the cutter are sharp.
2
1
3
Figure 5-2
•
•
•
•
•
Cleaning the cutter
Disconnect the THERMOMARK X1.2 from the mains.
Loosen screw (1) and remove the cutter from the printer.
You can use a Philips screwdriver (with a blade width of 7 mm) to turn the axle (3) and
clean the circular blade.
The circular blade's angle of rotation is restricted to 120° by the screw (2).
If there is a high level of soiling, loosen the screw (2) so that it protrudes by
approximately 5 mm in order to be able to turn the cutter without restriction.
Remove any deposits on the blades with the help of isopropyl alcohol and a soft cloth.
WARNING: If you have loosened the screw (2), the circular blade must be re-adjusted
after cleaning as described in section 5.2.1 on page 5-3.
5-2
PHOENIX CONTACT
103938_ia_01
Fitting and cleaning the cutter (accessory)
5.2.1
Adjusting the cutter after cleaning
English
If the circular blade's screw was only removed in order to clean the blade, the circular blade
(1) and the clock wheel (2) must be realigned with one another in order to ensure correct
functioning of the cutter.
Figure 5-3
•
•
•
•
Aligning the circular blade with the clock wheel
Completely remove screws (3), (5) and (9, on the rear of the cutter) and remove the
enclosing guard (4).
Loosen screw (8) so that it protrudes from the cutter's profile by approximately 5 mm.
Use a Philips screwdriver (with a blade width of 7 mm) to turn the cutter's axle (7) so that
the circular blade's label (6) faces down.
When viewed as a cross-section, a flat surface can be seen on both axles (A, B). These
two surfaces (A, B) are now aligned, or will be aligned after one or two more complete
turns, and point toward the rear of the cutter.
Excessive tightening of screw (8) may damage its thread.
•
103938_ia_01
Retighten screw (8) and the screw on the enclosing guard.
PHOENIX CONTACT
5-3
THERMOMARK X1.2
5-4
PHOENIX CONTACT
103938_ia_01
A Technical appendix
A1
Technical data
Print head
Thermal transfer
Print resolution
300 dpi
Print speed
30 mm/s ... 125 mm/s
Print width
Up to 105.6 mm
English
Printing method
Labels
Media
Labels on rolls or Leporello fold, assembled or continuous
Media thickness
0.05 mm ... 1.2 mm
Media width
for media thickness < 0.4 mm
for media thickness > 0.4 mm
Label width
25 mm ... 105 mm
5 mm ... 105 mm
4 mm ... 116 mm
Label height
5 mm ... 2000 mm
Weight
60 g/m² ... 250 g/m²
Supply roll
Outside diameter
up to 210 mm
Core diameter
38 mm ... 100 mm
Label winding
Outside or inside
Ink ribbon
Ink side
Outside
Reel diameter
up to 80 mm
Core diameter
25 mm
Ribbon length
up to 500 m
Width
up to 114 mm
Printer dimensions
Dimensions (W x H x D)
242 mm x 274 mm x 446 mm
Weight
9 kg
Label sensor
Type
Gap sensor, bottom-reflective sensor
Distance to paper edge
5 mm ... 53 mm
Electronics
High-speed processor, 32 bits, ColdFire
Clock rate
103938_ia_01
266 MHz
PHOENIX CONTACT
A-1
THERMOMARK X1.2
Electronics
Main memory (RAM)
64 MB
Program memory (ROM)
8 MB flash
Realtime clock with printout of time and date
Control panel
Buttons illuminated according to operating mode
pause, feed, cancel, menu, Enter, 4 x cursor
LCD graphic display
Width x height
60 mm x 40 mm
Interfaces
Serial V.24 (RS-232-C)
1 200 to 230 400 baud/8 bits
USB 2.0
High-speed slave for PC connection
Ethernet
10/100 Base-T, LPD, RawIP-Printing, DHCP, HTTP, FTP, SMTP, SNMP
Settings
Local settings
Regional settings
(CZ, DE, DK, E, FR, GB/USA, H, I, IL, IR, N, NL, P, PL, RUS, S, SF, TR)
Monitoring
Stop printing
When the end of the ink ribbon is reached, when end of media is reached,
when print head is open
Test options
System diagnostics
When switching on incl. Print head check, short status display, status printout,
font list, device list, print head profile, label profile, test grid, monitor mode
Status messages
Comprehensive status printout with information about device settings,
such as print length counter, operating hours counter, device status
requested via software command
Status indicator in the display
Network error - no link, barcode error
Fonts
Font types
5 bitmap fonts including OCR-A, OCR-B, and 3 vector fonts Swiss 721,
Swiss 721 Bold, and Monospace 821 available internally, loadable TrueType
fonts
Character sets
Windows 1250 to 1257, DOS 437, 737, 775, 850, 852, 857, 862, 864, 866,
869, EBC DIC 500, ISO 8859-1 through to -10 and -13 through to -16,
WinOEM 720, UTF-8, Macintosh Roman, DEC MCS, K0I8-R.
All Western and Eastern European, Latin, Cyrillic, Greek, Hebrew, and Arabic
characters are supported.
Optional Chinese (simplified Chinese)
Bitmap fonts
Size in width and height: 1 - 3 mm
Enlargement factor: 2 - 10
Orientation: 0°, 90°, 180°, 270°
A-2
PHOENIX CONTACT
103938_ia_01
Technical data
Fonts
Vector/size
In width and height: 0.9 - 128 mm
TrueType fonts: Variable enlargement factor
Orientation: 360° in increments of 1°
Font styles
Bold, italic, underlined, outlined, inverted, gray, vertical, depending on the
font type
Character spacing
Variable
Windows drivers
Windows 2000, Windows XP 32/64bit, Windows 2003 32/64bit,
Windows VISTA 32/64 bit
Planning and marking software
CLIP PROJECT advanced / professional
English
Software
Operating data
Voltage
100 V AC ... 240 V AC, 50/60 Hz, PFC
Power consumption
300 W, maximum
Operating temperature
10 °C ... 35 °C
Humidity
30 % ... 85%, without condensation
Safety requirements
CE, FCC class A, CB, CCC
Cutter THERMOMARK X1-CUTTER, Order No. 5145290
Cutting length
At least 5 mm
Material thickness
0.05 mm ... 1.2 mm
Power supply
Via I/O connection on the printer
Outlet height
2.5 mm
Perforator and cutter THERMOMARK W2-CUTTER/P, Order No. 5146244
Cutting length
At least 5 mm
Material thickness
0.05 mm ... 1.2 m
Power supply
Via I/O connection on the printer
Outlet height
4.5 mm
103938_ia_01
PHOENIX CONTACT
A-3
THERMOMARK X1.2
A2
Ordering data
Printer
Description
Thermal transfer printer for labels and marker sleeves, incl. connecting cable,
Windows printer drivers and marking software
Type
Order No.
Pcs./Pkt.
THERMOMARK X1.2
5145274
1
Accessories
Description
Type
Order No.
Pcs./Pkt.
Cutter for labels
THERMOMARK X1-CUTTER
5145290
1
Replacement parts
Description
Type
Order No.
Pcs./Pkt.
Pressure roller
THERMOMARK X-ROLLER
On request
Cutter
THERMOMARK X1-CUTTER
5145290
1
Perforator and cutter
THERMOMARK W2-CUTTER/P
5146244
1
Materials
Description
Type
Order No.
Pcs./Pkt.
Labels for THERMOMARK X1.2, 2500 pieces per roll,
lettering field size: 16.5 mm x 5 mm, color: White
EML (16.5x5)R
0816702
1
Labels for THERMOMARK X1.2, 2500 pieces per roll,
lettering field size: 20 mm x 8 mm, color: White
EML (20x8)R
0816786
1
Labels for THERMOMARK X1.2, 1000 pieces per roll,
lettering field size: 70 mm x 32 mm, color: White
EML (70x32)R
0817060
1
Labels for THERMOMARK X1.2, 300 pieces per roll,
lettering field size: 100 mm x 73 mm, color: White
EML (100x73)R
0817125
1
Labels for THERMOMARK X1.2, 2500 pieces per roll,
lettering field size: 17.5 mm x 8 mm, color: Yellow
EML (17.5x8)R YE
0816757
1
Labels for THERMOMARK X1.2, 2500 pieces per roll,
lettering field size:20 mm x 8 mm, color: Yellow
EML (20x8)R YE
0816799
1
Labels for THERMOMARK X1.2, 1000 pieces per roll,
lettering field size: 70 mm x 32 mm, color: Yellow
EML (70x32)R YE
0817073
1
Labels for THERMOMARK X1.2, 300 pieces per roll,
lettering field size: 100 mm x 73 mm, color: Yellow
EML (100x73)R YE
0817138
1
Labels for THERMOMARK X1.2, 2500 pieces per roll,
lettering field size: 26.5 mm x 17.5 mm, color: silver
EML (26.5x17.5)R SR
0816883
1
Labels for THERMOMARK X1.2, 1000 pieces per roll,
lettering field size: 70 mm x 32 mm, color: silver
EML (70x32)R SR
0817057
1
Labels for THERMOMARK X1.2, 400 pieces per roll,
lettering field size: 70 mm x 50 mm, color: silver
EML (70x50)R SR
0817086
1
Labels for THERMOMARK X1.2, 300 pieces per roll,
lettering field size: 100 mm x 73 mm, color: silver
EML (100x73)R SR
0817112
1
Ink ribbon for printing labels with the THERMOMARK X1.2
length 300 m, width: 110 mm, black
THERMOMARK-RIBBON 110
5145384
1
Materials
Description
Type
Order No.
Pcs./Pkt.
Shrink tube for THERMOMARK X1.2
Conductor diameter: 1.0 mm ... 3.0 mm, length 30 m, white
Conductor diameter: 1.0 mm ... 3.0 mm, length 30 m, yellow
Conductor diameter: 1.5 mm ... 4.5 mm, length 30 m, white
Conductor diameter: 1.5 mm ... 4.5 mm, length 30 m, yellow
Conductor diameter: 2.0 mm ... 6.0 mm, length 25 m, white
Conductor diameter: 2.0 mm ... 6.0 mm, length 25 m, yellow
WMS 3 (EX5)R
WMS 3 (EX5)R YE
WMS 4.5 (EX7.5)R
WMS 4.5 (EX7.5)R YE
WMS 6 (EX10)R
WMS 6 (EX10)R YE
0817633
0817662
0821904
0821946
0821917
0821959
1
1
1
1
1
1
WMS 9 (EX15)R
WMS 9 (EX15)R YE
WMS 12.5 (EX20)R
0817646
0817675
0821920
1
1
1
Conductor diameter: 3.0 mm ... 9.0 mm, length 20 m, white
Conductor diameter: 3.0 mm ... 9.0 mm, length 20 m, yellow
Conductor diameter: 4.0 mm ... 12.5 mm, length 20 m, white
A-4
PHOENIX CONTACT
103938_ia_01
Ordering data
Type
Conductor diameter: 4.0 mm ... 12.5 mm, length 20 m, yellow
WMS 12.5 (EX20)R YE
Conductor diameter: 6.0 mm ... 18.0 mm, length 20 m, white
WMS 18 (EX30)R
Conductor diameter: 6.0 mm ... 18.0 mm, length 20 m, yellow
WMS 18 (EX30)R YE
Conductor diameter: 8.0 mm ... 25.0 mm, length 15 m, white
WMS 25 (EX40)R
Conductor diameter: 8.0 mm ... 25.0 mm, length 15 m, yellow
WMS 25 (EX40)R YE
Ink ribbon specifically for printing on marker sleeve with the THERMOMARK X1.2
Length 300 m, width: 64 mm, black
THERMOMARK-RIBBON 64-WMSE
Length 300 m, width: 64 mm, blue
THERMOMARK-RIBBON 64-WMSE BU
Length 300 m, width: 64 mm, red
THERMOMARK-RIBBON 64-WMSE RD
Halogen-free shrink sleeve for THERMOMARK X1.2
Conductor diameter: 1.0 mm ... 3.0 mm, length 30 m, white
WMSHF 3 (EX5)R
Conductor diameter: 1.0 mm ... 3.0 mm, length 30 m, yellow
WMSHF 3 (EX5)R YE
Conductor diameter: 1.5 mm ... 4.5 mm, length 30 m, white
WMSHF 4.5 (EX7.5)R
Conductor diameter: 1.5 mm ... 4.5 mm, length 30 m, yellow
WMSHF 4.5 (EX7.5)R YE
Conductor diameter: 2.0 mm ... 6.0 mm, length 25 m, white
WMSHF 6 (EX10)R
Conductor diameter: 2.0 mm ... 6.0 mm, length 25 m, yellow
WMSHF 6 (EX10)R YE
Conductor diameter: 3.0 mm ... 9.0 mm, length 20 m, white
WMSHF 9 (EX15)R
Conductor diameter: 3.0 mm ... 9.0 mm, length 20 m, yellow
WMSHF 9 (EX15)R YE
Conductor diameter: 4.0 mm ... 12.5 mm, length 20 m, white
WMSHF 12.5 (EX20)R
Conductor diameter: 4.0 mm ... 12.5 mm, length 20 m, yellow
WMSHF 12.5 (EX20)R YE
Conductor diameter: 6.0 mm ... 18.0 mm, length 20 m, white
WMSHF 18 (EX30)R
Conductor diameter: 6.0 mm ... 18.0 mm, length 20 m, yellow
WMSHF 18 (EX30)R YE
Conductor diameter: 8.0 mm ... 25.0 mm, length 15 m, white
WMSHF 25 (EX40)R
Conductor diameter: 8.0 mm ... 25.0 mm, length 15 m, yellow
WMSHF 25 (EX40)R YE
Halogen-free ink ribbon specifically for printing on halogen-free marker sleeves with the THERMOMARK X1.2
Length 300 m, width: 55 mm, black
THERMOMARK-RIBBON 55-WMSHF
Order No.
Pcs./Pkt.
0821962
0817659
0817688
0821933
0821975
1
1
1
1
1
5145724
5145737
5145740
1
1
1
0821988
0822068
0821991
0822071
0822000
0822084
0822026
0822107
0822039
0822110
0822042
0822123
0822055
0822136
1
1
1
1
1
1
1
1
1
1
1
1
1
1
0827856
1
English
Materials
Description
For numerous other print media, please refer to the Phoenix Contact catalog.
103938_ia_01
PHOENIX CONTACT
A-5
THERMOMARK X1.2
A3
A-6
PHOENIX CONTACT
Declaration of conformity
103938_ia_01
B Index
C
M
Cleaning
Pressure roller ...................................................... 4-2
Print head ............................................................. 4-1
Cleaning agents ......................................................... 4-1
Cleaning the pressure roller ....................................... 4-2
Cleaning the print head .............................................. 4-1
Computer connection................................................. 2-3
Connections............................................................... 2-2
Control panel.............................................................. 3-1
Maintenance plan....................................................... 4-1
D
Display ....................................................................... 3-1
Disposal ..................................................................... 1-4
E
Environment............................................................... 1-4
Error causes............................................................... 4-4
Error correction .......................................................... 4-4
Error messages.......................................................... 4-4
F
Functions during printing............................................ 3-2
H
Hexagonal wrench ..................................................... 4-1
Navigator pad............................................................. 3-1
Network connection ................................................... 2-3
P
Power supply connection ........................................... 2-2
R
Replacing rollers ........................................................ 4-2
Replacing the pressure rollers.................................... 4-2
S
Safety notes ............................................................... 1-1
Screen........................................................................ 3-1
Setting up the printer .................................................. 2-1
Storage ...................................................................... 1-3
T
Tool ............................................................................ 4-1
Transportation safeguards ......................................... 2-1
U
Unpacking .................................................................. 2-1
I
Inserting a label strip into the print head ..................... 2-7
Installation.................................................................. 2-1
Interfaces ................................................................... 3-5
L
Lithium battery ........................................................... 1-4
Loading labels............................................................ 2-4
Loading labels from a roll ........................................... 2-6
Loading media ........................................................... 2-4
Loading shrink tubes, loading marker sleeves ........... 2-4
Loading the ink ribbon................................................ 2-5
Loading the ribbon ..................................................... 2-5
Loading the transfer ribbon ........................................ 2-5
103938_ia_01
PHOENIX CONTACT
B-1
English
N
THERMOMARK X1.2
B-2
PHOENIX CONTACT
103938_ia_01