1
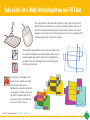
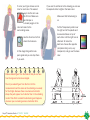
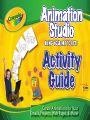
Activity
Guide
Published By
Create Animations for Your
Emails, Projects, Web Pages, & More!
®
Contents
introduction to Crayola Animation Studio
Introductory Activities
Activity 1: take a Line for a Walk: introducing draw and Fill tools
Activity 2: exploring Color: Basic and Complementary Colors
Activity 3: Creating a Background image
Activity 4: Saving an image as a Background
Animation Activities
Activity 1: Moving image
Activity 2: Moods, emotions, and Feelings
Activity 3: Simple Animation
Activity 4: email Signature
Activity 5: Web Banner
More Artwork Activities
Activity 1: using and transforming Stamps
Activity 2: imaginary Animals: using Stamps and Patterns
Activity 3: Human Figure: Advanced drawing and Coloring Features
Activity 4: Light and Color: using tones and Blending
Activity 5: Landscape: Light and Color in Nature
Activity 6: Perspective: vanishing Points and Horizon Lines
Table of Keyboard Shortcuts
1
2
4
6
8
9
10
13
15
17
19
21
23
25
27
29
33
images needed for the activities in this Guide can be found by opening the My
Paintings>Activities folder in Crayola® Animation Studio.
Published By
www.core-learning.com
©2010 Core Learning inc. and Logotron Limited.
©2010 Crayola. Crayola®, Chevron design®, Serpentine®, Oval Smile design®
are trademarks of Crayola used under license.
Introduction to Crayola Animation Studio
The Crayola Animation Studio Program is an easy-to-use
digital art program with tools for creating animations for
emails, web pages, and projects. You can create original
images, add text, or import images into the program.
parents in learning how to use the program tools and
functions.
The activities use many images that have been included with
the program. When the Activity Guide refers to the Activities
folder, you can locate this by choosing File>Open>My
The features of Crayola Animation Studio include:
Paintings>Activities. The program automatically opens in
• five realistic art tools for drawing and painting
the My Paintings folder when you choose File>Open, so you
• animation tools
should just have to locate the Activities folder in there. The
• images in the Stamps browser to use for animations
• motifs and textures to add artistic effects to animations Activity Guide also refers to images in the Stamps folder. You
can access the images from the Stamp Browser located on
• text functions
the right side of the interface (if not displayed, click
the
Learn About Crayola Animation Studio Features
on the toolbar to show the sub-folder names).
There are three documents found in the Resources Menu to
help the you become acquainted with the program features
If you wish to add an image to the Stamp Browser, you have
and tools. They include are:
to save your images in the program Stamps Folder. You
can do this by choosing Save As>C:>Program Files>Crayola
1. Quick Start Tour - is a self-running demo on how Crayola
Animation Studio>Stamps. You can choose a folder to add
Animation Studio works.
them to, create a "new" stamps folder category, or save in
2. Activity Guide is the document you are currently reading. the "open" folder (unlabelled folder at the top of the drop
It contains activities to help learn animation creation
down list in the Browser). Save to the Stamps folder and not
techniques.
a named sub-folder. Now when you open your Stamp Browser
3. User Manual contains a complete discussion of features
in the program, your stamp images will be accessible.
of the program. Many opportunities for creative expression
are explained. It will assist users, teachers, tutors, and
Crayola® Animation Studio A c t i v i t y G u i d e
1
Take a Line for a Walk: Introducing Draw and Fill Tools
You may be able to draw well with a pencil or crayon but you may find it
difficult using a mouse. Even if you have a graphics pad it is not easy to
start with. Although the drawing tool is like holding a pencil, the picture
appears on the screen, not on the surface on which you are pressing. The
following exercise will help you to practice.
Crayola® Marker
Choose the Crayola® Marker and a color and “take a line
for a walk” as Paul Klee (a famous Swiss painter from a
hundred years ago) used to say. Keep to straight lines,
perhaps in line with the edges of the surface using the
Continuous Curve tool.
Continuous Curve
Fill
Fill in some of the shapes with
colors. These could be one light
color and one dark one; or
perhaps they could be colors that
are all light or all dark. You could
put them in shapes that do not
touch each other or shapes that
only touch at the corners.
Crayola® Animation Studio A c t i v i t y G u i d e
2
If you have left a background that surrounds these
shapes, try filling that in with a light or dark color to see
what effect it has on the main part of the picture.
Fill
When you are happy with the mouse or graphics pad
drawing you have done, see if it suggests anything you
can recognize. When you can see something in the
picture, make this your new subject and complete the
picture as you wish, using other colors and tools to draw
in any other details you need. (You could find things in
the Stamp browser to add to it too).
Stamps
If you want to erase something, right-click the mouse.
Continuous Curve
Perhaps you could draw a line for your
friend to finish, or your friend could
draw you a line to turn into a picture.
Alternatively, load the Lines.rna files from
the Activities folder.
Crayola® Animation Studio A c t i v i t y G u i d e
3
Exploring Color: Basic & Complementary Colors
Have you ever looked closely at the colors in a rainbow?
Look at the rainbow and at the color wheel. Is your
favorite color there?
The basic colors in the circle are Red, Blue
and Yellow.
+
+
+
=
=
=
Crayola® Animation Studio A c t i v i t y G u i d e
If you mix Red and Yellow together you will get Orange.
Red and Blue make Purple.
Blue and Yellow make Green.
Look at the colors in the color wheel. The colors Orange, Purple and
Green come between the colors that make them.
4
Some of these colors form families.
Purple, Red and Orange, for instance, are
related because they all contain Red.
On the other hand, some colors are opposites, such
as Red and Green. Look straight across the color
wheel and see if you can find other opposite colors.
Opposite Colors are called Complementary Colors.
Some of the colors are light and some
are dark.
Stamps
Think of a good subject containing bright colors. Here
are a few suggestions: a bed of flowers; a bunch of balloons; kites flying against a colorful sky; a mixture of all
of these. Use any drawing tool plus the Fill tool. See if
you can find pictures in the Stamp browser to help you
or load the Colors.rna file from the Activities folder.
Fill
In some of your pictures keep the related colors close to each other. In
others try putting an opposite color in with the related ones. Try putting
the dark ones together and adding a pale one to them.
Crayola® Animation Studio A c t i v i t y G u i d e
5
Creating a Background Image
A background is an image that creates a setting that
appears behind your main images. It provides a scene for
your images. There are many different types of background
that can be used. They could be beaches, shopping centers,
parking lots, classrooms, kitchens, deserts, rainforests, and
much more.
are trying to create. Is it indoors or outdoors? Day or night?
Real or imaginary? A room, a place, or a location? Once you
have chosen a theme for your image you can start to build a
background.
Think of a background in layers. Decide what features will be
needed on the entire drawing and then build on them.
Start by drawing the main elements of your
background, such as the sky and grass. You can use
the filled rectangle or square.
Filled
Rectangle or
Sqaure
Think about different backgrounds you have seen in different
pictures. What type of backgrounds could you use as a
starting point for your picture? Think of the type of image you
Crayola® Animation Studio A c t i v i t y G u i d e
6
Once you have your basic background, you can start adding
the other elements. Use a variety of shape tools and art
tools to experiment. If you want something to appear in the
distance, such as mountains, draw them next. Place them on
the horizon (the line where the sky and grass meet). You can
make them appear farther away by drawing them smaller or
closer by drawing them the same size.
Next add some trees, or a road. Complete your drawing
however you wish, adding elements that you do not want to
have changed, such as flowers, cars, birds, etc.
Continuous
Curve
Filled Circle
Now add features to
your sky - perhaps
some clouds (the
filled circle or freehand drawing tools
are great for this),
the sun, or some
birds.
Remember to look in your Stamp Browser for
images you can easily add to your background.
Stamps
Crayola® Animation Studio A c t i v i t y G u i d e
7
Saving an Image as a Background
You can use any of the pictures you draw, or pictures you
have saved on your computer as a background (this means
that art tools such as the Erasing tool will not work on your
image).
Select your picture using the selection tool and
drawing a shape around the entire picture, or
Selection
press the CTRL>A keys on your keyboard. With
your picture selected, right click your mouse. A
dropdown menu will appear. Go to Use as Background. A popout menu will appear with these options: Center, Fit, Resize,
and Tile.
Choose Resize to have your background fill the page. Now
your image is the background. Even if you clear the page
using the Clear picture feature, your image will remain the
background.
You can now complete your picture by adding other elements
- drawing objects, adding
stamp images, or adding
text to it.
You can also save your
image as a background
by saving it as a Stamp
(File >Save As>My
Computer>Local Disk
(C:)>Program Files>Crayola
Animation Studio>Stamps>
Backgrounds>your
filename.rna). This will store your background for later use.
When you use the stamp you will have to right click the
mouse again to have the Use as Background options appear.
Crayola® Animation Studio A c t i v i t y G u i d e
8
Moving Image
When you go to the movies, what appears to be a
moving picture is a series of still pictures shown in quick
succession. In order to make a cartoon, all you have to
do is make a sequence of drawings, each with a little
change from the previous one. Originally, all cartoons
were made from thousands of drawings. These were
then put together by filming them with a cine camera.
Computers help us to do this much more quickly now,
using software like Crayola Animation Studio.
Paper
Properties
Start a new page and use Paper Properties
to set the screen to 128 x 128 pixels. Choose
the Organizer from the View Menu to open the
Organizer Window at the bottom of the screen.
Your first frame will be visible to the left.
Crayola® Animation Studio A c t i v i t y G u i d e
9
Stamps
Go to the Stamp Browser and choose ‘Animation’.
The strip of pictures which appears contains
eight drawings of a little man and five of a little
dog. Drag the top one of the dog into your page.
Position it in the middle and make sure that its
nose and tail do not go outside the frame.
Now click on the ‘New Frame After’ button to get
the next frame.
New Frame After
Onion Skin
Click on the ‘Onion Skin’ icon and the contents
of the first frame will appear in pale gray in the
new frame. Drag the next dog into the new frame
and, using the Onion Skin, line up the backbones.
Get another frame and repeat this pattern until all
five drawings have been inserted.
Click on the ‘Play Forward’ button to see your dog
running along.
Play Forward
Start a new file (File>New or Ctrl+N), and repeat the
exercise with the little man’s eight frames. Color in his head,
hands and feet.
Eraser
Crayola® Animation Studio A c t i v i t y G u i d e
Try doing your own drawings of a simple movement...
If you want to erase something, use the Erasing tool.
(The shortcut to this is to draw with the right hand
mouse button instead of the left). Note that if you
draw with white paint and use the left hand button you
will not be able to see the Onion Skin drawing of the
previous frame.
10
Moods, Emotions, and Feelings
You are going to show (in an animation) how emotion can
change a face as circumstances change.
Before you start, you need to get in your mind
a little story which you are going to depict.
It could be near the end of a race and your
favorite athlete is half a pace behind the
leader. Can they make up the distance before
the finish line?
You can finish the story yourself but the tension and final
outcome are only expressed by the agonies or joy on the face
of the spectator.
When you have decided what you are going to do, draw the
main versions of the face as set out in your storyboard. Work
out how many frames will be needed between each and add
that number of frames.
The normal planning tool for animations and films is the
storyboard. This is a grid into which a mixture of words
and sketches go to give a rough idea of what the piece will
contain and where the major changes in the story occur.
For instance select the first frame and click on
the New Frame After button as many times as you
want new frames.
New Frame After
It would be a good idea to think about the faces you want
to express and do sketches of what happens to the eyes,
mouth, eye-brows and color.
Turn on the Onion Skin so you can see the
shadow of the previous frame to help you draw.
Onion Skin
In the Activity Folder there is a template called
Storyboard.rna to help you plan your animation.
Crayola® Animation Studio A c t i v i t y G u i d e
11
Resize Stamps
Fill
Look in the Stamp browser and load the list called
‘Cartoon Elements’. In it you will find various facial
features which you may be able to use. Drag one
into your frame and resize it as necessary. You
can also use the Rotate and Skew tools while it
is in Selection mode. But the easiest way to see
what facial expressions are like is to pull a face in a
mirror.
Rotate
Skew
You can color the face. For instance you could
make it turn red as it comes to anger or fury.
Choose a mid-red from the palette and move the
transparency slider about two-thirds of the way to
the right. Color in all the faces in this sequence with
the Fill tool. Click once in the first face, twice in the
second, three times in the third and so on till you
have done all of them.
One of the earliest animated films or cartoon
films was called Skeleton Jangle, in which some
jolly skeletons dance round a graveyard. Use the
Skeleton.rna file from the Activity folder to try and
make your own skeleton dance.
Crayola® Animation Studio A c t i v i t y G u i d e
12
Simple Animation
In this activity you will learn how to
make an image move across the
screen.
Stamps
Open a new image. This will be the
first Frame of your animation. Start by adding
a background. Go to the Stamp Browser and
choose the Backgrounds category. Choose the
image of the sky, grass, and tree (the fifth image
in the list). Click and drag it onto the screen.
With the selection box active around it, right-click
and choose Use as Background from the dropdown list. Choose the Resize option from the
pop-out list. This will now be the background for
each new Frame added.
Now add another Frame. Turn the Onion Skin
feature on. This will allow you to see a shadow of
the previous frame, allowing for easier placement
Onion Skin
of the next image. Place another instance of the
butterfly stamp on the screen, more towards the center and
to the left. Also, resize the stamp, making it a little smaller.
Now let's start your animation
by adding an image. For this
example, use the butterfly
image found in the Animals
category of the Stamp
Browser. Click and drag the
stamp image onto the screen.
Position it near the bottom
right hand side of the screen.
Crayola® Animation Studio A c t i v i t y G u i d e
13
Play Forward
Continue to add the same butterfly image on multiple frames, reducing the size of the image and the distance
from the starting point on each frame. Once you have 6 or 7 frames, and your butterfly is small and near the top
left side of the page, press the Play Forward button to see your butterfly "fly" across the screen.
The default delay (speed of movement) is 100 which means a tenth of a second per frame. This makes the butterfly move
rather quickly. Note: Setting the delay to 1000 will give a speed of one second per frame.
You can change the speed of the whole animation by using the Set Delay feature on the Animation menu. You can also
manually change the speed of each frame. Click on the number below the frame and type in the new number. The larger the
number, the slower the speed.
To change multiple frames at once to the same speed, select all the frames and
then right-click. Select Animation>Set Delay and then type in a new number.
Click OK. Try setting your delay to 200 for all frame items and then Play Forward
again. This will provide a more realistic movement of the butterfly.
To save your image as animation, choose the *gif file format under the Save As
drop down menu.
Crayola® Animation Studio A c t i v i t y G u i d e
14
Email Signature
Emails are a popular way of communicating. Like handwritten
letters and notes, emails close with a signature. You can use
Crayola Animation Studio to create a moving signature or to
add a moving graphic to enhance a typed signature.
Add the rest of the letter and repeat the steps: select, copy,
add new frame item, paste, and draw. Repeat the steps as
many times as you need to finish spelling you name. When
completed, click on the play forward button and watch as your
name "writes" itself on the screen.
To create a signature that appears like you are writing it,
chose an art tool and a color. On the first frame item, "write"
part of the first letter of your name.
Select the drawing using the selection tool and copy it. Now,
insert a new Frame item and paste the drawing. The pasted
drawing will appear in the exact same position as it was
copied from.
Crayola® Animation Studio A c t i v i t y G u i d e
15
The animation will automatically loop (start over at the
beginning and repeat all movements continuously). To stop
it from looping, Choose the Animation>Frame option on the
Animation menu click on Loop Frames. This will deselect the
looping feature. Remember to save your animation as a *.gif.
Experiment with different colors (try making a rainbow
colored name), different speeds using set delay, or with
adding images.
To make an image appear to move across the screen,
change the position or direction of it in each frame. The
series of frames below show re-positioning of the ladybug in
each frame. When this animation is played, you will see the
ladybug move as the signature is done.
Crayola® Animation Studio A c t i v i t y G u i d e
16
Web Banner
Web banners are used on web sites to advertise or highlight
items of interest. this activity will teach you how to create a
web banner.
the following is a list of standard web banner sizes measured
in pixels available in Crayola Animation Studio.
as a background. then "layer" your text and images on top.
Add text and images. insert a new Frame item and continue
adding elements until completed. Adjust the time delays to
the appropriate speed for each frame item to appear. Save as
a *.gif.
Here are a few techniques that you could use:
Full Banner
Leaderboard
Skyscraper
468 x 60
728 x 90
160 x 600
Choose view>Paper
Properties to select a
banner size from the
drop down menu.
1. Scrolling text - Choose the text tool. type your full
message and position it off the paper to the left, right, top,
or bottom. Add a new frame, click the text tool again (it
will remember what was last typed) and position the text
showing slightly more of the message. Continue adding
frames and the same text until the whole thing is showing,
or until it has "left" the image area.
Before you start, plan out what the banner will look like
(images and messaging) and what it will do (have text move
across screen, have text or images "flash", have multiple
messages rotate through, etc.). Always start by filling the
background with a color or choosing a Stamp image to use
Crayola® Animation Studio A C t i v i t y G u i d e
17
2. Flashing text/images - copy and paste the text/images that
you want to flash onto every other frame (if you are doing a
simple flashing image, such as a New button, you only need
to have 2 frames - one with the text/image, and one with
just your background image). When you hit play forward, they
will appear to flash on and off the screen.
3. Rolling banners - create frame items with the same
background, but change all the images and text on each
frame. Adjust the time delay to ensure that each message is
visible long enough to read (short messages should have a
delay between 800 and 1000, longer ones, over 1000).
Crayola® Animation Studio A C t i v i t y G u i d e
18
Using and Transforming Stamps
Stamps are a collection of images found in the
Crayola Animation Studio Stamp Browser for use
in your drawings. New images can be drawn and
saved in the Stamp folder for easy access.
Stamps
To resize, click and drag any of the corners or sides. Dragging
on the corners will scale your image proportionately (evenly
in all directions). Dragging the sides will distort your stamp
(stretch or shrink it in the direction you are dragging).
Open the Stamp Browser. Choose the Dinosaurs
category. Select a dinosaur stamp.
You can apply stamps to your picture in two
ways. First, you can select the stamp then click
on the page to "stamp" it on your picture. This is
the quickest way to add stamps.
However, you can also click and drag a stamp
onto the screen. This will create a selected
stamp which will allow your to resize, rotate,
and skew it.
Crayola® Animation Studio A c t i v i t y G u i d e
Next, we will rotate the image. Double click on the image to
have the selection
handles turn into
circles (or right
click and choose
rotate). Drag one of
the corners in the
direction you want to
turn your image.
19
To skew your image, double click the image again to have the corners turn into
triangles (or right click and choose skew). Drag one of the handles to skew your
image. Skewing an image turns it in a way that can show the appearance of
movement.
You can further adjust the stamp by right clicking on the it. You can choose to
transform your image by preset values - expand, shrink, flip horizontal, flip vertical,
or rotate 90º, 180º, or 270º. Right clicking also let's you restore your image to the
original settings if you don't like the way it appears.
Crayola® Animation Studio A c t i v i t y G u i d e
20
Imaginary Animals: Using Stamps and Patterns
If you look at pictures of dinosaurs in a
book you are seeing them as someone else has
imagined them. You can work out the size and
shape of the animals by studying the bones,
but you have to imagine the other details. For
instance, ears do not have many bones in them
so their shapes have to be imagined or left out.
Of course, you do not know what color the ears
were.
Look at someone's eye or your own in
a mirror. It has a white part, a colored
part (called the iris) and a small black
circle (called the pupil) in the middle.
The surface of the eye is always
moist so there is nearly always a little
light reflection in it which is called
a highlight. Different animals have
different shaped eyes and
the shapes inside
them can be quite
different too.
Crayola® Animation Studio A c t i v i t y G u i d e
Most animals today share many
features with each other and
the dinosaurs. They have eyes, a
mouth, a nose, legs and a head,
but not tails or crests on the tops
of their heads.
In the same way you could look at the feet on your cat or
dog. They have the same number of toes that people do,
but their feet are a very different shape. Animals such
as sheep, cattle and horses have hooves. Large animals
such as elephants and rhinos seem to have toenails but
no toes. Birds, too, have several different sorts of feet.
21
Which animals have these patterns?
Heads, tails, hair, feathers, noses and teeth
come in a great number of varieties. The colors
and patterns on fur and hide can be even more
varied: some are brightly colored, some dull,
some have patterns, some have stripes, some
have long hair, some have short, and some have
scales.
Long ago imaginary animals appeared quite often in fairy tales. Have
you ever heard of a dragon or a unicorn? They weren't real animals,
nor were the sphinx or the griffin. The sphinx was a mixture of a
woman's head and a lion's body with wings added. A griffin also had
the body of a lion but the head of an eagle! These mythical creatures
were mixtures of two or more different animals or humans and
animals.
Stamps
Paint your own animal invention. Look at different animal and
human features in pictures or in real life. Put some of them
together to make your new creature. Perhaps you can find
things to use in the Stamp browser. See the Dinosaurs and
Line Art Animals stamps or load the Mythical.rna files from the
Activities folder.
Crayola® Animation Studio A c t i v i t y G u i d e
22
Human Figure: Advanced Drawing and Coloring Features
When people think of skeletons they nearly
always think of dead ones, but most of the
skeletons we know are alive–inside us! They
give us our bodies their basic shape.
The proportions of the human body are
usually worked out in terms of the height of
the head (actually the face from the chin to
the hairline).
Roughly, an adult male
will be 7.5 heads high
An adult woman will be
7 heads high
A young child–about
6 years of age, will
be about 5 heads
high
Start by trying to draw a standing figure that you are
looking at from the front. Estimate or measure how
many heads tall your subject is. Measure on your model
where body parts such as the waist, hips, knees, elbows
and ankles come in terms of head measurements from
the top of the head down. See if you can find out how
wide the shoulders, waist and hips appear to be in
head measurements. Here is a tip, if you stand upright
and press your wrists to the sides of your legs you will
find they coincide with the joint at the top of your leg. A
viewfinder grid might be a useful tool for helping to see
the proportions.
Anti-aliasing
When you have decided what the measurements
are, turn off the Anti-aliasing and sketch in the
limbs like a stick person using the Continuous
Curve tool. Draw the general shape of the person.
Choose a different color to fill out the body on top of
the stick person. Red is shown here.
Continuous Curve
To erase the stick person choose the Erasing tool.
You may need to Zoom in to do this.
Is this skeleton male or
female? An adult or child?
Erasing
Crayola® Animation Studio A c t i v i t y G u i d e
23
To color your figure choose a midtone for each color. The easiest
way to do this is to use
the Fill tool. Make sure
each shape is Fill
a closed polygon or the
color will leak into the surrounding areas.
Use the Zoom tool to find
where the holes are.
Zoom
At this stage things often look
quite good and you can stop there
if you wish.
If you want to add tones to the drawing you can use
transparent white to lighten the basic color.
Make sure that Anti-aliasing is
on.
Anti-aliasing
Put the Transparency slider near
the right end of the palette and
do several strokes on top of
each other until the right tone is
obtained. To make the
dark tone choose the opposite
(complementary) color, very
Transparency Slider
transparent, and go over the base
color.
Draw a seated figure from the side so that you can see
how the legs and arms are arranged.
Then try a seated figure from the front. All the
measurements will the same as the standing one except
for the thighs. Because these now make a horizontal
shape they will appear much shorter than in the standing
model. This effect is called foreshortening and happens
wherever you are looking across a horizontal form.
Crayola® Animation Studio A c t i v i t y G u i d e
24
Light and Color: Using Tones and Blending
Reflected light defines the form of three-dimensional objects.
A circle, by itself, could be a hole you can look through, a flat
disc, or a solid sphere. After shading is added, the type of object
immediately becomes obvious.
This sphere is standing on a flat surface. It casts a shadow where
light does not fall. The object is reflecting light, creating tones or
shading.
Look at this hollow cylinder
which is lit from one side
to see how reflected light
affects the inside and outside
surfaces and how the shadow
is cast. To see the shades
more easily, use white objects
and only one light source. The
brighter the light, the higher
the contrast will be between
dark and light tones (shading).
Crayola® Animation Studio A c t i v i t y G u i d e
Look at the color wheel on the next page.
There are more variations of each color.
Red, yellow and blue are the Primary
colors. When mixed together in pairs
they make orange, green and purple,
which are the Secondary colors. The
colors between these are what you get
from mixing a Primary and its opposite
(Secondary) color. These are called
Tertiary colors.
25
Now use a sphere that is the same color all
over, such as an orange. This time the different
tones apply to a color. If you have a white light
source, getting a lighter version of your color is
easy–just add a little white. If you use black,
your color will soon be overwhelmed by it and
the picture will look muddy.
To add tones to any colored object, try mixing in
some of the opposite color, a little at a time. It
will darken the object color so it will appear less
vibrant where the light does not reach.
Experiment with this technique. Choose a
kind of paint and select the base color of your
object. Dab it into the opposite complementary
color on the mixing palette and choose the
intensity you want. When you paint with it, it will
be transparent. Go over an area several times
to get a darker color.
You can also select your color from the
Color Chooser at the top of the screen
and use the slider below it to make colors
transparent. Moving to the right makes
them paler. Moving to the left makes them
darker. This gives more control over the
color's tone.
Load the file Mixer.rna from the Activities Folder. We
started with red and darkened it bit by bit with green
until we got brown. Pick a color yourself and use the
clear blocks to experiment with creating your own
blends.
Crayola® Animation Studio A c t i v i t y G u i d e
26
Landscape: Light and Color in Nature
Landscape in Art is how we show outdoor scenery. The art may include natural
objects such as plants, trees and water; human-made elements such as
buildings, fields and roads; or the space around them.
Buildings are nearly always made with simple geometric
forms. Most are box shapes and prisms. Linear perspective
influences how they are depicted. Things seem to get smaller
as they get further away from you.
Water nearly always appears as a reflection, like a mirror if
it is still, but broken up if it is moving. In the photograph,
the water surface is moving just enough to blur the
reflection of the trees and bridge.
Crayola® Animation Studio A c t i v i t y G u i d e
Each species of plant has its
own shape, color and texture.
The differences between
an oak tree and a birch
tree are obvious. Even
bushes are not all the
same, although they
may seem to be until
you look closely.
27
The most important aspect of depicting landscapes is how to show the
three-dimensional space. The combination of distance and light affects
the appearance of the tones and colors as they get farther away from the
viewer. Objects in the distance look paler and slightly bluer. The contrast
between the lightest and darkest tones also is less. One way
to achieve this effect in art is to make the colors rather more
vivid than they appear and then to stroke over them with very
transparent white or blue.
Tempera Paint
Use the Tempera Paint Brush for this exercise. At the
bottom of the Color Chooser is a transparency slider.
Move the arrow on it to the right end with your cursor.
Any color you paint with will now be transparent.
Look up into a clear blue
sky. Can you see the
difference between the
color overhead and that
at the horizon?
Load the Landscape.rna file from the Activities folder. Use the
transparency slider to modify the green and blue. Draw in your own
landscape.
Crayola® Animation Studio A c t i v i t y G u i d e
28
Perspective: Vanishing Points and Horizon Lines
Center of Vision
As things get further away from you
they appear to become smaller and
less clear.
The system which artists use to help
them understand and control this in
their pictures is called Perspective.
Linear Perspective, developed
during the Renaissance, deals with
lines. Aerial Perspective deals with
tones and colors.
Look at this picture of a railway
station. You are looking straight
down the tracks. The width between
the rails seems to get smaller
as they go into the distance. The
lines of the rails and the platform
seem to converge (go toward each
other) as they recede. Some of the
lines seem to go to a point in the
distance. These lines are actually
parallel to each other (the railway
lines, cable gantries, edges of the
platforms and top and bottom of the
fences).
Crayola® Animation Studio A c t i v i t y G u i d e
Eye Level
The point where the lines
appear to meet is called the
Vanishing Point. The direction
in which you are looking is
the Center of Vision. Notice
that the horizontal line on
which the lines seem to meet
is also the Horizon (the line
where the earth and sky
appear to meet) and is on
the eye level of the figure in
the picture. This is because
our perspective lines are all
parallel to the ground.
Line
Fill
Try finishing the drawing called
Chessboard.rna in the Activities folder.
Using the Eye Level and Vanishing
Points complete the perspective view
of the chessboard (Eight Squares x
Eight Squares) and use the Line and
Fill tools.
29
The best way to find out about perspective is to look closely
at the world around you. A little technical knowledge about
it will help you to see things a little more accurately.
Our picture of the station looks straight down the lines
with the Vanishing Point (VP) right in the middle. Look at
the diagram on the right to see how you can put Vanishing
Points elsewhere on the Horizon Line to make, for example,
a road change direction.
Plan View
Look at the Plan View or
bird's eye view of the same
road. Note the angle where
it changes direction. Now
look at the Perspective View.
The angles from the plan are
plotted from the point where
the Center of Vision and the
Base Line meet. The Vanishing
Points occur where the angle
lines cut the Horizon Line. All
lines parallel to those angles
on the plan will go to the same
Vanishing Point.
Crayola® Animation Studio A c t i v i t y G u i d e
Perspective View
30
The row of squares below the Base Line is a Plan View of
part of a grid pattern. The angle of the diagonal is 45°.
The diagonals are parallel to each other so will have the
same Vanishing Point. To find this, plot an angle of 45°
from the Base Line and Center of Vision to the Horizon Line.
This cuts three of the receding lines, showing where the
corners will be. Draw horizontal lines through these points
and you will see the first three rows of the grid appear in
perspective. Now draw from the left of the farthest row to
the 45° Vanishing Point and you will cut the receding lines
in several more places from which you can draw more rows
in.
If you look at the first few rows of tiles they appear
distorted. This is because the Base Line represents the
feet of the viewer and is an area which you cannot see if
you are looking at the horizon. It is generally taken that
if you draw an angle of 15° from the Center of Vision on
the Base Line to the Horizon Line and then draw a circle
centered on the 90° Vanishing Point, what is within the
circle is what lies within the vision of the viewer.
Crayola® Animation Studio A c t i v i t y G u i d e
31
To draw a box on one of the squares, draw a square from the
front corners and draw in the receding lines to the Center
of Vision. Now draw a diagonal perspective line to the 45°
Vanishing Point from the top of one of the vertical lines.
Where this cuts the receding lines draw the horizontal line
for the far edge of the box.
Straight lines which are parallel to each other in reality
appear to meet at a point in a perspective view. Lines which
are parallel to the ground have a Vanishing Point on the
Horizon or Eye Level. Because of this, lines lower than your
eyes will go up towards the Horizon and lines above your eyes
will go down as they go further away from you.
To draw a box when you are looking at a corner instead
of a face, draw a plan view and measure the angles the
sides make with the Base Line. Plot these angles onto the
Eye Level from the Base Line. Start with the vertical edge
of the box nearest to you and draw in the perspective lines
as above.
Crayola® Animation Studio A c t i v i t y G u i d e
In the Activities Folder you will find the
file Space City.rna. Try to complete this
picture of a city in the future, using
the two points of perspective.
32
Table of Keyboard Shortcuts
Here are standard shortcuts you can use on your keyboard with the Crayola® Animation Studio program. You can customize the keyboard
shortcuts. Some options have more than one shortcut combination.
Shortcut
Menu option
Button in a toolbar
or tool window
[
Paint->Selection->Transform->
Rotate by 270°
]
Paint->Selection->Transform->
Rotate by 90°
Alt+BackSpaceEdit->Undo <last change>Undo
Alt+F2
File->Save As...
Paint->Selection->Save Selection As…
Alt+F3 File->Close
Alt+F7View->Other->Color Chooser
Alt+X
File->Exit
Ctrl+`
Paint->Selection->Transparent
Ctrl+AEdit->Select All
Ctrl+Alt+SpaceView->Other->Customize…
Ctrl+CEdit->Copy
Copy
Ctrl+F4
File->Close
Ctrl+F7View->Other->Color Settings
Ctrl+InsertEdit->Copy
Copy
Ctrl+N
File->New
Ctrl+Num -View->Zoom->Zoom Out
Ctrl+Num *View->Zoom->Normal Size
Ctrl+Num +View->Zoom->Zoom In
Ctrl+O
File->Open…
Open
Ctrl+P
File->Print…
Print…
Ctrl+QView->Zoom->Zoom Out
Ctrl+S
File->Save
Save
Crayola® Animation Studio A c t i v i t y G u i d e
Shortcut
Menu option
Button in a toolbar
or tool window
Ctrl+VEdit->Paste or Edit->Paste After Paste
Ctrl+WView->Zoom->Zoom In
Ctrl+XEdit->Cut
Cut
Ctrl+ZEdit->Undo <last change>Undo
DelEdit->Delete
F2
File->Save
F3
File->Open…
F4View->Organizer
F5View->Brushes
F7View->Palette
F8View->Zoom Settings
F9View->Preview
F11View->Stamp Browser
Stamp Browser
InsertEdit->Insert After
Shift+Ctrl+ZEdit->Redo <last change>
Redo
Shift+Ctrl+ZEdit->Undo <last change>
Shift+DeleteEdit->Cut
Cut
Shift+InsertEdit->Paste or Edit->Paste After Paste
Alt+G
Animation->Generate...
Alt+T
Animation->Transform...
Ctrl+B
Animation->Blend
Ctrl+D
Animation->Set Delay...
Ctrl+H
Animation->Set HotSpot...
Ctrl+R
Animation->Reverse Order
33