1
BiznesPl@net User Manual Bank BGŻ BNP Paribas Spółka Akcyjna with its seat in Warsaw at Kasprzaka 10/16, 01-211 Warsaw, registered in the Register of Entrepreneurs of the National Court Register by the District Court for the capital city of Warsaw in Warsaw, XII Business Division of the National Court Register under the number KRS 0000011571, with tax identification number (NIP): 526-10-08-546 and share capital of PLN 84,238,318 fully paid up Table of Contents 1. GLOSSARY 7 2. SYSTEM REQUIREMENTS 8 3. GENERAL NAVIGATION 9 3.1 Form Components 10 3.2 Printing Forms 11 4. LOGGING INTO SYSTEM 12 4.1 Logging into the System for the First Time 4.1.1 First Login with Masked Password and SMS Codes 4.1.2 First Login with Electronic Signature 12 13 13 4.2 Subsequent System Logins 4.2.1 Logging in Using Masked Password and SMS codes 4.2.2 Subsequent Login Using Electronic Signature 15 15 17 5. ADMINISTRATION AND TOOLS 19 5.1 User Management 19 5.2 My rights 20 5.3 Acceptance Patterns 21 5.4 Keys Management 24 5.5 Card / USB Cryptographic Device Management 26 5.6 Password Change 26 5.7 Change of the Logging and Transaction Authorization Method27 5.8 Import 5.8.1 Template Review 5.8.2 New Template 5.8.3 Importing data 28 28 29 31 5.9 Export 5.9.1 Template Review 5.9.2 New Template 5.9.3 Export Data 31 32 32 34 Bank BGŻ BNP Paribas SA | BiznesPl@net User Manual | April 2015 2 5.9.4 Filters 34 5.10 Reports 5.10.1 Templates Review 5.10.2 New Template 5.10.3 New Filter 5.10.4 Generating Reports 5.10.5 Reports to Download 5.10.6 New Filter 35 35 37 38 39 39 41 6. 42 OTHER 6.1 Correspondence 6.1.1 Correspondence Review 6.1.2 New Message 42 42 43 6.2 45 System Usage History 6.3 Applications 6.3.1 New Application or Instruction 6.3.2 Submitted Applications and Instructions 46 46 47 6.4 Notifices 6.4.1 Notification settings 6.4.2 Sent Notifications 48 48 50 6.5 SMS Codes 6.5.1 Telephone for SMS Codes 6.5.2 SMS Code List 51 51 52 6.6 SMS Charges 52 6.7 User Profile 53 7. TEMPLATES AND CONTRACTORS 55 7.1 Payment Templates 7.1.1 List of Payment Templatess 7.1.2 New Template 7.1.3 Modify Template 7.1.4 Remove Template 55 55 56 60 61 7.2 Contractors 61 7.2.1 List of Contractors 62 In order to assign a contractor to a given group, select a contractor from the list, choose a group from Move to group field and click Move. 62 7.2.2 Groups Management 63 7.2.3 New Contractor 65 Bank BGŻ BNP Paribas SA | BiznesPl@net User Manual | April 2015 3 7.2.4 Modifying Contractor Data 7.2.5 Remove Contractor 65 66 8. USER CONTEXTS 67 9. ACCOUNTS 68 9.1 Accounts List 68 9.2 Account Details 69 9.3 Blockades 71 9.4 Bank Statement 71 9.5 Account History 75 9.6 MBR Statement 77 10. TRANSFERS 80 10.1 General Information about Transfers 80 10.2 Packages 80 10.3 Review 10.3.1 To Send 10.3.2 Sent 10.3.3 Executed 10.3.4 Rejected 10.3.5 Waiting Room 10.3.6 Search 82 84 85 87 88 89 90 10.4 Domestic Transfer 92 10.5 ZUS Transfer 96 10.6 Tax Transfer 97 10.7 Currency Conversion 99 10.8 Cross-Border Transfer 101 10.9 MT101 Transfer 106 10.10 Direct Debit 10.10.1 New Direct Debit Order 10.10.2 Request for Consent to Direct Debit 10.10.3 List of Requests 108 108 110 112 Bank BGŻ BNP Paribas SA | BiznesPl@net User Manual | April 2015 4 11. LOANS 114 11.1 Loans List 114 11.2 Loan Data 114 11.3 Repayment Schedule 115 11.4 Loan Accounts 117 11.5 Guarantees 118 12. 120 LETTERS OF CREDIT 12.1 Import L/C 12.1.1 List of L/C 12.1.2 Opening a L/C 12.1.3 Amending Terms 12.1.4 Application Review 12.1.5 Document Acceptance 12.1.6 Payments Register 120 120 121 131 131 132 134 12.2 Export L/C 12.2.1 List of L/C 12.2.2 Cover Letter to Documents 12.2.3 Application for an L/C transfer 12.2.4 Application for a transfer of a change to the L/C 12.2.5 Assignment of proceeds 12.2.6 Application Review 12.2.7 Payments Register 136 136 139 139 139 140 140 140 13. 143 STANDING ORDER 13.1 Standing Orders List 143 13.2 New Standing Order 144 13.3 Modifying Standing Order 146 13.4 Canceling Order 148 14. 150 DEALONPL@NET 14.1 Spot transactions 150 14.1.1 FX rate panels 150 14.1.2 Transactions 152 Bank BGŻ BNP Paribas SA | BiznesPl@net User Manual | April 2015 5 14.1.3 Orders 153 14.2 Orders 154 14.3 Transaction and order history 155 14.4 Market analyses 156 14.5 Settings 14.5.1 Panel configuration 14.5.2 Account configuration 14.5.3 Transaction and order authorisation 157 158 158 159 15 160 DEPOSITS 15.2 Deposit List 160 15.3 New Deposit 161 15.4 Negotiated Deposit 163 15.5 Negotiable Deposit Calculator 165 15.6 Deposit Modification 165 15.7 Breaking a Deposit 166 15.8 Deposit Interest Rate 166 16 169 CARDS 16.2 Payment Cards List 169 16.3 Card Data 170 16.4 Transactions Specification 171 16.5 Card Account Statement 171 16.6 Card-Related Applications 173 Bank BGŻ BNP Paribas SA | BiznesPl@net User Manual | April 2015 6 1. Glossary Transaction Authorization — a security mechanism that enforces user’s confirmation of request of transaction before they are sent to the Bank. In BiznesPl@net, you must place your electronic signature or enter an SMS code, depending on which transaction authorization method you are using. PDF (Portable Document Format) — a widely known and used document format created and advocated by Adobe Systems. You can download a PDF viewer application from http://www.adobe.com/products/acrobat/. ZIP format — a widely known and used file compression format. Using compressed files saves time during data transmission. IBAN — the International Bank Account Number. This is the extension of the BBAN (Basic Bank Account Number) used internationally to uniquely identify a Customer account all over the world. ID — your unique ID in the system, also called login or user name. You use your ID to log into the system. Import — a system feature designed to read data from files in some predefined or specified formats (for example, instead of entering transfers manually, you can read a group of transfers from a file generated by a financial and accounting system.) Key (PCKS) — in cryptography, a code used to encrypt, sign or decrypt encoded data. Encrypted communications use the following keys: Public Key Private Key, which is secret and known only to the authorized person (the key may reside at the User’s disk drive or on a cryptography card). for example, such a key may be used to sign orders. Customer (Company / User) context — working in a context refers to performing specific actions in relation to the specified company (company context) or individual customers’ accounts. for example, when working in a specific company context, you have access exclusively to the accounts of that company (even if you are authorized to access accounts belonging to multiple companies). A list of your accounts is displayed by default after you log into BiznesPl@net. Starter Package — a machine-generated envelope containing the password to activate (or unlock) user access. Each envelope issued to you is recorded in the system. Authorization Rights Differentiation Mechanism — a feature that enables different authorization rights to accounts to be granted. Transactions entered by a user must be signed by persons specified in acceptance patterns for a given account before they can be sent. for example, User A has the right to enter transactions for account No. 111. The user must authorize any data entered. In such a case, the transfer will wait until Users B and C place their signatures. Placing a signature is tantamount to authorizing. Only when the two users’ signatures are placed, the transfer can be sent to the Bank. SSL 3.0 — a secure and private protocol for exchanging data over the Internet. Data sent over the network are encrypted so that no third party can decode them. This is the most widely used and most effective encryption method used in Internet banking and commerce. Bank BGŻ BNP Paribas SA | BiznesPl@net User Manual | April 2015 7 2. System Requirements To use the Internet system, you need a computer with Internet access and one of the following Web browsers: Internet Explorer 5.5 or higher (v5.5 must have SP2 installed) Netscape Navigator 7.02 or higher Opera 8.5 or higher Mozilla Firefox 1.5.xx or higher The system works correctly in 1024x768 screen resolution. Internet connection data rate required for the client application is 64kb/s minimum, 256 kb/s recommended. For detailed information, see the Bank’s Web site section related to e-Banking. Bank BGŻ BNP Paribas SA | BiznesPl@net User Manual | April 2015 8 3. General Navigation The BiznesPl@net screen is divided into the following sections: Navigation Bar Envelope symbol ( Overview form. The navigation section contains the following links: ) directs you to the Correspondence module, Correspondence News Contact Settings — directs to the Settings form that enables you to configure the following system parameters: Data sorting — ascending or descending Number of records in tables — 10, 20, 30, 50, 100, All Default context displayed after login (for customers who use BiznesPl@net as individual and company users, or as individual users who have access to more than one company account.) A list of your accounts is displayed by default after you log into Pl@net. Default private key for logging in and signing orders (if you are using an electronic signature and you have generated more than one key). Image displayed in the anti-phishing security feature. Bank BGŻ BNP Paribas SA | BiznesPl@net User Manual | April 2015 9 This image helps secure the system. With this image you can be sure you are at the Bank’s Web Site. If you were redirected to a phishing Web site pretending to be BiznesPl@net to try to capture your system passwords, you would see a different image than the one you have selected. for more information see the security rules in the eBanking section at the Bank’s Web site. Foreign currency rates — directs you to the foreign currency rates form with current rates. Additionally, if you click Exchange rate archive, you are directed to an external site where you can browse archive data. System security — directs you to information about the system’s security features. Questions and Answers — direct you to answers to Frequently Asked Questions. Show help/Hide help — enables or disables the System Help bar at the bottom. Polish/English — application language version. Main Navigation Menu The main menu consists of tabs (e.g. Accounts, Cards, Deposits, Transfers, etc.) By clicking any tab in the main menu, you can open the side menu relevant for the tab and based on your user authorization rights in the system. Side Menu When you click an option in the menu, a form opens in the work area. The list of tabs and forms you can see depends on your user rights in the transaction system. Work Area This is where forms are displayed. You use the forms to perform all operations in the Internet system. Below the work area, there is information about the version of the component installed. 3.1 Form Components The following components may appear in forms: Drop-down list — you can choose a single option from this list of items: Bank BGŻ BNP Paribas SA | BiznesPl@net User Manual | April 2015 10 Check-box — with this form component, you can choose several options at the same time: Radio button — with this form component, you can choose only one option: Edit box — enables you to enter any value containing alphanumerical characters and special characters. Depending on the specific form, the edit box may accept values according to allowed characters defined for that field (for example, detailed information on domestic transfers and international transfers): 3.2 Printing Forms You can print information from the majority of forms. To print a form, click Bank BGŻ BNP Paribas SA | BiznesPl@net User Manual | April 2015 . 11 4. Logging into System BiznesPl@net system provides two methods for logging in and authorization: logging in authorization method 1: masked password and SMS codes method 2: electronic signature + + SMS code electronic signature For more details, see the Bank’s Web site. 4.1 Logging into the System for the First Time The first system login screen is available when you enter the https://biznesplanet.bgzbnpparibas.pl Web page. You can find the link to the login page at the Bank’s home page. To activate system access, you need the starter password (disposable code) and login. You receive the information when you submit the application to activate application access. At the logging in page, you enter your login (user name), e.g. janiks480. Then, enter your disposable password which you have received in the secure envelope. Bank BGŻ BNP Paribas SA | BiznesPl@net User Manual | April 2015 12 Using the Virtual Keyboard, you can enter your password by choosing characters from a keyboard displayed on your screen. This helps protect you against any spyware installed in your computer that try to read characters typed on your standard keyboard. 4.1.1 First Login with Masked Password and SMS Codes If you have chosen to use masked password to log in, the system will display a form with a request to define your target password for the system. This is the only time you enter the whole password in the system. During subsequent login procedures, the system will require you to type only selected characters from the password. 4.1.2 First Login with Electronic Signature If you have chosen to log in using an electronic signature, you need to install a component to generate electronic signatures and Comarch SmartCard software to support cryptographic devices. Then you need to generate a key by clicking “Generate Key.” In order to install the Comarch SmartCard software to support cryptographic devices, please follow the instructions displayed on the screen. Bank BGŻ BNP Paribas SA | BiznesPl@net User Manual | April 2015 13 Please note: When the installation process is completed, if you use Windows 98 or Windows ME operating systems, you need to restart your computer. When your web browser is required to be closed, please repeat steps described in Item 4.1. Logging into the System for the First Time. Once you click the Generate Key button again, the system will display the cryptographic key generation screen. Please select a device type where the key is to be generated on and assign a name to the key to be saved (the key name cannot include Polish diacritics or special characters). In the next step, you need to initialise the cryptographic device (that is, define the PIN and PUK to the device where the key will be generated on). Bank BGŻ BNP Paribas SA | BiznesPl@net User Manual | April 2015 14 Once the cryptographic device has been initialised, encrypting keys will be generated. To this end, you need to enter the PIN. The key will be now generated and then you will be logged in to the BiznesPl@net system. 4.2 Subsequent System Logins 4.2.1 Logging in Using Masked Password and SMS codes When you open the internet system’s login page (https://biznesplanet.bgzbnpparibas.pl), you will see the log in form that consists of two subsequent screens. The first screen enables you to enter your login: Bank BGŻ BNP Paribas SA | BiznesPl@net User Manual | April 2015 15 After you enter a correct login, the system will ask you to provide your masked access password. You need to fill in only the missing characters at the specified positions in the password. The mask does not always have the same number of characters as the password you defined: After entering selected characters from the password, click Log on. In the next step, the system will request you to authorize the logging by an SMS code. A screen will appear with a field to enter an SMS code, and the SMS code will be generated and delivered to the cellular telephone number predefined in the system. Bank BGŻ BNP Paribas SA | BiznesPl@net User Manual | April 2015 16 Once you have correctly entered the SMS code received, click Log on to confirm the entire logging operation. 4.2.2 Subsequent Login Using Electronic Signature When you log in using an electronic signature, the system will first ask you to provide your login (the same as in the masked password procedure), and then to choose a key from your list of signature keys. Then please enter the PIN that secures the cryptographic device (smart card or a USB device) where the key is stored. Bank BGŻ BNP Paribas SA | BiznesPl@net User Manual | April 2015 17 Bank BGŻ BNP Paribas SA | BiznesPl@net User Manual | April 2015 18 5. Administration and Tools This tab contains features responsible for system operation management at the Customer’s side, including user rights management and acceptance patterns management. 5.1 User Management The User Management feature enables you to change authorization rights assigned by the Bank. Only the superuser can perform that role. Within the rights granted to him or her by the bank, the superuser may only restrict the authorization rights of other users. User authorization rights revoked by the superuser can be granted to the user again by the superuser. Additionally, the superuser may grant authorization rights that the regular user did not have before, provided that the relevant right had been granted by the BANK. Authorization rights can be changed by selecting a user from the drop-down list and checking or un-checking the check boxes next to individual authorization rights. In the available accounts section, choose the relevant account and action that the user will be allowed to perform (Preview is a prerequisite for other actions: Save, Sign, Send.) A marked check-box means that the user has the authorization right to perform the relevant function. When you are done, click Confirm. Similarly, the superuser can use the other sections to specify which functions a user can access. Bank BGŻ BNP Paribas SA | BiznesPl@net User Manual | April 2015 19 To confirm changes, click Confirm. 5.2 My rights This form is used to display authorization rights for the user logged in to the application along with the actions he or she may perform on available accounts. The information is presented in the company context in which the current user is logged in. ` Bank BGŻ BNP Paribas SA | BiznesPl@net User Manual | April 2015 20 Authorization rights to Accounts: Save — the user has the right to fill in, modify and delete order forms. Sign — the user has the right to accept orders (within company-defined acceptance patterns). Send — the user has the right to send orders to the Bank. This section lists all accounts for which the user has any of the above-mentioned rights. Authorization rights to Functions: This section lists actions available to the user, grouped by individual modules. 5.3 Acceptance Patterns This form shows the list of acceptance groups and users assigned to the groups. You can use any name for a group. “Acceptance Group Symbol” is marked with subsequent letters. Below, acceptance patters are defined, i.e. the rules which apply to making payments from the specified accounts. Bank BGŻ BNP Paribas SA | BiznesPl@net User Manual | April 2015 21 Account acceptance patterns are grouped into blocks. Each block contains a list of relevant accounts and any patterns assigned to them. In addition to such fields as: pattern name, pattern formula, pattern expiration date and currency, each account-related pattern contains fields that define individual limits. Limits for Internal Orders, related Group (within a holding) and External Orders are defined separately. Bank BGŻ BNP Paribas SA | BiznesPl@net User Manual | April 2015 22 You define limits in relation to a single operation (S), total operations per day (D), per week (W) and per month (M). If no limit has been set for a field, then the No Limit message appears. You can click used limits to see how much of the limit has been used. The form also shows acceptance patterns for applications. In this case, the procedure is the same as for account-related patterns, except that a single pattern applies to an entire group of applications. RULES FOR ACCEPTANCE PATTERN FORMULAS The acceptance pattern specifies how many people from which groups must sign an order before it can be sent to the Bank. The following example outlines the rules for creating an acceptance pattern: We have three user groups: A, B, and C. The following pattern definitions are available: 1. A — the order must be signed by ONE person from Group A 2. A 2B — the order must be signed by ONE person from Group A and TWO persons from Group B 3. 2[AB] — the order must be signed by TWO persons from Groups A and B, i.e. one of the following three signature combinations is acceptable: a. one person from Group A and one from Group B b. two persons from Group A c. two persons from Group B NOTE: If several patterns have been assigned to a block of accounts, they are considered as alternatives. This means that it’s enough to meet one of the patterns for an order to be accepted. You can directly test how the acceptance patterns you have defined will work. Use the Test button to do this. To test if an order could be sent, select an account, enter an amount in the correct currency, and choose an order type. Then select persons who would sign the order. Bank BGŻ BNP Paribas SA | BiznesPl@net User Manual | April 2015 23 When you click Test, a message appears with the information whether an order with such a definition could be accepted. 5.4 Keys Management Keys management is required for users who authorize their orders with electronic signatures that need private keys. The form enables you to see all the keys you have, and to generate a new private key. If you generate several keys, you can use any one you want by selecting the desired key from a drop-down list. The list appears when you place your electronic signature (when signing orders when logging in.) If you happen to block a key by entering an invalid passwords three times, you can still use the system by using another, active key. When you click the link with your key name, a form opens presenting the key’s detailed data. To generate an additional key, click the Generate Key button. The action of Bank BGŻ BNP Paribas SA | BiznesPl@net User Manual | April 2015 24 generating a new key (from the Keys Management form) requires your signature that uses another active key. The detailed key data form enables you to perform the following actions: Cancel — cancels changes made in the form Lock — locks the active key; once you block a key, you cannot unlock it Hide — temporarily hides the key in the system. A hidden key is not shown e.g. when you sign orders. The key remains active and you can “show” it at any time. If you want to generate another key, please specify its name and location where it will be stored (e.g. a USB device or a smart card). Each of the generated keys should be activated by anyone of the keys activated earlier. Bank BGŻ BNP Paribas SA | BiznesPl@net User Manual | April 2015 25 5.5 Card / USB Cryptographic Device Management Cryptographic devices that can store private keys used to generate electronic signatures are a smart card and a USB cryptographic device. Both devices are secured by a PIN and PUK. The PIN prevents unauthorised and accidental use of your smart card or USB cryptographic device, including execution of orders and instructions in your account, which require an electronic signature. The PIN is strictly confidential and should be known only to the owner of a given cryptographic device. The PIN should consist of four (4) digits. The PUK – personal unblocking key. It should be stored in a safe place and protected against being lost, since it can be useful in case the user forgets his/her PIN or if the PIN is incorrectly entered five times in a row (blockade of a card/ USB device). In such situations, the PUK will allow you to unblock the card or USB device. The PUK consists of eight (8) digits. The card/USB device management in the BiznesPl@net system enables its users to use the following options: Card/USB device initialization – it consists in determination of a PIN and PUK for a card or a USB device. The initialisation should be performed for each new cryptographic device. A blocked device can be also unblocked this way, which results however in a loss of keys saved on a given device and the need to determine a new PIN and PUK, PIN change – in order to change the PIN, you should enter the existing PIN to a form and then determine a new PIN and enter it again for the selected cryptographic device, PUK change – in order to change the PUK (unblocking key) for a card/USB device, please select the “PUK Change” option, enter the existing PUK and then determine a new PUK and enter it again, Unblocking a card / USB device – in order to unblock a smart card or USB device, please enter the present PUK for a given device and then determine a new PIN, Keys deletion – deleting a key from a selected cryptographic device. 5.6 Password Change This form enables you to change the masked password. You must enter your new password twice to confirm the deletion of the old password. You only enter your full password when you are defining it. When you are logging in, the system requires you to type only selected characters from the password. Bank BGŻ BNP Paribas SA | BiznesPl@net User Manual | April 2015 26 5.7 Change of the Logging and Transaction Authorization Method BiznesPl@net system provides two methods for logging in and transaction authorization: 1) logging in with a masked password and SMS code and authorizing with an SMS code 2) logging in and authorizing using an electronic signature You can change the method you are using to the alternative method provided that you have the necessary authorization rights. If you change the method to masked password and SMS code, you must specify the mobile phone number at which you will receive SMS codes. You must also define a password. You must validate this form using your current authorization method — i.e. the electronic signature. If you want to change the method to use electronic signatures, a form appears that enables you to generate a new signature key: Bank BGŻ BNP Paribas SA | BiznesPl@net User Manual | April 2015 27 Please note: In order to generate a key and use electronic signatures, you need to install an electronic signature generation component and Comarch SmartCard software to service cryptographic devices. You should also have a cryptographic device to store encrypting keys that are used to generate signatures – either a USB cryptographic device or a smart card (with a reader). A change of the logging and transaction authorisation method into electronic signatures should be confirmed by the currently used authorisation method, i.e. the SMS code. 5.8 Import Importing is an application functionality that enables you to feed the system with data from files that contain: Domestic transfers Cross-border transfers Tax transfers ZUS transfers Direct debits Domestic contractors Foreign contractors MT101 transfers Debtors in direct debit To import data into the system, you use a template that specifies the type of data imported. The side menu for the Import tab gives you direct access to: Preview of templates that already exist in the system (Templates Review) Creating new templates (New Template) 5.8.1 Template Review This form enables you to perform three types of actions: View / Modify existing templates Delete templates Import data based on templates Bank BGŻ BNP Paribas SA | BiznesPl@net User Manual | April 2015 28 To view/modify a template, click a link with the template type (this feature is not available for Bank-predefined templates.) A form appears. It is the same form as the one displayed when defining a new template, but it contains data. If you want to delete a template, select a check-box next to the desired record, and then click the Delete button (you cannot delete Bank-defined templates.) Click a link in the Template name column to start importing data using this template. 5.8.2 New Template To add a template, click New template in the side menu. A form will open enabling you to choose the template type. Another form appears, letting you specify the remaining parameters. In the form, define the following fields: Template name — enter the name for the template you are creating Data separator — define how individual data items are separated (e.g. with semicolons) Encoding page — choose a code page from the list Bank BGŻ BNP Paribas SA | BiznesPl@net User Manual | April 2015 29 Decimal separator — the decimal separator character (dot or comma) Date format Date separator Text fields in quotation marks Header field names The next section lets you specify the fields you want to import. The list on the left contains the names of all fields available for a given template type. The list on the right contains names that you have added to the template. Note that the field order must be the same as the order in which they appear in the file. To move one or all fields to the selected items list, click Add or Add all. Similarly, to delete fields you have selected, click Delete or Delete all. Deleted items will return to the list on the left. To change the order of the selected fields, use the Move Up and Move Down buttons. The buttons move the selected field one rank up or down. To save the template you have created, click Save. Bank BGŻ BNP Paribas SA | BiznesPl@net User Manual | April 2015 30 5.8.3 Importing data To import data, choose a template for importing the data file from the list of your templates (see section 5.8.1). To do so, click the link with the template’s name. A form will appear letting you to specify the location of the imported file. When you click Import, data are pre-imported into the system. Then the contents of the file is verified, and the result of data validity check is displayed. At this point you can cancel the data import (reject the entire data file that has been read and return to the previous form). To cancel the data import click Cancel or accept the data imported (enter data that have been successfuly verified), by choosing one of the following options: Save – the data imported will be saved as separate orders Create package – the orders imported will be saved in a package (this functionality is described in chapter “Packages”) Add to the package – a screen with a list of available packages will appear. Orders will be added to the package selected from the list. 5.9 Export The data export feature enables you to generate a file (report) with data that meet the criteria specified in the export template. You can choose an existing export template or choose a new one. Then define an export filter, or choose the simple filter option. The Export feature is available for: Account history Rejected transfers Completed transfers Bank account statements (also for several accounts at the same time for MT940 format) MBR (Multi Bank Reporting) statements(also for several accounts at the same time for MT940 format) Card account statements Credit account statements Domestic contractors Foreign contractors Bank BGŻ BNP Paribas SA | BiznesPl@net User Manual | April 2015 31 Debtors in direct debit Card transaction statement 5.9.1 Template Review This form enables you to perform four types of actions: View / Modify existing templates Delete templates Export data based on templates Add filters To view/modify a template, click the link with the template/filter type. You cannot modify Bank-predefined templates. A form appears which looks the same as the form for defining a new template, but is filled with data. To delete a template, select a check box next to a template/filter name and confirm the operation by clicking Delete template. To start file export, click a link with filter/template name. 5.9.2 New Template To create a new export template, choose the template type from the drop-down list. A form opens where you can define the export template. In the form, define the following fields: Template name — enter the name for the template you are creating Bank BGŻ BNP Paribas SA | BiznesPl@net User Manual | April 2015 32 Data separator — define how individual data items are separated Encoding page — choose a code page from the list Decimal separator — the decimal separator character (dot or comma) Date format Date separator Text fields in quotation marks Header field names The next section lets you specify the fields you want to export. The list on the left contains the names of all fields available for a given template type. The list on the right contains names that you have added to the template. Note that the order of the fields is the same as the order in which they will appear in the file. To move one or all fields to the selected items list, click Add or Add all. Similarly, to delete fields you have selected, click Delete or Delete all. Deleted items will return to the list on the left. To change the order of the selected fields, use the Move Up and Move Down buttons. The buttons move the selected field one rank up or down. To save the template you have created, click Save. Bank BGŻ BNP Paribas SA | BiznesPl@net User Manual | April 2015 33 5.9.3 Export Data To export data, do the following: 1. Define a new template or use an existing template from the template list 2. Define a new filter if you want 3. Click the link with the template/filter name When you perform the last activity listed above, an export form will appear with an integrated account filter and the option to save data in the compressed format (ZIP). 5.9.4 Filters You can add filters to templates to export only such data that meet all criteria defined in the filter. Bank BGŻ BNP Paribas SA | BiznesPl@net User Manual | April 2015 34 To create a filter, click the Add filter button which is located in the same line as your selected template in the export templates list. A criteria definition box will appear. Filtering applies to fields that are available for a given export template. 5.10 Reports The Reports tab contains functionality that enables you to generate reports on user banking operations. Reports are generated on the basis of a user-defined template you prepare earlier. The template is a set of columns that you define. The resulting report is shown in the Reports to Download form, where you can download the desired file as PDF or HTML file. 5.10.1 Templates Review This form enables you to do the following operations: - find a template you have previously defined - view/modify a template you have previously defined Bank BGŻ BNP Paribas SA | BiznesPl@net User Manual | April 2015 35 - add a template (in this case you will be redirected to the New Template tab) - delete a template you have previously defined - create a filter for a template you have previously defined - view/modify a filter you have previously defined - delete a filter you have previously defined - generate a report on the basis of a template and filter you have previously defined A report template can generate the following types of reports: Account history report Completed and rejected transfers report Card transactions report To find a specific template, choose the organization for which you have defined the template (this option is available only if you have a holding; if you have a single company, this selection is not available), and choose the type of template you want. The next part of the form appears, listing all existing templates that meet your criteria. The table contains such information as: template/filter name, template/filter type, template/filter author. You can sort the list of templates by clicking column descriptions. Click a link in the Filter/Template Type column to see the template/filter details or start editing the template/filter. Click an item (link) in the Filter/Template Name to generate a report and move to the Report Review form. Bank BGŻ BNP Paribas SA | BiznesPl@net User Manual | April 2015 36 To delete a report, select a check box next to the report’s name and click the Delete template button. Click an item in the Filter/Template Type column to see the template details or start editing the report template. 5.10.2 New Template To create a new report template, open the Template Review form and click Add Template, or choose New template directly from the Reports side menu. The Define Report Template form opens. Choose Template Type from the drop-down list. The next section of the form appears, showing the list of templates that meet your filtering criteria. Complete the following fields: Template name Fields that will be shown in the report (depend on template type). The list on the left contains names of all fields available for the template type. The list on the right contains names added to the template. Field order represents the data of order in the file. Level of detail (lines per record number) Text size Format — PDF or HTML Bank BGŻ BNP Paribas SA | BiznesPl@net User Manual | April 2015 37 To move one or all fields to the selected items list, click Add or Add all. Similarly, to delete fields you have selected, click Delete or Delete all. Deleted items will return to the list on the left. Use Move down and Move Up buttons to reorder selected items. To save the template you have created, click Save. After you save your new template, the Template Review form appears. To save the template you have created, click Save. 5.10.3 New Filter After you have created a new template, define a filter for this template. To do so, click the Add filter button located in the same line as the template name. The Filter Definition form will appear, enabling you to define data filtering criteria for the report. Bank BGŻ BNP Paribas SA | BiznesPl@net User Manual | April 2015 38 Click Save. You will return to the Template Review form. 5.10.4 Generating Reports After you define a report template and create a filter for this template, you can generate a report. To generate a report, open the Template Review tab, find the desired template, and click the name of a filter created for the template. The filter name is a link that you click to generate reports. The Report Review tab will open, and the newly generated report will appear as the first line in the column. Click any link in the line to browse the report in the format you have previously defined (.html or.pdf), or to save the report to your hard drive. 5.10.5 Reports to Download With this form, you can download reports you have generated earlier. Use available filters to quickly find the desired report. Bank BGŻ BNP Paribas SA | BiznesPl@net User Manual | April 2015 39 By applying filters, you can obtain a summary of completed reports: Click any link in the line to browse the report in the format you have previously defined or to save the report to your hard drive. To delete a report, select a check box next to its line and click Delete. Bank BGŻ BNP Paribas SA | BiznesPl@net User Manual | April 2015 40 5.10.6 New Filter After you have created a new template, you can define a filter for this template. To do so, click the Add filter button located in the same line as the template name. The Filter Definition form will appear, enabling you to define data filtering criteria for the report. Click Save. You will return to the Template Review form. Bank BGŻ BNP Paribas SA | BiznesPl@net User Manual | April 2015 41 6. 6.1 Other Correspondence This module enables you to exchange correspondence with the Bank. 6.1.1 Correspondence Review The Correspondence Review form shows the list of messages you have received ( sent ( ). Messages that have attachments are marked with a special icon ( message form opens, simply click a link (e.g.: ) and ) in the list. After the ) to download the file. You can preview the full content of each message in the message list by clicking the link in the message subject. A new message form opens. The form for received messages is shown below. For all messages (both sent and received), you can perform the following actions: Cancel — returns to the Correspondence Review form. Bank BGŻ BNP Paribas SA | BiznesPl@net User Manual | April 2015 42 Delete — deletes the message from the Correspondence Review form. The Correspondence module also contains system messages about rejected transfer orders. Clicking Send again in the form automatically opens the form for a given transfer type (e.g. domestic transfer), already filled with data from the previously rejected transfer. Correct invalid items (the message contains information on errors) and send the transfer again to the Bank. 6.1.2 New Message With this form, you can write a new message and send it to the Bank. Bank BGŻ BNP Paribas SA | BiznesPl@net User Manual | April 2015 43 To do so, complete the following fields: message subject message contents if you want, you can add an attachment: choose a file using the Browse feature ( ), and then click Add attachment. The attachment will be added to the list of files to send. Click Send. Bank BGŻ BNP Paribas SA | BiznesPl@net User Manual | April 2015 44 6.2 System Usage History This feature enables you to track events in the system. The System Usage History screen contains a filter allowing you to choose such criteria, as: event type; account from which an operation has been performed; period to review. When you click Execute, a list of operations performed by a specific user will appear. The list contains the following columns: Date and time of the event Type — information about the type of the event Description Bank BGŻ BNP Paribas SA | BiznesPl@net User Manual | April 2015 45 6.3 Applications With this module, you can submit applications for letters of credit, payment cards, cash handling, and other orders. Additionally, users with sufficient authorization rights have access to system applications for activating new users in the system, modifying their rights, or modifying acceptance patterns. The applications you submit require additional signatures before they can be sent to the Bank, depending on acceptance patterns defined in your company for applications. When a cash supply order is made, which by definition results in taking funds to execute the instruction, acceptance patters for accounts are verified. 6.3.1 New Application or Instruction To submit applications, choose the Other tab, and then choose Applications in the side menu. Choose the desired type of application. You can only see applications for which you have necessary authorization rights. Bank BGŻ BNP Paribas SA | BiznesPl@net User Manual | April 2015 46 Click a link with an application name. An application form with fields to complete will appear. The form contains links to existing documents as well (e.g. The Terms and Conditions for Issuing and Using Payment Cards), which you should read before submitting an application. After you complete the application, the system will ask for an SMS code or electronic signature, depending on the logging and transaction authorization method you have selected. The application will then await at the Submitted Applications and Instructions tab for authorized persons’ signatures according to acceptance patterns. 6.3.2 Submitted Applications and Instructions You can see the applications you have submitted at the Submitted Applications and Instructions tab. The tab also contains information about application type, date of submission, and current status. Choose an application name to see detailed information Bank BGŻ BNP Paribas SA | BiznesPl@net User Manual | April 2015 47 about the application. Application details contain information on who submitted the application, who signed it, and who sent it. 6.4 Notifices Notifications are messages that inform about specific events, such as system login or transfer completion. You can receive notifications as system messages (Correspondence), as e-mail messages, or as short text messages (SMS). The last option is subject to a fee. 6.4.1 Notification settings Notifications are generated when a specific event occurs. Use the Notification Settings form to configure notifications. The form contains two sections: In the first section, you can define the telephone number at which you want to receive SMS-based notifications, and define your e-mail address. Bank BGŻ BNP Paribas SA | BiznesPl@net User Manual | April 2015 48 The other section enables you to configure the types of notifications delivered, and channels through which the notifications are to be available. Bank BGŻ BNP Paribas SA | BiznesPl@net User Manual | April 2015 49 For each service/product, select the desired check box next to each channel through which you want to receive notifications. The system enables you to receive the same notifications through multiple channels. 6.4.2 Sent Notifications This form shows notifications sent to you that meet the criteria of available filters. Bank BGŻ BNP Paribas SA | BiznesPl@net User Manual | April 2015 50 By filtering messages, you receive a chronological summary of notifications you have received, with the following attributes listed: 6.5 Notification sending date Notification subject Channel through which the notification has been delivered SMS Codes To perform any transaction (e.g. send a transfer), you must authorize it. SMS codes are one authorization method. When transaction authorization is required, you receive a short text message (SMS) with the code you need to enter in the system. 6.5.1 Telephone for SMS Codes Bank BGŻ BNP Paribas SA | BiznesPl@net User Manual | April 2015 51 In this form, you can enter the number of the mobile phone to which SMS codes will be sent. If you want to change this telephone number, you must authorize the change using a code sent to the previous number. 6.5.2 SMS Code List This form displays a summary of SMS codes generated and sent to users within a company. You can filter the list by sent date (in the from... to... format). After you click Execute, you will see a table with the following attributes (columns): 6.6 SMS number — the number of the message Message sending date Message receipt date Telephone number at which BiznesPl@net sent the message SMS Charges With this form, you can change the account charged with SMS notification fees. Note: SMS notifications inform you about specific events, e.g. account charge [for SMS codes sent]. SMS codes, on the other hand, are used to authorize transactions and are sent free of charge. The system shows global statistics related to both SMS notifications and SMS codes. Bank BGŻ BNP Paribas SA | BiznesPl@net User Manual | April 2015 52 To change the account charged for SMS notification fees, choose another account from the Debited Account drop-down list, and then click Change Account to confirm the change. 6.7 User Profile With this form, you can review your data stored in the BiznesPl@net system. Use this form to define or change your contact information: the telephone number for contacts and e-mail address. When you add an e-mail address to the form, the system will ask you whether the change should also refer to the number to which SMS notifications are sent. When you change the telephone number, the system will remind you that you might also need to change the number for receiving SMS notifications and codes. However, this change will not be done automatically. The form contains two more buttons: Change and Keys. Bank BGŻ BNP Paribas SA | BiznesPl@net User Manual | April 2015 53 Change — moves you to the Changing The Logging and Authorization Method form Keys — moves you to the Keys Management form Bank BGŻ BNP Paribas SA | BiznesPl@net User Manual | April 2015 54 7. Templates and Contractors 7.1 Payment Templates Payment templates serve as examples you can use when creating transfers. When you choose a payment template while creating a transfer, the fields defined in the template will be automatically filled in (e.g. with data on the contractor and amount). There are two methods to create templates: choose Templates and Contractors from the menu and define a template without sending the transfer send a transfer (choose from the Transfers menu) and save the template with data defined in the transfer you are sending New templates can be based on previously defined templates. In this case, if you create a template under a new name, you will create a new template. If you use the same name as the template you are basing your changes on, you will modify the existing template. 7.1.1 List of Payment Templatess To review the list of existing templates, choose the type of transfer for the template. You can use search filters after you click Execute. Bank BGŻ BNP Paribas SA | BiznesPl@net User Manual | April 2015 55 Click Template Name to open the Modify Template form for this template. 7.1.2 New Template This form enables you to create a new transfer template. Templates can also be created when you are sending a transfer. You can save the transfer as a template. To create a template, first define the template type. The type depends on the type of transfer for which you are creating the template (domestic transfer, cross-border transfer, ZUS transfer, tax transfer, MT 101 transfer). At this point, the remaining section of the form will change to match the transfer you have selected. Complete empty fields in the form. You can also create a new template on the basis of an existing template. To do so, find the template you want to serve as the basis for your new template, and click the link with its name. Bank BGŻ BNP Paribas SA | BiznesPl@net User Manual | April 2015 56 The initial New Template form will appear again, already filled with data from the template. Additionally, the template you have just found is automatically added to the list of recently used templates. Bank BGŻ BNP Paribas SA | BiznesPl@net User Manual | April 2015 57 BiznesPl@net enables you to create a contractor base, discussed further in this manual. When you create a template, you can choose a contractor from the base instead of manually entering the contractor’s data, provided that the contractor has already been added to the base. To do so, choose the contractor’s short name from the drop-down list or use the link to the search engine. Bank BGŻ BNP Paribas SA | BiznesPl@net User Manual | April 2015 58 Bank BGŻ BNP Paribas SA | BiznesPl@net User Manual | April 2015 59 After you find the contractor, click the link with the contractor’s name to fill in the payment template with the contractor’s data. Moreover, you can add a new contractor to the database from the Transfer Recipient section. After you enter recipient data, click Add contractor to contractor list. To save the template you have just created, click Add Template. 7.1.3 Modify Template Using the Modify Template form, you can modify existing transfer templates in the BiznesPl@net system. Before you can edit a template, you must find it. To do so, specify the following: Template type (domestic, ZUS, tax, cross-border, direct debit, MT 101) Template name — choose a name from the list of all templates of a given type Bank BGŻ BNP Paribas SA | BiznesPl@net User Manual | April 2015 60 You can also use advance search options (click Find Template). This option becomes available after you choose the Template Type. To modify the template you have found, click the link with its name. The edit form will open. 7.1.4 Remove Template With this form, you can delete existing transfer templates from the BiznesPl@net system. Before you can delete a template, you must find it. To do so, specify: Template type (domestic, ZUS, tax, cross-border, direct debit, MT 101) Template name — choose a name from the list of all templates of a given type You can also use the search engine. To do so, click Find Template. Click Delete Template to delete the file. 7.2 Contractors Contractors serve as models you can use when creating transfers or payment templates. When you choose a contractor while creating a transfer, the fields related to the Transfer Recipient will be automatically completed. There are two methods to create contractors: choose Templates and Contractors from the menu and define a new model without sending the transfer send a transfer (choose from the Transfers menu) and click Add Contractor to Contractors List. Bank BGŻ BNP Paribas SA | BiznesPl@net User Manual | April 2015 61 7.2.1 List of Contractors The List of Contractors tab enables you to browse through the recipient database stored in the system’s dictionaries. The contractors are divided into three types: domestic foreign debtor in direct debit TF Contractor. The user may also introduce his/her own group division that will enable him/her to control which contractors are visible to other users within a company: All – contractors classified to this group are visible to all users within a company, Private – contractors are visible to logged-in users only, Global – contractors are visible to users who hold authorisations to a given group. For more information on groups’ creation and editing see chapter “Groups Management.” To display a list, choose contractor type or a group and click Execute. You can also use the search engine. To do so, click Find contractor. In order to assign a contractor to a given group, select a contractor from the list, choose a group from Move to group field and click Move. Bank BGŻ BNP Paribas SA | BiznesPl@net User Manual | April 2015 62 Once the contractors’ list has been displayed, you can delete some contractors. First select respective contractors from the list and then click Remove contractors. 7.2.2 Groups Management Groups management tab enables the user to browse groups created in a given company, to create new groups, likewise edit and delete the existing ones. A list of groups available to the user will be displayed upon clicking the Commit button. The list can also be narrowed by typing in a fragment of a group's name and clicking Commit. The following buttons are placed below the list of groups: New Group – opens a form used for creating a new group, Remove – deletes selected groups, Edit - enables making modifications to a selected group. Bank BGŻ BNP Paribas SA | BiznesPl@net User Manual | April 2015 63 To delete the existing group, first select a group from the list and click Remove. The Global and Private groups cannot be deleted. Also, a group to which contractors are assigned cannot be deleted. You can create a new group by giving it a name and choosing users who will be authorised to access it. Authorisation to a group allows the user to use contractors from this group, and also transfer contractors to this group. The group will be saved after clicking the Commit button. To modify the existing group select a given group from the list and choose Edit. A form to edit a group is analogous to the form used for creating a new group, with the difference that the former contains data. The group's name and authorised persons can be modified. The group will be modified after clicking the Commit button . The Main and Private groups cannot be edited. Bank BGŻ BNP Paribas SA | BiznesPl@net User Manual | April 2015 64 7.2.3 New Contractor This form enables you to add a new contractor (domestic, foreign, debtor) to the dictionary. First, specify the Contractor Type. A form will appear. Fill in the fields. After you complete the contractor data, confirm them by clicking Save. The system enables you to create new contractors on the basis of previously defined ones. Find an existing contractor using the Find Contractor link. If you find the contractor you want to serve as the basis for your new contractor, click the link with its name. You will return to the form for creating a new contractor. The form will be filled in with data for the contractor you have just found. Modify the data and save them by clicking Save. 7.2.4 Modifying Contractor Data With this form you can change data for existing contractors. First, choose the type of contractor to modify. Bank BGŻ BNP Paribas SA | BiznesPl@net User Manual | April 2015 65 After you choose a type, the Modify Contractor Data form will appear. In the form, choose a contractor to edit. Do one of the following: choose a contractor from the drop-down list of all contractors of the type, or click Find Contractor to open the contractor search form. After you find a contractor, click the link with its name to return to the Modify form. In this form, you can do the following actions: 7.2.5 Cancel — returns you to the Contractor List Modify Contractor — saves modified contractor data Remove Contractor — remove the contractor from the dictionary. Remove Contractor With this form, you can remove existing contractors from the BiznesPl@net system. To remove a contractor, choose the contractor type and click Find Contractor. Finally, confirm the removal by clicking Remove Contractor. Bank BGŻ BNP Paribas SA | BiznesPl@net User Manual | April 2015 66 8. User Contexts When you work in the Internet system, you are working in a specific context, i.e. in the context of the company or holding that you are assigned to. A holding is a group of companies connected by various means. When you work in a company context, you only see the company’s banking products (accounts, cards, credits, etc.) even if you have rights to access the accounts of other companies. To perform operations on another company’s accounts/products, you must change the context. If you have the rights to access two or more companies that form a holding, you can work in the Holding context. Specifically, this enables you to access all accounts of companies within the holding you have rights to. You do not need to change your work context to a specific company. To change the work context, use the drop-down list in the info bar. Bank BGŻ BNP Paribas SA | BiznesPl@net User Manual | April 2015 67 9. Accounts This tab contains functionality designed to provide information on a specific customer’s accounts at the Bank. 9.1 Accounts List When you choose the Accounts tab in the side menu, the system automatically executes the Accounts List function that presents a form with the customer accounts to which you have been granted access. The Accounts List contains the following information, grouped into individual rows: Account Number / Company Name — a link to the Bank Statement Name — a link to Account Data Balance — current account balance Available balance You can sort the list by clicking one of the text links in column names. Bank BGŻ BNP Paribas SA | BiznesPl@net User Manual | April 2015 68 9.2 Account Details You can access the Account Details form from two levels: Accounts List — click the name of the desired account. The Account Details form for the selected account will open. This means that detailed information for this account will be shown automatically. You don’t need to select this account from the drop-down list. Account Data — first choose the desired account from the drop-down list. A table listing the most important details will appear. Additionally, you can print information shown in the main Account Details window. To do so, click the Print icon ( ). Bank BGŻ BNP Paribas SA | BiznesPl@net User Manual | April 2015 69 You can create or change the “friendly name” for accounts you can access. The name is visible only to you and is designed to help you choose the right account. To use this feature, enter the account name in the edit box in the Account Name record, and then confirm the operation by clicking the Save Changed Name link. If you click a link in the Blocked Amount record (this field is only visible if there are any funds locked in the account), the Blockade form opens. Blocked funds data are shown automatically and are visible in the context of the account you have selected in the Account Data form. The list of blocked funds in the account shows the following data: Date of blocking Blocking expiration date Blockade type and description Amount and currency Bank BGŻ BNP Paribas SA | BiznesPl@net User Manual | April 2015 70 9.3 Blockades You can access the Blockades form from two levels: 9.4 Account Data — click a link in the Blocked Amount line to open the Blockades form Blockades — first choose the account for which you want to display blockades. Bank Statement The form enables you to display bank account statements. First choose the desired account and select the date for the statement. Click Execute. A statement for the specified date will appear. The statement contains two sections: a list of operations performed on that date, and the initial and closing balance. Bank BGŻ BNP Paribas SA | BiznesPl@net User Manual | April 2015 71 A bank statement can also be displayed without O/N deposit operations. To use this option, before clicking Execute select Hide operations related to automatic overnight deposits. Bank account statements of specific accounts presented in the BiznesPl@net system are numbered. Account numbering rules are the following: The numbering will be independent of the numbering of (paper) account statements in the bank system; A sequential number of a statement of a given account is increased on each day when any transaction is booked on a given account. If no transaction is booked on the account on a given day, the account statement number is not updated. Account statement numbers will be zeroed at the beginning of the new year. Bank BGŻ BNP Paribas SA | BiznesPl@net User Manual | April 2015 72 The system will provide additional information for each account you select in the following format: Bank BGŻ BNP Paribas SA | BiznesPl@net User Manual | April 2015 73 NRB (Bank Account Number) — 26 digits separated with spaces, grouped in the following sections: kk BBBB BBBk MMMM MMMM MMMM MMMM1,IBAN — format: PLkk BBBB BBBk MMMM MMMM MMMM MMMM, BIC (Bank Identifier Code) Click an item in the Transaction Name and Description column to open a new Transfer Execution Confirmation pop-up window. The window shows the electronic document with transfer confirmation that is equivalent to the hardcopy version sent to the customer. You can print the confirmation or save it to your hard drive as a PDF file. 1 kk — checksum, B — bank branch number digit, M — account number digit Bank BGŻ BNP Paribas SA | BiznesPl@net User Manual | April 2015 74 There are two ways to navigate between statements from individual days: Choose a specific date for the statement ( )2Use the links below the balance statement ( ). The links will move you to the next statement in the system (by date). You can save the entire statement (the main Bank Statement form frame) to your hard drive as a PDF file, or print it in a separate window. 9.5 Account History Account History shows a set of all transactions that the meet you define. When you choose this feature, a screen with filtering criteria appears: 2 Account for which you want to display operations history Date from... to... Last X days — you can browse the history of transactions made in the last X days Filtering — you can define filters to show only those transactions in the transaction history that meet the filter’s conditions The system will not allow you for entering a date that is a holiday. Bank BGŻ BNP Paribas SA | BiznesPl@net User Manual | April 2015 75 You can save the filter and reuse it later. To do so, click Save Filter. If you want to use the filter just once, click Apply. You can modify existing filters. Confirm your changes by clicking Save Filter. Transaction history contains the following fields: Posting date Transaction name and description — a link to Transfer Execution Confirmation Withdrawals Deposits Bank BGŻ BNP Paribas SA | BiznesPl@net User Manual | April 2015 76 You can print the transaction history or save it as a PDF file. 9.6 MBR Statement With this form, you can display MBR (Multi Bank Reporting) statements. When you choose MBR Statement, a screen with filtering criteria appears: Account for which you want to display operations history Date from... to... Last X days — you can browse the history of transactions made in the last X days Filtering (see the description in section 9.5). Bank BGŻ BNP Paribas SA | BiznesPl@net User Manual | April 2015 77 Additionally, you can apply/change the name of an account from within the filter. To do so, click Add your own friendly name for the account. Another section will appear in the MBR Statement form: Bank BGŻ BNP Paribas SA | BiznesPl@net User Manual | April 2015 78 You can save the entire statement (the main MBR Statement form frame) to your hard drive as a PDF file, or print it in a separate window. Bank BGŻ BNP Paribas SA | BiznesPl@net User Manual | April 2015 79 10. Transfers 10.1 General Information about Transfers In BiznesPl@net, you can create transfers manually, by clicking the Transfers tab, or you can import transactions from a file (this feature is available in the Administration and Tools tab.) You need appropriate authorization rights to perform this action. After you create a transfer, you must authorize it. When you finish filling in transfer fields, the system will ask you for an SMS code or electronic signature, depending which transaction authorization method you have chosen. In the next stage, the transfer must be sent by authorized persons. The principles for sending transfers are defined when you apply for the system, and are set together with limits for individual accounts. Prepared transfers await signatures at the To Send tab. The authorized user or users sign the transfer with an SMS code or electronic signature, depending on their transaction authorization method. 10.2 Packages In addition to making individual transfers, you can also create packages (batches). To do so, find the transfers (entered manually or imported) in the To Send list. Mark them on the left, and click Create Package. Bank BGŻ BNP Paribas SA | BiznesPl@net User Manual | April 2015 80 In addition to the user-defined name, a package has its Type and Mode of Execution. Package types are assigned automatically on the basis of transfers contained in the package. Packages can have the following types: Domestic (contain Domestic Transfers, ZUS Transfers, Tax Transfers) Cross-Border (contain Cross-Border Transfers) MT101 (contain MT101 Transfers) Direct Debit (contain Direct Debit transfers) Note: You cannot create a package with different kinds of transfers. You cannot add Currency Conversion to a package. The Mode of Execution is user-defined. There are the following modes of execution: Standard (the default mode, applied if you do not select anything): in this mode, transfers are made one by one. If you do not have sufficient funds to execute all transfers in a package, only the transfers for which there is enough funds will be executed. The remaining transfers will be placed in the Waiting Room or will be rejected. The entire package (choose Reject entire package if any transfer cannot be executed): In this mode, the package will be executed only if there are sufficient funds to meet the entire package (a total of transaction amounts and commission amounts). Note: The Entire Package may not be wholly executed if a transfer is not executed by the central system for reasons other than insufficient funds. Payroll Package (choose Payroll Package): This package may only contain payroll transfers, i.e. transfers sent from payroll accounts. This is a specific case of the Entire Package option. The difference is that when the transfers from payroll account or accounts have been sent, the account will be replenished from a source account defined by the customer. Note: In the case of cross-border payroll transfers, the debited account must be the same as the commission account. Commissions: Domestic — the commission is collected as a single amount, charged for transfers executed within a package. The commission is posted to the account or accounts from which the transfers have been sent. Cross-Border — the commission is collected with the transfer, individually for each transfer executed within a package. MT101 — the commission is collected with the transfer, individually for each transfer executed within a package. Direct Debit — the commission is collected as a single amount, charged for direct debit transfers executed within a package. The commission is posted to the account or accounts from which the direct debit transfers have been sent. Note: for domestic payroll packages, transfers are sent from the payroll account. The account is then replenished with a single amount equivalent to the total sum of transactions; the commission is charged to the source account for the replenishment as defined by the customer. Bank BGŻ BNP Paribas SA | BiznesPl@net User Manual | April 2015 81 Note: for cross-border payroll packages, transfers together with commissions are sent from the payroll account. The account is then replenished with the amount equivalent to the total sum of transactions, and the amount equivalent to the total sum of commissions, charged to the source account for the replenishment as defined by the customer. Delivery: Packages are delivered during system availability hours — see the FAQ at the Website. After the deadline hour elapses, all packages that had been placed in the waiting room are rejected. In the specific case of a package placed after the deadline on one day, this package will be rejected on the following day, after the deadline elapses. During delivery, packages can have the following statuses: To send, Entered — packages with transfers that have been entered or imported. To Send, Under Approval Process— packages that have already been signed, but acceptance patterns have not yet been met. To Send, Accepted — packages that have been fully signed, i.e. acceptance pattern conditions have been met. To Send, Accepted — packages that have been canceled by the user. Sent, Future Delivery Date — packages that contain only transfers with future execution dates (which can be canceled). Sent, Submitted to Delivery — packages that are to be delivered on the same day, but their delivery hasn’t started yet (they can be canceled). Sent, In-Process — packages which are already being delivered (these packages cannot be canceled). Delivered — packages that contain executed transfers. Waiting Room — packages containing transfers that have been moved to the waiting room. Rejected — packages containing transfers that have been rejected. Note: It may happen that the same package appears on multiple lists with several various statuses. When some transfers from a package have been executed, some have been rejected, and some have been placed in the waiting room, the package will be shown in the Delivered, Rejected, and Waiting Room lists. 10.3 Review When you choose the Transfers tab, the Transfers Review form will open. The transfers are grouped by their status: To Send — transfers that have been entered into the system but haven’t been sent yet. These transfers await acceptance, are undergoing acceptance, or have been accepted but have not been sent yet or have been canceled. A transfer can be sent after all the signatures required by the account acceptance pattern are obtained. To sign a transfer, select the transfer and click Sign/Send. Bank BGŻ BNP Paribas SA | BiznesPl@net User Manual | April 2015 82 For a package, enter the package details, select some or all transfers, and click Sign Package. Sent Executed Rejected Waiting room Search You can specify how many records should be displayed per page (10, 20, 30, 50, 100, or All). Bank BGŻ BNP Paribas SA | BiznesPl@net User Manual | April 2015 83 10.3.1 To Send This feature provides information about transfers with the ‘To Send’ status. A User can send an order, prepared earlier but not sent, with a payment date earlier than the current date (up to three days back). To find transfers to be sent, complete the fields available in the form and click Execute. The search results display the specified transfers or packages containing the transfers, along with transfer-related information, i.e. Debited Account and Company Name, Recipient’s Name and Address, Payment Title (payment description), Date, Amount, and Status. Bank BGŻ BNP Paribas SA | BiznesPl@net User Manual | April 2015 84 Selected transfers or packages may be marked on the list and saved to the hard disk as a PDF file, or printed in a separate window. 10.3.2 Sent This feature provides information about transfers that have been sent. To find transfers that have been sent, complete the fields available in the form and click Execute. Bank BGŻ BNP Paribas SA | BiznesPl@net User Manual | April 2015 85 The search results display the specified transfers or packages containing the transfers, along with transfer-related information, i.e. Debited Account and Company Name, Recipient’s Name and Address, Payment Title (payment description), Date, Amount, and Status. Bank BGŻ BNP Paribas SA | BiznesPl@net User Manual | April 2015 86 10.3.3 Executed This feature provides information about transfers that have been delivered. To find transfers that have been delivered, complete the fields available in the form and click Execute. Bank BGŻ BNP Paribas SA | BiznesPl@net User Manual | April 2015 87 The search results display the specified transfers or packages containing the transfers, along with transfer-related information, i.e. Debited Account and Company Name, Recipient’s Name and Address, Payment Title (payment description), and Amount. 10.3.4 Rejected This feature provides information about transfers that have been rejected. To find transfers that have been rejected, complete the fields available in the form and click Execute. Bank BGŻ BNP Paribas SA | BiznesPl@net User Manual | April 2015 88 The search results display the specified transfers or packages containing the transfers, along with transfer-related information, i.e. Debited Account and Company Name, Recipient’s Name and Address, Payment Title (payment description), Date, and Amount. 10.3.5 Waiting Room This feature provides information about transfers placed in the waiting room, i.e. transfers that have been sent to the bank, but since there were insufficient funds in the debited account, the transfers are pending delivery. Bank BGŻ BNP Paribas SA | BiznesPl@net User Manual | April 2015 89 To find transfers that have been placed in the waiting room, complete the fields available in the form and click Execute. 10.3.6 Search This feature enables you to find any transfer or package in the system. To find a transfer or package, select the desired option: Find Transfer or Find Package, and then complete the remaining fields and click Execute. Bank BGŻ BNP Paribas SA | BiznesPl@net User Manual | April 2015 90 The search results display the specified transfers or packages containing the transfers, along with transfer-related information, i.e. Debited Account and Company Name, Recipient’s Name and Address, Payment Title (payment description), Date, Amount, and Status. Bank BGŻ BNP Paribas SA | BiznesPl@net User Manual | April 2015 91 10.4 Domestic Transfer With this feature you can make transfers from the customer account to another domestic banking account in PLN currency (provided that you have the necessary authorization rights). Note: Make ZUS (Social Security Office) and US (Internal Revenue Office) using their separate forms. To make a domestic transfer, first select the account to be debited. Then provide information about the contractor and the transfer, and click Confirm Transfer. Bank BGŻ BNP Paribas SA | BiznesPl@net User Manual | April 2015 92 When you create a transfer, you can use an existing payment template to automatically fill in fields in transfer forms. Bank BGŻ BNP Paribas SA | BiznesPl@net User Manual | April 2015 93 You can create payment templates using the Templates and Contractors tab, or save the transfer you are executing as a template. You can also use predefined contractor data. In contract to payment templates, contractor templates only store information about Transfer Recipients. You can use predefined contractor when creating payment templates. You can also save contractor data to the database when you are creating a transfer. To do so, click Add Contractor. Data of a given contractor can be also modified from the transfer level by choosing the Overwrite contractor's data option. Contractor's data become modified once the new data have been saved or the transfer has been sent. When you finish filling in all the required fields and click Confirm Transfer, an intermediate screen will appear with read-only data. Depending on your transfer authorization method, enter your SMS code or place your electronic signature. Bank BGŻ BNP Paribas SA | BiznesPl@net User Manual | April 2015 94 The form for SMS code authorization method. An authorized transfer awaits signatures which can be placed only by people authorized to do so under applicable acceptance patterns. You can save the transfer from the form containing filled-in domestic transfer data. When you click Save, an intermediate screen will open with a message that the transfer has been saved. To find a saved transfer, click the Transfer tab and choose the To Send status. Bank BGŻ BNP Paribas SA | BiznesPl@net User Manual | April 2015 95 10.5 ZUS Transfer The ZUS transfer form enables you to design transfer orders to the national social security office (ZUS). You can only make ZUS transfers from accounts maintained in PLN. The content of the ZUS transfer form meets the requirements of the Ordinance of the Minister of Finance dated Sept. 4, 2009 (Journal of Laws No. 164, item 1586), as amended on Dec. 21, 2004 (Journal of Laws No. 285, item 2850). You create and accept ZUS transfers in the same way as domestic transfers. The ZUS form contains different fields for you to complete (fields with taxpayer information). Bank BGŻ BNP Paribas SA | BiznesPl@net User Manual | April 2015 96 10.6 Tax Transfer The tax transfer form enables you to define a transfer order to individual Internal Revenue offices and other tax authorities. You can only make tax transfers from accounts maintained in PLN. You create and accept tax transfers in the same way, as domestic transfers. The tax form contains different fields for you to complete (fields with taxpayer information and Transfer Recipient data). Bank BGŻ BNP Paribas SA | BiznesPl@net User Manual | April 2015 97 Bank BGŻ BNP Paribas SA | BiznesPl@net User Manual | April 2015 98 10.7 Currency Conversion The currency conversion option is used to exchange currencies between Customer accounts. To prepare an order, choose an account from the list. Choose the account to which you want to [transfer] the funds. Then, fill in the date and amount fields, choose the conversion currency, and complete the Payment Details section. Bank BGŻ BNP Paribas SA | BiznesPl@net User Manual | April 2015 99 When you finish filling in all the required fields and click Confirm Transfer, an intermediate screen will appear with read-only data. Depending on your transfer authorization method, enter your SMS code or place your electronic signature. When you click Sign and Send, you will see a screen that confirms the action has been performed. You can save the transfer from the form containing filled-in domestic transfer data. When you click Save, an intermediate screen will open with a message that the transfer has been saved. Bank BGŻ BNP Paribas SA | BiznesPl@net User Manual | April 2015 100 To find a saved transfer, click the Transfer tab and choose the To Send status. 10.8 Cross-Border Transfer The cross-border transfer is an order to transfer funds to an account carried at a foreign bank, regardless of currency of the order; or to transfer funds to an account maintained by a Polish bank in foreign currency or in PLN when the debited account is maintained in foreign currency. Bank BGŻ BNP Paribas SA | BiznesPl@net User Manual | April 2015 101 Bank BGŻ BNP Paribas SA | BiznesPl@net User Manual | April 2015 102 When you create a transfer, you can use an existing payment template to automatically fill in fields in transfer forms. You can create payment templates using the Templates and Contractors tab, or save the transfer you are executing as a template. You can also use predefined contractor data. In contract to payment templates, contractor templates only store information about Transfer Recipients. You can use predefined contractor when creating payment templates. You can also save contractor data to the database when you are creating a transfer. To do so, click Add Contractor. Data of a given contractor can be also modified from the transfer level by choosing the Overwrite contractor's data option. Contractor's data become modified once the new data have been saved or the transfer has been sent. Bank BGŻ BNP Paribas SA | BiznesPl@net User Manual | April 2015 103 When you finish filling in all the required fields and click Confirm Transfer, an intermediate screen will appear with read-only data. Depending on your transfer authorization method, enter your SMS code or place your electronic signature. Bank BGŻ BNP Paribas SA | BiznesPl@net User Manual | April 2015 104 The form for SMS code authorization method. An authorized transfer awaits signatures which can be placed only by people authorized to do so under applicable acceptance patterns. When you click Sign and Send, you will see a screen that confirms the action has been performed. Bank BGŻ BNP Paribas SA | BiznesPl@net User Manual | April 2015 105 You can save the transfer from the form containing filled-in foreign transfer data. When you click Save, an intermediate screen will open with a message that the transfer has been saved. To find a saved transfer, click the Transfer tab and choose the To Send status. 10.9 MT101 Transfer Using the MT101 Transfer feature, Customers can transfer funds from their accounts at different banks. You can import an existing package with MT101 transfers by clicking Import MT101 Order, or you can enter transfer data in the form. An MT101 order requires additional verification by the Bank’s employee before it can be sent. To make a MT101 transfer, choose an account from the Transfer Funds From Account drop-down list. Next, fill in the Transfer Recipient , Order Data and Costs sections. The Costs section refers to the costs incurred in relation to sending the MT101 order. You can use payment templates and the contractor database in the same manner as for other transfers. Bank BGŻ BNP Paribas SA | BiznesPl@net User Manual | April 2015 106 Bank BGŻ BNP Paribas SA | BiznesPl@net User Manual | April 2015 107 When you finish filling in all the required fields and click Confirm Transfer, an intermediate screen will appear with read-only data. Depending on your transfer authorization method, enter your SMS code or place your electronic signature. An authorized transfer awaits signatures which can be placed only by people authorized to do so under applicable acceptance patterns. When you click Sign and Send, you will see a screen that confirms the action has been performed. 10.10 Direct Debit The Direct Debit tab contains three sub-tabs: New Direct Debit Order — you can send a new direct debit order to the debtor. Request — you can send the debtor a request for consent to direct debit. List of Requests — enables you to find and display a list of direct debit requests. 10.10.1 New Direct Debit Order To correctly complete the New Direct Debit Order, you need to fill in three sections: Creditor’s Data, Debtor, and Direct Debit Data. You can use a template to fill in the Creditor Data section. To do so, click Choose Template. Alternatively, choose an account from the Creditor’s Account drop-down list and complete the following sections. Similarly, in the Debtor section, you can select the debtor from debtor dictionaries by clicking Find Debtor, or enter debtor data manually into individual fields. If you have typed in debtor data manually, you can add the debtor to the debtor dictionary by clicking Add Debtor To Debtors List. If you select a debtor from the list, you can modify his/her data before saving or sending orders by choosing Overwrite contractor's data. In the Direct Debit Data section, specify the Execution Date, Amount, Creditor’s NIP (tax identification number), Payment ID, Payment Title (choose payment description from the drop-down list), Date Range, and Payment Details. After you have entered data into a new direct debit form, you can save the order as a template. To do so, select the Save As New Payment Template checkbox, and specify a name in the Template Name field. Bank BGŻ BNP Paribas SA | BiznesPl@net User Manual | April 2015 108 Bank BGŻ BNP Paribas SA | BiznesPl@net User Manual | April 2015 109 When you finish filling in all the required fields and click Confirm Transfer, an intermediate screen will appear with read-only data. Depending on your transfer authorization method, enter your SMS code or place your electronic signature. The form for SMS code authorization method. When you click Sign and Send, you will see a screen that confirms the action has been performed. 10.10.2 Request for Consent to Direct Debit To correctly complete the Request for Consent to Direct Debit, you need to fill in three sections: Creditor’s Data, Debtor, and Request Data. You can use a template to fill in the Creditor Data section. To do so, click Choose Template. Alternatively, choose an account from the Creditor’s Account drop-down list and complete the following sections. Similarly, in the Debtor section, you can select the debtor from debtor dictionaries by clicking Find Debtor, or enter debtor data manually into individual fields. If you have typed in debtor data manually, you can add the debtor to the debtor dictionary by clicking Add Debtor To Debtors List. To complete the Request Data section, specify the Execution Date, Creditor’s NIP (taxpayer’s ID number), and Payment ID. After you have entered data into the Request Consent for Direct Debit form, you can save the order as a template. To do so, select the Save As New Payment Template checkbox, and specify a name in the Template Name field. Bank BGŻ BNP Paribas SA | BiznesPl@net User Manual | April 2015 110 When you finish filling in all the required fields and click Confirm Transfer, an intermediate screen will appear with read-only data. Depending on your transfer authorization method, enter your SMS code or place your electronic signature. Bank BGŻ BNP Paribas SA | BiznesPl@net User Manual | April 2015 111 The form for SMS code authorization method. When you click Sign and Send, you will see a screen that confirms the action has been performed. 10.10.3 List of Requests The list of direct debit request is a system feature that enables you to find debtors’ consents. You can use filters to find a specific request for consent. Bank BGŻ BNP Paribas SA | BiznesPl@net User Manual | April 2015 112 After you correctly complete filtering conditions, you will see a list of requests. Bank BGŻ BNP Paribas SA | BiznesPl@net User Manual | April 2015 113 11. Loans After you click the Loans tab in the main menu, you will see more sub-tabs that provide the following information: 11.1 Loans list Loan data Repayment schedule Loan accounts Loan account history Guarantees Guarantees list Guarantee order Loans List The Loans List shows basic information about loans drawn by your company. You need sufficient authorization rights to see the information. 11.2 Loan Data To show loan data, choose a company from the Company Name drop-down list, and choose a loan type. Detailed loan information will appear. Bank BGŻ BNP Paribas SA | BiznesPl@net User Manual | April 2015 114 You can use a button located at the bottom of the screen to go to the loan’s repayment schedule. 11.3 Repayment Schedule To show loan repayment schedule, choose a company from the Company Name drop-down list, and choose a loan. A set of read-only data will appear, including the repayment schedule. Bank BGŻ BNP Paribas SA | BiznesPl@net User Manual | April 2015 115 Bank BGŻ BNP Paribas SA | BiznesPl@net User Manual | April 2015 116 Click the button at the bottom of the screen to go to the loan data form. There are also icons that enable you to print the schedule or save it as a PDF file. 11.4 Loan Accounts To see Loan Accounts and information such as account name and balance, choose a company from the Company Name drop-down list. From this form, you can go to the Loan Account History sub-tab. To do so, click an active link with a loan name. You can assign any name you want to a loan account by clicking Add your own friendly name for the account. This name will be visible only to the user that has assigned it. To show loan account history, choose a company from the Company Name drop-down list, and choose an account. You can then use the three filtering options to specify a range of dates, or the number of recent days or transactions. At the bottom of the list, there are icons that enable you to print the history or save it as a PDF file. Bank BGŻ BNP Paribas SA | BiznesPl@net User Manual | April 2015 117 11.5 Guarantees You can use this feature to review guarantees granted to a company, and to apply for another guarantee (provided that you have the necessary authorization rights). To show the list of guarantees, choose a company from the Company Name drop-down list and complete the filter with a range of dates. Click Execute. A list of guarantees will be displayed. Bank BGŻ BNP Paribas SA | BiznesPl@net User Manual | April 2015 118 Bank BGŻ BNP Paribas SA | BiznesPl@net User Manual | April 2015 119 12. Letters of Credit The Letters of Credit module enables you to: Browse the list of import and export Letters of Credit, Request opening an import Letter of Credit, Apply for amending import Letter of Credit conditions, Apply for an export Letter of Credit transfer, Apply for a transfer of a change to an export Letter of Credit, Send a cover letter to documents within an export Letter of Credit, Apply for an assignment of proceeds for an export Letter of Credit, Browse submitted applications regarding import and export Letters of Credit, Browse registry of import and export payments, Accept export Letter of Credit documents. You need sufficient authorization rights to perform these actions. 12.1 12.1.1 Import L/C List of L/C To view a list of Letters of Credit, choose a company from the Company Name drop-down list, use available filters if you want, and click Execute. Bank BGŻ BNP Paribas SA | BiznesPl@net User Manual | April 2015 120 The system will display a list of Letters of Credit with information such as: L/C number, company name, beneficiary, amount with/without tolerance, current balance, date of issue and expiry and status. L/C name at the same time refers to its details. The Create similar button on the L/C details level enables to duplicate an L/C. Application form with L/C details completed is displayed. 12.1.2 Opening a L/C To complete the application to open a new Letter of Credit, enter applicant’s data into the form. Bank BGŻ BNP Paribas SA | BiznesPl@net User Manual | April 2015 121 Then, enter data related to the applicant and beneficiary. Bank BGŻ BNP Paribas SA | BiznesPl@net User Manual | April 2015 122 Bank BGŻ BNP Paribas SA | BiznesPl@net User Manual | April 2015 123 The next step is completing an L/C confirmation instruction, information about L/C availability, beneficiary’s bank, payment dates. Bank BGŻ BNP Paribas SA | BiznesPl@net User Manual | April 2015 124 In the next section specify the information on the transport of goods. Bank BGŻ BNP Paribas SA | BiznesPl@net User Manual | April 2015 125 In the last section information on documents attached to the L/C should be completed. Bank BGŻ BNP Paribas SA | BiznesPl@net User Manual | April 2015 126 Bank BGŻ BNP Paribas SA | BiznesPl@net User Manual | April 2015 127 Bank BGŻ BNP Paribas SA | BiznesPl@net User Manual | April 2015 128 Bank BGŻ BNP Paribas SA | BiznesPl@net User Manual | April 2015 129 Bank BGŻ BNP Paribas SA | BiznesPl@net User Manual | April 2015 130 After you complete the data, confirm the order by clicking Send an application. The system will ask you to authorize the application with your SMS code or electronic signature, depending on which authorization method you have chosen. The application must then be signed by authorized persons as requested by acceptance patterns defined for applications. 12.1.3 Amending Terms To complete an application for the amendment of terms of an existing Letter of Credit, modify individual sections of this Letter of Credit. After you complete the data, confirm the order by clicking Send an application. The system will ask you to authorize the application with your SMS code or electronic signature, depending on which authorization method you have chosen. The application must then be signed by authorized persons as requested by acceptance patterns defined for applications. 12.1.4 Application Review To automatically display the L/C applications that have been submitted, choose a company from the Company Name drop-down list. The system will display L/C applications that have been submitted, showing such information as the type, company name, L/C reference number, L/C beneficiary, amount with/without tolerance, date of submission, order type and status. Bank BGŻ BNP Paribas SA | BiznesPl@net User Manual | April 2015 131 Items displayed in the Type/Company Name column are active links. You can click them to open the Order Details form that contains detailed, read-only information about the L/C application that has been submitted. 12.1.5 Document Acceptance In order to display a list of documents to be accepted you need to filter the appropriate criteria and click the Execute button. Bank BGŻ BNP Paribas SA | BiznesPl@net User Manual | April 2015 132 The presented list of payments includes the L/C number, company name, payment number, L/C’s beneficiary, payment amount and charges, payment date, payment instructions, discount and status. Number of an L/C is a reference to the details of accepted/rejected payment. Bank BGŻ BNP Paribas SA | BiznesPl@net User Manual | April 2015 133 To accept or reject payment click the relevant button on a form. The system will ask you to authorize the application with your SMS code or electronic signature, depending on which authorization method you have chosen. The application must then be signed by authorized persons as requested by acceptance patterns defined for applications. 12.1.6 Payments Register To view a list of payments, choose a company from the Company Name drop-down list, use available filters if you want, and click Execute. The System will display a list of payments including information such as: L\C number, company name, payment number, beneficiary, payment amount and charges, due date, payment instruction, discount status. Bank BGŻ BNP Paribas SA | BiznesPl@net User Manual | April 2015 134 The L/C number and Payment number columns display information in the form of active links. You can click them to open Details form in a ‘read-only’ format. Bank BGŻ BNP Paribas SA | BiznesPl@net User Manual | April 2015 135 12.2 Export L/C 12.2.1 List of L/C To view a list of Letters of Credit, choose a company from the Company name drop-down list, use available filters if you want, and click Execute. Bank BGŻ BNP Paribas SA | BiznesPl@net User Manual | April 2015 136 The system will display a list of Letters of Credit with information such as: L/C number, company name, beneficiary, amount with/without tolerance, current balance, date of issue and expiry and status. L/C name at the same time refers to its details. The Create similar button on the L/C details level enables to duplicate an L/C. Application form with L/C details completed is displayed. Bank BGŻ BNP Paribas SA | BiznesPl@net User Manual | April 2015 137 Bank BGŻ BNP Paribas SA | BiznesPl@net User Manual | April 2015 138 12.2.2 Cover Letter to Documents In order to send a cover letter you should first choose the Letter of Credit and then complete the document fields in the application form. After you complete the data, confirm the order by clicking Send an application. The system will ask you to authorize the application with your SMS code or electronic signature, depending on which authorization method you have chosen. The application must then be signed by authorized persons as requested by acceptance patterns defined for applications. 12.2.3 Application for an L/C transfer To complete an application for the Letter of Credit transfer, modify individual sections of the selected Letter of Credit. After you complete the data, confirm the order by clicking Send an application. The system will ask you to authorize the application with your SMS code or electronic signature, depending on which authorization method you have chosen. The application must then be signed by authorized persons as requested by acceptance patterns defined for applications. 12.2.4 Application for a transfer of a change to the L/C To complete an application for a transfer of a change to the Letter of Credit, modify individual sections of the selected Letter of Credit. After you complete the data, confirm the order by clicking Send an application. The system will ask you to authorize the application with your SMS code or electronic signature, depending on which authorization method you have chosen. The application must then be signed by authorized persons as requested by acceptance patterns defined for applications. Bank BGŻ BNP Paribas SA | BiznesPl@net User Manual | April 2015 139 12.2.5 Assignment of proceeds In order to send an application for an assignment of proceeds due from the L/C, the proper fields in the form should be completed. After you complete the data, confirm the order by clicking Send an application. The system will ask you to authorize the application with your SMS code or electronic signature, depending on which authorization method you have chosen. The application must then be signed by authorized persons as requested by acceptance patterns defined for applications. 12.2.6 Application Review To automatically display the applications that have been submitted, choose a company from the Company Name drop-down list. The system will display submitted applications including information such as type, company name, reference number, applicant, submission date, order type (project, application) and status. Items displayed in the Type/Company Name column are active links. You can click them to open the Order Details form that contains detailed, read-only information about the L/C application that has been submitted. 12.2.7 Payments Register To view payments register, choose a company from the Company Name drop-down list, use available filters if you want, and click Execute. Bank BGŻ BNP Paribas SA | BiznesPl@net User Manual | April 2015 140 The system will display payments register with information such as: L\C number, company name, applicant, liability amount, payment date, transfer, assignment, discount and status. The L/C number and Payment number columns display information in the form of active links. You can click them to open L/C Details form in a ‘read-only’ format. Bank BGŻ BNP Paribas SA | BiznesPl@net User Manual | April 2015 141 Bank BGŻ BNP Paribas SA | BiznesPl@net User Manual | April 2015 142 13. Standing Order Using the Standing Orders module, you can: 13.1 view the list of standing orders create a new standing order modify an existing standing order cancel a standing order Standing Orders List To automatically display the Standing Orders List, choose a company from the Company Name drop-down list. The system will show standing orders information such as: Company Name, Contractor Name and Account Number, Payment Title (description), Next Payment, Status, and Amount. Items displayed in the Contractor Name and Account Number column are active links. You can click the links to open the Modify Standing Order form. Bank BGŻ BNP Paribas SA | BiznesPl@net User Manual | April 2015 143 13.2 New Standing Order To create a new standing order, complete the order form and click Confirm. You fill the form in the same way as when creating transfers. Similarly, you can use the contractor database and payment templates. To define the type of the standing order, choose one of the following: standard (order) entire balance — the order will create a transfer for the amount equal to the account’s balance Overbalance — the order will create a transfer of any amount from the account’s balance in excess of a specified amount After you complete the order form, accept it by clicking Confirm Standing Order. The system will ask you to authorize the order with your SMS code or electronic signature, depending on which authorization method you have chosen. Bank BGŻ BNP Paribas SA | BiznesPl@net User Manual | April 2015 144 . Bank BGŻ BNP Paribas SA | BiznesPl@net User Manual | April 2015 145 13.3 Modifying Standing Order To modify a standing order, choose the order from the Order To Modify drop-down list. The Modify Standing Order form will appear. Bank BGŻ BNP Paribas SA | BiznesPl@net User Manual | April 2015 146 The system will ask you to authorize the modification with your SMS code or electronic signature, depending on which authorization method you have chosen. Bank BGŻ BNP Paribas SA | BiznesPl@net User Manual | April 2015 147 13.4 Canceling Order To cancel a standing order, choose the order from the Order To Cancel drop-down list. The Cancel Standing Order form will appear. Data in the form is not editable. Bank BGŻ BNP Paribas SA | BiznesPl@net User Manual | April 2015 148 The system will ask you to authorize the cancellation with your SMS code or electronic signature, depending on which authorization method you have chosen. Bank BGŻ BNP Paribas SA | BiznesPl@net User Manual | April 2015 149 14. DealOnPl@net A new functionality, "DealOnPl@net", has been activated in the BiznesPl@net system. This module enables the users to execute foreign exchange transactions (FX) on-line and provides them with current information on the FX market. Customers may independently set individual parameters of accounts used for making FX transactions and decide on the transaction authorisation method that they will use in the module. Menu within the "DealOnPl@net" functionality has the following structure: Spot transactions, Orders, Transaction and order history, Market analyses, Settings. 14.1 Spot transactions In the "DealOnPlanet" module the "Spot Transactions" tab is a default tab. The tab includes information on the current FX buy and sell rates for currency pairs defined by the Customer. FX rates are updated on a current basis. A list of transactions and orders is shown below the FX rate panels (for more information, see chapters 14.1.2 and 14.1.3). 14.1.1 FX rate panels Depending on the configuration selected by the user, a maximum of three FX rate panels are displayed on the form. At the first log in to the module, only one empty panel is presented with no currency pair defined. Before starting to use the system, the Customer should individually configure the panels (details about configuration are described in chapter 14.5 Settings). Once respective parameters are set, the predefined currency pairs will be displayed during subsequent logging in. Bank BGŻ BNP Paribas SA | BiznesPl@net User Manual | April 2015 150 It is possible to change the currency pair shown in the panel. To do so the user should click the currency pair list located in the top left hand corner of the box and select a required currency pair. In the event the user tries to execute transactions on non-configured currency pairs, a relevant notice will be displayed. "Sell" and "Buy" fields present a current FX rate at which a given currency may be either sold or bought. FX rates are updated on a current basis during the service availability hours. In order to execute a spot transaction the Customer should determine a required transaction amount. First, the Customer should enter the amount in a given currency and click the "Ask about price" button. The system will display the exchange rate at which a given transaction may be executed at a given moment. Once the "Ask about price" button has been selected, the option of asking about price in the current as well as other boxes will be blocked for the validity period of the FX rate presented. At this point, it is possible either to execute the transaction or cancel it. Transaction execution Depending on the transaction direction, the Customer should click a sell or buy box, then a preliminary approval of transaction at the FX rate binding at a given moment is performed. Transaction will be forwarded to the Bank once it has been authorised by a selected authorisation method in a period required by the system. Bank BGŻ BNP Paribas SA | BiznesPl@net User Manual | April 2015 151 Upo n transaction execution, its details are displayed on the list, and the transaction confirmation is available in the PDF file. Cancellation When the user selects the "Cancel" button, all fields completed with amounts will be cleared and activated so that the Customer could once more ask about price in panels s/he has predefined. 14.1.2 Transactions This section includes transactions ordered by the Customer on a current day. Transactions are sorted by the hour of transaction conclusion, depending on the sorting settings selected (top menu Settings). Bank BGŻ BNP Paribas SA | BiznesPl@net User Manual | April 2015 152 For executed transactions, a confirmation in the PDF format can be downloaded by clicking an icon on the right hand side, near each executed transaction. The transaction list may be refreshed by clicking the "Refresh" button. Depending on the Customer's needs, the list may be either rolled up or unrolled. 14.1.3 Orders The list displays: all active orders orders cancelled by the user (visible on the cancellation day only) not executed orders (displayed on the day when a specific event took place and on the next business day only). Once the order has been completed, it is no longer displayed on the order list. Such an order is moved to the transaction list, and is shown as a transaction with the "Completed" status. In order to refresh the list click the "Refresh" button. Depending on the Customer's needs, the list may be either rolled up or unrolled. Orders with the "Pending" status may be modified or cancelled. Bank BGŻ BNP Paribas SA | BiznesPl@net User Manual | April 2015 153 Clicking the "Modify" link next to a selected order, the user is directed to an order edit form that is analogous to the "Błąd! Nie można odnaleźć źródła odwołania." form (chapter 14.2). The following parameters may be modified: Amount, FX Rate, Expiry date. Other parameters are displayed in the "read only" mode. Order modification has to be authorised in accordance with the transaction authorisation method used in the DealOnPl@net module. A form to cancel an order will be displayed after clicking the "Cancel" button located near a given order. Order cancellation is authorised in accordance with transaction authorisation method used in the DealOnPl@net module. 14.2 Orders DealOnPl@net enables the user to set transaction parameters for a selected period, based on which s/he will be inclined to accept it. Such a manner of defining transactions has the form of Orders. The system enables the user to enter an order with a date up to 30 days ahead. Companies may place a maximum of 5 active orders. Please note that the level of orders in relation to the current FX rates on the market is controlled by the system between 9:00 am and 5:00 pm on a business day only, thus if a specific FX rate is published at night-time an order may not be executed. In order to execute an FX buy/sell order it is necessary to determine: currency pair, order type (buy/sell), order amount (denominated in one of the currencies from the currency pair), FX rate (at which the transaction is to be executed) order validity date. Bank BGŻ BNP Paribas SA | BiznesPl@net User Manual | April 2015 154 By clicking the "Approve" button, a screen of the order acceptance will be displayed. If within the DealOnPl@net module the user activated a given authorisation method, s/he should sign orders using the same method. Once an order has been approved, the system will wait until specified terms and conditions applicable to the transaction execution occur. If the said terms and conditions are met, the transaction will be executed. Clicking the "Clear" button, from the order defining tab, will clear all data entered. 14.3 Transaction and order history A Customer who uses the module may return at any time to FX transactions and orders placed in the system. To display the list of transactions and orders the user should enter the Transaction and order history tab. To display data the user should define the searching criteria with the use of the available filters, such as company name (for holding companies), type (of transaction/order), status, dates. Depending on the operation type selected, the "Status" combo field will include various values, i.e.: Orders (Pending, Cancelled, Not executed (Insufficient funds), Not executed (No price), Executed, All) - orders with "Pending" status (in the course of executing) are not displayed in the history. Bank BGŻ BNP Paribas SA | BiznesPl@net User Manual | April 2015 155 Transactions (Executed, Cancelled, All). Transactions with "Pending" statutes are not displayed in the history. After clicking the Execute button the system will display transactions/orders along with the following information: company/user name, account to be debited/ credited, currency pair, value date, conclusion time, buy/sell amount, FX rate and status in accordance with the search criteria selected. For executed transaction the user may download a confirmation in the PDF format by clicking an icon on the right hand side of the status. 14.4 Market analyses Each Customer who uses the DealOnPl@net service will be granted access to market analyses prepared by the Bank's Chief Economist. A form with market analyses is divided into two sections, i.e. daily comments and monthly/weekly comments. The system displays by default 5 weekly/monthly comments and 5 daily comments. All comments are available in the PDF format. To download a comment the user should click a selected link. Bank BGŻ BNP Paribas SA | BiznesPl@net User Manual | April 2015 156 14.5 Settings One of the system's functionality enables the user to adjust settings of the "DealOnPl@net" to his/her individual needs. In the "Settings" form the user can configure: panels that are displayed on the Spot transactions form and currency pairs accounts for selected currencies authorisation method used for transactions and orders Bank BGŻ BNP Paribas SA | BiznesPl@net User Manual | April 2015 157 Each change introduced within the "Settings" tab must be authorised by authorisation method adopted by the user. 14.5.1 Panel configuration The user may choose the number of available panels (from one to three panels) and default currency pairs that are displayed after the "Spot transactions" form opens. After marking the check box, a combobox, from which a currency pair is to be selected, gets activated Apart from standard currency pairs (XXX/PLN), the following cross currency pairs are also available: EUR/USD, EUR/GBP, EUR/CHF,GBP/USD, USD/CHF. 14.5.2 Account configuration The system enables the user to select accounts that will be used as default accounts for a given currency. Bank BGŻ BNP Paribas SA | BiznesPl@net User Manual | April 2015 158 To match the currency to the account, first the user needs to choose the currency from the combo field. Then, all accounts that are maintained in the selected currency and to which the user is authorised are displayed. After selecting the account and clicking the "Add" button, the account is added to the "Parameterised currencies" list. In the DealOnPl@net module, a given currency may be matched to one account only. There is no possibility of adding a second account if an account in the same currency has been already added. To delete parameterisation for a given currency, the user should click the "Delete" button near a given currency/account pair. To modify the currency/account pair, the user should click the "Modify" button. 14.5.3 Transaction and order authorisation The user may activate or inactivate the authorisation of FX transactions and orders executed within the DealOnPl@net functionality. The following authorisation methods as regards transactions and orders are available within the DealOnPl@net functionality: A single click on the price box, Transaction confirmation in accordance with an authorisation method selected - in order to execute transactions in the DealOnPl@net the system requires the user to submit a text message code or a password to a key. Bank BGŻ BNP Paribas SA | BiznesPl@net User Manual | April 2015 159 15 Deposits The Deposits module provides the following options: Deposit list New deposit Negotiated deposit Deposit modification Breaking a deposit Deposit interest rate 15.2 Deposit List To display a list of deposits for a company, choose the company from the Company Name drop-down list. The system will display the following information about deposits: name, company name, amount, interest rate, forecasted interest, date of opening, closing date. Items in the Name column are active links. You can click any of the links to open the Modify Deposit form. Bank BGŻ BNP Paribas SA | BiznesPl@net User Manual | April 2015 160 15.3 New Deposit To create a new deposit, choose a company for which you want to create the deposit, and choose an account. Bank BGŻ BNP Paribas SA | BiznesPl@net User Manual | April 2015 161 Then complete the form fields. After completing the form fields, confirm the data by clicking Open Deposit. The intermediate acceptance screen will appear. You must authorize the deposit using an SMS code or electronic signature, depending on your chosen method of logging in and transaction authorization. Bank BGŻ BNP Paribas SA | BiznesPl@net User Manual | April 2015 162 15.4 Negotiated Deposit To create a negotiated deposit, fill in the order form. After completing the form fields, confirm the data by clicking Open Deposit.A screen presenting a ‘read-only’ data will be displayed. Additionally, the information about opening deposit will be displayed. Bank BGŻ BNP Paribas SA | BiznesPl@net User Manual | April 2015 163 In order to finally approve the order once again click the Approve button. You must authorize the deposit using an SMS code or electronic signature, depending on your chosen method of logging in and transaction authorization. Bank BGŻ BNP Paribas SA | BiznesPl@net User Manual | April 2015 164 15.5 Negotiable Deposit Calculator This option enables checking interest rate for the negotiable deposit - to this end deposit data such as currency, amount and period should be completed. Clicking on the Calculate button displays interest rate according to the conditions selected. 15.6 Deposit Modification To modify a deposit, choose the deposit from the drop-down list. Bank BGŻ BNP Paribas SA | BiznesPl@net User Manual | April 2015 165 The Deposit Modification form will appear. From this form, you can save the modified deposit (choose Modify Deposit) or click Cancel to cancel the changes and return to the list of deposits. 15.7 Breaking a Deposit To terminate a deposit, choose the deposit from the drop-down list. The Break Deposit form will appear. 15.8 Deposit Interest Rate This feature provides information about current interest rates for your deposits. Bank BGŻ BNP Paribas SA | BiznesPl@net User Manual | April 2015 166 Bank BGŻ BNP Paribas SA | BiznesPl@net User Manual | April 2015 167 Bank BGŻ BNP Paribas SA | BiznesPl@net User Manual | April 2015 168 16 Cards The Cards module provides the following options: Payment cards list Card data Transactions specification Card account statement Applications regarding cards 16.2 Payment Cards List This feature provides information about your company’s payment cards. To display a list of payment cards, define search criteria and confirm the search by clicking Execute. A list of cards that match your criteria will appear. Card type information is an active link that leads to the card’s data. Bank BGŻ BNP Paribas SA | BiznesPl@net User Manual | April 2015 169 16.3 Card Data To display detailed information about a card, first find the card using filters. When you click Execute, detailed information about the card will appear. Bank BGŻ BNP Paribas SA | BiznesPl@net User Manual | April 2015 170 Click Transactions Specification to open the transaction summary form (see the following chapter for description). for charge cards, you can also click the Card Account Statement button (provided that you have the necessary authorization rights). 16.4 Transactions Specification To display a transaction summary, define search criteria and confirm the search by clicking Execute. 16.5 Card Account Statement To generate a card account statement, choose the desired card account and settlement period, and then click Execute. This tab is not available for Visa Electron cards. Bank BGŻ BNP Paribas SA | BiznesPl@net User Manual | April 2015 171 A screen will appear, listing card information followed by a summary of transactions. Bank BGŻ BNP Paribas SA | BiznesPl@net User Manual | April 2015 172 16.6 Card-Related Applications If you have sufficient authorization rights, you can send applications related to cards to the Bank, such as the application to use a payment card, an application to issue a payment card, or an application to change card limits. When you complete the application, authorize it using your SMS code or electronic signature, depending on the authorization methods you have chosen. The application must subsequently be signed by persons defined within acceptance patterns for applications. Bank BGŻ BNP Paribas SA | BiznesPl@net User Manual | April 2015 173


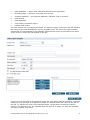
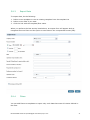


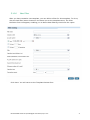
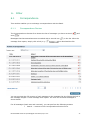


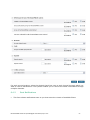


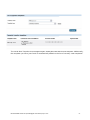
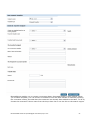
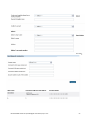


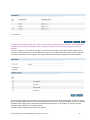

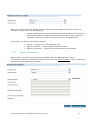


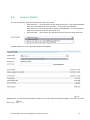


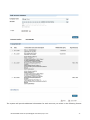
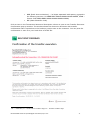

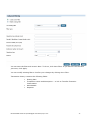


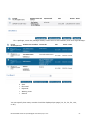


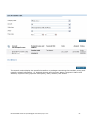

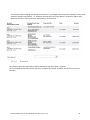
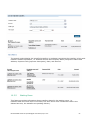
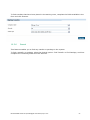


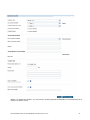
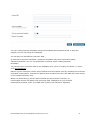
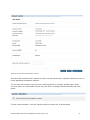
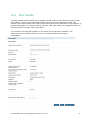

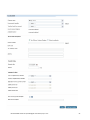


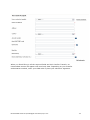
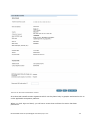

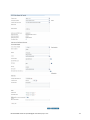


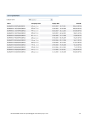


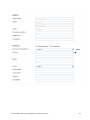

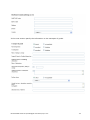


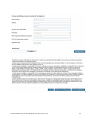
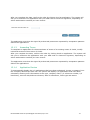
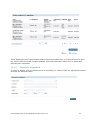

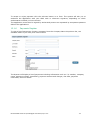


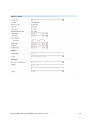


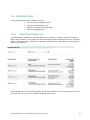
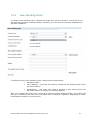
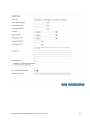


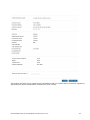


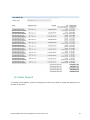

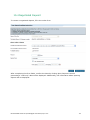


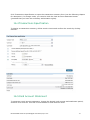


![[December] [2010] Oracle Part Number E51712-01](http://vs1.manualzilla.com/store/data/005705420_1-4b383e67b8ec6628c44005398bb7935f-150x150.png)