1
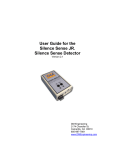
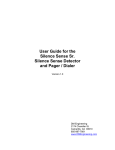
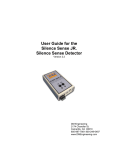
User Guide for the
Silence Sense JR.
Silence Sense Detector
Version 1.1
DM Engineering
2174 Chandler St.
Camarillo, CA 93010
805-987-7881
www.DMEngineering.com
Theory of Operation
The Silence Sense Jr. is a microprocessor-based device that senses the
presence of audio from a single ended input over a wide range of input
levels. A user adjustable input control and LED indicator are used to set
the input sensitivity. When the audio input ceases for a predetermined
user selectable period, a set of normally open relay contacts are closed.
These contacts may be momentary or continuous, depending on user
selection. A LED indicator signals when the time period has been
exceeded and remains on until audio is firmly re-established. Reapplication of audio automatically resets the device. Power for the device
is supplied by a “wall wart” power supply and battery back-up is provided
to assure operation when the power fails. Both external and battery backup power are disconnected when the power switch is in the off position.
Connections
1. Audio input…A single ended audio source is attached to the supplied RCA
male connector with the yellow marker. This connector is to be inserted in
the yellow RCA female connector on the end of the Silence Sense Jr.
2. Relay output…This connection goes in series with the indicator, sounder
or other circuit desired. After setting up the Silence Sense Jr. in
accordance with the Operation section below, and using the supplied RCA
male connector with the red marker, connect your circuit to the red female
RCA connector on the end of the Silence Sense Jr.
3. Power input…With the Silence Sense Jr. power switch in the off position,
connect the “wall wart” DC output connector to the power input jack on the
side of the unit next to the selector switches. Plug the “wall wart” into a
convenient 117VAC outlet.
4. Battery back-up…Remove the bottom battery compartment door by
pressing down and outward on the door when viewed from the bottom.
Locate the battery that was shipped with the unit and remove the
protective terminal cover from the battery. Connect the battery to the snap
on battery connector in the compartment and replace the door.
Setup
1. With audio present at the input, depress the power switch to the on
position. Slowly adjust the gain adjust control in the clockwise direction
until the yellow LED glows at full brilliance at low audio passages.
Depending on your programming, this level may need to be readjusted for
reliable audio detection later.
2. Adjust the duration set control to the desired timeout period. Fully counterclockwise is 5 seconds, mid-setting is 30 seconds, and fully clockwise is 60
seconds. You may set the control to any position desired. Note that after
the adjustment is made the power switch must be momentarily be turned
off and back on to reset the microprocessor. This is true any time the
duration set adjustment is changed. The red LED will signify when the
timeout period has been reached.
3. Connect the male RCA connector with the red marker to the relay output
red female RCA connector as described in the Connections section, part 2
above.
4. Select momentary or continuous relay operation using the relay output
selector switch with the red button.
Operation and test
To test the Silence Sense Jr., remove the audio input RCA connector and
wait for the red LED and relay to activate. This will be the actual delay
time, and may be reset at will. Remember to momentarily turn off the
power switch to reset the microprocessor each time this adjustment is
changed. To test the battery back-up operation simply disconnect the
external DC power. The Silence Sense Jr. should continue to function
normally. That’s it… the Silence Sense Jr. is now ready and waiting to
monitor your audio.
Hints
Most programming has pauses from time to time that may last for 30
seconds or more, especially if you are broadcasting Sunday morning
church services. Experience has taught that 45-60 seconds is the best
selection if you don’t want to receive false alarms. Also, take time in
setting the input levels. Wait and watch the yellow LED through different
types of programming or selections of music and speech to assure that
the sensitivity is set correctly.
Specifications
• Input: Impedance is 10K ohms minimum, single ended, RCA female
connector
• Input Level: -20 to +10 dbm., input adjustable
• Silence Detect Time: 5-60 seconds, user adjustable
• Output: Normally open single pole relay contacts, 1 A rating @ 30 VDC,
1 second momentary or continuous closure...switch selectable, RCA
female connector
• Power Requirements: Supplied adapter, 115 VAC to 9-12 VDC, 100200 ma.
• Battery Back-up Requirements: 9 VDC alkaline battery, NEDA 1604A
(supplied)
• Size: 4.4 x 2.6 x 1.1
• Shipping Weight: Approximately 2 lbs.