1
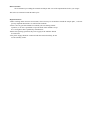
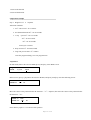
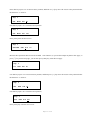
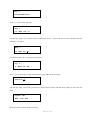
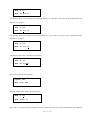
TE Thermo-cycler
User Manual
Dear Customer:
We recommend you reading the manual carefully & take care of the important hits before you using it.
This is the user manual for TE Thermal-cycler.
Important Notes:
*When working under moisture environment, The water may be accumulates around the sample plate , so do not
put any important documents /or stuff near the machine.
*There is not any part that should be touched by the user during normal
operation, so no one is permitted to open the shell of the machine except
he is an engineer that is qualified by manufacturer.
*Before the repairing operation, the power supply of the machine should
be turned off.
*The power supply should be connected with the Ground carefully, do not
use the unsafely socket.
INDEX
1、Unpackage-----------------------------------------------------------------------------------------------------------------1
2、Installation-----------------------------------------------------------------------------------------------------------------2
3、Front panel keyboard introduction-------------------------------------------------------------------------------------3
4、Operation introduction---------------------------------------------------------------------------------------------------4
4.1 Turn on the machine ------------------------------------------------------------------------------------------------4
4.2Main menu -----------------------------------------------------------------------------------------------------------4
4.3 Edit---------------------------------------------------------------------------------------------------------------------4
4.4 Save -------------------------------------------------------------------------------------------------------------------8
4.5 Resue ----------------------------------------------------------------------------------------------------------------- 9
4.6 Run-------------------------------------------------------------------------------------------------------------------- 10
4.7 Pause ----------------------------------------------------------------------------------------------------------------- 11
4.8 Stop -------------------------------------------------------------------------------------------------------------------12
4.9 Unusual power off---------------------------------------------------------------------------------------------------12
4.10 Turn off the machine-----------------------------------------------------------------------------------------------12
4.11 System setting-------------------------------------------------------------------------------------------------------12
4.12 Heat Lid--------------------------------------------------------------------------------------------------------------14
5、Examples-------------------------------------------------------------------------------------------------------------------15
6、Trouble shooting ----------------------------------------------------------------------------------------------------------21
1、UNPACKAGE
*Before opening of the package, be sure that the package is not upside down. Open the package carefully. Check
the items in the package according to the item list in the package.
*Preserve the package materials, they will may be needed in the future transportation.
*Check the outlook of the machine and other items, if there is any damage due to transportation. Please inform
the supplier immediately.
*Please fills the warranty and sent it back to manufacturer. as soon as possible, so we can supply after-selling
service at any time you want.
Page 1
of 23
2、INSTALLATION
2.1 Installation filed
Please choose a stable and anti-humidity platform to install the TE Thermo-cycler, the hight of the platform
should be well suitable for operation.
The rear panel of machine should be at least 25cm away to the wall to ensure the ventilation. The power
supply should be at least 10A,and be well connected to earth.
2.2Environment
The machine can only work under the following environment:
Environment temprerure:5℃--40℃
Relative humidity:≤80%
Not directly under sun shine.
Far away from heat source, water & intensive electromagnetic source.
2.3 Power on
1. Connect the power line to the machine.
2. Turn on the power switch at the rear panel of the machine.
Hint: Before turn on the power, make sure that the power source has a good earth ground
connection
Hint: The power switch and power socket are at the rear panel of the machine.
Page 2
of 23
3、
、panel keyboard induction
Keys on the control panel
[↑]
Page up key, you may page up the display screen when you edit
your program
[↓]
Page down key, you may page down the display screen when you edit your program.
[→]
Cursor moving key, you may press the key to move the cursor to choose the edit item . When running the
program, you may use this key to change the display page.
[Pause] Pause key, press this key once will pause the current running program, press this key again will resume
the program running.
[Stop]
Stop key, press this key will cause current running program exit.
[Enter] Enter key, press this key will comfim your current operation.
[ CE ]
Clear key, press this key will clear current input data.
[-]
Minus key, this key is used to define the input minus data.
[·]
Point key .
[0-9]
Data key, these keys all used for data input.
[Util]
Function key, this key is used to set the system data, diagnose the system and temperature adjusting. This
key is used only by the qualified maintenance engineer, users should not have the knowledge of this key.
Page 3
of 23
4、OPERATION INTRODUCTION
4.1 Turn on the machine
Hint: Please keep the lid closing during running.
Hint: Do not touch the surface of the sample plate & heat lid , they are hot.
After turn on the machine, you will hear 2 “bip”s, and the machine will enter self-checking procedure. The screen
will display:
<-EG 3200 Model ->
Ver5.0 @2007
After that, the screen will display the main menu.
**Thermal Profile**
RUN EDIT SAVE RASUME
Now you can operate the machine by keypad operation.
Hint: If you have to turn off the machine during program running, better wait 3 minutes
before you turn it on again.
4.2.Main menu
Let’s start from main menu. After turning on the machine and self check procedure. The main menu will display
on the screen, or when in other status, press [stop] key, will back to main menu.
**Thermal Profile**
RUN EDIT SAVE RASUNE
There are four operations in main menu, RUN, EDIT, SAVE and RESUME. The cursor is under current choosing
operation.
RUN and EDIT can only operate on the working memory of the machine, save operation will save the program in
working memory to saving memory. RESUME operation is the reverse operation of SAVE.
Hint: Every time you turn on the machine, the machine will resume the program you ran last
time automatically.
4.3.Edit
In maim menu press [→] key move the cursor to EDIT and press [enter] will enter EDIT menu, see below:
Segment #01
Hold
Cycle
End
Now you can define the first segment in your PCR program(1 user program may contain up to 15 segments). You
Page 4
of 23
may define this segment as Hold/or cycle/ or End. by moving the cursor in the menu.
4.3.1.Hold
Press [→] key move the cursor to Hold, and press [enter] key to confirm your choice. Then the screen will
display as below.
Hold at 0C
Hold for 0m
0s
Hold the temperature at 0℃
Hold time is 0 min 0 sec
Set holding parameters:
The data you must enter is holding temperature and holding time (min & sec).
By pressing data keys, you may enter these data, If the data you enter is out of the limitation , it will be cleared
automatically. Press [CE] will clear error data input.
After setting a parameter, you may moving the cursor to the next data by pressing [→].
Hint: If you want to modify the data input, you may press [→
→] to move the cursor to target data and
then input your new data.
Hint: Temperature limitation:-5℃
℃~100℃
℃
Time-minute limitation: 0min~98min.
Time-second limitation: 0sec~59sec.
Hint: If you want to input a minus data, first input the data, and then press [-] to add the “-” in front
of the data.
Hint: If you enter a “99” in holding time “min” position. It means that Hold time will not end until
you press [stop] key to stop the program running.
Page 5
of 23
4.3.2.Cycle:
Chose “Edit” in main menu, the following menu will display on
The screen.
Segment #01
Hold
Cycle
End
Move the curser to Cycle, and press “enter” to define current segment as cycle segment, now the screen will
display:.
2 Step PCR
In this menu, you will input step of the PCR cycle
Choose 1, 2/or 3 step PCR by pressing concerning numerical keys, press enter to confirm the input and enter the
1st step setting interface:
Step 1
0C Hold 0m 0s
The first step
0℃ hold 0 min
In this page , you may set the step’s temperature point, every temperature point has 3 pages:
The first page displays the temperature point and the holding time(see up).
You may move the cursor among the parameters by pressing [→], and set the data by pressing concerning
numerical keys. After data set, press enter to confirm the set and enter the second page:
Step 1
Extended time 0m 0s
If your PCR cycle has a time extending requirement, you may enter the extending time in this page, the
instrument will add the extending time to holding time after each cycle.
The extending time may be positive/ or negative.
If it’s a normal PCR, just press enter without any data input to enter the third page:
Step 1
Extended temp: 0. 0C
If your PCR cycle has a temperature-extending requirement, you may set it here, the instrument will add the
extending temperature automatically to the holding temperature after each cycle, and the extending temperature
may be positive/or negative.
If it’s a normal PCR, just press enter without any data input to enter step 2 setting:
If you choose 3 step PCR, the 2 and 3 step ‘s parameters’ setting will be the same as the 1st step.
After all step are set, you will enter temperature up/down speed setting page, if you want the thermal cycle up/
down speed at a fixed speed, just enter them in this page, the value range is from 0.3-3 C for temperature up, and
0.2-2 C for temperature down.
Press enter without setting any data in this page will let the thermal cycle at the maxim speed.
Page 6
of 23
Up speed= 0.0 C/s
Down speed= 0.0 C/s
Now we enter the total cycle setting page:
Total Cyc le= 0
You may set the cycle times in this page, the number may be up to 99.
Hint: When data input in one segment is finished, [enter] key must be Pressed to ensure the data input
and you can enter the next segment. One program may contain up to 15 Segments.
After input the total cycle times, press [enter] key will enter the next segment editing, the screen will display as
following:
Seg men t #02
Ho ld
Cycle
En d
The 2nd segment
Hold cycle end
If the program has only one cycle segment (most PCR experiments have only one cycle segment).you may use
[→] key move the cursor to “End” and press [enter], the screen will display.
Profile at End!
Press<Stop > to exit
The edit operation is end, press
[Stop] key to end the operation.
Press [stop] will back to the main menu:
**Thermal P rofile**
RUN EDIT SAVE RASUME
Main menu
4.3.3.Hint for Edit operations
If you press [stop] key during editing operation, may cause several results:
1. when you press [stop] out of segment editing, the screen will display
End current prg ?
Press<Stop > to exit
Page 7
of 23
If you press [stop] will end the editing and back to main menu. Press any other keys will back to edit page.
2. when you press [stop] in the segment editing, the screen will display:
Abort cur rent seg?
Press<Stop > to exit
Press [stop] key will back to segment editing menu, the screen will display:
Seg men t #02
Ho ld
Cycle
En d
3.If you has modified some data in the program editing, and press [stop] key, the screen will display:
Press <1> to END!
P re s s < 2 > t o a bo r t
If you press [1] key, the data modifications will be valid and back to main menu.
If you press [2] key, the data modifications will be given up and back to main menu.
Hint:[↑
↑] [↓
↓]in used to browse the program, if you want to browse the segment, press [enter] to enter
the segment and then use [↑
↑] and [↓
↓] to browse the segment.
4.4.Save
If you want to save the current edited program permanently, you should use SAVE function.
Press [→] to move the cursor to the SAVE in main menu, then pre[enter] enter SAVE menu, the screen will
display:
Save to Me thod #?
(0 → 120)
1
You may chose one No. from 1 to 120 as program No. for example, you chose the No.10, then you should press
[1] [0] and [enter], the screen will display:
Page 8
of 23
Save need time !
Waiting ****
The “*”will increase to show the saving process.
When saving is finished, the screen will display:
Prg 10 is saved OK
Press <Enter> to exit!
If there is a program already in No.10 prg’s memory space, the screen will display.
Prg 10 a lready ex ist
<1>Overwrite <2>Abort
You may press [1] to overwrite it/or press [2] to Abort current program saving.
4.5 Resume
If you want to load one program from program memory space to working memory space to run it /or edit it, you
may use RESUME function, use [→] move the cursor to “RESUME” in main menu, press [enter]
the screen will display.
Resu me Me thod #?
(0 → 119)
0
You may enter the program No. (from 0-120), you want to Resume, for example No.10 program, you should
press [1], [0] and [enter], then the screen will display:
Resu me need time !
Waiting After the Resume operation is finished, the screen will display:
Prg 10 resu me OK
Press<Ente r>to exit
Page 9
of 23
Press [enter] will back to main menu.
If there is no program in specified program memory space the screen will display:
No prg in prg 1 0
Press<E mter>to ex it
Press [enter] to back to main menu.
4.6 Run
Hint: Please close the lid of sample plate when run the program to ensure the heat preservation of the
plate.
Hint: Please choose the appropriate 0.2ml test tube to get the best heat transforming result.
Hint: Before insert the test tubes in the well, please add several drops of Oil in the well to get better heat
transforming result. If choose high quality test rube, adding oil can be omitted.
Hint: After insert the test tube in the well, turn the test tube in half a cycle in the well to ensure better
contact.
Hint: Do not add too many drops of oil in the well, the oil overflow will cause the machine working
unnormal and short the life of the machine.
RUN
In main menu, use [→] key move the cursor to “RUN”, then press [enter], the machine will begin to run the
program currently in the working memory space of the machine. User may monitor the working status (such as
heating, cooling, holding time, running time) of the machine by watching the screen.
If the running status information has two pages, you may use [→] key to browse them.
For example:
Up to 94C
Cycle 4
Blk=55 C
3 m 0s
Page 10 of 23
This screen indicate that: now the machine is heating, target temperature is 94℃, current temperature is 55℃,
this is the 4th cycle, when get to 94℃, the machine will hold this temperature for 3min 0 sec.Press[→] will
display next page.
Step #1 Tot Cyc 25
Oh18 m20 s Seg men t 1
This screen indicate that: this is the 1st step, this segment has 25 cycles total, the machine has run for 18 min
20sec. This is segment 1.
If the program running reach it’s end normally, the screen will display:
Progra m co mp le tes!
Press any Key …
You may press any key to back to the main menu now.
4.7 Pause
If the program need pause during. Running, you may use [pause] key. If your experiment need add enzyme in the
midway, this function is needed.
During the program running, press [pause] key, the following screen will appears:
Pause (0h0 m10s)
94 C 0h1 9 m40s
Has paused for 10sec, current temperature is 94℃,
pause start time is 0 hour 19 min 40sec.
Press [pause] again will exit the pause mode.
Page 11 of 23
4.8 Stop
User may stop the running program at any time by press [stop] key, and then the screen will display.
Press<Stop>to abort
or<Ce>to run ag ain !
Now you may press [stop] again to ensure the stop operation/or press [CE] key to recover the program running.
Hint: If the machine has running at a low temperature for a very long time, there may be water
accumulate on the sample platform this will enlarge the time to reach a high temperature. Sweeping away
the water will make the machine working better.
4.9 Unusual power off
If the power supply is suddenly off unnormally during the program is running, the machine will remember the
break point. Once the power supply is recover, the machine will run the program from the break point
automatically. Then several ** will appear on the screen to indicate that the power has once been off.
Up to 94 BLK=55C
Cycle 4 3 m0 s ***
This indicate that the power
has ever been off.
4.10 Turn off the machine
The right way to turn off the machine is to turn off the power switch
under main menu.
**Thermal Profile**
RUN EDIT SAVE RESUME
If you turn off the machine during the program is running, next time you turn on the machine, the machine will
keep on the program last time you run.
4.11System data setting
In main mean, Press [Util] Key, the screen will display:
FUMCTION NO=0
Press <Stop>to exit!
Input 1, and press enter will enter user setting page:
USER manage
<1>M<2>S<3>T<4 >TP
Page 12 of 23
1: Simulator /or plate temperature choosing.
Is initially set as plate.
2: Temperature changing Speed function switch. Is initially set off.
3: Time extending function switch. Is initially set off.
4: Temperature extending function switch. Is initially set off.
Simulator/plate mode selecting:
Press 1 in upper page will enter simulator/plate mode selecting page:
Wor kMode : S imu lato r
<1>Sim
<2>P late
press 1/or 2 to select work mode between simulator/or plate
exp: after press 1, the screen will show:
Change to Simu-c tl
For 3 seconds and then back to:
Wor kMode : S imu lato r
<1>Sim <2> Plate
then press Enter back to setting page.
Temperature changing speed function on/off setting:
In user manage setting page, press 2,enter temperature changing speed function on/off setting page:
Speed Statu s: ON
<1>ON <2> OFF
1: speed changing function on,
2: speed changing function off.
Page 13 of 23
If set on, temperature changing speed setting page will appear in user program editing pages. Else , will not.
This function is set off initially.
Time extending function on/off setting:
In user manage setting page, press 3,enter time extending
function on/off setting page:
TimeExtend: ON
<1>ON <2> OFF
1: time extending function on,
2: time extending function off.
If set on, time extending function setting page will appear in user program editing pages. Else , will not.
This function is set off initially.
Temperature extending function on/off setting:
In user manage setting page, press 4,enter temperature extending function on/off setting page:
TempExtend : ON
<1>ON <2> OFF
1: temperature extending function on,
2: temperature extending function off.
If set on, temperature extending function setting page will appear in user program editing pages. Else , will not.
This function is set off initially.
4.12.Heat lid
TE Thermo-cycler has a heat lid that can be turned on/or off by user.
The heat lid is set on initially, if your PCR experiment need
no heat lid, you may turn it off:
In main menu, press Util key, enter function page:
FUNCTION No.=0
Press <stop> to ex it!
Input 3, press enter to enter heat lid control page:
War m cap sta tus:OFF
<1>ON <2>OFF
Page 14 of 23
1: Turn on the heat lid.
2: Turn off the heat lid.
5.Operation example
Exp.1.Diagnoses of C hepatitis
*Reaction condition:
1.65℃ anti-record
for 15 minus.
2.Pre denaturalization:94℃ for 60 seconds.
3.3 step cycle 94℃ for 35 seconds.
55℃ for 45 seconds.
72℃ for 50 seconds.
Total cycle: 36 times
4.Keep warm:72℃ for 200 seconds
5.long time preservation: 4℃ 99mins.
After the program editing, save it in program No.8
*Operation
In main menu, Move the cursor to EDIT, press [enter] key enter EDIT screen:
Seg men t #01
Ho ld
Cycle
En d
In this screen, press[→]key Move the cursor to HOLD, and press [enter]key enter the following screen:
Ho ld at
Hold for
0C
0m
0s
Move the cursor to the position before the character :“C”,input 65, then move the cursor to the position before
the character :“m”.
Ho ld at 65C
Ho ld for 0 m
0s
Press date key input “15” at current cursor position
Page 15 of 23
Hold at 65C
Ho ld 15 m
0s
Then press [enter] enter the next segment:
Segment #02
Hold
cycle
End
Move the cursor to “Hold” and press [enter] enter the following screen:
Ho ld
Ho ld
at 0C
for 0 m
0s
Press date key input “94” at current cursor position, and then press [→]
Hold
Hold
at
for
94C
0m 0s
Move the cursor to the position before the character “s” in line 2.
Use date key input “60”at current cursor position,
Hold
Ho ld
at
for
94C
0m
60 s
Press [enter] key enter the next segment:
Seg men t #03
Ho ld cyc le End
Move the cursor to “Cycle”, and press [enter] enter the following screen:
0
Step
PCR
Press data key input “3” at current cursor position, then press [enter] enter the next screen:
Step 1
0C Hold
0m
0s
Page 16 of 23
Press data key input “94” at current cursor position, and then use [→]key move the cursor to the position before
the character “s” in line 2.
Step 1
94C
Hold 0 m 0 s
Use data key input “35” at current cursor position
Step 1
94C
Hold 0 m 35 s
Press [enter] enter the next screen
Step 1
Extended time 0 m 0 s
Because this experiment does not need extended time function ,so you need not input any data in this page, so
press [▽] key turn to next page, you can also press [enter] key enter the next page :
Step 2
0 C hold 0 m 0s
Use data key input “55” at current cursor position, and then press [→] key move the cursor to the position before
the character “s” in line 2.
Step 2
55C
hold
0 m 0s
Use data key input “45” at current cursor position,
Step 2
55C
hold
0 m 45s
Press [enter] key enter the next screen:
Page 17 of 23
Step 2
Extenuated time 0 m 0 s
Press [▽] or [enter] skip this page
Step 3
0 C Hold 0 m 0 s
Use data key input “72” at current cursor position then press [→] moves the cursor to the position before the
character “s” in line 2.
Step 3
72
Hold 0 m 0 s
Use data key input “50” at current cursor position,
Step 3
72
Hold 0 m 50s
press [▽] key or [enter] key skip “extended time” page and enter the next page:
Total cycle = 0
Use data key input “36”as total cycle times at current cursor position, and then press [enter] key enter the next
page:
Segment #04
Hold Cycle End
Move the cursor to “Hold” and press [enter]
Page 18 of 23
Hold
at 0 c
Hold for 0 m 0 s
Use data key input “72” at current cursor position, then use [→] key Move the cursor to the position before the
character “m” in line 2.
Hold
at 72c
Hold for 0 m 0 s
Use data key input “3”at current cursor position then use [→] key Move the cursor to the position before the
character “s” in line 2.
Hold
at 72c
Hold for 3 m 0 s
Use data key input “20” at current cursor position.
Hold
at 72c
Hold for 3 m 20 s
Press [enter] enter the next segment
Segment # 05
Hold Cycle End
Move the cursor to the “Hold”, press [enter] key
Hold
at 0 C
Hold for 0 m 0 s
Input data “4” at current cursor position use data key, then move the cursor to the position before the character
Page 19 of 23
“m”
Hold
at 4C
Hold for 0 m 0 s
Use data key input “4” at current cursor position,
Hold
at 4C
Hold for 99 m 0 s
99mim means that the machine will hold at 4℃ until user press [stop] key to end the program running.
Then press [enter] enter the next segment
Segment # 6
Hold Cycle End
Move the cursor to “END” and press [Enter] key.
Profile at End!
Press<stop> to exit
Press [stop] key back to main menu
**Thermal Profile **
RUN EDIT SAVE RESUME
USE [→] key move the cursor to “SAVE” and press [enter] to SAVE the current program.
Save to prg #?
(1-120)
1
Press data key input “8” and then press [enter] to save the current program as program No.8
Page 20 of 23
Save need time!
Waiting…..
After saving is finished, the screen will display
Prg 8 is saved ok
Press <Enter> to exit
Press [enter] key back to main menu
6.Trouble shooting
The following table will help you to find out the trouble's causes of your machine and give out the solution of
these problems. If you still can not find out the cause in this table, please contact us.
Page 21 of 23
Problems
Cause
Solution
The machine has no reaction when you
*Power cut
*turn off the switch and
turn the power switch on
*Power line is not
Connected well.
*Fuse is broken
wait for power supply
resuming.
*check power line
*change the fuse
Water accumulate
Under the machine
*Environment humidity
*try to low the humidity
of the room
is high
*The machine has run at low
*wipe up the water
temperature
for a long time
The noise is loud when
*The desk is unstable
*change a stable desk
running
*The desk is unbalance
*make the desk/or
*The screws on the shell
is unscrewed
machine balance
*fasten the screw on
the shell
Heating speed is slow
*Power supply voltage
*use a voltage regulator
is not high enough
Cooling speed is slow
*The ventilation window
at the sides are blocked
*Environment temperature
*make the ventilation
Routine clean.
*cooling the Room
temperature
is high
*Setting temperature is
low.
*cooling the Room
temperature
Warm keeping is not
*The lid is open
*close the lid
Well
*Running in low
*set the machine hold
temperature for a long
in high temperature
time
for a moment and swipe
up the water on the
plate
Page 22 of 23
Action error when press
*Press a wrong key
*press the right key
Keys
*The machine is not
*connect the machine
connected with earth
with earth well
well
The screen display**
*The power has ever been
off during program
running
*it’s normal
*check the power
socket and power line
*The power line is not
connected well
The screen flash when
Power on
*Power supply voltage
is unstable
*There is a powerful
electromagnetic source
nearby
*use voltage regulator
*put the machine away
from the influence.
*make the environment
temperature and
*Environment temperature or humidity
humidity normal
is out of limitation
After the power is on,
LCD Module does not
Turn off the power
the Fan don′t Rotate, the Beeper
Work or cable is not
Connected with the
Beeps, But LCD Display nothing
Connected well
manufacturer
Page 23 of 23