1
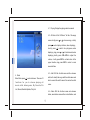
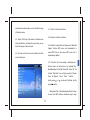
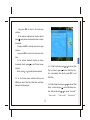
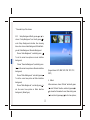
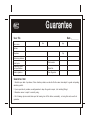
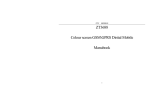
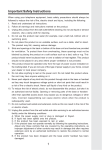
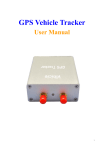
Multimedia Mini Projector
MMP-1000
Operation Manual
尺 寸:115X70
Operation Manual
Thank you for using new type of projector MMP1000,and please read this
manual carefully firstly,so as to ensure safety and use safely and correctly.
1
I.Safety Precaution
Contents
This product is a new product. Please use it properly
according to the user manual, prevent it from falling
I.Safety precaution… … … … … … … … … … …2
and avoid fierce collision;
There are heat dissipation holes on the top, bottom,
II.Disclaimer… … … … … … … … … … … … …3
front, and back of the product. Do not block them when
using;
III.Accessories… … … … … … … … … … … … …3
During operation, water drops and other fluids flowing
into the heat dissipation holes may cause short circuit
IV.Brief Introductionto Projection Function…3
and other faults;
Please use the product regardless of the slight heat of
V. Parts Diagram of Projector… … … … … …4
the body during playing for a long time,for it is normal
phenomenon;
Surface of the lens is specially treated,which can
VI. Installation and preparation of projector…5
reduce ray reflection. Please keep off the lens and do
not wipe with other non-specialized cloths,alcohol,
VII. Basic Function Operation Guides… … …6
benzene, and other organic solutions.
Do not dissemble and assemble the product by
VIII.Troubleshooting… …… … ……… … … …19
yourself. Please contact specified dealers or our
2
IV. Brief Introduction to Projection
company if there is any operational or technical
problem.
Function
Please save your data before formatting since
formatting will make all the data missing.
5 Lumens new projection module, efficient far and near
II.Disclaimer
clear focus, and efficient heat dissipation.
Support TF card expansion
All content and services available from this
equipment belong to the third party, and shall be
Support ASF,AVI, MP4, 3GP,FLV,MPE, MPG,
protected by the copyright, patent, trademark and
MPEG, DAT,RM, RMVB, 720P full series
other intellectual property rights laws.
Movies
display directly and needn't to shift the format.
III. Accessories
Support main audio-formats,such as FLAC, APE,
Check whether there are the following articlesin the
packing box:
OGG, MP3, RA,WMA,WAV, AMR, and AAC.
Mini projector MMP1000 (memory capacity printed on
Support many kinds of picture format,such as JPG,
the packaging box)
Power adaptor
Tripod
USB cable
Manual
AV cable
Warranty card
Earphone
Cloth Bag
BMP,GIF, PNG, TIFF, PCX,and ICO. Support picture
rotation and slideshow function.
3
V. Parts Diagram of Projector
10 EQ Selects,MP3 Repeat
功能
按键
部位
Multilanguage
功能
E-Book
play/pause
Auto Flip,Auto Flip Time
Independent Bookmark,Multiple Bookmarks in One
Article.
ESC
back/menu
RE SE T
reset
VO L+
volume up
VOL-
volume down
TF Card expansion
High-speed USB 2.0 Cable.(Max 5 M/S)
Static current down to 30MA.power dissipation is only
60%-70% of the similar products.
left/previous
MMP10 0 0
4
right /next
VI. Installation and preparation
2. Connecting PC
Connect projector to the PC with USB cable, and PC
of projector
will display projector driveexists, and then you can
copy the files from PC to projector and play. Please
1. Inserting TF card
Inserting TF card, press
or
Manager then short press
to choose your File
refer to the basic function operation for specific use.
to inter menu, and the
Look at the guide photo as follows:(please set up
menu display two intes of U Disk and TF Card.
screen saver when battery charging, and refer to the
Please refer to the basic function operation guides for
basic function operation guide-system setting-9.6
specific use (7. File Browser).Below figure:
backlight time )
TF
c a rd
Inserting TF card
Inserting USB cable into USB port
5
VII. Basic Function Operation
3. Connecting AV
When the projector operating, connect the projector
Guide
with the product of AV-IN function with AV cable. And
1. Basic functions
then the product will display what projector display.
Turn on: long press OK
Please refer to the basic function operation guide for
Turn off: long press OK (P.S. please do not cut off the
specific use (3.5 AV-OUT).Below figure:
connection between projector and PC when data
transmitted)
Connect PC:connect projector and PC with USB
cable, data can be transmitted into the projector.
2. Function operation and Introduction
After turning on,the main menu displays Picture,
S y s t e m S e t t i n g , Too l b o x , E - B o o k , F i l e M a n a g e r,
Music,and Video, press
or
to choose specified
Functional Model Menu and press
Inserting AV cable to AV port
to enter. press
ESC key to return upper interface,and long press
ESC key to return main menu interface. (Below
figure):
6
3. Video
(Support formats: ASF, AVI, MP4, 3GP, FLV, MPE,
At the main menu interface,press
video,press
or
to choose
MPG,MPEG, DAT, RM, and RMVB)
to enter,then showing five functions of
playing,play on, display mode, show bar,TV output
3.1
.(Below figure):
Playing
Enter submenu of video and choose playing, then
press
or
to browse list and press
to play wanted
file.
At playing,press
7
can shift play or pause; long press
or
press
3.3
to faster or rewind.
and then press
or
Display Mode
Enter"display mode", there are three items for you to
to view the previous
choose:original size,normal, full screen.
or next video.
Voice adjustment
3.4 show bar
press VOL+/VOL- to adjust the voice.
press show bar, and press
press ESC and you will see the menu which list
show bar and caption.
to set up whether hide the
:original size, normal, full screen, TV output, show
bar,stop display. You can press
or
3.5 TV output:
to adjust the
size of the screen and set the show bar (show or hide).
Press
Long press
into menu. There are three modes for you to
to return main menu interface.
or
to choose AV-OUT and press
enter
choose: PROGECTION, TV_PAL, TV_NTSC. Choose
3.2
PROJECTION to project and choose TV_PAL and
Play On
TV_NTSC to transmit the data to TV.
When this function turns on, if you choose the file that
has been played,popup menu will come out.Press
or
to confirm or cancel.If you choose confirm, press
to start to play at the place when you quitted last
time. If you choose cancel, it will play at the
beginning.
8
4.1
Playing: Display the playing audio documents
4.2 All Music: At the "All Music", list all of the songs
name,shortly press
press
to choose songs , shortly
or
to enter display interface; when displaying ,
shortly press
to switch into play/pause; when
displaying,long press
or
to faster/rewind; when
displaying, shortly press VOL+ /VOL- to adjust the
volume; s hortly press ESC to exit and return to the
upper interface , long press ESC to return to main
menu interface.
4.3 Artist: Will list all artist name and the unknown
4. Music
Enter Music,press
artist,will classify the songs with the artist names and
to enter into menu. There are 10
able to search the artist's music files under the artist
functions for you to choose:playing,all
name.
music,artist,album,genre,My Favorite,Dir
List, Record,Medialib Update, Play Set.
4.4
Album: Will list all album name and unknown
album, music album name will be in classification, and
9
4.7 Dir List: List all the music files .
under the music album name you can find all the songs
of the album name.
4.8 Record: List all the record files .
4.5 Genre: Will list all of the music in different music
style classification, and under the music style you can
4.9 Medialib Update:At"music"mode,select "Medialib
find all the songs of the music style.
Update" function, MP3 music will automatically to
search MP3 files in the player,MP3 music list is
4.6 My favorite: List all your music collection of all the
automatically updated.
music in the player.
4.10 Play Set: Can set according to individual prefErences , menu will show below four settings " Play
Mode/Background Play/EQ Select/3D Select , At the
function " Play Mode" , can set 5 play modes of " Repeat
Once ", All Repeat "," Once " ," Order " ," Shuffle " ,
shortly press
press
or
to choose Play Mode, shortly
to define.
Background Play: Choose Background Play function
to open, from MP3 interface retirement song to keep
10
playing,or exit MP3 interface song to stop playing.
At the function" EQ Select",can set 10 effects of " No
Effect,PopMusi, Rock, Bass, Dance, Electricity, Count
ry, Jazz,Classical, Bruce".
At the function" 3D Select" ,can set 8 modes of" Turn
off tone, Generic, Studio, Cathedral, Concert hall,
Submerge, Interior,Paychotic".
4.11 At Video playing,shortly press ESC to pop menu
( Support formats:FLAC/APE/OGG/MP3/RA/WMA/
displaying: Join the favorites, EQ Select, 3D Select,
WAV/AMR/AAC)
Background Play, and Return to the main menu.
Shortly press
press
or
5. Picture:
to choose settings, and shortly
5.1 At the main menu, choose"Picture" and shortly
to define play mode.(Below figure)
press
to enter pictures submenu:
Shortly press
to enter pictures subdirectories
interface;
Shortly press ESC to exit and return to the upper
interface;
11
Long press ESC to return to the main menu
interface;
At the pictures subdirectories interface, shortly
press
to inter pictures thumbnail interface or choose
thumbnails;
Shortly press ESC to exit and return to the upper
interface;
Long press ESC to return to the main menu interface;
At the pictures thumbnail interface, to choose
thumbnails,shortly press
to inter Picture browse
5.2.1 Slide Play:Shortly press
interface;
Shortly press
or
Play", and shortly press
to switch pictures up/down;
face
or
to choose"Slide
to enter Slide Play inter-
automatically,then shortly press ESC to exit
Slide Play.
5.2 At the Picture browse interface, shortly press
VOL-to pop menu: Slide Play, Slide Setup, and Setup
5.2.2 Slide Setup:Shortly press
Background. (Below figure)
Setup" , and shortly press
face, then shortly press
"3seconds”,
12
or
to choose"Slide
to enter Slide Setup interor
to choose " 2seconds",
"5seconds","8seconds",
" 15seconds"any of the choices.
5.2.3
Setup Background:Shortly press
or
choose " Setup Background",and shortly press
to
to
enter Setup Background interface, then showing
below four choices:Audio Background, E-Book Background, Radio Background, Recorder Background.
Choose"Audio Background",and shortly press
To set the current view picture as music interface
background;
Choose "Recorder Background" ,and shortly press
to set the current view picture as Recorder interface
(Support format: JPG, BMP,GIF,PNG, TIFF,PCX,
background;
ICOP)
Choose"E-Book Background",and shortly press
To set the current view picture as E-Book interface
6. E-Book
background;
Choose"Radio Background" ,and shortly press
At the main menu,choose "E-Book" and shortly press
to
to inter "E-Book" interface, and shortly press
set the current view picture as Radio interface
or
to choose the files wanted to read, then shortly press
background;( Below figure)
to read, shortly press
13
or
to roll a line up/down;
Shortly press ESC to exit and return to the upper
6.1 Open File: At the E-Book Upset interface, choose
interface; long press ESC to return to the main menu
"Open File" and shortly press
interface; At the E-Book playing interface, shortly
press
press VOL- to pop menu:OpenFile,CharacterSet,
shortly press
or
to inter file listshortly
to choose the files wanted to read,and
to read.
BookmarkList, OperateSet, Background, Text, Auto
Explorer,Go To.
6.2
(Below figure)
choose " Character Set" and shortly press
Character Set: At the E-Book Upset interface,
menu, shortly press
and shortly press
6.3
or
to inter
to choose Character Set,
to set.
Bookmark List: At the E-Book Upset interface,
choose "Bookmark List" and shortly press
the interface: shortly press
or
to inter
to choose setup or
jumping bookmark, and shortly press
to set.
6.4 Operate Set: At the E-Book Upset interface,
choose" Operate Set" and shortly press
to inter
Operate Set interface and you can choose below five
modes as your wish " Flip One Line/ Flip Tow Line/ Flip
Three Line/ Flip Four Line/ Flip One Page",and then
14
shortly press
menu: Bookmark list; Auto Explorer.(Below figure)
to define.
6.5 Background:At the E-Book Upset interface,choose"
Background"and shortly press
to inter Background
nterface, and you can set below three modes according
to your individual" ride Style, Background Color,Background Picture" .
6.6
Text: Enter"Text" ,will
display Text Color,Line
Space, Word Space, Tab Width,Text Size;choose you
wanted by
or
,then press
to enter.
6.7 Auto Explorer: Enter "Auto Explorer";it will be in
Auto Scroll Browse when you press
.
6.8 Goto: Enter "Goto" ,choose the interface you want
by pressing
or
,then press
( support format:TXT)
7. File Manager
to enter.
Enter "File Manager" by pressing
, will display Disk,
Expansion Card (insert the Card); choose the folder by
or
;press
ok, press "VOL-" popup menu: Open,
Copy, Delete,and Move to. Choose you wanted by
6.9
When you open E-book,pressing
will popup
15
or
;Press ESC back,long press ESC to go to main
Menu.
8.2
(Below figure)
(Below figure)
8. Toolbox
Calendar: press
to
enter, check date byor.
9. System Setting
Enter" Toolbox" by pressing
Enter " System Setting" by ,will display Desktop Set;
,will display World
Clock, Calendar.
Animate Set;Resume Background;Boot Option; Time
S h u t d o w n ; B a c k l i g h t Ti m e , L a n g u a g e s ; S y s t e m
8.1
Word Clock: press
to enter,press
check time in different parts of world;press
or
to
Function. Press
to enter
then press
the area you want to set;press “VOL-” to display Year,
Month, Date, Hour, Minute; press
right date and time, then press
or
ok.
(Below figure)
to choose the
ok and back.
16
or
to choose you wanted function,
Off, Curtain, Shade,Zoom, Turn, and Wave. Press
or
to choose you wanted function, then press
ok;
press ESC back, long press ESC to go to Main Menu.
9.3 Resume Background: Enter" Resume Background" by
to enter, press
or
ok or Cancel;press
ESC back, long press ESC to go to Main Menu.
9.4 Boot Option:Enter" Boot option"by , will display
Enter Desktop,Keep scene Before Close. Press
To choose you wanted function and press
9.1 Desktop Set : Enter" Desktop Set"by ,will display
Desktop Back, Desktop Clock,Time Zone Set,and
Date Time.Press
then press
or
or
ok.
9.5 Time shutdown:Enter" Time shutdown"by
will
display: 10 minutes,30 minutes,1 hour, off. Press
or
To choose you wanted time,then press
ok.
to choose you wanted setting,
9.6 Backlight Time:Enter into" Backlight Time"by , it
ok; press ESC back, long press ESC to
go to Main Menu.
will display menu: 5 seconds,10 seconds,15seconds,
9.2 Animate Set: Enter “Animate Set” by , will display
choose you wanted time, then press
20seconds, 30seconds, Alway son, Press or
17
ok.
to
9.7 Languages:Enter into" Languages" by press
9.8.1 Device information:Enter into"Device
,it
will display Simplified Chinese,Traditional Chinese,
information" by
Japanese, and English etc. then press
version, U Disk Size, U Disk Space, External Card.
ok and back.
,will display Device model, Device
9.8 System function: Enter into" System function"by
9.8.2 Recover system: Enter into"Recover system",
,Will display Device information, Recover System,
press
Format U disk, Updating system,Test scene.(Below
9.8.3
Format U disk:Enter into" Format U disk" by,
figure)
press
or
or
to choose Yes or No;then press
to choose Yes or No; then press
ok.
ok.
9.8.3 Format U disk: Enter into" Format U disk" by ,
press
or
to choose Yes or No; then press
ok.
9.8.4 Updating system:Enter into"Updating
system"by
press
9.8.5
press
18
,press
or
to choose Yes or No; then
ok.
Test scene: Enter into" Test scene" ,and then
ok.
VII.Problems shooting
5. Why Charge Less Power?
Set in the screen saver when you charge (please refer
1. Blurring Image
to basic functionSystem setting9.6 Backlight time)
Adjust the focus gear till the image clear
2. No Sound
Check the voice button; make sure the volume is
above zero
Check the audio out jack; make sure it is clean;
Make sure the file is correct format and undamaged
3. Projector Shutdown?
If don't use the player, record function in standby time,
MP4 PLAYER will stdby automatically.
Lower battery will shut down automatically
Whether set timing shutdown
4. Can't Turn On
The battery is used up.
Connect the adaptor, check again
19
Guarantee
Keep the card for
gurantenn
to keep in repair
Date
User file
User name
Sex
Age
Address
Zip
Telephone
Purchasing address
Retail price
Commodity name
and specification
Odd number
Dealer signature
User Signature
Model No.
Guarantee Item
1. 3months upon date of purchase, if there function problem, we should offer the same item subject to goods and packing
maintain pperfect.
2. 1 year upon date of purchase, we willguarantee to keep the goods in repair, ( not including fittings)
3. Guarantee server is suject to normally using.
4. All of damage by man-made( tear open the housing, tear off the sticker,unnormally) , or losing this card, we will not
guarantee.
Keep the card for
gurantenn
to keep in repair
Guarantee