1
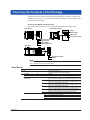
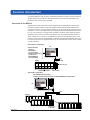
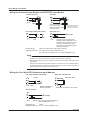
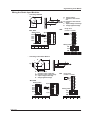
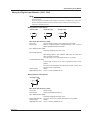
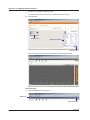
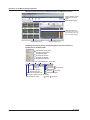
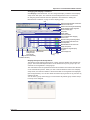
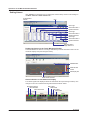
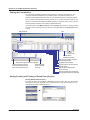
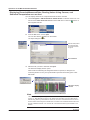
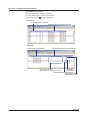
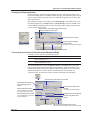
 Connection to the Network
Connecting the Ethernet Cable to the Main Module
Connect the Ethernet cable to the Ethernet port (10BASE-T/100BASE-TX) of the main
module. Use a UTP cable (category 5 or better) or an STP cable for the Ethernet cable.
Ethernet port
RJ-45 modular jack
Ethernet cable
Checking the Communication Status
You can check the status on the two LEDs at the upper-right and lower-right of the
Ethernet port.
ETHERNET
10BASE - T
100BASE - TX
LINK LED
Illuminates in orange when the link between
the MX100 and the connected device is
established and communication is mutually possible.
ACT LED
Blinks green when transmitting/receiving packets.
Connection to the PC
Make the connection via a hub. As shown in the figure below, connect the MX100 to the
PC locally using a one-to-one relationship.
System requirements for the MX100 Standard Software
OS
Windows 2000 Professional SP4,
Windows XP SP2 (excluding x64 Edition),
Windows Vista Home Premium (excluding the 64-bit Edition),
or Windows Vista Business (excluding the 64-bit Edition).
PC
Ethernet cable
(straight cable)
PC
For Windows 2000 and Windows XP:
PC with an Intel Pentium II, 400 MHz or higher CPU
(Pentium III, 1 GHz or higher recommended), and at least 256 MB
of memory (512 MB or more recommended)
For Windows Vista:
PC with an Intel Pentium 4, 3.0 GHz or higher CPU and at least
1 GB of memory (2 GB or more recommended)
Hub
MX100
MX100
Ethernet port
Hard disk
Free space: 50 MB or more (1 GB or more recommended)
RPM: 7200 rpm or more
Display
1024 × 768 dot resolution or higher
(1280 × 1024 dots or higher recommended), 65536 colors or more
With Windows Vista, a video card recommended for the OS
Note
• The NIC on the PC should support 100BASE-TX (recommended) or 10BASE-T.
• When connected to an external network, the communications within the network other than
those related to the MX100 may hinder the measurement operations on the MX100.
24
IM MX100-02E