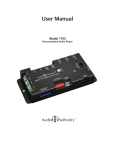
1
SF-16M 16-Channel Digital Matrix Amplifier Installation and Operation Guide DATE LTR REVISION RECORD AUTH DR CK 7/30/10 A Release DAF 11/4/10 B Update fuse legend DAF 12/22/10 C Update fuse legend DAF 1/7/11 D Update fuse legend DAF 2/18/11 E New ETL mark, part dimensions DAF 3/21/11 F New ETL information DAF SF-16M 16-Channel Digital Matrix Amplifier Firmware version 1.4.0. SF-16M Serial Number Date of Purchase / Installation Custom Installer Telephone Number This product has been tested by an accredited laboratory and meets the provisions of FCC 47 CFR Part 15. (b) Operation of an intentional, unintentional, or incidental radiator is subject to the conditions that no harmful interference is caused and that interference must be accepted that may be caused by the operation of an authorized radio station, by another intentional or unintentional radiator, by industrial, scientific and medical (ISM) equipment, or by an incidental radiator. ETL LISTED CONFORMS TO UL STD 60065 4002715 CERTIFIED TO CAN/CSA STD C22.2 NO. 60065 100-125V~ 50-60 Hz 2.2A Replace Fuse Only with T 2.5A, 250Vac Remplacer Uniquement avec Fuse T 2.5A, 250Vac 701-13209F (c) The operator of a radio frequency device shall be required to cease operating the device upon notification by a Commission representative that the device is causing harmful interference. Operation shall not resume until the condition causing the harmful interference has been corrected. Ink Color: White Part Number 701-13209 Tolerance -- Drawn By DAF Scale 1:1 Title 2006 Left Chassis Cover Artwork Date 3/17/10 Drawing No. 20AN0620 Sheet No. 1/2 Rev. F VOLTAGE SELECTOR VOLTAGE SELECTOR Set voltage selector and install correct fuses according to local power supply. Set voltage selector and install correct fuses according to local power supply. WARNING: AVERTISSEMENT: MAIN IR Régler le sélecteur 16Régler le sélecteur RS-232 OUT de tension et OUT de tension et installer les fusibles installer les fusibles Pour réduire les risques d’incendie ou de choc électrique, corrects selon corrects selon To reduce the risk of fire or electric shock, do l’alimentation locale. l’alimentation locale. ne pas exposer cet appareil à la pluie ni à l’humidité. not expose this apparatus to rain or moisture. 13 14 15 16 The lightning flash within an equilateral triangle is intended 100-120V~ 50-60 Hz to alert the user to the presence 1125Wof uninsulated “dangerous voltage” within the product’s enclosure that may be of Replace Fuses Only sufficient magnitude to constitute a risk of electric shock to with T 10A, 250V persons. Remplacer Uniquement The exclamation point within an equilateral triangle is TEREO ZONE 7 STEREO ZONE 8of important avec Fusible T 10A, 250V intended to alert the user to the presence operating and maintenance (servicing) instructions in the literature accompanying the appliance. ! The exclamation point symbol within the eightsided shape alerts users to important operating and maintenance instructions in this booklet. L’éclair terminé d’une flèche à l’intérieur 100-120V~ 50-60 d’un Hz triangle indique à l’utilisateur la présence à l’intérieur 1125Wde l’appareil d’une tension dangereuse non isolée ayant une amplitude suffisante pour Replace Fuses Only provoquer une électrocution. with T 10A, 250V Le point d’exclamation à l’intérieur d’un triangle indique que des Remplacer Uniquement instructions de fonctionnement et d’entretien importantes sont avec Fusible T 10A, 250V detaillées dans les documents fournis avec l’appareil. ! Le point d’exclamation à l’intérieur de l’octagone indique à l’utilisateur que des importantes instructions d’opération et d’entretien sont incluses dans ce document. • Read these instructions. • Lire toutes les directives avant de mettre l’appareil en opération. • Keep these instructions. • Conserver les directives de sécurité et d’utilisation pour future consultation. • Heed all warnings. • Follow all instructions. • This product must be installed by qualified personnel. • Do not open the cover—there are no user-serviceable parts inside. • Do not use this apparatus near water. 701-13303 • Clean only with dry cloth. • Tenir compte des avertissements. • Suivre les directives. • Ce produit doit être installé par un personnel qualifié. • Afin d’éviter tout risque d’électrocution, ne pas retirer le capot ou la couvercle. Aucune des pieces intérieures n’est réparable par l’utilisateur. Pour toute réparation, s’adresser à un technician d’entretien qualifié. 701-13303 • Ne pas utiliser cet appareil près de l’eau. • Nettoyer seulement avec un chiffon sec. • Make sure there is enough space around the unit for SF-16M 120V Rear Panel Artwork SF-16M 120V Panel • Assurez-vous que la circulation d’airRear autour de l’ampli Artwork est suffisante. Les cooling. Do not block any ventilation openings. Install in ouvertures et fentes dans le chassis sont prévues pour la ventilations accordance with the manufacturer’s instructions. de l’appareil. Ces ouvertures ne doivent pas être bloquées. Installer 16BN4020 16BN4020 • Do not install near any heat sources such as 1/2 radiators, conformement aux directives du manufacturier. 1/2 heat registers, stoves, or other apparatus (including • L’appareil doit être situé loin de sources de chaleur telles que des amplifiers) that produce heat. radiateurs, des registres de chaleur, des fourneaux, ou d’autres appareils • Do not defeat the safety purpose of the grouding-type plug. If the provided plug does not fit into an outlet, consult an electrician for replacement of the obsolete outlet. • Before plugging the unit into a power socket, please make sure you have selected the correct voltage. • Protect the power cord from being walked on or pinched, particularly at plugs, convenience receptacles, and the point where it exits from the apparatus. • Use only attachments/accessories specified by the manufacturer. • Unplug this apparatus during lightning storms or when unused for long periods of time. • Refer all servicing to qualified service personnel. Servicing is required when the apparatus has been damaged in any way, such as power-supply cord or plug is damaged, liquid has been spilled or objects have fallen into the apparatus, the apparatus has been exposed to rain or moisture, does not operate normally, or has been dropped. produisant de la chaleur. • Ne pas modifier le dispositif de securité de la fiche ayant une broche de mise à la terre. S’il est impossible d’insérer la fiche dans la prise de courant, contacter un électricien pour remplacer la prise de courant. • Avant de relier votre SF-16M à la tension secteur, assurez-vous qu’il est réglé sur la tension adéquate. • Les cordons d’alimentation devraient être disposés de façon à ce qu’on ne puisse pas marcher dessus ou qu’ils soient susceptibles d’être coincés par des articles placés sur ou contre eux. Une attention particulière doit être portée aux fiches, prises de courant, et aux points où ils sortent de l’appareil. • Utiliser seulement les attachements et accessoires recommandés par le manufacturier. • Débrancher l’appareil de la prise d’alimentation pendant un orage électrique ou une absence d’utilisation prolongée. • Confier tout entretien à un personnel de service qualifié. • Un service d’entretien est necéssaire quand l’appareil ne fonctionne pas normalement en suivant les consignes d’utilisation, quand le cordon d’alimentation ou sa fiche sont endommagés, quand des objets sont tombés dans l’appareil, quand du liquide y a étè renversé, ou quand l’appareil a étè exposé à la pluie ou à l’eau. SF-16M Matrix Amplifier Installation and Operation Guide 5 Installation and Operation Guide Model SF-16M 16-Channel Digital Matrix Amplifier Table Of Contents Warnings . . . . . . . . . . . . . . . . . . . . . . . . . . . . . . . . . . . . . . . . 5 Introduction . . . . . . . . . . . . . . . . . . . . . . . . . . . . . . . . . . . . . . . 7 Panel Descriptions . . . . . . . . . . . . . . . . . . . . . . . . . . . . . . . . . 8 Getting Started . . . . . . . . . . . . . . . . . . . . . . . . . . . . . . . . . . . . 9 Connections . . . . . . . . . . . . . . . . . . . . . . . . . . . . . . . . . . . . . 10 Operation and Basic Configuration (Front Panel Menu) . . . . 16 Advanced Configuration (PC Utility) . . . . . . . . . . . . . . . . . . . 21 Control Interfaces (Using Ethernet, RS-232 and IR) . . . . . . . 24 FlexPort Audio Transmitters (Appendix A) . . . . . . . . . . . . . . 26 Updating Firmware (Appendix B) . . . . . . . . . . . . . . . . . . . . . 28 Rack Mounting (Appendix C) . . . . . . . . . . . . . . . . . . . . . . . . 28 Serial and Ethernet Commands (Appendix D) . . . . . . . . . . . 29 Specifications (Appendix E) . . . . . . . . . . . . . . . . . . . . . . . . . 35 Limited Warranty . . . . . . . . . . . . . . . . . . . . . . . . . . . . . . . . . . 35 Audio Authority and the Double-A Symbol are registered trademarks of Audio Authority Corp. Copyright 2012, all rights reserved. Lexington, Kentucky www.audioauthority.com 800-322-8346 SONAFLEX VIDEO TUTORIALS 6 SF-16M Matrix Amplifier Installation and Operation Guide INTRODUCTION The SonaFlex™ SF-16M is a unique blend of premium, multi-channel amplification, flexible input options, audio matrix switching, signal processing, and open control capability. Built and designed in the U.S. with AV integrators in mind, the SF-16M offers a new approach to commercial and residential distributed audio applications. This manual covers basic and some advanced topics, but you can find more articles and video at www.audioauthority.com/sonaflex_tips. SONAFLEX VIDEO TUTORIALS Key Features • Input matrix switching, signal processing and amplification in one unified system • 16 analog RCA inputs, plus two FlexPort™ inputs (two channels each) for a total of 20 mono (10 stereo) inputs • Optional Cat 5 FlexPort audio transmitters accept balanced line/mic, XLR, digital SPDIF, or analog RCA audio • 16 amplified outputs can be configured as mono, stereo or a combination of stereo and mono • Up to four SF-16M units can be linked together to form a 64-output audio matrix (see p. 15) • Class-D amplification provides a conservatively rated 50 watts per channel, all channels driven into 8 Ohms - stable at 4 Ohms • Linear power supply delivers the warmth and musicality of an analog amplifier, combined with the responsiveness and headroom required for dynamic music content • Signal processing tools include hi and low shelf filters (bass/treble), hi and low pass filters and up to seven bands of parametric equalization per output • 10 preset sound scenes (a system-wide snap-shot of all volume and source settings) can be saved and recalled using IR, RS-232 or IP commands • 10 output “groups” allow multiple outputs to share commands like volume ramping, muting, and source selection • Compatible with virtually any control system using RS-232, Ethernet, or IR commands •Commonly used settings are accessible via the front panel controls and VFD display; advanced setup is performed via the PC configuration utility* or Ethernet/serial commands (see page 24) • Power saving features include automute and turn off per output channel, and a system trigger input so that power management devices can put the SF-16M in standby when not in use FlexPort Cat 5 Audio Inputs • Four compatible FlexPort audio modules: FPM-U Stereo RCA, FPM-D Digital Coax/Optical Audio, FPM-X Mic/ 1/4” TRS Audio and FPM-B Balanced Audio (See Appendix A for detailed information) • Provides a mixture of consumer and pro audio sources such as MP3 players, audio streaming devices, microphones, audio mixers, paging microphones and more • FlexPort modules can be located up to 500 feet away from the SF-16M giving flexibility in audio source placement Control Interfaces • Ethernet via telnet commands (see page 24) • RS-232 serial commands (see page 25) • Two contact closure inputs to trigger audio overrides and sound scenes (page 14) • Rear panel IR input (3.5 mm jack) • Front panel IR sensor • Front panel capacitive touch buttons and knob with vaccuum fluorescent screen Carton Contents Other Materials You May Need • SF-16M 16 Channel Matrix Amplifier • Speakers and cabling • Power Cord • Audio sources, microphones, audio mixers • Rack ears (see page 22) • Patch cables: Ethernet, RCA, DB-25 (see page 10) • Ferrite beads (see page 10) • Infrared receiver • User manual • Third party programmable remote control • USB 1.1 or USB 2.0 compliant drive (FAT 32) * The PC configuration utility (free download) allows easy setup, but is not intended as a day-to-day user interface. See online video tutorials for details: www.audioauthority.com/sonaflex_tips. SF-16M Matrix Amplifier Installation and Operation Guide 7 FRONT PANEL DESCRIPTIONS Model SF-16M 16-Channel Matrix Amplifier A B C D E F A Power Indication LED E Menu Selection Button B Front Panel IR Receiver F Back Button C Vacuum Fluorescent Display (VFD) G Dim Button D Multi Function Knob G BACK PANEL DESCRIPTIONS H I AUDIO OVERRIDE SYSTEM TRIGGER 1 2 IN J UNIT ID OUT K L ETHERNET 701-13303B USB LINK O SPEED Audio Authority® Corp. • 2048 Mercer Rd. Lexington, KY 40511 USA 800-322-8346 • 859-233-4599 • www.audioauthority.com DB25 AUDIO INPUT 1 FlexPort 2 IN IN OUT A BUS 5V - 24V AC / DC FlexPort 1 N OUT M LINE INPUTS CONTACT CLOSURE AUDIO LOOP OUTPUT 2 3 4 5 6 C 5 E 9 F 11 G 13 H RS-232 IN MAIN IR IN 15 S 4002715 ETL LISTED CONFORMS TO UL STD 60065 CERTIFIED TO CAN/CSA STD C22.2 NO. 60065 T VOLTAGE SELECTOR Set voltage selector and install correct fuses according to local power supply. R 4 6 SPEAKER OUTPUTS (CLASS 2 WIRING) 7 D 7 PDF User Manual L 2 1 B 3 Q P Model SF-16M 16-Channel Matrix Amplifier 8 9 10 8 10 12 11 14 12 MAIN IR OUT 16 13 14 RS-232 OUT 15 U Régler le sélecteur de tension et installer les fusibles corrects selon l’alimentation locale. 16 100-120V~ 50-60 Hz 1125W STEREO ZONE 1 8 STEREO ZONE 2 STEREO ZONE 3 STEREO ZONE 4 R STEREO ZONE 5 STEREO ZONE 6 STEREO ZONE 7 STEREO ZONE 8 Replace Fuses Only with T 10A, 250V Remplacer Uniquement avec Fusible T 10A, 250V H Audio Override Triggers 1 & 2 (Contact Closures) O RCA Stereo/Mono audio inputs (p.10) I System Trigger In & Out (5V - 24V AC / DC) P 3.5 mm Main IR In/Loop Out (p.13) 701-13303 J Unit ID Switch for multiple unit operation (p.15) Q DB-9 RS-232 In/Loop Out (p.13) K Ethernet Connector with Link/Speed Indicators R Stereo and/or Mono Speaker level Outputs L USB Connector (to update firmware and save settings) S Power Switch M FlexPort Audio 1 & 2 In/Loop Out (p.11) T Fuse Compartment (p.12) N DB-25 Audio In/Loop Out (p.10) U Power Cord Input SF-16M Matrix Amplifier Installation and Operation Guide SF-16M 120V Rear Panel Artwork 16BN4020 1/2 BEFORE YOU BEGIN • Confirm that nothing is missing from your shipping carton. Refer to Carton Contents on page 7. SONAFLEX VIDEO TUTORIALS • Record the serial number (see rear panel) in the space provided inside the cover of this manual. • Activate your warranty and receive firmware update notifications: www.audioauthority.com/register. • Read this instruction manual to become familiar with the configurations and functions of this product. Essential Setup Tasks 1. Thoroughly plan your system layout including wire runs, audio inputs and speaker locations. 2. Mount the SF-16M in an equipment rack (page 28); pull and label all audio and control cabling. 2. Connect audio sources to SF-16M inputs and speakers to amplified outputs of the SF-16M. 3.Set all outputs to an acceptible volume level for testing (all outputs are muted by default). Note: If the SF-16M will not be used to control volume, set all outputs to -0dB (full volume). 4. Set up the SF-16M using the PC configuration software* (or with the front panel for basic setup). 5. Recommended: connect a control system via the Ethernet, RS-232 or IR ports of the SF-16M. Program your control system using SF-16M serial commands (listed on page 29) or IR codes*. 6. Test all audio inputs at all speaker locations. * Available for download at audioauthority.com SYSTEM CONNECTION AND PLANNING WORKSHEET Unit #: 1 2 3 4 Use this worksheet to plan and document all audio input and output connections to the SF-16M. RCA or DB-25 Inputs: 1 L 2 R 3 L 4 R 5 L 6 R 7 L 8 R Mono q Mono q Mono q Mono q 9 L 10 R 11 L 12 R 13 L 14 R 15 L 16 R Mono q Mono q Mono q Mono q FlexPort Inputs: 1 17 L 18 R Mono 19 L 20 R q 2 Mono 9 L 10 R 11 L 12 R 13 L 14 R 15 L 16 R Mono q Speaker Outputs: 1 L 2 R 3 L 4 R 5 L 6 R 7 L 8 R q Mono q Mono q Mono q Mono q Mono q Mono q Mono q SF-16M Matrix Amplifier Installation and Operation Guide 9 SF-16M CONNECTIONS - Audio Inputs RCA Line Inputs The SF-16M includes 16 RCA audio inputs that can be configured as mono, stereo or a combination of both mono and stereo. Figure 1 provides examples of all configurations. NOTE: Specify input configurations using the PC utility (page 21) or the front panel menu (page 18). STEREO SOURCE SYSTEM TRIGGER IN UNIT ID OUT ETHERNET MONO SOURCE STEREO SOURCE USB LINK SPEED Audio Authority® Corp. • 2048 Mercer Rd. Lexington, KY 40511 USA 800-322-8346 • 859-233-4599 • www.audioauthority.com DB25 AUDIO INPUT A BUS 5V - 24V AC / DC 1 OUT LINE INPUTS FlexPort 2 IN Note: to create a mono signal from a stereo source, Audio Authority recommends using the SF-16M DSP for optimal audio quality, but when only one RCA input jack is available, a y-adapter may be used. AUDIO LOOP OUTPUT ANY STEREO INPUT MAY BE CONVERTED TO MONO IN SF-16M DSP SETTINGS Figure 1 3 4 5 6 B 3 C 5 7 E 9 F 11 G 13 H MAIN IR IN 15 PDF User Manual RS-232 IN 4002715 ETL LISTED CONFORMS TO UL STD 60065 CERTIFIED TO CAN/CSA STD C22.2 NO. 60065 L VOLTAGE SELECTOR Set voltage selector and install correct fuses according to local power supply. R 2 4 6 SPEAKER OUTPUTS (CLASS 2 WIRING) DB-25 Audio Connections D 7 Model SF-16M 16-Channel Matrix Amplifier 8 9 10 8 10 12 11 14 12 MAIN IR OUT 16 13 14 RS-232 OUT 15 Régler le sélecteur de tension et installer les fusibles corrects selon l’alimentation locale. 16 SF-16M units may be linked together to create systems up to 64 outputs (see page 15 for hookup details). The DB-25 ports streamline this type of expanstion, and also serve as a connection from other Audio Authority matrix systems. STEREO ZONE 2 STEREO ZONE 3 STEREO ZONE 4 STEREO ZONE 5 STEREO ZONE 6 STEREO ZONE 7 STEREO ZONE 8 100-120V~ 1125 Replace Fu with T 10A Remplacer U avec Fusible T 1.Source audio link between SF-16M units: When multiple SF-16M units are linked together, the DB-25 audio input receives source audio from the DB-25 audio loop output of the previous SF-16M. The source audio originates from the RCA audio inputs or the DB-25 audio input of the first SF-16M chassis. (See Figure 2). 2.Direct input from an Audio Authority audio matrix: The SF-16M may serve as an amplifier for Audio Authority audio matrix switchers such as the ADX-0808/ADX-1616 and the HLX 2278 audio output card (Figure 3). In this scenario, the SF-16M receives all audio content from the ADX or HLX and passes the audio through to the amplified outputs. The HLX or ADX provides all of the matrix switching (See figure 3 below). If the volume levels will be controlled from the HLX or ADX matrix, turn up all SF-16M outputs to maximum volume (-0dB). 701-13303 SF-16M 120V 16B AUDIO FROM SOURCES TO SF-16M RCA INPUTS AUDIO FROM ADX OR HLX TO SF-16M DB-25 RCA INPUTS ARE NOT USED SF-16M DB-25 LOOP OUT DB-25 LOOP OUT RCA INPUTS ARE NOT USED SF-16M Figure 2 10 SF-16M Matrix Amplifier Installation and Operation Guide SF-16M Figure 3 FlexPort Cat 5 Audio Inputs 1 SYSTEM TRIGGER 2 IN UNIT ID OUT ETHERNET USB FLEXPORT 761-392 LINK The SF-16M includes two FlexPort Cat 5 inputs that accept a variety of pro and consumer SPEED audio sources via optional FlexPort audio modules. See Appendix A for a detailed overview of all FlexPort modules and system configuration. CONTACT CLOSURE FlexPort module options include: FPM-B Balanced line/mic with phantom power 1 FlexPort 2 IN IN OUT BUS OUT OUT AUDIO LOOP OUTPUT FPM-X XLR/ 1/4” TRS with phantom power ASSIGN CHANNEL FPM-D Digital optical/coax DUAL M MONO 1 MONO 2 SF-16M FlexPorts Understanding the FlexPort Audio Bus 1 BUS 5V - 24V AC / DC FlexPort 1 FPM-U Analog RCA Audio Aut 800 BUS IN DB25 AUDIO INPUT 3 2 4 Each SF-16M FlexPort input supports: • Two channels of audio - input can be either stereo or two mono channels (allows two mono inputs per FlexPort bus) STEREO ZONE 1 LINE INPUTS AUDIO OVERRIDE MIN L R GAIN MAX INPUT MIX OVERRIDE BUS PWR 2 SWITCH MIC ON 5 ON 6 MOMENTARY TERM. ON PHANT. OFF LINE OFF OFF TOGL. OFF ON SPEAKER OUTPU 7 8 FPM-B FlexPort module rear view STEREO ZONE 2 STEREO ZONE 3 STEREO ZONE 4 • RS-485 data pathway - provides 2-way communication between the SF-16M and all connected FlexPort modules • 18V power - provides power for two FlexPort modules on a single bus 761-392 761-392 Daisy Chain FlexPort Modules For Two Mono Inputs Per Bus FLEXPORT FLEXPORT All FlexPort audio modules feature a FlexPort Bus In and Out, so any two modules may be daisy chained together for a two mono source setup. In daisy chain configurations, it is required to assign one module as “Mono 1” and the other module as “Mono 2” using BUSA for more BUSthe dipswitches located on the back of the FlexPort modules. See Appendix IN IN illustrates a daisy chain configuration. information. Figure 4 below IN OUT SF-16M BUS OUT BUS OUT FPM-U ASSIGN CHANNEL FPM-B ASSIGN CHANNEL IN MIN OUT DUAL M MONO 1 MONO 2 GAIN MAX Figure 4 FPM-D DUAL M MONO 1 MONO 2 FPM-U SWITCH the audio modules as shown below. BUS IN FPM-D and FPM-U: These are natively stereo input modules - Dipswitch setting should be “Stereo”. IN BUS OUT INPUT MIX OVERRIDE BUS figure 5 below) PWR GAIN MAX SWITCH MIC LINE ON OFF ON OFF MOMENTARY TOGL. FLEXPORT ON OFF it TERM. is necessary to configure PHANT. OFF ON 761-392 761-392 INPUT MIC LINE MIX ON OFF OVERON OFF Single FlexPort Module Connection For One Stereo or Dual Mono Input RIDE FLEXPORTMOMENTARY TOGL. OFF audio module to a FlexPort bus input (See WhenBUS connecting aTERM. singleON FlexPort PWR PHANT. OFF ON MIN BUS IN FPM-B and FPM-X: These are natively mono input modules - If one mono source input is desired on both FlexPort bus audio channels, the dipswitch setting should be set to “Dual M” for dual mono. BUS OUT OUT ASSIGN CHANNEL DUAL M MONO 1 MONO 2 Figure 5 INPUT MIX OVERRIDE BUS PWR SF-16M MINFPM-D FPM-B GAIN MAX SWITCH MIC ON ON MOMENTARY TERM. ON PHANT. OFF LINE OFF OFF TOGL. OFF ON ASSIGN CHANNEL DUAL M MONO 1 MONO 2 MIN GAIN MAX SWITCH INPUT MIC MIX ON OVERON RIDE MOMENTARY SF-16M Matrix Amplifier Installation and Operation Guide 11 BUS TERM. ON PWR PHANT. OFF LINE OFF OFF TOGL. OFF ON SF-16M CONNECTIONS - Speaker Outputs SF-16M STEREO PAIR SYSTEM MONO UNIT ID ET SP ALL STEREO INPUT SIGNALS ARE AVAILABLE AS STEREO FOR OUTPUTS AND AS CONTACT CLOSURE 5V - 24V AC / DC COMBINED MONO SIGNALS FOR MONO OUTPUTS FlexPort 1 FlexPort 2 IN IN OUT OUT MONO Figure 6 Speakers and Impedance 1 Each amplfier output of the SF-16M can support a 4 Ohm speaker load. In many cases only one speaker is connected per amplifier output, so any single speaker with a 4 - 8 Ohm impedance rating is acceptable for use with the SF-16M. Two 8 ohm speakers can be connected in parallel onto a single SF-16M amplifier output without sacrificing performance (Figure 7). Do not connect multiple 6 ohm or 4 ohm speakers to one SF-16M output, and do not connect multiple speakers wired in series. Speaker Impedance 8Ω 6Ω 4Ω Max # of speakers per SF-16 amp output 2 1 3 2 STEREO ZONE 1 + 1 Ferrite Beads + If System Trigger or Override terminals are used, attach a ferrite bead (included in SF-16M carton) around the wires near the terminal. Apply separate ferrite beads to Override and System Trigger wires. Changing the Power Fuse STEREO ZONE 2 – 100-120 Volts • Remove the power cord. • Slide out spare fuse compartment as shown and remove a spare fuse. F H G H SERIAL VOLTAGE SELECTOR Set voltage selector and install correct fuses according to local power supply. ACTIVE de tension et • Replace the blown fuse with a spare fuse, FUSES installer les fusibles 5V - 24V AC / DC 5V - 24V AC / DC corrects selon or a fuse of the same value. l’alimentation locale. Figure 8 • Orient the fuse cover so that the arrow (CLASS 2 WIRING) 9 11 10 12 13 correct 12 14 13 15 14 16 15 16 points toward11the voltage for your region as shown in Figure 8. Figure 8 12 200-240 Volts 701-13306 SF-16M Matrix Amplifier Installation and Operation Guide Régler le sélecteur UP VOLTAGE SELECTOR Set voltage selector and install correct fuses according to local power supply. UP 200V - 240V OUTPUTS ) G 4002715 ETL LISTED CONFORMS TO UL STD 60065 CERTIFIED TO CAN/CSA STD C22.2 NO. 60065 SYSTEM • Inspect both fuses TRIGGER to determine whichTRIGGER SERIAL IN OUT IN OUT one is blown. E 4002715 ETL LISTED CONFORMS TO UL STD 60065 BUS INPUTTO CAN/CSA CERTIFIED C22.2 NO. 60065 1:1STD INPUTS 100V - 120V TRIGGER MODE INPUT TRIGGER • Carefully remove the fuse coverBUS using a MODE ALWAYS ON 1:1 INPUTS ALWAYS ON flat blade screwdriver. F 701-13306 SPARE FUSE PDF User User Manual Manual PDF SYSTEM Figure 7 - Parallel 8 ohm speaker wiring 100V - 120V Model SF-16 8-Zone Digital Amplifier Model SF-16 8-Zone Digital Amplifier – SPEAKER B 200V - 240V Before changing the fuse, find and correct the excessive impedance load or wiring short that caused the fuse failure. 4 SF-16M SPEAKER OUTPUT 1 SPEAKER A Manual rr Manual 0 AUDIO OVERRIDE Factory default for all 16 amplified speaker outputs is mono, -40dB and muted. For installation, set all outputs atTRIGGER a 1 both 2 mono and stereo. IN OUT reasonable volume (page 18). Outputs can be configured as mono, stereo or a combination of NOTE: Specify speaker output configurations using the PC configuration utility (page 21) or the front panel menu. Régler le sélecteur de tension et installer les fusibles corrects selon l’alimentation locale. 100-120V~ 50-60 Hz 1125W 100-120V~ 50-60 Hz 1125W Replace Fuses Only Replace Fuses Only with T 10A, 250V with T 10A, 250V Remplacer Uniquement avec Remplacer Uniquement avec Fusible T 10A, 250V Fusible T 10A, 250V ARROW INDICATES VOLTAGE FUSE COVER CAREFULLY PRY WITH A SMALL SCREWDRIVER SF-16M CONNECTIONS - Control The SF-16M is designed to be integrated into an automation system with advanced control capabilities. Four methods of system control are possible, listed here in recommended order: 1 Third party serial controller DB-9 RS-232 port Most reliable, all functions available, customized 2 Third party telnet controller RJ-45 Ethernet port Very reliable, all functions available, customized 3 Third party IR controller 3.5mm IR port Most functions available, customized 4 Front panel menu (see page 14) Keys and multi-function knob Most functions available, inadequate for day-to-day operation 701-13303B RS-232 Port The DB-9 “Serial In” port of the SF-16M can be connected to virtually any third party RS-232 controller using a straightthru serial cable. Allows 2-way communications for control and feedback. Commands are listed on page 29. Model SF-16M 16-Channel Matrix Amplifier PDF User Manual Corp. • 2048 Mercer Rd. Lexington, KY 40511 USA 6 • 859-233-4599 • www.audioauthority.com B C 3 D 5 4002715 E 7 F 9 G H SF-16M 13 11 MAIN IR IN 15 ETL LISTED CONFORMS TO UL STD 60065 CERTIFIED TO CAN/CSA STD C22.2 NO. 60065 RS-232 IN CONTROL SYSTEM (SERIAL PORT) VOLTAGE SELECTOR Set voltage selector and install correct fuses according to local power supply. 4 6 8 10 12 14 MAIN IR OUT 16 Régler le sélecteur TO NEXT de tension et SF-16M installer les fusibles corrects selon l’alimentation locale. RS-232 OUT Figure 9 ASS 2 WIRING) 9 10 11 12 Ethernet Port 13 14 15 SERIAL INPUT 16 100-120V~ 50-60 Hz STEREO ZONE 5 The SF-16M Ethernet port connects to any standard Ethernet router/switch. Control4 SDDP1125W is available for seamless Replace Fuses Only integration. By default DHCP is enabled on the SF-16M. If the router is also DHCP enabled, it will automatically assign a with T 10A, 250V Remplacer Uniquement unique network IP address to the SF-16M. Once an IP address is assigned, the SF-16M can be setup and controlled with STEREO ZONE 6 STEREO ZONE 7 STEREO ZONE 8 avec Fusible T 10A, 250V any network-enabled control system using telnet-based serial commands. For detailed information on Ethernet setup, please see page 24. Allows 2-way communications for control and feedback. Commands are listed on page 29. AUDIO SF-16M OVERRIDE 1 SYSTEM TRIGGER 2 IN ETHERNET UNIT ID OUT WIRELESS NETWORK USB LINK REMOTE Audio Authority® Corp. • 2048 Mercer Rd. Lexington, KY 40511 USA 800-322-8346 • 859-233-4599 • www.audioauthority.com CONTROL SPEED DB25 AUDIO INPUT Figure 10 BUS 5V - 24V AC / DC 701-13303 FlexPort 1 FlexPort 2 IN IN OUT A 1 LAPTOP B C 3 5 D 7 AUDIO LOOP OUTPUT 16BN4020 IR Port 1/2 A BUS LINE INPUTS 1 B 3 C 5 D 7 E SF-16M 9 4 3 2 F 11 G 13 F 11 10 12 701-13303B R 2 4 6 The 3.5mm “Main IR In” connects to any third party IR controller using a mono 3.5mm cable. A comprehensive list of 8 available IR commands for the SF-16M is available in spreadsheet format. Download the hex. code /IR command set from Audio Authority® Corp. • 2048 Mercer Rd. Lexington, KY 40511 USA the SF-16M product page on our website. Model SF-16M 16-Channel Matrix Amplifier PDF User Manual 800-322-8346 • 859-233-4599 • www.audioauthority.com SPEAKER OUTPUTS (CLASS 2 WIRING) 1 E 9 SF-16M 120VLRear Panel Artwork OUT LINE INPUTS CONTACT CLOSURE Mod SYSTEM 5 H MAIN IR IN 15 4002715 6 RS-232 IN DISCRETE IR 7 CONFORMS 8 ETL LISTED TO UL STD 60065 CERTIFIED TO CAN/CSA COMMANDS STD C22.2 NO. 60065 9 10 11 12 CONTROL SYSTEM (IR OUTPUT) L VOLTAGE SELECTOR STEREO ZONE 1 STEREO ZONE 2 STEREO ZONE 3 R 6 8 10 12 14 16 MAIN IR OUT 2 4 1 2 RS-232 OUT 3 10 11 12 13 14 15 RF REMOTE e ot 1 em e R n F o R or Z f 100-120V~ 50-60 Hz 1125W Replace Fuses Only SF-16M Matrix Amplifier Installation and Operation Guide STEREO ZONE 5 STEREO ZONE 6 STEREO ZONE 7 STEREO ZONE 6 16 s al n gn si to tio F nt a R se St se Ba ONE 4 9 6 8 STEREO ZONE 5 installer les fusibles corrects selon l’alimentation locale. 5 ER OUTPUTS (CLASS 2 WIRING) Régler le sélecteur de IR tension et TO NEXT SF-16M INPUT 4 Figure 11 Set voltageZONE selector STEREO 4 and install correct fuses according to local power supply. STEREO ZONE 8 with T 10A, 250V Remplacer Uniquement avec Fusible T 10A, 250V 13 SF-16M CONNECTIONS - Audio Override (Contact Closure) The SF-16M provides two “Audio Override” contact closure inputs, which allow pushbuttons, partition wall contacts, and other contact sensors to trigger the system. Audio override provides a convenient method of temporarily switching to an alternate audio input when a sensor is triggered. Learn more: www.audioauthority.com/sonaflex_tips. SONAFLEX VIDEO TUTORIALS A practical example of this feature is a conference hall with movable partition walls (Figure 12). The speakers in the room normally play background music from a satellite radio receiver. A pushbutton triggers Override 1 which is programmed to toggle speaker outputs for both rooms between background music and the Microphone 1 input. When the partition closes to create individual rooms, a partition wall contact closure (Override 2 in the example) triggers the SF-16M to switch the speakers in Room B to microphone 2. When the partition wall opens, the SF-16M returns to its default audio input. OVERRIDE 2 PUSHBUTTON 1 SYSTEM TRIGGER 2 IN UNIT ID OUT ETHERNET PARTITION CONTACT USB LINK SPEED Audio Authority® Corp. • 2048 Mercer Rd. Lexington, KY 40511 USA 800-322-8346 • 859-233-4599 • www.audioauthority.com SATELLITE RADIO CONTACT CLOSURE BUS FlexPort 1 FlexPort 2 IN OUT AUDIO LOOP OUTPUT MICROPHONE 1 SF-16M OVERRIDE CONTACTS A 2 STEREO ZONE 1 3 4 STEREO ZONE 2 5 C 3 D E 5 7 9 6 8 10 L R 2 MICROPHONE 2 4 ROOM A SPEAKERS 1 B 1 IN OUT DB25 AUDIO INPUT 5V - 24V AC / DC LINE INPUTS AUDIO OVERRIDE PARTITION OVERRIDE 1 ROOM B SPEAKERS SPEAKER OUTPUTS (CLASS 2 WIRING) 6 7 STEREO ZONE 3 8 9 STEREO ZONE 4 10 11 STEREO ZONE 5 1 STEREO ZO Figure 12 NOTE: In order for Audio Override to function, all settings must be programmed using the PC configuration software. Learn more: www.audioauthority.com/sonaflex_tips. SF-16M CONNECTIONS - Standby and System Trigger By default, the SF-16M enters standby mode when it cannot sense audio on its inputs; it wakes from standby when it receives audio input. The System Trigger contacts on the SF-16M allow equipment such as AV receivers or power managment devices to put the SF-16M in standby to conserve energy. POWER MANAGEMENT DEVICE AUDIO OVERRIDE To use the System Trigger: 1 SYSTEM TRIGGER 2 IN UNIT ID OUT ETHERNET LINK 1.Enable “Audio Sense + Trigger” via front panel controls (see page 20), PC Utility (Misc. Tab) or serial command (see page 34). SPEED 2.Make system trigger connections as illustrated in Figure 13. 3.Power the SF-16M, then test the power management system. DB CONTACT CLOSURE 4.A high-to-low voltage transition on the trigger input puts the SF-16M into standby mode; a low-to-high voltage transition wakes the unit from standby. FlexPort 1 IN OUT 5V - 24V AC / DC FlexPort TO2NEXT SF-16M SYSTEM TRIGGER OUT INPUT IN AUD Figure 13. System trigger (5V-24V AC/DC) 14 SF-16M Matrix Amplifier Installation and Operation Guide 1 2 3 4 5 6 SF-16M CONNECTIONS - Connecting Multiple SF-16M Chassis Up to four SF-16M units can be linked to function as a 64 output system. In Figure 14, the maximum number of input channels is 20; 16 inputs via RCA or DB-25, and four shared Flexport channels. Units are linked using the loop out connections for FlexPort Audio, DB-25 Audio, IR, Serial and System Trigger inputs (Figure 13). Set the Unit ID as shown, incrementing from top to bottom. All SF-16M units can share the Unit 1 FlexPort inputs, as shown, or each unit can have independent FlexPort inputs, increasing the total number of inputs to 32 (four FlexPort channels per SF-16M unit). FLEXPORT BUS 1 (FOUR CHANNELS) FLEXPORT BUS 2 (FOUR CHANNLES) IR CONTROLLER 16 SOURCE INPUT CHANNELS RS-232 CONTROLLER 1 AUDIO OVERRIDE 1 SYSTEM TRIGGER 2 IN 701-13303B UNIT ID OUT ETHERNET USB LINK SPEED Audio Authority® Corp. • 2048 Mercer Rd. Lexington, KY 40511 USA 800-322-8346 • 859-233-4599 • www.audioauthority.com DB25 AUDIO INPUT 1 FlexPort 1 FlexPort 2 IN IN OUT A BUS 5V - 24V AC / DC OUT LINE INPUTS CONTACT CLOSURE AUDIO LOOP OUTPUT 3 2 4 5 C 5 D 7 E 9 7 G 13 H PDF User Manual RS-232 IN MAIN IR IN 15 4002715 ETL LISTED CONFORMS TO UL STD 60065 CERTIFIED TO CAN/CSA STD C22.2 NO. 60065 VOLTAGE SELECTOR Set voltage selector and install correct fuses according to local power supply. R 4 6 8 10 SPEAKER OUTPUTS (CLASS 2 WIRING) 6 Model SF-16M 16-Channel Matrix Amplifier F 11 L 2 1 B 3 8 9 10 12 11 14 MAIN IR OUT 16 12 13 RS-232 OUT 14 15 Régler le sélecteur de tension et installer les fusibles corrects selon l’alimentation locale. 16 100-120V~ 50-60 Hz 1125W STEREO ZONE 1 STEREO ZONE 2 STEREO ZONE 3 2 AUDIO OVERRIDE 1 SYSTEM TRIGGER 2 IN UNIT ID OUT ETHERNET NOTE: The DB-25 Loop Output only passes source inputs from the DB-25 Audio Input OR the 16 RCA audio inputs on to the next chassis. It does NOT loop out FlexPort audio inputs. STEREO ZONE 4 Audio Authority® Corp. • 2048 Mercer Rd. Lexington, KY 40511 USA 800-322-8346 • 859-233-4599 • www.audioauthority.com DB25 AUDIO INPUT A BUS FlexPort 1 FlexPort 2 IN OUT LINE INPUTS 1 IN AUDIO LOOP OUTPUT 3 2 4 5 B 3 Replace Fuses Only with T 10A, 250V Remplacer Uniquement avec Fusible T 10A, 250V STEREO ZONE 8 701-13303B C 5 D 7 E 9 7 11 G 13 H 15 PDF User Manual RS-232 IN MAIN IR IN 701-13303 4002715 ETL LISTED CONFORMS TO UL STD 60065 CERTIFIED TO CAN/CSA STD C22.2 NO. 60065 SF-16M 120V Rear Panel Artwork 16BN4020 1/2 VOLTAGE SELECTOR Set voltage selector and install correct fuses according to local power supply. R 4 6 8 10 SPEAKER OUTPUTS (CLASS 2 WIRING) 6 Model SF-16M 16-Channel Matrix Amplifier F L 2 1 STEREO ZONE 7 LINK 5V - 24V AC / DC OUT STEREO ZONE 6 USB SPEED CONTACT CLOSURE STEREO ZONE 5 8 9 10 12 11 14 MAIN IR OUT 16 12 13 RS-232 OUT 14 15 Régler le sélecteur de tension et installer les fusibles corrects selon l’alimentation locale. 16 100-120V~ 50-60 Hz 1125W STEREO ZONE 1 STEREO ZONE 2 STEREO ZONE 3 STEREO ZONE 4 STEREO ZONE 5 STEREO ZONE 6 STEREO ZONE 7 Replace Fuses Only with T 10A, 250V Remplacer Uniquement avec Fusible T 10A, 250V STEREO ZONE 8 3 AUDIO OVERRIDE 1 SYSTEM TRIGGER 2 IN 701-13303B UNIT ID OUT ETHERNET USB LINK SPEED Audio Authority® Corp. • 2048 Mercer Rd. Lexington, KY 40511 USA 800-322-8346 • 859-233-4599 • www.audioauthority.com DB25 AUDIO INPUT 1 FlexPort 1 FlexPort 2 IN IN OUT A BUS 5V - 24V AC / DC OUT LINE INPUTS CONTACT CLOSURE AUDIO LOOP OUTPUT 3 3 2 4 5 C 5 D 7 E 9 7 11 G 13 H 15 PDF User Manual RS-232 IN MAIN IR IN 701-13303 4002715 ETL LISTED CONFORMS TO UL STD 60065 CERTIFIED TO CAN/CSA STD C22.2 NO. 60065 SF-16M 120V Rear Panel Artwork 16BN4020 1/2 VOLTAGE SELECTOR Set voltage selector and install correct fuses according to local power supply. R 4 6 8 10 SPEAKER OUTPUTS (CLASS 2 WIRING) 6 Model SF-16M 16-Channel Matrix Amplifier F L 2 1 B 8 9 10 12 11 14 MAIN IR OUT 16 12 13 RS-232 OUT 14 15 Régler le sélecteur de tension et installer les fusibles corrects selon l’alimentation locale. 16 100-120V~ 50-60 Hz 1125W STEREO ZONE 1 STEREO ZONE 2 STEREO ZONE 3 STEREO ZONE 4 STEREO ZONE 5 STEREO ZONE 6 STEREO ZONE 7 Replace Fuses Only with T 10A, 250V Remplacer Uniquement avec Fusible T 10A, 250V STEREO ZONE 8 4 AUDIO OVERRIDE 1 SYSTEM TRIGGER 2 IN 701-13303B UNIT ID OUT ETHERNET USB LINK SPEED Audio Authority® Corp. • 2048 Mercer Rd. Lexington, KY 40511 USA 800-322-8346 • 859-233-4599 • www.audioauthority.com DB25 AUDIO INPUT 1 FlexPort 1 FlexPort 2 IN IN OUT A BUS 5V - 24V AC / DC OUT LINE INPUTS CONTACT CLOSURE AUDIO LOOP OUTPUT 2 3 4 5 6 C 5 E 9 Model SF-16M 16-Channel Matrix Amplifier F 11 G 13 H MAIN IR IN 15 PDF User Manual RS-232 IN 701-13303 4002715 ETL LISTED CONFORMS TO UL STD 60065 CERTIFIED TO CAN/CSA STD C22.2 NO. 60065 SF-16M 120V Rear Panel Artwork 16BN4020 1/2 VOLTAGE SELECTOR Set voltage selector and install correct fuses according to local power supply. R 4 6 SPEAKER OUTPUTS (CLASS 2 WIRING) 7 D 7 L 2 1 B 3 8 9 10 8 10 12 11 12 14 MAIN IR OUT 16 13 14 RS-232 OUT 15 Régler le sélecteur de tension et installer les fusibles corrects selon l’alimentation locale. 16 100-120V~ 50-60 Hz 1125W STEREO ZONE 1 STEREO ZONE 2 STEREO ZONE 3 STEREO ZONE 4 STEREO ZONE 5 STEREO ZONE 6 STEREO ZONE 7 STEREO ZONE 8 Replace Fuses Only with T 10A, 250V Remplacer Uniquement avec Fusible T 10A, 250V Figure 14 701-13303 Rear Panel Artwork Guide SF-16M Matrix Amplifier InstallationSF-16M and120VOperation 16BN4020 1/2 15 CONFIGURATION Configure the SF-16M using front panel controls, PC utility, or individual commands (via serial or telnet). Basic settings can be accessed via the front panel controls; the best way for any advanced configuration is the PC utility (see page 21, and www.audioauthority.com/sonaflex_tips), but all settings can also be adjusted via telnet/serial commands with a program such as hyperterminal from a PC (page 24). SONAFLEX VIDEO TUTORIALS Front Panel Description Multi-Function Knob Operation: The multi-function knob can scroll (clockwise or counterclockwise) and select or de-select (press in). The open arrow symbol is displayed when scrolling through menu items. Once an item has been selected (press the knob), the arrow fills in . Turn the knob to adjust the value. Press the knob again to de-select the menu item and scroll to the next item. Model SF-16M 16-Channel Matrix Amplifier VFD (Vacuum Fluorescent Display) D A B C Menu Button > Menu Screen A Output Settings, Input Settings, Groups, Override, Scene Presets, Front/Back Panel, Network, Export/Import, Firmware and Factory Defaults. The menu button also toggles the display between the main menu and output meters. Back Button B Press Back to return to a previous screen. Pressing the back button repeatedly eventually returns to the main menu. Dim Button C This button toggles through four brightness levels for the display and key lights. After a set period of time (adjustable using the front panel or the SF-16M PC configurator), the display enters a screen saver mode (dark). The power and button lights remain on. Any key press or knob adjustment causes the display to return to the last selected brightness level. SF-16M Main Menu Main Menu The main menu contains the root level selections for basic operation. Many commands are available only through serial or telnet control. See the serial command list (page 29) for more information. Vertical Bar Graph The vertical output level graph, which is accessible by pressing the menu key while in the root menu, displays the output levels of all channels simultaneously. Press the menu key, back, or the encoder knob to return to the menu. Output Settings Output Settings > Quick Access Line 1: Output number and name. Mono outputs appear with a single number and name (example, 1 Entry Hall), while stereo pairs appear with two numbers separated by a comma and a name (example 1,2 Family Rm). The SF-16M PC utility software is available at audioauthority.com/sonaflex. In addition to being more efficient than other setup methods, the utility makes it easy to save an archive of each SF16M configuration to your PC for backup and for working off-site. Detailed instructions and tutorials for SF-16M setup using the PC utility can be found at audioauthority.com/sonaflex. 16 SF-16M Matrix Amplifier Installation and Operation Guide Output > Quick Access 1 2 3 4 5 6 7 8 9 10 11 Line 2: Volume level or other status of the output channel(s). Select to display and adjust volume level. Status messages are as follows: • Standby – the entire unit is in standby, forcing all outputs into low power mode (no output). • Shutdown – the output is in thermal shutdown, meaning the output chip has overheated. Shutdown prevents any permanent damage to the chip and gives it time to cool down. • Overtemp – the output stage is getting too hot. The SF-16M turns down the output by 3dB at this point in order to prevent shutdown. • Poweroff – power is removed from the output manually. Poweroff is similar to mute, but when the output is powered back on, it comes on in a known and safe state (within minimum turn on, maximum turn on volume settings). • Muted – the output has been muted. When an output is unmuted, it returns to its most recent volume level, which can be outside minimum/maximum turn on. • Automute – the output has been automatically muted due to lack of input audio. The outputs are split into two banks, 1-8 and 9-16. If no input audio is present on an entire bank, all the outputs in that bank will automatically mute to conserve power. • Volume – the output volume level of the channel. Volume bar is always available when you select the line. General Setup Tips • Each input and output can be set up as stereo or mono, but the easiest way to keep track is by counting each mono input or output as a single channel. Use the odd numbered channel to number a stereo input (skip the even numbers). • Be sure to record input names and stereo or mono status; a worksheet is provided on page 7. • Do not connect RCA and DB-25 input cables at the same time; it may degrade audio quality. • Audio Override terminals provide a way to trigger an override or a sound scene. Connect a momentary switch, button, or other contact closure. Use the SonaFlex PC utility to define sound scenes and overrides (see online video tutorials). • Observe correct polarity when connecting system trigger input or output (e.g. a preamp out which sends out a +12V signal when on, and 0V when off). Mono vs. Stereo Note: A stereo input can be selected for mono output(s) using either of its input numbers (e.g. 7 or 8). Stereo input channels are available to stereo outputs as stereo, and also combined in the DSP for mono outputs. Output > Quick Access Line 3: The connected input number(s) and name. There are four ways for an output and input to be connected: 1. Stereo output pair to stereo input pair - The stereo input pair is listed in the “number-comma-number” sequence (e.g. “1,2 iPod” is a stereo input pair including channels 1 and 2). 2.Stereo output pair to mono input - The mono input is displayed as a mono pair (e.g. 3,3 Microphone). The “number-comma-number” indicates that the stereo output pair has both outputs connected to the same input. 3.Mono output to stereo input pair - The mono output connects to a “monoized” version of the stereo input pair and displays in “number-plus-number” format (e.g. 1+2 CD Changer). Input 1 and 2 are digitally combined to mono. 4.Mono output to mono input - The mono output will connect to a mono input; it appears as a “single number and name” (e.g. “1 Page Mic”). Line 4: Loudness status. Loudness is a 5 dB bass and treble boost. It is intended to enhance audio for listening at low volume levels. Loudness uses low shelf and high shelf filters at 200 Hz and 3000 Hz respectively. Adjusting Levels To change volume levels, bass, treble, and balance, select the item and turn the knob to reach the desired level on the bar graph provided. Press the knob again when finished. Line 5: Bass boost, an adjustable low shelf filter. Bass boost requires that filter 1 is a low shelf, but allows any frequency to be specified and still operate. The boost range is -15 to +15 dB. Switching filter 1 to any other filter type will disable bass boost. When the fifth line is selected, a horizontal bar showing the bass setting is displayed. SF-16M Matrix Amplifier Installation and Operation Guide 17 Line 6: Treble boost (like bass boost but high shelf). Requires filter 2 to be a high shelf. Line 7: Stereo/mono status. Any output can be mono or stereo. Line 8: Balance; attenuates a single channel of a stereo pair. Line 9-11: Maximum volume, maximum turn on volume, and minimum turn on volume. Maximum volume sets the maximum level that the output can ever be set to. Maximum and minimum turn on volumes take effect when the output is powered off and then back on. If the volume is below the minimum turn on volume, it is raised to the minimum volume; if above, it is turned down to the the maximum. Output > Volume Levels OUTPUT NUMBER LIVE VOLUME LEVEL ASSIGNED INPUT Output Settings > Volume Levels Shows live volume levels of all outputs on one screen, and shows input(s) connected. Note: for stereo pairs, only the first member of the stereo pair is selectable, but controls both outputs. Note: The scale range on the input level detection is 500 mVRMS = 0 dB; therefore an input signal of 500 mVRMS on an output set to 0 dB will have full scale display. Select a line to show a horizontal bar for volume level, the full name of the output, and the full name of the input. To set all outputs to a specific volume, select the last line and rotate the knob to increase/decrease, then push the knob again to activate the new setting (volume does not update in real time). Output Settings > Assign Inputs Output > Assign Inputs OUTPUT NUMBER INPUT CHANNEL(S) INPUT NAME • Each line shows output, input channel number, and input name. Mono outputs are individually selectable (inputs 1 and 2 are selectable, shown by an underscore), whereas only the first output of a stereo pair can be selected, but both switch together. • Select an output and rotate the knob to switch the input on the fly. • To set ALL outputs to a specific input, scroll to the bottom line. This adjustment only activates after you push the knob. Input > Quick Access CHANNELS INPUT NAME Input Settings There are two ways to make input adjustments: QUICK ACCESS, which allows multiple adjustments to an individual input, and GAIN LEVELS, which allows gain adjustment of all inputs on the same screen. Input > Quick Access Adjust input gain and stereo/mono settings for an individual input or stereo pair. LEFT (LEVELS) Input > Input Gain RIGHT Line 1: Input channel number(s) and names. A mono input displays a single channel (e.g., 7 Sirius), and stereo inputs display the channel-comma-channel format (e.g., 7,8 CD Changer). Again, to select a stereo input, select the first channel of the pair. Line 2: Stereo or mono mode of the input. All inputs are natively mono, but when an input is set to stereo, outputs connect as as left and right. Line 3: Gain level, digital gain of -10 to 10 dB. Line 4: The fourth line displays the live volume input level. This level is a dB display from -20 to 0 dB; therefore any inputs that are below -20 dB will not show on the meter. Input > Input Gain 18 Input > Gain Levels All input channels are listed on the left and the meter displays input levels from -20 to 0 dB. The last line allows all input gains to be set in one action. SF-16M Matrix Amplifier Installation and Operation Guide How to Adjust Input Gain Adjust input gain so that all input sources are approximately the same volume. Tip: it is usually best to trim the “hot” inputs, rather than boost low ones; too much digital gain can sometimes introduce distortion with a hot input signal. 1.Access INPUT SETTINGS, then choose GAIN LEVELS so that you can see all inputs at once. Connect all outputs to the first source, and if it has a volume control, turn it up to maximum. CLIP 2.Look at the live input level; if it is clipping, turn the input device down until it is just barely clipping (shown by an asterisk at the end of the bar). 4.If the level is low, turn up the SF-16M input gain, just until it clips. 5.If the device has no output volume control and it is clipping, turn the gain down. Groups Groups Groups are a collection of outputs that can be controlled simultaneously using group volume and group switching commands, etc. If you have several different outputs that are a member of the group, you can adjust their settings individually, but when a group command is issued, all member outputs respond. Line 1: Group number and name. All members of the group are displayed if you scroll down. The format is number name for mono and number comma number name for stereo. Line 2: The most recent input selection of any member in the group. (All members in the group can have different input selections.) Select this line to force every member of the group to select the input displayed here. Line 3: Volume adjustment. Select the line, turn the knob, and deselect the line to activate the new level. Line 4: Mute status of the final member of the group. Select and turn the knob to mute or unmute all members of the group. Override Override 1 Override 2 An override is a command that temporarily switches a number of designated outputs to an input, and when the override is released, all outputs return to previous inputs. An override sets a specified volume level for each output, and if the output is muted or powered off, will unmute or power on appropriately. Output volume levels can be adjusted while an override is active, but the level will be reset to the override settings next time the override is activated. Each override has a priority setting that dictates whether it effects outputs already in override. Priority 1 is the highest. Example: A music source override with priority 5 would be interrupted by a doorbell override with priority 4. Once the doorbell override is released or cancelled, the music source will be re-enabled. When all overrides are released, then all outputs return to their original input sources and volume levels that were active before the override. Line 1: The override number and type. There are ten audio overrides and four mono FlexPort overrides (or two when FlexPorts are used in stereo mode). Line 2: Active/inactive status of the override. Select this line to activate an override. Activating a standard override follows the rules below; a FlexPort override activates in stereo mode, so FlexPort override 3 activates channels 19 and 20. Line 3: Input number and name that will take effect when the override is activated. Line 4: Override priority. Priority 1 is highest. Line 5: Member(s) of the override, which are the outputs that are affected by the override. For example, you may not want a doorbell to ring in certain rooms, so you could disable (ignore) them for that override. SF-16M Matrix Amplifier Installation and Operation Guide 19 For Each Member Output, A Sound Scene Preset Remembers: • Current volume level • Mute status • Power status • Current input Note: A scene “snapshot” command saves the current volume/input, so if you have an override activated, the override input and volume level will be recorded in the scene preset. Scene Presets A Scene Preset is a “snapshot” of the current state of the system (volume, inputs, mute, and power status). When you recall a Scene Preset these settings return to just the way they were when the preset was saved. Create a Scene Preset by sending a snapshot command (see page 34) via Ethernet or serial. You can also build or edit a scene preset using the PC utility (see page 24 and video tutorial). When you send a snapshot command to save a Scene Preset, all outputs are included as members of that Scene, but it is possible to disable outputs from a Scene membership or to add them manually using serial/Ethernet commands or the PC utility. Line 1: Scene number and name. Line 2: Select this line to recall and activate the scene. Status is not indicated here because a scene is not activated and then “released” like an override. Line 3 and Following: Outputs belonging to the Scene Preset, aka “members”. Front/Back Panel Sleep Timer: Turns off the front panel display after the front panel keys and knob have not been used for a period of time. Select a time period of 0, 1, 2, or 5 minutes. Select (zero) if the display should remain on. The display is turned off automatically when entering standby unless the sleep timer is set to zero. Brightness: Brightness level of the keys and front panel display. Choose 100%, 75%, 50%, or 25%. Also accessible by the dim button on the keyboard. Front Panel IR On/Off: Disables / enables front panel IR sensor. If not required for control, leave it off to avoid issues with sunlight or other interference. Audio Sense Standby: Choose standby mode: either Audio Sense standby (AS) or Audio Sense + Trigger (AST). In AS mode, the SF-16M detects the presence of audio to exit or enter standby (power-conserve). To use AST mode, connect any 12V device to the trigger input on the back of the unit. With AST mode on, a high-to-low transition triggers standby (automute), and a lowto-high transition will bring it out of standby. Simply having a high or low level present does not trigger the amp; it is the transition that triggers the change. Network Firmware Network This screen displays the status of the network, the native IP address, gateway, subnet mask, and mac address. It is often convenient to turn DHCP on to connect automatically to a DHCP network for initial setup. Once the SF-16M is installed, use a static IP address and turn DHCP off. If the network settings have changed but not yet committed, this screen displays a message. Firmware This screen displays the unit number, the system firmware and bootloader, and the input board firmware and bootloader versions. To update firmware load the new version onto a USB drive, insert the drive into the USB port, and select the update firmware line. Factory Defaults If you need to clear all the settings in the SF-16M and return it to default values, use the Factory Defaults command. The only way to restore custom settings is if you have an archive saved on a USB drive or computer hard disk. Learn more: www.audioauthority.com/sonaflex_tips. 20 SF-16M Matrix Amplifier Installation and Operation Guide Advanced Configuration Using the PC Utility The PC Utility is the most efficient way to set up the SF-16M, and it is easy to save an archive of each configuration to work on off-site, or for backup. This manual covers main functions of the utility, but for more detail, see video tutorials at www. audioauthority.com/sonaflex_videos. The following settings can only be configured using Ethernet/serial commands or the PC setup utility (not front panel controls): Input/ Output Names, Groups, Overrides, Scene Presets, DSP (EQ Filters), IP Configuration. Setup Tips: • Save your work! Learn more: www.audioauthority.com/sonaflex_tips. • To connect via Ethernet, connect the SonaFlex to the network via DHCP, and check its network menu for the assigned IP address. Open the utility on your PC, choose Mode > Telnet, and enter the SonaFlex IP address. • Import your SF-16M configuration, either by serial connection, Ethernet, or a USB drive via File Mode (in File Mode, you must export it from the SF-16M onto a USB drive first). SONAFLEX VIDEO TUTORIALS • Double click in each field to enter information (do not use tab or enter key). • Save time by using the “Apply to All” check box where available. 1. Naming Inputs and Outputs - Type a name for each input or output, choose mono or stereo, and click update. All inputs and outputs are mono by default. Designating an input or output as stereo ties the selected odd numbered input or output to the next even number for switching, volume and DSP. Mono outputs appear with a single number and name (example, 1 Entry Hall), while stereo pairs appear with two numbers separated by a comma and a name (example 1,2 Family Rm). 16 characters are allowed, including a-z, A-Z, 0-9, - . , / ! ? \ but long names may display truncated on the front panel display. The Flexport inputs can be named in a similar fashion. They can also be set to mono or stereo, but additional setup must be performed. See the FlexPort manual for details. Levels 2. Input / Output Assignment - Provides a basic input switching interface, and indicates the mono or stereo mode. 3. Levels - Set gain or trim levels for inputs, and volume levels for outputs. Some settings on this tab are permanent (e.g. input gain and maximum output levels, etc.), and some are intended for temporary convenience while setting up levels (e.g. mute, power off, etc.),. Set minimum and maximum turn-on levels to impose moderate volume levels when an output is powered on (limits do not apply after mute). SF-16M Matrix Amplifier Installation and Operation Guide 21 DSP Filters 4. DSP Settings - Seven filters are available, to be used individually and/ or as a multi-band EQ. Filters include high-pass, low-pass, high shelf, low shelf, and parametric. To create a seven-band parametric EQ, select type: parametric for all filters, then set frequencies at regular intervals. Set levels to compensate according to requirements for each output. High-pass and low-pass filters are intended for passive subwoofers and satellite speakers. If low shelf filter is used, always use filter slot 1. Groups 5. Output Groups - Group multiple outputs together to share source selection, volume up/down, mute on/off, and power on/off commands. Groups are ideal for making large areas act like a single audio zone or for grouping outputs with hi-pass and low-pass filters (sub/sat combinations) so that they respond together. Group specific serial and IR commands are available for source selection, volume up/down, mute on/off and power on/off. Up to 10 groups can be stored per SF-16M. Group settings include group naming and output members. Overrides Contact Closures 7. Sound Scenes - A sound scene is a system-wide snapshot of all volume levels and input assignments. Scenes allow the end-user to recall previously captured system settings with a single button press. Up to 10 sound scenes can be saved and recalled per SF-16M. Scenes can also be saved and recalled across multiple SF-16M amplifiers linked together, however each individual SF-16M has a maximum of 10 unit or “global” scenes (see sidebar for details). Scene settings include scene naming, input selection, output levels, mute status and an “Ignore” option which allows any output to always ignore a scene preset. Sound Scenes Network 6. Overrides - The purpose of audio override is to provide a convenient method of temporarily switching a pre-defined group of outputs to a specific input. Once the audio override is released or cancelled, the outputs effected by the override return to their previous inputs and volume levels. Overrides can be breif, for applications like paging and doorbells, or longer duration for local source selection like an iPod, AppleTV, or audio mixer. Audio override can be triggered by two contact closure inputs on the back of the SF-16M, as well as specific serial and IR commands. Up to 10 audio override configurations can be set up per SF-16M, plus FlexPort overrides (see FlexPort Manual). Audio override settings include input assignment, output members, output levels, override priority and momentary or toggle mode for the audio override contact closures. Lockout 8. Miscelaneous - DHCP is convenient for initial network setup, but it is best to use a static IP address for long term use, or use a serial connection. Leave front panel IR sensor off if not required for day-today operation. I is often a good practice to lock front panel controls after setup is complete to prevent tampering. Contact closures may be used to trigger an override or a sound scene preset. Choose toggle or momentary. Contact closures can not be used to trigger a FlexPort input. Editing Configuration Files with Text Editor To edit configuration files manually, export the file, either from the SF16M onto a USB drive, or from the PC Utility onto USB or hard drive. The file is a text document that can be edited in a text editor such as Notepad++. This method can be more efficient when programming multiple SF-16M amplifiers to be used in one system. Set up one amplifier, then make copies of that configuration file and find/replace the Unit ID number for each additional SF-16M. You may also want to use this method to enter DSP settings, or scene presets, etc. 22 SF-16M Matrix Amplifier Installation and Operation Guide An example Sound Scene Preset designed to be triggered by an automation system every morning. Soft music plays in some rooms, while others are muted or powered off. A different source plays in each of the bedrooms. In this example, all seven filters are used for a 7-band parametric EQ set up at regular frequency intervals. The frequencies may be set at any interval. The levels may be set from -10db through +10db. Bass and treble controls are not available on an output when Advanced DSP is enabled. Activate loudness for intelligibility at low volumes. SF-16M Matrix Amplifier Installation and Operation Guide 23 CONTROL INTERFACES Operate the SF-16M using a professional automation control system. Its open-control architecture allows any third party automation controller to use serial or Ethernet commands to control volume, EQ, switching, overrides, sound scenes, or any other function programmed into the controller. IR controllers are adequate for many basic installations. Control Interface Capabilities All commands are available on Ethernet and RS-232, but other control methods are limited as shown. The SF16M PC utility (not shown) is the best setup method for advanced tasks, but is not intended as a user interface. RS-232 Ethernet Infrared Front Panel Source selection per output X X X X Output volume, mute & tone control X X X X Parametric EQ, hi-pass/low-pass filters X X Lock front panel interface X X Change Ethernet settings X X Group, scene and override creation X X Group, scene and override control X X X X Upgrade firmware X X Using Serial and Ethernet (Telnet) Follow the instructions for the controller of your choice using the serial settings below, and/or Ethernet settings accessible via the SF-16M front panel menu. Serial commands (listed on page 29), are used for telnet or serial control. Control4 SDDP is available for seamless Ethernet integration. The internal SF-16M telnet server allows two clients to be connected at one time. Each client connection has a time out of 15 minutes; if a client crashes and does not close the connection properly (sending an EOF command) that connection remains busy until it times out. GND RX TX 5 4 3 2 1 9 8 7 6 DB-9 Connector on SF-16M rear panel Using the RS-232 Port System controllers and PCs send all setup and control commands as well as receive feedback via the RS-232 serial port. Important: If a PC is connected directly to the SF‑16M RS-232 port, use a standard serial serial cable (male to female) for RS-232 input, and to loop out to the next SF-16M, if multiple SF-16Ms are included in the system. Transfer Rate 9600 bps Data Bits 8 Parity None Stop Bits 1 Flow Control None or Off Character type ASCII Connector DB-9 Electrical Rating Pins 2 and 3, ±15 VDC Pin out Pin 2, Tx (Standard cable) Pin 3, Rx Pin 5, Ground Shell, Ground Using a PC via Ethernet Connect a computer directly to the SF-16M Ethernet port using a crossover cable, or alternatively use a standard Ethernet hub or switch and a standard patch cable. Once connected to a computer or network, the SF-16M by default attempts to obtain an IP address automatically using DHCP. To use static settings, see the detailed instructions on page 25. There are two LED indicators located next to the Ethernet port on the rear panel that will help in identifying connection issues: AUDIO OVERRIDE SYSTEM TRIGGER • Link - The Link LED is steadily lit if a connection is detected and flashes when activity isUNIT ID 1 2 IN OUT present. • Speed - The Speed LED is off for 10 base T, and on for 100 base T. 24 SF-16M Matrix Amplifier Installation and Operation Guide USB LINK SPEED Using DHCP DHCP is enabled on the SF-16M by default. If DHCP is CONTACT enabledCLOSURE on your network, simply 5V - 24V AC / DC connecting the SF-16M to the network with an existing DHCP server enables it to obtain all FlexPort FlexPort 2 necessary information. You can enter a static IP and turn DHCP off after1 initial setup is finished. IN ETHERNET OUT IN OUT Network Jack on SF‑16M rear panel DB25 AUDIO INPUT AUDIO LOOP OUTPU Static Addressing Connected Directly to a PC Assign an IP address to the SF-16M which will not conflict with the PC. • Windows 7: Control Panel -> Network and Sharing Center > Change adapter settings > Local Area Connection (or wi-fi adapter) > Details • Windows XP: control panel > network > local connection properties SF-16M screen image showing Network Settings with DHCP set to ON, with a link established. Change the TCP/IP protocol properties, and set the IP address, gateway, and subnet mask, if they are not already set. This can be arbitrarily done on a direct connection, but a good choice for the settings would be IP address of 192.168.0.1, subnet mask of 255.255.255.0, and an empty default gateway. Once these values have been set, use serial commands to set the network settings of the SF-16M in a similar manner, but use a different IP address than that of the computer (for example, 192.168.0.2). Static Addressing on a Network The SF-16M must be set to the same settings as the PC except for the IP address, which must be one available on the network. To determine this in Windows, use the DOS prompt (Start->Run>cmd) commands ipconfig and ping. Ipconfig will list the PC’s settings, and ping will allow you to test addresses to make sure that nothing else on the network has that address. Enlist the help of a network administrator if you are unfamiliar with setting up a network connection. Once a connection is established, a telnet program such as Hyper Terminal, Teraterm, PuTTY etc, must be used to connect to the device. Enter the IP address of the SF-16M and leave the default port (23) to connect. Once connected, standard serial commands can be issued in an identical manner to serial control. Using an IR Control System The SF-16M uses a two wire IR circuit. It is imperative that the correct polarity be maintained when connecting third party IR equipment. The 3.5MM pinout is shown in the illustration below. Connect the IR signal from your IR controller directly to the main IR input port on the rear panel. Alternatively, adhere an IR emitter from your infrared system onto the SF-16M front panel receiver. TipTip= =Signal Signal Ring = Not Used Ring Ground Sleeve = Ground Sleeve = +12 Volts If the SF-16M IR codes are available from your remote control company, download and/or activate those files. A CCF file containing the latest codes can be downloaded from our website on the SF-16M product page. Learn more: www.audioauthority.com/sonaflex_tips. Tips for Using Infrared Control • If you are using standard hand-held IR remote controls, ensure correct operation by avoiding sources of light pollution such as Plasma and LCD TVs, direct sunlight, fluorescent light, etc. Experiment with the physical placement of the IR receiver to avoid interference. • If a source of interference cannot be eliminated or avoided, use IR receivers that block that type of interference, such as Plasma-proof or LCD-proof receivers. • The SF-16M back panel IR input provides no power, and therefore requires a connecting block if used with an IR receiver. • The loop out to another unit or device is compatible with a mono or stereo 3.5mm patch cable. SF-16M Matrix Amplifier Installation and Operation Guide 25 7/29/11 A Release 11/15/11 B DRA Remove IR DAF BALANCED AUDIO INPUT Appendix A: FlexPort Audio Modules + FlexPort audio modules provide up to four additional audio inputs (2 per FlexPort input) to each SF-16M. FlexPort modules connect via Cat 5 cable to the SF-16M and accept a wide variety of pro and consumer audio sources. All FlexPort GND modules can be located up to 500 feet from the SF-16M and include mounting points for either surface or in-wallOVR mounting in an “open ended” single gang bracket such as Arlington model LV1 or Carlon model SC100RR. 1. FPM-B Balanced line/mic input with phantom power MODEL FPM-B • Accepts any 3-wire balanced line or mic level audio input OVERRIDE BALANCED AUDIO INPUT • “Override” contact closure input for push-to-talk paging mics such as Bogen model MBS1000A + • Override button (defeatable) with backlighting to indicate audio override status GND BALANCED • 15V phantom power (defeatable) for condenser microphonesAUDIO INPUT • Input gain potentiometer OVR AUDIO INPUT + L • Input can be assigned as Dual Mono (2 mono channels), Mono 1 or Mono 2 on the FlexPort GND audio bus OVR • Optional “Mix” setting allows two FlexPort modules to be mixed together on a single FlexPort audio bus (both inputs must be assigned to a mono channel) R MODEL FPM-B DATE OVERRIDE LTR REVISION RECORD AUTH 11/15/11 P1 Prototype MODEL FPM-B DR CK DAF MODEL OVERRIDE FPM-U AUDIO MIC INPUT OVERRIDE 2. FPM-X XLR/ 1/4” TRS input with phantom power • Accepts any 3-wire balanced line or mic level audio input via a combo XLR/ 1/4” TRS input • Override button (defeatable) with backlighting to indicate audio override status • 15V phantom power (defeatable) for condenser microphones • Input gain potentiometer 716-307 • Input can be assigned as Dual Mono (2 mono channels), Mono 1 or Mono 2 on the FlexPort audio bus • Optional “Mix” setting allows two FlexPort modules to be mixed together on a single FlexPort audio bus (both inputs must be assigned to a mono channel) Model FPM-B Artwork MODEL OVERRIDE 16AN4200 FPM-X AUDIO MIC INPUT 7/29/11 A Release 11/15/11 B 3. FPM-D Digital Coax/Optical Input 1/2 DRA Remove IR DAF DIGITAL INPUT AUDIO MIC INPUT • Accepts any digital SPDIF coax or optical audio input (Stereo PCM only) COAX OPTICAL • Override button (defeatable) with backlighting to indicate audio override status • Input can be assigned as Stereo (default), Mono 1 or Mono 2 on the FlexPort audio bus MODEL FPM-X L OVERRIDE R AUDIO OUTPUT • Optional “Mix” setting allows two FlexPort modules to be mixed together on a single FlexPort audio bus (both inputs must be assigned to a mono channel) • Analog audio output (pass-thru) for applications where a converted analog output is desired MODEL FPM-X MODEL FPM-D OVERRIDE 4. FPM-U Analog Audio Input • Accepts any analog RCA audio input OVERRIDE Ink color: Pantone Cool Gray 8C BALANCED AUDIO INPUT • Override button (defeatable) with backlighting to indicate audio override status + AUDIO INPUT Part Number L 716-308 R • Input can be assigned as Stereo (default), Mono 1 or Mono 2 on GND the FlexPort audio bus OVR • Optional “Mix” setting allows two FlexPort modules to be mixed together on a single FlexPort audio bus (both inputs must be assigned to a mono channel) Title Full Drawing No. 11/15/11 16AN4300 LTR REVISION RECORD 11/15/11 P1 Prototype MODEL FPM-B 26 SF-16M Matrix Amplifier Installation and Operation Guide OVERRIDE MODEL FPM-U DRA Drawn By Checked Model FPM-X Artwork Date DATE Scale Sheet Rev. P1 1/2 AUTH DR DAF OVERRIDE CK FPM Rear Panel Connections and Settings FlexPort RJ-45 Pinout It is recommended that all FlexPort bus Cat 5 wiring be configured using the EIA-568B standard pinout. Audio Authority cannot garantee correct operation using any other wiring configuration. Figure A-3 below shows both EIA-568B and FlexPort RJ-45 pinouts. FPM-B and FPM-X 761-392 FLEXPORT FPM-B and FPM-X A FlexPort Bus In - Connects via Cat 5 to the FlexPort “Bus Out” of another FPM in daisy chain scenarios BUS IN B BUS OUT ASSIGN CHANNEL D MIN DUAL M MONO 1 MONO 2 B FlexPort Bus Out - Connects via Cat 5 to a SF-16M “FlexPort In” or in daisy chain configurations to the “Bus In” of an additional FPM (See D for audio settings when daisy chaining) A GAIN MAX INPUT MIX OVERRIDE BUS PWR E C Input Gain - Increase or decrease input signal level prior to being sent to the C SWITCH MIC ON ON MOMENTARY TERM. ON PHANT. OFF LINE OFF OFF TOGL. OFF ON SF‑16M D Assign Channel - The input source can be assigned as: Dual Mono (input is assigned to both FlexPort channels), Mono 1 (FlexPort bus channel 1) or Mono 2 (channel 2) Figure A-1 E Input Mic/Line - Sets input gain as mic or line level Mix On/Off - Allows two daisy chained FlexPort modules to mix together upon override Override On/Off - Enables or Disables override button on the front panel Momentary/Toggle - Sets the override button to respond as a momentary or toggle switch Bus Termination On/Off - Turn on if the FPM is the last module in a daisy chain configuration Phantom Power On/Off - Turn on for phantom powered microphones FPM-D and FPM-U 761-391 FLEXPORT ASSIGN CHANNEL I FPM-D and FPM-U STEREO MONO 1 MONO 2 G BUS IN F BUS OUT MIN GAIN MAX SWITCH G FlexPort Bus In - Connects via Cat 5 to the FlexPort “Bus Out” of another FPM J in daisy chain scenarios F FlexPort Bus Out - Connects via Cat 5 to a SF-16M “FlexPort In” or in daisy chain configurations to the “Bus In” of an additional FPM (See I for audio settings when daisy chaining) MIX OVERRIDE BUS ON ON MOMENTARY TERM. ON OFF OFF TOGL. OFF Figure A-2 H Input Gain - Used to increase or decrease input signal level prior to being sent to the SF-16M I Assign Channel Switch - The input source can be assigned as: Stereo (default), Mono 1 (FlexPort bus channel 1) or Mono 2 (channel 2) J Mix On/Off - Allows two daisy chained FlexPort modules to mix together upon override Override On/Off - Enables or Disables override button on the front panel Momentary/Toggle - Sets the override button to respond as a momentary or toggle switch Bus Termination On/Off - Turn on if the FPM is the last module in a daisy chain configuration FlexPort Pinout: (EIA-568B) Pin 1: RS-485A Pin 2: RS-485B Pin 3: Audio Left + Pin 4: Audio Right + Pin 5: Audio Right – Pin 6: Audio Left – Pin 7: 18V Pin 8: Ground Pair 3 Pair 2 Pair 1 Pair 4 Modular Jack (RJ-45) 1 2 3 4 5 6 7 8 W-O O W-GR BL W-BL GR W-BR BR T568B Pair Assignments Figure A-3 SF-16M Matrix Amplifier Installation and Operation Guide 27 FlexPort Module “Override” Button The purpose of the front panel override button is to switch designated SF-16M outputs to a FPM input. Learn more: www.audioauthority.com/sonaflex_tips. A typical example is an audio mixer, connected to a FPM-X in a conference room. When the override button is pressed, designated outputs switch over to the audio mixer for the duration of the override. When the override button is pressed again, all affected outputs will switch back to the input source prior to override. Audio override is based on two key settings: SONAFLEX VIDEO TUTORIALS 1.FPM dipswitch settings, previously configured above. 2.SF-16M audio override settings, programmed using the SF-16M PC configuration software (see page 22 or view the online video Override tutorial). 761-391 761-392 Audio Override with “Mix” Option Enabled In some cases it may be desired to mix two FPM module inputs together upon audio override. An example would be a classroom where both a microphone and an audio presentation need to be heard simultaneously. To acheive this function, first daisy chain two FPM modules and wire back to the SF-16M. Set one FPM as “Mono 1”, and set the other as “Mono 2”. Both FPM’s must have the “Mix” dipswitch set to On. FLEXPORT BUS IN BUS IN BUS OUT BUS OUT ASSIGN CHANNEL DUAL M MONO 1 MONO 2 INPUT MIX OVERRIDE BUS PWR ASSIGN CHANNEL MIN STEREO MONO 1 MONO 2 GAIN MAX SWITCH MIC ON ON MOMENTARY TERM. ON PHANT. OFF SF-16M FlexPort Input FLEXPORT MIN GAIN MAX SWITCH LINE OFF OFF TOGL. OFF ON MIX OVERRIDE BUS ON ON MOMENTARY TERM. ON OFF OFF TOGL. OFF Figure A-4 Appendix B: Firmware Update Procedure The latest version of firmware is available from our website on the SF-16M product page. Learn more: www.audioauthority.com/sonaflex_tips. 1. Copy the latest firmware file onto a USB drive. 2. Insert the drive in the USB port on the rear panel of the SF-16M. 3. Press the menu key and navigate to the firmware update menu item. 4. Follow the prompts and select the firmware file. 5. After a short delay the SF-16M reboots and performs the firmware update. 6. Once the update has finished, the SF-16M reboots and resumes operation with the new firmware version. Appendix C: SF-16M Rack Mounting The SF-16M is designed so that it may be installed either on a shelf or in a standard 19-inch equipment rack. If rack mounting, remove the feet and the cover screws adjacent to the front panel of the unit. Reuse the cover screws to mount the rack adapters supplied with the SF-16M. Be sure to place a spacer under the adapters at every screw location. Secure the SF-16M to the rails of the equipment rack with the screws supplied, and use appropriate chassis supports, such as Middle Atlantic CSA Series. Figure C-1 28 SF-16M Matrix Amplifier Installation and Operation Guide SF-16M Matrix Amplifier Installation and Operation Guide 29 [U#DHCP#] [U#GW###.###.###.###] [U#IP###.###.###.###] [U#NM###.###.###.###] [U#QE] DHCP Gateway IP Address Network Mask Query [U#FPIR#] [U#FPL#] [U#SLEEP#] IR Sensor Lock Controls Sleep Timer [U#XG##] [U#I#N”@”] [U#I##STEREO#] Gain All Input Name Stereo or Mono Output-Specific Commands [U#I##G##] Gain Input-Specific Commands [U#DIM#] Dim Front Panel Controls [U#EC] Serial String U1-4, I1-20, STEREO0-2 (0 off, 1 on, 2 toggle) U1-4, I1-20, N (16 characters a-z, A-Z, 0-9, -.,/!?\) U1-4, G-10-10 (dB) U1-4, I1-20, G-10-10 (dB) U1-4, SLEEP (0, 1, 2, 5 in minutes) U1-4, FPL0-2 (0 off, 1 on, 2 toggle) U1-4, FPIR0-2 (0 off, 1 on, 2 toggle) U1-4, DIM0-3 (0 = 100%, 1 = 75%, 2 = 50%, 3 = 25%) U1-4 U1-4, NM (0.0.0.0 - 255.255.255.255) U1-4, IP (0.0.0.0 - 255.255.255.255) U1-4, GW (0.0.0.0 - 255.255.255.255) U1-4, DHCP0-2 (0 off, 1 on, 2 toggle) U1-4 Valid Range Sets an input pair as stereo or mono, which defines how stereo or mono outputs will connect to the input. For example, a stereo input of (1,2) will be selected by a stereo output as (1,2), but a mono output as (1+2). A mono input of 1 will be selected by a mono output as 1, but a stereo output as (1,1). Names the specified input stereo pair or mono source for front panel display. Set the level of digital input gain on all inputs. Set the level of digital input gain on a stereo pair or mono input channel. This feature is designed to equalize the input volumes of sources that do not have volume control. Sets the front panel VFD sleep timer, in minutes. A time of 0 never sleeps. Front panel lock. Locks out front panel input (keyboard, knob) to prevent changing system settings from the front panel. An alternate unlock sequence is available via the keyboard: press menu, back, dim, back, dim, dim. Enable/disable the front panel IR sensor. Sets the brightness level of the front panel display and lights. Query the current Ethernet settings - DHCP, IP Address, subnet mask, gateway, mac address, commit status. Set the subnet mask; DHCP must be off. Note that a commit command is required after changing this setting. Set the static IP address; DHCP must be off. Note that a commit command is required after changing this setting. Change the gateway setting. The gateway is used to communicate with devices that are not inside the subnet (devices external to the router or switch). Note that a commit command is required after changing this setting. Change the dynamic host configuration protocol (DHCP) setting. This protocol is used to allow the device to receive IP address settings automatically from a properly enabled network. Note that a commit command is required after changing this setting. Commit changes that have occurred to the Ethernet settings. This command must be issued after you have finished changing DHCP, IP, Gateway, or Netmask settings in order to cause them to become active. Note that any Telnet client connected will be disconnected when this command is issued. Description See page 22 and www.audioauthority.com/sonaflex_tips. for instructions. Commit Ethernet Command Serial and Ethernet Command List Appendix D: 30 SF-16M Matrix Amplifier Installation and Operation Guide [U#O##BALL] [U#O##BALR] [U#O##M#] [XM#] [U#XM#] [U#O#N”@”] [U#O#P#] [XP#] [U#XP#] [U#O##Q] [U#O##STEREO#] [U#O##I##] [XI##] [U#XI##] [U#O##V###] [U#O##VD] [U#O##VU] [XV###] [XVD] [XVU] [U#XV###] [U#XVD] [U#XVU] Balance Right Mute Mute All Global Mute All Output Name Power Power All Global Power All Query an Output Stereo or Mono Switch Switch All Global Switch All Volume Volume Down Volume Up Volume All Global Volume All Down Global Volume All Up Global Volume All Unit Volume All Unit Down Volume All Unit Up [U#O##BAL##] Balance Left Balance U1-4 U1-4 U1-4, V-80-0 (dB) V-80-0 (dB) U1-4, O1-16 U1-4, O1-16 U1-4, O1-16, V-80-0(dB) U1-4, I1-20 I1-20 U1-4, O1-16, I1-20 U1-4, O1-16, STEREO0-2 (0 off, 1 on, 2 toggle) U1-4, O1-16 U1-4, P0-2 (0 off, 1 on, 2 toggle) P0-2 (0 off, 1 on, 2 toggle) U1-4, O1-16, P0-2 (0 off, 1 on, 2 toggle) U1-4, O1-16, N (16 characters a-z, A-Z, 0-9, -.,/!?\) U1-4, M0-2 (0 off, 1 on, 2 toggle) M0-2 (0 off, 1 on, 2 toggle) U1-4, O1-16, M0-2 (0 off, 1 on, 2 toggle) U1-4, O1-16 U1-4, O1-16 U1-4, O1-16, BAL-40-0 (dB) Decrements the output volume level of all outputs of a unit from their current settings. Increments the output volume level of all outputs of a unit from their current settings. Set the output volume level of all outputs of a unit to a specified level. Decrements the output volume level of all outputs from their current settings. Increments the output volume level of all outputs from their current settings. Set the output volume level of all outputs. Decrement the volume of a single output or stereo pair. Increment the volume of a single output or stereo pair. Set the output volume of a single output or stereo pair. Switches all outputs of a unit to the specified input observing mono/stereo connection rules. Switches all outputs to the specified input observing mono/stereo connection rules. Switches the single output or stereo pair to the specified single input or stereo pair. Enables or disables the pairing of outputs. Stereo mode causes two outputs to track each other when performing all functions, and also controls the manner in which inputs are connected to the outputs. For example, consider a pair of stereo outputs (1,2), a mono output (3), a pair of stereo inputs (5,6) and a mono input (7). Valid connections will be (1,2) = (5,6) or (7,7), and (3) = (5+6) or (7). Query a specified output, which displays all settings related to that output Set the power status of all outputs in the specified unit. If power status is toggled, each output is toggled individually, where outputs that are off will be turned on and outputs that are on will be turned off. Set the power status of all outputs. If power status is toggled, each output will be toggled individually, where outputs that are off will be turned on and outputs that are on will be turned off. Set the power status of a single output or stereo pair. An output that is powered from off to on will be checked to confirm that the output volume level fits into allowed limits and may be adjusted. Name the specified single output or stereo pair. Change the mute status of all the outputs of the specified unit. Change the mute status of all outputs. Change the mute status of an output. Adjust the balance level for the specified output pair to the right (decreasing the output volume of the left output). Adjust the balance level for the specified output pair to the left (decreasing the output volume of the right output). Set the balance level of an output. This setting is a negative volume offset applied each time the volume level is set for the output. SF-16M Matrix Amplifier Installation and Operation Guide 31 [U#O##MXTO###] [U#O##MNTO###] Volume Max Turn On Volume Min Turn On [U#GR] [U#G##I##] Remove All Switch [U#O##BASS##] [U#O##BASSD] [U#O##BASSU] [U#O##LD#] [U#O#TREB##] Bass Bass Down Bass Up Loudness Treble Basic DSP [U#G##VU] [U#G##O##R] Remove Volume Up [U#G##Q] Query [U#G##VD] [U#G##P#] Power Volume Down [U#G##N”@”] Name [U#G##V##] [U#G##M#] Mute Volume [U#G##O##A] Add Groups [U#O##MV###] Volume Max U1-4, O1-16, TREB-15-15 (dB) U1-4, O1-16, LD0-2 (0 off, 1 on, 2 toggle) U1-4, O1-16 U1-4, O1-16 U1-4, O1-16, BASS-15-15 (dB) U1-4, G1-10 U1-4, G1-10 U1-4, G1-10, V-80-0 (dB) U1-4, G1-10, I1-20 U1-4 U1-4, G1-10, O1-16 U1-4, G1-10 U1-4, G1-10, P0-2 (0 off, 1 on, 2 toggle) U1-4, G1-10, N (16 characters a-z, A-Z, 0-9, -.,/!?\) U1-4, G1-10, M0-2 (0 off, 1 on, 2 toggle) U1-4, G1-10, O1-16 U1-4, O1-16, MNTO-80-0 (dB) U1-4, O1-16, MXTO-80-0 (dB) U1-4, O1-16, MV-80-0 (dB) Set the treble boost level of a single output or stereo pair. This requires that the output DSP filter 2 is a high shelf filter. Turns on or off loudness for a single output or stereo pair. This requires that output DSP filter 3 is a low shelf and DSP filter 4 is a high shelf. Increment the bass boost level of a single output or stereo pair. This requires that the output DSP filter 1 is a low shelf filter. Decrement the bass boost level of a single output or stereo pair. This requires that the output DSP filter 1 is a low shelf filter. Set the bass boost level of a single output or stereo pair. This requires that the output DSP filter 1 is a low shelf filter. Increments the output volume of all members in the group from their current volume setting. It is possible to set different members of the group to different volumes and retain the difference while turning them all up. Decrements the output volume of all members in the group from their current volume settings. It is possible to set different members of the group to different volume levels and retain the difference while turning them all down. Sets the output volume of a group. Switch the outputs in the group to the specified input, based upon the mono/stereo status of the input(s) and output(s). Clears the group membership of all groups. Removes a single output or stereo pair from a group. Query a group, which displays group members and group name. Sets the power status of a group. Toggling power status will result in all the members of the group being set to the same power status as the first member; if that member is powered off, all will be powered on, and vice versa. Names the specified group. Sets the mute status of a group. Toggling mute status will result in all the members of the group being set to same mute status as the first member; if that member is muted, all will be unmuted, and vice versa. Adds a single output or stereo pair to a group. Sets the minimum turn on volume. After a power cycle or return from standby, the desired output volume will be checked against this, and will be set to this level if they were lower. Sets the maximum turn on volume. After a power cycle or return from standby, the desired output volume will be checked against this, and any levels exceeding it will be set to the maximum. Sets the maximum volume level of an output. Note that this setting also directly affects the nominal output volume, the current ‘live’ output volume, override levels, the maximum turn on volume, the minimum turn on volume, and scene preset volumes. If any of these contain a level that exceeds the maximum, they will be set to the maximum. 32 SF-16M Matrix Amplifier Installation and Operation Guide [U#O##B#HPF#####] [U#O##B#HS##F#####] [U#O##B#LPF#####] [U#O##B#LS##F#####] [U#O##B#P##F#####] Hi-pass Filter Highshelf Filter Low-pass Filter Lowshelf Filter Peaking Filter [U#AO##O##V##A] [U#AO##I##] [U#AO##P##] [U#AO##Q] [U#AO##O##R] [U#AOR] Add Input Priority Query Remove Remove All FlexPort Override [U#AO##A#] Action Basic Audio Override Override [U#O##B#BYPASS] [U#O#TREBU] [U#O#TREBD] Bypass Filter Advanced DSP Treble Up Treble Down U1-4, AO1-10 U1-4, AO1-10, O1-16 U1-4, AO1-10 U1-4, AO1-10, P1-14 U1-4, AO1-10, I1-20 U1-4, AO1-10, O1-16, V-80-0 (dB) U1-4, AO1-10, A0-2 (0 off, 1 on, 2 toggle) Unit 1-4, Output 1-16, Biquad 1-7, Peaking Boost (-15 to 15 dB), Frequency (1-20000 Hz) U1-4, O1-16, B1-7, LS-15-15 (dB), F1-20,000 (Hz) U1-4, O1-16, B1-7, LPF120,000 (Hz) U1-4, O1-16, B1-7, HS-15-15 (dB), F1-20,000 (Hz) U1-4, O1-16, B1-7, HPF120,000 (Hz) U1-4, O1-16, B1-7 U1-4, O1-16 U1-4, O1-16 Clear the membership status of all overrides. Remove a single output or a stereo pair from an audio override. Query an audio override, which displays membership, levels, input, and priority. Set the priority level of the audio override. Lower numbers equal a higher priority (priority 1 is the highest). Multiple overrides can have the same priority. Overrides of the same priority will override each other. Set the input(s) to be connected when the audio override is activated. Add a single output or a stereo pair to an audio override. Override action (toggle on or off). Turning an override on connects the output(s) that are members of the audio override to a specified input at a specified volume level. Outputs that are muted or powered off will be turned on and unmuted for the duration of the override. Turning an override off causes the outputs that are a member of the override to be set to their previous volume level and input. Enable a peaking filter in the specified DSP and single output or stereo pair. A peaking filter is essentially a parametric equalizer, allowing a boost or cut at the frequency of interest. Enable a low shelf filter in the specified DSP and single output or stereo pair. Enables a low pass filter on the specified DSP and single output or stereo pair. The filter is a second order filter, resulting in a -3 dB pass band at the crossover frequency and dropping at -40 dB per decade above. Enable a high shelf filter in the specified DSP and single output or stereo pair. Enables a high pass filter in the specified DSP and single output or stereo pair. The filter is a second order filter, resulting in a -3 dB pass band at the crossover frequency and dropping at -40 dB per decade below. Bypass the DSP filter on the single output or stereo pair. Increment the treble boost level of a single output or stereo pair. This requires that the output DSP filter 2 is a high shelf filter. Decrement the treble boost level of a single output or stereo pair. This requires that the output DSP filter 2 is a high shelf filter. SF-16M Matrix Amplifier Installation and Operation Guide 33 [U#FPO#O##V##A] [U#FPO#P#] [U#FPO#Q] [U#FPO#O##R] [U#FPOR] Add Priority Query Remove Remove All [U#XQSB] Query All Square Brackets [U#CC#M#] Contact Closure Mode [U#SP##O##I##V##A] [SP##LOAD] [U#SP##LOAD] Add Load Global Load Scene Presets [U#CC#T#A##B##] Contact Closure Type Contact Closure (Audio Override) [U#XQ] Query All Query [U#FPO#A#] Action U1-4, SP1-10 SP1-10 U1-4, SP1-10, O1-16, I1-20, V-80-0 (dB) U1-4, CC1-2, M0-1 (0 momentary, 1 toggle) U1-4, CC1-2, T0-1 (0 audio override, 1 scene preset), A1-10 (the number of the audio override or scene preset), B0-10 (the number of the scene preset to trigger when contact closure is released, or 0 for none) U1-4 U1-4 U1-4 U1-4, FPO1-4, O1-16 U1-4, FPO1-4 U1-4, FPO1-4, P1-14 U1-4, FPO1-4, O1-16, V-80-0 (dB) U1-4, FPO1-4, A0-6 (0 off, 1 on stereo, 2 on mono, 3 on mix, 4 toggle stereo, 5 toggle mono, 6 toggle mix) Set the input, volume level, mute, and power status of the output(s) in the unit which are members of the scene preset. Set the input, volume level, mute, and power status of the output(s) which are members of the scene preset on all units. Add a single output or stereo pair to a scene preset, by specifying the volume level and input(s) to connect to when the scene preset is loaded. When an output is added to a scene using this command, mute for the output is set to off, and power for the output is set to on. Sets the mode of the audio override contact closure inputs on the back panel of the unit. Momentary mode causes the override action when the contacts are closed and opened. Toggle mode requires a close and open for each action. Set the effect of the audio override contact closure inputs on the back panel of the unit. By default, the contact closure inputs activate the matching audio override (contact closure 1 activates audio override 1, contact closure 2 activates audio override 2). Alternatively, the contact closures can be used to load one or two scene presets. On contact closure, argument A scene will be loaded. On contact closure open, argument B scene will be loaded, or if the scene number is specified to be 0, nothing will happen; this allows a scene to be loaded on closure and one to be loaded (or nothing happen) on release. Query all settings, but return them in square brackets [ ]. Useful to copy and paste settings into a text file for editing. Note that the unit will be unresponsive while displaying the settings. WARNING - if you have units looped together, this command could cause unintended actions. Query all settings for the unit. Note that while displaying the settings the unit will be unresponsive. Remove all outputs from all audio overrides. Remove an output from an audio override. This output will be ignored by the override when it is activated. Query a FlexPort override, which displays membership, levels, input, and priority. Set the priority level of the flexport override. Lower numbers equal a higher priority (priority 1 is the highest). Multiple overrides can have the same priority. Overrides of the same priority will override each other. Add a single output or stereo pair to a flexport override. This output will be set to the override defined input and the specified volume level when the override is activated. FlexPort override action (toggle on/off or momentary). Turning a FlexPort override on connects the output(s) that are members of the audio override to a FlexPort input at a specified volume level. FlexPort override actions can cause a variety of results depending upon on command. Consider stereo outputs (1,2) and mono output (3), as well as flex port input (17), which is override 1. Action on stereo connects (1,2) to (17,18), and (3) to (17+18). Action on mono connects (1,2) to (17,17), and (3) to (17). Action on mix connects (1,2) to (17+18,17+18), and (3) to (17+18). Outputs that are muted or powered off will be turned on and unmuted for the duration of the override. Turning an override off causes the outputs that are a member of the override to be set to their previous volume level and input. 34 SF-16M Matrix Amplifier Installation and Operation Guide [U#SP##N”@”] [U#SP##O##P#] [U#SP##Q] [U#SP##O##R] [U#SPR] [SPRS#] [SP##SAVE] [U#SP##SAVE] Name Power Query Remove Remove All Allow Remote Save (allow snapshot) Remote Save (snapshot) Remote Save (snapshot, one unit) [U#SBY#] [U#TRIG#] Standby Trigger [U#LOAD] [U#RESET] [U#SAVE] Load Reset Save State [SBY#] Standby Global Standby [SP##N”@”] [U#SP##O##M#] Name Global Mute U1-4 U1-4 U1-4 U1-4, TRIG0-2 (0 off, 1 on, 2 toggle) U1-4, SBY0-2 (0 off, 1 on, 2 toggle) SBY0-2 (0 off, 1 on, 2 toggle) U1-4, SP1-10 SP1-10 SPRS0-2 (0 off, 1 on, 2 toggle) U1-4 U1-4, SP1-10, O1-16 U1-4, SP1-10 U1-4, SP1-10, O1-16, P0-2 (0 off, 1 on, 2 toggle) U1-4, SP1-10, N (16 characters a-z, A-Z, 0-9, -.,/!?\) SP1-10, N (16 characters a-z, A-Z, 0-9, -.,/!?\) U1-4, SP1-10, O1-16, M0-2 (0 off, 1 on, 2 toggle) Save the system state to memory. There is an auto-save that saves the state 60 seconds after the last change. Reset the state of the system to factory defaults. Load the system state from memory. Sets the way the system trigger input on the back panel functions. By default, the unit will auto-mute and power down the channel blocks in groups of 8 based on the detection of input signals. In addition to this power saving feature, the system trigger input can force the entire unit into standby or out of standby based on a voltage present on the system trigger input. Once the trigger mode is set to on, a high to low transition on the trigger input will place the unit into standby. Once in standby, a low to high transition will release the unit from standby. Places a unit in standby or releases it from standby. Places all units in standby or releases them from standby. Turning on standby causes all outputs to be disabled, the DSP to stop running, and the screen to be turned off. Returning from standby turns on the DSP and the outputs. Snapshot: Save the current output levels, input levels, and mute status to the preset in the specified unit. Snapshot: Save the current output levels, input levels, and mute status to the specified preset. Turn on or off the ability to save scene presets (take a snapshot) remotely. Remove all outputs from all scene presets. Remove an output from a scene preset. Query a scene preset, which lists all members, their settings, and the name of the preset. Specify the power status of a single output or stereo pair in a scene preset. Specify the name of a scene preset on a per-unit basis. Specify the name of the scene preset on all units. Set the mute status of a single output or stereo pair in a scene preset. Appendix E: SF-16M Specifications Updated July 15, 2013. Power Per Channel (All Channels Driven): 50W @ 8 Ohms Frequency Response: 20Hz to 20kHz, +/- 0.55 dB into 8 Ohms Full Power Bandwidth: 20Hz to 20kHz S/N Ratio: 96dB Channel Separation: 70dB(channel to channel @1kHz) THD+N: <0.3% @ full power output IMD: <0.5% @ full power output Input Sensitivity: 0.5Vrms Input Impedance: 20k Ohms Audio Clock Frequency: 96KHz Output Clock Frequency: 385KHz Output Protection: Short Circuit, Over-Temperature, Overload Line Voltage & Frequency: 100-120VAC 50-60Hz Power Consumption: 1125W continuous, 1280W for 2 minutes Maximum Current Draw: 10A RMS Heat Output: 1109BTU/Hr. maximum Dimensions (H x W x D): 5.22” x 16.60” x 14” Net Weight: 41 lb. Shipping Weight: 49 lb. Approvals FCC, ETL Warranty: Three years, parts and labor Limited Warranty If this product fails due to defects in materials or workmanship within two years from the date of the original sale to the end-user, Audio Authority guarantees that we will repair or replace the defective product at no cost. Freight charges for the replacement unit will be paid by Audio Authority (Ground service only). A copy of the invoice from an Authorized Re-seller showing the item number, serial number, and date of purchase (proof-of-purchase) must be submitted with the defective unit to constitute a valid in-warranty claim. Units that fail after the warranty period has expired may be returned to the factory for repair at a nominal charge, if not damaged beyond the point of repair. All freight charges for out-of-warranty returns for repair are the responsibility of the customer. Units returned for repair must have a Customer Return Authorization Number assigned by the factory. This is a limited warranty and is not applicable for products which, in our opinion, have been damaged, altered, abused, misused, or improperly installed. Audio Authority makes no other warranties either expressed or implied, including limitation warranties as to merchantability or fitness for a particular purpose. Additionally, there are no allowances or credits available for service work or installation performed in the field by the end user. SF-16M Matrix Amplifier Installation and Operation Guide 35 2048 Mercer Road, Lexington, Kentucky 40511-1071 USA Phone: 859-233-4599 • Fax: 859-233-4510 Customer Toll-Free USA & Canada: 800-322-8346 www.audioauthority.com • [email protected] v 1.4.0 752-607 20130820