1
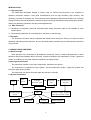
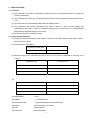
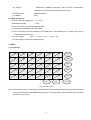
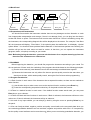
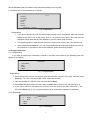
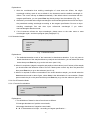
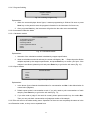
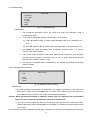
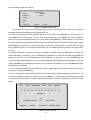
DNM-9602 Microplate Reader
USER’S MANUAL
Madell Technology Corp.
7372 Walnut Ave. Suite V
Buena Park, CA 90620
USA
Phone: 1-877-670-9023
http://www.madelltech.com
1
CONTENTS
1. Introduction
1.1 Characteristic
1.2 Main Functions
1.3 Cautions
2. Principle and Features
2.1 Work Principle
2.2 Arrangement Features
2.3 System Configuration
3. Specifications
3.1 Functions
3.2 Technical Specifications
3.3 Work Conditions
4. Panel
4.1 Front Panel
4.2 Back Panel
4.3 Preparations
5. Program
5.1 Program Introduction
5.2 Program Operation
6. Detect
7. Set
7.1 Time Setting
7.2 Wavelength Setting
8. Inquire
9. Maintenance
9.1 Filters
9.2 Lamp
9.3 Tray
9.4 Fuse
10. Transportation
11. Equipment Parts List
12. Warranty
13. Warning
2
INTRODUCTION
1.1 Characteristics
The DNM-9602 Microplate Reader is mainly used on clinical immunity-tests in the hospitals or
epidemic prevention stations. It has good characteristics such as high sensitivity, high accuracy, fast
checking, and ease for operation etc. The instrument has a dedicated keyboard that enables you to rapidly
change functions and set parameters. Display is a liquid crystal type with alphanumeric and graphic options.
Setting and detecting operations are easy and straightforward.
1.2 Main Functions
(1) Detections of enzymatic plate and cultivated plate during enzymatic tests in the hospitals or other
organizations;
(2) Corresponding detection for microanalysis in chemistry or biochemistry.
1.3 Cautions
The instrument has been strictly inspected and tested before leaving the factory, so it does not need
assembly and testing before detection, and you should be able to operate it just by following the instructions
of the manual.
2. PRINCIPLE AND FEATURES
2.1 Work Principle
Work principle of the instrument is photoelectric colorimetry. Firstly, it detects absorbencies of under
detection sample and standard liquid. Secondly, it performs analyses and calculations. Finally, it produces
values or conditions of the under detection material in the sample liquid.
2.2 Arrangement Features
The instrument consists of two main components: mainframe and printer.
The mainframe is composed of optic system, 8-channel detection system, single-chip system and
enzymatic plate driving system.
The instrument can detect enzymatic plate that has 96 or 48 wells.
2.3 System Schematics
Lamp
Optic
system
8-channel
Prismatic organ
Enzymatic
plate
Photoelectric
detection
Drive circuit
CPU
Steady-voltage
power
Display
Keyboard
Simulative-signal disposal
and A/D-conversion circuit
Printer
RS232 serial port
Fig. 1: System Schematics
3
3. SPECIFICATIONS
3.1 Functions
(1) The instrument can detect on absorbance method and carry out detection based on quality and
quantity respectively;
(2) The instrument can save up to 30 programs for common use and display their parameters on the
LCD;
(3) The instrument can automatically select filters for different items;
(4) The instrument will conduct auto-check first when it starts up, and an initial setting and
self-checking will begin. If there is something wrong with the instrument, the corresponding
diagnosis hint will be displayed on the screen;
(5) The instrument has the printing function.
3.2 Technical Specifications
(1) Range of working wavelength is from 400nm to 700nm. It has 4 filters when leaving factory: 405nm,
450nm, 492nm, 630nm;
(2) Characteristics of the filters
Accuracy of wave (nm)
Half-width(nm)
±3.0
≤12
Table 1: Characteristics of the Filters
(3) Detection range of the instrument is from 0.1A to 3.0A. The error of absorbance accuracy is as
follows:
Absorbance (A)
Accuracy Error
0.1--1.0
±1.0% or ±0.01A
>1.0--2.0
±2.0% or ±0.02A
>2.0--3.0
±10.0% or ±0.10A
Table 2: Absorbance Accuracy
(4)
Absorbance (A)
Error (%)
0.1--1.0
±1.25
>1.0--2.0
±2.0
>2.0--3.0
±8.0
Table 3: Linearity of the Instrument
(5) Repeatability:
(6) Stability:
(7) Detection modes:
≤1.0%;
≤±0.005A/10min;
single wavelength or dual wavelengths;
(8) Display:
240x128 pixels LCD screen;
(9) Print:
external printer;
(10) Data Link:
RS232 serial port;
4
(11) Output:
absorbance, qualitative judgment, value of P/CO, concentration,
judgment of normal value and quality control value
(12) Dimensions:
420x290x180mm:
(13) Weight:
10Kg.
3.3 Work Conditions
(1) Environmental temperature:
(2) Relative humidity:
10~30℃;
<=70%;
(3) Be away from strong electromagnetic field;
(4) Avoid direct irradiation from strong light;
(5) The work place must be dustproof and shake-proof. There should be no caustic gas such as
hydrochloric acid in the air;
(6) Power supply:
220×(1±10%)V, 50×(1±2%)Hz;
(7) Power supply must be grounded perfectly.
4. PANEL
4.1 Front Panel
1
01
2
02
3
03
4
04
5
05
6
06
Print
7
07
8
08
9
09
0
10
。
11
,
12
Delete
A
13
B
14
C
15
D
16
E
17
F
18
Save
G
19
H
20
I
21
P
22
R
23
S
24
Reset
T
25
V
26
M
27
g
28
30
Enter
29
F1
F2
F3
Fig. 2: Front Panel
Note: The numerals from 01 to 30 stand for serial number of the programs saved in the instrument. F1 is the
key for communication. F2 and F3 are spare keys. If the instrument is not connected with a computer,
please do not press F1.
5
4.2 Back Panel
Fig. 3: Back Panel
Switch
Fuse
Power
RS232 Port
Print port
Fan
4.3 Preparation and Examinations
You should first examine the instrument whether there are any damages such as distortion or crack
from inappropriate transportation and storage. If there is no damage found, you can plug into the electric
socket and switch on power. The instrument will conduct auto-check first. If there is something wrong with
the instrument, the corresponding diagnosis hint will be displayed on the screen. For example, if the filters
fail, the instrument will display: “Filter failure”; if the optical system has malfunction, it will display: “Optical
system failure”. You should fix these problems before detection. If the instrument passes auto-checking, the
machine will go into the main menu and wait for orders. At that time, you can operate the instrument
(program, detect, or inquire) according to your needs.
Note: Before beginning the detection, you must wait 20 minutes for a complete warming up from the
time when the instrument was switched on.
5. PROGRAM
Before beginning the detection, you should first program the instrument according to your needs. For
the convenience of future work, the numbering of the programs should be based on the following principles:
(1) Put the most commonly used detection item at first and arrange combined items together.
(2) Because the instrument can only allows five items to process quality control at the same time, you
should put the item, which needs quality control, among the first five items when programming.
5.1 Program Introduction
5.1.1Each function in each menu of the instrument has a sequential number, so there are two methods to
select function:
(1) Use direction keys to make cursor move to the required function, and then press Enter key;
(2) Press the corresponding sequential number key on the panel to select the function.
5.1.2There is a default function in each menu. If the default function meets actual need, you can press
Enter key to go to submenu.
5.1.3There are Back and Next functions in each menu. If Back is selected, the instrument will return to the
main menu; if Next is selected, the instrument will go to submenu.
5.1.4In case of any input mistake, you can always go back by using the cursor or pressing Delete key on
the panel.
5.1.5You can freely set blank, negative, positive and quality control wells on the enzymatic plate when you
are conducting qualitative detection and can set blank, negative and positive wells from 1 to 3 respectively,
but the quality control well must not be more than one. When you are conducting quantitative detection, you
6
can set standard wells from small to large values according to rows or lines.
5.1.6 Main menu of the instrument is as follows:
V1.2
1.Detect
2.Program
3.Inquire
4.Set
5.Time
6.Finish
XX-XX-XX
XX: XX
Fig. 4: Main Menu
Explanations:
1. If you press numeric key 5 on the panel when the main menu is displayed, date and time will
appear at the lower part of the panel. Then if you press the key again, date and time will
disappear. When date and time are displayed, you can’t select other functions.
2. The displaying order of date and time from left to right is year, month, date, hour and minute.
3. After completing the detection, you can press numeric key 6 to take the working tray return to
the instrument. If you want to resume the detection, press numeric key 6 again.
5.2 Program Operation
5.2.1 Programming
If you want to program the instrument, select 2 in the main menu and then the following menu will
appear on the display.
PROGRAM
1.Test Name:
2.No.:
3.Next
4.Back
Fig. 5: Program Menu
Explanations:
1. Press alphanumeric keys in the panel to input test name (for example: HSV.I.IgG), and then press
Enter key. The cursor will shift to No., which means test number;
2. Input test number (01~30), then the cursor will shift to Next;
3. Press Enter key again when the cursor stays on Next, then it will go to the sub menu (Fig. 6);
4. If you want to return to the main menu, you can move the cursor to the main menu with↓, and
then press Enter key, or you can press numeric key 4. (subsequent operation is the same)
5.2.2 Wavelength
WAVELENGTH
1.
Single
2.
Dual
3.Next
4.Back
nm
,
nm
Fig. 6: Wavelength
7
Explanations:
1. With the consideration that working wavelengths of most tests are 450nm, the single
wavelength working mode is set as default in the instrument and the default wavelength is
450nm. The cursor will stay on Next automatically. If the default value is consistent with the
reagent specification, you can press Enter key directly and go into the submenu (Fig. 10);
2. Otherwise you should select single-wavelength or dual-wavelength detection mode and input
the prescribed working wavelength according to the reagent specification. Be sure to input
checking
wavelength
first
and
then
input
referenced
wavelength
if
you
select
dual-wavelengths detection mode;
3. If the instrument refuses the input wavelength, please return to the main menu to reset
wavelengths again, and then reprogram (see paragraph 7.2).
5.2.3 Detection Modes
DETECTION MODES
1.Absorbance
2.Cut-Off
3.Conc
4.Next
5.Back
Fig. 7: Detection Modes
Explanations:
1. The defaulted detection mode of the instrument is absorbance detection. If you only want to
obtain absorbance of the sample without any analysis and calculation, you can select this mode.
At that time press Enter key to go to the sub menu (see 5.2.6);
2. When it is required to judge the negative and positive critical values (cut-off values) of the sample,
you should select the detection mode of Cut-off. Please press numeric key 2 on the panel and
then press Enter key to go to the submenu (see 5.2.4);
3. When it is required to detect concentration of the under detection sample, you should select the
Conc detection mode in above figure, where Conc is the abbreviation for concentration. Please
press numeric key 3 on the panel and then press Enter key to go into the submenu (see 5.2.5).
5.2.4 Cut-off Detection Mode
5.2.4.1 Formula for calculation
CALCULATION MODE
1. C.O.=AP+BN+F
2.Next
3.Back
Fig. 8: Calculation Mode
Explanations:
1. The definitions of letters in above formula are as follows:
P-Average absorbance of positive-control wells;
N-Average absorbance of negative-control wells;
A、B、F-Parameters to be input(according to reagent specification).
8
2. When a formula is selected, the right-hand side of screen will display: A=
, B=
, F=
etc.. At
that time you should input the values according to reagent specification, and then press Enter
key to confirm;
4. When the cursor stays on Next, you can press Enter key or directly press numeric key 2 on the
panel to go to the sub menu (Fig. 9).
5.2.4.2 Limitation of negative-control values
1.If N.C.V. ≦
,
adopt input value.
2.If N.C.V. ≥
,
adopt input value.
3.Next
4.Back
Fig. 9: Limitation of Negative-Control Values
Explanations:
1. N.C.V. means negative-control value in above figure;
2. If the regent specification prescribes that you should calculate according to the input value
when the negative-control value is less than the input value (for example: 0.05), please select
the first item and input the regulated value. If the regent specification prescribes that you
should calculate according to the input value when the negative-control value is more than the
input value (for example: 1.20), please select the first item and input the regulated value.
1.S≥C.O. positive
2.S≥C.O. negative
3.Next
4.Back
5.2.4.3 Qualitative mode selection
Fig. 10: Qualitative Mode Selection
Explanations:
1. The first qualitative direction suits the items that if the value of the unchecked sample is not
less than C.O. (cut-off value), it is positive (+); contrarily negative (-);
2. The second qualitative direction suits the items that if the value of the unchecked sample is
not less than C.O. (cut-off value), it is negative (-); contrarily positive (+);
3. The first type is set as default. If it is equal to the demand, you can press Enter key and go into
the sub menu (Fig. 11).
5.2.4.4 Shaking modes
SHAKING MODES
1. No
2. Slow
3. Fast
4.Next
5.Back
Fig. 11: Shaking Modes
9
Explanations:
1. The instrument has shaking function, but the intensity is limited. If you already have a shaking
machine, it is suggested to use your shaking machine and not to use the instrument to shake.
2. No (means no shaking speed) is set as default in the instrument. If you needn’t shake, please
press Enter key to go into the sub menu (Fig. 12).
5.2.4.5 Invalidity judgment
JUDGEMENT
1.If P<
invalid.
2. If P>
invalid.
3.Next
4.Back
, N>
,
, N<
,
Fig. 12: Invalidity Judgment
Explanations:
1. Reagent specifications of some detection items prescribe the validity judgment of the
absorbance for positive-control value and negative-control value to ensure validity of
detection results. Under this circumstance, please input the prescribed value as required by
reagent specification;
2. If the reagent specification has no requirement, you can press Enter key to go into the sub
menu (Fig. 13).
5.2.4.6 Wells setting
1.B Well:
2.N Well:
P Well:
3.Q Well:
4.Finish
5.Back
Fig. 13: Wells Setting (1)
Explanations:
1. The instrument allows each comparison well to be set at any place on the plate;
2. If you need to amend the quality of a well, please choose the corresponding number, and then
the defaulted quality will automatically disappear. Under this circumstance you only need to
input the appropriate quality of the well. When wells of the same type need more than two
places, be sure to input a comma between two wells;
3. If the quality control is needed, please input the place symbol for the quality control wells, and
notice that the instrument only memorizes the detection result of one quality control well. If the
instrument does not accept the input symbol of the well place, it means that the serial number
exceeds 05;
4. The input symbol of the well place must be consistent with the sample place on the enzymatic
plate;
5. Number of the blank wells can be 0-2; number of the negative or positive comparison wells can
be 1-3 and number of the quality control wells should be 0-1.
10
5.2.4.7 Program finishing
Program complete.
Please save.
Fig. 14: Finishing Programming
Explanations:
1. When the screen displays above figure, it means programming is finished. Be sure to press
Save key on the panel to store the program information in the instrument for future use;
2. After you press Save key, the instrument will go back to the main menu automatically.
5.2.5 Concentration Detection Mode
5.2.5.1 Calculation modes
CALCULATION MODES
1.Interpolation Technique
2.Regression Method
3.Semi-log Method
4.Total Logarithmic Method
5.Next
6.Back
A=
Fig. 15: Calculation Modes
Explanations:
1. Selection of the calculation method is decided by reagent specification;
2. When a calculation method is selected, the screen will display “A=
”. Please input the dilution
multiple required by the reagent specification, and press Enter key to confirm your input. If the
reagent is not diluted, please input 1 and press Enter key to go into the sub menu (Fig. 16).
5.2.5.2 Report modes
REPORT MODES
1.Conc
2.Nor.
3.Next
4.Back
Fig. 16: Report Modes
Explanations:
1. In the above figure, Conc is the abbreviation for concentration and Nor. is the abbreviation for
normal value judgment;
2. Default report mode is concentration mode. If you only need to print concentrations of each
sample, press Enter key to go into the sub menu (Fig. 11);
3. If you also need to judge if the result is normal, please press numeric key 2 or select Nor..
Then you can print both concentration and judgment results of the sample.
5.2.5.3The sub menu is the shake setting menu. Operations of the menu are completely the same as in the
cut-off detection mode, so they are not repeated here.
11
5.2.5.4Wells setting
SETTINGS
1.B Well: A1
2.Dir.: A1,B1,…
3.C Well:
,
,
4.Q Well:
5.Next
6.Back
,
,
,
,
,
Fig. 17: Wells Setting (2)
Explanations:
1. The instrument prescribes A1 is the blank well when the detection mode is
concentration mode;
2. If you want to change the direction, please press↓on the panel:
(1) If A1, A2 follows 2. Dir., it means setting standard wells in row sequence (A1→
A12).
(2) If A1, B1 follows 2. Dir., it means setting standard wells in row sequence (A→H).
3. Press Enter key when the setting order is selected, and then press → to set the
amount of the required wells.
4. If the quality control is required for the item, please press numeric key 4 on the panel,
and then input the symbol of the wells (you can set 0~1 well). What should be paid
attention to is showed in section 5.2.4.6.
5. The amount of standard wells is prescribed by the reagent specification (the largest
amount is eight).
5.2.5.5 Standard values inputting
1.Sta.:
,
,
2.Nor.:
3.Finish
4.Back
,
,
,
INPUT VALUE
,
,
,
Fig. 18: Standard Values Inputting
Explanations:
1. Input the standard concentrations as required by the reagent specification in the order from
small value to large value. Press Enter key to confirm after a value is input (The amount of
concentrations input should be equal to the standard wells set before);
Caution: When the detection method is logarithm method, you can’t input the first concentration
value if it is zero, otherwise the detection results will contain errors.
2. If you have normal values and want to know whether the result is in the normal value range,
please input normal values following Nor. on the display. (The amount of normal values can be
one or two.)
5.2.5.6The sub menu is the program finishing menu. Operations of the menu are completely the same as in
12
the cut-off detection mode, so they are not repeated here.
5.2.6 Absorbance Detection Mode
5.2.6.1When the absorbance detection mode is selected, the instrument will directly display the shake
setting menu. Operations of the menu are completely the same as the former one.
5.2.6.2Wells setting
1.B Well:
2.Finish
3.Back
Fig. 19: Wells Setting (3)
Explanations:
1. If you want to print the original absorbance, please press Enter key continuously to end
programming (without inputting the blank wells);
2. If you want to print the actual absorbance (deducting the blank value), please input the
symbol of blank wells (1~2).
5.2.6.3 Programming is finished. Operations of the menu are completely the same as the former
one.
6. DETECTION
The instrument can be used for clinical tests after being programmed.
Attention: To ensure veracity of the detecting results, you must arrange the places of the blank
wells, negative-control wells and the positive-control wells on the board to be consistent with the
detection program.
6.1 Switch the instrument on and then it will start auto-checking first. If the instrument passes auto-checking,
the screen will display the main menu. At that time, you should not start the detection immediately. Please
wait 20 minutes for a complete warming up before you begin the detection;
6.2 When you start the detection, please press numeric key 1 on the panel to select Detect function, the
screen will display the list of detection programs. Press Enter key to find the number for the required
program, and press the corresponding key on the panel. Then the program will display as follows:
(1) Cut-off detection method:
Name:
B Well:
N Well:
P Well:
Q Well:
Use:
1.Stop at col.
DETECTION
Plate No.:
Wave:
2. Start
3. Back
Fig. 20: Detection Interface (1)
13
(2) Concentration detection method:
Name:
B Well: A1
C Well:
,
,
Q Well:
Use:
1.Stop at col.
,
,
DETECTION
Plate No.:
Wave:
,
,
,
,
2. Start
3. Back
Fig. 21: Detection Interface (2)
If you know the number for the required program, you can directly press the numeric key to select the
program regardless the serial number is displayed or not.
6.3 Firstly, you should check the appeared program over to see if it corresponds with the needs (if not,
press Reset key to select again). If it is for a whole board detection, press Enter key directly, otherwise
press 1 to input the required list number (01~12) and then press Enter key to start detection. If you need to
set the original plate number, press numeric key 0 first. Secondly, input the number of original plate. Finally,
press Enter key to confirm your input. Since then, the number of plate will add 1 automatically after each
time of detection. When you change detection item, you can change the plate number at the same time if
you want.
6.4 After the detection is started, the screen will display “Checking”. When the detecting is finished, the
screen will display “Calculating”, and it will display the absorbance of each well first after the calculation is
finished. If you want to print the absorbance, press Print key on the panel; if not, press Enter key, the
screen will display detecting results. If both output methods are selected, the screen will display the first one.
Then press Enter key, it will display the second one. Under this circumstance, if you press Enter key again,
it will return to the first one.
6.5 If the detecting results need to be stored for query, press Save key on the panel (it won’t store the
results if you don’t press Save key).
6.6 If you want to print, press Print key on the panel (it will print the results displayed on the screen). The
instrument will send the data to the printer if you press Enter key. You can perform other operations once
the printing is started and do not need to wait until the printing is finished. The printing format shows as in
table 4.
Item
Plate
Wavelength
Date
Time
Operator
-----------------------------------------------------------------------------01 02 03 04 05 06 07 08 09 10 11 12
A
B
(Results)
C
D
E
-0.8
F
Qualitative Results
+1.3
S/CO Value
G
H
Negative
Positive
Cut-off value
Quality control
Table 4: Printing Format
14
Explanations:
The output of detecting results is decided by the program. Detecting results mainly include the following
four parameters:
(1) Absorbance;
(2) Result of cut-off judgment (+, -) and value of S/CO;
(3) Concentration;
(4) Judgment based on normal concentration value (H, L).
If the detecting result of concentration is 99999, it means the concentration of the sample is beyond the
linear range, so you should dilute the sample and conduct the detection again.
6.7 Connect the signal wire when it is required to send the detection data to PC, and make the PC wait.
When the detected absorbance appears, please press F1 key on the panel.
6.8 When all the work above is finished, you can take the enzymatic board out, and press Enter key. Then
the instrument will display contents of the program again. If you still want to continue detection of the item,
replace a new enzymatic board and repeat the operating steps starting from step 6.3.
6.9 If you still want to detect other items, please press Reset key, and then it will go back to the detecting
program list. Under this circumstance, please repeat operating steps starting from step 6.2.
6.10 After all the detection items are finished, press Reset key on the panel when the screen displays
detection program list. It will go back to the main menu. Then after you press key 6 on the panel, the tray of
the enzymatic board will return to the instrument automatically. After that, you can turn off the power, and
pull out the plug.
7. SET
Select 4 in the main menu, and then the screen will display as follows:
SYSTEM SETTING
1.Time Setting
2.Wavelength Setting
3.Back
Fig. 22: System Setting
7.1 Time Setting
When there is something wrong with the date or the time displayed on the instrument, you can select
this function and input the correct date and time in order in the sub menu, and press Save key on the panel.
After that, the instrument will go back to the main menu automatically.
7.2 Wavelength Setting
7.2.1Input the wavelength data (nm) of the filters in order, pay attention to inputting the data in accordance
with the arrangement of the filters in the tray, otherwise it will lead to wrong results. There are four filters in
the instrument, in the order of 405nm, 450nm, 492nm and 630nm.
7.2.2The instrument can set 7 filters at most. Please continue to press Enter key when the total of filters is
less than 7 until the screen displays information about saving. Press Save key to save the newly input data
in the memory, and then go back to the main menu.
15
8.
INQUIRE
The function is designed for inquiring the saved quality-control data and detection results.
8.1 Inquiry Introduction
Press numeric key 3 on the panel to confirm the function of inquiry when the screen displays the main
menu, and then the following figure will appear:
1.Quality Control
2.Results
Fig. 23: Inquiry Interface
Explanations:
1.
If you need to print the quality-control results, press numeric key 1 on the panel. The screen
will display list of quality-control items. Press the corresponding key on the panel, and then
the printer will print the selected quality-control data.
2.
When “Results” is selected, the screen will display the detection results list. You can move
cursor to the needed item and press Enter key, or directly press numeric key on the panel.
The instrument will display the result of the detection item. You can press Print key on the
panel at this time, then the result will be printed again. Press Enter key again, and the screen
will display detection results list again.
8.2 When the operation is finished, press Reset key on the panel and then the machine will go back to the
main menu to wait for other orders.
9. MAINTENANCE
The instrument only needs cleaning during normal use. But the following assemblies may fail or
malfunction after a long time of use. You must maintain them under the guidance of the specialist.
9.1 Filter
The transmission rate of filters will decline after a period of use. When the instrument can’t work like
normal, it gives you a clue. In order to maintain accuracy of detection, the invalid filter must be replaced in
time by the specialist.
9.2 Lamp
The instrument will prompt you if the lamp fails. At that time, you should open the lid of the instrument
and examine it. If you confirm that the lamp is broken, please replace it with a lamp of the same standard. If
something is wrong with the power, you should repair it.
9.3 Tray
When there is something wrong with the tray (e.g. it can’t pass through the instrument), there are some
possible reasons: down lead of the step-motor is not perfectly connected; synchronous strap is loose or
doffed; moving parts shift or get blocked etc. Please search for the cause and fix the malfunction.
9.4 Fuse
If the fuse burns out, you must cut off the power supply at first, and then replace the fuse with one of
the same standard. You must replace the fuse under the guidance of the specialist.
16
10. TRANSPORTATION
(1) Range of environmental temperature: -20℃ ~
+55℃;
(2) Relative humidity of environment: <=93%;
(3) Range of atmospheric pressure: 500hpa~1060hpa.
11. EQUIPMENT PARTS LIST
Items
Quantity
(1) DNM-9602 Microplate Reader
1
(2) Printer
1
(3) User’s manual
1
(4) Product certificate
1
(5) User inspection and acceptance sheet
2
(6) Accessories
a. Wire for power supply
1
b. Fuse φ5×20 2A
2
c. Plastic cover
1
12. QUALITY GUARANTEE
We will repair or replace the instrument or accessories free of charge if there is any problem with the
instrument, provided that you have complied with the instructions of this operating manual, and it is within
one year from the date of purchase. You will be charged if you have not followed this operating manual or
you have disassembled the instrument without authorization. We will answer maintenance related
questions for the instrument even after the one year warranty period.
13. WARNING
(1) The power supply should be grounded perfectly;
(2) Filters must be replaced in time by the specialist if they fail.
Madell Technology Corp.
7372 Walnut Ave. Suite V
Buena Park, CA 90620
USA
Phone: 1-877-670-9023
http://www.madelltech.com
17