1
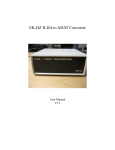
ATMA USER MANUAL
Please read safety instructions before you use this amplifier!!!
Features:
•
•
•
•
•
•
•
•
•
•
•
•
•
•
•
•
2x EL84 18W Class A cathode biased power amp
EZ81 tube rectifier (vintage mode)
3x JJ ECC83s preamp and phase inverter
Ch1: clean with volume and tone control, 3 position bright switch
Ch2: crunch with gain preset (back panel) and volume control
Ch3: solo with volume control
Ch2+3 share gain, bass, middle and treble control, 3 position voicing switch
Buffered series effects loop
Single instrument input
Power attenuator switch for 1 and 5 watt operation
Power-amp vintage/modern switch
16, 8 and 4 ohm speaker outputs
Frequency adjusted line out (sn:064077 and higher)
Functions on footswitch: Crunch (solo) and Overdrive (clean)
Head only, complementary aluminum speaker cabinet
All aluminum chassis with unique aesthetics
DIMENSIONS and WEIGHTS: Are subject to change anytime, Please measure your amp carefully if a
Custom Case is being made. Add ¾ inch for each, handle and rubber feet.
The head has two screws on each side to secure the aluminum top shell, please note theyneed
clearance on each side!
Head:
1x12 Cabinet:
6.25” H
17”
H
12.62” W
17”
W
6.50” D
10.50” D
14 pounds
31 pounds
Please read this owner manual completely before use to fully understand your Atma’s functions.
input
The Atma has a single high impedance input located on the front panel.
cl/cr/so toggle switch
This switch lets you select one of the three channels if no foot controller is connected. The front panel
display lets you know which controls are active. Whatever control is illuminated at a certain channel
setting can be used to alter the sound.
BOGNER AMPLIFICATION
1
60/70/80 toggle switch
This 3 position switch works on the crunch and solo channel and will give you the option to find the right
gain structure for guitar, pickups, and musical style.
60 - produces lower gain plexi and bassman tones, you have to set the gain high for overdriven sounds
otherwise the amp stays pretty clean which of course gives you the option to use it as a second clean
channel as well. This voicing works well in combination with high volume settings for dynamic cranked
power-amp overdrive.
70 - bumps up the gain and slightly narrows the frequency spectrum to give you a more focused high gin
sound
80 - has the most gain, due to the high compression the volume gets cut and needs to be readjusted.
This mode is also good for very low volumes.
gain control
This control sets the amount of gain for the crunch and solo channel.
Important! Located on the back panel you find the cr gain control. This one lets you preset the crunch
gain, which is the difference in gain between the crunch and solo channel. With this control turned up all
the way the crunch channel has essentially identical gain as the solo channel. This is useful if you would
rather have channels with identical gain but want two different switchable volume settings.
tone control
This control attenuates the tone and gain characteristics of the clean channel. A lot of thought has been
put into the design to have a very flexible clean channel with just a tone-, volume control and a bright
switch. It is best to start out with it set half way and see it as a neutral position. From there if you turn it
down, you will get less gain with more highs and bass for the typical scooped blackface sound. Turning
the control up will add gain and midrange growl reminiscent of the classic tweed tone.
bass, middle and treble controls
Let you control the bass, middle and high frequencies of the crunch and solo channel.
volume controls
These controls let you set the loudness of each channel independently from each other.
bright switch
This switch lets you choose a dark, neutral or bright position and works for the clean channel only. Note
the higher the clean volume is set the less effective the switch becomes.
power indicator light
This light indicates that the amp is powered on, it is also sensitive to the input level and will flash along
with your strumming dynamics.
BOGNER AMPLIFICATION
2
power cable socket – back panel
This socket connects the Atma to the main AC voltage, it is recommended to have the power switch in the
off, zero (0) position. Plug the supplied cable first into the amplifier and then into your wall AC socket.
Make sure your amplifier is made for the correct voltage of your location.
The power cable socket also has a little pull out fuse holder, it contains the main fuses. To pull the fuse
holder out, you must disconnect the power cable first; use a little screw driver to pull the holder out.
Please note it does not detach from the socket. The holder comes with two fuses, the inner one is the
actual one used while the outer one is a spare.
power switch – back panel
After connecting a speaker cabinet or other load and with the power cable connected you can turn the
power on, flip it from 0 to 1, the pilot light on the front will light up. Please note the Atma has no standby
switch, to extend tube live we recommend to have the vintage/modern switch set to vintage so the EZ81
rectifier tube is engaged which will raise the voltage very slowly and therefore protect the tubes and filter
capacitors from voltage peaks.
fx loop – back panel
The Atma has a buffered series effects loop between pre and power amp. Connect the send to the input
of an effect and the return to the output. The loop circuit is completely out of the audio path as long as
nothing is plugged into the send jack. The send signal still feeds directly into the power amp as long as
nothing is plugged into the return jack. This can be useful if you just want to send the preamp signal to an
external power amp etc….
vintage/modern switch - back panel
This switch is in the power amp circuit and lets you have either a wide open dynamic – vintage - or a
more dense and tight - modern – response usually preferred for higher gain rock tones. In the modern
setting it also turns off the tube rectifier which is helpful in case the EZ81 rectifier tube is bad. We
recommend to set the switch to vintage at the time you turn the power on, then wait 20 seconds before
you switch to modern, see the “power switch” topic.
power attenuator switch – back panel
This switch gives you three power settings, in the middle position you have the full 18 watts for maximum
headroom. From there you have the choice to set it to 5 or 1 watt.
ft.sw. foot controller – back panel
Plug here the foot controller in. You have two switches, the right one lets you switch from clean to
overdrive (led illuminated), the left one lets you switch between the solo and crunch (led illuminated)
channel. If you switch from the clean channel to the overdrive, it will depend on the left switch which one
of the two overdrive channels is on.
cr gain – back panel
As previously explained above, the cr gain control lets you preset the crunch gain, which is the difference
in gain between the crunch and solo channel. With this control turned up all the way the crunch channel
has essentially identical gain as the solo channel. This is useful if you would rather have channels with
identical gain but want two different switchable volume settings.
BOGNER AMPLIFICATION
3
speaker outputs – back panel
You have the choice of 16, 8 or 4 ohm output impedance; please use the value which matches your
speaker cabinet. A speaker or other load must be hooked up before you turn the Atma on, otherwise you
risk damaging the output transformer. If you want to hook up two cabinets you need to get a splitter box
which gets hooked up to one of the three outputs, always just use one, never two or three outputs at the
same time. If you have two cabinets with the same impedance hooked up to a splitter box, the single out
put with half the impedance value must be used. Example two 16 ohm cabinets connected to a splitter
box, the box gets connected to the 8 ohm speaker output only!
line out – back panel
The line out is a frequency adjusted line level signal from the power-amp. A speaker cabinet or other load
needs to be hooked up at all times. Due to space restrictions, a 3.5mm mono connector is used.
speaker cabinet – not included with the head
The complimentary 1x12 open back speaker cabinet features an aluminum shell construction with a
screwed in Baltic birch baffle board. It comes loaded with a Celestion G12H30 at 16 ohms.
Troubleshooting
Make sure you read and understand the safety instructions!! Repairs should be done only by
knowledgeable Technicians!! Always make sure your Cables, Guitars, Effects and Extension Cabinets are
working and hooked up correctly. If you think something is wrong with your Amp, play straight into the
Amp with nothing else hooked up other than a Guitar. That way you make sure it is the Amp. If you own a
combo unplug the internal speaker and hook up an external speaker cabinet to make sure it's only the
amp which is faulty. For noise check the appropriate preamp tubes (refer to f). Tubes are delicate and
have a limited life span depending on operating time, temperature and mechanical influences. 99% of all
sound and noise problems come from preamp tube failure. W e let our amps run for at least two days
before we ship them to make sure that the tubes work properly, but since they have glass housing and
delicate little plates inside them, it is possible they were damaged during shipping. Please don't feel
discouraged. We don't manufacture tubes and can only retest them to make sure they're okay.
Fuses
To check the fuses, use an Ohmmeter to make sure they're blown because sometimes you can't see if
they're blown. The Atma uses a 1A slow blow 5x20mm type as main fuses located in the power cable
socket on the back panel. Due to the small chassis the Atma has no H.T. fuse.
If the main fuse(s) blow(s) it could be just a voltage peak from your power outlet. Put a new one in and
see what happens. If it blows again please contact us.
There you have it! It's all up to you now, be creative and push your musical imagination…For Questions
call or visit out our website: bogneramplification.com
BOGNER AMPLIFICATION
4