Download GSM/GPRS/GPS TRACKER
Transcript
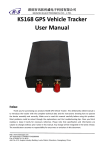
GPS VEHICLE TRACKER
USER MANUAL
Preface
Thank you for purchasing the TK103 GPS vehicle tracker. This manual shows how to operate the device
smoothly and correctly. Make sure to read this manual carefully before using this product. Please note that
specification and information are subject to changes without prior notice in this manual. Any change will be
integrated in the latest release. The manufacturer assumes no responsibility for any errors or omissions in this
document.
1
Contents
◆Quick Using................................................................................................................................................................................. 3
◆GPS Vehicle Tracker Installation ................................................................................................................................................. 3
1 Summary functions....................................................................................................................................................................... 4
2 Hardware Description................................................................................................................................................................... 4
4 Specs............................................................................................................................................................................................. 5
5 Usage ............................................................................................................................................................................................ 6
5.1 Installation SIM card ......................................................................................................................................................... 6
6. Set up ........................................................................................................................................................................................... 7
1. Initialization......................................................................................................................................................................... 7
2. Add authorized number ....................................................................................................................................................... 7
3. Delete authorized number.................................................................................................................................................... 7
4. Change the Password........................................................................................................................................................... 7
5. Resume the initial password ................................................................................................................................................ 8
6. Enquiry Positioning ............................................................................................................................................................. 8
7. Control Oil........................................................................................................................................................................... 8
8. Control Circuit ..................................................................................................................................................................... 8
9. Monitor mode ...................................................................................................................................................................... 8
10 Movement alert................................................................................................................................................................... 8
11. Overspeed alert .................................................................................................................................................................. 8
12. Geo-fence .......................................................................................................................................................................... 9
13 . Restart the tracker. ............................................................................................................................................................ 9
14. Auto track .......................................................................................................................................................................... 9
15. Set ACC open and close time interval ............................................................................................................................... 9
16. Set ACC open and close SMS notify ................................................................................................................................. 9
17. Set country time zone ...................................................................................................................................................... 10
18. Modes switch between “track” and “monitor” ................................................................................................................ 10
19. Modes switch between “telephone” and “web”............................................................................................................... 10
20. Modify IP address and port.............................................................................................................................................. 10
21. Set Device ID number ..................................................................................................................................................... 10
22. Set APN ........................................................................................................................................................................... 10
23. Set GPRS user name and password ................................................................................................................................. 10
24. Set Web............................................................................................................................................................................ 11
7 Command list ............................................................................................................................................................................. 11
2
◆Quick Using
1) Inset GSM card, connect GPS GSM antennas and external power supply.
2) Put GPS antenna outside, around 30s blue light will keep stable on and with red light flash at 2 seconds,
means device can start normal working.
3)Make a call to device number or send SMS “google” to device number, it will reply a tracking message show
location.
4)if need real time tracking on computer, please send 2 SMS commands connect to platform as below:
SMS 1: ip116.205.4.114port8169
SMS 2: apn123456+space+APN of operator
SMS 3: user+space+ APN user name+space+APN password(if no APN user name and prd, skip this)
SMS 4: number+latter 11 digits of device IMEI number(also can use device GSM card number)
5)login tracking platform to check real time location( please contact your supplier)
◆GPS Vehicle Tracker Installation
GPS tracker should be installed by technical professional of local service centre. Without permission, the
user cann’t repair and move the tracker randomly. If users do, any unfortunated damage should be compensated
by himself.
Installation steps (caution: the following installation should under no power, otherwise will be dangerous)
1. Install GPS and GSM antennas: GPS antenna can’t cover with metal. (necessary)
2 . Power supply line: The red wire connects 12V“+”;Black wire connects to 12V“-” (necessary)
2. Device light status:
Red represents GSM signal, blue represents GPS signal, when blue light stable lighting on and flash with red
light at 2 seconds (red and blue is same light ).
3. Wire for cutting off oil or circuit of the tracker(optional connect)
Relay white wire connects positive +; relay yellow wire connects device yellow wire; two green wires
connect Oil pump or circuit two ends. Caution: Wrong connection of yellow wire will damage the tracker.
4. Emergency triggering alarm (optional connect)
The blue wire connects the positive of the alarm button, and the black wire connects the negative of the alarm
button.
3
1 Summary functions
Working Based on existing GSM/GPRS network and GPS satellites, this product can locate and monitor any
remote targets by SMS or GPRS.
1.1 Positioning and Tracking: Through the on-line Positioning Platform or the cell phone to locates at times,
and get the working status. You can choose the Positioning Platform by yourself.
1.2 Triggering Emergency Alarm: When there is a emergency happened on the vehicle, you can put on the
button and the installed unit will send out alarm to the authorized numbers.
1.3 Remote controlling oil and circuit: you can control the oil and circuit via the unit by SMS in anywhere and
anytime.
1.4 Remote Monitoring: In anywhere and anytime, call the phone number in the unit, when it connects, you can
monitor the sound around 5 meter.
1.5 Movement Alert: Send SMS to the unit to start the movement alert function. When the vehicle is moving,
the unit will send the movement alert to all authorized numbers.
1.6 Overspeed Alert: Send SMS to the unit to start the movement alert function. When the vehicle is overspeed,
the unit will send the overspeed alert to all authorized numbers.
1.7 Geo-fence: Set up a geo-fence for the unit to restrict its movements within a district. The unit will send the
message to all authorized numbers when it breaches the district.
1.8 Resume the unit: send SMS to resume the default of unit.
1.9 Auto Track: You can set up auto track by SMS or on-line positioning platform.
1.10 Mileage statistics; ACC checking; cutting off power and alarm.
1.11 Compatible with the original anti-theft alarm: It will send SMS alarm after the original anti-theft alarm
warning.
1.12 Modify the IP and Port of Communication Protocol for different on-line positioning platform
2 Hardware Description
2.1 Front face
2.2 Rear face
2.3 Side face
GSM/GPRS ANTENNA
GPS ANTENNA
INDICATOR lights
4
3.4 Bottom face
PRESS BUTTON TO
TAKE OUT SIM CARD.
WIRE BOX
MICROPHONE
SIM CARD
4 Specs.
Content
Dim.
Weight
Network
Band
GPS chip
GSM/GPRS
module
GPS sensitivity
GPS accuracy
Specs.
85mm x 63mm x 25mm
160g
GSM/GPRS/GPS
900/1800 Mhz or 850/900/1800/1900 Mhz
Ublox chip
Simcom840W
-159dBm
5m
Time To First Fix
Cold status 45s
Warm status 35s
Hot status 1s
Work voltage
Battery
Storage Temp.
Operation Temp.
Humidity
12V—36V
Chargeable changeable 3.7V 500mAh Li-ion battery
-40°C to +85°C
-20°C to +55°C
5%--95% non-condensing
5
5 Usage
5.1 Installation SIM card
Put the card box into host as picture.
.
5.2 Install Wire Box
5.3 GPS Vehicle Tracker Installation
6
6. Set up
1. Initialization
Send “begin+password” in SMS to the unit, it will reply “begin ok” and initialize all the
settings. (Default password: 123456)
2. Add authorized number
Send SMS “admin123456 13612345678”. "admin" as instruction, "123456" as password, "13612345678"
as authorized number. It will reply “admin ok!”.
3. Delete authorized number
Send SMS “noadmin123456 13612345678”. "noadmin" as instruction, "123456" as password,
"13612345678" as deleted number. It will reply “noadmin ok!”.
4. Change the Password
Send SMS: “password + old password + space + new password” to change the password.
For example: Send SMS “Password123456 138138”. "password" as instruction, "123456"as old password,
"138138" as new password. Password must be six digits. Tracker’s initial password is 123456.
7
5. Resume the initial password
If you forget your password, you can resume the initial password 123456.
Send “resumepassword” to the tracker, the tracker will resume the initial password. If there is no authorized
numbers, all numbers can resume initial password. If there is already authorized numbers, only the authorized
numbers can resume initial password.
6. Enquiry Positioning
Send SMS “position” or “google” to the unit, then the unit will send SMS with real-time longitude and
latitude to the cell phone.
7. Control Oil
Send SMS “stopoil+password” to control oil. For example send SMS: stopoil123456
"stopoil" as instruction, "123456"as password.
To supply the oil again, send SMS “supplyoil+password” to the unit. For example, send
SMS “Supplyoil123456” to the tracker. "Supplyoil" as instruction, "123456" as the password.
8. Control Circuit
Send SMS “stopelec+password” to control circuit. For example send SMS: “stopelec123456”.
"stopoil" as instructions, "123456" as the password.
To supply the circuit again, send SMS “supplyelec+password” to the unit. For example, send
SMS “Supplyelec123456” to the tracker. "Supplyelec" as instruction, "123456" as password.
9. Monitor mode
There are three modes for monitor.
1) All Monitor Mode: Send SMS “AllMonitor” to the unit, the unit will return to this mode. In this mode, any
number can monitor this unit.
2) Restrict Monitor Mode: Send SMS “RestrictMonitor” to the unit, the unit will return to this mode. In this
mode, authorized number can monitor this unit.
3) Close Monitor Mode: Send SMS “CloseMonitor” to the unit, the unit will return to this mode. In this mode,
all numbers can not monitor this unit.
10 Movement alert
Set up: The user can send SMS “Move + password” to the unit, then the unit will reply “move ok!” .In case of
such a movement, it will send SMS “Move” along with a Geo-info to the number.
For example, send SMS “Move123456” to the unit. "Move" as instructions, “123456”as password.
Cancel: Send SMS “nomove+password” to deactivate the movement alert.
11. Overspeed alert
8
Set up: Send SMS “speed+password+space+080” to the unit (support the speed is 80km/h).
For example, send SMS “speed123456 080”. "speed" as instruction, "80" as limit speed, “123456”as
password.
Cancel: Send SMS “nospeed+password” to deactivate the overspeed alert.
12. Geo-fence
1) Set up a geo-fence for the unit to restrict its movements within a district. The unit will send the message to
the authorized numbers when it breaches the district.
2) Set up:the user can Send SMS “stockade+ password + space + MinLatitude, MinLongitude;
MaxLatitude, MaxLongitude” to unit to set the restricted district. In case of breach, it will send SMS
“stockade! + geo-info” to the authorized number.
3) For example send SMS “stockade123456 22.548123, 114.081234; 22.549123, 114.082234” to the unit.
Remark: The first latitude & longitude is coordinate of min of the Geo-fence, while the second latitude &
longitude is the coordinate of the max. It will alarm one time in each setting.
4) Cancel: Send SMS “nostockade + password” to deactivate this function.
This function will be out of effect after the unit moves outside the district.
13 . Restart the tracker.
Send SMS “reboot+password” to the tracker. For example“reboot123456”.The tracker will be restarted. It will
reply “system will reboot...”.
14. Auto track
Send SMS “at30sum5” to the unit, it will reply “Auto track set ok.” and report a Geo-info at 30 seconds
intervals for 5 times:
The max intervals is 65535 seconds. You can send “at30sum0” for heaps of times.
Send“noat123456” to the tracker, it will reply “Cancel auto track ok.”. And the tracker will stop send messages.
15. Set ACC open and close time interval
Device can set time interval of send data when ACC open or close.
Send SMS “accon+time interval” to the unit, for example “accon 30”stand for when ACC open send data for
every 30 seconds.
Send SMS “accoff+time interval” to the unit, for example “accon 60”stand for when ACC close send data for
every 60 seconds.
16. Set ACC open and close SMS notify
Device can set SMS alarm when ACC open or close status.
Send SMS “accnotify 1” to the unit, for example “accnotify 1”stand for when device detects ACC open and
close status, device will SMS to authorized number.
Send SMS “accnotify 0” to the unit, for example “accnotify 0”stand for close this function.
9
17. Set country time zone
In the default, tracker reply position SMS time is UTC time. After you can set zone time, tracker will reply the
time of your country. The format is “zone + password + space + time zone value”. For example, “zone123456
8” is set east 8 time zone. Time zone value ranges from -12 to 12. One time zone stands for one hour.
“zone123456 -8” is set west 8 time zone. After send SMS, tracker will reply “Set Time Zone OK.”
18. Modes switch between “track” and “monitor”
The default mode is “track”. Send SMS “monitor + password” to the unit, and it will reply “monitor ok!” and
switch to “monitor” mode. For example send SMS: “monitor123456”. In this mode, you can monitor tracker by
call tracker card number.
Send SMS “tracker + password” to the unit, it will reply “tracker ok!” and restore to “track” mode. For
example send SMS “tracker123456”. In this mode, you can get position SMS by call tracker.
19. Modes switch between “telephone” and “web”
Set up: Send SMS “web + password” to device. For example, the password is 123456. Send SMS
“web123456” to the device, the device will reply SMS “set web ok”. After this, the tracker will report the GPS
data to IP address.
If you want to send GPS data to telephone, you can send SMS “telephone + password” to device, the device
will reply “set telephone ok”. And then, the device will send GPS data to your telephone by SMS. (The default
is sending the GPS data to the telephone)
20. Modify IP address and port
The IP address and port of the tracker can be modified and transferred data to other platform. Send SMS “ IP +
ip address + PORT + port value” to the unit. If the platform’s IP address and port is 116.205.4.114 and 8169,
send SMS “ip116.205.4.114port8169” to the tracker. It will reply “set IP address and PORT ok.”. After this,
device will send GPS data to this IP and Port.
21. Set Device ID number
This command uses only for GPRS communication. Default device ID is the same. In order to identify device
for platform, must set device ID for every device. Send SMS “number + tracker ID number” to the tracker.
For example “number13612345678”.
22. Set APN
In order to send GPS data to IP address, you still must set mobile network Access Point Name (APN). If you
don’t know the APN, you can consult local network service supplier. The format of set APN is “APN +
password +space + apn value”. For example you send SMS “apn123456 cmnet” to the device. The device
will reply SMS “Set APN ok.” .
23. Set GPRS user name and password
Some country must be set GPRS user name and password for GPRS communication. The format of set GPRS
user name and password is “user + space + GPRS user name + space + GPRS password”. For example,
“user name 123456”, “user” is command, “name” is GPRS user name, “123456” is GPRS password. After send
SMS, tracker will reply “Set GPRS User and Password ok . ” .
10
24. Set Web
In order to see your website in each replying Geo SMS, for example your website is www.webs***.com, then
send “home123456 www.webs***.com”.Then it will reply “set home ok”, when you want to cancel it, just
send “nohome123456”, it will reply SMS ”cancel home ok”.
7 Command list
No.
Function
SMS
Reply
1
Initialization
begin123456
begin ok
2
Admin number
admin123456 13800000000
admin ok
3
Delete number
noadmin123456 13800000000
noadmin ok
4
Change password
password123456 888888
change password ok
5
Resume password
resumepassword
resume password ok
stopoil123456
stop oil ok
supplyoil123456
supply oil ok
stopcircuit123456
Stop circuit ok
supplycircuit123456
supply circuit ok
allmonitor
Set all monitor ok
restrictmonitor
Set restrict monitor ok
closemonitor
Set close monitor ok
move123456
Move ok
nomove123456
Cancel move ok
speed123456 080
Speed ok
nospeed123456
Cancel speed ok
stockade123456 coordinate;coordinate
Set stockade ok
nostockade123456
Cancel stockade ok
6
7
Control oil
Control circuit
8
Set monitor mode
9
10
11
Movement alert
Overspeed alert
Geo-fence alert
12
Restart tracker
reboot123456
System will reboot
13
Enquiry position
position or google
Geo ino
at30sum5
Auto track ok
noat123456
Cancel auto track ok
monitor123456
Monitor ok
tracker123456
Tracker ok
14
15
Auto track
Switch between monitor and tracker
16
Set IP and port
ip116.205.4.114port7887
Set ip address and port ok
17
Set device ID number
number13500001111
Set number ok
18
Set APN
apn123456 cmnet
19
Set APN user name and APN password
user apnusername apnpassword
Set GPRS User and Password ok
20
Set time zone
zone123456 8
Set time zone ok
accon 30
Set ACC ON interval ok
accoff 60
Set ACC OFF interval ok
accnotify 1
Set ACC notify OK
accnotify 0
Set ACC notify OK
21
22
Set ACC on/off time interval
Set ACC on/off SMS alarm
11


