1
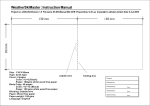
2.0 Button Layout
1.0 Introduction
Thank you for purchasing this Watch. Your
Watch features electronic sensors which
measures and shows the outdoor conditions:
weather forecast, temperature, pressure,
altitude and compass directions.
Yo u r Wa t c h a l s o p r o v i d e s t h e e s s e n t i a l
information at the time during you are skiing,
and these data can be further logged into a
logbook for later review.
Outdoor Master Pro
Instruction Manual
3.1 Major Function Mode - Sensor Menu
[L/R]*
1
2
3
4
5
Ski Mode
Menu
1
2
3
4
5
1
2
3
4
5
Log Mode
Menu
[ESC]
[S/S]
[L/R]*
[M]
Altimeter Mode
Menu
Timer, Pacer and Dual Time Mode.
n To select among Ski, Ski Logbook, Altimeter, Barometer
[S/S]
Level 1
n To select among the setting items during setting display.
seconds.
Note: When 'Night' back light function is ON,
pressing any key will turn ON the back light too.
Start/Stop Button [S/S]
[M]
+C o n f i r m t h e
selection/setting
[S/S]
+ Scroll the menu
mode.
[L/R]
+ Scroll the menu
Lap/Reset Button [L/R]
n To activate the 'lap' or 'reset' function during Chronograph
and Timer Mode.
n To move the cursor to left by one during History recalling
display.
4.1 Current Time Mode - Weather Forecast
Temperature
[S/S]
+ON
+OFF
+Normal
+Night
+Off
+ON
+OFF
0
2. Total
elapsed time
10
[S/S] [S/S]
[S/S] [S/S]
0
3. Lap Time
10
[S/S]
[S/S]
lap 2
[S/S]*
the 2nd lap
record
hold [M]
[M]
time
Weekly Alarm
NOTE:
1. If the 'DAILY' is selected, the alarm is turned ON and the Watch will alarm at the
predefined time everyday.
2. If a Weekday (i.e 'MON', 'TUE' and etc ) is selected, the alarm is turned ON and the
Watch will alarm at the predefined time at that weekday of every week.
3. Press [L/R] to move the selection in the reverse order.
target
time *1
[L/R]
Total
elapsed
time
[L/R]
5 min
10 min
[L/R]
3 min
[S/S]*
the next lap
record
the 1st lap
record
Lap Time Display
current
time
[S/S]*
[S/S]*
Total elapsed
time
[L/R]
[L/R]
45 min
15 min
[L/R]
User Preset
Value *3
Time Mode
[S/S]*
Counting
Reset
Elapsed time, Total Elapsed time and Lap time
THU*2
7.0 Timer Mode - Setting the Target Time
[S/S]*
lap 3
30
[S/S]*3
change the setting
value faster
Alarm ON
NOTE:
If Daily or Weekly Alarm is ON (the '
' is appeared), the Watch will beep at the
predefined alarm time daily or weekly.
The Watch will sound for 30 seconds at the alarm time. While alarm sounds, press
any key to stop the sound instantly.
Alarm 1 and Alarm 2 can be set to alarm Daily or Weekly, See 5.1 for the details of
the setting.
[M]
20
WED*2
[S/S]*3
6.1 Chronograph Mode - Recalling Lap Time
10
[S/S]*3
FRI*2
Weekly Alarm
Alarm ON
Counting
[S/S]*3
TUE*2
[S/S]*3
hold
[S/S] or [L/R]
[S/S] or [L/R]
[S/S]
10
minute
Quick-Set-Value*2
the last
lap record
Target Time Setting Sequence
[S/S]
0
[S/S]*3
[M]
change setting
value
hold [L/R]
[L/R]
MON*2
SAT*2
Alarm Mode
lap no.
[S/S]*3
SUN*2
hour
Daily Alarm
or
Lap Time
10
[L/R] *1
seconds
[L/R]
[M]
[ESC]
OFF
Alarm OFF
Daily
Alarm *1
[S/S]*3
[M]
lap time
(freeze for
10 seconds)
[L/R]
[S/S]*3
DAILY
alarm
ON/OFF
alarm
time
[ESC]
10
lap 1
5.1 Alarm Mode - Setting the Alarm
[L/R]
Alarm 2
0
hold [L/R]
IMPORTANT:
The Watch predicts the coming weather by using the readings of the changes of
air pressure, in order to avoid the changes of pressure is caused by the changes
of altitude, it is highly recommended to stay at the same altitude for at least 24
hours for a higher accurate predication.
WARNING:
The Watch can predict the weather by adopting general weather prediction
principles, it is NOT capable to reflect the extreme changing of weather within a
very short period of time. Always double check the predicted weather from this
Watch with other credible sources for critical events.
Hold
[M]
+mb
+hPa
+inHg
20
10
Weather Forecast
Alarm Mode
+°F
[S/S] hold [L/R]
[S/S]
Raining
Alarm OFF
+Keytone
+Chime*3
0
Cloudy
Weather Forecast Symbols
Level 4
6.0 Chronograph Mode - Using the Chronograph
20
Cloudy with sun
Current Time Mode
NOTE:
When the Watch is NOT in use, storing the watch in Power Saving Mode (LCD is
OFF) could save battery.
To activate Power Saving Mode by holding [L/R] for 5 seconds in Current Time
Mode. Press any button will resume normal operation from Power Saving Mode.
NOTE:
*1. Press [M] to select among the settings.
*2. Press [EL] will turn ON the backlight if 'Normal' is selected. Press any button
will turn ON the backlight if 'Night' is selected. Backlight will not turned ON if 'OFF'
is selected.
*3. The Watch will beep once at the hour i.e 1:00, and 2:00, etc. if 'Chime' is ON (
the '
' is appeared).
0
Sunny
date
+Metric
+Imperial
1. Elapsed
time
Timer Mode
Menu
NOTE:
When one of the menus is selected, the corresponding function
mode will appear after a few seconds or press [M] to show the
function mode immediately.
The menu guide shows the current menu no.(e.g 3) with the
total no. of available menus (e.g 6).
*Press [S/S] to move the selection in the reverse direction.
n To toggle Yes/No.
n To increase the digits during setting display.
5.0 Alarm Mode - Setting the Alarm ON and OFF
Level 3
+Temperatu
re
+Pressure
Pace Mode
Menu
Timekeeping Menu
and Timer Mode.
+1
+2
+3~14
+15
+LCD
+Sound
+Light*2
1
2
3
4
5
6
n To activate the 'start' or 'stop' function during Chronograph
Sea Level
Pressure Graph
Timekeeping Menu
(Chapter 3.0)
+Year*1
+Month *1
+Day *1
Dual Time Mode
Menu
n To select different functional displays under the same
Alarm 1
Current Time Mode
[ESC]
+Exit the current
display
[L/R]*
1
2
3
4
5
6
[S/S]
[S/S]
[ESC]
Level 2
[L/R]*
1
2
3
4
5
6
Sensor Button [ESC]
n To select between Sensor Mode and Timekeeping Mode.
n Hold down to turn on the EL back light for about 3
current
time
1
2
3
4
5
+Second*1
+Minute*1
+Hour*1
+12/24
Sensor Menu
(Chapter 3.1)
menu
guide
4.2 Current Time Mode - Setting the Watch
1. Time
2. Date
3. System
menu
guide
[L/R]*
[L/R]*
Weather Forecast
Day of Week
Barometer Mode
Compass Mode
Menu
Menu
Sensor Menu
Hold
[M]
Chronograph Mode
Menu
[ESC]
and Compass Mode.
[L/R]*
NOTE:
When one of the menus is selected, the corresponding
function mode will appear after a few seconds or press [M]
to show the function mode instantly.
The menu guide shows the current menu no.(e.g 3) with
the total no. of available menus (e.g 5).
*Press [S/S] to move the selection in the reverse direction.
Alarm Mode
Menu
Current Time Mode
Menu
Mode Button [M]
n To select among Current Time, Daily Alarm, Chronograph,
[S/S]
Altitude Graph
1
2
3
4
5
1
2
3
4
5
6
[L/R]
[L/R]*
[L/R]*
1
2
3
4
5
6
[L/R]*
1
2
3
4
5
6
1
2
3
4
5
6
4.0 Current Time Mode - Function Overview
[L/R]*
11
22
33
44
5
Your Watch also includes current time, daily
alarm, chronograph, timer, pacer and dual time
function.
To get the most of your purchase, it is
advisable to use this watch in conformity with
the below notes:
Be sure to carefully read this manual and keep
it on hand for later reference when necessary.
A v o i d e x p o s i n g y o u r Wa t c h t o e x t r e m e
conditions for an unreasonable time.
Avoid rough usages or severe impacts to your
Watch.
Do not open the Watch's case unless a
certified service agency because your Watch
contains precise electronic sensors and
components.
Clean your Watch with a soft cloth occasionally
that working for a longer use life of your watch.
Keep your Watch away from magnets or the
appliances which contains magnetic objects
such as mobile phones, speakers and motors.
Store your Watch in a dry place when it is not
in use.
3.0 Major Function Mode - Timekeeping Menu
Stop Counting
Chronograph Mode
Lap Times Recall Sequence
hold [L/R] *2
Chronograph Mode
Stop Counting
NOTE:
1. The Watch can record up to 50 lap times i.e L1 to
L50.
2. H o l d d o w n [ L / R ] f o r 2 s e c o n d s ( w h e n t h e
chronograph is stopped) to reset the chronograph.
If the Chronograph is reset, the recorded Lap
Time(s) will be erased too.
7.1 Timer Mode - Setting the User Preset Target Time
NOTE:
1. Press [L/R] to move the selection in the reverse order.
2. See 6.0 to erase the recorded Lap Time(s) (reset the chronograph).
NOTE:
1. The Timer starts counting from the Target Time to zero.
2. The Watch includes 5 Quick-Set-Values : 3, 5, 10, 15 and 45 minutes for
setting the Target Time faster, and these values CANNOT be set by user.
3. The User Preset Value of the Target Time CAN be set by user.
7.2 Timer Mode - Using the Countdown Timer
8.0 Pacer Mode: Using the Pacer
1. Single Countdown
3
Beep
0
[S/S]
hold
[M]
hour
minute
second
*2
2. Multiple Countdown
3
2
[S/S]
[S/S]
2' 59''
2
1
[S/S]
[S/S]
hold [S/S] / [L/R]
[L/R]
3
User Preset Value Setting Sequence
[S/S] / [L/R]
[S/S]
time
(minute)
3
2
NOTE:
setting range is up to 99 hours 59 minutes 99 seconds.
[S/S]
[L/R]
1
Single and Multiple Countdown
change setting
value
nThe
'Zero'
[M]
[ESC]
Countdown Time Mode
beep
3
[M]
[M]
beep
rate
0
Target Time
Pacer Mode
Stop Beeping
Pacer Mode
Beeping
Counting*1
change the setting
value faster
counting
step
counter
[S/S]
[S/S]
NOTE:
*1. The Watch will prompt (during the counting) as
follows:
a) Beep once every minute for the last 10 minutes,
i.e 10'00", 9'00" and etc.
b) Beep once every 10 seconds for the last minute,
i.e 0'50", 0'40" and etc.
c) Beep once every seconds for the last 5 seconds.
d) Beep for 30 seconds when timer reaches zero
(Press any button to stop the beep sound).
*2. The Target Time will be reloaded automatically.
hold [L/R]
[L/R]
stop
counting
Stop Counting
Pacer Mode
Stop Beeping
8.1 Pacer Mode: Setting the Pacer
8.2 Pacer Mode:
9.0 Dual Time Mode
Using Pacer with Chronograph
10.0 Ski Mode - Ski Function Overview
Ski Mode
Ski Mode includes the
following functions:
nShow the current ski data on
display, and
nLog the ski data into Ski
Logbook.
Dual Time Mode
nThe
beep
[M]
dual
time
[M]
current
time
Pacer Mode
Accumulative
Descent
Ski Log
Function
Current
Ski Speed
hold
[M]
[ESC]
Pacer Mode
Activated
Travel Time
Period
Current
Altitude
Accumulative
Ascent
[M]
[ESC]
hold [M]
Current
Temperature
Ski Mode Function
[M]
30
35
175
180
[M]
beep
hour
minute
[S/S]
[S/S] / [L/R]
hold [S/S] / [L/R]
change setting
value
Ski Mode
[S/S] / [L/R]
Stop Counting
change setting
value
Chronograph Mode
10.1 Ski Mode - Ski Mode Display - Auto Mode
change the setting
value faster
NOTE: The second digits of Dual Time
is synchronized with the second digits of
Current Time.
10.2 Ski Mode - Ski Mode Display - Manual Mode
Top Row Options
[L/R]
current
decent speed
total elapsed
time
[L/R]
[L/R]
[L/R]
accumulative
ascent
Ski Mode
(Auto Mode)
accumulative
descent
Middle Row Options
hold
[L/R]
current time
current ski no.
Bottom Row Options
10.4 Ski Mode - Function Menu Overview
An Example to Illustrate Ski Log Function
nAssume a user enjoyed three skiing within a
Skiing 1
start the logging automatically when
a significant altitude change is
detected, i.e a skiing is started.
The data of that skiing run will be
shown on the display and logged into
logbook. See 10.3 for the detail of the
Ski Log Function.
The Top Row Display
nPress [S/S] to change the top row
display between Current Altitude
and Current Temperature.
IMPORTANT: If the user intends to
get an accurate reading of air
temperature, the user must taken off
the watch from the wrist for 20 to 30
minutes before the actual
measurement. It prevent body
temperature effect the Watch.
T he Middle Row Display
nPress [L/R] to change the middle row
display among skiing's Current
Descent Speed, Total Elapsed Time,
Accumulative Descent and
Accumulative Ascent.
NOTE: This changing can be
functioned only if the Ski Log Function
is started.
The Bottom Row Display
nHold down [L/R] to change the
bottom row display between Current
Time and the skiing number.
NOTE: This changing can be
functioned only if the Ski Log Function
is started.
current
altitude
10.3 Ski Mode - Ski Log Function, an Example
Session 1
Auto Mode
nUnder Auto Mode, the Watch can
[S/S]
How to select between Auto
and Manual Mode
down [S/S] in Ski Mode
to select between Auto Mode
and Manual Mode.
nHold
Note: (1)I n Chronograph Mode, p ress
[S/S] to start/stop the counting with
pacer (beeping) when the Pacer has
already been activated.
Note: The Pacer rate is setting in a step of
5 beeps per minute i.e 30,35,40,45,50, etc.
hold [S/S] / [L/R]
Counting
Pacer Setting Sequence
current
temperature
' 3 ' Rolling
(Ski Log Function
Started)
Dual Time Setting Sequence
change the setting
value faster
Ski Log Function
nTo log the data for a skiing,
user must start the Ski Log
function in advance.
Note: The Ski Log function can
be started or stopped from the
Ski Mode Function Menu. See
10.4.1 for the details.
nWhen the user starts a skiing.
t h e Wa t c h c a n s t a r t t h e
logging automatically (Auto
Mode) or Manually (Manual
Mode).
day as it is outlined by the adjacent diagram.
To use the Ski Log function, the user needs to
start the Ski Log Function before the skiing.
iin
The Watch will log the below ski data into
g
Logbook automatically, and these ski data can
1
600
600
AM 1 1 : 05
be reviewed from Logbook Mode. See 11.0 to
b c
11.1.2 for the details.
400
400
358
Ski Session (statistic of all skiing within that
200
200
session)
a
nThe started date of the session= 11 June.
d
0
0
nThe started time of the session = AM10:00
00.
nThe total travel time = 5: 00 00.
Skiing 2
nThe total number of skiing recorded = 3
AM 1 2 : 00
meter
meter
sk
skiing.
iin
800
800
nThe total descent time = 0:15 00.
g2
nThe accumulative descent = 1200m.
AM 1 2 : 05
600
600
nThe accumulative ascent = 1200m.
f g
nThe maximum descent speed = 15 Km/h*.
400
400
nThe maximum altitude reached = 700 m.
358
nThe minimum altitude reached = 200 m.
e
The slope of the ski course = 358
200
200
h
Skiing (ski data)
0
0
nThe started time of the run= AM 11:00 00
(run 1), AM 12:00 00 (lap 2 ), PM 2:00 00
PM 2 : 00
(run 3).
Skiing 3
sk
meter
meter
nThe total descent time = 0:05 00 (run 1),
iin
800
800
0:05 00 (run 2), 0:05 00 (run 3).
g
Turn OFF
nThe maximum descent speed = 9 Km/h* (run
3
ski function
j k
1), 11 Km/h* (run 2), 15 Km/h* (run 3).
at point (m)
600
600
PM 2 : 05
o n 11 Jun,
nThe average descent speed = 6 Km/h (run
P M 3 :00
1), 8 Km/h (run 2), 10 Km/h (run 3).
400
400
nThe maximum altitude reached = 500 m (Lap
358
1), 600 m (run 2), 700 m (run 3).
200
200
i
nThe minimum altitude reached = 200 m
m
l
(Lap 1), 200 m (run 2), 200 m (run 3).
0
0
nThe altitude change = 300 m (run 1), 400 m
(run 2), 500 m (run 3).
NOTE:*These maximum speeds are dummy figures, the nThe descent altitude change graph for every
run.
maximum speed can be logged in a real case only.
Turn ON the
ski function
at point (a)
on 11 Jun,
AM 10:00
meter
800
current
decent speed
[L/R]
total elapsed
time
Middle Row Options
Ski Mode
(Manual Mode)
current time
hold
[L/R]
current ski no.
Bottom Row Options
Manual Mode
Manual Mode, press [S/S] to start or stop the logging when a
ski run is started or ended.
The data of that skiing will be shown on the display and logged into
logbook. See 10.3 for the detail of the Ski Log Function.
T he Middle Row Display
Press [L/R] to change the middle row display between skiing's Current
Descent Speed and Total Elapsed Time.
The Bottom Row Display
nHold down [L/R] to change the bottom row display between Current
Time and the skiing number.
nUnder
10.4.1 Ski Mode - Function Menu 1, Start or Stop the Logbook
AM 11:00
meter
800
sk
10.4.2 Ski Mode - Function Menu 1, AS/DS Rate Setting
Ascend/Descend Rate
Function Menu Overview
nThe function menu includes four
menus:
nMenu 1 - Logbook Start /Stop: To
start or stop the ski log function.
nMenu 2 - Ascend rate setting : To set
the trigger sensitivity for start or stop
the logging under auto mode.
nMenu 3 - Descend rate setting: To set
the trigger sensitivity for start or stop
the logging under auto mode.
nMenu 4 - Slope setting: To set the
slope for the ski course.
nCheck the coming chapters for more
detail on how to use these menus.
Menu 1
+ To start or stop the ski log
function.
Logbook Start /Stop
Menu 2
+ To set the ascend rate.
Ascending rate setting
Menu 3
+ To set the descend rate.
Descending rate setting
Hold
[M]
'Start' or 'Stop'
Start/stop the log function
[ L/R ]*
[ESC]
'AS Rate'
Set the Ascend rate
Skimeter Mode
[ L/R ]*
'DS Rate'
Set the Descend rate
[ L/R ]*
'Slope'
Set the Slope
[ L/R ]*
Logbook Mode
Function Menu
Menu 4
+ To set the slope for the
ski course.
[M]
[ESC]
How to Start/stop the Log
Function
nIn Ski Mode, h old down [M]
for about 2 seconds to
exhibit the function menu.
nPress [S/S] or [L/R] to move
the reversed color
(selected) until 'Start' or
'Stop' is selected .
nPress [M] will enter the
menu.
nPress [S/S] to confirm the
start or stop of the log
function.
nPress [ESC] to abort.
nW h e n t h e o p e r a t i o n s i s
completed, press the [ESC]
button to exit the function
menu.
Hold
[M]
YES: Confirm
to start/stop
Ski Mode
Function Menu
sensitivity for start or stop the logging
under Auto Mode) can be adjusted.
[ L/R ]*
[ESC]
nThere are three levels of sensitivity:
'AS Rate'
Set the Ascend rate
Ski Mode
nFast Sensitivity: If sometimes false
[ L/R ]*
[ L/R ]*
'Slope'
Set the Slope
[ L/R ]*
Ski Mode
Function Menu
How to Set the Ascend/Descend Rate
nIn Ski Mode, h old down [M] for about 2
seconds to exhibit the function menu.
[M]
[ESC]
nPress [S/S] or [L/R] to move the
[ L/R ]*
reversed color (selected) until 'AS
Rate' or 'DS Rate' is selected .
[ L/R ]*
Fast
Normal
Slow
nPress the [M] button will enter the
[ L/R ]*
menu.
nPress [S/S] or [L/R] to to change the
Ascend/Descend Rate Setting
YES or NO
* Press [S/S] to move selection in the reverse direction.
* Press [S/S] to move selection in the reverse direction.
10.4.3 Ski Mode - Function Menu 1, DS Rate Setting
Hold
[M]
'Start' or 'Stop'
Start/stop the log
[ L/R ]*
[ESC]
'AS Rate'
Set the Ascend rate
Skimeter Mode
[ L/R ]*
'DS Rate'
Set the Descend rate
[ L/R ]*
'Slope'
Set the Slope
[ L/R ]*
Ski Mode
Function Menu
Change the angle
hold
[S/S] or
[L/R]
Change the angle
at a faster speed
[M]
[ESC]
[S/S] or
[L/R]
Slope Angle
Slope Angle Setting
* Press [S/S] to move selection in the reverse direction.
Slope Setting
nThe slope setting is the
setting that inputs the
slope angle of the ski
field into the Watch for
calcuation.
Most of the ski fields post
that figure to skier on the
ski field.
How to Set the Slope
nIn Ski Mode, h old down
[M] for about 2 seconds
to exhibit the function
menu.
nPress [S/S] or [L/R] to
move the reversed color
(selected) until 'Slope' is
selected .
nPress [M] will enter the
menu.
nPress [S/S] or [L/R] to
set the slope angle.
nWhen the operations is
completed, press the
[ESC] button to exit the
function menu.
11.1.1 Logbook Mode: Function Menu 1, To review Session
Hold
[M]
'View'
Review Logged Session
[L/R] *
[ESC]
'Erase'
Erase Session
[L/R] *
Logbook Mode
(Session 2 of10)
'Mem.'
Free Memory Review
[L/R] *
Logbook Mode
Function Menu
[ESC]
[M]
Press the [S/S] or [L/R] to select among these data
The total no.
the
the record
the total
of ski lap
record date started time travel period
recorded
[M]
[ESC]
the total
descent time
the
accumulative
ascent & descent
the maximum the minimum
altitude
altitude
reached
reached
the maximum
descend
speed
the slope
of the ski
course*
Data summary of all skiing of the selected Ski Session
[ESC]
[M]
11.1.2 Logbook Mode:
Function Menu 1, To Review Skiing
11.0 Logbook Mode - Function Menu Overview
How to Review the Ski Session
nIn Logbook Mode, press [S/S] or [L/R]
button to select a target session (e.g the
Session 2 of 10) for reviewing.
nHold down [M] in that d isplay for about
2 seconds to exhibit the function menu:
to move the
nPress [S/S] or [L/R]
r e v e r s e d c o l o r u n t i l t h e ' Vi e w ' i s
selected. Press the [M] button will enter
that menu.
nPress [S/S] or [L/R] to review the
summary of that ski session according to
the adjacent diagram.
nPress the [ESC] to go back to previous
display, or
nPress [M] to review skiing data. See
11.1.2 for the details.
nWhen the review is completed, press
[ESC]
for several times to exit the
function menu.
*Note: The slope of a session can be
changed during the review by the
following steps:
n1) Hold down [M] in 'Slope' Display.
n2) Press [S/S] or [L/R] to change the
slope.
n3) Press [ESC] to exit.
nThe maximum and average descent
speed will be updated according to the
new slope.
Menu 1
nTo r e c a l l t h e d e t a i l o f
logged data.
Data Recall
Menu 2
nTo erase the logged data
(one session or all).
Data Deletion
Function Menu Overview
The function menu includes three menus:
nMenu 1 - Session Review: To review the logged
session and the summary of all skiing of that
session.
nMenu 2 - Data Erasure: To erase one or all
logged session(s).
nMenu 3 - Free Memory Review: To review the
free memory capacity.
nCheck the coming chapters for more detail on
how to use these menus.
Menu 3
nTo view the free memory
capacity.
auto-activation is observed, select this
setting to improve the performance.
Sensitivity: If the autoactivation is functioned normally, keep
this setting.
nSlow Sensitivity: If the auto-activation
can not be functioned, select this
setting to improve the performance.
nN o r m a l
'DS Rate'
Set the Descend rate
[S/S]
Slope setting
nThe Ascend/Descend Rate (the trigger
'Start' or 'Stop'
Start/stop the log
setting among 'FAST' (Fast), 'SLOW'
(Slow) and 'NORMAL' (Normal).
nWhen the operations is completed,
press the [ESC] button to exit the
function menu.
11.1 Logbook Mode: Function Menu 1
Ski Session
nThe Logbook logs all skiing (taken
under one start-stop of the log
function) into a session, and it
provides the summary of these skiing:
nThe started date of the Session,
nThe started time of the Session,
nThe total travel period,
nThe total number of skiing recorded,
nThe total descent time,
nThe accumulative ascent & descent,
nThe maximum descent speed,
nThe maximum altitude reached,
nThe minimum altitude reached and
The slope of the ski course.
Skiing
nT h e s k i i n g l o g s t h e d a t a o f a
particular skiing, and it includes:
nThe started time of the run
nThe total descent time
nThe maximum descent speed,
nThe average descent speed,
nThe maximum altitude reached,
nThe minimum altitude reached,
nThe altitude difference, and
nThe altitude chart
Session X
Session 2
Session 1
the
record date
the record
started time
The total no.
the total
of ski lap
travel period
recorded
the
accumulative
ascent & descent
the total
descent time
the maximum the minimum
altitude
altitude
reached
reached
the maximum
descend
speed
the slope
of the ski
course
Ski Session (the summary of all skiing under that session)
Run X
Memory Review
Run 2
Logbook Mode
Function Menu
Run 1
the lap
started time
the total
descent time
the maximum
descent
speed
the average
descent
speed
the
altitude
difference
altitude
chart
the maximum the minimum
altitude
altitude
reached
reached
Skiing (the summary of a particular skiing)
11.1.2 Logbook Mode: Function Menu 1, To review a Skiing
11.1.1 Logbook Mode:
Function Menu 1, To Review Ski Session
[M]
[ESC]
[S/S] or
[L/R]
Run X
Run 2
Run 1
the lap
started time
Select a target skiing
[ESC]
How to Review the skiing
nPress [M] in a session (11.1.1) to enter
the skiing selection:
to select a
nPress the [S/S] or [L/R]
target skiing. Press the [M] button will
enter that menu.
nPress [S/S] or [L/R] to review the
summary of that skiing according to the
adjacent diagram.
nWhen the review is completed, press
[ESC] button for several times to exit
the function menu.
11.2 Logbook Mode: Function Menu 2, Delete Session
Hold
[M]
[ L/R ]*
[ESC]
'Erase'
Erase Session
Logbook Mode
(Session 2 of 10)
[ L/R ]*
'Mem.'
Free Memory Review
YES: Confirm
to erase one or
all session
[ESC]
"Yes"
[S/S]
[M]
How to Delete One or All Session
Logbook Mode
Function Menu
the total
descent time
the maximum
descent
speed
the maximum
altitude
reached
the minimum
altitude
reached
the
altitude
difference
altitude
chart
[M]
[ESC]
[M]
Press the [S/S] or [L/R] to review
among these data
ONE
YES or NO
"No"
[ESC]
[ L/R ]
ALL
Function Menu
* Press [S/S] to move selection in the reverse direction.
the average
descent
speed
The data summary of the selected skiing
nIn Logbook Mode, press [S/S] or
'View'
Review logged Session
[ L/R ]*
[L/R] to select a target session to
erase. H old down the [M] button for
about 2 seconds in that display to
exhibit the function menu.
nPress the [S/S] or [L/R] button to
move the reversed color (selected)
until 'Erase' is selected .
nPress the [M] button will enter that
menu.
nPress the [S/S] or [L/R] to select
the 'ALL' (all session will be
erased) or 'ONE' (the selected
session will be erased).
nIf 'ALL' or 'ONE' is selected, press
the [M] to display the Confirm
Menu.
nIf Confirm Menu - 'Yes' or 'NO' is
displayed, press the [S/S] to
confirm.
nWhen the operations is completed,
press the [ESC] button to exit the
function menu.
11.3 Logbook Mode: Function Menu 3, Recall free memory
Hold
[M]
'View'
Review Logged Session
[ L/R ]*
[ESC]
'Erase'
Erase Session
Logbook Mode
(Session 2 of 10)
[ L/R ]*
'Mem.'
Free Memory Review
[ L/R ]*
Logbook Mode
Function Menu
[M]
[ESC]
Function Menu
(the free memory reading)
* Press the [S/S] button to move
selection in the reverse direction.
How to Recall the Free
Memory
+I n L o g b o o k M o d e , h o l d
down the [M] button for
about 2 seconds to exhibit
the function menu.
+Press [S/S] or [L/R] to
move the reversed color
(selected) among the
functions according to the
adjacent diagram.
+When ' Mem. ' is select ed,
press the [M] button will
enter that menu.
+The free log memory will
exhibit on the display.
+When the operations is
completed, press the
[ESC] button to exit that
menu. Press the [ESC]
button once again to exit
the function menu.
12.0 Altimeter Mode - Function Overview
12.1 Altimeter Mode - Function Display
Altitude: The altitude difference between the current
altitude and Sea Level (0 m).
nAltitude
Difference: The altitude difference between the current
altitude and the altitude where the altitude difference is set to
zero.
nAltitude Graph: This altitude graph is plotted from the 48 Hour
Altitude Log, the x-axis is the time variable (1 hour) while the yaxis is altitude variable.
Altitude
Difference
Altitude Graph
Alarm: An alert will prompt when the user passes
through the defined altitude (from below or above the altitude).
There are two altitude alarms - Altiutude Alarm 1 and 2.
nAltitude
Altitude
Alarm
Altitude
Lock
nAltitude
Altitude
Adjustment
nAltitude
Lock: A function to lock the altitude. The altitude will not
be changed when Altitude Lock is activated
Adjustment: A function to calibrate the Watch to achieve
a more accurate altitude reading.
Level 1
Altimeter Mode
[ESC]
nExit the current
display
nGo to last setting
level
[M]
nConfirm the
selection/setting
nGo to next setting
level
Temperature
meter
Altitude unit
feet
Level 3
Level 2
nSetting
nCur. Alt
(Set the
Alarm for
Current
Altitude
nAlt. Dif
(Set the
nSetting
nAlarm
1/2*2
nYES*1
12.3.2 Altimeter Mode: Menu 2, Calibrating Reference Altitude
n- 1 h o u r
log (at the
preceding
hour)
n- 2 ~ -47
hour logs
n- 4 8 h o u r
nMx. Alt
(Maximum
naltitude)*4
nMn.Alt
(Minimum
600m
Altitude Alarm 1
- Set 980m as alarm
- Alarm turned ON
B
600m
0m
(sea level)
B
C
2980m
beep
altitude
alarm 2
B
1980m
300m
900m
900m
0m
600m
altitude
difference
C
300m
B
altitude
alarm 1
NOTE:
get the Altitude Difference of two points (e.g point B and C), reset the Altitude
Difference to 0 at the starting point (e.g point B). The watch will show the altitude
difference of point B and C at point C (300m ).
nSee 12.3\Alt.Dif.\ to reset the Altitude Difference.
nTo
12.3.4 Altimeter Mode: Menu 4, Using AS/DS Counter
Altitude Alarm 2
- Set 1980m as alarm
- Alarm turned ON
absolute
altitude
Example I (Using Altitude Alarm 1)
D
900m
0m
(sea level)
0m
Sea Level
980m
Absolute Altitude Adjustment
12.3.5 Altimeter Mode - Menu 5, Reviewing Altitude Log
the Maximum
Altitude
the time stamp
- XX hour
current time
altitude
(m/ft.)
the first
reading
AM12:00
altitude
(m/ft.)
the latest
reading
PM8:00
the latest
reading
PM8:00
H
A
300m
h 900
i 90 0
F
NOTE:
get Ascending/Descending Altitude, start the AS/DS function first.
nWhen the AS/DS Counter is ON, the '
' indicator will be flashing on the display.
nWhen this function has been activated for over 24 hours in any function Mode (except
Altimeter Mode), the AS/DS counting will be turned OFF automatically.
nRefer to 12.3\AS/DS\ to start/stop or clear the AS/DS counter.
nTo
13.0 Barometer Mode - Function Overview
Absolute
Pressure
nAbsolute
Pressure: The pressure readings which detects
currently on the current altitude.
- 2 hour
-1 Hour
(the preceeding hour)
29 26 23 20 17 14 11 8 5 2 column
the logged
altitude
29 26 23 20 17 14 11 8 5 2 column
time (hour)
Daily Chart
Altimeter Mode
time (hour)
History Chart
Altitude Graph
the time stamp
the time stamp
the Minimum Altitude
Altimeter Mode
C
Ascending and Descending Altitude
12.3.6 Altimeter Mode - Menu 6, Setting Chart for Altitude Graph
- XX hour
- XX hour
the Minimum
Altitude
altitude
alarm 1
AS/DS Counter ON
Altitude Alarm 1
- Set 980m as alarm
- Alarm turned ON
IMPORTANT:
The altitude alarm will be sounded in Altimeter Mode only.
NOTE:
nAltitude Alarm 1 and 2 are independent alarm. These alarms CAN be set for absolute
altitude or altitude difference.
nThe alarm will sound if passing through (either from below or from above) the
predefined altitude.
nSee 12.3\Alt. Alm\ to set the alarm.
- 48 hour
the max. altitude
Altitude Graph
beep
h0
i0
450m
G
Example III (Using Altitude Alarm 1 and 2)
- XX hour
time (hour)
A
altitude
alarm 2
beep
0m
(sea level)
Why the Altitude Need to be Adjusted
This Watch calculates absolute altitude from air pressure, l ike most altimeters the
change of air pressure would affect the altitude reading. As air pressure may change
gradually even within hours, achieve a more accurate reading, the Watch need to be
adjusted from time to time
Adjusting the Altitude
nAdjusting the altimeter at a place where the altitude is well-defined, like the place
with an altitude sign pole (e.g marked 600 m).
See 12.3\Ref.Alt.\ to i nput the reference altitude into the Watch.
IMPORTANT: Input an incorrect altitude, may result an incorrect reading.
- 1 hour (the
preceeding hour)
beep
beep
B
Altitude Alarm 2
- Set 1980m as alarm
- Alarm turned ON
h 900
i 60 0
h 750
i 60 0
h 300
i 15 0
B
600m
C
E
h 300
i0
750m
Example II (Using Altitude Alarm 2)
h 750
i 15 0
h 750
i 15 0
A
980m
1980m
lower row:
absolute
altitude
Absolute and Relative Altitude
beep
300m
upper row:
altitude
difference
300m
900m
0m
(where
the altitude
difference
set to zero)
200m
300m
A
beep
A
2980m
altitude
(m/ft.)
absolute
altitude
nDaily
beep
980m
600m
590m
C
IMPORTANT:
*1. In order to get an accurate air temperature, remove the Watch from the wrist for
a while (to eliminate body heat effect) before the measurement.
NOTE:
*2. To get the Altitude Difference of two points, reset the Altitude Difference
(Default:100 m) to 0 at the 1st. point.
*3. To get Ascending and Descending altitude, start the AS/DS counter prior to the
ascent or descent.
*4. To read the Altitude Graph on a daily or continuous basis, choose 'Daily' or
'History' Chart option. See Chapter 12.3 for detail of the setting.
0m
Sea Level
12.3.3 Altimeter Mode: Menu 3, Setting Altitude Alarm
1980m
after the
adjustment
[S/S]
Ascending Altitude*3
300m
NOTE: Read Chapter 12.3.1 - 12.3.6 before using this Menu.
*1. Press [S/S] to process the selection -Yes or press [ESC] to escape
out of the selection - NO.
*2.Press [S/S] to select between Alarm 1 and Alarm 2.
*3 Press [L/R] to select between 'ON' and 'OFF' the alarm. Hold down
(M) to select setting display.
*4 Press [M] to review the logged altitude.
[L/R]
nScroll the menu
n Change the setting
2980m
absolute
altitude
before the
900m adjustment
Altitude Difference*2
[S/S]
Altimeter Mode
600m
nYES*1
nStart
[S/S]
nScroll the menu
n Change the setting
NOTE:
*1 The altitude will NOT be changed when Altitude Lock is activated. For example,
activate Altitude Lock when staying in a campsite, it keeps the Watch's altitude
unchange even a changing of weather overnight.
Descending Altitude*3
current
time
Level 4
nYES*1
1. Alt. Dif
( R e s e t
a l t i t u d e
Difference to
0).
2. Ref.Alt. (Set
reference
Altitude Calibration )
3. Alt.Alm. (Set
A l t i t u d e
Alarm)
4. A S / D S
(Start/Clear
Acending/Des
cending log)
5. Vw.Log (View
Max., Min,
and the 48
Frehenheit
Celsius
Temperature unit
[L/R]
absolute
altitude
12.3.1 Altimeter Mode: Menu 1, Resetting Altitude Difference
12.3 Altimeter Mode: Altimeter Function Menu
hold [S/S]
locked
unlock
Altitude Lock
[S/S]
n48
48 hour Altitude
Log /Recall
hold
[M]
hold [L/R]*1
[S/S]
Altitude: The Watch will count the
ascending or descending altitude automatically when this function
is activated.
Hour Altitude Log and readings Recall: The Watch logs the
altitude every hour automatically (i.e 1:00, 2:00, etc.) for 48
hours, and these logged altitude readings can be recalled by
user.
Temperature *1
Altitude Graph *4
nAscending/Descending
Ascending/
Descending
Altitude
Function Overview
12.2 Altimeter Mode - Setting the Units and Altitude Lock
[S/S]
nAbsolute
Absolute
Altitude
48 hour Pressure
Log /Recall
Sea Level Pressure
Pressure Graph
Logged
Altitude Readings
Sea Level Pressure
Adjustment
Altitude Graph
nThe Graph shows the logged altitude readings (Chapter 12.3.5) by the following two ways:
n Daily Chart - Shows the logged altitude readings for the current day only. The 1st. log of the
48 Hour Altitude Log
Watch logs the altitude every hour at the hour for the last 48 hours automatically.
For example, the current time is PM 8:38, the altitude readings were logged at PM
8:00 (-1 hour) , PM 7:00 (-2 hour), PM 6:00 (-3 hour) and etc.
nThese readings are further plotted into an altitude-time graph i.e. the Altitude Graph.
nThe maximum and the minimum altitude with the respective time stamp will be sorted
out from the log. These readings and other logged altitude readings of the last 48
hours can be reviewed by this menu.
nSee 12.3\Vw. Log\ to review the logged altitude readings.
nThe
13.1 & 13.2 Barometer Mode - Function Display & Setting
day (AM12:00) will be shown on the 30th column, the 2nd. log (AM1:00) will be shown on the
29th column, and the other readings are shown similarly, or
nHistory (Continuous) Chart - Shows the logged altitude readings continuously by First-In-FirstOut data structure. The latest log will be shown on the 1st. column, the second latest log will
be shown on the 2nd. column, and the other readings are shown similarly.
nSee 12.3\Chart\ to choose Daily or History Chart.
Absolute Pressure
Adjustment
n48
Hour Sea Level Pressure Log and readings Recall: The
Watch logs the pressure readings automatically every hour at
the hour, (i.e 1:00, 2:00, etc.) for 48 hours, and these logged
pressure readings can be recalled by the user.
nSea
Level Pressure Pressure Graph: This pressure graph
is plotted from the pressure readings which logged by the 48
Hour Sea Level Pressure Log.
nSea
Level Pressure Adjustment: A function to adjust the
Watch to achieve a more accurate sea level pressure
nAbsolute
Pressure Adjustment: A function to adjust the
Watch to achieve a more accurate absolute pressure reading.
Function Overview
13.3.1 Barometer Mode - Menu 1, Adjusting Sea Level Pressure
13.3 Barometer Mode: Barometer Function Menu
absolute
altitude
hold [S/S]
current
pressure
hold
[M]
Frehenheit
Celsius
current
time
Temperature unit
[L/R]
Barometer Mode
hPa
[L/R]
Temperature Display
[S/S]
Sea Level Pressure graph
Temperature *1
[S/S]
[S/S]
[L/R]
milibar
inHg
Pressure unit
1.SLP (Sea Level
Pressure setting).
2.Cur. Pres (Current
Pressure calibration)
3.Vw.Log (View Max.,
Min, and the 48 hour
Barometer Mode
[ESC]
+ Exit the current
display
+ Go to last setting
level
[M]
+ Confirm the
selection/setting
+ Go to next setting
level
[S/S]
+ Scroll the menu
+ Change the
Weather Fo recase
IMPORTANT:
*1. In order to get an accurate air
temperature, remove the Watch from the
wrist for a while (to eliminate body heat
effect) before the measurement.
Level 1
The pressure and temperature display unit
can be changed in Barometer Mode or in
Current Time Mode. See 4.2\unit\ for the
details of the setting.
[L/R]
+ Scroll the menu
+ Change the
NOTE: See 13.3.1 - 13.3.3 for more detail of these functions.
Level 2
Level 3
900m
+Adjustme
1013
mb
+Adjustme
+Mx.Tmp
(Maximum
temperature
)
+Mn.Tmp
(Minimum
temperature
)
+Mx. SLP
(Maximum
Sea Level
Pressure)
+Mn. SLP
(Minimum
after the
adjustment
before the
adjustment
1016
mb
600m
+-1 hour log
( a t t h e
preceding
hour)
+- 2 ~ -47
hour logs
+- 4 8 h o u r
log
1016
mb
300m
0m
sea level
get the sea
level pressure
from weather
station
Sea Level Pressure Adjustment
Why Sea Level Pressure need to be Adjusted
nThis Watch includes a Sea Level Pressure adjustment feature, which CAN:
nTo achieve a more accurate Sea Level Pressure,
nTo achieve a more accurate Altitude (In case the exact altitude is NOT available for
calibrating the reference altitude).
nBefore calibrate the sea level pressure, consult the nearest observatory to get the
most update sea level pressure.
nDuring the adjustment, input that Sea Level Pressure into the Watch.
nSee 13.3\SLP\ to adjust the Sea Level Pressure.
IMPORTANT: Input an incorrect pressure during the adjustment procedure, it results
a mistaken pressure reading in future.
13.3.2 Barometer Mode - Menu 2, Adjusting Absolute Pressure
altitude
- 1 hour (the
preceeding hour)
get the a bsolute
after the
pressure from
adjustment
another referring
barometer
before the
adjustment
900m
time (hour)
943
mb
943
mb
the Maximum
Temperature
- 48 hour
300m
nCompass
directions: A way to indicate the direction of an
object by divided direction into 4, 8 or 16 directions (N,E,S,W,
NE, SE, SW, NW and etc.)
Compass Directions
the logged
pressure
- XX hour
the Minimum
Pressure
current
time
Compass Bearings
the time stamp
- 2 hour
- 1 hour
(the preceding hour)
the latest
pressure
log
Bearings: A way to indicate the direction of an object
by using t he angular difference between North (08) and the
object (0 8 to 359 8 ) .
- XX hour
the Maximum
Pressure
pressure graph
600m
0m
sea level
nCompass
- XX hour
sea level
pressure
(mb/inHg)
the time stamp
940
mb
14.0 Compass Mode - Function Overview
13.3.3 Barometer Mode- Menu 3, Reviewing Pressure Logs
the Minimum
Temperature
the time stamp
the time stamp
Pressure Graph Display
nNorth
pole pointer: A pointer which always indicate the
direction of magnetic north.
- XX hour
North Pole Pointer
the time stamp
Logged Sea Level
Pressure Readings
nBackward
Bearing: The backward bearing
opposite direction from normal bearing.
Ambient Pressure Adjustment
Why Absolute Pressure need to be Adjusted
achieve higher accuracy, this Watch includes an adjustment feature which allow
user to adjust the absolute pressure.
nBefore adjusting the absolute pressure, obtain another referring barometer to get the
absolute pressure of your current position.
nDuring the adjustment, input that absolute pressure into the Watch.
nSee 13.3\Cur. Pres\ to adjust the A bsolute Pressure.
IMPORTANT: Input an incorrect pressure my results an incorrect pressure reading in
future.
nFor
14.1 Compass Mode - Precautions
indicates the
Backward Bearing
48 Hour Sea Level Pressure Log
nThe Watch logs the Sea Level Pressure every hour at the hour for the last 48 hours
automatically. For example, the current time is PM 8:38, then the Sea Level Pressure
readings were logged at PM 8:00 (-1 hour), PM 7:00 (-2 hour), PM 6:00 (-3 hour) and
etc.
nThese readings are further plotted into a pressure-time graph i.e the Sea Level Pressure
Graph.
nThe Maximum/Minimum Sea Level Pressure readings and the Maximum/Minimum
Temperature readings with respect to the time stamp will be sorted out from the log.
These readings and other logged Sea Level Pressure readings of the last 48 hours can
be reviewed by this menu.
nSee 13.3\Vw. Log\ to review the logged Sea Level Pressure readings.
14.2 Compass Mode - Compass Directions and Bearings
nCompass
Lock: A function to lock the compass bearing,
compass direction and the magnetic north pole pointer.
Compass Lock
nCompass
Calibration: A process to allow the watch to self
regulate the compass to achieve a more accurate compass
reading.
Compass Calibration
nMagnetic
Declination Compensation: A setting to compensate
the local magnetic declinaton to achieve a more accurate
compass reading.
Magnetic Declination
Compensation
Function Overview
14.3 Compass Mode - Compass Display
N
object D
NW
nAvoid
measuring direction when:
nClose to a magnetic object
nClose to metallic object
nClose to an electrical appliance
nInside a moving object.
nKeep
the Watch away from
Magnetic sources, like:
nSpeakers,
nMotors,
nMobile phones and etc.
N
E
object B
point A
SE
Compass Directions
compass calibration or magnetic declination compensation process
when:
nThe Watch is using for the first time,
nThe battery has been replaced,
nThe bearing direction digits are flashing, and the compass bearing and
compass direction are flashing
nThe compass use in a location that is apart from the place in which the
compass had been calibrated,
nThe user intends to regulate the precision of the digital compass.
angular
difference
nPerform
90
point
A
135
0
0
°
0
°
SSW
SW
WSW
°
object B
W
WNW
NW
NNW
°
East Southeast
Southeast
South Southeast
South
South Southwest
Southwest
West Southwest
West
West Northwest
Northwest
North Northwest
Compass Bearing
349° - 118°
12° - 33°
34° - 56°
57° - 78°
79° - 101°
102° - 123°
124° - 146°
147° - 168°
169° - 191°
192° - 213°
214° - 236°
237° - 258°
259° - 281°
282° - 303°
304° - 326°
327° - 348°
object C
14.5 Compass Mode - Applications of the Compass
compass
lock indicator
0
mountain A
[L/R]
270
[S/S]
°
point A
mountain B
135
Direction Unlock
Direction Locked
°
Check Current Position By Backward Bearing
backward
bearing
135
Norm al Bearin g indicator Backward Bearin g
°
point E
(finish point)
315
225
NOTE:
point D
the 'Backward Bearing indicator '
' is appeared, the Watch is showing the
backward bearing direction of the navigating direction.
nWhen the 'Lock' indicator '
' is appeared, the compass direction, bearing direction
and the magnetic north pole pointer are locked.
nThe Compass Lock will be released automatically when the Watch enter IDLE Mode.
0
3120 m
°
nWhen
point C
°
0
°
4110 m
315
point B
2120 m
A Sample Trail on a Map
14.6.1 Compass Mode - Menu 1,
Compass Directions
North
North Northeast
Northeast
East Northeast
East
°
point A
(starting point)
nUse a ruler to draw the line 135° on the map
which starting from the mountain A. Draw the
lines 270° on the map which starting from the
mountain B.
nYour current position on the map will be the
interchapter point (point A) of the lines 135° and
270°
How to Check the Trek Course Correct
nMark the points (identifiable landmarks) where
the trail turns its direction or the trail branches
its way, such as the point A, B, C, D and E on
the adjacent diagram.
nFind out the bearing directions of point B from
point A (315 ° ), point C from point B (0 8 ), point
D from point C (225 ° ), and then point E from
point D (315 ° ).
nDuring the trekking, make sure that the heading
direction is 315 ° from point A to point B.
Performing the similar checking for other
sections of the trail.
Magnetic
North
True North
Magnetic
Declination
Magnetic
Declination
turn
turn
turning axis
Completed
'R ota tio n' Pro cess
NOTE:
nDuring the 'rotation' process, ensure the following practices are carrying out:
nTurning steadily - Keep the time for the 'rotation' for about 20 to 30 seconds,
IMPORTANT: Keep the Watch parallel to the horizon
nPerform the 'rotation' process in a open space.
nLocate an object in front of you, then steadily turn your body clockwise along the vertical axis
of your body.
nThe Watch is calibrated if a square appear on the display.
nThe Magnetic North Pole which is slightly
different from the True North Pole. This
Watch, like most magnetic compass, points to
the Magnetic North Pole, while everything
measure from a map is related to the True
North Pole.
nThe angular difference between Magnetic
North Pole and True North Pole is called
magnetic declination. Its amount (degrees
and minutes) and direction (easterly and
westerly) depend on where you are in the
world.
For serious compass user or whom intends to
perform accurate navigation, this Watch must
be adjusted for magnetic declination.
Magnetic Declination Information
nMost topographic maps include a small arrow
which shown magnetic north pole and or the
magnetic declination information.
nThis manual includes the magnetic declination
for some major cities. See the coming chapter
'Magnetic Declination at Major Cities' for
more detail.
nFor the cities are not included in the list,
please refer to the online magnetic
declination calculator at:
nhttp://geomag.nrcan.gc.ca/apps/mdcal_e.php
nhttp://www.ngdc.noaa.gov/seg/geomag/jsp/De
clination.jsp
nWhen the calibration is completed, press [ESC] to exit the calibration.
nSee 14.6\calibrate\for starting the calibration.
14.6.2.2 Compass Mode - Menu 2, Setting Magnetic Declination
No. Country/Place
Major City
1
2
3
4
5
6
7
8
9
10
11
12
13
14
15
16
17
18
19
20
21
22
23
24
25
26
27
28
29
30
31
32
Kabul
Canberra
Vienna
Manama
Dhaka
Brussels
Brasilia
Ottawa
Santiago
Beijing
Hong Kong
San Jose
Havana
Prague
Copenhagen
Cairo
Helsinki
Paris
Berlin
Athens
Budapest
New Delhi
Jakarta
Jerusalem
Rome
Tokyo
Amman
Nairobi
Seoul
Kuala Lumpur
Mexico City
Kathmandu
Afghanistan
Australia
Austria
Bahrain
Bangladesh
Belgium
Brazil
Canada
Chile
China
China
Costa Rica
Cuba
Czech Republic
Denmark
Egypt
Finland
France
Germany
Greece
Hungary
India
Indonesia
Israel
Italy
Japan
Jordan
Kenya
Korea
Malaysia
Mexico
Nepal
Declination
+2E
+12E
+2E
+2E
0
-1W
-19W
-14W
+5E
-6W
-2W
0
-3W
+2E
+1E
+3E
+6E
-1W
+1E
+3E
+4E
+1E
+1E
+ 3E
+1E
-7W
+3E
+1E
-7W
+1E
+6E
0
No. Country/Place Major City
33
34
35
36
37
38
39
40
41
42
43
44
45
46
47
48
49
50
51
52
53
54
55
56
57
58
59
60
61
62
63
64
Netherlands
New Zealand
Norway
Pakistan
Philippines
Portugal
Russia
Singapore
South Africa
Spain
Sweden
Switzerland
Taiwan
Thailand
UAE
United Kingdom
United States
NO key has been
operated for
1 minute
compass
bearing
compass
direction
[S/S] or [L/R]
Compass Mode
Distortion
Compass Idle
NOTE:
If NO key has been operated for about 1 minute, the Wa t c h w i l l g o t o I D L E
Mode automatically. Press [S/S] or [L/R] t o resume the compass to normal
operation .
If distortion is detected, the compass bearing and compass direction are
flashing. See 14.6\Calibrate\ to restore the compass to normal operation when
distortion occur.
15.0 Battery
-1W
-22E
0
+2E
-1W
-5W
+9E
0
-23W
-3W
+3E
0
-3W
0
+1E
-3W
-10W
+25E
+12E
+2E
+16E
+10E
-4W
+10E
-16W
+2E
+1E
+10E
+6E
+18E
-11W
+14E
low battery
indicator
Note:
nReplace
the battery with a new
CR2032.
nHowever,
Level 1
hold
[M]
Level 2
1.Calibrate (Calibrating
the compass)
2.Declinate (Setting the
magnetic declination
of your current
position)
Compass Mode
nYES
nNO
n-90*1
n-89
n-88~ +88
n+89
n+90
[ESC]
nExit the current
display
nGo to last setting
level
[M]
nConfirm the
selection/setting
nGo to next setting
level
[S/S]
nScroll the menu
nChange the setting
[L/R]
nScroll the menu
nChange the setting
NOTE: See more detail of these functions from 14.6.1 14.6.2.2
*1.See 14.6.2.2 to select the magnetic declination value of the
city which is close to your current position.
14.6.2.1 Compass Mode - Menu 2, Setting Magnetic Declination
M a g n e t i c D e c l i n a t i o n
Compensation Examples
nTo get an object's true bearing (TB)
by subtract westerly (W) magnetic
declination or add easterly (E)
object B
magnetic declination with the
magnetic bearing (MB).
nExample 1: 23 ° Westerly magnetic
declination
and the compass needle
magnetic
points 323 ° .
bearing
point A
323 °
nTB = MB - W. While MB = 323 ° ;
W =23 °
Weste rly (W ) Magnetic Declin atio n
nTB = 323 ° - 23 °
nTB = 300 °
nThe true bearing will be 300 ° .
magnetic
declination
nExample 2: 22 ° Easterly magnetic
true north
22 ° E
declination and the compass needle
magnetic
0°
points 278 ° .
north
nTB = MB + E. While MB = 278 8 ; E
object B
= 22 °
true
nTB = 278 ° + 22 °
bearing
nTB = 300 °
300 °
magnetic
nThe true bearing will be 300 ° .
bearing
point A
nThe Watch can compensate the
278 °
compass bearing at a place where
Easte rly (E ) Magnetic Declin atio n
the magnetic declination is either
Westerly declination or Easterly
declination.
magnetic
north
magnetic
declination
23 ° W
true north
0°
true
bearing
300 °
16.0 Specifications - Timekeeping Mode
Declination
Amsterdam
Wellington
Oslo
Islamabad
Manila
Lisbon
Moscow
Singapore
Cape Town
Madrid
Stockholm
Bern
Tai-pei
Bangkok
Abu Dhabi
London
Washington, DC
Juneau
Phoenix
Little Rock
Sacramento
Denver
Atlanta
Honolulu
Boston
Saint Paul
Jackson
Santa Fe
Oklahoma City
Salem
Harrisburg
Salt Lake City
14.6 Compass Mode - Compass Function Menu
IMPORTANT: If you are in doubt of the directions
and positions of the trail, consult
the park
administration office before starting the trekking.
14.6.2 Compass Mode - Menu 2, Setting Magnetic Declination
Calibrating the Compass
turn
object
the north
pole pointer
How to Check your Position by Backward
Bearing
nSpot two distant identifiable landmarks such as
mountain, light-house or fort from your current
position, like the mountain A and B.
nCheck out the backward bearing directions of
mountain A and B from your current position, i.e
135° from mountain A and 270° from mountain
B.
What is Magnetic Declination
start
navigating
direction
NOTE:
This Watch includes both compass directions and compass bearings.
°
°
0
Compass Bearings
14.4 Compass Mode - Backward Bearing and Compass Lock
navigating
direction
°
3150
Tips and Precautions
navigating
direction
3158
0
object D
object C
Marks
N
NNE
NE
ENE
E
ESE
SE
SSE
S
if the appearance of
battery-low indicator is c a u s e d
by using the Watch under very
cold condition, the indicator will
be disappeared when normal
temperature resume.
nIt is recommended to complete
the battery replacement by a
c e r t i f i e d s e r v i c e a g e n c y,
because this Watch contains
precise electronic sensors and
components.
nThe memory will be cleared if
the battery has been replaced.
Current Time Mode
nLast 1 minute beeps once every 10 seconds
Barometer Mode
nHour, minute, second, am, pm, month, date
nLast 5 seconds beeps once every second
nR e s o l u t i o n /
nDay of week, weather forecast, temperature, sea level
nSounds for 30 seconds when count to zero
pressure history display or altitude history.
nTime System: 12-hour or 24-hour format
nCalendar System
nAuto-Calendar pre-programmed from the year 2000 to 2099
Weather Forecast: 4 symbols to indicate the predicated
weather
Daily Alarm Mode
n2 daily or weekly alarms
nHourly chime
nAlarm Sound
Sounds for 30 seconds at preset time
Chronograph Mode
nResolution: 1/100 second
nMeasuring Range: 99 hours 59 minutes 59.99 seconds
Measuring Mode: 50 lap memories; Recall lap memories and
total time.
Countdown Timer Mode
nResolution: 1 second resolution
nUser-defined target time setting: 99 hours
59 minutes 59
seconds
nOperation Mode: Countdown
nQuick Set : 5 quick set Values (3, 5, 10, 15 and 45 minutes)
nTimer Sounds:
nLast 10 minutes beep once every minute
Pacer Mode
nRange: 30 - 180 bpm (in step of 5)
Step counter: Maximum 999999 steps.
Dual Time Mode
nHour, minute, second
Ski Mode
nSki Lap trigger: Automatic or Manual
nSki Slope setting: 5 ° to 9 0 °
nSensitivity type: Ascending and Descenting
Measuring Range: 300
hPa/mbar to 1100 hPa/mbar (8.85 inHg to
32.48 inHg)
nSampling Interval : First 5 min: 1 second;
After 5 min: 1 min
nHistory
Thermometer
nResolution: 0.1 ° C (0.1 ° F)
Measuring range: -10.0 ° C to 60.0 8C (14.0
8F to 140.0 8F)
Compass Mode
nResolution: 1 ° display (digital)
nSensitivity Level: Fast, Normal and Slow
nMeasuring range: 0 to 359 ° (digital)
nAltitude range: -706m to 9164m (-2316ft to
nOthers: Digital bearing reading Lock
30067 ft)
nTravel Time: Maximum 99 minutes, 59.99
seconds.
skiing memory: 50 skiing
Altimeter Mode
nResolution : 1m (1ft)
nMeasuring range: -706m to 9164m (-2316ft to
30067ft)
nSampling Interval: First 5 min: 1 sec; After 5
min: 1 minute
nHistory Recall: Maximum 48 hours history
recall
Altitude Alarm: 2 altitude alarms
nDigital backward bearing
Declination Setting: Range: +90 8 to -90 8
Backlight
Electro-Luminescent (EL) backlight
Battery
nWatch: 3V lithium battery (CR2032) 1 piece