1
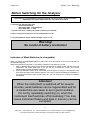
 User Manual
Vibration Analyser
Adash 4300 - VA3
Balancing
FW 03.19
Ref: 13042007 RS
Adash Ltd., Czech Republic, Tel.: +420 59 6232670, Fax: +420 59 6232671, e-mail: [email protected]
For further technical and contact information consult www.adash.net, www.adash.cz
Adash Ltd.
A4300 - VA3 - Balancing
Contents
Before Switching On the Analyser .......................................................................................3
Indication of Weak Batteries (re-chargeable) ......................................................................3
References ..............................................................................................................................4
Interpretation of Basic Terms ...............................................................................................5
Speed Synchronisation........................................................................................................5
Order Analysis .....................................................................................................................5
Amplitude and Phase Measurement....................................................................................5
Main Menu...............................................................................................................................6
Balancing Item .....................................................................................................................6
Balancing Menu......................................................................................................................7
Load project Item .................................................................................................................7
Ampl. & Phase measur. Item ...............................................................................................7
Balancing Item .....................................................................................................................7
Single plane balancing ................................................................................................................. 8
Dual Plane balancing.................................................................................................................... 9
Weight splitting ........................................................................................................................... 12
Clear meas. memory Item .................................................................................................13
New project Item................................................................................................................13
Project Parameter....................................................................................................................... 14
Machine Parameter .................................................................................................................... 14
Balancing Parameter .................................................................................................................. 14
Input Parameter .......................................................................................................................... 14
Sensor Parameter....................................................................................................................... 15
Measurement Parameter............................................................................................................ 15
Stop mode Parameter ................................................................................................................ 15
Finishing of project definition ...................................................................................................... 16
Modify project Item ............................................................................................................16
Erase project Item..............................................................................................................16
User notes.............................................................................................................................17
2
Adash Ltd., Czech Republic, Tel.: +420 59 6232670, Fax: +420 59 6232671, e-mail: [email protected]
For further technical and contact information consult www.adash.net, www.adash.cz
Adash Ltd.
A4300 - VA3 - Balancing
Before Switching On the Analyser
Ignoring any recommendations mentioned below may cause failure of the instrument.
Operating with a power higher then 24 V can cause an accident.
1. Connect into the ICP input only:
- ICP powered sensor
- AC voltage max. 12 V peak-peak
- DC voltage max. +/- 24 V.
If you are not sure, contact your dealer or directly our website.
2. Never connect the analyser to a line voltage 230 V (110 V).
3. Only use batteries with a nominal voltage of max. 1.5 V.
Warning!
Be careful of battery orientation!
Indication of Weak Batteries (re-chargeable)
When you select the Instrument info from main menu, then information on the current condition of
the batteries appears.
While the instrument is switched on, the battery condition is checked every 30 sec.
1. When a warning low battery level is detected (insufficient to enable correct and safe work with
instrument), the yellow ERR light is on (on the top of keyboard). Finish your current
measurement and then change the batteries.
2. When the alert low battery level is detected, all three lights on the top of the keyboard blink
three times and instrument switches itself off. You have to change the batteries immediately. If
the instrument switches itself off after switch-on, then you also have to change the batteries
immediately.
Attention!
When the instrument is switched off for several
minutes, weak batteries can be regenerated and for
a limited time can seem to be in good condition.
Do not try repeatedly switching on, when the
instrument itself switches off immediately! You may
cause instrument failure and data in memory can be
corrupted.
3
Adash Ltd., Czech Republic, Tel.: +420 59 6232670, Fax: +420 59 6232671, e-mail: [email protected]
For further technical and contact information consult www.adash.net, www.adash.cz
Adash Ltd.
A4300 - VA3 - Balancing
References
This user manual contains information on how to operate with FW module Balancer. It contains
detailed description about this FW module.
References:
[1]
Vibration Analyser Adash 4300-VA3, User manual
The basic manual is often mentioned in this one as see [1].
We recommend reading of introductory chapters References and Terminology in the basic user
manual [1] at first.
This manual is registered in the list of references as the [5] item.
4
Adash Ltd., Czech Republic, Tel.: +420 59 6232670, Fax: +420 59 6232671, e-mail: [email protected]
For further technical and contact information consult www.adash.net, www.adash.cz
Adash Ltd.
A4300 - VA3 - Balancing
Interpretation of Basic Terms
Speed Synchronisation
Every measurement of complex spectrum (required for balancing) requires the speed synchronisation
by an external pulse.
This must be a once-per-revolution trigger. In the case of order analysis measurements, amplitude
and phase measurements and all measurements in the balancing module the speed synchronisation
is required.
Every measurement in balancing module requires connection of tacho
probe. Balancing process requires stable speed of machine and all steps
should be made at the same speed.
Order Analysis
A standard option of the Adash 4300-VA3 is order analysis. It is a special case of complex spectrum
measurement. The first spectrum line is the speed frequency, next lines are the harmonics.
Description of order analysis measurement – see [1], chapter Dyn. Measur. – Setup Menu / Order
Analysis item
Stable phase is important for the balancing process. Please follow these directions:
- use as high a resolution setting (RESOL parameter) as you can whist checking that the phase is
stable,
- phase values are comparable only with the same set of RESOL and HARM-NMB parameters.
Amplitude and Phase Measurement
Adash 4300-VA3 instrument can measure amplitude and phase of the vibration. The basic is the order
analysis, from which the first line is displayed. Measurement of amplitude and phase – see [1],
chapter Analyser Menu / Ampl. & phase measur. Item.
5
Adash Ltd., Czech Republic, Tel.: +420 59 6232670, Fax: +420 59 6232671, e-mail: [email protected]
For further technical and contact information consult www.adash.net, www.adash.cz
Adash Ltd.
A4300 - VA3 - Balancing
Main Menu
When the FW module Balancer is downloaded to the instrument, the Balancing item appears on the
main menu. After selection of this item the balancing main menu appears – see next chapter. The
base structure of balancing data is the balancing project. It includes all names, parameters, data …
Balancing Item
This menu item enables the creation and maintenance of a balancing project, memory management,
project loading, on-line amplitude, phase and speed measurement, balancing process.
Reminder: the actual balancing project is saved to the VA3 memory and is not cancelled after
instrument switch off.
6
Adash Ltd., Czech Republic, Tel.: +420 59 6232670, Fax: +420 59 6232671, e-mail: [email protected]
For further technical and contact information consult www.adash.net, www.adash.cz
Adash Ltd.
A4300 - VA3 - Balancing
Balancing Menu
Select the Balancing item from instrument main menu. Then the Main menu of balancing appears.
- by using up/down arrows select required item and then press right arrow, ENTER or START
- by using left arrow or ESC return to main menu.
Load project Item
A project is loaded from the data instrument memory (12MB) to the balancing instrument memory.
Select required project name and confirm by ENTER.
Ampl. & Phase measur. Item
It enables on-line measurement of amplitude, phase and machine speed. Description of these items –
see [1], chapter Analyser Menu / Ampl. & phase measur. Item. These measurements can be made
before creation of a new project and before balancing procedure – see chapters New project Item,
Balancing Item.
Balancing Item
This is the main balancing process.
Before creation of a new balancing process or when you continue with process it is sensible to check
whether the amplitude and phase is equal with initial condition.
- by right arrow, ENTER or START button the first measurement screen occurs. Screen is empty for
new project without measurements.
- by using PdDn and PgUp you can display next or previous measurement screens.
- every measurement starts by START button.
7
Adash Ltd., Czech Republic, Tel.: +420 59 6232670, Fax: +420 59 6232671, e-mail: [email protected]
For further technical and contact information consult www.adash.net, www.adash.cz
Adash Ltd.
A4300 - VA3 - Balancing
- if you press ENTER instead of START then you can manually enter the values from keypad
(balancing calculator). Attention! You have to always enter the amplitude as RMS value. It will be
immediately re-calculated (test it).
Two different screens exist for:
- single plane balancing,
- dual plane balancing.
Single plane balancing
Balancing process in the single plane consists of the following steps:
- 1st RUN measurement
- entering of TRIAL MASS value and installation of trial mass to machine
- 2nd RUN and RESULT calculation
- removing of trial mass and installation of result mass
- running TEST MEAS. and calculation TRIM #1 result
- installation Trim #1 mass
- repeating of TEST MEASUREMENT and installation of next TRIM #2, #3 … masses.
1st RUN
Push START button. The result is amplitude/phase of unbalanced machine. The example measured
amplitude 1.131 mil 0-P represents 100% amplitude for next balancing process. Measurement was
made at 1200 RPM. This speed also represents 100% of next balancing process.
TRIAL MASS
Push PgDn button. A trial mass input dialog box will appear. Enter trial mass value and push ENTER
button. Install trial mass on the machine. You can install it to any angle you want.
The example trial mass is 0.75 oz.
2nd RUN
The second run screen appears after the trial mass value has been entered. Use START button and
run the measurement. If the trial mass is installed in the wrong place (the measured phase is almost
the same as in the first run) then you are informed about it. Remove the trial mass and install it again
in different place (90° change is recommended) or enlarge its weight. Repeat the measurement.
8
Adash Ltd., Czech Republic, Tel.: +420 59 6232670, Fax: +420 59 6232671, e-mail: [email protected]
For further technical and contact information consult www.adash.net, www.adash.cz
Adash Ltd.
A4300 - VA3 - Balancing
Notice: Push Setup button to recall the trial mass input dialog box and change trial mass value if
necessary.
The result amplitude/phase measurement is displayed.
Remove trial mass and mark its position (it represents 0 degrees). From this position will be
calculated the result balancing mass. A positive angle is orientated in the rotation direction.
In the result field read the balancing mass solution value and angle value for its installation. Install this
mass to required position.
In the example on the screen:
The 1.403 mil 0-P amplitude was measured at 1201 RPM (it is 0.08% higher speed then in 1st RUN).
The result mass is 0.358 oz and the position is 23.4 deg from trial mass position in opposite rotation
direction.
TEST MEAS.
Push PgDn and test. meas screen appears. Press START and run the test measurement. The result
is the vibration amplitude after balancing. If this value is sufficient then the balancing process is
finished. If the value is still high then in the TRIM #1 field the next balancing mass and angle is
displayed. Install TRIM #1 mass and repeat test measurement in next screen (PgDn) as TRIM #2, #3
…
Notice: Don’t remove any formerly installed weights now!
In the example on the screen:
The 0.136 mil 0-P is an amplitude reduction of –88%. It means machine condition is much better then
before balancing. If this result is not acceptable then install next TRIM #1 mass (0.043 oz/-94.4 deg).
The angle is related always to trial mass position.
Dual Plane balancing
In two planes you can balance with one or two vibration sensors. In case of one sensor you will need
to move the sensor from one plane to the other. The balancing process takes more time.
Recommendation: If you balance with two sensors, it is recommended in project definition to enter
Channel parameter equal CH2. This channel will be assigned to the left plane. When you select CH2
9
Adash Ltd., Czech Republic, Tel.: +420 59 6232670, Fax: +420 59 6232671, e-mail: [email protected]
For further technical and contact information consult www.adash.net, www.adash.cz
Adash Ltd.
A4300 - VA3 - Balancing
then it is optically equal with the position of CH2 input on the left side of instrument. Generally you can
select both channels.
Balancing process in the dual plane consists from next steps:
- 1st RUN measurement – left plane
- 1st RUN measurement – right plane
- entering of TRIAL MASS value – left plane
- installation of trial mass to machine – left plane
- 2nd RUN measurement – left plane with trial mass in left plane
- 2nd RUN measurement – right plane with trial mass in left plane
- removing of trial mass
- entering of TRIAL MASS value – right plane
- installation of trial mass to machine – right plane
- 3rd RUN measurement – left plane with trial mass in right plane
- 3rd RUN measurement – right plane with trial mass in right plane
- removing of trial mass and installation of result masses to right and left plane
- running TEST MEAS. – left plane
- running TEST MEAS. – right plane and calculation TRIM #1 results
- installation TRIM #1 masses
- repeating of test measurements and installation of next TRIM #2, #3 … masses
Attention! The order of measurements in left and right plane is not important. Results are calculated
after measurements in both planes. What you have to keep is:
- 2nd RUN
- trial mass in left plane
- 3rd RUN
- trial mass in right plane
To the next balancing step you are able to go after measurement in both planes.
When you measure with two sensors, then the button START takes both measurements (left + right
plane) automatically. Right / left arrows are used especially for results readings in both planes. The
next example shows measurement with one sensor, where after one plane measurement you have to
switch to the second plane and repeat the measurement.
1st RUN
Install sensor to the left plane. Push START and vibration values for the left plane is taken. Move the
sensor to the second plane, by right arrow switch to second plane and repeat the measurement. Now
you have both values. The sense of speed and speed change (%) is the same as in single plane
balancing.
TRIAL MASS
Push PgDn button. A trial mass input dialog box will appear. Enter trial mass value for left plane and
push ENTER button. Install the left plane trial mass on the machine. You can install it to any angle you
want.
The example trial mass is 0.50 oz.
10
Adash Ltd., Czech Republic, Tel.: +420 59 6232670, Fax: +420 59 6232671, e-mail: [email protected]
For further technical and contact information consult www.adash.net, www.adash.cz
Adash Ltd.
A4300 - VA3 - Balancing
2nd RUN
The second run screen appears after the trial mass value has been entered. Use START and
measurement will be taken. When the trial mass is installed in wrong place, move it to the different
position and repeat the measurement.
Notice: Push Setup button to recall the trial mass input dialog box and change trial mass value for left
plane if necessary.
By right/left arrow switch the measurement to the second plane and repeat the measurement.
Remove trial mass from left plane and mark its position as 0° for left plane.
TRIAL MASS
Push PgDn button. A trial mass input dialog box will appear. Enter trial mass value for right plane and
push ENTER button. Install the right plane trial mass on the machine. You can install it to any angle
you want.
The example trial mass is 0.50 oz.
3rd RUN
The third run screen appears after the trial mass value has been entered. Press START and
measurement will be taken. When the trial mass is installed in wrong place, move it to the different
position and repeat the measurement.
Notice: Push Setup button to recall the trial mass input dialog box and change trial mass value for
right plane if necessary.
By right/left arrows switch the measurement to the opposite plane and repeat the measurement.
Remove trial mass from right plane and mark its position as 0° for right plane.
11
Adash Ltd., Czech Republic, Tel.: +420 59 6232670, Fax: +420 59 6232671, e-mail: [email protected]
For further technical and contact information consult www.adash.net, www.adash.cz
Adash Ltd.
A4300 - VA3 - Balancing
Both balancing masses/angles are displayed in result field. Use right/left arrow to look at it. Install
these masses to required position.
No result is known now.
In the moment results for both planes are known.
Test measurement
Use PgDn and switch to test meas. screen. Press START and run test measurement in one plane.
Then switch to opposite plane and repeat the measurement. When vibration levels are acceptable
then the balancing process is finished. When the amplitudes are still high then use the TRIM #1, #2 …
for next development.
When you are not satisfied, then in this moment both TRIMs #1 are calculated. Install these masses
and repeat test measurement on next screen.
Notice: Don’t remove any formerly installed weights now!
No TRIM is known now.
In the moment TRIM for both planes is known.
Weight splitting
It is often the case, for example on a fan, that the balance solution requires the location of a mass in
an impossible position – in between two blades for example. To resolve this problem you will need to
use the weight splitting function.
When you press Info button on any screen, then the weight splitting screen appears. When you do
this from a screen which displays a balance solution, then this result is copied automatically to the
weight splitting screen. By using up/down arrows and ENTER button set the directions (deg) for both
locations. Weight splitting is calculating.
When the Info button is pressed, the result (0.358 oz/-23.4 deg) values are displayed on weight
splitting screen.
12
Adash Ltd., Czech Republic, Tel.: +420 59 6232670, Fax: +420 59 6232671, e-mail: [email protected]
For further technical and contact information consult www.adash.net, www.adash.cz
Adash Ltd.
A4300 - VA3 - Balancing
For instance we have a fan with the blades difference 15 deg. It means we can install mass to the
position 0 deg, ± 15 deg, ± 30 deg, ± 45 deg, … Required position lies between -15 deg and -30 deg.
We enter these values to split weight screen. After both angles definitions the result masses are
calculated.
Clear meas. memory Item
This item will remove all measurements results and to begin balancing process again, it means from
1st RUN.
The balancing process can be interrupted in any step. It is possible to return (PgUp) back to any
measurement screen and by using START button run the measurement and continue balancing from
this position.
When you need to start the process again it is possible:
- run the measurement on the 1st RUN screen
- select Clear meas. memory item.
The Clear meas. memory removes only results of measurement. Information saved in the project is
not removed. When you need to remove current balancing project, you need to use Erase project.
New project Item
When you select this item then all data of the balancing memory will be erased. In the data memory
there is saved always a copy of balancing project, it means there is no danger of losing data. On the
next screen you have to set the parameters of new balancing project. Select individually items by
up/down arrows and confirm by right arrow, ENTER or START button. By using Save button you
can save the analyser setup to the setup memory of instrument.
Before definition of new project there is suitable to make several measurements in Analyser mode,
which help you to set parameters well:
- measure the machine speed in the condition which will be used for balancing.
13
Adash Ltd., Czech Republic, Tel.: +420 59 6232670, Fax: +420 59 6232671, e-mail: [email protected]
For further technical and contact information consult www.adash.net, www.adash.cz
Adash Ltd.
A4300 - VA3 - Balancing
- choose suitable vibration sensor and set its parameters. For low speed machines there is better to
use a velocity sensor. For standard speed machines there is accelerometer acceptable.
- choose the amplitude unit for balancing. Obviously it is better to set the velocity, if the sensor is
accelerometer. Then set the VIEW-UNIT parameter, this unit will be displayed on the screen during
whole balancing process (assure, that you understand what is the differences between
SENSOR-UNIT, AMPL-UNIT, VIEW-UNIT)
- when the SENSOR-UNIT is acceleration and AMPL-UNIT is velocity, then set the integrator
frequency (10 Hz or 1 Hz, it is 600 CPM or 60 CPM) – see [1], chapter Instrument Setup Menu /
Meas. Param. Item / HP Integ. Parameter.
- check the signal shape by time signal measurement. Set the frequency range ten times higher then
speed frequency. Measured signal should be similar to a pure sine.
- measure the spectrum in the same frequency range. This spectrum should have only one significant
line on speed frequency.
- when the spectrum includes more significant lines then more problems exist in the machine. The
balancing process probably will not be successful.
- measure on-line ampl/phase and check whether the phase is stable. If not, set different Resol
parameter. If you are not able to measure stable phase, then again the balancing process probably
will not be successful.
- now set all project parameters.
Project Parameter
Use right arrow or ENTER and enter the name of project. Until the name is defined, it is not possible
to enter next items.
Machine Parameter
Use right arrow or ENTER and enter the name of machine. Until the name is defined, it is not
possible to enter next items.
Balancing Parameter
Use right arrow or ENTER and select one from three possible balancing methods:
- single plane,
- dual plane with one sensor,
- dual plane with two sensors.
Input Parameter
In the case of using only one sensor set the channel to which the sensor will be connected. When you
use two sensors, then this input channel means the left plane. It is suitable to set CH2, because this
CH2 input is on the left side of the instrument. The second input will be used for right plane.
14
Adash Ltd., Czech Republic, Tel.: +420 59 6232670, Fax: +420 59 6232671, e-mail: [email protected]
For further technical and contact information consult www.adash.net, www.adash.cz
Adash Ltd.
A4300 - VA3 - Balancing
Sensor Parameter
Use right arrow or ENTER and the Inputs & sensors screen occurs. Now set all parameters for CH1
and CH2 (if it is used). The description of all parameters – see [1], chapter Analyser Menu / Inputs
and Sensors Item.
If you use two sensors, then both sensors have to have the same unit.
Measurement Parameter
Use right arrow or ENTER and on the next screen define next balancing parameters. These
parameters are equal with parameters from Ampl. & phase measur. setup - see [1], chapter
Analyser Menu / Ampl. & phase measur. Item.
Additional parameter there is MASS-UNIT parameter, which defines unit of trial mass and of result
balancing masses. When you use the relative trial mass (it means equal 1) then this mass unit is only
formal.
The mass values are always positive. When you want removed the mass then you have to do it on the
opposite side of rotor.
Stop mode Parameter
For the 03.14 FW version and later.
Use right arrow or ENTER and from the next menu select a desired mode of a balancing
measurement stopping.
- single measurement: Only a single measurement of the
amplitude, phase and speed is performed. Its result is
stored as the balancing measurement result.
- user stop: The amplitude, phase and speed on-line
measurement cycle is run. Watch the measured phase and
speed values within the measurement cycle. If a correct
balancing speed value is reached and the phase value is
stable, then break the measurement cycle by pressing of
ESC key on the instrument keypad. The last measurement
result is stored as the balancing measurement result.
15
Adash Ltd., Czech Republic, Tel.: +420 59 6232670, Fax: +420 59 6232671, e-mail: [email protected]
For further technical and contact information consult www.adash.net, www.adash.cz
Adash Ltd.
A4300 - VA3 - Balancing
Finishing of project definition
Press ESC or left arrow on the parameters screen. The list of existing projects appears. Set the
pointer to the <new item> and press ENTER or START.
When you select the existed project, it will be rewritten by new project and all data will be lost.
Modify project Item
This item allows you to modify the project parameters of an existing project. It is the same process as
for new project definition. When you change some important parameters, then some measured values
which are not longer compatible, will be removed.
Erase project Item
It enables deleting of an existing project.
16
Adash Ltd., Czech Republic, Tel.: +420 59 6232670, Fax: +420 59 6232671, e-mail: [email protected]
For further technical and contact information consult www.adash.net, www.adash.cz
Adash Ltd.
A4300 - VA3 - Balancing
User notes
17
Adash Ltd., Czech Republic, Tel.: +420 59 6232670, Fax: +420 59 6232671, e-mail: [email protected]
For further technical and contact information consult www.adash.net, www.adash.cz