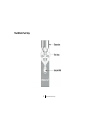
1
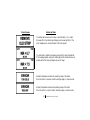
Professional User’s Guide
Distributed By: CLIAwaived, Inc.
San Diego, CA 92130 USA
(858) 481-5031
1-877-436-6444
Technical Service (24 hours/day, 7 days/week)
Customer Service (7am - 5pm PST, Monday-Friday)
© 2003-2006 Hemosense Inc. All rights reserved.
P/N 0200123 REV G
Table of Contents
I.
Introduction ..................................................................................... 1
Customer Service Information ............................................. 2
Use of the INRatio system ...................................................... 3
Installation .......................................................................................... 4
Special Requirements .................................................................. 5
II. Principles of Operation ......................................................... 6
The INRatio meter: Top View ............................................. 7
The INRatio meter: Bottom and End ............................ 8
INRatio Prothrombin Time/INR Test Strip ............. 9
Performance Characteristics and Specifications .... 10
UL Classification ......................................................................... 11
III. Performing a Test
...................................................................
IV. Collecting a Fingerstick Sample
...............................
12
18
V.
Main Menu Functions .....................................................
Review Memory .......................................................................
Change Setup: Setting the Date ...................................
Change Setup: Setting the Time ..................................
Units: Choosing the Units to be Displayed .........
Target: Using the Target Range Feature ................
Change Setup: Changing the Printer Option .....
Change Setup: Choosing the Language ..................
21
23
25
28
31
33
36
38
VI.
Quality Control
40
......................................................................
VII. Operational Precautions and Limitations
.......
41
VIII. Hazards and Symbols ......................................................... 42
IX.
Service and Maintenance ...............................................
Maintenance and Cleaning ...............................................
Installing Batteries ..................................................................
Troubleshooting .......................................................................
Warranty ........................................................................................
43
44
45
46
50
Glossary of Terms .................................................................................. 51
I. Introduction
Congratulations on your purchase of the INRatio system from HemoSense. This guide will provide
you with useful information needed to perform Prothrombin Time testing on the INRatio system.
The HemoSense INRatio meter is for quantitative Prothrombin Time testing with INRatio Prothrombin
Time/INR test strips.
Please see the Package Insert which accompanies the Test Strips for additional information.
The INRatio system is for in vitro diagnostic use only.
If you have any questions regarding the use of the INRatio system, contact HemoSense Technical Support at:
1-877-436-6444 (24 hours/day, seven days/week).
Please access our website at http://www.hemosense.com for additional information.
NOTE: Please read the entire manual, and undergo proper training and practice before
attempting to use the INRatio system.
1
introduction
Customer Service Information
For additional information regarding HemoSense INRatio meters, test strips, or accessories please contact our customer service department.
They can be reached at:
HemoSense
ATTN: Customer Service
651 River Oaks Parkway
San Jose, CA 95134 USA
Hours:
Toll Free:
International:
Fax:
E-Mail:
Web:
7:00 am - 5:00 pm Pacific Standard Time, Monday - Friday
1-877-436-6444
1-408-719-1393
1-408-719-1184
[email protected]
www.hemosense.com
Product
Part Number
Description
INRatio Professional Kit
0100004
Includes INRatio Meter, Power Supply, 50 Lancets,
Professional Users Guide, Quick Reference Guide, and Training Video
INRatio Test Strips (Box of 12)
0100071
12 test strips for use with the INRatio meter
INRatio Test Strips (Box of 48)
0100139
48 test strips for use with the INRatio meter
INRatio Power Supply
0100011
US Power supply for use with the INRatio meter
Unistik Lancets (Box of 50)
0902009
“Unistik 2” single use lancets (21g)
2
customer service information
Use of the INRatio System
The INRatio system performs Prothrombin Time (PT) testing on fresh, capillary whole blood.
The PT test is the principle assay used to monitor warfarin therapy. The dosage of warfarin should
be adjusted based on test results to recommended therapeutic ranges.
The thromboplastins used in performing PT tests can vary substantially causing differences in results
between methods. The International Normalized Ratio (INR) is a mathematical correction of the PT
result that adjusts for differences in thromboplastins. The American College of Chest Physicians makes
these recommendations regarding INR ranges for patients on oral anticoagulation therapy:
Indication
Prophylaxis of venous thrombosis
Treatment of venous thrombosis
Treatment of pulmonary embolism
Prevention of systemic embolism
Tissue heart valves
AMI
Valvular heart disease
Atrial fibrillation
Mechanical prosthetic valves (high risk)
Bileaflet mechanical valve in aortic position
INR
2.0-3.0
2.0-3.0
2.0-3.0
2.0-3.0
2.0-3.0
2.0-3.0
2.0-3.0
2.0-3.0
2.5-3.5
2.0-3.0
3
use of the INRatio system
Installation
Your INRatio meter comes with:
You will also need:
Power supply
Quick Reference Guide
• Professional User’s Guide
• Lancets
• Training Video
• Warranty Reply Card
INRatio Test Strips
Alcohol pads
• Gauze pads or cotton balls
• Puncture resistant container (SHARPS container)
•
•
•
•
Refer to the package insert that is supplied with each box of test strips for further information.
The INRatio meter may be used on battery power, or with the AC adapter.
See Section IX for instructions on installing the batteries.
If you choose to use the AC adaptor (part # 0100011), plug it into the POWER JACK on the back of the
meter, and into a conventional 120v outlet. (See page 8 for a diagram showing the location of the power jack)
If you purchased a printer (part # 0200046), please refer to the “Printer Operating Instructions”,
included with the printer, for set up and operating instructions.
4
installation
Special Requirements
To ensure that your INRatio system operates correctly, be sure the following conditions are met:
o
o
o
o
•
Room temperature should be between 50 F and 95 F (10 C and 35 C) for testing.
•
Relative humidity should be between 10% and 95%, without condensation, for testing.
•
The INRatio meter should be transported in its original shipping container or another
secure container. Avoid dropping the meter, or treating it roughly.
•
The meter and test strip must be at room temperature before use.
•
Test with the meter on a level surface.
•
Do not move or touch the meter during testing.
5
special requirements
II. Principles of Operation
The HemoSense INRatio system performs a modified version of the one-stage Prothrombin Time
test, and consists of a meter, test strips, and accessories.
On the disposable test strip are the sample well and test area. The blood is applied to the sample well.
The test area contains the electrodes and reagents needed to perform a test. Each strip performs a test
on the blood sample applied, as well as low and high control tests using reagents that are contained in
the test strip.
The meter consists of a Liquid Crystal Display (LCD), test strip area, and three buttons. The test
strip area contains the test strip guide, the sample light, and the cleaning door which can be lifted for
easy cleaning. The MENU button accesses the meter menu and memory functions. The UP/DOWN
button is used to make changes and the OK button to select them.
The test strip is inserted into the test strip guide. When the strip reaches operating temperature a
bright green light appears through the sample well on the strip, indicating where the blood should be
applied. A drop of blood is applied to the test strip, where it is drawn into the test area and mixed with
reagents that cause coagulation to begin. As the blood clots, there is a change of the impedance in the
sample, which is detected by the meter. The meter monitors this change in impedance, then calculates
the PT and INR for the sample based on calibration information entered as a Strip Code, and reports
them on the display. Please see the following pages for a diagram of the meter and test strip.
6
principles of operation
The INRATIO Meter: Top View
Display
OK Button
UP/DOWN Button
MENU Button
Cleaning Door
Sample Light
Test Strip Guide
7
the INRatio meter: top view
The INRATIO Meter: Bottom and End
Power Jack
Battery Door Release
Data Port
8
the INRatio meter: bottom and end
Battery Door
The INR ATIO Test Strip
9
the INRatio test strip
Performance Characteristics and Product Specifications
o
o
Operating Conditions: Temperature: 50-95 F (10-35 C)
Humidity: 10-95% (without condensation)
Atmospheric Pressure: 700 hPa - 1060 hPa
Memory: 60 tests with time and date
Data Port: RS232
Power: Battery: 4 x 1.5v (AA) alkaline batteries (not included)
AC: Input: 120v
Output: 7.8v DC
(Use only HemoSense Part # 0100011 power supply or damage to meter may result)
Size: 6.2 x 3 x 2.25 in. (15.7 x 7.6 x 5.7 cm.)
Weight: Without batteries: 8.1 oz. (230 g.)
With batteries: 11.6 oz. (330 g.)
10
performance characteristics and product specifications
UL Classification:
Medical Electrical Equipment
With respect to electrical shock, fire and mechanical hazards only
in accordance with UL 2601-1/CAN/CSA C22.2 No. 601
Class II/Internally Powered Equipment
Type BF Applied Part
Continuous Operation
11
ul classification
III. Performing a Test
Action
Meter Display
Follow these steps to perform a test.
NOTE: Allow a test strip pouch to reach room temperature
before starting this procedure.
1. Press any button to turn on the meter.
The meter will automatically perform a self test and display the software version.
NOTE: If an error message appears, consult the troubleshooting
section of this manual.
2. When the self test is complete, the meter will prompt for a test strip.
3. Remove the test strip from the foil pouch, and insert it into the test strip guide
until the meter beeps and displays a strip code. The strip has been properly
inserted when the words on the strip are readable to the operator.
12
performing a test
Action
Meter Display
! CAUTION: The strip code must be correct or the results may be inaccurate.
4. Check the strip code on the test strip pouch or strip container.
If the strip code on the display matches the strip code on the strip pouch or strip
container, press the OK button and continue to step 6.
If the strip code on the display does not match the strip code on the strip pouch
or strip container:
a. Press the UP/DOWN button to highlight and change each digit one at
a time. Hold down the button to scroll through the letters and numbers.
b. Press the OK button to select each changed digit.
c. Press the OK button again to proceed.
NOTE: If an invalid strip code is entered, an error message will be
displayed for a short time, then the meter will return to the Strip Code
screen, and allow you to re-enter the correct code.
5. If necessary, the meter will now warm up to operating temperature.
13
performing a test (continued)
Action
Meter Display
6. The meter will beep when it has completed the warm up, the message
“APPLY SAMPLE” will appear in the display and the green light on
the meter will appear under the sample well on the test strip.
NOTE: For fingerstick instructions, see Section IV.
7. Apply a large, hanging drop of blood (at least 15µL) to the sample well
on the test strip, over the green light. Do not move the meter during testing.
8. After a few seconds, the meter will beep, signaling that the sample is accepted.
The meter will now perform the test. If the meter does not beep and begin
processing, not enough blood was applied. Do not attempt to add more sample. Begin again at Step #3 with a new test strip, and perform a new fingerstick.
If the meter begins the test, but does not detect enough sample,
an error message will be displayed. Do not attempt to add more sample.
Begin again with a new test strip. If the results are unusually low or high,
repeat the test.
14 performing a test (continued)
Action
Meter Display
9. When testing is complete, the meter will beep and the results will appear
on the display with a “QC OK” message or actual QC results, confirming that
the low and high controls are in range.
The actual display screen will vary depending on units selected.
10. Remove the test strip and discard in a puncture proof container.
Record the results or print as appropriate.
Results are stored in memory with time and date.
Refer to Section V. Main Menu Functions for additional information.
11. If a printer is attached to the INRatio meter and the “Printer” option has been
selected, press OK and the following message will appear on the display.
12. Press OK to print the test results.
When printing is complete, the meter will prompt to run another test.
15
performing a test (continued)
Action
Meter Display
NOTE: If the onboard controls are out of range or an error message
is displayed, follow the instructions in the “Troubleshooting”
section or call HemoSense Technical Support for assistance.
13. If the Target Range option is in use and the result is out of the selected target
range, an “ABOVE TARGET” or “BELOW TARGET” message will appear
with the test results.
(see Section V. Main Menu Functions on page 21 for instructions on setting
a target range)
14. If the result is outside the measuring range of the meter,
the result will appear as > 7.5 or < 0.7
If this should occur, repeat test.
If it occurs again, testing should be done by another method.
16 performing a test (continued)
Action
Meter Display
15. To begin another test, insert a new test strip into the strip guide
and follow the instructions beginning at step 3.
If left unattended, the meter will turn off automatically after a few
minutes. It will beep a warning and display this message. Press any
button if you do not wish it to turn off and it will remain activated.
16. To shut down when testing is completed:
Press the MENU button to return to the Main Menu.
Highlight “TURN METER OFF” by pressing the UP/DOWN button.
Press the OK button to select.
NOTE: Manual shutdown is recommended when meter is
on battery power.
17
performing a test (continued)
IV. Collecting a Fingerstick Sample
Follow these steps to obtain a drop of blood from a fingerstick:
1. Increase blood circulation by:
•
Warming the hand by washing in warm water
Warming the hand with a heating pad or hand warmer
•
Gently massaging the finger
•
Holding the hand below the heart
•
2. Prepare supplies for use:
•
Lancet
•
Alcohol pad
•
Gauze or cotton ball
•
Adhesive Bandage
•
Puncture resistant container (Sharps)
18 collecting a fingerstick sample
IV. Collecting a Fingerstick Sample (continued)
3. Identify a site on the finger to puncture:
• On one of the middle fingers of
either hand
• Near the top of the finger on either side
• Away from any calluses or scars
4. Clean the selected area
with 70% isopropyl
alcohol, or an alcohol
pad. Dry thoroughly
with cotton or gauze.
5. Puncture the finger following
the instructions for the lancet
that you are using.
19 collecting a fingerstick sample (continued)
IV. Collecting a Fingerstick Sample (continued)
6. Apply gentle, continuous
pressure until a large, hanging
drop of blood forms.
7. Apply the hanging drop to the
sample well on the test strip,
over the green light.
CAUTION !
DO NOT APPLY STRONG,
REPETITIVE PRESSURE.
THIS MAY DILUTE THE
SAMPLE AND CAUSE
INACCURATE RESULTS.
8. After applying the sample,
hold gauze or a cotton ball
over the puncture site with
firm pressure until the
bleeding stops.
9. Dispose of all used materials
properly in a biohazard
(sharps) container.
20
collecting a fingerstick sample (continued)
V. Main Menu Functions
The Main Menu allows you to access the test results in memory, print results,
access the Change Setup menu, turn the meter off, or return to testing.
REVIEW MEMORY: This function allows you to access past test results,
which are stored with the most recent test first. Results will be displayed in
the units you have selected.
PRINT MEMORY: If the optional printer is attached, results from the
meter memory can be printed upon completion of the test, or at any time.
CHANGE SETUP: The Change Setup Menu allows you to set the clock
and calendar, as well as choose optional features:
Time and Date: The time and date are stored with test results in the memory of the meter.
It is important to set the correct time and date so that this feature can be used properly.
Units: Results can appear on the display as INR only, PT seconds and INR, or PT seconds, INR,
and QC results.
Target: A target therapeutic range can be set in the meter. If results are outside this range, they will
be displayed with an “ABOVE TARGET” or “BELOW TARGET” message. You can choose preset target ranges, set a custom target range or deactivate this feature.
Printer: If the optional printer is attached, the printer option may be selected.
Language: You can choose a language for the meter display from a list of multiple languages.
21
main menu functions
continued...
V. Main Menu Functions (continued)
TURN METER OFF: This allows you to turn off the meter. The
meter will turn off automatically after a few minutes of inattention. If
you are using batteries, shutting it down immediately will help to conserve power.
RUN TEST: This option returns you to the testing function.
22
main menu functions (continued)
Review Memory
Action
Meter Display
1. Press any button to turn on the meter. The meter will begin a self test.
2. When the self test is complete, the meter will prompt for a new test strip.
NOTE: If an error message appears, consult the troubleshooting section.
3. Press the MENU button to view the Main Menu.
“REVIEW MEMORY” will be highlighted. Press the OK button to select.
The result of the last test will appear on the display.
The result will be displayed in the units you have selected.
NOTE: Press the UP/DOWN button to scroll through the options
in the main menu.
23
review memory
Review Memory (continued)
Action
Meter Display
If there are no test results in memory, the message “MEMORY EMPTY” will appear.
4. If you wish to print the current result, and the optional printer is attached,
press the OK button and the meter will ask if you want to print. Press OK to
print the current result, or any other key for no.
5. If you wish to see previous test results, press down on the UP/DOWN button.
Press up or down on the UP/DOWN button to move forward or back in the
memory.
6. Press the MENU button when finished to return to the Main Menu.
7. If you wish to perform a test at this time, highlight “Run Test”
in the menu by pressing the UP/DOWN button.
Press the OK button to select.
To turn off the meter, highlight “TURN METER OFF” by pressing
the UP/DOWN button. Press the OK button to select.
24 review memory (continued)
Change SetUp: Setting the Date
Action
Meter Display
1. Press any button to turn on the meter. The meter will begin a self test.
2. When the self test is complete, the meter will prompt for a new test strip.
NOTE: If an error message appears, consult the troubleshooting section.
3. Press the MENU button to view the Main Menu.
4. Press the UP/DOWN button to highlight “CHANGE SETUP”.
Press the OK button to select.
25
change setup: setting the date
Change SetUp: Setting the Date (continued)
Action
Meter Display
5. “DATE” will be highlighted. Press the OK button to select it.
6. The choices for the date format will be displayed.
Push the UP/DOWN button to choose a format. Push OK to select.
7. The date will appear on the display as currently set, with the month highlighted.
Press the UP/DOWN button to change the month.
When correct, press the OK button to select.
8. The day will now be highlighted. Press the UP/DOWN button to change the day.
When correct, press the OK button to select.
9. The year will now be highlighted. Press the UP/DOWN button to change the year.
When correct, press the OK button to select.
26 change setup: setting the date (continued)
Change SetUp: Setting the Date (continued)
Action
Meter Display
9. Press the MENU button to return to the Change Setup Menu.
The meter will cue you if you have selected a day past the number
of days in that month. Go back and enter the correct day if this occurs.
10. Press the MENU button to return to the Main Menu.
11. If you wish to perform a test at this time, highlight “RUN TEST” in the
menu by pressing the UP/DOWN button. Press the OK button to select.
To shut down the meter, highlight “TURN METER OFF” by pressing the
UP/DOWN button. Press the OK button to select.
27
change setup: setting the date (continued)
Change SetUp: Setting the Time
Action
Meter Display
1. Press any button to turn on the meter. The meter will begin a self test.
2. The meter will prompt for a new test strip.
NOTE: If an error message appears, consult the troubleshooting section.
3. Press the MENU button to view the Main Menu.
4. Press the UP/DOWN button to highlight “CHANGE SETUP”.
Press the OK button to select.
28
change setup: setting the time
Change SetUp: Setting the Time (continued)
Action
Meter Display
5. Press the UP/DOWN button to highlight “TIME”.
Press the OK button to select.
6. The choices for time format will be displayed.
Push the up/down button to choose a format. Push OK to select.
7. The time appears on the display, with the hour highlighted.
Press the UP/DOWN button to change the hour.
When the hour is correct, press the OK button to select.
8. The minutes will now be highlighted. Press the UP/DOWN button to
change the minutes. When the minutes are correct, press the OK button
to select.
9. If the 12 hour clock was selected, the AM/PM indicator will now be
highlighted. Press the UP/DOWN button to toggle between AM and PM.
When correct, press the OK button to select.
10. Press the MENU button to return to the Change Setup Menu.
11. Press the MENU button to return to the Main Menu.
29
change setup: setting the time (continued)
Change SetUp: Setting the Time (continued)
Action
Meter Display
12. If you wish to perform a test at this time, highlight “RUN TEST” in the
menu by pressing the UP/DOWN button. Press the OK button to select.
To shut down the meter, highlight “TURN METER OFF” by pressing
the UP/DOWN button. Press the OK button to select.
30
change setup: setting the time (continued)
Change SetUp: Choosing the Units to be Displayed
Action
Meter Display
1. Press any button to turn on the meter.
The meter will begin a self test.
2. The meter will prompt for a new test strip.
NOTE: If an error message appears, consult the troubleshooting section.
3. Press the MENU button to view the Main Menu.
4. Press the UP/DOWN button to highlight “CHANGE SETUP”.
Press the OK button to select.
31
change setup: choosing the units to be displayed
Change SetUp: Choosing the Units to be Displayed (continued)
Action
Meter Display
5. The SetUp Menu appears on the display. Press the UP/DOWN button
to highlight “UNITS”. Press the OK button to select.
6. The UNITS options will be displayed.
Press the UP/DOWN button to choose an option.
Press the OK button to select.
7. Press the MENU button to return to the Change Setup Menu.
8. Press the MENU button to return to the Main Menu.
9. If you wish to perform a test at this time, highlight “RUN TEST” in the
menu by pressing the UP/DOWN button. Press the OK button to select.
To shut down the meter, highlight “TURN METER OFF” by pressing
the UP/DOWN button. Press the OK button to select.
32
change setup: choosing the units to be displayed (continued)
Using the Target Range Feature
Action
Meter Display
1. Press any button to turn on the meter.
The meter will begin a self test.
2. The meter will prompt for a new test strip.
NOTE: If an error message appears, consult the troubleshooting section.
3. Press the MENU button to view the Main Menu.
4. Press the UP/DOWN button to highlight “CHANGE SETUP”.
Press the OK button to select.
33
using the target range feature
Using the Target Range Feature (continued)
Action
Meter Display
5. Press the UP/DOWN button to highlight “TARGET.”
Press the OK button to select.
6. The Target Range options will be displayed.
Press the UP/DOWN button to choose an option.
Press the OK button to select.
7. To set a custom range, highlight “CUSTOM” and press the OK button
to select. A screen will appear that will allow you to set a target range.
8. Press the UP/DOWN button to change each number one at a time.
Press the OK button to select each digit and move to the next digit.
9. Press the MENU button when your custom range is set properly.
The meter will cue you if you try to set the lower end of the range higher than
the high end, or if you set the lower or upper limit outside the measuring range
of the meter (0.7-7.5 INR).
34
using the target range feature (continued)
Using the Target Range Feature (continued)
Action
Meter Display
10. Press the MENU button to return to the Main Menu.
11. If you wish to perform a test at this time, highlight “RUN TEST” in the
menu by pressing the UP/DOWN button. Press the OK button to select.
12. To shut down the meter, highlight “TURN METER OFF” by
pressing the UP/DOWN button. Press the OK button to select.
NOTE: Manual shutdown is recommended when meter is on battery power.
35
using the target range feature (continued)
Change SetUp: Choosing the Printer Option
Action
Meter Display
1. Press any button to turn on the meter. The meter will begin a self test.
2. The meter will prompt for a new test strip.
3. Press the MENU button to view the Main Menu.
4. Press the UP/DOWN button to highlight “CHANGE SETUP”.
Press the OK button to select.
5. Press the UP/DOWN button to highlight “Printer”.
Press the OK button to select.
6. The PRINTER options will be displayed.
Press the UP/DOWN button to choose an option.
Press the OK button to select.
36
change setup: choosing the printer option
Change SetUp: Choosing the Printer Option (continued)
Action
Meter Display
7. Press the MENU button to return to the Change Setup Menu.
8. Press the MENU button to return to the Main Menu.
9. If you wish to perform a test at this time, highlight “RUN TEST” in the
menu by pressing the UP/DOWN button. Press the OK button to select.
To shut down the meter, highlight “TURN METER OFF” by
pressing the UP/DOWN button. Press the OK button to select.
37
change setup: choosing the printer option (continued)
Change SetUp: Choosing the Language
Action
Meter Display
1. Press any button to turn on the meter. The meter will begin a self test.
2. The meter will prompt for a new test strip.
3. Press the MENU button to view the Main Menu.
4. Press the UP/DOWN button to highlight “CHANGE SETUP”.
Press the OK button to select.
5. Press the UP/DOWN button to highlight “LANGUAGE”.
Press the OK button to select.
6. The Language options will be displayed.
Press the UP/DOWN button to choose a language.
Press the OK button to select.
38
change setup: choosing the language
Change SetUp: Choosing the Language (continued)
Action
Meter Display
7. Press the MENU button to return to the Change Setup Menu.
8. Press the MENU button to return to the Main Menu.
9. If you wish to perform a test at this time, highlight “RUN TEST”
in the menu by pressing the UP/DOWN button.
Press the OK button to select.
To shut down the meter, highlight “TURN METER OFF” by
pressing the UP/DOWN button. Press the OK button to select.
39
change setup: choosing the language (continued)
VI. Quality Control
Quality control is an important part of PT testing. Testing controls ensures that you are performing
the steps of the test correctly and that your INRatio system is working properly.
Each time a test is performed, a low and high control are tested automatically by the INRatio system.
When a QC OK message appears, or QC1 and QC2 results are displayed without an error message,
the meter is working properly, the test strip is working properly and testing was done using acceptable
techniques. If the control result is out of range, an error message, indicating which controls are not in
range, will appear on the display. If the INR+PT+QC feature is selected, the actual QC results for each
test will be displayed.
An error message usually occurs when test strips have not been stored properly, and have deteriorated.
If you get a control error message, check to make sure your test strips have not expired, that the correct
strip code is input into the meter, and confirm that they have been stored properly. If you believe the
strips are okay, repeat the test. If an error message is displayed again, make note of the error message and
call HemoSense Technical Support for assistance.
40
quality control
VII. Operational Precautions and Limitations
•
The INRatio system is for in vitro diagnostic use only.
•
Use only fresh (not anticoagulated) capillary blood for testing.
•
Blood samples must be applied to the test strip immediately after collection or the blood will begin clotting,
causing inaccurate results.
•
Squeezing the fingerstick site excessively (milking) releases interstitial fluid and may cause inaccurate results.
•
The fingerstick site must be completely dry. If any alcohol remains on the finger,
it may cause hemolysis which may cause inaccurate results.
•
•
•
Do not allow any liquid to spill on the meter. If this should occur, unplug the meter (if it is plugged in)
and call HemoSense Technical Support immediately.
The meter is a delicate instrument, and should be handled with care.
Dropping or other mishandling may cause it to malfunction.
Running a test strip with an incorrect strip code may cause erroneous results.
Confirm the strip code each time a test strip is inserted.
•
The test strips are for one use only. Do not reuse them.
•
Do not move or touch the meter while it is running a test.
41
operational precautions and limitations
VIII. Hazards and Symbols
Attention:
The meter generates, uses, and can radiate radio frequency energy. If it is not installed and used in
accordance with instructions, it may cause interference to other devices in the vicinity. Call HemoSense
Technical Support for help in determining whether your INRatio meter is causing interference and
how to correct any interference.
Any equipment connected to the data port must be certified to IEC 60601-1-1. If you connect any
equipment that is not recommended by HemoSense, you are responsible for compliance with this standard. Please contact HemoSense Technical Support if you have any questions.
Use only HemoSense Part # 0100011 Power Supply or damage to meter may result.
Class II Equipment: The meter is double insulated.
Type BF Applied Part: The meter has conductive contact with the patient.
Biological Risks: Disposable items pose biological risks
42
hazards
IX. Service and Maintenance
In this section, you will find information on:
•
Maintenance and Cleaning
Installing Batteries
• Service and Troubleshooting
•
•
Warranty
If you have any questions or problems, call HemoSense Technical Support.
We are available to answer questions 24 hours/day, seven days/week at 1-877-436-6444
43 service and maintenance
Maintenance and Cleaning
•
•
No maintenance is required other than routine cleaning.
Clean the outside of the INRatio meter with a clean damp cloth. If necessary, a mild detergent
or disinfectant (such as a 5% bleach solution or 70% isopropyl alcohol) may be used.
•
Do not immerse the meter in any liquid.
•
Do not use any abrasive cleaner.
When necessary, clean the area around the test
strip guide by lifting the cleaning door, and
cleaning underneath with a swab or pad that has
been wetted with alcohol or a 5% bleach solution.
44 maintenance and cleaning
Installing Batteries
Batteries should be replaced when a BATTERIES LOW messages appears on the meter
display. Batteries are not necessary if you are using the AC adapter.
To replace the batteries:
1. Turn the meter upside down.
2. Remove the battery door by pressing
down on the battery door release.
Battery Door
3. Remove the old batteries and replace with four
new standard AA batteries. The direction for battery
placement is shown inside the battery compartment.
4. Replace the battery door.
45 installing batteries
Troubleshooting
In this section, you will find information on how to resolve most problems that you might encounter. If you have
any questions, or problems during the troubleshooting process, feel free to call HemoSense Technical Support.
We are available 24 hours/day, seven days/week.
Error Screen
Action to Take
The sample was applied to the test strip before the warm up was complete, or a
used test strip was inserted. Begin again with a new test strip. Be sure to wait until
the “Add Sample” message displays.
There was not enough sample applied to the test strip to fill the test area.
Begin again with a new test strip, and perform another fingerstick.
DO NOT TRY TO ADD MORE BLOOD TO THE TEST STRIP.
The strip code entered was detected to be invalid by the error checking
mechanism of the meter. Re-enter the correct strip code at the prompt.
If the error message repeats, call HemoSense Technical Support.
(The error number can be any combination of numerical digits) There was a
problem with the test, or not enough sample was applied to the test strip.
Repeat the test. If the error message repeats, call HemoSense Technical Support.
46 troubleshooting
Error Screen
Action to Take
The meter was turned on with a new or used test strip in it, or a test
strip was left in the meter. Begin test again with a new test strip. If the
error message recurs, call HemoSense Technical Support.
The test result is outside the measuring range of the meter. Repeat test.
If the message repeats, arrange for testing by another method as soon as
possible as the INR may be dangerously out of range.
Ambient temperature is below the operating range of the meter.
Move the meter to a warmer location and begin again in a few minutes.
Ambient temperature is above the operating range of the meter.
Move the meter to a cooler location and begin again in a few minutes.
47
troubleshooting (continued)
Error Screen
Action to Take
One or both of the on-board controls is out of range.
Check expiration date and proper storage of test strips.
Repeat test paying careful attention to proper technique
(See Section VI. Quality Control for more information).
If message repeats, call HemoSense Technical Support.
The printer option has been selected and either no printer is
connected to the meter or the printer is not functioning properly.
Recheck all the connections. If the error message repeats, call
HemoSense Technical Support.
The printer is out of paper. Insert paper into the printer and try again.
48 troubleshooting (continued)
Error Screen
Action to Take
The batteries are running low and should be replaced soon.
You may continue with the present test, but the battery should
then be replaced as soon as possible.
The batteries are dead, and the meter will now be non-operational
until the batteries are replaced or the unit is plugged into a wall outlet.
If you have any difficulty
inserting a test strip. . .
1. Open the cleaning door and remove any obstruction.
2. Check that the test strip is not bent.
If it is bent, discard and start again with a new strip.
3. If the strip still cannot be inserted, call HemoSense Technical Support.
49 troubleshooting (continued)
Warranty
Use of the INRatio system
The INRatio meter system (the "Meter") is designed for use in monitoring patients on oral anticoagulant therapy. Proper adherence
to the instructions in the User's Manual and package insert are critical to proper operation. WARNING: Failure to comply with the
user manual could lead to inaccurate results and resultant incorrect medication dosing which could result in injury or death.
Limited Warranty
HemoSense guarantees to the original purchaser of the Meter that the Meter is free from material defects in material and workmanship
for one year from the date of purchase. This warranty does not guarantee the uninterrupted operation of the meter.
HemoSense's only liability and Purchaser's only remedy under this warranty is that during the warranty period HemoSense shall
replace or repair, at no charge, any Meter component with defects in material or workmanship. HEMOSENSE MAKES NO OTHER
WARRANTIES AND EXPRESSLY EXCLUDES ANY IMPLIED WARRANTY OF MERCHANTABILITY,
NONINFRINGEMENT OR FITNESS FOR A PARTICULAR USE.
The only user serviceable parts of the Meter are the battery, the cleaning door and the battery door. Tampering with any other portion
of the Meter, abusing the Meter or using the Meter in a manner inconsistent with its user manual will void this warranty. This warranty
does not apply to any component that is damaged by improper storage or accident or that is subject to alteration, misuse, tampering or
abuse. Before returning any defective components, you must obtain a "Return Material Authorization" number and return instructions
from HemoSense Technical Support by calling 1-877-436-6444.
HEMOSENSE'S ENTIRE LIABILITY IN CONNECTION WITH THE METER, REGARDLESS OF THE LEGAL OR
EQUITABLE BASIS OF ANY CLAIM, IS LIMITED TO THE PURCHASE PRICE OF THE METER. IN NO EVENT WILL
HEMOSENSE BE LIABLE FOR ANY INCIDENTAL, INDIRECT, SPECIAL, CONSEQUENTIAL, OR PUNITIVE LOSS OR
DAMAGES IN ANY WAY RELATED TO THE METER, OR ANY THIRD PARTY CLAIMS, EVEN IF HEMOSENSE OR ITS
DISTRIBUTORS ARE AWARE OF THE POSSIBILITY OF SUCH CLAIM OR DAMAGES AND NOTWITHSTANDING THE
ESSENTIAL PURPOSE OF ANY REMEDY.
50 warranty
Glossary of Terms (listed alphabetically)
Capillary Blood: Blood from the smallest blood vessels of the body usually obtained from a fingerstick.
Cleaning Door: The door on the front of the INRatio meter that
can be opened to perform routine cleaning.
Data Port: Port located on the top left side of the meter for connecting
to a printer.
Electrodes: The component on the test strip that allows the meter
to measure impedance.
Fingerstick: A small puncture to the finger.
Hanging Drop: A drop of blood that forms after a fingerstick that is large
enough to hang from the fingertip. Collecting a hanging drop helps
to ensure that an adequate sample (at least 15µL) is being applied.
Hemoglobin: The oxygen-carrying pigment and predominant protein
in the red blood cells.
Hemolysis: The destruction of red blood cells leading to the release
of hemoglobin from within the red blood cells into blood plasma.
Hemolysis should be avoided because it may interfere with the PT test.
Impedance: Resistance that opposes the flow of alternating current
(conductivity). Example: The InRatio meter uses impedance to
measure Prothrombin Time.
Interstitial Fluid: Fluid between the cells in the body.
International Normalized Ratio (INR): Standardized system of reporting
PT that takes into account the different sensitivity of thromboplastins
used in various methods. INR results are comparable across PT
measurement systems.
In Vitro Diagnostic: A diagnostic test done outside the body.
Lancets: A sharp pointed instrument, (example: needle), used to make
a small incision or fingerstick to collect the small drop of blood
used in performing a PT test.
Mechanical Prosthetic Valves: A synthetic (mechanical) substitute
for a natural human heart valve.
Oral Anticoagulant: Any oral agent, (example: Coumadin® ),
used to prevent the formation of blood clots.
Plasma: The liquid part of blood.
Power Jack: The power port located on the top right hand side
of the meter for use with a INRatio power adapter (120 volt).
Prothrombin Time (PT): The clotting test done to test the
extrinsic coagulation pathway.
Pulmonary Embolism: The obstruction of the pulmonary artery
or a branch of it leading to the lungs by a blood clot.
Quality Control: The testing done to show that a system is
working properly and giving dependable results.
Reagent: A substance used to produce a chemical reaction to measure
a substance or process (such as a Prothrombin Time test).
Sample Light: Green light on the test strip guide that is directly under the
sample well of an inserted test strip. This light helps users identify
where to place the blood sample on an INRatio strip.
Sample Well: Round target on the single use HemoSense test strip
where the blood sample is applied.
Strip Code: Code entered and used by the INRatio system that
corresponds to the code identified on the INRatio strip box,
(this code should be entered for each new lot).
Systemic Embolism: The obstruction of a blood vessel by an abnormal
particle (example: air bubble), circulating in the blood system.
Test Strip: HemoSense single use test strip used to perform the
Prothrombin Time.
Thromboplastins: A substance used by blood platelets and combined
with calcium that converts prothrombin (protein) into thrombin
(enzyme) as part of the clotting cascade.
Venous Thrombosis: A clot formation in the veins.
Warfarin: An oral agent used to prevent the formation of blood clots.
51 glossary of terms