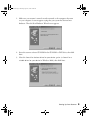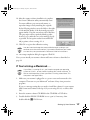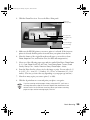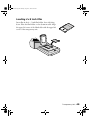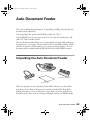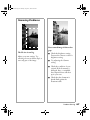
1
basics.book Page i Thursday, August 31, 2000 10:08 AM
EPSON Perfection 1640SU
EPSON Perfection 1640SU PHOTO
EPSON Perfection 1640SU OFFICE
Scanner Basics
Printed on recycled paper
basics.book Page ii Thursday, August 31, 2000 10:08 AM
Copyright Notice
All rights reserved. No part of this publication may be reproduced, stored in a retrieval system, or transmitted in
any form or by any means, electronic, mechanical, photocopying, recording, or otherwise, without the prior
written permission of SEIKO EPSON CORPORATION. The information contained herein is designed only for
use with this EPSON scanner. EPSON is not responsible for any use of this information as applied to other
scanners.
Neither SEIKO EPSON CORPORATION nor its affiliates shall be liable to the purchaser of this product or third
parties for damages, losses, costs, or expenses incurred by purchaser or third parties as a result of: accident, misuse,
or abuse of this product or unauthorized modifications, repairs, or alterations to this product, or (excluding the
U.S.) failure to strictly comply with SEIKO EPSON CORPORATION’s operating and maintenance instructions.
SEIKO EPSON CORPORATION shall not be liable for any damages or problems arising from the use of any
options or any consumable products other than those designated as Original EPSON Products or EPSON
Approved Products by SEIKO EPSON CORPORATION.
A Note Concerning Responsible Use of Copyrighted Materials
Digital cameras and scanners, like photocopiers and conventional scanners, can be misused by improper copying of
copyrighted material. While some countries’ laws permit limited copying of copyrighted material in certain
circumstances, those circumstances may not be as broad as some people assume. EPSON encourages each user to
be responsible and respectful of the copyright laws when using digital cameras and scanners.
Trademarks
EPSON and EPSON Stylus are registered trademarks and EPSON Smart Panel is a trademark of SEIKO EPSON
CORPORATION.
EPSON Perfection and ColorTrue are registered trademarks, and Micro Step Drive, EPSON Software, and
EPSON Store are trademarks of Epson America, Inc.
General Notice: Other product names used herein are for identification purposes only and may be trademarks of
their respective owners. EPSON disclaims any and all rights in those marks.
Copyright © 2000 by Epson America, Inc.
CPD-10858
8/00
basics.book Page i Thursday, August 31, 2000 10:08 AM
Contents
A COMPLETE SCANNING SOLUTION
1
About Your Scanner
About Your Documentation
Cautions, Notes, and Tips
1
2
2
SETTING UP YOUR SCANNER
3
Unpack Your Scanner
Choose a Good Place for Your Scanner
Unlock the Scanner
Connect the Scanner to Your Computer
USB
SCSI
Install the EPSON TWAIN Driver
If You’re Running Windows 98 or Windows 2000 . . .
If You’re Running Windows 95 . . .
If You’re Running Windows NT 4.0 . . .
If You’re Using a Macintosh . . .
Install the Scanner and Bonus Software
Viewing Your Electronic Manuals
Viewing Your HTML Reference Guide
Viewing Your EPSON Smart Panel PDF Manual
3
4
5
6
6
7
8
8
12
15
17
19
22
22
25
BASIC SCANNING
27
Placing Your Original Document
Using EPSON Smart Panel
Setting Up the Start Button in EPSON Smart Panel
27
28
29
Contents
i
basics.book Page ii Thursday, August 31, 2000 10:08 AM
ii
Scanning Projects
Scanning to E-mail
Scanning to OCR
Scanning and Printing Photos
Scanning Something That Doesn’t Fit Under the Document Cover
31
31
32
34
36
ADVANCED SCANNING WITH EPSON TWAIN
37
Scanning with EPSON TWAIN
Selecting TWAIN from Your Application
Using EPSON TWAIN
Selecting TWAIN Settings
Tips for Getting the Best Scan
Recommended Settings
Selecting Resolution
Scaling (Resizing) Images
37
38
39
42
43
43
44
44
TRANSPARENCY UNIT
45
Unpacking the Transparency Unit
Installing the Transparency Unit
Loading Transparencies
Using Film Holders
Placing the Film
Loading 35 mm Negative or Positive Film
Loading Brownie Size Film
Loading 4 x 5 inch Film
Loading Slides and Film Directly on the Document Table
Selecting Settings
Scanning Reflective (Non-Transparent) Documents or Photographs
Removing the Transparency Unit
45
46
47
47
47
48
48
49
50
51
52
52
Contents
basics.book Page iii Thursday, August 31, 2000 10:08 AM
AUTO DOCUMENT FEEDER
53
Unpacking the Auto Document Feeder
Installing the Auto Document Feeder
Using the Auto Document Feeder
Loading Paper into the Auto Document Feeder
Selecting Settings
Loading Documents Manually
53
54
55
55
56
57
SCANNER MAINTENANCE
59
Transporting the Scanner
Cleaning the Scanner
59
60
PROBLEM SOLVING
61
Scanner Light and Buttons
Problems and Solutions
Setup Problems
Scanner Problems
Software Problems
Scanning Problems
Where To Get Help
EPSON Technical Support
Bonus Software Technical Support
61
62
62
63
64
67
73
73
74
REQUIREMENTS AND NOTICES
75
System Requirements
Windows
75
75
Macintosh
Important Safety Instructions
FCC Compliance Statement
DECLARATION of CONFORMITY
76
77
78
79
Contents
iii
basics.book Page iv Thursday, August 31, 2000 10:08 AM
iv
ENERGY STAR Compliance
Warranty
79
80
INDEX
83
Contents
basics.book Page 1 Thursday, August 31, 2000 10:08 AM
A Complete Scanning Solution
Your EPSON Perfection® 1640SU scanner is a high-quality scanner for business,
home, or school. Using the EPSON® ColorTrue® Imaging System, the scanner
captures your images with amazing detail and accurate colors.
About Your Scanner
Your EPSON Perfection 1640SU scanner includes the following features:
■
Superior image quality:
■
True optical resolution of 1600 dots per inch (dpi)
■
Hardware resolution of 1600 × 3200 dpi with Micro Step Drive™ technology
■
Maximum resolution of 12,800 × 12,800 dpi with interpolation
■
Start button for easy, one-touch scanning
■
42-bit color and 14-bit grayscale image capture
The EPSON Perfection 1640SU PHOTO includes a transparency unit for scanning
negatives, slides, and positive film.
The EPSON Perfection 1640SU OFFICE includes an auto document feeder to
quickly scan multi-page documents.
For a list of software included with your scanner, see the inside front cover.
A Complete Scanning Solution
1
basics.book Page 2 Thursday, August 31, 2000 10:08 AM
About Your Documentation
This guide includes instructions for setting up your scanner, scanning tips, and
troubleshooting advice. It also includes instructions for viewing your electronic
manual. For details on using the scanner software, see your electronic Reference Guide.
Cautions, Notes, and Tips
Please follow these guidelines as you read your documentation:
Cautions must be observed to avoid damage to your equipment.
Notes contain important information about your scanner.
Tips contain hints for great scanning.
2
A Complete Scanning Solution
basics.book Page 3 Thursday, August 31, 2000 10:08 AM
Setting Up Your Scanner
Setting up your scanner is easy—just follow the simple steps in this chapter in the
order listed below.
1. Unpack and choose a place for your scanner.
2. Unlock the scanner.
3. Connect the scanner to your computer.
4. Install the EPSON TWAIN driver.
5. Install the software and view your electronic manuals.
Unpack Your Scanner
Remove the scanner from the box, then remove the packing material from your
scanner. Save the packaging in case you need it later. Your EPSON Perfection
1640SU comes with this Scanner Basics book and the items shown below.
scanner
USB interface cable
2 or 3 CD-ROMs with driver,
electronic manuals, scanner
software, and bonus software
The EPSON Perfection 1640SU and EPSON Perfection 1640SU PHOTO scanners
include three CD-ROMs. The EPSON Perfection 1640SU OFFICE scanner
includes two CD-ROMs.
Setting Up Your Scanner
3
basics.book Page 4 Thursday, August 31, 2000 10:08 AM
The EPSON Perfection 1640SU PHOTO also includes the transparency unit and
several film holders. See page 46 for installation instructions.
film holders
transparency unit
The EPSON Perfection 1640SU OFFICE includes an auto document feeder, which
comes with the scanner instead of the document cover. See page 53 for instructions
on unpacking and installing your auto document feeder.
auto document feeder
paper support
spare paper path guide
document mat
Choose a Good Place for Your Scanner
Here are some points to consider:
4
■
Place the scanner on a flat, stable surface. If the scanner is tilted, it can’t operate
properly.
■
Make sure to place the scanner where you can easily unplug the power cord, and
where the USB or SCSI cable can reach your computer.
■
Keep the scanner away from direct sunlight and strong light sources.
■
Avoid places subject to shocks and vibrations, or high or rapidly changing
temperatures and humidity.
Setting Up Your Scanner
basics.book Page 5 Thursday, August 31, 2000 10:08 AM
■
Be sure there’s enough room behind the scanner for the cables, and above the
scanner so you can fully raise the document cover. If you’re using the auto
document feeder, make sure there’s enough room in front of the scanner to pull
out the lower paper support.
18.5 inches (47 cm)
when document
cover is open
3.8 inches (9.6 cm)
when document
cover is closed
11.4 inches (28.9 cm)
at least
3.9 inches (10 cm)
17.4 inches
(44.2 cm)
If you attach the transparency unit or auto document feeder to your
scanner, the dimensions will differ from the ones listed above.
Unlock the Scanner
Before connecting the scanner to a power source, you must release the transportation
lock, located on the side of the scanner.
Turn the transportation lock down to the unlocked position using a coin or similar
object, as shown.
Setting Up Your Scanner
5
basics.book Page 6 Thursday, August 31, 2000 10:08 AM
If you can’t turn the transportation lock easily, plug the scanner in; then, after a
minute, unplug the scanner and try again.
Always lock the scanner carriage before transporting it; otherwise, the
scanner may be damaged. Be sure the scanner lamp is in the home
position (toward the back of the scanner). To ensure this, always turn on,
then turn off the scanner using the P Operate button before locking the
carriage.
home position
Connect the Scanner to Your Computer
You can connect your scanner with SCSI or USB. See the sections below.
USB
If you are connecting to a PC, Microsoft® Windows® 98 or Windows 2000 must be
preinstalled on your system.
1. Make sure the scanner is unplugged, and the computer and any USB devices
connected to your computer are turned off.
2. Locate the USB cable that came with your scanner.
6
Setting Up Your Scanner
basics.book Page 7 Thursday, August 31, 2000 10:08 AM
3. Plug the square connector
on the USB cable into the USB connector
on the back of the scanner. Then plug the flat connector
into the
USB port on your computer or self-powered USB hub.
Your system may not work correctly if you use a USB cable other than the
one supplied by EPSON or if you connect your scanner through more than
one hub.
SCSI
If your computer does not have a SCSI port, you need to add a SCSI adapter board to
your computer. You also need a SCSI cable. See pages 75 and 76 for adapter and cable
specifications.
Set the SCSI ID Number
The scanner is preset at the factory to SCSI ID 2. If you need to change this number,
turn the scanner off. Then use the tip of a small flathead screwdriver to turn the rotary
switch on the back panel. Be sure to choose a unique number that doesn’t conflict
with the ID number of other SCSI devices (including the SCSI interface board itself,
which is usually ID 7).
Don’t use SCSI ID 8 or 9 for your scanner; these are for factory use only.
Don’t use SCSI ID 0 or 1; these are reserved for storage devices.
For more information on setting your SCSI ID number, see your electronic Reference
Guide, as described on page 22.
Setting Up Your Scanner
7
basics.book Page 8 Thursday, August 31, 2000 10:08 AM
Connect the Scanner to Your Computer
Make sure the scanner, computer, and any SCSI devices connected to
your computer are turned off. The scanner is off when the P Operate
button is out (not pushed down below the surface of the panel).
Attach your SCSI cable to the scanner. The scanner is self-terminated and must be the
last device in the chain.
Your scanner does not include a SCSI cable. The length of the SCSI cable
must not exceed 9.8 feet (3 meters). If you are connecting multiple SCSI
devices, the total length of the SCSI bus (cables) must not exceed
19.7 feet (6 meters); otherwise the system may not work properly.
Install the EPSON TWAIN Driver
The scanner comes with two CD-ROMs: one for Adobe® PhotoDeluxe® and the other
for your EPSON TWAIN driver, scanner software, bonus software, and electronic
documentation. If you have the EPSON Perfection 1640SU or the EPSON
Perfection 1640SU PHOTO, your scanner also includes a third CD-ROM with
Adobe Photoshop® 5.0 LE.
If You’re Running Windows 98 or Windows 2000 . . .
You may be asked to insert your Windows operating system CD-ROM during the
scanner installation. Have your Windows CD-ROM handy, in case you need it.
The illustrations in this section show Windows 98 screens. The screens in
Windows 2000 look different, but the steps are almost identical; any
differences are noted in the instructions below.
8
Setting Up Your Scanner
basics.book Page 9 Thursday, August 31, 2000 10:08 AM
1. Make sure your scanner is turned on and connected to the computer; then turn
on your computer. A screen appears saying that your system has detected new
hardware. Then the New Hardware Wizard screen appears.
2. Insert the scanner software CD-ROM in the CD-ROM or DVD drive, then click
Next.
3. Select the Search for the best driver for your device option (or Search for a
suitable driver for your device in Windows 2000), then click Next.
Setting Up Your Scanner
9
basics.book Page 10 Thursday, August 31, 2000 10:08 AM
4. Check Specify a location, click Browse, select the TWAIN 5\WIN98 or
TWAIN 5\WIN2000 folder, then click OK.
5. When you return to the New Hardware Wizard, click Next. Windows finds the
driver for your scanner and you see the following screen:
6. Click Next to install your TWAIN driver.
If your system stops installation and requests files from your Windows operating
system CD-ROM, replace your scanner software CD-ROM with your Windows
disk and click OK to continue. You may be prompted to re-insert the EPSON
disk.
10
Setting Up Your Scanner
basics.book Page 11 Thursday, August 31, 2000 10:08 AM
7. In Windows 2000, you see the following screen:
Click Yes to finish installing your TWAIN driver.
8. After the scanner software installation is complete, the
Screen Calibration utility automatically starts. You
must calibrate your screen and scanner to reproduce
images closely matching the originals.
In the following window, move the slider to the right
or left until the shades of the horizontal gray stripes
appear similar. View the screen from a short distance.
The gray stripes will not perfectly blend together;
however, try to make the two tones match as closely
as possible. For best print results from an EPSON
ink jet printer, select a setting of 1.8.
9. Click OK to register the calibration setting.
You don’t need to change the screen calibration again so long as you
continue to use the same monitor. If you need to recalibrate your screen
at a later time, see your electronic Reference Guide for instructions.
Setting Up Your Scanner
11
basics.book Page 12 Thursday, August 31, 2000 10:08 AM
10. Click Finish to exit the New Hardware Wizard.
11. Now you can install your scanner software and bonus software as described on
page 19.
If You’re Running Windows 95 . . .
You may be asked to insert your Windows operating system CD-ROM during the
scanner installation. Have your Windows CD-ROM handy, in case you need it.
1. Make sure your SCSI board and SCSI driver are installed and the scanner is
connected to your computer.
2. Turn on your scanner first, then turn on your computer. When you see the screen
below, click Next.
12
Setting Up Your Scanner
basics.book Page 13 Thursday, August 31, 2000 10:08 AM
3. When you see the next screen, click Other Locations.
4. Make sure your scanner software CD-ROM is in the drive. Browse to the
following location on your CD-ROM drive: TWAIN 5\WIN95. Then click OK.
(The example shows F as the CD-ROM drive. Your CD-ROM drive letter may
be different.)
5. When you see the window below, click Finish. Then restart your computer.
Setting Up Your Scanner
13
basics.book Page 14 Thursday, August 31, 2000 10:08 AM
6. Once your computer restarts, double-click
My Computer, then double-click
the
Epson CD-ROM icon. The CD-ROM window opens.
7. Double-click
EPSON.exe.
8. The software License Agreement appears. After reading the license agreement,
click Agree to continue with the installation.
9. You see the Install TWAIN Driver screen. Click Install.
Follow the instructions on the screen to install your TWAIN driver.
10. When installation is complete, you see
the window on the right. Make sure
Perfection1640 appears in the Scanner
Selection list.
11. Click Test to check the connection. If the
scanner software is installed correctly, you see
Status: Device Ready under Scanner
Information. Click OK to close the window.
14
Setting Up Your Scanner
basics.book Page 15 Thursday, August 31, 2000 10:08 AM
12. After the scanner software installation is complete,
the Screen Calibration utility automatically starts.
You must calibrate your screen and scanner to
reproduce images closely matching the originals.
In the following window, move the slider to the right
or left until the shades of the horizontal gray stripes
appear similar. View the screen from a short distance.
The gray stripes will not perfectly blend together;
however, try to make the two tones match as closely
as possible. For best print results from an EPSON
ink jet printer, select a setting of 1.8.
13. Click OK to register the calibration setting.
You don’t need to change the screen calibration again so long as you
continue to use the same monitor. If you need to recalibrate your screen
at a later time, see your electronic Reference Guide for instructions.
14. The Setup completion dialog box appears. Click OK.
Now you can install your scanner software and bonus software as described on
page 19.
If You’re Running Windows NT 4.0 . . .
You may be asked to insert your Windows operating system CD-ROM during the
scanner installation. Have your Windows CD-ROM handy, in case you need it.
1. Make sure your SCSI board and SCSI driver are installed and the scanner is
connected to your computer.
2. Turn on your scanner first, then turn on your computer.
3. Log onto Windows NT® and insert your scanner software CD-ROM in your
drive.
My Computer, then double-click the
4. Double-click
icon. The CD-ROM window opens.
5. Double-click
Epson CD-ROM
EPSON.exe.
6. The software License Agreement appears. After reading the license agreement,
click Agree to continue with the installation.
Setting Up Your Scanner
15
basics.book Page 16 Thursday, August 31, 2000 10:08 AM
7. You see the Install TWAIN Driver screen. Click Install.
Follow the instructions on the screen to install your TWAIN driver.
8. When installation is complete, you see
the window on the right. Make sure
Perfection1640 appears in the Scanner
Selection list.
9. Click Test to check the connection. If the
scanner software is installed correctly, you see
Status: Device Ready under Scanner
Information. Click OK to close the window.
16
Setting Up Your Scanner
basics.book Page 17 Thursday, August 31, 2000 10:08 AM
10. After the scanner software installation is complete,
the Screen Calibration utility automatically starts.
You must calibrate your screen and scanner to
reproduce images closely matching the originals.
In the following window, move the slider to the right
or left until the shades of the horizontal gray stripes
appear similar. View the screen from a short distance.
The gray stripes will not perfectly blend together;
however, try to make the two tones match as closely
as possible. For best print results from an EPSON
ink jet printer, select a setting of 1.8.
11. Click OK to register the calibration setting.
You don’t need to change the screen calibration again so long as you
continue to use the same monitor. If you need to recalibrate your screen
at a later time, see your electronic Reference Guide for instructions.
12. The Setup completion dialog box appears. Click OK.
Now you can install your scanner software and bonus software as described on
page 19.
If You’re Using a Macintosh . . .
If your iMac™ is running OS 8.1, you’ll need to upgrade your operating
system to OS 8.5.1, or later, before installing your scanner software. To
find out which operating system your iMac is running, select About This
Computer in the Apple menu.
1. Make sure your scanner is plugged in to a power source and connected to the
computer. Then turn on your Macintosh® and turn off any virus protection
programs.
If you see a message stating that you need to install the software for your scanner,
click Cancel and continue with step 2 (if you are using OS 8.6, or earlier, click
OK).
2. Insert the scanner software CD-ROM in the CD-ROM or DVD drive.
3. Double-click the EPSON CD-ROM icon to open it, if necessary, then
EPSON icon.
double-click the
Setting Up Your Scanner
17
basics.book Page 18 Thursday, August 31, 2000 10:08 AM
4. The software License Agreement screen appears. After reading the license
agreement, click Agree to continue with the installation.
5. You see the Install TWAIN Driver screen. Click Install.
6. You see the EPSON TWAIN Driver Installer screen. Click Install to install your
TWAIN driver.
7. When the scanner software installation is complete, you see this screen:
Click Quit. You see the Screen Calibration window. You must calibrate your
screen and scanner to reproduce images closely matching the originals.
8. In the following window, move the slider
to the right or left until the shades of the
horizontal gray stripes appear similar. View
the screen from a short distance. The gray
stripes will not perfectly blend together;
however, try to make the two tones match
as closely as possible. For best print results
from an EPSON ink jet printer, select a
setting of 1.8.
9. Click OK to register the calibration setting.
18
Setting Up Your Scanner
basics.book Page 19 Thursday, August 31, 2000 10:08 AM
You will not need to change the screen calibration again as long as you
continue to use the same monitor. If you need to recalibrate your screen
at a later time, select Screen Calibration in the EPSON Scanner folder.
10. Restart your Macintosh.
11. After your computer restarts, install your scanner software and bonus software as
described below.
Install the Scanner and Bonus Software
Before you begin, be sure any virus protection programs are turned off.
Be sure to install EPSON Smart Panel,™ ScanSoft™ TextBridge® Pro, and
Adobe PhotoDeluxe to take advantage of your scanner’s ] Start button.
Adobe PhotoDeluxe is included on a separate CD-ROM. Follow these
steps to install PhotoDeluxe:
In Windows, insert the PhotoDeluxe CD-ROM in your drive, double-click
My Computer, then double-click the CD-ROM icon. Open the
English\Install folder and double-click Setup.exe. Follow the instructions
on the screen and then restart your computer.
On a Macintosh, insert the CD-ROM in your drive and double-click the
CD-ROM icon, if necessary. Double-click the English icon, then
double-click the Adobe PhotoDeluxe Installer icon. Follow the steps on the
screen and then restart your computer.
Follow these steps:
1. Insert the scanner software CD-ROM in your CD-ROM or DVD drive.
My Computer, then double-click the
2. Windows: Double-click
CD-ROM
EPSON.exe.
icon. The CD-ROM window opens. Double-click
Macintosh: Double-click the EPSON CD-ROM icon to open it, if necessary,
EPSON icon.
then double-click the
3. The EPSON screen appears. If the software License Agreement screen appears,
read the license agreement and click Agree to continue with the installation.
Setting Up Your Scanner
19
basics.book Page 20 Thursday, August 31, 2000 10:08 AM
The Main Menu appears on your screen.
4. Click Scanner Software. The Scanner Software screen appears.
5. Click EPSON Smart Panel.
6. Click the Install button and follow the instructions on the screen to install
EPSON Smart Panel.
20
Setting Up Your Scanner
basics.book Page 21 Thursday, August 31, 2000 10:08 AM
7. When the installation is complete, you return to the EPSON Smart Panel install
screen. Click Back.
8. From the Scanner Software screen, click ScanSoft TextBridge Pro.
9. Click the Install button and follow the instructions on the screen to install
TextBridge Pro.
10. In Windows, when the installation is complete, you return to the TextBridge Pro
install screen. Click Back. Click Back again to return to the Main Menu.
For Macintosh, click Restart to restart your computer. When your computer
restarts, double-click the EPSON CD-ROM icon to open it, if necessary, then
double-click the EPSON icon.
11. Click Bonus Software.
12. Click the application name or button for the program you want to install.
Setting Up Your Scanner
21
basics.book Page 22 Thursday, August 31, 2000 10:08 AM
13. The install screen appears for the application you selected (the example shown is
for ArcSoft™ PhotoMontage™). Click the Install button to install the selected
software. (You can skip the installation by clicking the Back button at the bottom
of the window.)
14. If the application requires a restart, go back to step 11 after restarting to install
another application. If the application does not require a restart, you return to the
application’s install screen. Select another application to install or click Back to
return to the Main Menu.
If any of the software you installed requires a restart and you did not
restart when you installed the software, you should restart your computer
now.
Viewing Your Electronic Manuals
You always have easy access to your electronic manuals—just go to the Main Menu
screen on your scanner software CD-ROM and click Electronic Documentation.
Viewing Your HTML Reference Guide
Your scanner software CD-ROM includes an electronic Reference Guide for your
scanner. The manual is in HTML format, so you need a browser—such as Microsoft®
Internet Explorer 3.0 or later or Netscape Navigator® 3.0 or later—to view it. If you
are using a different browser, the pages may not display correctly.
22
Setting Up Your Scanner
basics.book Page 23 Thursday, August 31, 2000 10:08 AM
A browser is not included on the scanner software CD-ROM.
You can view your electronic Reference Guide from the CD-ROM or copy it to your
hard drive and view it from there. Follow these steps:
1. Insert your scanner software CD-ROM.
My Computer, double-click your
2. Windows: Double-click
EPSON icon.
drive icon, then double-click the
CD-ROM
Macintosh: Double-click the EPSON CD-ROM icon, then double-click the
EPSON icon.
The Main Menu appears:
3. Click Electronic Documentation. The following screen appears:
4. Click View Reference Guide.
Setting Up Your Scanner
23
basics.book Page 24 Thursday, August 31, 2000 10:08 AM
5. You can either view the manual from the CD-ROM (View Reference Guide) or
copy the manual to your hard drive (Install Reference Guide) and view it from
there. For details on viewing the manual, see section below.
If you copied the manual to your hard drive, you can access it at any time, as follows:
Windows: Select Start, Programs, EPSON, and click Reference Guide.
Macintosh: Open the EPSON PERFECTION 1640SU folder and double-click View
Reference Guide.
When you first open the Reference Guide, you see this screen:
Click here
to expand
the table of
contents
Click a topic on the left to expand the table of contents.
After expanding the table of contents, you can click on the topic you want to view.
Closed
lists, click
to expand
Click to go
to topic
If you see an icon in place of a graphic when viewing your Reference
Guide in Netscape Navigator, click the Reload button to load the graphic.
24
Setting Up Your Scanner
basics.book Page 25 Thursday, August 31, 2000 10:08 AM
Viewing Your EPSON Smart Panel PDF Manual
You always have easy access to your EPSON Smart Panel electronic manual—it is
automatically copied to your hard drive when you install the software.
In Windows, you can access the manual by clicking Start, Programs, EPSON Smart
Panel for Scanner, then EPSON Smart Panel for Scanner User’s Manual.
On a Macintosh, open the EPSON Smart Panel for Scanner folder and double-click
SMART PANEL for Scanner Manual.
If you already have Adobe® Acrobat® Reader (version 3.0 or later) on your system, the
manual opens in Acrobat Reader automatically. If you don’t have Acrobat Reader,
you can install it from the CD-ROM.
For guidelines on viewing your electronic manuals using Acrobat Reader, see
“Navigating a Manual” below.
Your Bonus software may also include electronic manuals in PDF format.
After installing the software, check its program folder to see if an
electronic manual is available.
Navigating a Manual
When you open an electronic manual, you’ll see this toolbar:
previous page next page
first page
last page
show bookmarks and page
With Acrobat Reader, you have several ways to navigate through text:
■
Click on hot topics, which are usually underlined or displayed in a different color.
To find out if a topic is hot, move your cursor over it. If the cursor turns into a
pointing hand, the topic is hot—you can jump to it by clicking once.
■
Use the bookmark section on the left side of the screen to move quickly to the
topic of your choice. Click the Show Bookmarks icon on the toolbar to see the
bookmark section, if the manual has bookmarks. Some manuals only have a table
of contents, but you can also use this to navigate the manual if the topics are hot.
Setting Up Your Scanner
25
basics.book Page 26 Thursday, August 31, 2000 10:08 AM
■
Use the arrow buttons in the toolbar or the vertical scroll bar on the right side of
the document to move through a manual. (The box to the left of the scroll bar
displays the current page number.)
For more information, see your Acrobat Reader online guide.
26
Setting Up Your Scanner
basics.book Page 27 Thursday, August 31, 2000 10:08 AM
Basic Scanning
You can use the EPSON Smart Panel for all types of scanning with a convenient
on-screen control panel. Your EPSON Perfection 1640SU also lets you scan directly
to a Smart Panel application simply by pressing the ] Start button.
If you’re experienced with scanning, you can use the EPSON TWAIN
interface to scan with applications like Adobe PhotoDeluxe or any other
TWAIN-compliant program. See “Advanced Scanning with EPSON
TWAIN” on page 37 for instructions.
Placing Your Original Document
1. Raise the document cover and place your
document face down on the document
table glass.
2. Position the document so the horizontal
and vertical edges are carefully aligned
with the guides on the top and right side
of the document table.
3. Close the document cover slowly. Be
careful not to move the document.
unscanned
area
An area of 0.12 inches (3 mm) in from the horizontal and vertical guides is
not scanned.
The self-adjusting cover allows you to place thick documents on the
document table glass without removing it. For instructions, see page 36.
If you are using the auto document feeder, see “Using the Auto
Document Feeder” on page 55 to load your document. If you are using
the transparency unit, see “Loading Transparencies” on page 47 for
instructions on how to load negatives and transparencies.
Basic Scanning
27
basics.book Page 28 Thursday, August 31, 2000 10:08 AM
Using EPSON Smart Panel
Follow these steps to use EPSON Smart Panel to scan your document or photo:
For instructions on installing EPSON Smart Panel, see page 19.
1. Place your original document(s) face down on the document table, as described
on the previous page.
2. Do one of the following to open the Smart Panel:
■
Press the ] Start button on your scanner.
■
Click the
■
Open the Apple menu and select EPSON SMART PANEL.
Smart Panel icon on the Windows taskbar.
The Start button is set to open the Smart Panel by default. This setting
may be changed, however, and can be configured for one-touch scanning.
See the section below for details.
If you have a modem and e-mail
service, you can use your scanner
to send photos or documents.
The control panel on
your computer screen
allows you to make
copies of printed pages
and photos.
Automatically scans your image and then
opens it in PhotoDeluxe, which guides you
through steps to create a print project—such
as a calendar, card, label, or web page.
28
Basic Scanning
Optical character recognition (OCR) converts
a scanned text image into text that you can
edit in a word processing format.
Gives you an easy
way to reprint your
photos in any size
you want.
Automatically scans your image and
then opens it in any supported
application program on your computer.
basics.book Page 29 Thursday, August 31, 2000 10:08 AM
3. Click the icon for your desired scanning option. The window for that option
appears and lets you adjust settings for your scan. Follow the on-screen steps for
each option.
If you select Copy or Photo Print, make sure your printer is turned on and
the correct paper type and size is loaded in your printer. You can use Photo
Print only with an EPSON Stylus Color or EPSON Stylus Photo printer.
For detailed instructions on using each of the Smart Panel options, read your
electronic manual for EPSON Smart Panel, as described on page 22.
Setting Up the Start Button in EPSON
Smart Panel
You can configure your ] Start button to automatically scan to any of the options in
the EPSON Smart Panel.
You need to do the following to configure and use your Start button:
■
Set up the Start button to launch a Smart Panel option
■
Set up copying, printing, e-mailing, scanning, or OCR
■
Copy, print, e-mail, scan, or use OCR with the Start button
Follow these steps:
1. Open EPSON Smart Panel:
In Windows, click the
Smart Panel icon on the Windows taskbar.
On a Macintosh, click the Apple menu icon, then click EPSON SMART PANEL.
Basic Scanning
29
basics.book Page 30 Thursday, August 31, 2000 10:08 AM
2. From the ] Start Button menu, select the option you want to scan to using the
scanner’s Start button. The Start icon appears over the selected option.
Start icon appears
over selected
option
click to choose the scanning
option for the Start button
3. Click the icon for the selected option.
4. Follow the on-screen steps, as if you were going to scan, and set up the default
settings for your Start button scans.
The next time you press the ] Start button, the scanner automatically scans, using
the option you selected.
See page 31 for a detailed example of scanning to e-mail, page 32 for a detailed
example of scanning to OCR, or page 34 for a detailed example of scanning and
printing photos.
When copying or printing, make sure your printer is turned on and has the
correct paper size and type loaded. You can use Photo Print only with an
EPSON Stylus Color or EPSON Stylus Photo printer.
30
Basic Scanning
basics.book Page 31 Thursday, August 31, 2000 10:08 AM
Scanning Projects
The following sections include step-by-step scanning projects for three of the Smart
Panel scanning options: Scan to E-mail, Scan to OCR, and Photo Print. The steps for
the other Smart Panel options are similar. For detailed instructions, see your
electronic manual for EPSON Smart Panel.
Scanning to E-mail
You can scan photos or documents and then attach the resulting files to an e-mail
message. Follow these steps to scan to e-mail:
1. Open the EPSON Smart Panel:
In Windows, click the
Smart Panel icon on the Windows taskbar.
On a Macintosh, click the Apple menu icon, then click EPSON SMART PANEL.
2. Click the Scan to E-mail icon.
3. Select the document settings for your scans:
■
Select the document type for your source image.
■
Select a destination setting.
■
Check the Scan Multiple Images or Enable Auto Document Feeder boxes if
you will be using either of these options.
4. Click Scan. The scanner scans your image(s).
5. Click Specify Name and Format. You see the following:
6. Choose a format for your file(s).
If you save your file in the JPEG format, you can
select a compression option from the Options list. If
you select RTF, your scan is saved as an image in
the RTF file; it is not converted to editable text.
7. Click Apply and then click Finish. A screen appears
showing any available e-mail programs on your system.
Basic Scanning
31
basics.book Page 32 Thursday, August 31, 2000 10:08 AM
Your e-mail program must be MAPI-compliant. See your e-mail
documentation for details. AOL® is not a MAPI-compliant e-mail
application.
8. Select your e-mail program and click Send E-mail. Enter the e-mail address, type
in a message and subject, then send your e-mail.
If you’re scanning multiple pages without using the ADF, you’ll see a
message after each page has scanned. Replace the document on the
table and click Yes to continue scanning. When you’re done scanning
pages and see the message again, click No.
Scanning to OCR
You can use EPSON Smart Panel to scan and create editable text files with an OCR
(optical character recognition) engine. If you are using the auto document feeder, you
can scan multiple pages and turn them into multiple single-page documents or a
single multi-page document.
Follow these steps to scan to OCR:
1. Open the EPSON Smart Panel:
In Windows, click the
Smart Panel icon on the Windows taskbar.
On a Macintosh, click the Apple menu icon, then click EPSON SMART PANEL.
2. Click the Scan to OCR icon.
32
Basic Scanning
basics.book Page 33 Thursday, August 31, 2000 10:08 AM
You see the OCR scan settings screen:
select the source
paper size
select a Scan Mode
click to scan pages
using the auto
document feeder
click to scan multiple pages
from the document table
3. Select the settings for your scan:
■
Select the paper size for your document: you can choose from Letter or A4.
■
Select a Scan Mode: Color, Grayscale, or Black&White (recommended).
■
Check the Scan Multiple Images or Enable Auto Document Feeder boxes if
you will be using either of these options.
4. Click Scan. The scanner scans your document and you see the Recognize screen:
■
Select a language for the documents that you’ll be scanning.
■
Select the OCR engine that you want to use to recognize and convert the text.
If you select Presto! OCR, you can click the Options button and set up
additional options.
TextBridge Pro does not work with EPSON Smart Panel on Macintosh
systems. Use TextBridge Pro by itself, or use the Smart Panel with
Presto! OCR.
5. Click Recognize. The OCR engine recognizes the text. Then you see a screen
that lets you choose how you want to save or open the text.
Basic Scanning
33
basics.book Page 34 Thursday, August 31, 2000 10:08 AM
6. To save your documents without opening them, click Save. Enter a name and
folder in the File Name and Path box, or leave the default name. For multiple
documents, each file is assigned the file name you select with a new number.
Select one of the available formats for saving your file: TXT, RTF, HTML, or PDF.
To open your files for editing, click Open. Select an application from the list.
Click Property to change any settings for the way your documents will open.
Click OK when you are done making changes to the Property settings, or click
Cancel if you don’t want to save your changes. Click Open.
When you scan to OCR using the Start button, the pages are automatically
opened as individual files in the last application that was selected in Smart
Panel’s OCR option.
If you’re scanning multiple pages without using the auto document
feeder, you’ll see a message after each page has scanned. Replace the
document on the table and click Yes to continue scanning. When you’re
done scanning pages and see the message again, click No.
Scanning and Printing Photos
You can scan photos and then print them on your EPSON Stylus® Color or EPSON
Stylus Photo printer. You can even print directly from transparencies or negatives if
you are using the transparency unit.
You can use Photo Print only with an EPSON Stylus Color or EPSON
Stylus Photo printer.
Make sure you have paper loaded in your EPSON printer and the printer is turned
on, then follow these steps:
1. Open the EPSON Smart Panel:
In Windows, click the
Smart Panel icon on the Windows taskbar.
On a Macintosh, click the Apple menu icon, then click EPSON SMART PANEL.
34
Basic Scanning
basics.book Page 35 Thursday, August 31, 2000 10:08 AM
2. Click the Photo Print icon. You see the Photo Print panel:
change to a
different printer
select print size
select paper size
and type
select media type
of source image
scan and print
3. Make sure the EPSON printer you want to print to is selected. If the incorrect
printer is selected, click the printer icon and select your printer from the list.
4. Select the format of the original from the media types; you can choose from
Photo, Negative Film, and Positive Film (for slides and transparencies).
5. Select one of the following paper types and sizes under Print Paper: Photo Paper
4 × 6 - Card, Photo Quality Ink Jet Card - Card, Photo Paper - Letter, Photo
Quality Glossy Film - Letter, Premium Glossy Photo Paper - Letter.
6. From the Print Sizes list, select a size for the image to print. You can select 3 × 5,
4 × 6, 3.5 × 5, L - size (3.5 × 5.1 inches), 10 × 15 cm, or Panorama (3.5 × 10.2
inches). (The sizes you can select vary depending on your paper type and size.)
7. Select how many copies you want to print (1 to 999).
8. Click the x print button to scan and print your photo or negative.
If you’re scanning multiple pages without using the ADF, you’ll see a
message after each page has scanned. Replace the document on the
table and click Yes to continue scanning. When you’re done scanning
pages and you see the message again, click No.
Basic Scanning
35
basics.book Page 36 Thursday, August 31, 2000 10:08 AM
Scanning Something That Doesn’t Fit
Under the Document Cover
The self-adjusting document cover
allows you to place thick documents on
the document table glass without
removing the cover. If your document is
too thick to fit under the cover—such as
a photo in an album—you can remove
the document cover. To do this, simply
open the document cover and lift the
back of the document cover straight up.
When scanning with the cover removed, make sure no area of the document table is
exposed. This prevents interference from external light.
When reattaching the document cover,
hold the cover so the hinges are aligned
with the notches on the scanner. Then
lower the cover so the hinges fit into the
notches and close the document cover.
36
Basic Scanning
basics.book Page 37 Thursday, August 31, 2000 10:08 AM
Advanced Scanning with EPSON
TWAIN
Your scanner’s EPSON TWAIN driver includes detailed settings that you can make
to refine your scans. This chapter describes how to use advanced scan settings.
Scanning with EPSON TWAIN
Scans are always performed from within a host application—the application into
which you plan to import the scanned image or document, such as Adobe
PhotoDeluxe, or nearly any other graphics program. You have to start this application
before you can access EPSON TWAIN, your scanner software.
Once you’ve started your application, you need to select the scanner “source” you
want to scan with. Your EPSON Perfection 1640SU scanner comes with the EPSON
TWAIN 5 driver. You need to select this driver as the source in your application.
This section contains step-by-step instructions for doing exactly this. Since Adobe
PhotoDeluxe comes with your scanner, this section uses it as an example, but you can
perform the same steps with most graphics programs, such as Adobe Photoshop or
CorelDRAW. The electronic Reference Guide on your CD-ROM has detailed
instructions on how to use the EPSON TWAIN driver (see page 22). For instructions
on using a creative software application, see its electronic manual or online help.
Advanced Scanning with EPSON TWAIN
37
basics.book Page 38 Thursday, August 31, 2000 10:08 AM
Selecting TWAIN from Your Application
Once the document is placed on the scanner and the scanner is turned on, you can
start EPSON TWAIN to capture the image into your graphics application.
Follow these steps to start EPSON TWAIN from your application software (the steps
may vary, depending on your application):
1. Start your application.
2. Select the scanner source. Open the File menu and choose Select Source, Import,
or Acquire, and then select either Select TWAIN_32 Source (Windows) or
TWAIN Select (Macintosh).
click to select the
scanner source
3. Select EPSON TWAIN 5 and click OK or Select.
You can also access EPSON TWAIN from EPSON Smart Panel; click the
TWAIN button on the Scan Settings screen for each option.
38
Advanced Scanning with EPSON TWAIN
basics.book Page 39 Thursday, August 31, 2000 10:08 AM
Using EPSON TWAIN
Once EPSON TWAIN 5 is selected, you can start scanning from your application.
Follow these steps:
1. Start EPSON TWAIN for scanning. Open the File menu and choose Import or
Acquire and if necessary, select either TWAIN_32 (Windows) or TWAIN Acquire
(Macintosh).
click to open
EPSON TWAIN
If your computer fails to recognize the scanner, you won’t see the EPSON
TWAIN driver when you try to select a scanner source from your host
application. In addition, an error message may appear. If this happens, turn
off your computer and scanner, and then turn the scanner back on. Then
restart the computer.
2. The first time you start EPSON TWAIN, you see the Automatic Scanning
window.
If you want, you can let the TWAIN driver automatically scan your document. It
detects what type of document you’re scanning and automatically chooses the
optimum settings for your scan.
To scan in manual mode and adjust your scan settings, click Cancel.
Advanced Scanning with EPSON TWAIN
39
basics.book Page 40 Thursday, August 31, 2000 10:08 AM
You see the following window:
3. Click Manual Mode to open the EPSON TWAIN 5 window:
4. Select the type of image (such as Color Photo or Line Art) and final output
destination (such as Screen/Web or Laser Printer) from the Image Type and
Destination menus.
40
Advanced Scanning with EPSON TWAIN
basics.book Page 41 Thursday, August 31, 2000 10:08 AM
5. Click the
Preview icon to preview your scan. You see a preview of your scan in
the preview area on the right side of your screen.
6. Click the Scan button to scan your image.
The operate light on the top of the scanner blinks for several seconds while it’s
scanning. In a few moments, the scanned image is imported into your application.
7. Click Close to close the EPSON TWAIN window.
See “Selecting TWAIN Settings” on page 42 for a summary of EPSON TWAIN
settings, or your electronic Reference Guide for a complete description.
If the operate light continues to blink, it may indicate an error condition. See
“Scanner Light and Buttons” on page 61 for more information.
Don’t leave documents, especially photographs, on the document table or
in the transparency unit for long periods of time. They may stick to the
glass or deteriorate from the warmth of the scanner.
Advanced Scanning with EPSON TWAIN
41
basics.book Page 42 Thursday, August 31, 2000 10:08 AM
Selecting TWAIN Settings
The illustration below shows the different settings you can adjust in the EPSON
TWAIN window, and the preferred order you should adjust them in. Detailed
descriptions are given in your electronic Reference Guide.
Manually adjust settings in the EPSON TWAIN window in the following order:
3 Automatically set the scan
area for your image using
Auto Locate
1 Select the basic settings:
Document Source
Image Type
Destination
4 Size or scale the image
(be sure to increase the
Resolution if you increase
the size or scale)
5 Customize your Settings,
Configuration, and use
color management
2 Preview your image
6 Scan the image into your
application
7 Close the EPSON TWAIN window
42
Advanced Scanning with EPSON TWAIN
basics.book Page 43 Thursday, August 31, 2000 10:08 AM
Tips for Getting the Best Scan
Getting the best scan possible depends on several factors, including the quality of your
original and the resolution you select. The better your original is, the better your scan
will be. While you can make some corrections in your scanning software, you’ll need
to do major photo retouching in a program such as Adobe PhotoDeluxe or Adobe
Photoshop to correct or mask problems such as a coffee stain on the original image.
Recommended Settings
If you are manually adjusting the settings in the TWAIN window, you should
consider using the following settings for optimal scans (a more detailed listing is
available in your electronic Reference Guide):
1
2
Image type
Recommended Image Type
Scanning
resolution for
printing 1, 2
Photograph
Color Photo
300 dpi
Small photograph to be
enlarged
Color Photo
300 dpi to 3200 dpi
Magazine
Color Photo
300 dpi
Newspaper (text only)
Text (Background Removal)
400 dpi
Text for OCR
Text (Background Removal)
400 dpi
Text with images
Color Document
400 dpi
Line art
Line Art
300 to 3200 dpi
35 mm film (negative)
TPU for neg.Film
300 to 3200 dpi
4 x 5 or Brownie film (negative) TPU for neg.Film
300 to 3200 dpi
35 mm slide or
4 x 5 transparency
300 to 3200 dpi
TPU for pos.Film
If your final file is for on-screen viewing (for example, on a web page or in an e-mail message),
select 72 dpi for your resolution.
If you are enlarging your image, you must manually increase the resolution (dpi) proportionally to
maintain the resolution of your original.
Advanced Scanning with EPSON TWAIN
43
basics.book Page 44 Thursday, August 31, 2000 10:08 AM
Selecting Resolution
Resolution refers to how many dots per inch (dpi) or dots per centimeter (dpcm) your
image contains. The best resolution for a scanned image depends on the type of image
you’re scanning and your final output device.
For most images except line art, use a scanning resolution that is approximately one
third of your output resolution. For example, use a scanning resolution up to 100 dpi
with a 300 dpi laser printer, and up to 200 dpi with a 600 dpi laser printer. For 1440
dpi ink jet printers, such as the EPSON Stylus Color or Photo series, use a scanning
resolution of approximately 300 dpi. For on-screen viewing, you can scan at 72 dpi.
Keep the following in mind when you choose a resolution:
■
Higher resolution settings result in larger file sizes. For example, an 8.5 × 11-inch
original scanned at 300 dpi can produce a 24MB file. The same original scanned
at 72 dpi creates only a 1.3MB file. Large files take longer to process and print, so
consider the practical limitations of your computer system when selecting a
resolution. To keep your file size manageable, select the lowest possible resolution
that gives acceptable quality.
■
When scanning at a higher resolution, reduce the file size by scanning only part of
the image.
Scaling (Resizing) Images
If you plan to enlarge your image, it is better to enlarge it when you’re scanning rather
than in your application. Each time you modify an image, you lose some quality.
Keep in mind when you enlarge a small photo, such as a 35 mm slide or wallet-size
photo, you’ll need to scan at a high enough resolution to retain your image quality,
but not so high that your file size is too large to be efficient.
You must manually adjust the resolution (dpi) to maintain the same image quality
when you resize your image. For example, if you have a 300 dpi 2 × 2-inch image that
you want to enlarge to 4 × 4 (a factor of 200%), increase the Scale setting to 200%
and change the resolution to 600 dpi.
44
Advanced Scanning with EPSON TWAIN
basics.book Page 45 Thursday, August 31, 2000 10:08 AM
Transparency Unit
This section includes basic information on unpacking, installing, and using the
transparency unit (B813172). The transparency unit, also referred to as the film
adapter, lets you scan negative or positive film strips and slides on your scanner.
You can purchase this option from EPSON at (800) 873-7766 or visit the EPSON
Store™ at www.epson.com (U.S. sales only). In Canada, please call (800) 873-7766
for dealer referral.
The transparency unit is included with the EPSON Perfection 1640SU PHOTO
scanner.
Unpacking the Transparency Unit
Make sure that all the items below are included in the transparency unit box. If any
items are missing or damaged, contact your EPSON dealer immediately. Keep all the
packing materials so you can use them for storage when you are not scanning
transparencies.
film holders
transparency unit
Transparency Unit
45
basics.book Page 46 Thursday, August 31, 2000 10:08 AM
Installing the Transparency Unit
Follow the steps below to install the transparency unit on the scanner.
1. Make sure the scanner is turned off.
2. Remove the document cover from the scanner by opening it to an upright
position and lifting it straight up.
3. Make sure the document table glass is clean and dust free.
4. Place the transparency unit on the document table glass so that the hinges face the
rear of the scanner and it fits on the document table glass.
5. Connect the transparency unit connector (arrow faces up) to the scanner’s option
interface.
on/off switch
6. Turn on the transparency unit.
7. Turn on the scanner.
For information on loading transparencies and selecting driver settings, see “Loading
Transparencies,” below.
46
Transparency Unit
basics.book Page 47 Thursday, August 31, 2000 10:08 AM
Loading Transparencies
Before scanning transparencies, wipe the
lid of the transparency unit, the scanner’s
document table glass, and the narrow
calibration window near the hinges; dust
in the calibration window can cause a line
in the scanned image. Be sure to keep the
window uncovered when loading your
transparencies. If your transparency
obstructs the window, the colors in your
scans will be affected.
calibration
window
lid
You can load transparencies in the film
holders or you can place them directly on
the document table, as described in the
following sections.
Using Film Holders
Three film holders are included with the transparency unit. To place film in the
holders, see the instructions for the type of film you’re scanning. To remove a film
holder from the document table, lift it out by its tab.
Hold the film by the edges or use gloves. Touching the film surface with
bare hands can leave fingerprints or other marks on the film.
Placing the Film
Film has two sides: a base side that is shiny and a dull side with the emulsion. The
base side of the film has the film maker’s name and film ID numbers printed on it.
Film should always be loaded in the film holders or placed on the document table
with the base side down.
Transparency Unit
47
basics.book Page 48 Thursday, August 31, 2000 10:08 AM
Loading 35 mm Negative or Positive Film
Insert a strip of film in the 35 mm film holder, base side facing
down. Place the film holder on the document table. Align the
upper left corner of the film holder with the upper left corner
of the transparency unit. You can adjust the position of 35 mm
film by sliding the strips in the film holder so the frames you
want to scan are positioned in the window.
Loading Brownie Size Film
Brownie size film is 2.4 × 3.5 inches (6 × 9 cm). Insert the film
in the Brownie size film holder, base side facing down. Place
the film holder on the document table. Align the upper left
corner of the film holder with the upper left corner of the
transparency unit.
48
Transparency Unit
basics.book Page 49 Thursday, August 31, 2000 10:08 AM
Loading 4 x 5 inch Film
Insert film in the 4 × 5 inch film holder, base side facing
down. Place the film holder on the document table. Align
the upper left corner of the film holder with the upper left
corner of the transparency unit.
Transparency Unit
49
basics.book Page 50 Thursday, August 31, 2000 10:08 AM
Loading Slides and Film Directly on the
Document Table
Hold the film by the edges or use gloves. Touching the film surface with
bare hands can leave fingerprints or other marks on the film.
You can scan slides and film strips in the 4 × 5-inch (101.6 × 127 mm) scanning area
of the transparency unit. You can use film holders (as described in the previous
sections) or place them directly on the document table. Follow the steps below.
1. Open the top of the transparency unit while holding the base down.
If the film size is 4 × 5 inches, it may be easier to use the film holder. If you
place the film directly on the document table, it may be difficult to pick up.
50
Transparency Unit
basics.book Page 51 Thursday, August 31, 2000 10:08 AM
2. Load the slide or film with the base side down on the scanner’s document table in
the transparency unit window, as shown below.
3. Close the transparency unit.
calibration
window
Leave the narrow calibration window
uncovered, otherwise the colors in your
scans will be affected.
Make sure the unit is completely closed,
otherwise an option error results and you
will not be able to scan the document or
get correctly colored images.
Selecting Settings
In EPSON TWAIN, select TPU - Neg. Film or TPU - Pos. Film as the Document
Source setting, depending on the type of film (35 mm film strips or slides) you are
scanning. When previewing images of negatives scanned using a film holder, the color
may appear odd as the frame of the film holder is perceived as white, causing your
scans to appear darker. To see the correct color, click and drag the mouse over the
Zoom Preview button. For details on scanner software
image area, then click the
settings, see your electronic Reference Guide, as described on page 22.
Transparency Unit
51
basics.book Page 52 Thursday, August 31, 2000 10:08 AM
Scanning Reflective (Non-Transparent)
Documents or Photographs
When you return to scanning normal reflective documents (such as memos or
photographs), you can turn off the transparency unit, then place documents between
it and the document table. Remember to change the Document Source setting to
Flatbed in EPSON TWAIN.
Be aware that the entire document table will be scanned so you will scan not only your
document, but also the underside of the transparency unit. To prevent scanning the
underside of the transparency unit, you can place a white piece of paper between your
document and the transparency unit.
When scanning thin documents, you may see an impression of the underside of the
transparency unit in your scans. If so, remove the transparency unit and reinstall the
document cover as described below.
If you don’t plan to scan transparencies for a while, you can remove the transparency
unit and reinstall the document cover as described in the next section.
Removing the Transparency Unit
Follow these steps to remove the transparency unit:
1. Turn off the transparency unit and the scanner.
2. Remove any film holders or film from the document table.
3. Unplug the transparency unit connector from the scanner’s option interface.
4. Store the transparency unit and film holders in their original packaging.
5. Reattach the document cover as described on page 36.
52
Transparency Unit
basics.book Page 53 Thursday, August 31, 2000 10:08 AM
Auto Document Feeder
This section includes basic information on unpacking, installing, and using the auto
document feeder (B813222).
You can purchase this option from EPSON at (800) 873-7766 or
visit the EPSON Store at www.epson.com (U.S. sales only). In Canada, please call
(800) 873-7766 for dealer referral.
The auto document feeder allows you to automatically load single-sided, multi-page
documents into your scanner. The document feeder is particularly useful for optical
character recognition (OCR) scanning or for creating an image database. The auto
document feeder is included with the EPSON Perfection 1640 OFFICE scanner.
Unpacking the Auto Document Feeder
auto document feeder
spare paper path guide
paper support
document mat
When you unpack your auto document feeder (ADF), make sure you have all the
parts shown above. Remove the protective materials from the ADF. Keep all the
packing materials so you can use them for storage when you are not using the auto
document feeder. If any items are missing or damaged, contact your EPSON dealer.
Auto Document Feeder
53
basics.book Page 54 Thursday, August 31, 2000 10:08 AM
Installing the Auto Document Feeder
1. Make sure your scanner is turned off.
2. If your scanner has a document cover, remove it from the scanner by opening it to
an upright position, and lifting it straight up.
3. Make sure the document table is clean and dust free.
4. Insert the hinges on the ADF into the
outer square holes at the back of the
scanner and close the ADF.
5. Attach the ADF’s connector (arrow faces
up) to the scanner’s option interface.
6. Attach the paper support to the ADF.
7. Turn on the scanner.
For information on loading paper in the ADF
and selecting driver settings, see “Selecting
Settings” on page 56.
54
Auto Document Feeder
basics.book Page 55 Thursday, August 31, 2000 10:08 AM
Using the Auto Document Feeder
Loading Paper into the Auto Document Feeder
Your ADF can automatically load up to 30 sheets of the following paper sizes (based
on a paper weight of 17 lbs and a stack thickness of 0.24 inch [6.0 mm] or less):
■
Letter: 8.5 × 11 inches (215.9 × 279.4 mm)
■
Legal: 8.5 × 14 inches (215.9 × 355.6 mm)
■
Checks: 3.3 × 5 inches (83 × 127 mm)
■
B5: 7.17 × 10.1 inches (182 × 257 mm)
■
A4: 8.27 × 11.69 inches (210 × 297 mm)
The width can range from 3.3 to 8.5 inches (85 to 216 mm) and the length can range
from 5 to 14 inches (127 to 356 mm).
Do not feed photographic sheets or valuable original artwork into the auto
document feeder as a misfeed may result in accidental wrinkling or
damage.
If you are scanning high-quality color or halftone documents, place the
documents directly on the document table.
Opening the auto document feeder or its cover while it is operating results
in an error, and paper feeding stops.
Check the following before feeding a document into the feeder:
■
Ink on the document is dry.
■
The document has no holes and is not ripped or wrinkled.
■
The document has no staples, paper clips, or other objects attached that might
damage the feeder mechanism.
■
The document has no folds closer than 0.2 inch (5 mm) from its edge.
■
The document is not a multipart form or bound.
■
The document has no rear carbon coating.
■
The document has no cut-out areas.
Auto Document Feeder
55
basics.book Page 56 Thursday, August 31, 2000 10:08 AM
Make sure no documents or dust are on the document table glass when
using the auto document feeder. Dust on the document table glass near
the carriage home position may result in vertical lines on the scanned
images.
Follow the steps below to load paper into the auto document feeder:
1. Pull out the lower paper support.
2. Slide the right edge guide all the way to the
right.
3. Insert the paper stack into the ADF until it
meets resistance. Make sure that the side you
want to scan is facing up, with the top edge
facing into the feeder; the first page you want
to scan should be on top.
4. Move the right edge guide so it is flush with
the right edge of your paper.
Documents are output into the lower tray after
scanning is finished.
Selecting Settings
Be sure to select Auto Document Feeder (ADF) in the Document Source setting in
EPSON TWAIN. For more information on selecting driver settings, see your
electronic Reference Guide, as described on page 22.
56
Auto Document Feeder
basics.book Page 57 Thursday, August 31, 2000 10:08 AM
Loading Documents Manually
You can load documents manually even when the ADF is installed.
Lift the ADF and place the document on the document table. Place the document
mat over the document, as shown. Then lower the ADF and scan the document.
Make sure the ADF and its cover are closed before scanning. If you are scanning thick
material or documents more than 1.6 inches (4 cm) thick, leave the ADF in the
upright position. Cover any exposed areas of the document table glass.
Be sure to select Flatbed in the Document Source settings in EPSON TWAIN.
Opening the auto document feeder or its cover while it is operating results
in an option error and stops paper feeding.
When scanning thin documents, you may see an impression of the
underside of the auto document feeder in your scans. If so, remove the
auto document feeder and reinstall the document cover as described on
page 36.
Auto Document Feeder
57
basics.book Page 58 Thursday, August 31, 2000 10:08 AM
58
Auto Document Feeder
basics.book Page 59 Thursday, August 31, 2000 10:08 AM
Scanner Maintenance
This chapter tells you how to transport your scanner safely and gives you basic
maintenance instructions.
Transporting the Scanner
When you transport the scanner a long distance or store it for an extended time,
secure the carriage by following the steps below.
1. Turn on the scanner and wait until the carriage moves to the home position
(toward the back of the scanner). Then turn off and unplug the scanner.
home position
If the carriage does not automatically return to the home position, slowly
raise the front of the scanner and hold it up until the carriage comes to rest
in the home position. Then turn the transportation lock to the locked
position.
2. Use a coin or screwdriver to turn
the transportation lock to the
locked position (toward the top of
the scanner).
locked
unlocked
Scanner Maintenance
59
basics.book Page 60 Thursday, August 31, 2000 10:08 AM
Cleaning the Scanner
To keep your scanner operating at its best, you should clean it periodically. Before
cleaning, unplug the power cord.
Use a soft cloth to clean the outer case with mild detergent dissolved in water.
If the document table glass gets dirty, clean it with a soft, dry cloth that is free of lint.
Paper towels are not recommended for cleaning the glass. If the glass is stained with
grease or other hard-to-remove material, use a small amount of glass cleaner on a soft
cloth to remove it. Wipe off any remaining liquid with a dry cloth.
Be sure there’s no dust on your document table. Dust can cause white spots to appear
in your scanned image.
Never use a harsh or abrasive brush or cleaning product to clean the
document table. A damaged glass surface can decrease the scanning
quality.
Never use alcohol, thinner, or corrosive solvent to clean the scanner.
These chemicals can damage the scanner components as well as the
case.
Be careful not to spill liquid into the scanner mechanism or electronic
components. This could permanently damage them.
Never open the scanner case. Don’t spray lubricants inside the scanner. If
you think repairs or adjustments are necessary, consult your dealer or
contact EPSON.
If you are using the auto document feeder with your scanner, you should
clean the paper path guide periodically. See your electronic Reference
Guide for instructions, as described on page 22.
60
Scanner Maintenance
basics.book Page 61 Thursday, August 31, 2000 10:08 AM
Problem Solving
This chapter gives you the basics for diagnosing and solving scanner problems. For
illustrations identifying the scanner parts, see the inside back cover.
For more troubleshooting tips, see the “Troubleshooting” section of your electronic
Reference Guide, as described on page 22.
Scanner Light and Buttons
If an error occurs, the scanner stops and its indicator light shows the type of error.
Scanner indicator light
Light
Color
Status
Flashing
Green
The scanner is initializing or busy scanning.
On
Green
The scanner is ready to scan images.
Flashing
Red
The scanner may not be not properly connected to the
computer. Check the cable connection. Then turn the scanner
off and back on to reset it.
Make sure the scanner is unlocked. Turn off the scanner,
unlock the transportation lock, then turn the scanner on.
Off
—
The scanner is turned off.
Scanner buttons
Button
Function
P Operate
Turns the scanner on and off.
] Start
Lets you scan directly to an application with one touch. See “Setting
Up the Start Button in EPSON Smart Panel” on page 29, and your
electronic Reference Guide for more information.
61
basics.book Page 62 Thursday, August 31, 2000 10:08 AM
Problems and Solutions
Here are some troubleshooting tips if you have any problems setting up or using your
scanner.
Setup Problems
■
If the SCSI board is found, but
not the scanner, check the SCSI
ID. Make sure the SCSI ID is
not conflicting with another
SCSI device.
■
Check the SCSI cable
connection or try using
another SCSI cable.
■
Make sure the SCSI board you
are using is ASPI-compliant.
Your system doesn’t recognize the
scanner.
■
Make sure your scanner is
turned on. If you opened your
host application before you
turned on your scanner, close
your application and reopen it.
■
Check the cable connection or
try using another cable.
■
If you get the message, “No
push button scanner found,”
turn off your scanner, shut
down your computer, turn on
your scanner, and then turn on
your computer.
Your system doesn’t recognize the
SCSI board.
62
■
(Windows) Check the Plug and
Play option for your computer;
it should be turned on.
■
Make sure the SCSI board is
installed correctly. If it isn’t
seated firmly in the PCI slot, the
computer may not recognize it.
Problem Solving
You are unable to install EPSON
TWAIN in Windows.
■
In Windows 2000, don’t select
Block under Control Panel,
System, Hardware, Driver
Signing; select Ignore or Warn
instead.
■
If you see an error message or
the software doesn’t install
correctly on Windows 2000 or
Windows NT, you may not
have software installation
privileges. See your system
administrator.
■
Reinstall EPSON TWAIN from
the Reinstall TWAIN Driver
screen on your CD-ROM. See
page 66.
basics.book Page 63 Thursday, August 31, 2000 10:08 AM
Scanner Problems
The scanner indicator light
doesn’t come on.
Check the scanner power cord.
Make sure the power cord is
securely plugged into the power
outlet, and that the scanner is
turned on. Also, check that the
power outlet is working and
provides sufficient power for the
scanner.
You see the message “Scanner Not
Ready” (Windows) or “Cannot
find the scanner on the bus”
(Macintosh).
■
Make sure the scanner is turned
on. You may need to restart
your computer after turning on
your scanner.
■
Make sure your scanner cable
is securely connected. Then
open and close Scanner Monitor
to manually check for the
scanner (see “Enabling Scanner
Monitoring” in your electronic
Reference Guide). If you still see
the message, turn off your
scanner, then turn it on again,
and restart your system.
■
To turn off scanner monitoring,
see “Enabling Scanner
Monitoring” in your Reference
Guide.
The scanner doesn’t scan your
image.
■
Make sure you selected EPSON
TWAIN 5 as your scanner source
setting.
■
If you are using a USB hub, try
connecting the scanner directly
to the computer’s USB port.
Use only the USB cable that
came with your scanner.
■
If you are connected via SCSI,
make sure there are no SCSI ID
conflicts.
You’re having trouble scanning
while using the optional
equipment.
■
Make sure the option is
correctly installed and
connected to the scanner’s
option interface.
■
If you’re using the transparency
unit, make sure it is turned on.
The scanner lid seems “loose.”
This is normal. Your scanner has a
self-adjusting cover that allows you
to place thick documents on the
document table glass without
removing the cover.
Problem Solving
63
basics.book Page 64 Thursday, August 31, 2000 10:08 AM
■
Make sure you select the correct
Document Source setting for
the option and your image:
Auto Document Feeder (ADF),
TPU for neg.Film, or TPU for
pos.Film.
4. If paper is still jammed inside
the mechanism, open the cover
to remove it.
ADF cover
You need to remove jammed
paper from the auto document
feeder.
Follow the steps below:
1. Turn off the scanner.
2. Push down the release lever to
slightly raise the feeder
mechanism and release the
paper.
release lever
5. After removing jammed paper,
make sure that the cover is
closed, and push the feeder
mechanism down until it clicks
into place.
Software Problems
You can’t open the EPSON
TWAIN driver.
■
Check the cable connection.
Also, make sure the scanner’s
operate light is on. The scanner
should be turned on before you
start your computer. If
necessary, turn on the scanner
and restart your computer.
■
If you are connected via SCSI,
make sure there are no SCSI ID
conflicts.
■
Check that your system
recognizes your scanner and
SCSI board. In Windows 98,
3. Slowly pull the jammed paper
out of the feeder mechanism.
(Be careful not to pull too hard;
the paper may tear, making it
more difficult to remove.)
64
Problem Solving
basics.book Page 65 Thursday, August 31, 2000 10:08 AM
Windows 95, or Windows
2000, check your System
Device Manager in the Control
Panel. For Windows NT 4.0,
check SCSI Adapters in the
Windows Control Panel.
■
Check your scanner software
installation. Make sure that
your software is correctly
installed and set up. If all else
fails, uninstall your software,
then reinstall it, as described on
the next page.
TextBridge Pro does not work with
EPSON Smart Panel on Macintosh
systems. To use TextBridge Pro,
scan your document with EPSON
TWAIN, following the instructions
starting on page 38.
■
If you are connected via SCSI,
make sure there are no SCSI ID
conflicts.
The scanner software doesn’t
work properly.
1. Double-click the Scanners and
Cameras icon in the Windows
Control Panel.
■
If you aren’t using EPSON
Smart Panel, check your scanner
source setting in your
application. Make sure you
selected EPSON TWAIN 5.
your software and computer
manuals.) If you are scanning a
large image or scanning at a
high resolution, your computer
may not have enough memory
to process the image.
TextBridge Pro does not work.
■
■
Make sure your computer meets
the system requirements listed
on page 75, and supports the
software applications you’re
using.
Check your computer’s memory
to see if there is enough memory
for your software. If you’re
running other software at the
same time, using RAM resident
programs, or have many device
drivers, the computer may not
have enough memory. (See
You need to uninstall your
TWAIN driver in Windows 98 or
Windows 2000.
2. On the Devices tab, select
EPSON Perfection 1640.
3. Click the Remove button.
Then click OK to close the
window.
4. Restart your computer.
Problem Solving
65
basics.book Page 66 Thursday, August 31, 2000 10:08 AM
You need to uninstall your
TWAIN driver in Windows 95 or
Windows NT.
1. On the Start menu, click
Programs, EPSON Scanner,
EPSON TWAIN 5 Uninstall.
2. When you’re finished, restart
your computer.
You need to reinstall your
TWAIN driver in Windows.
For best results, first
uninstall the TWAIN
driver as described
above.
You need to reinstall your
TWAIN driver on a Macintosh.
1. Insert your scanner CD-ROM
in your CD-ROM drive.
2. Double-click the
icon.
EPSON
3. On the Main Menu, select
Reinstall Scanner Software.
1. Insert your scanner CD-ROM
in your CD-ROM drive.
4. On the Reinstall window, click
the Reinstall button.
2. Click Start and Run. At the
prompt, type your CD-ROM
drive letter and EPSON (for
example: D:\EPSON).
5. Read the next message, then
click Yes.
3. On the Main Menu, select
Reinstall Scanner Software.
4. On the next screen, click the
Reinstall button.
5. At the restart message, click OK.
6. In Windows 98 or Windows
2000, you see the New
Hardware Wizard screen when
your computer restarts. Follow
steps 1 through 10, starting on
page 8, to install your scanner
software.
66
In Windows 95, you see the
Update Device Driver Wizard
screen when your computer
restarts. Follow steps 1 through
7, starting on page 12, to install
your scanner software.
Problem Solving
6. On the TWAIN Installer
screen, make sure Easy Install
is selected for the default
installation, then click Install.
7. After the installation is
complete, click Restart. If
necessary, calibrate your screen.
Then your Macintosh
automatically restarts.
basics.book Page 67 Thursday, August 31, 2000 10:08 AM
Scanning Problems
Your scanned image is faint or has
gaps.
The file size is too big.
■
Adjust your scan settings. Try
selecting a lower resolution (dpi), or
scan only part of the image.
Check the brightness setting.
Decrease the software or driver’s
brightness setting.
■
Try adjusting the Gamma
setting.
■
Check the condition of your
original. If the document is
damaged, dirty, or wrinkled,
these imperfections will show
up in your scan.
■
Check that the document is
placed flush against the
document table.
Problem Solving
67
basics.book Page 68 Thursday, August 31, 2000 10:08 AM
Your scanned image is blurred or
distorted.
■
68
Check the position and
condition of your document.
Make sure the document is
placed flat against the scanner’s
document table glass. If only
part of the image is blurred, part
of your document may be
wrinkled or warped.
■
Make sure the document table
glass is clean.
■
Make sure the scanner is not
tilted or placed on an unstable
or uneven surface.
Problem Solving
The edges of the document are
not scanned.
■
Check the position of your
source document. Adjust your
document’s position so that the
image is within the glass area.
■
The document table has
non-readable areas around the
edges (see page 27). If part of
your document extends beyond
the maximum limits marked on
the document table edge guides,
you may have to reposition your
document so that the image you
want to scan is within the
readable area.
basics.book Page 69 Thursday, August 31, 2000 10:08 AM
Your image scans at an angle.
Check the position of your source
document. It may be placed at an
angle on the document table. Align
it so the horizontal and vertical
edges are carefully aligned with the
scales on the top and side of the
document table.
Your image is too dark or has odd
colors.
■
Make sure your software
settings are correct for your
document type.
■
Try adjusting the brightness
with your application software.
Also check the brightness and
contrast values of your display
screen.
■
If you’re using the transparency
unit, make sure the rectangular
window near the hinges on the
base is uncovered, or make sure
the top of the transparency unit
is closed when scanning.
■
Remember that the dark area
around film, such as the frame
of the film holder, is perceived
as white—altering the exposure
of the scanning area and causing
your scans to appear darker. Set
Problem Solving
69
basics.book Page 70 Thursday, August 31, 2000 10:08 AM
the correct color by adjusting
the marquee or frame border
and then adjusting the exposure.
See your electronic Reference
Guide for details.
The image on screen does not
look the same as the original or
when printed.
■
Because your monitor and
printer use different
technologies to represent colors,
your printed colors cannot
exactly match the colors you see
on your monitor screen.
■
Check your software settings
and make sure they are correct
for your image type. Try
different combinations of image
settings using your scanner
software.
■
Try increasing your monitor’s
color palette to 16 or 24 bit.
■
Your software may not have
sufficient color matching and
color management features, or
these components of your
software may not be correctly
installed. (See your software,
monitor, and computer manuals
for information on color
matching and calibration.)
■
70
If you are importing an image
file into your application
software, make sure the file
Problem Solving
format is one your software can
read. Also check that the image
settings in your application are
appropriate for the type of
image you want to scan. (See
your software manual.)
Colors are patchy or distorted at
the edges of the image.
■
Make sure your document is
flat. If the document is very
thick or warped at the edges, the
edges of the image may be
discolored. Cover the edges of
the document with opaque
paper to block outside light.
■
If your document is too large,
part of the document extends
beyond the document table, and
that edge may not be in contact
with the document table.
Change the position of the
document.
A line of dots is always missing in
the scanned image.
■
If this happens in your printed
image only, your printer may be
low on ink or toner. Replace
your ink or toner cartridge. If
this does not solve the problem,
your printer may be
malfunctioning. (See your
printer manual.)
basics.book Page 71 Thursday, August 31, 2000 10:08 AM
For an EPSON ink jet printer,
try cleaning the print heads as
described in your
documentation.
■
If this happens on both your
screen and printout, the
scanner’s sensor may be
malfunctioning. Consult your
dealer.
A line of dots always appears in
the scanned image.
■
If this happens on both your
screen and printout, the
document table glass may be
dusty or scratched. Clean the
document table glass.
■
If you are using the auto
document feeder, the paper
path guide of the auto
document feeder may be dusty.
Clean the paper path guide. If
the problem still exists, the
guide may be scratched and
must be replaced.
Lines appear in the scanned image
when using the transparency unit.
Dust in the transparency unit’s
calibration window will result in a
vertical line in the scanned image.
Clean the scanner document glass,
especially in the calibration window
area on your scanner.
Textured patterns of dots appear
on areas of an image.
You are using halftoning, which
causes normal moiré patterns. Your
scanner automatically minimizes the
problem if you turn on
De-screening in the Image Type
dialog box.
Your printed image is larger or
smaller than the original size.
You have changed the resolution or
scaled your image. The image size
settings in your software determine
the size of the printed image. Do
not use the size of the image on your
monitor to judge the printed size.
You cannot print your image or
the printout is garbled.
■
Your image file may be too
large. Make sure that your
computer has enough memory
for your software. If there are
many device drivers on your
system, you are running
multiple programs at the same
time, using RAM-resident
programs, or you have little free
space on your hard drive, your
computer may not have enough
memory available. (See your
software and computer
documentation.)
Problem Solving
71
basics.book Page 72 Thursday, August 31, 2000 10:08 AM
■
■
72
Check that the printer is
properly connected to the
computer and is correctly set
up. (See your printer manual.)
Check that your software is
properly installed and set up for
your printer. (See your software
manual.)
Problem Solving
Straight lines in the image are
jagged.
The document may have been
placed at an angle on the document
table. Align it so that the horizontal
and vertical lines are carefully
aligned with the scales on the top
and side of the document table.
basics.book Page 73 Thursday, August 31, 2000 10:08 AM
Where To Get Help
EPSON Technical Support
EPSON provides technical assistance through electronic support services and
automated telephone services 24 hours a day. The following table lists the contact
information:
Service
Access
World Wide Web
From the Internet, you can reach EPSON Support at
http://support.epson.com. At this site, you can download
drivers and other files, look at documentation such as product
brochures and user manuals, and access troubleshooting
information.
EPSON Internet
FTP Site
If you have Internet FTP capability, use your Web browser (or
other software for FTP downloading) to log onto ftp.epson.com
with the user name anonymous and your e-mail address as the
password.
EPSON E-mail
Technical Support
To receive technical advice through e-mail, go to
http://support.epson.com and complete the form under the
troubleshooting tab, as requested.
Automated
Telephone Services
A variety of automated help services are available 24 hours a
day, seven days a week. To use these services, you must have a
touch tone telephone and call (800) 922-8911.
To speak to a technical support representative, dial (562) 276-4382 (U.S.) or
(905) 709-3839 (Canada), 6 AM to 6 PM, Pacific Time, Monday through Friday. Toll
or long distance charges may apply.
Before you call, please have the following information ready:
■
product name (EPSON Perfection 1640SU)
■
product serial number (located on the back of the scanner)
■
proof of purchase (such as a store receipt) and date of purchase
■
computer configuration
■
description of the problem
Problem Solving
73
basics.book Page 74 Thursday, August 31, 2000 10:08 AM
You can purchase genuine EPSON supplies and accessories from EPSON at
(800) 873-7766 or visit the EPSON Store at www.epson.com (U.S. sales only). In
Canada, please call (800) 873-7766 for dealer referral.
Bonus Software Technical Support
Software
Telephone
Fax
Online and E-mail
EPSON TWAIN driver
U.S.
(562) 276- 4382
(800) 922-8911
fax-on-demand
system
support.epson.com
EPSON Software Film
Factory
ScanSoft
TextBridge Pro
Canada
(905) 709-3839
EPSON Smart Panel
(510) 445-8616
(510) 445-8601
[email protected]
Adobe PhotoDeluxe
(206) 675-6126
6:00 AM to 5:00 PM,
PST, Monday through
Friday (pay support)
(206) 675-6137
fax-on-demand
system
www.adobe.com/support
(510) 440-9901
8:30 AM to 5:30 PM,
PST, Monday through
Friday
(510) 440-1270
www.arcsoft.com
(978) 749-9944
9:00 AM to 5:00 PM,
EST, Monday through
Friday
—
Adobe Photoshop LE
ArcSoft PhotoPrinter
2000 Pro
ArcSoft Panorama
Maker 2000
[email protected]
[email protected]
ArcSoft PhotoMontage
2000
Monaco Systems
MonacoEZcolor*
www.ezcolor.com/faq.html
[email protected]
* The MonacoEZcolor software offer is available at a discounted price for EPSON Perfection
1640SU owners, for a limited time. Call (978) 749-9944 to order from Monaco Systems. The
color management package includes software, a target print, and a corresponding target file. You
can install the software and target file from your scanner CD-ROM. However, you won’t be able
to use the software until you obtain the target print, available by mail when you purchase the
color management package for $149 (U.S.)--that’s half off the retail price of $299. The offer
expires 12/31/01.
74
Problem Solving
basics.book Page 75 Thursday, August 31, 2000 10:08 AM
Requirements and Notices
System Requirements
The minimum system requirements for Windows and Macintosh are listed below. For optimum
performance, a faster processor and more memory are recommended. If you are scanning
high-resolution images, you need more than the minimum available hard disk space listed.
Windows
■
An IBM® compatible PC with a 486/66 MHz or faster processor
■
16MB RAM (32MB recommended)
■
50MB available hard disk space
■
Mouse or pointing device
■
CD-ROM drive
■
VGA or higher resolution monitor with 640 × 480 resolution (800 × 600 or higher
recommended) and 256 colors (65,000 colors or more recommended)
USB
■
Windows 98 or Windows 2000 preinstalled
■
Available USB port or self-powered hub connection
SCSI
■
Microsoft Windows 95, Windows NT 4.0, Windows 98, or Windows 2000
■
SCSI adapter (AdaptecTM recommended)
■
SCSI cable
The length of the SCSI cable must not exceed 9.8 feet (3 meters). If you are
connecting multiple SCSI devices, the total length of the SCSI bus (cables) must not
exceed 19.7 feet (6 meters); otherwise the system may not work properly.
Requirements and Notices
75
basics.book Page 76 Thursday, August 31, 2000 10:08 AM
Macintosh
You cannot use a serial interface to connect the scanner.
■
32MB RAM (64MB recommended)
■
50MB available hard disk space
■
CD-ROM drive
■
Mouse or pointing device
■
VGA color monitor with 640 × 480 screen resolution (or higher recommended) and 256 colors
(32,000 colors or more recommended)
Color and tone reproduction are subject to the display capability of your computer
system, including the video card, monitor, and software. See the documentation for
these products for details.
EPSON TWAIN supports the Apple ColorSync™ 2.x color management system and QuickTime.™
These extensions are automatically installed during EPSON TWAIN installation.
USB
■
Apple® Macintosh computer (G3, or higher, or iMac) running Mac® OS 8.5.1, or later
Check the Apple website for any updates to your operating system.
■
Available USB port or self-powered hub connection
SCSI
■
Power Macintosh® with Mac OS 8.0, or later
■
SCSI port or SCSI adapter (Adaptec recommended)
■
SCSI cable
The length of the SCSI cable must not exceed 9.8 feet (3 meters). If you are
connecting multiple SCSI devices, the total length of the SCSI bus (cables) must not
exceed 19.7 feet (6 meters); otherwise the system may not work properly.
76
Requirements and Notices
basics.book Page 77 Thursday, August 31, 2000 10:08 AM
Important Safety Instructions
Read all of these instructions and save them for later reference. Follow all warnings and instructions
marked on the scanner.
■
Unplug the scanner before cleaning. Clean with a damp cloth only. Do not spill liquid on the
scanner.
■
Do not place the scanner on an unstable surface or near a radiator or heat source.
■
Do not block or cover the openings in the scanner’s cabinet. Do not insert objects through the
slots.
■
Use only the type of power source indicated on the scanner’s label.
■
Connect all equipment to properly grounded power outlets. Avoid using outlets on the same
circuit as photocopiers or air control systems that regularly switch on and off.
■
Do not let the power cord become damaged or frayed.
■
Unplug the power cord if you will not be using the scanner for an extended period of time.
■
If you use an extension cord with the scanner, make sure the total ampere rating of the devices
plugged into the extension cord does not exceed the cord’s ampere rating. Also, make sure the total
ampere rating of all devices plugged into the wall outlet does not exceed the wall outlet’s ampere
rating.
■
Do not attempt to service the scanner yourself.
■
Unplug the scanner and refer servicing to qualified service personnel under the following
conditions:
If the power cord or plug is damaged; if liquid has entered the scanner; if the scanner has been
dropped or the cabinet damaged; if the scanner does not operate normally or exhibits a distinct
change in performance. Do not adjust controls that are not covered by the operating instructions.
Requirements and Notices
77
basics.book Page 78 Thursday, August 31, 2000 10:08 AM
FCC Compliance Statement
For United States Users
This equipment has been tested and found to comply with the limits for a Class B digital device,
pursuant to Part 15 of the FCC Rules. These limits are designed to provide reasonable protection
against harmful interference in a residential installation. This equipment generates, uses, and can
radiate radio frequency energy and, if not installed and used in accordance with the instructions, may
cause harmful interference to radio or television reception. However, there is no guarantee that
interference will not occur in a particular installation. If this equipment does cause interference to radio
and television reception, which can be determined by turning the equipment off and on, the user is
encouraged to try to correct the interference by one or more of the following measures.
■
Reorient or relocate the receiving antenna.
■
Increase the separation between the equipment and receiver.
■
Connect the equipment into an outlet on a circuit different from that to which the receiver is
connected.
■
Consult the dealer or an experienced radio/TV technician for help.
Warning
The connection of a non-shielded equipment interface cable to this equipment will invalidate the FCC
Certification of this device and may cause interference levels which exceed the limits established by the
FCC for this equipment. It is the responsibility of the user to obtain and use a shielded equipment
interface cable with this device. If this equipment has more than one interface connector, do not leave
cables connected to unused interfaces. Changes or modifications not expressly approved by the
manufacturer could void the user’s authority to operate the equipment.
For Canadian Users
This Class B digital apparatus meets all requirements of the Canadian Interference-Causing Equipment
Regulations.
Cet appareil numérique de la classe B respecte toutes les exigences du Règlement sur le materiel
brouilleur du Canada.
78
Requirements and Notices
basics.book Page 79 Thursday, August 31, 2000 10:08 AM
DECLARATION of CONFORMITY
According to 47CFR, Part 2 and 15 for Class B Personal Computers and Peripherals; and/or CPU
Boards and Power Supplies used with Class B Personal Computers:
We:
EPSON AMERICA, INC.
Located at:
MS 6-43
3840 Kilroy Airport Way
Long Beach, CA 90806-2469
Telephone: (562)290-5254
Declare under sole responsibility that the product identified herein, complies with 47CFR Part 2 and
15 of the FCC rules as a Class B digital device. Each product marketed, is identical to the representative
unit tested and found to be compliant with the standards. Records maintained continue to reflect the
equipment being produced can be expected to be within the variation accepted, due to quantity
production and testing on a statistical basis as required by 47CFR §2.909 Operation is subject to the
following two conditions: (1) this device may not cause harmful interference, and (2) this device must
accept any interference received, including interference that may cause undesired operation.
Trade Name:
EPSON
Type of Product:
Image Scanner
Model:
G754A
ENERGY STAR Compliance
As an ENERGY STAR Partner, EPSON has determined that this product meets
the ENERGY STAR guidelines for energy efficiency. The EPA ENERGY STAR
office equipment program is a voluntary partnership with the computer and office equipment industry
to promote the introduction of energy-efficient personal computers, monitors, printers, scanners, fax
machines, and copiers in an effort to reduce air pollution caused by power generation.
Requirements and Notices
79
basics.book Page 80 Thursday, August 31, 2000 10:08 AM
Warranty
EPSON AMERICA, INC.
LIMITED WARRANTY
What Is Covered: Epson America, Inc. (“EPSON”) warrants to the first end user customer of the
EPSON product enclosed with this limited warranty statement, that the product if purchased and used
in the United States or Canada, conforms to the manufacturer’s specifications and will be free from
defects in workmanship and materials for a period of one year from the date of original purchase.
EPSON warrants that the EPSON product is manufactured from new components and parts, or if you
have purchased a refurbished product, like-new components and parts which perform like new and
meet the EPSON standard of quality.
What EPSON Will Do To Correct Problems: Should your EPSON product prove defective during the
warranty period, please bring the product securely packaged in its original container or an equivalent,
along with proof of the date of original purchase, to your EPSON Dealer or EPSON Customer Care
Center. You are responsible for all costs (shipping, insurance, travel time) in getting the product to the
service location. EPSON will, at its option, repair or replace on an exchange basis the defective unit,
without charge for parts or labor. When warranty service involves the exchange of the product or of a
part, the item replaced becomes EPSON property. The replacement unit may be new or refurbished to
the EPSON standard of quality, and at EPSON’s option, the replacement may be another model of
like kind and quality. EPSON’s liability for replacement of the covered product will not exceed the
original retail selling price of the covered product. Exchange or replacement products or parts assume
the remaining warranty period of the product covered by this limited warranty.
What This Warranty Does Not Cover: This warranty covers only normal use in the United States and
Canada. This warranty does not cover damage to the EPSON product caused by parts or supplies not
manufactured, distributed or certified by EPSON. This warranty does not cover third party parts,
components or peripheral devices added to the EPSON product after its shipment from EPSON, e.g.,
dealer-added boards, chips or drives. EPSON is not responsible for warranty service should the
EPSON label or logo or the rating label or serial number be removed or should the product fail to be
properly maintained or fail to function properly as a result of misuse, abuse, improper installation,
neglect, improper shipping, damage caused by disasters such as fire, flood, and lightning, improper
electrical current, software problems, interaction with non-EPSON products, or service other than by
an EPSON Authorized Servicer. If a claimed defect cannot be identified or reproduced in service, you
will be held responsible for costs incurred.
80
Requirements and Notices
basics.book Page 81 Thursday, August 31, 2000 10:08 AM
THE WARRANTY AND REMEDY PROVIDED ABOVE ARE EXCLUSIVE AND IN LIEU OF
ALL OTHER EXPRESS OR IMPLIED WARRANTIES INCLUDING, BUT NOT LIMITED TO,
THE IMPLIED WARRANTIES OF MERCHANTABILITY OR FITNESS FOR A PARTICULAR
PURPOSE. SOME LAWS DO NOT ALLOW THE EXCLUSION OF IMPLIED WARRANTIES.
IF THESE LAWS APPLY, THEN ALL EXPRESS AND IMPLIED WARRANTIES ARE LIMITED
TO THE WARRANTY PERIOD IDENTIFIED ABOVE. UNLESS STATED HEREIN, ANY
STATEMENTS OR REPRESENTATIONS MADE BY ANY OTHER PERSON OR FIRM ARE
VOID. IN THE EVENT THE REMEDIES ABOVE FAIL, EPSON’S ENTIRE LIABILITY SHALL
BE LIMITED TO A REFUND OF THE PRICE PAID FOR THE EPSON PRODUCT
COVERED BY THIS LIMITED WARRANTY. EXCEPT AS PROVIDED IN THIS WRITTEN
WARRANTY, NEITHER EPSON AMERICA, INC. NOR ITS AFFILIATES SHALL BE LIABLE
FOR ANY LOSS, INCONVENIENCE, OR DAMAGE, INCLUDING DIRECT, SPECIAL,
INCIDENTAL, OR CONSEQUENTIAL DAMAGES, RESULTING FROM THE USE OR
INABILITY TO USE THE EPSON PRODUCT, WHETHER RESULTING FROM BREACH OF
WARRANTY OR ANY OTHER LEGAL THEORY.
In Canada, warranties include both warranties and conditions.
Some jurisdictions do not allow limitations on how long an implied warranty lasts and some
jurisdictions do not allow certain exclusions or limitations on damages, so the above limitations and
exclusions may not apply to you. This warranty gives you specific legal rights, and you may also have
other rights which vary from jurisdiction to jurisdiction.
To locate the EPSON Authorized Reseller or EPSON Customer Care Center nearest you call:
800-922-8911 or write to:
Epson America, Inc. ● P.O. Box 93008 ● Long Beach, CA 90809-9985
Requirements and Notices
81
basics.book Page 82 Thursday, August 31, 2000 10:08 AM
82
Requirements and Notices
basics.book Page 83 Thursday, August 31, 2000 10:08 AM
Index
Numerics
D
35 mm film, loading, 48
4 × 5 inch film, loading, 49
Dark images, 69 to 70
Document cover, removing, 36
Document position, 27, 68
Documentation, how to use, 2, 22 to 26
Dots in image, 70 to 71
Dust and image quality, 56
A
Accessories, 45, 53, 74
Adobe Acrobat Reader, 25 to 26
Advanced settings, TWAIN, 39 to 44
Angle, images scan at, 69
Auto document feeder
installing, 54
loading paper, 55 to 57
troubleshooting, 63 to 64
unpacking, 53
B
Base side, 47
Blurred image, 68
Brightness problems, 69 to 70
Brownie size film, loading, 48
Buttons, 61
C
Calibration screen
Macintosh, 18
Windows, 11, 15, 17
Calibration window, 47
Cleaning the scanner, 60
Connecting the scanner to your computer
SCSI, 7 to 8
USB, 6 to 7
Correcting color, 69 to 70
Cover, removing, 36
Crooked scans, 69, 72
E
Electronic manuals, 22 to 26
E-mail, scanning to, 31 to 32
ENERGY STAR, 79
EPSON
help, 73 to 74
Store, 45, 53, 74
F
Faint image, 67
File size, 67
Film holder
35 mm film, 48
4 × 5 inch film, 49
Brownie size film, 48
removing, 47
H
Help, 73 to 74
Home position, 5 to 6
I
Image quality problems, 67 to 72
Incorrect colors, 69 to 70
83
basics.book Page 84 Thursday, August 31, 2000 10:08 AM
Installing
auto document feeder, 54
document cover, 36
EPSON TWAIN driver in Macintosh,
17 to 19
EPSON TWAIN driver in Windows,
8 to 17
scanner software and bonus software,
19 to 22
transparency unit, 46
O
OCR, scanning to, 32 to 34
Operate button, 61
Options
auto document feeder, 53 to 57, 63 to 64
purchasing, 45, 53, 74
transparency unit, 45 to 52, 63 to 64
troubleshooting, 63 to 64
P
L
Lid
problems, 63
removing, 36
Light, scanner, 61, 63
Lines in image, 71
Loading paper
auto document feeder, 55 to 57
manually, 57
Loading slides and film
on document table, 50 to 51
using film holders, 47 to 49
Loading transparencies, 47 to 51
Lock, transportation, 5 to 6, 59
M
Macintosh
installing software, 17 to 22
reinstalling software, 66
screen calibration, 18
system requirements, 76
Maintenance, 59 to 60
Manual mode, TWAIN, 39 to 42
Manuals, viewing electronic, 22 to 26
Moving the scanner, 59
84
Paper jams, 64
Paper support, 54
Photographs
scanning, 43
scanning and printing, 34 to 35
Placement of scanner, 4 to 5
Placing documents on scanner, 27
Printed image problems, 70 to 72
R
Recommended settings, 43
Reference Guide, 22 to 24
Reflective documents, 52
Removing document cover, 36
Resizing images, 44
Resolution, choosing, 43 to 44
S
Safety instructions, 4 to 5, 77
Scaling images, 44
Scanner
buttons, 61
light, 61, 63
locking, 59
maintenance, 59 to 60
on/off, 6
problems, 63 to 64
setup, 3 to 8
unlocking, 5 to 6
basics.book Page 85 Thursday, August 31, 2000 10:08 AM
Scanning
advanced, 37 to 44
basic, 27 to 36
photos, 34 to 35, 43
projects, 31 to 35
Start button, 29 to 30
to e-mail, 31 to 32
to OCR, 32 to 34
TWAIN, 37 to 44
Screen calibration
Macintosh, 18
Windows, 11, 15, 17
SCSI
connecting, 7 to 8
ID number, 7
troubleshooting, 62, 63, 64, 65
Service, 73 to 74
Setting tips, 43
Setting up scanner, 3 to 8
Settings, software, 40 to 41, 42, 43, 51, 56
Setup problems, 62
Slides, loading, 50 to 51
Smart Panel
electronic manual, 25 to 26
scanning and printing photos, 34 to 35
scanning from, 28 to 29
scanning to e-mail, 31 to 32
scanning to OCR, 32 to 34
Start button scanning, 29 to 30
Software
problems, 64 to 66
reinstalling, 66
support, 74
uninstalling, 65 to 66
Software installation
Macintosh, 17 to 22
Windows, 8 to 17, 19 to 22
Software settings, 40 to 41, 42, 43, 51, 56
Space requirements, 5
Start button
scanner, 61
setting up, 29 to 30
Support, 73 to 74
System requirements, 75 to 76
T
Technical support, 73 to 74
Text, scanning, 43
Thick documents, 36, 57
Transparency unit
installing, 46
removing, 52
troubleshooting, 63 to 64, 69, 71
unpacking, 45
using, 47 to 52
Transparency, scanning, 43, 47 to 51
Transportation lock, 5 to 6, 59
Transporting the scanner, 59
Troubleshooting
auto document feeder, 63 to 64
image quality, 67 to 72
scanner, 63
SCSI, 62, 63, 64, 65
setup, 62
software, 64 to 66
transparency unit, 63 to 64, 69, 71
TWAIN
advanced scanning, 39 to 42
automatic scanning, 39
instructions, 37 to 44
manual scanning, 39 to 42
selecting in application, 38
troubleshooting, 64 to 66
U
Unlocking the scanner, 5 to 6
Unpacking
auto document feeder, 53
scanner, 3 to 4
transparency unit, 45
USB, 6 to 7, 63, 75, 76
85
basics.book Page 86 Thursday, August 31, 2000 10:08 AM
V
Viewing electronic manuals, 22 to 26
W
Windows
installing software, 8 to 17, 19 to 22
screen calibration, 11, 15, 17
system requirements, 75
troubleshooting, 62, 64 to 66
uninstalling software, 65 to 66
World Wide Web, 73
86