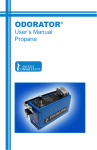
1
ODORATOR 2TM
Operator’s Manual
All Models
Proprietary Notice
The contents of this instruction manual are proprietary to Heath Consultants Incorporated.
Reproduction of this manual, in whole or in part, is prohibited without the express written
consent of Heath Consultants Incorporated.
Heath Consultants Incorporated operates under a continual product improvement program and
reserves the right to make improvements and / or changes without prior notification.
This manual supersedes all previous manuals for this instrument.
COPYRIGHT 2015, HEATH CONSULTANTS INCORPORATED.
Operator’s Manual, ODORATOR 2, HPN: 104147 Rev. B
OdorSeer Manual, ODORATOR 2, HPN: 104189 Rev. B
ODORATOR 2, Complete, HPN: 104175
ODORATOR 2
Operator’s M anua l
Models:
1.00 % Methane
0.50 % Methane
0.15 % Methane
0.44 % Propane
Heath Consultants Incorporated
9030 Monroe Road
Houston, TX 77061
Tel: 713-844-1300
www.heathus.com
Heath…Safety, Leadership, Innovation, Performance
Then, Now and Tomorrow
TABLE OF CONTENTS
Introduction …………………………………………………………….…………………………
Warnings and Cautions …………………………………………….……….…………………..
Use At Elevation ………………………………………………………………………………....
Use at Low Temperature Extremes …………………………………………………………….
List of Contents ………………………………………………………….…………………….…
Power On Sequence …………………………………………………………………………….
Test Mode Sequence ……………………………………………………………………………
1
2
4
4
4
5
5
CHAPTER ONE
Instructions for Operation …………………………………………………….………………...
Odor Threshold Level and Relative Odor Intensity Tests Procedure …………………
Bluetooth …………………………………………………………………………………….
ODORATOR 2 Operator Controls and Connectors …………………………………….
Figure 1. ODORATOR 2 Top Panel Layout …………………………………….
Figure 2. ODORATOR 2 Rear Case View ……………………………………..
Battery Charging ………………………………………………………………………..……….
Battery Pack Replacement ……………………………………………………………………..
6
6
9
9
9
10
10
11
CHAPTER TWO
Periodic Test ……………………………………………………………………………………..
Calibration ……………………………………………………………………………………...
12
12
CHAPTER THREE
Troubleshooting Chart …………………………………………………………………………..
Parts List ………………………………………………………………………………………….
Appendix A - Periodic Test Records …………………………………………………………..
13
13
14
CHAPTER FOUR
Warranty and Warranty Repair ………………………………………………………………
Return Procedure (RMA) ……………………………………………………………………..
Sales, Customer Service and Instrument Repair Locations ……………………..……….
Notes ……………………………………………………………………………………………
17
18
19
20
Introduction
The ODORATOR 2 is a handheld, portable, electronic GNSS based audit system used to
evaluate and record the odor levels within a utility’s gas stream with respect to actual test
locations. Natural gas (methane) and propane are two common gases typically odorized and
distributed for consumption.
Sample gas to be tested enters the ODORATOR 2 through the quick connect fitting at the gas
supply inlet port. Internally, the sample gas passes through an internal five micron filter to the
input of a low pressure regulator. It then passes from the output of the low pressure regulator
to the flow metering valve. This valve, located on the top panel of the ODORATOR 2, is
controlled by the operator. After passing through the valve (when partially opened), the gas
enters a mass flow sensor. This is the heart of the ODORATOR 2. The mass flow sensor
responds to gas flow within the range of the flow metering valve. The signal from the mass
flow sensor is then converted to a digital signal, processed and fed to a liquid crystal display
(LCD) for the operator’s use. Metered gas from the mass flow sensor then passes to the
mixing chamber where it is combined with fresh air drawn in by a blower. The operator then
sniffs the gas / air mixture at the exhaust port as part of the test. If no odor is detected in the
exhaust mix, the flow metering valve is incrementally opened and the exhaust port sniffed until
odor is readily detectable at which time the operator presses the READ switch to automatically
record the corrected percent gas in air by volume, GNSS location (GPS and/or GLONASS),
test time, test date and various instrument parameters. While driving to the various test points
in the distribution system the ODORATOR 2 may also automatically record the GNSS location,
date, time and various instrument parameters to be able to show the actual breadcrumb trail
used. The electronics and the speed of the blower are calibrated so that the concentration of
the gas / air sample at the exhaust port agrees with the LCD reading at 20% of the Lower
Explosive Level (LEL) or at a pre-determined point less than 20% of the LEL. For methane or
natural gas the LEL is typically 5.0% and for propane the LEL is typically 2.2%. All readings
are automatically corrected for atmospheric pressure and temperature via an embedded
microcontroller and associated sensors. Depending on how far the flow metering valve is
opened, the concentration of gas in air at the exhaust port will be anywhere from zero up to
approximately 2% for methane. An alarm and the display alert the operator of instrument
status, problems or high reading values.
INTRODUCTION
The ODORATOR 2 continuously monitors its health and operational status. Typical
operational checks include but are not limited to: blower speed, battery state-of-charge, GNSS,
memory card, communications buss, power supplies and calibration interval.
Included but not required for odor level testing is OdorSeer and OdorSeer Remote PC
software for managing the recorded data, mapping, report generation, instrument configuration
and remote data access. Connectivity interfaces include USB 2.0 and Bluetooth. Refer to the
OdorSeer / OdorSeer Remote manual for details.
A replaceable, rechargeable Li Ion battery pack is used to power the ODORATOR 2. An
external power supply is used to re-charge the battery pack. The ODORATOR 2 is designed
and intended to be used in accordance with the GPTC Guide For Gas Transmission And
Distribution Piping Systems (49 CFR) 192.625 Subpart L dated 10-1-13, the American Society
For Testing And Materials Standard D 6273 – 08 and NFPA 58 for performing odor threshold
1
level and relative odor intensity tests. Supply gas must be natural gas (methane) or propane
and of high quality. Blended or mixed gases as sometimes found during peak shaving cannot
be tested using the ODORATOR 2.
Warnings and Cautions
Prior to use, the operator should read all warnings and cautions, instructions for
operation and maintenance r e q u i r e m e n t s contained in this operator’s m a n u a l .
WARNING:
DO NOT USE THE ODORATOR 2 OR BREATHE IN GAS FROM SOURCES WHICH MAY
CONTAIN TOXIC LEVELS OF CHEMICALS SUCH AS 2HYDROGEN SULFIDE (H2S) AS IT
COULD BE HARMFUL TO HUMAN HEALTH AND SAFETY TO DO SO. SOURCES WHICH
MAY CONTAIN TOXIC LEVELS OF CHEMICALS INCLUDE BUT ARE NOT LIMITED TO
PRODUCTION SYSTEMS AND LANDFILLS.
It is the sole responsibility of the product purchaser/ owner to ensure that: (1) all
operators of the ODORATOR 2 read, understand, and comply with the precautions, instructions
for operation and maintenance requirements contained in this manual; (2) the ODORATOR 2
is only used in a proper and safe manner; and (3) while using the ODORATOR 2, operators
are not inhaling or sniffing dangerous materials that could cause injury or death.
WARNING:
DURING OPERATION, KEEP THE ODORATOR 2 AWAY FROM OPEN FLAMES. INLET SUPPLY
PRESSURE SHOULD NOT EXCEED FOUR PSIG. INLET PRESSURES IN EXCESS OF FOUR
PSIG COULD RUPTURE THE LOW PRESSURE REGULATOR DIAPHRAM, VENT THE GAS
OUT OF THE INSTRUMENT AND CAUSE INSTRUMENT FAILURE. THE RECOMMENDED INLET
SUPPLY PRESSURE IS 7” WATER COLUMN.
WHEN OPERATING THE ODORATOR 2 YOU WILL BE WORKING WITH FLAMMABLE
METHANE OR PROPANE GAS WHICH IS POTENTIALLY DANGEROUS IF NOT HANDLED
PROPERLY. METHANE GAS FROM A LECTURE BOTTLE MAY BE ODORLESS, COLORLESS
AND IS E X P L O S I V E IN CONCENTRATIONS OF APPROXIMATELY 5.0 TO 15.0 PERCENT BY
VOLUME IN AIR. PROPANE’S EXPLOSIVE RANGE IS APPROXIMATELY 2.2 TO 9.6 PERCENT BY
VOLUME IN AIR.
WHEN NOT OPERATING THE ODORATOR 2 CLOSE ALL VALVES AND TURN THE ODORATOR 2
OFF.
ANY TIME GAS IS BEING PASSED THROUGH THE ODORATOR 2 THE POWER MUST BE
TURNED ON. THIS WILL DILUTE THE GAS AT THE EXHAUST PORT AND PREVENT POCKETS
OF CONCENTRATED GAS FROM ACCUMULATING.
100% LEL IS APPROXIMATELY EQUAL TO 5.0% METHANE OR 2..2 % PROPANE GAS BY
VOLUME IN AIR. AS LONG AS A REFERENCE CGI READS SAFELY BELOW THE LEL (20% LEL
OR LESS) YOU SHOULD NOT HAVE ANY PROBLEMS WITH A FLAMMABLE MIXTURE
BUILDING UP.
ANY SUSPICION OF A GAS LEAK BY UNEXPLAINED SOUND OR OPERATION OF THE
ODORATOR 2 IS REASON TO IMMEDIATELY SHUT OFF THE GAS SUPPLY VALVES AND
THEN SEEK THE CAUSE.
2
IF INDOORS, DO NOT TURN THE ODORATOR 2 ON UNTIL A REFERENCE CGI INDICATES THE
ENVIRONMENT IS SAFE. LIKEWISE, ALLOW THE ODORATOR 2 TO PURGE FOR AT LEAST
ONE MINUTE AFTER A REFERENCE CGI ALSO INDICATES THE ENVIRONMENT IS SAFE.
THE ODORATOR 2 IS PENDING CERTIFICATION TO BE SAFE FOR USE IN CLASS 1, DIVISION 2,
GROUP D HAZARDOUS AREAS.
PERFORM ANY AND ALL MAINTENANCE IN A LOCATION KNOWN TO BE NON-HAZARDOUS.
TO REDUCE THE RISK OF IGNITION OF A FLAMMABLE OR EXPLOSIVE ATMOSPHERE, THE
BATTERY PACK MUST BE CHANGED OR CHARGED ONLY IN A LOCATION KNOWN TO BE NONHAZARDOUS.
NO ATTEMPT SHOULD BE MADE TO REPAIR THE INSTRUMENT BY THE OPERATOR. SHOULD THE
INSTRUMENT NOT WORK PROPERLY OR INDICATE AN ERROR OR WARNING, REFER TO THE
TROUBLESHOOTING SECTION OF THIS MANUAL.
SUBSTITUTION OF COMPONENTS MAY IMPAIR SAFETY. NO OPERATOR SERVICEABLE
COMPONENTS ARE CONTAINED WITHIN THE INSTRUMENT.
ONLY USE BATTERY PACK HPN 101311-0.
TO REDUCE THE RISK OF IGNITION OF A FLAMMABLE OR EXPLOSIVE ATMOSPHERE, A USB
CABLE MUST ONLY BE CONNECTED IN A LOCATION KNOWN TO BE NON-HAZARDOUS.
DO NOT OBSTRUCT OR BLOCK THE INTAKE OR EXHAUST PORTS.
CAUTION:
Do not store the gas sample hose in the case. The gas sample hose must “breathe” in fresh air to
lengthen its useful life and not contaminate the instrument. A mesh bag attached to the carrying
handle is included and recommended to be used for storage.
CAUTION:
Because of inherent limitations, liquid crystal displays should not be subjected to extremes
o
of temperature or humidity. I f the instrument is exposed to a temperature below -2 0 F
o
o
o
(-29 C) or above 158 F ( 70 C), the liquid crystal display may temporarily cease to function
properly and in some cases permanent damage may result. I t is therefore recommended
that the instrument not be subjected to extreme conditions such as a closed vehicle in direct
sunlight or continuous sub-freezing temperatures.
The battery pack contains built-in thermal protection and will internally disconnect at
o
o
temperatures above 122 F (50 C). Do not charge the battery pack at temperatures above
o
o
104 F (40 C).
WARNING:
o
o
Do not expose the battery pack to temperatures above 158 F ( 70 C).
3
Use at Elevation
The ODORATOR 2 automatically corrects its readings for actual air pressure and temperature.
There are no special precautions in using the ODORATOR 2 at elevations from sea level to
10,000 feet (3,048 meters).
Use at Low Temperature Extremes
o
o
The ODORATOR 2 is specified for intermittent use at 0 F (-18 C). A potential usage issue is
frosting of flow system speed sensing components as when leaving a warm service vehicle and
exposing the ODORATOR 2 to sub-freezing temperature. If this condition occurs, as indicated
by “LO FLOW” on the display, allow the ODORATOR 2 to warm up above freezing and then
gradually expose it to sub-freezing temperature.
CAUTION:
Of greater concern is the effect of sub-freezing temperature on the operator’s olfactory
response. The operator must take precautions of not allowing their nasal passage linings to
cool down to the point of affecting their sense of smell. Proper use of the ODORATOR 2
requires an operator with a normal sense of smell.
List of Contents
The following items are included with the ODORATOR 2:
1. ODORATOR 2 instrument with mesh utility bag.
2. ODORATOR 2 gas sample tubing.
3. ODORATOR 2 power supply.
4. ODORATOR 2 USB cable
5. ODORATOR 2 CD containing OdorSeer, OdorSeer Remote, USB drivers, manuals and
the brochure.
A replacement and accessories parts list may be found on page 13.
The Operator’s Manual, OdorSeer / OdorSeer Remote Manual and ODORATOR 2 brochure are
also available on-line at:
http://heathus.com/info-center/
A QR barcode is available on the instrument’s main label located on the inside of the top cover
for ease of access.
4
Power On Sequence:
When first turned on, the ODORATOR 2 performs internal tests and displays both status and
configuration specific information for the operator. The general sequence is as follows:
1.
2.
3.
4.
5.
6.
7.
8.
9.
10.
11.
12.
13.
LCD segments test – all segments on.
Instrument firmware version number.
Diagnostic Self-Test. Normally “SELF TEST” and “OK” will be displayed. If
errors are detected then “ERR” and an error number will be displayed and held.
Optionally a “LO BAT” message and beep may appear.
Instrument model type and model. Example: METHANE 1.00%
User ID number if configured.
Operator name if configured. If not configured, “NO USER” will display.
Actual UTC Date.
Actual UTC Time.
Calibration Date.
Optionally a “CAL” message and beep may appear to inform the operator of an
upcoming or past due calibration.
“CAL OK”.
A live reading display in % Gas units. The actual battery capacity will be shown
on the bar graph on the left side of the display.
The turn-on sequence will generally take 20 – 30 seconds to complete.
Test Mode Sequence:
After turning on and successfully passing an internal diagnostics self-test, the instrument test
mode sequence will be as follows:
1.
2.
3.
4.
5.
6.
7.
Conditioning Mode. A Flow Self-Test may be performed in Conditioning Mode.
Zero.
Odor Threshold Detection Level (TDL) test.
Odor Readily Detectable Level (RDL) test.
Optional Relative Odor Intensity test.
Purge Mode (configurable via OdorSeer).
Sleep (configurable via OdorSeer).
5
CHAPTER ONE
Instructions for Operation (for firmware version 1.32)
This chapter discusses the proper steps to safely operate the ODORATOR 2. Also included are
procedures for periodic testing and identification of the ODORATOR 2’s controls.
WARNING:
DURING OPERATION, KEEP THE ODORATOR 2 AWAY FROM OPEN FLAMES. INLET SUPPLY
SHOULD NOT EXCEED 4 PSIG AND 1/4 PSIG (7 INCHES WATER COLUMN) IS RECOMMENDED.
**NOTE** Connect the ODORATOR 2 to the gas supply with a non- absorbing, odor-free hose or
tubing such as high grade urethane, PVC or Tygon. Tygon tubing is recommended.
**NOTE** Operators of the ODORATOR 2 should be selected with due consideration to
smoking habits, colds, and other conditions of health since these factors affect the sense of
smell. It is desirable to select o p e r a t o r s with an average sense of smell in order to
obtain reasonably consistent results from the use of the ODORATOR 2.
**NOTE** See Figures 1 and 2 on pages 9 and 10 to reference the top panel layout and rear
case view for the following steps.
**NOTE** All valves must be closed and the ODORATOR 2 turned “OFF”.
Odor Threshold Level and Relative Odor Intensity Tests Procedure
1. Prior to attaching the sample hose, sniff the sample hose and verify no odor is detected. If
odor is detected replace the sample hose.
2. Connect the sample hose to the gas supply outlet valve and to the ODORATOR 2 inlet
port. Squeeze the inlet port lock to disengage while connecting or disconnecting.
3. Wake the ODORATOR 2 up by holding down the “PWR” key until the display becomes
active. After booting up, the LCD will show the present live reading which will typically be
“0.00” with no gas flowing into the instrument. If the reading is not “0.00”, verify all valves
are closed and then press the “ZERO” key to automatically zero the reading. If gas flow is
detected, “CLOSE” “VALVE” will be displayed for 5 seconds before returning to live
readings. Verify all valves are closed before repeating zeroing by again pressing the
“ZERO” key. While zeroing, the ZERO icon will flash. When complete, the new zero
reading along with the non-flashing ZERO and VIEW icons will be held in the display.
Press the “ * ” key to return to live readings.
**NOTE** Should the battery pack be changed or the LCD displays “RESET” “ZErREF”, perform
Zero Reset as stated on page 11.
6
4. Open the gas supply outlet valve and the ODORATOR 2 Flow Metering Valve fully for
about 10 seconds to purge the air out of the sample hose and condition the instrument. Do
not sniff the exhaust while conditioning.
5. It is recommended to perform a Flow Self-Test at the start of each day of testing or when a
test reading is suspect. With the Flow Metering Valve fully open, to perform a Flow SelfTest, press the “SELF TEST” key. If no gas flow is detected, “OPEN” “VALVE” and the
ERROR icon will be displayed for 5 seconds before returning to live readings. Check the
gas supply and all valves prior to repeating the Flow Self-Test by again pressing the “SELF
TEST” key. To pass Flow Self-Test the flow must be sufficient to produce a reading greater
than or equal to the calibration target value (typically 1.00 %) and then SELF TEST OK and
the reading will be displayed for 5 seconds before returning to live readings. If the Flow
Self-Test reading is less than the calibration target value the Flow Self-Test will fail ERROR and the reading will be displayed for 5 seconds before returning to live readings.
Check the gas supply and all valves prior to repeating the Flow Self-Test by again pressing
the “SELF TEST” key. It is recommended to not use the ODORATOR 2 for odor level
testing if the Flow Self-Test fails. All Flow Self-Test results are recorded. Fully close the
Flow Metering Valve after performing a Flow Self-Test, wait about 30 seconds and do not
sniff the exhaust port during a Flow Self-Test.
6. Close the Flow Metering Valve. Do not force, finger tighten only!
7. Wait about 30 seconds and then position the nose approximately 3/4 inch (20 mm) above
the exhaust port and sniff the exhaust. The exhaust must be un-odorized. If odorant is
detected, the ODORATOR 2 must not be used for odor level testing.
8. Press the “ZERO” key to automatically zero the reading. If gas flow is detected, “CLOSE”
“VALVE” will be displayed for 5 seconds before returning to live readings. Verify all valves
are closed before repeating zeroing by again pressing the “ZERO” key. While zeroing, the
ZERO icon will flash. When complete, the new zero reading along with the non-flashing
ZERO and VIEW icons will be held in the display.
9. Press the “READ” key and the LCD will show “TDL” for performing a Threshold Detection
Level (TDL) test.
10. To perform a TDL test, slowly open the Flow Metering Valve counter-clockwise by 1/4 – ½
turn, wait about 30 seconds, position the nose approximately 3/4 inch (20 mm) above the
exhaust port and sniff the exhaust. Your upper lip may lightly touch the front edge of the
exhaust port.
11. If no odor is detected in the exhaust, repeat step 10.
**NOTE** The operator should frequently pause when sniffing for odorant by moving the
nose away from the instrument, breathing fresh air and then continue testing. This
precaution is necessary because the sense of smell fatigues rapidly during this type of
test.
12. The first faint smell of odor is called the TDL level. Considerable variation will exist
among individuals in detecting this threshold level. When detected, press the “READ” key
to record the corrected TDL reading level along with GNSS location and timestamp.
13. The LCD will show “RDL” for performing a Readily Detectable Level (RDL) test. Slowly
open the Flow Metering Valve another 1/4 – 1/2 turn, wait about 30 seconds, position the
7
nose approximately 3/4 inch (20 mm) above the exhaust port and sniff the exhaust.
14. If the exhaust does not have a readily detectable level of odor, repeat step 13. If the exhaust
has a readily detectable odor, press the “READ” key to record the corrected RDL reading
level along with GNSS location and timestamp. The display may briefly show the
RDL icon and the test reading. The Readily Detectable Level should be detectable by
the average person’s sense of smell.
15. If optionally enabled via OdorSeer Configuration, the instrument can now be used to
perform a Relative Odor Intensity (ROI) test. The LCD will display “ROI x.xx” where “ROI”
will flash and “x.xx” is the live reading. Adjust the Flow Metering Valve to obtain the predetermined target reading on the LCD. If configured via OdorSeer, the pre-determined
target reading may be viewed by pressing and holding the “VIEW” key. Upon release, the
display will return to “ROI x.xx”.
16. Wait about 30 seconds, position the nose approximately 3/4 inch (20 mm) above the
exhaust port and sniff the exhaust. Rate the relative odor intensity on a scale from 1 – 5
where the relative odor intensity is:
1 – absent,
2 – barely detectable,
3 – readily detectable,
4 – strong or
5 – very strong or obnoxious.
17. Enter the rated odor relative intensity in the instrument by using the “↑” or “↓” keys to
increment or decrement the count until the desired value is shown on the display. The
display count will change by one for each “↑” or “↓” key press and alternate between “ROI”
and the count value. For example, after 5 “↑” key presses “5 0.80” would indicate a rating
of 5 relative to a test reading of 0.80 % gas in air.
18. Press the “READ” key to record the ROI rating along with ROI target value, actual
corrected % gas concentration, GNSS location and timestamp.
**NOTE** The rating must be entered before the “READ” key will be active.
19. The display will show the RDL icon and test reading for 5 seconds. Should the RDL
reading exceed the configurable (via OdorSeer) RDL High Alarm, the display will show
“RDL” “HIGH” for 5 seconds along with an audible beep from the instrument to alert the
operator of the RDL test result. The ODORATOR 2 will now go into PURGE mode and the
display will show the PURGE icon, a flashing “ * “ and the live reading. The Flow Metering
Valve must be closed while in PURGE mode and the live reading should be “0.00”. In
PURGE mode, the last set of readings may be reviewed by pressing either the “↑” or “↓”
keys to scroll through the last ZERO, TDL, RDL and optionally ROI values. After the
PURGE mode times out the ODORATOR 2 will automatically power off and enter SLEEP
mode (“ZZZZZ” will briefly display). During PURGE mode the LCD shows a flashing
asterisk “ * ” to allow the operator to abort PURGE mode and re-enter CONDITIONING
mode for additional tests by pressing the “ * “ key. The operator may also choose to press
and hold the “PWR” key to turn the ODORATOR 2 “OFF” after sufficiently purging the flow
system by entering SLEEP mode (“ZZZZZ” will briefly display).
8
20. When testing is complete, close the gas supply outlet valve, disconnect the sample hose
from the gas supply outlet and verify the Flow Metering Valve is closed finger tight only. Do
not store the sample hose in the instrument’s case. A mesh bag attached to the handle is
included for sample hose and fittings storage.
Bluetooth
Bluetooth hardware is installed and configured but connectivity is not supported.
A future firmware and OdorSeer / OdorSeer Remote release will provide support.
**NOTE**
ODORATOR 2 Operator Controls and Connectors
Figure 1. ODORATOR 2 Top Panel Layout
1.
2.
3.
4.
5.
6.
Accessory door/pull knob
Gas inlet
Mini USB 2
Flow metering valve
LCD
Charge LEDs
7. Keypad
8. Alarm
9. GNSS antenna
10. Blower intake
11. Exhaust Port
9
Figure 2. ODORATOR 2 Rear Case View
Battery Charging
WARNING:
ONLY USE BATTERY PACK HPN 101311-0.
WARNING:
TO REDUCE THE RISK OF IGNITION OF A FLAMMABLE OR EXPLOSIVE ATMOSPHERE, THE
BATTERY PACK MUST BE CHANGED OR CHARGED ONLY IN A LOCATION KNOWN TO BE NONHAZARDOUS.
The ODORATOR 2 has an internal, rechargeable, replaceable lithium-ion battery pack that
provides power to the instrument and will usually last for three weeks before needing to be
recharged. Battery capacity is indicated on the left edge of the LCD. At about 20 % capacity
the instrument will alert the operator on the LCD with “LO BAT” and an alarm beep. The “ * “
key must be pressed to acknowledge. At about 6 % capacity the instrument will alert the
operator on the LCD with “LO BAT”, an alarm will beep and the instrument will go back to
sleep. The ODORATOR 2 must be recharged in this case prior to use.
**NOTE** In order to obtain full battery capacity, charge the battery pack when the ambient
temperature is above 50 ºF (10 ºC) and below 85 oF (30 oC). When storing the instrument or
battery pack for more than a month, leave the battery pack charged to at least 40% (three to
o
four bars), store at a room temperature of 60 - 70 F (15 – 21 oC) with less than 70% relative
humidity and set “Wakeup & record position” to “NO” (refer to the OdorSeer manual for
details).
**NOTE** The prolonged non-use of a battery inside or outside the instrument can cause the
battery’s chemistry to be irreversibly damaged leading to permanent failure of the battery pack.
It is recommended to check the battery capacity every month. It should have at least 40%
charge (three to four bars). The battery pack should not be allowed to fully discharge and then
be stored for extended periods of time. Otherwise it will shorten the lifecycle and capacity of
the battery pack significantly.
10
CAUTION:
To prevent damage to the battery pack or electrical circuits, always plug the ODORATOR 2’s
power supply into a surge-protected and conditioned outlet.
To charge the ODORATOR 2, plug the 18 Vdc power supply into an approved AC outlet and
then connect the bayonet connector to the external power connector on the rear of the case. It
will twist and lock into position. International AC cord sets are available. Verify charging by
opening the lid and observing the charge status LEDs just above the keypad. The charge
status LED states are:
1.
2.
3.
Both solid green and blinking RED – heavy charge
Solid green – light charge
Both off – fully charged (after states 1 and 2).
Battery Pack Replacement
When the battery pack wears out or the need arises to replace the battery pack, do so by:
1.
2.
3.
4.
5.
6.
7.
8.
9.
Turn the ODORATOR 2 “OFF”.
Raise the accessories door by pulling up on the knob.
Loosen the two thumbscrews on the battery cover.
Pull the top of the cover slightly out, then up to remove the cover.
Squeeze the cable connector’s lock to disengage and unplug the battery from its
extension cable.
Plug in the new battery pack. The instrument will boot-up. Turn the
ODORATOR 2 “OFF”.
Set the new battery pack in the cover and tuck the wiring in between the pack
and its cover.
Position the two lower tabs into their slots, push down, position the cover into
place and tighten the thumb screws finger tight.
Recharge the new battery pack prior to use.
**NOTE** When next used, ZERO MUST be reset prior to performing odor threshold or
intensity tests. Sample gas flow MUST be zero. It is recommended to disconnect the
sample line from the instrument to do so. The procedure to perform a reset or “coarse”
ZERO is:
1.
2.
3.
4.
5.
Press and hold down the “↑ “ key.
Press and hold down the “↓ “ key.
Press the “ZERO” key.
Release all 3 keys. Zero reset will be automatically performed. It may take up to
a minute or two to perform a zero reset. When completed, the ZERO icon in the
display will not be flashing and VIEW will be visible in the display.
Press “ * “ to exit and return to live readings.
11
CHAPTER TWO
Periodic Test
1. Every thirty (30) days the ODORATOR 2 should be operated with the power switch on
and while not hooked up to a gas supply.
2. Wait about 30 seconds and then position the nose approximately 3/4 inch (20 mm)
above the exhaust port and sniff the exhaust.
3. If no odor is detected, turn the ODORATOR 2 “OFF”. The ODORATOR 2 has not
absorbed the odorant and is usable.
4. If an odor is detected, turn the ODORATOR 2 “OFF” and send it to the nearest Heath
Repair Center (Regional Office) listed on page 19. The odor is an indication that the
ODORATOR 2 has absorbed the odorant and must have its internal tubing replaced
and gas flow components cleaned.
The forms on pages 15 and 16 are provided to document the Periodic Tests and are as a
courtesy only. Company procedures will define how records are kept and in what format.
Calibration
For regulatory compliance, instrument calibration and maintenance a factory
calibration is recommended every 12 but not more than 15 months from the date of the
previous factory calibration. The ODORATOR 2 will default to automatically start alerting the
operator 30 days from the actual annual calibration due date. The operator must acknowledge
the alert by pressing the “ * “ key. An OdorSeer administrator can configure an earlier date if
desired. Refer to the OdorSeer manual for more details. Only Heath factory or factory trained
personnel should perform ODORATOR 2 calibration. Factory recognized labels and seals
maintain warranty.
Refer to page 19 for Heath repair and calibration centers.
12
CHAPTER THREE
Troubleshooting Chart
Problem
“LO BAT” appears on the LCD
Probable Cause
Weak batteries
ODORATOR 2 not recognized by a
PC.
Remedy
Charge or replace battery
pack
Swap USB cable, RMA
Blower will not turn.
RMA
ERROR appears on the LCD.
LCD will not zero with gas supply line
attached to the ODORATOR 2
Odor always detected
Check setup, RMA
Metering valve open or
instrument problem
Contaminated sample hose
or flow system
Close metering valve, RMA
Change tubing, RMA
The RMA process may be found on page 18 of this manual.
Parts List
The following list specifies ODORATOR 2 parts and accessories that are available from the
factory or regional offices.
HPN 104175
104147
104189
22112110
104145
103607-0
0716725
0111004
0104146
101311-0
102555-1
104288
102458-0
ODORATOR 2, complete
Operator’s manual, ODORATOR 2
OdorSeer / OdorSeer Remote manual, ODORATOR 2
Tubing (available in various lengths), Tygon
Quick-connect, male with barb
Label, “Warning” ODORATOR 2
Regulator, external, low pressure, 250 PSI max.
Regulator, external, high pressure, 3000 PSI max.
CD, ODORATOR 2
Battery pack, 11.1V, 4.8 Ah
Battery charger, standalone
Mesh bag, ODORATOR 2
Inverter, DC to AC, 150W
13
Appendix A - Periodic Test Records
A Periodic Test should be conducted every 30 days. The procedure for this test may be found on
page 13 of this manual.
The forms on pages 15 and 16 are provided for your convenience. They should remain in the
manual and be kept in a safe location as a permanent record of periodic testing. Company
procedures will define how records are kept and in what format.
14
Periodic Test Records
Test Date
Results
Action
15
Operator Name
Periodic Test Records
Test Date
Results
Action
16
Operator Name
CHAPTER FOUR
Warranty and Warranty Repair
All instruments and products manufactured by Heath Consultants Incorporated are
warranted to be free from defects in material and workmanship for one (1) year from the
date of shipment.
Furthermore, the warranty on authorized repairs in the Houston Factory Service Center
(FSC) and other regions is ninety (90) days materials and thirty (30) days labor. This repair
warranty does not extend any other applicable warranties.
Our warranty covers only failures due to defects in materials or workmanship which occur
during normal use. It does not cover failure due to damage which occurs in shipment, unless
due to improper packing, or failures which result from accident, misuse, abuse, neglect,
mishandling, misapplication, alteration, modification, or service by anyone other than a Heath
warranty repair location.
Batteries and damage from battery leakage and all expendable items such as filters and
tubing are excluded from this warranty.
Heath’s responsibility is expressly limited to repair or replacement of any defective part,
provided the product is returned to an authorized warranty repair location, shipped prepaid,
and adequately insured. Return shipping charges and insurance will be paid by Heath
warranty expense.
We do not assume liability for indirect or consequential damage or loss of any nature in
connection with the use of any Heath product. There are no other warranties expressed,
implied, or written except as listed above.
Heath warrants only that the parts manufactured by it will be as specified and free of defects.
H eath makes no other warranties or representations of any kind whatsoever, express or
implied, and any and all implied warranties including any warranty of merchantability and
fitness for a particular purpose or use are hereby disclaimed.
17
Return Procedure (RMA)
The following steps will expedite the repair of your instrument:
1. Contact Heath Factory Service at 800-432-8487 to request a repair form. The form is
also available on-line at http://heathus.com/info-center/repair-forms/
2. Package carefully using the original shipping carton and cushions if available and
return all components including the repair form.
The repair form requests information such as complete shipping and billing addresses,
instrument or product name, model number and serial numbers. Also included will be a brief
description of the problem you are experiencing and the person and phone number to be
contacted for additional information and approvals. An RMA number will be assigned to the
return.
CORPORATE HEADQUARTERS
9030 Monroe Road
Houston, Texas 77061
Phone: 713-844-1300
Fax: 713-844-1309
www.heathus.com
FACTORY SERVICE
9030 Monroe Road
Houston, Texas 77061
Phone: 713-844-1350
Fax: 713-844-1384
www.heathus.com
[email protected]
18
SALES, CUSTOMER SERVICE AND INSTRUMENT REPAIR
National Toll Free # 1-800-HEATH-US (1-800-432-8487)
REGIONAL SALES, CUSTOMER SERVICE AND INSTRUMENT REPAIR
Eastern Region
Heath Consultants Incorporated
575 Park Way
Monongahela, PA 15063
Phone: 724-242-3145
Fax: 724-872-3206
Southwest Region
Heath Consultants Incorporated
9030 Monroe Road
Houston, TX 77061
Phone: 713-844-1300
Fax: 713-844-1309
Western Region
Heath Consultants Incorporated
30 Main Avenue, Unit 3
Sacramento, CA 95838
Phone: 916-921-5198
Fax: 916-921-5437
19
Notes:
___________________________________________________________________________
___________________________________________________________________________
___________________________________________________________________________
___________________________________________________________________________
___________________________________________________________________________
___________________________________________________________________________
___________________________________________________________________________
___________________________________________________________________________
___________________________________________________________________________
___________________________________________________________________________
___________________________________________________________________________
___________________________________________________________________________
___________________________________________________________________________
___________________________________________________________________________
___________________________________________________________________________
___________________________________________________________________________
___________________________________________________________________________
___________________________________________________________________________
___________________________________________________________________________
___________________________________________________________________________
___________________________________________________________________________
20
Heath Consultants Incorporated
9030 Monroe Road
Houston, TX 77061
Tel: 713-844-1300
www.heathus.com
Heath…Safety, Leadership, Innovation, Performance
Then, Now and Tomorrow