1
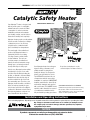
WARNING: CAREFULLY READ THE FOLLOWING INSTALLATION INFORMATION.
Models:
Catalytic Safety Heater
Your Olympian™ heater is designed and
built to provide years of comfortable,
radiant heat and economical LP Gas
consumption. In order to minimize
installation problems and maximize
your heating comfort, read all of these
instructions carefully and completely.
EFFECTIVE DATE: JANUARY 2009
Olympian heaters produce mostly radiant
heat as a result of a flameless catalytic
combustion process. Its efficiency
is high because combustion takes
place at relatively low temperatures.
The wavelength of the radiant heat
produced by Olympian heaters is
particularly effective for creating
a feeling of warm comfort similar
to solar radiation. The sun is an
excellent example of radiant heat
transfer, because it transmits energy
through space, releasing heat when
its rays strike objects and people.
Like the sun, Olympian heaters radiate
heat directly to people, floors, walls
and other objects without heating the
air first, so warmth is felt immediately.
Radiant heat is absorbed by objects
and then emitted into the air to heat
the surrounding area. Therefore, your
Olympian heater should be oriented to
direct its heat rays toward the space
to be heated, much like a floodlight is
positioned to illuminate a desired area.
Avoid placing furniture or objects in a
place that will block the heat rays.
™
Your Olympian heater has undergone
rigorous safety, performance and
quality assurance testing before
leaving the factory. It is designed to
deliver years of trouble-free service.
The INSTALLER must leave this set
of instructions with the owner after
installation is completed. (IMPORTANT:
Installers must have the owner fill out
and mail the warranty card supplied
with each heater.) The OWNER should
read this entire manual to be assured
of a satisfactory installation and to
fully understand operating procedures.
Keep these instructions in a safe,
convenient place for future reference.
CALIFORNIA PROPOSITION 65 WARNING:
Combustion by-products produced when using
this product contain chemicals known to the
State of California to cause cancer and/or birth
defects or other reproductive harm.
Installation and Operating Instructions
This is a heating appliance. Any safety screen or guard removed for servicing must be replaced prior to operating the heater.
Any changes or alterations to this heater or its controls (or attempts to clean
the catalytic pad) can result in damage, defective operation, fire, explosion,
asphyxiation and/or burns.
NOTICE
If product components are missing or damaged do not return to dealer.
Contact the manufacturer at (336) 668-7661
1
KEEP THIS MANUAL FOR FUTURE REFERENCE
IMPORTANT SAFETY PRECAUTIONS
Read thoroughly and understand all warnings, cautions
and instructions in this manual and on the heater before
installing, operating, or having your Olympian™ catalytic
heater serviced. Failure to comply with the warnings,
cautions and instructions could create conditions causing
fire, explosion, asphyxiation and/or burns, thereby causing
injury, death and/or property damage.
For assistance, consult a qualified installer, service agency,
your gas supplier, or the factory.
For your safety
If you smell gas:
1. Do not try to ignite any appliance.
2. Open windows.
3. Do not touch any electrical switch; do not use
any phone in your building.
4. Extinguish open flames.
5. Evacuate area; call gas supplier from a cell phone
or a neighbor’s phone.
6. Shut off propane at tank.
Fire, burn and explosion hazard
Do not use this heater in a space where flammable or
explosive materials, liquids, vapors or particulate dusts are
being stored, used or are otherwise present. Examples of
such materials are gasoline, naphtha, kerosene, varnishes,
lacquers, paints, mineral spirits, acetone and other thinners,
flammable gases, and chemical and grain dusts. Consult
your local fire marshal for specific hazards.
The heater consumes air from the space in which it is used.
Sufficient fresh air must be provided to assure complete
combustion of the fuel gas. Improper combustion can result
in the production of poisonous carbon monoxide, causing
danger of asphyxiation and death. Carbon monoxide is an
odorless, colorless gas. Early signs of carbon monoxide
poisoning resemble the flu, with headache, dizziness and/
or nausea. If you have these signs, heater may not be
working properly. Get fresh air at once! Have heater serviced.
Symptoms of carbon monoxide poisoning often cannot be
recognized before losing consciousness.
SAFETY INFORMATION FOR USE OF LP GAS
Propane (LP Gas) is a flammable gas that can cause fires and
explosions. In its natural state, propane is odorless and colorless.
You may not know all of the following safety precautions that can
protect both you and your family from an accident. Read them
carefully now, then review them point by point with the members
of your household. Someday, when there may not be a minute to
lose, everyone’s safety will depend on knowing exactly what to do.
If, after reading the following information, you feel you still need
more information, please contact your gas supplier.
LP Gas Warning Odor
If a gas leak happens, you should be able to smell the gas
because of the odorant put in the LP Gas. That’s your signal to go
into immediate action!
• Do not operate electric switches, light matches, or use your
phone. Don’t do anything that could ignite the gas.
• Get everyone out of the building, vehicle, trailer or area
IMMEDIATELY.
• Close all gas tank or cylinder-supply valves.
• LP Gas is heavier than air and may settle in low areas such as
basements. If you have reason to suspect a gas leak, keep out
of basements and other low areas. Stay out until firefighters
declare them to be safe.
• Use your neighbor’s phone or a cell phone to call a trained LP
Gas service person and the fire department. Even though you
may not continue to smell gas, do not turn on the gas again.
Do not re-enter the building, vehicle, trailer or area.
• Finally, let the service man and firefighters check for escaped
gas. Have them air out the area before you return. Properly
trained LP Gas service people should repair the leak, then
check and relight the gas appliance for you.
2
No Odor Detected - Odor Fade
Sometimes, for environmental or health reasons, not everyone
can smell the chemical odor put into gas. You must find out if you
can smell the odorant in propane. Smoking can decrease your
ability to smell. Also, being around an odor for a period of time
can affect your sensitivity or ability to detect that odor. Sometimes
other odors in the area mask the gas odor. People may not smell
the gas odor if their minds are on something else. Thinking about
smelling a gas odor can make it easier to detect.
The odorant in LP Gas is colorless, and it can fade under some
circumstances. For example, if there is an underground leak, the
movement of the gas through soil can filter the smell. Odorants in
LP Gas are also subject to oxidation. This fading can occur if there
is rust inside the storage tank or in iron gas pipes.
The odorant in escaped gas can absorb onto or into walls,
masonry, and other materials and fabrics in a room. This will take
some of the odorant out of the gas, reducing its odor intensity.
LP Gas may stratify in a closed area, and the odor intensity could
vary at different levels. Since it is heavier than air, there may be
more odor at lower levels. Always be sensitive to the slightest gas
odor. If you detect any smell, treat it as a serious leak. Immediately
go into action as instructed earlier.
SAFETY INFORMATION FOR USE OF LP GAS (cont.)
Some Points to Remember
• Learn to recognize the odor of LP Gas. Your local LP Gas
dealer can give you a “Scratch and Sniff” pamphlet. Use it to
find out what propane odor smells like. If you suspect that your
LP Gas has a weak or abnormal odor, call your LP Gas dealer.
• If you are not qualified, do not light pilot lights, perform
service, or make adjustments to appliances on the LP Gas
system. If you are qualified, consciously think about the odor
of LP Gas prior to and while lighting pilot lights, performing
service, or making adjustments.
• Sometimes a basement or a closed-up house has a musty
smell that can cover-up LP Gas odor. Do not try to light pilot
lights, perform service, or make adjustments in an area where
the conditions are such that you may not detect the odor if
there has been a leak of LP Gas.
• Odor fade, due to oxidation by rust or absorption on walls of
the new cylinders and tanks, is possible. Therefore, people
should be particularly alert and careful when new tanks or
cylinders are placed in service. Odor fade can occur in new
tanks, or reinstalled old tanks, if they are filled and allowed
to sit too long before refilling. Cylinders and tanks that have
been out of service for a time may develop internal rust, which
will cause odor fade. If such conditions are suspected to
exist, a periodic sniff test of the gas is advisable. If you have
any question about the gas odor, call your LP Gas dealer. A
periodic sniff test of the LP Gas is a good safety measure
under any circumstance.
• If, at any time, you do not smell the LP Gas odorant and you
think you should, assume you have a leak. Then take the same
immediate action recommended above for the occasion when
you do detect the odorized LP Gas.
• If you experience a complete “gas out” (the container is under
no vapor pressure), turn the tank valve off immediately. If the
container valve is left on, the container may draw in some air
through openings such as pilot-light orifices. If this occurs,
some new internal rusting could occur. If the valve is left
open, then treat the container as a new tank. Always be sure
your container is under vapor pressure by turning it off at
the container before it goes completely empty or by having it
refilled before it is completely empty.
SAFETY INFORMATION FOR USE OF LP GAS (cont.)
Gas Supply
The installation must conform to local codes. In the absence
of local codes, the installation must conform with American
National Standard (National Fuel Gas Code) known as NFPA
54 and ANSI Z223.1 2002 or the latest edition (Available
from the American National Standard Institute, Inc.,
(HQ) 1819 L Street NW, 6th Floor, Washington, DC 20036 Phone - 202-293-8020 / Fax - 202-293-9287 or
(OPS) 25 W 43rd Street, 4th floor, New York, NY 10036
Phone - 212-642-4900 / Fax - 212-398-0023).
The heater is designed to operate with a manifold pressure
(the gas pressure downstream from the appliance controls)
of 10.5" w.c. (0.38 psig). A gas supply pressure of 11" w.c.
(0.40 psig) minimum is required at the heater controls.
The supply line must be equipped at the cylinder with
a listed low pressure LP regulator set to deliver the
specified pressure. The high-pressure propane line
between the propane supply source and the regulator
must be equipped with an excess flow valve to limit the
escape of fuel in case of a break in the line.
Include a drip leg (trap) in the supply line. The purpose
of the drip leg is to prevent moisture and contaminates
in the gas supply from entering the heater controls. The
drip leg should be readily accessible to permit cleaning
or emptying. A drip leg should not be located where
condensation is likely to freeze. Failure to use a drip
leg can result in operational difficulties in the heater.
Operation of the heater at lower pressures can
cause improper combustion and lower operating
efficiency. Operation at higher pressure can cause
improper combustion or release of unburned gas.
The heater is furnished with a 3/8" male flare SAE fitting
for connection to the gas supply.
A union must be provided directly at the gas inlet to the
heater. A manual gas valve must be provided upstream of
the union. The heater must be isolated from the gas supply
by closing this valve during any pressure testing of the gas
supply piping system at pressure equal to or less than
0.50 psig (13.85" w.c.). The heater and its individual
manual shut-off valve must be disconnected from the gas
supply piping system during any pressure testing of the
system at test pressures in excess of 0.50 psig. (3.45 kPa)
3
INSTALLATION INSTRUCTIONS
Many codes and regulations do not allow the use
or storage of portable LP Gas cylinders larger
than 2 lb. water capacity in structures. Check with
your local regulatory authority before using your
Olympian™ heater indoors with larger cylinders.
Fuel
The heater is designed for use with HD-5 propane gas
only. Do not attempt to convert it for use with natural gas,
other LP Gases, or other fuels gaseous or liquid. Use of any
propane gas other than HD-5 may cause damage to the
catalytic heating element. THIS HEATER CANNOT BE
CONVERTED TO ANY OTHER FUEL SOURCE.
Locations
Clearances from combustible materials must be a minimum of:
• 4" from each side
• 4" from the floor (rug, tile, etc.)
• 18" from the top
• 30" from the front
• 0" from the rear
Heater Connection
The 3/8" male and female SAE flare connectors must be
checked and cleaned before assembly and then wrenched
securely for a gas-tight connection. Apply Camco Gas Leak
Detector to joints and watch for bubbles to check for gas leaks.
DO NOT USE ANY EXPOSED FLAME TO CHECK FOR LEAKS.
DO NOT OVERTIGHTEN.
Due to high temperatures, the appliance should be located
out of traffic and away from furniture and draperies. Children
and adults should be alerted to the hazard of high surface
temperature and should be kept away to avoid burns or
clothing ignition. Young children should be carefully supervised
when they are in the same room with the appliance.
The ideal location for the operation of your heater is as
low as possible to radiate heat in the frontal direction. The
heating element will throw a beam of infrared heat. Ideally,
this beam of heat should be pointing at the area, objects or
persons you wish to heat. The infrared heat beam will heat
up the objects and then become convection heat, eventually
heating the surrounding air.
If you have a question regarding the location for installation
of your heater, call Technical Support at (336) 668-7661.
Do not place clothing or other flammable material on or
near appliance. INSTALLATION AND REPAIR SHOULD BE
DONE BY A CERTIFIED LP GAS SERVICE TECHNICIAN.
The appliance should be inspected before use and at least
annually by a professional service person. More frequent
cleaning may be required due to excessive lint from
carpeting, bedding material, etc.
The heater may be installed in a variety of fixed locations.
It also may be used as a portable heater by using optional
leg stands.
Consistent with other requirements, keep the gas supply line
from the tank to the heater as short as possible.
The installation including that of the gas supply
system must conform with all applicable state and
local codes and with the National Fuel Gas Code
ANSI Z223.1.
Installation should be performed only by qualified LP Gas
service personnel familiar with non-vented gas space
heaters. See section titled Gas Supply.
4
Mounting Heater on Wall
The Olympian™ Wave 6 and Wave 8 can be hung on the wall in a
vertical or horizontal position. The Wave 3 can only be mounted
in the vertical position.
Controls must be at the bottom when the heater is
mounted vertically.
Controls must be at the right with the control knob at
the upper right corner when the heater is mounted
horizontally. This is for easy use and proper operation of the
heater.
Follow these easy mounting steps:
1. Material on which heater is to be mounted must be firm and
structurally strong.
2. Screws and plastic anchors for installation are found in the
accessories bag furnished with the heater.
3. Cut out the four corners on the Mounting Template furnished
with the heater. Use the Template to locate vertical or
horizontal mounting hole positions.
4. Drill 3/8" diameter hole in wall for plastic anchors, according
to horizontal or vertical surface installation holes on mounting
template.
5. Push plastic anchors into the holes.
6. Thread screws in the plastic anchors.
INSTALLATION INSTRUCTIONS (cont.)
7. Hang heater on the screws, and allow
to slide into place.
8. Check for clearance. If adjustment is
necessary, remove heater and loosen
or tighten screws. Repeat steps 7 and
8 until heater is firmly mounted.
NOTE: Screw head should be
approximately 5/16" from wall
to ensure tight installation.
9. Connect heater to the gas supply.
The installation must be made so that
the gas supply shut-off valve at the
heater is readily accessible.
Recessed Horizontal or
Vertical Installation
Olympian™ Wave 6 and Wave 8 Heaters may be recessed
into the wall in either the horizontal or vertical position.
Follow these easy mounting steps:
1. Purchase Chrome Recess Mounting Kit 57692 for the
Wave 6 or Kit 57695 for the Wave 8.
2. Using the Template supplied with Recess Mounting
Kit, carefully trace outline of cutout onto the area to
be removed. BE SURE THERE ARE NO ELECTRIC,
WATER OR GAS LINES IN AREA TO BE CUT OUT.
3. Cut out and remove wall section.
4. Slip the mounting ring over the face of the heater until the
distance from the front of the recess ring to the back of
the case is 1-3 ⁄4". This is the maximum recess depth.
5. Using the ring as a template, carefully drill 7/64" diameter
screw holes through the heater case at the side and top.
Be careful of internal gas lines.
6. Fasten the recess mounting ring to the heater case, using
the #6 x 3/8" lg panhead tapping screws included in the
recess mounting kit.
7. Fasten the heater and mounting ring assembly to the wall,
using #6 x 3/8" lg panhead tapping screws.
8. Connect the heater to the gas supply. The installation
must be made so that the gas supply shut-off valve at the
heater is readily accessible. (Refer to page 5 of Installation
Instructions: Heater Connection.)
Outdoor Portable use of Heater
Optional leg stands may be purchased to allow portable use
of your Olympian Wave Heater. Order #57701 Leg Stand Kit.
For most portable installations the heater is used with a
standard 20 lb. or less gas capacity LP Gas cylinder fitted
with an LP Gas hose, low pressure regulator, and cylinder
connector.
The Wave 3 Olympian Heater is not designed to be
operated in a recessed position. Such an installation
could cause overheating and the danger of fire.
Recommended
Installation
For Recommended
Installation do not
exceed 1-3/4" from
the back of the heater
to the front of the
recess ring.
1-3/4" Max.
5
OPERATING INSTRUCTIONS
Air Supply
IMPORTANT: On initial lighting from a cold start, a
slight odor or propane smell may be noticed for a short
period of time. This is normal. If odor persists, do not
continue to use heater. Shut the heater off and have it
serviced.
IMPORTANT: When operating the heater in the
horizontal position, it is harder to start than when it is in
the vertical position. Because of this, it may take longer
for complete ignition to occur, and the propane odor
may last for a longer period. If, however, it does not go
away, the heater should be shut off and serviced.
This heater consumes air from the room in which it is
installed. To assure complete combustion, an adequate
fresh-air supply to the room is necessary. It is good
practice to have at least two openings, one high and one
low. The room must have a total of at least 24 square inches
free-air opening (i.e. an opening of 4" x 6"=24 square inches).
Provide additional ventilation of at least 2 square inches for
every 1,000 BTUs per hour of input for any additional fuel
burning appliances used at the same time. If the room is
tightly sealed or insulated so that natural infiltration is low,
additional ventilation is required (see below).
After heater is turned off, wait at least 5 minutes before
relighting the heater.
If the heater is to be left OFF for a considerable period of
time, the gas supply to the heater should be turned off as
close to the gas source as possible (See illustration on
pg. 3 under Gas Supply).
In the case of wall-mounted heaters, this can be at the
manual gas valve near the heater or further upstream (See
illustration on pg. 3 under Gas Supply).
In the case of portable use, the gas should be turned off at
the LP Gas storage cylinder valve.
Do not attempt to service or clean heater while it is hot.
Failure to follow this instruction can result in painful burns.
Use only your hand to push in or turn the gas control
knob. Never use tools. If the knob will not push in or
turn by hand, don’t try to repair it; call a qualified
service technician. Force or attempted repair may
result in a fire or explosion.
Do not use this appliance if any part has been under
water. Immediately call a qualified service technician
to inspect the appliance and to replace any part of the
control system and any gas control that has been under
water.
6
Some shelter materials such as fabric tents are often
thought of as not being airtight, but do become almost
impervious to air and gas passage when wet or covered
with snow. Special precautions must be taken to provide
enough air for efficient combustion and for breathing by the
occupants (see above).
OPERATING INSTRUCTIONS (cont.)
For Your Safety Read Before Lighting!
WARNING: If you do not follow these instructions exactly,
a fire or explosion may result causing property damage,
personal injury, or loss of life.
BEFORE LIGHTING smell all around the appliance area
for gas. Be sure to smell next to the floor because LP Gas
is heavier than air and will settle to the floor.
• Only use HD-5 propane gas.
• Do not attempt to clean catalyst pad. Follow
cleaning instructions accompanying heater.
• Do not use heater if the catalytic pad becomes
torn or damaged. The heater should then be
serviced by a licensed or qualified service
person.
If you smell gas:
1. Do not try to light any appliance.
2. Open windows.
3. Do not touch any electrical switch; do not use any
phone in your building.
4. Extinguish open flames.
5. Call gas supplier from a neighbor’s phone or remotely
from a cell phone.
6. Shut off propane at tank.
Lighting and Operating Instructions
1. STOP! Read the safety instructions above.
2. Turn heat control knob to OFF.
3. Make sure gas supply is turned on and gas is available
at the heater.
4. Set heater control knob to START position and depress firmly
for 10 seconds. This will allow gas flow into gas lines and will
remove air from gas lines. You should hear gas flowing to
the heater pad. NOTE: Pressing knob and holding it for
10 seconds is only required the first time you start your
heater. Thereafter, holding the gas knob for 5 seconds
should be ample time.
5. While continuing to hold control knob in, press PIEZO
sparker button one or more times until gas-flame spreader
is lit. The flame spreader should now be on. If not, repeat
pressing PIEZO sparker button until flame spreader is lit.
6. After initial ignition occurs, keep control knob depressed
for 45 to 60 seconds maximum. By this time the safety
thermocouple should be heated enough to keep the gas
valve open.
7.
When ignition occurs you will see small blue flames dancing
over the catalyst pad face while it heats up. This flaming
is normal during start-up of the heater as this begins the
catalytic combustion process. Flaming may occur several
times during the heating up period.
8. Release the control knob, push know in slightly and
immediately turn it to HIGH heat setting. Done properly, the
control knob should rotate easily. DO NOT FORCE. The
initial small blue flames should become extinguished and the
catalytic combustion process is now taking place.
NOTE: Flame Spreader will go out immediately
upon releasing the control knob.
9. If catalytic pad ignition fails at start-up, wait five minutes,
and repeat steps 2 through 8.
10. Allow the heater to operate on HIGH for 10 minutes to assure
even heating of the catalyst pad. You may now set to Low or
Medium.
11. Adjust the heat to the desired setting by slightly depressing
and turning the control knob. Adjustments can be made
periodically as desired. There are slight “detents” or
set-points built into the control valve. DO NOT adjust in
between HI-MED-LOW knob settings.
12. To turn the heater off, turn the control knob to the OFF
position.
13. IMPORTANT: On initial lighting from a cold start, a light
flame will be evident at the heater face. This is normal
while the catalyst pad heats up. If flame continues even
in a local area after the pad heats up, do not continue
to use the heater. Shut the heater off and have it
serviced.
RELIGHTING:
If the heater goes out during normal operation, do not
attempt to relight until:
• the reason the heater quit operating has been
determined. An empty propane supply, gas line
blockage, gas leak, lack of sufficient air, regulator
failure, heater mechanical failure or catalytic element
deterioration are all possible causes.
• the heater has been allowed time to cool down
completely.
• it has been determined there is no spilled or
otherwise unburnt propane present in the surrounding
atmosphere.
7
OPERATING INSTRUCTIONS (cont.)
Red Glowing on Heating Element
The red glowing on the face of the heater (particularly noticeable in the dark) will
resemble charcoal glowing when hot. This is a normal phenomenon of catalization.
A properly operating heater will slightly “glow” on about 40% of the bottom area
of the heating element. At times, a high glow “spot” may be seen on the heating
element. This is normal. The glowing phenomenon diminishes over a period of years
usage.
CARE OF HEATER
General
Service
• Any changes or alterations to this heater or its controls (or
attempts to clean the catalytic pad) can result in damage,
compromised operation, decreased performance and /or
risk of accident.
• Alterations to the heater or its control can result in the
heater’s faulty operation, which may create hazardous
conditions.
• If the instructions in this manual are not followed exactly,
a fire or explosion many result causing property damage,
personal injury or loss of life.
Cleaning
The heater and its surroundings should be kept clean and
free of dust.
• It is recommended that the heater be kept covered at all
times when not in use. Custom-made dust covers are
available from the factory or your local dealer (see chart
below for part number). DO NOT COVER HEATER WHILE
IT IS HOT.
Wall Mounted
Portable
Wave 3
57706
57722
Wave 6
57713
57723
Wave 8
57715
57724
• The exterior of the heater can be cleaned with a damp
cloth. Avoid the direct use of any aerosol or spray-on
cleaners. Do not use abrasive material or cleaners on the
decals or control knob. Take care not to get moisture,
cleaners or solvents on the catalytic element surface.
• Never touch, vacuum or wash off the catalyst pad. This
may destroy the active catalytic platinum surface and
make the pad inoperable.
Off Season
• If the heater is to be left “OFF” for a considerable period of
time, the propane (LP) gas supply to the heater should be
turned off as close to the gas source as possible.
• In the case of portable use, the gas should be turned off
at the propane (LP) supply cylinder.
• In the case of wall-mounted heaters, there should be a
manual gas valve installed near the heater.
8
With good care and normal operating conditions, your
Olympian™ Catalytic Heater should provide many years of
warmth and comfort.
The following service tips will assist you in taking
care of the heater.
• Locate and use the heater where it is least likely to be
subject to impact, exposure to adverse weather or in
direct contact with cooking products or cleaning agents.
• The gas supply system to the heater should be checked
periodically by a qualified LP Gas service technician. If
the heater will not light, will not stay lit, or does not put
out the normal amount of heat, the very first thing to do
is check the gas supply. Find out if the gas is available
at the heater. Check LP Gas regulator to ensure correct
manifold pressure.
• Operation of the heater should be checked by a qualified
LP Gas service technician when the heater has been
out of service for a considerable period (intermittent
operation) and in any event at least once a year.
• For continued high efficiency operation, it is
recommended that the catalyst pad be replaced every
seven years, and sooner if abnormal operation of the
pad is noticed. Catalyst pad replacement must be done at
the factory or by a certified LP Gas technician.
• The heater has no moving parts except in the gas supply
and control system. Because of this, part replacement is
minimal and only a few parts can be replaced in the field.
The parts described herein can be easily replaced in the
field.
• Users should not attempt to repair or change any parts of
the heater. All repairs must be performed at the factory or
by a qualified LP Gas technician.
Piezo Electric Igniter
If no spark is obtained when the igniter button is pressed
several times, the Piezo Igniter (Part #57800) or Ceramic Spark
Plug (Part #57784) may need replacement. These parts are
available through the factory.
CARE OF HEATER (cont.)
Thermocouple
If the heater will not stay lit when the control knob is
released, the thermocouple (Part #57794) either: a) is not
connected tightly to the control valve, b) is not positioned
properly on the catalyst pad, or c) is faulty and needs
replacement. The thermocouple should produce at least
15 mv when hot, which can be checked by your gas supplier.
If there is no voltage or low voltage output and thermocouple
is properly placed and connected, it should be replaced by
your gas supplier. The thermocouple tip should be touching
the catalytic heating element.
When replacing the thermocouple, care must be taken to
place it in the exact same position as the original part.
Do not perforate or otherwise injure the catalyst pad
when replacing the thermocouple.
Return to Factory
If gas supply, igniter and thermocouple are all O.K. and the
heater still will not operate properly, it must be returned to
the factory or sent to a qualified LP Gas technician for testing
and service.
Alterations to the heater or to its controls can result in faulty
operation that may create hazardous conditions.
Catalyst Pad “Poisoning”
The catalytic process burns gas in air to produce infrared
heat without flame! The operational surface temperature of
the catalytic heating element is 720°F maximum, well below
the temperature of conventional flame type heaters, which
operate at 2,100°F. For this reason, catalytic heaters are
considerably safer than conventional flame type heaters. The
process works because the gas and air are brought together
in the presence of the platinum catalyst. Gas goes through
the pad from the back, mixes with air on the surface, and a
chemical reaction occurs to release heat without flame.
The heater has a high efficiency as long as the catalyst
material is intact. If partially or completely blocked, the
catalytic process does not work. This is called “Catalytic
Pad Poisoning.” It usually can be noticed by reduced heat,
propane odor, and/or difficulty in lighting, or inability of the
heater to light partially or completely.
Catalyst Pad deterioration can be caused by:
• Improper gas
• Impurities in the gas
• Impurities in the air
• Physical abuse
Use of improper gas: Your heater is designed to burn HD-5
propane. Use of other LP Gases such as those too high
in sulfur, propylene or other hydrocarbons may injure the
catalyst pad. Gas or sludge from the inside of old or dirty
cylinders may block out the catalyst and prevent it from
working.
Dirty or improper gas may plug the orifice and restrict the
gas supply to the catalyst pad. Symptoms of this are:
•Heater won’t light or will only light partially
•Gas odor
•Reduced heat output
These orifices cannot be replaced in the field. The
heater must be returned to the factory for service or repaired
by a qualified LP Gas technician.
Airborne Contamination: Airborne chemical compounds
such as lead from motor fuel and sulfur from industrial
processes are contaminants. Cooking oils, aerosol
compounds, vapors from machining processes, agricultural
chemicals, animal waste, airborne dirt, and alkali dust can
all cause catalyst pad deterioration.
Physical abuse: Catalyst pads can be damaged by
attempting to wash, vacuum or brush off the surface of the
pad or by physically poking a hole in the pad surface. Such
actions may remove the catalyst. Never attempt to use a pad
with a damaged or perforated surface.
If catalyst pad poisoning is known or suspected, take the
heater out of service and return it to the factory or take it to
a qualified LP Gas technician for service. Do not attempt to
operate the heater with a damaged or poisoned catalyst pad.
Determine the cause of the problem if possible. Olympian
Heaters are designed to give good service for many years
if used under proper conditions. Warranty does not cover
catalyst pad poisoning from any cause as they are beyond
the Company’s control and are not a defect in manufacturing
and workmanship.
Over a period of years, even under good operating
conditions, some of the catalyst sites may be rendered
inoperative because trace contaminants almost always are
present in the gas and in the air. If lowered heat output is
noticed, it is possibly time to have the catalyst pad replaced.
Catalyst pad poisoning can cause lowered heat output and
release of unburned or partially burned gas. Operation of
the heater in the event of catalyst poisoning may result in
the dangers of fire, explosion and/or production of carbon
monoxide. Injury, death and/or property damage can result.
The heater should be taken out of service and returned to
the factory or taken to a qualified LP Gas technician to have
the catalyst pad replaced before it is used again.
9
CARE OF HEATER (cont.)
Observe these operating precautions:
• Locate heater away from furniture and drapes and
out of traffic flow.
• Alert children and adults to the hazard of high
surface temperatures. Caution them to stay away
to avoid burns or clothing ignition.
• Carefully supervise young children when they are
in the room with the heater.
• Do not place clothing or other flammable materials
on heater.
• Do not remove safety guard from heater or operate
heater with it not in place.
Partial parts list
Description
Thermocouple......................................... 57794
Piezo Spark Ignitor.................................. 57800
Catalytic Heating Element (Wave 3)......... 57831
Catalytic Heating Element (Wave 6)......... 57836
Catalytic Heating Element (Wave 8)......... 57841
Control Knob........................................... 57781
Wave 3 Leg Stands for Portable Use........ 57701
Wave 3 Dust Cover — Wall Mount............. 57706
Wave 3 Dust Cover — Portable Use.......... 57722
Wave 6 Leg Stands for Portable Use........ 57701
Wave 6 Recess Mounting Kit – Chrome.... 57692
Wave 6 Dust Cover – Wall Mount............. 57713
Wave 6 Dust Cover – Portable Use.......... 57723
Wave 8 Leg Stands for Portable Use........ 57701
Wave 8 Recess Mounting Kit – Chrome.... 57695
Wave 8 Dust Cover – Wall Mount............. 57715
Wave 8 Dust Cover – Portable Use.......... 57724
Part No.
Note: A complete parts list, parts diagram and parts
price list may be obtained by writing directly to Camco
Mfg., Inc. Please include a stamped, self-addressed
envelope when requesting a parts list. Please specify
heater model and serial number.
The heater is designed as a non-vented, gas fired space
heater. Such heaters have many uses in residential,
agricultural, industrial, trade, service and recreational
applications. Its use is intended for purposes described
and limited by any applicable standards. Camco cannot
anticipate all of the many applications for which catalytic
heaters may be used. This heater should not be used
for purposes not in conformance with its design, where
non-vented heaters are not allowed. Such uses may be
dangerous and could create hazardous conditions. Consult
your local fire marshal or other governing authority if you
have any other questions.
For service call or write:
Camco Mfg., Inc.
Olympian Division
121 Landmark Drive
Greensboro, NC 27409
336-668-7661 ext. 231
[email protected]
www.uscatalytic.com
For installation service or operating questions call
Technical Support ext. 169
To order parts or accessories call
Customer Service ext. 231
Notes:_ ____________________________
__________________________________
__________________________________
__________________________________
__________________________________
__________________________________
__________________________________
__________________________________
__________________________________
__________________________________
__________________________________
__________________________________
__________________________________
Camco Mfg. Inc.
121 Landmark Drive / Greensboro, NC 27409
Phone: 800-334-2004 / fax: 336-668-2049
www.uscatalytic.com · [email protected]
10
Accessories for Your OLYMPIAN™ Heater
Leg Stands
Recess Kits
To make Olympian Wave heaters portable. Leg stands
fit all heaters models: Wave 3, Wave 6 and Wave 8.
Model
Part No. 57701
Part No.
Chrome Recess Kit
Wave 6
57692
Wave 8
57695
Custom Fitted Dust Covers
Low Pressure Regulator and Hose
Model
For LP Gas tank
Part No.
For wall-mount heaters
Length
Part No.
Wave 3
57706
6 ft.
57703
Wave 6
57713
8 ft.
57704
Wave 8
57715
12 ft.
57721
For portable heaters with leg stands
Wave 3
57722
Wave 6
57723
Wave 8
57724
Elbow
90° Elbow
3/8" SAE male with 3/8" SAE
female connector. Full 360°
Swivel.
Part No. 57633
OLYMPIAN™ GUARANTEE
OLYMPIAN™ GUARANTEE: Camco Mfg., Inc.
warrants the original purchaser that Olympian
Wave heaters are free of defects in manufacture
and workmanship for a period of 36 months from
the date of consumer purchase. Camco Mfg., Inc.
warranty covers the replacement of all parts (except catalytic pad) free of
charge. This warranty does not cover damages resulting from: misuse,
alteration, improper installation or improper operations. This warranty
does not cover repairs made by unauthorized persons or dealers, and
specifically excludes liability for indirect or consequential damage to
property. Warranty repairs must be made by Camco Mfg., Inc.
11
Olympian Accessories Order Form
™
Item
Part #
Price ea.
90° Elbow 3/8" SAE male with 3/8" SAE female
connector. Full 360° swivel.
57633
11.95
Low Pressure Hose with Regulator for LP tank– 6'
57703
31.95
Low Pressure Hose with Regulator for LP tank– 8'
57704
34.95
Low Pressure Hose with Regulator for LP tank–12'
57721
39.95
57701
12.95
Qty
Total
LP Gas Hoses with regulator
Leg Stands for Wave Heaters
Leg Stands to make Olympian Wave Heaters
portable. One size fits Wave 3, Wave 6 or Wave 8
Heaters
Custom-fitted Dust Covers for every Wave Heater
Cover for wall-mounted Wave 3
57706
17.75
Cover for wall-mounted Wave 6
57713
18.75
Cover for wall-mounted Wave 8
57715
19.95
Cover for portable Wave 3 with leg stands
57722
17.75
Cover for portable Wave 6 with leg stands
57723
18.75
Cover for portable Wave 8 with leg stands
57724
19.95
Chrome Recess Kit for Wave 6
57692
22.95
Chrome Recess Kit for Wave 8
57695
27.55
Recess Kits for Wave 6 and 8 Heaters
subtotal
Payment Method:
Check
MasterCard#____________________________________
VISA#__________________________________________
Card Expiration Date ______________________________
Signature _________________________________________
Ship to:
Name:____________________________________________
6.75% Sales Tax
NC Residents only
Shipping & Handling*
TOTAL
* Shipping and Handling Charges:
For orders up to $99.99, add $9.84
For orders $100 and up, add $18.94
Online Ordering Available
Order by mail, phone or fax
or online at www.uscatalytic.com
Address:___________________________________________
City:_ _____________________________________________
State / Zip:_________________________________________
Order Date:_______________________________________
E-mail:____________________________________________
Camco Mfg. Inc.
121 Landmark Drive / Greensboro, NC 27409
Phone: 800-334-2004 / fax: 336-668-2049
www.uscatalytic.com · [email protected]
Prices effective February 15, 2009. Prices subject to change without notice.
12
#109 895048