1
Before installing this unit, please read through the following points:
• Do not place cords from the AC adapter where they can be pinched or stepped on.
• Leave at least 50mm of space between the CVR16 and other objects to allow air circulation.
• Do not expose the CVR16 or Cameras to excessive heat, cold, or moisture.
• Never immerse any component in water, and do not spray cleaners of solvents on the unit. Unplug
units before cleaning. When cleaning, use a damp, lint-free cloth only.
• Do not place heavy objects on cords, or cover cords with rugs or carpet.
• Service should be handled only by qualified technicians.
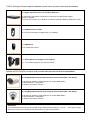
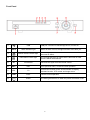
Rear Panel
WARNING
Please ensure you use the correct power
supply for each component. Plugging
either Power supply into the wrong deice
cause damage to it.
1
VIDEO IN
2
AUDIO OUT
3
AUDIO IN
4
VGA
Connect to monitor using VGA cable.
5
HDMI
Connect to Digital Monitor with supplied HDMI cable.
6
USB
Connect to USB storage device, mouse, or DVD-RW.
7
Network port
8
RS485
For RS485 PTZ Control.
9
DC12V
Connect to 12V power supply.
10
Power button
11
GROUND
Connect to HDCVI cameras, video input signal.
Connect to video output device such as sound box.
Connect to audio input device such as speaker.
Connect to LAN.
Powers on/off the CVR16.
Ground point.
3