1
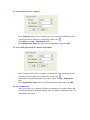
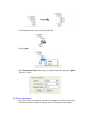
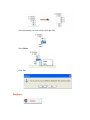
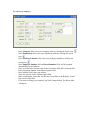
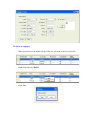
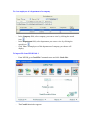
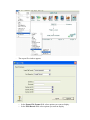
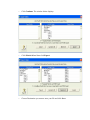
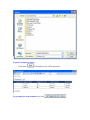
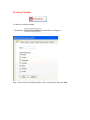
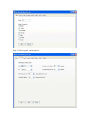
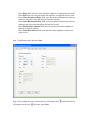
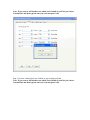
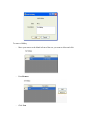
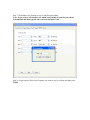
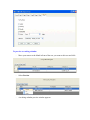
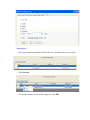
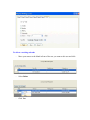
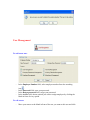
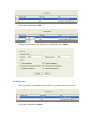
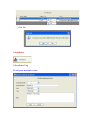
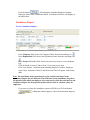
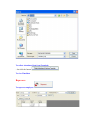
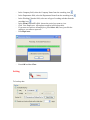
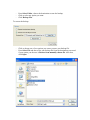
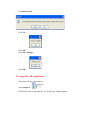
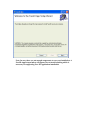
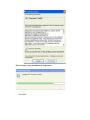
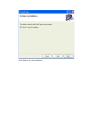
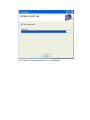
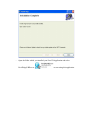
F910-Hanvon-Software-User-Manual.pdf
Company:
To add a new company:
-
In the Company Name field, type your company name
Press Add, your company name will be appeared in the “Company Management”
table above.
To edit a company:
-
Move your mouse to the blank in front of the row you want to edit user and click
-
Right click and select Edit
-
In the Company Name field, edit your company name and press Update
To delete a company:
-
Move your mouse to the blank in front of the row you want to edit user and click
-
Right click and select Delete
-
Click Yes
Department:
To add a department to a company:
-
In the Company field, select a company you want from a list containing records
-
you have previously entered by clicking the search icon.
Select Root in the Sup – Department field
In the Department Name field, type name of department and press Add
To add a child department to a mother department:
-
In the Company field, select a company you want from a list containing records
you have previously entered by clicking the search icon.
Select name of mother department you want to add in the Sup – Department
field.
In the Department Name field, type Child Department Name and press Add.
To edit a department:
- Move your mouse to a company which has a department you want to update and
click the plus button in front of company name and mother department name. All
departments will appear.
-
Select department you want to edit and right click.
-
Select Update.
-
In the Department Name field, retype your department name and press Update.
The entry is saved.
To delete a department:
- Move your mouse to a company which has a department you want to delete and
click the plus button in front of company name. All departments will appear.
-
Select department you want to delete and right click
-
Select Delete.
-
Click Yes.
Employee
To add a new employee
-
In the Company field, select your company name by clicking the search icon.
In the Department field, select your department name by clicking the search
-
icon.
In the Working Calendar field, select your working calendar by clicking the
-
search icon.
In the Employee Number field and Payroll number field: will be assigned
automatically by the software.
Enter your first name and last name in the First Name field and Last Name field.
Enter your phone number in the Phone Number field.
In the Address field, enter your address.
Type your job title in the Job Description field.
Enter your birthday, joined day and left day (if possible) in the Birthday, Joined
Day and Left Day field.
If you want to change your terminal, just click Change button. The below table
will appear.
+ If you want to add a new terminal, just choose another available
terminal in the right of table, and then click Add Terminal(s).
+ If you want to remove a registered terminal, just choose one of
registered terminals in the right of table, and then click Remove Terminal(s)
+ Click Finish.
- Click Add.
To edit an employee
-
Move your mouse to the blank in front of the row you want to edit user and click.
-
Right click and select Update
- Edit any information you want to change and press Update
To delete an employee
-
Move your mouse to the blank in front of the row you want to edit user and click.
-
Right click and select Delete
-
Click Yes.
To view employees of a department of a company
-
In the Company field, select company you want to view by clicking the search
-
icon.
In the Department field, select department you want to view by clicking the
-
search icon.
Click View. All employees of this department of company you choose will
display.
To import file from MYOB 16.0.1
-
From MYOB, go to Card File Command centre and click Cards List.
-
The Cards List window appears.
Note: Please ensure that all the Card IDs are in numbers only. FaceID does not
support other formats.
-
Next, go to File menu, select Export Data, select Cards and then select
Employee Cards
-
The export file window appears
+
+
In the Export File Format field: select options you want to display.
In the First Record field: select options you want to display.
+
Click Continue. The window below displays
+
Click Match All and then click Export.
+
Choose Destination you want to store your file and click Save.
+
-
The file you have just saved look like this:
From FaceID Application, go to Employee menu, click Import from file
, choose the file you have just saved above and press Open
+
Click View. All employees who imported from MYOB display
To export to file
- Click Export to file
and click Save.
and then choose Destination to export file
To print an employee report
-
Click Print
The employee list will be generated.
To get employee from terminal: just click
Terminal
To add a new terminal
-
In the Terminal Name field, type your terminal name.
Enter IP address in the IP Address field.
Click Add.
To edit a terminal
-
Move your mouse to the blank in front of the row you want to edit user and click.
-
Right click and select Update
-
Change name or IP address and click Update.
To delete a terminal
-
Move your mouse to the blank in front of the row you want to edit user and click
-
Right click and select Delete
-
Click Yes
Working Calendar
To add new working calendar
- Click button
The table below will appear.
Step 1: Enter name of working calendar, select working days and press Next
Step 2: Select regular working hours
-
In the Entry field, select the time which the employee is supposed to start work.
In the Exit field, select the time which the employee is supposed to leave work.
In the Grace Forward to Entry field, enter the number of minutes by which an
employee may arrive early and still get clocked in on time.
In the Grace Backward to Exit field, enter the number of minutes by which an
employee may leave late and still get clocked out on time.
In the Earliest Entry allowed field: enter the earliest time which employee is
allowed to clock an entrance.
In the Latest Exit allowed field: enter the time which employee is allowed to
clock an exit.
Step 3: Build break times and press Next
Step 4: Set working days rate. Choose hours by clicking the icon
clicking the search icon.
After that, press Next.
and select rates by
Note: If you want to add another rate which is not include in rate list, just choose
Custom Rate and then type the rate you want and press Add.
Step 5: Set non–working days rate. Similar to step 4 and press Next
Note: If you want to add another rate which is not include in rate list, just choose
Custom Rate and then type the rate you want and press Add.
Step 6: Set holidays.
To add holiday:
- Choose any day from the calendar you want to set Holiday and press Add. The
Add Holiday window appears
-
Enter description of these holidays and press Add.
To remove Holiday
-
Move your mouse to the blank in front of the row you want to delete and click
-
Press Remove.
-
Click Next
Step 7: Set holidays rate. Similar to step 4, and then press Next
Note: If you want to add another rate which is not include in rate list, just choose
Custom Rate and then type the rate you want and press Add.
Step 8: Set pay period. Select one of options you want to pay by clicking and then press
Finish.
To preview a working calendar
-
Move your mouse to the blank in front of the row you want to edit user and click
-
Select Preview
-
A working calendar preview window appears.
To edit a working calendar
* First way
-
Move your mouse to the blank in front of the row you want to edit user and click
-
Select Edit
-
Update any data you want to change from step 1 to step 8 and then press Finish
* Second way:
-
Move your mouse to the blank in front of the row you want to edit user and click
-
Select Preview
-
A working calendar preview window appears. Click Edit
-
Update any data you want to change from step 1 to step 8 and then press Finish
To delete a working calendar
-
Move your mouse to the blank in front of the row you want to edit user and click
-
Select Delete
-
Click Yes.
User Management
To add a new user:
-
In the Employee Number field, select employee number from the searching
-
icon
.
In the Password field, enter your password.
In the Retype password field, retype your password.
In the Access field, choose options you want to assign employee by clicking the
blank in front of every option.
To edit a user:
-
Move your mouse to the blank in front of the row you want to edit user and click.
-
Click right click and select Edit
-
Change your password or any options you want and then press Update.
To delete a user:
-
Move your mouse to the blank in front of the row you want to edit user and click
-
Click right click and select Delete
-
Click Yes
Attendance
Attendance Log
To add a new attendance record
-
In the Employee Number field, enter employee number.
In the Employee Name field, enter Employee name
In the Date field, type the day you want to enter data.
In the Time field, type the time employee check in or check out.
In the Note field, just make a message you want to note.
Press Add
To view Attendance Log:
-
Go to Attendance Log.
-
In the Company field, choose the Company Name from the searching icon .
In the Department field, choose the Department Name from the searching icon.
-
In the From field and To field: choose the period you want to view Attendance
Log.
-
Press the button
. All information including Employee Number,
Employee Name, Date, Attendance Detail, Total Hours and Note will display in
the table below.
Attendance Report
To view Attendance Report
-
In the Company field, choose the Company Name from the searching icon.
In the Department field, choose the Department Name from the searching icon.
-
In the From field and To field: choose the period you want to view Attendance
Log.
Click the blank in front of “Show Chart” if you want to see chart.
Press View Reports. All information including Employee Number, Employee
Name, Date, Attendance Detail, Total Hours and Chart will appear in the below
table.
-
Note: The total hours in the Attendance Log site and the total hours in the
Attendance Report site are different. The total hours in the Attendance Log site is
the period of time which an employee is in work exactly while the total hours in the
Attendance Report site is the period of time which is used to calculate salary for
employees.
-
If you want to export the Attendance report to MYOB, just Click the button
Save As
. A Save As window appears. Chose the destination and press
To collect Attendance Data from Terminals
- Just click the button
To view TimeSheet
Reprocess
To reprocess employees
-
In the Company field, select the Company Name from the searching icon
-
In the Department field, select the Department Name from the searching icon
In the Working Calendar field, select one of type of working calendar from the
-
searching icon
In the From field and To field: choose the period you want to view.
Click View Employees. All employees appear in the below table.
If you want to reprocess all employees, press Select All; if not, just click the
employee you want to reprocess.
Press Reprocess.
-
Press OK and then Close
-
Setting
To back up data
-
Press Select Folder, choose the destination to store the backup.
Click to select any option you want.
Click Backup Now
To restore the backup
-
Click to choose one of two options you want to restore your backup file.
Press Select File and then select your backup file from the destination you stored
if your option you chooses is Restore from manually chosen file. After that,
click Open
-
Press Restore Now
-
Click Yes
-
Click OK
Click Save Settings
-
Click OK
To set up Face ID Application
-
Insert your CD into your computer.
-
Select setup.exe.
-
Click double click to open this file. A Face ID App. window appears
Note: In case, there are not enough components to carry out installation. A
FaceID App Setup window will appear first to install anything which is
necessary for supporting Face ID Application installation.
Press Accept to start installation of components
-
Press Next
-
Select installation folder, choose options which install for yourself or anyone who
use your computer and then press Next
-
Click Next to start the installation.
-
Click Close after finishing installation Face ID Application.
-
Open the folder which you installed your Face ID Application and select
FaceIDAppVBEta.exe
to start using this application.