1
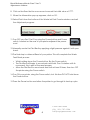
Quick Reference Guide
Important Adjustment Program
Utilities for Your Fast T-Jet 3
1-800-408-0040
(01) 201-797-1504
[email protected]
(User’s of Windows Vista OS- The Adjustment Program described
in here and in Chapter 7 of your User’s Manual must be run using
Windows XP SP2 specifications. Use the Vista OS Compatibility Wizard to set these parameters. The EXE file to configure is “ASPR1800_
Ver10” located in the “epson/epson11483” folder created during
program installation.)
Epson Adjustment Program
There are four Utilities that may be run to calibrate Print Head Alignment and
ensure your Fast T-Jet 3 will print the best quality images possible. In fact, should
you have banding or mis-registration issues, these utilities may solve the problem
without the need for a strong Head Cleaning. Try these first!
These Utilities are accessed through the Epson Adjustment Program software
that is available for download from the Support section of
http://support.equipmentzone.com
To run these maintenance procedures, you must install the application on the
computer to which your Fast T-Jet 3 is connected.
Getting Started
Once the application is installed, run the program
and select the Particular Adjustment Mode. A
pop-up window (Setting) will ask you to select
the Port to which your printer is connected. Scroll
through the list and select Epson Stylus Photo 1800.
This is your Fast T-Jet 3.
You will then be taken to the Main Selection
Screen. From here you will select the first Utility to
run- Head Angular Adjustment.
1
QRG- Fast T-Jet 3
Adjustment Utilities
Head Angular Adjustment
You will need to place a standard 8.5” x 11”
sheet of paper on a Shirtboard to perform this
procedure. Once the paper is loaded, press Print
and the Fast T-Jet 3 will print two groups of parallel
lines labeled Band Pass Incline 0 > > 80 and Band
Pass Incline 0 < < 80. These groups of lines will be
assigned numbers from -6 to 6. The lines to either
side of the numbered lines are marked NG and
these are not used for calibration. A third printout
labeled Head Incline will print at the bottom of the
page and will consist of seven boxes broken into horizontal line segments. The
five boxes of concern will be numbered 70 to – 70.
Examine the first group parallel lines labeled Band
Pass Incline 0 > > 80 and note which set contains
the straightest segment. If you look closely, you
will see most of the lines are slightly offset in the
middle. Note the number of the one with NO
offset and enter this in the applicable data field
by placing a checkmark in the Band box and
entering the line segment number in the box next
to the correct group name. Next, examine the
second group of lines and select the straightest
segment from that group. Enter that line’s number
in the next data field.
Place a check in the Raster Offset box and
examine the set of boxes under the heading Head
Incline. Select the set of interlocking lines that
fill the gaps between but DO NOT overlap any
line above or below it. Enter this number into the
applicable data field.
Good
Click on Input and the application will do some
calculations before placing its own data in the
fields. Once the calculations are complete, click
on Finish and you will be taken back to the main
selection screen.
Once you have entered data on this screen you must click on the
Input button FIRST and then click on Finish. If you do not follow this
sequence, or you click on any other buttons in between Input and
Finish, your data will not be stored properly and you must rerun this
calibration process.
2
QRG- Fast T-Jet 3
Adjustment Utilities
Auto Bi-Directional Adjustment
You will need to place a standard 8.5” x 11” sheet of paper on a Shirtboard
to perform this procedure. Once the paper is loaded, from the main selection
screen of the Adjustment Program, select the Auto Bi-D Adjustment routine.
On the next screen, select Perform and the routine will print automatically and
make the necessary calibrations. You will not need to input any data manually.
When the Auto Bi-Directional Adjustment procedure is complete, you MUST click
on Finish for the data to be properly stored. You will then be taken back to the
main selection screen.
PF Roller and Eject Roller Adjustments
(PF Adjustment Utility)
You will need to place a standard 8.5” x 11” sheet
of paper on a Shirtboard to perform each of these
procedures and both are run from the
PF Adjustment Utility.
Select the PF Roller Utility and press Print. A group
offset boxes will print along with 7 colored boxes at
the bottom of the page. Each set of offset boxes
will have reference numbers that may be positive,
negative or a combination of both and these are
what will be used to calibrate the PF Roller.
Carefully examine the offset boxes and note
the group with NO GAP (White space) and NO
OVERLAP (Black line) where the upper and lower
one meet. Place a check mark next to PF in the
Input & Read section and enter the number
that corresponds with the two boxes you have
selected.
To calibrate the Eject Roller, you will need to
place a clean sheet of standard 8.5” x 11” paper on the
Shirtboard and select Eject Roller and Letter for paper
size. Press the Print button.
Good
A thick line will be printed with a series of small blocks
below it. These blocks will have reference numbers that
may be positive, negative or a combination of both.
Carefully examine the blocks and select the one that
TOUCHES the long bar above it, with NO GAP or OVERLAP
between them. Place a check mark next to Eject in the
3
Bad
Quick Reference Guide- Fast T-Jet 3
Adjustment Utilities
Input & Read section and enter the number of the block you have selected into
the data field. Click on Input and then click on Finish.
You have now completed the necessary initialization procedures for your Fast
T-Jet 3. Close the Adjustment Program. Close the main selection screen and
select Quit from the program screen.
Head Cleaning Utilities
If a Head Alignment Procedure does not fix
your printing issues, you should initiate a Head
Cleaning. Additionally, if the printer has been idle
for several days, or you believe you have a clog,
a Head Cleaning may be the solution.
To execute a Head Cleaning, make sure your
printer is ON, but not printing, and all of the Red
Ink lights are off.
Load the Epson Adjustment Program and select Particular Adjustment Mode.
Select your printer and from the main selection screen choose Head Cleaning.
From the Head Cleaning window press Cleaning and follow the on-screen
instructions. A Head Cleaning will take about 45 seconds, during which time the
printer makes noise and the Power light and the Red Ink lights will flash.
You should never turn OFF the printer while the Power light is
flashing! This may damage the printer. A Head Cleaning cycle also
wipes the bottom of the head, therefore it is recommended you
initiate a Head Cleaning if you start to see drops of ink on garments
or if the Print Head comes in contact with a garment
When both the Power light and the Ink lights stop flashing, perform a Nozzle
Check. You will need a few sheets of letter size paper OR clear inkjet film for this
purpose. It is hard to see White ink on White paper when doing a Nozzle Check,
so the film is a better choice.
Good Nozzle Check
Lay the paper or film on top of the
Garment Holder, butting up against
the zero point of the bed. Next, click
on Print from the Nozzle Check section
and follow the on-screen prompts.
After the Nozzle Check Pattern has
printed, check to see if the lines have
any gaps or bands in them. If the
4
Print Head Needs Cleaning
Quick Reference Guide- Fast T-Jet 3
Adjustment Utilities
Nozzle Check Pattern has no gaps or bands, click on Finish.
If the Nozzle Check Pattern has gaps or bands, click on the Cleaning button to
clean the Print Head again.
For serious clogs you may have to run this routine several times.
Doing this will use a lot of ink but will generally clear even badly
clogged heads.
Resetting the Waste Ink Counter
You may reset the Waste Ink Counter through FastRIP if you
have downloaded Printer Package Update 4.5 for the Fast
T-Jet 3. You may also reset the Waste Ink Counter using the
Epson Adjustment program.
1. Open the Epson Adjustment Program and select
Particular Adjustment Mode.
2. The Setting window will appear. Locate your
Fast T-Jet 3 (Epson Stylus Photo 1800) and click
on OK.
3. Scroll down and select Waste Ink Pad Counter
from the Maintenance section and click on OK.
4. Within the Waste Ink Pad Counter window,
click on the Read button.
5. When the Information pop-up appears, click on OK.
6. The Waste Ink Pad Counter window will still be
present. Click on the Initialization button as
shown on the right.
7. Another Information pop-up will appear,
indicating that the Waste Ink Counter has
initialized properly. Click on OK.
5
Quick Reference Guide- Fast T-Jet 3
Adjustment Utilities
8. Click on the Read button once more to record the initial value of 1777.
9. When the Information pop-up appears, click on OK.
10.Select Finish from the bottom of the Waste Ink Pad Counter window and exit
the Adjustment program.
11.Turn OFF your Fast T-Jet 3 by using the Power button and Power
switch, located on the rear of your printer adjacent the power
cord.
12.Manually center the Print Bed by applying a light pressure against it with your
hand.
13.The final step is a Manual Reset of your printer. This will complete the Waste
Tank Reset process.
▪▪
▪▪
▪▪
While holding down the Power button, flip the Power switch.
The Print Bed will begin to move back and forth. Don’t interfere with its movement, this is part of the reset process.
Allow the Print Bed to move back and forth at least 2 times, then turn OFF the printer using the Power switch.
14.Turn ON your printer, using the Power switch, but this time DO NOT hold down
the Power button.
15.Press the Power button and allow the printer to go through its start-up cycle.
6
1-800-408-0040
(01) 201-797-1504
[email protected]