1
Version 13
User Manual Windows
This document applies to Adabas D Version 13 and to all subsequent releases.
Specifications contained herein are subject to change and these changes will be reported in subsequent
release notes or new editions.
© Copyright Software AG 2004
All rights reserved.
The name Software AG and/or all Software AG product names are either trademarks or registered
trademarks of Software AG. Other company and product names mentioned herein may be trademarks of
their respective owners.
Adabas D: User Manual Windows
User Manual Windows
Table of Contents
User Manual Windows .
.
.
.
.
.
.
.
.
User Manual Windows .
.
.
.
.
.
.
.
.
Introduction .
.
.
.
.
.
.
.
.
.
.
.
Introduction
.
.
.
.
.
.
.
.
.
.
.
Connect .
.
.
.
.
.
.
.
.
.
.
.
.
Connect .
.
.
.
.
.
.
.
.
.
.
.
Establishing a Database Session
.
.
.
.
.
.
Connect With Predefined User Specifications (ADUSER)
Connect With User Specifications When Calling a Tool .
Precedence Rules of the Various Connect Procedures .
Using ADUSER .
.
.
.
.
.
.
.
.
.
Calling ADUSER .
.
.
.
.
.
.
.
.
Structure of the ADUSER Input Form
.
.
.
.
Creating the ADUSER Data in Batch Mode .
.
.
Adabas Tools: General Properties .
.
.
.
.
.
.
Adabas Tools: General Properties .
.
.
.
.
.
.
Special Call Options .
.
.
.
.
.
.
.
.
Case Sensitivity of Database Objects
.
.
.
.
.
Using Files .
.
.
.
.
.
.
.
.
.
.
File Access Errors
.
.
.
.
.
.
.
.
.
Printing from the Adabas Tools
.
.
.
.
.
.
Calling Operating System Commands .
.
.
.
.
The Built-in Editor for Load and Query .
.
.
.
.
The Key-oriented Editor
.
.
.
.
.
.
.
The Prefix Editor .
.
.
.
.
.
.
.
.
General Commands
.
.
.
.
.
.
.
.
The System Editor
.
.
.
.
.
.
.
.
.
Administration Tool Control .
.
.
.
.
.
.
.
Administration Tool Control .
.
.
.
.
.
.
.
Prerequisites on Operating System Level
.
.
.
.
Calling Control .
.
.
.
.
.
.
.
.
.
Calling Control in Batch Mode to Perform Backups .
.
Protocol Files
.
.
.
.
.
.
.
.
.
.
Loading Tool Load .
.
.
.
.
.
.
.
.
.
Loading Tool Load .
.
.
.
.
.
.
.
.
.
Calling Load .
.
.
.
.
.
.
.
.
.
.
Load Protocol File
.
.
.
.
.
.
.
.
.
Load Return Codes .
.
.
.
.
.
.
.
.
End User Tool Query
.
.
.
.
.
.
.
.
.
End User Tool Query .
.
.
.
.
.
.
.
.
Calling Query
.
.
.
.
.
.
.
.
.
.
Query Return Codes .
.
.
.
.
.
.
.
.
Adabastclsh and Adabaswish .
.
.
.
.
.
.
.
Adabastclsh and Adabaswish .
.
.
.
.
.
.
.
Programming Tool SQL-PL .
.
.
.
.
.
.
.
Programming Tool SQL-PL .
.
.
.
.
.
.
.
Call of the SQL-PL Workbench
.
.
.
.
.
.
Call of the SQL-PL Interpreter .
.
.
.
.
.
.
.
.
.
.
.
.
.
.
.
.
.
.
.
.
.
.
.
.
.
.
.
.
.
.
.
.
.
.
.
.
.
.
.
.
.
.
.
.
.
.
.
.
.
.
.
.
.
.
.
.
.
.
.
.
.
.
.
.
.
.
.
.
.
.
.
.
.
.
.
.
.
.
.
.
.
.
.
.
.
.
.
.
.
.
.
.
.
.
.
.
.
.
.
.
.
.
.
.
.
.
.
.
.
.
.
.
.
.
.
.
.
.
.
.
.
.
.
.
.
.
.
.
.
.
.
.
.
.
.
.
.
.
.
.
.
.
.
.
.
.
.
.
.
.
.
.
.
.
.
.
.
.
.
.
.
.
.
.
.
.
.
.
.
.
.
.
.
.
.
.
.
.
.
.
.
.
.
.
.
.
.
.
.
.
.
.
.
.
.
.
.
.
.
.
.
.
.
.
.
.
.
.
.
.
.
.
.
.
.
.
.
.
.
.
.
.
.
.
.
.
.
.
.
.
.
.
.
.
.
.
.
.
.
.
.
.
.
.
.
.
.
.
.
.
.
.
.
.
.
.
.
.
.
.
.
.
.
.
.
.
.
.
.
.
.
.
.
.
.
.
.
.
.
.
.
.
.
.
.
.
.
.
.
.
.
.
.
.
.
.
.
.
.
.
.
.
.
.
.
.
.
.
.
.
.
.
.
.
.
.
.
.
.
.
.
.
.
.
.
.
.
.
.
.
.
.
.
.
.
.
.
.
.
.
.
.
.
.
.
.
.
.
.
.
.
.
.
.
.
.
.
.
.
.
.
.
.
.
.
.
.
.
.
.
.
.
.
.
.
.
.
.
.
.
.
.
.
.
.
.
.
.
.
.
1
1
2
2
6
6
6
7
8
9
11
11
11
13
15
15
15
16
17
18
18
18
20
20
21
23
27
29
29
29
29
30
31
32
32
32
34
34
36
36
36
41
43
43
44
44
44
48
i
User Manual Windows
Adabas D: User Manual Windows
Call of the SQL-PL Interpreter for Applications Installation
.
.
.
.
.
Integration into the System Environment .
.
.
.
.
.
.
.
.
SQL-PL Return Codes .
.
.
.
.
.
.
.
.
.
.
.
.
.
C / C++ Precompiler .
.
.
.
.
.
.
.
.
.
.
.
.
.
.
C / C++ Precompiler
.
.
.
.
.
.
.
.
.
.
.
.
.
.
Setting the Environment Variables INCLUDE and LIB
.
.
.
.
.
.
C/C++ Precompiler Calls and Options .
.
.
.
.
.
.
.
.
.
Compiling the Precompiled C/C++ Program .
.
.
.
.
.
.
.
.
Linking the Compiled C/C++ Program .
.
.
.
.
.
.
.
.
.
Executing the Linked C/C++ Program .
.
.
.
.
.
.
.
.
.
C/C++ Precompiler Runtime Options
.
.
.
.
.
.
.
.
.
.
C/C++ Precompiler Input/Output Files .
.
.
.
.
.
.
.
.
.
Calling Operating System Commands .
.
.
.
.
.
.
.
.
.
C/C++ Precompiler Include Files .
.
.
.
.
.
.
.
.
.
.
Subsequently Integrating the C/C++ Precompilerinto the Microsoft Developer Studio
Integrating the C/C++ Precompiler into aMicrosoft Developer Studio Project
.
Cobol Precompiler .
.
.
.
.
.
.
.
.
.
.
.
.
.
.
Cobol Precompiler .
.
.
.
.
.
.
.
.
.
.
.
.
.
.
Special Features .
.
.
.
.
.
.
.
.
.
.
.
.
.
.
Cobol Precompiler Calls and Options
.
.
.
.
.
.
.
.
.
.
Compiling the Precompiled Cobol Program .
.
.
.
.
.
.
.
.
Linking the Compiled Cobol Program .
.
.
.
.
.
.
.
.
.
Executing the Linked Cobol Program
.
.
.
.
.
.
.
.
.
.
Cobol Precompiler Runtime Options
.
.
.
.
.
.
.
.
.
.
The Cobol Precompiler as a Micro Focus Workbench Tool
.
.
.
.
.
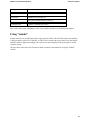
Using "nmake" .
.
.
.
.
.
.
.
.
.
.
.
.
.
.
Cobol Precompiler Input/Output Files .
.
.
.
.
.
.
.
.
.
Calling Operating System Commands .
.
.
.
.
.
.
.
.
.
Cobol Precompiler Include Files
.
.
.
.
.
.
.
.
.
.
.
The Cobol Precompiler for ACU Cobol .
.
.
.
.
.
.
.
.
.
Call Interface (ODBC)
.
.
.
.
.
.
.
.
.
.
.
.
.
.
Call Interface (ODBC) .
.
.
.
.
.
.
.
.
.
.
.
.
.
Configuring the Adabas ODBC Driver .
.
.
.
.
.
.
.
.
.
User Options .
.
.
.
.
.
.
.
.
.
.
.
.
.
.
.
Integrating ODBC into the Microsoft Developer Studio
.
.
.
.
.
.
Call Interface (JDBC)
.
.
.
.
.
.
.
.
.
.
.
.
.
.
Call Interface (JDBC) .
.
.
.
.
.
.
.
.
.
.
.
.
.
Call Interface (OCI) .
.
.
.
.
.
.
.
.
.
.
.
.
.
.
Call Interface (OCI) .
.
.
.
.
.
.
.
.
.
.
.
.
.
.
Translating an OCI Application .
.
.
.
.
.
.
.
.
.
.
.
Linking an OCI Application
.
.
.
.
.
.
.
.
.
.
.
.
Executing a Linked OCI Application
.
.
.
.
.
.
.
.
.
.
Runtime Options .
.
.
.
.
.
.
.
.
.
.
.
.
.
.
The Trace File
.
.
.
.
.
.
.
.
.
.
.
.
.
.
.
Profiling .
.
.
.
.
.
.
.
.
.
.
.
.
.
.
.
.
Special Remarks .
.
.
.
.
.
.
.
.
.
.
.
.
.
.
Integrating OCI into the Microsoft Developer Studio .
.
.
.
.
.
.
Call Interface (Perl) .
.
.
.
.
.
.
.
.
.
.
.
.
.
.
Call Interface (Perl) .
.
.
.
.
.
.
.
.
.
.
.
.
.
.
ii
.
.
.
.
.
.
.
.
.
.
.
.
.
.
.
.
.
.
.
.
.
.
.
.
.
.
.
.
.
.
.
.
.
.
.
.
.
.
.
.
.
.
.
.
.
.
.
.
.
.
.
.
.
.
.
.
.
.
.
.
.
.
.
.
.
.
.
.
.
.
.
.
.
.
.
.
.
.
.
.
.
.
.
.
.
.
.
.
.
.
.
.
.
.
.
.
.
.
.
.
.
.
.
.
.
.
.
.
.
.
.
.
.
.
.
.
.
.
.
.
.
.
.
.
.
.
.
.
.
.
.
.
.
.
.
.
.
.
.
.
.
.
.
.
.
.
.
49
.
50
.
50
.
52
.
52
.
52
.
52
.
54
.
54
.
54
.
55
.
55
.
56
.
56
.
56
.
57
.
59
.
59
.
59
.
60
.
61
.
61
.
62
.
62
.
62
.
63
.
65
.
66
.
67
.
68
.
70
.
70
.
70
.
70
.
71
.
72
.
72
.
73
.
73
.
73
.
73
.
74
.
74
.
75
.
77
.
77
.
77
.
79
.
79
.
Adabas D: User Manual Windows
Windows -Specific Features .
.
.
.
.
Windows -Specific Features .
.
.
.
.
Connecting To The Performance-Monitor
.
General Information
.
.
.
.
.
Installing Using MONINST .
.
.
.
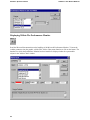
Displaying Within The Performance-Monitor
Automatically Starting The Database
.
.
Quick Administration .
.
.
.
.
.
Supporting The Microsoft Cluster Server
.
Installing The Database .
.
.
.
.
Appendix - Keyboard Layout .
.
.
.
.
Appendix - Keyboard Layout .
.
.
.
.
User Manual Windows
.
.
.
.
.
.
.
.
.
.
.
.
.
.
.
.
.
.
.
.
.
.
.
.
.
.
.
.
.
.
.
.
.
.
.
.
.
.
.
.
.
.
.
.
.
.
.
.
.
.
.
.
.
.
.
.
.
.
.
.
.
.
.
.
.
.
.
.
.
.
.
.
.
.
.
.
.
.
.
.
.
.
.
.
.
.
.
.
.
.
.
.
.
.
.
.
.
.
.
.
.
.
.
.
.
.
.
.
.
.
.
.
.
.
.
.
.
.
.
.
.
.
.
.
.
.
.
.
.
.
.
.
80
.
80
.
80
.
80
.
80
.
82
.
83
.
83
.
84
.
84
.
86
.
86
.
iii
Adabas D: User Manual Windows
User Manual Windows
User Manual Windows
Introduction
Connect
Adabas Tools: General Properties
Administration Tool Control
Loading Tool Load
End User Tool Query
Adabastclsh and Adabaswish
Programming Tool SQL-PL
C / C++ Precompiler
Cobol Precompiler
Call Interface (ODBC)
Call Interface (JDBC)
Call Interface (OCI)
Call Interface (Perl)
Windows -Specific Features
Appendix - Keyboard Layout
1
Introduction
Adabas D: User Manual Windows
Introduction
What Is the Purpose of This Manual?
The "User Manual Windows" describes operating system-specific aspects of the work with Adabas under
Windows. It contains the information needed to call and use the Adabas tools and the Adabas
programming interface under Windows.
The Adabas tools and the Adabas programming interface form as Adabas components the interface
between user and database.
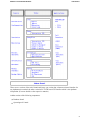
Adabas D and Its Tools
2
Adabas D: User Manual Windows
Introduction
There are two versions of the tools Control and Query: one version has a character-oriented interface for
any alphanumeric terminal; the other version has a Tcl/TK based GUI interface which is also platform
independent. (For more details see the respective manuals.)
Adabas consists of the following components:
Database kernel
Operating tool Control
3
Introduction
Adabas D: User Manual Windows
Loading tool Load
Administration tool Domain
End user tool Query
End user tool QueryPlus
Upsizing tool AccessPlus
Programming tool SQL-PL
Precompilers for C/C++ and Cobol
Call Interface (ODBC)
Call Interface (JDBC)
Call Interface (OCI)
Call Interface (Perl)
ODBC driver (Windows)
The Windows tools
QueryPlus
AccessPlus
are completely described in manuals of their own. Therefore, they are not described here.
What Are the Prerequisites ?
This manual does not enter into the particulars of the general usage of Adabas and its components. It is
meant to be a complement of the individual Adabas manuals which contain a detailed explanation of the
usage of the Adabas tools and programming interface as well as of their functionalities. It is assumed that
the reader of this manual is already familiar with the main functionality of the Adabas components used
by him.
Who Should Use This Manual?
This manual provides additional information for any user who works with Adabas under Windows
including
the database administrator or database operator who, as Control user, must perform administrative
tasks or, as Load user, must load external data or edit own data for further external processing.
the Adabas user who usually works with the end user tools or who accesses the database using
precompiled application programs.
the application programmer who uses the precompilers to construct and test Windows application
programs with embedded SQL.
4
Adabas D: User Manual Windows
Introduction
What Is the Structure of This Manual?
Each section of the "User Manual Windows" is directed to a certain kind of user.
First of all, the connect of a user to the database is described in Section "Connect". The connect procedure
is the same for almost all the Adabas components. The user specifications required for the connect can be
recorded by using the special tool ADUSER. The other Adabas components can retrieve them from there
(see Section "Connect With Predefined User Specifications (ADUSER)" and "Using ADUSER").
Section "Adabas Tools: General Properties", explains operating system specific properties that are the
same for all tools such as file handling, printing, editing etc., as well as working with the editor built into
some of the tools (see Section 3.7 3.7, "The Built-in Editor for Load and Query").
Section 4 explains the call options of the "Administration Tool Control".
Section 5 describes call and properties of the "Loading Tool Load".
Section 6 describes the "End User Tool Query" and its operating system specific functions and properties.
Section 8 describes the "Programming Tool SQL-PL" and its operating system specific functions and
properties.
The Sections "C / C++ Precompiler", "Cobol Precompiler", "Call Interface (ODBC)", "Cal Interface
(JDBC)", "Call Interface (OCI)" and "Call Interface (Perl)" are primarily directed to the application
programmer who uses one of the Adabas programming interfaces to construct application programs with
embedded SQL.
The Appendix contains the keyboard layout for the PC keyboard ("MF2" keyboard).
5
Connect
Adabas D: User Manual Windows
Connect
This chapter covers the following topics:
Establishing a Database Session
Using ADUSER
Establishing a Database Session
To establish a database session, the Adabas user must connect to the database. To be able to do so, certain
user specifications must be passed to the called Adabas component for identification purposes.
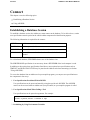
The following information is required for the connect:
USERID:
Adabas user name
PASSWORD:
Adabas password of the user
SERVERDB:
name of the Adabas database to be used
SERVERNODE: name of the network node where the addressed database is
located
For a distributed database, SERVERDB denotes one of the database sites.
The SERVERNODE specification is not necessary when a SERVERDB of the local computer is used.
In addition to the required user specifications listed above, more optional user specifications such as
TIMEOUT and ISOLATION LEVEL may be passed to the Adabas tool when connecting (see Section
"Using ADUSER").
To access the database from an Adabas tool or precompiler program, you can pass user specifications to
the component in four ways:
1. User Specifications Predefined With ADUSER
User specifications can be preset and stored by using the special tool ADUSER. The ADUSER
entries can be accessed when an Adabas tool (except Control) or a precompiler program is called.
2. User Specifications Made When Calling a Tool
User specifications can be passed as arguments. For example:
xload -u parker,secret -d testdb -n sql1
3. Predefining by Using Environment Variables
6
Adabas D: User Manual Windows
Connect
The database name can be predefined by setting the environment variable SERVERDB.
4. Connect Screen
If there are no predefined user specifications, the called Adabas tool displays the connect screen. This
does not happen when precompilers and application programs are called.
The connect screen is also displayed when the user specifications did not result in a successful
connect.
Missing or incorrect user specifications in a precompiler program have the effect that a program is
aborted and a corresponding error message is output.
User specifications can be passed to the Adabas tools using combinations of these four ways. The
combinations are described in Section "Precedence Rules of the Various Connect Procedures".
If precompilers and application programs constructed using the Adabas programming interface are called,
user specifications can be passed directly within the program. Different precedence rules apply in these
cases; they are described in the "C/C++ Precompiler" or "Cobol Precompiler" manual. In principle, the
same ways of connecting are valid for both precompilers and application programs. These principles are
explained in the following for calls to the Adabas tools.
Connect With Predefined User Specifications (ADUSER)
The simplest way to call an Adabas tool is to use predefined user specifications. These specifications must
have been predefined using the ADUSER tool.
For one operating system user, ADUSER manages up to 32 different combinations of user specifications
for establishing an Adabas session. These specifications are stored in the Registry Database.
Modifications in this database must not be done "manually" because they could lead to an inconsistent
state of the database as the result of which you had to reinstall Windows.
In this way, user specifications can be predefined for different tasks and then be used for the connect.
Thus it is possible to administer individual user specifications even for several database users who work
under different Adabas user names but on the same Windows PC.
The user receives his specifications from the database administrator who must have created the
corresponding database user. The user himself can use ADUSER to store these specifications by calling
"ADUSER". (Section "Using ADUSER" contains a detailed description of ADUSER.)
When valid predefined user specifications are used to call an Adabas tool, the operative mode of the tool
can be accessed automatically.
The syntax of the connect with ADUSER access is in general:
<component name> [-U <user option>]
<component name>
<user option>
::=
::=
adquery
| xquery
| xload
<userkey> | prompt
The Sections "C / C++ Precompiler", "Cobol Precompiler" and "Call Interface (OCI)" of this manual and
the "C/C++ Precompiler" or "Cobol Precompiler" manual describe how the predefined user specifications
are used for precompilers and precompiler programs as well as for the OCI. Applications using the ODBC
7
Connect
Adabas D: User Manual Windows
Interface do not access the ADUSER data.
Calling Without Parameter Specifications
This will be the most common format of the call.
When using this call for the end user tools, all user specifications required for the connect are taken from
the parameter combination "DEFAULT" which must have been stored using ADUSER (see Section
"Using ADUSER"). After the call, the Adabas tool is operative.
Calling With USERKEY
To use one of the other parameter combinations stored with ADUSER for a connect, the parameter
combination must be addressed using the option -U and its key name (USERKEY). The USERKEY must
be specified exactly as it is defined in ADUSER; i.e., the USERKEY is case sensitive.
Example:
Besides the usual user specifications in the parameter combination "DEFAULT" declared using
ADUSER, the user frequently works with another parameter combination, e.g., to access a database on
another computer. The user specifications required for this purpose have been stored in ADUSER with the
key "remsql". The call then runs as follows:
xquery -U remsql
The user specifications are taken from the parameter combination "remsql"; the Adabas tool is accessed
automatically.
Calling With "prompt" Option
If the connect screen is to be displayed in any case, this can be obtained by using the "-U prompt" option:
xquery -U prompt
In this case, the user specifications are preset from the ADUSER parameter combination "DEFAULT" and
the connect screen is displayed so that the user can overwrite the specifications, if necessary.
Connect With User Specifications When Calling a Tool
The user specifications are passed as arguments with the call of the Adabas tool.
The syntax of the call is in general:
8
Adabas D: User Manual Windows
Connect
<component name> <connect spec>
<component name>
|
<connect spec>
::=
adcontrol | xcontrol | xload
adquery | xquery
::=
[-u <user id>[,<password>]]
[-d <serverdb>] [-n <servernode]
[-t <session timeout>]
[-I <isolation level>]
The options -t, -I, and -n cannot be used for xcontrol.
Example:
xquery -u parker,secret -d testdb -n sql1 -t 300
All user specifications are made explicitly, and no more information from the ADUSER data is required.
The tool is accessed automatically. If the specifications for the options -u, -d, or -n are incorrect, the
connect screen is displayed where the entries can be corrected.
Precedence Rules of the Various Connect Procedures
This section only refers to the Adabas tools. For the call of precompilers and application programs, there
are special precedence rules of passing the user specifications. These rules are described in the "C/C++
Precompiler" or "Cobol Precompiler" manual.
When calling an Adabas tool, the following order of precedence applies (highest priority first):
Connect data is passed with parameters when calling the tool,
Connect data is taken from the ADUSER data,
SERVERDB is taken from the Windows environment variable SERVERDB,
i.e., each procedure of higher priority overrides the specifications of a less-priority procedure.
In detail, the following is true:
1. If the corresponding parameters for the required user specifications USERID, PASSWORD,
SERVERDB, and SERVERNODE have been set for the call of an Adabas tool, these parameters are
used to establish a database session. The operative mode of the tool can be accessed automatically.
Example:
xquery -u parker,secret -d dbtest -n sql1
The same is true if the called tool uses additional user specifications such as TIMEOUT or
ISOLATION LEVEL. DEFAULT values possibly existing from the ADUSER data or from
Windows environment variables are overridden.
9
Connect
Adabas D: User Manual Windows
2. If ADUSER specifications are available, all missing and required user specifications are taken from
the parameter combination "DEFAULT".
Examples:
xquery
-u parker,secret
xquery
-u parker
xquery
-u parker
xquery
-u parker
xquery
-d dbprod -n sql1
-d testdb
-d testdb
In all cases, at least one of the required user specifications is missing:
SERVERDB and SERVERNODE or
PASSWORD or
PASSWORD and SERVERNODE or
PASSWORD, SERVERDB, and SERVERNODE or
USERID, PASSWORD, and SERVERNODE.
The missing specifications are taken from the ADUSER parameter combination "DEFAULT". The
operative mode can be accessed automatically.
xquery
All user specifications are taken from the ADUSER parameter combination "DEFAULT". The
operative mode can be accessed automatically.
3. If a special USERKEY was specified before the explicit specification of individual user parameters,
the missing user specifications are completed from the corresponding ADUSER parameter
combination.
Examples:
xquery -U special -d dbprod
USERNAME, PASSWORD, and SERVERNODE are completed from the ADUSER parameter
combination "special".
xquery -U remsql
All user specifications are taken from the ADUSER parameter combination "remsql". The operative
mode can be accessed automatically.
4. If only the parameter SERVERDB is missing and no ADUSER specifications exist, then the value of
the environment variable SERVERDB is used to complete the user specifications.
10
Adabas D: User Manual Windows
Connect
5. If one of the required specifications cannot be found in any of these sources or if one of the
specifications is incorrect, the called Adabas tool returns the connect screen.
Using ADUSER
Calling ADUSER
Format:
aduser [-u <user id>[,<passwd>]] [-b <filename>]
ADUSER distinguishes between the first and subsequent calls. It is not possible to specify options for the
first call. For the first group of parameters, the input screen is displayed at once. For all the other calls, it
is necessary to connect with USERID and PASSWORD from the first parameter combination that
contains a non-empty USERID.
The connect can be done using the option -u in the call or using the ADUSER connect screen.
The option -b allows ADUSER to be used in batch mode (see Section "Creating the ADUSER Data in
Batch Mode").
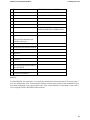
Structure of the ADUSER Input Form
Up to 32 parameter combinations can be stored. Each consists of
11
Connect
Adabas D: User Manual Windows
User Key: Key name used to access the combination.
The first parameter combination is named "DEFAULT". This name
cannot be modified.
User
Name:
Adabas user name.
Password: Adabas password of the user.
Server
DB:
Name of the Adabas database to be used. If not specified, the name will
be taken from the environment variable SERVERDB.
Server
Node:
Name of the network node where the addressed database resides. If not
specified, the local computer will be taken.
SQL
Mode:
Ensures compatibility with the SQL dialects of other manufacturers.
Possible specifications are ADABAS, ANSI or ORACLE. Default is
Adabas. This parameter is effective for precompiler programs and the
tools Load and Query.
Cachelimit: Limit for the size of a temporary data buffer (only affects application
programs with large SELECT results).
Timeout: Time interval in seconds at the end of which an inactive session of the
user is terminated: see the "Reference" manual, Section "Transactions,
<connect statement>".
Isolation
Level:
ISOLATION LEVEL for locks that affect the user (only valid for
application programs and precompilers): see the "Reference" manual,
Section "Transactions, <connect statement>".
The password is invisible and must be entered twice for security reasons (Confirm Password).
User Key, SERVERDB, and SERVERNODE are case sensitive.
User Name and Password must be enclosed in double quotation marks, as in database operation, if they
are to contain lowercase letters or special characters. Otherwise, lowercase characters are converted into
uppercase.
The SQL Mode can be specified in any notation. If not specified, the default value Adabas is valid.
Cachelimit, Timeout and Isolation Level are numeric parameters. If the respective default value is to be
used for these parameters, -1 must be specified as value. In the empty input screen, the default values are
already set for these parameters .
The current number of the group of parameters is displayed in the header line of the screen. One group is
displayed per page.
The following functions can be executed by using the available buttons:
12
Adabas D: User Manual Windows
Connect
Cancel: Leaving ADUSER without saving. Modifications previously stored with
Save are rolled back.
Clear: Removing the entries of the current combination.
Delete: Deleting an individual combination. Subsequent parameter combinations
move upward. Note: The parameter combination moved to the first place is
automatically assigned the User Key "DEFAULT". The deletion only
becomes effective if ADUSER is left with Save.
Delete Deleting all combinations.
All:
Ok:
Leaving ADUSER.
Save:
Saving the current parameter combinations.
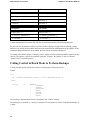
Creating the ADUSER Data in Batch Mode
The ADUSER data cannot only be created in interactive mode by entering the parameters in the input
forms, but also by using a batch file which must be specified with the ADUSER call.
The call for the batch mode is:
aduser -b <filename>
The name of the file can be chosen freely. The file consists of groups of nine lines. The first line of each
group contains the User Key, the second the User Name, the third the Password, then follow Server DB,
Server Node, SQL Mode, Timeout, Cachelimit and Isolation Level just as they are specified in the input
screen. The next group (parameter combination) begins in the next line. If optional parameters (Server
DB, Server Node, SQL Mode, ...) are not to be entered, a blank line must be at the corresponding place.
The entries in the file begin in column one without field identifier, for example:
DEFAULT
parker
secret
db1dial
sqldial
Adabas
-1
-1
home
parker
"top_secret"
db2dial
sqldial
90
1
13
Connect
Adabas D: User Manual Windows
When the option -b is used, new ADUSER data is created in any case. An ADUSER file possibly existing
will be overridden.
If the specified file contains only blanks or has the length 0, the state after the installation is restored; i.e.,
the input screen for the first parameter group appears with the next ADUSER call.
Both formats can be used to make ADUSER operative again when the user forgot the password.
14
Adabas D: User Manual Windows
Adabas Tools: General Properties
Adabas Tools: General Properties
The following two Sections "Special Call Options" and "Case Sensitivity of Database Objects" are valid
for all Adabas tools in both variants. The other sections of Section 3 only refer to the character-oriented
variants xload and xquery, not to the Tcl/Tk-based GUI tools.
This chapter covers the following topics:
Special Call Options
Case Sensitivity of Database Objects
Using Files
File Access Errors
Printing from the Adabas Tools
Calling Operating System Commands
The Built-in Editor for Load and Query
The System Editor
Special Call Options
All Adabas tools can be called from the Windows command line, the Windows Program Manager or a
Windows command file.
In addition to the form "-<option>", all call options can also be specified in the form "/<option>" which is
common under Windows.
All Adabas tools support the following special call options:
-h
displays the call options possible for the respective tool.
-V
displays the version of the tool.
A database session is not opened.
Format:
<component name> -h
|
<component name> -V
<component name>
::=
adcontrol | xcontrol | xload
|
adquery | xquery
Example:
15
Adabas Tools: General Properties
Adabas D: User Manual Windows
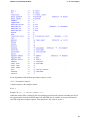
xload -h
Result:
correct use of xload is:
connect user
::=
-u <userid>,<password>
database
::=
-d <serverdb>
nodename
::=
-n <servernode>
ADUSER key
::=
-U <userkey>
timeout
::=
-t <sec>
help information
::=
-h
run file
::=
-r <filename>
batch file
::=
-b <filename>
prompt
::=
-P
SQL mode
::=
-S ADABAS | ANSI | ORACLE
Example:
xquery -V
Result:
QUERY Version 12 Date 2000-01-31
Case Sensitivity of Database Objects
As a general rule, the Adabas tools convert all input characters from lowercase letters into uppercase. As a
consequence, database objects are usually stored and then accessed with uppercase names, regardless of
the format used on input.
It is possible to bypass this conversion and explicitly give the database objects lowercase names by
enclosing the names in double quotation marks when creating or calling a database object (see the
"Reference" manual, Section "Common Elements - <token>, <special identifier>" and the manuals of the
Adabas tools).
If the names of stored database objects containing lowercase characters are to be passed as parameters
when calling an Adabas tool, these names must be enclosed in single quotation marks.
16
Adabas D: User Manual Windows
Adabas Tools: General Properties
Examples:
The call
xquery -R hotel
has the effect that Query executes the command HOTEL that was stored in Query either with the
command ==> store HOTEL or ==> store hotel. The call of the lowercase command hotel stored with
==> store "hotel" must be formatted as follows:
xquery -R ’hotel’
These examples can be applied when calling all other Adabas tools.
Using Files
Some commands within the Adabas tools have a filename as argument. This filename always refers to a
file in one of the Windows file systems (FAT or NTFS, see Windows documentation).
Examples:
put customer.dat
get data\customer.dat
export customer d:\prog\customer.app
The filename must comply with the conventions of the used file system (FAT or NTFS).
Examples of filenames in a FAT file system:
1.
2.
3.
4.
customer.frm
forms\customer.frm
d:\forms\customer.frm
%DBROOT%\test\customer.frm
Examples of filenames in an NTFS file system:
1.
2.
3.
4.
customer.frm
ownforms\customer.frm
e:\ownforms\customer.frm
’%DBROOT%\my testdata\customer.frm’
The Windows filename is specified either as a simple filename (Example 1), or as a relative path name,
i.e., starting with one or more directory names that are separated from each other and from the simple
filename by a "\" (Example 2), or as an absolute path name starting with the root directory "\" or a drive
letter (Example 3).
For simple filenames, the current working directory will be scanned. For relative path names, the specified
directories will be searched, starting with the current working directory.
17
Adabas Tools: General Properties
Adabas D: User Manual Windows
Each simple filename or directory name may have up to 8 or 12 characters (including a dot and three
extension characters) in a FAT file system, up to 255 characters in an NTFS file system. NTFS file or path
names that contain blanks must be enclosed in single quotation marks (Example 4).
Note:
The complete Windows filename which is used as an argument in an Adabas tool must not exceed 64
characters.
Note:
Environment variables can be used within filenames (Example 4). In this way, the actual filename can
obtain the maximum NTFS length.
File Access Errors
If an error occurs within functions operating on external files, either a text or a numeric code is integrated
in the error message which specifies the reason for the error (for a detailed description see the "Messages
and Codes" manual).
Printing from the Adabas Tools
Output generated by the PRINT command or the function key "PRINT" is directed to the printer that was
configured as standard printer in the Windows Print Manager.
To output the result of a DATAEXTRACT run or the protocol file to the printer in Load, the filename
"PRINTER" must be specified. The target printer used in this case is also the printer specified in the
Windows Print Manager.
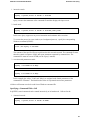
Calling Operating System Commands
In all Adabas tools, Windows commands and executable programs can be called from the command line
by prefixing an exclamation mark to them. The Windows command interpreter is called "cmd" or
"command". It is free to use any of them. In the following examples, the command interpreter is called
"<comspec>". This value must be substituted by "cmd" or "command".
Examples
18
Adabas D: User Manual Windows
Adabas Tools: General Properties
A new Windows session is always opened; i.e., command processing takes place in a separate window.
Internal commands, such as "dir", and Windows command files can only be performed if they are called
along with a Windows command interpreter (cmd/ command).
It is also possible to call only a command interpreter (cmd/command), to execute several commands using
this interpreter, and then to return to the Adabas tool by using "exit".
Commands such as "cd" are no longer effective when returning to the tool.
Syntax:
19
Adabas Tools: General Properties
Adabas D: User Manual Windows
The Built-in Editor for Load and Query
As various kinds of editors are used in different operating systems, Adabas provides two types of a
built-in editor for the Adabas tools Load and Query. One type uses key functions which follow the pattern
of the RAND editor (Unix); the other uses prefix commands similar to those of the XEDIT. You can
switch interactively between these two variants.
Both editor types support additional editor commands that can be entered in the command line.
The Key-oriented Editor
This editor is called by the command RED.
It is key-oriented, i.e., most of the functions (insert, delete, move) can be called by using special keys.
The particular assignment of these special keys is included in the Appendix.
Marking Text Areas
Before the functions can be executed, the corresponding text areas must be marked.
To execute functions that only refer to one line, position the cursor on the desired line and then press the
function key.
To mark an area (e.g., several lines, rectangles), position the cursor at the beginning of the area and press
the Mark key. Then position the cursor at the end of the area and press the desired function key.
20
Adabas D: User Manual Windows
Adabas Tools: General Properties
If the cursor is only moved vertically, the total length of lines is marked.
If the cursor is also moved horizontally, a rectangle (block) is defined that is limited by these two marks.
Inserting Lines and Blocks
To insert single blank lines, position the cursor on the corresponding line and press the INS-B key.
To generate several blank lines from the cursor position, issue the command
CMD n INS-B
where n is the number of the desired blank lines.
If an area has been marked, a corresponding number of blank lines or a rectangle of blanks is inserted.
Deleting Lines and Blocks
To delete single lines, position the cursor on the corresponding line and press the DEL-B key.
To delete several lines from the cursor position, issue the command
CMD n DEL-B
where n is the number of lines to be deleted.
If an area has been marked, a corresponding number of lines or the rectangle is deleted.
The last deleted text is stored in a temporary buffer (PICK buffer).
To restore the last deleted text, press the Put key.
Copying Lines and Blocks
To copy the line on which the cursor is placed or the marked text area, write it to a temporary buffer
(PICK buffer) by pressing the Pick key. Then copy this text to any place by pressing the Put key.
As the PICK buffer is preserved up to the next PICK command or until the DEL-B key is pressed, its
contents can be copied as often as desired.
Moving Lines and Blocks
To move lines or marked text areas, delete them from one place by pressing the DEL-B key. Then restore
them immediately afterwards to another place by pressing the Put key.
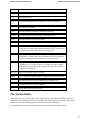
The Prefix Editor
The prefix-oriented editor version is called using the command XED.
The prefix commands are written to the area in the form marked by "====".
Prefixes may be positioned either at the left or at the right margin of the input area by using the SWITCH
command. The SWITCH command must be entered in the command line.
21
Adabas Tools: General Properties
Adabas D: User Manual Windows
The prefix commands refer to single lines or blocks of lines of the edit form. Default for the block length
n is 1.
I n After this line, n new lines are inserted and initialized with blanks.
D
n
Starting from this line, n lines are deleted.
DD Starting from this line, all lines are deleted up to the next line marked
accordingly.
> n The contents of this line are moved n columns to the right.
>> The contents of the lines from this one to the next one that is also marked with
n
>> are moved n columns to the right.
< n The contents of this line are moved n columns to the left.
<< The contents of the lines from this one to the next one that is also marked with
n
<< are moved n columns to the left.
" n This line is duplicated n times.
""
The series of lines from this one up to and including the next one that is also
marked with "" are duplicated.
""
n
The series of lines from this one up to and including the next one that is also
marked with "" is duplicated n times.
C
This line is copied after the next line marked with F or before the next line
marked with P.
CC The series of lines from this line up to and including the next one that is
marked accordingly is copied after the line marked with F or before the line
marked with P.
CC The block of lines from this line up to and including the next one that is
n
marked with CC is copied n times after the line marked with F or before the
line marked with P.
M
Like C, but deleting the original line.
MM
Like CC, but deleting the original lines.
X
n
The next n lines are excluded from the display.
XX The series of lines from this line up to and including the next one that is
similarly marked is excluded from the display.
S n The next n excluded lines are displayed.
22
Adabas D: User Manual Windows
Sn
The last n excluded lines are displayed.
/
The corresponding line is centered on the screen.
Adabas Tools: General Properties
The commands (I, D, DD, C ...) can also be entered in lowercases.
General Commands
The editor commands are entered in the command line after ===>.
All keywords can be abbreviated to three characters. They can be written in upper- or lowercase
characters.
Some commands can also be executed by using function keys. The current meaning of the function keys is
displayed on the screen.
GET Command
1. The content of an external file is copied into the input area.
Call:
GET
<file name> [ <section> ]
<section> ::= <beginning> [ <number> ]
The target position is the line in the input area on which the cursor is placed, or the first line of the
form if the cursor is not positioned within the input area.
The sequence number of the first line to be copied (default: 1) and the number of the lines to be
copied (default: as many as possible) can be optionally specified. At most 12 KB can be copied in
both cases. If the specified file exceeds this value, the rest will be truncated and a message be output.
Examples:
get clist.query
get clist.form 20
get clist 100 18
2. The content of the internal PICK buffer is copied into the input area.
Call:
23
Adabas Tools: General Properties
Adabas D: User Manual Windows
GET
Target position is the line in the input area on which the cursor is placed, or the first line of the form
if the cursor is not positioned within the input area.
Example:
get
PUT Command
1. The content of the edit form is copied into a file.
Call:
PUT <file name> [ <section> ] [ APPEND ]
<section> ::= <beginning> [ number> ]
The number of the first line to be copied (default: 1) and the number of the lines to be copied
(default: as many as possible) can be optionally specified.
Specifying APPEND ensures that text is added at the end of an already existing file rather than
overwriting the file.
Examples:
put clist.query
put clist.form 20 append
put clist 100 18 app
2. The content of the input area is copied into the internal PICK buffer.
Call:
PUT [ <number> ]
The first line copied is the first line displayed on the screen. The user may optionally specify the
number of lines to be copied (default: the lines displayed on the screen).
Examples:
put
24
Adabas D: User Manual Windows
Adabas Tools: General Properties
put 3
PRINT Command
This command sends the contents of the edit form to the print log.
Call:
PRINT
PRINT writes the content of the form into the currently opened print log. The command can also be issued
by pressing the Print key.
CLOSE Command
This command closes the print log and sends its content to the printer.
Call:
CLOSE
CLOSE terminates the currently opened print log and outputs the log to the printer.
When the tool that called the editor is left, a print log not yet printed is automatically sent to the printer.
If a PRINT command was issued by using the Print key, the print log is sent to the printer by immediately
pressing the key a second time.
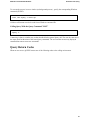
SEARCH Command
This command searches a specified character string.
Call:
[-]/ <character string> /
Starting from the first displayed line, the first occurrence of the specified character string is searched. If it
is detected, the corresponding line is highlighted on the screen and marked by the cursor.
REPLACE Command (CHANGE)
REPLACE or CHANGE replaces character strings in the edit form.
Call:
REPLACE / <char_string_old> / <char_string_new> /
[<area>]
or
CHANGE / <char_string_old> / <char_string_new> /
[<area>]
25
Adabas Tools: General Properties
<area>
<n>
<m>
Adabas D: User Manual Windows
::= <n> [<m>]
::= <lines to change>
::= <changes per column>
Default values for the area is n = 1, m = 1; i.e., starting from the first displayed line, each occurrence of
<char_string_old> is replaced by <char_string_new>.
n indicates the number of lines in which replacements are to be performed.
m indicates the maximum number of replacements per line.
Specifying * * replaces any occurrence of <char_string_old> up to the end of the file.
The SPLTJOIN Key
The Spltjoin key splits and rejoins single lines of text.
A line is split or joined from cursor position. If the cursor is placed behind the end of a line, the text
following the cursor will be appended to the current line.
Additional Commands
26
Adabas D: User Manual Windows
RESET
Adabas Tools: General Properties
clears the input area.
UP < n > scrolls towards the top of the form for n lines ( n is optional).
-<n>
same function as UP.
DOWN < scrolls towards the bottom of the form for n lines ( n is optional).
n>
+ n
same function as DOWN.
LEFT
moves the window towards the left margin of the form.
RIGHT
moves the window towards the right margin of the form.
TOP
moves the window to the top of the form.
BOTTOM moves the window to the bottom of the form.
SPLIT
If the cursor placed in the input area is positioned to the command line
by using the key CMD or Enter and the command SPLIT is entered, the
line is split at the position where the cursor was placed.
JOIN
If the cursor placed in the input area is positioned to the command line
by using the key CMD or Enter and the command JOIN is entered, the
next line is appended to the line where the cursor was placed.
WRAP ON The command is only available in the RED and only if the terminal used
is appropriate for it. If there are lines in the editor area that are longer
than the editor window, the cursor is positioned to these lines and an
error message is displayed.
WRAP OFF
disables the automatic split/join function.
WRAP
dshows whether the automatic split/join function is enabled or disabled.
=
writes the last executed editor command to the command line.
==
repeats the last executed editor command.
?
calls the HELP function of the editor.
The System Editor
Under Windows, also a system editor can be called. Default is the Windows NOTEPAD. The Set
parameters of the Adabas tool from which the editor was called can be used to call any other editor
installed on the system that supports the same call syntax as the NOTEPAD.
In Load and Query, the defined system editor can be used instead of the built-in editor.
27
Adabas Tools: General Properties
Adabas D: User Manual Windows
Entering the command "sysed" in the command line of the built-in editor switches to the selected system
editor, passing the contents of the edit form to it. Modifications to the contents must be saved within the
system editor, if they are to be kept when returning to the Adabas tool.
To transfer the editor contents, a file is generated which will be deleted after having returned to the
built-in editor.
The name ed."pid" is used for this file. "pid" denotes the string obtained from the process ID.
In Control, the system editor is only used to facilitate the reading of protocol files. For this purpose, a
copy of the corresponding protocol file is stored in the %DBROOT%/wrk/%SERVERDB%/cn_tmp
directory, then loaded into the editor, and deleted again when the editor was left.
28
Adabas D: User Manual Windows
Administration Tool Control
Administration Tool Control
Control is available in two variants. The selection is done with the call command.
Adcontrol
calls a GUI interface based on Tcl/TK. This interface does not yet provide the complete functionality of
Control (compare the "Control" manual).
xcontrol
displays a character-oriented interface for an alphanumeric terminal.
This chapter covers the following topics:
Prerequisites on Operating System Level
Calling Control
Calling Control in Batch Mode to Perform Backups
Protocol Files
Prerequisites on Operating System Level
For regular operation, the Windows user who calls Control must satisfy some conditions.
To be able to call Control, the Windows user must belong to the group of administrators and be authorized
to write into the directory that during installation was denoted as RUNDIRECTORY, because the Control
protocol files are stored there (see Section "Protocol Files").
Calling Control
Format:
29
Administration Tool Control
Adabas D: User Manual Windows
Call:
Call:
xcontrol [<connect spec>]
adcontrol.tcl [<connect spec>]
[<batch operation spec>]
[<tcl commands>]
| xcontrol -V
| adcontrol -V
| xcontrol -h
| adcontrol -h
Call options:
Call options:
<connect spec> ::=
<connect spec> ::=
[ -u <userid>[,<password> ]]
[ -u <userid>[,<password> ]]
[ -d <serverdb> ]
[ -d <serverdb> ]
Control distinguishes between the first call after an installation and the calls following thereafter.
For the first call, no parameters must be specified. Control displays an input form for defining a profile
that allows for storing all user names and passwords required for the administration of the database. If the
usernames and passwords have been entered, the main screen of Control is displayed.
For further calls without options, a connect screen is displayed which contains the options required for the
connect. The options -u and -d are described in Section "Connect", the options -V and -h in Section
"Adabas Tools: General Properties".
Calling Control in Batch Mode to Perform Backups
Control provides a batch call for the execution of backup and verifications actions.
Format:
Call:
xpl -b %DBROOT%\PGM\BACKUP <dbname> <action> BATCHSAVE <media_id>
where:
<action>
::=
SAVEDATA
|
SAVEPAGES
|
SAVELOG
|
SAVELOGSEG
|
AUTOON
|
AUTOOFF
|
UPDSTAT
|
VERIFY
The meaning of the individual actions is described in the "Control" manual.
The backup device denoted by <media_id> must have been interactively defined in the Media Manager of
Control.
30
Adabas D: User Manual Windows
Administration Tool Control
Protocol Files
Control creates a general protocol file "control.log". It creates the special protocol file "control.bkl" for all
SAVE and RESTORE operations. These files are written to the directory that was specified as the
RUNDIRECTORY during installation (see the "Control" manual).
31
Loading Tool Load
Adabas D: User Manual Windows
Loading Tool Load
This chapter covers the following topics:
Calling Load
Load Protocol File
Load Return Codes
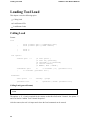
Calling Load
Format:
Call:
|
xload [<connect spec>] [<commandfile spec>]
xload [<connect spec>] [<LOAD command>]
|
|
xload -V
xload -h
Call options:
<connect spec>
::=
[-U
[-u
[-d
[-t
[-S
<user option> ]
<user id>[,<password>]]
<serverdb>] [-n <servernode]
<session timeout>]
ADABAS | ANSI | ORACLE ]
<commandfile spec>
::=
-r <filename> [-P ] [<parameter list>]
|
-b <filename> [<parameter list>]
Parameters:
<user option>
::=
<parameter list>
<userkey> | prompt
::=
<parameter> [<blank> <parameter list>]
Calling Load (general format)
xload
The options -u, -U, -d, and -n required for the connect are described in Section "Connect", the options -V
and -h in Section "Adabas Tools: General Properties".
After the connect, the tool is in input mode where the Load commands can be entered.
32
Adabas D: User Manual Windows
Loading Tool Load
Specifying a TIMEOUT Value
The SESSION_TIMEOUT value determines the time interval in seconds at the end of which the session
will be terminated if it was not active. The database administrator can determine this value for the whole
database using Control or for a single user on his creation (default: 300 seconds). The option -t allows the
user to specify a smaller value in seconds. A value larger than predefined produces an error message.
xload -t 90
The database session started with this call is terminated after 90 seconds of inactivity.
Specifying an SQLMODE
The option -S can be used to specify the SQLMODE desired for the call. If the option is not used, LOAD
works in the default mode ADABAS.
xload -S ORACLE
Specifying a Command With a Call
In Load, command files can be started interactively or in batch mode. Calls are for the
1. interactive mode:
xload -u parker,secret -d testdb -r filename
Load executes the statements of the command file and then displays the input screen. If -P
(PROMPT) was not specified, Load executes the indicated command file in NOPROMPT mode.
2. batch mode:
xload -u parker,secret -d testdb -b filename
In this case, Load suppresses any screen interaction and terminates after execution.
To execute the command file in a new window (as a background process) , specify the corresponding
Windows command (START):
start /min xload -b filename
3. execution with parameter transfer
33
Loading Tool Load
Adabas D: User Manual Windows
xload -r filename 21.00 Mayr
xload -b filename 21.00 Mayr
In this example, the values "21.00" and "Mayr" are assigned to the formal parameters of the
command file "filename". The blank has the effect of a separator between two parameters.
All of these call formats can also be used from a Windows command file.
Load Protocol File
The protocol file written by Load is a normal file named "load.prt" stored in the directory from which
Load was called. Name and path of the protocol file can be specified using the SET command. If the
protocol file is to be output to the printer specified using the Set parameters, "PRINTER" must be
specified as filename.
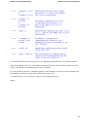
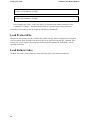
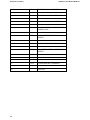
Load Return Codes
When an error occurs, Load returns one of the following codes to the calling environment:
34
Adabas D: User Manual Windows
Loading Tool Load
1: -8888
SERVERDB NOT ACCESSIBLE
2: -8000
SERVERDB MUST BE RESTARTED
3: -1021
TOO MANY USERS CONNECTED
4: -4008
UNKNOWN USER
NAME/PASSWORD COMBINATION
5: Invalid call option.
(The specified command is not
available to this tool.)
6: The protocol file cannot be created.
7: SQL error
8: Load error
9: Rows rejected by DATALOAD or
DATAUPDATE
10:
File error in a statement
Remarks:
For Load BATCH, the return codes 1 to 6 implicitly mean that the job was not started. The return codes 7
to 10 are default return codes. Load terminates with one of these codes when the Load command file does
not contain a statement to set a special return code. These values should be avoided when a return code is
set by using the STOP or RETURNCODE statement.
35
End User Tool Query
Adabas D: User Manual Windows
End User Tool Query
As mentioned at the beginning there are two variants of Query available. The selection is done by the call
command.
adquery
calls a GUI interface based on Tcl/TK. This does not yet support the full functionality of Query (compare
the manuals "Query" and "GUI Query").
xquery
displays a character-oriented interface for an alphanumeric terminal.
This chapter covers the following topics:
Calling Query
Query Return Codes
Calling Query
Format
Call:
Call:
xquery [<connect spec>]
adquery.tcl [<connect spec>]
[<commandfile spec>]
[<commandfile spec>]
| xquery [<connect spec>]
[<QUERY command spec>]
| xquery [<connect spec>]
[<QUERY LIST option>]
| xquery -V
| adquery -V
| xquery -h
| adquery -h
Call options:
Call options:
<connect spec> ::=
<connect spec> ::=
[-U <user option> ]
[-U <user option> ]
[-u <user id>
[-u <user id>[,<password>]]
36
Adabas D: User Manual Windows
End User Tool Query
[,<password>]]
[-d <serverdb>]
[-d <serverdb>]
[-n <servernode]
[-n <servernode]
[-I <isolation level>]
[-I <isolation level>]
[-t <session_timeout>]
[-t <session_timeout>]
[-s]
[-S ADABAS | ANSI | ORACLE ]
[-S ADABAS | ANSI | ORACLE ]
<commandfile spec> ::=
-r <filename>
[<parameter list>]
| -b <filename>
[<parameter list>]
<QUERY command spec> ::=
-R <stored command>
[<parameter list>]
| -B <stored command>
[<parameter list>]
| -e <object_name>,
<filename> [-A]
| -i <filename>
<QUERY LIST option> ::=
-L
Parameters:
Parameters:
<user option>
<user option>
::= <userkey> | prompt
::= <userkey> | prompt
<parameter list>
::= <parameter> <blank>
[<parameter list>]
<object_name>
::= <Suchname>*
| <stored command name>
37
End User Tool Query
Adabas D: User Manual Windows
Calling Query (general format)
adquery
xquery
The options -u, -U, -d, and -n required for the connect are described in Section "Connect", the options -V
and -h in Section "Adabas Tools: General Properties".
After the connect, the tool is in input mode where the SQL statements can be entered.
Specifying an ISOLATION LEVEL
The ISOLATION LEVEL determines the read and write locks Query must use in certain situations. If no
specification is made, ISOLATION LEVEL 0 is assumed. A description of the possible values and their
meanings is contained in the "Reference" manual.
Specifying a TIMEOUT Value
The SESSION TIMEOUT value determines the time interval in seconds at the end of which the session
will be terminated if it was not active. The database administrator can determine this value for the whole
database using Control or for a single user on his creation (default: 300 seconds). The option -t allows the
user to specify a smaller value in seconds. A value larger than predefined produces an error message.
adquery -t
90xquery -t 90
The database session started with this call is terminated after 90 seconds of inactivity
Calling Query in SELECT Mode
xquery -s
In SELECT mode, only read access to database objects is possible. This mode is valid during the whole
Query session.
Specifying an SQLMODE
The option -S can be used to specify the SQLMODE desired for the call. If the option is not used, Query
works in the default mode ADABAS.
adquery -S ANSIxquery -S ANSI
Specifying a Command File With a Call
In Query, command files can be started interactively or in batch mode. Calls are for the
38
Adabas D: User Manual Windows
End User Tool Query
1. interactive mode:
xquery -u parker,secret -d testdb -r filename
Query executes the statements of the command file and then displays the input screen.
2. batch mode:
xquery -u parker,secret -d testdb -b filename parm1 parm2
In this case, Query suppresses any screen interaction and terminates after execution.
To execute the process in a new window (as a background process) , specify the corresponding
Windows command (START):
start /min xquery -b filename
The contents of the specified file are copied into the edit area and executed. The command file must
therefore contain a sequence of SQL and report statements separated by comment lines. The
command file must not exceed 12 KB (see the "Query" manual).
3. execution with parameter transfer
xquery -r filename 21.00 Mayr
xquery -b filename 21.00 Mayr
In this example, the values "21.00" and "Mayr" are assigned to the formal parameters of the
command file "filename". The blank has the effect of a separator between two parameters.
All these call formats can also be used from a Windows command file.
Specifying a Command With a Call
In QUERY, stored commands can be started interactively or in batch mode . Calls are for the
1. )interactive mode:
xquery -u parker,secret -d testdb -R HOTEL
39
End User Tool Query
Adabas D: User Manual Windows
Query executes the specified command and then displays the input screen.
2. batch mode:
xquery -u parker,secret -d testdb -B HOTEL
In this case, Query suppresses any screen interaction and terminates after execution.
To execute the process in a new window (as background process) , specify the corresponding
Windows command (START):
start /min xquery -B HOTEL
3. execution with parameter transfer
xquery -R command1 21.00 Mayr
xquery -B command1 21.00 Mayr
In this example, the values "21.00" and "Mayr" are assigned to the formal parameters (&1, &2, ...) of
the stored command "COMMAND1". The blank has the effect of a separator between two parameters.
All these call formats can also be used from a Windows command file.
Exporting or Importing Stored Commands in Batch Mode
xquery -e HOTEL,hotel.qsc
xquery -e *,my.qsc
xquery -i hotel.qsc
In the first example, Query exports the stored command "HOTEL" into the Windows file "hotel.qsc". In
the second example, Query exports all stored commands of the user into the Windows file "my.qsc".
Query imports all stored commands recorded in the Windows file "hotel.qsc". In all cases, no screen
interaction takes place. Query terminates after execution.
Specifying "-A" (APPEND) ensures that text is added at the end of an already existing file rather than
overwriting the file.
40
Adabas D: User Manual Windows
End User Tool Query
To execute the process in a new window (as background process) , specify the corresponding Windows
command (START):
start /min xquery -i hotel.qsc
All these call formats can also be used from a Windows command file.
Calling Query With the Query Command "LIST"
xquery -L
Connecting is done in a similar way to that described for the general Query call. The user does not access
the input mode but the menu of the stored Query commands. The user can then execute any displayed
command but cannot create new commands.
Query Return Codes
When an error occurs, QUERY returns one of the following codes to the calling environment:
41
End User Tool Query
Adabas D: User Manual Windows
1:
-8888
SERVERDB NOT ACCESSIBLE
2:
-8000
SERVERDB MUST BE RESTARTED
3:
-1021
TOO MANY USERS CONNECTED
4:
-4008
UNKNOWN USER NAME/PASSWORD
COMBINATION
5:
-13503
NAME OF STORED COMMAND
MISSING
6:
-13506
STORED COMMAND NOT FOUND
7:
-13508
PARAMETER LIST TOO SHORT OR
MISSING
8:
9:
10:
42
SQL error
-13523
INVALID REPORT COMMAND
Other errors
Adabas D: User Manual Windows
Adabastclsh and Adabaswish
Adabastclsh and Adabaswish
These tools that are based on Tcl provide Adabas D with a command line oriented SQL interface. The
calls
adabastclsh
adabaswish
start a fully functional Tcl shell. A prompt appears at which all valid Tcl and SQL statements can be
entered. Adabastclsh outputs the data via the shell’s standard out, whereas Adabaswish starts a special
TK-oriented window for the output.
When called with
adabastclsh <filename>
adabaswish <filename>
the tools work in batch mode. The specified file contains Tcl statements or "Adabas Tcl statements". More
details about the syntax of these statements are included in the description of Adabastclsh and Adabaswish
in the "User Manual Internet".
43
Programming Tool SQL-PL
Adabas D: User Manual Windows
Programming Tool SQL-PL
The call of SQL-PL depends on whether the user intends
to generate a new program or to modify an existing program via the SQL-PL workbench.
to call an existing program via the SQL-PL interpreter.
to make an existing program available to the end user or to install a program, both by means of the
SQL-PL interpreter for the installation of applications.
This chapter covers the following topics:
Call of the SQL-PL Workbench
Call of the SQL-PL Interpreter
Call of the SQL-PL Interpreter for Applications Installation
SQL-PL Return Codes
Call of the SQL-PL Workbench
The SQL-PL workbench is used to create, test, administer, and execute SQL-PL programs.
Call Syntax of the SQL-PL Workbench:
44
Adabas D: User Manual Windows
Programming Tool SQL-PL
Call of the SQL-PL Workbench (general format)
xpl
After the connect the user is either in the application menu or, if he does not have any SQL-PL modules
and no call privileges for the programs of other users, in the editor.
Specifying a TIMEOUT Value
In addition to the user specifications USERID, PASSWORD, SERVERDB and SERVERNODE which
can be made for the call of an Adabas tool via call options (see Section "Connect"), a SESSION
TIMEOUT value can be specified. In this way the user can reduce the time interval at the end of which the
session will be terminated if it was not active for a certain period of time.
45
Programming Tool SQL-PL
Adabas D: User Manual Windows
xpl -t 90
The database session started via this call iserminated after 90 seconds of inactivity
Specifying the ISOLATION LEVEL
If the user wants to work in a particular ISOLATION LEVEL, then he can specify it with the SQL-PL
call. Possible are the specifications 0, 1, 2, 3, or 4 (see "SQL‑PL" manual). Example:
xpl -d testdb -I 2
Specifying a Command With a Call
When calling SQL-PL there is the possibility of starting programs either interactively or in batch mode as
well as of exporting or importing programs in batch mode.
The program has to contain a module named ’start’ in order that a program is capable of being started only
by specifying its name. If a module with such a name is not available, the name of the program to be
called as the first module has to be specified in addition to the program name.
Note: SQL-PL does not distinguish between program names in upper or lower case characters.
1. Call of a User’s own SQL-PL Program
in interactive mode:
xpl -R HBL
xpl -R HBL.start
xpl -u parker,secret -d testdb -R HBL
SQL-PL executes the program HBL and then terminates the database session.
in batch mode:
xpl -B turnover
xpl -B turnover.start
46
Adabas D: User Manual Windows
Programming Tool SQL-PL
xpl -u parker,secret -d testdb -B list.print
in this case the corresponding program is executed without any screen interaction.
Note:
Programs can only be called in batch mode, when they are suited for this mode. Programs where
input and output is made via the screen while being executed cannot be called in batch mode. If the
attempt is made to perform such a program in batch mode, a corresponding error message is output.
in batch mode as background process:
If the user wants the SQL-PL program to be executed as background process, he has to specify
the corresponding Windows command (START):
start /min xpl -B filename
2. Call of Other Users’ SQL-PL Programs
If a program is to be started which belongs to the library of another user <owner> but for which the
current user has got the call privilege, then the owner name and the start module (even if the module
is named ’start’) have to be specified in addition to the program name. Examples:
xpl -u parker,secret -R george.HBL.start or
xpl -u parker,secret -B george.TEST.start
3. Executing a Program Passing Parameters
xpl -R prog1.xa 21.00 Mayr
In this example the values ’21.00’ and ’Mayr’ are assigned to the formal parameters of the module
’xa’ of the program ’prog1’.
The blank has the effect of a separator between two parameters.
If character strings containing blanks or quotes are to be passed as parameters, they have to be
enclosed in double quotation marks. Examples:
xpl -R georg.proj1.start "Say Hallo"
47
Programming Tool SQL-PL
Adabas D: User Manual Windows
In this example a parameter with the value ’Say Hallo’ is passed.
xpl -R georg.proj1.start "Say Hallo" "" "what’s the matter"
Here three parameters are passed to the program:
1. Say Hallo
2. "", which is interpreted as NULL
3. what’s the matter
4. Export/Import of Programs
xpl -e HBL hbl.apl
The program HBL is written to an operating system file named ’hbl.apl’.
xpl -i hbl.apl
The program is transferred from the operating system file ’hbl.apl’ to the user’s own SQL-PL
program library.
All these call formats can also be used from a Windows command file.
Call of the SQL-PL Interpreter
The SQL-PL interpreter is intended especially for end users who only execute programs of other users and
do not have a program library of their own. The SQL‑PL interpreter can be called, like the
SQL-PL workbench, with call options (see 8.1,8.1 "Call of the SQL-PL Workbench").
The SQL-PL interpreter is called in the following way:
xplrun
The execution of a program <prog name> of the user’s own library can be started from a Windows
command file with the call
xplrun -R <prog name>.<module name>
If the program has a module named ’start’, then the call
48
Adabas D: User Manual Windows
Programming Tool SQL-PL
xplrun -R <prog name>
is sufficient.
If a program is to be started which belongs to the library of another user <owner> and for which the
current user has got the call privilege, then the call always runs as follows (even if the module is named
’start’):
xplrun -R <author>.<prog name>.<module name>
If all connect parameters are known to Adabas, the program is immediately executed, otherwise a connect
screen is displayed into which the connect parameters unknown to Adabas have to be entered first.
Note:
The SWITCH construct of SQL-PL allows an appropriate program menu to be defined for every end user
who can do then with a single XPLRUN call.
Call of the SQL-PL Interpreter for Applications Installation
In addition to the possibility of executing SQL-PL programs the SQL-PL interpreter for the installation of
applications provides administrative functions which are necessary to make an application accessible to a
particular user. For these tasks a workbench is available which, except for the functions for constructing
and testing a program, provides the user with the full workbench functionality, in particular with::
all show commands
all authorizing commands (PRIVILEGES, EXPORT, IMPORT, GRANT, REVOKE)
the installation command IMPORT <filename>
the SET command
VERSION (for the display of the workbench version)
HELP
The SQL-PL interpreter for the installation of applications is called in the following way:
xtplrun
XTPLRUN can be called like XPL and XPLRUN with call options (see 8.1,8.1 "Call of the SQL-PL
Workbench" and 8.2,8.2 "Call of the SQL-PL Interpreter").
49
Programming Tool SQL-PL
Adabas D: User Manual Windows
Integration into the System Environment
The workbench functions IMPORT/EXPORT do not only build bridges between the SQL-PL libraries but
also between the SQL-PL library and the Windows file system. The command
==> export customer customer.apl
writes all modules of the program ’customer’ one after the other to the Windows file ’customer.apl’. The
individual modules are separated from each other by a line which only contains the keyword
ENDMODULE.
On the other hand a Windows file having the same structure as a file generated with EXPORT can be read
into the workbench by means of the command
==> import customer.apl
Thereby each single module is implicitly checked using STORE and already existing modules with the
same name are overwritten. This feature enables the user in particular
to generate and maintain complete programs in Windows files using the familiar system editor.
to temporarily save programs in private Windows files.
to apply the mechanisms which are used to administer and file program versions (COBOL,
PASCAL) to the SQL-PL programs as well.
SQL-PL Return Codes
When an error occurs, the following codes are returned to the calling environment:
50
Adabas D: User Manual Windows
1:
-8888
SERVERDB NOT ACCESSIBLE
2:
-8000
SERVERDB MUST BE RESTARTED
3:
-1021
TOO MANY USERS CONNECTED
4:
-4008
UNKNOWN USER NAME/PASSWORD COMBINATION
5:
Invalid call option
Programming Tool SQL-PL
The specified command is not available for this component.
6:
The command is not available for standard users.
Standard users are only allowed to execute existing SQL-PL programs of other
users. They are not able to create or import any programs.
7:
Workbench command resulted in an error.
The specified command could not be terminated successfully
(e.g. translation error, file could not be opened).
8:
SQL-PL program terminated with runtime error.
When setting return codes by means of the STOP statement, the values specified here should be avoided,
if possible.
51
C / C++ Precompiler
Adabas D: User Manual Windows
C / C++ Precompiler
This chapter covers the following topics:
Setting the Environment Variables INCLUDE and LIB
C/C++ Precompiler Calls and Options
Compiling the Precompiled C/C++ Program
Linking the Compiled C/C++ Program
Executing the Linked C/C++ Program
C/C++ Precompiler Runtime Options
C/C++ Precompiler Input/Output Files
Calling Operating System Commands
C/C++ Precompiler Include Files
Subsequently Integrating the C/C++ Precompilerinto the Microsoft Developer Studio
Integrating the C/C++ Precompiler into aMicrosoft Developer Studio Project
Setting the Environment Variables INCLUDE and LIB
The Adabas precompiler libraries are stored in %DBROOT%\Lib , the include files in %DBROOT%\Incl
.
Before the precompilers can be used, the environment variables INCLUDE and LIB must be extended in
the following way:
SET INCLUDE=%INCLUDE%;%DBROOT%\Incl
SET LIB= %LIB%;%DBROOT%\Lib
C/C++ Precompiler Calls and Options
cpc <precompiler_options>
<fn> ::= file name
<fn>
<compiler_options>
The name of the source code file must be <fn>.cpc.
C/C++ precompiler options:
52
Adabas D: User Manual Windows
C / C++ Precompiler
For an explanation of the different precompiler options, see the
"C/C++ Precompiler" manual.
Compiler option:see the compiler manual
Set is: -c
Sample Call: cpc -u DBUSER,DBPWRD test
Additional connect data is fetched for the corresponding session from the connect command specified in
the program and/or from the ADUSER data. If no ADUSER data is available, all connect data must be
specified using the precompiler options. These options are only valid for session 1.
53
C / C++ Precompiler
Adabas D: User Manual Windows
Compiling the Precompiled C/C++ Program
Only the Microsoft Visual C++ compiler is supported under Windows.
cl compiler options <fn>.c
A source file saved after its precompilation can be compiled in the usual way with cl. All compiler options
are allowed. -c is the default option for the cl call implicitly made by cpc.
Linking the Compiled C/C++ Program
An Adabas application is linked with the Windows command cpclnk. The library files needed are stored
in the %DBROOT%\lib directory. Their names are output when calling cpclnk.
cpclnk <options> <main> <external objects or libs>
Options: see the linker manual
The file of the main program <main> must be specified as the first parameter after the linker options. The
executable program recieves the file name with the suffix ".exe". The other file parameters are noted
without suffix and must be object modules "*.obj", resource files "*.rbj", or libraries "*.lib" in any
sequence.
Example:
cpclnk -subsystemn:console -entry:mainCRTStartup test fn1 fn2
The main program test.exe is created from the objects test.obj, fn1.lib and fn2.obj.
Executing the Linked C/C++ Program
Options are passed to the program in the environment variable SQLOPT .
Example:
SET SQLOPT=-X -d MyDatabase
<fn>
Enter the command <fn> to execute the linked program.
54
Adabas D: User Manual Windows
C / C++ Precompiler
C/C++ Precompiler Runtime Options
For an explanation of the different precompiler options, see the
"C/C++ Precompiler" manual.
C/C++ Precompiler Input/Output Files
<fn>.pcl:
Precompiler source and error listing.
sqlerror.pcl:
Adabas error file. This file is output, when errors
occur before the file "<fn>.pcl" has been opened.
<fn>.obj:
Object module. Linked to an executable module with
other object modules and the runtime system.
<fn>.lst:
Compiler source and error listing.
<fn>.pct:
Trace file. It contains the performed SQL statements.
<fn>.c:
The precompiled application program.
<fn>.w1:
Precompiler work file.
<fn>.w2:
Precompiler work file.
<fn>.w3:
Precompiler work file.
55
C / C++ Precompiler
Adabas D: User Manual Windows
Calling Operating System Commands
Windows commands and executable programs can be called using the "exec command ..." (see Section
"Calling Operating System Commands").
Examples:
<command> ::= ’<comspec> /c displays the current directory
dir /p’
<command> ::= ’ print out ’
prints the file "out"
<command> ::= ’ pgm1 >
pgm1.lis’
starts the program "pgm1" riting the results to the
file "pgm1.lis".
C/C++ Precompiler Include Files
The precompiler generates the preprocessor directive #include %DBROOT%\incl\cpc.h. This file contains
all declarations required for the translation of a C/C++ program.
Subsequently Integrating the C/C++ Precompilerinto the Microsoft Developer Studio
To integreate the C precompiler call into the Tools menu of the Microsoft Developer Studio, proceed as
follows:
Click on the
Tools / Customize / Tools / Add
items. Enter
%DBROOT%\bin\cpc.exe
in the "Add Tool" window under Command, where %DBROOT% must be replaced with the
corresponding path; then press the OK button. The Browse button can also be used to make this entry.
Then enter
<parameter> ${FileName}
in the "Customize" window under "Arguments" and
${CurDir}
56
Adabas D: User Manual Windows
C / C++ Precompiler
under "Initial directory". Enable the "Redirect to Output Window" option in addition. Click on the Close
button and the C precompiler appears as "Cpc" in the Tools menu.
Integrating the C/C++ Precompiler into aMicrosoft Developer Studio Project
First, add the C precompiler file to the project using
Insert / Files into Project / File name
The filename
name.cpc
can be entered directly or by using the Browse button. Then click on the Add button. Use
Build / Settings / Settings For
to select the filename in the desired configuration or in both configurations and enter
cpc <parameter> -c ${InputName}
under
Custom Build / Build command(s)
Enter
${InputName}.c
under
Custom Build / Output files(s)
and click on the OK button. Then enter the name of the precompiled file
name.c
57
C / C++ Precompiler
Adabas D: User Manual Windows
under
Insert / Files into Project / File name
and click on the Add button. If this file does not yet exist, a message box appears which must be
acknowledged with "Yes". Afterwards, use
Build / Settings / Settings For
to enter the precompiler libraries. To do so, select the name of the exe file in the desired configuration or
in both configurations and insert the libraries
cpclib.lib sqlpcr.lib
at the beginning under
Link / Object / library modules
Subsequently, select the value "multithreaded" under
C/C++ / Category / Code Generation / Use run-time library
Finally, click on the OK button and the project should be complete.
58
Adabas D: User Manual Windows
Cobol Precompiler
Cobol Precompiler
This chapter covers the following topics:
Special Features
Cobol Precompiler Calls and Options
Compiling the Precompiled Cobol Program
Linking the Compiled Cobol Program
Executing the Linked Cobol Program
Cobol Precompiler Runtime Options
The Cobol Precompiler as a Micro Focus Workbench Tool
Using "nmake"
Cobol Precompiler Input/Output Files
Calling Operating System Commands
Cobol Precompiler Include Files
The Cobol Precompiler for ACU Cobol
Special Features
The Microfocus Cobol compiler is used as the default compiler. It is called with "cobol".
If the Microfocus Cobol compiler is to be called from another directory or if a Cobol compiler of another
manufacturer is used, the call must be entered in the shell variable SQLCOBCOM. This call overrides the
default call.
Example:
SQLCOBCOM="%COBDIR%\cobol"
Subroutine for Entering a Variable’s Address
For the usage of the DESCRIBE statement, a variable’s address must be entered into the SQLDA. For this
purpose, the subroutine "sqbaddr" is distributed together with the precompiler runtime system.
59
Cobol Precompiler
Adabas D: User Manual Windows
Cobol Precompiler Calls and Options
cobpc <precompiler options> <fn> <compiler options>
<fn> ::= filename
The complete name of the precompiler input file (source) must be <fn>.pco.
Cobol pecompiler options:
For an explanation of the different precompiler options, see the
"Cobol Precompiler" manual.
60
Adabas D: User Manual Windows
Cobol Precompiler
Compiler options:see the compiler manual
Sample Call:
cobpc -u DBUSER,DBPWRD test -o sqldbtst
Additional connect data is fetched for the corresponding session from the connect command specified in
the program and/or from the ADUSER data. If no ADUSER data is available, all connect data must be
specified using the precompiler options. These options are only valid for session 1.
Compiling the Precompiled Cobol Program
mfenv 32 cobol <fn>.cob,,,,Linkcount"512"
Options: see the compiler manual
The compiler call corresponds to that of MF Version 4.0.07 and can be different for any other version.
Specifying the option -c creates an output file <fn>.cob. This is the input for the Cobol compiler. It can
only be compiled using the above mentioned command.
Linking the Compiled Cobol Program
An Adabas application is linked with the Windows command cobpclnk. The library files needed are stored
in the %DBROOT%\lib directory. Their names are output when calling cobpclnk.
cobpclnk <options> <main> <external objects or libs>
Options:see the linker manual
The file name of the main program <main> must be specified as the first parameter. The executable
program receives the name of the file with the suffix ".exe". The other file parameters are noted without
suffix and must be object modules "*.obj", resource files ".rbj", or libraries "*.lib" in any sequence.
Example:
cobpclnk test fn1 fn2
There are test.obj, fn1.lib, fn2.obj.
The executable program receives the name test.exe.
61
Cobol Precompiler
Adabas D: User Manual Windows
Executing the Linked Cobol Program
Options are passed to the program in the variable SQLOPT .
SET SQLOPT=-X -d MyDatabase
<fn>
The linked program is executed by entering the filename.
Cobol Precompiler Runtime Options
CACHELIMIT
::=
-Y <cache limit>
ISOLATION LEVEL
::=
-I <isolation level>
MFETCH
::=
-B <number>
NO SELECT DIRECT FAST
::=
-f
PROFILE
::=
-R
SERVERDB
::=
-d <serverdb>
SERVERNODE
::=
-n <servernode>
TIMEOUT
::=
-t <timeout>
TRACE ALT
::=
-Y <statement count>
TRACE FILE
::=
-F <tracefn>
TRACE LONG
::=
-X
TRACE NO DATE/TIME
::=
-N
TRACE SHORT
::=
-T
TRACE TIME
::=
-L <seconds>
USER
::=
-u <usern>,<passw>
USERKEY
::=
-U <userkey>
For an explanation of the different precompiler options, see the
"Cobol Precompiler" manual.
The Cobol Precompiler as a Micro Focus Workbench Tool
Dragging the "Tool" icon from the "Template" window opens the "Tool Settings" form that can be filled
in as follows:
62
Adabas D: User Manual Windows
Name:
Adabas precompiler
Icon:
tool
Executable...:
%DBROOT%\bin\cobpc.exe
Cobol Precompiler
(The find file function can be used here.)
Command Line:
%options %filename(pco cobpc)
More information on the embedding of tools can be found in the Micro Focus Workbench manual.
Using "nmake"
Sample makefiles are provided that can be used to generate a DLL and an EXE from the corresponding
Cobol precompiler source file. If the DLL or EXE is to be created from several source files, the sample
makefiles must be adapted accordingly. The same is true when changing Cobol precompiler or Cobol
compiler options.
The base name of the source file (filename without extension) is determined by using the "PCSRC"
variable.
63
Cobol Precompiler
Adabas D: User Manual Windows
The following command sequence using the previous makefile creates an EXE:
set PCSRC=hbl
nmake /f cobpcexe.mak hbl.exe
64
Adabas D: User Manual Windows
Cobol Precompiler
The following command sequence using the previous makefile creates a DLL:
set PCSRC=hbl
nmake /f cobpcdll.mak hbl.dll
Cobol Precompiler Input/Output Files
65
Cobol Precompiler
Adabas D: User Manual Windows
<fn>.pcl: Precompiler source and error listing.
sqlerror.pcl:
Adabas error file. This file is output, when errors occur before the file
"<fn>.pcl" has been opened.
<fn>.obj: Object module. Linked to an executable module with other object
modules and the runtime system.
<fn>.lst:
Compiler source and error listing.
<fn>.pct: Trace file. It contains the performed SQL statements.
<fn>.cob: The precompiled application program.
<fn>.p1: Precompiler work file.
<fn>.w1: Precompiler work file.
<fn>.w2: Precompiler work file.
<fn>.w3: Precompiler work file.
<fn>.lp1: Precompiler work file.
<fn>.ln1: Precompiler work file.
<file_spec>:
Trace list file.
Calling Operating System Commands
Windows commands and executable programs can be called using the "exec command ..." (see Section
"Calling Operating System Commands " ).
Examples:
displays the current directory
<command> ::= ’<comspec> /c dir /p’
prints the file "out"
<command> ::= ’ print out ’
<command> ::= ’ pgm1 > pgm1.lis’
66
starts the program "pgm1" writing the
results to the file "pgm1.lis".
Adabas D: User Manual Windows
Cobol Precompiler
Cobol Precompiler Include Files
The include files are stored in the %DBROOT%\incl file directory. Their names begin with "CSQL", e.g.,
"CSQLCA". These files must not be modified because they are required for an application to run. The
following include files may also be used as copy elements by the user:
CSQLDA contains the elements of the SQLDA with 300 SQLVAR entries. It can
be used, for example, in a declaration in the following way:
01 SQLDA1.
COPY "CSQLDA".
CSQL1DA
contains the main structure of the SQLDA (without SQLVAR entries)
CSQL2DA
contains the SQLVAR elements. For example, the include files can be
used in the following way:
01 SQLDA2.
COPY "CSQL1DA".
02 SQLVAR OCCURS 10 TIMES.
COPY "CSQL2DA".
Thus the number of SQLVAR entries is defined within the program.
The following include files are used for Oracle compatibility. They contain the Oracle descriptors in the
variant required by Adabas.
67
Cobol Precompiler
Adabas D: User Manual Windows
CSQLOR1
contains SET statements for assigning the addresses required within the
bind descriptor (BNDDSC). This include file must be inserted into the
Procedure Division before the first SQL statement.
CSQLOR2
contains the declaration of the bind descriptor (BNDDSC) for up to 300
entries.
CSQLOR3
contains the declaration of the select descriptor (SELDSC) for up to 300
entries.
CSQLOR4
contains the SET statements for assigning the addresses required within
the select descriptor (SELDSC). This include file must be inserted into
the Procedure Division before the first SQL statement.
CSQLADR
contains a Cobol subroutine for determining a variable’s address. This
subroutine must be called in the following way:
CALL "SQLADR" USING <variable name> <pointer variable>
The Cobol Precompiler for ACU Cobol
acupc <precompiler options> <fn> <compiler
options>
<fn> ::= filename
The complete name of the precompiler input file (source) must be <fn>.cobpc.
Before compiling the Cobol program, the programmer must ensure that the copy elements can be found.
For this purpose, either the shell variable
COPYPATH=%DBROOT%\incl
must be set or the following compiler option
-Sp %DBROOT%\incl
be specified.
Sample call:
acupc -c -H nocheck test
ccbl32 -Sp %DBROOT%\incl test.cob
68
Adabas D: User Manual Windows
Cobol Precompiler
Linking the ACU Cobol runtime module (wrun32)
In %DBROOT%\incl there is a "sub85.c" as a pattern. The original "sub85.c" must be changed using the
files "sub85def.h" and "sub85fun.h". Moreover, there is a "wrun32.mak" available as a pattern that can be
used to change the original makefile.
Options are passed to the program in the shell variable SQLOPT.
Example:
set SQLOPT=-X -d MyDatabase
wrun32 <fn>.out
69
Call Interface (ODBC)
Adabas D: User Manual Windows
Call Interface (ODBC)
The Adabas ODBC driver enables access to the Relational Database Management System Adabas D on a
server.
Standard application programs provided with an ODBC interface can access data in the Adabas database
server in multi-user operation. The RDBMS ensures integrity and quick availability of the data.
In the Microsoft Windows operating systems, the driver is used as a 32-bit DLL. It can be used by 32-bit
and 16-bit applications or through the WIN32s interface.
This chapter covers the following topics:
Configuring the Adabas ODBC Driver
User Options
Integrating ODBC into the Microsoft Developer Studio
Configuring the Adabas ODBC Driver
There is a series of options for the Adabas ODBC driver, e.g. to support different SQLMODEs, that affect
the driver’s runtime behavior.
Under Windows, the different options and configuration parameters can be set in the ODBC.INI file. For
16-bit applications, this file is located in the Windows system directory. For 32-bit applications under
Windows, a corresponding entry is made to the registry database instead of using the file. In a Microsoft
Windows environment, a setup program maintains these entries. The structure of the files or registry
database is described in Section "Configuring the Adabas ODBC Driver" in the "User Manual ODBC".
User Options
In the following, the options allowed for the ODBC driver are described. The description only refers to the
kind of entries, their syntax, and their effects. The handling of the SetupDialog is described in Section
"Creating New Data Sources (Windows)" in the "User Manual ODBC".
Different SQLMODEs
SQLMode allows for using the ODBC driver in another SQLMODE. The ODBC driver then does not
only understand the ODBC- and Adabas-specific syntax but also Oracle SQL. This is especially useful if
the available code is adapted to another ODBC driver.
Syntax:
SQLMode=ADABAS
|
(Default)
ANSI
|
ORACLE
70
Adabas D: User Manual Windows
Call Interface (ODBC)
IsolationLevel
Usually, the application determines the IsolationLevel by using the SQLSetConnectOption function. If an
IsolationLevel other than the default (Committed) is desired, use the entry "IsolationLevel" to override the
default. This IsolationLevel will then be valid for all connections of the data source to the server. The
defined IsolationLevel can be overridden with SQLSetConnectOption and requested using
SQLGetConnectOption.
Syntax:
IsolationLevel
=
Uncommitted |
Committed |
Repeatable |
Serializable |
(Default)
Trace of SQL Statements
SQL statements issued by the application can be traced into a file. The TraceFilename option enables the
trace file, where the execution time, start and end of a session, the connect parameters, and the input and
output parameters of the SQL statement are recorded. Only one application can write to the same trace
file.
Syntax:
TraceFileName = <file-name>
file-name ::= [<drive-name>:][<path-name>/]file-identifier
Processing LONG Columns
When retrieving LONG columns, MS ACCESS does not behave correctly to the correct return code in
pcbValue. Therefore it is not possible to retrieve OLE objects from a table. The LongVarTrunc option can
be used to achieve that the return code is built in another way than provided in the ODBC specification.
The following return codes can be set:
Syntax:
LongVarTrunc = n
where n can assume one of the following values:
LONG_MAX
=
-1
(for MS ACCESS)
cbValueMax
=
-2
cbValueMax+1
=
-3
SQL_NO_TOTAL
=
-4
(default ODBC)
Integrating ODBC into the Microsoft Developer Studio
No further step is required after ODBC-SDK installation.
71
Call Interface (JDBC)
Adabas D: User Manual Windows
Call Interface (JDBC)
System prerequisite for the usage of the JDBC interface is a JAVA interpreter. As JAVA is independent of
a system there is no need to describe special Windows-specific properties. A more detailed description of
the JDBC interface is contained in the "User Manual Internet".
A sample program showing the most important information on the structure of a JAVA database
application is included in the directory DBROOT/demo/eng/JDBC.
72
Adabas D: User Manual Windows
Call Interface (OCI)
Call Interface (OCI)
C applications can also access an Adabas database using the Oracle Call Interface (OCI). An existing
application that uses the OCI Interface can work with Adabas without changes in the source files. Just a
link to the Adabas OCI libraries is required. Differences between the OCI Interface and Oracle’s OCI
which may force changes to the source files are described in Section "Special Remarks".
A description of the OCI entries can be found in the respective Oracle user manuals.
This chapter covers the following topics:
Translating an OCI Application
Linking an OCI Application
Executing a Linked OCI Application
Runtime Options
The Trace File
Profiling
Special Remarks
Integrating OCI into the Microsoft Developer Studio
Translating an OCI Application
The include path must be added. The OCI-specific include files are stored in the %DBROOT%\incl
directory.
Linking an OCI Application
The Windows command file "ocilnk" is used to link an OCI application for Adabas. The library files
required for the OCI Interface as well as for the Adabas runtime environment are stored in the
%DBROOT%\lib directory. Their names are output when calling "ocilnk".
ocilnk <options> <main> <external objects or libs>
Options: see the linker manual
The filename of the main program <main> must be specified as first parameter after the linker options.
The executable program receives the name of the file (with the suffix ".exe"). All the other file parameters
are noted without suffix and must be object modules "*.obj", resource files "*.rbj", or libraries "*.lib" in
any sequence.
73
Call Interface (OCI)
Adabas D: User Manual Windows
Example
ocilnk -subsystem:console -entry:mainCRTStartup cdemo1 fn1 fn2
The executable program cdemo1.exe is created from the objects cdemo1.obj and fn2.obj and the library
fn1.lib.
Executing a Linked OCI Application
Options are passed to the program in the environment variable SQLOPT .
SET SQLOPT=-X -d MyDatabase
<fn>
The linked program is executed by entering this command.
Runtime Options
cachelimit
::=
-Y < cache limit>
isolation level
::=
-I <isolation level>
profile
::=
-R
serverdb
::=
-d <serverdb>
servernode
::=
-n <servernode>
timeout
::=
-t <timeout>
trace alt
::=
-Y <statement count>
trace file
::=
-F <tracefn>
trace long
::=
-X
trace no date/time
::=
-N
trace short
::=
-T
trace time
::=
-L <seconds>
user
::=
-u <usern>,<passw>
userkey
::=
-U <userkey>
For an explanation of the different precompiler options, see the
74
Adabas D: User Manual Windows
Call Interface (OCI)
"C/C++ Precompiler" manual.
The Trace File
The trace file shows the executed OCI entries , including their actual parameters and information sent to
or received from the interface to the Adabas kernel. The SQL statements are only recorded for parse
requests to the kernel. The parse identification (parseid) can be used to find out which SQL statement is
currently executed.
The information contained in the trace file depends on the trace option.
For a simple trace (TRACE SHORT), only the sequence of the executed OCI entries – including their
actual parameters, the SQL statements sent to the database kernel and the return code of the OCI entries –
are recorded.
Example:
75
Call Interface (OCI)
Adabas D: User Manual Windows
If the detailed form of the trace file is specified (TRACE LONG), the input and output values of the SQL
parameters involved and the execution time of the statements are included.
Example:
The option TRACE ALT has the effect that the trace output is made alternately to two files. When doing
so, as many executed OCI entries are recorded in each file as are specified in <statement count>. If there
are more OCI entries to be executed than indicated by <statement count>, the files will be overwritten
cyclically. The trace files are named "OCITRAC.pct" and "OCITRA2.pct". The long form of the trace is
generated.
If the trace output should not be given the default name, the option TRACE FILE can be used to specify
another name. If no other trace option was specified, the option TRACE SHORT is simultaneously
enabled as a default. The filename must be standardized according to the operating system conventions.
The name can also be specified as a character string constant (optional). The option overrides the option
passed during the precompiler run. Only trace files with default trace filenames are not buffered on output.
76
Adabas D: User Manual Windows
Call Interface (OCI)
The option TRACE NO DATE/TIME can be used to suppress the output of the date and time values for
the start and end of the execution of an OCI entry made into the trace file.
With the option TRACE TIME, only those OCI entries are recorded whose execution time is greater than
or equal to <seconds>. The long form of the trace is generated.
Profiling
When the option PROFILE is enabled during an application’s run, the Adabas kernel generates statistics
on the processed OCI entries.
For every order, the date of runtime, number of calls and accumulated realtime is entered into the
SYSPROFILE table of the local SYSDBA. The realtime consists of the time taken by the processing of a
statement within an application program including all data conversions and time needed by the Adabas
kernel. The time needed to enter this information into the SYSPROFILE table is not included. The key of
a row consists of the following specifications: user name, program name, module name, language of the
application program, and line number of the statement within the application program related to the source
and the internal parseid. With the enabled TRACE option, the time required for writing the trace to a file
affects the profiling. Therefore, it is not convenient to activate the PROFILE and TRACE options at the
same time.
The entries to the SYSPROFILE table are made within the transactions of the application program.
Therefore, they are only stored in the table when the application program issues a COMMIT WORK.
When the option is enabled, old entries made for username, program name, and language are always
deleted when executing the first CONNECT statement.
Special Remarks
The subroutine calls "sqlld2" and "oopt" have no effect.
"odessp" provides a description of the parameters of the specified Adabas Stored Procedure.
In certain situations, Adabas return codes can be passed to the application in addition to
Oracle-compatible return codes.
The ROWID in the CURSOR DATA area is not set to a value.
Restrictions concerning Oracle SQL are described in the "Reference/Oracle" manual.
Integrating OCI into the Microsoft Developer Studio
For OCI integration into the Microsoft Developer Studio, only an entry of the OCI library is required.
Select the desired configuration or both configurations of the exe files under
Build / Settings / Settings For
77
Call Interface (OCI)
Adabas D: User Manual Windows
and insert the library
ociw32.lib
at the beginning under
Link / Object/library modules
Click on the OK button and the OCI applications should be linked free of error.
78
Adabas D: User Manual Windows
Call Interface (Perl)
Call Interface (Perl)
In this way a Perl programmer is also provided with an Adabas interface. System prerequisite for its usage
is a Perl interpreter. As Perl is independent of a system, there is no need to describe special
Windows-specific properties.
Adabas supports the Perl interface DBI which is independent of database systems as well as an interface
which is particularly tailored for Adabas D. A more detailed description of these interfaces is contained in
the "User Manual Internet".
79
Windows -Specific Features
Adabas D: User Manual Windows
Windows -Specific Features
This chapter covers the following topics:
Connecting To The Performance-Monitor
Automatically Starting The Database
Quick Administration
Supporting The Microsoft Cluster Server
Connecting To The Performance-Monitor
General Information
The Microsoft Performance Monitor makes it possible to have specific parameters of a process
represented graphically as a function of time. This enables you to examine the load of a computer and
influence the tuning of a particular process, if needed.
It is also intended to monitor Adabas D under Windows using the Performance Monitor. The following
parameters of the database kernel can be monitored with the Performance Monitor:
% Active User
Tasks
The number of active users as the percentage of the maximum
of active users allowed
Collisions Region Number of collisions per second in the region xyz
xyz
(The regions CONVERT, FBM, LOCK, NET are supported.)
Dispatches UKTn Number of dispatches per second by UKTn
This parameter is a measure of the load of UKTn
Read rate
<devspace>
Number of read operations per second from <devspace>
Write rate
<devspace>
Number of write operations to <devspace>
Installing Using MONINST
The display of an Adabas database in the Performance Monitor is enabled by an installation using the
MONINST tool. The call syntax is as follows:
moninst <moninst parms>
<moninst parms> ::= [-d <serverdb>] [-R
<dbroot>][-r|-u]
Special call parameters:
80
Adabas D: User Manual Windows
Windows -Specific Features
-R
Specify a DBROOT other than set using environment
variables.
-r
(remove): Deinstall the database for the Performance Monitor.
-u
(update): Change the specifications previously made for the
Performance Monitor.
Attention! For the installation, the respective database must be in warm mode.
The installation with MONINST can also be done interactively. This procedure is recommended for a
normal installation:
moninst
Call without parameters: Here the database for which the connection to the Performance Monitor is to be
established can be selected from a list of installed databases. This can only be done for databases in warm
mode.
Clicking on the button "Install" performs the installation, "Uninstall" deactivates a valid installation
(deinstallation).
Clicking on the button "Set Scales" allows specifying a scaling factor for each parameter to be displayed.
This option is needed when there is such a heavy load on the corresponding database that the range of
values of a parameter exceeds the range of values of the display.
The scaling factor can be set for each parameter individually or as decimal power (1,10,100, … as well as
0.1, 0.01, 0.001, …).
81
Windows -Specific Features
Adabas D: User Manual Windows
Displaying Within The Performance-Monitor
Read the Microsoft documentation on the handling of the Microsoft Performance Monitor. To insert the
Adabas parameters into the graphic, call the Edit / Add to Chart menu function or click on the button. The
database for which the Performance Monitor has been installed is displayed under the representable
objects in the "Add to Chart" window.
82
Adabas D: User Manual Windows
Windows -Specific Features
Automatically Starting The Database
It is desirable that the dabase is automatically started after a server start. In order that this is done, proceed
in the following way:
Start the Service Manager in the Control Panel ("Services" icon). The database is entered there as a
service. By clicking on the "Startup" button you can set the "Startup Type" to "Automatic".
Now the database is brought into warm mode after each start of the computer.
When the computer is being stopped, a "SHUTDOWN QUICK" is performed for the database, and the
database is stopped.
Quick Administration
If a database is started, a traffic light is displayed in the task bar at the bottom right which shows the
current mode:
green
warm
yellow
cold
red
is being stopped
If you move the cursor over the traffic light, the name of the database is displayed. In this way, you can
distinguish the icons for different databases.
Pressing the left mouse button opens a menu where the database can be started or stopped.
(When the database has been stopped, it cannot be restarted in this way, because the traffic light is no
longer displayed in the task bar.)
83
Windows -Specific Features
Adabas D: User Manual Windows
Pressing the right mouse button opens the following menu:
Start/Stop
opens the already known menu for Stop / Shutdown /
Restart
Administration
starts CONTROL for the database
About
shows information about the version of the current
database
Supporting The Microsoft Cluster Server
Installing The Database
There are two ways to install a database on a cluster. For both variants, Adabas must be installed first
using SETUP. It is recommended to have DBROOT point to a path on a local hard disk. If DBROOT
were on a common disk of the cluster, some tools would not be available when the used computer is not
the active node in the cluster. This is especially relevant to XSERVER and the Adabas D Remote Control
Server.
DBROOT On The Common Hard Disk
For this variant, copy, on the active node (node 1), the complete DBROOT directory to the common hard
disk. Then generate a new database by means of Control using the new DBROOT directory and initialize
it completely. It is important that the RUNDIRECTORY and the devspaces are taken as proposed. They
must be on the same drive as the (new) DBROOT.
Now the installed database must be made known to the cluster. To do so, call the Cluster Administrator
from this node. First define a new group for the installed database. Move the resources
Cluster IP Address
the common hard disc
to this group. Then define a new resource for the database using the parameters
Resource Type:
Dependencies:
Adabas D Database
Cluster IP Address
the common hard disk
Combined Variant: DBROOT Always Local
Install the same version of Adabas on both nodes. The setting of the environment variable DBROOT can
be chosen freely; it must always be on a local drive. It is recommended to use similar names. On the active
node (node 1), a database is installed using Control. All parameters can be taken as proposed or changed
according to one’s requirements. The only restriction is that all devspaces must be on the common drive.
Then call the Cluster Administrator and define the database as new resource. Afterwards you must install
the database on the second node.
84
Adabas D: User Manual Windows
Windows -Specific Features
Make the second node the active node and copy the XPARAM file (%DBROOT%\Config\<dbname>)
from node 1 into the %DBROOT%\Config directory of node 2. It can happen that the rundirectory on the
second node must be adapted using x_param. Then call
service –d <dbname>
to install the kernel as Windows service. After that the database can be started as usual.
This variant cannot be maintained as easily as the first one; if database parameters are changed using
Control or XPARAM, these modifications must be done on the second node as well. For this reason it is
strictly recommended to use the first variant.
85
Appendix - Keyboard Layout
Appendix - Keyboard Layout
Keyboard Layout under Windows (MF2 Keyboard)
<Ctrl> <INS>:<INS-B>
<Ctrl> <DEL>:<DEL-B>
<Ctrl> <HOME>:<Top>
<Ctrl> <END>:<Bottom>
86
Adabas D: User Manual Windows