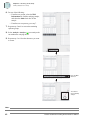
1
Getting Started Guide
Applied Biosystems
Relative Quantification
Introduction
ABI PRISM® 7000 Sequence Detection System
Designing an
RQ Experiment
Primer Extended on mRNA
5′
3′
Reverse
Primer
5′ cDNA
Oligo d(T) or random hexamer
Synthesis of 1st cDNA strand
3′
5′ cDNA
Performing
Reverse
Transcription
Generating
Data from RQ
Plates
Performing an
RQ Study
© Copyright 2003, Applied Biosystems. All rights reserved.
For Research Use Only. Not for use in diagnostic procedures.
NOTICE TO PURCHASER:
PLEASE REFER TO THE ABI PRISM®7000 SEQUENCE DETECTION SYSTEM USER’S MANUAL FOR
LIMITED LABEL LICENSE OR DISCLAIMER INFORMATION.
Trademarks
Applied Biosystems, MicroAmp, Primer Express, and VIC are registered trademarks of Applera Corporation or its
subsidiaries in the US and/or certain other countries.
AB (Design), ABI PRISM, Applera, Assays-by-Design, Assays-on-Demand, FAM, and MultiScribe are trademarks of
Applera Corporation or its subsidiaries in the US and/or certain other countries.
AmpErase, AmpliTaq Gold, and TaqMan are registered trademarks of Roche Molecular Systems, Inc.
SYBR is a registered trademark of Molecular Probes, Inc.
Microsoft and Windows are registered trademarks of Microsoft Corporation.
All other trademarks are the sole property of their respective owners.
Relative Quantification Getting Started Guide for 7000 v1.1
September 26, 2003 3:17 pm, GSG_FrontCover.fm
ii
SAMPLE DOCUMENT
Part Number 4346727 Rev. A
9/2003
Introduction
1
Introduces concepts related to relative quantification (RQ) experiments using the ABI PRISM® 7000
Sequence Detection System and provides an overview of the RQ Study workflow.
Designing an RQ Experiment
2
Describes the required components of an RQ experiment and describes the set up of a sample RQ
experiment. Also provides a list of the materials and equipment required for RQ studies.
Performing Reverse Transcription
Primer Extended on mRNA
5′
3′
Reverse
Primer
5′ cDNA
Oligo d(T) or random hexamer
Synthesis of 1st cDNA strand
3′
5′ cDNA
3
Outlines the preferred methodology for reverse transcribing total RNA to cDNA and provides
guidelines for RNA quality and starting amounts of total RNA.
4
Generating Data from RQ Plates
Explains how data generated during the PCR process is captured in RQ Plate documents and
provides information about analyzing RQ Plate data.
5
Performing an RQ Study
Explains how to analyze data from one or more RQ Plate documents and to save the results in an RQ
Study document.
Relative Quantification Getting Started Guide for 7000 v1.1
iii
Contents
Chapter 1
Preface
vii
Safety and EMC Compliance Information
ix
Introduction
1
About the 7000 SDS Instrument . . . . . . . . . . . . . . . . . . . . . . . . . . . . . . . . . . . . . . . . . . . 1
About Relative Quantification . . . . . . . . . . . . . . . . . . . . . . . . . . . . . . . . . . . . . . . . . . . . . 1
About RQ Experiments . . . . . . . . . . . . . . . . . . . . . . . . . . . . . . . . . . . . . . . . . . . . . . . . . . 2
About the Sample RQ Experiment . . . . . . . . . . . . . . . . . . . . . . . . . . . . . . . . . . . . . . . . . 3
Materials and Equipment . . . . . . . . . . . . . . . . . . . . . . . . . . . . . . . . . . . . . . . . . . . . . . . . 4
Chapter 2
Designing an RQ Experiment
7
Workflow . . . . . . . . . . . . . . . . . . . . . . . . . . . . . . . . . . . . . . . . . . . . . . . . . . . . . . . . . . . . . 7
Selecting the PCR Method . . . . . . . . . . . . . . . . . . . . . . . . . . . . . . . . . . . . . . . . . . . . . . . 7
Specifying the Components of an RQ Experiment . . . . . . . . . . . . . . . . . . . . . . . . . . . . . 9
Selecting the Sequence Detection Chemistry and Reagent Configuration . . . . . . . . . 11
Choosing the Probes and Primers . . . . . . . . . . . . . . . . . . . . . . . . . . . . . . . . . . . . . . . . 13
Chapter 3
Performing Reverse Transcription
15
Workflow . . . . . . . . . . . . . . . . . . . . . . . . . . . . . . . . . . . . . . . . . . . . . . . . . . . . . . . . . . . . 15
RT-PCR Methods . . . . . . . . . . . . . . . . . . . . . . . . . . . . . . . . . . . . . . . . . . . . . . . . . . . . . 15
Guidelines for Preparing RNA . . . . . . . . . . . . . . . . . . . . . . . . . . . . . . . . . . . . . . . . . . . . 16
Generating Data from RQ Plates
19
Workflow . . . . . . . . . . . . . . . . . . . . . . . . . . . . . . . . . . . . . . . . . . . . . . . . . . . . . . . . . . . . 19
Before You Begin . . . . . . . . . . . . . . . . . . . . . . . . . . . . . . . . . . . . . . . . . . . . . . . . . . . . . 19
Preparing the PCR Master Mix . . . . . . . . . . . . . . . . . . . . . . . . . . . . . . . . . . . . . . . . . . . 20
Creating an RQ Plate Document . . . . . . . . . . . . . . . . . . . . . . . . . . . . . . . . . . . . . . . . . . 22
Specifying Thermal Cycling Conditions and Starting the Run . . . . . . . . . . . . . . . . . . . 25
Analyzing and Viewing RQ Plate Data . . . . . . . . . . . . . . . . . . . . . . . . . . . . . . . . . . . . . 27
Exporting RQ Plate Documents . . . . . . . . . . . . . . . . . . . . . . . . . . . . . . . . . . . . . . . . . . 30
iv
Relative Quantification Getting Started Guide for 7000 v1.1
September 26, 2003 3:17 pm, RQGSG_TOC.fm
Chapter 4
SAMPLE DOCUMENT
Generating cDNA . . . . . . . . . . . . . . . . . . . . . . . . . . . . . . . . . . . . . . . . . . . . . . . . . . . . . 16
Chapter 5
Performing an RQ Study
33
Workflow . . . . . . . . . . . . . . . . . . . . . . . . . . . . . . . . . . . . . . . . . . . . . . . . . . . . . . . . . . . .33
Creating an RQ Study Document . . . . . . . . . . . . . . . . . . . . . . . . . . . . . . . . . . . . . . . . .33
Analyzing and Viewing the Results of the RQ Study . . . . . . . . . . . . . . . . . . . . . . . . . .37
Reanalyzing an RQ Study . . . . . . . . . . . . . . . . . . . . . . . . . . . . . . . . . . . . . . . . . . . . . . .40
Omitting Samples from a Study . . . . . . . . . . . . . . . . . . . . . . . . . . . . . . . . . . . . . . . . . .41
Exporting RQ Study Results . . . . . . . . . . . . . . . . . . . . . . . . . . . . . . . . . . . . . . . . . . . . .43
References
45
Appendix A Creating Detectors
47
Appendix B Upgrading the 7000 Software with RQ Study
49
Index
September 26, 2003 3:17 pm, RQGSG_TOC.fm
SAMPLE DOCUMENT
Back Cover
Relative Quantification Getting Started Guide for 7000 v1.1
v
September 26, 2003 3:17 pm, RQGSG_TOC.fm
Relative Quantification Getting Started Guide for 7000 v1.1
SAMPLE DOCUMENT
vi
Preface
How to Use This Guide
Purpose of This
Guide
Assumptions
This manual is written for principal investigators and laboratory staff who conduct
relative quantification studies for gene expression using the ABI PRISM® 7000 Sequence
Detection System (7000 SDS instrument).
This guide assumes that you have:
• Familiarity with Microsoft® Windows® 2000 operating system.
• Knowledge of general techniques for handling DNA samples and preparing them
for electrophoresis.
• A general understanding of hard drives and data storage, file transfers, and copying
and pasting.
If you want to integrate the ABI PRISM® 7000 Sequence Detection System into your
existing laboratory data flow system, you need networking experience.
September 26, 2003 3:14 pm, RQGSG_Preface.fm
DRAFT
Text Conventions
This guide uses the following conventions:
• Bold indicates user action. For example:
Type 0, then press Enter for each of the remaining fields.
• Italic text indicates new or important words and is also used for emphasis. For
example:
Before analyzing, always prepare fresh matrix.
• A right arrow bracket (>) separates successive commands you select from a dropdown or shortcut menu. For example:
Select File > Open > Spot Set.
Right-click the sample row, then select View Filter > View All Runs.
User Attention
Words
Two user attention words appear in Applied Biosystems user documentation. Each word
implies a particular level of observation or action as described below:
Note: Provides information that may be of interest or help but is not critical to the use of
the product.
IMPORTANT! Provides information that is necessary for proper instrument operation,
accurate chemistry kit use, or safe use of a chemical.
Relative Quantification Getting Started Guide for 7000 v1.1
vii
Preface
Send Us Your Comments
Examples of the user attention words appear below:
Note: The size of the column affects the run time.
Note: The Calibrate function is also available in the Control Console.
IMPORTANT! To verify your client connection to the database, you need a valid Oracle
user ID and password.
IMPORTANT! You must create a separate Sample Entry Spreadsheet for each 96-well
microtiter plate.
Safety Alert
Words
Related
Documentation
Safety alert words also appear in user documentation. For more information, see “Safety
Alert Words” on page x.
For more information about using the instrument and relative quantification, refer to:
• ABI PRISM® 7000 Sequence Detection System Online Help
• Livak, K.J., and Schmittgen, T.D., 2001. Analysis of Relative Gene Expression
Data Using Real-Time Quantitative PCR and the 2–∆∆CT Method. Methods 25:402408.
• Sequence Detection Systems Chemistry Guide Chemistry Guide (PN 4330019)
• ABI PRISM® 7700 Sequence Detection System User Bulletin #2: Relative
Quantitation of Gene Expression (PN 4303859)
Send Us Your Comments
Applied Biosystems welcomes your comments and suggestions for improving its user
documents. You can e-mail your comments to:
viii
Relative Quantification Getting Started Guide for 7000 v1.1
September 26, 2003 3:14 pm, RQGSG_Preface.fm
DRAFT
[email protected]
Safety and
EMC Compliance Information
This section includes the following topics:
Safety Conventions Used in This Document
Symbols on Instruments
. . . . . . . . . . . . . . . . . . . . . . . . . . . . . . . . . . . . . . . . . . xi
Safety Labels on Instruments
General Instrument Safety
Chemical Safety
........................... x
. . . . . . . . . . . . . . . . . . . . . . . . . . . . . . . . . . . . . . xii
. . . . . . . . . . . . . . . . . . . . . . . . . . . . . . . . . . . . . . . . xii
. . . . . . . . . . . . . . . . . . . . . . . . . . . . . . . . . . . . . . . . . . . . . . . xiii
Chemical Waste Safety
. . . . . . . . . . . . . . . . . . . . . . . . . . . . . . . . . . . . . . . . . . xiv
Physical Hazard Safety
. . . . . . . . . . . . . . . . . . . . . . . . . . . . . . . . . . . . . . . . . . . xv
Biological Hazard Safety
Workstation Safety
. . . . . . . . . . . . . . . . . . . . . . . . . . . . . . . . . . . . . . . . . xv
. . . . . . . . . . . . . . . . . . . . . . . . . . . . . . . . . . . . . . . . . . . . . . xv
. . . . . . . . . . . . . xv
September 26, 2003 3:14 pm, RQGSG_Safety.fm
DRAFT
Safety and Electromagnetic Compatibility (EMC) Standards
Relative Quantification Getting Started Guide for 7000 v1.1
ix
Safety and EMC Compliance Information
Safety Conventions Used in This Document
Safety Conventions Used in This Document
Safety Alert
Words
Four safety alert words appear in Applied Biosystems user documentation at points in
the document where you need to be aware of relevant hazards. Each alert
word–IMPORTANT, CAUTION, WARNING, DANGER–implies a particular level of
observation or action, as defined below:
Definitions
IMPORTANT! – Indicates information that is necessary for proper instrument operation,
accurate chemistry kit use, or safe use of a chemical.
– Indicates a potentially hazardous situation that, if not avoided, may
result in minor or moderate injury. It may also be used to alert against unsafe practices.
– Indicates a potentially hazardous situation that, if not avoided,
could result in death or serious injury.
– Indicates an imminently hazardous situation that, if not avoided,
will result in death or serious injury. This signal word is to be limited to the most
extreme situations.
Except for Important, each safety alert word in an Applied Biosystems document
appears with an open triangle figure that contains a hazard symbol. These hazard
symbols are identical to the hazard icons that are affixed to Applied Biosystems
instruments (see “Safety Symbols” on page xi).
Examples
IMPORTANT! You must create a separate a Sample Entry Spreadsheet for each 96-well
microtiter plate.
The lamp is extremely hot. Do not touch the lamp until it has cooled
to room temperature.
ELECTRICAL HAZARD. Failure to ground the instrument
properly can lead to an electrical shock. Ground the instrument according to the
provided instructions.
x
Relative Quantification Getting Started Guide for 7000 v1.1
DRAFT
CHEMICAL HAZARD. Formamide. Exposure causes eye, skin,
and respiratory tract irritation. It is a possible developmental and birth defect hazard.
Read the MSDS, and follow the handling instructions. Wear appropriate protective
eyewear, clothing, and gloves.
September 26, 2003 3:14 pm, RQGSG_Safety.fm
The following examples show the use of safety alert words:
Symbols on Instruments
Electrical Symbols on Instruments
Symbols on Instruments
Electrical
Symbols on
Instruments
The following table describes the electrical symbols that may be displayed on
Applied Biosystems instruments.
Symbol
Description
Indicates the On position of the main power switch.
Indicates the Off position of the main power switch.
Indicates the On/Off position of a push-push main power switch.
Indicates a terminal that may be connected to the signal ground reference of
another instrument. This is not a protected ground terminal.
Indicates a protective grounding terminal that must be connected to earth
ground before any other electrical connections are made to the instrument.
Indicates a terminal that can receive or supply alternating current or voltage.
Indicates a terminal that can receive or supply alternating or direct current or
voltage.
September 26, 2003 3:14 pm, RQGSG_Safety.fm
DRAFT
Safety Symbols
The following table describes the safety symbols that may be displayed on
Applied Biosystems instruments. Each symbol may appear by itself or in combination
with text that explains the relevant hazard (see “Safety Labels on Instruments” on
page xii). These safety symbols may also appear next to DANGERS, WARNINGS, and
CAUTIONS that occur in the text of this and other product-support documents.
Symbol
Description
Indicates that you should consult the manual for further information and to
proceed with appropriate caution.
Indicates the presence of an electrical shock hazard and to proceed with
appropriate caution.
Indicates the presence of a hot surface or other high-temperature hazard and to
proceed with appropriate caution.
Indicates the presence of a laser inside the instrument and to proceed with
appropriate caution.
Indicates the presence of moving parts and to proceed with appropriate caution.
Relative Quantification Getting Started Guide for 7000 v1.1
xi
Safety and EMC Compliance Information
Safety Labels on Instruments
Safety Labels on Instruments
The following CAUTION, WARNING, and DANGER statements may be displayed on
Applied Biosystems instruments in combination with the safety symbols described in the
preceding section.
English
Francais
CAUTION Hazardous chemicals. Read the
Material Safety Data Sheets (MSDSs)
before handling.
ATTENTION Produits chimiques
dangeureux. Lire les fiches techniques de
sûreté de matériels avant la manipulation
des produits.
CAUTION Hot surface.
ATTENTION Surface brûlante.
DANGER High voltage.
DANGER Haute tension.
WARNING To reduce the chance of
electrical shock, do not remove covers that
require tool access. No user-serviceable
parts are inside. Refer servicing to
Applied Biosystems qualified service
personnel.
AVERTISSEMENT Pour éviter les risques
d'électrocution, ne pas retirer les capots
dont l'ouverture nécessite l'utilisation
d'outils. L’instrument ne contient aucune
pièce réparable par l’utilisateur. Toute
intervention doit être effectuée par le
personnel de service qualifié de
Applied Biosystems.
CAUTION Moving parts.
ATTENTION Parties mobiles.
Operating the
Instrument
PHYSICAL INJURY HAZARD. The instrument is to be moved
and positioned only by the personnel or vendor specified in the applicable site
preparation guide. If you decide to lift or move the instrument after it has been installed,
do not attempt to lift or move the instrument without the assistance of others, the use of
appropriate moving equipment, and proper lifting techniques. Improper lifting can cause
painful and permanent back injury. Depending on the weight, moving or lifting an
instrument may require two or more persons.
Ensure that anyone who operates the instrument has:
• Received instructions in both general safety practices for laboratories and specific
safety practices for the instrument.
• Read and understood all applicable Material Safety Data Sheets (MSDSs). See
“About MSDSs” on page xiii.
PHYSICAL INJURY HAZARD. Use this instrument as specified
by Applied Biosystems. Using this instrument in a manner not specified by
Applied Biosystems may result in personal injury or damage to the instrument.
xii
Relative Quantification Getting Started Guide for 7000 v1.1
DRAFT
Moving and
Lifting the
Instrument
September 26, 2003 3:14 pm, RQGSG_Safety.fm
General Instrument Safety
Chemical Safety
Chemical Hazard Warning
Chemical Safety
Chemical Hazard
Warning
About MSDSs
CHEMICAL HAZARD. Before handling any chemicals, refer to
the Material Safety Data Sheet (MSDS) provided by the manufacturer, and observe all
relevant precautions.
Chemical manufacturers supply current Material Safety Data Sheets (MSDSs) with
shipments of hazardous chemicals to new customers. They also provide MSDSs with the
first shipment of a hazardous chemical to a customer after an MSDS has been updated.
MSDSs provide the safety information you need to store, handle, transport, and dispose
of the chemicals safely.
Each time you receive a new MSDS packaged with a hazardous chemical, be sure to
replace the appropriate MSDS in your files.
Obtaining
MSDSs
You can obtain from Applied Biosystems the MSDS for any chemical supplied by
Applied Biosystems. This service is free and available 24 hours a day.
To obtain MSDSs:
1. Go to https://docs.appliedbiosystems.com/msdssearch.html
2. In the Search field, type in the chemical name, part number, or other information
that appears in the MSDS of interest. Select the language of your choice, then click
Search.
September 26, 2003 3:14 pm, RQGSG_Safety.fm
DRAFT
3. Find the document of interest, right-click the document title, then select any of the
following:
• Open – To view the document
• Print Target – To print the document
• Save Target As – To download a PDF version of the document to a destination
that you choose
4. To have a copy of a document sent by fax or e-mail, select Fax or Email to the left
of the document title in the Search Results page, then click RETRIEVE
DOCUMENTS at the end of the document list.
5. After you enter the required information, click View/Deliver Selected Documents
Now.
Chemical Safety
Guidelines
To minimize the hazards of chemicals:
• Read and understand the Material Safety Data Sheets (MSDS) provided by the
chemical manufacturer before you store, handle, or work with any chemicals or
hazardous materials. (See “About MSDSs” on page xiii.)
• Minimize contact with chemicals. Wear appropriate personal protective equipment
when handling chemicals (for example, safety glasses, gloves, or protective
clothing). For additional safety guidelines, consult the MSDS.
Relative Quantification Getting Started Guide for 7000 v1.1
xiii
Safety and EMC Compliance Information
Chemical Waste Safety
• Minimize the inhalation of chemicals. Do not leave chemical containers open. Use
only with adequate ventilation (for example, fume hood). For additional safety
guidelines, consult the MSDS.
• Check regularly for chemical leaks or spills. If a leak or spill occurs, follow the
manufacturer’s cleanup procedures as recommended on the MSDS.
• Comply with all local, state/provincial, or national laws and regulations related to
chemical storage, handling, and disposal.
Chemical Waste Safety
Chemical Waste
Hazard
HAZARDOUS WASTE. Refer to Material Safety Data Sheets and
local regulations for handling and disposal.
CHEMICAL WASTE HAZARD. Wastes produced by Applied
Biosystems instruments are potentially hazardous and can cause injury, illness, or death.
CHEMICAL STORAGE HAZARD. Never collect or store waste
in a glass container because of the risk of breaking or shattering. Reagent and waste
bottles can crack and leak. Each waste bottle should be secured in a low-density
polyethylene safety container with the cover fastened and the handles locked in the
upright position. Wear appropriate eyewear, clothing, and gloves when handling reagent
and waste bottles.
xiv
• Read and understand the Material Safety Data Sheets (MSDSs) provided by the
manufacturers of the chemicals in the waste container before you store, handle, or
dispose of chemical waste.
• Provide primary and secondary waste containers. (A primary waste container holds
the immediate waste. A secondary container contains spills or leaks from the
primary container. Both containers must be compatible with the waste material and
meet federal, state, and local requirements for container storage.)
• Minimize contact with chemicals. Wear appropriate personal protective equipment
when handling chemicals (for example, safety glasses, gloves, or protective
clothing). For additional safety guidelines, consult the MSDS.
• Minimize the inhalation of chemicals. Do not leave chemical containers open. Use
only with adequate ventilation (for example, fume hood).For additional safety
guidelines, consult the MSDS.
• Handle chemical wastes in a fume hood.
• After emptying the waste container, seal it with the cap provided.
• Dispose of the contents of the waste tray and waste bottle in accordance with good
laboratory practices and local, state/provincial, or national environmental and
health regulations.
Relative Quantification Getting Started Guide for 7000 v1.1
September 26, 2003 3:14 pm, RQGSG_Safety.fm
To minimize the hazards of chemical waste:
DRAFT
Chemical Waste
Safety Guidelines
Physical Hazard Safety
Ultraviolet Light
Physical Hazard Safety
Ultraviolet Light
ULTRAVIOLET LIGHT HAZARD. Looking directly at a UV
light source can cause serious eye damage. Never look directly at a UV light source and
always prevent others from UV exposure. Follow the manufacturer’s recommendations
for appropriate protective eyewear and clothing.
Biological Hazard Safety
General
Biohazard
BIOHAZARD. Biological samples such as tissues, body fluids, and
blood of humans and other animals have the potential to transmit infectious diseases.
Follow all applicable local, state/provincial, and/or national regulations. Wear
appropriate protective eyewear, clothing, and gloves. Read and follow the guidelines in
these publications:
• U.S. Department of Health and Human Services guidelines published in Biosafety
in Microbiological and Biomedical Laboratories (stock no. 017-040-00547-4;
http://bmbl.od.nih.gov)
• Occupational Safety and Health Standards, Bloodborne Pathogens
(29 CFR§1910.1030; http://www.access.gpo.gov/nara/cfr/
waisidx_01/29cfr1910a_01.html).
Additional information about biohazard guidelines is available at: http://www.cdc.gov
September 26, 2003 3:14 pm, RQGSG_Safety.fm
DRAFT
Workstation Safety
Correct ergonomic configuration of your workstation can reduce or prevent effects such
as fatigue, pain, and strain. Minimize or eliminate these effects by configuring your
workstation to promote neutral or relaxed working positions.
MUSCULOSKELETAL AND REPETITIVE MOTION
HAZARD. These hazards are caused by potential risk factors that include but are not
limited to repetitive motion, awkward posture, forceful exertion, holding static unhealthy
positions, contact pressure, and other workstation environmental factors.
To minimize musculoskeletal and repetitive motion risks:
• Use equipment that comfortably supports you in neutral working positions and
allows adequate accessibility to the keyboard, monitor, and mouse.
• Position the keyboard, mouse, and monitor to promote relaxed body and head
postures.
Relative Quantification Getting Started Guide for 7000 v1.1
xv
Safety and EMC Compliance Information
Safety and Electromagnetic Compatibility (EMC) Standards
Safety and Electromagnetic Compatibility (EMC) Standards
This section provides information on:
•
•
•
•
U.S. and
Canadian Safety
Standards
U.S. and Canadian Safety Standards
Canadian EMC Standard
European Safety and EMC Standards
Australian EMC Standards
This instrument has been tested to and complies with standard UL 3101-1, “Safety
Requirements for Electrical Equipment for Laboratory Use, Part 1: General
Requirements.”
This instrument has been tested to and complies with standard CSA 1010.1, “Safety
Requirements for Electrical Equipment for Measurement, Control, and Laboratory Use,
Part 1: General Requirements.”
Canadian EMC
Standard
European Safety
and EMC
Standards
This instrument has been tested to and complies with ICES-001, Issue 3: Industrial,
Scientific, and Medical Radio Frequency Generators.
Safety
This instrument meets European requirements for safety (Low Voltage Directive
73/23/EEC). This instrument has been tested to and complies with standards EN 610101:2001, “Safety Requirements for Electrical Equipment for Measurement, Control and
Laboratory Use, Part 1: General Requirements” and EN 61010-2-010, “Particular
Requirements for Laboratory Equipment for the Heating of Materials.”
This instrument meets European requirements for emission and immunity (EMC
Directive 89/336/EEC). This instrument has been tested to and complies with standard
EN 61326 (Group 1, Class B), “Electrical Equipment for Measurement, Control and
Laboratory Use – EMC Requirements.”
This instrument has been tested to and complies with standard AS/NZS 2064, “Limits
and Methods Measurement of Electromagnetic Disturbance Characteristics of Industrial,
Scientific, and Medical (ISM) Radio-frequency Equipment.”
DRAFT
Australian EMC
Standards
xvi
Relative Quantification Getting Started Guide for 7000 v1.1
September 26, 2003 3:14 pm, RQGSG_Safety.fm
EMC
Safety and Electromagnetic Compatibility (EMC) Standards
September 26, 2003 3:14 pm, RQGSG_Safety.fm
DRAFT
Australian EMC Standards
Relative Quantification Getting Started Guide for 7000 v1.1
xvii
Prim
5′
Syn
3′
Are you familiar with
the 7000 instrument
and relative
quantification?
No
Chapter
1
Read the introduction
for an overview
Yes
Yes
Have you designed
your experiment?
Chapter
2
Design an RQ experiment.
Chapter
3
Reverse transcribe total
RNA to cDNA.
No
Have you converted
total RNA to cDNA?
No
on mRNA
3
Reverse
Primer
5′ cDNA
Oligo d(T) or random hexamer
DNA strand
5′ cDNA
Have you collected
PCR data in an RQ
plate document?
No
Chapter
4
PCR amplify the cDNA
and collect data in
RQ Plate documents.
Have you analyzed
data in an RQ study?
Chapter 1 Introduction
No
Chapter
5
Analyze one or more
RQ Plates in an RQ study.
DRAFT
Yes
September 26, 2003 3:14 pm, C1_Intro.fm
Yes
Introduction
1
About the 7000 SDS Instrument
Description
The ABI PRISM® 7000 Sequence Detection System (7000 SDS instrument) is a secondgeneration sequence detection instrument capable of quantitative and qualitative
detection with fluorescent-based PCR chemistries. The instrument is capable of
quantitative detection using real-time analysis, and qualitative detection using end-point
and dissociation-curve analysis.
The 7000 SDS instrument combines thermal cycling, fluorescence detection, and
application-specific software. It detects accumulated polymerase chain reaction (PCR)
product cycle-by-cycle, thus making quantification available immediately after
completion of PCR, without the need for further process analysis.
Supported Assay
Types
The 7000 SDS instrument allows you to perform the following assays with plates or
tubes in the 96-well format:
September 26, 2003 3:14 pm, C1_Intro.fm
DRAFT
• Relative Quantification (RQ) – Determines the quantity of a single nucleic acid
target sequence within an unknown sample, relative to the same sequence within a
calibrator sample
• Absolute Quantification (AQ) – Determines the absolute quantity of a single
nucleic acid target sequence within a sample
• Allelic Discrimination (AD) – Indicates the genotype of samples.
• Plus/Minus – Indicates the presence or absence of a specific target sequence in a
sample
For more information about the assay types, refer to the Sequence Detection Systems
Chemistry Guide and the Online Help for the 7000 SDS instrument.
About Relative Quantification
Real-time PCR
Assays
Real-time PCR is the ability to monitor the progress of the PCR as it occurs. Data is
collected throughout the PCR process rather than at the end of the PCR process
(end-point PCR).
In real-time PCR, reactions are characterized by the point in time during cycling when
amplification of a target is first detected rather than the amount of target accumulated at
the end of PCR.
There are two types of quantitative real-time PCR: absolute and relative.
Notes
Relative Quantification Getting Started Guide for 7000 v1.1
1
Chapter 1 Introduction
About RQ Experiments
Definition of
Relative
Quantification
Relative quantification describes the change in expression of the target gene in a test
sample relative to a calibrator sample. The calibrator sample can be an untreated control
or a sample at time zero in a time-course study (Livak and Schmittgen, 2001). For
example, relative quantification is commonly used to compare expression levels of wildtype versus mutated alleles or the expression levels of a gene in different tissues.
Unlike absolute quantification, relative quantification provides accurate comparison
between the initial level of template in each sample, without requiring the exact copy
number of the template. Further, the relative levels of templates in samples can be
determined without the use of standard curves.
About RQ Experiments
This document uses the term “RQ experiments” to refer to the entire process of
generating cDNA from RNA (reverse transcription) through analyzing RQ studies. The
RQ experiment workflow has several steps, as shown in the following figure.
Primer Extended on mRNA
5′
3′
Reverse
Primer
5′ cDNA
Oligo d(T) or random hexamer
Synthesis of 1st cDNA strand
3′
RQ Studies with
the 7000 v1.1
Instrument
5′ cDNA
Designing
an RQ
Experiment
See Chapter 2
Performing
Reverse
Transcription
See Chapter 3
Generating
Data from
RQ Plates
See Chapter 4
Performing
an RQ Study
See Chapter 5
The RQ Study Add On software for the 7000 v1.1 SDS instrument enables you to
perform RQ assays, which calculate the relative quantification values from data
generated during real-time PCR. (Without the add-on software, the 7000 v1.1 SDS
instrument can perform AQ, AD, and Plus/Minus but not RQ assays.)
The data-collection part of the assay is a single-plate document, called the RQ Plate.
Amplification data from PCR runs is stored with sample setup information on the plate.
Notes
2
Relative Quantification Getting Started Guide for 7000 v1.1
DRAFT
Note: For instructions on installing the RQ Study Software, refer to Appendix B.
September 26, 2003 3:14 pm, C1_Intro.fm
RQ Experiment
Workflow
About the Sample RQ Experiment
Description of the Sample RQ Experiment
The data-analysis part of the assay is a multi-plate document, called the RQ Study. You
can analyze up to ten RQ plates in a study. RQ Study documents neither control the
instrument, nor do they provide tools for setting up or modifying plates.
The following figure illustrates the RQ Study process.
Kidney
kidneyplate.sds
Liver
liverplate.sds
Bladder
bladderplate.sds
Plated Reactions
7000 SDS Instrument
v1.1 Software
with RQ Study
Add On
RQ Plate Documents
v1.1 Software
with RQ Study
Add On
RQ Study Document
IMPORTANT! The 7000 SDS instrument software (v1.1) with the RQ Study Add On
uses only the comparative method (∆∆Ct) to calculate relative quantities of a nucleic
acid sequence.
About the Sample RQ Experiment
Description of the
Sample RQ
Experiment
This guide uses a sample RQ experiment to help you understand the workflow.
Example
September 26, 2003 3:14 pm, C1_Intro.fm
DRAFT
In the sample RQ experiment, levels of expression of 23 genes were compared in the liver, kidney, and bladder tissue of an
individual.
The experiment was designed for singleplex PCR—samples and endogenous controls were amplified in separate wells.
Glyceraldehyde-3-phosphate (GAPDH) served as the endogenous control. Four replicates of each sample and endogenous
control were amplified.(In this experiment, an entire 96-well-plate is devoted to each tissue because the four replicates of
each of the 23 genes plus the endogenous control take up all 96 wells.)
Predesigned and labeled primer/probe sets were selected from the Applied Biosystems Assays-on-Demand™ product line.
Reactions were set up for two-step RT-PCR, where the High Capacity cDNA Archive Kit and the TaqMan® Universal PCR
Master Mix were used for reverse transcription and PCR, respectively.
Data was generated by running three RQ plates, one for each tissue.
All three plates were analyzed in an RQ study, with the Liver samples serving as the calibrator.
The implementation details of this sample RQ experiment will be discussed throughout this guide in Example boxes like this
one.
Notes
Relative Quantification Getting Started Guide for 7000 v1.1
3
1
Chapter 1 Introduction
Materials and Equipment
Materials and Equipment
You need to supply the following items to complete an RQ study.
Item
Source
High Capacity cDNA Archive Kit
Applied Biosystems
(PN 4322171)
TaqMan® Universal PCR Master Mix
Applied Biosystems
(PN 4304437)
MicroAmp® Optical 96-Well Reaction
Plate and Optical Caps
Applied Biosystems
(PN 403012)
Note: Reaction plates and caps may
also be purchased separately. Reaction
plates can also be sealed with
ABI PRISM™ Optical Adhesive Covers.
Labeled primers and probes from one of
the following sources:
• Assays-by-Design™ service
(predesigned primers and probes)
• Applied Biosystems Web site
• Contact your Applied Biosystems
Sales Representative
• PN 4330710 (1-user license)
PN 4330709 (10-user license)
PN 4330708 (50-user license)
Reagent tubes with caps, 10-mL
Applied Biosystems
(PN 4305932)
Centrifuge with adapter for 96-well
plates
Major laboratory supplier (MLS)
Gloves
Major laboratory supplier (MLS)
Microcentrifuge
MLS
Microcentrifuge tubes, sterile 1.5-mL
MLS
Nuclease-free water
MLS
Pipette tips, with filter plugs
MLS
Pipettors, positive-displacement
MLS
Tris-EDTA (TE) Buffer, pH 8.0
MLS
Vortexer
MLS
DRAFT
• Primer Express Software (customdesigned primers and probes)
Notes
4
Relative Quantification Getting Started Guide for 7000 v1.1
September 26, 2003 3:14 pm, C1_Intro.fm
• Assays-on-Demand™ Gene
Expression Products (predesigned
primers and probes)
Materials and Equipment
Description of the Sample RQ Experiment
September 26, 2003 3:14 pm, C1_Intro.fm
DRAFT
1
Notes
Relative Quantification Getting Started Guide for 7000 v1.1
5
Prim
5′
Syn
3′
E
T
Have you selected
a PCR method?
(Single or Multiplex)
T
E
No
page 7
Select a PCR method.
E - Endo Ctrl
T - Target
Yes
Have you designated
the targets, calibrator,
endogenous control,
and replicates for the
experiment?
Target
Control
Calibrator
# of Replicates
No
?
?
?
?
page 9
Designate the four
essential components
of RQ experiments.
page 11
Select the SDS chemistry
for your experiment.
page 13
Choose primers and probes
for your experiment.
Yes
Have you selected
the SDS chemistry
(SYBR Green 1 or
TaqMan ®) and reagent
configuration?
No
R
Q
3′
No
Primer Extended on mRNA
5′
3′
Reverse
Primer
5′ cDNA
Oligo d(T) or random hexamer
Synthesis of 1st cDNA strand
3′
Chapter 2 Designing an RQ Experiment
5′ cDNA
Go to chapter 3,
Performing Reverse
Transcription
September 26, 2003 3:14 pm, C2_Design.fm
Have you designed
your primers and
probes?
DRAFT
Yes
Designing an RQ Experiment
Workflow
Designing
an RQ
Experiment
Primer Extended on mRNA
5′
3′
Reverse
Primer
5′ cDNA
Oligo d(T) or random hexamer
Synthesis of 1st cDNA strand
3′
5′ cDNA
Performing
Reverse
Transcription
Designing an RQ Experiment
• Select the PCR method
(multiplex or singleplex).
2
• Designate the targets, calibrator,
endogenous control, and replicates.
• Select the SDS chemistry and
reagent configuration.
• Choose the primers and probes.
Generating
Data from
RQ Plates
Performing
an RQ Study
September 26, 2003 3:14 pm, C2_Design.fm
DRAFT
Selecting the PCR Method
Traditional PCR is performed as a singleplex reaction, where a single primer pair is
present in the reaction tube or well. Only one target sequence or endogenous control can
be amplified per reaction—target sequences and endogenous controls cannot be
amplified in the same tube.
In multiplex PCR, two or more primer pairs are present in the reaction. Each primer pair
amplifies either a target sequence or an endogenous control. The availability of multiple
reporter dyes for TaqMan® probes, each with different emission wavelength maxima,
makes multiplex PCR possible.
Notes
Relative Quantification Getting Started Guide for 7000 v1.1
7
Chapter 2 Designing an RQ Experiment
Selecting the PCR Method
Both methods give equivalent results for relative quantification experiments. Which
method to use depends on the
• Type of chemistry you will be using to detect PCR products – Singleplex PCR can
use either SYBR® Green or TaqMan reagent-based chemistry. Multiplex PCR can
use only TaqMan chemistry.
• Amount of time you want to spend optimizing and validating your experiment –
Amplifying target sequences and endogenous controls in separate reactions
(singleplex PCR) requires less optimization and validation than multiplex PCR.
Among the factors to consider when doing multiplex PCR are primer limitation, the
relative abundance of the target and reference sequences (the endogenous control
must be more abundant than the targets), and the number of targets in the study.
IMPORTANT! As the number of gene targets increases, the singleplex format is
typically more effective than the multiplex format, because less optimization is
required.
• Requirement for high throughput performance – Running multiple reactions in the
same tube in a multiplex experiment increases throughput and reduces the effects of
pipetting errors.
For more information about multiplex and singleplex PCR, refer to the Sequence
Detection Systems Chemistry Guide (PN 430019).
Example
The singleplex PCR method was used in the sample experiment for the following reasons:
• Large number of targets to be amplified (23 genes, plus one endogenous control)
Notes
8
Relative Quantification Getting Started Guide for 7000 v1.1
September 26, 2003 3:14 pm, C2_Design.fm
DRAFT
• No requirement for optimization and validation for singleplex experiments
Specifying the Components of an RQ Experiment
Specifying the Components of an RQ Experiment
RQ experiments require:
• A target – The nucleic acid sequence that you are studying.
• A calibrator – The sample used as the basis for comparative results.
• An endogenous control – A gene present at a consistent expression level in all
experimental samples. By using an endogenous control as an active reference, you
can normalize quantification of a cDNA target for differences in the amount of
cDNA added to each reaction. Note that
– Each sample type (for example, each tissue in a study comparing multiple
tissues) requires an endogenous control.
– If samples are spread across multiple plates, each plate must have an endogenous
control.
Typically, housekeeping genes such as β-actin, glyceraldehyde-3-phosphate
(GAPDH), and ribosomal RNA (rRNA), are used as endogenous controls.
• Replicate wells – For relative quantification studies, Applied Biosystems
recommends the use of three or more replicate reactions per sample and
endogenous control to ensure statistical significance. Replicates allow you to
preserve data and remove outliers.
September 26, 2003 3:14 pm, C2_Design.fm
DRAFT
For more information about these concepts, refer to the Sequence Detection Systems
Chemistry Guide.
Notes
Relative Quantification Getting Started Guide for 7000 v1.1
9
2
Chapter 2 Designing an RQ Experiment
Specifying the Components of an RQ Experiment
Example
The objective of the sample experiment is to compare the expression levels of several genes in the liver, kidney, and bladder
tissue of an individual. There are 23 genes of interest, including ACVR1, ACVR2, CCR2, CD3D, and FLT4. These genes are
the targets.
Once targets are identified, you need to determine which samples will serve as the basis of comparison for the other
samples in the study. In this experiment, the liver samples served as the calibrator. The 7000 SDS instrument software sets
gene expression levels for the calibrator samples to 1. Consequently, if there is more ACRV1 in the kidney than in the liver,
the gene expression level of ACRV1 in the kidney is greater than 1. Similarly, if there is less CD3D in the bladder than in the
liver, the gene expression level of CD3D in the bladder is less than 1.
Because RQ is based on PCR, the more template there is in a reaction, the more the PCR product and the greater the
fluorescence. To account for possible differences in the amount of template added to the reaction, GAPDH serves as an
endogenous control. (Expression levels of the endogenous control are subtracted from expression levels of target genes.)
An endogenous control was prepared for each tissue.
The experiment includes three sets of endogenous controls—one for each tissue. Further, the endogenous control for each
tissue must be amplified on the same plate as the target sequences for that tissue. Finally, note that the experiment uses
the singleplex PCR format, and therefore, the endogenous controls are amplified in different wells from the targets.
Four replicates of each sample and endogenous control are performed to ensure statistical significance.
Note: The sample RQ experiment requires a separate plate for each of the three tissues because of the number of genes
being studied. Experiments can also be designed so that several samples are amplified on the same plate, as shown in the
following table.
In experiments where multiple sample types are on the
same plate, an endogenous control for each sample type
must also be included on the same plate.
Liver
Liver
Samples
GR2323
Regulus
Liver_96Plate.eps
GR2323
Kidney
Bladder
GR2322
Regulus
LivKidBladPlate.eps
Samples
Endogenous
Controls (GAPDH)
GR2322
GR2324
Regulus
Kidney_96Plate.eps
Endogenous
Controls (GAPDH)
Kidney
Samples
GR2324
GR2325
Regulus
Bladder_96Plate.eps
Endogenous
Controls (GAPDH)
GR2325
DRAFT
Bladder
Samples
Endogenous
Controls (GAPDH)
Notes
10
Relative Quantification Getting Started Guide for 7000 v1.1
September 26, 2003 3:14 pm, C2_Design.fm
In the sample RQ experiment, each plate contains a single
sample type (tissue). The endogenous control for each
tissue is on the same plate as the targets for that tissue.
Selecting the Sequence Detection Chemistry and Reagent Configuration
About SDS Chemistries
Selecting the Sequence Detection Chemistry and Reagent
Configuration
About SDS
Chemistries
Applied Biosystems offers two types of chemistries that can be used to detect PCR
products on SDS instruments, as explained in the following table. For more information
about SDS chemistries, refer to the Sequence Detection Systems Chemistry Guide.
Chemistry
TaqMan® reagents or kits
Description
TaqMan reagent-based chemistry uses a
fluorogenic probe to enable detection of a specific
PCR product as it accumulates during PCR cycles.
Process
Polymerization
FORWARD
PRIMER
5′
3′
R = REPORTER
Q
3′
5′
3′
5′
R
3′
5′
5′
3′
5′
Step 1
September 26, 2003 3:14 pm, C2_Design.fm
Uses SYBR Green I dye, a double-stranded DNA
binding dye, to detect PCR products as they
accumulate during PCR cycles.
3′
5′
Polymerization Completed
Q
Description
5′
5′
R
5′
3′
3′
Step 1 continued: when both dyes
are attached to the probe, reporter
dye emission is quenched.
Cleavage
Step 2: During each extension
cycle, the AmpliTaq Gold® DNA
polymerase cleaves the reporter
dye from the probe.
DRAFT
Q
5′
3′
Step 1: A reporter (R) and a
quencher (Q) are attached to the
5' and 3' ends of a TaqMan
probe.
• Optimized assays available
SYBR® Green I reagents
R
Q = QUENCHER
REVERSE
PRIMER
• Increases specificity with a probe. Specific
hybridization between probe and target
generates fluorescent signal.
• Allows 5′ -nuclease assay to be carried out
during PCR
PROBE
5′
Advantages
• Provides multiplex capability
Strand Displacement
R
Q
3′
5′
3′
5′
5′
3′
5′
Step 3: Once separated from the
quencher, the reporter dye emits
its characteristic fluorescence.
The SYBR Green I dye within the SYBR
Master Mix immediately binds with all
double-stranded DNA present in the
sample.
Advantages
• Reduces cost (no probe needed)
Step 2
During PCR, AmpliTaq Gold® DNA
Polymerase amplifies each target.
Step 3
The SYBR Green I dye then binds to each
new copy of double-stranded DNA.
• Amplifies all double-stranded DNA
• Yields a melting profile of distinct PCR runs
• Increases sensitivity for detecting amplification
products relative to product length
Limitations
Binds nonspecifically to all double-stranded DNA
sequences. To avoid false positive signals, check
for nonspecific product formation using dissociation
curve or gel analysis.
Notes
Relative Quantification Getting Started Guide for 7000 v1.1
11
2
Chapter 2 Designing an RQ Experiment
Selecting the Sequence Detection Chemistry and Reagent Configuration
About Reagent
Configurations for
RT-PCR
There are several TaqMan kits and SYBR Green I dye chemistry kits available for
quantitative experiments. The reagent configuration you use depends on whether you are
performing one-step or two-step RT-PCR:
• In one-step RT-PCR, reverse transcription (RT) and PCR are take place in a single
buffer system (that is, a single tube or well). This offers the convenience of a singletube preparation for RT and PCR amplification. However, the carryover prevention
enzyme, AmpErase® UNG (uracil-N-glycosylase), cannot be used with one-step
RT-PCR. For more information about UNG, refer to the Sequence Detection
Systems Chemistry Guide.
• Two-step RT-PCR is performed in two separate reactions: total RNA is reverse
transcribed into cDNA, which is then amplified by PCR. This method is useful for
detecting multiple transcripts from a single cDNA template or for storing cDNA
aliquots for later use. If dUTP is not used during the RT step, AmpErase UNG
enzyme can be used to prevent carryover contamination.
IMPORTANT! Applied Biosystems recommends that you use the two-step RT-PCR
method for RQ experiments. This guide assumes that RQ experiments are designed
using two-step RT-PCR. Further, only the recommended reagent configurations are
documented. For additional options, refer to the Sequence Detection Systems Chemistry
Guide.
The following table lists the recommended kits for two-step RT-PCR. For information
about the available reagents for one-step RT-PCR, refer to the Sequence Detection
Systems Chemistry Guide.
Step
Reagent
Part Number
TaqMan
reagents or
kits
RT
High Capacity cDNA Archive Kit
4322171
PCR
TaqMan Universal PCR Master Mix
4304437
SYBR Green I
reagents or
kits
PCR
SYBR Green Master Mix
4309155
RT and PCR
SYBR Green RT-PCR Reagents
4310179
Example
The sample experiment seeks to determine the expression levels of specific genes. it requires probes that can bind to
specific DNA sequences. Premade probes and primers for all the genes of interest were available from the Assays-onDemand product line, which uses TaqMan chemistry.
DRAFT
Two-step RT-PCR was performed, using the reagents recommended for TaqMan reagent- or kit-based chemistry in the
table above.
Notes
12
Relative Quantification Getting Started Guide for 7000 v1.1
September 26, 2003 3:14 pm, C2_Design.fm
Chemistry
Choosing the Probes and Primers
About Reagent Configurations for RT-PCR
Choosing the Probes and Primers
You must choose probe and primer sets for both your target and endogenous control
sequences. Applied Biosystems provides three options for choosing primers and probes:
• Assays-on-Demand™ Gene Expression Products – Provide you with optimized,
ready-to-use TaqMan 5′ -nuclease assays for human, mouse, or rat transcripts. For
information on available primer/probe sets, go to:
http://www.appliedbiosystems.com and click the Assays-on-Demand Gene
Expression Products link on the right-hand column.
• Assays-by-DesignSM Service - Designs, synthesizes, formulates, and delivers
quality-controlled primer and probe sets. Use this service if the assay you need is
not currently available. To place an order, contact your Applied Biosystems
representative.
• Primer Express® Software – Helps you design primers and probes for your own
quantification assays. For more information about using this software, refer to the
Primer Express Software v2.0 User’s Manual (PN 4329500).
Applied Biosystems provides Assay Design Guidelines, which have been
developed specifically for quantification assays. When used in their entirety, these
steps provide a rapid and reliable system for assay design and optimization. For
information about the Assay Design Guidelines, refer to the Sequence Detection
Systems Chemistry Guide.
Example
Premade assays from Assays-on-Demand products are available for all the genes included in the sample experiment;
primers and probes were obtained from Applied Biosystems. Each assay consists of two unlabeled PCR primers (forward
and reverse) and a FAM™ dye-labeled TaqMan® MGB probe, provided as a 20✕ assay mix.
September 26, 2003 3:14 pm, C2_Design.fm
DRAFT
If you order Assays-on-Demand or Assays-by-Design products, probes are already labeled with a reporter dye. (If you
design your own assays, you would need to specify a reporter dye for your custom probe(s).) For singleplex experiments,
where the targets and endogenous controls are amplified in separate wells, you can use the same dye for targets and
endogenous control(s). For multiplex experiments, where the targets and endogenous controls are amplified in the same
well, the probe for the target is typically labeled with FAM dye and that for the endogenous control with VIC® dye.
In the sample experiment, all target probes were labeled with FAM dye; the endogenous control was also labeled with FAM
dye (GAPDH-FAM).
The following table lists the gene symbol, gene name, and Applied Biosystems Assay ID number (provided on the Web site)
for five of the genes studied in the sample experiment, plus the endogenous control.
Gene Symbol
Gene Name
Assay ID #
ACVR1
acrosomal vesicle protein I
Hs00153836 m1
ACVR2
activin A receptor, type II
Hs00155658_m1
CCR2
chemokine (C-C motif) receptor 2
Hs00174150_m1
CD3D
CD3D antigen, delta polypeptide (TiT3 complex)
Hs00174158_m1
FLT4
fms-related tyrosine kinase 4
Hs00176607 m1
GAPDH
glyceraldehyde-3-phosphate dehydrogenase
Hs99999905 m1
Notes
Relative Quantification Getting Started Guide for 7000 v1.1
13
2
Primer Extended on mRNA
5′
3′
Reverse
Primer
5′ cDNA
Oligo d(T) or random hexamer
Synthesis of 1st cDNA strand
5′ cDNA
3′
Have you:
• Selected the PCR
method?
• Designated the four
essential components?
• Selected an SDS chemistry
& reagent configuration?
• Designed primers and
probes?
No
Chapter
2
Design an RQ experiment
according to guidelines in
chapter 2.
Yes
No
Do you have purified
total RNA?
page 16
Isolate total RNA using
these guidelines.
page 16
Adjust RNA concentration.
page 16
Convert total RNA to cDNA
using the High Capacity
cDNA Archive Kit.
GU
U U
A C
Yes
Is the concentration
of RNA within the
recommended range?
No
.1 to 10 µg
No
on mRNA
3
Reverse
Primer
5′ cDNA
Oligo d(T) or random hexamer
DNA strand
5′ cDNA
Go to chapter 4,
Generating Data
from RQ Plates
Chapter 3 Performing Reverse Transcription
September 26, 2003 3:14 pm, C3_RT.fm
Have you converted
the total RNA to cDNA?
DRAFT
Yes
Performing Reverse Transcription
Primer Extended on mRNA
5′
3′
Reverse
Primer
5′ cDNA
Oligo d(T) or random hexamer
Synthesis of 1st cDNA strand
3′
5′ cDNA
Workflow
Designing
an RQ
Experiment
Primer Extended on mRNA
5′
3′
Reverse
Primer
5′ cDNA
Oligo d(T) or random hexamer
Synthesis of 1st cDNA strand
3′
5′ cDNA
Performing
Reverse
Transcription
Performing Reverse Transcription
(cDNA generation)
1. Prepare total RNA samples.
Generating
Data from
RQ Plates
2. Use the manual method of the
High Capacity cDNA Archive Kit
to generate cDNA.
3
Performing
an RQ Study
As discussed in “Selecting the PCR Method” on page 7, there are two RT-PCR methods
that you can choose from when performing RQ experiments: one-step RT-PCR or twostep RT-PCR.
September 26, 2003 3:14 pm, C3_RT.fm
DRAFT
RT-PCR Methods
IMPORTANT! Applied Biosystems recommends that you use the two-step RT-PCR
method for RQ experiments. This guide assumes that RQ experiments are designed
using two-step RT-PCR. Further, only the recommended reagent configurations are
documented. For additional options, refer to the Sequence Detection Systems Chemistry
Guide.
Notes
Relative Quantification Getting Started Guide for 7000 v1.1
15
Primer Extended on mRNA
5′
3′
Reverse
Primer
Chapter 3 Performing Reverse Transcription
5′ cDNA
Oligo d(T) or random hexamer
Synthesis of 1st cDNA strand
5′ cDNA
3′
Guidelines for Preparing RNA
Guidelines for Preparing RNA
Quality of RNA
Ensure that the total RNA you use for RQ experiments is of reasonable quality:
• Its A260/280 ratio should be greater than 1.9
• It should be intact when visualized by gel electrophoresis
• It should not contain RT or PCR inhibitors
The High Capacity cDNA Archive Kit Protocol (4312169) contains additional guidelines
for preparing the RNA template.
Starting Amount
of Total RNA
The High Capacity cDNA Archive Kit is optimized to convert 0.1 to 10 µg of total RNA
to cDNA. Convert enough total RNA so that the final concentration of total RNA
converted to cDNA is 10 to 100 ng in 5 µL for each 50-µL PCR reaction.
Generating cDNA
Using the High
Capacity cDNA
Archive Kit
As mentioned in “About Reagent Configurations for RT-PCR” on page 12, Applied
Biosystems recommends that you use the two-step RT-PCR method for RQ experiments.
Synthesis of cDNA from total RNA samples using the High Capacity cDNA Archive Kit
(PN 4322171) is the first step in the two-step RT-PCR procedure. Use the manual
method for converting total RNA into cDNA, as specified in the High Capacity cDNA
Archive Kit Protocol (PN 4322169).
Note: The protocol is not shipped with the High Capacity cDNA Archive Kit. You must
download the protocol from
http://docs.appliedbiosystems.com/search.taf
The High Capacity cDNA Archive Kit uses the following thermal cycling parameters for
the RT step.
Step Type
Time
Temperature
HOLD
10 min
25 ° C
HOLD
120 min
37 ° C
Note: Thermal cycling conditions for one-step RT-PCR are described in “Thermal
Cycling Conditions for One-Step RT-PCR” on page 25.
Notes
16
Relative Quantification Getting Started Guide for 7000 v1.1
DRAFT
Thermal Cycling
Parameters for RT
September 26, 2003 3:14 pm, C3_RT.fm
To search for the document, select ABI PRISM™ 6100 Nucleic Acid PrepStation under
Products, then click Search. The protocol is listed under the Protocols heading.
Generating cDNA
Storing cDNA
Storing cDNA
Primer Extended on mRNA
5′
3′
Reverse
Primer
5′ cDNA
Oligo d(T) or random hexamer
Synthesis of 1st cDNA strand
5′ cDNA
3′
After thermal cycling, store all cDNA samples at −15 to −25 ° C. To minimize repeated
freeze-thaw cycles of cDNA, Applied Biosystems recommends that you store your
cDNA samples in aliquots.
CHEMICAL HAZARD. 10 × RT Buffer may cause eye, skin, and
respiratory tract irritation. Read the MSDS, and follow the handling instructions. Wear
appropriate protective eyewear, clothing, and gloves.
Example
For the sample experiment, RNA was extracted from the liver, bladder, and kidney tissues of an individual. RNA
concentration was determined through spectrophotometry (using A260) and the RNA was diluted to a final concentration of
50 ng/µL.
The RT master mix was prepared as follows, using guidelines from the High Capacity cDNA Archive Kit Protocol:
Component
Volume (µL)/Reaction
10✕ Reverse Transcription Buffer
10
25✕ dNTPs
4
10✕ random primers
10
MultiScribe™ Reverse Transcriptase, 50 U/µL
5
Nuclease-free water
21
Total per reaction
50
3
The cDNA archive plate was then prepared by pipetting
• 50 µL of the RT master mix
• 30 µL of nuclease-free water
• 20 µL of RNA sample (bringing the total starting amount of RNA to 1 µg per 100 µL reaction)
The RNA was then converted to cDNA using the universal thermal cycling parameters for two-step RT-PCR, as described in
“Thermal Cycling Parameters for RT” on page 16.
September 26, 2003 3:14 pm, C3_RT.fm
DRAFT
The cDNA was stored at −20 ° C for 24 hours.
Notes
Relative Quantification Getting Started Guide for 7000 v1.1
17
Prim
5′
Syn
3′
No
on mRNA
3
Do you have cDNA?
Reverse
Primer
5′ cDNA
Oligo d(T) or random hexamer
DNA strand
Chapter
3
Reverse transcribe
total RNA to cDNA.
page 20
Prepare the PCR master mix
as directed in the TaqMan ®
Universal PCR Master Mix Protocol.
page 22
Create a new RQ plate document.
5′ cDNA
Yes
Have you prepared the
PCR master mix?
PCR
Master
Mix
No
Yes
No
Have you created an
RQ plate document?
Yes
No
Have the detectors for
the experiment been
added to the software?
page 23
Create detectors.
No
Are the default thermal
cycling conditions for
PCR set?
page 25
Program the default PCR conditions
or enter the thermal cycling
conditions for one-step RT-PCR
page 26
Save the data in the RQ plate
document.
page 28
View the RQ plate data to
confirm that the run was
successful.
Yes
No
Have you saved the
data from the PCR run?
Yes
No
Have you viewed the
RQ plate data?
Yes
Go to chapter 5,
Performing an
RQ Study
Chapter 4 Generating Data in RQ Plates
DRAFT
Start the run.
September 26, 2003 3:14 pm, C4_RQPlate.fm
Yes
Generating Data from RQ Plates
Workflow
Designing
an RQ
Experiment
Generating Data from RQ Plates
Primer Extended on mRNA
5′
3′
Reverse
Primer
5′ cDNA
Oligo d(T) or random hexamer
Synthesis of 1st cDNA strand
3′
5′ cDNA
Performing
Reverse
Transcription
1. Prepare the PCR Master Mix
using TaqMan Universal PCR
Master Mix.
2. Create an RQ Plate document.
Generating
Data from
RQ Plates
3. Create detectors.
3. Set thermal cycling parameters.
4. Save and run the RQ plate.
September 26, 2003 3:14 pm, C4_RQPlate.fm
DRAFT
Performing
an RQ Study
5. Analyze and view the results.
Before You Begin
Calibrating the
7000 SDS
instrument
Check that background and pure-dye runs have been performed regularly to ensure
optimal performance of the 7000 SDS instrument. For more information about
calibrating the 7000 SDS instrument, refer to the Online Help for the 7000 SDS
instrument.
Preventing
Contamination
PCR techniques require special laboratory practices to avoid false positive
amplifications (Kwok and Higuchi, 1989). The high throughput and repetition of these
techniques can lead to amplification of a single DNA molecule (Saiki et al., 1985; Mullis
and Faloona, 1987).
4
Notes
Relative Quantification Getting Started Guide for 7000 v1.1
19
Chapter 4 Generating Data from RQ Plates
Preparing the PCR Master Mix
Follow these recommended general PCR practices:
• Wear a clean lab coat (not previously worn while handling amplified PCR products
or used during sample preparation) and clean gloves when preparing samples for
PCR amplification.
• Change gloves whenever you suspect that they are contaminated.
• Maintain separate areas, dedicated equipment, and supplies for:
– Sample preparation and PCR setup
– PCR amplification and post-PCR analysis
• Never bring amplified PCR products into the PCR setup area.
• Open and close all sample tubes carefully. Try not to splash or spray PCR samples.
• Quick-spin PCR samples whenever residual sample is present on the inside lid
(such as after dropping a tube or when there is condensation on the tube from
heating or thawing)
• Keep reactions and components capped as much as possible.
• Use aerosol-resistant or positive-displacement pipette tips.
• Clean lab benches and equipment periodically with freshly diluted 10% chlorine
bleach.
Preparing the PCR Master Mix
The second step in the two-step RT-PCR procedure is amplifying the cDNA. TaqMan®
Universal Master Mix reagents provide a PCR mix that may be used with any
appropriately designed primer and probe to detect any DNA or cDNA sequence.
Reaction Component
Volume (µL)
Per Sample
Final Concentration
TaqMan Universal PCR Master Mix (2✕)
25.0
1✕
Forward primer
5.0
50 to 900 nM
Reverse primer
5.0
50 to 900 nM
TaqMan probe
5.0
50 to 250 nM
cDNA sample
5.0
10 to 100 ng
Nuclease-free water
5.0
—
Total
50.0
—
Notes
20
Relative Quantification Getting Started Guide for 7000 v1.1
DRAFT
CHEMICAL HAZARD. TaqMan Universal PCR Master Mix
may cause eye and skin irritation. Exposure may cause discomfort if swallowed or
inhaled. Read the MSDS, and follow the handling instructions. Wear appropriate
protective eyewear, clothing, and gloves.
September 26, 2003 3:14 pm, C4_RQPlate.fm
The TaqMan Universal PCR Master Mix Protocol (PN 4304449) explains how to use the
reagents provided in the kit. The following table lists the universal assay conditions
(volume and final concentration) for using the master mix.
Preparing the PCR Master Mix
Preventing Contamination
For most TaqMan reagent- or kit-based assays that are designed and run following
Applied Biosystems assay development guidelines (refer to the Sequence Detection
Systems Chemistry Guide), using a concentration of 900-nM primers and a 250-nM
probe provides a highly reproducible and sensitive assay when using cDNA or DNA as a
substrate in a singleplex assay.
Probes and primers that you design using Primer Express software must be optimized to
work with the universal assay conditions, using the volumes listed in the table on
page 20.
All Assays-by-Design (ABD) and Assays-on-Demand (AOD) products are formulated
so that the final concentration of the primers and probes falls within the recommended
parameters. But because the primers and probes are supplied as a 20✕ assay mix, the
volumes are slightly different from the universal assay conditions, as explained in the
following Example.
CHEMICAL HAZARD. TaqMan Universal PCR Master Mix
may cause eye and skin irritation. Exposure may cause discomfort if swallowed or
inhaled. Read the MSDS, and follow the handling instructions. Wear appropriate
protective eyewear, clothing, and gloves.
Example
Primers and probes for the sample RQ experiment were obtained from the Assays-on-Demand™ product line and were
provided as a 20✕ Gene Expression Assay Mix. The PCR master mix was prepared as follows (according to guidelines
specified in the product insert that comes with all AOD and ABD products):
Reaction Component
Volume (µL)
Per Sample
Final Concentration
TaqMan Universal PCR Master Mix (2✕)
25.0
1✕
20✕ Assays-on-Demand Gene
Expression Assay Mix
(contains forward and reverse primers
and labeled probe)
2.5
1✕
cDNA sample
5.0
50 ng (for the 50-µL
reaction)
Nuclease-free water
17.5
—
Total
50.0
—
September 26, 2003 3:14 pm, C4_RQPlate.fm
DRAFT
™
4
The reactions were kept on ice until the plate was loaded on the 7000 SDS instrument.
Notes
Relative Quantification Getting Started Guide for 7000 v1.1
21
Chapter 4 Generating Data from RQ Plates
Creating an RQ Plate Document
Creating an RQ Plate Document
Summary
An RQ Plate document is an SDS document that stores data collected from an RQ run
for a single plate; there must be one RQ Plate document for every RQ plate. RQ Plate
documents also store other information about the run, including sample names and
detectors.
IMPORTANT! You cannot change the data collected during the run. However, the 7000
SDS instrument software allows you to change sample names and detectors even after a
run has been completed.
A plate document appears as a three-tabbed pane in the software window. Each tab
relates to a step in the analysis process: Setup, Instrument, and Results. The Results tab
has several subtabs for the various viewers associated with an assay.
Run Setup
Requirements
Before creating an RQ Plate document, you must define several parameters for each RQ
plate:
• Detectors – Determine which detector you will use for each sample and endogenous
control. Appendix A, “Creating Detectors,” explains how to create detectors.
IMPORTANT! To conduct a comparative analysis of the data in a study, all the
plates in the study must contain a common set of detectors.
IMPORTANT! In order to open RQ Plate or RQ Study documents, you must have
the RQ Study Software installed, as explained in Appendix B.
Detector Tasks
A task is a setting that you apply to the detectors within a well of a plate document and
that determines the way the software uses the data collected from the well during
analysis.
• Target – All detectors of wells that contain PCR reagents for the amplification of
target sequences. The instrument software indicates targets by a .
• Endogenous Control – All detectors of wells that contain reagents for the
amplification of the endogenous control sequence. The instrument software
indicates endogenous controls by an .
Notes
22
Relative Quantification Getting Started Guide for 7000 v1.1
DRAFT
For RQ Plate documents, there are two types of tasks:
September 26, 2003 3:14 pm, C4_RQPlate.fm
• Endogenous control(s) – If your experiment consists of multiple plates, each plate
must have at least one endogenous control with at least three replicates. If your
experiment consists of a single plate with multiple samples, there must be an
endogenous control for each sample. “Specifying the Components of an RQ
Experiment” on page 9 explains the concept of an endogenous control. All plates
must use the same endogenous control (for example, GAPDH).
Creating an RQ Plate Document
Detector Tasks
To create a new plate document:
1. Select Start > Programs > ABI Prism 7000 >
ABI Prism 7000 SDS Software (
7000 SDS instrument software.
)to start the
2. Select File > New. The New Document dialog
box opens.
3. In the Assay drop-down list, select Relative
Quantification (ddCt) Plate. Accept the default
settings for the Container and Template fields
(96-Well Clear and Blank Document).
4. Click OK. The 7000 SDS instrument software
opens a new RQ Plate document.
5. Specify the detectors for the plate.
a. Select Tools > Detector Manager. The
Detector Manager dialog box lists all
detectors that have been created for the
system. If no detectors are listed in the
Detector Manager dialog box, create
detectors as explained in Appendix A,
“Creating Detectors.”
b. Click on the detector name/s to select the
appropriate detector/s.
c. Click Add to Plate Document. The
detectors are added to the plate document.
u
d. Click Done or
to close the Detector
September 26, 2003 3:14 pm, C4_RQPlate.fm
DRAFT
Manager.
Selected detectors
Note: After adding detectors to a document, the
Detector Manager remains open until you close
the window.
4
6. Label the wells of the plate.
a. Select View > Well Inspector. The Well
Inspector dialog box lists the detectors that
you added in step 5.
b. Click a well to select it. If there are replicate
wells for a sample, click on all the wells to
select them.
c. In the Well Inspector, enter the sample
name.
Notes
Relative Quantification Getting Started Guide for 7000 v1.1
23
Chapter 4 Generating Data from RQ Plates
Creating an RQ Plate Document
7. In the Well Inspector, select the detector/s and
detector tasks for each sample.
a. Click on a detector to select it.
b. Click the Use check box.
c. Click under the Task column to assign the
detector task.
d. Repeat steps a to c until all detectors and
detector tasks have been specified.
8. Accept the default setting for the Passive
Reference (ROX™ dye).
9. Click
to close the Well Inspector.
6c
7a – b
7c 8
9
10. Verify the information on each well in the Setup
tab.
Note: You can import sample information from
spreadsheets or use template documents to set up
plate documents. Refer to the Online Help for the
7000 SDS instrument for more information about
these tasks.
Example
In the sample RQ experiment, the samples for each of the three tissues (liver, kidney, and bladder) were plated on three
separate plates. Consequently, there were three RQ Plate documents created, one for each of the sample plates.
The figure below shows a sample RQ Plate document after sample names, detectors, and detector tasks have been
assigned for each well in the liver plate.
Sample Name
For a sample illustration of how a multiplexed plate would appear, refer to the “Comparative Method” topic of the Online
Help for the 7000 SDS instrument.
Notes
24
Relative Quantification Getting Started Guide for 7000 v1.1
DRAFT
Detector Task and
Color
September 26, 2003 3:14 pm, C4_RQPlate.fm
Because it is a singleplex experiment, there is only one sample—either a target or endogenous control, but not both—in
each well. Each well is associated with a detector (indicated by the colored squares). Additionally, each well has also been
assigned a detector task—T (target) or E (endogenous control).
Specifying Thermal Cycling Conditions and Starting the Run
Default Thermal Cycling Conditions for PCR
Specifying Thermal Cycling Conditions and Starting the Run
Default Thermal Cycling Conditions for
PCR
If you selected the two-step RT-PCR method for your
RQ experiment (recommended), you have already
completed the RT step. At this point in the workflow,
you are ready to PCR amplify cDNA.
The default thermal cycling conditions for the PCR
step of the procedure, shown in the following table,
should appear on the Instrument tab.
Times and Temperatures (Two-step RT-PCR)
1) RT Step
HOLD
HOLD
10 min @ 25 ° C
120 min @ 37 ° C
* For reference only. RT is complete at this
point.
Initial Steps
AmpErase®
PCR (Each of 40 cycles)
Gold®
UNG
Activation
AmpliTaq
DNA
Polymerase Activation
Melt
HOLD
HOLD
CYCLE
2 min @ 50 ° C
10 min @ 95 ° C
15 sec @ 95 ° C
2) PCR Step
Anneal/Extend
1 min @ 60 ° C
Thermal Cycling Conditions for One-Step
RT-PCR
September 26, 2003 3:14 pm, C4_RQPlate.fm
DRAFT
If you selected the one-step RT-PCR method, cDNA
generation and amplification take place
simultaneously at this point in the workflow.
The following table shows the thermal cycling
conditions for one-step RT-PCR experiments.
4
Times and Temperatures (One-step RT-PCR)
Initial Steps
PCR (Each of 40 Cycles)
AmpliTaq®
Reverse Transcription
Gold DNA
Polymerase Activation
HOLD
HOLD
30 min @ 48 ° C
10 min @ 95 ° C
Melt
Anneal/Extend
CYCLE
15 sec @ 95 ° C
1 min @ 60 ° C
Notes
Relative Quantification Getting Started Guide for 7000 v1.1
25
Chapter 4 Generating Data from RQ Plates
Specifying Thermal Cycling Conditions and Starting the Run
To specify thermal cycling conditions and start the
run:
1. Select the Instrument tab.
By default, the standard PCR conditions for the
PCR step of the two-step RT-PCR method are
displayed.
2. Verify that:
• If you are using two-step RT-PCR – The
default thermal cycling conditions are set.
• If you are using one-step RT-PCR – You set
the thermal cycling parameters as shown in
“Thermal Cycling Conditions for One-Step
RT-PCR” on page 25.
• The sample volume is set to 50 µL.
• The 9600 Emulation check box is selected.
3. Select File > Save As, enter a name for the RQ
Plate document, then click Save.
4. Load the plate into the instrument.
As the instrument performs the PCR run, it
displays real-time status information in the
Instrument tab. When the run is finished, the
status values and the buttons are grayed-out.
Additionally, the Analysis button is enabled
( ).
Position plate
with well A1
at the upper
left-hand
corner.
During the run, the instrument records the
fluorescent emissions resulting from cleavage of
TaqMan probes in the presence of the target and
reference sequences.
DRAFT
All data generated during the run are saved to the
RQ Plate document that you specified in step 3.
Notes
26
Relative Quantification Getting Started Guide for 7000 v1.1
September 26, 2003 3:14 pm, C4_RQPlate.fm
5. Click Start.
Analyzing and Viewing RQ Plate Data
Terms Used in Quantification Analysis
Analyzing and Viewing RQ Plate Data
Terms Used in
Quantification
Analysis
Following are terms commonly used in quantification analysis.
Term
Definition
Baseline
A line fit to the initial cycles of PCR, in which there is little change in
fluorescence signal.
For information about setting the baseline, refer to the Online Help
for the 7000 SDS instrument.
Threshold cycle (CT)
The fractional cycle number at which the fluorescence passes the
threshold.
For information about setting the threshold, refer to the Online Help
for the 7000 SDS instrument.
Passive reference
A dye that provides an internal fluorescence reference to which the
reporter dye signal can be normalized during data analysis.
Normalization is necessary to correct for fluorescent fluctuations
caused by changes in concentration or of volume.
Reporter dye
The dye attached to the 5′ end of a TaqMan probe. The dye
provides a signal that is an indicator of specific amplification.
Normalized reporter
(Rn)
The ratio of the fluorescence emission intensity of the reporter dye
to the fluorescence emission intensity of the passive reference dye.
Delta Rn (∆Rn)
The magnitude of the signal generated by the given set of PCR
conditions. (∆Rn = Rn −baseline)
The figure below shows a representative amplification plot and includes some of the
terms defined above.
Rn+
September 26, 2003 3:14 pm, C4_RQPlate.fm
DRAFT
Sample
Rn
Rn
4
Threshold
Rn–
No Template Control
Baseline
0
5
10
15
GR0757
CT
20
25
30
35
40
Cycle Number
Starting the
Analysis
To analyze RQ Plate data after the run, select Analysis > Analyze. The SDS software
mathematically transforms the raw fluorescence data to establish a comparative
relationship between the spectral changes in the passive reference dye and those of the
reporter dyes. Based on that comparison, the software generates several types of result
views, as described in the following section.
Notes
Relative Quantification Getting Started Guide for 7000 v1.1
27
Chapter 4 Generating Data from RQ Plates
Analyzing and Viewing RQ Plate Data
Viewing the analysis results helps you verify that the cDNA was correctly amplified.
The four types of result views are shown in the following table.
View/Description
Plate
Displays the sample name,
detector task and color, and
Rn value.
Spectra
Displays a plot of spectra
(raw fluorescence data) for
the selected cycle number
and well/s.
To view the plot...
Example
In the Results tab, click the Plate
subtab.
The plate appears on the screen.
1. In the Results tab, click the
Spectra subtab.
The Cycle Number slider is at 1
and the plot is empty until you
select wells.
The plot varies depending on
the reporter dye used in the
assay. The example on the
right shows a successful
amplification when the FAM
reporter dye is used.
2. Click a well to include it in the
plot. (Ctrl-click to include multiple
wells; Click-drag to include
multiple adjacent wells.)
Component
1. In the Results tab. click the
Component subtab.
The graph is blank until you
select wells.
2. Click on a well to include it in the
plot. (Ctrl-click to include multiple
wells; Click-drag to include
multiple adjacent wells.)
DRAFT
Displays a plot of
fluorescence level of each
dye against the cycle number
for selected well/s.
3. Move the slider to indicate the
cycle number.
Notes
28
Relative Quantification Getting Started Guide for 7000 v1.1
September 26, 2003 3:14 pm, C4_RQPlate.fm
Types of Result
Views
Analyzing and Viewing RQ Plate Data
Reanalyzing Data
View/Description
To view the plot...
Amplification Plot
This view displays a plot of
Rn against cycle number for
the selected detector and
well/s.
Example
1. In the Results tab, click the
Amplification Plot subtab.
The plot is empty until you select
a detector (or all detectors) and
well/s.
2. Click on a well to include it in the
plot. (Ctrl + click to include
multiple wells; Click and drag to
include multiple adjacent wells.)
3. Select an individual detector or
All (all detectors) in the Detector
drop-down list.
Note: You can modify the graph settings for several of the result views, as explained in
“Modifying Graph Settings” on page 39.
Reanalyzing Data
Raw data fluorescence data (spectra), Rn values, and well information (sample name,
detector, and detector task) are saved in an RQ plate document.
If you decide to omit wells or change well information after a run has been completed,
you must reanalyze the data.
September 26, 2003 3:14 pm, C4_RQPlate.fm
). Whenever
you change a setting that requires reanalysis, the Analyze button is enabled ( ).
DRAFT
Note: After the software analyzes data, the Analyze button is disabled (
4
Notes
Relative Quantification Getting Started Guide for 7000 v1.1
29
Chapter 4 Generating Data from RQ Plates
Exporting RQ Plate Documents
Exporting RQ Plate Documents
1. Select File > Export, then select the data type to
export:
• Sample Setup (*.txt)
• Calibration Data (*.csv)
• Background Spectra (*.csv)
• Component (*.csv)
• Rn (*.csv)
Typically, you export sample setup data for
newly created and newly run plates; other data
types are exported for existing plates.
2. Enter a file name for the export file.
Note: The name of the dialog box depends on
the type of data you want to export.
Notes
30
Relative Quantification Getting Started Guide for 7000 v1.1
September 26, 2003 3:14 pm, C4_RQPlate.fm
DRAFT
3. Click Save.
Exporting RQ Plate Documents
September 26, 2003 3:14 pm, C4_RQPlate.fm
DRAFT
Reanalyzing Data
4
Notes
Relative Quantification Getting Started Guide for 7000 v1.1
31
Prim
5′
Syn
3′
Have you have one
or more RQ plate
documents?
No
Chapter
4
Generate data and save
it in RQ plate documents.
page 33
Create a new RQ study
document.
page 34
Add one or more plates
to the study.
Yes
Have you created
an RQ Study
document?
No
No
Have you added
plates to the study?
Yes
Have you configured
the analysis settings
for the study?
No
page 35
Specify the analysis settings
for the study.
Analyze the results of the RQ study
by viewing the amplification or
gene expression plates.
Chapter 5 Performing an RQ Study
DRAFT
Yes
September 26, 2003 3:14 pm, C5_RQStudy.fm
Yes
Performing an RQ Study
Workflow
Designing
an RQ
Experiment
Primer Extended on mRNA
5′
3′
Reverse
Primer
5′ cDNA
Oligo d(T) or random hexamer
Synthesis of 1st cDNA strand
3′
5′ cDNA
Performing
Reverse
Transcription
Performing an RQ Study
Generating
Data from
RQ Plates
1. Create an RQ Study document.
a. Add plates to the study.
b. Configure analysis settings.
September 26, 2003 3:14 pm, C5_RQStudy.fm
DRAFT
Performing
an RQ Study
c. Select samples for the study.
2. View and analyze the results.
Creating an RQ Study Document
To conduct a comparative analysis of RQ plates in a study, you must first create anRQ
Study document. The 7000 v1.1 software with the RQ Study Add On uses the
comparative method (2−∆∆Ct) of relative quantification. For more information about
methods of calculating relative quantification, refer to ABI PRISM® 7700 Sequence
Detection System User Bulletin #2.
In an RQ study, you can...
You cannot
• Select the endogenous control and the calibrator sample
• Create, add, or modify samples
• Select the control type (The 7000 SDS instrument
software assigns the control type when applicable.)
• Create, add, or modify detectors
• Change detector tasks
• Set baseline and threshold parameters and RQ Min/Max
Confidence Levels
• Omit individual wells or sample replicates
5
Notes
Relative Quantification Getting Started Guide for 7000 v1.1
33
Chapter 5 Performing an RQ Study
Creating an RQ Study Document
To create a new RQ Study document:
1. Select File> New. The New Document dialog
box opens.
2. In the Assay drop-down list, select Relative
Quantification (ddCt) Study. Accept the default
settings for the Container and Template fields
(96-Well Clear and Blank Document).
3. Click OK. The SDS software opens a new RQ
Study document and displays the RQ Study Main
View.
The RQ Study Main View has three frames:
a. RQ Detector Grid – Allows you to select
detectors to associate with the loaded study.
The following information is displayed for
each detector: Color, Detector name,
Threshold Value, Auto-Ct, and Baseline.
3a
b. RQ Sample Grid – Displays the samples
associated with the selected detector(s). The
Sample Grid displays numerical results of
RQ computations and has two subtabs:
Sample Summary or Well Information.
3c
3b
c. RQ Results Panel – Contains the three
results-based tabs (Plate, Amplification
Plot, and Gene Expression).
4. Add plates to the study.
a. Click Add Plate. The Select RQ Plate(s)
b. Select the plate(s) that you want to add to
the study, then click Open. The selected
plates are displayed in the Plate tab.
IMPORTANT! All plates added to a study
DRAFT
must have identical thermal cycling
parameters—the same number of steps,
cycles, sample volume, emulation mode.
The SDS software will reject a plate if it
detects any differences.
Notes
34
Relative Quantification Getting Started Guide for 7000 v1.1
September 26, 2003 3:14 pm, C5_RQStudy.fm
dialog box opens.
Creating an RQ Study Document
5. Configure analysis settings.
a. Select Analysis > Analysis Settings. The
Analysis Settings dialog box opens.
b. In the Detectors drop-down list, select All.
c. Select AutoCt or Manual Ct.
• If you select AutoCt, the SDS software
automatically calculates both the
threshold and baseline. After analysis,
you must verify that the baseline and
threshold were called correctly for
each detector. Refer to the Online Help
for the 7000 SDS instrument.
• If you select ManualCt, specify both
the threshold and the baseline for the
selected detector(s).
d. Select the calibrator sample.
Note: As discussed in “Specifying the
Components of an RQ Experiment” on
page 9, if your experiment uses only a
single plate, there must be at least two
different samples that have different names
and have their own endogenous controls.
(You can go back to a saved RQ Plate
document and change the sample names, if
necessary.)
e. Select the Endogenous Control Detector.
f. Select the Control Type if the study contains
September 26, 2003 3:14 pm, C5_RQStudy.fm
DRAFT
both multiplex and nonmultiplex reactions.
Note: If the study contains only singleplex
reactions, Nonmultiplexed is automatically
selected; if it contains only multiplex
reactions, Multiplexed is automatically
selected. Only when a study contains both
types of reactions are you asked to indicate
the control type.
g. Select the RQ Min/Max Confidence level.
h. Click
. The detector information
appears in the RQ Detector grid.
For more information about the settings in the
Analysis Settings dialog box, refer to the online
help for the 7000 SDS instrument.
5
Notes
Relative Quantification Getting Started Guide for 7000 v1.1
35
Chapter 5 Performing an RQ Study
Creating an RQ Study Document
6. In the RQ Detector Grid, select detectors to
include in the result graphs by clicking a
detector. (Ctrl-click to include multiple detectors;
Click-drag to include multiple adjacent
detectors.)
The corresponding samples appear in the RQ
Sample Grid. Depending on which tab you select
in the RQ Results Panel (Plate, Amplification
Plot, or Gene Expression), analysis results are
displayed.
To see information about a specific well, select
the Well Information tab.
Example
Suppose that you wanted to view the comparative gene expression levels of the following genes when the liver tissue was
used as the calibrator: ACVR1, ACVR2, CCR2, CD3D, and FLT4.
Selecting the detectors in the RQ Detector grid (1) displays the sample information in the RQ Sample grid (2) and a result
graph in the RQ Results panel (3). Note that
• The Gene Expression tab is selected.
• The gene expression levels are sorted by detector.
• Gene expression levels for bladder samples are denoted by the green bar; those for kidney samples by the blue bar.
These colors are used to denote the samples in the RQ Sample Grid and the RQ Results Panel plots.
• Liver samples were used as calibrators; consequently, the expression level of these samples is set to 1. But because the
graph plots gene expression levels as log10 values (and the log10 of 1 is 0), the expression level of the calibrator sample
appears as 0 in the graph.
• Because the relative quantities of the targets are normalized against the relative quantities of the endogenous control,
the expression level of the endogenous control is 0; there are no bars in for GAPDH.
1
3
DRAFT
2
Notes
36
Relative Quantification Getting Started Guide for 7000 v1.1
September 26, 2003 3:14 pm, C5_RQStudy.fm
• The value in the RQ column in the Sample Summary tab is 2−∆∆CT.
Analyzing and Viewing the Results of the RQ Study
Viewing Amplification Plots
Analyzing and Viewing the Results of the RQ Study
Viewing
Amplification
Plots
Amplification Plots show either of the following:
• The fluorescence of each detector as a function of cycle number
• The threshold cycle (CT) as a function of well position.
View/Description
To view the plot...
Rn vs. Cycle (Linear)
The Rn vs. Cycle plot displays
normalized reporter (Rn) dye
fluorescence as a function of cycle.
You can use this plot to identify and
examine irregular amplification.
Example
1. In the RQ Results panel,
select the Amplification
Plot tab.
2. In the Data drop-down list,
select Rn vs. Cycle.
For more information about Rn, refer
to the online help for the 7000 SDS
instrument.
∆Rn vs.Cycle (Log)
September 26, 2003 3:14 pm, C5_RQStudy.fm
DRAFT
The ∆Rn vs.Cycle plot displays Rn
dye fluorescence as a function of
cycle number. You can use this plot
to identify and examine irregular
amplification and to manually set
the threshold and baseline
parameters for the run.
Ct vs. Well Position
The Ct vs. Well Position plot
displays threshold cycle (Ct) as a
function of well position. You can
use this plot to locate outliers from
detector data sets (see “Omitting
Samples from a Study” on page 41
for more information).
1. In the RQ Results panel,
select the Amplification
Plot tab.
2. In the Data drop-down list,
select Delta Rn vs. Cycle.
1. In the RQ Results panel,
select the Amplification
Plot tab.
2. In the Data drop-down list,
select Ct vs. Well Position.
Refer to “Terms Used in Quantification Analysis” on page 27 for definitions of Rn, ∆Rn,
CT, and other terms used in quantification analysis.
Notes
Relative Quantification Getting Started Guide for 7000 v1.1
37
5
Chapter 5 Performing an RQ Study
Analyzing and Viewing the Results of the RQ Study
Viewing Gene
Expression Plots
Gene Expression plots show the expression level or fold-difference of the target sample
relative to the calibrator as log10 of the 2−∆∆Ct value. For example, if the bladder has a
log10 relative quantification value of 5 relative to the kidney, then that gene (detector) is
expressed at a level five times higher in the bladder than in the kidney.
Note: Because the calibrator is compared to itself, the expression level for the calibrator
is always 1.
Gene Expression Plot
Orientation: Detector
Detectors are plotted on the x-axis,
and each bar shows the detector
value of a given sample.
Gene Expression Plot
Orientation: Sample
Example
1. In the RQ Results panel,
select the Gene
Expression tab.
2. In the Orientation dropdown list, select Detector.
1. In the RQ Results panel,
select the Gene
Expression tab.
2. In the Orientation dropdown list, select Sample.
DRAFT
Samples are plotted on the x-axis,
and each bar shows the set of
sample values of a given detector.
To view the plot...
Notes
38
Relative Quantification Getting Started Guide for 7000 v1.1
September 26, 2003 3:14 pm, C5_RQStudy.fm
View/Description
Analyzing and Viewing the Results of the RQ Study
Modifying Graph Settings
Modifying Graph Settings
You can modify the default graph settings for several
graphs, including Amplification and Gene Expression
plots. For example, you can use labeled 3-D bars in
the Gene Expression plot.
1. In a graph, double-click an axis of a plot or select
Analysis > Graphical Settings to display the
Graph Settings dialog box.
• To set real-time settings, change them before you
start the run. Auto Scale is the default.
• To set the graph scaling for post-run data, set the
y-axis of the graph to linear or log.
2. Select Apply. The system applies the changes
made in the graphical settings box to the active
plot.
3. Select OK to close the Graph Settings dialog.
September 26, 2003 3:14 pm, C5_RQStudy.fm
DRAFT
For more information about graph settings, refer to
the Online Help for the 7000 SDS instrument.
5
Notes
Relative Quantification Getting Started Guide for 7000 v1.1
39
Chapter 5 Performing an RQ Study
Reanalyzing an RQ Study
Reanalyzing an RQ Study
If you change any of the analysis settings, you must reanalyze the data before you can
view any results. (You can switch between the variations of the Amplification and Gene
Expression plots without having to reanalyze the data.)
Suppose you select Liver as the calibrator, then perform an analysis. Next, you view the
Amplification and Gene Expression plots. If you then want to use Kidney or Bladder as
the calibrator, you need to reanalyze the data before viewing results.
Similarly, if you want to change the baseline or threshold values, the endogenous
control, the control type, or the RQ Min/Max parameters, you need to reanalyze your
data.
Bladder as Calibrator
Notes
40
Relative Quantification Getting Started Guide for 7000 v1.1
September 26, 2003 3:14 pm, C5_RQStudy.fm
Kidney as Calibrator
DRAFT
Liver as Calibrator
Omitting Samples from a Study
Omitting Samples from a Study
For any PCR, experimental error may cause some
wells to amplify insufficiently or not at all. These
wells typically produce CT values that differ
significantly from the average for the associated
replicate wells. If included in the calculations, these
outliers can result in erroneous measurements.
To ensure precise relative quantification, you must
carefully view replicate groups for outlying wells.
You can remove outliers manually using the CT vs.
Well Position Amplification Plot.
To remove samples from an RQ Study:
1
1. Select the Amplification Plot tab.
2. In the Data drop-down list, select Ct vs. Well
2
Position.
3. In the RQ Detector grid, select a detector to
3
examine. All samples that use this detector are
displayed in the RQ Samples grid.
4
4. In the RQ Samples grid, click to select the
samples to display in the Amplification Plot.
5. Verify the uniformity of each replicate
Good
clustering
of replicate
data. No
outliers.
September 26, 2003 3:14 pm, C5_RQStudy.fm
DRAFT
population by comparing the groupings of CT
values for the wells that make up the set.
Potential
outlier.
5
Notes
Relative Quantification Getting Started Guide for 7000 v1.1
41
Chapter 5 Performing an RQ Study
Omitting Samples from a Study
6. Do one of the following:
• If outliers are present, select the Well
Information tab, find the outlying sample,
and select the Omit check box for the
sample.
• If outliers are not present, go to step 7.
7. Repeat steps 5 and 6 to screen the remaining
replicate groups.
8. Select Analysis > Analyze (
) to reanalyze the
run without the outlying data.
9. Repeat steps 3 to 8 for other detectors you want
Select the Omit
check box.
DRAFT
The outlier is
removed during
analysis.
Notes
42
Relative Quantification Getting Started Guide for 7000 v1.1
September 26, 2003 3:14 pm, C5_RQStudy.fm
to screen.
Exporting RQ Study Results
Exporting RQ Study Results
1. Select File > Export > Results, then select the
data type to export:
• Sample Summary (*.csv)
• Well Information (*.csv)
• Both (*.csv)
2. Enter a file name for the export file.
Note: The name of the dialog box depends on
the type of data you want to export.
September 26, 2003 3:14 pm, C5_RQStudy.fm
DRAFT
3. Click Save.
5
Notes
Relative Quantification Getting Started Guide for 7000 v1.1
43
Chapter 5 Performing an RQ Study
Notes
44
Relative Quantification Getting Started Guide for 7000 v1.1
September 26, 2003 3:14 pm, C5_RQStudy.fm
DRAFT
Exporting RQ Study Results
References
Kwok, S. and Higuchi, R. 1989. Avoiding false positives with PCR. Nature
339:237–238.
Mullis, K.B. and Faloona, F.A. 1987. Specific synthesis of DNA in vitro via a
polymerase-catalyzed chain reaction. Methods Enzymol. 155:335–350.
Livak, K.J., and Schmittgen, T.D. 2001. Analysis of Relative Gene Expression Data
Using Real-Time Quantitative PCR and the 2–∆∆CT Method. Methods 25:402–408.
September 26, 2003 3:17 pm, RQGSG_References.fm
DRAFT
Saiki, R.K., Scharf, S., Faloona, F., et al. 1985. Enzymatic amplification of β-globin
genomic sequences and restriction site analysis for diagnosis of sickle cell anemia.
Science 230:1350–1354.
Relative Quantification Getting Started Guide for 7000 v1.1
45
46
Relative Quantification Getting Started Guide for 7000 v1.1
September 26, 2003 3:17 pm, RQGSG_References.fm
DRAFT
References
A
Creating Detectors
Before you can use a plate document to run a plate, it
must be configured with detector information for the
experiment. A detector is a virtual representation of a
gene- or allele-specific nucleic acid probe reagent
used for analyses performed on SDS instruments.
Examples of reagents represented as detectors include
TaqMan® probes and the SYBR® Green 1 dsDNA
binding dye.
You must create and apply detectors for all assays
present on the plate before running it.
To create a detector:
1. Select Tools > Detector Manager. The Detector
Manager dialog box opens.
Note: A plate document (any type) must be open
September 26, 2003 3:14 pm, RQGSG_AppendixDetectors.fm
DRAFT
before you can access the Tools menu.
2. In the Detector Manager, select File > New. The
New Detector dialog box opens.
3. In the New Detector dialog box, enter a name for
the detector.
IMPORTANT! The name of the detector must be
unique and should reflect the target locus of the
assay (such as GAPDH or RNase P). Do not use
the same name for multiple detectors.
4. Optionally, click the Description field, then
enter a brief description of the detector.
3
4
5
6
7
8
10
Notes
Relative Quantification Getting Started Guide for 7000 v1.1
47
Appendix A
5. In the Reporter Dye and Quencher Dye dropdown lists, select the appropriate dyes for the
detector.
Note: The dyes that appear on the Reporter and
Quencher Dye lists are those that have been
previously entered using the Dye Manager. If the
dye that you want to use does not appear in a list,
use the Dye Manager to add the dye and then
return to this step in this procedure. Refer to the
Online Help for the 7000 SDS instrument for
more information.
6. Click the Color box, select a color to represent
the detector using the Color dialog box, then
click OK.
7. Optionally, click the Notes field, then enter any
additional comments for the detector.
8. Click OK to save the detector and return to the
Detector Manager dialog box.
9. Repeat steps 2 through 8 for the remaining
detectors.
when you have finished adding detectors.
g
Example
In the sample RQ experiment, a detector was created for each target gene and endogenous control. 24 detectors were
created: 23 for the target genes and 1 for the endogenous control, GAPDH.
For example, the detector for the ACVR1 gene was named ACVR1 and assigned a yellow color. Because all Assays-onDemand™ products have probes that are labeled with FAM™ dye, FAM was selected for the reporter dye. Additionally,
Assays-on-Demand products use TaqMan MGB probes, which do not need quenchers; no quencher dye was selected for
the detector.
Assays-on-Demand products are shipped with an assay information file (AIF). This text-based file contains information
about the assays that you ordered, including the Applied Biosystems Assay ID number, well-location of each assay, primer
concentration, and primer sequence. The file also indicates the reporter dyes and quenchers (if applicable) that are used for
each assay. When creating detectors, you would use the reporter dye and quencher information (and optionally, the gene
name or symbol for the sample name).
DRAFT
You can view the contents of AIFs in a spreadsheet program, such as Microsoft Excel.
Notes
48
Relative Quantification Getting Started Guide for 7000 v1.1
September 26, 2003 3:14 pm, RQGSG_AppendixDetectors.fm
10. In the Detector Manager dialog box, click Done
Upgrading the 7000 Software with
RQ Study
Installing the RQ
Study Software
B
This section describes how to upgrade ABI PRISM® 7000 SDS Software v1.1 to add the
RQ Study v1.0 software. The new software is installed in the ABI PRISM 7000 folder.
For a new installation, you can install the RQ Study v1.0 software when you install the
ABI PRISM® 7000 SDS Software v1.1. Follow the instructions in the ABI PRISM 7000
SDS Installation Guide.
Before you begin installation, check that you have:
• The RQ Study v1.0 Installer CD.
• Installed the current ABI PRISM® 7000 SDS Software v1.1.
• Administrator privileges.
To install the RQ Study software:
1. Insert the RQ Study v1.0 Installer CD into the CD-ROM drive. The installer on the
CD starts automatically. Follow the onscreen instructions as the software installs
the files.
2. When the Welcome window opens, click Next. The New Installation page opens to
September 26, 2003 3:17 pm, RQGSG_AppendixInstall.fm
DRAFT
indicate that the installer is ready to perform a new installation.
3. Click Next again. The wizard loads all the necessary files, creates the ABI PRISM
7000 SDS Software shortcut on the desktop, and registers your software.
4. When the installation is complete, click Finish.
5. When the software opens, enter the Registration code on the CD jewel case cover.
Cancel if you do not have a registration code.
6. Remove the CD, place it in its holder, and store it in a safe place.
Checking
Program File
Location
After the software is installed, check that the program files are in the following
locations:
• The default location for the 7000 SDS software program:
C:\Program Files\ABI Prism 7000\Prism7000.exe
Notes
Relative Quantification Getting Started Guide for 7000 v1.1
49
Appendix B
• The Start menu location for the 7000 SDS software shortcut:
Start\Programs\ABI Prism 7000\ABI Prism 7000 SDS Software
IMPORTANT! The installer program creates a link to the ABI PRISM 7000 SDS
Notes
50
Relative Quantification Getting Started Guide for 7000 v1.1
September 26, 2003 3:17 pm, RQGSG_AppendixInstall.fm
DRAFT
Software by placing a shortcut icon on the desktop during the installation. Clicking
the icon opens the program from the desktop without having to go through the Start
menu.
Index
Numerics
5’-nuclease assay 11
9600 Emulation Mode 26
A
September 26, 2003 3:14 pm, RQGSG_IX.fm
SAMPLE DOCUMENT
ABI PRISM® 7000 Sequence Detection System 1
absolute quantification 2
Absolute Quantification (AQ) Assay 1
add-on software for RQ studies 49
AIF. See assay information files
Allelic Discrimination (AD) Assay 1
AmpErase UNG 12
amplification plots
Amplification Plot view for RQ plates 29
representative 27
types of amplification plots for RQ studies 37
Analysis Settings dialog box 35
Applied Biosystems
contacting viii, 2
customer feedback on documentation viii
Services and Support viii, 2
Technical Communications viii
Technical Support viii, 2
Assay Design Guidelines 13, 21
assay information files 48
assay types 1
Assays-by-Design 13
Assays-on-Demand 13
Australian EMC standards xvi
B
baseline 27
biological hazard safety xv
C
calibrating the 7000 SDS instrument 19
calibrator
definition 9
selecting in RQ studies 35
Canadian safety standards xvi
CAUTION, description x
Relative Quantification Getting Started Guide for 7000 v1.1
cDNA
generating 16
storing 17
chemical safety guidelines xiii
comparative method of calculation 3, 33
Component view 28
confidence levels 35
contamination, preventing 19
conventions
text vii
Ct vs. Well Position view 37
Ct. See threshold cycle
curves, standard 2
D
DANGER, description x
data
analyzing 27, 37
exporting 30, 43
generating PCR data from RQ plates 26
omitting from a study 41
delta Rn 27
Delta Rn vs.Cycle view 37
designing RQ experiments
determining reagent configuration 11
PCR method 7
primers and probes 13
selecting an SDS chemistry 11
workflow 7
Detector Manager dialog box 23, 47
detector tasks
definition 22
specifying for RQ plates 24
detectors
adding to RQ plates 23
creating 47
definition 47
selecting for RQ studies 35
documentation
feedback viii
documents
exporting 30, 43
importing 24
RQ Plate 22
51
Index
electromagnetic compatibility standards. See EMC
standards
EMC standards xvi
Australian xvi
Canadian xvi
European xvi
emulation mode, 9600 26
endogenous controls
associating with detectors 22, 24
definition 9
for RQ plates 22
selecting for RQ studies 35
endpoint PCR 1
equipment 4
ergonomic safety xv
European safety standards xvi
exporting data
RQ plates 30
RQ studies 43
F
FAM dye 13
G
Gene Expression plots 38
graph settings 29, 39
Graph Settings dialog box 39
guidelines
assay development 13, 21
chemical safety xiii
preparing RNA 16
preventing PCR contamination 19
H
IMPORTANT, description x
importing data into RQ plates 24
installing RQ Study Software 49
instrument operational safety xii
Instrument tab 26
M
master mix, PCR 20
materials 4
mode, emulation 26
moving and lifting instrument, safety xii
MSDSs xiii
obtaining viii
multiplex PCR 7
N
New Detector dialog box 47
normalized reporter 27
O
outliers 41
P
passive reference 24, 27
PCR
end-point 1
generating data from RQ plates 19
master mix, preparing 20
multiplex 7
preventing contamination 19
real-time 1
selecting a method 7
singleplex 7
starting an RQ plate run 26
physical hazards xv
Plate view 28
plate, RQ. See RQ plates
Plus/Minus Assay 1
preventing contamination 19
Primer Express Software 13
primers 13, 21
probes 7, 13, 21
hazard icons x
hazards xv
High Capacity cDNA Archive kit 16
52
Relative Quantification Getting Started Guide for 7000 v1.1
September 26, 2003 3:14 pm, RQGSG_IX.fm
E
I
SAMPLE DOCUMENT
documents (continued)
RQ Study 33
templates 24
dyes
FAM 13
multiple 7
reporter 27
ROX 24
SYBR Green I 11, 12, 47
VIC 13
Index
September 26, 2003 3:14 pm, RQGSG_IX.fm
SAMPLE DOCUMENT
R
Rapid Assay Development Guidelines 13, 21
reagent configurations 12
real-time PCR assays 1
reference, passive 24, 27
relative quantification
comparative method of calculation 3
definition 2
experiments.See also RQ experiments 2
real-time PCR 1
references 2
RQ plates 2
RQ studies 3
sample experiment 3
Relative Quantification (RQ) Assay 1
replicates 9
reporter dye 27
results
RQ Study analysis 37
Results tab 28
reverse transcription
guidelines for preparing RNA 16
High Capacity cDNA Archive kit 16
thermal cycling parameters 16
worfklow 15
Rn vs. Cycle view 37
Rn. See normalized reporter
RNA, guidelines for preparing 16
ROX dye 24
RQ Detector grid 35
RQ experiments
components 9
designing 7
generating data 19
PCR 19
probes and primers 13
reagent configuration 11
requirements 9
reverse transcription 15
RQ plates 19
RQ studies 33
SDS chemistries 11
workflow 2
RQ Main Study view 34
RQ plates
adding to RQ studies 34
Amplification Plot view 29
analyzing 27
Component view 28
data types 30
definition 2
detectors, creating 47
exporting data 30
importing sample information 24
Relative Quantification Getting Started Guide for 7000 v1.1
RQ plates (continued)
overview 19
Plate view 28
reanalyzing data 29
results 28
RQ Plate documents 22
Spectra view 28
starting a run 26
templates 24
workflow 19
RQ Results panel 36, 37
RQ Sample grid 36
RQ studies
adding RQ plates 34
Amplification Plots 37
analysis settings 35
confidence level 35
control type 35
data types 43
definition 3
exporting data 43
Gene Expression plots 38
omitting samples from 41
orientation 38
overview 33
reanalyzing data 40
results 37
RQ Study documents 33
RQ Study Software 49
worklfow 33
RQ Study Add On software 2
RT-PCR
one-step 12, 25
two-step 12, 15
S
safety x
sample RQ experiment
assay design 13
components 10
creating detectors 48
description 3
PCR master mix 21
PCR method 8
probes and primers 13
reagent configuration 12
reverse transcription 17
RQ Plate document, example 24
RQ Study document, example 36
SDS chemistry 12
SDS chemistries 11
Services and Support, obtaining viii, 2
settings, graph 29, 39
Setup tab 24
singleplex PCR 7
53
Index
software, RQ Study 49
Spectra view 28
standard curves 2
standards xvi
starting an RQ plate run 26
study, RQ. See RQ studies
SYBR Green I dye chemistry 11
symbols xi
workflow
experiment design 7
reverse transcription 15
RQ experiment overview 2
RQ plates 19
RQ studies 33
workstation safety xv
T
TaqMan chemistry 11
TaqMan Universal PCR Master Mix 20
target
associating with detectors 22, 24
definition 9
tasks. See detector tasks
Technical Communications, contacting viii
Technical Support, contacting viii, 2
template documents 24
text conventions vii
thermal cycling conditions
default for PCR 25
one-step RT-PCR 25
specifying 26
thermal cycling parameters
for plates added to a study 34
RT using High Capacity cDNA Archive kit 16
threshold cycle
definition 27
setting for RQ studies 35
Training, obtaining information about viii
training, obtaining information about 2
types of assays 1
V
VIC dye 13
W
WARNING, description x
Well Information tab 36
Well Inspector dialog box 23
wells, replicate 9
54
Relative Quantification Getting Started Guide for 7000 v1.1
SAMPLE DOCUMENT
ultraviolet light xv
uracil-N-glycosylase 12
US safety standards xvi
September 26, 2003 3:14 pm, RQGSG_IX.fm
U
September 26, 2003 3:17 pm, GSG_BackCover.fm
DRAFT
Back Cover
Services and Support
For the latest services and support information for all locations, go to
http://www.appliedbiosystems.com, then click the link for Services and
Support.
At the Services and Support page, you can:
• Search through frequently asked questions (FAQs)
• Submit a question directly to Technical Support
• Order Applied Biosystems user documents, MSDSs, certificates of
analysis, and other related documents
Headquarters
850 Lincoln Centre Drive
Foster City, CA 94404 USA
Phone: +1 650.638.5800
Toll Free (In North America): +1 800.345.5224
Fax: +1 650.638.5884
Worldwide Sales and Support
Applied Biosystems vast distribution and service
network, composed of highly trained support and
applications personnel, reaches 150 countries on six
continents. For sales office locations and technical
support, please call our local office or refer to our Web
site at www.appliedbiosystems.com.
• Download PDF documents
• Obtain information about customer training
• Download software updates and patches
In addition, the Services and Support page provides access to worldwide
telephone and fax numbers to contact Applied Biosystems Technical Support
and Sales facilities.
Applera Corporation is committed to providing the world’s
leading technology and information for life scientists.
Applera Corporation consists of the Applied Biosystems and
Celera Genomics businesses.
Printed in USA, 09/2003
Part Number 4346727 Rev. A