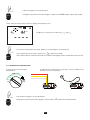
1
Loop and residual current device tester ENGLISH User's manual C.A 6030 Thank you for purchasing a C.A 6030 loop and RCD tester. For best results from your instrument: read these operating instructions carefully, comply with the precautions for use. WARNING, risk of DANGER! The operator must refer to these instructions whenever this danger symbol appears. Equipment protected by double insulation. Battery. Earth. The CE marking indicates conformity with the European LVD and EMC directives. The rubbish bin with a line through it indicates that, in the European Union, the product must undergo selective disposal in compliance with Directive WEEE 2002/96/EC. Definition of measurement categories: Measurement category IV corresponds to measurements taken at the source of low-voltage installations. Example: power feeders, counters and protection devices. Measurement category III corresponds to measurements on building installations. Example: distribution panel, circuit-breakers, machines or fixed industrial devices. Measurement category II corresponds to measurements taken on circuits directly connected to low-voltage installations. Example: power supply to electro-domestic devices and portable tools. Precautions for use This device is protected against voltages not exceeding 550 V with respect to earth in measurement category III. The protection provided by the device may be compromised if it is used other than as specified by the manufacturer. Observe the rated Maximum voltage and the measurement category. Never exceed the protection limits indicated in the specifications. Observe the conditions of use: temperature, humidity, altitude, degree of pollution, and place of use. Set the switch to OFF when the device is not in use. Before opening the device, check that none of the terminals is connected and that the switch is set to OFF. Do not place your device in water. Do not use the device or its accessories if they seem damaged. Use only the accessories supplied with the device, which comply with safety standards (IEC 61010-031). Troubleshooting operations and metrological checks must be performed by approved skilled personnel. 1 Contents 1. First start-up....................................................................................................................................................................... 4 1.1. Unpacking....................................................................................................................................................................... 4 1.2. Inserting the batteries...................................................................................................................................................... 4 2. Presentation........................................................................................................................................................................ 6 2.1. Device.............................................................................................................................................................................. 6 2.2. Functions of the device................................................................................................................................................... 7 2.3. Display unit...................................................................................................................................................................... 7 2.4. Keypad and button.......................................................................................................................................................... 8 2.5. switch............................................................................................................................................................................ 11 3. Simple use........................................................................................................................................................................... 12 3.1. Voltage measurement.................................................................................................................................................... 12 3.2. Loop measurement....................................................................................................................................................... 14 3.3. Earth measurement on live circuit................................................................................................................................. 16 3.4. Test of RCD................................................................................................................................................................... 18 3.5. Direction of phase rotation............................................................................................................................................ 21 3.6. Current measurement.................................................................................................................................................... 23 4. Use in detail........................................................................................................................................................................ 24 4.1. Before making any measurements................................................................................................................................ 24 4.2. Voltage measurement.................................................................................................................................................... 24 4.3. Compensation of the leads........................................................................................................................................... 25 4.4. Loop measurement....................................................................................................................................................... 28 4.5. Earth measurement on live circuit................................................................................................................................. 32 4.6. Test of residual current device....................................................................................................................................... 35 4.7. Direction of phase rotation............................................................................................................................................ 42 4.8. Current measurement.................................................................................................................................................... 44 5. SET-UP.................................................................................................................................................................................... 46 5.1. Access to SET-UP ........................................................................................................................................................ 46 5.2. Setting the date and time.............................................................................................................................................. 46 5.3. Type of power supply.................................................................................................................................................... 47 5.4. Audible signal................................................................................................................................................................ 48 5.5. Viewing the internal parameters of the device.............................................................................................................. 48 5.6. Smoothing of the measurement (SMOOTH)................................................................................................................. 48 5.7. Configuration of the measurements.............................................................................................................................. 49 5.8. Alarm thresholds........................................................................................................................................................... 50 5.9. Default configuration..................................................................................................................................................... 51 5.10. Communication rate for printing................................................................................................................................. 51 6. Storage................................................................................................................................................................................ 52 6.1. Organization of the memory.......................................................................................................................................... 52 6.2. Storage.......................................................................................................................................................................... 52 6.3. Readout......................................................................................................................................................................... 53 6.4. Erasure.......................................................................................................................................................................... 53 6.5. Errors............................................................................................................................................................................. 54 7. Printing................................................................................................................................................................................ 55 8. Data export software................................................................................................................................................... 56 9. Technical characteristics......................................................................................................................................... 57 9.1. Reference conditions..................................................................................................................................................... 57 9.2. Electrical characteristics............................................................................................................................................... 57 9.3. Variations in the range of use........................................................................................................................................ 61 9.4. Intrinsic uncertainty and operating uncertainty............................................................................................................. 62 9.5. Power supply................................................................................................................................................................. 62 9.6. Environmental conditions.............................................................................................................................................. 62 9.7. Mechanical characteristics ........................................................................................................................................... 63 9.8. Conformity to international standards........................................................................................................................... 63 9.9. Electromagnetic compatibility (EMC)............................................................................................................................ 63 10. Definition of symbols.................................................................................................................................................. 64 11. MAINTENANCE..................................................................................................................................................................... 65 11.1. Cleaning...................................................................................................................................................................... 65 11.2. Replacing the batteries............................................................................................................................................... 65 11.3. Storage........................................................................................................................................................................ 65 11.4. Resetting the device.................................................................................................................................................... 65 11.5. Updating of the internal software................................................................................................................................ 66 11.6. Metrological check...................................................................................................................................................... 66 11.7. Repair.......................................................................................................................................................................... 66 12. Warranty .......................................................................................................................................................................... 67 13. To order............................................................................................................................................................................. 68 13.1. Accessories................................................................................................................................................................. 68 13.2. Replacement parts...................................................................................................................................................... 68 2 1. First start-up 1.1. Unpacking ➀ ➁ ➅ ➂ ➄ FICHE DE SÉCURITÉ DU C.A 6116 (FR) Vous venez d’acquérir un contrôleur d’installation C.A 6116 et nous vous remercions de votre confiance. Pour obtenir le meilleur service de votre appareil : lisez attentivement cette notice de fonctionnement, respectez les précautions d’emploi. ATTENTION, risque de DANGER ! L’opérateur s’engage à consulter la présente notice à chaque fois que ce symbole de danger est rencontré. Appareil protégé par une isolation double. Polarité du connecteur d’alimentation en tension continue. Le marquage CE atteste la conformité aux directives européennes. ➆ La poubelle barrée signifie que, dans l’Union Européenne, le produit doit faire l’objet d’un tri sélectif des déchets pour le recyclage des matériels électriques et électroniques conformément à la directive WEEE 2002/96/EC. Définition des catégories de mesure : La catégorie de mesure IV correspond aux mesurages réalisés à la source de l’installation basse tension. La catégorie de mesure III correspond aux mesurages réalisés dans l’installation du bâtiment. La catégorie de mesure II correspond aux mesurages réalisés sur les circuits directement branchés à l’installation basse tension. La catégorie de mesure I correspond aux mesurages réalisés sur des circuits non reliés directement au réseau. x5 ➃ PRÉCAUTIONS D’EMPLOI Cet appareil est protégé contre des tensions accidentelles n’excédant pas 600 V par rapport à la terre en catégorie de mesure III ou 300 V par rapport à la terre en catégorie de mesure IV. La protection assurée par l’appareil peut-être compromise si celui-ci est utilisé de façon non spécifiée par le constructeur. Respectez la tension et l’intensité maximales assignées ainsi que la catégorie de mesure. Ne dépassez jamais les valeurs limites de protection indiquées dans les spécifications. Respectez les conditions d’utilisation, à savoir la température, l’humidité, l’altitude, le degré de pollution et le lieu d’utilisation. N’utilisez pas l’appareil ou ses accessoires s’ils paraissent endommagés. Pour le recharge de la batterie, utilisez uniquement le bloc adaptateur secteur fourni avec l’appareil. Utilisez des accessoires de branchement dont la catégorie de surtension et la tension de service sont supérieures ou égales à celles de l’appareil de mesure (600 V CAT III). Toute procédure de dépannage ou de vérification métrologique doit être effectuée par du personnel compétent et agréé. Utilisez les moyens de protection adaptés. ➇ 04 - 2009 Code 691923A01 - Ed. 1 ➀ ➁ ➂ ➃ ➄ ➅ ➆ ➇ A carrying bag for the device and its accessories. One mains measuring cable. One measuring cable, three safety leads. Three alligator clips (red, yellow and white). Three probe tips (red, yellow and white). Transfer software and a communication cord (optical-RS232). Five user manuals (one per language) on a CD. Five safety sheets (one per language). 1.2. Inserting the batteries Turn the device over. Use a coin to unscrew the quarter-turn screw of the battery compartment cover. 3 Insert the six batteries in the compartment (three to the right and three to the left), observing the indicated polarity (+ up). Raise the prop and pull on it to withdraw the battery compartment cover. Replace the battery compartment cover and screw the quarter-turn screw back in. 4 2. Presentation 2.1. Device 600V CAT III N Connection terminals. L2 PE L3 L1 L > 550V Backlit LCD display unit. On the back: battery compartment cover and prop. To start the measurements. I N (2s) MORE TEST ALARM PRINT MEM MR SMOOTH LOOP / RCD 300mA 500mA 100mA var. 30mA 6-Key keypad. L1 L3 L2 10mA OFF To select a measurement or SET-UP. SET-UP C.A 6030 LOOP/RCD TESTER 5 Optical interface for serial communication. 2.2. Functions of the device The C.A 6030 loop and RCD tester is a portable device operating on battery power. It is used to check the safety of electrical installations. Measurement functions: voltage, frequency, test of the protection conductor (PE), fault loop measurement (L-PE), live earth resistance measurement (Ra), line loop measurement (L-N or LN-LM) calculation of the short-circuit current, test of residual current devices (RCD), detection of the direction of phase rotation in a three-phase network, current measurement with an optional current clamp. The C.A 6030 can be very simple to use (see §3), but experienced users can also configure it manually (see §4). 2.3. Display unit 1 L 2 L 4 3 5 26 LR 24 U REF Ta > < OBJ. TEST MR > Ia Ik I N< V kΩ kmA DC AC 52 x I 150mA 250mA 2nd 21 20 19 MEM kΩVmH msHz SEL 22 8 P COM ALARM 23 7 P SMOOTH R 0 25 6 N s 18 9 10 11 12 13 14 17 16 15 The main digital display unit and the secondary digital display unit have four digits, used to display the measurements and their various parameters. 6 1 Position of the phase conductor on the outlet. 2 Indication of connection of the auxiliary rod. 3 Display of the smoothed measurement. 4 Audible signal activated. 5 Communication via the serial link in progress. 6 Remaining battery life. 7 Automatic standby switching of the device activated. 8 Level of memory occupancy. 9 Reading or recording in memory. 10 Secondary digital display unit. 11 Test number for recording in memory. 12 Block (object) number for recording in memory. 13 Main digital display unit. 14 Half-wave signal to test the RCD (start on positive- or negative-going edge). 15 Full-wave signal to test the RCD (start on positive- or negative-going edge). 16 Measurements without tripping of the RCDs. 17 Measurements with tripping of the RCDs. 18 RCD test current in pulse mode. 19 Test of RCDs in pulse mode. 20 Test of RCDs in ramp mode. 21 Indicates a press on the yellow key (second function). 22 Type of quantity displayed. 23 Alarm function activated or display of an alarm threshold. 24 Danger symbol. 25 Type of quantity displayed. 26 Compensation of the measurement leads is activated. In the present manual, the symbol indicates blinking. 2.4. Keypad and button Presses on the keys and button are of three types: short press, press the yellow key then press the key (second function), long press (more than two seconds). 2.4.1. TEST button Start of a measurement, except for the voltage and current measurements, which are made immediately; Stop of a measurement; TEST 7 + Exit from the error mode. Smoothing of the measurement (SMOOTH). Activate before starting the measurement. TEST > 2s Compensation of the measurement leads (with the rotary switch set to LOOP/RCD). TEST 2.4.2. 2nd key (yellow) + Access to the second function of the key (marked in yellow under the key). other key Display of time and date for as long as the press lasts. > 2s 2.4.3. MORE key Display of complementary measurements and/or calculations of a function, possibly in association with the key. MORE + Activation or de-activation of the alarm. The alarm is adjusted in SET-UP (see §5.8). MORE 2.4.4. key Display of the complementary measurements and/or calculations of a function, possibly in association with the MORE key. In memory write, memory read, or printing, selection of the block (OBJ.) or test (TEST). 8 + On/Off switching of display unit backlighting. In the RCD settings of the switch, selection of the type of test (pulse or ramp) and of the pulse current value. > 2s 2.4.5. key In memory write, memory read, or printing, incrementing of the block (OBJ.) or test (TEST) number. In the RCD settings of the switch, selection of the RCD test mode - (with or without tripping) - and of the shape and polarity of the test signal. + In memory write, memory read, or printing, decrementing of the block (OBJ) or test (TEST) number. 2.4.6. MEM key + MEM Recording of a measurement and all information linked to it. MEM + Reading out of recorded measurements. MEM 2.4.7. PRINT key Printing of the last measurement made. PRINT 9 2.5. switch The switch has 10 settings, used to select the desired function: OFF Switching the device off LOOP / RCD 10mA, 30mA, 100mA, 300mA, 500mA Test of RCD, rating 10, 30, 100, 300 or 500mA, or loop measurement only. LOOP / RCD var Test of RCD, rating 6 to 650mA (rating chosen in SET-UP). Determination of the phase rotation direction Current measurement SET-UP Configuration of the device 10 3. Simple use The device is configured so that it can be used without modifying the parameters; this covers the great majority of the measurements to be made. For most measurements, you can therefore simply select the function by turning the switch, then pressing the TEST button. However, you can also parameterize the device and the measurements using the function keys and SET-UP (see §4). If you want to record your measurement results, refer to §6. You will find definitions of all of the abbreviations in §10. Users are assumed to be at the reference earth potential. They must therefore not be insulated from earth: they must not wear insulating shoes or gloves and must not use a plastic object to press the TEST button. 3.1. Voltage measurement 3.1.1. Making a measurement Set the switch to one of the six RCD positions. Connect one end of the lead to the terminal block of the device and the other to the device to be tested. LOOP / RCD 300mA 500mA 100mA var. 30mA L1 L3 L2 10mA OFF SET-UP 600V CAT III N L2 PE L3 L1 L > 550V The mains socket outlet of the measuring cable is marked with a white reference spot. On the display unit, you will see: L : if the phase is on the right-hand pin of the mains plug when the white spot is up. L : if the phase is on the left-hand pin of the mains plug when the white spot is up. L L : if the device cannot locate the phase, probably because the PE is not connected or the L and PE conductors are interchanged. Remark: the terminal identified as L is the one that has the highest voltage with respect to PE; this does not mean that the other terminal is not at a dangerous voltage. 11 3.1.2. Reading of the result L R 0 Hz V The voltage ULN and its frequency are displayed. AC The key is used to see voltages ULN, ULPE and UNPE. and their frequencies. 3.1.3. Error indication The only errors reported in voltage measurement are values outside the voltage and/or frequency measurement range. To exit from the error mode, you must eliminate the cause of the error. 12 3.2. Loop measurement The loop measurement is used to measure the earth resistance at a place where it is impossible to make a 3P earth measurement or to disconnect the earthing strip, a common situation in urban settings. The loop measurement does not trip RCDs located upstream of the measurement point. In a TT type installation, the loop impedance measurement is an easy way to make an earth measurement without planting any rods. The result obtained, RLPE, is the loop resistance of the installation between the L and PE conductors. It is only very slightly greater than the earth resistance, to which it adds the earthing resistance of the transformer and the resistance of the cables, which are both negligible. In a TN or TT installation, the loop resistance measurement can also be used to calculate the short-circuit current and to size the protections of the installation (fuse or circuit-breaker) The loop measurement cannot be made in an IT installation because of the high earthing impedance of the power supply transformer, even its total isolation from earth. 3.2.1. Making a measurement Set the switch to one of the LOOP/RCD positions. Connect the measuring cable to the device, then to the socket outlet of the installation to be tested. LOOP / RCD 300mA 500mA 100mA var. 30mA We recommend first disconnecting all loads from the network on which you make the loop measurement. This guarantees non-tripping of upstream RCDs, by eliminating any residual current there might be in the installation. If, in spite of all, tripping occurs, refer to §5.7.4, which explains how to reduce the test current. L1 L3 L2 10mA OFF SET-UP Case of a TN installation Case of a TT installation RL RN L RL L N RN N RE PE PE Rb Ra 600V CAT III N 600V CAT III N Rb L2 PE L3 L2 L1 L PE > 550V To set the device to non-tripping mode, press the key until the + L3 L1 L > 550V symbol is displayed. To activate the alarm, press the ALARM key. The device will emit an audible signal if the measurement result exceeds 50 Ω (default value; can be programmed in SET-UP). MORE 13 Press the TEST button to start the measurement. The measurement stops automatically. TEST 3.2.2. Reading of the result During the measurement, the device displays “LOOP” and the dashes blink. At the end of the measurement, the device displays the following screen: L R 0 R Ω The measurement result, RLPE, is the loop resistance. If the switch is set to 300 or 500mA, the loop impedance, ZLPE, is also displayed. L Press the MORE key to view the other result screens. R 0 U REF Ik is the short-circuit current: Ik = UREF / RLPE. V As default, UREF = 230 V. Ik A MORE There are two other result screens. The key is used to view voltages ULN, ULPE and UNPE and the compensation resistances of the leads RDL, RDPE and RDN. 3.2.3. Error indication The commonest errors in the case of loop resistance measurement: A connection error. Voltage on the protection conductor too high. Check your connections carefully, then repeat the measurement. To exit from the error mode, press the TEST button. 14 3.3. Earth measurement on live circuit This measurement is made without disconnecting the earth, with only one additional rod, saving time with respect to a conventional earth measurement with two auxiliary rods. In the case of a TT type installation, this measurement is a very simple way to measure the earth of frame grounds. The live earth measurement cannot be made in an IT installation because of the high earthing impedance of the power supply transformer, even its total isolation from earth. 3.3.1. Making a measurement Set the switch to one of the RCD positions. LOOP / RCD 300mA 500mA 100mA var. 30mA Connect the measuring cable to the device, then to the socket outlet of the installation to be tested. L1 L3 L2 We recommend first disconnecting all loads from the network on which you make the live earth measurement. 10mA OFF SET-UP Plant the auxiliary rod at a distance of more than 25 metres from the earth electrode terminal of the device. The symbol is then displayed. and connect it to the Case of a TN installation Case of a TT installation RL L RL L RN N RNPE N PE PE Rb 600V CAT III N Ra > 25 m PE Rb L2 L3 L1 L PE To set the device to non-tripping mode, press the key until the + L2 > 25 m > 550V 600V CAT III N Ra L3 L1 L > 550V symbol is displayed. To activate the alarm, press the ALARM key. The device will emit an audible signal if the measurement result exceeds 50 Ω (default value; can be programmed in SET-UP). MORE Press the TEST button to start the measurement. The measurement stops automatically. TEST 15 3.3.2. Reading of the result During the measurement, the device displays “-rA-” and the dashes blink. At the end of the measurement, the device displays the following screen: L P R 0 R Ω The earth resistance, RA, is the measurement result. 3.3.3. Error indication The commonest errors in the case of a live earth measurement: A connection error. A voltage on the protective conductor that is too high. An earth rod resistance that is too high: reduce it by tamping and moistening the earth around the rod. A voltage on the rod that is high: move the rod away from the influence of the earth electrode. To exit from the error mode, press the TEST button. 16 3.4. Test of RCD The device can perform two types of test on RCDs: a test of tripping in ramp mode, a test of tripping in pulse mode. The test in ramp mode serves to determine the current at which the RCD trips. The test in pulse mode serves to determine how long it takes for the RCD to trip. 3.4.1. Performing a test Set the switch to the RCD position that corresponds to the rated current of the RCD to be tested. For a more accurate measurement in ramp mode, we recommend first disconnecting all loads from the network on which you are performing the test, in order to eliminate any residual currents in the installation. LOOP / RCD 300mA 500mA 100mA var. 30mA L1 L3 Connect the three-conductor cord to the device, then plug it into an outlet in the circuit protected by the RCD to be tested. L2 10mA OFF RCD SET-UP RL L N RN PE Rb 600V CAT III N Ra L2 PE RL L > 550V RCD RCD Particular case: To test an RCD located downstream of another RCD having a smaller nominal current, you must use the three-conductor cord terminated by 3 leads and make the connections shown opposite (upstream-downstream method). In this case, the RCD tested is not part of the installation. L1 L3 L N RN 30 mA white 300 mA PE red yellow Rb Ra 600V CAT III N L2 PE Check that you are in fact in tripping mode ( is displayed. L3 symbol displayed). If not, press the key until the 17 L1 L > 550V symbol Then choose the type of test (if the tripping mode Perform a long press on the key. Each time the key is pressed again, the device proposes a type of test: xI test in ramp mode N > 2s is not selected, it is not possible to choose the type of test): 2xI N 5 xI N test in Pulse mode at 2I∆N for the type S RCD test in pulse mode s 150mA 250mA test in Pulse mode at 5I∆N test in Pulse mode at 150mA test in Pulse mode at 250mA The test signal shape proposed is sinusoidal starting with a positive-going edge. This suits most of the tests. It is however possible to change it (see §4.6). To validate your choice, perform another long press on the key. > 2s To activate the alarm, press the ALARM key. The device will emit an audible signal if the measurement result exceeds 50 W (default value; can be programmed in SET-UP). + MORE Press the TEST button to start the measurement. The measurement stops automatically. TEST The device first of all performs a loop measurement to check that the fault voltage, UF , will not exceed maximum voltage UL during the tripping test. If this is the case, the tripping measurement is disabled. Again, during the tripping test, voltage UF is monitored. If it exceeds UL, the test is aborted. This precaution ensures that the measurement made will not endanger the installation. 18 3.4.2. Reading of the result During the measurement, the device starts by displaying “LOOP” during the preliminary measurement; during the test of the RCD, it displays “rCd” and the dashes blink. A S (selective) RCD is normally tested at 2 I∆N. The device counts 30 seconds between the preliminary measurement and the test of the RCD proper, in order to allow its demagnetization, and displays “SEC”. This wait can be cut short by pressing the TEST button again. The results are presented in the same way in the ramp mode as in the pulse mode, with or without an auxiliary rod. At the end of the measurement, the device displays the following screen: L R 0 Ta Ia In the ramp mode, the current Ia at which the RCD tripped. Ia must be between 0.5 I∆N and I∆N. ms mA In the pulse mode, the tripping time Ta. It must be less than 300 ms (200 ms for a selective RCD). 3.4.3. Error indication The commonest errors in the case of an RCD test are: A connection error. The fault voltage is too high and, for the user’s safety, the test was aborted. It is necessary in this case to revise the wiring of the installation and to measure the earth with an earth ohmmeter. An earth rod resistance that is too high: reduce it by tamping and dampening the earth around the rod. The circuit-breaker trips out when it should not. The leakage currents are probably too high. First disconnect all loads from the network on which you are performing the test. Also perform a second test with current INtP reduced in SET-UP (see §5.7.4). If the problem persists, the RCD must be declared defective. The RCD failed to trip in the ramp mode test. But, to ensure the users’ safety, the RCD must trip at a current between I ∆N /2 and I∆N. Check the wiring of the RCD. If there is nothing wrong with it, the RCD must be declared defective and replaced. The RCD failed to trip in the test in pulse mode. Check the wiring of the RCD. If there is nothing wrong with it, the RCD must be declared defective and replaced. The device is too hot. Wait until it cools before resuming the measurements. To exit from the error mode, press the TEST button. 19 3.5. Direction of phase rotation This measurement is made on a three-phase network. It is used to check the phase order of the network. This can be done by the “3-wire” method or by the “2-wire” method. 3.5.1. Making a “3-wire” measurement Set the switch to Connect the measuring cable terminated by 3 leads to the device and to each of the phases: the red lead to L1, the yellow to L2 and the white to L3. . LOOP / RCD 300mA 500mA 100mA var. 30mA L1 L1 L3 L2 L2 10mA L3 OFF red yellow white N SET-UP 600V CAT III N PE L2 PE L3 L1 L > 550V Press the TEST button to start the measurement. The measurement stops automatically. TEST 3.5.2. Making a “2-wire” measurement Set the switch to Press the key to switch to “2-wire” measurement. The “rdy 3L” display becomes “rdy 2L”. . LOOP / RCD 300mA 500mA 100mA var. 30mA L1 L3 L2 10mA OFF SET-UP Connect the three-conductor cord terminated by 3 leads to the device and connect the yellow lead to L2. L1 L2 L3 Press the TEST button. red yellow white N PE TEST 600V CAT III N L2 PE L3 L1 L > 550V 20 Wait for the message “to L1” on the display unit, then connect the red lead to L1. L1 L2 L3 red yellow white N 600V CAT III N PE L2 PE L1 L3 L > 550V Wait for the message “open L1” to appear on the display unit and disconnect the red lead. When the message “to L3” is displayed, connect the red lead to L3. L1 L2 L3 yellow red white N 600V CAT III N PE L2 PE L3 L1 L > 550V The measurement is over and the result is displayed. 3.5.3. Reading of the result Hz 1.2.3: the phase order is direct. 3.2.1: the phase order is reversed. 3.5.4. Error indication The commonest errors in the case of a test of direction of phase rotation are: One of the three voltages is outside the measurement range (connection error). The frequency is outside the measurement range. To exit from the error mode, press the TEST button. 21 3.6. Current measurement This measurement requires the use of an optional current clamp. It can measure very low currents (of the order of a few mA) like leakage currents, and high currents (of the order of a few hundred Amperes. 3.6.1. Making a measurement Set the switch to Connect the clamp to the terminal of the device. Press the trigger to open the clamp and close it on the conductor to be measured. Release the trigger. . LOOP / RCD 300mA 500mA 100mA var. 30mA L1 L3 L2 10mA OFF SET-UP 600V CAT III N I L2 PE + L3 L1 L > 550V To activate the alarm, press the ALARM key. The device will emit an audible signal if the measurement result exceeds 30mA (default value; can be programmed in SET-UP). MORE There is no need to press the TEST button because the measurement is made at all times. 3.6.2. Reading of the result Hz I The measured current and its frequency. If the L, N, and PE terminals are connected, it is also possible to read the values ULN, ULPE and UNPE using the MORE and keys. mA 3.6.3. Error indication The commonest errors in the case of a current measurement are: The clamp is not connected. The current or frequency is outside the measurement range. To exit from the error mode, you must eliminate the cause of the error. 22 4. Use in detail In this part, all functions of the device are described, together with the measurement principles. You can parameterize the measurements using the function keys or by configuring the device in SET-UP (§5). Users are assumed to be at the reference earth potential. They must therefore not be insulated from the earth: they must not wear insulating shoes or gloves and must not use a plastic object to press the TEST button. 4.1. Before making any measurements If you want to record your measurement results, make sure that the date and time of the device are correct (see §5.2). Also make sure that the device has enough free memory. The symbol indicates the level of memory occupancy, with each bar representing 50 measurements recorded. The total capacity is 200 measurements. If the memory is full, refer to §6.4 for an explanation of how to erase it, partially or completely. Before starting a measurement by pressing the TEST key, check that the configuration of the device suits your application. This can be done by successive presses on the MORE key and the key. 4.2. Voltage measurement 4.2.1. Description of the measurement principle In all of the LOOP/RCD settings, the device is a voltmeter that measures the voltages present on its terminals at all times. The device separates the alternating voltage from the direct voltage and compares the amplitudes to decide whether the signal is AC or DC. In the case of an AC signal, the frequency is measured and the device calculates the RMS value of the AC part and displays it. In the case of a DC signal, the device does not measure its frequency, but calculates its mean value and displays it. The device checks that the connection is correct and displays the position of the phase on the outlet. It also checks the presence of a protection conductor on the PE terminal thanks to the contact users make by touching the TEST button with a finger (the key conducts). 4.2.2. Making a measurement Refer to §3.1.1. 4.2.3. Error indication The only errors reported in voltage measurement are: L P R 0 Hz > voltage outside measurement range, V 23 L P R 0 > Hz frequency outside measurement range, V L R 0 Hz > or a connection error. V To exit from the error mode, you must eliminate the cause of the error. Here, this is done by connecting the device to a network of which the voltage and frequency are compatible with the specifications of the device (see §9.2.1 and 9.2.2). 4.3. Compensation of the leads The leads must be compensated for measurements of low loop and earth resistance values, in order to make the measurements more accurate. If a compensation already exists, the R 0 symbol is displayed. To view the compensation values, use the MORE and keys. 4.3.1. Applying a compensation Set the switch to one of the LOOP/RCD positions. Connect one end of the three-conductor cord terminated by 3 leads to the device. Short-circuit the 3 leads. LOOP / RCD 300mA 500mA 100mA var. 30mA L1 L3 L2 10mA OFF SET-UP 600V CAT III N L2 PE In the case of a mains outlet, connect the two earth pins with the earth pins with leads. L1 L3 L > 550V 600V CAT III N L2 PE 24 L3 L1 L > 550V Perform a long press on the TEST button. > 2s During the measurement, the device displays “LEAd” and the R 0 symbol, and the dashes blink. TEST At the end of the measurement, the device displays the following screen: R 0 COM Ω R The key is used to view the values of R∆L, R∆N and R∆PE. To exit from compensation of the leads, perform a second long press on the TEST key. > 2s R If the compensation of the leads is effective, the 0 symbol is lit steadily. If the compensation has not been performed, the symbol is not displayed and the compensation values are zero. TEST 4.3.2. Withdraw a compensation Set the switch to one of the LOOP/ RCD positions. To withdraw the compensation of the leads, connect nothing to the terminals, or leave the leads open. LOOP / RCD 300mA 500mA 100mA var. 30mA L1 L3 L2 10mA OFF SET-UP 600V CAT III N 600V CAT III N L2 L2 PE > 2s L3 L1 L Then perform a long press on the TEST button. During the measurement, the device displays “LEAd” and the TEST 25 PE > 550V R 0 L3 L1 L symbol and the dashes blink. > 550V At the end of the measurement, the device displays the following screen: The device reports that the result found is greater than 5 Ω and withdraws the compensation of the leads. > > 2s Ω For exit from compensation of the leads, perform a second long press on the TEST key. TEST 4.3.3. Error indication The errors that can occur during the compensation of the leads are: The voltage on the terminals exceeds 2 V. Check your connections. The measured resistance of the leads is greater than 5 Ω. If this is not intentional, to withdraw the compensation, check your connections. 26 Hz > > V Ω 4.4. Loop measurement 4.4.1. Description of the measurement principle The device injects an adjustable measurement current, INtP = I∆N x (0.1 to 0.5), chosen by the user, between L and PE. This weak current serves to avoid tripping the RCD of which the nominal current is indicated on the switch. The device thereby measures RLPE and ZLPE if INtP ≥ 100mA. If a rod is planted, it also measures RA (ZA if INtP ≥ 100mA). The device then calculates the short-circuit current Ik = UREF / ZLPE. The value of Ik serves to check the proper sizing of the protections. 4.4.2. Making a measurement For the connection diagrams, refer to §3.2.1. Before starting the measurement, you can parameterize it: By adjusting the alarm. As default, the device indicates whether the measurement exceeds 50 Ω, but this value can be programmed in SET-UP (see §5.8). By choosing the value of UREF that will be used to calculate the short-circuit current (see §5.7.1). By choosing the maximum contact voltage, UL (see §5.7.2). By choosing the nominal current of the RCD I∆N. This current is determined by the setting of the switch: 10, 30, 100, 300, 500mA, or VAR. The VAR. setting is used to choose a current of 6 to 650mA (see §5.7.3). By choosing non-tripping measurement current INtP (see §5.7.4). If the RCD operates normally and no load is connected downstream, choose INtP = 0.4 or 0.5 I∆N, which avoids tripping and gives better resolution and accuracy in the loop measurement. If it is not possible to disconnect the loads downstream of the RCD, choose INtP = 0.2 or 0.3 I∆N to tolerate the presence of leakage currents during the measurement and avoid tripping. For greater security as regards non-tripping, you can measure, in advance, the leakage current (see §3.6 or §4.8) circulating in the RCD before choosing INtP. Bearing in mind that: Ileak + INtP must be less than 0.5 I∆N. By choosing the number of measurements to be taken into account for smoothing of the measurement (SMOOTH) (see §5.6). By choosing whether or not to compensate the leads (see §4.3). By activating the alarm. Set the switch to the RCD position corresponding to the rated current of the RCD that protects the installation. To activate the alarm, press the ALARM key. The device will indicate whether the measurement result crosses the programmed threshold. LOOP / RCD 300mA 500mA 100mA var. 30mA L1 L3 + L2 10mA OFF SET-UP MORE 27 By activating smoothing of the measurement (SMOOTH). Without turning the switch, press the SMOOTH key. + TEST To set the device to non-tripping mode, press the key until the symbol is displayed Press the TEST button to start the measurement. The measurement stops automatically. TEST 4.4.3. Reading of the result During the measurement, the device displays «LOOP» and the dashes blink. L At the end of the measurement, the device displays the following screen: The measurement result, RLPE, is the loop resistance. R 0 R Ω If current INtP ≥ 100mA, loop impedance, ZLPE, is also displayed. To have INtP ≥ 100mA, you must operate in the 300mA, 500mA, or VAR range (≥ 300mA). Press the MORE key to view the other result screens. MORE L R 0 V U REF Ik is the short-circuit current: Ik = UREF / RLPE. Ik A 28 L R 0 Voltage ULPE and its frequency before the start of the measurement. Hz V MORE The key is used to view voltages ULN, UNPE and ULPE. L R 0 Ω R Alarm threshold, ZL, has not been crossed. ALARM > Ω MORE 4.4.4. Error indication The commonest errors in the case of a loop resistance measurement are: R 0 A connection error, for example no voltage on L, L R 0 or N and PE reversed, 29 L L R 0 or L and PE reversed. L R 0 > V Voltage on the protection conductor too high. Then check the earth resistance. To exit from the error mode, press the TEST button. TEST 30 4.5. Earth measurement on live circuit This measurement is made without disconnecting the earth, with only one additional rod, saving time with respect to a conventional earth measurement with two auxiliary rods. In the case of a TT type installation, this measurement is a very simple way to measure the earth of frame grounds. This measurement cannot be made in an IT installation because of the high earthing impedance of the power supply transformer, even its total isolation from earth. 4.5.1. Description of the measurement principle The device starts by making a loop measurement RLPE. It then measures the potential between the PE conductor and the auxiliary rod and from it deduces the value of the earth measurement, RA = UPI-PE / INtP, INtP being the measurement current chosen by the user. 4.5.2. Making a measurement For the connection diagrams, refer to §3.3.1. Before starting the measurement, you can parameterize it: By adjusting the alarm. As default, the device indicates whether the measurement exceeds 50 Ω, but this value can be programmed in SET-UP (see §5.8). By choosing the value of UREF that will be used to calculate the short-circuit current (see §5.7.1). By choosing the maximum contact voltage, UL (see §5.7.2). By choosing the nominal current of the RCD I∆N. This current is determined by the setting of the switch: 10, 30, 100, 300, 500mA, or VAR. The VAR. setting is used to choose a current of 6 to 650mA (see §5.7.3). By choosing non-tripping measurement current INtP (see §5.7.4). If the RCD operates normally and no load is connected downstream, choose INtP = 0.4 or 0.5 I∆N, which avoids tripping and gives better resolution and accuracy in the loop measurement. If it is not possible to disconnect the loads downstream of the RCD, choose INtP = 0.2 or 0.3 I∆N to tolerate the presence of leakage currents during the measurement and avoid tripping. For greater security as regards non-tripping, you can measure, in advance, the leakage current (see §3.6 or §4.8) circulating in the RCD before choosing INtP. Bearing in mind that: Ileak + INtP must be less than 0.5 I∆N. By choosing the number of measurements to be taken into account for smoothing of the measurement (SMOOTH) (see §5.6). By choosing whether or not to compensate the leads (see §4.3). By activating the alarm. Set the switch to the RCD position corresponding to the rated current of the RCD that protects the installation. To activate the alarm, press the ALARM key. The device will indicate whether the measurement result crosses the programmed threshold. LOOP / RCD 300mA 500mA 100mA var. 30mA L1 L3 L2 + 10mA OFF SET-UP MORE 31 By activating smoothing of the measurement (SMOOTH). + Without turning the switch, press the SMOOTH key. TEST To set the device to non-tripping mode, press the key until the symbol is displayed. Press the TEST button to start the measurement. The measurement stops automatically TEST 4.5.3. Reading of the result During the measurement, the device displays “-rA-” and the dashes blink. At the end of the measurement, the device displays the following screen: L P R 0 Ω R The earth resistance, RA, is the result of the measurement. Press the MORE key to see the other result screens. L P R 0 Hz V MORE 32 AC Voltage ULN and its frequency before the start of the measurement. The key is used to view the voltages UNPE, ULPE, UP (voltage on the rod) and ULN. L P R 0 Ω R The alarm threshold, RA ALARM, and the fault voltage: UF = UREF x RA / RLPE ALARM V MORE L P R 0 R The compensation of the L lead. The key is used to view the compensation of the N and PE leads (R∆N and R∆PE) along with the resistance of the rod (RP). The conventional maximum contact voltage is displayed at the bottom. Ω V MORE 4.5.4. Error indication The commonest errors in the case of a live earth measurement: A connection error (see §4.4.4). The voltage on the protection conductor is too high (see §4.4.4). L R 0 > R An earth rod resistance is too high: reduce it by tamping and dampening the earth around the rod. kΩ V L R 0 The voltage on the rod is high: move the rod away from the influence of the earth electrode. To exit from the error mode, press the TEST button. TEST 33 > V 4.6. Test of residual current device The device can perform two types of test on RCDs: a tripping test in ramp mode, a tripping test in pulse mode. The ramp mode test determines the current at which the RCD trips. The pulse mode test determines how long it takes for the RCD to trip. In what follows, the residual current device will be called RCD. 4.6.1. Description of the measurement principle The device starts by checking that the RCD can be tested without endangering the user, in other words without threshold voltage, UL , exceeding 50 V (or 25 V according to what is defined in SET-UP). It therefore starts by injecting a non-tripping measurement current, INtP = I∆N x (0.1 to 0.5, chosen by the user) between L and PE in order to measure RLPE, as if it involved a loop or live earth resistance measurement. It then calculates UF = RLPE x I∆N (or UF = RLPE x 2 I∆N for a voltage exceeds UL, the device will not perform the test. S type RCD ) which will be the voltage produced during the test. If this For a more accurate measurement of the threshold voltage, we recommend planting an auxiliary rod, as for live earth measurements. The device then measures RA and calculates UF = RA x I∆N (or UF = RA x 2 I∆N for a S type RCD ). Once this first part of the measurement has been made, the device goes on to the second part, which depends on the type of test. For the ramp mode test, the device generates a sinusoidal current, at the mains frequency, of which the amplitude increases gradually from 0.3 to 1.06I∆N between the L and PE terminals. When the RCD opens the circuit, the device displays the exact value of the tripping current and the trip time. This time is an indication and may differ from the trip time in pulse mode, which is closer to the operational reality. F or the pulse mode test, the device generates a sinusoidal current at the mains frequency, having an amplitude of I∆N, 2 I∆N or 5 I∆N between the L and PE terminals, lasting at most 500ms. And it measures the time the circuit-breaker takes to open the circuit. This time must be less than 500ms. In all cases, if the circuit-breaker does not trip out, the device then sends a current pulse between the L and N terminals. If the circuit opens, it means that the circuit-breaker was incorrectly installed (N and PE reversed). 4.6.2. Performing a test Set the switch to the RCD position corresponding to the rated current of the RCD that protects the installation. Connect the measuring cable to the device, then to a socket outlet included in the circuit protected by the circuit-breaker to be tested. RCD RL LOOP / RCD 300mA 500mA 100mA var. 30mA L N L1 L3 RN L2 10mA OFF PE SET-UP Rb Ra 600V CAT III N L2 PE L3 L1 L > 550V At the time of connection, the device detects the positions of the phase (L) and of neutral (N) with respect to the protective conductor (PE) and displays them. If necessary, it then automatically switches the L and N terminals so that the loop measurement can be made without modifying the connections of the terminals. We recommend first disconnecting all loads from the network on which you are performing the RCD test. This eliminates the risk of perturbation of the test by leakage currents due to these loads. 34 If you have a current clamp, you can measure the leakage currents (see §3.6) at the RCD and so make allowance for them during the test, for the adjustment of INtP. To make a more accurate measurement of the fault voltage, plant the auxiliary rod at a distance of more than 25 metres from the symbol is then displayed. earth electrode and connect it to the terminal of the device. The RCD RL L N RN PE Rb 600V CAT III N Ra > 25 m L2 PE Particular case: To test a residual current device located downstream of another residual current device having a smaller nominal current, you must use the measuring cable terminated by 3 leads and make the connections shown opposite (upstream-downstream method). In this case, the RCD tested is not part of the installation. L3 L1 L > 550V RCD RL RCD L N RN 30 mA PE white 300 mA red yellow Rb Ra 600V CAT III N L2 PE L3 L1 L > 550V Before starting the measurement, you can parameterize it: By adjusting the alarm. As default, the device indicates whether the measurement exceeds 50 Ω, but this value can be programmed in SET-UP (see §5.8). By choosing the value of UREF that will be used to calculate the short-circuit current (see §5.7.1). By choosing the maximum contact voltage, UL (see §5.7.2). By choosing the nominal current of the RCD I∆N. This current is determined by the setting of the switch: 10, 30, 100, 300, 500mA, or VAR. The VAR. setting is used to choose a current of 6 to 650mA (see §5.7.3). By choosing non-tripping measurement current INtP (see §5.7.4). If the RCD operates normally and no load is connected downstream, choose INtP = 0.4 or 0.5 I∆N, which avoids tripping and gives better resolution and accuracy in the loop measurement. If it is not possible to disconnect the loads downstream of the RCD, choose INtP = 0.2 or 0.3 I∆N in order to tolerate the presence of leakage currents during the measurement and avoid tripping. For greater security as regards non-tripping, you can measure, in advance, the leakage current (see §3.6 or §4.8) circulating in the RCD before choosing INtP. Bearing in mind that: Ileak + INtP must be less than 0.5 I∆N. By choosing the number of measurements to be taken into account for smoothing of the measurement (SMOOTH) (see §5.6). By choosing whether or not to compensate the leads (see §4.3). 35 By activating the alarm. Set the switch to the RCD position corresponding to the rated current of the RCD that protects the installation. LOOP / RCD LOOP / RCD 300mA 500mA 100mA var. 30mA 300mA 500mA 100mA var. L1 L3 30mA L2 L1 L3 L2 10mA 10mA OFF OFF SET-UP + SET-UP To activate the alarm, press the ALARM key. The device will indicate whether the measurement result crosses the programmed threshold. MORE By activating smoothing of the measurement (SMOOTH). + Without turning the switch, press the SMOOTH key. TEST Check that you are in fact in tripping mode ( is displayed. symbol displayed). If not, press the key until the is not selected, it is not possible to choose the type of test): Then choose the type of test (if the tripping mode Perform a long press on the key. Each time the key is pressed again, the device proposes a type of test: xI test in ramp mode N 2xI > 2s N test in Pulse mode at 2I∆N for the type S RCD 5 xI N test in pulse mode s symbol 150mA 250mA test in Pulse mode at 5I∆N test in Pulse mode at 150mA test in Pulse mode at 250mA To validate your choice, perform another long press on the key. > 2s 36 The choice of the shape of the test signal: Press the key. At each press on the key, the device proposes a different test signal: signal starting with a positive half-wave, signal starting with a negative half-wave, signal made up entirely of positive half-waves, signal made up entirely of negative half-waves, non-tripping test (see §4.4 and §4.5). Press the TEST button to start the measurement. The measurement stops automatically. TEST 4.6.3. Reading of the result During the measurement, the device starts by displaying “LOOP” during the preliminary measurement, or “-rA-” if a rod is planted; during the test of the RCD, it displays “rCd” and the dashes blink. A S (selective) RCD is normally tested at 2 I∆N. The device counts 30 seconds between the preliminary measurement and the test of the RCD proper, in order to allow its demagnetization, and displays “SEC”. This wait can be cut short by pressing the TEST button again. The results are presented in the same way in the ramp mode as in the pulse mode, with or without an auxiliary rod. At the end of the measurement, the device displays the following screen: L R 0 Ta In the ramp mode, the current Ia at which the RCD trips. Ia must be between 0.5 I∆N and I∆N. ms Ia In the pulse mode, tripping time Ta. It must be less than 300 ms (200 ms in the case of a selective RCD). mA Press the MORE key to view the other result screens. MORE L R 0 I ∆N the rated current of the RCD. I mA N 37 L MORE R 0 INtP, the current used for the loop measurement made before the test of the RCD (can be programmed in SET-UP). I mA L R 0 Ω R Ω MORE Loop impedance ZLPE and, if the auxiliary rod is planted, the earth resistance, RA. L MORE R 0 V U REF The reference voltage used in calculating the short-circuit current: Ik = UREF / ZLPE. Ik A L R 0 V If the auxiliary rod is planted, the fault voltage: UF = UREF x RA / RLPE. MORE L MORE R 0 The fault voltage referred to I ∆N (or 2I ∆N in the case of a RCD). V UFn = RA x I ∆N or UFn = ZLPE x I ∆N and for a type S RCD: UFn = RA x 2I∆N or UFn = ZLPE x 2I∆N 38 S type L R 0 > R Ω ALARM > Ω MORE The resistance alarm threshold, RL, and the impedance alarm threshold, ZL. L R 0 Ω R V The compensation of the L lead. The key is used to view the compensation of the N and PE leads (R∆N and R∆PE) along with the resistance of the rod (RP) if it is connected. MORE L R 0 Hz V Voltage ULN and its frequency before the start of the measurement. The key is used to view voltages ULPE, UNPE, UP (voltage on the rod if it is connected) and ULN. MORE 4.6.4. Error indication The commonest errors in the case of a test of an RCD are: A connection error (see §4.4.4). A voltage on the protective conductor that is too high (see §4.4.4). An earth rod resistance that is too high (see §4.5.4). A voltage on the rod that is high (see §4.5.4). L R 0 The circuit-breaker trips out when it should not. The leakage currents are probably too high. First disconnect all loads from the network on which you are performing the test. Then perform a second test with the current reduced (in UF check) as far as possible. If the problem persists, the circuit-breaker must be declared defective. 39 L R 0 The RCD failed to trip in the ramp mode test. But, to ensure the users’ safety, the RCD must trip at a current between I ∆N /2 and I∆N. Check the wiring of the RCD. If there is nothing wrong with it, the RCD must be declared defective and replaced. > Ia mA L R 0 Ta The RCD failed to trip in the test in pulse mode. But, to ensure the safety of the users, an RCD must trip in less than 500 ms. Check the wiring of the RCD. If there is nothing wrong with it, the RCD must be declared defective and replaced. > L P R 0 > The device is too hot. Wait until it cools before resuming the measurements. To exit from the error mode, press the TEST button. TEST 40 ms 4.7. Direction of phase rotation This measurement is made on a three-phase network. It is used to check the phase order of the network. This can be done by the “3-wire” method or by the “2-wire” method. 4.7.1. Description of the measurement principle In a “3-wire” measurement, the device checks that the three signals are of the same amplitude and at the same frequency. It then measures the phase differences between the three phases and deduces their order (forward or reverse direction). In a “2-wire” measurement, the device checks voltage U12 in amplitude and frequency, then stores its phase. It then checks voltage U32 in amplitude and frequency. It then compares its phase to that of U12 and deduces the phase order (forward or reverse direction). 4.7.2. Making a measurement For the connection diagrams and the measurement process, refer to §3.5.1 and 3.5.2. 4.7.3. Reading of the result Hz 1.2.3: the phase order is direct. 3.2.1: the phase order is reversed. Press the MORE key to view the other result screen. The voltage between phase, Hz V MORE 4.7.4. Error indication The commonest errors in the case of a test of direction of phase rotation are: One of the three voltages is outside the measurement range. (See §4.2.3). The frequency is outside the measurement range (See §4.2.3). The voltages are not of the same order of magnitude. 41 U12, and its frequency. The key is used to view voltages U23 and U31 and their frequencies. In a “2-wire” measurement, the frequencies measured are too different. In a “2-wire” measurement, the maximum time allowed for the voltage measurement, 10 seconds, is exceeded. To exit from the error mode, press the TEST button. TEST 42 4.8. Current measurement This measurement requires the use of an optional current clamp. It can measure very low currents (of the order of a few mA) like fault currents, and high currents (of the order of a few hundred Amperes. 4.8.1. Description of the measurement principle The clamp is connected to the device at 3 points. Between two points, there is a resistance that enables the device to recognize the type of clamp. The measurement is made between the other two points. Knowing the ratio of the clamp, the device displays a direct reading of the current. 4.8.2. Making a measurement For the connection diagrams, refer to §4.6.1. Before starting the measurement, you can parameterize it: By adjusting the alarm. + As default, the device indicates whether the measurement exceeds 30mA, but the value can be programmed in SET-UP (see §5.8). To activate the alarm, press the ALARM key. The device will emit an audible signal if the measurement result exceeds 30mA (default value; can be programmed in SET-UP). MORE There is no need to press the TEST button because the measurement is made at all times. 4.8.3. Reading of the result Hz The measured current and its frequency. I mA Press the MORE key to view the other result screens. Hz V MORE 43 The present voltage ULN and its frequency. The key is used to view voltages ULPE and UNPE. MORE ALARM The current alarm threshold. > I mA 4.8.4. Error indication The commonest errors in the case of a current measurement are: The clamp is not connected. The current or frequency is outside the measurement range. If the current measured by the clamp is too low. Use a clamp having a lower ratio or pass the conductor through the clamp several times to increase the measured current. 600V CAT III N I Here, the conductor passes through the clamp 4 times. You will have to divide the measured current by 4 to know the true value of I. L2 PE L3 L1 L > 550V If the current measured by the clamp is too high, use a clamp having a higher ratio. To exit from the error mode, you must eliminate the cause of the error. Here, this means measuring a power supply of which the voltage and frequency are compatible with the specifications of the device (see §9.2.5). 44 5. SET-UP This function is used to: set the date and time, choose the type of power supply to the device and the whether or not the standby switching mode is activated, choose whether the audible signal is activated or not choose the time constant of the measurement smoothing filter choose the reference voltages for the calculation of short-circuit current Ik choose the maximum contact voltage UL choose the nominal current for the VAR setting of the switch, choose loop measurement current INtP so as to avoid untimely tripping, set the alarm thresholds for the loop, earth, and current measurements, set the communication rate of the device, restore the default configuration of the device, display the internal parameters of the device. 5.1. Access to SET-UP The display is as follows: Set the switch to SET-UP. LOOP / RCD P 300mA 500mA 100mA var. 30mA L1 L3 L2 10mA OFF SET-UP The device switches to permanent mode (display of the configuration process. P symbol) to prevent automatic standby switching interrupting the The general operating principle is as follows: The item that can be modified blinks and can be modified using the and keys. The other items to be modified are accessed using the key. The modifications are validated upon return to this screen (PUSH btn). To exit without saving, turn the switch to any position. 5.2. Setting the date and time + Use the key to choose the format in which the date is displayed: EU (European format): dd.mm US (American format): mm.dd MEM Use the and keys to set the year (YEAr). MEM 45 Use the and keys to set the date (dAtE). MEM Use the and keys to set the time (tiME). MEM Press the MEM key one last time to validate the modifications and return to the PUSH btn screen. MEM 5.3. Type of power supply The default configuration is battery operation (bAtt) with switching to standby at the end of 5 minutes with no action on the switch or the keys. + Use the key to specify the type of power supply: batteries (bAtt) rechargeable batteries (niMH) The device supports both types of power supply, but their voltages are different. Use the key to choose between automatic standby switching (SHUt On) to save the batteries or no automatic switching (SHUt OFF). In the latter case, the P symbol is displayed at all times. If automatic standby switching is selected, use the and keys to set the operating time of the device, between 1 and 59 minutes. Press the key one last time to validate the modifications and return to the PUSH btn screen. 46 5.4. Audible signal As default, the audible signal is activated. + > 2s Use the key to activate (On) or deactivate (OFF) the audible signal (biP). When the audible signal is active, each key press, each crossing of an alarm threshold, and each error will be signalled. Use a second long press on the key to validate the modifications and return to the PUSH btn screen. > 2s 5.5. Viewing the internal parameters of the device Successive presses on the key let you view, in order: the serial number of the device (Sn), the version of the internal software (SOFt), the version of the electronics on the boards (HArd), the date of adjustment of the device, all segments of the display unit lit. 5.6. Smoothing of the measurement (SMOOTH) As default, smoothing averages 3 consecutive measurements. SMOOTH P + Use the key to change the number of measurements included in the smoothing process (between 2 and 5). TEST The duration of the measurement is proportional to the number of measurements chosen. Smoothing applies only to the loop and live earth measurements. Press the TEST button again to validate the changes and return to the PUSH btn screen. TEST 47 5.7. Configuration of the measurements 5.7.1. Choice of reference voltage As default, UREF = 230 V. Press the MORE key. P V U REF MORE Use the key to choose the reference voltage, UREF, for the calculation of Ik = UREF/RLPE: MEAS: UREF = the voltage measured by the device. 110 V 127 V 220 V 230 V 380 V 400 V. 5.7.2. Choice of maximum contact voltage UL As default UL = 50 V. Press the MORE key again. P V x2 MORE Use the key to choose the maximum contact voltage, UL: 50 V. 25 V: for a measurement in a damp environment. 5.7.3. Choice of nominal current for the test of RCDs in variable mode As default I∆N = 30mA. Press the MORE key a third time. MORE P Use the and keys to set the nominal current of the RCD, I∆N, for the VAR position of the switch (between 6 and 650mA). x3 I mA N 48 5.7.4. Choice of loop measurement current As default INtP, = 0.4 I∆N. Press the MORE key a fourth time. P x4 I MORE N Use the key to choose the loop measurement current, INtP, as a function of the rated current of the RCD that protects the installation I∆N , between 0.1 and 0.5 I∆N. Press the MORE key a fifth time. x5 Press the MORE key one last time to validate the modifications and return to the PUSH btn screen. MORE 5.8. Alarm thresholds The default alarm thresholds are: resistance measurement:< 50.00 Ω current measurement: > 30.0 mA + Use the and keys to set the resistance alarm threshold, for the loop measurement or the earth measurement, between 0.00 and 3999 Ω. Select the direction of the alarm (< or >) and the position of the decimal point (.). MORE Use the and keys to set the current alarm threshold, between 0.00 mA and 39.99 A. Select the direction of the alarm (< or >) and the position of the decimal point (.). MORE Press the MORE key one last time to validate the modifications and return to the PUSH btn screen. MORE 49 5.9. Default configuration + TEST > 2s To restore the factory configuration of the device (dFLT), perform a long press on the TEST button. Only the date, the time, and any recorded measurements will not be modified. TEST 5.10. Communication rate for printing The default communication rate is 9600 Bauds + Use the key to choose the communication rate (bAUd): 300, 600, 1200, 2400, 4800, or 9600 Bauds. PRINT Press the PRINT key again to validate the modifications and return to the PUSH btn screen. PRINT Press the PRINT key when in the PUSH btn screen to print out the configuration of the device. PRINT 50 6. Storage 6.1. Organization of the memory The device has 100 memory locations to record measurements. These comprise measurements (TEST) that are arranged in blocks (OBJ.) A block number (OBJ.) may for example represent an installation and the measurement numbers (TEST) the various measurements made on the installation. 6.2. Storage As soon as a measurement is over, you can record the measurement result and all associated values (date, time, type of measurement, parameters, etc.). It is therefore important to check the date and time before storing any results (see §5.2) Press the MEM key. The slot proposed as default is the first free memory slot (FrEE). Here, OBJ. = 1 and TEST = 1. L P R 0 COM MEM MEM OBJ. TEST To change the slot (Object or Test), use the and or keys. The numbers must be between 01 and 99. If the slot is already taken, the device displays OCC, but you can even so overwrite it and put your new measurement in place of the old. Press the MEM key again. The FrEE symbol turns into rEC to report that the measurement is being recorded. The device then returns to voltage measurement mode. L P R 0 COM MEM OBJ. 51 TEST MEM 6.3. Readout To read out a measurement, press the MR key. To choose the slot, use the and or keys to change the block (OBJ.) and measurement (TEST) numbers. Free slots are identified by FREE and occupied slots by rCd, VOLt, LOOP, rA, etc., depending on the type of measurement recorded. L + R 0 MR MEM OBJ. TEST Press the MEM key again. The recorded measurement is displayed and the MR symbol blinks. You can use the MORE key to view all of the information concerning the measurement, as during an immediate reading of a measurement result. MEM 6.4. Erasure It is possible to erase a single measurement (TEST), a single memory block (OBJ.) with all of the measurements that it contains, or the whole memory. Set the switch to SET-UP. Press the MEM key. MEM LOOP / RCD 300mA 500mA 100mA var. 30mA L1 L3 L2 10mA OFF P SET-UP MEM 6.4.1. Partial erasure Press the key. Use the and or keys to select the block (OBJ.) or measurement (TEST) to be erased, making it blink. P MEM OBJ. 52 TEST Perform a long press on the MEM key. The selected block or measurement is erased and OCC is replaced by FREE, followed by a return to the PUSH btn screen. > 2s MEM 6.4.2. Complete erasure The whole memory is erased and the display “Clr ALL” is replaced by “FrEE ALL”. Perform a long press on the MEM key. P MEM > 2s MEM 6.5. Errors The commonest errors during storage are the following: P R 0 COM OBJ. MEM The memory is full and you try to record a measurement. It is then necessary to erase records to clear space in memory. TEST P R 0 COM OBJ. TEST MR The memory is empty and you try to read it. 53 7. Printing This function requires the use of a serial printer, available as an option. It is used to print a measurement as soon as it is over. Connect the printer to mains, then connect it to the device using the optical-RS232 communication cord provided. Insert the provided metallic adapter between the cord and the printer. Press the PRINT key. PRINT Example of printing ticket: ********************* * LOOP MEASUREMENT * ********************* MEAS. MODE.: TRIP Z(LPE): 1.09 ohms R(LPE): 1.08 ohms L(LPE): 0.00 mH Ik(LPE): 212.8 A Smooth: 1 meas. ********************* COMPENSATION SETTING: on R(L): 0.06 ohms on R(N): 0.06 ohms on R(PE): 0.06 ohms ********************* ********************* * R.C.D. * ********************* Trip current: 23.6mA Trip delay..: 19.4 ms Test mode...: SLOPE ********************* 54 8. Data export software The data export software, Transfertview, is used to recover the recorded measurements and transfer them into an Excel™ file. Start by installing Transfertview using the provided CD. Power up the device, then connect it to the PC using the optical-RS232 communication cord. Start the Transfertview software, then follow the instructions. You can also use Transfertview’s Help function. 55 9. Technical characteristics 9.1. Reference conditions Quantity of influence Reference values Temperature 20 ± 3 °C Relative humidity 45 to 55% RH Supply voltage 8.5 ± 0.5 V Electric field < 1 V/m Magnetic field < 40 A/m The intrinsic uncertainty is the error defined under the reference conditions. The operating uncertainty includes the intrinsic uncertainty plus the effects of variation of the quantities of influence (supply voltage, temperature, spurious currents, etc.) as defined in standard IEC-61557. 9.2. Electrical characteristics 9.2.1. Voltage measurements Particular reference conditions: Peak factor = 1,414 en AC AC component <0.1% in DC measurement DC component <0.1% in AC measurement Specified measurement range 2.0 – 79.9 V 80.0 – 399.9 400 - 550 V 0.1 V 0.1 V 1V Intrinsic uncertainty in DC ± (4% + 5 ct) ± (2% + 1 ct) ± (2% + 1 ct) Intrinsic uncertainty in AC ± (3% + 5 ct) ± (1.5% + 1 ct) ± (1.5% + 1 ct) Resolution Input impedance 440 kΩ Frequency of use DC and 15.3 … 450 Hz Contact voltage measurements Specified measurement range (AC) 2.0 – 100.0 V Intrinsic uncertainty ± (15% + 2 ct) Input impedance 4.5 MΩ in series with 4.7 nF Frequency of use 15.3 … 65 Hz This voltage is displayed only if it exceeds UL. Measurements of potential of the voltage probe The characteristics are the same as in the voltage measurements. This voltage must normally be between 0 and UL. 9.2.2. Frequency measurements Particular reference conditions: Voltage ≥ 10 V or current ≥ 100 mA for the MN20 clamp, ≥ 100 mA for the C172 clamp, ≥ 1 A for the C176 clamp. Beyond these values, the frequency is indeterminate (display of - - - - ). 56 Specified measurement range Resolution 15.3 – 399.9 Hz 400.0 – 499.9 Hz 0.1 Hz 1 Hz Intrinsic uncertainty ± (0.1% + 1 ct) 9.2.3. Loop impedance and live earth measurements Particular reference conditions: Voltage of the installation: 90 to 550 V. Frequency of the installation: 15.3 to 65 Hz. Resistance of the leads: compensated. Inductance of the leads: negligible. Impedance of the inductive part of the measured impedance: < 0.1 x the resistive part. Contact voltage (potential of the protection conductor with respect to the local earth): < 5 V. Resistance of the voltage measurement probe: ≤ 15 kΩ. Potential of the voltage probe with respect to PE: ≤ 50 V. Residual leakage current of the installation: zero. Compensation of the leads up to 5 Ω. Measurement current: 0.1 0.2 0.3 0.4 or 0.5 I∆N can be set in SET-UP. Range I∆N 10mA Specified measurement range 1 Resolution Intrinsic uncertainty 2 20 – 3,999 Ω 4.00 – 10.00 kΩ 7.0 – 399.9 Ω 400 – 3,333 Ω 1Ω 10 Ω 0.1 Ω 1Ω ± (15% + 50 ct) ± (10% + 15 ct) ± (15% + 50 ct) ± (10% + 15 ct) Range I∆N 100mA Specified measurement range 1 Resolution Intrinsic uncertainty 30mA 2 5.00 – 399.9 Ω 400 – 1,000 Ω 0.20 – 39.99 Ω 40.0 – 333.3 Ω 0.1 Ω 1Ω 0.01 Ω 0.1 Ω ± (15% + 25 ct) ± (10% + 15 ct) ± (15% + 25 ct) ± (10% + 15 ct) Range I∆N Specified measurement range Resolution Intrinsic uncertainty 2 300mA 500mA 1 0.20 – 39.99 Ω 40.0 – 200.0 Ω 0.01 Ω 0.1 Ω ± (15% + 25 ct) ± (10% + 15 ct) 1: For each range, the upper limit of the measurement range is specified for UL?=?50?V. It is divided by 2 if UL?= 25?V. 2: Variable range: I∆N < 10mA: the intrinsic uncertainty is equal to (15%+25 ct) x 10/ I∆N (in mA) I∆N > 10mA: the intrinsic uncertainty must be interpolated between the fixed ranges specified above. Characteristics of the short-circuit current calculation: Calculation formula: Ik = UREF / ZLPE Calculation range 3 Resolution Intrinsic uncertainty 0.1 – 399.9 A 400 – 3,999 A 4.00 – 39.90 kA 0.1 A 1A 10 A = √ (Intrinsic uncertainty on the voltage measurement if UMEAS is used)² + (Intrinsic uncertainty on the loop measurement)² 3: In practice, the Maximum value calculated cannot exceed 5000A. 57 9.2.4. Test of residual current device Particular reference conditions: Voltage of the installation: 90 to 550 V. Frequency of the installation: 15.3 to 65 Hz. Contact voltage (potential of the protective conductor with respect to the local earth): < 5 V. Resistance of the voltage probe (if used): ≤ 15 kΩ. Potential of the voltage probe (if used) with respect to the PE: < UL. Residual leakage current of the installation: zero. or Limitation of the ranges in full-wave mode ( Range I∆N ) 10mA 30mA 100mA 300mA 500mA var. Ramp yes yes yes yes yes yes Pulse at I∆N yes yes yes yes yes yes Pulse at 2 x I∆N yes yes yes yes NO yes if ≤ 325mA Pulse at 5 x I∆N yes yes yes NO NO yes if ≤ 130mA Pulse at 150mA yes yes NO NO NO yes if ≤ 30mA Pulse at 250mA yes yes NO NO NO yes if ≤ 50mA or Limitation of the ranges in half-wave mode ( Range I∆N ) 10mA 30mA 100mA 300mA 500mA var. Ramp yes yes yes yes NO yes if ≤ 320mA Pulse at I∆N yes yes yes yes NO yes if ≤ 320mA Pulse at 2 x I∆N yes yes yes NO NO yes if ≤ 160mA Pulse at 5 x I∆N yes yes NO NO NO yes if ≤ 65mA Pulse at 150mA yes yes NO NO NO yes if ≤ 15mA Pulse at 250mA yes yes NO NO NO yes if ≤ 30mA Characteristics in pulse mode 10mA - 30mA - 100mA - 300mA - 500mA - 650mA - 1000mA Variable (6 to 650mA) 4 Tripping Non-tripping Tripping Type of test Loop measurement test test test (selective) 0.5 x I∆N I∆N 2 x I∆N Test current 0.1 x I∆N … 0.5 x I∆N 5 Intrinsic uncertainty on the test +0 -7% +0 -7% -0 +7% -0 +7% current ± 2 mA ± 2 mA ± 2 mA ± 2 mA Maximum duration of application from 32 to 72 1,000 ms 500 ms 500 ms of the test current periods Range I∆N Tripping test 5 x I∆N -0 +7% ± 2 mA 40 ms 4: the upper limit (650mA) of the variable range depends on the type of test performed and on the shape of the test signal. It can range from 15 to 650mA. 5: this current is adjustable in steps of 0.1 I∆N and cannot be less than 3mA. Characteristics in ramp mode 10mA - 30mA - 100mA - 300mA - 500mA - 650mA - 1000mA Variable (6 to 999mA) 4 Range I∆N Type of test Loop measurement Non-tripping test Tripping test Test current Intrinsic uncertainty on the test current Maximum duration of application of the test current 0.1 x I∆N … 0,5 x I∆N 0.5 x I∆N 0.9573 x I∆N x k / 28 6 +0 -7% ± 2 mA +0 -7% ± 2 mA -0 +7% ± 2 mA from 32 to 72 periods 1,000 ms 3,400 ms Intrinsic uncertainty on the tripping current indication − 5 -0 +7% + 3.3 % IDN ± 2 mA Resolution de 0.1 mA up to 400 mA and 1 mA thereafter 6: k is between 9 and 31. The ramp so generated ranges from 0.3 I∆N to 1.06 I∆N in 22 steps of 3.3% I∆N each, with a duration of 200 ms. 58 Characteristics of the trip time (TA) Pulse mode Specified measurement range 5.0 – 399.9 ms Resolution 400 - 500 ms 0.1 ms Intrinsic uncertainty Ramp mode 1 ms 10.0 – 200.0 ms 0.1 ms ± 2 ms ± 2 ms Characteristics of the short-circuit current calculation: See §9.2.3. Characteristics of the fault voltage calculation (UF): Calculation formula: I∆N x ZLPE (or RA ) and 2 x I∆N x ZLPE (or RA ) if the test is performed at 2x I∆N. Specified measurement range 5.0 – 50.0 V Resolution 0.1 V Intrinsic uncertainty ± 10% 9.2.5. Current measurement Particular reference conditions: Peak factor = 1.414 DC component < 0.1% Frequency: 15.3 to 450 Hz. Characteristics with the MN20 clamp: Transformation ratio: 1,000 / 1 Specified measurement range 5.0 – 399.9mA 0.400 – 3.999 A 4.00 – 39.99 A 0.1mA 1mA 10mA ± (2% + 10 ct) ± (1.5% + 2 ct) ± (1.2% + 2 ct) 5.0 – 399.9mA 0.400 – 3.999 A 4.00 – 39.99 A 0.1mA 1mA 10mA ± (2% + 10 ct) ± (1.5% + 2 ct) ± (1.2% + 2 ct) 0.055 – 3.999 A 4.00 – 39.99 A 40.0 – 399.9 A 1mA 10mA 100mA ± (2% + 10 ct) ± (1.5% + 2 ct) ± (1.2% + 2 ct) Resolution Intrinsic uncertainty Characteristics with the C172 clamp: Transformation ratio: 1000 / 1 Specified measurement range Resolution Intrinsic uncertainty Characteristics with the C176 clamp: Transformation ratio: 10 000 / 1 Specified measurement range Resolution Intrinsic uncertainty 9.2.6. Direction of phase rotation Particular reference conditions: Three-phase network. Voltage of the installation: 90 to 550 V. Frequency: 50 Hz. Frequency stability: 0.1% during the measurement. Acceptable level of amplitude unbalance: 20%. Acceptable level of phase unbalance: 10%. Acceptable level of harmonics (voltage): 10%. 59 Characteristics: Frequency range (approximately ± 6% with respect to the theoretical value): between 15.7 and 17.7 Hz (for 16.67 Hz) or between 47 and 53 Hz (for 50 Hz) or between 56 and 64 Hz (for 60 Hz). Reference period acquisition time after contact: ≤ 500 ms (2-wire mode only). Reference period information retention time: 10 s (2-wire mode only). Measurement period acquisition time after contact and phase order display time: ≤ 500 ms. Phase order indication retention time: no limitations other than those of the functions of the device: switching off, reset of the function. Rejection of EDF remote control frames (TCC-175Hz-188Hz) 9.3. Variations in the range of use 9.3.1. Voltage measurement Quantities of influence Temperature Relative humidity Supply voltage Frequency Variation of the measurement Limits of the range of use Typical Maximum -10 … + 55 °C 1%/10 °C ± 1 ct 2%/10 °C + 2 ct 10 … 85% RH at 45°C 2% 3% + 2 ct 6.8 … 10 V 0.5% 2% + 2 ct 15.3 … 450 Hz 0.5% 1% 0 … 500 Vac 50 dB 40 dB Series mode rejection in AC 50/60Hz series mode rejection in DC Common mode rejection in 50/60Hz AC 9.3.2. Earth measurement on live circuit, loop and selective earth Quantities of influence Temperature Relative humidity Supply voltage Network frequency of the installation tested Limits of the range of use Variation of the measurement Typical Maximum 1%/10 °C ± 1ct 2%/10 °C + 2 ct 10 … 85% RH at 45°C 2% 3% + 2 ct 6.8 … 10 V 0.5% 2% + 2 ct 99 to 101% of the nominal frequency 0.5% or 1 ct 1% + 1 ct 0.5% or 1 ct 1% + 1 ct 0.5%/10° 1%/10° 0.1%/kΩ 0.2%/kΩ + 1 ct 0.1%/10 V 0.2%/10 V + 1 ct -10 … + 55 °C 85 to 110% of the nominal frequency 0 …20° Phase difference between the internal load and or the measured impedance or inductance of the 0 … 400 mH measured impedance or L/R ratio of the measured or impedance 0 … 500 ms Resistance in series with the voltage probe (earth 0 … 15 kΩ on live circuit only) Contact voltage (UF) 0 … 50 V Network voltage of the installation tested 9.3.3. Test of residual current device Quantities of influence Limits of the range of use Variation of the measurement Typical Maximum 1%/10 °C ± 1ct 2%/10 °C + 2 ct 10 … 85% RH at 45°C 2% 3% + 2 ct 6.8 … 10 V 0.5% 2% + 2 ct Network frequency of the installation tested 99 to 101% of the nominal frequency 0.5% 1% + 1 ct Network voltage of the installation tested 85 to 110% of the nominal frequency 0.5% 1% + 1 ct Temperature Relative humidity Supply voltage -10 … + 55 °C 60 9.3.4. Direction of phase rotation No quantity of influence 9.3.5. Current measurement Quantities of influence Limits of the range of use Temperature Relative humidity Supply voltage Frequency Common mode rejection in 50/60Hz AC Variation of the measurement Typical Maximum 1%/10 °C ± 1ct 2%/10 °C + 2 ct 10 … 85% RH at 45°C 2% 3% + 2 ct 6.8 … 10 V 0.5% 2% + 2 ct -10 … + 55 °C 15.3 … 450 Hz 0.5% 1% 0 … 500 Vac 50 dB 40 dB 9.4. Intrinsic uncertainty and operating uncertainty The C.A. 6030 installation tester complies with standard IEC-61557, which requires that the operating uncertainty, called B, be less than 30%. In loop measurement, B = ± ( |A| + 1,15 √ E1² + E2² + E3² + E6² + E7² + E8² ) withE1 = influence of reference position ± 90°. E2 = influence of the supply voltage within the limits indicated by the manufacturer. E3 = influence of the temperature between 0 and 35°C. E6 = influence of the phase angle from 0 to 18°. E7 = influence of the network frequency from 99 to 101% of the nominal frequency. E8 = influence of the network voltage from 85 to 110% of the nominal voltage. In test of residual current device, B = ± ( |A| + 1,15 √ E1² + E2² + E3² + E5² + E8² ) withE5 = influence of the resistance of the probes within the limits indicated by the manufacturer. 9.5. Power supply The device can be powered by 6 1.5-V LR6 alkaline batteries or by NiMH rechargeable batteries of the same size. Each change of type of power supply (from batteries to rechargeable batteries or vice versa) must be indicated in SET-UP, because the low supply level is not the same, and the device might then either validate erroneous measurements or prohibit measurements because the power supply seems too low. The supply voltage is measured regularly and displayed ( symbol). When the voltage is too low to ensure correct operation, the device displays BAtt and switches to standby. The batteries must then be replaced. Battery life is at least 40 hours, allowing 5 days of use at 8 hours a day. 9.6. Environmental conditions Indoor and outdoor use. Operating range -10 to 55 °C and 10% to 85% RH Specified operating range 3 0 to 35 °C and 10% to 75% RH Range in storage (sans piles) -40 °C to +70 °C and 10% to 90% RH Altitude < 2,000 m Pollution degree 2 7: This range corresponds to the range of the operating uncertainty defined by standard IEC-61557. When the device is used outside this range, it is necessary to add 1.5%/10°C and 1.5% between 75 and 90% RH to the operating uncertainty. 61 9.7. Mechanical characteristics Dimensions (L x l x H) Weight 211 x 108 x 60 mm approximately 850 g Protection class IP 54 per IEC 60 529 IK 04 per IEC 50102 Free fall test per IEC 61010-1 9.8. Conformity to international standards The device is in conformity with IEC 61010-1, 600V CAT III. Assigned characteristics: measurement category III, 600V with respect to earth, 500V in differential between the terminals. The device is in conformity with: IEC 61557 parts 1, 3, 6 and 7. IEC 61557 part 10. 9.9. Electromagnetic compatibility (EMC) Emissions and immunity in an industrial environment per IEC61326-1. 62 10. Definition of symbols Here is a list of the symbols used in this document and on the display unit of the device. AC AC (Alternating Current) signal. DC DC (Direct Current) signal. Hz Hertz: indicates the frequency of the signal. I current. IALARM current alarm threshold. Ia effective RCD operating current (ramp mode test). I∆N nominal rating of the RCD tested. Ik short-circuit current between the L and N terminals. IT type of link to earth defined in standard IEC 60364-6. INtP loop or live earth measurement current. L L terminal (phase). N N terminal (neutral). PE PE terminal (protective conductor). R∆L resistance of the lead on the L terminal subtracted from the measurement (compensation of measurement leads). R∆N resistance of the lead on the N terminal subtracted from the measurement (compensation of measurement leads). R∆PE resistance of the lead on the PE terminal subtracted from the measurement (compensation of measurement leads). RA earth resistance in earth measurement on live circuit. RA ALARM loop resistance alarm threshold. RCD acronym designating a Residual Current Device or switch. RL-PE resistance in the L-PE loop. RMS Root Mean Square: root-mean-square value of the signal, the square root of the mean of the squares of the signals. RP resistance of the auxiliary rod. S selective residual current device. Ta effective trip time of the residual current device (pulse mode test). TN type of link to earth defined in standard IEC 60364-6. TT type of link to earth defined in standard IEC 60364-6. UF fault voltage appearing during a fault condition between accessible conducting parts (and/or external conducting parts) and the reference frame ground (IEC 61557). UFn fault voltage referred to I∆N, calculated before applying the tripping current for the test of the RCD. UL conventional maximum contact voltage (IEC 61557). UL-N voltage measured between the L and N terminals. UL-PE voltage measured between the L and PE terminals. UN-PE voltage measured between the N and PE terminals. UP voltage between the PE conductor and the auxiliary rod. UREF reference voltage for calculation of the short-circuit current. ZL-PE impedance in the L-PE loop. ZL ALARM loop impedance alarm threshold. 63 11. MAINTENANCE The manufacturer cannot be held liable for any accident that occurs following a repair not performed by its customer service department or by an approved repairer. 11.1. Cleaning Disconnect the unit completely and turn the rotary switch to OFF. Use a soft cloth, dampened with soapy water. Rinse with a damp cloth and dry rapidly with a dry cloth or forced air. Do not use alcohol, solvents, or hydrocarbons. 11.2. Replacing the batteries When there are no more bars in the battery symbol ( ), you must replace all of the batteries. Disconnect anything connected to the device and set the switch to OFF, then proceed as described in §1.2. You can use either batteries of the type indicated by the label on the battery compartment cover or NiMH rechargeable batteries having a capacity of at least 2000mAh. If this is done, it must be indicated in SET-UP (see §5.3) When the batteries are withdrawn, enough energy is stored in the device to preserve the date and time for one minute. If this time is exceeded, the device will display tIME when next powered up, prompting you to check the date and time (see §5.2). 11.3. Storage If the device is to be left unused for an extended period (more than two months), withdraw the batteries. The date and time will have to be set when the device is next used (see §5.2). 11.4. Resetting the device If the device crashes, it can be reset, like a PC. Set the switch to RCD 300mA. Press the 3 keys indicated below simultaneously. LOOP / RCD 300mA 500mA 100mA var. 30mA L1 L3 L2 10mA OFF SET-UP I N (2s) MORE TEST ALARM PRINT MEM MR SMOOTH LOOP / RCD 300mA 500mA 100mA var. 30mA L1 L3 L2 10mA OFF SET-UP C.A 6030 LOOP/RCD TESTER 64 11.5. Updating of the internal software With a view to providing, at all times, the best possible service in terms of performance and technical upgrades, Chauvin Arnoux invites you to update the embedded software of the device by downloading the new version, available free of charge on our web site. Our site: http://www.chauvin-arnoux.com Sign in and open your account. Then go to “Software support space”, then “Freely available software”, then “C.A 655X-6030”. Connect the device to your PC using the USB cord provided. 11.6. Metrological check Like all measuring or testing devices, the instrument must be checked regularly. This instrument should be checked at least once a year. For checking and calibration, contact one of our accredited metrology laboratories (information and contact details available on request), at our Chauvin Arnoux subsidiary or the branch in your country.9 11.7. Repair For all repairs before or after expiry of warranty, please return the device to your distributor. 65 12. Warranty Except as otherwise stated, our warranty is valid for twelve months starting from the date on which the equipment was sold. Extract from our General Conditions of Sale provided on request. The warranty does not apply in the following cases: Inappropriate use of the equipment or use with incompatible equipment; Modifications made to the equipment without the explicit permission of the manufacturer’s technical staff; Work done on the device by a person not approved by the manufacturer; Adaptation to a particular application not anticipated in the definition of the equipment or not indicated in the user’s manual; Damage caused by shocks, falls, or floods. 66 13. To order C.A 6030 Loop and RCD Tester (Euro) ..................................................................................................................... P01191511 C.A 6030 Loop and RCD Tester (GB) ....................................................................................................................... P01191511A C.A 6030 Loop and RCD Tester (IT) ......................................................................................................................... P01191511B C.A 6030 Loop and RCD Tester (CH) ....................................................................................................................... P01191511C C.A 6030 Loop and RCD Tester (US) ........................................................................................................................ P01191511D Delivered with a carrying bag containing: One mains measuring cable (Euro, GB, IT, CH, or US plug depending on the model ordered). One measuring cable, three safety leads. Three alligator clips (red, yellow and white). Three probe tips (red, yellow and white). Transfer software and a communication cord (optical-RS232). One user manual in 5 languages on a CD. Five safety sheets (one per language). 13.1. Accessories MN20 current clamp .................................................................................................................................................... P01120440 C172 current clamp...................................................................................................................................................... P01120310 C176 current clamp...................................................................................................................................................... P01120330 Serial printer ................................................................................................................................................................ P01102903 Loop kit (1 earthing rod + 1 coil of 30m of green cable) ............................................................................................. P01102020 Earth option (Loop kit + carrying bag) ......................................................................................................................... P01101999 13.2. Replacement parts Optical communication cable ...................................................................................................................................... P01295252 Set of 3 alligator clips (red, yellow, white) ................................................................................................................... P01101905 Set of 3 probe tips (red, yellow, white) ........................................................................................................................ P01101906 Carrying bag (for the device + its accessories) ........................................................................................................... P01298066 67 68 06 - 2011 Code 689772B02 - Ed. 1 DEUTSCHLAND - Chauvin Arnoux GmbH Straßburger Str. 34 - 77694 Kehl / Rhein Tel: (07851) 99 26-0 - Fax: (07851) 99 26-60 SCHWEIZ - Chauvin Arnoux AG Moosacherstrasse 15 - 8804 AU / ZH Tel: 044 727 75 55 - Fax: 044 727 75 56 ESPAÑA - Chauvin Arnoux Ibérica S.A. C/ Roger de Flor, 293 - 1a Planta - 08025 Barcelona Tel: 90 220 22 26 - Fax: 93 459 14 43 UNITED KINGDOM - Chauvin Arnoux Ltd Unit 1 Nelson Ct - Flagship Sq - Shaw Cross Business Pk Dewsbury, West Yorkshire - WF12 7TH Tel: 01924 460 494 - Fax: 01924 455 328 ITALIA - Amra SpA Via Sant’Ambrogio, 23/25 - 20050 Macherio (MI) Tel: 039 245 75 45 - Fax: 039 481 561 MIDDLE EAST - Chauvin Arnoux Middle East P.O. BOX 60-154 - 1241 2020 JAL EL DIB (Beirut) - LEBANON Tel: (01) 890 425 - Fax: (01) 890 424 ÖSTERREICH - Chauvin Arnoux Ges.m.b.H Slamastrasse 29/2/4 - 1230 Wien Tel: 01 61 61 9 61-0 - Fax: 01 61 61 9 61-61 CHINA - Shanghai Pu-Jiang - Enerdis Instruments Co. Ltd 3 F, 3 rd Building - N° 381 Xiang De Road - 200081 SHANGHAI Tel: +86 21 65 21 51 96 - Fax: +86 21 65 21 61 07 SCANDINAVIA - CA Mätsystem AB Box 4501 - SE 18304 TÄBY Tel: +46 8 50 52 68 00 - Fax: +46 8 50 52 68 10 USA - Chauvin Arnoux Inc - d.b.a AEMC Instruments 200 Foxborough Blvd. - Foxborough - MA 02035 Tel: (508) 698-2115 - Fax: (508) 698-2118 http://www.chauvin-arnoux.com 190, rue Championnet - 75876 PARIS Cedex 18 - FRANCE Tél. : +33 1 44 85 44 85 - Fax : +33 1 46 27 73 89 - [email protected] Export : Tél. : +33 1 44 85 44 38 - Fax : +33 1 46 27 95 59 - [email protected]