1
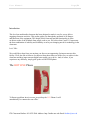
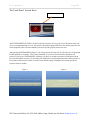
User Manual
Page |1
This document is a publication of ITS Learning Space Design at the University of North Carolina.
It may be copied for individual or non-profit use. Please send comments about this publication to:
CB# 3420, 100 Port Hole Alley, Chapel Hill, NC 27599-3420 or to [email protected].
ITS Classroom Hotline: 962-6702 Web Address: http://hotline.unc.edu Email: [email protected]
User Manual
Page |2
Table of Contents
Introduction
Start-up Page
3
4
The Touch Panel
An Overview
System Reset
5
6
The Main Menu Bar
Computer
Laptop
PC Stress Busters
VCR
DVD/CD
DOC CAM
7
8
9
10
11
12
The Room Control Menu Bar
LCD Projector
LCD Stress Busters
Screen
Shade
Lights
Help
13
14
15
16
17
18
The In-Class Computer
Using Remote Desktop to view your own PC
Using your USB key
20
27
What If… Troubleshooting
FAQ (room for written Q & A)
28
ITS Classroom Hotline: 962-6702 Web Address: http://hotline.unc.edu Email: [email protected]
User Manual
Page |3
Introduction
This level one multimedia classroom has been designed to make it easy for you to deliver
engaging classroom activities. This packet guides you through the operation of all features
and functions of the equipment. The design of this classroom and the functionality it offers
are direct results of the feedback from people such as you. We believe that Carroll 111 represents
the best combination of usability and scalability to meet your changing needs for technology in the
classroom.
Let’s Talk...
We would like to hear from you anytime you discover an opportunity for improvement to this
facility. We’d also like to listen to you discuss ideas about what you’d like to try to achieve in the
classroom and how improvements might better enable you to do so. And, of course, if you
experience any difficulty, simply pick up the red HOTLINE phone.
The HOTLINE Phone
To Report a problem in a in a room, just pick up the RED Phone. It will
automatically be connected to our office.
ITS Classroom Hotline: 962-6702 Web Address: http://hotline.unc.edu Email: [email protected]
User Manual
Page |4
*STRESS BUSTER*
IF we cannot solve the problem over the phone, please specify whether or not
the technician may interrupt your class to resolve the problem.
The Touch Panel: Start Pages
To begin using the touch panel, press here
ITS Classroom Hotline: 962-6702 Web Address: http://hotline.unc.edu Email: [email protected]
User Manual
Page |5
The Touch Panel: An Overview
Main Menu Bar
Room Control Bar
The Main Menu Bar accesses all
of the devices in the room.
The Room Control Bar accesses
all the room settings.
Program audio control buttons
*STRESS BUSTERS*
ITS Classroom Hotline: 962-6702 Web Address: http://hotline.unc.edu Email: [email protected]
User Manual
Page |6
More power to you: Your laptop’s battery should last for about an hour and a half, but why risk it?
Bring your AC adapter with you and use it during your presentation/lecture.
You’ll never feel powerless again!
ITS Classroom Hotline: 962-6702 Web Address: http://hotline.unc.edu Email: [email protected]
User Manual
Page |7
The Touch Panel: System Reset
System Reset button
The SYSTEM RESET BUTTON is located in the top left corner of every page. Press this button at the end
of every event/presentation to “reset” the system to its default settings for the next user and to protect the life
of the equipment. This will ensure that the system will operate properly for the next user.
After pressing SYSTEM RESET (Figure 1), the video projector will turn off, as will each piece of equipment
located inside the A/V cabinet. This is fully automated, so you do not need to turn the equipment off
yourself. If you press SYSTEM RESET accidently, you have 10 seconds to press the screen again to abort
the reset and continue as before. If 10 seconds pass without the screen being touched, the system will enter a
two minute cool down period while it restores to the default settings. During this two-minute period, the
system will not be usuable.
Figure 1
Figure 2
ITS Classroom Hotline: 962-6702 Web Address: http://hotline.unc.edu Email: [email protected]
User Manual
Page |8
The Main Menu Bar: Computer Control
Press the Computer button.
1
1) Use PROJECTOR button to display the computer image.
*STRESS BUSTERS*
If you don’t see an image after selecting Computer, don’t worry. If unused for awhile, the computer
will sometimes go into hibernation or sleep mode. To wake it up, move the mouse around or press
the space bar on the keyboard.
ITS Classroom Hotline: 962-6702 Web Address: http://hotline.unc.edu Email: [email protected]
User Manual
Page |9
The Main Menu Bar: Laptop Control
Press the Laptop button.
1
1) Use PROJECTOR button to display the laptop image.
ITS Classroom Hotline: 962-6702 Web Address: http://hotline.unc.edu Email: [email protected]
User Manual
P a g e | 10
The Main Menu Bar: Laptop Control (Cont’d)
Stress Busters
1.)
2.)
3.)
4.)
Plug in your AC power adapter (optional), and turn your laptop on.
Attach the audio and video cables to your laptop.
Attach the network cable to your laptop network adapter, if you want to connect to the network.
Toggle your display by pressing Function (Fn) and F7 together. This may be Fn and F5 depending upon
your laptop.)
ITS Classroom Hotline: 962-6702 Web Address: http://hotline.unc.edu Email: [email protected]
User Manual
P a g e | 11
The Main Menu Bar: VCR
Press to start the VCR.
1
Keypad for Direct
channel entry.
8
*STRESS BUSTERS*
9
10
The Digital Satellite Service is shared between both the North Bell Tower and South End Zone
conference rooms. Be sure the service is not in use in the opposite room before trying to watch TV.
If the DSS #1 button is selected while in use, the following error message will appear.
11
2
3
4
5
6
7
1) Use PROJECTOR button to display the VCR image
2) Rewinds a VCR tape
3) Plays a VCR tape
4) Fast Forwards a VCR tape
5) Pauses a VCR tape
6) Stops a VCR tape
7) Ejects a VCR tape
8) Displays a counter
9) Resets the counter
10) Enables an aux video source to be displayed though the front AV jacks
11) Changes TV channels where available
ITS Classroom Hotline: 962-6702 Web Address: http://hotline.unc.edu Email: [email protected]
User Manual
P a g e | 12
The Main Menu Bar: DVD/CD
Press to start the DVD/CD.
1
0
10
11
12
13
Change Channel
2
3
4
5
6
7
8
1) Use PROJECTOR button to display the DVD or CD image
2,4) Scans backwards or Forwards
3) Plays a DVD or CD
5) Pauses a DVD or CD
6) Stops a DVD or CD
7,8) Skips backwards or forwards
9) Ejects a DVD or CD
10) Displays Search keypad
11) Displays the DVD menu
12) Menu navigation keys
13) Displays a counter
ITS Classroom Hotline: 962-6702 Web Address: http://hotline.unc.edu Email: [email protected]
9
User Manual
P a g e | 13
The Main Menu Bar: DOC CAM
Press to start the DOC
CAM.
1
0
Use PROJECTOR button to display the Doc Cam image
ITS Classroom Hotline: 962-6702 Web Address: http://hotline.unc.edu Email: [email protected]
User Manual
P a g e | 14
The Room Control Menu Bar: LCD Projector
1
2
3
4
5
6
7
8
9
Press to use the LCD projector controls
1) Power ON turns on LCD projector
2) Power OFF turns on LCD projector
3) IMAGE BLANK mutes and unmutes the LCD projector image
4) AUTO PC ADJUST adjusts the projector to the best computer image
5) 16:9 ratio display video in a 16:9 format
6) 4:3 ratio display video in a 4:3 format
7) PC input displays a computer image
8) VIDEO input displays the VCR or DVD
9) Turns on or off close caption
*STRESS BUSTERS*
WARNING!!!
IF YOU TURN THE PROJECTOR OFF, IT CANNOT BE TURNED ON FOR 2 MINUTES!
ITS Classroom Hotline: 962-6702 Web Address: http://hotline.unc.edu Email: [email protected]
User Manual
P a g e | 15
The Room Control Menu Bar: LCD Projector (Cont’d)
If you want to have your display ready and waiting but hidden from your audience without turning
the projector off, use the IMAGE BLANK button. This will take the projected image off the screen,
but will leave the projector on and running. Doing this will avoid the two minute down and warm
up times.
To show the image again, press IMAGE BLANK. If you need to change the input on one of the
projectors, press the appropriate DATA or VIDEO button to display the image.
Aspect ratios are typically in 4:3 or 16:9. 4:3 are what you normally see on TV or desktop PC
monitors. 16:9 represents widescreen, typically used for HDTV or movies.
Note: Some movies are played with black bars on the top and bottom to display the image in a
widescreen aspect ratio on a 4:3 screen. If so, you may not need to use the 16:9 option.
ITS Classroom Hotline: 962-6702 Web Address: http://hotline.unc.edu Email: [email protected]
User Manual
P a g e | 16
The Room Control Menu Bar: Screen
Press to use the screen controls
The SCREEN button gives you control over the center screen. You may raise or
lower the SCREEN. Pressing the UP button will raise the selected screen.
Pressing the DOWN button will lower the selected screen. The screens are preset at specific
levels and heights. If the levels are off or not operating correctly, please call the hotline for
assistance
ITS Classroom Hotline: 962-6702 Web Address: http://hotline.unc.edu Email: [email protected]
User Manual
P a g e | 17
The Room Control Menu Bar: Shades
Pressing the UP button will raise the shades.
Pressing the DOWN button will lower the shades.
Press to use the screen controls
ITS Classroom Hotline: 962-6702 Web Address: http://hotline.unc.edu Email: [email protected]
User Manual
P a g e | 18
The Room Control Menu Bar: Lights
1
2
3
4
Press to use the light controls
There are four preset levels to which the lights may be set:
1) ALL ON sets lights to 100%
2) MEDIUM sets lights to 50%
3) LOW sets certain lights to 25% for optimal video viewing
4) ALL OFF turns all lights off.
Depending on the room, some of the Zone lights are dimmable
while others are either on/off.
ITS Classroom Hotline: 962-6702 Web Address: http://hotline.unc.edu Email: [email protected]
User Manual
P a g e | 19
The Room Control Menu Bar: Help
Help button
The HELP button provides quick and easy access to information concerning the touch panel as well
as the multimedia technology in the room.
After selecting a device, pressing HELP will generate a help page for that device.
Press HELP again to quit help and return to normal use of the touch panel
Example Help Page
ITS Classroom Hotline: 962-6702 Web Address: http://hotline.unc.edu Email: [email protected]
User Manual
P a g e | 20
The In-Class Computer: Using Remote Desktop to view your own PC
Before you can connect to your office computer, you must change your settings to enable a
connection from a remote user. You must first enable the Remote Desktop feature on your office
computer so that you can control it remotely from the Network PC.
I. Enabling your office computer to use Remote Desktop
Right-click My Computer and choose Properties. You should get a box labeled System
Properties that looks like the picture below. Click on the Remote tab.
ITS Classroom Hotline: 962-6702 Web Address: http://hotline.unc.edu Email: [email protected]
User Manual
P a g e | 21
Check box Allow users to connect remotely to this computer. Write down your Full
computer name and keep it for later use. If you would like to change your computer
name you can click on the Computer Name tab to do so. Click OK.
ITS Classroom Hotline: 962-6702 Web Address: http://hotline.unc.edu Email: [email protected]
User Manual
P a g e | 22
Make sure the firewall does not block Remote Desktop by clicking on Start, then
Control Panel. Click Security Center.
Click Windows Firewall.
ITS Classroom Hotline: 962-6702 Web Address: http://hotline.unc.edu Email: [email protected]
User Manual
P a g e | 23
Make sure that the Don’t allow exceptions box is not checked.
ITS Classroom Hotline: 962-6702 Web Address: http://hotline.unc.edu Email: [email protected]
User Manual
P a g e | 24
ITS Classroom Hotline: 962-6702 Web Address: http://hotline.unc.edu Email: [email protected]
User Manual
P a g e | 25
Click on the Exceptions tab and check the Remote Desktop box. Then click OK.
ITS Classroom Hotline: 962-6702 Web Address: http://hotline.unc.edu Email: [email protected]
User Manual
P a g e | 26
II. Finding the IP Address of your office computer
*Note: This section (Section II) is unnecessary if you wrote down your full computer
name. Just make sure to leave your computer on.
Click Start, then Run.
Type cmd into the Open: field and click OK.
A window with a black background (DOS window) will emerge. Type ipconfig and
press Enter. The IP Address will be under the heading, Ethernet adapter Local Area
Connection. It will be your first combination of four digits separated by three periods
(i.e. 152.2.12.1). Write down the IP address and leave your computer on. It is
recommended that you use your full computer name instead of IP address. Because of the way the
network operates, your IP address may change every once in a while but your full computer name
will not. Check your IP address periodically to make sure it is the same as the last time you wrote it
down.
ITS Classroom Hotline: 962-6702 Web Address: http://hotline.unc.edu Email: [email protected]
User Manual
P a g e | 27
III. Connecting to your office computer from the Classroom
On the desktop of the classroom computer, double-click on the Remote Desktop icon.
Type in the full computer name or the IP address of your office computer and click
Connect.
Enter the User Name and password you would use to login to your office computer. A
bar should appear at the top of the screen. You can use the push pin icon to auto-hide the bar. Also,
by pressing the minus (-), you can minimize remote desktop and switch back to controlling the
classroom computer. Make sure to disconnect when you are finished with class by closing the
remote desktop bar.
Please remember to practice the process before your first class. As always, call 962-6702 to
schedule a demonstration of classroom equipment.
The In-Class Computer: Using your USB key
USB keys are also called flash drives, memory sticks, pen drives, etc. To use them,
simply plug them into the USB slot in a computer. Depending on the brand, you may
have to go to “My Computer” and it should show up there. In a few of the classrooms,
the front of the computer is exposed and you just plug in your USB key into the USB slot
in the front. Most of the classrooms with computers in them have a USB extension cable
that looks similar to the pictures below. The extension cable is either on the desktop or in a drawer.
ITS Classroom Hotline: 962-6702 Web Address: http://hotline.unc.edu Email: [email protected]
User Manual
P a g e | 28
What If...
Problem
Possible Reason
Help
No image on screen
LCD Projector is not on
Press the ON button
No audio
Volume is not high enough
Adjust the volume
LCD Projector is turned on and
LAPTOP is selected, but no
laptop display
Laptop display needs to be
toggled
Press Function and F8
The screen is blank, but the LCD
projector is on
Image blank is on
Press the IMAGE BLANK button
on the LCD PROJECTOR page
Still no image on any of the
various modes (VCR, DVD, PC,
etc.
Projector lamp may be burnt out
Contact hotline for a replacement
lamp.
No sound is playing from Laptop,
but still working on other menus
Laptop audio output may be too
low
Turn up the volume on the laptop
and also verify that the volume on
the amplifier is turned up
No audio
Source is not sent to a projector
Select LEFT or RIGHT Projector
ITS Classroom Hotline: 962-6702 Web Address: http://hotline.unc.edu Email: [email protected]