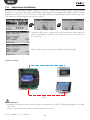
1
pLoads Energy control solution User manual Integrated Control Solutions & Energy Savings ENG Content 1. INTRODUCTION 5 2. USER INTERFACE 6 2.1 Display ............................................................................................................... 6 3. SYSTEM ARCHITECTURE 8 4. MAIN MENU – FUNCTION TREE 9 5. USER FUNCTIONS 5.1 5.2 5.3 5.4 5.5 5.6 11 Clock setting ................................................................................................... 11 General scheduler setting ........................................................................... 11 Energy scheduler configuration ................................................................. 12 Exceptions to general scheduler ................................................................ 12 Scheduler setting for each load ................................................................. 13 Load cut-off configuration........................................................................... 14 6. INPUT/OUTPUT TABLE 16 7. INSTALLER FUNCTIONS 17 7.1 7.2 7.3 7.4 7.5 7.6 7.7 7.8 Load installation .............................................................................................17 Pulse counter installation .............................................................................17 Energy meter installation............................................................................. 19 Supervisor installation ..................................................................................20 General settings............................................................................................. 21 Wireless network installation ......................................................................22 Description of the terminals .......................................................................24 Electrical connections ...................................................................................26 8. OPERATING LOGIC 8.1 8.2 8.3 8.4 29 Scheduler ........................................................................................................29 Load cut-off ....................................................................................................30 Override loads ...............................................................................................33 Control interaction ........................................................................................34 9. PARAMETERS TABLE 35 10. SUPERVISOR TABLE 47 11. ALARM TABLE 56 3 pLoads - +040000131 - rel. 1.3 - 05.06.2013 ENG 12. PLOADS FEATURES 12.1 12.2 12.3 12.4 12.5 12.6 57 Installation warnings - intended environments and connection........ 57 Uploading the application program..........................................................58 Power supply .................................................................................................59 Technical specifications ................................................................................59 Other features ................................................................................................ 61 Dimensions ....................................................................................................62 IMPORTANT WARNINGS The CAREL product is a state-of-the-art device, whose operation is specified in the technical documentation supplied with the product or can be downloaded, even prior to purchase, from the website www.carel.com. The customer (manufacturer, developer or installer of the final equipment) accepts all liability and risk relating to the configuration of the product in order to reach the expected results in relation to the specific installation and/or equipment. The failure to complete such phase, which is required/indicated in the user manual, may cause the final product to malfunction; CAREL accepts no liability in such cases. The customer must use the product only in the manner described in the documentation relating to the product. The liability of CAREL in relation to its products is specified in the CAREL general contract conditions, available on the website www.carel.com and/or by specific agreements with customers. NO POWER & SIGNAL CABLES TOGETHER READ CAREFULLY IN THE TEXT! ATTENTION: Separate as much as possible the probe and digital input signal cables from the cables carrying inductive loads and power cables to avoid possible electromagnetic disturbance. Never run power cables (including the electrical panel wiring) and signal cables in the same conduits. DISPOSAL OF THE PRODUCT The appliance (or the product) must be disposed of separately in accordance with the local waste disposal legislation in force All trademarks hereby referenced are the property of their respective owners. CAREL is a registered trademark of CAREL INDUSTRIES Hqs in Italy and/or other countries. © CAREL INDUSTRIES Hqs 2013 all rights reserved CAREL reserves the right to modify the features of its products without prior notice. pLoads - +040000131 - rel. 1.3 - 05.06.2013 4 ENG 1. INTRODUCTION The pLoads device can handle several different functions, depending on system requirements: 1. load scheduler; 2. load cut-off ; 3. energy meter collection; 4. consumption measurement (energy, water di gas or general loads). All these functions can be used at the same time. The different connection modes are illustrated below. 1. Load scheduler Manual inputs Line RS485 Modbus / Carel £ pLoads Loads outputs supervisor Fig. 1.a 2. Load cut-off Manual inputs Line RS485 Modbus / Carel Line RS485 Modbus £ £ pLoads Energy meter1 Loads outputs supervisor Fig. 1.b 3. Energy meter collection Line RS485 CAREL pLoads Rack supervisor MPX PRO Line RS485 Modbus£ CDZ Energy meter1 Energy meter2 Energy meter3 Energy meter... Energy meter12 Fig. 1.c 4. Consumption measurement Linea RS485 Modbus / Carel supervisor pLoads Line RS485 Modbus £ Energy meter1 Current and voltage measurer Pulse counter (water, gas, energy) Fig. 1.d Versions available The controller is available in two versions, which differ in terms of the number of I/Os and communication ports available (for details see the input/output table): Hardware type Compact Large Description Built-in display + USB + RS485 optoisolated Built-in display + USB + RS485 built-in optoisolated 5 CAREL code PLO550X30U000 PLO550L30UB00 pLoads - +040000131 - rel. 1.3 - 05.06.2013 ENG 2. USER INTERFACE pLoads features the pGD1 “built-in” terminal as the user interface. This device features the following buttons: Alarm displays the list of alarms; Prg accesses the main menu tree; Esc returns to the previous screen; Up scrolls a list upwards or increases the value shown on the display; Down scrolls a list downwards or decreases the value shown on the display; Enter enters the selected submenu or confirms the set value. Tab. 2.a 2.1 Display Main screen 1 2 3 4 Fig. 2.a date, weekday and time; type of current day; current power in kW, energy in kWh and percentage of power in relation to load cut-off threshold; load status (7 possibilities). Tab. 2.b This is the screen displayed during normal unit operation: from any other menu press ESC until reaching this screen. The following icons may be displayed in the loads area (): the load is on; the load is off ; the load has been cut off ; the load is on from supervisor; the load is off from supervisor; the load is on from digital input; the load is off from digital input: pLoads - +040000131 - rel. 1.3 - 05.06.2013 6 ENG Alarm screens If an alarm is active, the red LED under the ALARM button flashes. 5 6 7 8 Fig. 2.b alarm code; alarm description; alarm number; total number of active alarms. Use the arrows (UP and DOWN) to scroll the list of alarms; at the end of the list, pressing ENTER on the special screen directly accesses the alarm log. For details on the alarms, see the alarm table, chapter 11. Parameter display and editing screens To access these screens, from the main screen press PRG to enter the menu list: scroll the menus using the UP and DOWN buttons and press ENTER to select the desired menu (see the function tree). 9 10 11 12 Fig. 2.c name of the function edited on the screen screen index editable parameter parameter name. Note: editable fields feature numeric values or upper case letters. 7 pLoads - +040000131 - rel. 1.3 - 05.06.2013 ENG 3. SYSTEM ARCHITECTURE pLoads, as illustrated in chapter 1, Presentation, is a device that manages several functions. For greater system flexibility, pLoads can also integrate wireless devices. The flexibility of the architecture proposed in fact allows more complex installation requirements to be met, in which the energy, water and gas meters are often located quite some distance apart, and thus serial connection over an RS485 network is not always practical. The diagram shown below illustrates a typical installation in which the energy meters are connected to the pLoads controllers over the wireless network. The diagram highlights the connections for pLoads Large, however the same also apply to the Compact model. Example diagram Modbus® RS485 digital inputs 1 RS485 Supervisor water electricity Access Point gas emeter3 2 3 emeter3 emeter3 ...up to 12 devices CI pulse counter IN1 IN2 PlantVisor PRO Router Bridge RB emeter3 emeter3 4 5 ...up to 2 devices Fig. 3.a DEVICE ADDRESS NETWORK Modbus RS485 CAREL CODE Access point Energy meter 1 2…13 Pulse counter CI RB Router Bridge 31, 32 - WS01AB2M20 MT300W1100 (MTOPZD0000, user interface) WS01E02M00 WS01RB2M20 Important: The addresses of the energy meter must be consecutive, even if the RB Router Bridge is used The address of the AP Access Point must always be 1. The addresses available for the energy meters are always between address 2 and address 13. The address of the main energy meter (used to manage load cut-off ) is always 2. The addresses of the CI wireless pulse counters must be 31 and 32. If the wireless network includes an RB Router Bridge, all the energy meters should be connected to one or more RB Router Bridge device. Energy Meters and Access Points cannot coexist on the same RS485 line, as the stop bits are not always compatible between these devices. This is true, for example, for the ‘CAREL emeter3’; consequently, check compatibility with the energy meters available in the network and managed by the pLoads controllers. • For further details on operation of the CAREL wireless system, see manual +0300030EN and quick guide cod. +0400030EN. • • • • • • pLoads - +040000131 - rel. 1.3 - 05.06.2013 8 ENG 4. MAIN MENU FUNCTION TREE Main menu A. General On-Off B. Unit status Settings menu (with password) Settings C. Clock LogOut D. General configuration E. Load configuration F. Other Tab. 4.a Note: the settings menu is accessed after entering a 4-digit password (user and manufacturer). There are two types of password: installer and user. The installer password allows read/write access to the parameters, while the user password gives read-only access. These passwords can be set on the corresponding screens. Note: the menu structure is reflected by the screen index. See the following example: When selecting the following item in the menu: ON C. OFF Clock the letter of the original menu will be shown at the top right of the screen. Note: after entering the user/installer password, the LogOut function will be shown on the main menu. The password will need to be entered again after selecting LogOut or in any case after 10 minutes of no activity; It will be necessary a new entering. Password: Mask index Display description Description --- Insert password Password for the access level management 9 Default UM Values 1234: User 1234: Manufacturer --- 0…9999 pLoads - +040000131 - rel. 1.3 - 05.06.2013 ENG Fig. 4.a pLoads - +040000131 - rel. 1.3 - 05.06.2013 10 ENG 5. USER FUNCTIONS The control allows a time scheduling with switching on and off of loads; it is active when the unit is ON from display or digital input. You can notice that the scheduler has been disabled from the main screen: Scheduler deactivated Scheduler activated 5.1 Clock setting The user interface can be used to set the general scheduler and the current time. The date format, current day and time can be set. In addition, on the next screen, C02, automatic daylight savings changeover can be set. 5.2 General scheduler setting Four types of "days" are available (Ordinary, Special, Short and Closing). The opening time and closing time can be set for each type of day. Minimum setting resolution is 1 minute. Select the type of day for each day of the week, from those available as set previously. 11 pLoads - +040000131 - rel. 1.3 - 05.06.2013 ENG 5.3 Energy scheduler configuration To use pLoads as a load cut-off device, ‘power’, ‘energy’ or ‘apparent power’ thresholds can be set, and are selected automatically by the scheduler throughout the day. This is done on the screens provided, used to set up to six power, energy or apparent power thresholds for each hour of the day. The table below shows how the different thresholds can be set over the 24 hours of the selected day. For further details, see paragraph 8.2 ‘Load cut-off ’ and 5.6 'Load cut-off configuration'. Monday Thusday Wednesday Thursday Friday Saturday Sunday 0:00 T1 T1 T1 T1 T1 T3 T3 1:00 T1 T1 T1 T1 T1 T3 T3 2:00 T1 T1 T1 T1 T1 T3 T3 3:00 T1 T1 T1 T1 T1 T3 T3 4:00 T1 T1 T1 T1 T1 T3 T3 5:00 T1 T1 T1 T1 T1 T3 T3 6:00 T1 T1 T1 T1 T1 T3 T3 7:00 T2 T2 T2 T2 T2 T4 T4 8:00 T2 T2 T2 T2 T2 T4 T4 9:00 10:00 11:00 12:00 13:00 14:00 15:00 16:00 17:00 18:00 19:00 20:00 21:00 22:00 23:00 T2 T2 T2 T2 T2 T2 T2 T2 T3 T3 T3 T3 T3 T4 T4 T2 T2 T2 T2 T2 T2 T2 T2 T3 T3 T3 T3 T3 T4 T4 T2 T2 T2 T2 T2 T2 T2 T2 T3 T3 T3 T3 T3 T4 T4 T2 T2 T2 T2 T2 T2 T2 T2 T3 T3 T3 T3 T3 T4 T4 T2 T2 T2 T2 T2 T2 T2 T2 T3 T3 T3 T3 T3 T4 T4 T4 T4 T4 T4 T4 T4 T4 T4 T5 T5 T5 T5 T5 T6 T6 T4 T4 T4 T4 T4 T4 T4 T4 T5 T5 T5 T5 T5 T6 T6 Each hour of the day can be associated with a specific energy threshold. The settings can be copied from one day to another, or for the entire week. Consequently, a different energy profile can be set for each individual day. Exceptions are used to set the time period, type of day and energy profile for specific dates. 5.4 Exceptions to general scheduler Up to 15 special periods can be set, representing exceptions to the general scheduler. Screen for entering the exceptions. Select month using: pLoads - +040000131 - rel. 1.3 - 05.06.2013 12 ENG Select day using: Enter period the exception applies to. The same screen can be used to set the type of opening and the corresponding energy band. The calendar shows where the exceptions have been entered. Note: to cancel an exception, you need to: from this mask, press ENTER, press UP until you reach the highlighted exception that you want to delete, and then press ENTER. The exception will be deleted. This screen shows the next exception and set any additional exceptions. 5.5 Scheduler setting for each load The controller manages a scheduler for each load, with an offset for activating and deactivating the load in question (for details see paragraph 8.1 "Scheduler"). Enable the load for scheduling, set the on/off offset and the behaviour between bands. Note: if a load is not managed by the scheduler, it is always ON even when the system is OFF. 13 pLoads - +040000131 - rel. 1.3 - 05.06.2013 ENG 5.6 Load cut-off configuration The controller features settable three type of electrical load cut-off thresholds: • energy threshold (kWh); • power threshold (kW). • apparent power threshold (kVA). The effective load cut-off threshold is not the value set on the screens, but rather is adjusted by a settable offset, positive for power and apparent power, and negative for energy. To disable these offsets, simply set them to zero. For details on load cut-off operation, see paragraph 8.2 " Load cut-off ". The different thresholds can be loaded ‘Automatically’ or by ‘Digital Input’; this depends on the type of the controller used: pLoads Large manages both options, ‘Automatic’ or ‘Digital Input’, while pLoads Compact only handles ‘Automatic'. The digital inputs can only be used for selecting the Power and Apparent power thresholds. The different thresholds can be set on the following screens: Both sizes of pLoads can enable load cut-off for the three measurements. Only on pLoads Large can ‘DIN', Digital Input be selected to change in threshold. pLoads Large If Digital Input is enabled for managing the change in threshold, these inputs only apply to the change in threshold for Power and Apparent power. ID2 position Closed Closed Open Open ID3 position Closed Open Closed Open Threshold (parameter): Row 1 (50 / 80) Row 2 (60 / 90) Row 3 (70 / 100) Row 4 (80 / 110) The Energy threshold is single and set on screen D05, where the monitoring time can also be set. If 'automatic' management is enabled for changing the threshold, all three measurements are managed by the scheduler, and screen D05 only sets the energy monitoring time. pLoads - +040000131 - rel. 1.3 - 05.06.2013 14 ENG pLoads Compact On pLoads Compact, the load cut-off thresholds are always managed by the scheduler and screen D05 only sets the energy monitoring time.. Below are the screens for setting the various load cut-off parameters: The cut load delay is the same for all the loads; while the minimum and maximum cut time can be set for each single load, on loop (E.Load config). Set the safety offsets for Power, Energy and Apparent Power load cutoff. For Power and Apparent Power the percentage is only positive, while for Energy the percentage is only negative. For each load, you can enable the cutting loads and priority to activate it (for details, see "Loads cut-off " on par. 8.2). Enable load cut-off and set the deactivation priority when load cut-off is required. Each load, that is enabled for the cut load action, you can set the minimum and maximum time for cut. 15 pLoads - +040000131 - rel. 1.3 - 05.06.2013 ENG 6. INPUT/OUTPUT TABLE Digital outputs NO1 NO2 NO3 NO4 NO5 NO6 NO7 NO8 NO9 NO10 NO11 NO12 NO13 NO14 NO15 NO16 NO17 NO18 pLoads Large Load 1 Load 2 Load 3 Load 4 Load 5 Load 6 Load 7 Load 8 Load 9 Load 10 Load 11 Load 12 Alarm Load cut-off active pLoads Compact Alarm Load 1 Load 2 Load 3 Load 4 Load cut-off active Digital inputs ID1 ID2 ID3 ID4 ID5 ID6 ID7 ID8 ID9 ID10 ID11 ID12 ID13 ID14 ID15 ID16 ID17 ID18 pLoads Large Remote ON/OFF - Alarm Rate band 1 Rate band 2 Manual load 1 Manual load 2 Manual load 3 Manual load 4 Manual load 5 Manual load 6 Manual load 7 Manual load 8 Manual load 9 Manual load 10 Manual load 11 Manual load 12 Manual load control Pulse counter (with PCO208DI00) Pulse counter (with PCO208DI00) pLoads Compact Pulse counter Manual load control Tab. 6.a Tab. 6.b Analogue outputs Y1 Y2 Y3 Y4 Y5 Y6 pLoads Large pLoads Compact Analogue inputs B1 B2 B3 B4 B5 B6 B7 B8 B9 B10 pLoads Large Generic input 1, (V-I) Generic input 2, (V-I) Generic input 3, (V-I) pLoads Compact Generic input 1, (V-I) Generic input 2, (V-I) Generic input 3, (V-I) Pulse counter Generic input 4, (V-I) Generic input 5, (V-I) Generic input 6, (V-I) Manual load 1 Manual load 2 Manual load 3 Manual load 4 Tab. 6.c Tab. 6.d pLoads - +040000131 - rel. 1.3 - 05.06.2013 16 ENG 7. 7.1 INSTALLER FUNCTIONS Load installation The controller features a digital input (‘manual loads’, see Tab. 6.b) used to notify the supervisor that one of the loads has been put in manual control, thus bypassing the controller logic. To enable this, the load and the manual switch will need to be connected, as shown in Fig. 7.h (par. 7.8). If there is no connection to the corresponding digital input, there will be no feedback that one of the loads has been switched on/off without being managed by the controller. For each load, a manual input is also available (‘manual load x’, see Tab. 6.b and 6.d) that, on variation, changes the load status until the next request. To set the logic parameters for the load outputs and inputs, access the following screens: Set the number of loads controlled and the delay between different load activations so as to avoid peaks in power. A label can be set for each load; this is then copied to all the screens that regard that specific load. The load output logic and manual control input (button) can also be set. Note: the digital input reserved for ‘Manual load X’ will physically be a switch and not a button. pLoads will manage the transition of the switch OPENCLOSED and CLOSEDOPEN as a request to reverse load status at the moment the switch is operated. In this way, ‘Manual load x’ management bypasses the scheduler, load cut-off, etc.; for further details, see paragraph 8.4. 7.2 Pulse counter installation The pulse generator device will have a free-contact digital output. In particular, pLoads Compact strictly requires a noise-free signal; a REED magnetic contact signal, due to its characteristics, is not classified as a freecontact signal and for this reason it's recommended a 'bounce' filter connected between the pulse generator device and ID1. The connections are shown in figure below: External Impulse generator B5 BC5 BC4 pLoads Large B4 ID1 J2 GND pLoads Compact Input signal characteristics J3 Type Voltage-free contact Typical current 5 mA Maximum frequency 2 kHz External Impulse generator Fig. 7.a 17 pLoads - +040000131 - rel. 1.3 - 05.06.2013 ENG Parameters can be set to adjust the weight of the pulse, reset, an offset count and, where necessary, to addif pulses are missed. It is possible modify the type of counter connected (energy, water, gas), enable a warning after a blackout to inform the user that the counter may have lost the pulse; so you can carry out a check. The counters wireless CI have setted it because it is equipped with a battery. Type of controller pLoads Compact pLoads Large Max no. of pulse Remarks counter inputs 5 1 built-in CI pulse counter (ID1) 2 wireless CI pulse counters (CI, add. 31) 2 wireless CI pulse counters (CI, add. 32) 7 1 built-in CI pulse counter (B5) 2 built-in CI pulse counters (ID17-ID18) with PCO208DI00 device 2 wireless CI pulse counters (CI, add. 31) 2 wireless CI pulse counters (CI, add. 32) Important: as shown in the table, pLoads Compact features just one built-in pulse counter input. pLoads Large, on the other hand, can manage two more (built-in): ID17 and ID18. They can be used as pulse counter inputs only if they interface with the CAREL PCO208DI00 device; it foresees one pulse output for every eight inputs, therefore count is performed by pLoads applying a factor of 8. For details on the operation of this device, see the specific documents, +05003570. Below is a connection diagram for the PCO208DI00 device to pLoads Large. clock 1 (x8) clock 1 clock 2 J1 J5 J6 J7 J8 J2 J3 J4 PCO208DI00 Fig. 7.b pLoads - +040000131 - rel. 1.3 - 05.06.2013 18 IDC17 ID18 ID17 BC10 B10 BC9 B9 Y6 Y5 ID16H J20 ID16 IDC15 ID15 ID15H J19 clock 2 (x8) ENG 7.3 Energy meter installation The controller can manage up to 9 types of energy meter. pLoads can manage a maximum of 12 energy meters, and these must all be the same model. The following models can be selected on the user interface: 1. CAREL emeter3 (cod. Carel: MT300W1100); 2. Gavazzi CPT-DIN (basic); 3. Gavazzi WM14-DIN (basic); 4. Gavazzi WM14-96 (basic), si selezioni il modello 'Gavazzi CPT-DIN/WM14'; 5. Ducati Energia Smart più; 6. IME Nemo 96 HD; 7. IME Nemo D4; 8. Electrex FEMTO D4; 9. Socomec (Diris A10). The following screens are used to set the Modbus® communication parameters with the energy meter: Set the communication speed with the devices, stop bits, parity control and timeout for offline alarm. Set the number of energy meters on the Modbus® line and the type. The main configuration parameters are displayed for each energy meter. In addition, the counters can be reset for the meters on the same screen. On the next mask, for CAREL emeter3 and Gavazzi (CPT-DIN, WM14-DIN and WM14-96) energy meters only, the device address can be set. For connection details, see the following paragraph. 19 pLoads - +040000131 - rel. 1.3 - 05.06.2013 ENG 7.4 Supervisor installation pLoads can be connected to various supervisory systems, in particular the following BMS communication protocols can be used: Carel RS485 and Modbus®. Both protocols are supported by PlantVisorPRO models, available from version SP 2.1.0 Connection is via a BMS serial port, already fitted for both models of pLoads. The supervisor communication settings are as follows. Supervisor BMS port 1 setting: the supervisor protocol, baud rate and device serial address can be set. These settings must be the same as on the supervisor. Supervisor BMS port 2 setting: only available on pLoads Large. pLoads Compact Fig. 7.c Important: • on pLoads Compact, to connect the controller to a supervisor, fit card PCOS004850 (standard) in the “Serial card 1” slot. • port J8 is connected to the energy meter as per the instructions. pLoads - +040000131 - rel. 1.3 - 05.06.2013 20 ENG pLoads Large Fig. 7.d Important: • port J25 (BMS2) is connected to the Carel supervisor as the instructions. • port J26 (FBus2) is connected to the energy meter as the instructions. Note: on pLoads Large, serial BMS1 has been enabled where, using an optional supervisor card (not supplied as standard), pLoads can be connected to a second supervisory system. This is useful, for example, when wanting to install a pCOWeb card. 7.5 General settings The controller can manage the installation of other devices, including: 1. Alarm relay; 2. Load cut-off in progress relay; 3. Remote ON-OFF/alarm input; 4. Current/Voltage reading inputs For details on the operation of these devices, refer to chap. 8 ‘Operating logic’ too. The logic also needs to be configured for these devices, on the following screens: Set the logic for “load cut-off active” and “alarm active” digital outputs. 21 pLoads - +040000131 - rel. 1.3 - 05.06.2013 ENG Set the logic for “loads bypassed” and "remote ON-OFF" digital inputs. Depending on the model of pLoads, reading of some generic inputs can be enabled. This is used to read Current or Voltage values to measure the power consumption of a generic load when lower precision is possible. The following screens can then be used to set the type of sensor connected to the various inputs. The auxiliary load can be monitored for Power and Energy. The Current reading is always the value measured by a sensor; the Voltage may be a parameter or the value read by a second sensor. The auxiliary load can be set as ‘single-phase’ or ‘three-phase’. If ‘three-phase’, the Cos-fi value can be modified and will be considered when calculating the Power and Energy. The ‘reset’ function is used to reset the energy meter. ‘Three-phase’ load with voltage value settable by parameter. 7.6 Wireless network installation pLoads is perfectly integrated with the CAREL rTM wireless system. The energy meter can be connected to pLoads via a RB Router Bridge (see fig. 3.a). The network will therefore consist of an Access Point (with address 1) connected to the FieldBus serial port on the controller, and at least one RB Router Bridge with the corresponding energy meter connected via RS485; up to 2 CI pulse counters can also be used, with this configuration. Enabling the Access Point configures pLoads to accept data from a RB Router Bridge and CI pulse counter. Access point must be configured 'With Router Brigde' (see example). The "Min address" will be the lowest address of the Energy meter connected to RB Router Bridge; generally 2, which is the first useful for reading an energy meter in serial. The "Max address" will be the last serial address that pLoads will read and present on the network; usually the last address of the energy meter. pLoads - +040000131 - rel. 1.3 - 05.06.2013 22 ENG Set the number of CI pulse counters to read, up to 2. The addresses must be 31 and 32. This screen can be used, only if the CI device is online, to modify the data transmission time. Remember that the lower the value, the shorter battery life will be. The following screens, (D36, ...) are used to set the weight of the pulse for wireless devices, see paragraph 7.2. Remember that each CI pulse counter provides 2 fast inputs. 23 pLoads - +040000131 - rel. 1.3 - 05.06.2013 ENG 7.7 Description of the terminals pLoads Compact J 11 J12 14 15 10 B8 B7 ID2 9 GND C3 8 NO7 NO6 7 NO5 11 6 NO4 C3 5 NO3 4 12 13 16 1 2 3 Fig. 7.e Key: 1 power supply connector (G, G0) 24 Vac or 48 Vdc (36 Vdc min to 72 Vdc max) 2 “SYNC“ synchronicity inputs for phase control and 0 to 1 V, 0 to 5 V, 0 to 20 mA, 4 to 20 mA analogue inputs, +5 Vref to supply 5 V ratiometric probes and +VDC (+21 Vdc) for active probes 3 digital output 4 connector for all standard pCO series terminals and for downloading the application program 5 pLAN network connector 6 connector for pLD terminals 7 tLAN network connector 8 optically-isolated “Field-Bus” serial connector 9 0 to 10 V analogue and PWM phase control outputs (not used) 10 digital output 11 digital outputs 12 NTC analogue inputs and digital inputs 13 removable cover for USB access 14 digital outputs (type B) 15 digital outputs (type B) 16 Built-In terminal (LCD, buttons and LEDs) Tab. 7.e pLoads - +040000131 - rel. 1.3 - 05.06.2013 24 ENG pLoadsLarge Fig. 7.f Key: 1. 2. 3. 4. 5. 6. 7. 8. 9. 10. 11. 12. 13. 14. 15. 16. 17. 18. 19. power supply connector [G (+), G0 (-)] button and pLAN address, 7 segment display and LED (power on and +Vdc terminal overload) additional power supply for the terminal and 0 to 5 V ratiometric probes universal analogue inputs 0…1 V, 0…5 V ratiometric, 0…10 V, 0…20 mA, 4…20 mA passive analogue inputs PT1000, ON/OFF 0 to 10 V analogue outputs (not used) 24 Vac/Vdc digital inputs 230 Vac or 24 Vac/Vdc digital inputs display terminal connector (external panel with direct signals) connector for all standard pCO series terminals and for downloading the application program relay digital outputs Fieldbus2 connector pLAN network connector cover for inserting the supervisor serial card option (BMS1) cover for inserting the field card option (Fieldbus1) BMS2 connector Fieldbus2 connector Built-In terminal (LCD, buttons and LEDs) USB Host and Slave connector Tab. 7.f 25 pLoads - +040000131 - rel. 1.3 - 05.06.2013 G GND pLoads - +040000131 - rel. 1.3 - 05.06.2013 26 ID5 ID6 ID7 ID8 IDC1 ID6 ID7 ID8 IDC1 digital input 8 J13 J14 J4 B8 B6 GND B7 ID4 ID5 Y4 ID4 Y4 Y3 ID3 Y3 Y2 ID3 Y2 Y1 digital input 3 digital input 4 digital input 5 digital input 6 digital input 7 Y1 VG0 J3 ID2 VG0 VG FieldBus card ID1 VG BC5 J2 J12 ID2 BC5 B5 J26 FBus2 ID1 B5 +VDC +VDC BC4 GND GND BC4 B3 B3 B4 B2 B2 input: 24 V 50...60 Hz / 28...36 V max. power: 45 VA/20 W B4 B1 B1 +5 VREF J24 +5 VREF +Vterm G0 G J1 GND +Vterm G0 J9 J25 BMS2 digital input 2 G0 G J11 pLAN digital input 1 230/24 V ac NO7 C7 NO8 C8 NC8 NO8 C8 NC8 C7 C7 C4 C7 NO7 NO6 NO4 NO4 C4 C4 C4 NO6 C1 C1 NO5 NO3 NO3 NO5 NO2 NO1 NO2 C1 C1 NO1 GND Rx+/Tx+ Rx-/Tx- GND Rx+/Tx+ Rx-/Tx- GND Rx+/Tx+ Rx-/Tx- digital output 8 digital output 7 digital output 4 digital output 5 digital output 6 digital output 1 digital output 2 digital output 3 7.8 N L ENG Electrical connections J15 J16 J10 BMS card J5 J6 Fig. 7.g ID11 ID12 IDC9 ID13H ID13 IDC13 ID14 ID14H ID11 ID12 IDC9 ID13H ID13 IDC13 ID14 ID14H 27 digital input 16 digital input 15 IDC17 ID18 ID17 BC10 J19 B10 J22 BC9 B9 Y6 J21 Y5 ID16H ID16 IDC15 ID15 ID15H C16 NO18 NO17 NO16 C16 NC15 C15 NO15 NC14 C14 NO14 J17 digital input 14 J16 digital input 13 ID10 ID10 digital input 10 digital input 11 digital input 12 GND GND ID9 B8 B8 digital input 9 B7 B7 J6 ID9 B6 B6 NO11 NO11 NC13 C13 NO13 NC12 C12 NO12 NC13 C13 NO13 NC12 C12 NO12 digital output 14 digital output 13 digital output 12 digital output 11 NO10 C9 digital output 10 NO9 NO10 C9 digital output 9 C9 C9 NO9 ENG J18 J23 FBus2 J20 J7 J8 pLoads - +040000131 - rel. 1.3 - 05.06.2013 ENG Load connection example: The diagram shown below highlights the connection to the ‘bypassed loads’ input ID16 for pLoads LARGE: SA1 C1 Cn* N01 Nn* A-0-M 0 A SAn* A-0-M M M A pLoads IDC15 ID16 0 M M Rn* R1 UTENZA 1 UTENZA N* Fig. 7.h Counter connection example on pLoads Large: • ID2, ID3: select energy band input • B5: CI pulse counter input H m3 TC 1254887444 FRS vv 1383 1383 1383 83 m3 per l’energia ID3 B5 ID2 Fig. 7.i pLoads - +040000131 - rel. 1.3 - 05.06.2013 28 ENG 8. 8.1 OPERATING LOGIC Scheduler Under Settings Clock As seen on par. 5.2, the scheduler can manage all the loads controlled by the scheduler; up to four types of time scheduling can be selected for each day of the week: 1. ORDINARY DAY 2. SPECIAL DAY 3. SHORT DAY 4. CLOSING DAY For each type of time scheduling, an opening and closing time can be set in the morning and opening and closing time in the afternoon (except for Short Days, where only one daily band is managed). During the closing days no loads will be activated by the scheduler. The scheduler is only enabled when the system is ON. Exceptions can be set to the daily scheduler. Up to 15 exception periods can be set, selecting the following options: • first day/month of the exception; • last day/month of the exception; • type of day the controller will apply during the period; • type of energy band exception (if from scheduler). Note: exceptions are cyclical and therefore will be repeated every year until they are replaced or cancelled (see Note par. 5.4). Load scheduler Under Settings Load configuration, the behaviour of each individual load as regards the general scheduler can be set. The scheduler can be enabled or disabled and if enabled, before-opening, after-closing and behaviour of the load between morning and afternoon times can all be set. Load before-opening and after-closing operation can be set with values ranging from 0 to 120 minutes. During the scheduled time bands, three types of load operation can be selected: 1. BEFORE-AFTER BETWEEN TIME BANDS (the load will observe the after-closing and the pre-opening during the pause); 2. ALWAYS OFF BETWEEN TIME BANDS (the load will switch off immediately at the end of the load activation time band); 3. ALWAYS ON BETWEEN TIME BANDS (the load will remain on until deactivation is next requested by a time band). Note: to disable a specific time band, set the same start and end times. This also allows an additional short day to be created. The before-opening and after-closing times are ignored if the time band is disabled. Note: a before-opening operation that requires activation of the load on the previous day will be ignored. The load cannot be activated before midnight. Note: an after-closing operation that requires deactivation of the load the following day will be applied. 29 pLoads - +040000131 - rel. 1.3 - 05.06.2013 ENG Example of load operation: Morning opening – closing times: 8:00 - 12:00 Afternoon opening – closing times: 14:00 - 18:30 Load 1 Load 2 Load 3 Before-opening After-closing Behaviour between bands 30 minutes 60 minutes BEFORE-AFTER between bands 0 minutes 30 minutes ON between time bands 30 minutes 30 minutes OFF between time bands Apertura pomeriggio Afternoon opening Aperturaopening mattino Morning General Generale Load Carico11 Load Carico22 Carico33 Load 8:00 12:00 14:00 18:30 Time tempo Fig. 8.a 8.2 Load cut-off Load cut-off is only active when an energy meter is connected to the Field-Bus port on the controller. Power/ energy control is not available with a pulse counter or the analogue inputs reserved for reading Current/Voltage (see par. 7.5). The energy meter must be connected as “general” in the system structure (see par. 7.3). With reference to paragraph 5.6, remember that pLoads deactivates loads based on the following measurements: • Energy (kWh) • Power (kW) • Apparent Power (kVA) Load cut-off times can be set, in particular: • Delay between cutting off different loads (common for alls); • Minimum load cut-off time (for each load); • Maximum load cut-off time (for each load). Note: the delay between "cutting off different loads" applies to both deactivation and activation. Note: rotation applied between the loads is LIFO (Last In First Out) and cannot be modified. For each load, load cut-off can be enabled and the priority set. The load with the highest priority will be the first switched off when a load cut-off is required. Subsequently, if other loads need to be disconnected, the other loads will be cut off in order of lower priority. When the load cut-off request is no longer active, the controller will reactivate the loads again in order of priority. pLoads - +040000131 - rel. 1.3 - 05.06.2013 30 ENG For each enabled load, the following settings are available: • enable scheduler • set a before-opening time • set an after-closing time • set behaviour between time bands • enable load cut-off • set the load cut-off priority Below is an example of load cut-off : LoadRichiesta cut-off request taglio Max.tempo cut-off time carico Massimo di taglio Load with Carico priority 1 Priorità 1 Max. load cut-off time Massimo tempo di taglio carico Load with Carico priority 2 Priorità 2 Delay Tempobetween tra tagli cutting off Delay Tempobetween tra tagli cutting off Load with Carico priority Priorità 3 3 Delay between Tempo tra taglicutting off Time Tempo Fig. 8.b The graph shows how the loads switch off in order of priority, from the highest (load with priority 1) to the lowest (load with priority 3). After the maximum load cut-off time, the load with priority 1 will switch on again even if the load cut-off request is still active. Once the request is no longer active, the first load to switch on is the one with the lowest priority. The load with priority 2 will switch on without observing the delay between cutting off different loads as the maximum load cut-off time has elapsed. Load cut-off by Power and Apparent Power Under Settings General configuration, different power cut-off thresholds can be set (see paragraph 5.6). The table below summarises the possible configurations: Type of controller pLoads Compact pLoads Large Load cut-off by: Power (kW) Energy (kWh) Apparent power (kVA) Power (kW) Energy (kWh) Apparent power (kVA) • • • • • • Threshold selection: • AUTO (6 thresholds) • AUTO (6 thresholds) • DIN (4 thresholds for kW e kVA, 1 threshold for kWh) On pLoads Large, load cut-off can be configured with the following settings: • Digital input (4 thresholds for kW e kVA, 1 threshold for kWh) • Automatic (6 possible thresholds) 2 digital inputs are available for selection with binary logic. 31 pLoads - +040000131 - rel. 1.3 - 05.06.2013 ENG Below is an example of load cut-off by power: Potenza Power (kW) (kW) Soglia+ Safety sicurezza threshold + Soglia threshold Load with Carico Priorità11 priority Min.tempo load cut-off Minimo taglio time Load with Carico Priorità22 priority fra tagli di carichi diversi Delay betweenRitardo cutting off different loads tempo Time Fig. 8.c Load cut-off by energy Under 'Settings General' configuration, the energy threshold and the monitoring time for energy can be set (see paragraph 5.6). The controller will record the energy values sent by the general meter according to the energy “monitoring time” parameter. If between the last energy value read and the energy value recorded over the previous minutes (determined by the energy monitoring time), energy consumption is higher than the energy threshold calculated, the load will be cut off. Below is an example of load cut-off by energy: Energy (kWh) Monitoring Time Time Load Time Fig. 8.d Load cut-off active function The controller features the load cut-off active function (see the corresponding digital output in Tab. 6.a). When the controller is cutting off loads or the load cut-off conditions are true (so even when no load is enabled to be cut off ), the “Load cut-off active” digital output will be activated. The system installer can connect this digital output to an input on an external power generator to signal greater demand. Note: if the energy meter is offline, all types of load cut-off functions are disabled. pLoads - +040000131 - rel. 1.3 - 05.06.2013 32 ENG 8.3 Override loads Override from manual input For each load connected to the controller, a digital input is available for enabling manual control by button. When the user operates the switch, load status will be reversed (if off it will be switched on, or if on it will be switched off ). The load only temporarily reverses status, i.e. until the next ON/OFF request is received from the scheduler, supervisor, load cut-off or the digital input itself. The following pages describe how these different requests interact with one another. Override from supervisor For each load connected to the controller, a supervisor command is available for switching the load on or off. Fig. 8.e From the supervisor, each load can be switched MAN-ON, MAN-OFF or left in AUTO operation Note: if the supervisor is offline, the load will remain in the status set by the supervisor. Note: in the event of a power failure on pLoads, the command sent previously by the supervisor will be reset when the device starts again. To return the load to the previous status, the supervisor needs to send the command again. 33 pLoads - +040000131 - rel. 1.3 - 05.06.2013 ENG 8.4 Control interaction After having analysed the different requests that affect a load, the interactions between these and the different priorities are illustrated below. Time zone If enabled and in time zone band Æ switching on requirement Cut loads If enabled and enabled to cut load Æ switching off requirement Push button Reverse the required status Supervisor Decide the end status of the load Load status Fig. 8.f Example of how the requests interact to determine load status: Time zone Cut loads Manual mode SPV request Auto ON Auto OFF Auto Loads status 1 2 3 4 5 5 5 6 7 7 8 9 9 10 Fig. 8.g Key: 1 = load OFF; 2 = load ON by time zone; 3 = load OFF by manual mode; 4 = load OFF by cut-load; pLoads - +040000131 - rel. 1.3 - 05.06.2013 5 = load ON by supervisor; 6 = load OFF by time zone; 7 = load OFF by cut-load; 8 = load ON by manual mode; 34 9 = load OFF by supervisor; 10 = load ON by time zone. ENG 9. PARAMETERS TABLE Below is the table of the parameters that can be displayed on the terminal. The values indicated with ‘---‘ are not Signifi cant or are not set, while the values indicated with ‘…’ may vary according to the confi guration, with the possible options visible on the user terminal. A row of ‘…’ means that there are a series of parameters Similar to the previous ones. “Mask index”: indicates the unique address of each screen and consequently the path needed to reach the parameters available. Note: Not all the screens and parameters shown in the table are always visible or can be set, the screens and parameters that are visible or can be set depend on the configuration and the access level. Mask index Display descript. Main screen Main screen pLoads for pLoads --large (display ----only) --- Description Def. UoM Values The name of the product Hours ,minutes and date Weekday (Monday to Sunday) Weekday type (Full, Reduce, Special, Closing day) Energy ----------- ----- --- Power --- --------kWh/ MWh kW Power percentage: Energy percentage App.power perc.: --- Power percentage: Energy percentage (can be selected) Apparent power percentage (can be selected) Unit status (with unit OFF) --------- % % % --- Read the status of loads Load 1 status (if enable) Load 2 status (if enable) Load 3 status (if enable) Load 4 status (if enable) Load 5 status (if enable) Load 6 status (if enable) Load 7 status (if enable) Load 8 status (if enable) Load 9 status (if enable) Load 10 status (if enable) Load 11 status (if enable) Load 12 status (if enable) The name of the product Hours ,minutes and date Weekday (Monday to Sunday) Weekday type (Full, Reduce, Special, Closing day) Energy ------------------------------------- --Power percentage: Energy percentage: App.power perc.: --- Power Power percentage Energy percentage (can be selected) Apparent power percentage (can be selected) Unit status (with unit OFF) ----------- ----------------------------------kWh/ MWh kW % % % --- 0...999 0...999 0...999 Unit OFF by DIN Unit Off by keypad --0… 7 (see par. 2.1) 0… 7 (see par. 2.1) 0… 7 (see par. 2.1) 0… 7 (see par. 2.1) 0… 7 (see par. 2.1) 0… 7 (see par. 2.1) 0… 7 (see par. 2.1) 0… 7 (see par. 2.1) 0… 7 (see par. 2.1) 0… 7 (see par. 2.1) 0… 7 (see par. 2.1) 0… 7 (see par. 2.1) ----- Load status --------- Read the status of loads Load 1 status (if enable) Load 2 status (if enable) Load 3 status (if enable) Load 4 status (if enable) ----------- ----------- Description Def. UoM Values Load status ------------------------Main screen pLoads for pLoads ----compact (display only) ----- Mask index Display descript. 0...9999999999 0...9999 0...9999999999 0...9999 0...999 0...999 0...999 Unit OFF by DIN Unit Off by keypad … 0… 7 (see par. 2.1) 0… 7 (see par. 2.1) 0… 7 (see par. 2.1) 0… 7 (see par. 2.1) A. General ON-OFF A01 OFF by keyboard Unit status --- 35 --- ON general / OFF from input / OFF from keyboard pLoads - +040000131 - rel. 1.3 - 05.06.2013 ENG Mask index Display descript. Description Def. UoM Values B.Unit status (the I/Os available depend on the selected configuration, the following are just some examples.) B01(Read only) Lights 1 --- The label of load 1 Manual digital input (pLoads Large - ID4, pLoads Compact - B5) --Status of digital manual load 1 Load output (pLoads Large - NO1, pLoads Compact - NO2) --Status of load 1 B02 (Read Conditioning 1 The label of load 2 --Manual digital input (pLoads Large - ID5, pLoads only) Compact – B6) Status of digital manual load 2 Load output (pLoads Large – NO2, pLoads Compact – NO3) … Status of load 2 B03 (Read LT Cabinet 1 The label of load 3 --Manual digital input only) (pLoads Large - ID6, pLoads Compact – B7) Status of digital manual load 3 Load output (pLoads Large – NO3, pLoads Compact – NO4) … Status of load 3 B04 (Read NT Cabinet 1 The label of load 4 --Manual digital input only) (pLoads Large - ID7, pLoads Compact – B8) Status of digital manual load 4 Load output (pLoads Large – NO4, pLoads Compact – NO5) … Status of load 4 … … … B13 (Only Remote ON-OFF ID01: Status of digital input remote ON-OFF pLoads Large Band1 input ID02: IN 1 for band of energy/power/apparent power can read) Band2 input ID03: IN 2 for band of energy/power/apparent power B14 (Read --pLoads bypassed (pLoads Large – ID16, pLoads only) Compact – ID2) --Status of digital input load by-passed B15 (Read --Status of digital input load by-passed only) --Alarm output (pLoads Large – NO13, pLoads Compact – NO1) --General alarm status --B16 (Read only, if enable) B17 (Read only, if enable) B18 (Read only, if enable) Cut active output (pLoads Large – NO14, pLoads Compact – NO6) Power(kW): Power Energy(kWh): Energy Apparent p.(kVA): Apparent power Power percentage: Power percentage Energy percentage: Energy percentage App.power perc.: Apparent power percentage CAREL emeter3 Enery meter 1 type --Energy meter 1 address Voltages (V) L1-L2: Energy meter 1, Voltage L1-L2 L2-L3: Energy meter 1, Voltage L2-L3 L3-L1: Energy meter 1, Voltage L3-L1 Average: Energy meter 1, Phase-phase average voltage Total: Energy meter 1, Voltage total average Frequency (Hz): Energy meter 1, Frequency CAREL emeter3 Enery meter 1 type --Energy meter 1 address Voltages (V) Neutral 1: Energy meter 1, Voltage L1 Neutral 2: Energy meter 1, Voltage L2 Neutral 3: Energy meter 1, Voltage L3 Total: Total (only can be show with CAREL Emeter3) pLoads - +040000131 - rel. 1.3 - 05.06.2013 36 0 --- ----- ----- ----- … 7 --- … ----- ----- ----- … 13 --- … ----- ----- ----- … 16 --- … ----- ----- ----- … … --------- … … --------- ----- ----- --- ----- 0: Cut active NO6: 1: Cut active NO14: 0: Close 1: Open ------% % % ----V V V V V Hz ----V V V V 0... 32767 0...32767 0...32767 0...999 0...999 0...999 See NOTE 3 2... 13 0... 9999 0... 9999 0... 9999 0... 9999 0... 9999 0... 999.9 See NOTE 3 2... 13 0... 9999 0... 9999 0... 9999 0...9999 ------------------------------------------- See NOTE 1 0: Manual input ID4: 1: Manual input B5:: 0: Close 1: Open 0: Load output NO01: 1: Load output NO02: See NOTE 2 See NOTE 1 0: Manual input ID5: 1: Manual input B6: 0: Close 1: Open 0: Load output NO02: 1: Load output NO03: See NOTE 2 See NOTE 1 0: Manual input ID6: 1: Manual input B7: 0: Close 1: Open 0: Load output NO03: 1: Load output NO04: See NOTE 2 See NOTE 1 0: Manual input ID7: 1: Manual input B8: 0: Close 1: Open 0: Load output NO04: 1: Load output NO05: See NOTE 2 … 0: Close 1: Open 0: Close 1: Open 0: Close 1: Open 0: pLoads bypassed ID02: 1: pLoads bypassed ID16: 0: Close 1: Open 0: Alarm NO1: 1: Alarm NO13: 0: Close 1: Open ENG Mask index B19 (Read only, if enable) Display descript. CAREL emeter3 --Current (A) Line 1: Line 2: Line 3: Power factor: L1 L2 L3 B20 (Read only, if enable) B21 (Read only, if enable) B22 (Read only, if enable) B23 (Read only, if enable) B24 (Read only, if enable) B25 (Read only, if enable) CAREL emeter3 --Apparent power (kVA) Phase 1: Phase 2: Phase 3: Total: CAREL emeter3 --Reactive power (kVAr) Phase 1: Phase 2: Phase 3: Total: Reactive energy eq.: Description Def. Enery meter 1 type --Energy meter 1 address --Energy meter 1 (Building consumption), Current line 1 --Energy meter 1 (Building consumption), Current line 2 --Energy meter 1 (Building consumption), Current line 3 --Power factor part 1 --Power factor part 2 --Power factor L1 part 1(only can be show CAREL Emeter3) --Power factor L1 part 2(only can be show CAREL Emeter3) --Power factor L2 part 1 (only can be show CAREL Emeter3) --Power factor L2 part 2 (only can be show CAREL Emeter3) --Power factor L3 part 1(only can be show CAREL Emeter3) --Power factor L3 part 2(only can be show CAREL Emeter3) --Enery meter 1 type --Energy meter 1 address --Apparent power of phase 1 --- UoM ----A A A --------------------kVA Values See NOTE 3 2... 13 0… 999.9 0… 999.9 0… 999.9 0... 9 0... 99 0... 9 0... 99 0... 9 0... 99 0... 9 0... 99 See NOTE 3 2... 13 0.0...999.9 Apparent power of phase 2 Apparent power of phase 2 Total apparent power Enery meter 1 type Energy meter 1 address Reactive power 1 ------------- kVA kVA kVA ----kVAr 0.0...999.9 0.0...999.9 0.0...999.9 See NOTE 3 2... 13 0... 999.9 --------------------------------------------------------------------------------------- kVAr kVAr kVAr ------------kW kW kW kW kWh kWh kWh ------V V V V Hz ----V V V V ----A A A ----------------- 0... 999.9 0... 999.9 0...999.9 0… 9999 0… 999 0… 999 0: kVArh 1: MVArh Reactive power 2 Reactive power 3 Total reactive power Reactive energy high part Reactive energy middle part Reactive energy low part --Reactive energy meter is reading in MWh CAREL emeter3 Enery meter 1 type --Energy meter 1 address Power (kW) Phase 1: Power 1 Phase 2: Power 2 Phase 3: Power 3 Total: Energy meter 1 (Building consump.), Equivalent power Energy: Energy value high part Energy value middle part Energy value low part --Energy meter is reading in MWh CAREL emeter3 Enery meter 2 type --Energy meter 2 address Voltages (V) L1-L2: Energy meter 2, Voltage L1-L2 L2-L3: Energy meter 2, Voltage L2-L3 L3-L1: Energy meter 2, Voltage L3-L1 Average: Energy meter 2, Phase-phase average voltage Frequency (Hz): Energy meter 2, Frequency CAREL emeter3 Enery meter 2 type --Energy meter 2 address Tensioni (V) Neutr0 1: Energy meter 2, Voltage L1 Neutro 2: Energy meter 2, Tensione L2 Neutro 3: Energy meter 2, Tensione L3 --Total (only can be show with CAREL Emeter3) CAREL emeter3 Enery meter 2 type --Energy meter 2 address Current (A) Line 1: Energy meter 2, Current line 1 Line 2: Energy meter 2, Current line 2 Line 3: Energy meter 2, Current line 3 Power factor: Power factor part 1 … Power factor part 2 L1 Power factor L1 part 1(only can be shown with Carel Emeter3) Power factor L1 part2 (only can be shown with Carel Emeter3) L2 Power factor L2 part1 (only can be shown with Carel Emeter3) Power factor L2 part2 (only can be shown with Carel Emeter3) L3 Power factor L3 part 1(only can be shown with Carel Emeter3) Power factor L3 part 2 (only can be shown with Carel Emeter3) 37 2... 13 0... 999.9 0... 999.9 0... 999.9 0…999.9 0…9999 0…999 0…999 0: kWh 1: MWh See NOTE 3 2... 13 0... 9999 0... 9999 0... 9999 0... 9999 0... 999.9 See NOTE 3 2... 13 0... 9999 0... 9999 0... 9999 0...9999 See NOTE 3 2... 13 0… 999.9 0… 999.9 0… 999.9 0... 9 0... 99 0... 9 0... 99 0... 9 0... 99 0... 9 0... 99 pLoads - +040000131 - rel. 1.3 - 05.06.2013 ENG Mask index B26 (Read only, if enable) B27 (Read only, if enable) Display descript. CAREL emeter3 --Apparent power (kVA) Phase 1: Phase 2: Phase 3: Total: Description Energy meter 2 type Energy meter 2, (modbus address 3) Apparent power of phase 1 Def. ------- UoM ----kVA Values See NOTE 3 2... 13 0.0...999.9 Apparent power of phase 2 Apparent power of phase 2 Total apparent power ------- kVA kVA kVA 0.0...999.9 0.0...999.9 0.0...999.9 Enery meter 2 type Energy meter 2, (address modbus 3) Reactive power 1 ------- ----kVAr See NOTE 3 2... 13 0... 999.9 Reactive power 2 Reactive power 3 Total apparent power Reactive energy high part Reactive energy middle part Reactive energy low part Reactive energy meter is reading in kVArh/MVArh --------------- kVAr kVAr kVA --------- 0... 999.9 0... 999.9 0.0...999.9 0… 9999 0… 999 0… 999 0: kVArh ------------- ----kW kW kW kW See NOTE 3 2... 13 0... 999.9 0... 999.9 0... 999.9 0…999.9 --------… --- kWh kWh kWh --… --- --Frequency: Enery meter 2 type Energy meter 2, (address modbus 3) Power 1 Power 2 Power 3 Energy meter 2 (Building consumption), Equivalent power Energy value high part Energy value middle part Energy value low part Energy meter is reading in MWh … Pusle counter from (pLoads Large – ID1, pLoads Compact – B5) Totally pulse counter digital 0 Totally pulse counter digital 1 Totally pulse counter digital 2 Totally pulse counter digital 3 Totally pulse counter digital 4 Totally pulse counter digital 5 Totally pulse counter digital 6 Totally pulse counter digital 7 Totally pulse counter digital 8 Totally pulse counter digital 9 Totally pulse counter digital 10 Totally pulse counter digital 11 Totally pulse counter digital 12 Totally pulse counter digital 13 Totally pulse counter digital 14 Totally pulse counter digital 15 Tipo dispos. da leggere (0: Energia; 1: Acqua; 2: Gas) Frequency of the pulse counter ------------------------------------- ----------------------------------Hz 0…9999 0…999 0…999 0: kWh 1: MWh … 0: Counter from ID1 1: Counter from B5 0…9 0…9 0…9 0…9 0…9 0…9 0…9 0…9 0…9 0…9 0…9 0…9 0…9 0…9 0…9 0…9 0: Wh 1: l 2: m³ 0…16384 1-phase load with Phase type load 1 --- CAREL emeter3 --Reactive power (kVAr) Phase 1: Phase 2: Phase 3: Total: Reactive energy eq.: ----- B28 (Read only, if enable) CAREL emeter3 --Power (kW) Phase 1: Phase 2: Phase 3: Total: Energy: … B89 (Read only) … --Totale: B92 (Read only, if enable) fix voltage value Voltage: Current: Power: Energy: B93 (Read only, if enable) 1-phase load with --Voltage load 1 Current load 1 Power load 1 Energy medium part Energy low part Phase type load 2 ------------ fix voltage value Voltage: Current: V A kW kWh kWh --Voltage load 2 Current load 2 pLoads - +040000131 - rel. 1.3 - 05.06.2013 ----- 38 V A 1: MVArh 0: (1-phase load with 1: (3-phases load with 0: AIN voltage value) 1: fix voltage value) 0...999.0 0...999.9 0...999.9 0...999 0...999 0: (1-phase load with 1: (3-phases load with 0: AIN voltage value) 1: fix voltage value) 0...999.0 0...999.9 ENG Mask index Display descript. Power: Energy: Description Power load 2 Energy medium part Energy low part B102 (Read Press Enter to see the --only, if enable wireless information wireless sensor) B103 (Read Access point Address of access point Firmware version: Firmware version of access point only) AP Trasmi.power: Transmit power of access point Radio signal lev.: Signal level B104 (Read Access point Address of access point Num. of connected Connected units with access point online only) units (online units) No. of units connected Connected units with access point access point: No. of units connected Number of units connected with Router Bridge RB through RB-device: B105 (Read Access point Address of access point No. of router network: Number of Router Bridge RB in the netwrok only) No. of router nearby: Number of router nearby No. of router nearby Number of router nearby with good connection with good connect.: B106 (Read CI device Address of pulse counter Firmware version: Firmware version of pulse counter only) Radio signal: Radio signal with access point Battery level: Battery level of pulse counter Def. -------- UoM kW kWh kWh --- Values 0...999.9 0...999 0...999 --- 1 ------1 --- ------------- 1 --- --- 0...32 --- --- 0...255 1 ------- --------- 1 0...32767 0...16 0...16 31 ------- --------- 31...32 Mask index Display descript. Description Def. UoM Values Day: Weekday (Monday to Sunday) --- --- 0: *** 4: Thursday 1: Monday 5: Friday 2: Tuesday 6: Saturday 3: Wednesday 7: Sunday Date format: Date format showing on the main mask 1 --- Date format: Set the new date - day Set the new date - month Set the new date - year Set the new time - hour Set the new time - minute Activates the module algorithm Set DST week change ----------1 0 --------------- 1: DD/MM/YY 2: MM/DD/YY 3: YY.MM.DD 0...31 0...12 0...99 0...23 0...59 0: Disable 1: Enable 0: Last 3: Third 1: First 4: Fourth 2: Second Set day start DST 0 --- 0: *** 4: Thursday 1: Monday 5: Friday 2: Tuesday 6: Saturday 3: Wednesday 7: Sunday in Set month start DST 0 --- 0: *** 1: January 2: February 3: March 4: April 5: May 6: June 7: July 8: August 9: Septem 10: October 11: Novemb 12: Decemb. End: Set hour start DST Set day stop DST 0 0 ----- 0...23 0: Last 1: First 2: Second 3: Third 4: Fourth Set month stop DST 0 --- 0: *** 4: Thursday 1: Monday 5: Friday 2: Tuesday 6: Saturday 3: Wednesday 7: Sunday 1 0...112 1...4 1...4 C.Clock C01 C02 Set the new date - day DST: Start: 39 pLoads - +040000131 - rel. 1.3 - 05.06.2013 ENG Mask index Display descript. In Description Set hour stop DST Def. 0 UoM Values --0: *** 1: January 2: February 3: March 4: April 5: May 6: June C03 Monday: Tuesday: Wednesday: Thursday: Friday: Saturday: Sunday: Day: Set DST stop Starting of Time Band 1, full day 1 Starting of Time Band 1, full day 1 Ending of Time Band 1, full day 1 Ending of Time Band 1, full day 1 Starting of Time Band 2, full day 1 Starting of Time Band 2, full day 1 Ending of Time Band 2, full day 1 Ending of Time Band 2, full day 1 Starting of Time Band 1, full day 2 Starting of Time Band 1, full day 2 Ending of Time Band 1, full day 2 Ending of Time Band 1, full day 2 Starting of Time Band 2, full day 2 Starting of Time Band 2, full day 2 Ending of Time Band 2, full day 2 Ending of Time Band 2, full day 2 Starting, reduce day 1 Starting, reduce day 1 Ending reduced day 1 Ending reduced day 1 Type scheduler Monday Type scheduler Tuesday Type scheduler Wednesday Type scheduler Thursday Type scheduler Friday Type scheduler Saturday Type scheduler Sunday Set the day 0 8 0 13 0 14 0 18 0 9 0 13 0 14 0 16 0 9 0 17 0 0 0 1 0 0 2 3 0 --H M H M H M H M H M H M H M H M H M H M ----------------- Copy to: Set the copy day 0 --- 00-05 Set the threshold for each hour (00, 01, 02, 03, 04, 05) 0 --- 0: T1 1: T2 2: T3 3: T4 4: T5 5: T6 06-11 Set the threshold for each hour (06, 07, 08, 09, 10, 11) 0 --- 12-17 Set the threshold for each hour (12, 13, 14, 15, 16, 17) 0 --- 18-23 Set the threshold for each hour (18, 19, 20, 21, 22, 23) 0 --- 3: T4 4: T5 5: T6 3: T4 4: T5 5: T6 3: T4 4: T5 5: T6 Exception: Set exception threshold 0 --- Copy to: Set exception threshold 0 --- 00-05 Set the threshold for each hour (00, 01, 02, 03, 04, 05) 0 --- 0: T1 1: T2 2: T3 0: T1 1: T2 2: T3 0: T1 1: T2 2: T3 0: ENERGY 1 1: ENERGY 2 2: ENERGY 3 3: ENERGY 4 4: --0: ENERGY 1 1: ENERGY 2 2: ENERGY 3 3: ENERGY 4 4: ALL 0: T1 1: T2 2: T3 Full day Special day Reduce day C04 C05(if enable) C06 (if enable) 7: July 8: August 9: Septem 10: October 11: Novem.b. 12: Decemb. pLoads - +040000131 - rel. 1.3 - 05.06.2013 40 0...23 0...23 0...59 0...23 0...59 0...23 0...59 0...23 0...59 0...23 0...59 0...23 0...59 0...23 0...59 0...23 0...59 0...23 0...59 0...23 0...59 0...3 0...3 0...3 0...3 0...3 0...3 0...3 1: Monday 5: Friday 2: Tuesday 6: Saturday 3: Wednesday 7: --4: Thursday 0: Monday 4: Friday 1: Tuesday 5: Saturday 2: Wednesday 6: Sunday 3: Thursday 7: All 3: T4 4: T5 5: T6 ENG Mask index Display descript. 06-11 Description Set the threshold for each hour (06, 07, 08, 09, 10, 11) Def. 0 12-17 Set the threshold for each hour (12, 13, 14, 15, 16, 17) 0 18-23 Set the threshold for each hour (18, 19, 20, 21, 22, 23) 0 Show the exceptions number Start exception day Strat exception month Stop exception day Stop exception month Set day type Set threshold type ... --- ----------0 0 … --- time band Next event present day and month Type of period for next exception Type of threshold for next exception Set month Read year Set start day Set end day Set period finish Set start day Set start month Set end day Set end month Type of special period ------0 ----------------0 threshold Type of threshold 0 --- Enter to confirm --- C07 (if Reception 01/ enable, read From only) to … C22 C23 (If enable set exception) C23 Time band: Threshold: ... Next exception ----------------Inset exception from to UoM Values --0: T1 3: T4 1: T2 4: T5 2: T3 5: T6 --0: T1 3: T4 1: T2 4: T5 2: T3 5: T6 --0: T1 3: T4 1: T2 4: T5 2: T3 5: T6 --0...15 --1...31 --1...12 --1...31 --1...12 --0...3 --0...3 … … --0: No exceptions 1: Next exception --0...31 0…12 --0...3 --0...3 --1...12 --0...99 --0: Do not set 1: Set --0: Do not set 1: Set --0: -- 1: END PERIODS!! --0...31 --0...12 --0...31 --0...12 --0: FULL DAY 1: SPECIAL DAY 2: REDUCE DAY 3: CLOSING DAY --0: ENERGY 1 1: ENERGY 2 2: ENERGY 3 3: ENERGY 4 ----- Mask index D. General D01(if enable) Display descript. Description Def. UoM Values config. (The I/Os available depend on the selected configuration, the following are just some examples) Enable cut-load by: Enable cut load by power ----0: NO 1: YES Power(kW): Energy(kWh) Enable cut load by energy ----0: NO 1: YES Apparent pow.(kVA): Enable cut load by apparent power ----0: NO 1: YES Set threshold Set threshold type 0 --0: DIN 1: AUTO D02 Percentage field on Select which percentage showing on the main mask 0 --0: POWER main mask: 1: ENERGY 2: APPARENT POWER D03 (Only for Power cut Threshold Thresholds of power and apparent power for cut load O kW 0...32767 pLoads Large (kW) (kVA) ID2 ID3 by ID2 and ID3 Threshold 1 of power and apparent power for start the O kW 0...32767 and enable) X X cut XO Threshold 2 of power and apparent power for start the O kW 0...32767 cut OX Threshold 3 of power and apparent power for start the O kW 0...32767 cut OO Threshold 4 of power and apparent power for start O kW 0...32767 the cut 41 pLoads - +040000131 - rel. 1.3 - 05.06.2013 ENG Mask index Display descript. D04(if kW kWh kVA enable) T1: D05 (if enable) D06 (if enable) Description Set threshold for T1 Set threshold for T1 Set threshold for T1 kW kWh kVA Set threshold for T2 Set threshold for T2 T2: Set threshold for T2 kW kWh kVA Set threshold for T3 Set threshold for T3 T3: Set threshold for T3 Set threshold for T4 kW kWh kVA Set threshold for T4 T4: Set threshold for T4 Set threshold for T5 kW kWh kVA Set threshold for T5 T5: Set threshold for T5 kW kWh kVA Set threshold for T6 Set threshold for T6 T6: Set threshold for T6 Energy cut Threshold: Threshold to cut the loads for energy Time check: Time to check the energy Safety to cut based Percentage to cut loads for power on power: Def. 50 100 80 60 110 90 70 120 100 80 130 110 90 140 120 100 150 130 0 15 30 UoM kW kWh kVA kW kWh kVA kW kWh kVA kW kWh kVA kW kWh kVA kW kWh kVA kWh min % Values 0...32767 0...32767 0...32767 0...32767 0...32767 0...32767 0...32767 0...32767 0...32767 0...32767 0...32767 0...32767 0...32767 0...32767 0...32767 0...32767 0...32767 0...32767 0...32767 1...60 1...100 Percentage to cut loads for energy 30 % 1...100 Percentage to cut loads for apparent power 30 % 1...100 D07 (if enable) D08 Safety to cut based on energy: Sicurezza su taglio per pot.apparen.: Delay between diff. cuts: By-passed loads Delay between different cut 60 s 0...9999 --- --- By-pass= Input channel (pLoads Large – Input ID16, pLoads Compact – Input ID12 Logic for digital input of load by-passed 0 --- --- Remote on-off DIN (pLoads large) --- --- Building on logic (pLoads large) 0 --- Output channel (pLoads Large : Output NO13, pLoads Compact : Output NO1) Logica uscita digitale per segnalazione allarme --- --- 0 --- 0: Input ID16 1: Input ID02 0: IN OPENED 1: IN CLOSED 0: 1: Remote ON-OFF 0: 1: Input ID01 0: IN OPENED 1: IN CLOSED 0: Output NO1: 1: Output NO13: 0: RELAY CLOSED 1: RELAY OPENED 0: Output NO6: 1: Output NO14: 0: RELAY CLOSED 1: RELAY OPENED 0...12 Input ID01 (pLoads large) D09 Alarm active Output ON= Cut active Output ON= D10 (if enable) Number of energy meter connected on FBus: Type of energy meter: Output channel (pLoads Large – Output NO14, pLoads --Compact – Output NO6) Logic for relay cut active (0: Normally open; 1: Normally 0 closed) Number of energy meter in modBus 0 Type of energy meter (0: IME HD; 1: IME D4; 2: Ducati; 3: 6 Gavazzi; 4: Socomec; 5: Electrex; 6: CAREL emeter3) pLoads - +040000131 - rel. 1.3 - 05.06.2013 42 --------- 0: IME NEMO 96 HD 1: IME NEMO D4 2: DUCATI ENERGIA SMART + 3: GAVAZZI CPT/WM14DIN 4: SOCOMEC 5: ELECTREX FEMTO 6: CAREL emeter3 ENG Mask index Display descript. D13 (if CAREL emeter3 enable) Description Enery meter 1 type Def. --- Energy meter 1 address New address System type CT value high part CT value low part Secondary CT VT value high part VT value low part Secondary VT Reset the counter ... Pulse counter from (pLoads Large – ID1, pLoads Compact – B5) Type device (0: Energy; 1: Water; 2: Gas) --1 --------------0 ... --- Pulse weight: "Pulse_Convertion"; The value of the counter is according with formula: Value= pulse x 10^ Pulse_Convertion 0 Blackout warning: --- Enable blackout warning Pusle counter from (pLoads Large – ID1, pLoads Compact – B5) Type device (0: Energy; 1: Water; 2: Gas) 0 ----- New offset for the meter (Value x pulse weight) New value for pulse counter Reset the counter Totally pulse counter digital 0 Totally pulse counter digital 1 Totally pulse counter digital 2 Totally pulse counter digital 3 Totally pulse counter digital 4 Totally pulse counter digital 5 Totally pulse counter digital 6 Totally pulse counter digital 7 Totally pulse counter digital 8 Totally pulse counter digital 9 Totally pulse counter digital 10 Totally pulse counter digital 11 Totally pulse counter digital 12 Totally pulse counter digital 13 Totally pulse counter digital 14 Totally pulse counter digital 15 Type device (0: Energy; 1: Water; 2: Gas) 0 0 0 ----------------------------------- --New address: System type: Primary CT: --Primary VT: ... D25 --Reset counters: ... --Type of device D26 Pulse lost for --Confirm? Reset meter? --- --- --D32 --... Enable access point: Enable access point --- ... --- 43 UoM Values --0: IME Nemo 96HD 1: IME Nemo D4 2: Ducati Smart 3: Gavazzi 4: Socomec 5: Electrex 6: CAREL emeter3 --2... 13 --2...13 --0...4 --0...999 --0...999 --0...5 --0...999 --0...999 --0...999 --0: NO 1: YES ... ... --0: Counter from ID1 1: Counter from B5 --0: Wh; 2: m³ 1: l --0: 1 4: 10000 1: 10 5: 100000 2: 100 6: 0,1 3: 1000 --0: NO 1: YES --0: Counter from ID1 1: Counter from B5 --0: Wh; 2: m³ 1: l --0...999 --0: NO 1: YES --0: NO 1: YES --0…9 --0…9 --0…9 --0…9 --0…9 --0…9 --0…9 --0…9 --0…9 --0…9 --0…9 --0…9 --0…9 --0…9 --0…9 --0…9 --0: Wh; 2: m³ 1: l ... ... --0: NO 1: YES pLoads - +040000131 - rel. 1.3 - 05.06.2013 ENG Mask index Display descript. Description D33 (if Access point Address of access point Type of access point: Type of access point enable) D34 (if enable) D35 D36 Min address connected to Router Bridge RB: Max address connected to Router Bridge RB: Number of pulse counter(CI sensor): Pulse counter Transmit data cycle: --Counter from CI01ID1 Type of device: Pulse weight: --- ... D40 D41 ... Number load/s reading from AIN: Analog input Bxx Configuration Probe type: Min value: Max value: … Alarm delay: Offset: … Min address connected to Router Bridge RB 0 UoM Values --1 --21: WITHOUT ROUTERBRIDGE 17: WITH ROUTER-BRIDGE --2...13 Max address connected to Router Bridge RB: 0 --- 2...13 Number of wireless CI pulse counter 0 --- 0...2 Address of CI wireless pulse counter 1 Trasmission data cycle time Address of CI wireless pulse counter 2 Transmit data cycle time Type device (0: Energy; 1: Water; 2: Gas) --60 --60 --- --s --s --- "Pulse_Convertion"; The value of the counter is according with formula: Value= pulse x 10^ Pulse_Convertion 0 --- Totally pulse counter digital 0 Totally pulse counter digital 1 Totally pulse counter digital 2 Totally pulse counter digital 3 Totally pulse counter digital 4 Totally pulse counter digital 5 Totally pulse counter digital 6 Totally pulse counter digital 7 Totally pulse counter digital 8 Totally pulse counter digital 9 Totally pulse counter digital 10 Totally pulse counter digital 11 Totally pulse counter digital 12 Totally pulse counter digital 13 Totally pulse counter digital 14 Totally pulse counter digital 15 Type device (0: Energy; 1: Water; 2: Gas) ... Number of load reading from AIN ----------------------------------... 0 ----------------------------------... --- Specify the analogue input channel Specify the probe type --0 ----- 31...32 5...3600 31...32 5...3600 0: Wh; 2: m³ 1: l 0: 1 4: 10000 1: 10 5: 100000 2: 100 6: 0,1 3: 1000 0…9 0…9 0…9 0…9 0…9 0…9 0…9 0…9 0…9 0…9 0…9 0…9 0…9 0…9 0…9 0…9 0: Wh; 1: l 2: m³ ... 0...(pLoads Large: 6 – pLoads Compact: 4) 1...20 Conversion limit min value for the controlled value for active inputs Conversion limit max value for the controlled value for active inputs Specify the alarm delay time Offset of the probe value … 0 --- -3276.8...3276.7 1000 --- -3276.8...3276.7 60 0 … 0...32000 -3276.8...3276.7 … pLoads - +040000131 - rel. 1.3 - 05.06.2013 Def. --0 44 s --… 0: NTC 1: PT1000 2: 0-1V 3: 0-10V 4: 0-20mA 5: 4-20mA 6: ON/OFF 7: 0-5V 8: 0.5-4.5V 9: NTC HT 10: -50T90 11: 10T170 12: PT100 ENG Mask index Display descript. D47 Type load 1: … D53 Description Phase type load 1 (0: mono-phase; 1: three-phase) Def. 0 --- Power formula --- I= Probe position number: current load 1 0 V= Probe position number: voltage load 1 0 ----Reset: … DEFAULT INSTALLATION Delete user parameters and install global default: --- Fixed Cosfi load 1 Fixed voltage load 1 Reset energy load 1 … Manual Inatallation of device default values (0: No default, 1: Default) 0.0 0.0 0 … 0 UoM Values --0: 1-PHASE 1: 3-PHASES --0: P=V x I 1: P=V x I x cosfi x SQR3 --0: 1: PROBE B1 2: PROBE B2 3: PROBE B3 4: PROBE B6 5: PROBE B7 6: PROBE B8 7: PARAMETER --0: PARAMETER 1: PROBE B1 2: PROBE B2 3: PROBE B3 4: PROBE B6 5: PROBE B7 6: PROBE B8 --0.0...1.0 V 0.0...999.9 --0: NO 1: YES … … --0: NO 1: YES Manual Initiallisation of device default values (0: No default, 1: Default) 0 --- Description Def. UoM Values Mask index Display descript. 0: 1: Please wait.... E.Load config. (The I/Os available depend on the selected configuration, the following are just some examples) E01 E02 E03 E03 Load number: Loads number 4 --- 5 s 0 --- ----- 0 --- pLoads Large: 0...12 pLoads Compact: 0...4 0...180 Delay between ON of Delay between ON of different loads different loads: Label: Label of load 1 --Load output channel (pLoads Large – NO1, pLoads Compact – NO2) Load ON= Logic for relay load 1 (0: Normally open; 1: Normally closed) --Manual input channel (pLoads Large – ID4, pLoads Compact – B5) Lights 1 Label of load 1 Scheduler: Enable scheduler of load 1 Preopening: Preopening of load 1 Postclosing: Postclosing of load 1 --Behaviour load 1 in pause between time bands --- --- --0 0 0 0 ----min min --- Cut load Switch-OFF for: Enable cut of load 1 Priority to cut the load 1 0 1 ----- See NOTE 1 0: Load output NO01 1: Load output NO02 0: RELAY CLOSED 1: RELAY OPENED 0: Manual input ID4 1: Manual input B5 See NOTE 1 0: NO 1: YES 0...120 0...120 0: OFF BETWEEN BANDS 1: ON BETWEEN BANDS 2: PRE-POST BETWEEN BANDS 0: NO 1: YES 1...Max cut load Label of load 1 Minimum time for cut load 1 Maximum time that the load is forced OFF ... --5 30 ... --sec sec ... See NOTE 1 0…500 0…999 ... E04 (if enable Lights 1 Min time to cut load: cut load) Max time to cut: ... ... 45 pLoads - +040000131 - rel. 1.3 - 05.06.2013 ENG Mask index Display descript. Description Def. UoM Values --Enter to change --User: Installator: Delete data logger: ModBus for devices Speed: Current language index ENTER to change / Esc to confirm Countdown time New service password New Installator password Reset data logger Baudrate of modbus master protocol 0 --60 1234 1234 0 3 --------------- Stop bit: Parity: Stop bits of modbus master protocol Parity mode of modbus master protocol 1 0 ----- Timeout: BMS1 setting BMS protocol: Timeout of modbus master protocol 300 Protocol BMS setting (1: CAREL RS485; 2: ModBus RS485; 1 3: pCOload local) ms --- Velocità BMS: Setting BMS speed 4 --- Adress: BMS2 setting BMS protocol: Address of the controller in a supervisory system network n.1 1 Protocol BMS setting (1: CAREL RS485; 2: ModBus RS485; 1 3: pCOload local) ----- BMS speed: Setting BMS speed --- Address: Address of the controller in a supervisory system network n.2 1 Information of pLoads --- F.Language F01 F02 F03 F04 F05 F06 F07, F08 Mask index Display descript. 4 ----- EN/IT/FR 0...999 0...9999 0...9999 0: NO 1: YES 0: 1200 3: 9600 1: 2400 4: 19200 2: 4800 0: 1 1: 2 0: NO 2: ODD 1: EQUAL 100...5000 0: NONE 1: CAREL RS485 2: MODBUS RS485 3: pCO MANAGER 0: 1200 3: 9600 1: 2400 4: 19200 2: 4800 1...207 0: NONE 1: CAREL RS485 2: MODBUS RS485 3: pCO MANAGER 0: 1200 3: 9600 1: 2400 4: 19200 2: 4800 1...207 Description Def. UoM Values Level: Show the user level of unit --- --- Press Enter to logout Show the information ----- --- Logout 0: None 2: Installator 1: User ______________________________________________________________________________________ Nota 1: 0: 1: 2: 3: 4: 5: 6: 7: 8: 9: lights 1 lights 2 lights 3 lights 4 external lights 1 external lights 2 external lights 3 conditioning 1 conditioning 2 conditioning 3 10: 11: 12: 13: 14: 15: 16: 17: 18: 19: automatic door 1 automatic door 2 automatic door 3 LT Cabinet 1 LT Cabinet 2 LT Cabinet 3 NT Cabinet 1 NT Cabinet 2 NT Cabinet 3 LT Compressor rack 1 20: 21: 22: 23: 24: 25: 26: 27: 28: 29: LT Compressor rack 2 NT Compressor rack 1 NT Compressor rack 2 Banner 1 Banner 2 Parking outside Parking Covered parking Oven 1 Oven 2 30: 31: 32: 33: 34: 35: 36: 37: 38: 39: Oven 3 Fryer 1 Fryer 2 Fryer 3 Spits 1 Spits 2 Hot-Plate 1 Hot-Plate 2 Lift recharge 1 Warm banch 1 40: 41: 42: 43: 44: 45: Warm banch 2 Others 1 Others 2 Others 3 Others 4 Others 5 Nota 2: 0: Disabled 1: Cut 2: ON by scheduler 3: OFF by scheduler 4: ON by manual 5: OFF by manual 6: ON by supervision 7: OFF by supervision 2: Ducati Energia Smart+ 3: Gavazzi CPT/WM14-DIN 4: Socomec 5: Electrex Femto 6: CAREL emeter3 Nota 3: 0: IME Nemo 96HD 1: IME Nemo D4 pLoads - +040000131 - rel. 1.3 - 05.06.2013 46 ENG 10. SUPERVISOR TABLE The table below shows the variables sent to the supervisor. Analogue variables Modbus® address 1 2 3 4 5 6 7 8 9 10 11 12 13 14 15 16 17 18 19 20 21 22 23 24 25 26 27 28 29 30 31 32 33 34 35 36 37 38 39 40 41 42 43 44 45 46 47 48 49 50 51 52 53 54 55 56 57 58 59 60 Carel address 1 2 3 4 5 6 7 8 9 10 11 12 13 14 15 16 17 18 19 20 21 22 23 24 25 26 27 28 29 30 31 32 33 34 35 36 37 38 39 40 41 42 43 44 45 46 47 48 49 50 51 52 53 54 55 56 57 58 59 60 Description Energy meter 1 (Building consumption), Equivalent power Energy meter 2, Equivalent power Energy meter 3, Equivalent power Energy meter 4, Equivalent power Energy meter 5, Equivalent power Energy meter 6, Equivalent power Energy meter 7, Equivalent power Energy meter 8, Equivalent power Energy meter 9, Equivalent power Energy meter 10, Equivalent power Energy meter 11, Equivalent power Energy meter 12, Equivalent power Energy meter 1 (Building consumption), Current line 1 Energy meter 2, Current line 1 Energy meter 3, Current line 1 Energy meter 4, Current line 1 Energy meter 5, Current line 1 Energy meter 6, Current line 1 Energy meter 7, Current line 1 Energy meter 8, Current line 1 Energy meter 9, Current line 1 Energy meter 10, Current line 1 Energy meter 11, Current line 1 Energy meter 12, Current line 1 Energy meter 1 (Building consumption), Current line 2 Energy meter 2, Current line 2 Energy meter 3, Current line 2 Energy meter 4, Current line 2 Energy meter 5, Current line 2 Energy meter 6, Current line 2 Energy meter 7, Current line 2 Energy meter 8, Current line 2 Energy meter 9, Current line 2 Energy meter 10 Current line 2 Energy meter 11, Current line 2 Energy meter 12, Current line 2 Energy meter 1 (Building consumption), Current line 3 Energy meter 2, Current line 3 Energy meter 3, Current line 3 Energy meter 4, Current line 3 Energy meter 5, Current line 3 Energy meter 6, Current line 3 Energy meter 7, Current line 3 Energy meter 8, Current line 3 Energy meter 9, Current line 3 Energy meter 10, Current line 3 Energy meter 11, Current line 3 Energy meter 12, Current line 3 Energy meter 1 (Building consumption), Power factor Energy meter 2, Power factor Energy meter 3, Power factor Energy meter 4, Power factor Energy meter 5, Power factor Energy meter 6, Power factor Energy meter 7, Power factor Energy meter 8, Power factor Energy meter 9, Power factor Energy meter 10, Power factor Energy meter 11, Power factor Energy meter 12, Power factor 47 UOM R/W kW kW kW kW kW kW kW kW kW kW kW kW A A A A A A A A A A A A A A A A A A A A A A A A A A A A A A A A A A A A ------------------------- R R R R R R R R R R R R R R R R R R R R R R R R R R R R R R R R R R R R R R R R R R R R R R R R R R R R R R R R R R R R pLoads - +040000131 - rel. 1.3 - 05.06.2013 ENG Modbus® address 61 62 63 64 65 66 67 68 69 70 71 72 73 74 75 76 77 78 79 80 81 82 83 84 85 86 87 88 89 90 91 92 93 94 95 96 97 98 99 100 101 102 103 104 105 106 107 108 109 110 111 112 113 114 115 116 117 118 119 120 121 122 123 124 125 126 127 Carel address 61 62 63 64 65 66 67 68 69 70 71 72 73 74 75 76 77 78 79 80 81 82 83 84 85 86 87 88 89 90 91 92 93 94 95 96 97 98 99 100 101 102 103 104 105 106 107 108 109 110 111 112 113 114 115 116 117 118 119 120 121 122 123 124 125 126 127 Description UOM R/W Starting of Time Band 1, full day 1 Ending of Time Band 1, full day 1 Starting of Time Band 2, full day 1 Ending of Time Band 2, full day 1 Starting of Time Band 1, full day 2 Ending of Time Band 1, full day 2 Starting of Time Band 2, full day 2 Ending of Time Band 2, full day 2 Starting, reduce day 1 Ending reduced day 1 Energy meter 1 (main), Phase to phase voltage L1-L2 Energy meter 1 (main), Phase to phase voltage L2- L3 Energy meter 1 (main), Phase to phase voltage L3-L1 Ending of Time Band 2, full day 2 Energy meter 2, Voltage L2-L3 Energy meter 2, Voltage L3-L1 Energy meter 3, Voltage L1-L2 Energy meter 3, Voltage L2-L3 Energy meter 3, Voltage L3-L1 Energy meter 4, Voltage L1-L2 Energy meter 4, Voltage L2-L3 Energy meter 4, Voltage L3-L1 Energy meter 5, Voltage L1-L2 Energy meter 5, Voltage L2-L3 Energy meter 5, Voltage L3-L1 Energy meter 6, Voltage L1-L2 Energy meter 6, Voltage L2-L3 Energy meter 6, Voltage L3-L1 Energy meter 7, Voltage L1-L2 Energy meter 7, Voltage L2-L3 Energy meter 7, Voltage L3-L1 Energy meter 8, Voltage L1-L2 Energy meter 8, Voltage L2-L3 Energy meter 8, Voltage L3-L1 Energy meter 9, Voltage L1-L2 Energy meter 9, Voltage L2-L3 Energy meter 9, Voltage L3-L1 Energy meter 10, Voltage L1-L2 Energy meter 10, Voltage L2-L3 Energy meter 10, Voltage L3-L1 Energy meter 11, Voltage L1-L2 Energy meter 11, Voltage L2-L3 Energy meter 11, Voltage L3-L1 Energy meter 12, Voltage L1-L2 Energy meter 12, Voltage L2-L3 Energy meter 12, Voltage L3-L1 Energy meter 1 (Building consumption), Phase-neutral average voltage Energy meter 2, Phase-neutral average voltage Energy meter 3, Phase-neutral average voltage Energy meter 4, Phase-neutral average voltage Energy meter 5, Phase-neutral average voltage Energy meter 6, Phase-neutral average voltage Energy meter 7, Phase-neutral average voltage Energy meter 8, Phase-neutral average voltage Energy meter 9, Phase-neutral average voltage Energy meter 10, Phase-neutral average voltage Energy meter 11, Phase-neutral average voltage Energy meter 12, Phase-neutral average voltage Energy meter 1 (Building consumption), Apparent power Energy meter 2, Apparent power Energy meter 3, Apparent power Energy meter 4, Apparent power Energy meter 5, Apparent power Energy meter 6, Apparent power Number of pulse counter Power load 1 Energy meter 7, Apparent power min min min min min min min min min min V V V V V V V V V V V V V V V V V V V V V V V V V V V V V V V V V V V V V V V V V V V V V V V V kVA kVA kVA kVA kVA kVA kW kVA R/W R/W R/W R/W R/W R/W R/W R/W R/W R/W R R R R R R R R R R R R R R R R R R R R R R R R R R R R R R R R R R R R R R R R R R R R R R R R R R R R R R R R R pLoads - +040000131 - rel. 1.3 - 05.06.2013 48 ENG Modbus® address 128 129 130 131 132 133 134 135 136 137 138 139 140 141 142 143 144 145 146 147 148 149 150 Carel address 128 129 130 131 132 133 134 135 136 137 138 139 140 141 142 143 144 145 146 147 148 149 150 Description UOM R/W Energy meter 8, Apparent power Energy meter 9, Apparent power Energy meter 10, Apparent power Energy meter 11, Apparent power Energy meter 12, Apparent power Percentage to the threshold of apparent power Power load 2 Percentage to cut loads for apparent power Threshold 5 to cut the load for general power Threshold 6 to cut the load for general power Threshold 2 to cut the loads for energy Threshold 3 to cut the loads for energy Threshold 4 to cut the loads for energy Threshold 5 to cut the loads for energy Power load 3 Threshold 6 to cut the loads for energy Threshold 1 to cut the loads for apparent power Threshold 2 to cut the loads for apparent power Threshold 3 to cut the loads for apparent power Threshold 4 to cut the loads for apparent power Threshold 5 to cut the loads for apparent power Threshold 6 to cut the loads for apparent power Power load 4 kVA kVA kVA kVA kVA kW kW kW kW kW kW kW kW kWh kVA kVA kVA kVA kVA kVA kW R R R R R R R R R/W R/W R/W R/W R/W R/W R R/W R/W R/W R/W R/W R/W R/W R ... ... ... 158 158 Power load 5 ... ... ... 166 167 168 166 167 168 Power load 6 Energy meter 1, Frequency Number of load reading from AIN ... ... kW R ... ... kW Hz - R R R/W ... ... ... ... ... 170 171 172 173 174 175 176 177 178 179 180 181 170 171 172 173 174 175 176 177 178 179 180 181 Label load 1 Label load 2 Label load 3 Label load 4 Label load 5 Label load 6 Label load 7 Label load 8 Label load 9 Label load 10 Label load 11 Label load 12 - R/W R/W R/W R/W R/W R/W R/W R/W R/W R/W R/W R/W ... ... ... ... ... 190 191 192 193 194 195 196 197 198 199 200 201 202 203 204 205 206 207 190 191 192 193 194 195 196 197 198 199 200 201 202 203 204 205 206 207 Type of device on pLoads Large DIN 17 (0: energy 1: water 2:gas) Type of device on pLoads Large DIN 18 (0: energy 1: water 2:gas) Type of device on pLoads (CI01-ID1)1 (0: energy 1: water 2:gas) Type of device on pLoads (CI01-ID2) (0: energy 1: water 2:gas) Type of device on pLoads (CI02-ID1) (0: energy 1: water 2:gas) Type of device on pLoads (CI02-ID2) (0: energy 1: water 2:gas) Manual of the load 1 from SPV (0: Auto; 1: OFF; 2: ON) Manual of the load 2 from SPV (0: Auto; 1: OFF; 2: ON) Manual of the load 3 from SPV (0: Auto; 1: OFF; 2: ON) Manual of the load 4 from SPV (0: Auto; 1: OFF; 2: ON) Manual of the load 5 from SPV (0: Auto; 1: OFF; 2: ON) Manual of the load 6 from SPV (0: Auto; 1: OFF; 2: ON) Manual of the load 7 from SPV (0: Auto; 1: OFF; 2: ON) Manual of the load 8 from SPV (0: Auto; 1: OFF; 2: ON) Manual of the load 9 from SPV (0: Auto; 1: OFF; 2: ON) Manual of the load 10 from SPV (0: Auto; 1: OFF; 2: ON) Manual of the load 11 from SPV (0: Auto; 1: OFF; 2: ON) Manual of the load 12 from SPV (0: Auto; 1: OFF; 2: ON) - R/W R/W R/W R/W R/W R/W R/W R/W R/W R/W R/W R/W R/W R/W R/W R/W R/W R/W Tab. 10.a 49 pLoads - +040000131 - rel. 1.3 - 05.06.2013 ENG Integer variables Modbus® address 5001 5002 5003 5004 5005 5006 5007 5008 5009 5010 5011 5012 5013 5014 5015 5016 5017 5018 5019 5020 5021 5022 5023 5024 5025 5026 5027 5028 5029 5030 5031 5032 5033 5034 5035 5036 5037 5038 5039 5040 5041 5042 5043 5044 5045 5046 5047 5048 5049 5050 5051 5052 5053 5054 5055 5056 5057 5058 5059 5060 5061 5062 5063 5064 5065 Carel address 1 2 3 4 5 6 7 8 9 10 11 12 13 14 15 16 17 18 19 20 21 22 23 24 25 26 27 28 29 30 31 32 33 34 35 36 37 38 39 40 41 42 43 44 45 46 47 48 49 50 51 52 53 54 55 56 57 58 59 60 61 62 63 64 65 Description UOM R/W Energy meter 1 (Building consumption), Equivalent energy Energy meter 1 (Building consumption), Equivalent energy Energy meter 2, Equivalent energy Energy meter 2, Equivalent energy Energy meter 3, Equivalent energy Energy meter 3, Equivalent energy Energy meter 4, Equivalent energy Energy meter 4, Equivalent energy Energy meter 5, Equivalent energy Energy meter 5, Equivalent energy Energy meter 6, Equivalent energy Energy meter 6, Equivalent energy Energy meter 7, Equivalent energy Energy meter 7, Equivalent energy Energy meter 8, Equivalent energy Energy meter 8, Equivalent energy Energy meter 9, Equivalent energy Energy meter 9, Equivalent energy Energy meter 10, Equivalent energy Energy meter 10, Equivalent energy Energy meter 11, Equivalent energy Energy meter 11, Equivalent energy Energy meter 2, Equivalent energy Energy meter 2, Equivalent energy Current hour Current minute Current day Current month Current year Starting of Time Band 1, full day 1 Ending of Time Band 1, full day 1 Starting of Time Band 2, full day 1 Ending of Time Band 2, full day 1 Starting of Time Band 1, full day 2 Ending of Time Band 1, full day 2 Starting of Time Band 2, full day 2 Ending of Time Band 2, full day 2 Starting, reduce day 1 Ending reduced day 1 Type scheduler Monday (0= full; 1= special; 2=reduce; 3= closed) Type scheduler Tuesday (0= full; 1= special; 2=reduce; 3= closed) Type scheduler Wednesday (0= full; 1= special; 2=reduce; 3= closed) Type scheduler Thursday (0= full; 1= special; 2=reduce; 3= closed) Type scheduler Friday (0= full; 1= special; 2=reduce; 3= closed) Type scheduler Saturday (0= full; 1= special; 2=reduce; 3= closed) Type scheduler Sunday (0= full; 1= special; 2=reduce; 3= closed) Day-Month start special period 1 Day-Month end special period 1 Behavior in special period 1 (0= full; 1= special; 2=reduce; 3= closed) Day-Month start special period 2 Day-Month end special period 2 Behavior in special period 2 (0= full; 1= special; 2=reduce; 3= closed) Day-Month start special period 3 Day-Month end special period 3 Behavior in special period 3 (0= full; 1= special; 2=reduce; 3= closed) Day-Month start special period 4 Day-Month end special period 4 Behavior in special period 4 (0= full; 1= special; 2=reduce; 3= closed) Day-Month start special period 5 Day-Month end special period 5 Behavior in special period 5 (0= full; 1= special; 2=reduce; 3= closed) Day-Month start special period 6 Day-Month end special period 6 Behavior in special period 6 (0= full; 1= special; 2=reduce; 3= closed) Day-Month start special period 7 kWh kWh kWh kWh kWh kWh kWh kWh kWh kWh kWh kWh kWh kWh kWh kWh kWh kWh kWh kWh kWh kWh kWh kWh h min day month year h h h h h h h h h h ----------------------------------------------------- R R R R R R R R R R R R R R R R R R R R R R R R R/W R/W R/W R/W R/W R/W R/W R/W R/W R/W R/W R/W R/W R/W R/W R/W R/W R/W R/W R/W R/W R/W R/W R/W R/W R/W R/W R/W R/W R/W R/W R/W R/W R/W R/W R/W R/W R/W R/W R/W R/W pLoads - +040000131 - rel. 1.3 - 05.06.2013 50 ENG Modbus® address 5066 5067 5068 5069 5070 5071 5072 5073 5074 5075 5076 5077 5078 5079 5080 5081 5082 5083 5084 5085 5086 5087 5088 5089 5090 5091 5092 5093 5094 5095 5096 5097 5098 5099 5100 5101 5102 5103 5104 5105 5106 5107 5108 5109 5110 5111 5112 5113 5114 5115 5116 5117 5118 5119 5120 5121 5122 5123 5124 5125 5126 5127 5128 5129 5130 5131 5132 Carel address 66 67 68 69 70 71 72 73 74 75 76 77 78 79 80 81 82 83 84 85 86 87 88 89 90 91 92 93 94 95 96 97 98 99 100 101 102 103 104 105 106 107 108 109 110 111 112 113 114 115 116 117 118 119 120 121 122 123 124 125 126 127 128 129 130 131 132 Description UOM R/W Day-Month end special period 7 Behavior in special period 7 (0= full; 1= special; 2=reduce; 3= closed) Day-Month start special period 8 Day-Month end special period 8 Behavior in special period 8 (0= full; 1= special; 2=reduce; 3= closed) Day-Month start special period 9 Day-Month end special period 9 Behavior in special period 9 (0= full; 1= special; 2=reduce; 3= closed) Day-Month start special period 10 Day-Month end special period 10 Behavior in special period 10 (0= full; 1= special; 2=reduce; 3= closed) Day-Month start special period 11 Day-Month end special period 11 Behavior in special period 11 (0= full; 1= special; 2=reduce; 3= closed) Day-Month start special period 12 Day-Month end special period 12 Behavior in special period 12 (0= full; 1= special; 2=reduce; 3= closed) Day-Month start special period 13 Day-Month end special period 13 Behavior in special period 13 (0= full; 1= special; 2=reduce; 3= closed) Day-Month start special period 14 Day-Month end special period 14 Behavior in special period 14 (0= full; 1= special; 2=reduce; 3= closed) Day-Month start special period 15 Day-Month end special period 15 Behavior in special period 15 (0= full; 1= special; 2=reduce; 3= closed) Preopening of load 1 Postclosing of load 1 Behaviour load 1 in pause between TB (0: Load OFF; 1: Load ON; 2: AUTO) Priority to cut the load 1 Preopening of load 2 Postclosing of load 2 Behaviour load 2 in pause between TB (0: Load OFF; 1: Load ON; 2: AUTO) Priority to cut the load 2 Preopening of load 3 Postclosing of load 3 Behaviour load 3 in pause between TB (0: Load OFF; 1: Load ON; 2: AUTO) Priority to cut the load 3 Preopening of load 4 Postclosing of load 4 Behaviour load 4 in pause between TB (0: Load OFF; 1: Load ON; 2: AUTO) Priority to cut the load 4 Preopening of load 5 Postclosing of load 5 Behaviour load 5 in pause between TB (0: Load OFF; 1: Load ON; 2: AUTO) Priority to cut the load 5 Preopening of load 6 Postclosing of load 6 Behaviour load 6 in pause between TB (0: Load OFF; 1: Load ON; 2: AUTO) Priority to cut the load 6 Priority to cut the load 6 Postclosing of load 7 Behaviour load 7 in pause between TB (0: Load OFF; 1: Load ON; 2: AUTO) Priority to cut the load 7 Preopening of load 8 Postclosing of load 8 Behaviour load 8 in pause between TB (0: Load OFF; 1: Load ON; 2: AUTO) Priority to cut the load 8 Preopening of load 9 Postclosing of load 9 Behaviour load 9 in pause between TB (0: Load OFF; 1: Load ON; 2: AUTO) Priority to cut the load 9 Preopening of load 10 Postclosing of load 10 Behaviour load 10 in pause between TB (0: Load OFF; 1: Load ON; 2: AUTO Priority to cut the load 10 Preopening of load 11 ----------------------------------------------------min min ----min min ----min min ----min min ----min min ----min min ----min min ----min min ----min min ----min min ----min R/W R/W R/W R/W R/W R/W R/W R/W R/W R/W R/W R/W R/W R/W R/W R/W R/W R/W R/W R/W R/W R/W R/W R/W R/W R/W R/W R/W R/W R/W R/W R/W R/W R/W R/W R/W R/W R/W R/W R/W R/W R/W R/W R/W R/W R/W R/W R/W R/W R/W R/W R/W R/W R/W R/W R/W R/W R/W R/W R/W R/W R/W R/W R/W R/W R/W R/W 51 pLoads - +040000131 - rel. 1.3 - 05.06.2013 ENG Modbus® address 5133 5134 5135 5136 5137 5138 5139 5140 5141 5142 5143 5144 5145 5146 5147 5148 5149 5150 5151 5152 5153 5154 5155 5156 5157 5158 5159 5160 5161 5162 5163 5164 Carel address 133 134 135 136 137 138 139 140 141 142 143 144 145 146 147 148 149 150 151 152 153 154 155 156 157 158 159 160 161 162 163 164 5165 165 5166 166 5167 167 5168 5169 5170 5171 5172 5173 5174 5175 5176 5177 5178 5179 5180 168 169 170 171 172 173 174 175 176 177 178 179 180 5181 5182 5183 5184 5185 5186 5187 5188 5189 5190 5191 5192 5193 5194 181 182 183 184 185 186 187 188 189 190 191 192 193 194 Description UOM R/W Postclosing of load 11 Behaviour load 11 in pause between TB (0: Load OFF; 1: Load ON; 2: AUTO) Priority to cut the load 11 Preopening of load 12 Postclosing of load 12 Behaviour load 12 in pause between TB (0: Load OFF; 1: Load ON; 2: AUTO) Priority to cut the load 12 Threshold 1 to cut the loads for general power Threshold 2 to cut the loads for general power Threshold 3 to cut the loads for general power Threshold 4 to cut the loads for general power Percentage to cut loads for power Threshold 1 to cut the loads for energy Time to check the energy Percentage to cut loads for energy Delay between different cut Min time for cut load 1 Max time for cut load 1 Pulse counter B5: pLoads Large – ID1: pLoads Compact (high part) Pulse counter B5: pLoads Large – ID1: pLoads Compact (low part) Type of period for next event SW version SW date Pulse counter from CI 1 digital input 1 (high part) Pulse counter from CI 1 digital input 1 (low part) Pulse counter from CI 1 digital input 2 (high part) Pulse counter from CI 1 digital input 2 (low part) Pulse counter from CI 2 digital input 1 (high part) Pulse counter from CI 2 digital input 1 (low part) Pulse counter from CI 2 digital input 2 (high part) Pulse counter from CI 2 digital input 2 (low part) "Pulse_Convertion"; The value of the counter is according with formula: Value= pulse x 10^ Pulse_Convertion , CI 1 ID1 (see note 3) "Pulse_Convertion"; The value of the counter is according with formula: Value= pulse x 10^ Pulse_Convertion , CI 1 ID2 (see note 3) "Pulse_Convertion"; The value of the counter is according with formula: Value= pulse x 10^ Pulse_Convertion CI 2 ID1 (see note 3) "Pulse_Convertion"; The value of the counter is according with formula: Value= pulse x 10^ Pulse_Convertion CI 2 ID2 (see note 3) Energy of aux load 1 Energy of aux load 1 Energy of aux load 2 Energy of aux load 2 Energy of aux load 3 Energy of aux load 3 Energy of aux load 4 Energy of aux load 4 Energy of aux load 5 Energy of aux load 5 Energy of aux load 6 Energy of aux load 6 "Pulse_Convertion"; The value of the counter is according with formula: Value= pulse x 10^ Pulse_Convertion (B5: pLoads Large – ID1: pLoads ompact) (see note 3) Status of load 1 (see note 2) Status of load 2 (see note 2) Status of load 3 (see note 2) Status of load 4 (see note 2) Status of load 5 (see note 2) Status of load 6 (see note 2) Status of load 7 (see note2) Status of load 8 (see note 2) Status of load 9 (see note 2) Status of load 10 (see note 2) Status of load 11 (see note 2) Status of load 12 (see note 2) Type of device on pLoads (Fast DIN) (0: Energy; 1: Water; 2: Gas) Type day active min ----min min ----KW kW kW kW --kWh min --min min min ----------------------------- R/W R/W R/W R/W R/W R/W R/W R/W R/W R/W R/W R/W R/W R/W R/W R/W R/W R/W R R R R R R R R R R R R R R --- R --- R --- R ------------------------- R/W R/W R/W R/W R/W R/W R/W R/W R/W R/W R/W R/W ----------------------------- R R R R R R R R R R R R R/W R pLoads - +040000131 - rel. 1.3 - 05.06.2013 52 ENG Modbus® address 5195 5196 5197 5198 5199 5200 5201 5202 5203 5204 5205 Carel address 195 196 197 198 199 200 201 202 203 204 205 5206 206 --- --- Description UOM R/W ----------------------- R R R R R/W R/W R R R R R/W --- R/W Day of next event Month of next event PPercentage to the threshold of power Percentage to the threshold of energy Number of energy meter in Modbus® Loads number Pulse counter ID17 pLoads Large, with PCO208DI00 (high part) Pulse counter ID17 pLoads Large, with PCO208DI00 (low part)) Pulse counter ID18 pLoads Large, with PCO208DI00 (high part) Pulse counter ID18 pLoads Large, with PCO208DI00 (low part)) "Pulse_Convertion"; The value of the counter is according with formula: Value= pulse x 10^ Pulse_Convertion (X8X), Pulse counter from ID17 (see note 3) "Pulse_Convertion"; The value of the counter is according with formula: Value= pulse x 10^ Pulse_Convertion (X8X), Pulse counter from ID18 (see note 3) ---- --- --- Tab. 10.b Note 1: 0: 1: 2: 3: 4: 5: 6: 7: 8: 9: lights 1 lights 2 lights 3 lights 4 external lights 1 external lights 2 external lights 3 conditioning 1 conditioning 2 conditioning 3 10: 11: 12: 13: 14: 15: 16: 17: 18: 19: automatic door 1 automatic door 2 automatic door 3 lt cabinet 1 lt cabinet 2 lt cabinet 3 nt cabinet 1 nt cabinet 2 nt cabinet 3 lt compressor rack 1 20: 21: 22: 23: 24: 25: 26: 27: 28: 29: lt compressor rack 2 nt compressor rack 1 nt compressor rack 2 banner 1 banner 2 parking outside parking overed parking oven 1 oven 2 30: 31: 32: 33: 34: 35: 36: 37: 38: 39: oven 3 fryer 1 fryer 2 fryer 3 spits 1 spits 2 hot-plate 1 hot-plate 2 lift recharge 1 warm banch 1 40: 41: 42: 43: 44: 45: warm banch 2 others 1 others 2 others 3 others 4 others 5 Note 2: 0: disabled 1: cut 2: ON by scheduler 3: OFF by scheduler 4: Manual ON 5: Manual OFF 6: ON by supervisor 7: OFF by supervisor 2: 100 3: 1000 4: 10000 5: 100000 6: 0,1 8: Waiting timings between loads Note 3: 0: 1 1: 10 53 pLoads - +040000131 - rel. 1.3 - 05.06.2013 ENG Digital variables Modbus® address 1 2 3 4 5 6 7 8 9 10 11 ... 15 16 17 18 19 20 ... 27 28 29 30 31 32 33 34 35 36 37 38 39 40 41 42 43 44 45 46 47 48 49 50 51 52 53 54 55 56 57 58 59 60 61 62 63 64 65 66 67 68 69 70 71 72 Carel address 1 2 3 4 5 6 7 8 9 10 11 ... 15 16 17 18 19 20 ... 27 28 29 30 31 32 33 34 35 36 37 38 39 40 41 42 43 44 45 46 47 48 49 50 51 52 53 54 55 56 57 58 59 60 61 62 63 64 65 66 67 68 69 70 71 72 Description UdM R/W General alarm pLoads Large ALARM probe B1 ALARM probe B2 ALARM probe B3 ALARM probe B6 ALARM probe B7 ALARM probe B8 Enable cut loads by power Enable cut loads by apparent power Enable cut loads by energy ... Reset energy of aux load 1 Reset energy of aux load 2 Reset energy of aux load 3 Reset energy of aux load 4 Reset energy of aux load 5 Reset energy of aux load 6 ... Energy meter 1 (Building consumption), Reset energy Energy meter 2, Reset energy Energy meter 3, Reset energy Energy meter 4, Reset energy Energy meter 5, Reset energy Energy meter 6, Reset energy Energy meter 7, Reset energy Energy meter 8, Reset energy Energy meter 9, Reset energy Energy meter 10, Reset energy Energy meter 11, Reset energy Energy meter 12, Reset energy Enable scheduler of load 1 Enable cut of load 1 Enable scheduler of load 2 Enable cut of load 2 Enable scheduler of load 3 Enable cut of load 3 Enable scheduler of load 4 Enable cut of load 4 Enable scheduler of load 5 Enable cut of load 5 Enable scheduler of load 6 Enable cut of load 6 Enable scheduler of load 7 Enable cut of load 7 Enable scheduler of load 8 Enable cut of load 8 Enable scheduler of load 9 Enable cut of load 9 Enable scheduler of load 10 Enable cut of load 10 Enable scheduler of load 11 Enable cut of load 11 Enable scheduler of load 12 Enable cut of load 12 ALARM blackout of fast Din (pLoads Large: B5; pLoads Compact: ID1) Status load 1 ALARM clock board Status load 2 ALARM P-memory (internal error)’ Status load 3 ALARM off-line, energy meter 1, add 2 Status load 4 ALARM offline energy meter 2 add.3 Status load 5 ----------------------- R R R R R R R R R/W R/W R/W pLoads - +040000131 - rel. 1.3 - 05.06.2013 54 ... ------------- ... R/W R/W R/W R/W R/W R/W ... --------------------------------------------------------------------------------------------- ... R/W R/W R/W R/W R/W R/W R/W R/W R/W R/W R/W R/W R/W R/W R/W R/W R/W R/W R/W R/W R/W R/W R/W R/W R/W R/W R/W R/W R/W R/W R/W R/W R/W R/W R/W R/W R R R R R R R R R R ENG Modbus® address 73 74 75 76 77 78 79 80 81 82 83 84 85 86 87 88 89 90 91 92 93 94 95 96 97 98 99 100 101 102 103 104 105 106 107 Carel address 73 74 75 76 77 78 79 80 81 82 83 84 85 86 87 88 89 90 91 92 93 94 95 96 97 98 99 100 101 102 103 104 105 106 107 Description UdM R/W ALARM offline energy meter 3 add.4 Status load 6 ALARM offline energy meter 4 add.5 Status load 7 ALARM offline energy meter 5 add.6 Status load 8 ALARM offline energy meter 6 add.7 Status load 9 ALARM offline energy meter 7 add.8 Status load 10 ALARM offline energy meter 8 add.9 Status load 11 ALARM offline energy meter 9 add.10 Status load 12 Status of digital input remote ON-OFF IN 1 for band of energy/power IN 2 for band of energy/power Status of digital input load by-passed RESET ALLARM Building ON-OFF On-Off building (0: Off ; 1: On) ALARM offline energy meter 10 add.11 ALARM offline energy meter 11 add.12 ALARM offline energy meter 12 add.13 ALARM Load by-passed CI address 31 present CI address 32 present Board is pCO compact ALARM blackout (ID17) ALARM blackout (ID18) ALARM offline AccessPoint (address 1) ALARM offline CI (address 31) ALARM offline CI (address 32) ALARM low battery CI (address 31) ALARM low battery CI (address 32) ----------------------------------------------------------------------- R R R R R R R R R R R R R R R R R R R/W R/W R R R R R R R R R R R R R R R Tab. 10.c 55 pLoads - +040000131 - rel. 1.3 - 05.06.2013 ENG 11. ALARM TABLE Alarm code AL01 AL02 AL03 AL04 AL05 AL06 AL07 AL08 AL09 AL10 AL11 AL12 AL13 AL14 AL15 AL16 AL17 AL18 AL19 AL20 AL21 AL22 AL23 AL24 AL25 AL26 AL27 AL28 AL29 AL30 AL31 Display / Description Clock card error or not connected Extended memory error Load bypassed Set counter manually Energy meter 1 offline Energy meter 2 offline Energy meter 3 offline Energy meter 4 offline Energy meter 5 offline Energy meter 6 offline Energy meter 7 offline Energy meter 8 offline Energy meter 9 offline Energy meter 10 offline Energy meter 11 offline Energy meter 12 offline Probe B1 fault Probe B2 fault Probe B3 fault Probe B6 fault Probe B7 fault Probe B8 fault Manually set counter ID17 Manually set counter ID18 Access Point offline/disconnected CI pulse counter add. 31, offline CI pulse counter add. 32, offline CI pulse counter add. 31, general alarm CI pulse counter add. 31, battery discharged CI pulse counter add. 31, general alarm CI pulse counter add. 32, battery discharged pLoads - +040000131 - rel. 1.3 - 05.06.2013 56 Reset Manual Manual Automatic Manual Automatic Automatic Automatic Automatic Automatic Automatic Automatic Automatic Automatic Automatic Automatic Automatic Automatic Automatic Automatic Automatic Automatic Automatic Automatic Automatic Automatic Automatic Automatic Automatic Automatic Automatic Automatic Action No No No No Load cut-off disabled No No No No No No No No No No No No No No No No No No No No No No No No No No Alarm relay YES YES YES YES YES YES YES YES YES YES YES YES YES YES YES YES YES YES YES YES YES YES YES YES YES YES YES YES YES YES YES Tab. 11.a ENG 12. PLOADS FEATURES 12.1 Installation warnings - intended environments and connection Avoid installing the boards in environments with the following characteristics: • relative humidity greater than the 90%; • strong vibrations or knocks; • exposure to continuous water sprays and exposure to aggressive and polluting atmospheres(e.g.: sulphur and ammonia fumes, saline mist, smoke) with consequent corrosion and/or oxidation; • strong magnetic and/or radio frequency interference (therefore avoid installing the units near transmitting antennae); • exposure to direct sunlight and to the elements in general; • large and rapid fluctuations in the room temperature; • environments where explosives or mixes of flammable gases are present; • exposure to dust (formation of corrosive patina with possible oxidation and reduction of insulation). The following warnings must be observed for connection: • install a power supply disconnect device in compliance with standards in force; • a power supply voltage other than the rated value may seriously damage the system; • use cable ends suitable for the corresponding terminals. Loosen each screw and insert the cable ends, then tighten the screws. When the operation is completed, slightly tug the cables to check they are sufficiently tight; • separate as much as possible the probe signal and digital input cables from the cables carrying inductive loads and power cables to avoid possible electromagnetic disturbance. Never insert power cables (including the electrical cables) and probe signal cables in the same conduits. Do not install probe cables in the immediate vicinity of power devices (contactors, circuit breakers or similar); • reduce the path of probe cables as much as possible, and avoid spiral paths that enclose power devices. • avoid touching or nearly touching the electronic components fitted on the boards to avoid electrostatic discharges (extremely damaging) from the operator to the components; • separate the power supply to digital outputs from the power supply to pLoads; • do not secure the cables to the terminals by pressing the screwdriver with excessive force, to avoid damaging the controller; • disconnect the controller from the power supply before performing any type of maintenance or assembly operations; • the controller must be installed inside a panel and must not be accessible, to avoid knocks and bumps; • if the device is used in a way not specified by the manufacturer, its rated protection may be affected; • in the event of faults on the controller and the optional cards, only contact CAREL for repairs; • only fit optional cards and connectors supplied by CAREL. pLoads does not provide protection against short-circuits and overloads, consequently suitable protection devices must be installed on the power supply lines (2.5 AT fuses) and 230 Vac digital input lines (500 mAT fuses). pLoads is not a device that guarantees electrical safety, but rather suitable operation: to prevent short-circuits from causing fire in the electrical panels, the customer must install appropriate electromechanical protection devices on the lines in question (fuses or the like). In addition, the type of software dos not guarantee electrical safety. 57 pLoads - +040000131 - rel. 1.3 - 05.06.2013 ENG 12.2 Uploading the application program When a new software release becomes available, the application program can be loaded to the flash memory in different ways: 1. by key: • smart key PCOS00AKY0; • USB pen drive; 2. by PC: • 485 serial port (28.8 kbps and 115.2 kbps) using USB-485 adapter code “CVSTDUTLF0”; • USB slave. To upload via PC, the “pCO Manager” manager program is available free-of-charge on the website ksa.carel.com. USB port operation pLoads features two different USB ports (host and slave), to be used during installation and diagnostics. Note: two USB ports can not be used simultaneously and have different capabilities. Otherwise the right functioning of pLoads, is not assured. The host port can be connected to USB storage devices (pendrive, portable hard disk, etc. with maximum current 200 mA) for performing a series of operations: • upload to pLoads files in the removable drive: application, parameters in buffer memory, configuration files for logs, BIOS. • download files from pLoads to the removable drive: application, parameters in buffer memory, data log, BIOS. To access the menu used to manage the contents of the removable drive connected to the host port, simply hold ALARM+ENTER for a few seconds, until the first BIOS system screen is shown. Selecting the FLASH/USB MEMORY item and then USB PEN DRIVE accesses the main menu used to choose the operation, upload or download. When selecting UPLOAD, a further option is shown to specify manual access to the contents of the pen drive (browsing the directories and files) or automatic access (direct access to the configuration files). In addition, if the peripheral connected contains a file called AUTORUN.TXT that is compliant with the corresponding specifications, the terminal will automatically show a screen for the direct activation of the specific function this refers to. The DOWNLOAD option is used to download the application, the logs, the parameters and the BIOS. Note that during the upload and download procedures through the host port, operation of the pLoads BIOS is limited solely to USB management. The USB slave port can be connected directly to a PC, without needing additional devices. To use this function, the pCO Manager software is required. The following operations are available through this port • upload files to pLoads, • download data to the PC from pLoads, • manage the NAND flash, • commissioning. Applications or BIOS can be uploaded through the slave port. The application includes any files relating to the parameters in the buffer memory and any configuration files for acquiring the logs. The download operations allowed are all those featured in pCO Manager, that is, downloading the logs and the contents of T and P memories. The slave port connection can also be used to manage the NAND flash, with the possibility to upload/download the files, delete files or completely format the memory. The same port can also be used for commissioning, as long as a suitable application is used, together with the information contained in the .2cf file. pLoads - +040000131 - rel. 1.3 - 05.06.2013 58 ENG 12.3 Power supply A class II safety transformer with a minimum rating of 50 VA and a 2.5 AT fuse must be used in the installation to supply just one pLoads controller. The power supply to the pLoads controller and terminal (or pLoads controllers and terminals) should be separated from the power supply to the other electrical devices (contactors and other electromechanical components) inside the electrical panel. If the secondary of the transformer is earthed, make sure that the earth wire is connected to terminal G0. This is true for all the devices connected to the pLoads. If more than one pLoads controller is connected, make sure that the G and G0 references are observed (G0 must be maintained for all boards). 12.4 Technical specifications Physical specifications dimensions assembly pLoads Compact pLoads Large all the versions are available on 6 DIN modules, Large version installable on 18 DIN modules, 105x115x60 mm 110 x 315 x 60 mm DIN rail Tab. 12.a Plastic case • Fitted on DIN rail in accordance with DIN 43880 and IEC EN 50022; • Material: technopolymer; • Flammability (pLoads Compact): V2 (UL94) and 960°C (IEC 695); • Flammability (pLoads Large): V2 (UL94) and 850 °C (in accordance with IEC 60695); • Ball pressure test 125 °C; • Resistance to creeping current ≥ 250 V • Colour grey RAL7035 Electrical specifications DC power supply AC power supply Maximum power CPU Program memory (FLASH) Working cycle duration Clock Clock precision Battery specifications pLoads Compact pLoads Large 48 Vdc (36 Vmin to 72 Vmax) 28 to 36 Vdc +10/-20% 24 Vac +10/-15 %, 50/60 Hz 14 VA/11 W 45 VA/20 W H8SX/1651 32-bit, 50 MHz 2+2 MBytes average 0.5 s Available as standard and integrated into main board 100 ppm lithium button battery code CR2430 voltage 3 Vdc (size 24x3 mm) Tab. 12.b Analogue inputs Max. cable length Analogue conversion CAREL NTC -50T90 °C; R/T 10 kΩ at 25°C or HT NTC0T150 °C 0 to 1 Vdc voltage 0 to 5 Vdc ratiometric 0 to 10 Vdc voltage 0 to 20 mA or 4 to 20 mA current PT1000 -100T200 °C; R/T 1000 Ω at 0 °C Classification of measuring circuits (IEC EN 61010-1) Total 10 m 10-bit A/D converter embedded in CPU pLoads Compact pLoads Large --B1, B2, B3 B1, B2, B3, B6, B7, B8 B1, B2, B3 B1, B2, B3, B6, B7, B8 B1, B2, B3 B1, B2, B3, B6, B7, B8 B1, B2 B1, B2, B3, B6, B7, B8 ---3 6 Tab. 12.c Warning: the 21 Vdc available at terminal +Vdc (J2) can be used to power any active probes; the maximum current is 60mA for pLoads Compact, 150mA for pLoads Large (protected against short-circuits). To power the 0 to 5 Vdc ratiometric probes, use +5 VREF, maximum current available 60 mA (protected against shortcircuits). Only use these voltages to power the active probes connected. 59 pLoads - +040000131 - rel. 1.3 - 05.06.2013 ENG Digital inputs Max. cable length Type Power supply Multifunction analogue inputs Fast digital input Normal digital input Total 10 m Not optically-isolated, voltage-free contact Internal pLoads Compact pLoads Large --ID1 (opto-isolated) B5 (not opto-isolated) 1 18 2 18 Tab. 12.d Warnings: for DC digital inputs (Vdc), either the + or the - can be connected to the common (IDC1). the rating of the external contact connected to the digital inputs must be at least 5 mA. Digital outputs type pLoads Compact pLoads Large maximum number 6 14 To simplify wiring, the common terminals of some relays have been grouped together, depending on the insulation distance. Within a group, the relays only have basic insulation between them and thus must be powered at the same voltage (generally 24 Vac or 110 to 230 Vac). Between groups there is reinforced insulation, thus the groups can be powered at different voltages. Make sure that the current running through the common terminals does not exceed the rated current of an individual terminal, that is, 8 A. Minimum relay contact current: 50 mA. Insulation distance The relay outputs have different features, depending on the model of pLoads. The outputs can be divided into groups. Between groups (cells in the table) there is double insulation and consequently these may have different voltages. There is also double insulation between each terminal of the digital outputs and the rest of the controller. The relays belonging to the same group (individual cell in the table) have basic insulation and therefore must have the same power supply (24 or 230 Vac). Makeup of the group group group group group group group group group group groups 1 2 3 4 5 6 7 8 9 10 Large 1-3 4-6 7 8 9-11 12 13 14 15 16-18 Relay type Type A Type A Type A Type A Type A Type A Type A Type A Type A Type A Changeover contacts Switchable power SSR outputs Compact 1 2 3-7 Relay type Type A Type A Type B pLoads Large: relays 8, 12, 13, 14 and 15 (total 5) pLoads Compact: relay 1 (total 1) - - - - type A relay SPDT relay: UL873: 2.5 A resistive, 2 A FLA, 12 A LRA, 250 Vac, C300 pilot duty (30,000 cycles) EN60730-1: 2 A resistive, 2 A inductive, cos-fi =0.6, 2 (2) A (100,000 cycles) type B relay SPST relay: UL873: 1 A resistive, 1 A FLA, 6 A LRA, 250 Vac, D300 pilot duty (30,000 cycles) EN60730-1: 1 A resistive, 1 A inductive, cos-fi =0.6, 1 (1) A (100,000 cycles) pLoads Large: relays 7, 12 and 14 or 7, 12, 14 and 15 (total 3 or 4) working voltage: 24 Vac/Vdc; maximum power: 10 W, resistive load working voltage: 110/230 Vac/Vdc; maximum power: 10 W, resistive load pLoads - +040000131 - rel. 1.3 - 05.06.2013 60 - - ENG 12.5 Other features Operating conditions Storage and transport conditions Index of protection Environmental pollution Class according to protection against electric shock Period of stress across the insulating parts Type of action Type of disconnection or microswitching Category of resistance to heat and fire Immunity against voltage surges Ageing characteristics (operating hours) Number of automatic operating cycles Software class and structure Category of immunity to voltage surges -10T60 °C, 90% RH non-condensing -20T70 °C, 90% RH non-condensing IP40 on the front panel only 2 to be integrated into Class I and/or II appliances long 1C microswitching Category D (UL94–V0) Category II 80,000 100,000 (EN 60730-1); 30,000 (UL 873) Class A Category III (IEC EN 61000-4-5) Tab. 12.e The device is not designed to be hand-held. Guidelines for disposal • • • • • Do not dispose of the product as municipal waste; it must be disposed of through specialist waste disposal centres. The product contains a battery that must be removed and separated from the rest of the product according to the instructions provided, before disposing of the product. Improper use or incorrect disposal of the product may negative effects on human health and on the environment. The public or private waste collection systems defined by local legislation must be used for disposal. In the event of illegal disposal of electrical and electronic waste, the penalties are specified by local waste disposal legislation. 3 5 4 open 1 6 2 remove the battery 61 pLoads - +040000131 - rel. 1.3 - 05.06.2013 ENG 12.6 Dimensions 115 pLoads Compact 60 105 Fig. 12.a pLoads Large 44 45 110 60 315 Fig. 12.b For further information, see the pCO sistema user manual. pLoads - +040000131 - rel. 1.3 - 05.06.2013 62 Via dell’Industria, 11 - 35020 Brugine - Padova (Italy) Tel. (+39) 049.9716611 - Fax (+39) 049.9716600 e-mail: [email protected] - www.CAREL.com pLoads - +040000131 - rel. 1.3 - 05.06.2013 CAREL INDUSTRIES HQs