1
Project no. 257438
CONTRAIL
Integrated Project
O PEN C OMPUTING I NFRASTRUCTURES FOR E LASTIC S ERVICES
Contrail Software: Installation Guide
Release v1.2
Contrail Consortium
Start date of project: October 1st 2010
Release Date: 1 April 2013
Project co-funded by the European Commission within the Seventh Framework Programme
Dissemination Level
√
PU Public
PP Restricted to other programme participants (including the Commission Services)
RE Restricted to a group specified by the consortium (including the Commission Services)
CO Confidential, only for members of the consortium (including the Commission Services)
Contents
1
Overview
4
2
Installation
7
2.1
Installation steps . . . . . . . . . . . . . . . . . . . . . . . . . . . .
7
2.1.1
Package sources . . . . . . . . . . . . . . . . . . . . . . . . .
7
Setting up package repositories . . . . . . . . . . . . . . .
7
RabbitMQ . . . . . . . . . . . . . . . . . . . . . . . . . . . .
9
OpenNebula installation . . . . . . . . . . . . . . . . . . . .
9
Installing OpenNebula . . . . . . . . . . . . . . . . . . . . .
9
OpenNebula Head Node . . . . . . . . . . . . . . . . . . .
10
Installing VEP . . . . . . . . . . . . . . . . . . . . . . . . . .
11
OpenNebula Worker Node . . . . . . . . . . . . . . . . . .
15
ONE Sensors . . . . . . . . . . . . . . . . . . . . . . . . . .
15
OpenNebula Head Node Continued . . . . . . . . . . . . .
16
ONE Monitor . . . . . . . . . . . . . . . . . . . . . . . . . .
16
REST Monitoring . . . . . . . . . . . . . . . . . . . . . . . .
17
2.1.6
Provider SLA Manager . . . . . . . . . . . . . . . . . . . .
17
2.1.7
Federation . . . . . . . . . . . . . . . . . . . . . . . . . . . .
18
Monitoring Hub . . . . . . . . . . . . . . . . . . . . . . . .
19
2.1.2
2.1.3
2.1.4
2.1.5
1
CONTENTS
Virtual Network configuration . . . . . . . . . . . . . . . .
20
Federation Certification Authority - Root CA and CA Server 21
Federation Web . . . . . . . . . . . . . . . . . . . . . . . . .
3
Public resources
28
31
Bibliography
31
Index
32
2
CONTENTS
3
Chapter 1
Overview
In this document we present a quick set-up guide for the Contrail system.
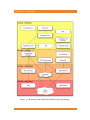
Contrail software packages are divided into four meta-packages:
• contrail-federation
• contrail-provider-common
• contrail-provider-one-head
• contrail-provider-one-node
Each meta-package consists of other software packages that need to be installed
on the machine in order join the Contrail system. Package contrail-federation
should be installed on a machine that will act as federation access point. Installation of this package is given in section 2.1.7.
Package contrail-provider-common should be installed on a machine that will
act as provider’s access point to the federation. Installation of this package is
given in section 2.1.3.
Since Contrail for the first release supports only OpenNebula [4] as IaaS software stack, there are two meta-packages for the IaaS itself: packages contrailprovider-one-head and contrail-provider-one-node should be installed on OpenNebula head and node machines, respectively. Refer to section 2.1.2 for details
on installation of OpenNebula).
The relations between packages are shown in Figure 1.1
4
In the last chapter 3 we list web resources that can help users to start with
Contrail quickly.
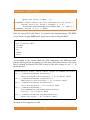
In the further sections we provide step-by-step guide to set-up the Contrail. In
listings like this:
# content of a property file
we give e.g. content of the property file.
When a user needs to provide some input such as write a command in command line, we show this in a yellow box:
echo "Please, install me Contrail!"
5
CHAPTER 1. OVERVIEW
Figure 1.1: Relations and information flow between packages.
6
Chapter 2
Installation
2.1
Installation steps
This is step-by-step installation guide of the Contrail system. In case of any
problems, please refer to the documentation of the component for detailed instructions (Contrail AdminGuide, [1]). In order to install the complete system,
you need to set up three different parts:
• provider head node (for example, the head node of the ONE cluster),
• provider worker node (for example, the worker node in the ONE cluster,
can be the same as head node),
• federation node (different node).
2.1.1
Package sources
This chapter is about getting Contrail binaries for installation and how to proceed in different installation scenarios (CD, Download repositories or Virtual
Machine). You can find in chapter 3 a quick-reference of network URLs where
to get binaries, sources, documentation and support.
Setting up package repositories
In order to include Contrail repositories, select one of the following supported
distributions (Debian 6.0, Ubuntu 11.04 and Ubuntu 11.10, Ubuntu 12.04) and
7
CHAPTER 2. INSTALLATION
add one of the following lines at the end of the /etc/apt/sources.list. Note
that the current state of the Contrail stack works best on the newest versions
of Ubuntu distributions, also on Debian 6.0 with unstable packaging.
Repositories based on official release code:
deb
deb
deb
deb
http://contrail.ow2.org/repositories/binaries/release/Debian_6.0/ ./
http://contrail.ow2.org/repositories/binaries/release/xUbuntu_11.04/ ./
http://contrail.ow2.org/repositories/binaries/release/xUbuntu_11.10/ ./
http://contrail.ow2.org/repositories/binaries/release/xUbuntu_12.04/ ./
Repositories with the nightly builds:
deb
deb
deb
deb
http://contrail.ow2.org/repositories/binaries/testing/Debian_6.0/ ./
http://contrail.ow2.org/repositories/binaries/testing/xUbuntu_11.04/ ./
http://contrail.ow2.org/repositories/binaries/testing/xUbuntu_11.10/ ./
http://contrail.ow2.org/repositories/binaries/testing/xUbuntu_12.04/ ./
Once repositories are added to the list, the following command adds a key for
the repositories:
wget -O - http://contrail.ow2.org/repositories/contrail.pub | sudo apt-key add -
followed by the updating of the repositories
sudo apt-get update
If aptitude packages are installed, you can check whether contrail packages
are available by executing the following command (in order to install aptitude,
use sudo apt-get install aptitude first):
aptitude search contrail
The command should return the list of packages. If the list is empty, either the
repositories or the key are not properly set.
8
2.1. INSTALLATION STEPS
RabbitMQ
The version of RabbitMQ that is required by the Contrail is newer than the
one available in the Ubuntu 11.04 and Debian 6.0 stable repositories. In order to avoid package conflicts between official old version of RabbitMQ included in the named distribution and ones required by the Contrail system,
we recommend to install RabbitMQ directly from the official RabbitMQ page
at http://www.rabbitmq.com/install-debian.html.
2.1.2
OpenNebula installation
In the following installation scenario, we are going to use oneadmin as an OpenNebula user and oneadmin as OpenNebula password for the user. Also, we are
going to use MySQL user root set without password. If your installation is different, please act accordingly. The commands are used for root user. In case
of installing the software under the normal user, use sudo when necessary.
Installing OpenNebula
Installation, configuration and administration of OpenNebula is described in
detail at www.opennebula.org. After installing a basic, functional OpenNebula
(ONE) deployment, follow this guide to join your ONE to a Contrail federation
as an infrastructure provider.
At the moment the Contrail software is developed against OpenNebula v2.2,
thus these instructions refer to the OpenNebula v2.2. Documentation is available at:
• OpenNebula v2.2 documentation
• Planning OpenNebula installation
The guide was tested during the installation of Contrail packages on Ubuntu
11.10 server. On other platforms, different package names and location of
configuration files should be expected.
9
CHAPTER 2. INSTALLATION
OpenNebula head We assume that ONE was already installed, configured
and tested. Here it is described the additional Contrail specific configuration.
On OpenNebula head node, we need to add ONE Contrail user account.
oneuser create contrail contrailpass
Monitoring components send messages about individual VMs to rabbitmq
server, located on ONE head.
apt-get install rabbitmq-server
rabbitmqctl add_user contrail contrailpass
rabbitmqctl set_permissions contrail ".*" ".*"
2.1.3
".*"
OpenNebula Head Node
We start with the installation of the software stack on ONE head node. In our
example ONE head is located at hostname (DNS name) n0004.
To install the software stack that is common for all providers, execute:
apt-get install contrail-provider-common
The package currently contains the following components:
• contrail-provisioning-manager,
• contrail-rest-monitoring,
• xtreemfs-client.
To install software stack that is specific for the ONE cluster, execute:
apt-get install contrail-provider-one-head
This package currently contains the following components:
• conpaas-scalarix-one-manager,
10
2.1. INSTALLATION STEPS
• contrail-one-monitor.
On some system, the following error might occur during the installation of the
contrail-provider-one-head package:
ERROR: Could not find a valid gem ’oca’ (>= 0) in any repository
ERROR: Possible alternatives: oca
1 gem installed
dpkg: error processing conpaas-scalarix-one-manager (--configure):
subprocess installed post-installation script returned error exit \
status 2
To get past that error, use the following command and repeat the procedure.
gem install oca
apt-get install contrail-provider-one-head
Installing VEP
Let us start with the component that currently needs most configuration, VEP.
There are two packages, one with GUI (contrail-vep-gui) and one for CLI
(contrail-vep-cli). We’ve used the CLI version of the component. If you prefer to use GUI version, use the documentation that is available in the Contrail
user guide [2]. If contrail-vep-cli package is not part of the contrail-provider-one-head, yet, you need to install it manually1 .
apt-get install contrail-vep-cli
To check if vep is running use:
ps -x | grep vep
If VEP component is not available, the following error might have occurred
when running:
1 At
time of writing this guide, contrail-vep-cli still was not part of the meta-package.
11
CHAPTER 2. INSTALLATION
root@n0004:~# contrail-vep-cli -d
VEP system properties file and VEP logger properties paths were \
not specified, using the default path for vep properties \
(/root/.vep-cli/vep.properties) and created a new default \
logger properties files
SLF4J: Detected both log4j-over-slf4j.jar AND slf4j-log4j12.jar \
on the class path, preempting StackOverflowError.
SLF4J: See also http://www.slf4j.org/codes.html#log4j\
DelegationLoop for more details.
Exception in thread "main" java.lang.ExceptionInInitializerError
at org.apache.log4j.Logger.getLogger(Logger.java:39)
at org.ow2.contrail.provider.vep.VEPHelperMethods.<init>\
(VEPHelperMethods.java:32)
at org.ow2.contrail.provider.vep.VEPStart.<init>(VEPStart.\
java:85)
at org.ow2.contrail.provider.vep.VEPStart.main(VEPStart.\
java:1048)
Caused by: java.lang.IllegalStateException: Detected both \
log4j-over-slf4j.jar AND slf4j-log4j12.jar on the \
class path, preempting StackOverflowError. See \
also http://www.slf4j.org/codes.html#\
log4jDelegationLoop for more details.
at org.apache.log4j.Log4jLoggerFactory.<clinit>\
(Log4jLoggerFactory.java:49)
... 4 more
To correct this error, edit the script that runs the component and remove the
references to log4j-over-slf4j.jar and slf4j-log4j12.jar:
nano /usr/bin/contrail-vep-cli
remove the topmost two files from the list and save the file.
We need to copy the following files for VEP to work properly:
mkdir /root/.vep-cli/
cp /usr/share/contrail/contrail-vep-cli/vep.properties \
12
2.1. INSTALLATION STEPS
/root/.vep-cli/
cp /usr/share/contrail/contrail-vep-cli/VEPKeyStore.jks .vep-cli/
Once configuration files are copied, edit the vep.properties file and set ONE
user and password, as well as part of the ONE installation details.
cd /root/.vep-cli
nano vep.properties
mysql.pass=contrail
one.ip=
one.port=2633
one.user=oneadmin
one.pass=oneadmin
pdp.use = true/false
contrail.cluster=1
VEP currently expects that ONE cluster exists. This can be made with the
following command:
onecluster create contrail # creates cluster with ID 1
Try running VEP again with calling the script contrail-vep-cli (do not use
switch -d now).
If output of the VEP indicates errors, such as:
/user/gregorb DEBUG dbHandler - Executing query: select * from \
user where username=’fedadmin’
qtp1482258114-21 DEBUG log - EOF org.eclipse.jetty.io.EofException
This indicates that the problem occurs when there is no fedadmin user in
MySQL database (or no user in the table user). To get past this, the following SQL statements are currently missing when running VEP:
root@n0004:~# SQL="use vepdb;"
root@n0004:~# SQL+="insert into ugroup \
13
CHAPTER 2. INSTALLATION
(gname,uid) values (’admin’, 1);"
root@n0004:~# SQL+="insert into user (username,uid,vid,oneuser,\
onepass,oneid,role) values (’fedadmin’,1,-1,0,\
’7bc8559a8fe509e680562b85c337f170956fcb06’,-1,’admin’);"
root@n0004:~# mysql -u root -e "$SQL"
Now, try using VEP with Telnet. As stated in the documentation, VEP REST
server listens on port 10500 while telnet server listens on port 10555.
# use vep-cli via telnet
telnet localhost 10555
locadmin
loc1234
yes
ladmin
l1234
As described in the section about the VEP component, the following commands add requested to properly set the data (datacenter, cluster, rack, host)
that is needed to identify the ONE setup (in the next listing we use ”/” to
break the line):
#noninteractive telnet, check console output if command succeeded
echo -e ’ladmin\nl1234\nadd datacenter\/
ndatac1\nSI\ndc-1-desc\ny\n\n\n’ | nc localhost 10555
echo -e ’ladmin\nl1234\nadd cluster\ncl1\/
n001\n1\ncl-1-desc\ny\n\n\n’ | nc localhost 10555
echo -e ’ladmin\nl1234\nadd rack\nrc1\n1\/
nrc-1-desc\ny\n\n\n’ | nc localhost 10555
echo -e ’ladmin\nl1234\nadd \
host\nn0004\nim_kvm\nvmm_kvm\ntm_nfs\ny\/
nexit\n’ | nc localhost 10555
echo -e ’ladmin\nl1234\nadd fedadmin\n0\n1\n1\/
nhost-vep-1\ny\n’ | nc localhost 10555
To check if all is properly set call:
14
2.1. INSTALLATION STEPS
onehost list
onecluster list
The final step is to make sure that ONE virual networks and images which are
referenced by the OVF should be public. While oneimage can be created onthe-fly by the VEP, onevnet virtual network has to be pre-created and explicitly
published.
onevnet publish 0
This finalizes our installation of VEP.
2.1.4
OpenNebula Worker Node
ONE Sensors
When VEP install is finished, we can continue installing contrail-provider-one-node
package on each ONE node. The package contains the following components:
• contrail-vin,
• scalaris,
• xtreemfs-server,
• contrail-one-sensor
Currently there is a missing dependency on sysstat package, therefore the
installation for ONE worker node looks like:
apt-get install contrail-provider-one-node sysstat
Edit the following configuration and set the address of ONE head node for
RabbitMQ host:
nano /etc/contrail/contrail-one-sensor/one-sensor.config
15
CHAPTER 2. INSTALLATION
Example of the content of the configuration file (changed values only):
rabbit_mq_host = n0004
host_properties_file = /etc/contrail/contrail-one-sensor/hostConfig
This concludes the installation of the ONE worker node.
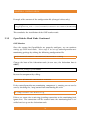
2.1.5
OpenNebula Head Node Continued
ONE Monitor
Once the sensors for OpenNebula are properly configure, we can continue
setting up ONE head node. Next step is to set up contrail-provider-onemonitoring package by editing the following configuration file:
/etc/contrail/contrail-one-monitor/one-monitor.config
Change the host of the federation node (in our case, the federation host is
n0005):
federation_finagle_host=n0005
Restart the component by calling:
/etc/init.d/contrail-one-monitor restart
If the contrail-provider-one-monitroing component is running or not can be
seen by checking the /tmp/contrail-one-monitor.log file with
cat /tmp/contrail-one-monitor.log
If there are errors due to missing/pending connection to the monitoring-hub,
ignore that. The connection will be restored once the monitoring-hub is installed and set up on the federation node.
16
2.1. INSTALLATION STEPS
REST Monitoring
To properly configure contrail-rest-monitoring package, edit the following config file:
/usr/share/contrail/common/rest-monitoring/config
And change the location of the directory with ONE images. The location of
the ONE images depends on the ONE deployed. In our case, the changed part
of the configuration file looks like:
image_cache_dir = /srv/one-images-2
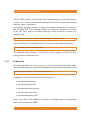
2.1.6
Provider SLA Manager
The Provider SLA Manager communicates with VEP, Provisioning Manager,
and monitoring; so, contrail-provider-common and contrail-vep-cli packages are
a prerequisite. The Provider SLAM is installed through contrail-provider-slamanager package with:
sudo apt-get install contrail-provider-sla-manager
The package contains a custom version of SLA@SOI framework. This include
an OSGI framework, basic SLA@SOI OSGI bundles, Contrail provider SLAM
OSGI bundles, a MySQL DB and the syntax converter (a SLA@SOI component). After installation, all the packages -but the DB- are deployed under
/opt/contrail with the following subdirectories:
• provider-slam/sla-at-soi/osgi-config - Contrail configuration of customized
SLA@SOI
• provider-slam/sla-at-soi/pax-runner - Pax-runner configuration for SLA@SOI
• provider-slam/sla-at-soi/profiles - Pax-runner bundles definitions
• provider-slam/sla-at-soi/syntax-converter - An external SLA@SOI component neeed by SLA@SOI
17
CHAPTER 2. INSTALLATION
All the OSGI bundles, included the four implementing the provider SLAM (
contrail-*.jar), will be automatically downloaded at the first framework startup
from the proper repositories.
An ancillary package of tools is required to perform administrative actions in
the SLA@SOI DB. These include creation of templates, products, and users
in the DB. These tools are installed through contrail-sla-manager-common-tools
package with:
sudo apt-get install contrail-sla-manager-common-tools
After installation, the common tools are installed in the following firectory:
/opt/contrail/slam-common-tools
The common tools package is used for the same purposes also for the SLA
management at federation level.
2.1.7
Federation
Once the providers have been set up, we need to set up the federation node.
The federation software is installed through the contrail-federation package with:
sudo apt-get install contrail-federation
Components in the contrail-federation package are:
• contrail-federation-api,
• contrail-federation-db,
• contrail-federation-id-prov,
• contrail-federation-web,
• contrail-monitoring-hub.
Please note that in the following examples of configuration, our federation
node is located on host n0005.
18
2.1. INSTALLATION STEPS
Monitoring Hub
For basic setup, we need to set the monitoring-hub and the federation-web
components. The monitoring-hub must know where to locate the federation
RabbitMQ. To set this up, we need to configure the following file:
/etc/contrail/contrail-monitoring-hub/config.json
And change the values:
rabbit,enabled=true
rabbit,host=n0005
When configuration is complete, restart the service by calling:
/etc/init.d/contrail-monitoring-hub restart
The following output is an example of a properly set monitoring-hub.
688731 [New I/O server worker #1-7]
monitoring.hub.HubServer$ n0004-xc2-xlab-lan.disk
688731 [New I/O server worker #1-7]
monitoring.hub.HubServer$ n0004-xc2-xlab-lan.disk for
INFO org.ow2.contrail.\
PUT /metrics/route/host.\
INFO org.ow2.contrail.\
New metric for route host.\
provider 1
The easiest way to check if the monitoring-hub is properly set is to use the
stdout for messages. This is obtained by using the following commands:
# To view log file - it is stdout actually, so
/etc/init.d/contrail-monitoring-hub stop
contrail-monitoring-hub
19
CHAPTER 2. INSTALLATION
Virtual Network configuration
Contrail applications are provided with virtual networks. Although most of
the administration of these networks is automatic, it is necessary to provide
some initial information, mostly address and port ranges.
An initial configuration file is provided in
/etc/contrail/vin/controller.cfg
You should verify that the port and address ranges listed in that file do not
collide with any installed software, and if necessary modify the configuration.
For details of the configuration options please refer to the comments in the
configuration file, or to the section on Virtual Network configuration in the
Administrator Guide.
20
2.1. INSTALLATION STEPS
Federation Certification Authority - Root CA and CA Server
The Contrail Federation Certification Authority (CA) consists of a CA Server
(a Tomcat web application) and a Root CA certificate configuration. In this section, we describe the creation of the Contrail Root CA certificate, and installing
the CA Server into Tomcat.
1. Install the CA Server package
NB: Assume that the ca-server package has already been installed with
the federation stack (contrail-federation).
2. Obtain and install an SSL Certificate for the CA Server
This step should be started first, as there may be a delay in getting a
response after sending the certificate signing request (CSR) to the external
CA. In case of such a delay, proceed with step 2, ’Create a Contrail Root
CA certificate’, and return to this step when you have a response from
the external CA.
The CA server needs to secure its communications with clients requesting certificates, for which an SSL server certificate is required. To allow
clients to trust this certificate, the CA Server SSL certificate should be created by a recognised external Certificate Authority. For most purposes,
a certificate obtained from a National Research and Education Network
(NREN), such as TERENA or other regional equivalent, should be adequate.
Create a certificate signing request:
openssl req -newkey rsa:2048 -keyout ca-server-key.pem -nodes \
-out ca-server-csr.pem -subj \
/O=your-organisation/OU=org-unit/CN=<ca-server-fqdn>
Where <ca-server-fqdn> should be replaced by the fully qualified domain name (FQDN/DNS entry) for the host which will be running the
CA server. (Do not type chevrons < or > when actually running any of
the commands described here.) Other DN components such as /O and
/OU may be used for informative purposes, but it is most important that
the /CN value is set to the DNS entry/FQDN for the server.
21
CHAPTER 2. INSTALLATION
This command creates a private key for the CA server in ca-server-key.pem.
The keylength specified on the command line is 2048 bits; if required this
can be changed providing a different value for the newkey option, after
the rsa: prefix. A Certificate Signing Request is created in ca-servercsr.pem, and this should be sent to an external Certificate Authority. The
-nodes argument specifies not setting a pass-phrase on the generated private key.
We do not recommend setting passphrases on server private key files as
this hinders the automatic startup of servers. We encourage protection of
server private keys by setting appropriate filesystem permissions - private
keys should only be readable by their owner.
The external CA will return a SSL certificate (we refer to this as ca-servercert.pem) and the signing chain (certificates leading to the self-signed external Root CA certificate). This certificate chain should be a single PEM
file, starting with the CA certificate which signed the server SSL certificate, followed by any intermediate CA certificates, and finally the Root
certificate of the external CA. We refer to this file as ca-cert-bundle.pem.
If the the server SSL certificate is not in PEM format, convert it into PEM
format using OpenSSL.
Next, run the following commands:
# cat ca-cert-bundle.pem /etc/ssl/certs/ca-certificates.crt > \
/tmp/all-ca-certs.pem
# openssl pkcs12 -export -in ca-server-cert.pem \
-inkey ca-server-key.pem \
-CAfile /tmp/all-ca-certs.pem \
-out /var/lib/contrail/ca-server/ks.p12 \
-caname root -chain
# chown tomcat7.tomcat7 \
/var/lib/contrail/ca-server/ks.p12
The first step ensures that all required CA certificates are available, in
case the ca-cert-bundle.pem file is missing a root CA certificate. The
commands creates a keystore file in PKCS#12 format suitable for use by
Tomcat, containing the SSL private key for the CA Server, and the associated certifcate chain (the CA Server’s SSL certificate and the chain
22
2.1. INSTALLATION STEPS
of signing certificates). The command will prompt for a passphrase to
protect the keystore file - you will need to specify this later as the keystorePass setting in server.xml. If you specify a keystore passphrase of
tomcat, this will match the default setting for keystorePass.
(The command needs root permission to set the ownership to tomcat7.
If you have tomcat6 installed, change the command arguments as appropriate.)
The keystore file output location, specified by the -out argument, should
be the same as the keystoreFile setting in server.xml.
3. Create a Contrail Root CA certificate
The CA Server requires an identity certificate to act as the root of trust in
the Contrail Federation. You need to choose an appropriate value for the
Root CA Subject name.
An example of the format required is::
/DC=your-region/DC=your-project/DC=ca/DC=users
Here, you should substitute the values in the first and second DC fields
with values appropriate to your project.
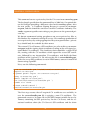
We create the root CA certificate with the following command:
# create-rootca-files \
/DC=your-region/DC=your-project/DC=ca/DC=users
NB There must be no spaces in the argument to this command. Using
a slash symbol ’/’ between components of the subject name is recommended for compatability between OpenSSL and Java.
Root user permission is needed as the generated files are stored with the
ownership of the Tomcat user (either tomcat6 or tomcat7).
The create-rootca-files command above creates the following files in the
directory /var/lib/contrail/ca-server:
File
rootca-key.pem
rootca-cert.pem
ts.jks
Purpose
Private Key for Root CA
Public Key Certificate for Root CA
Lists trusted CAs which issue client certificates
23
CHAPTER 2. INSTALLATION
The command creates a private key in rootca-key.pem and the Root CA
certificate in rootca-cert.pem. The key and certificate are used by the CA
server to create new certificates.
A trustore is created in ts.jks and is used by the CA server to identify
the issuing CAs of client certificates it is prepared to trust. It initially
contiains the Root Certificate for the Contrail Root CA itself, as this can
issue client certificates for testing purposes. When external providers are
later added to the Federation, the CAs which have issued infrastructure
certificates (e.g. to VEP in a provider) can be added to this truststore
with the add-trusted-ca command. The entry for the Contrail Root CA
certificate in the truststore has the entry alias rootca, and the password
for the truststore is tomcat.
The path to the ts.jks file is specified in the truststoreFile parameter of
the second SSL connector defined in the fragment of server.xml (shown
below).
The default lifetime for the CA certificate is 1825 days (˜5 years), and the
private key size is 2048 bits. These values can be changed by editing the
script ’create-rootca-files’ as required.
4. Configure Tomcat connectors for SSL
The CA servlets both provide server authentication to clients connecting
to them. The UserCertServlet can be accessed with (username, password)
authentication, and the DelegatedUserCertServlet requires SSL client certificate authentication.
Comment out any unused Tomcat connectors in <TC DIR>/conf/server.xml,
and add the following connector definitions (NB (this fragment is also
distributed in /etc/contrail/ca-server/tomcat-connector-fragment.xml); if
you have issued the previous commands with the suggested pathnames
and passphrases, you should be able to simply include this file into the
<TC DIR>/conf/server.xml file.
24
2.1. INSTALLATION STEPS
<Connector port="8080" protocol="HTTP/1.1" SSLEnabled="true"
keystoreType="PKCS12" keystorePass="tomcat" keystoreFile=
"/var/lib/contrail/ca-server/ks.p12"
maxThreads="150" scheme="https" secure="true"
clientAuth="false" sslProtocol="TLS"
/>
<Connector port="8443" protocol="HTTP/1.1" SSLEnabled="true"
keystoreType="PKCS12" keystorePass="tomcat" keystoreFile=
"/var/lib/contrail/ca-server/ks.p12"
maxThreads="150" scheme="https" secure="true"
clientAuth="true" sslProtocol="TLS"
truststoreType="JKS" truststorePass="tomcat" truststoreFile=
"/var/lib/contrail/ca-server/ts.jks"
/>
You may, of course, choose ports other than 8080 and 8443 if these are
already in use on your system.
NB If you have used the pathnames specified in the previous openssl
commands, you will not need to change the keystoreFile or truststoreFile
values in the server.xml file.
5. Deploy and Configure the CA web application
You need to configure the CA servlet to use the password set for the
Federation database user. Edit the file <TC DIR>/webapps/ca/WEBINF/classes/META-INF/persistence.xml and change the value of the password property to the password for the database user ’contrail’. The default value for the password is ’contrail’.
<property name="javax.persistence.jdbc.password"
value="contrail"/>
If you have used the pathnames given in the preceeding instructions, you
need do no more configuration. Otherwise, you will need to edit the values used for the properties issuerKeyPairFilename and issuerCertifcateFilename in the file WEB-INF/web.xml
25
CHAPTER 2. INSTALLATION
Restart the Tomcat server:
# service restart tomcat7
(The first restart ensures that the ca.war file has been expanded and the
persistence.xml file has been put in place. The second restart is to read
the new value for the database password. We will find a better way of
doing this.)
6. Adding additional CA certificates to the Federation CA server truststore
When a new server (Provisioning Manager or VEP) is added to a Cloud
in the Contrail Federation, the CA server needs to be configured to accept
requests from it. If the new server’s SSL certificate has been created by
a CA which isn’t already configured, you need to add the CA certificate
(which we refer to as <newCAcert.pem> to the Federation CA server’s
truststore.
# add-trusted-ca /var/lib/contrail/ca-server/ts.jks \
newCAcert.pem newCA
Here, the newCA argument is an alias for the new certificate entry. Adding
the new CA cert allows the new server to authenticate itself to the CA web
application by sending its SSL certificate.
You then need to configure the CA web application to add the Subject
from the new server’s SSL certificate into the allowedCNs property for
the DelegatedUserCertServlet.
Edit the file <TC DIR>/webapps/ca/web.xml:
26
2.1. INSTALLATION STEPS
...
<servlet>
<servlet-name>DelegatedUserCertServlet</servlet-name>
<servlet-class>
eu.contrail.security.DelegatedUserCertServlet
</servlet-class>
...
<init-param>
<description>
Subject fields contain client FQDNs to trust if not set, or empty, trust any client
Separate different Subject fields with a comma see the example param-value below
</description>
<param-name>allowedCNs</param-name>
<param-value/>CN=vep.your-cloud.your-domain</value>
</init-param>
...
</servlet>
You will then need to restart the Tomcat server.
You should see that the Tomcat server is listening on the ports defined
in the Tomcat connector definitions. You can do this by running the
following command:
# netstat -ntlp
This should show the ports 8080 and 8443 are in the LISTEN state, and
the associated program is java, which is running the Tomcat web server.
You can now test certificate creation.
7. Request a certificate from the CA server
If you wish to request a user certificate from the CA server with (username,password) authenticaton, you will need to make sure that the UserCertServlet in <TC DIR>/webapps/ca/web.xml is configured to pick up the
Root CA private key and public key certificate.
27
CHAPTER 2. INSTALLATION
You can then use the get-user-cert command to create a private key and
request a public key certificate from the CA server.
get-user-cert -u contrailuser -p password \
https://one-test.contrail.rl.ac.uk:8080/ca/user
This command will prompt for a passphrase to protect the private key. It
then reports the locations where the private key and user certificate have
been stored.
The ’-T’ argument specifies a truststore containing trusted CA certs, and
’-U’ specifies the passphrase (the default passphrase is shown here). If
the external CA which issued the SSL certificate for the CA Server is not
contained in the default OpenSSL list of trusted CAs, you will have to create a truststore containing the CA bundle which the external Certificate
Authority sent to you in the earlier step.
This concludes the configuration of the Federation CA Server.
Federation Web
The final component that needs to be configured is contrail-federation-web.
Currently, contrail-federation-cli and zookeeper (only a temporary solution)
should be installed manually:
apt-get install contrail-federation-cli zookeeperd
Continue the configuration by setting up the configuration file which is located
at:
/etc/contrail/contrail-federation-web/federation-web.conf.
We need to set up the locations of the federation and provider head nodes. In
our case, the changed values are:
FEDERATION_API_URL = http://n0005:8080/federation-api
SLA_EXTRACTOR_BASE =
http://n0004:8080/rest-monitoring/sla/slaextractor
MONITORING_BASE = http://n0004:8080/rest-monitoring/monitoring
28
2.1. INSTALLATION STEPS
Some parts of the configuration (user data, not install) are not included in
the GUI, yet. The script, which is listed in the following lines, is accessible
on-line2 . The following commands add provider, server, and SLAT (SLA Template) via contrail-federation-cli (provider can be added via GUI; actually
only PROVIDER ID is required for add-server and add-slats commands):
export FEDERATION_IP=n0005
export IP=n0004
export HOSTNAME=n0004
export FEDERATION_CLI_URL="http://n0005:8080/federation-api"
PROVIDER_ADD_DATA=$(contrail-federation-cli add-provider -data "{’name’:\
’CloudProvider2’,’email’:’cloudprovider2.com’,’country’:’UK’,’typeId’:42,\
’providerUri’:’http://$IP:10500’}")
export PROVIDER_ID=$(echo $PROVIDER_ADD_DATA | python -c "import sys; import \
json; print json.loads(sys.stdin.read())[’headers’][’Location’]\
.split(’/’)[-1]")
contrail-federation-cli add-server -providerId $PROVIDER_ID -data "\
{’name’: ’$HOSTNAME’, ’ram_total’: ’3915’, ’ram_used’: ’1152’, \
’ram_free’: ’2763’, ’cpu_cores’: ’4’, ’cpu_speed’: ’2494.276’, \
’cpu_load_one’: ’0.09’, ’cpu_load_five’: ’0.04’}"
contrail-federation-cli add-slat -providerId $PROVIDER_ID -data "\
{’name’: ’XLAB SLAT’, ’url’: ’http://contrail.xlab.si/test-\
files/ubuntu-test-xlab-SLA.xml’}"
Web GUI should now be available at http://n0005/.
The CloudCoordinator can login as coordinator:password. He creates new
users with role FederationUser. New users are able to use provider SLATs
and to deploy their applications (more on this in the User’s Guide).
You can also check if the contrail-federation-api is working properly by
calling (and obtaining non-empty JSON file in response):
apt-get install curl
installed yet
# In case you do not have ’curl’ \
2 http://contrail.xlab.si/test-files/init_fed.sh
29
CHAPTER 2. INSTALLATION
curl http://localhost:8080/federation-api/users # check, by \
querying federation-api rest interface
This conclude the installation steps of the Contrail components. The usage of
the system is described in the User Manual.
30
Chapter 3
Public resources
Here we list available Contrail public resources:
Contrail public Wiki resides here [3]
Contrail Admin guide [1]
Contrail User guide [2]
Contrail Installation guide is this document.
Contrail example files reside here: http://contrail.xlab.si/test-files/
31
Bibliography
[1] Contrail Consortium. Advance Guide: Administering Contrail. Technical
report, 2012.
[2] Contrail Consortium. Advance Guide: Using Contrail. Technical report,
2012.
[3] Contrail consortium. Contrail wiki pages. Website, 2012.
contrail.projects.ow2.org/xwiki/bin/view/Main/.
http://
[4] OpenNebula open-source project. Opennebula 2.2 guides. Website, 2011.
http://www.opennebula.org/documentation:archives:rel2.2.
32