1
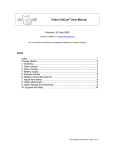
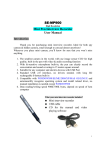
Mini Pen Interview Recorder
User Manual
Intr
roduction
Thank you for purchasing your mini interview recorder. Ideal for both
spy camera & hidden camera, small enough to conceal almost anywhere!
Wherever you place your mini camera, you’ll know for sure that you
won’t miss anything
What your mini interview recorder includes?
●
●
●
Mini interview recorder
USB cable
CD for the manual and video
playing software
●
●
Internal memory:1 GB 2GB or 4 GB
Playback video on PC
Camera Technical Parameter
●
●
●
●
●
●
●
●
●
●
Video compression : AVI video format,352*288
Voice recording: Yes
Internal memory: Yes
Flash:1 GB, 2GB or 4 GB
Video file size; 1.5MB-2MB per min
Recording mode :continuous recording until memory is full or
manually off
Adaptor type: USB adaptor charging cable
Battery type : Lithium-ion
Record time : 1GB Record time 8-10h
Battery use time : about 2-3h
A Quick Look at your Mini Pen Interview Recorder
Features
●
●
●
●
●
●
Dimension:150mm*15mm*15mm
Weight:30g
Tiny size makes it ideal for a variety of uses.
It’s great for use as a hidden camera, spy camera, etc.
Real time recording in AVI video format
Color video with voice lets you clearly see who’s there & hear what
they say.
● Place it up high or conceal it down low. With built-in rechargeable
1
battery so there’s no long cord for you to hide.
Starting your Mini Pen Interview Recorder
2
Step 1:
Press the switch, it turns to yellow. Five seconds later, the light will
become blue, which indicates that the recording beginning.
Step 2:
Press the switch again, it will begin to save data and then turn off, at this
time, the light turns to yellow, reflect that the pen DVR is at standby
status.
Step 3:
Hold down the switch for 5s, then the power switch is off.
Step 4:
Please turn off the pen DVR when being charged. While charging, the
yellow light will be twinkling. The light stops twinkling and the yellow
light keeps on, which means fully charged.
Step 7:
It will turn off itself when the battery has been used up. And will save
the recorded files before automatically shutting down.
Step 8:
This version adds a function which show the video recorder time
(year-month-day hour:minute:second)will be recorded in the recorded
files, and will be shown when playback. Please set the time correctly as
follow:
1.
Edit a .TXT file as (year-month-day hour:minute:second) for
example:2008-05-18 10:08:28
2. Name the txt file as userconfig.txt
3.
Insert the recorder-pen to your computer, copy userconfig.txt to
the root of the U_DISK of the pen.
4.
Remove the pen from your computer, power off the pen, then
power on, now the time will be setting.
5. When complete, the time will be save forever.
NOTE: The time should be reset if you have formatted the pen recorder.
Brief introduction
1. The high fidelity microphone can record the sound around 15
㎡.And the high clear kinescope can help the police and court to get
evidence.
2. The fancy aspect, smooth pen writing function, exchangeable
standard lead is all durable and environmental.
3. Suitable for any computer and electron device with USB port.
USB2.0 standard port, need no drive or circumscribed electric power
source neither.
4. 30W-200W pixels for the camera.
Connect to PC with USB cable
1. Connect the machine to the computer with USB cable. The machine
is in the state of charging while the yellow light is twinkling.(You
can also directly charge the camera using an adaptor accorded with
the specifications of USB).Charging 2 hours is necessary.
2. Function as removable disk when connect the camera to PC,
playback the video files stored flash via the software in the CD.
FAQ
Q : Can the video file which is recording be stored if the battery is out
suddenly during using?
A : Don’t worry . if the battery use off suddenly it will store the
recording video files before it turns off.
Q : How to deal with the situation of system halted?
A : Please use “RESET” button then push the on/off switch , so it will
work again.
Q : Which form can be chosen to format?
A : Please use form “FAT” to format.
Attention
Do not switch “RESET” button when the machine is recording ,
otherwise the data won’t be saved.