1
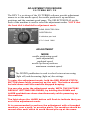
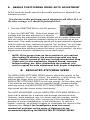
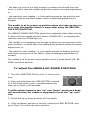
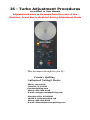
IS - Turbo Adjustment Procedures
As printed in User Manual
Adjustments have to be made from the rear of the
Machine. Front dial is disabled during Adjustment Mode
This document brought to you by:
Cousin’s Quilting
Authorized Nolting® Dealer
306 E. Loucust St.
Lamoille, IL 61330
Cousinsquilting.com
Phone: 815-303-6215
E-mail: [email protected]
Fountain Hills, AZ 85268
16336 E. Palisades Blvd. #9
Phone: 602-502-5705
E-mail: [email protected]
ADJUSTMENT PROCEDURE
I/S-TURBO REV 2.X
The REV 2.x revisions of the I/S-TURBO software provide adjustment
means to set the needle speed, the needle positioner's up and down
positions and the constant speed range. The SELECTOR DIAL on the
back of the machine is used to select the adjustment modes. NOTE that
the front dial is disabled in adjustment mode.
REAR SELECTOR DIAL
POSITION B1
6 stitches per inch
12 o’ clock MAX.
ADJUSTMENT
MODE
needle positioning speed
(auto adjustment)
regulated speed
needle up/down positions
maximum constant speed
The DOWN pushbutton is used to select between increasing
(light off) and decreasing (light on) the settings.
To enter the adjustment mode, hold the RED SINGLE STITCH
BUTTON down while powering up the unit. The button should
be held down until the machine stopped beeping.
You can also enter the adjustment mode, WITH THE FACTORY
DEFAULT SETTINGS RELOADED, by holding the DOWN and
LASER pushbuttons down simultaneously while powering up
the machine.
The light above the LASER button will flash to indicate that you
are in the adjustment mode.
It is recommended to perform the adjustment with a threaded
machine, over a quilt, or practice piece. The machine should be
moved after each stitch to avoid thread pile-up at the same
A.
NEEDLE POSITIONING SPEED AUTO ADJUSTMENT
In this mode the needle speed for the needle positioner is adjusted by an
automatic process.
Note that the needle positioning speed adjustment will affect ALL of
the other settings, so it should be performed first.
1. Turn the SELECTOR DIAL to the B1 position.
2. Push the RED BUTTON. Three short beeps will
indicate that the auto adjustment is about to
start. During the adjustment several stitches will be made. Make sure
that you move the machine between stitches to avoid pile-up at the
same spot. The needle positioning speed will be automatically adjusted
until the take-up lever reaches the optimal "up" position. You will hear
a beep after each stitch where the take-up lever is at this position. If
three consecutive stitches produce the same, correct position, the auto
adjustment is finished, indicated by three short beeps.
NOTE: If the proper take-up lever position is not reached
after taking 20 stitches, the process stops with one long
beep. Possible causes of this may include intermittent drag
(tight spot) in the mechanism, trapped thread, improper
tension setting, etc. After eliminating the problem, you
need to repeat the auto adjustment until proper completion.
B.
REGULATED STITCHING SPEED
The REGULATED STITCHING SPEED directly affects the quality of the
stitch regulation. If you can "outrun" the machine, in other words, the
stitches get longer when you move the machine faster, the
REGULATED STITCHING SPEED is not high enough. On the other hand,
if the stitches are shorter than the selected length, because double
stitching occurs, the REGULATED STITCHING SPEED is too high. Too
high speed can also cause motor overheating.
The AUTO ADJUSTMENT sets the REGULATED STITCHING SPEED to a
level that is optimal for a machine with average mechanical drag.
However, some machines may run slower than the average, usually
during their first month(s) after coming out of the manufacturer, or
because of minor misalignments in the mechanism. In case of a
"tighter" machine, we strongly suggest to investigate the causes of the
tightness first. Only if the investigation does not reveal
mechanical problems as the cause of tightness do we
recommend adjusting the REGULATED STITCHING SPEED.
While all of the other adjustments are "What You See Is What You Get",
the REGULATED STITCHING SPEED setting requires testing outside the
adjustment mode: After changing the speed, return to the normal
operating mode by turning the power off and on again. Test the quality
of the stitch regulation by moving the arm with your slowest and
fastest speed and decide whether further adjustments are necessary.
If yes, return to the adjustment mode and make the changes.
In order to help you in memorizing the settings, and to make the phone
assistance from an IntelliStitch service representative easier, the actual
REGULATED STITCHING SPEED correction is reported by
AUDIBLE INDICATION, a series of short and long beeps every time
you push the RED BUTTON. The relationship between the beeps and
correction steps is shown on the table below. The short beeps are marked
by "●", the long ones by "▬".
AUDIBLE INDICATION
CORRECTION
AUDIBLE INDICATION
CORRECTION
● ● ● 0 ● ● ▬ +1
● ▬ ● +2 ● ▬ ▬ +3
▬ ● ● +4 ▬ ● ▬ +5
▬ ▬ ● +6 ▬ ▬ ▬ +7
The optimum setting of the REGULATED STITCHING SPEED will
be just high enough to provide accurate stitch length, but not
too high to cause motor overheating or double stitching.
Always start with the speed set by the AUTO ADJUSTMENT, and
gradually increase it until acceptable regulation is reached.
To change the REGULATED STITCHING SPEED, follow the procedure
below:
1. Based on the regulation quality test, decide if
the speed needs to be increased or decreased.
2. Turn on the DOWN light if the speed needs to be
decreased, turn it off if increasing is necessary.
3. With the SELECTOR DIAL at the 6 stitches/inch position, push and
hold down the RED BUTTON. A series of short and long beeps will
report the actual speed correction setting.
4. While still holding the RED BUTTON down, hit the BLACK BUTTON. A
beep will indicate that the speed was increased/decreased and the new
value was stored in the computer's memory. A missing beep indicates
that a high/low limit was reached.
5. Release the RED BUTTON and repeat the procedure from Step 3,
changing the speed by one or two steps at a time.
6. Set the machine in normal operating mode and test the results of the
adjustment.
7. Repeat the procedure from Step 1, if necessary.
C. NEEDLE UP/DOWN POSITION ADJUSTMENTS
The needle position sensor's timing is set at the time of the installation,
there is no need to re-time the sensor. It is recommended, however, to
check the proper timing before the needle position adjustment takes place
To check the sensor timing:
1. While watching the red FAIL light, turn the handwheel very slowly
to the forward direction (counter-clockwise, if viewed from the rear)
until the light comes on. If the light just flashes, turn the handwheel
backward until the light is on again. With fine adjustments of the
handwheel the red light can be constantly turned on.
2. If the red light stays on when the needle is at its lowest position,
the timing is correct, you can proceed to the UP/DOWN POSITION
ADJUSTMENT.
3. If the red light is turned on when the needle is not at the desired
position, please call the manufacturer or IntelliStitch installer for
assistance.
The AUTO ADJUSTMENT sets the NEEDLE UP/DOWN POSITIONS to
levels that are optimal for a machine with average mechanical drag.
However, just like in case of the REGULATED STITCH SPEED, on
tighter machines these positions may be slightly off after the AUTO
ADJUSTMENT. In case of a tighter machine, we strongly suggest
to investigate the causes of the tightness first. Only if the
investigation does not reveal mechanical problems as the cause
of tightness do we recommend to adjust the NEEDLE UP/DOWN
POSITIONS.
The NEEDLE UP POSITION should be readjusted when after pulling it
up with the needle position button (DOWN KEY), or stopping the
machine with the DOWN light off
- the take-up lever is not high enough to release the thread from the
hook, in which case the needle up position needs a forward adjustment,
or
- the machine over-rotates, i.e. the needle passes its top position and
gets too close to the fabric again, when a backward adjustment is
needed.
The needle is at its proper up position when the take-up lever is
at or near the position where it stops after using the RED SINGLE STITCH BUTTON.
The NEEDLE DOWN POSITION should be readjusted when after moving
it down with the needle position button (DOWN KEY), or stopping the
machine with the DOWN light on
- the needle is not stopping low enough to keep the arm securely at the
given position, in which case the needle down position needs a forward
adjustment, or
- the machine over-rotates, i.e. the needle passes its bottom position
and starts coming out of the fabric, when a backward adjustment is
needed.
The needle is at its proper down position when it stops about 1/8" BEFORE its lowest position.
To adjust the NEEDLE UP/DOWN POSITION:
1. Turn the SELECTOR DIAL to the 12 o'clock position.
2. Push and hold down the RED BUTTON. Instead
of a full single stitch cycle, a needle positioning
step (up or down) will be made.
To differentiate between the "up" and "down" positions a beep
will sound when the needle is supposed to be at the "up" position.
3. Check the up or down position of the needle.
4. If the up(down) position is correct, release the RED BUTTON, and
go to Step 1 to check the other position.
5. If the up(down) position is not acceptable, while still holding the
RED BUTTON down, test whether forward or backward adjustment is
necessary:
- Turn the handwheel slowly forward (counter-clockwise, if viewed from
the rear)
- If the take-up lever and the tip of the needle are going TOWARD the
right positions, FORWARD ADJUSTMENT is necessary, so turn the
DOWN light OFF.
- If the take-up lever and the tip of the needle are going AWAY from
the right positions, BACKWARD ADJUSTMENT is necessary, so turn the
DOWN light ON.
6. While still holding the RED BUTTON down, hit the BLACK BUTTON. A
beep will indicate that the new position was stored in the computer's
memory.
7. Release the RED BUTTON. To check the setting you have just adjusted, press and release the RED BUTTON, then press the RED BUTTON
again and hold it down. Go back to step 5.
8. If the setting is correct for the position you have just checked, release the RED BUTTON then press the RED BUTTON again and hold it
down. You are now checking the opposite position. Repeat the procedure until the desired needle positions are reached.
D. MAXIMUM CONSTANT SPEED ADJUSTMENT
1. With the SELECTOR DIAL at the MAX. position,
push and hold down the RED BUTTON. The motor
will start running continuously with the fastest
constant speed.
Note that the RED BUTTON should be held down continuously
during the whole procedure. Make sure you move the machine
to avoid thread pile-up.
2. If the maximum speed needs adjustment, while still holding the RED
BUTTON down, turn on the DOWN light if the speed needs to be
decreased, turn it off if increasing is necessary.
3. While still holding the RED BUTTON down, hit the BLACK BUTTON. A
beep will indicate that the speed was increased/decreased. Repeat the
procedure from Step 2 until the desired maximum speed is reached.
4. Release the RED BUTTON to save the adjusted maximum speed in
the computer's memory.
After the adjustments are made the power should be turned off
and on again to start the unit in normal operating mode.