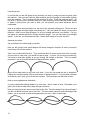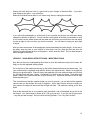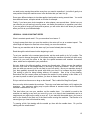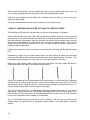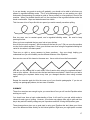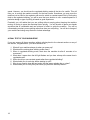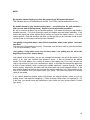
1
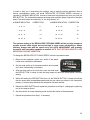
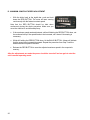
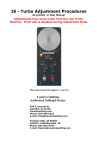
IntelliStitch®
Equalizer User Manual
written by
Helen Baczynski
Zoltan Kasa
Copyright © 2006, Kasa Engineering Services
www.intellistitch.com
INDEX
FEATURES OF THE EQUALIZER
OVERVIEW
2
CONTROL PANELS
3
START/STOP BUTTON
3
NEEDLE POSITION BUTTON
3
MODES OF OPERATION
REGULATED STITCHING MODE
4
CONSTANT SPEED MODE
5
NEEDLE JAM DETECTION
5
ADJUSTMENT MODE
5
QUICK GUIDE TO THE BEEP AND LIGHT SIGNALS
6
QUILTING WITH THE EQUALIZER
DAILY MAINTENANCE AND WARM UP
7
PRACTICE LESSONS
Lesson 1. Getting to know all the features.
8
Lesson 2. Using regulated stitching - minimum effort method.
11
Lesson 3. Using regulated stitching - more practicing
13
Lesson 4. Using constant speed.
15
Lesson 5. Comparing regulated stitching to constant speed.
16
HELP!
19
ADJUSTMENT PROCEDURE
21
FEATURES OF THE EQUALIZER
OVERVIEW
The Equalizer is a motor controller installed on your quilting machine. It consists of a computer
unit mounted on the top of your machine, with front and back control panels, handle switches,
two track sensor wheels and a needle position sensor.
The controller is driven by software embedded inside a microchip. Upgrades of the software are
done by replacing the old program chip with one containing the new version.
The track sensors measure the changing position of the needle as the machine is moved. The
needle position sensor recognizes if the needle is up or down. The stitching mode and other
commands are set on the control panels. The controller uses all this data to determine when a
stitch should be completed and then sends a command to the motor.
The controller moves the needle in and out of the fabric within the shortest distance of machine
movement, minimizing needle flexing. This speed sensitive operation makes the stitching
smooth when the machine is moved slowly, but allows for more powerful, higher speed stitches
when the machine is moved faster. The controller will always tell the machine to make a stitch at
the point of a sharp turn, even if that position does not fall on a selected stitch length. This gives
a sharp looking point every time.
All functions, except turning on the power, can be controlled by either the front or back control
panels. As a safety feature, the automatic lockout keeps track of which control panel is being
used each time. This prevents someone on one side of the machine from inadvertently
switching functions when you are operating the machine from the other side.
Two copies of the setup data (motor speed and needle positions) are stored in the memory of
the controller. This memory retains the data even if the power is turned off. Every time the
machine is turned on a data validity test is performed and the machine goes into normal
operation.
If the data in one block is detected as being corrupted, the other block will be used. If the data in
that block is corrupted, the FAIL light flashes and the machine beeps four times, and the factory
default settings will be restored. This happens very rarely but if it should, then the adjustment
procedure should be followed.
2
CONTROL PANELS
All the controls are active on both sides of the machine. You can turn the regulator on/off, set
stitch length or speed, position the needle from both sides. However, when the black start/stop
button is pushed on one side, the controls on the other side will be disabled, with the exception
of the black start/stop button that acts as an emergency stop.
The type of stitching is determined by how the sliding switch is set on the side where the
start/stop button is pushed. It is important to always glance at the control panel before you start
sewing to make sure it is set correctly. This is especially important if you move from one side of
the machine to the other.
The yellow “ON” light
indicates when the
main power to the
machine is on.
The slider in the middle
is used to set the stitch
length, when the switch
is up, or the constant
speed, when the switch
is down.
The green "RUN" light
indicates
that
the
machine is armed and
ready to sew. The light
flashes
when
the
machine has not been
moved for 4 seconds.
The red "FAIL" light serves as a warning
light. If it flashes when you are using
regulated stitching mode, it is indicating that
the stitches have reached twice the chosen
length and you are moving the machine too
fast. It will be continuously lit when the
controller detects a needle jam.
The mode switch on
the right is where you
choose which stitching
mode you want to use.
Slide the switch up to
select the regulated
mode, down to select
the constant speed
mode.
START/STOP BUTTON
This is the black button on the right handle. It needs to be held down for about a sixteenth of a
second to either start or stop the machine. The machine is protected from accidental starts
triggered by a noise spike on the power line or an accidental hit of the start/stop button.
NEEDLE POSITIONING BUTTON
This is the red button on the left handle, which toggles between needle up and needle down
positions. The needle will return to the position that was set before starting stitching when the
stitching is stopped with the black start/stop switch. If the needle is at the down position when
the start switch is pressed, it will be pulled up before the stitching starts. NOTE that you should
wait without moving the arm until the pull-up is complete to avoid needle flexing and breakage.
3
MODES OF OPERATION
REGULATED STITCHING MODE
The regulated stitching mode is selected when the mode switch is in the "up" position at the
moment when the black start/stop button is pushed.
Although the slider is continuous, there are only eight discreet settings in the regulated
stitching mode. The line on the knob should be aligned with the middle of the bars above the
slider. The bars represent stitch lengths from about 6 SPI (tallest bar) to close to 16 SPI
(shortest bar).
In regulated stitching mode the motor will not start when you press the start/stop button, only the
green run light will come on indicating that the machine is "armed". The motor will start when
you move the machine and will continue to stitch, according to the preset stitch length, until you
stop moving the machine or you press the start/stop button.
If you pause while stitching and do not press the start/stop button, the needle will be pulled up
and the machine will stay armed for about 8 seconds. The motor will start when the machine is
moved again. If you pause for the full 8 seconds, the green run light will begin to flash after 4
seconds and the machine will disarm itself after 4 more seconds. This is a safety feature. The
flashing light will catch your eye and remind you that the machine is armed and will start to sew
if it is jogged by accident. You should keep your fingers away from the needle when the
machine is still armed but not moving. When the machine disarms itself, it will sound one beep.
If you choose to start with your needle down, then the machine will lift the needle out of the
fabric when you press the start button and the green run light will come on. You should wait for
the needle to be lifted before you start to move the machine. The needle will stay up if you
pause while you are quilting. It will only return to the chosen down position when you press the
stop button or when the machine disarms itself.
The stitch regulator keeps the stitches at the selected length no matter how fast or how slowly
you move the machine. However, there is a speed limit and if you move the machine faster than
that limit you will get longer stitches. During your initial practice following the lessons, you will
find out when you reach this speed limit. Some quilters move very quickly when doing freehand
or pantograph quilting and therefore should not use the regulated stitching for that type of work.
Every time a stitch gets longer than twice the selected length, the red FAIL light will be turned
on and a beep will sound. This long stitch indication is turned on not only when you move the
machine too fast, but when there is a sudden speed change, usually at corners or points in a
pattern or when you first start off. You may find that you get some long stitches at first because
you are used to moving quickly through points and at start off in order to prevent a build up of
stitches.
We recommend that you move the machine with a more natural motion using minimum effort.
You will not have to force your machine to quickly change direction anymore, you will be able to
simply guide it.
4
CONSTANT SPEED MODE
The constant speed mode is selected when the mode switch is set to the "down" position when
the black start/stop button is pushed.
When you press the start/stop button the machine will begin sewing immediately. However, if
you choose needle down the machine will lift the needle out of the fabric before starting to sew.
You need to wait for this needle pull up to be completed before moving the machine.
When the slider is set at the left, the machine will run in a pulsed mode. This is the no-drag slow
speed feature, exclusive to IntelliStitch-brand controllers. It eliminates needle flexing and fabric
stretching which happens at extremely slow constant speed. At the leftmost slider position the
machine will take one stitch per second regardless of how fast or how slowly you move your
machine. Moving the slider to the right will increase the number of stitches per second, up to 10
stitches per second. Above 10, the motor runs continuously, with variable speed, determined by
the slider position.
NEEDLE JAM DETECTION
If there is any obstruction that prevents the needle from moving or making a complete stitch, a
slightly more powerful pulse will be applied by the motor to move the needle. If, however, the
motor cannot move the needle, the red fail light will come on, a continuous beep will sound and
the motor will be turned off.
This can happen at very thick seams. If you know a thick seam is causing the jam signal to
sound, then all you need to do is turn the handwheel by hand to raise the needle, move the
machine very slightly and start to quilt again by pressing the start/stop button.
If the needle jam signal goes off for no apparent reason, you need to turn off the main power to
the machine, raise the needle by turning the handwheel and move the machine away from your
work to find the cause of the jam before continuing.
ADJUSTMENT MODE
You should not need to use this, but in the event that your machine loses both its main memory
and its back up memory, you will need to re-set it by running the auto-adjustment.
To get into adjustment mode, hold down the red needle position button while powering up.
Adjustment can only be done at the back of the machine. The light above the laser button will
flash continuously to indicate that you are in adjustment mode.
Adjustment details and instructions can be found at the end of this guide.
5
QUICK GUIDE TO THE BEEP AND LIGHT SIGNALS
AT POWER UP
ONE BEEP - the regulator is ready for operation. The beep will be followed by a needle
positioning cycle. NOTE: if the motor starts running BEFORE the beep sounds, it indicates
system malfunction. When this happens, turn off the machine and call service.
FOUR BEEPS - the set-up memory has been lost or corrupted and the factory default settings
have been restored. The machine has gone into set up mode so that you can re-set it.
REPEATED BEEPS - one of the switches is shorted. Turn off the machine and call service.
CONTINUOUS BEEP WITH FAIL LIGHT - system malfunction. Turn off the machine and call
service.
RUN LIGHT FLASHING – you are in adjustment mode.
WHEN QUILTING
CONTINUOUS BEEP WITH FAIL LIGHT – a jam has been detected.
BEEP AND ONE FLASH OF THE FAIL LIGHT WHILE QUILTING IN REGULATED STITCHING MODE – a long stitch has been detected
ONE BEEP AFTER THE MACHINE HAS NOT MOVED FOR 8 SECONDS WHEN ARMED– the
machine has just disarmed itself
6
QUILTING WITH THE EQUALIZER
This section will not give you definitive instructions on how you should use the different modes
of operation of your Equalizer. There is no one correct way – each quilter will use the features
differently to suit their style. To help you decide how you will use the Equalizer, follow the series
of lessons after the daily maintenance section.
The daily maintenance and warm up are important and you should follow these instructions
each day before you begin to quilt.
DAILY MAINTENANCE AND WARM UP
BEFORE POWER UP
Touch your table to discharge any static.
Move the machine away from any work you have mounted.
Check the cleanliness of the sensor wheels and the rails. Wipe the rails with rubbing alcohol if
necessary and clean the wheels with a cloth. It is important to keep the wheels and rails free of
oil and lint so that they can relay the correct information to the controller. Check that there is no
thread caught around the sensor wheel shafts.
Remove the bobbin and the bobbin case. Unthread the machine to before the take up lever.
Put one or two drops of oil in the bobbin area and at all the oiling points.
POWER UP
When the power is turned on with the main power switch on the top of the machine, the
machine will always take one or more stitches. This is necessary for the needle position sensor
to find its "home" position. Before turning on the power check that there is nothing in the way of
the needle.
While the machine is powering up, sounds and lights give important information. See the Quick
Guide to the Beep and Light Signals page for an explanation.
WARM UP
Before you start a quilting session, it is important to warm up the machine so that it can react
promptly to the signals it receives.
Before running the warm up cycle, make sure you have removed your bobbin case and have
unthreaded the top thread to before your take up lever. Do not leave the take up lever threaded
as its movement can cause the thread to be sucked inside the machine, where it will start to
wind around the shaft beside the handwheel. Since the thread will eventually break, you may be
unaware of the build up inside the machine but it can cause your machine to bind, stitch
erratically and make the motor overheat.
7
To warm up the machine, select constant speed with the mode switch, set the slider to a
medium speed and start the machine. Leave the machine running for about 5 minutes.
PRACTICE LESSONS
This is a series of lessons to help you familiarize yourself with your Equalizer. The lessons
begin by being very detailed in their instructions. As you progress, the instructions become less
detailed as it is assumed that do not need to be reminded when or how to tie off your threads or
advance and baste the sides of your practice piece. Most of the work is done at the front, or
needle side, of the machine. You can repeat the sewing exercises as necessary.
These lessons will give you a good start in using the Equalizer. How you eventually use the
different operating modes is a decision only you can make. Some quilters use the Regulated
Stitching mode all the time, others prefer to use Constant Speed for certain things. There is no
right or wrong way to use the features of the Equalizer. You should use them to suit your style of
quilting.
Follow the page of daily maintenance instructions before starting these lessons.
LESSON 1. GETTING TO KNOW THE FEATURES OF THE EQUALIZER.
FINDING OUT WHAT ALL THE BUTTONS DO AND WHAT THE LIGHTS, BEEPS AND
NUMBERS MEAN.
Mount a practice piece of plain fabric and thread your machine with a contrasting color of thread
so that your sewing can be seen clearly. Read each paragraph through before following the
instructions.
Move your machine to the side of your table away from the practice piece and make sure the
needle is away from the clamps.
Turn off the main power to your machine. Now turn it on again. It will take one stitch and some
beeps will sound and perhaps some lights will flash. What did you hear and see? Do you know
what they mean? If not, refer to the Quick Guide to the Beep and Light Signals page.
Every time you power up, the machine will take one or more stitches. This is simply a selfchecking routine.
Go to the needle side or front of your machine. Move the machine over your practice piece.
Bring the bobbin thread to the top by using the needle position button. Where is the needle
position button? Read the page with the picture of the control panel if you have forgotten. Hold
both thread ends and use the needle position button to take multiple stitches very close together
or on top of one another to secure the ends.
Set your mode switch to the "up" position and the slider to the leftmost bar – what does this
mean? Refer back to the section about the Regulated Stitching Mode.
8
Press the start/stop button. Look at the control panel and watch for the green RUN light to come
on – when you see it, release the button. The machine is now armed and ready to sew but it will
not begin until you move the machine. Sew a line of stitches quite slowly. Stop moving the
machine, then press the black start/stop button to disarm the machine. Watch for the green
RUN light to go out. Now use the needle position button to do repeated stitches to tie off the
threads.
Again, bring the bobbin thread up and take multiple stitches to secure the ends.
Watch for the green RUN light as you press the start/stop button. When you see it come on, you
can release the button. What is the light telling you?
Sew a line of stitches – do not move the machine fast. Stop moving the machine after about 10
stitches but do not press the start/stop button. The green RUN light is still on so what will
happen if you move the machine or even accidentally jog it? Do not move the machine – watch
the green light. What happens after 4 seconds? Why? What happens after 4 more seconds?
The fast flashing of the light reminds you that the machine is still armed and ready to sew, so
keep your fingers away from the needle. The machine will always disarm itself after 8 seconds
of non-movement.
Move the slider to the next bar – what does this mean? Arm the machine – watch for the green
RUN light to come on. Move the machine and sew. After a few inches, pause (stop moving the
machine) and move the slider to the next bar. Move the machine again. What do you notice
about the stitches? Why did they change? Sew a little then pause and disarm the machine.
Move your slider to the shortest bar. Arm the machine and start to sew. Gradually move the
machine faster and faster and watch the FAIL light until you see it flash and hear a beep at the
same time. Sometimes it is hard to hear the beep. Pause then disarm the machine. Look at your
stitches – what was the fail light telling you? Refer back to the Regulated Stitching Mode section
to find out.
Now you’re going to sew in constant speed. What is constant speed? You’d press the button
and the motor would run at a constant speed.
How to select the constant speed mode? Forgotten? Refer back to the picture of the control
panel.
Set your mode switch to the "down" position and move the slider to the middle. Bring your
bobbin thread up and secure the ends just as you’ve done before. Now get ready – as soon as
you arm the machine, it will begin to sew whether it is moving or not. Arm the machine (press
the start/stop button) and move your machine straight away. If you want to go faster, move the
slider to the right. If you want to slow down, move it to the left. You can do this while the
machine is running. Disarm the machine when you are ready.
Set the slider all the way to the left. At this position the machine will sew one stitch per second
regardless of how fast or how slowly you move it. This is called no-drag slow speed. Read the
Constant Speed section for an explanation.
Disarm the machine. Set the mode switch to the "up" position and move the slider to the fourth
bar. Press the needle position button. What happened? Press it again – what happened?
9
This button selects needle down or up. Put the needle down again. Now arm the machine –
remember, watch for the green RUN light to come on. Don’t move the machine. What happened
when the machine became armed? Move the machine and sew a little then pause. Notice that
although you have needle down selected, the needle stays up when you pause. Sew again
then pause and disarm the machine. What happened? The needle only goes down, if you have
it selected, when you disarm the machine not when you pause.
When you select needle down in either regulated stitching or constant speed, you need to wait
for the needle to lift out of the fabric before moving off. When to use needle down will be
covered later.
Get into the habit of glancing at your control panel every time you get ready to arm the machine
to make sure the mode switch and the slider are set where you want them. This is especially
important when you move from one side of the machine to the other.
And now some questions to help you remember the features of Equalizer.
1. When you power up, what does the beep mean? What does the machine always do at
power up?
2. How do you arm the machine?
3. How do you take a single stitch?
4. What do the bars above the slider represent?
5. What is constant speed? Where do you set the mode switch to sew in constant speed?
6. How do you start with needle down? What happens when you arm the machine with the
needle down?
7. What does a flashing red fail light accompanied by a beep mean when you are quilting?
8. When you pause, what happens after 8 seconds of no movement?
10
LESSON 2. USING REGULATED STITCHING - MINIMUM EFFORT METHOD
The instructions in this lesson are less detailed than in lesson 1 as it is assumed that you know
how and when to tie off your threads and, of course, when and how to arm and disarm your
machine. You should advance your practice piece as necessary. Please repeat the individual
exercises if you feel you need more practice at any stage. Read each paragraph through before
beginning to sew.
We recommend to practice the machine movement technique when you first get your Equalizer
as it is important for you to move your machine correctly to get the best results. If you have
been quilting with an unregulated machine for a long time, you are probably skilled at moving off
fast and jerking quickly through points to stop that build up of little stitches. With the Equalizer,
you don’t need to do that anymore – in fact you shouldn’t do that because it will result in long
stitches as the sudden, fast change in speed will be too hard for the regulator to keep up with.
Thread your machine with one that you know works well – this is not the time to try out new
threads. It should be of a contrasting color to the fabric of your practice piece, which should be
already mounted.
Work at the front of your machine.
Start at the top left of your practice piece. Set the mode switch to regulated mode and the slider
to the leftmost bar (about 6 SPI). Secure the thread ends and sew a wavy or undulating line
across the full width of your quilt sandwich. Move the machine at a moderate speed. When you
reach the right hand side, make a U-turn and echo the first line about half an inch below back to
the left edge. Disarm your machine and move the slider to the next bar. Echo again across to
the right side and back to the left. Pause there. Do not disarm your machine. Pause once more
and move the slider to the next bar and continue sewing as before. Repeat this until you reach
the rightmost bar. Disarm your machine.
You have now sewn with all the different sizes of regulated stitches that you might choose when
quilting. Look at your lines of quilting. Are all your stitches even or do you have some longer
stitches where you started off after a pause? If you see long stitches at that point, you were
moving off too fast. When you start out, you need to accelerate slowly. The next exercise helps
you practice this slow start.
Set your slider to the left again. Begin at the left hand side of your piece. This time sew a
straight line for about 6 inches then pause. Continue sewing for another 6 inches and pause
again. Continue sewing and pausing all the way across and back again to the left side. Now
repeat the exercise using all the stitch lengths.
11
How did you do?
If you find that you are still getting a long stitch as you start, try using one hand to gently guide
the machine. Use one hand, then the other and then just the fingertips of both hands to gently
push the machine. This is quilting with the minimum of effort. Guide the machine gently – do
not force it. Since you do not need to keep your finger hovering over the start/stop button, ready
to press it quickly when you want to stop, you can position your hands anywhere that is
comfortable.
Now do a medium sized meander over the rest of the exposed quilting area. Pause now and
again and change the stitch length occasionally too. Vary the speed with which you move the
machine. When you’ve filled the space, tie off your threads and study your stitches. Can you
see where you paused and didn’t change the stitch length? Can you see where you changed
speed? If you can, you accelerated too fast. Which stitch length do you like the best?
Advance your piece.
Set your slider to the stitch length you prefer.
Now you are going to sew some designs with sharp changes in direction in order to learn the
correct way to move the machine.
Sew a row of clamshells like this. They should be about 2 inches across and nicely rounded.
As you come to each point, you should not hear a beep. If you do, you are moving incorrectly.
You need to slow down slightly as you go through the change in direction. This is a natural
movement – do not force the machine to change direction, guide it.
If you did not hear beeps at any point, well done! If you did, just repeat the line of clamshells,
holding your machine gently using its momentum to change direction. If you still hear a beep at
some points, don’t worry, go on to the next exercise. This movement can take time to learn.
Now try some upside down clamshells.
If you are comfortable quilting feathers, try some next. Sew a couple of rows. Remember, your
goal is not to hear a beep at any sharp change in direction.
Now you are going to sew some rows of leaves like this. Trace the design first with your finger if
you are not familiar with this type of leaf vine. There are some spaces to make the design path
clearer, you do not need to leave these gaps when you sew. Listen for the beeps.
12
Sewing this next holly leaf vine is a good test for your change of direction skills. If you don't
hear a beep at any point – very well done!
Make the individual leaves about 3 or 4 inches long, then try making them smaller.
If you quilt with pantographs, go to the back of your machine and choose one with some sharp
changes in direction to practice. You will use the control panel at the back so remember to look
at it to make sure the mode switch and the slider are set where you want them to be and watch
for the run light to come on when you arm the machine. You will also be using your laser light
or stylus.
After you have sewn some of the pantograph, pause and change the stitch length. At the end of
the pass, stop and look at your stitches to see which size you liked the best and how the
different lengths affected the look of the pattern. Which looks the best? Did you hear beeps at
some changes in direction?
LESSON 3. USING REGULATED STITCHING - MORE PRACTICING
Now that you have an understanding about how to move the machine correctly, this lesson will
help you use the regulated stitching mode.
Go to the front of the machine and bring up the bobbin thread and secure the thread ends. Set
your mode switch to regulated mode and the slider to the rightmost bar. Stitch in a straight line
across your practice piece. Start off slowly and gradually move the machine faster until you see
the fail light flash and hear a beep. Sometimes it is hard to hear the beep. Slow down and
pause. Disarm your machine and look at your stitching line. What was that flash of the fail light
and beep telling you?
This is another way that the machine helps you move it correctly – go too fast and the regulator
cannot keep up, the stitches will begin to lengthen. When they become twice the length you
have chosen, the beep will sound and the fail light will flash. The machine is telling you to slow
down.
Start at the left hand side of your practice piece and stitch a row of clamshells as you did in the
last lesson. You should hear no beeps at all. Did you hear any? If you did, look at your points
– why did you hear a beep? Did you notice the fail light flash? If so, why did it do that?
13
Stitch a row of the upside down clamshells too. How did you do this time?
Next quilt some feathers, then a row of the rounded leaves and finally a row of the holly vine.
Did get any long stitches? If you didn’t have any at all – congratulations! If you are still getting
long stitches, don’t worry. Some more practice will help to eliminate them.
Set the slider to the leftmost bar and sew a small meander – make the stitched lines about half
an inch apart. Pause after a little while and change the slider to the next bar then continue
meandering. Continue moving the slider to the right and try the same pattern, until reaching the
shortest stitch length.
Look at your quilting – which meandering looks the best? Notice how the shorter stitch lengths
give smoother curves.
Try some even smaller stippling and compare how the stitch size affects the look of the quilting.
Experiment some more with the different stitch lengths to see which ones you like the best.
Sew some rows of your favorite design either freehand or following a pantograph. Pause to
change the stitch length. Try them all then decide which looks the best to you. This is a
personal decision although it is always best to user a shorter stitch length for a smaller design,
especially one with lots of curves.
Get your favorite straight guide, if you have one. One of the advantages of the Equalizer is
being able to sew slowly and carefully, pausing whenever you need to when using guides or
templates.
Set your slider to the stitch length you prefer. You are going to stitch a zigzag line across your
practice piece. It is helpful to start with your needle down when using a guide as this allows you
to place the guide next to the foot exactly where you want to start quilting.
Secure your thread ends then put your needle down. Place the guide next to the machine’s
foot. If you have not used a guide before, just hold it gently and don’t press it hard against the
foot or the extended base – it is just a guide to stop your machine from wandering away from
the diagonal. Sew up as far as you can along the length of the guide stitching a diagonal line
then pause. Now reposition the guide and sew down the next leg of the zigzag. Continue in
this way across your piece. Notice how the needle does not go down when you pause. You
have needle down selected, so when will the needle stop in the down position?
Now draw a medium sized triangle on your practice piece with a pencil. Use your guide to help
you sew on your drawn lines.
Next draw a simple daisy type flower. Imagine this is an appliqué. You are going to sew next to
your line very carefully. If you have a stitch in the ditch guide, use it to help you guide your
machine. Remember, you can pause when necessary and move as slowly as you need to.
There is no need to keep the machine moving all the time or have your finger ready to stop it –
but you should be used to that by now.
If you do not have a stitch in the ditch guide, you can use a straight edge to help you sew
curves. Hold it gently against your foot and reposition it as necessary when you sew. There is
14
no need to stop moving the machine every time you need to reposition it, just slide it gently to a
new position to help the machine move in the direction that you want it to go.
Draw some different shapes to simulate appliqué and practice sewing around them. You could
draw different leaves, a simple animal or a house for example.
Finally, if you have some circle templates or other shapes, sew around them. Notice how you
can relax as you quilt and only need to pause, not disarm the machine, to reposition your hand.
If you are good at moving off slowly after a pause, you will not be able to tell where you paused
when you look at your finished shape.
LESSON 4. USING CONSTANT SPEED
What is constant speed mode? Do you remember from lesson 1?
It simply means that when you arm the machine, the motor will run at a constant speed. The
stitch length will depend on how fast or how slowly you move the machine.
Power up your machine and do the warm up if you haven't already done so today.
Read through the whole lesson before beginning to quilt.
To set your machine in the constant speed mode, set the mode switch to its "up" position. The
slider is used to change the speed. At its leftmost setting the machine will make one stitch every
second. As you move the slider to the right, the speed increases until reachine its maxium
value, which can be adjusted to your preference.
Set your slider to the leftmost position, secure your thread ends. When you arm the machine
this time it will start to sew straight away so be ready to move the machine. Since it will only
take one stitch per second, you do not need to move off quickly. Move your machine slowly at
first, then gradually increase the speed with which you move it to increase the stitch length.
This setting is good for doing basting stitches, for example. Sew a line of long basting.
Remember that you cannot pause and expect the machine to stop sewing in this mode, so if
you want to pause to admire your stitches, you have to disarm the machine.
Did you notice how there was no drag on the thread? This is called No-Drag Slow Speed.
Now move the slider towards the maximum. The motor runs faster and faster until it reaches the
maximum. Your maximum setting may be quite different to someone else's as the Equalizer
has been customized to suit you.
This time before you arm your machine, set the needle down. You should be used to the
machine not starting to sew until you move it by now, so to have it start immediately can be a
surprise and you might not be ready to move off. If you start with the needle down, you have to
wait for the needle to be lifted out of the fabric before moving the machine. That fraction of a
second gives you time to think and be ready.
Try sewing a little, first starting with the needle up, then with the needle down. Do you like
starting with the needle down?
15
Set the slider at the middle. Put the needle down then arm the machine and start to sew. As
you go along, gradually increase the speed of the motor by adjusting the slider.
Now sew some designs with the slider set at different points so that you get to know your
machine's speed range.
Tie off your threads and move the machine away from your practice piece.
LESSON 5. COMPARING REGULATED STITCHING TO CONSTANT SPEED
This final lesson will help you to decide how you will use all the features of Equalizer.
Every quilter has their own style - some will use the stitch regulator all the time, others may find
that they like to quilt certain designs very fast and so constant speed will be best for those. At
the other extreme, some quilters may find that they only use the stitch regulator when they are
doing careful work where they need control when moving the machine slowly. The way you
choose to use the Equalizer is entirely up to you. Its many modes of operation allow you the
freedom to quilt without stress.
Prepare your machine to sew. If you have not done the warm up today, go through that routine
first.
Remember to glance at your control panel before you start quilting to make sure the mode
switch and the slider are set where you want them to be and to check whether it is armed. This
is especially important when you move from one side of the machine to the other.
Before you begin sewing, take a pencil and mark lines about 12 inches apart and about 6
inches long across the width of your practice piece like this:
Secure your threads at the left hand edge of your practice piece. Set your machine in regulated
stitching mode at a stitch length you like. You will sew a straight line across your quilt. As you
sew across the piece, pause at each line. Continue sewing and pausing all the way across. Tie
off your threads and go back to the left ready to start again.
This time set the machine to constant speed, choosing a speed higher than 10, and do the
same thing - stopping at each line. (Remember that starting with the needle down gives you a
little time after you arm the machine in constant speed before you have to move off as you have
to wait for the machine to lift the needle out of the fabric)
Tie off your threads and look at the three lines of stitching. Can you see by looking at the
stitches where you paused when in regulated stitching mode? How about when in constant
speed?
16
If you are already very good at moving off gradually, you should not be able to tell where you
paused in regulated stitching mode. This is a big advantage when you are working on a quilt
and need to keep pausing to re-adjust a guide or move yourself to a new position in front of the
machine. When your bobbin thread runs out, the evenness of the regulated stitches make the
break unnoticeable. Stops and starts become less visible.
This time sew a line of loops like this at a speed you would normally use when quilting.
Sew two rows, one in constant speed, one in regulated stitching mode, No need to keep
pausing this time.
When you have completed the two rows, look at your stitches.
How do the two rows compare? Which mode was the best for you? Did you move the machine
too fast for the stitch regulator? Were your stitches even when using the regulated stitching but
varied in size when in constant speed?
There are no right or wrong answers to these questions - they are simply helping you
understand how you will ultimately use the different features of the Equalizer.
Now sew two rows of this zigzag in the same way. Use a guide to keep the lines straight.
How did you like sewing this in each mode? Was it easier when using the regulated stitches?
Look at your stitches - which row looks the best and has even stitches? Notice how you had to
keep pressing the stop/start button every time you changed direction when using constant
speed.
Repeat the exercise again but this time sew one of your favorite pantographs. If you do not
usually sew pantograph patterns, do two rows of feathers.
SUMMARY
These four exercises are enough to give you some idea of how you will use the Equalizer when
working on a quilt.
You should now have a basic understanding of how it will work for you and which mode to
choose for each type of quilting. However, your choice may change from quilt to quilt and from
day to day and will certainly change as your experience and skill in using the Equalizer grow.
These lessons have given you a good start in using your Equalizer but don't base your future
use of the different modes entirely on this limited practice. Right now you might prefer constant
17
speed. However, you should use the regulated stitching mode all the time for a while. This will
train you in moving the machine correctly for the best results. Sometimes you may move the
machine just too fast for the regulator and need to switch to constant speed. But by first having
tried to use regulated stitching, you will be sure that your decision to use constant speed for a
particular design or type of quilting is based on good experience.
Eventually you will realize that you are quilting without worrying about keeping the machine
moving or having to press the start/stop button quickly. You will be able to place your hands
anywhere that is comfortable and use minimum of effort to guide the machine. You will be
concentrating on what you are quilting rather than how you are quilting. You will be in charge of
your machine and using every feature to its best advantage.
A FINAL TEST OF YOUR KNOWLEDGE
If you can answer all these questions without referring back to the relevant sections or any of
the lessons, congratulations - you have learned a lot!
1. What will your machine always do when you power up?
2. What does the no-drag slow stitching mode mean?
3. When in regulated stitching mode, what does the machine do after 8 seconds of no
movement?
4. What does it mean when the fail light flashes and you hear a beep at the same time in
regulated mode?
5. When should you use constant speed rather than regulated stitching?
6. What should you do each day before starting to quilt?
7. Why do you need to keep the two tracks, that the sensor wheels ride on, clean?
8. What should you do every time just before you press the start/stop button?
18
HELP!
My machine started beeping very fast after powering up. What does this mean?
This indicates that one of the switches is shorted. Turn off the machine and call for service.
My bobbin thread is lying on the backing fabric – not sinking into the quilt sandwich –
and I can see dots of the top thread. Should I run the adjustment procedure?
No, this is a tension problem, not an Equalizer problem. First make sure that your top thread is
threaded correctly. If it is, then thoroughly clean your bobbin case and bobbin assembly. If the
tension still looks bad, either tighten the top tension or loosen the bobbin tension. You may
need to do both. Only trial and error will show you the right thing to do, but make a note of what
you do so that you can keep a record for future reference.
I am getting a long stitch when I start off and sometimes when I make points. How can I
stop that?
You are moving the machine incorrectly. Remember, use minimum effort to guide the machine
– do not move suddenly – relax.
I am getting a long stitch every now and then when I am quilting and it's not at the
beginning or at a point - what's wrong?
Look closely at the long stitch - do you see a needle hole through the quilt in the middle of the
stitch? If so, then your machine has skipped a stitch - it has not picked up the bobbin
thread. This could happen for a variety of reasons: the hopping foot is too high, the take up
roller is set too high, or your quilt is stretched too tightly. It could also be because the fabric has
a finish of heavy printing, which is slowing the needle slightly as it passes through. Too high
tension setting, small burrs that hold back the thread also may cause skipped stitches. If the
long stitches appear consistently as you move the machine away from you, when working at the
front of the machine, then you should check your timing - the hook may need to be moved
closer to the needle.
If you cannot determine whether these long stitches are skipped stitches, watch as you are
quilting to see if the machine is skipping, i.e. does not make a stitch when it is supposed to. If it
is the case, you should check the cleanliness of your tracks and your sensor wheels. Contact
your dealer.
19
20
ADJUSTMENT PROCEDURE
EQUALIZER REV 1.X
The REV 1.x revisions of the EQUALIZER software provide adjustment means to set the needle
speed, the needle positioner's up and down positions and the constant speed range. The
SLIDER on the back of the machine is used to select the adjustment modes. NOTE that the
front slider is disabled in adjustment mode.
REAR SLIDER
POSITION
ADJUSTMENT
MODE
first bar
needle positioning speed
(auto adjustment)
third bar
regulated speed
fifth bar
needle up/down positions
eighth bar
maximum constant speed
The MODE SELECTOR SWITCH is used to select between increasing (switch up)
and decreasing (switch down) the settings
To enter the adjustment mode, hold the REAR NEEDLE POSITION BUTTON down while
powering up the unit. The button should be held down until the machine beeps once.
You can also enter the adjustment mode, WITH THE FACTORY DEFAULT SETTINGS
RELOADED, by holding the NEEDLE POSITION and START buttons down simultaneously
while powering up the machine.
The green light will flash to indicate that you are in the adjustment mode.
It is recommended to perform the adjustment with a threaded machine, over a quilt, or
practice piece. The machine should be moved after each stitch to avoid thread pile-up at
the same spot.
21
A. NEEDLE POSITIONING SPEED AUTO ADJUSTMENT
In this mode the needle speed for the needle positioner is adjusted by an automatic process.
Note that the needle positioning speed adjustment will affect ALL of the other settings,
so it should be performed first.
1. Move the slider knob to the first bar.
2. Push the RED BUTTON. Three short beeps will indicate
that the auto adjustment is about to start. During the
adjustment several stitches will be made. Make sure that
you move the machine between stitches to avoid pile-up at
the same spot. The needle positioning speed will be
automatically adjusted until the take-up lever reaches the optimal "up" position. You will hear
a beep after each stitch where the take-up lever is at this position. If three consecutive
stitches produce the same, correct position, the auto adjustment is finished, indicated by
three short beeps.
NOTE: If the proper take-up lever position is not reached after taking 20 stitches, the
process stops with one long beep. Possible causes of this may include intermittent
drag (tight spot) in the mechanism, trapped thread, improper tension setting, etc.
After eliminating the problem, you need to repeat the auto adjustment until proper
completion.
B. REGULATED STITCHING SPEED
The REGULATED STITCHING SPEED directly affects the quality of the stitch regulation. If you
can "outrun" the machine, in other words, the stitches get longer when you move the machine
faster, the REGULATED STITCHING SPEED is not high enough. On the other hand, if the
stitches are shorter than the selected length, because double stitching occurs, the
REGULATED STITCHING SPEED is too high. Too high speed can also cause motor
overheating.
The AUTO ADJUSTMENT sets the REGULATED STITCHING SPEED to a level that is optimal
for a machine with average mechanical drag. However, some machines may run slower than
the average, usually during their first month(s) after coming out of the manufacturer, or because
of minor misalignments in the mechanism. In case of a "tighter" machine, we strongly
suggest to investigate the causes of the tightness first. Only if the investigation does not
reveal mechanical problems as the cause of tightness do we recommend adjusting the
REGULATED STITCHING SPEED.
While all of the other adjustments are "What You See Is What You Get", the REGULATED
STITCHING SPEED setting requires testing outside the adjustment mode: After changing the
speed, return to the normal operating mode by turning the power off and on again. Test the
quality of the stitch regulation by moving the arm with your slowest and fastest speed and
decide whether further adjustments are necessary. If yes, return to the adjustment mode and
make the changes.
22
In order to help you in memorizing the settings, and to make the phone assistance from a
service representative easier, the actual REGULATED STITCHING SPEED correction is
reported by AUDIBLE INDICATION, a series of short and long beeps every time you push the
RED BUTTON. The relationship between the beeps and correction steps is shown on the table
below. The short beeps are marked by "●", the long ones by "▬".
AUDIBLE INDICATION
CORRECTION
AUDIBLE INDICATION CORRECTION
● ● ●
0
● ● ▬
+1
● ▬ ●
+2
● ▬ ▬
+3
▬ ● ●
+4
▬ ● ▬
+5
▬ ▬ ●
+6
▬ ▬ ▬
+7
The optimum setting of the REGULATED STITCHING SPEED will be just high enough to
provide accurate stitch length, but not too high to cause motor overheating or double
stitching. Always start with the speed set by the AUTO ADJUSTMENT, and gradually
increase it until acceptable regulation is reached. NOTE THAT SETTINGS ABOVE +3 ARE
RESERVED FOR 50HZ OPERATION.
To change the REGULATED STITCHING SPEED, follow the procedure below:
1. Based on the regulation quality test, decide if the speed
needs to be increased or decreased.
2. Set the mode switch up if the speed needs to be increased,
set it down if decreasing is necessary.
3. With the slider knob at the third bar, push and hold down
the RED BUTTON. A series of short and long beeps will report the actual speed correction
setting.
4. While still holding the RED BUTTON down, hit the BLACK BUTTON. A beep will indicate
that the speed was increased/decreased and the new value was stored in the computer's
memory. A missing beep indicates that a high/low limit was reached.
5. Release the RED BUTTON and repeat the procedure from Step 3, changing the speed by
one or two steps at a time.
6. Set the machine in normal operating mode and test the results of the adjustment.
7. Repeat the procedure from Step 1, if necessary.
23
C. NEEDLE UP/DOWN POSITION ADJUSTMENTS
The needle position sensor's timing is set at the time of the installation, there is no need to retime the sensor. It is recommended, however, to check the proper timing before the needle
position adjustment takes place.
To check the sensor timing:
1. While watching the red FAIL light, turn the handwheel very slowly to the forward direction
(counter-clockwise, if viewed from the rear) until the light comes on. If the light just flashes,
turn the handwheel backward until the light is on again. With fine adjustments of the
handwheel the red light can be constantly turned on.
2. If the red light stays on when the needle is at its lowest position, the timing is correct, you
can proceed to the UP/DOWN POSITION ADJUSTMENT.
3. If the red light is turned on when the needle is not at the desired position, please call the
manufacturer for assistance.
The AUTO ADJUSTMENT sets the NEEDLE UP/DOWN POSITIONS to levels that are optimal
for a machine with average mechanical drag. However, just like in case of the REGULATED
STITCH SPEED, on tighter machines these positions may be slightly off after the AUTO
ADJUSTMENT. In case of a tighter machine, we strongly suggest to investigate the
causes of the tightness first. Only if the investigation does not reveal mechanical
problems as the cause of tightness do we recommend to adjust the NEEDLE UP/DOWN
POSITIONS.
The NEEDLE UP POSITION should be readjusted when after pulling it up with the needle
position button
-
the take-up lever is not high enough to release the thread from the hook, in which case the
needle up position needs a forward adjustment, or
-
the machine over-rotates, i.e. the needle passes its top position and gets too close to the
fabric again, when a backward adjustment is needed.
The NEEDLE DOWN POSITION should be readjusted when after moving it down with the
needle position button
-
the needle is not stopping low enough to keep the arm securely at the given position, in
which case the needle down position needs a forward adjustment, or
-
the machine over-rotates, i.e. the needle passes its bottom position and starts coming out of
the fabric, when a backward adjustment is needed.
24
To adjust the NEEDLE UP/DOWN POSITONS:
1. Move the slider knob to the fifth bar.
2. Push and hold down the RED BUTTON. A needle
positioning step (up or down) will be made.
To differentiate between the "up" and "down"
positions a beep will sound when the needle is supposed to be at the "up" position.
3. Check the up or down position of the needle.
4. If the up(down) position is correct, release the RED BUTTON, and go to Step 1 to
check the other position.
5. If the up(down) position is not acceptable, while still holding the RED BUTTON down,
test whether forward or backward adjustment is necessary:
-
Turn the handwheel slowly forward (counter-clockwise, if viewed from the rear)
-
If the take-up lever and the tip of the needle are going TOWARD the right positions,
FORWARD ADJUSTMENT is necessary, so set the mode switch up.
-
If the take-up lever and the tip of the needle are going AWAY from the right
positions, BACKWARD ADJUSTMENT is necessary, so set the mode switch down.
6. While still holding the RED BUTTON down, hit the BLACK BUTTON. A beep will indicate
that the new position was stored in the computer's memory.
7. Release the RED BUTTON. To check the setting you have just adjusted, press and
release the RED BUTTON, then press the RED BUTTON again and hold it down. Go
back to step 5.
8. If the setting is correct for the position you have just checked, release the RED BUTTON
then press the RED BUTTON again and hold it down. You are now checking the
opposite position. Repeat the procedure until the desired needle positions are reached.
25
D. MAXIMUM CONSTANT SPEED ADJUSTMENT
1.
With the slider knob at the eighth bar, push and hold
down the RED BUTTON. The motor will start running
continuously with the fastest constant speed.
Note that the RED BUTTON should be held down
continuously during the whole procedure. Make sure you
move the machine to avoid thread pile-up.
2.
If the maximum speed needs adjustment, while still holding the RED BUTTON down, set
the mode switch up if the speed needs to be increased, set it down if decreasing is
necessary.
3.
While still holding the RED BUTTON down, hit the BLACK BUTTON. A beep will indicate
that the speed was increased/decreased. Repeat the procedure from Step 2 until the
desired maximum speed is reached.
4.
Release the RED BUTTON to save the adjusted maximum speed in the computer's
memory.
After the adjustments are made the power should be turned off and on again to start the
unit in normal operating mode.
26