1
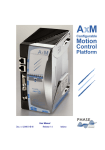
User Manual
Doc. n. 02490-0-B-M
Release 1.4
English
SUMMARY
1
Drive’s overall outline
1.1
1.2
2
Overall dimensions and space required for installation .....................................4
Mounting options................................................................................................5
Content of the package
2.1
2.2
3
4
10
What you need for first tests ............................................................................10
Minimum connections outline:..........................................................................10
Start up.............................................................................................................11
Basic Parameters Configuration ......................................................................12
Auxiliary Supply Setting ...................................................................................14
“Default” Mode .................................................................................................15
Settings ............................................................................................................16
Use of the PLC Application ..............................................................................17
Firmware uploading .........................................................................................20
Electric Installation
4.1
4.2
4.3
4.4
6
The standard package contains.........................................................................6
Software supplied ..............................................................................................6
First installation and tests
3.1
3.2
3.3
3.4
3.5
3.6
3.7
3.8
3.9
4
21
Connections general outline ............................................................................21
EMC Filter ........................................................................................................23
Causes of derating...........................................................................................24
Phisical specifications ......................................................................................25
5
Technical specifications
26
6
Electrical Performances
27
6.1
6.2
6.3
2
Output current derating, vs. room temperature................................................27
Operating area AX-M 04094............................................................................28
Operating area AX-M 06144............................................................................29
7
Hardware description
7.1
7.2
7.3
7.4
7.5
7.6
7.7
8
Power stage:....................................................................................................31
Connectors.......................................................................................................31
Overall connections diagram ...........................................................................32
Hardware .........................................................................................................32
Architecture......................................................................................................33
Led display.......................................................................................................33
Diagnostic ........................................................................................................35
Electrical Connections
8.1
8.2
8.3
8.4
8.5
8.6
9
10
11
54
AxM drive’s alarm list.......................................................................................54
CE conformity
11.1
11.2
11.3
11.4
11.5
11.6
11.7
11.8
52
General Informations .......................................................................................52
Emergency stop with inertial loads; safety brakes...........................................52
Power fail with high energy load ......................................................................53
Thermal protection delay .................................................................................53
Error codes
10.1
37
User Connectors (U1 /U2) ...............................................................................38
Encoder Connector (E1) ..................................................................................41
CAN connector (C1) ........................................................................................48
Power Connectors (P1 / P2) ............................................................................49
RS232 Serial Connector (S1) ..........................................................................50
Connection Example........................................................................................51
Emergency and power fail condition handling
9.1
9.2
9.3
9.4
31
58
Introduction: EC directives...............................................................................58
LVD Directive...................................................................................................59
Product safety..................................................................................................59
Application as directed – Scope of application ................................................59
Installation........................................................................................................59
EC Declaration of Conformity and Directive EMCD ........................................60
Installation as specified....................................................................................61
EC Declaration of conformity ...........................................................................62
3
1
Drive’s overall outline
1.1 Overall dimensions and space required for installation
4
Install inside a switchboard avoiding any obstacle for cooling fan air flux. To avoid any
derating of the product performance, do not place objects less than 10 mm from the
cooling plateside. (see par. 4.3, Performances derating)
Allways check that inner temperature of the switchboard does’nt exceed 40° C (see par.
6.1, Derating diagrams)
1.2 Mounting options
Two mounting options are available:
A) screws fastening B) DIN rails fastening (otional)
When option B is chosen is necessary to mount both the “cable plate” (code PM.03822.0)
and the “DIN rail support” (code PM.03821.0). When the drive is engaged on the DIN rail it
is enough to slide up the support and stop the screw on the cable plate.
5
2
Content of the package
2.1 The standard package contains
The AxM Digital Programmable Drive including:
Firmware for standard application of motor torque and speed control, and predefined parameters table with default settings.
Connectors’ Set:
User Connectors (U1 and U2) with identifiers and polarity keys,
Power connectors (P1 and P2),
Encoder connector (E1),
CAN connector Gender changer (C1).
User’s Manual:
The manual containing AxM installation and use instructions.
Read it thoroughly to the end!
A CD with a copy of the Phase Motion Control Internet Site where You will find:
Cockpit configuration tool with Control Panel e GPlc
Standard application sets
User’s, Software and GPLC Manuals
Firmware and Software copy
Other P.M.C. Drives and Motors Documentation
2.2
Software supplied
Configutation Utility “Cockpit”:
The Configuration Utility allows to create, analyze, modify and copy all parameters useful
for applications and regulations of the drive.
This Utility must be installed on the same Pc further used for AxM drive installation. The
«Cockpit» operates as drive center of control during the installation: it gives access to all
drive functions and parameters: it can identify the unit and its working life and it allows to
copy data in and out the memory in order to duplicate the installation data. Moreover
«Cockpit» is a powerfull diagnostic tool: interfaced with the real time drive recording
function, it allows, by “Control Panel” and “Oscilloscope”, the drive troubleshoouting without
any phisical operation on the drive’s terminals.
6
The software loaded on AxM drives is composed of: Firmware and Application.
Firmware:
The Firmware runs the operative system and all basic drive’s resources: current, speed
and position control rings, protections and diagnostics. A “basic” running mode is
integrated in the firmware: it allows to control motor’s current and speed without any
particular application loaded.. This special “basic application”, planned for usual classic
drive control current, turns AxM in a versatile brushless servomotors digital control.
Main features are:
•
Choice between current or speed control;
•
Standard analog differential (+/-10V) interface use;
•
Internal ramp generastor.
The configuration parameters of the basic features are specified beginning from the
paragraph 3.4.
Further peculiar features of the firmware are:
•
Full digital control of the direct and quadratic current, updated at 8 kHz frequency,
and 2 kHz bandwidth.
•
Digital speed ring with zero real speed, PII2D controller1 with generalized
feedforward.
•
Analog encoder interpolation to increase resolution.
•
Encoder simulation output configuration enabled from applications.
The firmware is originated in the Phase Motion Control Labs and it cannot be altered by the
end user. Periodically firmware updates are released and they are made allowable on the
Internet site http://www.phase.eu Compatibility of new updates with previous applications is
allways assured.
1
PII2D controller: 4 compensation terms are available: proportional (speed), differential
(acceleration), integral (position) and integral of position (to obtain a zero position error).
7
Application:
The Application includes the motion program and the logics runs. Global PLCis the
applications’ developement tool. This tool allows the customer to make his own automation
programs. Within the limits of the allowable I/O and program memory, standard automation
functions of IEC 1131-3 PLC can be used: but they are usable in a so fast tool that a very
refined real-time motion control can be accomplished; moreover a data acquisition function
from two separate encoders is included. The PLC software performs in cycle two different
tasks: one “fast”, used for the motion control functions, with a 4 kHz cycle frequency; the
other “slow” with 125 Hz cycle frequency for all general auxiliary uses. The GPLC language
is so powerfull that very fast functions as positioners, electronic, path control, are easily
executable by the end user. Which can therefore upgrade the AxM to be a control center of
the whole driven system, using his proprietary software entirely protected against imitation
and competition..
Standard applications:
Together with AxM drives, a set of Standard Applications is supplied with source code:
they can be loaded by “Cockpit” (see Software Manual).
In details following applications are supplied:
Speed-V
It is an extended form of the “basic” mode, moreover implementing:
•
Store capacity till 8 complete series of parameters (tasks); enabling to shift from
one set of parameters to another set in running time by digital inputs;
•
Electric shaft;
•
Encoder simulation: allows to emulate a step-motor running with the simulated
encoder resolution, programmable from the application itself.
Positioner
This application allows the use of the AxM drive as programmable multi-position positioner.
The main features of Positioner are:
•
•
•
8
32 positions to be selected by digital inputs. Every position can be configurated:
Position unit is chosen by the final user.
Choice between absolute and incremental offset.
Speed, acceleration and deceleration to be used during motion.
•
•
•
•
Space and time units chosen by the user.
Zero cycle carried out by zero sensor and encoder pulses to get the best precision
and repeatability of the cycle itself.
Jogging.
Limit switch inputs.
The “Basic” Application
Is a starting program suitable for teaching the user to develop its own dedicated
applications. The main features of “Basic” are:
•
•
•
•
Digital and analog encoder support.
Drive enable and control selection trough digital inputs (DI0: Enable, D16: control
selection).
Standard analog differential references +/- 10V.
Parameters’ setting in running time. The parameters allow the configuration of:
♦ current and speed limits, clockwise and counterclockwise.
♦ Different linear ramps for accelerations and decelerations, CW and CCW.
♦ Digital speed ring gain with zero real speed, PII2D controller.
For a detailed description of the features and I/O, please refer to HTML configuration
pages to be opened trough “Cockpit” configuration software.
Everything stricly related to the software, (ring philosophy and implementation, variables’
and parameters’ tables) you can find in the Software Manual.
9
3
First installation and tests
3.1 What you need for first tests
•
•
•
•
•
•
•
•
AxM drive and motor.
Triphase supply 198-465 Vac (not needed for applications programming and loading,
but necessary for drive testing).
22-30 Vdc > 0,6 A supply;
(if drive option “R” is chosen, the 24V feeding is required in case of mains failure
only).
PC with Windows 9x, Me, 2000, NT 4.0 or better, with a RS 232 serial line
RS232 serial cable female-female, null modem
The PC must have installed the Internet Explorer 4.0 browser (present on the CD) or
better;
Minimum 15 Mbyte free space on hard disk.
Software installation:
•
•
•
•
3.2
Insert the supplied CD-Rom in the PC;
If the autorun function is active in the PC, the main application self activates
automatically; if not, open page “index.htm” in the CD root directory with any Internet
browser (e.g. Internet Explorer);
Setup can be activated too by opening the “setup.exe” file present in the folder d:\
setup\axvsetup\disk1;
When setup is finished and PC restarted, the folder “AXV Cockpit” will be added to
the Windows menu “Start->Windows Programs”.
Minimum connections outline:
Programming and configuration:
•
Connect the 24 V supply on “+24 V” and “0 V” of the terminal board (see par. 8.1 for
connections outline of user connector U1).
•
Connect the RS 232 line to PC. In this condition the drive can be asked and
programmed. So far it is not necessary any power feeding.
10
Power connections:
•
Connect the motor terminals to the the A, B and C terminals of the drive’s power
terminal board, according to the sequence specified in the connection outline
supplied with the motor. Connect the power supply to the R, S and T of the power
terminal board (see par. 8.4 for power connection outline P1). The cable shield
must be grounded on both sides, motor and drive, connecting it to the special
screw provided for.
NOTE:
The AxM drives are designed to work with 3 phase supply only, the voltage value must be
less than 460V (+10%). (In case of the “R” option is chosen and the main voltage is lower
than 340 V, an auxiliary 24 V supply is anyhow needed).
WARNING:
Correct performance of the drive requires a braking resistor connection. The internal
braking resistor, normally connected to the power terminal board, can dissipate 10W
only. When a higher dissipation is required, an external suitable resistor must be
connected on the same terminals where the internal one is connected. Minimum and
maximum ohmic values for the external resistor are shown in the par. 4.1.
Position sensor connection:
•
Connect the position sensor to E1 port, through a suitable multipolar shielded cable.
The shield must be grounded on motor side and to connector body on drive
side.
3.3 Start up
After switched on, the drive lights briefly all leds: then, in sequence, led 0 lights about 1
second and led 7 keeps flashing at 1 Hz frequency, thus indicating the correct operation of
the drive.
Start the “Cockpit” configuration tools in order to basic parameters configure
(SysAxM_02_eng.par parameters table), such as those regarding the motor, the encoder
type and specifications, inputs and outputs, speed and acceleration limits.
NOTE: only if the motor is a PMC Ultract II type (except Minact) with ENDAT encoder
you can control the motor without any configuration of the drive.
11
3.4 Basic Parameters Configuration
If the motor isn’t a ultract II 4, 5, 7, 10 o 13 or the encoder is different from the sincos, is
necessary to configure the principal parameters to obtain any motor operation.
To setting this parameters the connection with the drive must be enabled
(232 interface, port S1);
Initially all the parameters are displayed on red, because they are modified only in the PC
side, you can now “read” the actual configuaration or “write” the modiified parameters to
activate the new settings, in both case the parameters are now displaied on black.
To confirm the modifications and to maintain new parameters use the “save” button.
NOTE: The “Write All” selection enable the tranfer of the visualized parameters only, but
the “save” selection enable the storing of all the parameters.
The main parameters you must set are the poles number of the motor, the type and pulse
number of the encoder. You have also the nominal and limit current.
12
This is the example for UL T motor with Endat encoder
To activate the encoder simulation, on the C1 port, select SYS_SE_ENABLE = ON; in the
“default mode” it can repeat only 1024 pulses per turn.
A detailed description of the drive parameters see Software manual Cap. 4
To verify the motor to drive connections and the settings there is the “Monitor Page”:
13
In this page you have the DC-link voltage value, the heat-sink temperature and the
encoder reading values: position and turn number. Turning clockwise the motor shaft (drive
diabled)
You must read a position increment, up to 65535 that is the maximum. When one turn is
completed you must read the initial value in the position number and the initial value +1 in
the turn number.
3.5 Encoder Supply Setting
The new AxM drives product starting from the second half of the 2006, with serial number
type 20XXXX, are able to automatically select the encoder supply. If the main encoder
parameter (SYS_ENC1_TYPE, IPA 18230) is set to ENDAT the encoder supply voltage is
set to 7,5V.
WARNING:
Do not connect any other encoders when the SYS_ENC1_TYPE
parameter is set to ENDAT.
For the older drive, with serial number of 4 number, It is possibible to set the value of the
encoder supply at 5 or 10V by a jumper iside the drive.
To modify the configuration it is necessary to open the
plastic cover removing the two screws in back side of
the drive and set the jumper as follow:
Setting for 5V supply:
Setting for 10V supply:
NOTE:
Using an auxiliary supply of 10V with a sincos or digital encoder or any other sensor with
5V supply can demage the sensor.
14
3.6 “Default” Mode
The “Default” mode allows the use of the drive avoiding any dedicated application loading.
Phase Motion Control
supplies the AxM drive
set for “default” mode
run. This mode allows
the current and speed
motor control.
Commands
and
controls are given by
activation of proper signals to digital inputs, while the current and speed values by analog
inputs. The following table resumes all the input configurations.
Input
Mark
Function
Description
Digital 0
DI0
Digital 1
DI1
Drive
enabling
Digital zero
Digital2
DI2
Inversion
The reference settings are reversed If this input is high.
Digital 6
DI6
Control
Selector
If this input is high the speed control is selected; if not the
current control is selected.
Analog 0
AI0
Speed
reference
When the speed control is selected this analog input changes
the speed reference.
Analog 1
AI1
Current
Reference
When the current control is selected this analog input changes
the current reference.
Drive is enabled on the input rise edge.
All analog references are put to zero if this input is high
Tab. n. 1
The drive activates the digital outputs related to its run state.
Output
Mark
Function
Description
Digital 0
DO0
Drive Ok
This output is enabled when the drive is on and no
alarms is present.
Digital 1
DO1
Run
This output is enabled when the drive activates the set
references.
Tab. n. 2
15
Selecting “Control Panel” you can command the analog and digital input by software
When you take the
control by control
panel the real input
are not used.
3.7 Settings
It is now possible that you need some parameters modification to obtain a right behaviour;
in the “settings” window you can find the main speed loop parameters:
The current loop parameters depend from motor type only. You can have a good settings
following the specification in table n. 3.
16
Gain
Value per UL II
Value per UL T
SYS_IC_P_FAK
SYS_IC_I_FAK
SYS_IC_D_FAK
L x 700
L x 350
0
3000
6000
500
Tab. n. 3
L is the fase inductance value of the motor
The speed loop parameters depend from the load and the transmission type therefore is
possible that you need some settings. For this you can begin incresing the speed gain.
When the motor becomes noisly or instable set this gain near at one half of the actual
values. Use the same procedure for the position gain, looking the positioning overshoot.
The integral gain is needed to keep the position reached with zero speed
NOTE: Instead of the Html pages you can use the parameters tables.
3.8 Use of the PLC Application
In addition to the basic functions of the drive, it could be useful to develop additional
features. Regarding to this Phase Motion Control supplies some standard applications that
generally satisfying the most common control requests. The use of dedicated applications
implies their downloading into the drive and the setting to “PLC” of the “SYS_SEL_MODE”
system parameter.
To looking if an application is now loaded inside the drive select the AxM link, from the
main page of the cockpit, by a click on the picture:
17
In this page are indicated the installed firmware and PLC application releases.
In the same page there are the links to the applications supplied from Phase Motion
Control. Selecting the desired application you will have a new window where you can
directly download the PLC code (press “LOAD” button and follow the istruction).
18
Otherwise choosing the menù “New application / Ax-M drive” from the main page window
all the standard applications are displaied.
In both cases a new application and a new directory will be created inside your PC. Two
windows will ask
You to check the connections and verify the address of the drive therefore the PLC project
will be compiled and downloaded in the drive.
If You want download a old application just created inside your PC, You can open the
parameters table of this application and select “Rebuild application” from the menù
“Application”.
In the application table there are some parameters copied from the System table (Ex.
Current limit, Encoder type, …) and some specifical parameters of the application.
A detailed description of the applications supplied is available in the chap. 6 of the
Software Manual.
NOTE:
Using “Cockpit” configuration interface, it is ever possible to activate/de-activate the
“default” running mode, entering the system parameter SYS_SEL_MODE, IPA 18051
(“Default” activated, “PLC” default de-activated; see also par. 4.3 of the Software Manual).
Any application loaded on the drive will be de-activated until such parameter is reset to
“PLC”.
19
3.9 Firmware uploading
Firmware upgrades are periodically available on the web site www.phase.eu.
New functionality and/or software evolution, processing from Phase Motion Control
laboratories, are fuse and a new firmware version is released.
To upload this, open a system table and select “Load firmware” from “Service” menù; the
follow window will appear:
With “Browse” button select the firmware file to download (Ex. “MPlc2_0.sre”).
Press before “Syncro” and after “Reset” to syncronize the drive.
When “Syncronization executed” appear press “Load” to star the downloading.
NOTE:
The drive will be unusable if any troubles occurs during this operation (Ex. Lost of 24V
supply, PC connection problem, …). You have to repeat the firmware upload in order to bet
back the drive working.
If is not possible connecting the drive with the PC, syncronize it pressing “Syncro” button,
then remove the 24V supply and connect now them.
20
4
Electric Installation
4.1 Connections general outline
Power connections:
Connect power supply to the R S and T terminals of the power connector using a 3 + 1
shielded cable; use one GND screw of the drive to connect the shield.
NOTE:
AxM drives are designed for tri-phase supply only; voltage must be lower than
460V (+10 %).
21
Braking resistor connection:
The internal braking resistor, connected to the power terminal board (P2) can dissipate a
maximum 10W braking power. If the power to dissipate is higher, it becomes necessary the
use of an external resistor of adequate power. To do this, disconnect the internal resistor
and connect the external one on the same terminals. The min and max ohmic values for
such external resistor are:
Model
Min
Max
AX-M 04094
AX-M 06144
AxM 09204
60 Ω
38 Ω
26 Ω
80 Ω
50 Ω
34 Ω
Tab. n. 4
If an external braking resistor is used, the following system parameters must be
configurated: SYS_R_BRAKE (resistance values expressed in ohm, IPA n°18106) and
SYS_PBRAKE_MAX (nominal power values expressed in Watt, IPA n°18107). The
firmware will use these values to activate the thermal protection of the resistor itself. For
further details see chap. 4 of the Software Manual.
Power connection of the Motor:
Connect the phase windings of the motor to the A, B and C terminals of the power
connector (P1) according to the sequence specified in the connection diagram supplied
with the motor and the connection outline shown in par. 8.4.
Use a shielded cable with section suitable for the motor nominal current.
When the connection cable is longer than 15 m, the use of damping inductances in series
with the cable is recommended.
WARNING:
The cable shield must be grounded on both sides, motor and drive, connecting it to
the special screw provided for.
Auxiliary supply connection:
Connect a 24V (22-30V) stabilized voltage, minimum current 0,6A to the connector U1
according to the diagram of par. 8.1.
22
Position sensor connection:
Connect the signals required by the used sensor to the Encoder connector (E1) according
to the relative correspondence specified in the wiring table of par. 8.2.
Use a shielded cable with twisted duplexes, possibly of high flexibility type.
When the connection cable is longer than 25 m, the use of adequate cable section is
recommended in order to avoid excessive voltage drops.
WARNING:
The cable shield must be grounded both to the motor and connecting it to the drive
connector frame.
NOTE:
If the chosen sensor is a Resolver, the cable to be used must have the duplexes
twisted and individually shielded, in addition to the whole cable shield. Connect the
individual shields to the pin 1 of the encoder connector E1, and the whole cable
shield to the frame of the connector.
4.2
EMC Filter
AxM has an internal EMC filter not enough by itself to comply with the EN 55011: but it
allows the choice of a very simple and cheap external filter.
The suggested filter is the FN 251-8-07 of the Shaffner list.
Connect such a filter between mains and drive or drives in case more drives should be
used together.
23
4.3
Causes of derating
Cooling air flux
To assure to the fan the
requested “breathing” and thus
the proper cooling of the heat
sink, the distance between the
heat sink edge and the nearest
flat surface (e.g. other drives,
cabinet wall,…) must be at
least 10mm, as shown in the
following table.
Distance
Derating
0mm
40%
5mm
20%
10mm
0%
The fan is automatically switched on when the heat sink temperature reaches 50° C.
24
4.4 Phisical specifications
Phisical specifications
AxM - 04094
AxM - 06144
AxM - 09204
Unità
Average braking power
with internal resistor
10
W
Power loss with nominal current
1700
J
Thermal capacity
85
95
110
W
Cooling
720
J/C
Dimensions (LxPxH)
Forced ventilation
--
Mass
78.5 x 148 x 167
mm
Ingress Protection
1.32
Kg
Vibrations
IP20
--
Shock
0.5 g all directions, 0-10 Hz
--
Operative temperature
1
g
Phisical specifications
0-40
0-50 with 20% derating
oC
Stock temperature
-20 / +70
oC
Relative humidity
0 - 95%
--
Altitude
0-1000 m;
over 1000 m, current derating 3% every
100 m
--
25
5
Technical specifications
Technical specifications
AxM - 04094
AxM - 06144
AxM - 09204
Unità
Voltage supply
0 - 460
Vac
3 phase
Auxiliary feeeding voltage 1)
22 – 30
Vdc
Corrent required 2)
9
14
20
0 – 400
Frequency
Arms
Hz
Nominal power 3)
2.3
3.3
4.8
KW
Current output,
axis < 100 rpm, S1 4)
4.5 (6*)
6 (8.5*)
9(10*)
Arms
Current output, max speed, S1 4)
3.5 (4*)
4.5 (5*)
6.5(7*)
Arms
Peak current
9
14
20
Arms
Maximum voltage output
Vin x 0.95
Vac
PWM frequency
16
KHz
Efficiency at nominal power 5)
96
96.5
%
Input form factor
9
Vac
3 phase
Maximum braking current
100 % of peak current
--
* If supplied with 230 Vac.
1) Peak value
2) Input bridge losses included
3) Vin =380 Vac, Tamb=40C, Comm. Freq. 8kHz, Vout= Vin × 0.95
4) Auxiliary supply (losses not included)
5) Not stabilized (1 Vpk-pk ripple) > 0.6 A
26
96.5
6
Electrical Performances
6.1 Output current derating, vs. room temperature
% output current variation versus room temperature
27
6.2
Operating area AX-M 04094
Operating area of AxM 04094 drive as function of output voltage, with voltage supply 220V
e 380V.
28
6.3
Operating area AX-M 06144
Operating area of AxM 06144 drive as function of output voltage, with voltage supply 220V
e 380V.
29
6.4 Operating area AX-M 06144
Operating area of AxM 09204 drive as function of output voltage, with voltage supply 220V
e 380V.
30
7
Hardware description
7.1 Power stage:
•
•
•
•
•
•
•
Innovative Ac-Ac converter without DC bus electrolytic capacitor, which provides
instant availability at power-on and correct input current waveform, in line with the
future IEC 555 norm;
Auto tuning of current limit vs. supply voltage and ambient temperature; single drive
for 198-465 Vac supply;
16 kHz carrier power IGBT stage, 16 kHz ripple frequency, built-in full power, limited
duty cycle brake resistor; full power braking chopper;
Forced ventilation controlled by the drive temperature (the fan is turned on only
above 50 oC) to limit dust accumulation; the drive temperature is monitored and
available for programmable cycle self-limiting;
Full power stage intrinsic protection (overtemperature, short circuit to ground and
between motor wires) with fault condition non volatile storage.
Control and power stages have separate and independent power supplies for
emergency shutdown and debugging
Real time temperature observer for each power chip, with adaptive current limit.
7.2 Connectors
High speed sensor interface (E1 andC1)
•
•
two independent inputs, configurable
a main analog/digital encoder input (E1-200 kHz BW) which can be programmed to
receive the following signals:
•
ENDAT serial Encoder (default encoder)
•
SINCOS 5 channel encoder (2 absolute analog tracks, 2 incremental analog
tracks, index)
•
Digital 6 track encoder (3 Hall commutation + 2 incremental + index)
•
Resolver
•
A secondary encoder I/O (C1-500 kHz) which can be programmed as incremental
digital encoder without commutation tracks.
31
WARNING:
The encoder supply can be programmed to 5V or 10V by internal jumper (JP5).
A wrong connection of the encoder may cause its damage. See par. 3.5 for the
correct configuration.
Phase Motion Control recommends the 10V choice and the use of a 7-10V Encoder supply
in order to avoid voltage drop.
•
Encoder simulation output, line driver, with programmable conversion rate with
reference to the main one (allovable on C1 connector)
NOTE: the encoder simulation output can be used alternatevely with the auxiliary encoder
input.
The C1 connector can also be used for Can interface.
See the connection list on par. 8.3
7.3 Overall connections diagram
User Interface (connectorsi U1, U2 and P1):
•
•
•
•
•
2 analog differential programmable inputs
2 analog programmable outputs
8 digital programmable inputs
4 digital programmable outputs
1 Watch-dog relay with N.O. and N.C.
contacts 1A, 250V
See connection tables beginning on Cap. 8
Communications (connectors S1, C1, X3 e X4):
•
serial synchronous interface RS232
•
CanOpen field bus interface
7.4 Hardware
•
•
•
•
32
IP 20 Cabinet protection, with internal RFI shield,
Control and power interfaces with removable terminals and connectors,
Encoder and serial interface with D standard connectors,
Integrated ground bar (4xM4) for shields and groundings.
7.5 Architecture
Dual processor architecture
Non volatile programmable memory area: 256 Kbyte
Processors’ speed: 40 MIPs (DSP) + 25 MIPs (microcontroller)
Task frequency:
- Current and drive monitoring cycle: 8 kHz - Position and speed ring: 4kHz
- Fast task (user programmable): 4 kHz - Slow task (user programmable): 125 Hz
- Position and position target register: 32 bit word
7.6 Led display
Led meaning
During the drive’s normal run, the following operating conditions are monitored on the led
display (more than one led can light together).
Drive condition
Led
on
Drive Disabled
7
SERIAL
Communication
CAN interface
communication *
Current limit
6
5
Lighting mode
Description
1Hz flashing
Drive’s normal run. Disabled.
Always on
Drive’s normal run. Enabled.
Variable frequency
flashing
The drive is connected to a remote PC
through the serial line
Always ON
Drive in OPERATIVE state
Flashing
Drive in PRE-OPERATIVE state
Always OFF
Drive in ERROR Hardware – Bus Off
Variable frequency
flashing
Drive is supplying the maximum current.
* The enable of the CANopen interface select also the Led 6 mode.
33
When the drive is in “alarm” or “error” condition, all run condition signals are cancelled: the
leds show the alarm codes only.
Alarm conditions
Drive
condition
Leds
on
Lighting mode
Description
Alarm
0, 1, 2,
3, 4
1 Hz flashing
The drive is in alarm condition: the binary
code of the active alarm is displayed.
Refer to chap. 10 for codes description.
System
fault
0, 1, 2, 3,
4, 5, 6, 7
1Hz flashing
Boot error
6
Fix
System fault due to a control firmware
error. Check the ground connection
and correct closure of the plastic cover
of the drive.
Ask Phase Motion Control Service.
Starting the system an initialization error
of the control firmware occurred.
Ask Phase Motion Control Service.
A detailed description of all AxM drive alarms is shown on chap. 10.
NOTE:
Moreover the led 6 can be flashing or lighted fix in case of synchronisation and/or firmware
updating.
34
7.7 Diagnostic
General description
The “diagnostic” function enables a test control sequence and allows the setting of drive’s
fundamental parameters avoiding the use of software interfaces.
The use of diagnostic takes place by
pressing the command push buttons
(Symbol Arrow IN) and (Symbol Arrow
OUT)
on the drive.
To have access to the diagnostic press
the
push button for about
2s.
This mode is marked by the led 7 lighted
fix.
We have now two operatve phases.
Selection phase: allows to select the
desired diagnostic test.
Press the key to scroll the
list of allowable diagnostics ascending mode, the key descending mode.
The selection is shown by led 0÷6 in binary code.
e.g.: if diagnostic Nr. 2 is selected (Digital input diagnostic), this should be shown as
follows:
35
The diagnostics presently available are:
Nr
Type
1
2
3
4
5
6
7
8
9
10
11
Encoder diagnostic
Digital input diagnostic
Digital output diagnostic
RS-232 serial baud rate diagnostic
Can baud rate diagnostic
Analog output 0 diagnostic
Analog output 1 diagnostic
Analog input 0 diagnostic
Analog input 1 diagnostic
Dc-bus voltage diagnostic
Power module temperature diagnostic
To exit from diagnostic, keep pressed “minus” key for at least 2 s.
Execution phase: carries out the selected diagnostic test.
Being in the selection phase, keep pressed the key
for at least 2s. The
selected diagnostic is carried out. The led display depends from diagnostic type chosen.
To come back to the selection phase keep pressed the key
2s
enables the parameters changes, if needed, by saving and drive’s reset.
long.
This
To exit from diagnostic pressing both command keys together. The display wil come back
to that of drive’s normal run. In this case the parameters change will not be saved.
NOTE:
The center key allows the drive’s hardware reset.
36
8
Electrical Connections
37
8.1 User Connectors (U1 /U2)
Remuvable Terminal Board, Phoenix 12 pin - cod. FK-MC 0.5/12-ST-2.5
U1
U2
NOTE:
To obtain a good performance of the analog input connect the RxN pin to the reference
(suorce side) and apply the –10/+10V to the RxP pin.
38
USER CONNECTOR U1
N
Name
Type
Function
1
R0P
Analog
input
Direct differential input
+/-10V, Zin = 10Kohm,
if not used connect to GND
2
R0N
Analog
input
Denied differential
input
+/-10V, Zin = 10Kohm,
if not used connect to GND
3
AO0
Analog
output
Programmable output
4
GND
Analog
ground
Reference ground
5
DI0
Digital
input
Programmable input
6.6 kOhm to ground, 20-30 V
6
DI1
Digital
input
Programmable input
6.6 kOhm to ground, 20-30 V
7
DI2
Digital
input
Programmable input
6.6 kOhm to ground, 20-30 V
8
DI3
Digital
input
Programmable input
6.6 kOhm to ground, 20-30 V
9
DO0
Digital
output
Programmable output
10
DO1
Digital
output
Programmable output
11
24V
Auxiliary
supply
Auxiliary supply of
control circuits
12
0V
Auxiliary
supply
Auxiliary supply
negative
Signal description
+/-10V f.s., 5 mA
Analog signals reference
PNP open collector, 24 V,
100mA max
PNP open collector, 24 V,
100mA max
Voltage: 22-30 V
Referred to Pin 12 ( 0V)
Requested current: 500mA.
Digital signal reference
__ key position
39
USER CONNECTOR U2
N.
Name
Type
Function
13
GND
Analog ground
Reference ground
Analog signals Reference
14
R1P
Analog input
Direct differential
input
+/-10V, Zin = 10Kohm, if not used,
connect to GND
15
R1N
Analog input
Denied differential
input
+/-10V, Zin = 10Kohm, if not used,
connect to GND
16
AO1
Analog output
Programmable
output
17
GND
Analog ground
Reference ground
18
DI4
Digital input
Programmable
input
6.6 kOhm to ground, 20-30 V
19
DI5
Digital input
Programmable
input
6.6 kOhm to ground, 20-30 V
20
DI6
Digital input
Programmable
input
6.6 kOhm to ground, 20-30 V
21
DI7
Digital input
Programmable
input
6.6 kOhm to ground, 20-30 V
22
DO2
Digital output
Programmable
output
PNP open collector, 24 V,
100mA max
23
DO3
Digital output
Programmable
output
PNP open collector, 24 V,
100mA max
24
0V
Auxiliary
supply
Auxiliary supply
negative
Digital signal reference
__ key position
40
Signal description
+/-10V f.s., 5 mA
Analog signals Reference
8.2 Encoder Connector (E1)
To allow the connection of different encoders some pins of this connector have more than
one function. Select the connection corresponding to your encoder and set the parameters
SYS_ENC1_TYPE and SYS_ ENC1_CY_REV in the system table (see par. 3.4)
Cannon connector subD 15 pin, male plug
Shield Connection:
To obtain a good connection without noise problems it is necessary to connect the shield of
the encoder cable both on motor and drive side.
Motor side:
connect the shield to the apposite screws or in the terminal board
Drive side:
connect the shield to the connector body.
If You are using a Resover sensor, adopt a cable with individually shielded twisted pairs
and connect all the internal shields to the pin 1 of the connector; connect the external
shield to the connector body.
NOTE:
check paragraph 3.5 for the encoder supply selection
41
Sincos Encoder Connections Table:
Pin
Name
Type
Function
Signal description
1
GND / PTC -
Supply 0V
Supply ground and
thermal sensor
Encoder ground
2
SIN +
Analog input
Encoder absolute
channel
1 Vpp differential
3
COS +
Multifunction input
Encoder absolute
channel
1 Vpp differential
4
COS -
Multifunction input
Encoder absolute
channel
1 Vpp differential
5
SIN -
Multifunction input
Encoder absolute
channel
1 Vpp differential
6
+ Vcc
5V / 7,5V
Auxiliary supply
Encoder supply
Positive supply
voltage
7
ENC A +
Multifunction input
Encoder incremental
channel
1 Vpp differential
42
8
PTC / KTY
Multifunction input
Thermal sensor
PTC or KTY ground
connected
9
ENC_I -
Multifunction input
Encoder index
1 Vpp differential
10
11
---
12
ENC A -
Multifunction input
Encoder incremental
channel
1 Vpp differential
13
ENC B -
Multifunction input
Encoder incremental
channel
1 Vpp differential
14
ENC_I +
Digital input
Encoder index
1 Vpp differential
15
ENC B +
Multifunction input
Encoder incremental
channel
1 Vpp differential
---
Endat Encoder Connections Table:
WARNING:
Maximum cable length with ENDAT encoder 40 mt
43
Pin
Name
Type
Function
Signal description
1
GND / PTC -
Supply 0V
Supply ground and
thermal sensor
Encoder ground
2
---
3
ENDATCLK+
Multifunction input
ENDAT clock
TTL
4
ENDATCLK -
Multifunction input
ENDAT clock
TTL
5
---
6
+ Vcc
5V / 7,5V
Auxiliary supply
Encoder supply
Positive supply
voltage
7
---
8
PTC / KTY
Multifunction input
Thermal sensor
PTC or KTY ground
connected
9
ENDAT
DATA -
Multifunction input
ENDAT data
TTL
10
11
12
13
---------
14
ENDAT
DATA +
Digital input
ENDAT data
TTL
15
---
Digital Line Driver Encoder Connections Table:
44
Pin
Name
Type
Function
Signal description
1
GND / PTC -
Supply 0V
Supply ground and
thermal sensor
Encoder ground
2
---
3
H1
Multifunction input
Hall sensor
TTL
4
H2
Multifunction input
Hall sensor
TTL
5
H3
Multifunction input
Hall sensor
TTL
6
+ Vcc
5V / 7,5V
Auxiliary supply
Encoder supply
Positive supply
voltage
7
ENC A +
Multifunction input
Encoder incremental
channel
TTL
8
PTC / KTY
Multifunction input
Thermal sensor
PTC or KTY ground
connected
9
ENC_I -
Multifunction input
Encoder index
TTL
12
ENC A -
Multifunction input
Encoder incremental
channel
TTL
13
ENC B -
Multifunction input
Encoder incremental
channel
TTL
14
ENC_I +
Digital input
Encoder index
TTL
15
ENC B +
Multifunction input
Encoder incremental
channel
TTL
10
11
45
Resolver Connections Table:
Adopt a cable with individually shielded twisted pairs and connect all the internal shields to
the pin 1 of the connector; connect the external shield to the connector body.
Pin
Name
Type
Function
Signal description
1
GND / PTC -
Supply 0V
Supply ground and
thermal sensor
Encoder ground
2
SIN +
Analog input
Absolute channel
1 Vpp: differential
3
COS +
Multifunction input
Absolute channel
4
COS -
Multifunction input
Absolute channel
5
SIN -
Multifunction input
Absolute channel
PTC + / KTY
Multifunction input
Thermal sensor
PTC or KTY
10
RESEXP +
Analog output
Resolver energising +
8 kHz sinusoidal wave
11
RESEXP -
Analog output
Resolver energising -
8 kHz sinusoidal wave
1 Vpp: differential /
TTL
1 Vpp: differential /
TTL
1 Vpp: differential /
TTL
6
7
8
9
12
13
14
15
46
Schema di Connessione per Motore Lineare WAVE:
pin
Name
Type
Function
Signal
description
Coming from
1
GND /
PTC-
Supply 0V
Supply ground and
thermal sensor
Encoder
ground
Hall sensor board
and encoder head
2
SIN+
Analog input
Encoder absolute
channel
1 Vpp
differential
Hall sensor board
3
COS+
Multifunction
input
Encoder absolute
channel
1 Vpp
differential
Hall sensor board
4
COS-
Multifunction
input
Encoder absolute
channel
1 Vpp
differential
Hall sensor board
5
SIN-
Multifunction
input
Encoder absolute
channel
1 Vpp
differential
Hall sensor board
6
+ Vcc
5V / 7,5V
Aux. supply
Encoder supply
Positive
voltage
Hall sensor board
and encoder head
7
ENC A
+
Multifunction
input
Encoder
incremental channel
TTL
Encoder head
8
PTC + /
KTY
Multifunction
input
Thermal sensor
PTC or KTY
Hall sensor board
9
ENC_I -
Multifunction
input
Indice encoder
TTL
Encoder head
(if available)
47
10
11
-----
12
ENC A
-
Multifunction
input
Encoder
incremental channel
TTL
Encoder head
13
ENC B
-
Multifunction
input
Encoder
incremental channel
TTL
Encoder head
14
ENC_I
+
Digital input
Indice encoder
TTL
Encoder head
(if available)
15
ENC B
+
Multifunction
input
Encoder
incremental channel
TTL
Encoder head
8.3 CAN connector (C1)
Cannon connector sub D 9 pin,
Male plug
C1 connector can be used
alternatively for CAN line or to the
auxiliary encoder signals; You can
connect either the CANopen net or
pick up the encoder emulation or
use the inputs for auxiliary
encoder.
The selection and the configuration
is made by some system
parameters.
Pin
48
Name
Type
Function
Signal description
TTL Differential
line driver
1
B+
Digital I/O
Encoder incremental
channel
2
CAN L
Digital I/O
CAN interface
CAN positive signal
3
Schermo
Gnd
CAN cable Shield
Logic Ground
4
A-
Digital I/O
Encoder incremental
channel
5
I-
Digital I/O
Encoder index
TTL Differential
line driver
TTL Differential
line driver
6
B-
Digital I/O
Encoder incremental
channel
TTL Differential
line driver
7
CAN H
Digital I/O
CAN interface
CAN negative signal
8
A+
Digital I/O
Encoder incremental
channel
9
I+
Digital I/O
Encoder index
TTL Differential
line driver
TTL Differential
line driver
NOTE:
Connect the shied of the encoder cable to the connector body.
8.4 Power Connectors (P1 / P2)
P1
Phoenix terminal board 10 pin – cod. GMSTB 2.5/10-ST
pin
Name
Type
Function
Description
1
R
Mains phase
Triphase power supply
2
S
Mains phase
Triphase power supply
3
T
Mains phase
Triphase power supply
4
DC-
DC bus negative
DC-bus parallel connection
possible
Rectified power
supply
5
A
Motor phase A
Motor power supply
Blu / A
6
B
Motor phase B
Motor power supply
Red / B
7
C
Motor phase C
Motor power supply
Yellow / C
Triphase power
supply
0 – 460V
49
8
N.C.
NC relay
Relay normally closed contact
9
N.O.
NO relay
Relay normally open contact
10
Com
Relay Common
Common relay contact
P2
Use it as Drive Ok
signal or to manage
the emergency
braking
Phoenix terminal board 2 pin – cod. GMSTB 2.5/10-ST
pin
Name
Description / Function
1
BR-
Connect to the internal or external braking resistor
2
BR+ / DC+
Connect to the internal or external braking resistor /
DC-bus parallel connection possible
8.5 RS232 Serial Connector (S1)
Cannon connector sub D 9 pin, female plug
50
pin
Description
Function
1
2
3
4
5
6
7
8
9
--Rx
Tx
DTR
GND
--RTS
-----
--Data line
Data line
Ground
-------
8.6 Connection Example
51
9
Emergency and power fail condition handling
9.1 General Informations
The AxM platform has been designed with two completely separate power supplies. The
power circuit is fed by the mains voltage, without preload timing; while the control circuit
needs to be fed by a separate unregulated 24 V supply. This is converted, by the internal
switching regulator, in order to supply all internal services and motor encoders at the
appropriate voltages.
This design solution overcomes all uncertainties of timing and synchronisation between
drive and main control cabinet, by unifying the same power supply for all services, such as
sensors, PLCs, switches and latches. In this way, all data are memorised and reset at the
same time, and a simple back-up is possible for all machine information without backing up
the main power too.
The power stage without preload (and without storage capacitors) ensures that the main
power is available to the drive without delay whenever the mains power switch is operated.
We suggest anyway to connect an external auxiliary supply, also with “R” option, when
emergency stop can occure in case of mains failure.
9.2 Emergency stop with inertial loads; safety brakes
Many applications involving brushless servo drives move high inertia loads in short, fast
cycles (typical example are Cartesian robots or pick and place machines). When the load
is moving at top speed, a significant amount of energy is stored in the load, so that a
sudden deenergization of the brake could be dangerous. It is therefore essential that, in the
event of an emergency, the load is braked as quickly as possible.
To resolve this problem, the use of a servo motor with a safety brake is sometimes
considered. The simple use of a safety brake, however, is wrong and dangerous for the
following reasons:
•
•
Safety brakes designed for servo motors are stationary brakes. They are designed
exclusively to hold a motor still when deenergized, typically for vertical translations.
They are not designed to absorb any significant energy, also because their torque to
size ratio is extreme. If used to stop a motor, instead of keeping it at standstill, they
would wear quickly and eventually seize.
The braking torque of an electrically driven brushless motor is always higher than that
of the brake and the corresponding braking time is shorter.
Consequently, the function “emergency stop” must be realized as follows:
52
the emergency condition, because of safety regulation, must turn off the mains power to
the drive; however, the auxiliary 24 V must be mantained, so that the drive is alive and can
brake;
at the same time, the emergency condition must generate a 0 speed reference that brakes
the motor at maximum torque, using the kinetic energy of the motor.
The drives regenerates energy from the motor to the DC bus until the motor speed is so
low that the motor back EMF is less than approximately 10 V. At this speed, the DC Bus
voltage falls, the drives locks in undervoltage and the motor is abandoned.
If the translation is vertical, and the motor is equipped with safety brake, only in this
moment, the safety brake can be released. To time the release, the relay contacts in the
drive can be used. The relay is switched by the DC Bus undervoltage, that corresponds to
motor almost at standstill. When the emergency stop logic is realised as described, the
machine encoders are kept alive and no index search or initialisation is required when
normal operation is resumed.
9.3 Power fail with high energy load
Mains power failure with a high kinetic energy load requires special control provisions. In
this case, the auxiliary 24 V supply may not be available for a time long enough to stop the
load. Two solutions are possible:
To back up the 24 V supply with a small battery system. This is the highest quality solution;
all encoders and sensors ride through the power failure and no reinitialization is required
when the power supply is again available.
When the back-up solution is not possible, the auxiliary 24 V should be generated with a
switching power supply fed from the drive DC Bus. The drive is equipped with a special
power fail routine that, irrespective of reference, when the DC bus falls, regenerates
energy from the motor to keep the DC bus just above the undervoltage level. In this way,
the auxiliary power is made available to the system as long as there is kinetic energy in the
load. A 0 speed reference or a braking ramp can be programmed as needed. Once more,
a safety brake can be safely released only at the end of the braking cycle. The 24 V supply
of the brake should be thus derived from the same switching power supply feeding the
drive. The drive relay can be used to release the brake when all the kinetic energy has
been dissipated.
9.4 Thermal protection delay
When a load carries a high kinetic energy, an untimely deenergization due to a protection
tripping can be dangerous. For this reason, the thermal protection of drive and motor is
delayed (approx. 2 s) from the onset and the setting of the appropriate terminal signal, so
that the load can be braked safely before the drive trips.
53
10 Error codes
10.1 AxM drive’s alarm list
The shorter the code, the higher the alarm importance. If more alarms are simultaneously
activated the drive displays the more important one only; e.g. if the alarms activated are Nr
9 “Fan stop” and Nr 22 “Endat alarm“ the first one only “Fan stop” is displayed. To have a
full list of active alarms, use the monitor
function of the "Cockpit"
configurator (see Software Manual).
In the table second column the error code is shown referred to the object 603Fh Device
Control, according to the Can Open DSP-402 specifications..
Code
Alarm type
Emergency
Code
(DSP-402)
1
DSP
communication
error
0x6188
2
Short circuit
3
Description
Suggested action
An internal error occurred in the
regulation and control firmware.
Call the Phase Motion Control
service.
0x2110
A short circuit occurred in the
motor windings or into the drive
power module.
Check the motor connections
and possible short-cicuits phase
to phase and phase to ground
into the motor.
Overcurrent
0x2280
The current reached a peak
value higher than that supported
by the drive.
Check the current loop gain
settings, possible mechanical
obstacle, and the correct motor
size for the use.
4
DC-BUS
overvoltage
0x3200
A too high voltage level has
been detected on the D.C. Link.
Check presence and connection
of braking resistor.
5
IGBT module
overtemperature
0x4200
The power module reached an
excessive temperature.
Too heavy work cycle.
6
IGBT brake
desaturation
0x4300
Guasto nel circuito di frenatura.
Resistenza di frenatura valore
troppo basso o in corto
oppure guasto nell’IGBT di
54
frenatura.
7
DSP
synchronization
error
0x7113
Si è verificato un errore interno
nel firmware di regolazione e
controllo.
Contattare l’assistenza Phase
Motion Control.
8
Heat sink
overtemperature
0x6180
Il dissipatore ha raggiunto una
temperatura eccessiva.
Ciclo di lavorazione troppo
pesante.
9
Fan locked
0x4140
Il drive segnala un cattivo
funzionamento del sistema di
raffreddamento
Verificare eventuali
impedimenti/restrizioni del flusso
d’aria di raffreddamento e dalla
ventola.
10
Braking always on
0x7110
11
Brake Overpower
0x0x7112
12
Braking resistor
error
0x7111
13
Fast task overtime
0x6181
14
Unvalid system
parameters
0x6320
15
Flash device error
0x5520
16
Fpga programming
error
0x6128
The braking circuit is always
active.
The supply voltage is too high or
the clamp level voltage is too
low. Check the parameter
“SYS_OV_CLM_LIM”IPA 18108.
The power loss in the braking
resistor is higher than allowed.
Connect an external resistor of
higher power.
Temporary warning preceding
the “Brake Overpower” signal.
It is to allow braking motor
before drive disabling.
See “Brake Overpower”
The fast task time is longer than
its activation period (250us).
If a user application is active, try
to optimize the Fast task
performance time.
During a user program saving or
a drive turn off, the drive’s
parameters have not been
correctly saved.
Try to repeat the saving and
reset the drive. If the problem
appears again contact the
Phase Motion Control service.
The flash sector where the
parameters are saved is
damaged.
If the problem appears again
contact the Phase Motion
Control service.
An error occurred during the
drive’s onboard Fpga
programming.
If the problem appears again
contact the Phase Motion
Control service.
55
17
Dsp programming
error
0x6183
An error occurred during the
downloading of the drive’s power
module firmware code.
If the problem appears again
contact the Phase Motion
Control service.
18
Lock Drive
0x7600
The drive is locked after a
parameters saving.
Reset the drive from the
configurator, or use the “reset”
button.
19
Encoder counting
error
0x8500
The drive found an uncorrect
index position.
Check the encoder wiring and
the shields cnnection.
20
Application not
loaded
0x6200
The drive has been started up
in application mode without
loading any executable
application.
Load a valid application into the
drive.
21
Motor
overtemperature or
PTC disconnected
0x4310
The PTC sensor has detected a
too high tempertaure of the
motor.
Check the motor PTC
connection to drive terminals
and the real temperature of the
motor.
22
Endat alarm
0x6186
Error in endat communication or
device in alarm condition.
Check connections between
endat and AxM drive.
23
Error in encoder
analog levels
0x6189
In the encoder analog channels,
a ripple occurred higher than the
maximum limit set by parameter
18234 SYS_AD_RIPPLE_LIM.
Check the encoder and shields
connection.
24
Auxiliary encoder
counting error
0x8500
The drive found an uncorrect
index position of
auxiliary encoder.
Check the configuration of the
SYS_ENC2_CY_REV par. and
verify the encoder wiring and
the shields cnnection.
25
Electric shaft
position error
0x8600
The difference between the
position read by the driver and
the position of the master shaft
has exceeded the maximum
value allowed.
Check the Auxiliary Encoder
configuration and verify that the
shaft controlled by the drive is
free to follow the master shaft.
26
Reserved
0x1000
56
27
Medium task
overtime
0x6184
The 2ms task time is longer than
its activation period.
If a user application is active, try
to optimize the Medium task
performance time.
28
Slow task overtime
0x6185
The Slow task time is longer of
its activation time (8ms).
If a user application is active, try
to optimize the Medium task
performance time.
29
Reserved
0x1000
30
Fieldbus devices
alarm
0x8100
Incorrect CanOpen network
configuration or
protocol mistake.
Refer to specific alarm code
(Software Manual) for detailed
informations. Check the
configuration parameters.
31
Endat initialization
error
0x6187
Error in the initial phase of endat
configuration.
Check the encoder and shields
connection.
57
11 CE conformity
Declaration of conformity – Manufacturer’s
declaration Installation instructions
EC1.8.1.96
Wiring recommendations and CE-typical system for conformity to EMCD and LVD
EC Declaration of Conformity for the purposes of EMCD e LVD
11.1 Introduction: EC directives
The EC Directives are manufacturing prescriptions intended to guarantee a standard level
of quality, reliability and safety for all industrial goods produced and marketed across the
European Union. The EC Directives are general documents that establish base
specifications for the certifications, which are subsequently converted into national laws by
all member states. A certification issued by a member state is valid automatically in all
other member states.
Technical details are not included in the directives. They are determined by the relevant
European harmonized standards (EN).
After verification, affixing a CE mark certifies the conformity to the CE directives. Within the
EU there are no commercial barriers for a product with the CE mark. A conformity
certificate, however, is generally not required for most directives. Consequently, it is not
always evident which of the (so far) 21 EC directives is considered in the CE mark of a
product and which standards are considered in the conformity verification.
In the field of Brushless motor drives, the CE mark is referred exclusively to the Low
Voltage Directive. As for the EMCD directive, a drive is only a component and not a
system, and the conformity of the system to the EMCD remains the sole responsibility of
the system designer or user. In order to assist their Customers, Phase Motion Control have
already proved and certified the conformity of a CE-typical system to the EMC directive
(see following chapter) with the AXV digital platforms and the ULTRACT II brushless
motors.
58
11.2 LVD Directive
The LVD directive deals with all electrical machines operating in usual environments
between 50 and 1000 V AC, and between 75 and 1500 V DC. This directive does not apply
to applications in particular atmospheres and/or anti-explosion machines; also it does not
refer to lifting equipment.
The directive’s general purpose is to guarantee a uniform electrical safety level from the
point of view of user’s risk and of possible damage to objects; the directive dictates the
product to be supported from the point of view of safety and of application prescriptions.
11.3 Product safety
1.
2.
3.
Transport, installation and use of the drives is reserved to qualified staff (IEC 364)
The opening of the drive’s enclosure or motors protections, or a defective installation,
can lead to personal or material damage
Drives and motors can have hot, rotating and live internal parts; this can be the case
even with power supply turned off.
11.4 Application as directed – Scope of application
1. AXV, AX4 drives are intended for variable speed motion control application, inside the
entire machine control cabinets.
2. When integrating the drives into machines, they may only be commissioned (i.e.
operation as directed) if the correspondence to the EC EMC directive 89/336/EWG is
proved, EN 60204 must be observed
3. The technical data on the units nameplates must be observed
4. The drives correspond to the LVD 73/23/EWG
11.5 Installation
1. The units must be installed and cooled according to the regulations stated in the
corresponding documentation
2. Ensure that no components are bent or insulation distances changed during transport.
The electronic components and contacts must not be touched.
3. When working on an energized controller the valid national requirements for the
prevention of accidents must be observed.
59
4. The electrical installation must comply with applicable regulations (cable cross
sections, fuses, protective conductor connections)
5. All control inputs and outputs of the drives are insulated with a “basic” insulation
(functional). Another level of protection must be implemented for personal safety
against electrical contact..
6. When using current-operated protective devices, please note that:
The controller have internal DC rectification. A DC fault current is therefore
possible. Some differential current protection systems are made inoperative by
DC current leakage. Use only “universal” or pulse operated protection devices.
The RFI filter which is built into the drives cause a certain amount of leakage
current to flow in the ground wires. This current may cause tripping of too
sensitive differential device and need to be taken into account while sizing
differential devices.
7. Irrespective of the CE mark on both drives and motors, it is reminded that the
compliance of the required limit values with the legal EMC regulations remain the
responsibility of the manufacturer of the system or machine.
11.6 EC Declaration of Conformity and Directive EMCD
Ref. to EC Low Voltage Directive 72/23/EWG
ULTRACT and MINACT series motors and AxV / AxM series brushless amplifier are
designed, manufactured and tested in conformity with the EC Low Voltage Directive
72/23/EWG and under the responsibility of
Phase Motion Control s.r.l., Lungobisagno Istria 27r, 16141 Genova
The applied standards are the following:
IEC 34-1, 34-5,34-6, 34-11, 34-14 e IEC 72;
EN 60529
IEC 249/1 10/86,
IEC 249/2 15/12/89
IEC 326/1 10/90,
EN 60097/9.93
60
The EMCD Directive (89/336EWG)
The EMCD directive relating to electromagnetic compatibility is effective for “equipment”
which may either cause electromagnetic disturbances or be affected by such disturbances.
The aim is the limitation of the generation of electromagnetic disturbances so that the
operation of radio and telecommunication systems and other equipment is possible and
that a suitable immunity of the equipment against electromagnetic disturbances is ensured
so that the operation can be achieved.
Controllers cannot be driven in stand-alone operation and therefore the controllers
themselves cannot correspond to the EMC directive. The controllers must be integrated
into a drive system to check the compliance with the EC directive relating to EMC of the
“Regulation about the electromagnetic compatibility of devices”.
Phase Motion Control has verified the conformity of controllers integrated into a “typical”
drive system (see below). The user can use this example as a reference to design a
system in according to EMCD.
11.7 Installation as specified
1. The RFI filter needs a ground connection. The typical application is not operable
without ground connection.
2. The drives are not domestic appliances and are not intended for domestic use.
3. For installations different from the typical application (e.g.: use of unscreened cables,
use of multiple drives, etc.) the conformity to the CE-EMC directive requires a check of
the machine or system regarding EMC limit values.
4. The user of the machine is responsible for the compliance with the EMC directive.
5. Screen all power cables from filters to drive and from drive to motor with a shield
coverage greater than 85%
6. Signal cables must always be shielded as above.
7. In order to reduce the interference caused by the motor cable and the induced noise in
the encoder connection cable, such wiring must be shorter than 15 meters. This
limitation is necessary also for the protection of the drive itself. For longer cables, use
appropriate snubber inductors.
8. For shield and ground connections, refer to fig. 1.
9. It is important that the power wires are inserted in wire ways different from the signal
and supply one and that any cross between the power and signal cables is carried out
at right angle.
10. A ground cable between the motor and the drive is always necessary with a layout
similar to that of the power cables.
61
11. If sensitive instruments are used (for example analogue, non preamplified transducers,
load cells, thermocouples etc.) keep a safe distance between the instrumentation
ground and the power ground.
12. The RFI filter which is built into the drives, as well as the high chopper frequency,
cause a certain amount of leakage current to flow in the ground wires. This current
may cause tripping of sensitive differential device and need to be taken into account
while sizing differential protection devices. For the same reason, high frequency noise
is normally conducted through the ground wire; all sensitive devices or cables should
be wired at a distance from the ground wire and cross the same wire at a right angle.
13. All devices (drives, filters, motors) must be grounded on a single ground bar, with
ground wires as straight and short as possible.
NOTE: As specified in the EMC IEC-22G-21/CDV norm, AXV drives are not domestic
appliances and can cause interference to radio and tv reception.
11.8 EC Declaration of conformity
Ref. to EC Directive Electromagnetic Compatibility (89/336/EWG)
NOTE: ULTRACT and MINACT series motors and AXV brushless drives series are not
stand-alone systems, and are specified to application fields 2 and 3 in accordance with
IEC-22G-21/CDV. The conformity with EMC directive cannot be verified on such
components.
To assist its own customers, Phase Motion Control declares that AXV drives running
Ultract or Minact motors assembled in accordance with the instructions above and
completed with the filter SHAFFNER FN251/16/07 or something equivalent, with up to 100
meters of shielded-conductor cable between the drive and the motor, following the cabling
normative explained in the user manual, allows the active system (PDS) to satisfy the
requirements of the IEC-EN 55011 norm Class A and EN 50022 Class B.
As Components the AXV drives comply with the IEC 1000-4-2 (IEC 801-2) and IEC 10004-4 (IEC 801-4), without any accessory or protection.
62