Download Manual - Northern Tool + Equipment
Transcript
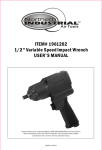
ITEM# 1961202
1/2" Variable Speed Impact Wrench
USER’S MANUAL
Read carefully and understand all ASSEMBLY AND OPERATION
INSTRUCTIONS before operating. Failure to follow the safety rules and other basic safety
precautions may result in serious personal injury.
Page: 1 of 7
MADE IN CHINA
For technical questions and replacement parts, please call 1-800-222-5381.
Thank you very much for choosing a NORTHERN TOOL + EQUIPMENT CO. INC,
Product! For future reference, please complete the owner’s record below:
Model: _______________
Purchase Date: _______________
Save the receipt, warranty and these instructions. It is important that you read the
entire manual to become familiar with this product before you begin using it.
This machine is designed for certain applications only. Northern Tool + Equipment
strongly recommends that this machine is not modified and/or used for any
application other than that for which it was designed. If you have any questions
relative to a particular application, DO NOT use the machine until you have first
contacted Northern Tool + Equipment to determine if it can or should be performed
on the product.
Before using this product, please read the following instructions carefully.
Technical Specifications
Item
Drive Size
Free Speed
Max. Torque
Air Consumption
Air Inlet Diameter
Max. Air Pressure
Description
1/2"
7000 RPM
300 ft-lbs
5.6 CFM
1/4"- 18NPT
90 PSI
SAVE THIS MANUAL
You will need this manual for the safety warnings and precautions, assembly, operating,
inspection, maintenance and cleaning procedures, parts list and assembly diagram. Keep this
manual and invoice in a safe and dry place for future reference.
WARNINGS AND SAFETY RULES
1.
Wear proper clothing. Always use ANSI-approved safety impact goggles when
assembling or using this tool. Wear long sleeved shirts, long pants and hard-toed shoes.
Take off any loose fitting jewelry and keep long hair covered to prevent being caught in
moving parts.
2.
Wear proper breathing protection. Remember that a “dust mask” is not a breathing
respirator. Use a respirator that uses charcoal filters for the best protection.
3.
Keep work area clean and well lighted. A dim and/or cluttered work area invites
personal injury.
4.
Keep children and pets away from work areas. Children can be a distraction and
should be supervised by an adult when near the work area. Never allow children to play
with this product even if it is turned off.
5.
Store idle tools properly. Keep this tool out of the reach of children.
Page: 2 of 7
6.
Do not use the Tool if under the influence of alcohol or prescription drugs. Doing so
may cause damage to the tool, or personal injury. Do not use this or any tool if you are
tired. Use common sense at all times.
7.
Check for damaged parts. Before using this tool, carefully check for any parts that may
be missing or damaged and any other conditions that may affect the operation of this tool.
Replace or repair damaged and worn parts immediately using only qualified repair facility.
8.
Always use the proper tools. This tool was designed for a specific task. Do not alter this
tool, or use it for a purpose for which it was not intended.
9.
Be careful when connecting/disconnecting air supply. It is recommended to use quick
disconnects (not included) rather than screw-on air connections.
10.
Use compressed air only. Clean, dry, regulated compressed air at 90 PSI. Never use
oxygen, carbon dioxide, combustible gases, or any other bottled gas as a power source
for this tool.
11.
Always disconnect air supply when this tool is not being used.
NOTE: The warnings, cautions, and instructions discussed in this instruction manual
cannot cover all possible conditions and situations that may occur. It must be understood
by the operator that common sense and caution are factors that cannot be built into this
product but must be supplied by the operator.
NOTE: READ ALL INSTRUCTIONS BEFORE USING THIS PRODUCT
OPERATION
i.
Set Up
Fig. 1
WARNING! This impact wrench supplies powerful torque and it
designed to be operated with two hands. Failure to operate the Impact
wrench with two hands may result in serious injury.
1. You will need to prepare a 1/4" air connector (not included) to connect to the air inlet on the
tool. First, wrap the 1/4" air connector with pipe thread seal tape (not included) before
threading it into the inlet. Connect the 3/8" ID air source hose (not included) to a
quick-disconnect coupler (not included) and then to the tool.
2. Set the air pressure on your compressor to 90 PSI. Do not exceed the recommended air
Page: 3 of 7
pressure of 90 PSI.
3. Check the air connection for leaks.
4. Disconnect from the air hose until next instructed to reconnect.
Note: Turn off your air compressor and disconnect the air hose when you are changing sockets.
After you attach the socket (not included), attach the air hose and turn the air compressor on.
ii.
Select the appropriate size 1/2" socket for your needs.
iii.
Push and snap the socket onto the anvil.
iv.
Tightening
The max. working torque of the impact wrench is 300ft.-lbs. It can be adjusted from 115
ft.-lbs. to 300ft.-lbs. Make sure that the nut or bolt you are using the tool to tighten can
withstand the rated torque.
1. Tighten the nut as far as you can by hand.
2. Place the socket on the nut. Press the REVERSE BUTTON (#30) to FORWARD 1, 2, 3.
You can get the different torque on different steps. (See Fig. 2)
115 ft.-lbs.
190 ft.-lbs.
300 ft.-lbs.
FIG. 2
3. Press the trigger to start the tool.
NOTE: When changing the step, stop pressing the trigger (#9), then adjust the reverse
button (#30).
NOTE:
¾
¾
¾
v.
If the tool stalls while tightening, DO NOT raise the outlet pressure of the air compressor
above 90 PSI.
When the nut has been tightened, remove the tool and socket. Do not overtighten.
If available, check the recommended torque specifications for the nut. You should use a
torque wrench to torque the nut after using the impact wrench.
Loosening
1. Attach the correct size socket to the anvil.
2. Set the compressor’s pressure regulator to 90 PSI. Do not set the compressor’s outlet
regulator above 90 PSI.
3. Connect the tool to the air compressor’s hose. If a leak is detected, disconnect the air hose
and fix it before use.
4. Place the socket over the nut to loosen.
5. Grip the tool firmly. Press the REVERSE BUTTON (#30) to REVERSE step. Press the
trigger to start the tool.
(Caution: Make sure the nut or bolt can withstand the impact wrench’s working torque.)
Page: 4 of 7
NOTE:
¾
¾
vi.
If the tool cannot loosen the nut, DO NOT raise the outlet pressure of the air compressor.
When the nut is moved, stop the tool by releasing the trigger and remove the tool from the
nut. Remove the nut from the socket if needed.
Speed Adjustment
1. Turn on the air compressor and allow its tank to be filled.
2. Set the air compressor regulator to 90PSI. This air impact wrench operates at a maximum
of 90psi air pressure.
3. Adjust torque regulator(1,2,3 signed) on the air impact wrench to desire torque.
4. Adjust tool either in forward or reverse position, depends on the purpose of the job. "F" for
forward direction or "R" for reverse direction.
5. Depress the trigger to start operating the tool.
6. Release trigger in order to stop the tool.
7. When changing sockets, always disconnect air supply to avoid injury.
8. When job is completed, turn off the air compressor and store the air tool after lubrication.
MAINTENANCE
WARNING Always disconnect the air supply before attempting any maintenance.
After disconnecting the air supply, squeeze the trigger to make sure no air remains in the unit.
1. After each use, wipe down the impact wrench with a lint-free cloth. Do not use solvents or
harsh detergents to clean the tool.
2. Make sure the air inlet is clean of dirt, grease, or debis.
Parts List
Part No.
1
2
3
4
5
6
7
8
9
10
11
12
13
14
15
16
17
Description
Housing
O-ring
Cap Screw
Hammer Case
Cap Screw
Trigger Retainer
Rev. Valve Sleeve
Trigger Shaft
Trigger
Valve Seat
Throttle Valve
Spring Valve
Exhaust Deflector
Inlet Bushing
Front end plate
Rotor
18
Spring Pin
Rotor Vane
Qty.
1
1
8
1
1
1
1
1
1
1
1
1
1
1
1
1
6
Part No.
22
23
24
25
26
27
28
29
30
31
32
33
34
35
36
37
38
1
39
Page: 5 of 7
Description
Bearing
Rear Gasket
Rev. Valve
O-ring
Rear Cover Ring
Back Cover
Locking Pin
Spring
Reverse Button
Screw
Spring Washer
Hammer Pin
Hammer
Hammer Frame
Standard Anvil
O-ring
Socket Retainer
Ring
Anvil Bushing
Qty.
2
1
1
1
1
1
1
1
1
1
8
2
2
1
1
1
1
1
19
20
21
Cylinder
Spring Pin
Rear End Plate
1
1
1
40
41
Diagram
Page: 6 of 7
Handle Grip
Spring Washer
1
1
1
WARNING
Some dust created by power sanding, sawing, grinding, drilling, and other construction activities contains
chemicals known to the State of California to cause cancer, birth defects or other reproductive harm.
Some examples of these chemicals are:
• lead from lead-based paints,
• crystalline silica from bricks and cement and other masonry products, and
• arsenic and chromium from chemically-treated lumber.
Your risk from these exposures varies, depending on how often you do this type of work. To reduce your
exposure to these chemicals: work in a well ventilated area, and work with approved safety equipment,
such as those dust masks that are specially designed to filter out microscopic particles.
Northern Tool + Equipment Co.,
2800 Southcross Drive West
P.O. Box 1499 Burnsville, MN 5337-0499
Made in China.
Page: 7 of 7


