1
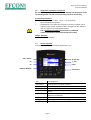
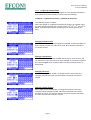
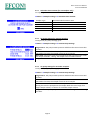
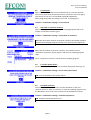
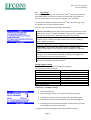
Efcon Vision User Manual Version 260115UK Efcon® Water User Manual Vision 130TM CPU Page 1 Efcon Vision User Manual Version 260115UK Index Page 1.1 1.2 1.3 1.4 1.5 1.6 1.7 1.7.1 1.7.2 General Application area Human Interface Display Main menu & password Changing parameters Operator functions Reset parameters Program by calendar 4________ 5 5 6 6 7 7 7 8 2 2.1 2.2 2.3.1 2.3.2 2.3.3 2.4 Sample settings Sample interval Sample volume Activation time actuator (ILS) Activation time air pump (Vacuum) Pump settings (peristaltic sampler) Error samples 9…11____ 9 9 10 10 10 11 3 3.1 3.2 3.3 3.4 3.5 Distributor settings Distributor turn time Turn Interval Stop after xx container changes Turn after power failure Overflow protection 11…12___ 11 12 12 12 12 4 4.1 4.2 4.3 4.4 4.5 Configuring inputs / outputs Flow signal Level signal Temperature signal Alarm output Pulse output 13…16____ 13…15 16 16 16 16 5 5.1 5.2 5.3 5.4 5.5 Pump setting Start / stop pump ½ Alarm levels Overflow Pump configuration Hour meter 17…18____ 17 17 17 17 18 6 6.1 6.2 6.2.1 6.2.2 6.2.3 6.2.4 6.3 6.3.1 6.3.2 General settings Changing date / time Cool settings Cool unit set points Defrost settings Cool after First sample Cool alarm setting Log settings Frequency log settings Event log settings 18…24____ 19 19 19 19 19 19 20…21 21 21 Page 2 Efcon Vision User Manual Version 260115UK 6 6.3.4 6.3.4.1 6.3.4.2 6.3.4.3 6.4 6.4.1 6.4.2 6.4.3 6.4.4 6.5 6.5.1 6.5.2 6.5.3 6.5.4 6.5.5 6.5.6 General settings SD-Card Copy data table to SD-card Changing log file name SD-card history SMS Settings Phone numbers Alarm SMS 1 Alarm SMS 2 Modem settings System System name Hardware configuration Container configuration I/O check Ethernet settings (Optional) Password settings 18…24___ 22 22 22 22 23 23 23 23 23 23 23 23 24 24 24 24 7 Reading SD-card 25_____ _ 8 Default Settings 26_______ Page 3 Efcon Vision User Manual Version 260115UK 1.1 General Efcon is developed by A.V.M. (Netherlands) as a complete package for Effluent Control Systems. Efcon products are designed for measuring and controlling wastewater flows. Efcon products meet the tough Dutch regulations (NEN 6600-1) and the international standards according ISO 5667-2/3&10. Products from the Efcon program Samplers (several types), level controllers, pump controllers, registration equipment, sample distributor systems, flowmeters (industrial and sewers), measurement pits, cool units, mobile systems, etc. BEFORE YOU START Read the manual before you connect the unit to a power supply or install. In case of illegal use or use in non-defined areas, any form of warranty will be denied. The user needs to be informed about the user manual and application dangers. Installing and adjusting parameters of the sampling system should be done by qualified personnel. Check transported equipment for any transport damage. In case of damage, directly contact your supplier and do not install the equipment. The equipment is tested (different quality tests) in the AVM factory (Hei- en Boeicop, Netherlands) before it is transported. Required maintenance or repair, which will not influence the warranty period, will have to be carried out by trained Efcon specialists. All equipment returned to AVM needs to be cleaned, sterilised and transported in a safe enclosure to avoid healththreatening situations. In case of service or repair, the equipment will not be accepted by AVM if there is no declaration of origin and safety added to the equipment. Extra cleaning can be refused or will be charged! Warranty will be denied if there are mechanical, electronic or software changes in the unit which are not performed by AVM. BASIC WARRANTY PERIODS When used and installed according specifications, not used for more than 150 samples and 24 distributor turns a day in a non-aggressive well ventilated environment. • • • • 48 months for thermoplastic enclosures for stationary use 24 months for electronic components 12 months for moving parts, such as pumps, pinchers & actuators. 3 months under courtesy for wearing Parts such as Seals, Rotor & discs of the vacuum pump. Page 4 Efcon Vision User Manual Version 260115UK 1.2 Application area Efcon® equipment Be aware! Wrong application or misuse can damage the equipment or the surrounding of the unit and is not covered by any form of warranty. Surrounding conditions: • Temperature: 0°C / +40°C. (-25°C / + 55°C optional) • Well ventilated environment • AVM advises not to place the enclosure into direct sunlight, for an optimal cooler output. Systems in direct sunlight cool less efficient due to a higher surrounding temperature! Use in explosion hazardous environment is prohibited unless mentioned on the product and in the manual! Sample Medium: • See Sampler Manual 1.3 Human interface The Vision 130™ display and operating elements are: Info / Status Escape key +/- key F1 F2 Enter Enter Key Numeric Buttons Cursor keys Key Info/Status F1 F1 1,2,3… etc. ESC +/ / /⊳/ ► Key assignment Shows general info (date time etc.). Function key F1. Function key F2. Numeric keys, to navigate throughout the menu, enter values. Return to the previous display, undo changed settings (when not confirmed). To change or to confirm a change value. Cursor keys to move the cursor and adjust settings. Page 5 Efcon Vision User Manual Version 260115UK 1.4 Display During normal mode the display shows the following totalizer display: Date & time Program status Totalizer display SD-card status Message display Current read out Program status: Indicates the status of the automatic sample program. Totalizer display: Total: Totalizes the flow signal connected to the input (digital or analogue) and displays the volume in m3 (cubic meters), this counter cannot be reset. See menu 4.2 to configure the flow signal. Cycle: Totalizes the flow signal, number of samples and error samples (between brackets). This totalizer resets when the sampler changes container. When there’s no distributor, it resets on a programmable time (3.1). Message display: Indicates current events / alarms, e.g. sampling, alarm messages, pump failure, etc. Current read out: Shows (when connected) the Temperature (°C), and actual flow (m3/hour) and / or level (mm). Date & Time: Current date and display. SD-Card status: Displays the used / free space on the SD-card. 1.5 Main menu When the display shows the totalizer, press F2 to enter the main menu. First press to enter the password (default 5555). To return press ESC. Press the corresponding numeric key (1 t/m 6) to enter one of the following sub menus 1 Operator functions: User functions; such as manual sample, move distributor to the next container, reset function, start/stop sampling program or start/stop program on a specific date & time. 2 Sampler settings: Enter the desired sample interval, adjust the sample volume, air pump timers, maximum number of error samples. 3 Distributor settings: Adjust turn time, turn day, container configuration, turn after power failure, container overflow protection. 4 In-/output configuration: Select & configure the installed flow signal, level sensor settings, temp. sensor settings, alarm output settings. 5 Pump settings; Set point pump controller, alarm levels, overflow level, alternating pumps, hour meters pumps & overflow. 6 General settings, Changing date / time, cool unit settings, hardware settings, SD / log settings. Page 6 Efcon Vision User Manual Version 260115UK 1.6 Changing parameters Be aware! Faulty settings may lead to defect hardware. Adjusting parameter settings should be done by qualified personnel. To change / adjust settings, move the cursor (inverted text like 001.00 beneath FR) with the keys ◄ or . To adjust its value press . Use the numeric keys or the or keys to change the setting. Press to save the adjusted value. 1.7 Operator functions Manual operating of the sampler, for instance; taking a manual sample, moving the distributor to the next container & start/stopping the sample program are done in the menu Operator Functions. F2 (Menu) > 1 (Operator functions) 1 Manual sample: Immediately take 1 sample. 2 Next container: Immediately move the sample outlet to the next container. 3 Reset: Reset menu to reset errors, cycle counters, log data. 4 Start sample program / Stop sample program: Start or stop auto sampling according the pre-set sample interval (see §2.1) & the distributor turns to the next container on a pre-set turn time & day (see §3.1). 5 Sample by calendar: Start and stop auto sampling on pre-determined calendar dates (see §1.7.2). 6 Sample by date/time: Start and stop auto sampling on pre-determined date & time (see §1.7.2). 1 1.7.1 Reset parameters Alarm messages of the sampler can be reset in menu 1.3 Reset parameters. Totalizers, pump hour counters, logging data can also be reset in this menu. 1 Reset error sample alarm: Press 1 to reset the error sample alarm 2 Reset current cycle counters: Press 2 to reset the cycle counters in the totalizer display. 3 Reset log data: Removes the stored data for cycle log, frequency log and event log (see §). 4 Reset Clean level pin error: Reset blocked sample interval, due to pump problems. Page 7 Efcon Vision User Manual Version 260115UK 1.7.2 Program by calendar dates To start or stop the auto sampling program on a pre-programmed date & time. When the totalizer display is active, press the following: F2 (Menu) > 1 (Operator functions) > 6 Sample by date/time The following display is loaded: When the sampler is programmed with these settings, the sampler starts the auto sampling program every month on the 11th, 12th, 13th, and 14th at 08:00. It will then take samples according the set sample interval (see §2.1). . Changing calendar month When the month is selected (inverted text) press and the text begins to blink, choose a month with and , press to load the calendar of the chosen month. Changing calendar days When de calendar is selected press and the cursor starts to blink. You can move the cursor with the arrow keys. Press to activate the selected day. By pressing when a selected day is already activated, the day is deactivated. Changing start time Select the digits behind “START” to change the start time of the auto sampling. Press and enter the desired start time with the numeric keypad. Changing sample duration Select digits behind “DURATION” to change the duration of the auto sampling. When selected press and enter the desired auto sample duration (in hours). The sampler will auto sample during this time when the clock time and start time are a match. Page 8 Efcon Vision User Manual Version 260115UK 2 Sample settings The sample settings can be changed in menu 2 “Sampler Settings”. Go to: F2 (Menu) > 2 (Sampler settings) 1 Sample Interval; Fill in (for every day of the week) the desired sample interval. Also choose the sample principle (§2.1.1). 2 Sample Volume; Fill in (in ml) the sample volume. 3 Activation time Actuator: Activation time for ILS actuator. 3 sec. for samplers with a pneumatic actuator (add flush time when necessary). 20 sec. for samplers with electric actuator (add flush time when necessary). 3 Vacuum pump settings: Activation time for the air pump during: Purge, Suction, Dose: (§2.1.3). 4 Error samples: Maximum number of consecutive error samples to trip the alarm and stop the auto sampling (see §2.4). 0 = continuous sampling. 2.1 Sample interval To change the sample interval or principle go to: F2 Menu > 2 Sampler settings > 1 Sample interval Choose between the following sample principles: Volume proportional: Pulse (volume) proportional sampling; take a sample every set number of m3 counted on the digital pulse input (setting in m3). Time proportional: Sampling by a time interval. Sample every xx minutes. (settings in minutes). Event sampling: Time-proportional sampling during activation of the pulse input. Fill in the desired interval for each day of the week. 2.2 Sample volume To change the sample volume (ml) go to: F2 Menu > 2 Sampler settings > 2 Sample volume Beware: For ILS sampling, change plunjer hardware (check Efcon manual). For Vacuum sampling change hardware, adjust the tube inside the sample chamber (check Efcon manual). For Peristaltic sampling, adjust the dose time in menu 2.3.3. Page 9 Efcon Vision User Manual Version 260115UK 2.3.1 Activation time actuator (for ILS samplers only) For adjusting the activation time of the actuator go to: F2 Menu > 2 Sampler settings > 3 Activation time Actuator Sampler Type ILS Guillotine 05 ILS 2WE ILS 3WE ILS 2WP ILS 3WP Recommended activation time 3 seconds 20 seconds 20 seconds (+ flush time) 3 seconds 3 seconds (+ flush time) 2.3.2 Air pump Settings for Vacuum samplers To adjust the (air) pump settings go to: F2 Menu > 2 Sampler settings > 3 Vacuum Pump Settings Purge Time 1: The pump creates pressure and blows the suction hose clear of water. Max. Suction Time: When the sampled medium hasn’t reached the level pins within this time, the sampler counts an error sample. 2Dose time: During this time the air pump blows the excessive water inside . the sample chamber, “dosing” the sample until its needed volume. 3Purge Time 2: Not used. . 2.3.3 Air pump Settings for Peristaltic samplers To adjust the (air) pump settings go to: F2 Menu > 2 Sampler settings > 3 Vacuum Pump Settings Purge Time 1: The pump creates pressure and blows the suction hose clear of water. Max. Suction Time: When the sampled medium hasn’t reached the level pins within this time, the sampler counts an error sample. Dose time: This timer determines the sample volume. During this time the pump doses the sample. Make this time longer for a larger sample volume, or shorter for a smaller sample volume. Purge Time 2: The pump empties the suction hose through the inlet during this time. Page 10 Efcon Vision User Manual Version 260115UK 2.4 Error samples (optional for ILS samplers) When a correct sample is taken, the sampler receives an internal contact and the sampler knows the sample was correctly taken. When the sampler doesn’t receive an internal contact an error sample is counted. This counter resets when a correct sample is taken. When too many (adjustable by parameter 3.4) consecutive error samples are counted, the sampler will display: To many error samples and the auto sampling will stop. The alarm output will be tripped too. To adjust this setting: F2 Menu > 2 Sampler settings > 4 Error samples To reset this message, go to: F2 Menu > 1 Operator functions > 3 Reset > 1 Reset Error Sam… To keep sampling and disregard the error samples, set the parameter to 0. 3 Distributor settings Samplers with multiple containers are equipped with a distributor system. This distributor rotates the outlet hose to the next container (clockwise). To change the distributor settings go to: F2 Menu > 3 Distributor settings 1 Turn time/day: Use this setting to adjust the clock time the distributor needs to turn (see §3.1). 2 Turn Interval: Use this setting to program multiple container rotations a day according a set interval (turn every xx hours). 3 Container Config.: Container configuration; Select the total number of containers and determine the container volume. 4 Turn after Power Failure: Turns the distributor to the next container after a power failure. 5 Overflow Protection: Container overflow protection; the sampler counts the sample in each container (when it almost overflows). 3.1 Distributor turn time To adjust the time the distributor needs to turn to the next container go to: F2 Menu > 3 Distributor settings > 1 Turn Time Turn time: Enter the desired time to turn the sample outlet to the next container. Turn Day: Select which day the distributor turn to the next container. Page 11 Efcon Vision User Manual Version 260115UK 3.2 Turn Interval When needed it’s possible to turn the distributor on a set time Interval. This interval starts after power failure and is reset by the Turn time (§3.1). This interval can be set to 1/2/3/4/6/8/12/24/48/72/96 hours. When programmed OFF this setting is not used. To change go to: F2 Menu > 3 Distributor settings > 2 Turn Interval 3.3 Stop after xx container rotations When the sampler needs to stop the auto sampling program after a set number of container rotations go to: F2 Menu > 3 Distributor settings > 2 Stop after xx containers 24: Select after which amount of container rotations the sampler needs to stop the auto sampling program. Choose from: OFF/1/2/3/4/ 6/8/12/24. Containers filled: Actual number of container rotations since the last reset. When the set number of container rotations are reached, the text “Containers full (P=off)” display appears and the auto sampling program stops. Go to “1 Operator Functions” restart the auto sampling program. 3.4 Turn after power failure To let the Distributor turn to the next container after power failure go to: F2 Menu > 3 Distributor settings > 4 Turn after power failure ON: Turn the distributor after power failure. OFF: Don’t turn the distributor after power failure. 3.5 Overflow Protection The container overflow protection turns the Distributor to the next container when it’s about to overflow, or stops the sampling program until the distributor move to the next container on the distributor turntime. F2 Menu > 3 Distributor settings > 5 Overflow protection ON: Container overflow protection on. OFF: Container overflow protection on. Page 12 Efcon Vision User Manual Version 260115UK 4 Configuring Inputs / output To configure or adjust the input signals on the sampler go to: F2 Menu > 4 In/Output configuration Flow signal settings: Determine the flow signal type, is signal is used to totalize the m3 and to do the volume proportional sampling. Level sensor settings: Select which type sensor is used to measure the water level. (for pump controllers or open channel flow measurement. Temp. sensor settings: Temperature sensor settings, don’t change. Alarm output: Determine the alarm contact switches NO or NC. Pulse output: Fill in the desired volume for a contact closure on the mechanical counter output. 4.1 Flow signal To totalize the m3 counters and take volume proportional samples, an input signal is needed which is directly related to the flow. The Vision 130TM can totalize a digital or an analogue flow signal. To select which signal is connected go to: F2 Menu > 4 In/Output configuration > 1 Flow signal settings Select which type of flow signal is connected by pressing and scroll with the and keys. Pulse: Connect a digital pulse signal from a flowmeter to the pulse input (pot free contact). Each contact closure equals a certain amount of volume, in m3. Current: Connect a 4-20mA signal from a flowmeter to the analogue input. 4mA equals no flow (0 m3/h), 20mA equals a set amount of m3/h) Pulse + Current: Connect both signals shown above. (Totalizer pulse contact. V-Notch: When the sampler is equipped with a level sensor, the flow is calculated for a V-notch weir plate. Venturi: When the sampler is equipped with a level sensor, the flow is calculated for a venturi flume. Data table: Enter up to 34 p. Page 13 Efcon Vision User Manual Version 260115UK Pulse (volumetric pulse contact) Connect a potential free contact (N.O.) to the pulse input. The contact pulse time length should be between 50 and 1000 ms long, Select PULSE in menu 4.1. Enter the volume in m3 for each contact closure on the pulse input. Current (volume totalizer by 4-20mA signal) Connect a 4-20mA signal to the analogue input Enter the amount in m3/hour for 20mA (full scale value) Pulse + Current (combination) When both pulse & current are connected (both of the same flowmeter), the pulse input is used for the m3 totalizers. The current input only give an indication of the flow in the totalizer display. 1 Pulse: Enter the volume in m3 for each contact closure on the pulse input 4mA: Enter the flow in m3/h for 4 mA (default 0 m3/h) 20mA: Enter the flow in m3/h for 20 mA adjustable from 1- 26000 m3/h (full scale value). Page 14 Efcon Vision User Manual Version 260115UK Open channel flow measurement (Optional) Sampling systems with open channel flow measurement can be equipped with a level sensor (bubbler tube sensor, or an external 4-20mA signal) and can be used for the following primary devices: V-Notch: V-notch measurement, for 3 standard angles (28,3°, 53° & 90°). Q= Ce x (8/15) x tan (A/2) x (2g)0,5 x (h)2,5 x 3600 Venturi: According formula: Q = (2/3)1,5 x √(g/100) x h1,5 x Cd x b x Cv x 3600, Cd= (1- 0,006 x l / b) x (1 – 0,003 l / h) Cv= from list b/B b/B 0,10 0,15 0,20 0,22 0,24 0,26 0,28 0,30 0,32 Cv 1,0022 1,0051 1,0091 1,0770 1,0132 1,0155 1,0181 1,0209 1,0240 b/B 0,34 0,36 0,38 0,40 0,42 0,44 0,46 0,48 0,50 Cv 1,0272 1,0308 1,0346 1,0386 1,0430 1,0476 1,0526 1,0579 1,0635 b/B 0,52 0,54 0,56 0,58 0,60 0,62 0,64 0,66 0,68 Cv 1,0695 1,0760 1,0829 1,0901 1,0980 1,1064 1,1153 1,1250 1,1353 Formula 1: According formula: Q = C × √h3× 3600 Formula 2: According formula: Q = C × he × 3600 Data table: Assign 24 medium levels (mm) to 24 flow (in m3/h) * Open channel, on water level base flow measurement are based on international leading standards like: ISO 1438 & BS 3600. V-notch (V-notch measuring) V-Notch Angle: Select angle of the notch in degrees, choose from 28,3°, 53° or 90°. Coefficient: Discharge coefficient, the constant value of the formula of the flow (in m3/hour). Level sensor 20mA: Full value of the level measurement. Level sensor offset: adjust the zero-point of the level measurement. Venturi (Venturi flumes) Inlet width (B): Enter the width of the inlet (mm). Throat width (b): Enter the throat width of the flume (mm). Throat length (l): Enter the throat length (mm) Gravity: Enter the gravitational acceleration (9,81 for Benelux) Data table When the flow at different water levels are known, it’s possible to enter these inside a data table. When the water level reaches between 2 points in the table the flow is calculated by interpolation. A total of 24 levels and flows can be stored. Be aware! Enter the values from low to high. Page 15 Efcon Vision User Manual Version 260115UK 4.2 Level signal (optional) The Vision can be equipped with a level probe for level measurement. To select a sensor and adjust the settings go to: F2 Menu > 4 In/Output configuration > 2 Level sensor settings Select which type of level sensor is connected by pressing , scroll between the sensor type with the and keys. Standard level sensors have the following preset values. Level probe: Pressure level sensor, standard range (Full scale): 2,5 meter. Ultra sonic: Ultrasonic level measurement, standard range (Full Scale): 1 meter. Bubble Tube: Bubble tube measurement: when selected the air pump for the bubble tube starts creating pressure, standard range (Full scale): 0-0,5 meter. It is possible to change the following settings: 20mA maximum measurable water level, equals 20mA. Offset: Zero point adjustment, for fine-tuning the level measurement. Damping: Delay, the input reads every 0,1 sec during xx seconds, the average is shown in the display. Measured: Actual water level. 4.3 Temperature sensor settings No access for users. 4.4 Alarm output When an error / alarm occurs, the alarm output relais is tripped. To choose how the relais contact output is operated, NO (normally open) or NC (normally closed), go to: F2 Menu > 4 In/Output configuration > 4 Alarm Output Select how the output needs to switch by pressing . Toggle with the and keys and press to select. 4.5 Pulse output The pulse output generates a contact closure after an adjustable amount m3 is counted. To adjust this amount go to: F2 Menu > 4 In/Output configuration > 5 Pulse Output Press and enter the desired value, press to store. Page 16 Efcon Vision User Manual Version 260115UK 5 Pump Settings (optional) ILS samplers can be equipped with a double pump controller. When this function is enabled the last row in the display shows the current level measured by the level sensor. When pumps are active, the letters P1 (for active pump 1) or P2 (pump 2) are shown in the display (behind level on the last row). To adjust the pump settings go to: F2 Menu > 6 Pump Settings 1 Start/stop pump 1/2: Fill out the desired start and stop level for pumps 1 & 2 (see §5.1). 2 Alarm level: Adjust High & Low water level alarm. 3 Overflow: Adjust overflow level. 4 Pump configuration: Determine how many pumps are controlled by the Vision (1 or 2) and if the 2 pumps start needs to alternate. 5 Hour meter: Time meter for the pumps and overflow level (see §5.5). 5.1 Start/stop pump 1/2 To enter the start and stop level for pump 1 and pump 2 go to: F2 Menu > 5 Pump Settings > 1 Start/stop Pump 1/2 5.2 Alarm levels Enter the desired levels for the alarm to trip. The alarm trips when the water level is above the high level, or below the low level. 5.3 Overflow Determine at which water levels the overflow contact needs to close and the hour meter starts running. BEWARE! Values entered at ON should be higher than values entered at OFF. 5.4 Pump configuration Enter the number of pumps used in the system, 1 or 2. When 2 pumps are selected, it’s possible to alternate the pump starts of pump 1 & 2. Page 17 Efcon Vision User Manual Version 260115UK 5.5 Hour meter When a pump is active (due to the water level) the time meters in menu 5.5 start counting. 6 General settings General Settings, such as changing time, SMS settings (optional) & SD-card settings can be altered in menu: F2 Menu > 6 General settings 1 Changing date/time: The sampler is not equipped with an automatic summer/winter time (see §6.1). 2 SMS Settings: Phone numbers settings for SMS messages, assign alarm SMS, Modem settings. (optional). 3 SD-Card: SD-card settings, file names, SD-card history. 4 Log settings: Log interval, which parameters to log. 5 System: Sampler name, hardware configuration. 6.1 Changing date / time To adjust the date and time go to: F2 Menu > 6 General settings > 1 Changing Date/Time 6.2 Cool settings In the totalizer display on the bottom row the actual temperature inside the cabinet is shown. On this row the status of the cool unit is shown. A C appears when the cool unit is active (compressor and ventilator inside the cool shaft turn), and H appears when the temperature is below set point low and the heater is activated. The cooler settings can be changed in the following menu: F2 Menu > 3 Cool settings 1 Cool unit Set points: Working range cool unit. 2 Defrost Settings: Defrost interval timer, defrost time length. 3 Cool after first Sample: Start cool unit after the first sample is taken. Reset the cool unit by pressing 5 in menu 1.3. 4 Cool alarm settings: In development. Page 18 Efcon Vision User Manual Version 260115UK 6.2.1 Cool unit set points To change the working range of the cool unit, go to: F2 Menu > 3 Cool settings > 1 Cool unit Set points Set Point High: When the temperature reaches this setting (or is above this setting), the cool unit starts cooling (default 5). Set Point Low: When the temperature reaches this setting (or is beneath this setting), the cool unit stops cooling (default 3). Current Temperature: This is the container temperature. 6.2.2 Defrost settings Defrost settings can be altered in menu: F2 Menu > 3 Distributor settings > 2 Defrost Settings Defrost interval: When the temperature reaches this setting (or is beneath this setting), the cool unit stops cooling. Defrost time: When the temperature reaches this setting (or is beneath this setting), the cool unit stops cooling. Continue cooling / Defrost (stop cool unit): When set to Defrost the sampler stops cooling to defrost. 6.2.3 Cool after first sample To safe power it is possible to set the sampler to start cooling when a sample is taken. To use this setting go to: F2 Menu > 3 Cool settings > 1 Cool unit Set points Go to the reset menu to reset the cooling and press 5. 6.2.4 Cool alarm settings In development. Page 19 Efcon Vision User Manual Version 260115UK 6.3 Log settings Data (totalizers, counters, etc.) of the Vision 130TM are internally stored in data tables. When a new row is stored in the data table, the oldest row (last) is erased and the rows above are copied to one row below. To read the stored data from the Vision 130TM press: F1 “Data Log”, press the numeric key to select the desired data. De Vision 130™ contains the following 6 data tables: Previous cycle history: Stores the beginning and end date & time of every cycle, stores: total m3, number of samples, number of error samples and min and max temperatures. (2000 log rows). Stored on SD-card. Total/sample history: Stores values: total m3, number of samples & number of error samples according a preset time interval. (2000 log rows). Stored on SD-card. Temperature/level history: Stores the level & temperature values according a preset time interval. (2000 log rows). Stored on SD-card Event history: Stores event with date & time. For example: start program, stop program, error samples, alarm messages, etc. (1000 log rows). Store load sampler Settings: Store and load programmed sampler settings such as; sample interval distributor settings, input signals etc. Default settings are stored under program 0 NEN 6600 Check: Cycle history + flow check (see the calculated flow velocity in percentages) For Dutch market. Storing program settings It is possible to store settings for 9 different programs. The following settings are stored: Sample interval Level sensor settings Sample volume Temperature sensor settings Maximum error samples Pump settings Distributor turn time Cool settings Distributor turn day Log settings Distributor interval Container configuration Overflow protection Program name Flow signal settings F1 Data Log > 5 Sampler settings 1. Enter the password. 2. Select a number from 1 – 9* to store the program settings. 3. Press F1 to store the current settings to the selected program. 4. Press F2 to load the stored settings from the selected program. 5. Each program can be named (maximum of 8 characters), this way the programs are more recognizable. * Program 0 cannot be changed, these are the default settings. Page 20 Efcon Vision User Manual Version 260115UK To change the SD card logging settings go to: F2 Menu > 6 General settings > 3 Log settings 1 Frequency: Determine the log frequency. Choose which totalizer is displayed. Also choose a time to reset the interval. 2 Event Log: Select extra events to log in de event log. 4 SD Card: Change settings regarding de SD-card. 6.3.1 Frequency log settings To change the frequency log settings go to: F2 Menu > 6 General settings > 3 Log settings > 1 Frequency log Log frequency: Determine at what time interval the data needs to be stored. Select to Display: Select which totalizer is displayed in the readout menu. Write to SD-card time: Determine at what (clock) time table should be written to the SD-card & the time interval needs to reset & start again. 6.3.2 Event log settings On default settings the sampler doesn’t log the samples, cool unit actions & pump actions in the event log file. To have these actions logged go to: F2 Menu > 6 General settings > 3 Log settings > 2 Event log 6.3.4 SD-Card Vision 130TM is standard equipped with a micro-SD-card. The data stored in the data tables of the vision can be copied to an SD-card. Each time the sampler stores data to the data table, a copy is made on the SD-card inside. To adjust the SD-card settings: F2 Menu > 6 General settings > 3 Log settings > 5 SD-Card 6.3.4.1 Copy data table to SD-card When a new row is stored in the data table, the vision copies the complete data table to the SD-card. 6 General settings > 3 Log settings > 5 SD-Card > 1 Copy to SD Choose which data table (log file) needs to be copied to the SD-card & press the corresponding numeric key. When the loading bar is full the file is successfully copied. Page 21 Efcon Vision User Manual Version 260115UK 6.3.4.2 Changing log file name Every table can be stored with an unique file name. To change this file name go to: 6 General settings > 3 Log settings > 5 SD-Card > 2 Log file name Use the numeric keys to change the filename (like making a textmessage on a mobile phone). 6.3.4.3 SD-card History To check the last successful writing of the data to SD-card go to: 6 General settings > 3 Log settings > 5 SD-Card > 2 SD history 6.4 SMS settings (optional) Optional for the Vision 130 TM is a GSM-module to receive text messages from the sampler, such as totalizer values, alarms, etc. 6.4.1 Phone numbers To receive text messages the receiving phone number. Go to: F2 Menu >6 General settings >2 SMS Settings >1 Phone numbers 6.4.2 Status SMS To select which events should be reported by text message go the menu: 2 Menu > 6 General settings > 4 SMS Settings > 4 Status SMS Cycle counters: Send a text when the distributor turns to the next container containing the values of : the total counter, cycle counter, sample counter & error counter Status Program: Send when the sample program status changes. (starts or stops by manually / calendar or date & time) Extra: Not used 6.4.3 Alarm SMS 1 To select which alarms should be reported by text message go to: 2 Menu > 6 General settings > 4 SMS Settings > 4 Status SMS 1 or 2 Menu > 6 General settings > 4 SMS Settings > 4 Status SMS 2 Page 22 Efcon Vision User Manual Version 260115UK To many error samples: Send text when the sampler goes in alarm when to many consecutive error samples are taken. High level alarm: Send text when the high level alarm switches on/off (When equipped with a pump controller) Low level alarm: Send text when the low level alarm switches on/off (When equipped with a pump controller) Overflow level: Send text when the overflow level alarm switches on/off (When equipped with a pump controller) Pomp 1 error: Send text when pomp 1 switches in alarm Pomp 2 error: Send text when pomp 1 switches in alarm Level sensor defect: Send text when the level sensor gives an error signal. Extra: Not used 6.4.4 Modem settings No access for users. 6.5 System To change system characteristics go to: 2 Menu > 6 General settings > 5 System System name: To give the sampler its own name. (see §6.5.1) Hardware Configuration: System hardware setup, not for users. I/O check the input- and output status (see §6.5.3) 6.5.1 System Name To give a sampler a name (maximum of 8 characters) go to: 2 Menu > 6 General settings > 5 System > 1 System Name 6.5.2 Hardware configuration This parameter cannot be entered by users. 6.5.3 Container Configuration To change the container configuration go to: F2 Menu > 3 Distributor settings > 3 Container Config. Number of Containers: Fill in how many containers will be used. Container Volume: Fill in the volume of each container. Page 23 Efcon Vision User Manual Version 260115UK 6.5.4 I/O check To check the input- and output status go to: 2 Menu > 6 General settings > 5 System > 2 Input Signals 5 Input Signals When a digital input or output is active the corresponding number will be displayed. E.g.: the display on the left shows input D01 and output O06 active. 6.5.5 Ethernet Settings (optional) An optional Ethernet-extension-module makes it possible to connect the Vision to a computer network. You can access the vision with program Remote access or Remote Operator (download). Data (data tables only with Remote access) can be downloaded and settings can be changed online from your desktop computer. To assign an IP-address, subnet mask & gateway to the Vision, go to: 2 Menu > 6 General settings > 5 System > 5 Input Signals 6.5.6 Changing Password settings The program settings are protected with a password. When entering an wrong password it’s still possible to take a manual sample or rotate the distributor to the next container. To alter the password settings go to: 2 Menu > 6 General settings > 5 System > 6 Changing password Password: You can change to password, adjustable from 1-9999 Key pad time out: When the menu is active and no keys are pressed during a set, the menu closes. For re-entering the menu the password needs to be entered again. Password bypass: Bypass the password protection, no password needs to be entered when entering the menu. Page 24 Efcon Vision User Manual Version 260115UK 7 Reading SD-card Requirements To retrieve the data stored on the micro SD-card, the following is required: • • PC with installed Unitronics SD-card suite software * Card-reader, suitable for SD-cards * Download the software from the following link: http://www.unitronics.com/Content.aspx?page=Downloads Scroll down to SD-card-suite and press free download. Open the installation file and follow the instructions. Retrieving data 1) Check menu 6.3.5.3 when the last data transfer from Vision to SD-card took place. 2) Remove the SD-card from the vision. 3) Place the SD-card inside the card reader from your PC. 4) Open the program SD Card Suite and right-click on Data Tables Editor. 5) Right-click the Open icon. 6) Select the folder “DT” from the SD card. 7) Select the file to open. Page 25 Efcon Vision User Manual Version 260115UK 8 Default settings The Vision 120TM has the following default settings: Sample principle Sample interval Sample Volume Activation time ILS sampler* Air pump settings Maximum number of error samples* Turn time * Distributor interval * Container configuration * Turn after power failure * Container overflow protection Cool settings Defrost cycle Start cooling after First sample Pulse input Temperature Sensor settings Password Page 26 Volume Proportional Mo=1m3, Tu=1m3, We=1m3, Tu=1m3, Fr=1m3, Sa=1m3, Su=1m3 50 ml 3 sec (only for ILS samplers) Purge time = 7 sec, Maximum suction time = 20 sec, Dose time = 8 sec (vacuum only) 0 (off) 08:00 Mo, Tu, We, Th, Fr, Sa, Su (all days) Off 4 containers 15 litres Off On Set point high= 5°C, Set point low= 3°C Interval = 3 hours Shut off 15 minutes Off 1 pulse = 0,1 m3 Min= -325, Max= 445, Offset -9 5555