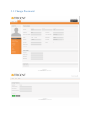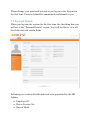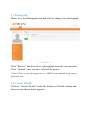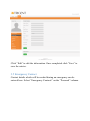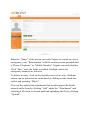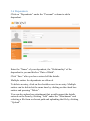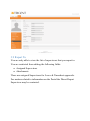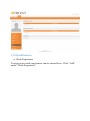
1
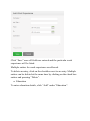
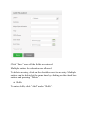
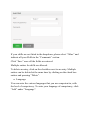
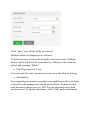
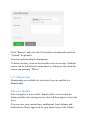
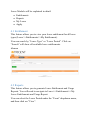
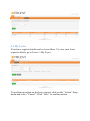
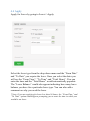
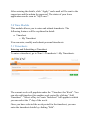
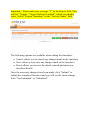
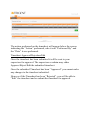
USER MANUAL for TRIGENTHRM Contents 1.0 Audience ..................................................................................................................................... 3 2.0 TrigentHRM................................................................................................................................ 3 3.0 My Info Module .......................................................................................................................... 3 3.1 Change Password .......................................................................................................................... 4 3.2 Personal Details ............................................................................................................................ 5 3.3 Photograph .................................................................................................................................... 6 3.4 Contact Details .............................................................................................................................. 6 3.5 Emergency Contact ....................................................................................................................... 7 3.6 Dependents.................................................................................................................................... 9 3.7 Immigration................................................................................................................................. 10 3.8 Job ............................................................................................................................................... 11 3.9 Report To .................................................................................................................................... 12 3.10 Qualifications ............................................................................................................................ 13 3.11 Membership .............................................................................................................................. 19 4.0 Leave Module ........................................................................................................................... 19 4.1 Entitlement .................................................................................................................................. 20 4.2 Reports ........................................................................................................................................ 20 4.3 My Leave .................................................................................................................................... 21 4.4 Apply .......................................................................................................................................... 22 5.0 Time Module............................................................................................................................. 23 5.1 Timesheets .................................................................................................................................. 23 1.0 Audience This document is intended for the Users of TrigentHRM. 2.0 TrigentHRM Log in to TrigentHRM with the Username provided as shown below: 3.0 My Info Module My Info Module provides you with a view of your Personal Information. You are encouraged to update your personal information. * Note - The Personal & Contact Details fields will not be available for edit after 10 Days from date of User creation. You are requested to update your Personal & Contact Details within 10 Days after which changes will need to be routed through HR for updates. You will see the edit functionality span through the system for a few fields. Please ensure all your details are accurate for records. 3.1 Change Password Please change your password as soon as you log in to the System for the first time. Password should be maintained confidential to you. 3.2 Personal Details When you log into the system for the first time, the first thing that you will see is the “Personal Details” screen. You will be able to view all the fields and edit certain fields. Following are restricted fields and need to be populated by the HR Admin: Employee ID Driver License No. Date of Birth 3.3 Photograph Mouse over the Photograph area and click to change your photograph. Click “Browse” and then select a photograph from the relevant path. Click “Upload” once you have selected the picture. * Note: Please restrict the image size to <1MB.You may upload in jpg, png or gif format only. 3.4 Contact Details Click on “Contact Details” under the Employee Details column and the screen as shown below appears. Click “Edit” to edit the information. Once completed click “Save” to save the entries. 3.5 Emergency Contact Contact details which will be needed during an emergency can be entered here. Select “Emergency Contacts” on the “Personal” column. Enter the “Name” of the person you wish Trigent to contact in case of emergency, your “Relationship” with the contact person provided and a “Home Telephone” or “Mobile Number” Trigent can reach him/her. Click “Save” once the fields are added. Multiple entries for emergency contacts are allowed. To delete an entry, click on the checkbox next to an entry. Multiple entries can be deleted at the same time by clicking on the check box entries and pressing “Delete”. You can also upload any attachment that would support the details entered on the form by clicking “Add” under the “Attachment” and selecting a file from a relevant path and uploading the file by clicking “Upload”. 3.6 Dependents Click on “Dependents” under the “Personal” column to add a dependent. Enter the “Name” of your dependent, the “Relationship” of the dependent to you and his/her “Date of Birth”. Click “Save” after you have entered all the details. Multiple entries for dependents are allowed. To delete an entry, click on the checkbox next to an entry. Multiple entries can be deleted at the same time by clicking on the check box entries and pressing “Delete”. You can also upload any attachment that would support the details entered on the form by clicking “Add” under the “Attachment” and selecting a file from a relevant path and uploading the file by clicking “Upload”. 3.7 Immigration To add immigration information, select “Immigration” under the “Personal” column. Select the document type (Passport or Visa) you wish to add details of, the “Number” whether it is a passport number or a visa number, the “Issued Date”, “Expiry Date”, the “Eligible Status” of your Passport/Visa and the “Eligible Review Date” as to when the eligibility status was reviewed. You may add a comment if necessary. Click “Save” once the fields are entered. You may add multiple entries of immigration documents. To delete an entry, click on the checkbox next to an entry. Multiple entries can be deleted at the same time by clicking on the check box entries and pressing “Delete”. You should also upload attachment of the Passport/Visa copy that would support the details entered on the form by clicking “Add” under the “Attachment” and selecting a file from a relevant path and uploading the file by clicking “Upload”. 3.8 Job You cannot make changes in the job details. You are only able to view your job details. You are restricted from editing the following fields: Job Title Job Specification (if defined) Employment Status Job Category Joined Date Sub Unit Location Employment Contract Start Date (if applicable) Employment Contract End Date (if applicable) Attachments 3.9 Report To You are only able to view the list of supervisors that you report to. You are restricted from editing the following fields: Assigned Supervisors Attachments There are assigned Supervisors for Leave & Timesheet approvals. For matters related to information on the Portal the Direct Report Supervisor may be contacted. 3.10 Qualifications Work Experience Your previous work experiences can be entered here. Click “Add” under “Work Experience”. Click “Save” once all fields are entered and the particular work experience will be listed. Multiple entries for work experience are allowed. To delete an entry, click on the checkbox next to an entry. Multiple entries can be deleted at the same time by clicking on the check box entries and pressing “Delete”. Education To enter education details, click “Add” under “Education”. Click “Save” once all the fields are entered. Multiple entries for education are allowed. To delete an entry, click on the checkbox next to an entry. Multiple entries can be deleted at the same time by clicking on the check box entries and pressing “Delete”. Skills To enter skills, click “Add” under “Skills”. If your skills are not listed in the dropdown, please select “Other” and indicate all your Skills in the “Comments” section. Click “Save” once all the fields are entered. Multiple entries for skills are allowed. To delete an entry, click on the checkbox next to an entry. Multiple entries can be deleted at the same time by clicking on the check box entries and pressing “Delete”. Language You can enter the various languages that you are competent in, with the level of competency. To enter your language of competency, click “Add” under “Language”. If your languages are not listed in the dropdown, please select “Other” and indicate languages known in the “Comments” section. Click “Save” once all the fields are entered. Multiple entries for languages are allowed. To delete an entry, click on the checkbox next to an entry. Multiple entries can be deleted at the same time by clicking on the check box entries and pressing “Delete”. License In this section you can enter the licenses/certifications that you may have. Click “Add” under “License”. Click “Save” once all the fields are entered. Multiple entries for languages are allowed. To delete an entry, click on the checkbox next to an entry. Multiple entries can be deleted at the same time by clicking on the check box entries and pressing “Delete”. Total Experience in Years You can enter the total experience in years as on the Date of Joining. Attachments Any supporting documents regarding your qualification that you think is needed by the management can be attached here. Please note that each document cannot exceed 1 MB, but you can attach more than one document. To add an attachment, click “Add” under attachment. Click “Browse” and select the file from the relevant path and click “Upload” to upload it. You may upload multiple attachments. To delete an entry, click on the checkbox next to an entry. Multiple entries can be deleted at the same time by clicking on the check box entries and pressing “Delete”. 3.11 Membership Membership are available for selection if you are entitled to a Membership. 4.0 Leave Module You can apply for leave online. Email will be sent to notify the Admin and the relevant supervisors who will then approve/reject the leave. You can view your current leave entitlement, leave balance and notification of leave approvals by your supervisors or the Admin. Leave Module will be explained in detail: Entitlements Reports My Leave Apply 4.1 Entitlement This feature allows you to view your leave entitlement for all leave types (Leave>>Entitlements>>My Entitlement). You can search by “Leave Type” or “Leave Period”. Click on “Search” will show all available leave entitlements. itlemen 4.2 Reports This feature allows you to generate Leave Entitlement and Usage Reports. You will need to navigate to Leave>>Entitlements>>My Leave Entitlements and Usage Report. You can select the Leave Period under the “From” dropdown menu, and then click on “View”. 4.3 My Leave Your leave request details can be viewed here. To view your leave requests details, go to Leave>>My Leave. To perform an action on the leave request click on the “Action” drop down and select “Cancel”. Click “Save” to confirm action. 4.4 Apply Apply for Leave by going to Leave>>Apply. Select the leave type from the drop down menu and the “From Date” and “To Date” you require the leave. Once you select the dates you will see the “From Time”, “To Time” and “Total Hours”. You can enter the time and the “Total Hours” would automatically populate. The “Leave Balance” would also appear indicating how many leave balance you have for a particular leave type. You can also add a comment on why you need the leave. * Note: If you are applying for leave less than 24 hours, the “From Time” and “To Time” option would appear prompting you to enter the time in which you would be on leave. After entering the details, click “Apply” and a mail will be sent to the supervisor and the admin for approval. The status of your leave application can be seen in “My Leave”. 5.0 Time Module This module allows you to enter and submit timesheets. The following features will be explained in detail: Timesheet o My Timesheet You can enter, modify and submit personal timesheets. 5.1 Timesheets Entering and Submitting a Timesheet To enter a timesheet, go to Time>>Timesheets>>My Timesheets. The current week will populate under the “Timesheet for Week”. You can also add timesheet for another week period by clicking “Add Timesheet”. “Select a Day to Create Timesheet” will appear in which you can select the 1st day of the week. Once you have selected the week period for the timesheet, you can enter the timesheet details by clicking “Edit”. Important – Please make sure you type “T” in the Project field. This will list “Trigent – Trigent Software Limited”, which you should select. Select “Trigent Timesheet” in the “Activity Name” field. The following options are available when editing the timesheet: Cancel: allows you to cancel any changes made in the timesheet Save: allows you to save any changes made in the timesheet Reset: allows you to reset the details entered and enter new timesheet details Once the necessary changes have been made, click “Submit” to submit the completed timesheet and you will see the status change from “Not Submitted” to “Submitted”. The action performed on the timesheet will appear below the screen indicating the “Action” performed, who it was “Performed By” and the “Date” it was performed. Timesheet Approval/Rejection/Edit Once the timesheet has been submitted it will be sent to your supervisor for approval. The supervisor or admin may either Approve/Reject/Edit the submitted timesheet. Once the submitted Timesheet has been “Approved” you cannot make any changes to the timesheet submitted. However if the Timesheet has been “Rejected”, you will be able to “Edit” the timesheet and re-submit the timesheet for approval.