1
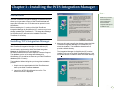
TOP
Copyright © 2003 Replicon, Inc. All rights reserved.
All parts of this manual are the property of Replicon, Inc.
No parts of this manual may be reproduced in any manner
whatsoever including mechanical or electronic media such
as disk or tape. No part of this manual may be transmitted
in any form by any means without the written permission of
Replicon, Inc.
Web TimeSheet is a registered trademark of Replicon, Inc.
All other products are registered trademarks or trademarks
of the respective companies.
Contact Information
Replicon, Inc.
830, 910 - 7th Ave. S.W.
Calgary, Canada T2P 3N8
Direct:
1-403-262-6519
Toll Free in North America:*
1-877-737-5420
Toll Free in Europe:*
00-800-7375-4266
Toll Free in Australasia:*
011-800-7375-4266
Fax:
1-403-233-8046
http://www.replicon.com
[email protected]
*The international toll free numbers
may not work in some countries. If you
experience problems, use the direct line
to contact Replicon.
Contents
Chapter 1 - Installing the WTS Integration
Manager
1
Introduction ........................................................................ 1
Installing WTS Integration Manager ................................... 1
Chapter 2 - Using the WTS Integration Manager
3
Accessing WTS Integration Manager ................................. 3
Preparing to Export Data .................................................... 3
Timesheet Export ......................................................... 3
Time Off Export ........................................................... 4
Expense Export ........................................................... 4
Exporting Data to QuickBooks ........................................... 4
Chapter 3 - Field Relationships
5
Chapter 1 - Installing the WTS Integration Manager
Note ...
Introduction
Make sure you install
Web TimeSheet 5.1
before installing the
Web TimeSheet
Integration Manager for
QuickBooks (IIF).
The Web TimeSheet Integration Manager for QuickBooks (IIF)
allows you to generate a report of Web TimeSheet data and
export the information to a .iif file that can be opened in Intuit
QuickBooks.
Before installing the 5.1 version of the Web TimeSheet
Integration Manager for QuickBooks (IIF), make sure you have
already installed Web TimeSheet 5.1. The Integration Manager
for QuickBooks (IIF) will need to be installed in the Web
TimeSheet 5.1 directory.
Installing WTS Integration Manager
This section explains how to complete the installation of the
Web TimeSheet Integration Manager for QuickBooks (IIF).
You will need to purchase the Web TimeSheet Integration
Manager for QuickBooks (IIF) and obtain the
WTS51QuickBooksLink.exe from Replicon Customer Support.
The database version of the Integration Manager for
QuickBooks (IIF) should be the same as your Web TimeSheet
database (SQL or Oracle).
3. Next you will need to specify the directory where the Web
TimeSheet Integration Manager for QuickBooks (IIF)
should be installed. The installation wizard does not
provide a default directory.
The Integration Manager for QuickBooks (IIF) must be
installed in the root of the Web TimeSheet directory. Use
the Browse button to locate the Web TimeSheet directory.
The Installation Wizard will guide you through the installation
process.
1. Stop the service associated with Web TimeSheet and
back up the Web TimeSheet database.
2. Launch the WTS51QuickBooksLink.exe file. The
Welcome screen is displayed.
1
4. Click the Next button on the Choose Destination
Location screen to continue with the installation.
5. Now you are ready to install the Web TimeSheet
Integration Manager for QuickBooks (IIF). Click the Next
button to start the installation.
6. When the installation is complete, click the Finish button
to close the Installation Wizard.
2
7. Restart the Web Timesheet service. You are now ready to
use the Web TimeSheet Integration Manager for
QuickBooks (IIF).
Chapter 2 - Using the WTS Integration Manager
Accessing WTS Integration Manager
The Web TimeSheet Integration Manager for QuickBooks (IIF)
is accessible as a report from within Web TimeSheet. You can
access this report as follows:
1. Log in to Web TimeSheet and click on the Reports button
at the top of the screen.
2. Select QuickBooks Link (under the QuickBooks
heading) from the side menu.
Preparing to Export Data
Before exporting Web TimeSheet data to Intuit QuickBooks, you
must set up the report. You can set up the following reports:
•
Timesheet Export (sends data to the Intuit QuickBooks
Timesheet module, and then the client invoice)
•
Time Off Export (sends data to the Intuit QuickBooks
Timesheet module)
•
Expense Export (sends data to the Intuit QuickBooks
vendor bills)
Timesheet Export
To export timesheet data:
1. Click on the Reports button at the top of the screen and
select Timesheet Export from the list of QuickBooks
Export reports in the side menu.
2. Select the appropriate timesheet period and specify
whether you want to include all timesheets, or only those
which have not yet been exported.
3. Click the Settings button. On the Basic Settings tab,
select the fields you want to export, and specify how the
client and project information should be mapped to Intuit
QuickBooks. Project information can be mapped to
QuickBooks Item, Class, or both.
4. Make sure you enter the correct information in the fields
towards the bottom of the screen (CompanyName,
CompanyCreateTime, Ver, and Rel).
CompanyCreateTime is a unique number that identifies
your organization in your version of Intuit QuickBooks. To
locate this number, run Export Lists for Timer... in Intuit
QuickBooks and open the resulting .iif file (by default the
file name is timer.iif).
5. Now select the Advanced Settings tab to set up more
advanced export options (optional):
Export time to QuickBooks as ...
Specify whether you would like to export time data to
QuickBooks as QuickBooks Time (default) or as a client
invoice. If you select QuickBooks Time, you can still
create a client invoice manually from within Intuit
QuickBooks.
Select Employee Types that act as vendors
If you have specific Web TimeSheet employee types that
should be considered vendors in Intuit QuickBooks, you
can select those employee types here. The time data for
any selected employee types will be exported to vendor
bills (instead of QuickBooks Time) in Intuit QuickBooks. If you have selected to export data as a client invoice, your
data will remain unaffected.
Specify Vendor Transaction Account
These are the accounts that will be credited/debited for
the vendor transactions (employee types selected above).
The credit account is the name of the liability account from
Intuit QuickBooks. The debit account is selected from the user defined fields
for Web TimeSheet employee types. To select a debit
account, you must set up one employee type user defined
field containing this information. You can then select a
field from the Debit Account drop-down list.
Note ...
If you are exporting
time off data (Time Off
Export report), be
aware that only
approved timesheets
will be included in the
report and exported to
Intuit QuickBooks.
Time off hours are
identified as nonbillable when exported
to Intuit QuickBooks.
Before exporting
expense information,
you must set up User
Defined Field #10 for
clients, which is
mapped to the
Accounts Payable
Name field in Intuit
QuickBooks. Refer to
the Web TimeSheet
User Manual for
further information
about creating user
defined fields.
Intuit Quick Books
does not allow a name
to be used in more
than one list. Please
make sure you do not
use the same name
for customers (client
name in Web
TimeSheet), vendors
(expense description),
or items (project
name/task name).
3
Map Fields
You may wish to map client specific user defined fields to
client information in Intuit QuickBooks. You cannot repeat
field mapping - meaning, you can map one user defined
field to one field in Intuit QuickBooks.
6. Click the Save button to save your settings. If you made a
mistake, you can click the Reset button to restore the
previous settings. Time Off Export
To export time off data:
1. Click on the Reports button at the top of the screen and
select Time Off Export from the list of QuickBooks Export
reports in the side menu.
2. Select the appropriate timesheet period and specify
whether you want to include time off information for all
timesheets, or only those which have not yet been
exported.
3. Click the Settings button. On the Basic Settings tab, enter
the correct information in the fields for CompanyName,
CompanyCreateTime, Ver, and Rel.
CompanyCreateTime is a unique number that identifies
your organization in your version of Intuit QuickBooks. To
locate this number, run Export Lists for Timer... in Intuit
QuickBooks and open the resulting .iif file (by default the
file name is timer.iif).
5. Click the Save button to save your settings. If you made a
mistake, you can click the Reset button to restore the
previous settings. Expense Export
For the Expense Export, you must first define User Defined
Field #10 for clients, which is mapped to the Accounts Payable
Name field in Intuit QuickBooks (refer to the Web TimeSheet
User Manual for instructions on setting up user defined fields).
To export expense data:
1. Click on the Reports button at the top of the screen and
select Expense Export from the list of QuickBooks Export
reports in the side menu.
4
2. Select the appropriate timesheet period and specify
whether you want to include all timesheets, or only those
which have not yet been exported.
3. Click the Settings button. On the Basic Settings tab,
specify how the client information should be mapped to
Intuit QuickBooks.
4. Now select the Advanced Settings tab to set up more
advanced export options (optional):
Export expense data as ...
Specify whether you would like to export expense data to
QuickBooks as a vendor bill (default) or as a client invoice.
If you select vendor bill, you can still create a client invoice
manually from within Intuit QuickBooks.
Map Fields
You may wish to map client specific user defined fields to
client information in Intuit QuickBooks. Select the user
defined fields you would like to export and specify the
Intuit QuickBooks field to which each user defined field will
be mapped. You can only select a QuickBooks field once
(no repetition).
5. Click the Save button to save your settings. If you made a
mistake, you can click the Reset button to restore the
previous settings. Exporting Data to QuickBooks
Once you have set up your report, you are ready to export the
data to Intuit QuickBooks. To export the data, simply click the
QuickBooks button at the top of the report.
Only data for approved timesheets/expense sheets will be
included in the export.
When you export the data, Web TimeSheet will create a .iif file
that can be opened in Intuit QuickBooks and accessed through
either the timesheets or time reports.
Chapter 3 - Field Relationships
The following table specifies which Web TimeSheet fields can be exported to Intuit QuickBooks. The report name refers to the
report where each field is available for export.
Report Name
Web TimeSheet Field
Intuit QuickBooks Field
Timesheet Export
User Name
Emp
Timesheet Export
Entry Date
Date
Timesheet Export
Client Name
Job
Timesheet Export
Client Project
Job
Timesheet Export
Project Name
Item, Class
Timesheet Export
Billable
Billing Status
Timesheet Export
Task Name
Item, Class
Timesheet Export
Role
Item
Timesheet Export
Total Hours
Duration
Timesheet Export
Comments
Note
Time Off Export
User Name
Emp
Time Off Export
Entry Date
Date
Time Off Export
Total Hours
Duration
Time Off Export
Comments
Note
Expense Export
Client User Defined Field 10
Accounts Payable Name
Expense Export
Expense Sheet Amount
Bill Amount Due
Expense Export
Expense Sheet Date
Bill Date
Expense Export
Expense Sheet Description
(limited to 30 characters)
Vendor Name
Expense Export
Expense Client
Expense Customer
Expense Export
Expense Code
(limited to 30 characters)
Expense Account Name
Expense Export
Expense Entry Amount
Expense Amount
Expense Export
Expense Entry Description
Expense Memo
© 2003 by Replicon Inc. All rights reserved.
5