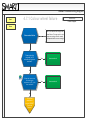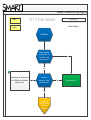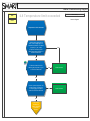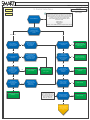
1
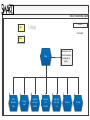
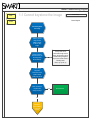
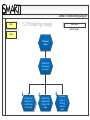
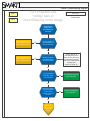
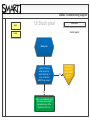
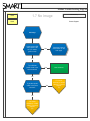
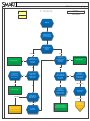
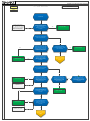
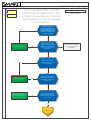
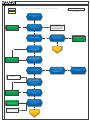
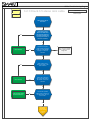
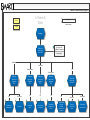
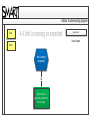
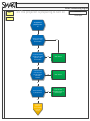
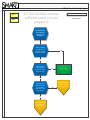
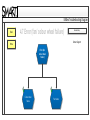
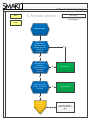
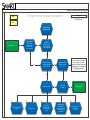
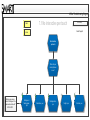
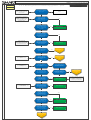
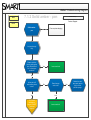
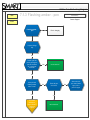
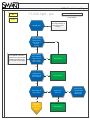
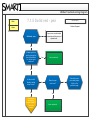
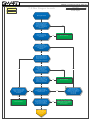
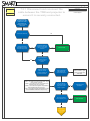
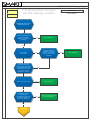
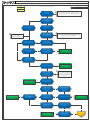
LR60wi Troubleshooting Diagram
Light Raise 60wi
Last revised: June 26, 2014
Light Raise 60wi
Glossary of Terms
Image
Network
Audio
Power & other
Serial interface
LR60wi Units are available
only for AR options.
Remote control
Finger touch or
pen interaction
smarttech.com/support
smarttech.com/contactsupport
© 2014 SMART Technologies ULC. All rights reserved. SMART Board, SMART Document Camera, the SMART logo, smarttech and all SMART taglines are trademarks or registered trademarks of
SMART Technologies ULC in the U.S. and/or other countries. All third-party product and company names may be trademarks of their respective owners.
Installation
LR60wi Troubleshooting Diagram
Revision History
1. Image
Back
Contact Support
Home
Always bypass any VGA
splitters for troubleshooting
any image issues on
projector.
Image
Cannot
keystone the
image
Flickering
image
Image shifts
when input is
connected
Video source
is not
recognized
Noisy image
(snowy, fuzzy,
etc.)
Stuck pixel
No image
LR60wi Troubleshooting Diagram
Back
1.1 Cannot keystone the image
Revision History
Contact Support
Home
Cannot keystone
the image
Ensure you are
using the blue
SMART splash
screen to align
image.
Factory reset can be
performed through service
menu. Service menu can be
accessed using navigation
keys on the remote control in
following order:
Down, up, up, left, up.
Perform a factory
reset to ensure you
are using all the
default settings.
Follow image
alignment
instructions in the
textless install
guide page 22-26.
Were you able to
keystone the
image properly?
No
For further
assistance,
contact SMART
Technical
Support.
Yes
Issue resolved.
LR60wi Troubleshooting Diagram
Back
1.2 Flickering image
Revision History
Contact Support
Home
Flickering
image
What kind of
flickering are
you seeing?
Projector has
‘rolling’ bars or
lines flickering
in the image.
Projector has
sparkles and/
or noise in the
image.
Projected
image is
flickering
different
colours.
LR60wi Troubleshooting Diagram
Back
Home
1.2.1 Projector has
‘rolling’ bars or
lines flickering in the image
Revision History
Contact Support
Projector has
‘rolling’ bars or
lines flickering in
the image
Monitor the issue. If the
issue re-appears, contact
SMART Technical Support.
Yes
Set the computer to
1280x800 @60Hz. Is
the issue resolved?
No
Monitor the issue. If the
issue re-appears, contact
SMART Technical Support.
Yes
Factory reset can be
performed through service
menu. Service menu can be
accessed using navigation
keys on the remote control in
following order:
Down, up, up, left, up.
Reset the projector
to its default state. Is
the issue resolved?
No
Try using a different
VGA cable. Is the
issue resolved?
Yes
Issue resolved, replace the
original VGA cable.
Yes
There is a problem with
your configuration.
No
Bypass any splitters
or accessories such
as a document
camera. Is the issue
resolved?
No
For further
assistance,
contact SMART
Technical
Support.
LR60wi Troubleshooting Diagram
1.2.2 Projector has sparkles
and/or noise in the image
Back
Home
Projector has
sparkles and/or
noise in the
image.
Try another video
cable. Is the issue
resolved?
Ensure all extenders and video splitters are
bypassed whenever troubleshooting image
issues.
Yes
Issue resolved, replace the
video cable.
Yes
Perform all driver updates
on the computer and check
with your local IT
department. It is possible
the video card is defective.
No
Try another
computer. Is the
issue resolved?
No
Issue resolved.
Yes
Factory reset can be
performed through service
menu. Service menu can be
accessed using navigation
keys in following order:
Down, up, up, left, up.
Perform a factory
reset on the
projector. Is the
issue resolved?
No
Disconnect all the
inputs from the
projector except
the power cable. Is
the issue
resolved?
Yes
The problem is with the
cabling or the image source
(i.e. computer)
No
For further
assistance,
contact SMART
Technical
Support.
Revision History
Contact Support
LR60wi Troubleshooting Diagram
Back
Home
1.2.3 Projected image is flickering
different colours.
Ensure all extenders, VGA
splitters are bypassed
whenever troubleshooting
image issues.
Projector is flickering
different colours
For further
assistance, contact
SMART Technical
Support.
(A)
No
Disconnect all the inputs
from the projector beside
power cable. Does this
resolve the issue?
Set the computer to
1280x800 @60Hz. This can
be checked from the
projector’s menu
Yes
Reconnect cables and
bypass XCP if
applicable. Is the issue
resolved?
Yes
For further
assistance, contact
SMART Technical
Support.
(B)
No
Determine which
source is causing
issue and replace
source. Is the issue
resolved?
Yes
Issue is the source. Use a
different computer, DVD,
VCR, etc or attempt to
adjust the source output
settings.
No
Try replacing
cabling between
source and
projector. Is the
issue resolved?
Yes
No
Issue resolved.
Yes
Try factory reset on
projector. Is the
issue resolved?
No
For further
assistance, contact
SMART Technical
Support.
(C)
Factory reset can be
performed through service
menu. Service menu can be
accessed using navigation
keys in following order:
Down, up, up, left, up.
Revision History
Contact Support
LR60wi Troubleshooting Diagram
Back
Home
1.3 Image shifts when
input is connected
Contact Support
Ensure all extenders, VGA
splitters are bypassed
whenever troubleshooting
image issues.
Image Shifts When Input is
Connected
Set the input source to
1280x800@60 Hz resolution.
Verify that the projector
recognizes the resolution by
checking the projector on
screen menu using the remote.
Is the issue resolved?
Revision History
Yes
Issue resolved.
Yes
Issue is with the cabling or
setup.
Yes
Issue resolved.
No
Bypass any splitters, hubs,
extenders or accessories such
as a document camera by
connecting a direct video cable
(i.e. VGA) from computer to
projector. Is the issue
resolved?
No
Swap computer and video
cable one at a time. Is the
issue resolved?
No
Example: If the current input
source is VGA, using remote
switch to HDMI and go back to
VGA.
When the shift occurs, change the
input using the remote and return
to the input that is being used.
OR
Attempt to reset the computer to
the projector native resolution.
Does either of these workarounds
resolve the issue?
No
For further
assistance, contact
SMART Technical
Support.
(B)
Yes
For further
assistance, contact
SMART Technical
Support.
(A)
LR60wi Troubleshooting Diagram
Back
1.4 Video source is not recognized
Revision History
Contact Support
Home
Video source is not
recognized
Is the issue resolved
by setting the computer
to 1280x800@ 60Hz?
Yes
No
Check the VGA for
damaged pins and
reconnect it. Is the
issue resolved?
Yes
Issue resolved.
No
Try a known working
video cable and ensure
correct source is
selected. Is the issue
resolved?
Yes
No
If the computer is a
laptop, ensure that the
computer’s external
display port is enabled.
Is the issue resolved?
Yes
Issue resolved.
Yes
Issue is with the video
source.
No
Use a different video
source (laptop, VCR,
DVD). Is the issue
resolved?
No
For further
assistance,
contact SMART
Technical
Support.
LR60wi Troubleshooting Diagram
Back
1.5 Noisy image (snowy, fuzzy, etc.)
Revision History
Contact Support
Home
Ensure all extenders, VGA
splitters are bypassed
whenever troubleshooting
image issues.
Noisy image (snowy,
fuzzy, etc.)
Inspect VGA for
damaged pins and
reconnect it. Is the issue
resolved?
Yes
No
Set the computer to
1280x800@ 60Hz. Is
the issue resolved?
Yes
Issue resolved.
No
Swap the VGA cable. Is
the issue resolved?
Yes
No
Connect the computer
and projector to the
same wall outlet or
power bar. Is the issue
resolved?
No
For further
assistance,
contact SMART
Technical
Support.
Yes
Issue resolved.
LR60wi Troubleshooting Diagram
Back
1.6 Stuck pixel
Revision History
Contact Support
Home
Stuck pixel
Confirm if it occurs
when no input is
connected. Does it
occur on the blue
SMART logo screen?
No
This is not considered a stuck
pixel issue, please select
appropriate issue at the
beginning of the Tree.
Yes
For further
assistance,
contact SMART
Technical
Support.
LR60wi Troubleshooting Diagram
Back
1.7 No image
Revision History
Home
Contact Support
No Image
Is the service LED
and/or power LED
on? (i.e. amber,
green or red)
Yes
Check the Power &
other section on the
main page
Yes
Issue resolved.
No
Try a different
power outlet. Is the
issue resolved?
No
Try another power
cable. Is the issue
resolved?
No
For further
assistance, contact
SMART Technical
Support.
(B)
Yes
For further
assistance, contact
SMART Technical
Support.
(A)
LR60wi Troubleshooting Diagram
2. Network
Back
Revision History
Contact Support
Home
Network
Network settings
can be found on
the User’s Manual
Try assigning an
IP to the
projector.
Manual IP
Issue resolved.
Try a different IP.
Another PC is
already assigned to
that IP address.
Yes
Yes
Did the IP
address stay and
is projector
connected?
DHCP
Did the IP
address stay and
projector is
connected?
No
No
Are you able to
ping the IP
address from a
network PC?
Does the PC get
an IP assigned
when plugged into
the network
connection?
Yes
Yes
Yes
Issue resolved.
Consult your
network
administrator. IP
assignment may
be restricted to
Mac addresses
No
Not connected
Consult your
network
administrator as
there is no DHCP
server on the port.
Try manual IP
connection.
No
Issue resolved.
Connected
Assign the IP
again. May be a
DHCP Server.
Not connected
Not connected
Contact your network
administrator as the
network refused the IP.
Try DHCP
connection.
Consult your network
administrator as there is no
DHCP server on the port.
For further
assistance,
contact SMART
Technical
Support.
LR60wi Troubleshooting Diagram
3. Audio
Back
Revision History
Contact Support
Home
Audio
No sound
Audio
feedback/
noisy audio
LR60wi Troubleshooting Diagram
3.1 No sound
Back
Revision History
Contact Support
Home
No sound
Factory reset can be
performed through service
menu. Service menu can be
accessed using navigation
keys in following order:
Down, up, up, left, up.
Power cycle the unit and
perform a factory reset in
the service menu
(DUULU). Is the issue
resolved?
Yes
Issue resolved.
No
Bypass XCP if applicable.
Is the issue resolved?
No
Confirm the cable from the
audio source (i.e. PC) that
being used to send audio
(HDMI or USB) is securely
connected to the projector.
Is the issue resolved?
Yes
No
Issue resolved.
Yes
Confirm the cable being
used to transmit audio
(HDMI or USB) is working
correctly. Is the issue
resolved?
Yes
Reconnect XCP and
reconnect cabling. Is the
issue resolved?
Yes
Issue resolved.
No
For further
assistance, contact
SMART Technical
Support.
(A)
No
Are you using the internal
projector speakers?
No
Yes
Issue resolved.
Yes
This turns the internal
speaker on.
Confirm the “speaker”
setting in the OSD under
the basic audio control
menu is set to “on” and
volume set to 20. Is the
issue resolved?
No
Confirm the computer is
set to output the audio to
the LR60wi. Is the issue
resolved?
Yes
No
Issue resolved.
The original device was not
outputting any audio.
Yes
Try connecting another
audio source to the
projector. Is the issue
resolved?
No
For further
assistance, contact
SMART Technical
Support.
(B)
Confirm the “line out”
setting in the OSD under
the basic audio control
menu is set to “on” and
volume set to 20. Is the
issue resolved?
Yes
Issue resolved.
No
Confirm the 3.5mm stereo
mini cable from the
projector audio out jack to
the speakers are securely
connected. Is the issue
resolved.
LR60wi Troubleshooting Diagram
3.1.1 Confirm the 3.5mm
stereo mini cable from the
projector audio out jack to
the speakers are securely
connected.
Back
Home
Revision History
Contact Support
Confirm the 3.5mm
stereo mini cable from
the projector audio out
jack to the speakers are
securely connected. Is
the issue resolved?
Yes
No
Issue resolved.
Yes
Confirm the computer
image is being projected
and it isn’t on the SMART
blue logo. Is the issue
resolved?
No
Swap out the 3.5mm
stereo mini cable. Is the
issue resolved?
Yes
No
Issue resolved.
Yes
Confirm the computer is
set to output the audio to
the LR60wi. Is the issue
resolved?
No
Issue resolved, contact
speaker manufacturer. If
they are SMART speakers,
please contact support.
No
Connect the speakers
directly to the computer or
an audio device. Do you
have sound?
Yes
For further
assistance,
contact SMART
Technical
Support.
Audio out port is disabled
when no video source is
being used.
LR60wi Troubleshooting Diagram
Back
3.2 Audio feedback/ noisy audio
Revision History
Contact Support
Home
Audio feedback/ noisy
audio
Issue resolved.
Yes
Factory reset can be
performed through service
menu. Service menu can be
accessed using navigation
keys in following order:
Down, up, up, left, up.
Power cycle the unit and
perform a factory reset in
the service menu
(DUULU). Is the issue
resolved?
No
Bypass XCP if applicable.
Is the issue resolve?
Yes
No
Yes
Issue resolved.
No
Confirm the cable from the
audio source (i.e. PC) that
is being used to send
audio (HDMI or USB) is
securely connected to the
projector. Is the issue
resolved?
Yes
Reconnect XCP and
reconnect cabling. Is the
issue resolved?
For further
assistance, contact
SMART Technical
Support.
(A)
No
Issue resolved.
Yes
Confirm the cable being
used to transmit audio
(HDMI or USB) is working
correctly. Is the issue
resolved?
No
Are you using the internal
projector speakers?
Yes
This turns the internal
speaker on.
Confirm the “speakers”
setting in the OSD under
the basic audio control
menu is set to “on” and
volume set to 20. Is the
issue resolved?
Yes
No
Issue resolved.
Yes
Confirm the computer is
set to output the audio to
the LR60wi. Is the issue
resolved?
No
Issue resolved, contact
speaker manufacturer. If
they are SMART speakers,
please contact support.
Yes
Try connecting another
audio source to the
projector. Is the issue
resolved?
No
The original device was
causing the feedback.
For further
assistance, contact
SMART Technical
Support.
(B)
No
Confirm the “line out”
setting in the OSD under
the basic audio control
menu is set to “on” and
volume set to 20. Is the
issue resolved?
No
Check 3.5mm stereo mini
cable
LR60wi Troubleshooting Diagram
3.2.1 Check 3.5 stereo mini cable
Back
Revision History
Contact Support
Home
Check 3.5mm stereo
mini cable
Confirm the 3.5mm
stereo mini cable from
the projector audio out
jack to the speakers are
securely connected. Is
the issue resolved?
Yes
No
Issue resolved.
Yes
Confirm the computer
image is being projected
and it isn’t on the SMART
blue logo. Is the issue
resolved?
No
Swap out the 3.5mm
stereo mini cable. Is the
issue resolved?
Yes
No
Issue resolved.
Yes
Confirm the computer is
set to output the audio to
the LR60wi. Is the issue
resolved?
No
Issue resolved, contact
speaker manufacturer.
No
Connect the speakers
directly to the computer or
an audio device. Do you
have sound?
Yes
For further
assistance,
contact SMART
Technical
Support.
Audio out port is disabled
when no video source is
being used.
LR60wi Troubleshooting Diagram
4. Power &
Other
Back
Revision History
Contact Support
Home
No image
See p.60 on the
LightRaise™ interactive
projectors User’s guide for
further details.
What is the
status of the
power LED?
Solid amber
Solid green
Flashing amber
Off
Flashing green
What is the
status of the
diagnostics
LED?
Off
Projector is in
standby mode
Flashing red
Lamp error
What is the
status of the
diagnostics
LED?
What is the
status of the
diagnostics
LED?
What is the
status of the
diagnostics
LED?
Off
Off
Off
Unit is running
as expected
The projector
is preparing to
turn on
Unit cooling
down
What is the
status of the
service LED?
Off
Solid red
The unit does
not have
sufficient
power or is not
plugged in
Error (fan
colour wheel
failure)
Flashing red
Temperature
limit exceeded
LR60wi Troubleshooting Diagram
Back
4.1 Projector is in standby mode
Revision History
Contact Support
Home
Projector is in
standby mode
Ensure you point the remote to the
projector sensor.
To test the remote, you may try to use
it on another SMART projector or take
another remote that works from
another SMART projector.
Turn on the projector
using a known
working remote. Is
the issue resolved?
Bypass the XCP (if
applicable) and turn
on the projector. Is
the issue resolved?
Yes
Yes
Issue resolved.
For further assistance,
contact SMART
Technical Support.
(A)
No
Power cycle the
projector. Is the issue
resolved?
Yes
No
Plug the projector into
another wall. Is the
issue resolved?
Yes
Issue resolved.
No
Try a known working
power cable. Is the
issue resolved?
No
For further assistance,
contact SMART
Technical Support.
(C)
Yes
For further assistance,
contact SMART
Technical Support.
(B)
LR60wi Troubleshooting Diagram
Back
4.2 Lamp error
Revision History
Contact Support
Home
Lamp error
Swap the lamp with
a known working
lamp. Is the issue
resolved?
Yes
No
Instructions can be found on
the LR60wi User’s Manual
found on p.47.
Clean the projector.
Is the issue
resolved?
Yes
Issue resolved.
Yes
Issue resolved.
No
Power cycle the unit.
Is the issue
resolved?
No
For further
assistance,
contact SMART
Technical
Support.
LR60wi Troubleshooting Diagram
Back
4.3 Unit cooling down
Revision History
Contact Support
Home
Unit cooling down
Allow the unit to cool
down and power the
unit back up. Is the
issue resolved?
Yes
No
Instructions can be found on
the LR60wi User’s Manual
found on p.47.
Clean the projector.
Is the issue
resolved?
Yes
Issue resolved.
Yes
Issue resolved.
No
Power cycle the
projector. Is the
issue resolved?
No
For further
assistance,
contact SMART
Technical
Support.
LR60wi Troubleshooting Diagram
Back
4.4 Unit is running as expected
Revision History
Contact Support
Home
Unit is running
as expected
Yes
Select the most
appropriate symptoms on
the main page
LR60wi Troubleshooting Diagram
Back
4.5 The projector is preparing to turn on
Revision History
Contact Support
Home
The projector is
preparing to turn
on
Wait for the projector
to power on. Is the
issue resolved?
Yes
No
Try a known working
remote to turn on the
projector. Is the
issue resolved?
Yes
Issue resolved.
Yes
Issue resolved.
No
Select the most
appropriate symptom on
the main page.
No
Reseat the lamp
cover and power
cycle the projector.
Is the issue
resolved?
No
Does it continue to
try and power on?
Yes
For further
assistance,
contact SMART
Technical
Support.
LR60wi Troubleshooting Diagram
Back
Home
4.6 The unit does not have
sufficient power or is not
plugged in
Revision History
Contact Support
The unit does not
have sufficient
power or is not
plugged in
Unplug and replug
the projector in to
the power outlet. Is
the issue resolved?
Yes
No
Plug the projector
into a different
power outlet. Is the
issue resolved?
Yes
Issue resolved.
No
Swap the power
cable with another
known working
power cable. Is the
issue resolved.
No
For further assistance,
contact SMART
Technical Support.
(B)
Yes
For further assistance,
contact SMART
Technical Support.
(A)
LR60wi Troubleshooting Diagram
Back
4.7 Error (fan/ colour wheel failure)
Revision History
Contact Support
Home
Error (fan
colour wheel
failure)
Colour wheel
failure
Fan failure
LR60wi Troubleshooting Diagram
Back
4.7.1 Colour wheel failure
Home
Not to be confused with image color
wheel failure. This one results in the
projector turning off and is usually
accompanied with an error message
Colour wheel failure
Power cycle the
projector for 30
seconds. Is the issue
resolved?
Yes
Issue resolved.
Yes
Issue resolved.
No
Follow the instructions
for cleaning the
projector on p.47. Is the
issue resolved?
No
For further
assistance,
contact SMART
Technical
Support.
Revision History
Contact Support
LR60wi Troubleshooting Diagram
Back
4.7.2 Fan failure
Revision History
Contact Support
Home
Fan failure
Power cycle the
projector for 30
seconds. Is the
issue resolved?
Yes
No
Instructions can be found on
the LR60wi User’s Manual
found on p.47.
Clean the
projector. Is the
issue resolved?
No
For further
assistance,
contact SMART
Technical
Support.
Yes
Issue resolved.
LR60wi Troubleshooting Diagram
Back
4.8 Temperature limit exceeded
Revision History
Contact Support
Home
Temperature limit exceeded
Is the unit too close to the
roof, under a bright light, or
otherwise unable to cool down
properly? If yes, install
projector according to the
install guide specifications. Is
the issue resolved?
Yes
No
Follow the instructions for
cleaning the projector on p.47.
Is the issue resolved?
Yes
Issue resolved.
Yes
Issue resolved.
No
Power cycle the projector for
60 seconds by unplugging
and replugging the power
cable. Is the issue resolved?
No
For further
assistance,
contact SMART
Technical
Support.
LR60wi Troubleshooting Diagram
5. Serial interface
Back
Home
Serial interface
Revision History
The serial interface of the projector acts as a Data
Communications Equipment (DCE) device and its settings
can’t be configured. You must configure your computer’s
serial communication program (such as Microsoft Hyper
Terminal) of your room control system’s serial
communication settings with the following values:
Baud rate: 19200
Data length: 8
Parity bit: None
Stop bit:1
See p.81 on the LR60wi Interactive Projector User’s Guide
Contact Support
Are you sending
commands from a
PC or a room control
system?
Room control
Do you have a
console that shows
you responses?
PC
No
Connect a PC so you
can identify if an
error message is
generated.
Are you seeing any
responses?
Yes
Check your
connection
properties against
the manual on page
63. Is the issue
resolved?
Ensure the use of the
correct RS232
commands as per the
user manual. Did this
resolve the issue?
No
Check your
connection
properties against
the manual on page
82. Is the issue
resolved?
Yes
Incorrect configuration.
Issue resolved.
Review the RS232
commands found in the
user’s guide.
Incorrect connection
details. Issue resolved.
Use a known
working serial cable.
Is the issue
resolved?
Yes
The cable was faulty. Issue
resolved.
Yes
Issue resolved.
Yes
Issue resolved.
No
No
Bypass the room
control system and
follow the PC
troubleshooting.
Power cycle the
projector. Is the
issue resolved?
No
Yes
The cable was faulty. Issue
resolved.
Yes
No
No
Use a known
working serial cable.
Is the issue
resolved?
Review the RS232
commands found in the
user’s guide.
No
Yes
Are you seeing any
responses?
Yes
Factory reset can be
performed through service
menu. Service menu can be
accessed using navigation
keys in following order:
Down, up, up, left, up.
Reset the projector
to its factory state. Is
the issue resolved?
No
For further assistance,
contact SMART
Technical Support.
(A)
LR60wi Troubleshooting Diagram
Back
6. Remote control
Revision History
Contact Support
Home
Remote control
Make sure the
plastic housed
inside the remote
has been removed.
Is the issue
resolved?
Yes
No
Confirm the remote
has direct line of
sight to the
projector IR sensor.
Is the issue
resolved?
Yes
Issue resolved.
Yes
Issue resolved.
No
Replace the battery
remote. Is the issue
resolved?
No
For further
assistance,
contact SMART
Technical
Support.
Any black SMART
projector remote can be
used.
LR60wi Troubleshooting Diagram
7. Finger touch or pen interaction
Back
Revision History
Contact Support
Home
Finger touch or
pen interaction
Issue resolved.
Yes
Download and
install latest
software and
drivers. Is the
issue resolved?
No
Are SMART
product drivers
11.1 (ESI 2013) or
higher installed?
Yes
No
Does the serial
number start with
Q010 or Q011?
Yes
Upgrade the touch
firmware version
to 1.1.2.0.
No
Is the issue
resolved?
You can locate this information
on the projector on screen
display by using the remote and
pressing menu. It is located on
the right-most column.
No
What is the issue?
No interactive pen
touch
No finger touch
Inaccurate
interactive pen
and/or finger
touch
Interactive pen
and/or finger
touch occurs only
certain areas of
the surface
Yes
Issue resolved.
Interaction occurs
on the wrong
screen
LR60wi Troubleshooting Diagram
Back
7.1 No interactive pen touch
Revision History
Contact Support
Home
No interactive
pen touch
What is the pen
status light when
in use?
Flashing green occurs
instead of solid green if the
serial number starts with
Q010 or Q011.
Solid green or
flashing green pen
Solid amber - pen
Flashing amber pen
No light - pen
Solid red - pen
LR60wi Troubleshooting Diagram
Back
7.1.1 Solid green or flashing green - pen
Revision History
Contact Support
Home
Flashing green occurs
instead of solid green if the
serial number starts with
Q010 or Q011.
Solid green or flashing
green - pen
Pen is charged and ready
to use.
If something is blocking the
projected image and
creating a shadow on the
surface, the interactive pen
may not work in the
shadowed area.
Confirm the USB
cable is securely
connected from the
computer to the
projector touch port. Is
the issue resolved?
Yes
No
Confirm that a shadow
is not obstructing the
area you are trying to
write on. Is the issue
resolved?
Yes
Issue resolved.
No
Confirm that there
aren’t any obstructions
within 2.5" of the
projected image such
as cabling, nails,
sticky notes, etc. Is the
issue resolved?
Yes
No
Listed under the
operational settings menu,
fourth column from the left.
You must use the remote
to access this menu.
Ensure the current
video input correspond
to the touch settings in
the OSD menu. Is the
issue resolved?
Yes
Issue resolved.
No
Try using a known
working pen. Is the
issue resolved?
Yes
For further
assistance, contact
SMART Technical
Support.
(A)
No
Also known as finger
touch.
Are you able to
interact with the
projector using your
finger?
Yes
For further
assistance, contact
SMART Technical
Support.
(B)
No
Located on the bottom
center of the SMART
settings.
Open the SMART
Settings and check the
status.
Your SMART Board
interactive whiteboard
is working properly
Try another computer.
Ideally one that works
on another LR60wi. Is
the issue resolved?
No SMART Boards
are connected. Press
Connection Wizard.
No
For further
assistance, contact
SMART Technical
Support.
(C)
Yes
Launch the
connection wizard
and follow the
onscreen instructions.
Is the issue resolved?
Yes
Issue resolved.
Yes
Issue resolved.
No
Bypass all extenders and
accessories.
Connect the projector
(touch port) directly to
the computer using a
USB cable no longer
that 16ft. Is the issue
resolved?
No
Disconnect or
reconnect the USB
cable between the
computer and
projector (touch port).
Is the issue resolved?
Yes
No
Try another known
working USB cable or
confirm existing USB
cable is working. Is
the issue resolved?
Yes
Issue resolved.
Yes
Issue resolved.
No
Try another computer.
Ideally one that works
on another LR60wi.
Is the issue resolved?
No
For further
assistance, contact
SMART Technical
Support.
(D)
If another computer resolved
the issue, contact your system
administrator as there may be
something conflicting or
corrupt on your machine.
LR60wi Troubleshooting Diagram
Back
7.1.2 Solid amber - pen
Revision History
Contact Support
Home
Solid amber pen
Pen requires charging
Let pen charge
fully
Power cycle the
pen by turning the
pen off and back
on. Is the issue
resolved?
Yes
Issue resolved.
No
Does the pen
work now?
No
Is the pen still
solid amber when
in use?
Yes
Yes
For further
assistance,
contact SMART
Technical
Support.
Issue resolved.
No
Select the new
pen state (status
light) on the
previous page.
LR60wi Troubleshooting Diagram
Back
7.1.3 Flashing amber - pen
Revision History
Contact Support
Home
Flashing amber pen
Pen is charging
Let pen charge
fully
No
Power cycle the
pen by turning the
pen off and back
on. Is the issue
resolved?
Yes
Issue resolved.
No
Is the pen still
flashing amber
when in use?
No
Does the pen
work now?
Yes
Yes
For further
assistance,
contact SMART
Technical
Support.
Issue resolved.
No
Select the new
pen state (status
light) on the
previous page.
LR60wi Troubleshooting Diagram
Back
7.1.4 No light - pen
Revision History
Contact Support
Home
Pen is fully discharged, in
sleep mode, or is not
turned on.
No light - pen
Pick up the pen
and try to use it to
wake it up from
sleep mode. Is
the issue
resolved?
Yes
No
The LightRaise™ interactive
projectors User’s guide contains
additional information on the
pen. See p.27 for more details.
Power cycle the
pen by switching
the pen off and
back on. Is the
issue resolved?
Yes
Issue resolved.
Yes
Issue resolved.
No
Does the pen
work now?
No
Charge the pen
for 2 hours, is the
issue resolved?
No
Does the pen still
have no light?
Yes
Yes
For further
assistance,
contact SMART
Technical
Support.
Issue resolved.
No
Select the new
pen state (status
light) on the
previous page.
LR60wi Troubleshooting Diagram
Back
7.1.5 Solid red - pen
Revision History
Contact Support
Home
A pen error was detected
on startup and the pen isn’t
operational.
Solid red - pen
No
Power cycle the
pen by turning the
pen off and back
on. Is the issue
resolved?
Yes
Issue resolved.
No
Is the pen still
flashing amber
when in use?
Yes
For further
assistance,
contact SMART
Technical
Support.
No
Does the pen
work now?
Yes
Issue resolved.
No
Select the new
pen state (status
light) on the
previous page.
LR60wi Troubleshooting Diagram
7.2 No finger touch
Back
Revision History
Contact Support
Home
No finger touch
Power cycle the unit
by unplugging the
power and plugging it
back in. Is the issue
resolved?
Yes
No
Perform a factory
reset. Is the issue
resolved?
Yes
Issue resolved.
No
Launch the
connection wizard. Is
the connection wizard
able to see the
LR60wi?
No
Are you connecting a
direct USB cable no
longer that 16ft from
the projector (touch
port) to the computer?
Yes
Disconnect or
reconnect the USB
cable between the
computer and
projector (touch port).
Is the issue resolved?
No
Yes
Yes
No
Try another known
working USB cable or
confirm existing USB
cable is working. Is
the issue resolved?
Yes
Issue resolved.
No
Connect a direct USB
cable no longer than
16ft. Is the issue
resolved?
No
Is the connection
wizard able to see the
LR60wi now?
Yes
No
Issue resolved.
Try another computer.
Ideally one that works
on another LR60wi.
Is the issue resolved?
No
For further
assistance,
contact SMART
Technical
Support.
Yes
Yes
Disconnect and
reconnect the cable
between the TDM and
projector to ensure it
is securely
connected.
Issue resolved. Contact
your system administrator
as there may be something
conflicting or corrupt on
your machine.
LR60wi Troubleshooting Diagram
Back
Home
7.2.1 Disconnect and reconnect the
cable between the TDM and projector to
ensure it is securely connected.
Revision History
Contact Support
Disconnect and
reconnect the cable
between the TDM
and projector to
ensure it is securely
connected.
Is the issue resolved?
Yes
No
Is the touch setting
the OSD menu match
the input being used?
No
Change the setting to
match the input video
source. Is the issue
resolved?
Yes
Issue resolved.
No
Yes
Start the alignment
process by running
the connection
wizard.
Select the LR60wi
and then choose
“product is being set
up for the first time”.
4 Stars – The surface is within preferred limits. Finger
touch detection is optimal.
3 Stars – The surface has minor imperfections that
may affect finger touch accuracy.
2 Stars – The surface has significant imperfections
that will affect finger touch accuracy.
1 Star – The surface has major imperfections. Finger
touch is disabled; interaction is with pen only.
Refer to the LR60wi
textless installation guide
(p.29) for visuals of the
instructions.
Press “initial setup”
and follow the on
screen instructions.
Are you able to
complete the initial
setup with a 3 star
rating or higher?
No
Troubleshoot the
installation.
Yes
Issue resolved.
Yes
Do you have finger
touch capability now?
No
For further
assistance,
contact SMART
Technical
Support.
LR60wi Troubleshooting Diagram
Back
7.3 Inaccurate interactive pen
or finger touch
Revision History
Contact Support
Home
Inaccurate
interactive pen or
finger touch
Factory reset can be
performed through service
menu. Service menu can be
accessed using navigation
keys on the remote control in
following order:
Down, up, up, left, up.
Set the computer
resolution to
1280x800. Is the
issue resolved?
Yes
Issue resolved.
No
Power cycle the unit
and perform a factory
reset in the service
menu (DUULU). Is the
issue resolved?
Yes
Issue resolved.
Yes
No
Does the computer
resolution match the
resolution the
projector shown in the
OSD menu?
No
Yes
Shorten the length of
the video cable or
confirm that it works
on another setup. Is
the issue resolved?
Run the connection
wizard, select the
LR60wi, and choose
the appropriate issue.
No
No
For further
assistance,
contact SMART
Technical
Support.
Follow the on-screen
instructions to perform
the 36-point pen
orientation which is
followed by the 9 –
point finger
orientation. Is the
issue resolved?
No
Troubleshoot the
installation.
The User’s Guide contains
additional information on
the OSD. See p.97 for
further details.
You should be selecting,
"ink doesn’t align with the
pen or finger contact point.”
or “Finger touch doesn’t
align with the contact
point.”
Yes
Issue resolved.
LR60wi Troubleshooting Diagram
Back
Home
7.4 Interactive pen and/or
finger touch occurs only
certain areas of the surface
Interactive pen and/
or finger touch
occurs only certain
areas of the surface.
Troubleshooting the
installation
Revision History
Contact Support
LR60wi Troubleshooting Diagram
Back
Home
7.5 Interaction occurs
on the wrong screen
Revision History
Contact Support
Interaction occurs on
the wrong screen.
Ensure the LR60wi is
set as the primary
display. Is the issue
resolved?
Yes
Issue resolved.
No
Is this a Mac
computer?
Using a mouse or
trackpad, move the
cursor to the primary
display. Is the issue
resolved?
Yes
No
Perform an orientation
but make sure the
orientation is displayed
on the projector. Press
spacebar to move the
orientation screen
between the displays.
Is the issue resolved?
No
Yes
Issue resolved.
Yes
There is a problem with
your configuration.
No
Bypass any type of
extenders or
accessories such as a
document camera. Is
the issue resolved?
No
For further
assistance,
contact SMART
Technical
Support.
Yes
Issue resolved.
LR60wi Troubleshooting Diagram
8 Installation
Back
Revision History
Contact Support
Home
Visit the LightRaise 60wi and 60wi2 interactive
projector page for various documentation resources.
Installation
Is the projector image
being projected
directly on the wall or
on some kind of dryerase board?
Type of dry-erase
board.
Directly on the wall
Confirm the selected
surface (projected
area) is relatively flat,
plumb, parallel, and
within tolerances with
the wall.
Check if there are any
bezels. Bezel thickness
cannot exceed
specifications. See page 3.
Is there a bezel on
the selected surface?
No
Are you able to
complete the initial
setup with 3-star
rating or higher now?
No
Bezel must be
removed or a new
surface or location
must be used. Is the
issue resolved?
If the image is not being projected directly on a flat wall
then we must confirm that the surface they are using
(i.e., dry-erase board) is level and plumb with the wall.
Tolerance is <10 mm. See page 3.
Yes
Yes
Is the less than 3
mm?
No
Yes
Issue resolved.
Yes
Issue resolved.
Yes
Remove any
obstructions near or
on the projected
image, i.e., screws,
nap rails, cabling etc.
No
Is the issue resolved?
No
Is the image is not being
projected directly on a flat wall
then you must confirm that the
surface (i.e., dry-erase board)
is fairly level. Tolerance is
<5mm.
Measure the flatness
of the selected
surface (projected
image). Not in
comparison with the
wall like earlier.
Location or surface being
used must be changed to
be within tolerance.
No
Is the surface within
the 5mm tolerance?
Yes
Are there any objects
near the projected
image that can
potentially reflect the
IR from the TDM i.e.,
chalk tray.
Yes
Remove or cover the
object with black tape
or black material that
will “absorb” the IR to
prevent it from
reflecting.
No
Is the issue resolved?
No
The LR60wi is not designed to
be compatible with other IR
devices and must not be used
simultaneously.
Yes
Remove or turn off
any of these IR
devices. Is the issue
resolved?
Yes
Are there any IR
devices being used in
the vicinity of the
projector (i.e. CAS
speakers)?
Yes
Issue resolved.
No
No
Confirm you are using
the correct number of
shims and/or
spacer(s) as well as
the value of D1. D2
and D3. See p.13.
Are you using correct
number of shims and/
or spacers?
Yes
No
Issue resolved.
Yes
Adjust the setup
accordingly to use the
correct number of
shims and/or
spacer(s). Is the issue
resolved?
No
For further
assistance,
contact SMART
Technical
Support.
LR60wi Troubleshooting Tree
REVISION HISTORY
SECTION
PAGE
REV.
REVISED BY
DATE
DESCRIPTION OF CHANGE
LR60wi Troubleshooting Diagram
Revision History
1.1
Cannot
keystone the
image
Contact Support
For further assistance,
contact SMART Technical
Support.
1.2.1
Projector has ‘rolling’
bars or lines flickering
in image
1.2.2
Projector has
sparkles and noise
in the image
1.2.3
Projector is
flickering different
colours
1.3
Image shifts
when input is
connected
Page 1.2.1 If video port
on projector is faulty,
RMA the projector.
Page 1.2.2 If issue occurs
when no inputs are
connected, RMA the
projector.
Page 1.2.3 If issue occurs
when no inputs are
connected, RMA the
projector.
(A)
Page 1.3 RMA the
projector if all
troubleshooting steps
has been completed and
last step leads to contact
support.
(B)
Page 1.2.3 RMA XCP if
bypassing it resolved the
issue and you confirmed
the video cable works.
(B)
Page 1.2.3 RMA the
projector if all
troubleshooting steps
has been completed and
last step leads to contact
support.
(C)
LR60wi Troubleshooting Diagram
Revision History
1.4
Video source
is not
recognized
1.5
Noisy Image
1.6
Contact Support
Page 1.4 RMA the projector is
all troubleshooting steps has
been completed and last step
leads to contact support.
Page 1.5 RMA the projector if
all troubleshooting steps has
been completed and last step
leads to contact support.
Page 1.6 RMA the projector if
all troubleshooting steps has
been completed and last step
leads to contact support.
Stuck pixel
1.7
Page 1.7 If replacing the
power cable resolved the
issue, RMA power cable.
(A)
Page 1.7 RMA the projector
if all troubleshooting has
been completed and last step
leads to contact Support.
(B)
No Image
3.1
Page 3.1 If bypassing XCP
resolves issue, RMA XCP.
(A)
No Sound
3.1.1
Confirm the 3.5mm
stereo mini cable from
the projector audio
out jack to the
speakers are securely
connected.
Page 3.1.1 RMA projector if
all troubleshooting steps has
been completed and last step
leads to contact support.
Page 3.1 RMA projector if all
troubleshooting steps has
been completed and last step
leads to contact Support.
Issue is with audio input.
(B)
LR60wi Troubleshooting Diagram
Revision History
3.2
Audio
Feedback /
Noisy Audio
3.2.1
Check 3.5
stereo mini
cable
4.1
Projector is in
standby mode
Page 3.2 RMA the XCP if
all troubleshooting has been
completed and last step
leads to contact support.
(A)
Contact Support
Page 3.2 RMA the projector
if all troubleshooting has
been completed and last
step leads to contact
support.
(B)
Page 3.2.1 RMA the
projector if all
troubleshooting steps has
been completed and last
step leads to contact
support.
Page 4.1 RMA the XCP if all
troubleshooting has been
completed and last step leads
to contact support.
(A)
Page 4.1 RMA the power cable
if swapping it resolved the
issue and all troubleshooting
steps has been completed.
(B)
Page 4.1 RMA the projector if
all troubleshooting steps has
been completed and the last
step leads to contact support.
(C)
Issue resolved, contact speaker manufacturer. If they are SMART speakers, please contact support.
4.2
Lamp error
4.3
Unit cooling
down
4.5
The projector
is preparing
to turn on
Page 4.2 RMA the projector
if all troubleshooting steps
has been completed and
last step leads to contact
support.
Page 4.3 RMA the projector
if all troubleshooting steps
has been completed and
last step leads to contact
support.
Page 4.5 RMA the projector
if all troubleshooting steps
has been completed and
last step leads to contact
support.
LR60wi Troubleshooting Diagram
Revision History
4.6
The unit does
not have
sufficient
power or is
not plugged in
4.7.1
Colour wheel
failure
4.7.2
Page 4.6 RMA the power
cable is replacing it resolved
the issue and all
troubleshooting steps were
performed.
(A)
Page 4.6 RMA the projector
if all troubleshooting has
been completed and last
step leads to contact
support.
(B)
Page 4.7.1 RMA the
projector if all
troubleshooting steps has
been completed and last
step leads to contact
support.
Page 4.7.2 RMA the projector if
all troubleshooting steps has
been completed and the last
step leads to contact support.
Fan failure
Issue resolved, contact speaker manufacturer. If they are SMART speakers, please contact support.
4.8
Temperature
limit
exceeded
5
Serial
interface
6
Remote
control
Page 4.8 RMA the projector
if all troubleshooting steps
has been completed and
last step leads to contact
support.
Page 5 RMA the projector if
all troubleshooting steps has
been completed and last
step leads to contact
support.
(A)
Page 6 RMA the remote if
all troubleshooting steps has
been completed and last
step leads to contact
support.
Contact Support
LR60wi Troubleshooting Diagram
Revision History
7.1.1
Solid green or
flashing green
- pen
7.1.2
Solid amber pen
7.1.3
Flashing amber
- pen
Page 7.1.1 RMA the pen if
replacing it resolved the
issue and all troubleshooting
steps were performed.
(A)
Page 4.6 7.1.1 RMA the pen
if replacing it resolved the
issue and all troubleshooting
steps were performed.
(B)
Page 4.6 7.1.1 If you are
able unable to connect to
the projector and you’ve
performed all the steps,
RMA the projector.
Page 7.1.2 RMA the pen if
all troubleshooting steps has
been completed and last
step leads to contact
support.
Page 7.1.3 RMA the pen if
all troubleshooting steps has
been completed and last
step leads to contact
support.
Issue resolved, contact speaker manufacturer. If they are SMART speakers, please contact support.
7.1.4
No light - pen
7.1.5
Solid red pen
7.2
No finger
touch
Page 7.1.4 RMA the pen if
all troubleshooting steps has
been completed and last
step leads to contact
support.
Page 7.1.5 RMA the pen if all
troubleshooting steps has
been completed and last step
leads to contact support.
Page 7.2 RMA the projector
if all troubleshooting steps
has been completed and
last step leads to contact
support.
Contact Support