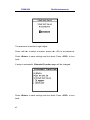
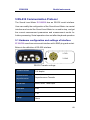
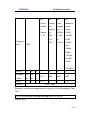
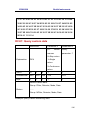
1
ZENITH INSTRUMENTS Zi 308/309 Integrating Sound Level Meter User Manual GB/T 3785 GB/T 17181 GB/T 3241 IEC 61672 IEC 60651 IEC 60804 142 Zi308/309 Zenith Instruments Zi 308/309 Sound Level Meter User Manual Zenith Instruments a brand of Runrite Electronics cc ©Runrite Electronics cc All Rights Reserved Product Features And Specifications Are Subject To Change Without Notice www.runrite.co.za Jun. 2014 1 Zi308/309 Zenith Instruments REVISION HISTORY Version 1.00 1.04 2.00 2.02 Date 2010.9. 17 2011.3. 11 2011.9. 19 Changes Original Version Authors Zhao Dawei Qiao Jie Zhao Dawei Add New Features Qiao Jie Huang Shan Add Rs-232 Protocol 2013.8. Update The Storage 14 Module Huang Shan Qiao Jie Huang Shan Wang Linzhang Zhao Qingyun THIS MANUAL CONTAINS PROPRIETARY INFORMATION THAT SHALL NOT BE USED FOR ANY OTHER PURPOSE THAN THAT FOR WHICH IT HAS BEEN RELEASED. THE INFORMATION CONTAINED HEREIN SHALL NOT BE REPRODUCED OR DISCLOSED TO THIRD PARTIES WITHOUT THE PRIOR WRITTEN CONSENT OF RUNRITE. 2 Zi308/309 Zenith Instruments DIRECTORY 1 INTRODUCTION........................................................................... 8 1.1 GENERAL DESCRIPTION................................................................... 8 1.2 APPLICATIONS:.............................................................................. 8 1.3 FEATURES: ................................................................................... 8 1.4 SPECIFICATION ............................................................................ 10 1.5 MAIN PARTS &ACCESSORIES .......................................................... 14 2 THE APPEARANCE AND STRUCTURE OF THE SOUND LEVEL METER ......................................................................................... 17 2.1 KEYBOARD.................................................................................. 17 2.2 MICROPHONE INTERFACE .............................................................. 19 2.3 SOUND LEVEL METER DATA AND POWER SUPPLY INTERFACE ................. 21 2.4 BATTERY .................................................................................... 23 3 MEASUREMENT INTERFACE SPECIFICATION .............................. 24 3.1 SCREEN DISPLAY ICONS AND MEANING ............................................. 24 3.2 MEASUREMENT INTERFACE............................................................ 26 4 OPERATION AND THE SETTING OF THE MENU ........................... 29 4.1 FUNCTION.................................................................................. 29 4.2 CALIBRATION .............................................................................. 30 4.2.1 By Measurement (Auto calibration) ................................ 30 4.2.2 By Cal.Factor(Calibration by manual) .............................. 31 4.2.3 Auto-calibration process .................................................. 32 4.3 MEASUREMENT .......................................................................... 35 3 Zi308/309 Zenith Instruments 4.3.1 MEAS.Setup ..................................................................... 35 4.3.2 MEAS.Range .................................................................... 38 4.3.3 ICCP Power ....................................................................... 38 4.3.4 Profile 1 ............................................................................ 39 4.3.5 Profile 2 ............................................................................ 40 4.3.6 Profile 3 ............................................................................ 41 4.3.7 Alarm Threshold .............................................................. 41 4.3.8 Extended Function ........................................................... 42 4.3.9 Statistical ......................................................................... 44 4.3.10 Time History ................................................................... 45 4.3.11 Octave Option ................................................................ 46 4.3.12 Custom Measure ............................................................ 47 4.4 SETUP ....................................................................................... 49 4.4.1 Contrast ........................................................................... 49 4.4.2 Backlight .......................................................................... 50 4.4.3 Battery ............................................................................. 50 4.4.4 Trigger.............................................................................. 51 4.4.5 Date & Time ..................................................................... 52 4.4.6 Version ............................................................................. 54 4.4.7 AutoPWROff .................................................................... 55 4.4.8 RS-232 .............................................................................. 56 4.4.9 GPS................................................................................... 60 4.4.10 File Management ........................................................... 60 4.5 LANGUAGE ................................................................................. 63 4.6 OUTPUT .................................................................................... 64 4.7 FACTORY SETTINGS ...................................................................... 67 4 Zi308/309 Zenith Instruments 5 RS-232 COMMUNICATION PROTOCOL ....................................... 68 5.1 HARDWARE CONFIGURATION AND SETTINGS OF INTERFACE .................. 68 5.2 TRANSFER PROTOCOL ................................................................... 69 5.2.1 The beginning and end of the block transfer ................... 69 5.2.2 ID .................................................................................... 70 5.2.3 ATTR Attribute character ................................................. 71 5.2.4 BCC check ......................................................................... 71 5.2.5 Block transfer format ....................................................... 72 5.2.6 Recovery of transmission errors ...................................... 74 5.2.7 Flow Control ..................................................................... 75 5.2.8 Multi-machine operation ................................................. 76 5.2.9 Rated parameters ............................................................ 76 5.3. INSTRUCTION............................................................................. 77 5.3.1 Instruction list .................................................................. 79 5.3.2 Instruction format ............................................................ 82 5.3.3 Instruction describe ......................................................... 84 6. PRODUCT NOTES/CALIBRATION/WARRANTY ......................... 146 6.1 NOTES..................................................................................... 146 6.2 CALIBRATION ............................................................................ 146 6.3 WARRANTY .............................................................................. 146 5 Zi308/309 Zenith Instruments Appearance Microphone and preamplifier 1/4 inch thread LCD with backlight 4xBattery Compartment No-slip surface Cover Lock: Left: unlock Right: lock External Power 9-12V Trigger DC AC 6 Zi308/309 Zenith Instruments Buttons Power Light Power Switch LCD ESC ENTER Arrow keys Backlight START/STOP MENU 7 Zi308/309 Zenith Instruments 1 Introduction 1.1 General Description The ZI 308 is a digital Sound Level Meter that complies with the IEC61672 Class 1, while ZI 309 is Class 2. This instrument is the basic model of ZI 300 series. The use of high precision 24Bits AD converter makes the instrument to be an ideal choice for performing many kinds of measurement tasks, for example, in environmental noise, vehicle noise and industrial application. A main interface can display most useful information of the instrument status and basic noise result. In addition, there is a three profiles interface which displays independently result that measured in parallel. All profiles can be defined different filters (A, C, Z) and detector time constants (Impulse, Fast and Slow). 1.2 Applications: Basic noise measurement Environmental noise assessment Product quality check Noise reduction 1.3 Features: Conforms to IEC61672-1 Class 1, IEC60531 Type 1, GB/T37851985 Class 1, GB/T17181-1997 Class 1 100dB dynamic range Parallel compute a combination of the three frequency weighting and time weighting. 14 groups of custom measurement 8 Zi308/309 Zenith Instruments Measurement mode: SPL, RMS, LEQ, Max, Min, Peak, SD, SEL, E 5 octave meet GB22337-2008 requirements Statistics calculated as a percentage (LN) and time-domain noise curve shows Timing- integral measurement Automatically / manually switch range Measure the upper limit of 131dB (A) (50mV/Pa microphone) , can be expanded to 160dB (A) The fully digital signal processing, wide frequency response range, high dynamic range, low noise instrument background Large-capacity Micro SD card (TF card) storage RS-232 remote control port, can print measurement data via a mini-thermal printer 9 Zi308/309 Zenith Instruments 1.4 Specification ZI 308/309 IEC 61672-1:2002 Class 1 IEC 60651:1979 Class 1 IEC60804:2000 Class 1 IEC 61260:1995 Class 1 ZI 308 ANSI S1.4-1983 Class 1 ANSI S1.43-1997 Class 1 GB/T 3785-1983 Class 1 GB/T 17181-1997 Class 1 GB/T 3241-2010 Class 1 Standard IEC 61672-1:2002 Class 2 IEC 60651:1979 Class 2 IEC60804:2000 Class 2 IEC 61260:1995 Class 2 ZI 309 ANSI S1.4-1983 Class 2 ANSI S1.43-1997 Class 2 GB/T 3785-1983 Class 2 GB/T 17181-1997 Class 2 GB/T 3241-2010 Class 2 10 Zi308/309 Zenith Instruments MPA231T: 1/2 inch pre-polarized ZI 308 measurement microphone , Class 1, Sensitivity : 50mV/Pa Frequency Range :10-20kHz Micropho ne MPA309T: 1/2 inch pre-polarized ZI 309 measurement microphone , Class 2 Sensitivity : 50mV/Pa Frequency Range :10-12.5kHz Microphone interface Detection, filtering TNC, ICCP power supply (4mA/24V) All-digital signal processing LXY(SPL), LXrms, LXeq, LXYsd, LXsel, LXe, LXYmax, LXYmin, LXPeak, LXN Measurement functions Where X is the frequency weighting : A, C, Z Y is time weighting :F, S, I N is the statistical percentage of .1-99 arbitrary set Integration time Integration time is optional Automatic measurement Measurement The measurement data may be stored into the SD card with period of measure time Frequency weighting Time weighting 11 Parallel A, C, Z Parallel F, S, I, and can measure Peak Zi308/309 Octave Zenith Instruments 5 Octave:31.5 Hz, 63 Hz, 125 Hz, 250 Hz, 500Hz Electric signal : ZI 308: 14dB(A), 17dB(C), 23dB(z) Sound signal : ZI 308: 21dB(A), Machine noise 24dB(C), 32dB(z) Electric signal : ZI 309: 18dB(A), 21dB(C), 27dB(z) Sound signal : ZI 309: 23dB(A), 26dB(C), 35dB(z) Up limit 131 dB(A)(50mV/Pa microphone ) Expandable up to 160dB (A) Frequency Range 10-20kHz Dynamic Range 102 dB(A) Range setting AD digits Sampling frequency Analysis rate Noise curve LCD display Storage Post-processing software High / low two steps , can be automatically / manually adjust 24 48kHz 64 times / sec Domain shows the noise curve, History time: 1min, 2min, 10min optional 160x160 LCD, with backlight 4G Micro SD(TF) Use processing software VA-SLM to read the store files , analysis, and generate reports 12 Zi308/309 Zenith Instruments Use adapter (Micro SD to SD card sets), or Export data directly connect the computer to read the memory card data files Output Alarm AC (maximum output 5Vrms of), DC (10mV/dB), RS-232 serial interface Can be set to Alarming 4 on the 5th 1.5V alkaline batteries Power (LR6/AA/AM3), sustainable use of more than 18 hours . It can also be an external 7-14V DC power supply RTC clock Operation Temperature Temperature measurement Size Weight Built-in backup battery. It is no need to reset when replacing the battery -10℃ ~ 50℃ (14°F ~ 122°F) Real-time temperature on the main screen 300 x 70 x36 mm About 620g, including batteries Optional Accessories Extension cords Printer 5m, 10m, 50m Microphone to the host Miniature thermal printer, without ribbon, RS232 interface ☆Note: The given data in the specifications are typical values. 13 Zi308/309 Zenith Instruments 1.5 Main parts &Accessories Nm S/No Description Sound Level Meter host, without the microphone. The host of features including Host 1 ZI308/9 Sound Level Meter mode, single / three kinds of Configuration configuration: the main screen, the Profile Extensions Function Microphone 2 CC308 Case 3 Statistical 4 Time History 5 Octave 6 MA231T 7 MP231 8 MP309 Equipment boxes Statistical analysis to test the cumulative percentage Time history function, record the acoustic parameters of time-varying data Octave function, test 5 octave data ICP preamplifier, TNC interface Class 1 microphone, including the test report(308) Class 2 microphone, including the test report(309) 14 Zi308/309 Zenith Instruments Calibrator of class 1, two 9 CA111 kinds of sound pressure level, 94dB/114dB 10 CA114 Calibrator of class 1, 94dB 11 CA115 Calibrator of class 1,114dB WS002-9 90mm wind-ball, for 1/2 inch wind-ball microphones Micro SD 4G, record data 12 13 14 15 Accessories 16 17 Adapter of Micro SD Battery Connected to the computer AA batteries (LR6/AA/AM3): 4 section Power External power , adapter 9-14V DC power supply USB to RS- For communication with other 232 line devices Miniature thermal printer, 18 Printer without ribbon, RS232 interface Line from TNC to TNC, 5m. 19 CT005 Connection to the host and microphone. 20 15 Tripod Measuring fixtures for the host-site support Zi308/309 Zenith Instruments 21 22 22 Material User manual Factory test certificate User manual Factory test certificate Software CD- Data processing software: VA- ROM SLM Measurement reports of 24 China Certification authority Institute of Metrology ☆Note: See the packet list for more details. 16 Zi308/309 Zenith Instruments 2 The appearance and structure of the sound level meter ZI 308/309 Sound Level Meter uses the same body and the keyboard layout. Instrument front are LCD screen, keyboard and status indicators. 2.1 keyboard Sound Level Meter has 10 keys, namely: <Power> 111111 <▲> <ESC> <▼> <Enter> <◄> < Backlight > <►> <Start/Stop> <Menu> <Power>: Long press this key for 2 seconds will open the sound level meter. Long press button for two seconds will display the shutdown-dialog-box when the Sound Level Meter is in the stopped 17 Zi308/309 Zenith Instruments state. Then, you can press <Enter> to power off. ☆Note: The <Enter> key is invalid when the Sound Level Meter is in the state of measurement. <ESC>: Exit the menu or return to previous menu. You can press <ESC> to clear the history curve at the time history main screen. <Enter>: To the next level menu; confirm the changes of the parameters; data storage (CSD format). < Backlight >: Press to open or close the LCD backlight, backlight duration can be set in the menu. See 4.4.2 to earn more details. <Start/Stop>: Start or stop the measurement. <▲>: Up. Used to select the menu item or adjust the parameters. <▼>: Down. Used to select the menu item or adjust the parameters. <◄>: Turn left. Used to select the menu item or adjust the parameters; Switch main-screen. 18 Zi308/309 Zenith Instruments <►>: Turn right. Used to select the menu item or adjust the parameters; Switch measurement screen. <Menu>: Press to enter the main menu list. 2.2 Microphone interface The TNC interface at the top of the Sound Level Meter is used to connect to a microphone and preamplifier (microphone and preamplifier is a whole), the TNC interface is threaded coaxial connector. ZI 308 is equipped with a microphone of class 1, while the ZI 309 is equipped with class 2: MPA231T: 1/2 inch pre-polarized measurement microphone, class 1. Sensitivity: 50mV/Pa. Frequency range: 10 – 20 kHz. 19 Zi308/309 Zenith Instruments Sound Level Meter itself with the ICCP power. Current: 4mA; voltage: 24V. MPA309T: 1/2 inch pre-polarized measurement microphone, class 2. Sensitivity: 40mV/Pa. Frequency range: 10-12.5 kHz. Sound Level Meter itself with the ICCP power. Current: 4mA; voltage: 24V. Microphone and preamplifier are connected together by thread, unless special circumstances, otherwise please do not separate them. The microphone is a precision measurement sensors, if long-term exposure to high humidity or dust environment would impact microphone. Microphone when not in use, should be placed in a dedicated microphone box to save. The microphone power supply is the ICCP. The supply current specifications are 4mA, voltage 24V. It will damage the microphone if voltage is more than 30V. ZI 308/309 Sound Level Meter has provided I CCP power, so can be directly connected microphone. 20 Zi308/309 Zenith Instruments When you are ready to install the microphone, please inserted into TNC interface. Then tighten the thread until the connections are tight. 2.3 Sound Level Meter data and power supply interface There are 7 interfaces at the bottom of the Sound Level Meter. Open the rubber cover to look at these interfaces. 21 Zi308/309 Zenith Instruments PWR: Power connector, using the standard DC socket (within the core diameter 2.5mm), can be connected to the 7-14V external power supply. ☆Note: Supply voltage over 14V could damage the device! MiniUSB: Unused. The MicroSD: MicroSD card socket, using a standard MicroSD (TF) card as a storage device. ☆Note: The front (literally) down! RS-232: As standard RS-232 interface at remote control mode. It can be used to connect to iniature -thermal-printer in the printer mode. TRIGGER: Trigger input interface using a standard 3.5mm headphone jack. (Look at 4.4.4 for more details.) DC OUT: DC output interface, using a standard 3.5mm headphone jack. (Look at 4.6 for more details.) AC OUT: AC output interface, using a standard 3.5mm headphone jack. 22 Zi308/309 Zenith Instruments AC output is the output of the microphone, the maximum output voltage of ± 7VPeak. 2.4 Battery Turn the button to the left side to unlock the battery compartment cover. Then lift the cover to open it. The ZI 308/309 use four Alkaline battery (LR6/AA/AM3), paying attention to +/- marking in the battery compartment. Do not mix used and new batteries. Close and lock the battery compartment after change the battery. ☆Note: Please ensure that the polarity of the battery compartment and the battery polarity is consistent! 23 Zi308/309 Zenith Instruments 3 Measurement interface specification Sound Level Meter has two functions measurement mode: the Sound Level Meter mode and octave mode. You can select in the menu. Sound Level Meter mode has six measurement-screens. You can press <◄>, <►> to switch. 6 interface: Main screen, 3profile, LN, Time history, Custom measurement 1 and Custom measurement 2. Octave mode has 1 interface: Octave. 3.1 Screen display icons and meaning Main screen of Sound Level Meter mode, for example: 24 Zi308/309 Zenith Instruments This picture is Main screen of Sound Level Meter mode. All the icons are light. Each icon meaning: Start/Stop. Over range (upper or lower). The current state is more than the upper range. ICCP status. It will be on when the ICCP power supply is turned off. Trigger status. It will be on when Sound Level Meter is in the trigger mode. RS-232 status. Display 232 when remote mode. Display PRT when print mode. USB status. Display USB when connected to computer. Micro SD status. Display SD when using SD. Power status. Display plug when using external power. Display battery when using battery. Shows the measured parameters. Frequency weighted icon. Time weighted icon. Range status icon. Display measurement value. 25 Zi308/309 Zenith Instruments Display measurement value. Date and time. The current page and total pages Temperature in the machine. Display measure time. : Timing integration time, : Duration time. 3.2 Measurement interface Main screen. Display the measurement results and the corresponding integration mode, frequency weighting, time weighting and range. The main screen displays is the first set of 3 profile。 3 Profile. Display three groups of measurement results .Group 1 also showed in the main screen. 26 Zi308/309 Zenith Instruments Statistical analysis. Display 10 groups of statistics the percentage of results. Each group of data sources (one of 3 Profile) and the percentage value can be customized. Time history. Shows the current noise value and time domain curve. You can customize the data sources (one of 3 Profile) and the timeline length (1min, 2min, 1 0min). In this interface, press <ESC> to clear the screen and redisplay the curve. 27 Zi308/309 Zenith Instruments Custom measurement 1. The user can set the type of the 14 sets of data. This interface can be displayed before the 7 groups of measurement data. This interface can be displayed to the other seven groups of measurement data. Octave. Display LAeq, LCeq or LZeq and five octave value. You can set alarm limits. If you exceed the limit, the alarm icon is displayed 28 Zi308/309 Zenith Instruments ☆Note: If the SD icon is displayed in the main screen, you can press <Enter> to save data as CSD type in both mode after stopping the measurement. The icon can be opened in MENU/ Measurement/MEAS. Setup/ Logger []. 4 Operation and the Setting of the Menu Press <MENU> to enter the main menu. 4.1 Function Select Function and press <Enter> to enter Function interface. 29 Zi308/309 Zenith Instruments Press <▲>, <▼> to select measurement mode. Press <Enter> to save settings and turn back. Press <ESC> to turn back. 4.2 Calibration Select Calibration and press <Enter> to enter Calibration interface. Temperature, humidity, barometric pressure and so on will impact the microphone's sensitivity. Before each measurement, user must calibrate the Sound Level Meter. There are two calibration methods: Calibration by manual and auto calibration. Calibration by manual method can manually adjust the calibration factor. 4.2.1 By Measurement (Auto calibration) Select By Measurement and press <Enter> to enter the autocalibration interface. 30 Zi308/309 Zenith Instruments Sound Level Meter calibration can be adjusted SPL between 0 ~ 199.9dB. <◄> <►> and <▲> <▼> keys to select the calibration sound pressure level, and <start / stop> key to start calibration. The measurement result is the calibration factor. Then select OK to save the calibration factor, select Cancel to discard the alignment factor. This interface can also display the calibration history. 4.2.2 By Cal.Factor(Calibration by manual) Select By Cal.Factor and press <Enter> to enter By Cal.Factor interface. 31 Zi308/309 Zenith Instruments Users can manually adjust the calibration factor. Press <Enter> to save the Cal.Factor. Press <ESC> to turn back. In the time history, M means By Measurement, while F means By Cal.Factor. 4.2.3 Auto-calibration process Automatic calibration routine calibration, the user needs to use the calibrator. ZI comply with the IEC60942 standard class-1 and class-2 acoustic calibrator. Auto-calibration process: (1) First insert the microphone into the cavity of the calibrator, and to ensure that plug into the bottom and do not loose; 32 Zi308/309 Zenith Instruments (2) Then open the power of the calibrator and the calibrator is set to a constant sound pressure level (for example, 94dB); (3) Select Calibration in the menu. And then press <Enter> to enter the Calibration menu. 33 Zi308/309 Zenith Instruments (4) In the By Measurement, first adjustment Cal.Level, and then press <Start/Stop> to start. (5) After the end of the calibration, the Sound Level Meter will display the latest results of the calibration, press <OK> button to save the calibration results. Press <Cancel> to ignore this measurement. 34 Zi308/309 Zenith Instruments (6) Return to the main screen, press the <start / stop> button to start the measurement (the calibrator is still working), the measurement results show that the stability of 94 dB. 4.3 Measurement Press <▲> <▼> to select the menu item, press <Enter> to enter the sub-menu. 4.3.1 MEAS.Setup Meas.Setup contains four menu options: Start Delay, Measure Time, Rep.Cycles and Logger. 35 Zi308/309 Zenith Instruments Start Delay: Delay time after press <Start/Stop>. There are nine options: 2s, 3s, 4s, 5s, 10s, 15s, 20s, 25s, 30s.Press <◄>, <►> to select. ☆Note: The Start Delay is very important. You can’t set to 0. Measurement Time: Time block, which also be used as buffer time. The total measurement time will be Measurement Time * Rep.Cycles. Measurement Time has 8 options: 1s, 5s, 10s, 30s, 1m, 5m, 10m, 30m, which can be change by <◄>/<►> Rep.Cycles: Number of replications: 1-254 or Inf. It also is the number of data in buffer file (time history file). Logger: Measurement data can be stored in the SD card if checked. There are three types of files can be saved: SWN, OCT and CSD. 36 Zi308/309 Zenith Instruments Level Meter mode, the 3 profiles time history will be saved in SWN file, and 1/1 Octave mode, the time history will be saved in OCT file. In both modes, when the measurement stopped, press <Enter>, the current data will be saved in CSD file. ☆Note: if menu/ Measurement/ Octave option/ integral: No, the saved spectrum will be the data of the last second; and if Integral: Yes, the saved spectrum will be the Leq value of the Measurement Time ( Measurement Time , not multiplied by Rep.Cycles) in the OCT file, or will be the Leq value of the whole Measurement Time (MeasurementTime * Rep.Cycles) in the CSD file ☆Note: If the version of the Sound Level Meter is 2.01, then, if menu/ Measurement/ Octave option/ integral: No, the saved spectrum will be the data of the last second; and if Integral: Yes, the saved spectrum will be the Leq value of the whole Measurement Time (MeasurementTime * Rep.Cycles) in the CSD file and OCT file. Duration Time: Show the total measurement time. ☆Note: There is a example to explain hwo to use the Duration Time. First, you set the mode of Profile1 to LEQ. Then, you set the save of Profile1 to RMS. Set the Measurement Time to 5 minutes. Set the Rep.Cycles to 24. Then the Duration Time is 2h. Look at the SWN file after stopped. The LEQ in the SWN file is LEQ of every 5 minutes. 37 Zi308/309 Zenith Instruments 4.3.2 MEAS.Range There are three ranges: Low, High, Auto. Press <◄>, <►> to select. Press <Enter> to save settings and turn back. Press <ESC> to turn back. 4.3.3 ICCP Power ICCP provide the user to enable or disable the ICCP function. If the ICCP function enable, Sound Level Meter can use the ICCP microphone as the input. User can use other transducer when disable 38 Zi308/309 Zenith Instruments the ICCP. Press <Enter> to save settings and turn back. Press <ESC> to turn back. 4.3.4 Profile 1 Profile 1 enables the user to set the proper parameter of the measurement for first profile which is one of the parallel measurements and display at data-source-name on main screen and first item of 3 profile screens. In order to enter the window one has to press the <Enter> on the inversely displayed Profile 1 text of the Measurement list. Profile 1 option contains 4 alternatives for measurement setup. Press <Up> and <Down> button to select the options. Filter: Supply 3 frequency weighting: A, C and Z. Press<◄>, <►> to select the appropriate frequency weighting. 39 Zi308/309 Zenith Instruments Detector: Supply 3 time weighting: Fast, Slow and Imp. Press<◄>, <►> to select the appropriate time weighting. Mode: Supply 6 mode of significant results: SPL, RMS, PEAK, LEQ, MAX and MIN. Press <◄>, <►>to select the appropriate option.It is used to set the display mode on the measurement screen. Also, this can set the mode of data in the CSD file. Save: Supply 4 mode of save data: RMS, PEAK, MAX and MIN. Press <◄>, <►> to select the appropriate option. This can set the mode of data in the SWN file. Press <Enter> to save settings and turn back. Press <ESC> to turn back. 4.3.5 Profile 2 40 Zi308/309 Zenith Instruments It is same as profile 1. User can set the second profile data of 3profile. 4.3.6 Profile 3 It is same as profile 1. User can set the third profile data of 3profile. 4.3.7 Alarm Threshold When the measurement data exceeds the alarm value, the power light color will turn red. The alarm value setting range is 20 ~ 200dB. 41 Zi308/309 Zenith Instruments Press <Enter> to save settings and turn back. Press <ESC> to turn back. 4.3.8 Extended Function Main and 3 Profile is enabled by default. Statistical, Logger and Octave is optional feature. Enter the password to make it enable after user has got permission. When you press <Enter> at the locked item, you will enter the password page. For example: 42 Zi308/309 Zenith Instruments The password consists of eight digital. Press <◄ <►> to select a location, press <▲> <▼> to set password. Press <Enter> to save settings and turn back. Press <ESC> to turn back. If setup is successful, Extended Function page will be changed: Press <Enter> to save settings and turn back. Press <ESC> to turn back. 43 Zi308/309 Zenith Instruments 4.3.9 Statistical Profile: Press <◄>, <►> to select data source. Data source can be profile 1 or profile 2 or profile 3. Press <Enter> to save settings. Press <ESC> to turn back. LN1-LN10: Set statistical percentage value. Appears to the right is the current percentage value. Press <Enter> to enter setup page. For example: 44 Zi308/309 Zenith Instruments Press <Enter> to save settings and turn back. Press <ESC> to turn back. 4.3.10 Time History Profile: Press <◄>, <►> to select data source. Data source can be profile 1 or profile 2 or profile 3. Time: Time means timeline length. Press <◄>, <►> to select. Press <Enter> to save settings and turn back. Press <ESC> to turn back. 45 Zi308/309 Zenith Instruments 4.3.11 Octave Option Integral: Yes=Integral, No= not integral. Press <◄>, <►> to select. If you select integral, then the LEQ means: (1) In the OCT file: LEQ means the whole measure time (measure time, not Multiplied by rep.Cycles). (2) In the CSD file:LEQ means the measure time(measure time, Multiplied by rep.Cycles). Otherwise, LEQ means every second. Press <Enter> to save settings and turn back. Press <ESC> to turn back. Octave Filter: Press <◄>, <►> to select. Press <Enter> to save settings and turn back. Press <ESC> to turn back. 46 Zi308/309 Zenith Instruments Leq 和 31.5Hz~500Hz: Set limits. If the measured value exceeds the limits then it will warn. Press <Enter> to turn to the setup page. For example: Press <Enter> to save settings and turn back. Press <ESC> to turn back. ☆Note: Range setting does not affect the measurements of Octave 4.3.12 Custom Measure 47 Zi308/309 Zenith Instruments Press <Enter> to turn to the setup page. As shown below: Filter: Supply 3 frequency weighting: A, C and Z. Press<◄>, <►> to select the appropriate frequency weighting. Detector: Supply 3 time weighting: Fast, Slow and Imp. Press<◄>, <►> to select the appropriate time weighting. Mode: Supply 19 mode of significant results: SPL, RMS, SD, SEL, E, PEAK, LEQ, MAX, MIN,LN1-LN10. Press <◄>, <►> to select the appropriate option. Press <Enter> to save settings and turn back. Press <ESC> to turn back. 48 Zi308/309 Zenith Instruments 4.4 Setup 4.4.1 Contrast Press <◄>, <►>to setup contrast. Press <Enter> to save settings and turn back. Press <ESC> to turn back. 49 Zi308/309 Zenith Instruments 4.4.2 Backlight Sound Level Meter provides automatic off function. Select TimeOut, and then press <◄>, <►> to whether to provide automatic off function. If you select Y, then the Sound Level Meter will provide automatic off. Delay means the light time when you set the TimeOut to Y. Press <Enter> to save settings and turn back. Press <ESC> to turn back. 4.4.3 Battery 50 Zi308/309 Zenith Instruments The Battery enables the user to check the internal battery condition. In order to enter the screen, press the <Enter> on the inversely displayed Battery text of the Setup list. The Battery screen is closed and the instrument returns to the Setup list after pressing the <Esc> or the <Enter>. The instrument can be powered from the external power supply, from four AA rechargeable or standard batteries. The view presented on the display for each of 2 kinds of powering sources is different. The current battery voltage is displayed together with its approximate state (in the graphical form). 4.4.4 Trigger Trigger is a analog input for control the Sound Level Meter start or stop measurement. ZI 308/309 has a 3.5mm socket in the bottom for trigger input. Short the signal and ground of the socket to start measurement, otherwise to stop the measurement. Notice that when enable the 51 Zi308/309 Zenith Instruments Trigger function, the <Start/Stop> button on the surface of the Sound Level Meter is disable. 4.4.5 Date & Time Select Date & Time and press <Enter> to enter the setup page. Setup Date: There are three date formats. Press <Enter> to save settings and turn to the date setup page. Press <ESC> to turn back. For example: 52 Zi308/309 Zenith Instruments Press <Enter> to save settings and turn back. Press <ESC> to turn back. Setup Time: Setup Time is the same as the Setup Date. RTC Calibration The Sound Level Meter has a RTC. User can adjust it by setting the time of error-every 30 days. The adjust range is +-157 seconds. 53 Zi308/309 Zenith Instruments If the adjust time is positive, then the timer will be slower, otherwise, it will be faster. If user doesn’t have high demands on time accuracy, the user can’t do RTC calibration. 4.4.6 Version The Version item provides the information of instrument. It contains the type and serial number of the instrument, the version and date of the software. Press <Enter> to save settings and turn back. Press <ESC> to turn back. 54 Zi308/309 Zenith Instruments 4.4.7 AutoPWROff In order to save the internal source of the instrument’s power, ZI 308/309 provides the function for automatic shut down the instrument. This function is only play a part in the state when the instrument is not measuring. The power save mode is disabled in case of a running measurement. If this option is set, the instrument is switched off after the fixed time which has been set, from pressing any button. If it happened, the pressing of any button would cause the time count restart form zero. AutoPwrOff provides the time how long the instrument can continue without measurement after the last time of the button has been pressed . There are 5 options to choose: 1m, 5m, 10m, 30m, off (off means the time is infinite). Press <◄>, <►>to select. Press <Enter> to save settings and turn back. Press <ESC> to turn back. 55 Zi308/309 Zenith Instruments 4.4.8 RS-232 User can setup the RS-232 port in this interface.(Look at RS-232 for more details.) RS-232 Mode: There are two kind of mode: Remote Control and Printer. In the Remote Control mode, user can setup the Sound Level Meter or get the measurement data from the Sound Level Meter through RS-232 interface. In the Printer mode, user can use a 56 Zi308/309 Zenith Instruments printer to print the measurement data. Press <Enter> to save settings and turn back. Press <ESC> to turn back. ID Setup: Set ID for the machine. ID is used for multi-machine networking for remote communication to distinguish between the Sound Level Meter. ID’s range is 1-255. Press <Enter> to save settings and turn back. Press <ESC> to turn back. 57 Zi308/309 Zenith Instruments Baud Rate: There are three kind of baud rate: 4800, 9600, 19200. Press <Enter> to save settings and turn back. Press <ESC> to turn back. Flow Control: There are two kinds of flow control: Software Flow and Hardware Flow. 58 Zi308/309 Zenith Instruments Press <Enter> to save settings and turn back. Press <ESC> to turn back. Response: User can open or close the ACK/NACK signal by setting the response. Press <Enter> to save settings and turn back. Press <ESC> to turn back. 59 Zi308/309 Zenith Instruments 4.4.9 GPS Open or close the GPS function. This is an optional module. 4.4.10 File Management This function is to show and operate the saved SWN, OCT, CSD files. The figure in the right is the number of the relevant files. Press <Enter> to enter the operate-page. 60 Zi308/309 Zenith Instruments SWN File: available option: Delete Press <◄>, <►> to select the file you want to delete. If the number you selected is 000, it means to delete all files. Press <Enter> to delete the chosen file and press (<ESC>) to turn OCT File: available option: Delete The operation is the same as the SWN file. 61 <Cancel> Zi308/309 Zenith Instruments CSD File: available option: Delete, Load The operation is the same as the SWN file. The option can be changed to Read by <◄>/<►>, and press <Enter> to load the chosen file. The interface of the saved CSD file in Level Meter mode: Start time Duration time Data 62 Zi308/309 Zenith Instruments The interface of the saved CSD file in 1/1 Octave mode: Press <◄>, <►> to switch. 4.5 Language Press <Enter> to save settings and turn back. Press <ESC> to turn back. 63 Zi308/309 Zenith Instruments 4.6 Output Level Meter DC Out: You can set the DC output in this interface. Output signal is analog signal. Correspondence between output amplitude and the noise values is 10mv/dB. Press <Enter> to save settings and turn back. Press <ESC> to turn back. 64 Zi308/309 Zenith Instruments 1/1 Octave DC Out: A total of eight kinds of octave output options: LAeq, LCeq, LZeq, 31.5Hz, 63Hz, 125Hz, 250Hz, 500Hz. Press <Enter> to save settings and turn back. Press <ESC> to turn back. Printer: 65 Zi308/309 Zenith Instruments Print Option: Press <◄>, <►> to select Auto or Manual. Auto will print measurement result automatically after stopped measurement. If you select Manual, you must select Print Now and press <Enter> when you want to print measurement data. ☆Note: User also can select Print Now and press <Enter> to print measurement data at the Auto mode. 66 Zi308/309 Zenith Instruments Please turn on the printer first, and then connect to the Sound Level Meter 4.7 Factory Settings Factory Settings provides the function for restore the parameter which has been set by customer, the parameter will be initialized to the original parameter which has been set at factory. Press <◄>, <►> to choose Y (Yes) or N (No). Choose Y and pressing <Enter> will initialize the parameter. Choose N or press <ESC> will not effect on the parameter. 67 Zi308/309 Zenith Instruments 5 RS-232 Communication Protocol The Sound Level Meter ZI 308/309 has an RS-232 serial interface. User can modify the configuration of the Sound Level Meter via a serial interface and control the Sound Level Meter to run and to stop, and get the current measurement parameters and measurement results for further processing. Serial operation does not affect keyboard operation. 5.1 Hardware configuration and settings of interface ZI 308/309 uses three-wire serial interface with LEMO plug and socket. Below is the definition of RS-232 interface. 1 2 1. TXD 2. GND 3 RS-232 Transfer settings: Transfer Mode Synchronous Full-duplex / asynchronous Asynchronous Transfer Baud rate 4800, 9600, 19200 bps Data bits 8 bit Stop bit 1 bit Parity None 68 Zi308/309 Zenith Instruments According to the time data in the rating table Flow Control to operate 5.2 Transfer Protocol ZI 308/309 RS-232 interface protocol is based on a block transfer, as shown below: Send commands block Send response block A typical command block or response block consists of “starting character, ID attribute character, command or data, the parity bit of the characters, carriage returns, line feeds ”, as shown below: <STX I ATT Comman <ETX BC <CR <LF > D R d or data > C > > 5.2.1 The beginning and end of the block transfer A command block or response block contains some start characters and end characters as shown below: 69 Zi308/309 Zenith Instruments Name Hex Meaning <STX> 02H start character <ETX> 03H stop character <CR> 0DH carriage returns <LF> 0AH line feeds 5.2.2 ID Each command block contains an ID .It is used to distinguish among a network of more than one Sound Level Meter. When the Sound Level Meter receives a command block, it will match the ID contained in the command block and its own ID .If matched, the corresponding operation will be performed, if not, then ignore this command. The response block returned from the Sound Level Meter also contains the ID information which is used to indicate that the block is sent by which one;☆Note: Please ensure that the ID of Sound Level Meter in the same network are different from each other, otherwise the error will occur during operation! ID is one byte of binary. It ranges from 1 to 255.The corresponding hexadecimal value is 01H - FFH. It means that the command is a broadcast command if the ID contained in command block is 00H.And the Sound Level Meter will execute the instruction without any return data, regardless of its own ID when the command is a broadcast command. 70 Zi308/309 Zenith Instruments Name Range 01H~FFH ID 00H Meaning ID Broadcast instruction 5.2.3 ATTR Attribute character ATTR attribute characters indicate the type of command or response. Name Hexadecimal code Meaning ‘C’ 43H Command block ‘A’ 41H Response block <ACK> 06H Normal response <NAK> 15H Error response 5.2.4 BCC check BCC check value is calculated by the sender. It is included in a block. The receiver can calculate the block’s BCC value and will compare with the BCC value contained in the send block. If same, it indicates that the received block is correct. BCC value is calculated by using bytes between <STX> and <ETX> with XOR operation. Sound Level Meter will not verify operation and directly authorized instruction if BCC is 00H.This way you can simplify the sending of the instruction block, but do not recommend this way 71 Zi308/309 Zenith Instruments for long-distance applications, because the BCC is the only way to guarantee reliable data transmission. Name Range Meaning 01H~FFH BCC XOR checksum Ignore 00H the checksum 5.2.5 Block transfer format Block transfer of data is divided into four types: command block, response block, normal response block and error response block, the following were to describe the four types of instruction format . Command: sent by the computer. <ST I ATT Instructi Parame <ET BC <C <LF X> D R on ter X> C R> > 1 1 1 3 N 1 1 1 1 Byte ATTR = 'C'. On the table, all instructions occupy 3 bytes. If you have more than one parameter, all parameters should separate by spaces. Response block: sent by the Sound Level Meter. <STX I ATT Respons <ETX BC <CR <LF > D R e data > C > > 72 Zi308/309 1 1 Zenith Instruments 1 N 1 1 1 1 Byte ATTR = 'A'. If you have more than one response data, each separated by a comma. Normal response: sent by the Sound Level Meter. <STX> ID ATTR <ETX> BCC <CR> <LF> 1 1 1 1 1 1 1 Byte ATTR=<ACK>. Error response: sent by the Sound Level Meter <STX> ID ATTR Error <ETX> BCC <CR> <LF> 1 1 1 Byte 1 code 1 1 1 4 ATTR=<NAK>. The error code occupies four bytes. The error code value is listed in the following table. The meaning of error code is described in section 5.2.6. Description: Error code Meaning 0001H Instruction error 0002H Parameter error 73 Zi308/309 0003H Zenith Instruments Can’t make the appropriate operating at the current state 5.2.6 Recovery of transmission errors Various errors may occur when the instruction block or in response to the block transfer. The following descript the Sound Level Meter will how to deal with and restore to the initial state when an error occurs. (1) Block transfer not complete Section 5.2.5 describes the four kinds of block transmission format. When the Sound Level Meter receives the beginning of a block of characters <STX>, you continue to receive the remaining data until the end of the block <CR>, <LF>. When the data reception is complete and correct parity, the Sound Level Meter will conduct follow-up actions. If received the character <STX> start of the block again before <CR>, <LF>, the Sound Level Meter will ignore all the information previously received and re-start the reception of a block. (2) Validation failure After receiving the data block, Sound Level Meter will verify. When validation fails, the Sound Level Meter will ignore this instruction. (3) Instruction error The Sound Level Meter may not recognize the instruction received. This may be because the computer sends an undefined instruction, or 74 Zi308/309 Zenith Instruments unexpected error has occurred during transmission. When the above errors occur, the Sound Level Meter will return a NAK block, which contains the error code 0001H. (4) Parameter error Command block parameters may be wrong. This may be because the parameters not separate by a space, the range of the parameter error, an incorrect number of arguments. When the above error occurs, the Sound Level Meter will return NAK block, which contains the errorcode 0002H. (5) The current state can’t make the appropriate operating The current state can’t make the appropriate operating when the following happens. 1 2 3 Sound Level Meter mode is required to return octave data. Or octave mode asked to return to a Sound Level Meter data. Be required to perform the calibration operation in the measurement mode. Be required to change the measurement parameters or system parameters in the measurement mode. When the above error occurs, the Sound Level Meter will return NAK block, which contains the error-code 0003H. 5.2.7 Flow Control The Sound Level Meter use three-wire serial port, which does not 75 Zi308/309 Zenith Instruments contain the hardware flow control pins. Sound Level Meter does not require software flow control. When the operation according to the requirements of the rated section 2.9 parameters, we can guarantee the correctness of the send data and receive data. 5.2.8 Multi-machine operation More than one Sound Level Meter can be connected to an RS-232 bus, to form a measurement net work. Users can broadcast instruction to change the set of all the Sound Level Meter, or access to data and parameters of a Sound Level Meter by ordinary instruction. Need to pay attention: Ensure that the ID of each Sound Level Meter is not the same. User can not broadcast command which can return any data; 5.2.9 Rated parameters Name Min Rated Max The response time of the — — 2s Sound Level interval Exceeds this value, the computer should do the time-out Meter The Description processing time of — 100ms — — 76 Zi308/309 the Zenith Instruments Sound Level Meter to send bytes The waiting Means time received after Sound Level Meter — Unlimited — the <STX> continue received wait <STX> remaining data Time interval Means that the of the Sound Level Meter to — Unlimited for to the speed of the — receive the bytes computer to send data can be very slow 5.3. Instruction The instruction is divided into two types: set instructions and query instructions. Set instructions: set the measurement parameters and system parameters of Sound Level Meter. Query instructions: used to query parameters and data of the Sound Level Meter. There are three types of send-instruction. Are: set instruction (no response), set instructions (with response), query instructions. 77 Zi308/309 Zenith Instruments (1) Set instruction (no response): Instruction —► Computer Sound level meter (2) Set instructions (with response): Normal response: Instruction computer ◄— — ► Sound level meter Return ACK Error response: Instruction —► computer Sound level meter ◄— Return NACK (3) Query command: Normal response: Query command computer —► Sound level meter ◄— Response data Error response: 78 Zi308/309 Zenith Instruments Query command computer —► Sound level meter ◄— Return NACK 5.3.1 Instruction list IDXp1: Setup ID............................................................................ 84 IDX?: Query ID number ............................................................... 85 BRTp1: Set the RS-232 baud rate ............................................. 86 BRT?: Query the RS-232 baud rate .......................................... 87 XONp1: Set the software / hardware flow control .................... 87 XON?: Query flow control mode ................................................ 88 RETp1: Setresponse mode ........................................................ 88 RET?: Query response mode ..................................................... 89 MEMp1: Set the measurement mode ........................................ 90 MEM?: Query measurement mode............................................ 91 CALp1: Set the SPL, and automatic calibration ....................... 91 CAL?: Query calibration sound pressure level and the calibration factor ........................................................................... 93 CAFp1: Manually calibrate .......................................................... 94 CAF?: Query calibration records ................................................ 95 BSEp1_p2_p3_p4: Basic Settings ............................................. 96 BSE?: Query Basic Settings ....................................................... 98 RNGp1: Range setting ................................................................ 98 RNG?: Query range setting ........................................................ 99 79 Zi308/309 Zenith Instruments ICPp1: Set ICCP power state ................................................... 100 ICP?: Query ICCP power state ................................................ 100 PR1p1_p2_p3_p4: Setup Profile1 ........................................... 101 PR1?: Query Profile1 Settings ................................................. 102 PR2?: Query Profile2Settings................................................... 104 PR3p1_p2_p3: Setup Profile3 .................................................. 104 PR3?: Query Profile3Settings................................................... 105 ALMp1: Set alarm limits ............................................................ 105 ALM?: Query the alarm limits ................................................... 106 ETFp1_p2: Unlock the extended function............................... 107 ETF?: Query expansionfunctional state .................................. 107 STSp1_p2_p3_p4_p5_p6_p7_p8_p9_p10_p11: Setup statisticalanalysis ........................................................................ 108 STS?: Query statistical analysis setting .................................. 109 HISp1_p2: Setup time history ................................................... 110 HIS?: Query time history setting .............................................. 111 OCSp1_p2_p3_p4_p5_p6_p7_p8: Setup Octave ................. 111 OCS?: Query octave settings ................................................... 113 CUSp1_p2_p3_p4: Custom setup ........................................... 113 CUSp1_?: Query custom settings............................................ 116 CONp1: Contrast setting ........................................................... 117 CON?: Query contrast setting .................................................. 117 BLTp1_p2: Backlight settings ................................................... 118 BAT?: Check power status and the supply voltage ............... 119 TRGp1: Trigger settings ............................................................ 120 TRG?: Query trigger settings .................................................... 121 80 Zi308/309 Zenith Instruments DATp1_p2_p3_p4: Date setting ............................................... 121 DAT?: Query date settings ........................................................ 122 HORp1_p2_p3: Time setting .................................................... 123 HOR?: Query hour settings ...................................................... 123 VER?: Query the version information ...................................... 124 PWOp1: Autopower off settings ............................................... 124 PWO?: Query auto power off settings ..................................... 125 Example: query auto power off settings: ................................. 126 LNGp1: Language Selection..................................................... 126 LNG?: Query Language Selection ........................................... 127 OUTp1_p2_p3_p4: Output options .......................................... 127 OUT?: Query output options ..................................................... 129 STAp1: Start / stop measurement ............................................ 130 STA?: query measurement state.............................................. 131 DMAp1_?: query the main interface data ............................... 132 TPR?: query 3Profile interface data ........................................ 133 DLN?: Query statistics analysis data (LN) .............................. 134 DCU?: Query custom data ........................................................ 136 DSLp1_p2_?: Query all the data of the sound level meter .. 138 Example: Query group 1 (RMS): .............................................. 139 DTR?: Show the structure-borne noise ratio of fixed equipment ...................................................................................................... 140 DOT?: Queryoctave data .......................................................... 141 CSD: Save 3Profile data into SD ............................................. 142 81 Zi308/309 Zenith Instruments 5.3.2 Instruction format In this section, “ ☐ ☐ ☐ ” on behalf of the three characters of the directive, “p1, p2 ......" on behalf of the parameter "d1, d2 ..." represents the data, "_" represents a space. Instruction block has multiple parameters. These parameters need to be separated by a space: ☐☐☐ Instruction without parameters ☐☐☐p1 Instruction with a parameter ☐☐☐p1_p2 There are two parameters of the instruction ☐☐☐? Instruction with query parameters ☐☐☐p1_? Instruction with one parameter and a query parameter ☐☐☐p1_ p2_? Instruction with two parameters and a query parameter Range of parameters in instruction can be large, for example from 1 to 255. These parameters are in ASCII format. Therefore, you can send 1-3 bytes. ☐☐☐93 ☐☐☐124 Parameter is 93 Parameter is 124 Note whether it is 93 or 124, they are an argument. So the individual 82 Zi308/309 Zenith Instruments numbers can’t be separated by spaces. ☐☐☐1_64 There are two parameters, namely 1 and 64. Note that 1 and 64 are two different parameters. So parameters need to be separated by space. Parameters can have a decimal point. However, if the actual value is an integer, decimal point and decimal bits can be omitted. More data in the response block, separated by commas: d1, d2, d3 Response return three data. Response block, the median of the actual data returned is less than its maximum possible number of digits, leading zeros. For example: 076, 009 Return data is 76 and 9. If the returned data contains date data, use the slash "/" to separate. If the data returned contains data, use a colon ":" to separate the data: 2011/08/05, 12:13:55 83 Zi308/309 Zenith Instruments 5.3.3 Instruction describe Note: 1. In the following description, the value of parameter, range, default, are represented by ASCII code; 2. The default is the state of Sound Level Meter factory delivery or restore the factory settings; 3. Described below, use the "_" indicates a space. IDXp1: Setup ID ID of Sound Level Meters in a same network must be different. Otherwise, there will be a communication error. ☆Note: When the instruction ID of Sound Level Meter is correctly received, ACK signal will be returned with the new ID. Instruction Parameters p1: ID number Explanation IDX Range: 1~255 Default: 1 ASCII I D X 1 Hexadecimal 49H 44H 58H 31H Byte 1 1 1 1~3 Return ACK / NAK 84 Zi308/309 Zenith Instruments Example 1: The instruction will set the ID of 3. 02 01 43 49 44 58 33 03 25 0D 0A Return: an ACK. Note where ID has been changed to 3 (03H). 02 03 06 03 04 0D 0A Example 2: The instruction will set the ID of 255. 02 01 43 49 44 58 32 35 35 03 24 0D 0A Return: an ACK. Note where ID has been changed to 255 (FFH). 02 FF 06 03 F8 0D 0A IDX?: Query ID number Instruction Parameters Explanation IDX Query parameter: ? ASCII I D X ? Hexadecimal 49H 44H 58H 3FH Byte 1 1 1 1 Return Return the current ID number Example: query ID number: 02 01 43 49 44 58 3F 03 29 0D 0A Return: the current ID number 001 02 01 41 30 30 31 03 70 0D 0A 85 Zi308/309 Zenith Instruments BRTp1: Set the RS-232 baud rate ☆Note: When the BRT instruction is correctly received by the Sound Level Meter, it will use the current baud rate to return through the ACK signal, and then update the baud rate. Instruction Parameters p1: RS-232 baud rate 2=4800bps Explanation BRT 3=9600bps 4=19200bps Default: 3 ASCII B R T 3 Hexadecimal 42H 52H 54H 33H Byte 1 1 1 1 Return ACK / NAK Example: Set the baud rate to 9600bps: 02 01 43 42 52 5433 03 34 0D 0A Return: ACK; 02 01 06 03 06 0D 0A 86 Zi308/309 Zenith Instruments BRT?: Query the RS-232 baud rate Instruction Parameters Explanation BRT Query parameter: ? ASCII B R T ? Hexadecimal 42H 52H 54H 3FH Byte 1 1 1 1 Return Return the current baud rate Example: Query the current baud rate: 02 01 43 42 52 543F 03 38 0D 0A Return: the current baud rate is 9600bps: 02 01 41 33 03 72 0D 0A XONp1: Set the software / hardware flow control Instruction Parameters p1: Flow control mode 0=hardware Explanation XON flow control 1= software flow control Default: 1 ASCII X O N 1 Hexadecimal 58H 4FH 4EH 31H Byte 1 1 1 1 Return 87 ACK / NAK Zi308/309 Zenith Instruments Example: set to software flow control mode: 02 01 43 58 4F 4E31 03 2B 0D 0A Return: ACK 02 01 06 03 06 0D 0A XON?: Query flow control mode Instruction Parameters Explanation XON Query parameter: ? ASCII X O N ? Hexadecimal 58H 4FH 4EH 3FH Byte 1 1 1 1 Return Return flow control mode Example: query flow control mode 02 01 4358 4F 4E 3F 03 25 0D 0A Return: the current flow control mode is software flow control: 02 01 41 31 03 70 0D 0A RETp1: Set response mode Response is the ACK / NAK signal returned from the Sound Level Meter (HIS and OCS instruction returns the status of the SD card or NAK signal).The user can disable or allow such a response signal. ☆Note: RET instruction itself is not affected by response mode. 88 Zi308/309 Zenith Instruments When the Sound Level Meter receive the RET instruction, it will return ACK/NAK whether the current state is enabled or disabled. Query command is not subject to the influence of response mode. Instruction Parameters p1: Response mode Explanation RET 0=Disabled;1=Enabled Default: 1 ASCII R E T 1 Hexadecimal 52H 45H 54H 31H Byte 1 1 1 1 Return ACK / NAK Example: Set to allow response: 02 01 43 52 45 5431 03 31 0D 0A Return: ACK 02 01 06 03 06 0D 0A RET?: Query response mode Instruction Parameters Explanation RET Query parameter: ? ASCII R E T ? Hexadecimal 52H 45H 54H 3FH Byte 1 1 1 1 Return 89 Return response mode Zi308/309 Zenith Instruments Example: query response mode: 02 01 4352 45 54 3F 03 3F 0D 0A Return: the current response mode is to allow the response: 02 01 41 31 03 70 0D 0A MEMp1: Set the measurement mode When MEM instruction is correctly received by the Sound Level Meter, Sound Level Meter will switch to the main interface of the octave mode or the main interface of Sound Level Meter mode. Instruction Parameters p1: measurement mode Explanation 0=Octave ; 1=Sound MEM level mode Default: 1 ASCII M E M 1 Hexadecimal 4DH 45H 4DH 31H Byte 1 1 1 1 Return ACK / NAK Example: Set the Sound Level Meter mode: 02 01 43 4D 45 4D31 03 37 0D 0A Return: ACK 02 01 06 03 06 0D 0A 90 Zi308/309 Zenith Instruments MEM?: Query measurement mode Instruction Parameters Explanation MEM Query parameter: ? ASCII M E M ? Hexadecimal 4DH 45H 4DH 3FH Byte 1 1 1 1 Return Return the measurement mode Example: Query the measurement mode: 02 01 434D 45 4D 3F 03 39 0D 0A Returns: the current measurement mode is Sound Level Meter mode: 02 01 41 31 03 70 0D 0A CALp1: Set the SPL, and automatic calibration ☆Note: When CAL instruction is correctly received by the Sound Level Meter, an ACK will be returned at the beginning and end of the calibration. In the records of calibration, M represents the autocalibration. Instruction Parameters p1: SPL Explanation CAL Range: 0~199.9 Default: 94.0 91 Zi308/309 Zenith Instruments ASCII C A L 94 Hexadecimal 43H 41H 4CH 39H, 34H Byte 1 1 1 1~5 Return ACK / NAK Example 1: Set the calibration sound pressure level of 94dB, and calibration: 02 01 43 43 41 4C 39 34 03 00 0D 0A Return : ACK 02 01 06 03 06 0D 0A Return again after the end of the calibration: 02 01 06 03 06 0D 0A Example 2: Set the calibration sound pressure level value of 113.8dB, and calibrate: 02 01 43 43 41 4C 31 31 33 2E 38 03 28 0D 0A Return : ACK: 02 01 06 03 06 0D 0A Return again after the end of the calibration: 02 01 06 03 06 0D 0A 92 Zi308/309 Zenith Instruments CAL?: Query calibration sound pressure level and the calibration factor Instruction Parameters Explanation MEM Query parameter: ? ASCII C A L ? Hexadecimal 43H 41H 4CH 3FH Byte 1 1 1 1 Return Returns the value of the calibration sound pressure level and the calibration factor Example: Query the calibration sound pressure level and the calibration factor: 02 01 4343 41 4C 3F 03 32 0D 0A Return: the current calibration of sound pressure level is 094.0, the calibration factor is 000.00: 02 01 41 30 39 34 2E 30 2C 2B 30 30 30 2E 30 30 03 7B 0D 0A 93 Zi308/309 Zenith Instruments CAFp1: Manually calibrate This command can modify the calibration factor.F is the identity of the manual calibration in the calibration record. Instruction Parameters p1: Calibration factor Range: Explanation CAF - 199.99~+199.99 (+ Can be omitted) Default: 0 ASCII C A F 0 Hexadecimal 43H 41H 46H 30H Byte 1 1 1 1~7 Return ACK / NAK Example: Set the calibration factor value of 0.74dB (+ sign is omitted). 02 01 43 43 41 46 30 2E 37 34 03 1A 0D 0A Return: ACK 02 01 06 03 06 0D 0A 94 Zi308/309 Zenith Instruments CAF?: Query calibration records Query the most recent calibration records(Four groups). Instruction Parameters Explanation CAF Query parameter: ? ASCII C A F ? Hexadecimal 43H 41H 46H 3FH Byte 1 1 1 1 Returns the value of calibration records in the last four groups. Return Format “Year / Month / day, hours: minutes: seconds, the calibration factor, Identity”。 Identity: M=Automatic calibration, F=Manual calibration. Example: Query the calibration records: 02 01 43 43 41 46 3F 03 38 0D 0A Return: the data returned by this command use a slash "/" split date, use a colon ":" split time. Calibration history is 2011/08/04, 17: 03: 28, +001.29, F, 2011/08/04, 17: 03: 02, +001.25, F, 2011/08/04, 17: 02: 20, +000.71, F, 2011/08/04, 17: 02: 00, +001.27, M. 02 01 41 32 30 31 31 2F 30 38 2F 30 34 2C 31 37 3A 30 33 3A 32 38 2C 2B 30 30 31 2E 32 39 2C 46 2C 32 30 31 31 2F 30 38 2F 30 34 2C 31 37 3A 30 33 3A 30 32 2C 2B 30 30 31 2E 32 35 95 Zi308/309 Zenith Instruments 2C 46 2C 32 30 31 31 2F 30 38 2F 30 34 2C 31 37 3A 30 32 3A 32 30 2C 2B 30 30 30 2E 37 31 2C 46 2C 32 30 31 31 2F 30 38 2F 30 34 2C 31 37 3A 30 32 3A 30 30 2C 2B 30 30 31 2E 32 37 2C 4D 03 62 0D 0A BSEp1_p2_p3_p4: Basic Settings ☆Note: HIS instruction is different from the other set commands, it does not return the ACK signal, but returns the status of the SD card or NAK. Set the start delay, measurement time, repeat cycle and logger. Instruction Explana tion BSE Param Paramet Parame Param eter 1 er2 ter3 eter 4 p1: p2: P3: P4: Start Measure Repeat Logge delay ment cycle r 0=2s; time 0=Infinit 0=Not 1=3s; 0=1s; e stored 2=4s; 1=5s; 1=1; 1=Stor 3=5s; 2=10s; 2=2; ed 4=10s 3=30s; …… Defaul ; 4=1m; …… t:0 5=15s 5=5m; …… ; 6=10m; …… 6=20s 7=30m; …… 96 Zi308/309 Zenith Instruments ; Default: 254=25 7=25s 0 4; ; Default: 8=30s 0 ; Defaul t: 0 ASCII B S E Hexade 42 53 45 cimal H H H Byte 1 1 1 0 0 30H 35H 1 1 0 0 0x30 0x30 1 1 Return status : 0=Successfully set. The SD card is ok. Return 1= Successfully set.SD card abnormal. 2= Successfully set. But did not detect the SD card. 3= Successfully set. The logger function does not unlock. Example: set: 3s, 1s, 5 times, stored. 02 01 43 42 53 45 31 20 30 20 35 20 31 03 32 0D 0A Returns: the set successfully, SD card is OK. 02 01 41 30 03 71 0D 0A 97 Zi308/309 Zenith Instruments BSE?: Query Basic Settings Instruction Parameter Explanation BSE Query parameter: ? ASCII B S E ? Hexadecimal 42H 53H 45H 3FH Byte 1 1 1 1 Return Return basic settings. Return order: start delay, the measurement time, repeat cycle, logger. Example: Query the basic settings: 02 01 43 42 53 45 3F 03 28 0D 0A Returns: the current basic settings: 3s, 1s, 5, stored.. 02 01 41 31 2C 30 2C 35 2C 31 03 68 0D 0A RNGp1: Range setting Instruction Parameter p1: Range Explanation RNG 0=Low;1=High;2=Auto Default: 2 ASCII R N G 2 Hexadecimal 52H 4EH 47H 32H Byte 1 1 1 1 Return ACK / NAK 98 Zi308/309 Zenith Instruments Example: Setting range is Auto: 02 01 43 52 4E 47 32 03 2A 0D 0A Return: ACK: 02 01 06 03 06 0D 0A RNG?: Query range setting Instruction Parameter Explanation RNG Query parameter: ? ASCII R N G ? Hexadecimal 52H 4EH 47H 3FH Byte 1 1 1 1 Return Return range setting Example: query range setting: 02 01 43 52 4E 47 3F 03 27 0D 0A Return: the current range is Auto: 02 01 41 32 03 73 0D 0A 99 Zi308/309 Zenith Instruments ICPp1: Set ICCP power state Instruction Parameter p1: ICCP power state Explanation ICP 0=On;1=Off Default: 0 ASCII I C P 0 Hexadecimal 49H 43H 50H 30H Byte 1 1 1 1 Return ACK / NAK Example: open ICCP power: 02 01 43 49 43 50 30 03 29 0D 0A Return: ACK: 02 01 06 03 06 0D 0A ICP?: Query ICCP power state Instruction Parameter Explanation ICP Query parameter: ? ASCII I C P ? Hexadecimal 49H 43H 50H 3FH Byte 1 1 1 1 Return Return ICCP power state Example: query ICCP power state: 02 01 43 49 43 50 3F 03 26 0D 0A 100 Zi308/309 Zenith Instruments Return: ICCP power is open: 02 01 41 30 03 71 0D 0A PR1p1_p2_p3_p4: Setup Profile1 Instruction Explanat ion PR1 Param Param Param Param eter 1 eter 2 eter 3 eter 4 p1: p2: p3: P4:Sav Freque Time Integra e ncy weighti tion 0=RM weighti ng mode S ng 0=Fast 0=SPL 1=PEA 0=A 1=Slo 1=RM K 1=C w S 2=MA 2=Z 2=Imp. 2=PEA X Default Default K 3=MIN :0 :0 3=LEQ Defalut 4=MAX :0 5=MIN Default :0 ASCII P R 1 Hexadec 50 52 31 imal H H H Byte 1 1 1 101 0 0 0 30H 30H 30H 1 1 1 0 30 1 Zi308/309 Zenith Instruments Return ACK / NAK Example: Set Profile1: A, Fast, SPL, save RMS 02 01 43 50 52 31 30 20 30 20 3020 3003 50 0D 0A Return: ACK: 02 01 06 03 06 0D 0A PR1?: Query Profile1 Settings Instruction Parameter Explanation PR1 Query parameter: ? ASCII P R 1 ? Hexadecimal 50H 52H 31H 3FH Byte 1 1 1 1 Return Return Profile1 setting Example : Query Profile1 setting: 02 01 43 50 52 313F 03 4F 0D 0A Return: current Profile1 setting mode is: A, Fast, SPL, save RMS: 02 01 41 30 2C 30 2C 30 2C 30 03 71 0D 0A 102 Zi308/309 Zenith Instruments PR2p1_p2_p3: Setup Profile2 Instruction Explanat ion PR2 Param Param Param Param eter 1 eter 2 eter 3 eter 4 p1: p2: p3: P4:Sav Freque Time Integra e ncy weighti tion 0=RM weighti ng mode S ng 0=Fast 0=SPL 1=PEA 0=A 1=Slo 1=RM K 1=C w S 2=MA 2=Z 2=Imp. 2=PEA X Default Default K 3=MIN :1 : 3=LEQ Defalut 4=MAX :1 5=MIN Default : ASCII P R 2 Hexadec 50 52 32 imal H H H Byte 1 1 1 Return 103 0 0 0 30H 30H 30H 1 1 1 ACK / NAK Zi308/309 Zenith Instruments PR2?: Query Profile2Settings Instruction Parameter Explanation PR2 Query parameter: ? ASCII P R 2 ? Hexadecimal 50H 52H 32H 3FH Byte 1 1 1 1 Return Return Profile2 setting PR3p1_p2_p3: Setup Profile3 Instruction Explanat ion PR3 Param Param Param Param eter 1 eter 2 eter 3 eter 4 p1: p2: p3: P4:Sav Freque Time Integra e ncy weighti tion 0=RM weighti ng mode S ng 0=Fast 0=SPL 1=PEA 0=A 1=Slo 1=RM K 1=C w S 2=MA 2=Z 2=Imp. 2=PEA X Default Default K 3=MIN :2 : 3=LEQ Defalut 4=MAX :2 0 5=MIN Default 104 Zi308/309 Zenith Instruments :0 ASCII P R 3 Hexadec 50 52 33 imal H H H Byte 1 1 1 0 0 0 30H 30H 30H 1 1 1 Return 0 30 1 ACK / NAK PR3?: Query Profile3Settings Instruction Parameter Explanation PR3 Query parameter: ? ASCII P R 3 ? Hexadecimal 50H 52H 33H 3FH Byte 1 1 1 1 Return Return Profile3 setting ALMp1: Set alarm limits Instruction Parameter p1: alarm limit Explanation ALM Range: 0~200 Default: 100 ASCII A L M 100 Hexadecimal 41H 4CH 4DH 31H, 30H, 30H Byte 1 1 1 1-3 Return 105 ACK / NAK Zi308/309 Zenith Instruments Example: Setting alarm limits 100dB: 02 01 43 41 4C 4D 31 30 30 03 32 0D 0A Return: ACK: 02 01 06 03 06 0D 0A ALM?: Query the alarm limits Instruction Parameter Explanation ALM Query parameter: ? ASCII A L M ? Hexadecimal 41H 4CH 4DH 3FH Byte 1 1 1 1 Return Return alarm limit Example: query alarm limits: 02 01 43 41 4C 4D 3F 03 3C 0D 0A Return: the current alarm limit is 100dB 02 01 41 31 30 30 03 70 0D 0A 106 Zi308/309 Zenith Instruments ETFp1_p2: Unlock the extended function Instruction Parameter 1 Parameter 2 p1: Extended p2: Password function Explanation ETF 0=Statistical 1=Logger 2=Octave ASCII E T F 0 XXXXXXXX Hexadecimal 45H 54H 46H 30H XXXXXXXX Byte 1 1 1 1 8 Return ACK / NAK Example: Unlock statistical analysis, the password is 12345678: 02 01 43 45 54 4630 20 31 32 33 34 35 36 37 38 03 0C 0D 0A Return: ACK: 02 01 06 03 06 0D 0A ETF?: Query expansion functional state Instruction Parameter Explanation ETF Query parameter: ? ASCII E T F ? Hexadecimal 45H 54H 46H 3FH Byte 1 1 1 1 Return return order is: statistical analysis, logger, octave。 107 Zi308/309 Zenith Instruments 0=Lock, 1=Unlock。 Example: query state: 02 01 43 45 54 46 3F 03 2B 0D 0A Return: statistical analysis, logger and octave are all unlocked. 02 01 41 31 2C 31 2C 31 03 70 0D 0A STSp1_p2_p3_p4_p5_p6_p7_p8_p9_p10_p11: Setup statistical analysis Paramete Instruction Explanation r1 STS Parameter 2~11 p1:Data p2~p11: 10 sources statistics 0=Profile percentage 1 values. 1=Profile Range: 1~99 2 Default: 10, 20, 2=Profile 30, 40, 50, 60, 70, 3 80, 90, 99 Default: 0 10_20_30_40_50 ASCII S T S 0 _ 60_70_80_90_99 Hexadecima 53 54 53 l H H H 30H 31H, 30H, 20H, 32H, 30H, 20H, 108 Zi308/309 Zenith Instruments 33H, 30H, 20H, 34H, 30H, 20H, 35H, 30H, 20H, 35H, 30H, 20H, 36H, 30H, 20H, 37H, 30H, 20H, 38H, 30H, 20H, 39H, 30H, 20H, 39H, 39H Byte 1 1 1 Return ACK / NAK 10~20+9(Space) 1 Example: set source of statistical analysis is Profile1, statistics percentage values were 10,20,30,40,50,60,70,80,90,99: 02 01 43 53 54 53 30 20 31 30 20 32 30 20 33 30 20 34 30 20 35 30 20 36 30 20 37 30 20 38 30 20 39 30 2039 39 03 26 0D 0A Return: ACK: 02 01 06 03 06 0D 0A STS?: Query statistical analysis setting Instruction Parameter Explanation STS Query parameter: ? ASCII S 109 T S ? Zi308/309 Zenith Instruments Hexadecimal 53H 54H 53H 3FH Byte 1 1 1 1 Return Return sources of statistical analysis and 10 groups statistical percentage Example: query statistical analysis setting 02 01 43 53 54 53 3F 03 28 0D 0A Return: statistical analysis source is Profile1 and the statistics percentage values are 10,20,30,40,50,60,70,80,90,99. 02 01 41 30 2C 31 30 2C 32 30 2C 33 30 2C 34 30 2C 35 30 2C 36 30 2C 37 30 2C 38 30 2C 39 30 2C 39 39 03 70 0D 0A HISp1_p2: Setup time history Instruction Parameter Parameter 1 2 p1: Explanation HIS Data p2: source Timeline 0=Profile1 0=1min 1=Profile2 1=2min 2=Profile3 2=10min Default: 1 Default: 1 ASCII H I S 1 1 Hexadecimal 48H 49H 53H 31H 31H Byte 1 1 1 1 1 Return ACK / NAK 110 Zi308/309 Zenith Instruments Example: set Profile2 the data sources. The timeline is 2min.: 02 01 43 48 49 53 31 20 31 03 31 0D 0A Return: ACK: 02 01 06 03 06 0D 0A HIS?: Query time history setting Instruction Parameter Explanation HIS Query parameter: ? ASCII H I S ? Hexadecimal 48H 49H 53H 3FH Byte 1 1 1 1 Return Return logger setting. Example: query logger setting: 02 01 43 48 49 53 3F03 2E 0D 0A Returns: the current logger setting: the data sources is Profile2, time line is 2min. 02 01 41 31 2C 31 03 6D 0D 0A OCSp1_p2_p3_p4_p5_p6_p7_p8: Setup Octave Instruction Explanati 111 OCS Param Param eter 1 eter 2 p1: p2: Parameter 3~8 p3~p8: LEQ Zi308/309 Zenith Instruments on Integral frequen and octave 0=No cy limits 1=Yes weighti Range: 0-199.9 Default: ng Default: 38, 79, 1 0=A 63, 52, 44, 38 1=C 2=Z Default: 0 ASCII O C S 1 0 38_79_63_52_ 44_38 33H, 38H, 20H, 37H, 39H, 20H, Hexadeci 4F 43 53 mal H H H 31H 30H 36H, 33H, 20H, 35H, 32H, 20H, 34H, 34H, 20H, 33H, 38H Byte 1 1 1 1 Return 1 6~30+5 (space) ACK / NAK Example: setting is not integral, frequency weighting is C, LEQ and octave limits are 60dB. 02 01 43 4F 43 53 30 20 31 20 36 30 20 36 30 20 36 30 20 36 30 20 36 30 20 36 30 03 3D 0D 0A Return: ACK: 112 Zi308/309 Zenith Instruments 02 01 06 03 06 0D 0A OCS?: Query octave settings Instruction Parameter Explanation OCS Query parameter: ? ASCII O C S ? Hexadecimal 4FH 43H 53H 3FH Byte 1 1 1 1 Return Return octave settings Example: query octave set: 02 01 43 4F 43 53 3F 03 23 0D 0A Returns: return octave settings. LAeq Limit =038.0dB;31.5Hz Limit =079.0dB;63Hz Limit =063.0dB;125Hz Limit =052.0dB;250Hz Limit =044.0dB;500Hz Limit =038.0dB 02 01 41 31 2C 30 2C 30 33 38 2E 30 2C 30 37 39 2E 30 2C 30 36 33 2E 30 2C 30 35 32 2E 30 2C 30 34 34 2E 30 2C 30 33 38 2E 30 03 62 0D 0A CUSp1_p2_p3_p4: Custom setup Instruction 113 Param Param Param Paramet eter 1 eter 2 eter 3 er 4 Zi308/309 Zenith Instruments p1: p2: p3: p4: Group Freque Time Measure numbe ncy weighti ment r weighti ng mode Range ng 0=Fast 0=SPL : 1-14 0=A 1=Slo 1=RMS 1=C w 2=SD 2=Z 2=Imp. 3=SEL Explana tion CUS 4=E 5=Max 6=Min 7=Peak 8=LEQ 9=LN1 …… 18=LN10 ASCII C U S Hexade 43 55 53 cimal H H H Byte 1 1 1 Return 1 0 0 0 31H 30H 30H 30H 1~2 1 1 1~2 ACK / NAK Example: set custom measurement in group 1 for the A-weighted, Fast, SPL 02 01 43 43 55 53 31 20 30 20 30 20 30 03 27 0D 0A Return: ACK 114 Zi308/309 Zenith Instruments 02 01 06 03 06 0D 0A Default value (with the * parameter is actually not work): Frequency weighting Custom 1 Custom 2 Custom 3 Custom 4 Custom 5 Custom 6 Custom 7 Custom 8 Custom 9 115 Time weighting Measurement Meaning mode 0 0 8 0 0 9 0 0 13 0 0 17 0 0 5 0 0 6 0 0 2 0 0 0 1 0 0 A, Fast*, LEQ A*, Fast*, LN1 A*, Fast*, LN5 A*, Fast*, LN 9 A, Fast, Max A, Fast, Min A, Fast, SD A, Fast, SPL C, Fast, SPL Zi308/309 Custom 10 Custom 11 Custom 12 Custom 13 Custom 14 Zenith Instruments 0 0 1 1 0 1 0 0 3 0 0 4 1 0 7 A, Fast*, RMS C, Fast*, RMS A, Fast*, SEL A, Fast*, E C, Fast*, Peak CUSp1_?: Query custom settings Instruction Parameter1 p1: Explanation CUS Group number Range: 1~14 Parameter2 Query parameter: ? ASCII C U S 1 ? Hexadecimal 43H 55H 53H 31H 3FH Byte 1 1 1 1~2 1 Return Return custom settings Example: query settings in 12 groups: 02 01 43 4355 53 31 32 20 3F 03 1A 0D 0A Return: the current 12 groups setting is A-weighted, Fast, SEL: 116 Zi308/309 Zenith Instruments 02 01 41 31 32 2C 30 2C 30 2C 30 33 03 6D 0D 0A CONp1: Contrast setting Instruction Parameter p1: Contrast Explanation CON Range: 0~14 Default: 7 ASCII C O N 7 Hexadecimal 43H 4FH 4EH 37H Byte 1 1 1 1 Return ACK / NAK Example: set the contrast of 9: 02 01 43 43 4F 4E 39 03 38 0D 0A Return: ACK 02 01 06 03 06 0D 0A CON?: Query contrast setting Instruction Parameter Explanation CON Query parameter: ? ASCII C O N ? Hexadecimal 43H 4FH 4EH 3FH Byte 1 1 1 1 Return Return contrast settings 117 Zi308/309 Zenith Instruments Example: Query contrast setting: 02 01 43 43 4F 4E 3F 03 3E 0D 0A Returns: the current contrast is 7 02 01 41 30 37 03 46 0D 0A BLTp1_p2: Backlight settings Instruction Explanation BLT Parameter1 Parameter2 p1: Backlight p2: Backlight delay duration 0=Y, 0=10s ; Automatically 1=20s ; shut down; 2=30s ; 1=N, 3=40s ; Never turn off 4=50s;5=60s Default: 0 Default: 0 ASCII B L T 0 0 Hexadecimal 42H 4CH 54H 30H 30H Byte 1 1 1 1 1 Return ACK / NAK Example: set the backlight will automatically shut down, duration 20s: 02 01 43 42 4C 54 30 20 31 03 38 0D 0A Return: ACK 02 01 06 03 06 0D 0A 118 Zi308/309 Zenith Instruments BLT?: Query backlight settings Instruction Parameter Explanation BLT Query parameter: ? ASCII B L T ? Hexadecimal 42H 4CH 54H 3FH Byte 1 1 1 1 Return Return backlight settings Example: Query the backlight settings; 02 01 43 42 4C 54 3F 03 26 0D 0A Return: the current backlight is set to never shut down, the duration of 20s (backlight never turned off, backlight duration in fact, and does not work.) 02 01 41 31 2C 31 03 6D 0D 0A BAT?: Check power status and the supply voltage Instruction Parameter Explanation BAT Query parameter: ? ASCII B A T ? Hexadecimal 42H 41H 54H 3FH Byte 1 1 1 1 Return 119 Returns the power state and power supply voltage Power state: 0=Battery;1=External power supply Zi308/309 Zenith Instruments Supply voltage: xx.xx V Example: check battery value: 02 01 43 42 41 54 3F 03 2B 0D 0A Returns: the current power supply is an external power supply, power supply voltage is 9.24V 02 01 41 31 2C 30 39 2E 32 34 03 7D 0D 0A TRGp1: Trigger settings Instruction Parameter p1: Trigger switch Explanation TRG 0=Off;1=On Default: 0 ASCII T R G 0 Hexadecimal 54H 52H 47H 30H Byte 1 1 1 1 Return ACK / NAK Example: turn off trigger: 02 01 43 54 52 47 30 03 32 0D 0A Return: ACK 02 01 06 03 06 0D 0A 120 Zi308/309 Zenith Instruments TRG?: Query trigger settings Instruction Parameter Explanation TRG Query parameter: ? ASCII T R G ? Hexadecimal 54H 52H 47H 3FH Byte 1 1 1 1 Return Return trigger settings Example: Query trigger settings 02 01 43 54 52 47 3F03 3D 0D 0A Returns: the current trigger state is turned off 02 01 41 30 03 71 0D 0A DATp1_p2_p3_p4: Date setting Instruction Parameter Param Param Param 1 eter2 eter3 eter4 p2: p3: p4: format Year Month Day 0=Year/Mo Range Range Range nth/Day : : 1~12 : 1~31 1=Month/D 1980~ ay/Year 2115 p1: Explan ation DAT Date 2=Day/Yea r/Month 121 Zi308/309 Zenith Instruments Default: 0 ASCII Hexade cimal Byte D A T 4 4 5 4 1 4 H H H 1 1 1 0 2011 1 1 31H 31H 1~2 1~2 32H, 30H, 30H 31H, 31H 1 Return 4 ACK / NAK Example: set the date format is year / month / day, 2011 August 5th, 02 01 43 44 41 54 30 20 32 30 31 31 20 38 20 35 03 0D0D 0A Return : ACK 02 01 06 03 06 0D 0A DAT?: Query date settings Instruction Parameter Explanation DAT Query parameter: ? ASCII D A T ? Hexadecimal 44H 41H 54H 3FH Byte 1 1 1 1 Return Return date settings Example: Query date setting: 02 01 43 44 41 54 3F 03 2D 0D 0A Return: the current date setting is year / month / day, 2011/08/05 122 Zi308/309 Zenith Instruments 02 01 41 30 2C 32 30 31 31 2F 30 38 2F 30 35 03 52 0D 0A HORp1_p2_p3: Time setting Instruction Explanatio n Paramet Paramet Paramet er 1 er 2 er 3 p2: p3: Minute Second Range: Range: 0-59 0-59 1 1 1 31H 31H 31H 1~2 1~2 1~2 p1: Hour HOR Range: 0-23 ASCII H O R Hexadecim 48 4F 52 al H H H Byte 1 1 1 Return ACK / NAK Example: The time is 18:37:30: 02 01 43 48 4F 52 31 38 20 33 37 20 33 30 03 18 0D 0A Return: ACK 02 01 06 03 06 0D 0A HOR?: Query hour settings Instruction Parameter Explanation HOR Query parameter: ? ASCII H 123 O R ? Zi308/309 Zenith Instruments Hexadecimal 48H 4FH 52H 3FH Byte 1 1 1 1 Return Return time settings Example: Query time setting: 02 01 43 48 4F 52 3F 03 29 0D 0A Returns: the current time is 18:37:48 02 01 41 31 38 3A 33 37 3A 34 38 03 40 0D 0A VER?: Query the version information Instruction Parameter Explanation VER Query parameter: ? ASCII V E R ? Hexadecimal 56H 45H 52H 3FH Byte 1 1 1 1 Return Return the version information Example: query version information: 02 01 43 564552 3F 03 3D 0D 0A Returns: the current version of the model: 308,1 480007 serial number, version 1.04, release date 2011/03/26 02 01 41 33 30 38 2C 31 2C 34 38 30 30 30 37 2C 31 2E 30 34 2C 32 30 31 31 2F 30 33 2F 32 36 03 5E 0D 0A PWOp1: Auto power off settings 124 Zi308/309 Zenith Instruments Instruction Parameter p1: Auto-off time 0=1min;1=5min Explanation 2=10min ; 3=30min ; PWO 4=Off Default: 4 ASCII P W O 4 Hexadecimal 50H 57H 4FH 34H Byte 1 1 1 1 Return ACK / NAK Example: Auto power off function is set to off 02 01 43 50 57 4F 34 03 3F 0D 0A Return: ACK 02 01 06 03 06 0D 0A PWO?: Query auto power off settings Instruction Parameter Explanation PWO Query parameter: ? ASCII P 125 W O ? Zi308/309 Zenith Instruments Hexadecimal 50H 57H 4FH 3FH Byte 1 1 1 1 Return Return auto power off settings Example: query auto power off settings: 02 01 43 50 57 4F 3F 03 34 0D 0A Returns: the current state is off: 02 01 41 34 03 75 0D 0A LNGp1: Language Selection Instruction Parameter p1: Language selection 0=English Explanation 1=Chinese LNG 2=Portuguese 3=Spanish Default: 0 ASCII L N G 0 Hexadecimal 4CH 4EH 47H 30H Byte 1 1 1 1 Return ACK / NAK Example: Set the language to Chinese: 02 01 43 4C 4E 47 31 03 37 0D 0A 126 Zi308/309 Zenith Instruments Return: ACK 02 01 06 03 06 0D 0A LNG?: Query Language Selection Instruction Parameter Explanation LNG Query parameter: ? ASCII L N G ? Hexadecimal 4CH 4EH 47H 3FH Byte 1 1 1 1 Return Return the language selection status Example: query language selection: 02 01 43 4C 4E 47 3F 03 39 0D 0A Returns: the currently selected language is Chinese: 02 01 41 31 03 70 0D 0A OUTp1_p2_p3_p4: Output options Set data form of DC output in Sound Level Meter mode and octave mode. Instruction 127 Param Param Paramet Param Zi308/309 Explana tion Zenith Instruments OUT eter 1 eter 2 er 3 eter 4 p1: p2: p3: p4: The The Measure Output freque time ment of ncy weighti mode of octave weighti ng the mode ng sound sound 0=LAe sound level level q level meter meter 1=LCe meter mode mode q mode 0=Fast 0=SPL 2=LZe 0=A 1=Slo 1=RMS q 1=C w 2=Peak 3=31.5 2=Z 2=Imp. Default: Hz Defaul Defaul 0 4=63H t: 0 t: 0 of of z 5=125 Hz 6=250 Hz 7=500 Hz Defaul t: 0 ASCII O U T 0 0 None None 128 Zi308/309 Zenith Instruments 1 0 0 0 Hexade 4F 55 54 30H 30H None None cimal H H H 31H 30H 30H 30H Byte 1 1 1 1 1 1 1 Return ACK / NAK Example 1: Set the output LAeq, Fast, SPL at the Sound Level Meter mode. Set the output LAeq at the octave mode. 02 01 43 4F 55 54 30 20 30 20 30 20 30 03 2D 0D 0A Return: ACK 02 01 06 03 06 0D 0A OUT?: Query output options Instruction Parameter Explanation OUT Query parameter: ? ASCII O U T ? Hexadecimal 4FH 55H 54H 3FH Byte 1 1 1 1 Return Return output options Example: query output options: 02 01 43 4F 55 54 3F 03 32 0D 0A Return: A, Fast, SPL at the Sound Level Meter mode, LAeq at the octave mode. 02 01 41 31 2C 30 2C 30 2C 30 03 6C 0D 0A 129 Zi308/309 Zenith Instruments RES: Restore factory settings ☆Note: After receipt of the ACK, the user must wait at least 6 seconds make it to complete the operation. Instruction Parameter Explanation RES Parameter: None ASCII R E S None Hexadecimal 52H 45H 53H None Byte 1 1 1 None Return ACK / NAK Example: To restore the factory settings: 02 01 43 52 45 53 03 07 0D 0A Return: an ACK. Wait at least six seconds after receipt of the ACK. 02 01 06 03 06 0D 0A STAp1: Start / stop measurement Instruction Parameter p1: Explanation Start / stop measurement STA 0=Stop 1=Start ASCII S T A 1 Hexadecimal 53H 54H 41H 31H Byte 1 1 1 1 130 Zi308/309 Zenith Instruments Return ACK / NAK Example: start measurement: 02 01 43 53 54 41 31 03 34 0D 0A Return: ACK 02 01 06 03 06 0D 0A STA?: query measurement state Instruction Parameter Explanation STA Query parameter: ? ASCII S T A ? Hexadecimal 53H 54H 41H 3FH Byte 1 1 1 1 Return Return measurement state Example: Query the measuring state: 02 01 43 53 54 41 3F 03 3A 0D 0A Returns: measuring: 02 01 41 31 03 70 0D 0A ☆Note: The following instructions are to query the Sound Level Meter measurements. They contain the "return manner” parameter, it means: Stop return: The Sound Level Meter no longer to return calculation results every second after received the instruction. 131 Zi308/309 Zenith Instruments Single return: The Sound Level Meter will return the calculation results on time after received the instruction. Continuous return: Automatically return to the current data every second after received the instruction. Therefore, the instructions in the "return mode" parameter can be set to 2 to send to the Sound Level Meter, Sound Level Meter will send the latest calculations every second. DMAp1_?: query the main interface data Instruction Parameter 1 Parameter 2 p1: Query Return manner parameter: ? 0=Stop return Explanation DMA 1=Single return 2=Continuous return ASCII D M A 1 ? Hexadecimal 44H 4DH 41H 31H 3FH Byte 1 1 1 1 1 132 Zi308/309 Zenith Instruments Return the main interface data Filter: 0=A;1=C;2=Z Detector: 0=Fast;1=Slow;2=Imp. Return Mode: 0=SPL;1=RMS;2=PEAK;3=LEQ;4=MAX; 5=MIN Range: 0=Low;1=High;2=Auto Measurement data: The value of the main interface Example: query the data of the main interface, and returns only once: 02 01 43 444D 41 31 20 3F 03 25 0D 0A Returns: the current data of the main interface is: A, Fast, SPL, Auto, measurement data 073.6dB. 02 01 41 30 2C 30 2C 30 2C 32 2C 30 32 35 2E 33 03 69 0D 0A TPR?: query 3Profile interface data Instruction Parameter 1 Parameter 2 p1: Query Return manner parameter: ? 0=Stop return Explanation TPR 1=Single return 2=Continuous return ASCII 133 T P R 1 ? Zi308/309 Zenith Instruments Hexadecimal 54H 50H 52H 31H 3FH Byte 1 1 1 1 1 Return 3Profile interface data First group: Filter, Detector, Mode, Range, Data Return Second group: Filter, Detector, Mode, Range, Data Third group: Filter, Detector, Mode, Range, Data Example: query 3Profile interface data: 02 01 43 54 50 52 31 20 3F 03 3B 0D 0A Returns: the current 3Profile Interface data: First group: A, Fast, SPL, Auto, 023.6dB; Second group: C, Fast, SPL, Auto, 026.6dB Third group: Z, Fast, SPL, Auto, 030.6dB 02 01 41 30 2C 30 2C 30 2C 32 2C 30 32 36 2E 33 2C 31 2C 30 2C 30 2C 32 2C 30 32 36 2E 36 2C 32 2C 30 2C 30 2C 32 2C 30 33 30 2E 36 03 6E 0D 0A DLN?: Query statistics analysis data (LN) Instruction Explanation DLN Parameter 1 Parameter 2 p1: Query Return manner parameter: ? 0=Stop return 134 Zi308/309 Zenith Instruments 1=Single return 2=Continuous return ASCII D L N 1 ? Hexadecimal 44H 4CH 4EH 31H 3FH Byte 1 1 1 1 1 Return statistical analysis (LN) data Filter: 0=A;1=C;2=Z Detector: 0=Fast;1=Slow;2=Imp. Mode: 0=SPL;1=RMS;2=PEAK;3=LEQ;4=MAX; 5=MIN Return Range: 0=Low;1=High;2=Auto LN data sources: 0=Profile1;1=Profile2;2=Profile3 Group 1 LN percentages and LN statistics …… Group 10 LN percentages and LN statistics Example: query statistical analysis (LN) data,: 02 01 43 44 4C 4E 31 20 3F 03 2B 0D 0A Returns: the current statistical analysis (LN)data: A, Fast, SPL, Auto, Profile2, LN10=074.2dB, LN20=074.2dB, LN30=074.2dB, LN40=047.9dB, LN50=027.3dB, LN60=027.2dB, LN70=027.1dB, LN80=027.0dB, LN90=027.0dB, LN99=026.9dB 135 Zi308/309 Zenith Instruments 02 01 41 30 2C 30 2C 30 2C 32 2C 31 2C 31 30 2C 30 37 34 2E 32 2C 32 30 2C 30 37 34 2E 32 2C 33 30 2C 30 37 34 2E 32 2C 34 30 2C 30 34 37 2E 39 2C 35 30 2C 30 32 37 2E 33 2C 36 30 2C 30 32 37 2E 32 2C 37 30 2C 30 32 37 2E 31 2C 38 30 2C 30 32 37 2E 30 2C 39 30 2C 30 32 37 2E 30 2C 39 39 2C 30 32 36 2E 39 03 70 0D 0A DCU?: Query custom data Instruction Parameter 1 Parameter 2 p1: Query Return manner parameter: ? 0=Stop return Explanation DCU 1=Single return 2=Continuous return ASCII D C U 1 ? Hexadecimal 44H 43H 55H 31H 3FH Byte 1 1 1 1 1 Return custom data: Group 1Filter, Detector, Mode, Data Return …… Group 14Filter, Detector, Mode, Data Example: query custom measuring data: 136 Zi308/309 Zenith Instruments 02 01 43 44 43 55 31 20 3F 03 3F 0D 0A Returns: the current custom measuring data: Group 0: A, Fast, LEQ, 023.1dB, Group 1: A, Fast, L10, 028.1dB, Group 2: A, Fast, L50, 026.4dB, Group 3: A, Fast, L90, 025.3dB, Group 4: A, Fast, MAX, 048.3dB, Group 5: A, Fast, MIN, 022.3dB, Group 6: A, Fast, SD, 002.3dB, Group7: A, Fast, SPL, 024.8dB, Group 8: C, Fast, SPL, 025.6dB, Group 9: A, Fast, RMS, 023.7dB, Group10: C, Fast, RMS, 024.5dB, Group 11: A, Fast, SEL, 049.8dB, Group 12: A, Fast, E, 8.737e-09, Group 13: A, Fast, Peak, 046.5dB, ☆Note: Parameters with an asterisk * in fact not work. 137 Zi308/309 Zenith Instruments 02 01 41 30 2C 30 2C 30 38 2C 30 32 33 2E 31 2C 30 2C 30 2C 30 39 2C 30 32 38 2E 31 2C 30 2C 30 2C 31 33 2C 30 32 36 2E 34 2C 30 2C 30 2C 31 37 2C 30 32 35 2E 33 2C 30 2C 30 2C 30 35 2C 30 34 38 2E 33 2C 30 2C 30 2C 30 36 2C 30 32 32 2E 33 2C 30 2C 30 2C 30 32 2C 30 30 32 2E 33 2C 30 2C 30 2C 30 30 2C 30 32 34 2E 38 2C 31 2C 30 2C 30 30 2C 30 32 35 2E 36 2C 30 2C 30 2C 30 31 2C 30 32 33 2E 37 2C 31 2C 30 2C 30 31 2C 30 32 34 2E 35 2C 30 2C 30 2C 30 33 2C 30 34 38 2E 39 2C 30 2C 30 2C 30 34 2C 38 2E 37 33 37 65 2D 30 39 2C 31 2C 30 2C 30 37 2C 30 34 36 2E 35 03 28 0D 0A DSLp1_p2_?: Query all the data of the Sound Level Meter Instruction Explanati on DSL Parame Parameter Paramete ter 1 2 r3 p1: Data p1: Return Query group manner paramete 0=SPL 0=Stop r: ? 1=RMS return 2=SD 1=Single 3=SEL return 4=E 2=Continu 5=Max ous return 6=Min 7=Peak 138 Zi308/309 Zenith Instruments 8=Leq 9=LN ASCII D S L Hexadeci 44 53 4C mal H H H Byte 1 1 1 0 1 ? 30H 31H 3FH 1 1 1 Return the corresponding data group: Group 0: LAF, LAS, LAI, LCF, LCS, LCI, LZF, LZS, LZI Group 1: LArms, LCrms, LZrms Group 2: LAFsd, LASsd, LAIsd, LCFsd, LCSsd, LCIsd, LZFsd, LZSsd, LZIsd Group 3: LAsel, LCsel, LZsel Return Group 4: LAe, LCe, LZe Group5: LAFmax, LASmax, LAImax, LCFmax, LCSmax, LCImax, LZFmax, LZSmax, LZImax Group 6: LAFmin, LASmin, LAImin, LCFmin, LCSmin, LCImin, LZFmin, LZSmin, LZImin Group 7: LApeak, LCpeak, LZpeak Group 8: LAeq, LCeq, LZeq Group 9: Percentage values and statistics of ten LN Example: Query group 1 (RMS): 02 01 43 44 53 4C31 20 31 20 3F 03 27 0D 0A Returns: the RMS data: LArms = 023.7dB, LCrms = 024.5dB; LZrms = 028.2dB 139 Zi308/309 Zenith Instruments 02 01 41 30 32 33 2E 37 2C 30 32 34 2E 35 2C 30 32 38 2E 32 03 62 0D 0A DTR?: Show the structure-borne noise ratio of fixed equipment Instruction Parameter1 Parameter2 p1: Query Return manner parameter: ? 0=Stop return Explanation DTR 1=Single return 2=Continuous return ASCII D T R 1 ? Hexadecimal 44H 54H 52H 31H 3FH Byte 1 1 1 1 1 Return Return structure-borne noise ratio of fixed equipment Example: Query the structure-borne noise ratio of fixed equipment: 02 01 43 44 54 5231 20 3F 03 2F 0D 0A Return: The structure-borne noise ratio of fixed equipment is 05% 02 01 41 30 35 25 03 61 0D 0A 140 Zi308/309 Zenith Instruments DOT?: Query octave data Instruction Parameter1 p1: Parameter2 Return manner 0=Stop return Explanation DOT 1=Single return Query parameter: ? 2=Continuous return ASCII D O T 1 ? Hexadecimal 44H 4FH 54H 31H 3FH Byte 1 1 1 1 1 Return octave data Return Integral: 0=No, 1=Yes LAeq;LCeq;LZeq;31.5Hz;63Hz;125Hz;250Hz; 500Hz Example: query octave measurement data: 02 01 43 44 4F 5431 20 3F 03 32 0D 0A Returns: the current octave measurement data is: integral, LAeq=065.0dB;LCeq=064.1dB;LZeq=064.8dB;31.5Hz=041.3dB; 63Hz=044.1dB;125Hz=047.3dB;250Hz=051.0dB;500Hz=053.3dB 02 01 41 31 2C 30 36 35 2E 30 2C 30 36 34 2E 31 2C 30 36 34 2E 38 2C 30 34 31 2E 33 2C 30 34 34 2E 31 2C 30 34 37 2E 33 2C 30 35 31 2E 30 2C 30 35 33 2E 33 03 7C 0D 0A 141 Zi308/309 Zenith Instruments CSD: Save 3Profile data into SD Instruction Parameter2 CSD None Explanation ASCII C S D Hexadecimal 43H 53H 44H Byte 1 1 1 Return status: Return 0= Stored successfully, SD ok 1= Failure to store, SD error; 2=No SD; Example: Save CSD: 02 01 43 43 53 44 03 17 0D 0A Return: Stored successfully, SD ok 02 01 41 30 03 71 0D 0A 142 6. Product Notes/Calibration/Warranty 6.1 Notes The measurement microphone is a sensitive component, please use it carefully. Store the microphone in the attached box which can protect it against damage from outside environmental factors. Please follow the introduction and user guide in this manual. Do not drop, knock or shake the product. Any operation over the limit mentioned in this manual could damage the product. Keep out the water and any other liquid due to no waterproof design on this product. Using qualified alkaline battery can extend your operation time and bring benefit to device. Do not mix using of old and new batteries at the same time. Remove batteries when the device is not in use. Long-term placement of the battery inside the product could cause battery leakage and damage the product. 6.2 Calibration Sound level meter has been calibrated before sales. Please keep regular calibration to ensure the accuracy of the measurement. Runrite Electronics provide the calibration service of sound/acoustic products via a select series of 3rd Party approved laboratories. 6.3 Warranty Runrite Electronics can provide warranty service during the warranty period. The component could be replaced according to the determination of Runrite Electronics to solve the issue caused by materials, design or manufacture. Please refer to the product warranty promise in sales contract. Do not open or repair the device by customer. Any unauthorized behavior will result in loss warranty of this product. 146 Zi308/309 ZENITH INSTRUMENTS A brand of RUNRITE ELECTRONICS cc Unit 2, 17 Caversham Road Pinetown KZN Republic of South Africa TEL: +27 31 701 4417 FAX: +27 31 701 6309 Web – www.runrite-sa.com Email: [email protected] Zenith Instruments