1
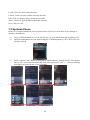
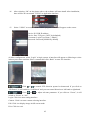
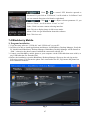
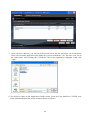
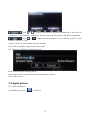
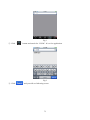
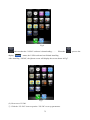
7. Mobile Phone Support
A state-of-the-art feature of this DVR device is transmitting live feed from the CCTV cameras to
your mobile phone, so that you can have ‘on the go’ access to your surveillance system from
virtually anywhere in the world. Currently, there are a limited number of phones that can support
this feature: Windows CE Mobile, Symbian S60 3rd Edition OS, Android, Blackberry and Iphone.
7.1 Windows Mobile
Note:
1. Prior to using this feature, you should apply for the Internet connection
service for your mobile phone, such as 3G or 3.5G. Please contact your
mobile service provider for details.
2. You can only watch one live feed channel at a time with your
mobile phone. Split mode and playback of recorded files is not
available at the moment.
From the installation CD, install file “vs500Setup.cab” onto your Windows Mobile phone. See
your phone user manual for more details on application install.
Find and execute program VS500 and click the Setting button to setup the IP address for your
DVR.
62
In the ensuing screen, input the user name (default Admin), password, device port(TCP port),
and IP address for your DVR (Server).
Input the value for the Port: default 34567 and choose the channel for streaming data from the
dropdown menu.
Select a camera to monitor it.
The main window of the Mobile Phone application offers the choice of channels, Connect and
Settings buttons.
: Click
or
to control PTZ direction upward or downward. If you click on
“UP/Down”, it will switch to “Left/Down” and you can control direction to left or right.
: Click
or
to adjust relevant parameter. If you click on “Zoom”, it will
switch to “Focus” or “Iris”
63
Login: Click it to enter setting interface.
Camera: Click it to enter camera selecting interface.
Full: Click it to display image in full screen mode.
About: Click it to get information about this software.
Exit: Click it to exit.
7.2 Symbian Phone
Please see a sample installation process shown below (The N97 will be taken as an example to
introduce installation):
(1) Copy “VS500(Symbian)V1.03.1.R.101203.sisx” to your mobile from the installation CD;
(2) Open file management on your mobile and find “VS500(Symbian)V1.03.1.R.101203.sisx”
you have copied;
(3) Select “Options” and a dialog will displayed which indicates “Install VS500?” You should
choose “Ok” to continue the following steps; after you choose “OK”, a serious of dialogs
will appear as picture below, select “continue”
64
(4) After selecting “Ok” on last picture above, the software will start install. After installation,
there will be an icon named “VS500” in application interface.
(5) Select “VS500” to execute VS500 and the program window will appear on the screen.
Device IP: DVR IP address;
Device Port: TCP port ( 34567 by defaulted)
Username: Login User Name〖Admin〗
Password: Password [888888 by default]
(6) After configuration, select “Login” to login system. A interface will appear as following to select
camera you want to monitor. Select a camera then click “Back” to enter live interface.
: Click
or
to control PTZ direction upward or downward. If you click on
“UP/Down”, it will switch to “Left/Down” and you can control direction to left hand or right hand.
: Click
or
to adjust relevant parameter. If you click on “Zoom”, it will
switch to “Focus” or “Iris”
Login: Click it to enter setting interface.
Camera: Click it to enter camera selecting interface.
Full: Click it to display image in full screen mode.
Exit: Click it to exit.
65
7.3 Android Mobile
1) Install the program
1 Copy the software “VS500 (Android)V1.00.0.apk” to your Android phone or copy to SD card.
1.2 Open your “ES File Explore” in android phone and find the
[VS500(Android)V1.00.0.apk] file in your android phone memory or SD card. Click
[VS500(Android)V1.00.0.apk] to install software.
2). Start vs500 software
VS500 provide video surveillance, channel switch, full screen magnify, PTZ control, focus and exit
function.
2 System main interface
After the installation, press “VS500” icon in the application to enter login interface.
Device IP: DVR IP address;
Device Port: TCP port ( 34567 by defaulted)
Username: Login User Name〖Admin〗
Password: Password [888888 by default]
After inputting device IP, device port, username and password, click “Login” to login system.
An interface will appear to select camera you want to monitor, the picture as following.
66
: Click
or
to control PTZ direction upward or
downward. If you click on “UP/Down”, it will switch to “Left/Down” and
you can control direction to left hand or right hand.
: Click
or
to adjust relevant parameter. If you
click on “Zoom”, it will switch to “Focus” or “Iris”
Video: Click it to enter camera selecting interface.
Full: Click it to display image in full screen mode.
About: Click it to get information about this software.
Exit: Click it to exit.
7.4 Blackberry Mobile
1) Program installation
1. Copy the setup software “VS500.alx” and “VS500.cod” to your PC.
2. In order to be able to install applications and themes via BlackBerry Desktop Manager, firstly the
PC should install Blackberry Desktop Manager. BlackBerry Desktop Manager will be known as
“DM.”; otherwise the phone cannot establish the connection with the PC.
3. Connect your BlackBerry mobile phone to your computer via the USB cable that came with it, or
any USB cable that fits. Start the DM.
4. Before the installation, open the BlackBerry Desktop Manager. Shown as the red sign on the
following pictures, Fig1 means the phone isn’t connected to the PC, Fig2 means the phone has
been connected to the PC.
Fig 1
67
Fig 2
5. Click on “Application Loader” to enter into its interface. In this screen you have two options to
select from. Select “Add/Remove Applications” (shown as follows).
6. You should now see something like what you see below. From this screen, click “Browse”
(shown as follows).
68
7. Once you click “Browse” you will see a file search screen like the one below. Go to and locate
where you saved the application files. Make sure you saved both the “.alx” file and “.cod” file in
the same folder. After finding the “VS500.alx” file for the application, highlight it and click
“open”.
8. You will now return to the Application Loader screen. From here you should see “VS500” now
listed with Install under the Action column (shown as follows)
69
9. Select “VS500” and click “Next” to go to next interface.
10.Click “Finish” to start install software. After installation, an interface will show as folling.
70
2) System explanations
VS500 phone port has the following capabilities and functions: live video surveillance, channel
switch, full screen display, PTZ control, including zoon/focus/iris, image capture, save as favorite
and exit function.
① System main interface
After the installation, press “VS500” icon in the application, see the below picture.
② System login interface
Open the main interface, see the configure interface as bellow. Modify your parameters as
necessary.
Device IP: DVR IP address
Device Port: TCP Port [34567 by default]
User name: Login User Name〖Admin〗
Password: Password [888888 by default]
Network Type: WIFI or others
Login: Click this button to login live interface;.
Cancel: Click this button to exit system.
③ System Live interface
After setting your configurations, press [Login] to login device list and click [Cancel] button to exit.
Please refer to the below picture:
Device list: Click this button to show device list and choose the one you want to connect.
④ Connect to DVR
After choose cameras, you will enter live interface.
71
: Click
or
to control PTZ direction upward or downward. If you click on
“UP/Down”, it will switch to “Left/Down” and you can control direction to left hand or right hand.
: Click
or
to adjust relevant parameter. If you click on “Zoom”, it will
switch to “Focus” or “Iris”
Camera: Click it to enter camera selecting interface.
Full: Click it to display image in full screen mode.
Set: Click it to set RTSP port and stream type.
RTSP: Set RTSP port according DVR.
Stream Type: Select type between extra stream and main stream.
Exit: Click it to exit.
7.5 Apple Iphone
(1). VS500 installation.
Open IPhone App store “
” as follows:
72
Fig 1
① Click“
”button and search for “VS500”. It is a free application.
Fig 2
② Click “
” and you will see following screen.
73
Fig 3
③ Click “
” as shown in Fig 3. It will display the screen shown in Fig 4. Click the “install”
button shown in Fig 4 “
” and it will display the screen shown in Fig 5. Input your Apple
account password, then click “
”. The screen will look like the one shown in Fig 6.
Fig 4
fig 5
74
Fig 6
: indicates that the “VS500” software is downloading …….
display“
When the “
”status, the VS500 software has finished installing.
After installing “VS500”, the iphone screen will display the screen shown in Fig7.
Fig 7
(2). How to use VS 500.
①. Click the “VS 500” icon to open the “VS 500” to set up parameters.
75
” process bar
Device IP: DVR IP address
Device Port: TCP Port [34567 by default]
User name: Login User Name〖Admin〗
Password: Password [888888 by default]
1
2
Fig 8
1.
Fig 9
PTZ Control: Click +or - to control PTZ direction upward or downward. If you click on
“UP/Down”, it will switch to “Left/Down” and you can control direction to left hand or right hand.
Click
or
to adjust relevant parameter. If you click on “Zoom”, it will switch to “Focus” or
“Iris”
2.
Login: Click it to set up parameters.
Camera: Click it to enter camera selecting interface.
Full Screen: Click it to display image in full screen mode.
Appendix 1 Setting up Internet Connections for
Remote Access
This section will explain the ways to connect your DVR to the internet using static and dynamic IP
addresses. To connect to the internet, you will need to use a modem and a router.
As a network device, your DVR should have its own address called an Internet Protocol (IP)
address. This address can be used by other network devices (ie. computers) to access the DVR to
remotely monitor the CCTV cameras and change settings. You can get a static IP address from your
internet service provider – this way you will always have the same address at all times, though this
76
method is rather expensive. If you have a static IP, enter your static IP in the DVR settings and the
router will connect your DVR to the internet.
You may alternatively choose to use dynamic IP, which means that the IP address of your DVR may
frequently change, but it will still be possible to find your DVR from remote computers, by using
DDNS (Dynamic Domain Name System) which dynamically assigns IP addresses to the DVR. This
functionality allows the DVR to automatically update its IP address to the DDNS Server each time
its Dynamic IP address changes. Your DVR is equipped with the DDNS functionality and has a list
of related domain names through which you can acquire an IP address. (See Section 5.4.3 for
details.)
Setup an account with a DDNS service provider and with the account information available, login
to the router and go to the DDNS page. Select the address of your service provider and type in the
account password. After saving, the router will send IP updates to your DDNS account and the
connection will always be forwarded to you current IP.
77
Statement
◎If there is any doubt or disputability in manual, you can call on our company and take its
plain as authority;
◎This manual provide reference for seviral types machine and you can contact with our customer
service department if you have any difficulty;
◎There maybe some different description with real device as our products are upgrading all
along. Please forgive us for not informing latest updating.
79
MC-664(A-2)