1
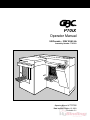
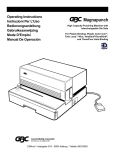
GBC Quantum P70iX
Automated Punch
User's Manual
Provided By
http://www.MyBinding.com
http://www.MyBindingBlog.com
P70iX
Operator Manual
US/Canada – 230V 50/60 Hz
Assembly Number 7707010
Operator Manual # 7707286
Date Issued October 15, 2003
Revision C-1
Table of Contents
Section
Safety Information
1. Introduction
Introduction
Page
i
1-1
2. Getting to Know your Quantum P70iX
Operating Controls
Plastic Covers
2-1
2-2
3. Operation
Operating Controls
3-1
4. Options and Accessories
Die Set
Die Set Storage
4-1
4-2
5. Home Screen
Operation
Service
5-1
5-1
6. Maintenance
Problem solving
Paper Jam
6-1
6-2
7. Specifications
Specifications Quantum P70iX
Power Cord Specifications
7-1
7-2
Safety Information
SAFETY MESSAGES
The safety of you and others is very important to GBC. Important safety messages and information are contained within this manual as well as on the
machine itself. Please be certain to carefully read and understand all of these
before operating the machine.
!
The safety alert symbol precedes each safety message in this Operating
Instruction Manual. This symbol indicates a potential personal safety
hazard that could hurt you or others, as well as cause product or
property damage.
The following pictorial is found on the Quantum P70iX:
!
CAUTION: This means you could fall and be injured if you try to stand or
sit on the conveyor belts.
!
WARNING: This means you can be seriously injured by crushing and cutting, moving parts. Do not operate without guards in place. Do not attempt
to defeat any of the safety interlock switches.
!
WARNING: This means you can be seriously injured by the covers falling
on you. Keep your hands and other body parts away to avoid getting them
crushed or cut.
i
Safety Information
SAFETY MESSAGES continued
!
WARNING: This means you can be seriously injured by crushing
and cutting, moving parts. Do not operate without guards in place.
Do not attempt to defeat any of the safety interlock switches.
The following symbols appear on this product, and their meaning is as follows:
I Means the electrical power is “ON”.
O Means the electrical power is “OFF”.
IMPORTANT SAFEGUARDS
• Use the Quantum P70iX only for its intended purpose of punching paper and
covers according to the indicated specifications.
• Retain this Operating Instructions manual for later use.
!
CAUTION: IN CASE OF EMERGENCY, USE THE POWER CORD AS A
MAIN DISCONNECT.
ii
Safety Information
IMPORTANT SAFEGUARDS continued
• The Quantum P70iX must be connected to a supply voltage corresponding
to the electrical rating of the machine operating instructions (also listed on
the serial number label).
• The socket-outlet shall be located near the equipment and shall be easily
accessible.
• The grounding plug is a safety feature and will only fit into the proper grounding-type power outlet. If you are unable to insert the plug into an outlet, contact a qualified electrician to have a suitable outlet installed. Do not alter the
plug on the end of the cordset (if provided) of the Quantum P70iX. It was
provided for your safety.
• Unplug the Quantum P70iX before moving the machine or whenever the
machine is not in use for an extended period of time.
• Do not operate the Quantum P70iX if the machine has a damaged power
supply cord or plug. Do not operate the machine after any malfunction, if liquid has been spilled into the machine, or it the machine has been damaged
in any way.
• Do not overload electrical outlets beyond their capacity. To do so can result in
fire or electrical shock.
• Do not attempt to bypass the safety interlocks, if you do so you may be
injured
SERVICE
Do not attempt to service your Quantum P70iX yourself. Contact an authorized
GBC service representative for any required repairs or major maintenance for
your Quantum P70iX.
There are NO user-serviceable parts inside the machine. To avoid potential personal injury and/or property or machine damage.
!
DO NOT REMOVE THE MACHINE’S SIDE COVERS AND TOP
COVERS.
CLEANING
You may clean the exterior of the Quantum P70iX using a soft, damp cloth. Do
not use detergent or solvents as damage to the machine may occur.
iii
Safety Information
MAIN CORDSET SELECTION
(THE FOLLOWING NOTE APPLIES ONLY TO EUROPEAN UNITS)
!
CAUTION: WHEN CHOOSING A DETACHABLE LINE CORD FOR USE
WITH YOUR Quantum P70iX, ALWAYS OBSERVE THE FOLLOWING
PRECAUTIONS
The cordset consist of three parts; the attachment plug, cordage and appliance
inlet. Each of these components must have European regulatory approvals for
safety.
The following minimum electrical ratings for the specific cordset are published
for safety purposes. DO NOT USE CORDSETS THAT DO NOT MEET THE
FOLLOWING MINIMUM ELECTRICAL REQUIREMENTS.
PLUG: 3 amperes, 250 volts, 50/60 Hz, Class 1, 3 conductor, European safety
approved.
CORDAGE: Type H05VV-F3G0.75, Harmonized ( < HAR> ). The “< >” symbols indicate cordage approved to appropriate European standard (NOTE:
“HAR” may be substituted for approval mark of European safety agency, which
approved the cordage. An example would be “ < VDE > “).
APPLIANCE CONNECTOR: 3 ampere, 250 volts, 50/60 Hz, European safety
approved, Type IEC 320. The cordset shall not exceed 3 meters in length. A
cordset with component electrical ratings greater than the minimum specified
electrical ratings may be substituted.
iv
Safety Information
MAIN CORDSET SELECTION continued
(THE FOLLOWING NOTE APPLIES ONLY TO THE U.S. UNITS.)
FCC NOTE
This equipment has been tested and found to comply with the limits for a Class
A digital device, pursuant to Part 15 of the FCC Rules. These limits are
designed to provide reasonable protection against harmful interference when the
equipment is operated in a commercial environment.
This equipment generates, uses, and can radiate radio frequency energy and, if
not installed and used in accordance with the Operator Manual, may cause
harmful interference to radio communications. Operation of this equipment in a
residential area is likely to cause harmful interference in which case the user will
be required to correct the interference at his/her own expense.
CAUTION: CHANGES OR MODIFICATIONS NOT EXPRESSLY APPROVED
BY GENERAL BINDING CORPORATION COULD VOID YOUR
AUTHORITY TO OPERATE THE EQUIPMENT.
!
This Class A digital apparatus complies with Canadian ICES-003.
Cet appareil numerique dela classe A est conforme a la norme NMB-003 du
Canada.
SERVICE AND EQUIPMENT MAINTENANCE AGREEMENT
By purchasing the P70iX you have invested in a highly capable punching machine that
will give you years of reliable service. To help protect this investment be certain to take
advantage of the GBC Equipment Maintenance Agreement (EMA). The EMA provides
your P70iX with proper ongoing maintenance and care, helping to ensure the years of
quality performance and long life built into the machine. Without an EMA, a charge for
parts and labor would result from every normal maintenance or repair service call. An
EMA for your P70iX eliminates this possibility by providing you with a low, fixed annual
cost for protecting your valuable machine investment. For full details about purchasing
an EMA, consult with your GBC Sales Representative or contact:
General Binding Corporation
500 Bond Street
Lincolnshire, IL 60069
Or Call: 1-800-790-7787
A GBC Authorized Technician must perform all service and maintenance unless it is
operator maintenance in accordance with the P70iX Automatic Punch User Guide. Use
of the P70iX Automatic Punch in any manner not in accordance with the GBC P70iX
User Guide is not recommended and may void your warranty or maintenance contract
Trained operators and regular operator maintenance of the P70iX A can optimize performance and minimize service calls.
1-1
1. Introduction
INTRODUCTION
The Quantum P70iX is designed to meet the unique requirements of the digital print
marketplace. It is designed to support all commonly required punching patterns, including three-hole, comb, VeloBind, Twin-Loop wire, and Color Coil. Custom die patterns are
also available. This new system is designed to deliver the quick changeover requirements of the short-run digital printer.
Virtually all set-ups are quickly and easily accomplished from the digital print display
panel, overcoming a major time-consuming aspect of traditional production punches.
Die changes can be accomplished in a short time without tools. The system is pre-programmed with all common paper sizes, and can store 20 custom jobs.
The P70iX is designed to handle a wide range of media. It can handle sheet sizes from
5 ?” x 5 ?” to 9” x 12”, including mixed paper-weights and cover stocks. Another key feature is the system’s ability to process intermixed index tabs without any special adjustments.
The P70iX incorporates GBC’s new “stack processing” technology, which is designed to
reduce operator labor cost. This new architecture allows the system to process a 14”
stack (3,500 sheets 20# bond) without operator attendance. The P70iX offers a maximum throughput speed of 60,000 sheets per hour.
The Quantum P70iX is GBC’s revolutionary new, near-line, high-speed Digital
Production Punch. It sets up in minutes and keeps up, side-by-side, with banks of
today’s fastest digital print engines.
These instructions have been prepared to acquaint you with the Quantum P70iX punch
and it’s operation. Please read them carefully. Keep these operating instructions for
future reference.
UNPACKING AND SETUP
The Quantum P70iX punch must be installed by a qualified GBC Technician.
Your Technician will ensure that the system is properly leveled and ready to run.
1-1
2. Getting to Know your Quantum P70iX
GETTING TO KNOW YOUR QUANTUM P70iX
External factors can affect performance of your P70iX. These factors include
customer requirements for hole quality, throughput materials (paper/transparencies/covers), toner coverage on the printed page, and environmental factors.
STATIC in the paper can result in poor performance. If your P70iX runs a fresh
ream of clean white paper but has trouble with your printed job, it may be due to
static. The following tips might help you to correct this problem.
Suggestions for static: If you’re P70iX Automatic Punch is having trouble
running certain jobs, it may be due to excessive static build-up in the
paper. Here are some suggestions that may help to minimize the static
effect.
1. Fan the paper before loading it into the P70iX. Do not jog the paper; this
will only cause more static build-up.
2. Slow the speed down on the P70iX. This will give the paper more time to
settle down into the die.
3. Consider the purchase of a room humidifier to add moisture into the air.
Dry air helps to produce more static.
4. Move your punching operation to an environmentally controlled room.
5. Pay close attention to seasonal conditions. Procedures you follow in the
hot humid days may need to be modified during dry winter months when
static is most common.
6. Consider storing your unwrapped paper jobs in very large Tupperware
type containers to retain the moisture. Using these containers along with
humidor type products can actually reintroduce moisture into the paper
that was lost during the fusing process.
7. Contact your copier/printer service department and enquire as to the
possibility of lowering your fuser temperature.
General areas to watch for maximum satisfaction.
Tabs must have a _” shoulder.
• When running mixed stocks, you must ensure the dimensions are consistent.
One stock smaller than the other will prevent proper hole registration.
• Very slippery paper or cover stocks may not run in the P70iX. Test small
stacks at slower speeds and/or smaller lift sizes before committing to a large
job.
• Cover stocks mixed with paper usually run best at slower speeds.
• If a very straight output stack is important for a particular job, you may find
the stack quality best when run at a slower speed.
• When running cover stock alone, performance is best at slower speeds.
• Improper loading of stack will result in feeding problems.
• Some specialty papers (NCR paper for example) will show handling marks.
• The punched edge of a stack will be taller than when it went in. With some
papers, paper sizes and die set combinations; you may want to reduce the
input stack to prevent slumping, instability or excessive height.
• Excessive paper curl can result in poor feeding or jams. If curl is not
excessive (more than ?” 2” from edge) you will have best results with curl
down. For our purposes, curl down is defined as the outside front edges are
down and the middle is up.
2-1
2. Getting to Know your Quantum P70iX
GETTING TO KNOW YOUR QUANTUM P70iX continued
Suggestions for clear plastic covers:
The Quantum P70iX is capable of handling and punching some types of clear cover
materials. In fact, every Quantum P70iX is tested with clear covers before it leaves the
factory. The following guidelines will help you to understand the capabilities of the
Quantum P70iX system. In cases where your particular clear cover stock is not suitable
to run through the Quantum P70iX, you may want to try separating the clear covers
from the book contents and punching the clear covers using a GBC Magnapunch heavy
duty table top punch.
• For clear cover stocks to work in the GBC Quantum P70iX, they require the body
found in GBC Premium covers, which are 10-mil and 14 mil thickness.
• Clear covers must be run intermixed. The photo sensors used on the Quantum
cannot detect clear covers.
• When running mixed stocks, you must ensure the dimensions are consistent. One
stock smaller than the other will prevent proper hole-registration.
• With a smaller lift size the punch is more likely to pick a single clear cover. Lift sizes
5-7 works best.
• It is best to run a job containing clear cover stocks at a slower speed. GBC recom
mends 75 LPM for most jobs.
• Clear covers produce more static sticking than other stock, ambient conditions will
affect performance.
• If a clear cover is picked alone, the punch may shut down with a false jam, however
the stock will not be damaged.
2-2
3. Operation
OPERATING CONTROLS
2
3
1
1. Ergonomic
Workflow:
load, unload and program from the same
side without any wasted
steps.
Loading and unloading
stack can be safely
accomplished while the
machine is punching.
1
2. Die Set Changes:
are completed without
tools and only take seconds to perform.
3. Fully Digital:
push button set-up and
operation. With simple
steps to recall up to 24
custom jobs.
3-1
4. Options and Accessories
OPTIONS AND ACCESSORIES:
Die Sets:
The GBC Quantum P70iX Automatic Punch is capable of punching a variety of hole
patterns commonly used in binding today, by simply changing the Die Set. Die sets
can be changed in seconds without tools.
A significant feature of the Quantum P70iX is that it uses GBC Magnapunch Die Sets.
Combined with a Magnapunch, you have the capability to switch the Die Set into the
punching platform best suited to handle the job in just a matter of minutes.
Please note: The PB Plastic Bind with multiple adjust depth of punch Magnapunch Die
Set (is not suitable for use in the automatic paper handling system utilized by the
Quantum.
The Die Sets currently available are listed below. Your GBC Sales Representative can
provide you with price and availability, or contact the GBC Call Center at 1-800-723-4000.
For more information, visit GBC’s website at www.gbcconnect.com.
Please note that each punching style listed above requires a separate die set for the
Quantum P70iX.
Quantum P70iX Automatic Punch - Die Sets
PB Plastic Bind – Deepest Fixed Back Gauge, .187”
PB Plastic Bind – Middle Fixed Back Gauge, .141”
PB Plastic Bind – Shallow Fixed Back Gauge, .094”
W3 Twin Loop Wire - 3:1 Round
W3 Twin Loop Wire - 3:1 Square
W2 Twin Loop Wire - 2:1 Rectangular
W2 Twin Loop Wire - 2:1 Round
C4 Color Coil – 4:1 Oval .2475
C4 Color Coil – 4:1 Round .2475 Pitch
C4 Color Coil - 4:1 Round .250 Pitch
C5 Color Coil - 5:1 Round
VB VeloBind 11 inch
Ring Binder 2/4 Standard 5/16” Diameter Hole
Ring Binder 3-5-7 5/16” Diameter Hole
Product Code
7707230
7707220
7707210
7707150
7707100
7707130
7707160
7707060
7707040
7707050
7707080
7707180
7707200
7707190
GBC offers a full suite of binding equipment and supplies to meet your binding needs.
Please see the enclosed Binding Solutions Catalog and Supplies Catalog for more
information.
Custom Die Sets are available for the Quantum P70iX. For additional information, consult with your GBC Sales Representative.
IMPORTANT: A decal on the handle of each interchangeable die set indicates the
punching pattern. When reading the Operating Instructions, please note the special
instructions for the correct punching pattern die set that you have installed in your
Quantum P70iX.
4-1
4. Options and Accessories
OPTIONS AND ACCESSORIES continued
Die Sets Storage:
Helpful Hint: The GBC Die Set Storage Cabinet #7703207 is an excellent way
to store all of your interchangeable die sets for the Quantum P70iX (see figure
3). This special product securely holds three die sets, protecting them from dirt,
dust, and accidental damage. Contact your sales representative for information
on obtaining a Die Set Storage Cabinet.
Figure 3
CAUTION: POSSIBLE PINCH POINT HAZARD. WHEN INSTALLING
DIE SETS INTO YOUR Quantum P70iX, ALWAYS KEEP FINGERS AND
BODY PARTS OUT OF THE MACHINE’S DIE SET SLOT AND AWAY
FROM ALL AREAS OF THE DIE SET EXCEPT FOR THE FINGER GROOVE
IN THE DIE SET’S HANDLE. FAILURE TO OBSERVE THESE
PRECAUTIONS MAY RESULT IN INJURY.
!
4-2
5. Home Screen
HOME SCREEN
GBC QUANTUM PUNCH
90 LPM
8.5"
PB .1
41
7
11"
MODE
UNLOAD
PROOF
JOB MANAGER
LANGUAGE
1
2
3
4
5
6
7
8
9
0
OK
The Home Screen is the starting point for operation of the Quantum P70iX. At
this screen, you are able to see the job that the Quantum is ready to run. In the
example above, the Quantum is setup to run:
•
•
•
•
•
A paper size of 8.5” x 11” with punching on the 11” side.
A lift thickness of “7” which is approximately 7 sheets of 24 pound paper.
At a speed of 90 lifts per minute.
Punching holes using a PB (Plastic Bind) die with a back gauge of .141”.
The Quantum is also operating with the controls reading in the English lan
guage.
If these job settings are acceptable, you may start you job by:
• Loading your paper on the input belts.
• Pressing the green start button.
5-1
5. Home Screen
HOME SCREEN continued
GBC QUANTUM PUNCH
90 LPM
8.5"
PB .1
41
7
11"
MODE
UNLOAD
PROOF
JOB MANAGER
LANGUAGE
1
2
3
4
5
6
7
8
9
0
OK
Other commands from the HOME SCREEN are:
MODE: allows you to select between Automatic or Manual. Automatic Mode
means the Quantum will continue to run non-stop as long as you place paper on
the Input Belts and remove the punched stack of paper from the Output Belts.
The Manual Mode means the Quantum will stop before it takes the next paper
stack in for processing. This mode is helpful if you want to start a new job that
requires different settings such as a different Die Set for example.
PROOF: you can run a few lifts of your job and have the Quantum stop. This
feature enables you to check the hole positioning and pattern to ensure the
setup is the job you intended.
UNLOAD: means that when pressed, the job currently inside of the Quantum
will exit. This is helpful if you need to start a job over again for some reason.
JOB MANAGER: will take you to the Job Manager screen where a different job
can be selected or created.
LANGUAGE: you may select between English, Spanish, French and German.
5-2
5. Home Screen
HOME SCREEN continued
GBC QUANTUM PUNCH
90 LPM
8.5"
PB .1
41
7
11"
MODE
UNLOAD
PROOF
JOB MANAGER
LANGUAGE
1
2
3
4
5
6
7
8
9
0
OK
Other commands from the HOME SCREEN:
You have constant control of the Speed by controlling the LPM or Lifts Per
Minute and the size of each Lift by adjusting the number of sheets per Lift.
Lifts Per Minute (LPM) is controlled by pressing the left – right arrow buttons.
You will see the number change in the window. The example above reads “90
LPM”. The choices are 60, 75, 90 and 105 LPM.
NOTE: You would choose a lower speed for harder to handle media such as
jobs with heavier than normal curl or heavier than normal toner coverage.
The size of the lift is controlled by pressing the Up – Down arrows. The numbers
roughly equal the number of sheets of 24 pound bond paper that would be
picked at this setting. This feature does not actually count sheets however and
you should not expect the lift to be exactly this quantity. The example shown is
of a lift size of “7”
NOTE: You would choose a lower lift for harder to handle media such as jobs
with heavier than normal curl or heavier than normal toner coverage.
5-3
5. Home Screen
JOB MANAGER SCREEN
JOB MANAGER — USE ARROWS
3:1RN
10"
GO JOB 1
10.5"
VIEW 13-24
11
9"
6"
8
297 mm
210mm
8.5"
7
PB141
8"
10
3:1 RN
11"
P8094
8"
9
6
11"
4
9.5"
PB141
8"
7.5"
PB141
11"
3
9"
8.5"
GB4:1
5
2
11"
?
8.5"
11"
3-5-7
PB141
12
11"
EDITOR
?
PB141
8.5"
PB141
?
HOME
1
2
3
4
5
6
7
8
9
0
OK
At the Job Manager Screen you are able to scroll between saved jobs (1 – 12)
by simply pressing the right-left and/or the up/down buttons. In the example
above, JOB 1 has been highlighted. To select this job and continue, simply press
“GO JOB 1” button.
Other Job Manager Features:
• VIEW 13-24: press to select a job #13 to #24.
• HOME: press to return directly to the Home screen.
• EDIT: a current job or create a new job,
Scroll to the job you wish to Edit, or,
Scroll to an unused job. In the example above, Job 12 is unused.
Press the EDITOR button.
5-4
5. Home Screen
EDITOR SCREEN
EDITOR
0..9
OTHER
SIZES
GO TO NEXT
SETTING
NO
CHANGE
ESCAPE
GO BACK
DATA OK
SAVE
STORE
ACCEPT
ESCAPE
SAVE
PB .1
41
1
8.5"
USE ARROWS TO
CHANGE
11"
ACCEPT
1
2
3
4
5
6
7
8
9
0
OK
To Edit an exiting job or create a new job, press the up – down arrows to select
the desired setting. In the example above, the Punch Edge paper dimension has
been selected and currently reads 11”.
Alternatively, the dimension can be entered directly using the numeric keypad.
The machine will automatically toggle between inches and millimeters depending on the size of the number entered.
Note that the range for this value is 5.50” to 12.00” (139.7 mm to 304.8 mm).
Once the desired value appears on the display, press the “ACCEPT” button.
5-5
5. Home Screen
EDITOR SCREEN continued
EDITOR
0..9
OTHER
SIZES
GO TO NEXT
SETTING
NO
CHANGE
ESCAPE
GO BACK
DATA OK
SAVE
STORE
ACCEPT
ESCAPE
SAVE
PB .1
41
1
8.5"
USE ARROWS TO
CHANGE
11"
ACCEPT
1
2
3
4
5
6
7
8
9
0
OK
EDITOR SCREEN
In the example above, the Side Edge paper dimension has been selected and
currently reads 8.5”.
Note that the range for this value is 5.50” to 9.00” (139.7 mm to 228.6 mm).
5-6
5. Home Screen
EDITOR SCREEN continued
EDITOR
GO TO NEXT
SETTING
NO
CHANGE
ESCAPE
GO BACK
DATA OK
SAVE
STORE
ACCEPT
ESCAPE
SAVE
PB .1
41
1
8.5"
USE ARROWS TO
CHANGE
11"
ACCEPT
1
2
3
4
5
6
7
8
9
0
OK
EDITOR SCREEN
In the example above, the Punch Die type has been selected and currently
reads PB .141. See Table 1 for the Die Sets available for the Quantum.
Once all three settings are correct, press the “SAVE” button which will return to
the Job Manager Screen.
5-7
5. Home Screen
“GO JOB” SCREEN
EDITOR
GO TO NEXT
SETTING
NO
CHANGE
ESCAPE
GO BACK
DATA OK
SAVE
STORE
ACCEPT
ESCAPE
SAVE
PB .1
41
1
8.5"
USE ARROWS TO
CHANGE
11"
ACCEPT
1
2
3
4
5
6
7
8
9
0
OK
Selection of a new Die Set will prompt the Die Set screen to come up. This
screen will prompt you to remove the proper Punch Pin numbers for the paper
size you are running. In the example shown, there are two possible pin configurations with this Die Set and Paper combination. The Die Set itself features a
handy reference label to identify the Pin numbers. The Quantum will automatically center the Die Set to the paper size selected if you press buttons 2 or 4. By
pressing buttons 1 or 2, the Quantum will perform all required adjustments (bind
edge, side edge & center the die). You can manually fine-tune the hole centering
by pressing the right-left arrows at this screen.
Note that the pins indicated on the display are the pins that should remain in the
Die Set, i.e. pull the pins to the left and right of the range indicated.
Note: in the screen above, the graphic should sow pins “4 - 23 and 5 – 23” not “1 – 23 and 5 – 23”.
5-8
5. Home Screen
RUN SCREEN
GBC QUANTUM PUNCH
90 LPM
8.5"
PB .1
41
7
11"
MODE
UNLOAD
PROOF
JOB MANAGER
LANGUAGE
1
2
3
4
5
6
7
8
9
0
OK
When the Quantum is running a job, the Graphics will provide you with information about the job that is running.
• The example above is telling you that there is paper on the Input Belts and on
the Output Belts as well as inside the Quantum processing area.
Other graphics would indicate:
• Elevator Positions
• Doors Open
• Die Set is clamped
• Error locations
• Adjusting sheet sizes
5-9
5. Home Screen
SETUP SCREEN
GBC QUANTUM PUNCH
90 LPM
8.5"
PB .1
41
7
11"
MODE
UNLOAD
JOB MANAGER
PROOF
LANGUAGE
1
2
3
4
5
6
7
8
9
0
OK
When the Quantum is running a job, the Graphics will provide you with information about the job that is running.
The example above is telling you that the Die Set is locked.
PAUSE verses STOP commands:
If you need to stop the system immediately, press “STOP” and the Quantum
P70iX will stop in mid-cycle. You may then need to clear paper from the various
points in the paper path if the system does not clear itself when you start-up
again. If you want to stop the punching process, but can allow paper in the path
to continue, press “PAUSE”. This will stop the feeding process, but allows any
paper currently in the paper path to run through the system.
5-10
6. Maintenance
ADDITIONAL INFORMATION
SLUG BIN (PAPER CHIP or PAPER CHAD) CONTAINER
The slug bin container for your Quantum P70iX is located behind the left hand
access door near the bottom of the machine. The container should be periodically pulled out and emptied. This will avoid jamming and damage to the
machine. The Quantum P70iX incorporates microprocessor technology to inform
the operator when the container needs to be emptied.
NOTE: When pull the Slug Bin is pulled out, make sure that it is emptied. To fully
reset the slug counter system, the Slug Bin Container must be fully removed
from the Quantum for a minimum of 5 seconds.
PUNCH PINS
You may need to remove some of the Punch Pins for proper punching of some
combinations of paper sizes and punching patterns.
SERVICE
Should your Quantum P70iX require service contact your local authorized GBC
service representative.
There are NO user-serviceable parts inside the machine. To avoid potential personal injury and/or property damage, DO NOT REMOVE THE MACHINE’S
COVER.
TROUBLESHOOTING Quantum P70iX
Problem
No power, won’t punch
Probable Cause
Power cord not attached to back of machine or not
properly plugged into the wall
Die Set is not fully inserted
Door or Lid is not closed
Punches too many holes
Selectable pins have not been pulled
Operator familiar with paper sizes
referenced on the Xerox DocuTech
as mm
Go to “SETUP” and change the dimensions to “mm”
from inches
When manually loading the first
stack of paper onto the Feed Belts,
the bottom sheets of paper catch
The surface of the belts are designed to grab the
paper. You will find that it is not possible to set the
paper stack on the belts and slide it into the alignment corner. Instead, push the stack gently against
the door first, then against the sheet metal right
guide and then set the stack down onto the belt.
Also loading a smaller stack first followed by a couple of larger stacks is best
After heavy use, the machine begins
to read jam, when there is no jam
A blast of air across the lens of each of the three
optical sensors periodically will prevent paper dust
build up from interfering with their performance.
6-1
7. Specifications
SPECIFICATIONS Quantum P70iX
Speed:
Up to 105 cycles / minute, 60,000 sheets per hour
Sheet size:
Punch edge 5 1/2” to 12”, side edge 5 ?” to 9”
Paper Stock:
61 gsm (16#) bond to 300 gsm (140#)
Intermixed weights, flush-cut covers, and standard index tabs
Lift Height:
Variable, 5 to 12 sheets of 20# bond (75 gsm)
Stack Height:
up to 14” (approximately 3,500 sheets of 20# bond (75 gsm)
Dimensions:
60”W x 55”L x 52”H (152cm x 140cm x 132cm)
(Easily breaks down to fit through a 32” doorway) see page 8
Weight:
850 lbs. (386kg)
Power Supply:
USA/Canada: 220VAC, 50/60Hz, Single Phase, 2.7 Amps, 0.32 KW, 1,092 BTU/hr
International: 220VAC, 50/60Hz, Single Phase, 2.7 Amps, 0.32 KW, 1,092 BTU/hr
Receptacle Type 6-20R 20A, 250V
Approvals:
CSA certified to CAN/CSA-C22.2 No. 60950-00, UL Std No. 60950-00, 3rd Ed.
TUV certified to EN 60950:2000
Compliance:
Carries CE mark to show compliance with European Union requirement
Die Sets:
Interchangeable die sets can be switched in seconds without tools
Specifications are subject to change without notice
GBC recommends ear protection for operators of the Quantum P70iX. Our
sound test levels are as follows:
Worst Case Operation (speed 4, C4 Die Set,
20# bond, lift #9 – 12 sheets):
Sound Pressure Level = LpA = 83.0 dbA
Sound Pressure Impulse = LpAI = 85.2 dbA
ISO 7779 Test method and microphone placement:
1.5M (59.1”) from Feeder,
1.5M (59.1”) high,
0.25M (9.85”) from vertical lead edge of
Quantum at control panel.
30°
0.25
(9.85”)
1.5
(59.1”)
Typical Use Operation (speed 2, PB Die Set,
20# bond, lift #9 – 12 sheets):
Sound Pressure Level = LpA = 78.5 dbA
Sound Pressure Impulse = LpAI = 83.5 dbA
Dimensions in meters
Standing operator
7-1
7. Specifications
POWER CORD SPECIFICATIONS
Voltage Rating:
250VAC
Current Rating:
15A
Plug:
NEMA 6-15P
®
Connector:
IEC 60320 C13
®
7-2
®
General Binding Corporation
Northbrook, IL 60062-4195
http://www.GBC.com
Printed in the U.S.A. Rev. A1 / GBC Part # 7707286