1
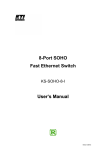
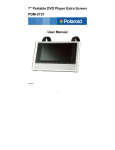
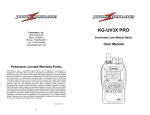
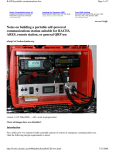
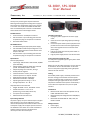
SS-30DV, SPS-30DM User Manual Powerwerx, Inc. 263 N Berry St, Brea, CA 92821 ▪ 714-674-0073 Phone ▪ 714-674-4949 Fax Thank you for purchasing the compact Powerwerx Switching Power Supply which is designed to supply 25 Amps continuous and 28 Amps surge (up to 5 minutes) at 14.1 VDC. Two models are available: SS-30DV with front mounted Powerpole connectors and SPS-30DM which includes front mounted digital meters. SS-30DV Features Front Connection: 2 Powerpole connectors Rear Connection: 1/4 inch binding posts that also accept banana plugs or compression connections Illuminated Power Switch SPS-30DM Features Dual Metered Digital (Amps/Volts) Power Supply User Selectable variable output voltage from 5~16 VDC by adjusting the front mounted knob or fixed output at 14.1 VDC Rear Connection: 1/4 inch binding posts that also accept banana plugs or compression connections Specifications Electrical specifications: Input Range: 100-120 VAC or 200-240 VAC, 50/60Hz (User switchable) Output Voltage: (model: SS-30DV) 14.1 VDC fixed (model: SPS-30DM) variable 5~16 VDC Output Amperage: 25 continuous, 28 surge Polarity Ground: Negative Internal Protection: Thermal, over current Internal Input Fuse: 6.3 Amps at 115 VAC Ripple Peak-to-Peak Max. <100mVpp Noise Peak-to-Peak Max. <100mVpp Operating temperature rating: 0 ~ 50 °C Storage temperature: -20 ~ 85 °C Physical dimensions and materials: Weight: SS-30DM - 3.0 lbs., SPS-30DM – 4.0 lbs. Overall Dimensions: 6.1 x 5 x 2.5 in (154mm long, 127mm wide, 63mm tall) Fan: Quiet internal cooling fan Machined metal case front bezel Input Voltage Selection The power supply is set up for 230V AC input as shipped from the factory. For 115V AC applications, set the recessed 115/230 input select switch located on the rear of the power supply into the proper position. Positions are identified on the switch. Use a small screwdriver to slide the switch into position. No adjustment is necessary for either 50 or 60 Hz input. SS-30DV SPS-30DM Installation Instructions 1. Unplug the power supply from the mains supply outlet. 2. Select the correct input voltage (See Input Voltage Selection). 3. Connect the power cable’s positive (red) wire to the positive terminal and connect the negative (black) wire to the negative terminal on the back of the power supply. 4. Plug the AC power cable into the power socket on the back of the radio. 5. Plug the power supply into the main AC wall outlet. Turning the Power Supply ON / OFF Turn the power supply ON by pressing the power switch to the ‘ON’ Position. Before you turn the power supply OFF, turn the radio off as described in the user documentation for the radio. Then turn the power supply off by pressing the power switch to the ’OFF’ Position. Cooling The SS-30DV power supply is cooled by convection and forced air cooling (normal airflow around the power supply in combination with a temperature controlled fan to improve cooling at higher levels of use). The fan is temperature activated and the speed is controlled by a sensor. When the temperature rises, the fan speed increases. Certifications Meets FCC CFR Title 47 Part 15 Subpart B: Class B, CISPR: 2005 ANSI C63.4: 2003 Meets CE/LVD (Low-Voltage Directive 2006/95/EC) standard Meets EMC: EN 55022:206+A1: 2007, 2010, EN 61000-3-2:2006 Package Contents Power Supply AC Power Cord, 4 ft. SS-30DV / SPS-30DM ▪ Rev 3/12 SS-30DV, SPS-30DM User Manual Powerwerx, Inc. 263 N Berry St, Brea, CA 92821 ▪ 714-674-0073 Phone ▪ 714-674-4949 Fax Caution: Install Indoors Install the power supply indoors. It is not designed for operation out-of-doors or in wet environments. Warning: Safe Operation To reduce the risk of fire or electric shock, please adhere to these warnings: Moisture: Do not expose this appliance to water or moisture. Cleaning: Unplug the power supply from the mains power outlet before cleaning. Switching off the power supply will not reduce this risk. Ventilation: Place the power supply in an area that will allow air to flow freely around the unit. This will prevent the power supply and mobile radio from overheating. Do not block or obstruct any of the ventilation openings on the unit. Warning: Servicing This power supply should be serviced by a qualified service technician. Incorrect assembly may result in electric shock or fire. This power supply contains no user serviceable parts inside. Some of the components inside the power supply can operate at voltage levels that may be lethal. Troubleshooting Condition: Solution Warning: Electrical Connections To reduce the risk of fire or electric shock, please adhere to these warnings: The power supply should be properly connected and grounded. Use the provided AC power cable to connect the power supply to a mains power outlet that is properly installed and grounded, in accordance with all local codes and ordinances. If the power supply cord is damaged, it must be replaced with the same type to comply with safety requirements. Warranty: The Powerwerx support policy is simple: we want you to be happy! If you have a problem, please feel free to contact us and we will do our best to get you up and running as soon as possible. Powerwerx power supplies have a three-year limited warranty. We will repair or replace (at our discretion) your power supply if you encounter any problems within three years from the date of purchase. We reserve the right to charge a reasonable fee for repairing units with user-inflicted damage. It is your responsibility to ship the defective unit back to Powerwerx via UPS Ground. We will pay for the return shipping back to you. We reserve the right to upgrade your equipment to an equivalent or better model. Possible Cause Low DC Power Supply output Power supply AC input voltage switch is not in the correct position On rear panel, change the AC selector switch from 230V to 115V. No DC output current Power Supply not receiving AC input voltage or is not receiving correct input voltage 1. Power Supply limiting output due to overload or ambient over temperature condition 2. Defective Power Supply Using a voltmeter, confirm AC input voltage. Check input connections. Confirm correct AC power cable is installed. 1. Reduce DC load to 25A or less and/or determine cause of over temperature condition. 2. Return to place of purchase or contact Powerwerx for return authorization. Power supply repeatedly trips input circuit breaker with no load connected. Incorrect input voltage is being applied while should be 100-120 VAC or 200-240 VAC. Using a voltmeter, confirm AC input voltage. Confrim input voltage switch is in the correct position. Confirm correct AC power cable is installed. SS-30DV / SPS-30DM ▪ Rev 3/12