1
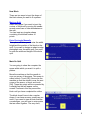
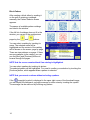
How To Use The IntelliQuilter Help
System
The user manual is at your fingertips at all
times.
Extensive help messages will explain what
to do on each screen.
If a help message does not fit fully in the
window, a scrollbar will appear to help you
in browsing through the message.
Use the
and
buttons on
the right to go line by line, or move the
slider bar in the middle for a quick canning.
When you are done, touch the
button to return to the original screen.
1
Main Menu
Design/Sew Quilt
You can start a new quilt or load an existing
one from the computer's memory. The
program offers a wide range of
transformations (scaling, rotation,
stretching, etc.) as well as copying,
repeating and combining patterns.
In addition to patterns, you can add and
modify blocks, to serve as guides for
aligning patterns.
You can compile the whole quilt, using
block, border and pantograph patterns,
then you can start quilting, or save the
design for later use.
Load Patterns
You can download patterns and complete
quilts from the designers' web sites using
any computer connected to the Internet.
During the download you need to select the
removable USB drive to which the data will
be downloaded. The patterns should be
downloaded into the "/patterns" directory, the quilts into the "/quilts" directory of
the USB drive. The patterns/quilts can then be loaded in the IntelliQuilter's memory
by selecting the Load Patterns mode and plugging in the USB drive.
Pattern Designer
In this version of the software you can design patterns by turning on recording while you sew
your own pattern. The recorded pattern can then be edited and saved for later use.
You can also trace paper patterns by putting the paper pattern on the top of the quilt and
moving the needle along the pattern's lines.
Manual Mode
With its unique motor mounting design the IntelliQuilter switches from computer-controlled to
manual mode fully automatically. By the touch of a button the motors will disengage, in
about 5 seconds, and you will be able to use the machine in manual mode without any drag
from the driving mechanism.
By selectively engaging each motor you can activate horizontal or vertical channel locks.
Utilities
This version of the software provides quilt/pattern catalog maintenance, pattern/quilt
archiving, drive roller cleaning, a measurement tool, by which you can measure distances
and areas on the quilt, and screen image capture utilities.
2
System
The System menu contains powerful system utilities to help our technical support in
checking out your system.
For those customers who have an Internet connection via Ethernet, an on-line
troubleshooting service is available.
Also, you can load software updates using an USB drive.
Another item of the System menu will display the unique password for your computer, which
will enable you to load copy-protected patterns and program updates into your system.
The "Interface Setup/Test" utility can be used to adapt the system to the various quilting
machines and to calibrate the touch screen.
Design/Sew Quilt
Start New
Choose this option if you want to start a
new quilt from scratch, or if you want to
create new patterns by modifying existing
ones.
Edit/Sew Existing
Chose this option if you want to continue
editing or stitching a previously compiled
quilt.
3
Add Pattern/Block
Pantograph
Select this option if you want to add a
pantograph pattern to your quilt.
A pantograph pattern is a repeated all-over
design stitched out in rows.
Block Pattern
Select this option if you want to place an
individual pattern or motif in a block or
small portion of the quilt.
Sampled Pattern
Select this option for stitch in the ditch or
outlining.
Add Block
Select this option if you want to add an
empty block to be used later as a guide to
place patterns on the quilt. You can "map"
the seam lines of the whole quilt and save it
as a template. You can fill the same
template
with different patterns in the future.
4
New Block
There are two ways to input the shape of
the block where you want to fit a pattern:
Mark on Quilt
Select this option if you want to input the
contour of the block by moving the needle
around seam lines or other boundaries on
the quilt.
You can input any irregular shape
consisting of unlimited number of
points.
Enter Rectangle Manually
This option will allow you to enter the width,
height and the position of the block on the
quilt. If you want to design an edge-to-edge
pantograph over the whole quilt, you need
to enter the width and height of the whole
quilt.
Mark On Quilt
You are going to show the computer the
space within which you want it to quilt a
pattern.
Move the machine so that the needle is
over one corner of the space. This space is
called a block. Touch [OK]. Now move the
machine so that the needle is over the next
corner of the space, or block, and touch
[OK]. These two points will be connected by
a straight line that will appear on the
screen. Continue in this way around the
block until you have completed its outline.
The block doesn't have to be a regular
shape. It can have as many corners as you
need. If you need to trace a block that has
curved edges, you will have to enter points
that are close together. The very short,
5
straight lines between the points will give
the illusion of a curve.
Close Block
Touch this button when you get to the last
corner and just need to connect the last
corner to the starting point.
Note that the block will close automatically
when you move the needle close to the
starting point.
Erase Last Point
Touch this button if you make a mistake
and want to erase the last point you
entered.
Touch [Finished] when you are satisfied
with your block. You will continue with
Block Pattern, Pantograph or go directly
to the Add/Edit Block screen.
Enter Rectangle Manually
Tell the computer the size of the block you
want to fill with a pattern. This could be the
size of the whole quilt if you are doing a
pantograph, or the size of a small part of
the quilt if you are designing a custom
quilt.
When you enter this screen, the "Width"
label is highlighted, so you can start keying
in the width.
For example, if your block is 7 inches wide,
touch the number 7. See how the number
appears next to Width?
Note: the inches are shown in decimals.
Half an inch should be entered as .50, a
quarter inch as .25, three fourths of an inch
as .75, a third of an inch as .33. A 7 and a
half inch block would be entered as 7.50.
6
Don't forget the "."! If you enter 750, it will make the block 750 inches wide.
If you make a mistake, touch [Clear].
When you have entered the size, touch [Enter]. Now the other dimension will be highlighted.
Key in the number for it.
If you've entered both height and width but realize you've made a mistake, just select the
dimension you want to change and enter the correct size.
When you have entered both dimensions, a [Continue] button will appear. However, the
computer will not accept a block where one of the dimensions is only 1". You cannot
continue with a block that small.
Touch [Continue] to go on to placing the block on the quilt.
Place Block On Quilt
Show the computer where this rectangle or
square is situated on your quilt by moving
the machine so the needle is over the top
left corner of the block. If you entered the
size of the whole quilt, then this will be at
top left corner at the edge of the quilt. If you
entered the size of a smaller part, then
move the machine to the top left corner of
that area.
Touch [OK] when the needle is set at the
desired location.
If you are doing some designing away from
the machine, then just touch [OK].
Note that you will be able to change the
location of this block using the Modify Block
function.
You will continue with Block Pattern,
Pantograph or go directly to the Add/Edit
Block screen.
7
Select Pantograph Pattern
The names of available pattern catalogs
are listed in the window.
If the full list of catalogs does not fit in the
window, you can go to the next/previous
pages by the
and
buttons.
You can select a catalog by touching its
name. The selected name will be
highlighted and the content of the catalog
will be shown on the screen, page by page.
There are nine patterns on a page. If there
are more patterns in the catalog, you can
use the [Next] and [Previous] buttons to
browse through the pages.
NOTE that the screen remains blank if
no catalog is highlighted.
You can select different patterns for the odd
and even rows of the pantograph. First, as
the instruction on the screen tells you,
select the pattern for the odd (1, 3, 5...)
rows. You can select a pattern by touching
its picture. The selected pattern will be
highlighted. Confirm your selection by
touching [Continue].
The highlight will be removed from the
selected pattern, and the instruction tells
you to select the pattern for the even (2, 4,
6...) rows. Select the pattern by touching its
picture, then touch [Continue].
NOTE that you cannot continue without
selecting a pattern.
8
(copyright) symbol is displayed in
If the
the upper right corner of the thumbnail
image, you can display the designer's
copyright message or other notes by
touching the symbol. The message can be
removed by touching any pattern.
9
Pantograph
The image shows the whole quilt or block
you want to fill with a pantograph.
The computer has decided how to fill the
space or block with your chosen pattern.
centered horizontally, and aligned with the
top vertically. There may be fractional
(clipped) rows on the top and bottom.
The pantograph pattern is clipped at the
block boundary, even when you entered an
irregular block. The machine will connect
the clipped edges either by continuous
stitch lines or jump stitches, depending on
the "Clipping Jump Stitch Threshold"
setting in Interface Test/Setup.
If the computer is mounted on the machine,
the actual position of the needle is shown
with green crosshairs. You can see where
the patterns fit on the quilt by moving the
crosshairs around the pattern on the screen
and see where the needle moves on the
quilt. This way you can match your editing
with the dimensions of the actual quilt.
You can change the appearance of the
pantograph in several ways:
Row Height
Select this option to change the size of the
rows. When you touch the button, the
writing and number will turn red. You can
increase or decrease the height of the rows
by touching the plus or minus buttons at the
right under the image, or by touching the
image and moving your finger up to
increase, or down to decrease the row
height. You can also use the numeric
keypad, which appears on the screen when
you touch the keypad symbol on the
toolbar.
10
Increasing the height of rows will make fewer rows. Decreasing the height of rows will
increase the number of rows. The spacing between the rows will not change, only the scale
of the pattern.
The pattern density display is a useful tool in determining the optimal settings. The density
reflects the average length of stitching lines within a one square-inch area. For each pattern
a range of density can be found that results in high productivity at a balanced (not over- or
under quilted) look.
Both the row height and the row gap affect the pattern density.
Row Gap
Select this option to increase or decrease
the gap between the rows. Use the arrows
on the right below the image to change the
gap. Use the downward pointing arrow to
make the gap smaller. Use the upward
pointing arrow to make the gap larger. You
can also change the gap by touching the
screen with your finger or stylus. As the gap
is changed, the number of the rows
changes. The number shows how much
you have changed the gap. It always starts
at 0.00". Negative numbers will be shown
for interlocking patterns.
Offset
Select this option if you need to offset the
odd rows to make the pattern interlock. This
option moves the rows horizontally. Use the
arrow buttons to move the rows or touch
and drag the image with your finger or
stylus. The amount you have moved the
rows always starts at 0%. This helps you
move the rows by an exact amount. You
can offset the odd rows by plus or minus 80%, in one percent increments.
There are "shortcut" buttons beside the left and right arrow keys on the toolbar. You can set
-50%, 0% or +50% offset in one step touching one of these buttons.
NOTE that the Offset function is disabled when the Clip Off option is selected.
Shift
Select this option to move the odd rows vertically. Use the arrow buttons to nudge the
pattern up or down. You can also do this by touching and dragging your stylus or finger on
the image. The shift is shown in
inches. It always starts at 0.00".
11
Skew
Select this option if you want to adjust the
width of the rows. You can use this function
to ensure that whole pattern repeats will fit
in the rows, minimizing clipped portions.
Clip on
Selecting this option will align the pattern
rows with the top and left side of the block
and will give you only complete repeats and
rows. To fill in any empty spaces, change
row height, row gap, shift or skew. IQ will
add only whole repeats or rows.
Flip X and Flip Y
Flip X flips the pattern horizontally, Flip Y
flips the pattern vertically.
Flip X and Flip Y at the bottom left hand
side of the screen affect the odd numbered
rows.
Flip X and Flip Y on the right affect the
even numbered rows.
Zoom
Touch ZOOM OFF to turn the Zoom feature on. Note that the next button becomes active
and gives you five options: TRUE SIZE, ZOOM IN, ZOOM OUT, ZOOM FULL and PAN.
Select TRUE SIZE and touch any part of the image to show the true size of the pattern. The
point where you touched the image becomes the new center of the screen. You can "pan"
the true size image by touching the screen at the edges, which will re-center the image.
Select ZOOM IN and touch any part of the image to increase its size so you can see the
pattern more clearly.
Select ZOOM OUT and touch the image to decrease the size of the image.
Select ZOOM FULL and touch the image to return to a view of the whole quilt.
Select PAN to move the enlarged image. Touch the screen and drag your finger or stylus to
move the image.
The extent of the zoom is controlled by the third button from the left. You can set the
zooming steps to 150%, 200% or 500%.
12
Grid
Use the grids to help you align the rows precisely. Used in conjunction with a zoomed
image, you will able to adjust the pattern exactly. The grids also help you see how large
individual elements of the pattern will be when they are stitched.
Touch GRID OFF to activate the grid. It will appear as black lines behind your design. You
can choose a one-inch, a half-inch or a quarter inch grid.
Measure
Touch MEAS.OFF to turn on the measuring
feature. Use your stylus to move the purple
crosshairs to each end of the distance you
want to measure.
If the computer is mounted on the machine,
you can touch the button with the image of
the needle and move your machine over
the quilt to measure a distance in any
direction.
The length of the line between the two
points is shown in inches on the screen.
Touch MEAS.ON to turn off this tool.
Touch [Finished] when you are satisfied
with your design. This will take you to the
Add/Edit Pattern screen.
Example
You can design complex pantographs by overlaying two or more designs on the same block.
An example is the "orange peel" pattern. To create this pattern, follow the steps below:
- Select the "half circle" pattern from the Geometric catalog
- Find the desirable row height, and write it down. Don't use any other adjustment.
- Touch [Flip Y] at the left to flip the odd rows.
- Touch [Finished].
- Select Add/Edit Pattern->Add Pattern->Pantograph->Use Current Block.
- Select the "half circle offset" pattern from the Geometric catalog.
- Set the same row height as for the first pass.
- Touch [Flip Y] in the middle to flip the even rows.
- Touch [Finished].
Now you have the "orange peel" pattern on the screen.
13
Block Pattern
After creating a block either by marking it
on the quilt or entering a rectangle
manually, the Pattern Selector screen
appears.
The names of available pattern catalogs
are listed in the window.
If the full list of catalogs does not fit in the
window, you can go to the next/previous
pages by the
and
buttons.
You can select a catalog by touching its
name. The selected name will be
highlighted and the content of the catalog
will be shown on the screen, page by page.
There are nine patterns on a page. If there
are more patterns in the catalog, you can
use the [Next] and [Previous] buttons to
browse through the pages.
NOTE that the screen remains blank if no catalog is highlighted.
You can select a pattern by touching its picture.
The selected pattern will be highlighted. You need to confirm your selection by touching the
[Continue] button, which appears when a pattern is selected.
NOTE that you cannot continue without selecting a pattern.
If the
(copyright) symbol is displayed in the upper right corner of the thumbnail image,
you can display the designer's copyright message or other notes by touching the symbol.
The message can be removed by touching any pattern.
14
Modify Pattern
The computer has decided how to fill the
block with the pattern you selected. In our
example the pattern was rotated and scaled
to fit the block set on point.
You can change this in a number of ways.
The pattern that has just been fitted into a
block is red. This is the pattern you can
modify. The block is also shown in red.
If the computer is mounted on the machine,
the actual position of the needle is shown
with green crosshairs. You can see where
the patterns fit on the quilt by moving the
crosshairs around the pattern on the screen
and see where the needle moves on the
quilt. This way you can match your editing
with the dimensions of the actual quilt.
For example, if you want to change the
width of a pattern to extend to the edge of
the quilt, move the needle over the edge
and change the width until the pattern touches the green crosshair line.
The actual size of the pattern when it is stitched is shown in inches next to width and height.
The fractions of an inch are shown as decimals. Half an inch is .50, quarter of an inch is .25,
and three fourths of an inch is .75.
Use the ZOOM, GRID and MEASURE options as described in the Pantograph chapter.
It is possible to make the pattern extend beyond the edges of the block. The block is shown
only as a guide for designing, the computer cannot see the block on the quilt. It will stitch the
complete pattern. It will not stop at the edges of a block if the pattern extends out beyond
them.
Width
Touch this button if you want to make the pattern wider. You can do this by using your finger
or stylus to drag the image, by touching the plus and minus buttons, or by using the numeric
keypad.
15
Height
Touch this button if you want to make the
pattern taller. You can do this by using your
finger or stylus to drag the image, by
touching the plus and minus buttons, or by
using the numeric keypad.
Rotation
Touch this button to turn the pattern around
its central pivot point. The number of
degrees you turn the pattern is recorded.
This is helpful if you need to rotate the
image by an exact amount. You rotate the
pattern either by touching the screen and
dragging the image, or by using the rotate
buttons at the right hand side under the
image. A separate button
is provided for setting the rotation steps.
Subsequent touches of this button will set
1, 5, 30, 45, 72 (for pentagons or five point
stars) and 90-degree steps. The pattern will
be rotated with the set angle when the
rotate buttons are pushed. Note that the
resolution of the rotation by dragging is
always one degree. You can also use the
numeric keypad to enter the rotation value.
Note that you can enter positive numbers
only.
Scale
Touch this button if you want to increase or
decrease the size of the whole pattern. The
change in size is shown as a percentage so
if you double the size, it will show 200%
and if you half the size, it will show 50%.
You can scale the pattern by touching and
dragging the image, by using the plus and
minus buttons, or by using the numeric
keypad.
Flip X
Touch this button if you want to flip the
pattern horizontally. It will flip when you
touch the button.
16
Flip Y
Touch this button if you want to flip the
pattern vertically. It will flip when you touch
the button.
Move
Touch this button if you want to move the
whole pattern within the block. When you
select move, green snap points will appear
on both the block and the pattern it
contains. Move the pattern by dragging the
image with your finger or the stylus or by
using the directional arrows under the
image. You can move the image in all
directions. For fine adjustments use the
direction buttons on the toolbar.
Stretch
Touch this button if you want to stretch the
pattern from a point. When you select
stretch, snap points will appear on the
pattern. Choose one to be the fixed or
anchor point and touch it. (The anchor point
is the center of the pattern on the picture).
Now touch another snap point and drag the
pattern - it will stretch away from or towards
the anchor point.
This allows you to alter a pattern slightly so
that it fits a block. For example, if you
attach one snap point on the pattern to a
snap point in the block, you can then use
that anchor point to stretch the pattern so
that another snap point will match up with
another point on the block.
Update
Touch this button when you have altered
your pattern and want the computer to
remember this modified pattern. When you
touch [Update], the computer will forget the
original pattern and only remember the new
one. It will use this one as a base pattern
to modify. After update, the scale will be
17
reset to 100% and rotation will be reset to 0
degree.
Undo
Touch this button when you want to erase
the last thing you did. You cannot undo
update.
Select
The [Select] button makes it possible to
select another pattern for editing without
leaving the Modify Pattern screen. After
touching this button you can select another
pattern by touching its image. You may
need to use the ZOOM functions to
navigate around the quilt while looking for
the next pattern to edit.
Finished
Touch this button when you are satisfied
with your pattern modification. This will take
you to the Add/Edit Pattern screen.
18
Add/Edit Pattern
This page shows your whole quilt.
Add Pattern
Select this option if you want to add another
pattern to the quilt.
Modify Pattern
Select this option if you want to change a
pattern's shape, size or position on the quilt
design.
Copy Pattern
Select this option if you want to make a
copy of a pattern.
Delete Pattern(s)
Select this option to remove one or more
patterns from your design.
Repeat Pattern
Select this option if you want to repeat a
pattern to make rows, columns or a
checkerboard design.
Combine Patterns
Select this option if you want to join some patterns together to create a new pattern.
Split Pattern(s)
Select this option if you want to delete or edit part of a pattern, or if you need to divide a
pattern that is larger than your quilting space into smaller portions enabling you to quilt it out
in sections.
Touch [Finished] when you are done with pattern addition/editing. This will take you to the
Edit/Sew Quilt screen.
19
Modify Pattern
Touch the individual pattern you want to
modify or change anywhere along its
stitching line. The pattern will turn red.
If you have a design with multiple patterns,
use the zoom feature to enlarge the image
so that you can touch the pattern you want
to modify more easily.
If you touch the wrong pattern, simply touch
the right pattern to correct your mistake.
You can select only one pattern.
Touch [Continue] when you have made
your selection. This will take you to the
Modify Pattern screen.
Copy Pattern
Select the pattern you want to copy by
touching it somewhere along its stitching
line. It will turn red.
If you have an image with multiple patterns,
use zoom to enlarge the image so you can
touch the pattern more easily.
If you select the wrong pattern, simply
touch the correct one. You can select only
one pattern to copy.
Touch [Continue] when you have made
your selection. This will take you to the
Modify Pattern screen.
The copied pattern will appear in red
slightly offset from the original on the next
screen.
20
Delete Pattern(s)
Touch the pattern you want to delete. Zoom
in so you can see the patterns more clearly.
The selected pattern will turn red.
If you have selected the wrong pattern
touch it again to remove it from the
selection. You can select multiple patterns.
Touch [Continue] when you've made your
selection.
A window will open asking if you are certain
you've made the right choice.
Touch [Yes] and all the red patterns will
disappear and you will return to the
Add/Edit Pattern screen.
Touch [No] and you'll return to the delete
pattern screen.
Repeat Pattern
Select the pattern you want to repeat by
touching it somewhere along its stitching
line. It will turn red.
If you have an image with multiple patterns,
use zoom to enlarge the image so you can
touch the pattern more easily.
If you select the wrong pattern, simply
touch the correct one.
You can select only one pattern to repeat.
Touch [Continue] when you have made
your selection.
21
You can repeat your pattern horizontally or vertically. You can also create a checkerboard
effect.
Use the zoom feature to enlarge the image. Use the grids to help you see the exact size of
the patterns and their spacing.
If the computer is mounted on the machine, the actual position of the needle is shown with
green crosshairs. You can see where the patterns fit on the quilt by moving the crosshairs
around the pattern on the screen and see where the needle moves on the quilt. This way
you can match your editing with the dimensions of the actual quilt.
For example, if you want to change the spacing of the patterns to fit a certain area on the
quilt, move the needle around the edges of the area and change the spacing until the
repeated pattern fills the area.
X Repeat(s)
Select this option to repeat the pattern to
create a row. The number shows how many
repeats there are. Below the number of
horizontal repeats the total width of the
pattern area is displayed.
Touch the plus and minus buttons to
increase or decrease the number of
repeats. As the number increases, the
image will get smaller in order to show the
whole design. To enlarge the image, use
the zoom feature. You will then only see
part of the whole design.
You can also touch the image and move
your stylus or finger to increase (move
right) or decrease (move left) the number of
repeats.
The numeric keypad is also available for
entering the number of repeats.
X Distance
Select this option to change the distance between each pattern in the row. The number
shows the width of one repeat.
You can use the plus and minus buttons, touch the image and move your stylus or finger to
increase (move right) or decrease (move left) the distance between each pattern, or use the
numeric keypad.
22
Y Repeat(s)
Select this option to repeat the pattern vertically. If you have one pattern, this will create a
column. If you have more than one pattern in a row, the whole row will be repeated. Below
the number of vertical repeats the total height of the pattern area is displayed.
You can use the plus and minus buttons, touch the image and move your stylus or finger to
increase (move up) or decrease (move down) the number of repeats, or use the numeric
keypad.
Y Distance
Select this option to change the distance between the rows. The number shows the height of
one repeat.
You can use the plus and minus buttons, touch the image and move your stylus or finger to
increase (move up) or decrease (move down) the distance between the rows, or use the
numeric keypad.
Use Flip X and Flip Y on the left to flip the odd numbered rows. Use the Flip buttons on the
right to flip the even numbered rows. Flip X switches the patterns side to side, Flip Y
switches the patterns from top to bottom.
Modify
Touching this button will take you to the
Modify Pattern screen, where you can
modify the original pattern. All the
modifications will show up on all the
repeated copies of the pattern. In our
example the original pattern was rotated by
45 degrees.
Note that the original pattern will reappear
on the Modify screen when it was cleared
by the Clear Odd function. It will be cleared
again when you exit the Modify screen.
23
Clear Even
Select this option to remove every other
pattern in a row.
When you touch Clear Even, the button will
change to Clear Odd, which will remove the
opposite patterns. Both these options give
a checkerboard design.
When you touch Clear Odd, the button will
change to Full Pattern, and all the patterns
will return.
When you are satisfied with your design,
touch [Finished]. This will take you to the
Add/Edit Pattern screen.
You can create a checkerboard design with
alternating patterns by placing another
pattern in the original block, then repeat
that pattern with the same repeat numbers
and distances as the original pattern
repeat.
Select the opposite checkerboard pattern to
fill the gaps in the original design with the
new pattern. This method, combined with
various flips will result in a complex
alternating quilt pattern.
24
Combine Patterns
When you combine patterns, you are
joining them together so that they become
a single pattern. The computer will
remember these combined patterns as a
single unit. A combined pattern is often
stitched out as one continuous line, but it
does not have to be.
The screen shows your whole design.
Touch the first pattern you want to combine
with another. It will turn red and the starting
and ending point will be shown - an
for
start and an
for end. If you want to
switch these points, touch Swap Start/End
points.
Use the zoom feature and the grids to help
you touch the right pattern.
When you are satisfied, touch [Continue].
Now select the next pattern and it will turn
red too. You will have two red patterns.
Swap the start and end points of the
second pattern if you want. You may want
to swap them to make the start point of the
second pattern touch the end point of the
first pattern. This will let you
create a continuous combined pattern.
If you want to delete the last selection touch
[Undo]. The last selected pattern will turn
black.
If you are satisfied with your combination so
far, touch [Continue].
Now you can tell the computer how you
want to connect the patterns when they are
combined. How will the machine move
from one part of the combined pattern to
the next?
25
Continuous Stitch Line
Select this option if you want the machine
to keep stitching as it goes from one pattern
to the next. For the best results, the start
and end points should be very close
together or touching. Sometimes this is not
possible and if they are some distance
apart and you select this option, the
machine will stitch a straight line from the
end of one pattern to the start of the next.
Stop To Cut Threads
Select this option if the two patterns are
farther from each other and you want to cut
the thread before moving to the next
pattern. When the machine reaches the
end of the first pattern, it will prompt you to
cut the threads. Note that the machine will
not tie off the threads at the end of the
stitching, just makes an additional single
stitch.
When you touch [Start] after securing and
cutting the threads, the machine will move
to the start of the next pattern and prompts you to pull up and secure the bobbin thread.
Automatic Jump Stitch
Select this option if you want to allow the machine to drag the thread from the end of the first
to the start of the next pattern. The machine will do backstitching to secure the threads
before moving to the next part of the combined pattern. You can set the length of the
backstitching on the Interface Setup/Test screen.
When you have made your selection, the screen will automatically change. The patterns will
now be combined and remembered as a single pattern.
Touch [Continue] if you want to combine more patterns.
Touch [Undo] to delete the last selection.
Touch [Finished] when you are done combining the patterns. This will take you to the
Add/Edit Pattern screen.
26
Split Pattern(s)
Splitting a pattern allows you to edit small
portions of a whole pattern. It cuts a pattern
into smaller sections so that you can modify
each section separately.
Splitting also makes it possible to stitch out
a pattern that may be larger than your
available quilting space.
For example, if you do not want to turn the
quilt to stitch out the side borders, you can
set your continuous border pattern in place,
then split it into sections so that you can
stitch a section each time you advance the
quilt.
Use your stylus to touch any place along
the stitching line where you want the
stitching to stop. You can move the split
point by moving the stylus along the
stitching line. Use the zoom feature to help
you select that point more accurately.
The current position of the needle is
displayed as green crosshairs. Move the
needle to the position where the border
pattern should be split and use it as a
guide.
One side of the split pattern will turn red,
the other green so that you can clearly see
the place you have chosen.
Now touch [Split].
You will see a new
and
appear on the
image. These indicate the start and end
point of the separated pattern.
You can split the pattern as many times as
you wish.
Touch [Finished] when you have as many
splits as you need. This will take you to the
Add/Edit Pattern screen.
27