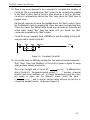
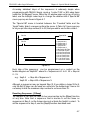
1
Ladder Logic Programmer's Reference Copyright Notice TRiLOGI Version 1.x, 2.x, 3.x and 4.x are trademarks and copyrights 1989 to 1999 of TRIANGLE RESEARCH INTERNATIONAL PTE LTD, SINGAPORE (“TRi”). All rights reserved. No parts of this manual may be reproduced, transmitted, transcribed, stored in retrieval system, or translated into any human or computer language, in any form or by any means, without the express written permission of TRIANGLE RESEARCH INTERNATIONAL PTE LTD, SINGAPORE. Please refer all inquiries to [email protected] * MSDOS and Windows 95/98 are a trademarks of Microsoft Inc. EMIT, emGateway, emMicro are a trademarks of emWare, Inc. MODBUS is a trademark of Groupe Schneider. OMRON is a trademark of OMRON Corp of Japan. All other trademarks belongs to their respective owners. Disclaimer TRi makes no representations or warranties with respect to the contents hereof. In addition, information contained herein are subject to change without notice. Every precaution has been taken in the preparation of this manual. Nevertheless, TRi assumes no responsibilities for errors or omissions or any consequential damages resulting from the use of the information contained in this publication. Table of Contents Chapter 1 Installation and Setup I. II. III. IV. Overview Installing TRiLOGI in Your Computer Running the TRiLOGI Software Using A Mouse 1-1 1-1 1-2 1-3 Chapter 2 Getting Started I. A TRiLOGI Sight-Seeing Tour 2-1 Chapter 3 Hands On I. II. Creating Your First Ladder Logic Program Testing Your Program 3-1 3-12 Chapter 4 TRiLOGI Main Menu Reference I. II. III. IV. V. VI. VII. The Main Menu The File Menu The Edit Menu The Controller Menu The Simulate Menu The Print Menu The Option Menu 4-1 4-1 4-3 4-8 4-14 4-21 4-25 Chapter 5 Ladder Editor Reference I. II. III. IV. The Browse Mode The "Circuit" Local Menu The Circuit Editing Mode The "Ins Element" Local Menu 5-1 5-2 5-5 5-7 Chapter 6 Special Bits & Functions I. Special Bits 6-1 6-1 6-2 6-2 6-3 II. Special Functions 6-3 6-3 6-5 6-10 6-11 6-12 6-13 6-13 1. 2. 3. 4. 1. 2. 3. 4. 5. 6. 7. Clock Pulse Bits Normally ON Flag - Norm.ON First Scan Pulse - 1st.Scan Real Time Clock Error - RTC.Err Reversible Counter Functions: [DNctr],[Upctr] & [RSctr] Sequencer Latch Relay Function [Latch] Interlock [ILock] & [ILoff] Differentiate Up and Down [δDIFU] and [δDIFD] Custom Functions: [CusFn] and [δCusF] Master Reset Chapter 1 Installation and Setup I. Overview This manual is a complete programmer’s reference for TRiLOGI Version 3.3 and 3.3E used for programming the E10 and H-series PLCs. It illustrates in details the procedure for creating ladder logic programs using the extremely user-friendly TRiLOGI ladder logic editor software. This manual also forms Part One of the reference manual for TRiLOGI Version 4.1, which is used for programming the powerful M+ series PLCs. TRiLOGI Version 4.1 fully supports all the features of the ladder logic editor, compiler and simulator described in this manual. In addition, Version 4.1 supports the TBASIC programming language for handling data processing jobs and for programming the many special peripherals of the M-series PLC. You will find that TRiLOGI Version 4.1 provides more selection items in its pull down and pop up menus than Version 3.3 and 3.3E. These differences have been documented in Chapter 1 of the Programmer’s Reference Part Two manual (The TBASIC Reference). You may refer to this document for a comparison between Version 3.3 and Version 4.0 II. Installing TRiLOGI in Your Computer TRiLOGI Version 3.3, 3.3E and Version 4.1 are all MS-DOS programs. Although the program can run in a “MS-DOS prompt” box under Windows for editing and simulating the ladder or Ladder+BASIC programs, it is best to run the program under pure DOS environment to achieve error free communication with the PLC. This is because TRiLOGI accesses the PC’s serial port directly instead of making API calls to Windows, and if Windows switches task to other programs TRiLOGI will tend to lose some incoming characters from the serial port, resulting in frequent “Communication Error” or other strange error messages. This however does not affect program editing or simulation since the program does not access the serial port during editing or simulation. If your PC is currently running in Windows 95 or 98, you can restart to DOS mode by clicking on the “Start” menu and then select “Shutdown”. Click the radio button of the option “Restart the computer in MS-DOS mode” and then click the “Yes” button. The computer will be restarted in DOS only mode without the windows running in the background. 1-1 TRiLOGI Ladder Logic Reference Chapter 1 - Installation & Setup Once the PC has restarted in DOS mode, you will see the prompt such as “C:\> or “C:\windows>”, depending on the setting in your “autoexe.bat” file. Follow the procedure outlined below to install the TRiLOGI program: 1. Place the TRiLOGI program disk into THE FLOPPY Drive (A: OR B). 2. Change the DOS prompt to the floppy disk drive letter. Example below shows how to change to drive A: C:\WINDOWS> A: A:\> 3. Enter the following command: A:\> install c: If you wish to install the program in another drive, simply substitute the drive letter c: with the desired driver letter. The installation program automatically creates the following directory: C:\TRILOGI\ The programs and data files for TRiLOGI Version 3.3 and 3.3E are stored in the subdirectory C:\TRILOGI\TL3\. Likewise, programs and data files for Version 4.1 are stored in the subdirectory C:\TRILOGI\TL4\. III. Running the TRiLOGI Software A few DOS “batch files” were created in the “C:\TRILOGI\” directory during installation which enable fast selection of the TRiLOGI version you wish to use. To run the TRiLOGI program, goes to TRiLOGI directory using the commands: C:\> CD \TRILOGI C:\TRILOGI> TL By typing the two letters “TL” followed by pressing the <Return> key the batch file “TL.BAT” will be executed. This batch file will show a menu and prompt you to select the PLC type that you are using. Once the PLC type has been selected the relevant version of the TRiLOGI software will be executed. There are a few other batch files which you can use to immediately run the correct versions of the software: 1-2 TRiLOGI Ladder Logic Reference Chapter 1 - Installation & Setup a) “TLM.BAT” for M-series, b) “TLH.BAT” for H-series and c) “TLE.BAT” for the E10 PLCs. E.g. To directly run TRiLOGI Version 4.1 for M-series PLC. Just type “TLM” and followed by the <Enter> key. Some version of MS-DOS may encounter difficulties running the TL.BAT file, in that case you should use the TLM.BAT, TLH.BAT or TLE.BAT directly to load the program. IV. Using a Mouse If you have a mouse installed in your computer system and a mouse driver loaded (see your mouse user manual for the installation of mouse driver), TRiLOGI will automatically sense it and use it. TRiLOGI treats the mouse actions (movement or pressing a button) as corresponding to the following keys: Mouse Movement Equivalent Key 1. 2. 3. 4. Move to the left Move the the right Move Upward Move Downward Mouse Button 1. Left button press 2. Right button press 3. Middle button press (for 3 button mouse only) ← → ↑ ↓ Equivalent Key < Enter > < ESC > < INS > TRiLOGI is specifically designed to be fast and easy to use without a mouse. Users should be familiar with the keyboard operation when going through the tutorial session. 1-3 Chapter 2 Getting Started I. A TRiLOGI Sight-Seeing Tour This part of the tutorial offers you a quick overview of some of the TRiLOGI's user-friendly commands to help you appreciate the easy-to-grasp user interface. We will not perform any circuit editing or circuit creation until the next Chapter. Meanwhile, just follow the steps below to begin your tour of the TRiLOGI program. 1. Start up TRiLOGI for M-series PLC (as described in Chapter 1). Press any key to clear the Copyright notice. 2. Let's load a demo file now for our tutorial purpose. Begin by selecting the pull-down "File" menu by pressing <F> key. Alternatively, use the cursor to move selection bar to the "File" command of the main menu and press <Enter> key. A pull-down menu should appear below "File" with the "Load" command highlighted (See Figure 2.1). Press <ESC> key to close the pulldown menu and <Enter> key to open it again. This is a standard way of opening and closing TRiLOGI's pull-down menus. Try it several times for familiarization. You can get help at any time by pressing the <F1> function key. The type of Help message which appears relates to where you are or what you are doing in the software when you press <F1>. Known as a Context-Sensitive Help system, this feature makes TRiLOGI extremely user-friendly for both first time users or occasional programmers. File Edit Controller Option Load Save Change Dir Write to Simulate Print F10 New DOS Access Run Utilities Quit Alt-X Figure 2.1 3. Re-open the pull-down "File" menu if it has been closed. Move the selection bar away from the "Load" menu using the up and down cursor keys. By pressing the left and right cursor keys, the pull-down "File" menu will be closed and the adjacent pull-down menu will be opened. Try it now. 2-1 TRiLOGI Ladder Logic Reference Chapter 2 - Getting Started 4. Go back to the pull-down "File" menu and select "Load" command. A prompt box appears with text string "*.PC4" being highlighted. Notice the cursor is at the first character "*". The text string can be edited if you type in any character or press any of the cursor keys, <Home>, <End>, <Del> and <Backspace> keys. For now, simply press <Enter> to accept the original text string "*.PC4". This is actually a "wildcard" filename, meaning any file with the extension ".PC4" can be opened. (Note: The default extension for TRiLOGI Version 3.3 is “*.PC3” and for Version 3.3E is “*.PE3”) 5. A directory window should appear on the screen. All files in the current directory with the ".PC4" extension are shown in the window. You can open any file within the directory window by selecting it. Let's move the selection bar to the file "DEMO.PC4" and press <Enter>. 6. When file "DEMO.PC4" is loaded, the pull-down "File" menu will be closed. You are immediately conveyed into the "Browse Mode" of the ladder logic editor which allows you to quickly browse at each circuit in your program. The cursor is the familiar blinking underscore DOS cursor and is located at the leftmost end of the first circuit. See Figure 2.2 Just below the main-menu is a status line showing the current circuit number (on the left side) that you are at and the filename (on the right side) of this ladder logic program. Along the bottom of the screen is a help message bar displaying the usage functions of various keys on the keyboard. File Edit Controller Simulate Circuit #1 start Cursor Print Option C:DEMO.PC4 Run Emerstop (RLY) Duration (TIM ) Run Clk:0.1s Run Duration FwdRev Clk:0.1s Run Duration FwdRev Seq1 [AVseq ] Seq1 [RSseq ] Hello, welcome to the comment feature of You are allowed to enter up to 3 lines per comment to describe feature or purpose of the following Duration MaRST [MaRST] ESC-Menu <Ins>-Cir.Menu <spbar>-Edit →↑↓←-Scroll <Ctrl_PgUp/Dn>-First/Last Figure 2.2 2-2 TRiLOGI Ladder Logic Reference Chapter 2 - Getting Started 7. When you use the up and down cursor keys to move the cursor to other circuits, the "Circuit #" display at the status line will reflect the change. The logic editor screen will scroll if you attempt to go beyond the screen. The <PgUp> and <PgDn> keys can also be used to scroll one page at a time. Try it now. Move the cursor to Circuit #5 now. You will notice a small window pops up at the bottom of screen as follow: File Edit Controller Simulate Circuit # 5 Print Option C:DEMO.PC4 Seq1 [ AVseq ] Seq1 [RSseq ] Clk:0.1s Run Duration FwdRev Clk:0.1s Run Duration FwdRev Hello, welcome to the comment feature of You are allowed to enter up to 4 lines per comment to describe any feature or purpose of the following circuits. Fn_#10 Clk:1min { δCusFn} Out1 Seq1:1 [ Latch] CusFn #10 (<F7> to Edit) ESC ‘ Scheduled Light ON at 7:00pm (1900 hrs) and OFF at 6:00am IF TIME[1] = 19 <Ctrl_PgUp/Dn>-First/Last →↑↓←-Scroll Figure 2.3 Examine this circuit carefully and notice a contact “Clk:1min” is connected to an output coil in curly bracket {δCusFn} with a label name “Fn_#10”. What this circuit does is to connect a clock pulse of 1 minute period to activate a “Custom Function” and the function number is #10. One of the greatest feature of TRiLOGI version 4.1 is the incorporation of the ability for users to define their own “custom functions” (designated as CusFn) using the versatile TBASIC language. Up to 256 custom functions may be defined by the users using the number 1 to 256. In our demo example the CusFn is #10 and the small window that pops up shows the first two lines of the definition of CusFn #10. If you press the <F7> function key at this circuit a full text editor screen will be opened up showing the rest of the TBASIC statements for this function. Try it now. To close the CusFn text editor window, simply press the <ESC> key and you will be returned to the browse mode. Details on Custom Functions and TBASIC commands will be covered in Part Two - TBASIC Reference manual. 2-3 TRiLOGI Ladder Logic Reference Chapter 2 - Getting Started 8. TRiLOGI permits a circuit to span beyond the horizontal width of your screen. If you press the left and right cursor keys, you can scroll the circuit horizontally to view the part of the circuit which is beyond the screen. The <Home> and <End> keys are quick ways of moving to the leftmost and the rightmost ends of the entire circuit. 9. The circuits you see on the screen have label names such as "start", "stop", "Duration", etc. above each contact or coil. These label names are created by first entering them into I/O tables and subsequently retrieved during circuit creation. We shall now proceed to tour the I/O tables. 10. Press <ESC> key to return to the main menu. Open the pull-down "Edit" menu as shown in Figure 2.4. The first command ("Logic") on the menu will put you back to the ladder logic editor. The next few items are for editing or defining new i/o names in any one of the five I/O tables, namely the "Inputs", "Outputs", "Relays", "Timers" and "Counters" definition tables. The last two items are for creating and browsing Custom Functions which will be described in PART TWO of the Programmer’s Reference manual. Notice that to the right of each menu item (except "logic") is a function key number: F2 to F6 (F7 as well for Version 4.1). These keys can be used to activate the i/o tables and Custom Function Editors as well. They are called "hotkeys" and they enable you to edit the i/o tables without having to return to the main menu, reducing much hassle particularly if you are in the midst of creating a new circuit. File Edit Edit Controller Simulate Circuit #1 Print Option C:DEMO.PC3 Logic Run Emerstop RLY) ( Input F2 Duration Run Output F3 (TIM ) Seq1 Clk:0.1sRun Relay Duration FwdRev F4 [AVseq ] F5 Run Duration FwdRev Clk:0.1sTimer Seq1 RSseq ] [ Counter F6 Custom Functionto the F7comment feature of Hello, welcome You are allowed to enter ^F7 up to 3 lines per comment to describe Browse All CusF feature or purpose of the following Duration MaRST [MaRST] start <ESC>-Browse <F2toF6>-Edit I/O <F9>-Run <F10>-Save Figure 2.4 2-4 TRiLOGI Ladder Logic Reference Chapter 2 - Getting Started 12. Select "Input" from the pull-down menu. An input table should pop up on the screen as in Figure 2.5. The bottom help status line changes instantly to show you the usage of keys for i/o table editing. Use the four cursor keys or <PgUp> and <PgDn> keys to move the selection bar within the table. Up to 128 inputs can be defined in the input tables. Spend some time navigating to all corners of the table now. 13. We move next to the other i/o tables. You can do it by pressing <ESC> key to close the input table first and then select other tables from the pull-down "Edit" menu. There are however two other quicker ways of moving to other tables directly from the input table. a) You may move to the next table by pressing the right cursor key in the following order: Inputs Outputs Relays Timers Counters To move backwards to the previous table, simply press the left cursor key. Try it now. b) You may also press hot keys <F2>,<F3>,<F4>,<F5> or <F6> to go directly to the respective tables. Refer to the pull-down "Edit" menu for definition of each hotkey. File Edit Controller Simulate Circuit #1 Inputs Logic Emerstop CH bit I/O# Label Input F2 1 start i00:0 Run Output 2 EmerStop i00:1F3 Clk:0.1s Run Duration FwdRev 3 FwdRev Relay i00:3F4 4 i00:4 Timer Run Duration Clk:0.1s 5 i00:5F5 FwdRev Counter 6 i00:6F6 Print Option C:DEMO.PC3 start 7 i00:7 Hello, welcome to the comment feature of 8 i01:0 You are allowed to enter up to 3 lines per comment 9 i01:2 feature or purpose of the following circuits. 10 i01:3 Duration 11 i01:4 12 i01:5 <ESC>-Close <Spbar>-Edit Run (RLY) Duration (TIM ) Seq1 [ AVseq ] Seq1 [RSseq ] to describe MaRST [MaRST] ↑↓ -Move <Tab>-Next Field <PgUp/Dn>-Scroll →←I/O Figure 2.5 2-5 TRiLOGI Ladder Logic Reference Chapter 2 - Getting Started 14. Navigate through each i/o table using the cursor keys and the <PgUp> and <PgDn> keys. A total of 128 inputs, 128 outputs, 256 relays, 128 timers and 128 counters can be defined in the tables. Verify these numbers yourself by moving to the last entry of each table and check under the "I/O #" column. 15. We shall not attempt to edit the i/o tables or the ladder logic circuits now. In a later section, you will be guided step by step to create your own ladder program. For the moment, let's end our tour of i/o tables by pressing <ESC> again to return to the ladder logic editor. Note that the <ESC> key at this point has the function of switching between the main-menu and the ladder logic editor. You might find this the most convenient way of going to the ladder logic editor. Alternatively, you can enter the logic editor using the pull-down "Edit" menu and choosing the "Logic" command. 16. Once you are inside the logic editor, you might notice that an additional menu item, "Circuit", appears at the rightmost end of the main-menu bar. This is a "local" menu, meaning it can only be activated when you are in the logic editor. Let's open the "Circuit" menu by pressing the <Ins> key. See Figure 2.6. File Edit Controller Simulate Circuit #1 Circuit Print C:DEMO.PC3 Edit Run Append (RLY) Goto Duration Run Insert (TIM ) Delete Seq1 Clk:0.1s Run Duration FwdRev Move [AVseq ] Copy Clk:0.1s Run Duration FwdRev Seq1 Kill [RSseq ] Replace Label Hello, welcome to the comment feature of Find Label You are allowed to enter up to 3 lines per commentPut to describe Comments feature or purpose of the following Duration MaRST [MaRST] start Emerstop Select a circuit manipulation function Figure 2.6 17. In the "Circuit" menu is a list of functions which enable you to manipulate each individual circuit. For example, you can rearrange the circuit sequence by using the "Move" command, duplicate any circuit using the "Copy" command or search for a circuit that contains a certain label using the "Find 2-6 TRiLOGI Ladder Logic Reference Chapter 2 - Getting Started Label" command. You can also insert a new circuit between two existing circuits using the "Insert" command or delete an existing circuit using the "Delete" command. To edit the elements of each circuit (i.e. the contacts or coil symbol), simply select the "Edit" command from the "Circuit" menu. Since this is only a "sightseeing" tour, we shall not edit the circuit at this moment. Press <ESC> to close the "Circuit" menu. You should still be inside the logic editor. 18. Move cursor to Circuit #1 by pressing both the <Ctrl> and <PgUp> keys simultaneously. Alternatively, you can also use the up/down cursor keys or <PgUp>/<PgDn> keys to do so. To confirm that you are at Circuit #1, look at the upper status line where the current circuit number is displayed. We shall now move from our present browse mode to the circuit editing mode to see some editing features. Hit the <spacebar> on the keyboard to get into the circuit editor, Alternatively, edit mode may be entered by pressing <Ins> key and choosing the "Edit" command from the "Circuit" menu. 19. The moment you are in the circuit editing mode, the cursor changes immediately to a block cursor. Press the right cursor key once and the element "start" will be highlighted with the cursor located at its right end. start Run Emerstop (RLY) Duration (TIM ) Run Figure 2.7 Press the <Tab> key and the cursor will switch to the left end of the highlighted element. The cursor indicates the position to insert a series contact. Try using the four cursor keys to navigate within the circuit. The editor does not allow you to move to a location without any element. Note: Where a circuit has parallel branch(es), (e.g. element "start" is in parallel to element "Run"), when you move out from the element enclosed by the branch (e.g. element "start") using left/right cursor keys, the highlight bar will disappear momentarily and the cursor will be positioned at the junction of the branch. If you insert a series contact to the circuit at this moment, the contact will be connected to the junction of the parallel circuit and not to its individual element. 2-7 TRiLOGI Ladder Logic Reference Chapter 2 - Getting Started 20. In the circuit editing mode, the position previously occupied by the "Circuit" menu title on the rightmost end of the main-menu bar is now changed to "Ins Ins Element". Element This is another local menu which appears only when you are in the circuit editing mode. Open "Ins Element" by pressing the <Ins> key. You should see a list of normally-open and normally-closed contacts. These contacts can be connected either in series or in parallel to the currently highlighted element. (See Figure 2.8). A circuit element is created by choosing an element from the menu. For now, simply close the menu by pressing <ESC> key. To exit from the circuit editing mode, press <ESC> again. File Edit Controller Simulate Circuit #1 Ins Element Print C:DEMO.PC3 1: Run 2: RLY ( ) Duration 3: Run (TIM ) 4: Seq1 Clk:0.1s Run Duration FwdRev 5: [AVseq ] 6: Clk:0.1s Run Duration FwdRev Seq1 ( ]) 7: [RSseq 8: ( ) Hello, welcome to the comment feature of 9: [Func] You are allowed to enter up to 3 lines per comment to0: describe [Func] feature or purpose of the following circuits. E: Edit Label /: Not (Invert) Duration MaRST [MaRST] start Emerstop Select an element to be connected Figure 2.8 2-8 Chapter 3 Hands On I. Creating Your First Ladder Logic Program Now that you have mastered the highly interactive user interface, you might like to create your first ladder logic program. This section shall take you, stepby-step, through the complete circuit creation process. We would like to create a simple program as shown below: start Run ( RLY ) Maxtime ( TIM ) stop Run Run Step Auto Maxtime Seq1 [AVseq ] Clk:0.2s Auto Seq1:1 Out1 ( OUT ) Out8 ( OUT ) Seq1:2 Out2 ( OUT ) Out7 ( OUT ) Seq1:3 Out3 ( OUT ) Out6 ( OUT ) Seq1:0 Out4 ( OUT ) Out5 ( OUT ) Figure 3.1 Simply follow the steps below to create your first ladder logic circuit. 1. Load TRiLOGI if you have already quitted. 2. Open pull-down "File" menu and select "New File". 3. A prompt box appears asking you for a file name to store your program. Type "trial1" (or any filename you fancy) and press <Enter> key. Since you did not specify an extension for this file, it will automatically be appended 3-1 TRiLOGI Ladder Logic Reference Chapter 3 - Hands On with an extension ".PC4". If the file "TRIAL1.PC4" already exists in the default directory, you will be prompted to confirm whether you wish to overwrite it. Should you make a mistake while typing the file name, don't panic. Simply use the cursor keys to move the cursor to the wrong character and press <Del> key to delete it. You can also erase the entire entry by pressing the <Ctrl> and <Backspace> keys simultaneously. Re-enter the desired filename. 4. You should now be in the "browse" mode of the logic editor. The vertical line on the left end of the screen is a power line. The cursor is at the position where you can key in your very first ladder logic. Before we commence the circuit creation, let us define the I/Os to be used for this program. Look at Figure 3.1 again, the following I/Os are required: Inputs Outputs Relays Timers Sequencer : Start, Stop, Auto, Step : Out1, Out2,.... Out8 : Run : MaxTime : Seq1 5. From the "sight-seeing tour", you might recall that the inputs, outputs, relays, timers and counters are defined using pop-up I/O tables which can be called from the pull-down "Edit" menu. However, we would now use hot keys <F2> to <F6> to call up the I/O tables to avoid getting out of the logic editor. Press <F2> to call up the "Input" table. 6. The "Input" table appears near the left side of the screen. This table comprises three columns: "I/O#", "Label" and "CH:bit". The "I/O#" column contains numbers from 1 to 128 and cannot be changed. The "Label" column allows you to enter the mnemonic names of the inputs. The last column “CH:Bit” needs a bit of explanation, as follow: In TRiLOGI Version 4.1, all the 128 inputs are accessible as 16-bit integer variables INPUT[1] to INPUT[8] within TBASIC, the last column “CH:Bit” shows the index and bit # of the corresponding TBASIC variables INPUT[n] to a particular input. The bit number follow binary convention and is numbered as bit # 0 to bit #15 (Hex number ‘F’). This column is primarily for reference purpose during TBASIC programming and is not normally not needed for programming the ladder logic. Note: For TRiLOGI Version 3.3 which does not support TBASIC, the last column "CH:Bit" treats the I/Os differently from Version 4.1. Basically it treats the inputs as 16 channels (0 to 15) of 8-bit data 3-2 TRiLOGI Ladder Logic Reference Chapter 3 - Hands On (bit 0 to 7) which is how the these inputs are organized when accessed by host link commands. As with Version 4.1 this column is not needed during ladder programming. 7. Use cursor keys to move the selection bar to the "Label" column of I/O#1. Type in the input name "Start". Notice that the selection bar disappears the moment you typed the first character "S". This indicates that you are editing a label name. The left/right cursor keys, <Backspace>, <Del> and <Enter> keys can be used during editing of label names. If you wish to erase entirely a previous entry, press <Ctrl-Backspace>. Pressing <ESC> key during editing of a label name aborts whatever changes you have made to it. To end the editing of label name, press the <Enter> key or the up/down cursor keys. After you have keyed in the name correctly, press <Enter> and the selection bar will automatically move to I/O# 2 for you to enter the next input label name. Type "Stop", "Auto" and "Step" consecutively for I/Os #2, 3 and 4. If you have entered an incorrect label and wish to change it, simply move the highlight bar to the incorrect name and press the <Spacebar> to edit it. 8. Having defined all the relevant inputs, we now proceed to define the outputs. Open the output table by pressing hot key <F3> or the right cursor key. Remember that hot key <F3> will always call up the output table regardless of your current operating mode, whereas the right arrow key will switch you from one I/O table to the others. When the output table appears, enter the output labels "Out1", "Out2", (we deliberately leave out "Out3" for the moment), "Out4", "Out5", "Out6", "Out7" and "Out8". Assign "Out4" to entry #3, "Out5" to entry #4, etc. so that there is no gap between two output labels in the table. We deliberately omit "Out3" so that we can demonstrate the flexibility of TRiLOGI by inserting it between "Out2" and "Out4" during creation of the ladder logic. 9. After entering the output definition, press the right cursor key again to call up the "Relays" table and enter relay name "Run". Press <Home> key yet again and the "Timers" table will pop up. The "Timers" and "Counters" tables differ from the others in that both contain an additional "Value" column. This column is necessary for entering the preset value associated with each timer and counter used for the program. 10. Enter timer name "MaxTime" into the "Label" column of Timer #1 and press <Enter>. The selection bar will automatically be positioned at the "Value" 3-3 TRiLOGI Ladder Logic Reference Chapter 3 - Hands On column for you to define the preset value. TRiLOGI's timers use a default timebase of 0.1 seconds. Enter "3000" for a preset value of five minutes (300 seconds). Note: You can only move the selection bar between the "Label" and "Value" columns using the <Tab> key if you need to amend the label name or the preset value after you have created it. 11. We are now left to define the sequencer, "Seq1". The sequencer is an extremely useful device for implementing sequencing logic found in many automated equipment. TRiLOGI supports 8 sequencers of 32 steps each. Each sequencer requires a "Step counter" to keep track of the current step sequence. The first 8 counters in the counter table double as the step counters for the 8 sequencers. These sequencers must be named "Seq1" to "Seq8" if they are to be used, i.e. Counter #1 to be named as "Seq1", Counter #2 as "Seq2", etc. However, any counter not used as sequencer may assume any other name (up to a maximum of 8 characters) if they are used as ordinary counters. If you are at the "Timers" table, pressing the right cursor key again or the <F6> key will bring up the "Counters" table. Enter the name: "Seq1" at the label column for Counter #1. Press <Enter> and the selection bar will move to the "Value" column. For now, let's enter a preset value of "3" for "Seq1". 12. We have now completed defining the I/Os, timers and counters. Press the <ESC> key to close the counter or other tables. Note that not all labels need to be defined before programming. You may create the label name anytime during circuit creation by pressing hotkeys <F2> to <F6>. You are still in the browse mode of the logic editor. Let's proceed to the "circuit-editing" mode by pressing the <Spacebar>. Alternatively, if you wish, press <Ins> and select "Edit" from the local menu "Circuit". 13. Notice that the cursor changes to a full cursor which remains at the power line location. The local menu "Circuit" is now replaced by local menu "Ins Element". We are ready to create Circuit #1 as shown in Figure 3.2 start Run stop Run ( RLY ) Maxtime ( TIM ) 3-4 TRiLOGI Ladder Logic Reference Chapter 3 - Hands On Figure 3.2 14. Press <Ins> key to open the “Ins Element” menu. Select the first item "1: " from the "Ins Element" menu by pressing the <1> key or by moving the selection bar to it and pressing <Enter>. This is a normally-open contact to be connected in series to the current cursor position. A replica of the "Inputs" table should appear on the right hand side of the screen, as shown in Figure 3.3. By moving the selection bar within this table you can select any pre-defined label name for this contact. The contents in the "Inputs" table are not meant to be edited at this moment and therefore no editing can be performed. A small message window also appears near the bottom of the screen, alerting you to the type of contact you are inserting. If you have selected the wrong type of element, press <ESC> to abort it and re-select from the "Ins Element" menu again. File Edit Controller Simulate Print Option Circuit C:TRIAL1.PC3 Inputs I/O# 1 2 3 4 5 6 7 8 9 10 11 12 Inserting type 1: <ESC>-Close <Spbar>-Edit ↑↓ -Move <Tab>-Next Field Label Start Stop Auto Step <Ins>-Shift CH bit i00:0 i00:1 i00:3 i00:4 i00:5 i00:6 i00:7 i01:0 i01:2 i01:3 i01:4 i01:5 àßOther TBLs Figure 3.3 15. Use the cursor to move the selection bar to label-name "Start" and press <Enter>. The "Start" contact should appear on the screen and it is highlighted. If the highlighted element is not a normally-open "Start" contact, it means that you have made a mistake. Delete the mistake by pressing the <Del> key. You can also change a normally-closed contact to a normally open one by pressing the </> key and vice-versa. Look at the "Start" contact again. You will find the cursor at the right end of the highlight bar, indicating that if a series contact is to be connected to this 3-5 TRiLOGI Ladder Logic Reference Chapter 3 - Hands On element, it will be connected on the right end of this contact. The cursor position can be switched between the right end and the left end of the highlighted contact by pressing the <Tab> key. For now, leave it at the right end because we will be connecting a normally-closed (NC) contact "Stop" in series to its right. 16. Press <Ins> again and then press the <2> key to select the series NC contact from the "Ins Element" menu. Select label-name "Stop" from pop-up "Inputs" table and the "Stop" contact should appear instantly. It is highlighted and shown as connected to the right of the "Start" contact. 17. We move on to connect a coil, "Run" to the right of the "Stop" contact. Item 7 or 8 of the "Ins Element" menu can be used to connect to the output coil of any output, relay, timer and counter. Select Item 7 from the "Ins Element" menu now. An "Outputs" table pops up on the right side of the screen. Because we are connecting the relay coil "Run" which is defined in the "Relays" table and not the "Outputs" table, we have to press the right cursor key once or the <F4> key to call up the "Relays" table. Remember that an input can never be used as a coil. Fortunately, TRiLOGI is smart enough not to call up the "Inputs" table when you are connecting a coil. Select "Run" from the "Relays" table and you should have a circuit as shown in Figure 3.4 start Run ( RLY ) stop Figure 3.4 ( RLY) " indicates that this is a relay coil, Notice that the coil symbol " which is helpful in identifying the function of the coil. TRiLOGI automatically places the coil at the extreme right end of the screen and completes the connection with an extended wire. 18. Right below the relay coil is a parallel timer coil with label name "MaxTime". To create this coil, open the "Ins Element" menu and select the item " ( ) ". This allows you to connect a parallel coil to the existing coil. 8: The "Relays" table will pop up for selection again. Since we want to choose a timer, press the right cursor key once to open the "Timers" table. Pick the first timer with label "MaxTime" from this table to complete the circuit. 3-6 TRiLOGI Ladder Logic Reference Chapter 3 - Hands On 19. There is one more element to be connected to complete the creation of Circuit #1. This is a normally-open "Run" contact to be connected in parallel to the "Start" contact. Such a circuit is often known as a "seal" or "latching" circuit as it automatically latches the "Run" relay when the "Start" input is pressed once. Use the left cursor key to move the highlight bar to the "Start" contact. Open the "Ins Element" menu by pressing the <Ins> key again and selecting Item 3 from the menu. The "Relays" table should pop up again as it was the last active table. Select "Run" from the table and you should see "Run" connected in parallel to the "Start" contact. Circuit #1 is now complete. Press <RETURN> to end the editing of Circuit #1 and proceed to create Circuit #2. Run Step Auto Clk:0.2s Auto MaxTime Seq1 [AVseq ] Figure 3.5 - Complete Circuit #2 20. You should have no difficulty creating the four series-connected elements : "Run", "Step", "Auto" and "MaxTime" of Circuit #2 as shown in Figure 3.5 using what you have already learnt so far. [ A V S e q ] " is different from The coil at the right end of Circuit #2: " that of Circuit #1. The square bracket symbol " [ ] " denotes a special function and not an ordinary coil. To create this element, press the <Ins> key again to open the "Ins Element" menu. Select the item " [ F U N C ] " and a special function table will pop up for you to 9: choose the desired function, as shown in Figure 3.6. 3-7 TRiLOGI Ladder Logic Reference File Edit start Controller stop Run Run Step Auto Chapter 3 - Hands On Simulate Print Select a Function 1: Decrement Rev. Counter 2: Reset. Counter 3: Increment Rev. Counter 4: Advance Sequencer 5: Reset Sequencer 6: Set Sequencer to Step N Maxtime 7: Latching Relay 8: Clear Latching Relay 9: Interlock Begin A: Interlock End B: Differentiate Up C: Differentiate Down D: Custom created Function E: Diff. Up Custom Functn F: Master Reset Ins Element [DNctr] [Upctr] [RSctr] [AVseq] [RSseq] [StepN] [Latch] [Clear] [ILock] [ILoff] [ δ DIFU] [δ DIFD] [CusFn] [δ CusF] [MaRST] Run ( RLY ) Maxtime ( TIM ) Figure 3.6 Note: Functions D: and E: are not available in TRiLOGI Version 3.3 and 3.3E The function we wish to use is one that will increment the step counter of Sequencer #1 each time its execution condition goes from OFF to ON. This is the "Advance Sequencer" function. Select "4:Advance Sequencer [AVseq]" from the function table either by pressing the "4" key or by moving the highlight bar to it and pressing <Enter>. Another pop up menu will appear for you to choose the sequencer #. Select "Sequencer 1" from the menu since this is the only sequencer used in this exercise. 21. Two more contacts, labeled "Clk:0.2s" and "Auto", need to be connected in parallel to the "Step" and the normally-closed "Auto" contacts. Because more than one element needs to be enclosed in this instance, we can no longer use Item 3 in the "Ins Element" menu which is tailored for creating a parallel branch to a single element only. Item 5 in the "Ins Element" menu should be chosen because it allows more than one element to be enclosed in the branch. To create this connection, move the highlight bar to the "Step" contact. Press the <Ins> key and then the <5> key to select Item 5 from the menu. An 'x' appears on the left arm of the "Step" contact, indicating the starting point of the parallel branch. You are now prompted to move to the other element to be enclosed in the parallel branch. Because the normally-closed "Auto" contact is also to be 3-8 TRiLOGI Ladder Logic Reference Chapter 3 - Hands On enclosed in the parallel branch, move the highlight bar to the "Auto" contact and press <Enter>. Another 'x' immediately appears on the right arm of "Auto" and an I/O table pops up again for the selection of label name for this parallel branch. See Figure 3.7. Run Step Auto x MaxTime Seq1 [AVseq ] x Figure 3.7. You may recall that the label "Clk:0.2s" to be connected has not been defined in any I/O, timer or counter table. It turned out this label is a predefined, reserved label used for representing the internal clock pulse of 0.2 second period. This label can be found in a "Special Bit" table which is located between the "Counters" table and the "Inputs" table when you navigate through the selection tables using the left and right cursor keys. If you have been following the exercise closely, the "Timers" table should be opened at this moment. Press the right cursor key twice to first get pass the "Counters" table and then the "Special Bit" table will appear as shown in Figure 3.8 File Edit Controller Option start stop Simulate Run Run Step x Auto MaxTime x Print Ins Element Special Bit 1: Sequencer 1 2: Sequencer 2 3: Sequencer 3 4: Sequencer 4 [AVseq] 5: Sequencer 5 6: Sequencer 6 7: Sequencer 7 8: Sequencer 8 9: Normally ON Flag 0: First Scan Pulse A: 0.01s Clock Pulse B: 0.02s Clock Pulse C: 0.05s Clock Pulse D: 0.1s Clock Pulse E: 0.2s Clock Pulse F: 0.5s Clock Pulse G: 1.0s Clock Pulse H: 1 min Clock Pulse I : Real Time Clk Err Run ( RLY ) Maxtime ( TIM ) Seq1 [AVseq ] Figure 3.8 Note: The above screen shows the special bit menu for Version 4.1. 0.05s and 0.5s Clock pulses are not available in TRiLOGI Version 3.3 and 3.3E. 3-9 TRiLOGI Ladder Logic Reference Chapter 3 - Hands On The "Special Bit" table comprises some entries for sequencers, clock pulses and some other special purpose bits. Let us ignore other items for the time being and look at Items "A" to "H" . These items represent the eight (six for version 3.3) built-in clock pulses in the system with periods ranging from 0.01s to 1 minute. Built-in clock pulses are useful if you need a time base to create, for example a "flashing light". A contact such as "Clk:0.1s" will automatically turn itself ON for 0.05s and then OFF for another 0.05s and then ON again, resulting in a series of clock pulses of period = 0.1 second. Select the item "0.2s Clock Pulse" from the "Special Bit" table and a contact with label "Clk:0.2s" will be connected in parallel to the two elements enclosed within the two 'x' markers as follows: Run Step Auto MaxTime Seq1 [ AVseq ] Clk:0.2s Figure 3.9 22. It is easy to connect the other normally-open "Auto" contact in series to the "Clk:0.2s" contact. Since this is a series connection, simply select the item "1: " from the "Ins Element" menu and pick the "Auto" label from the "Inputs" table. We have now completed the creation of Circuit #2. Circuits #3 to #6 are similar to one another. They make use of the sequencer to turn on the outputs 1 to 8 to create a pattern of "running light" when executed. Out1 ( OUT ) Out8 ( OUT ) Seq1:1 Figure 3.10 - Circuit #3 23. The label "Seq1:1" of the contact in Circuit #3 represents Step #1 of Sequencer 1. Remember that each sequencer can have up to 32 steps (Step #0 to 31), with each step individually accessible as a contact. A normally-open contact "Seq1:1" will be closed whenever the step counter of Sequencer 1 reaches number 1. Likewise a normally-closed contact "Seq5:20" will be opened when the step counter of Sequencer 5 reaches number 20. To create the normally-open contact "Seq1:1", choose from the "Ins Element" ". When the I/O table pops up, use either left or menu the item "1: 3-10 TRiLOGI Ladder Logic Reference Chapter 3 - Hands On right cursor key to find the "Special Bit" table seen in the earlier step (Figure 3.8). Choose the item "1: Sequencer 1" from the "Special Bit" table and a secondary menu will appear showing numbers 0 to 15. This secondary menu actually comprises numbers 0 to 31, allowing you to select the corresponding step number for the sequencer. You can scroll through the menu using the up/down cursor keys and the <PgUp> and <PgDn> keys. For this contact, select number "1" to indicate that the contact is for Step #1 of Sequencer 1 . 24. We have thus far created the circuit by selecting the elements from the local menu "Ins Element". A short-cut method of choosing elements to be created without first opening the "Ins Element" menu does exist. Simply press <0> to <9> keys directly when you call elements which correspond to the elementtype number in the "Ins Element" menu. You may wish to try this short-cut for the remaining part of Circuit #3. Press the <7> key either on the numeric keypad or on the main keyboard and the output table will immediately pop up for selection of a coil. Pick "Out1" from the "Outputs" table as per normal and the "Out1" coil will be connected. 25. Circuits #4, 5 and 6 are very similar to Circuit #3 and you should have little problem creating them. When creating Circuit #5 however, you may realize that the output label "Out3" has not been defined. You can call up the "Outputs" table for editing by pressing <F3> key while you are midway into creating Circuit #5. We would like to insert "Out3" in between "Out2" and "Out4". To achieve this, simply move the highlight bar to "Out4" and press the <Ins> key. A pop-up menu appears as shown in the following diagram: Shift I/O Entry Insert Entry (Shift Down) Remove Entry (Shift Up) This menu allows you to shift the I/O table downward to insert a new I/O label between existing ones, or remove a redundant I/O label and shift all the subsequent entries upward. However, care must be taken when performing shifting of "Inputs" and "Outputs" tables as these may affect the actual physical wiring. In this exercise, we assume that the target machine has not been built and therefore we can shift the output table at will. Selecting the item "Insert Entry (Shift Down)" when the highlight bar is at "Out4" creates a blank entry 3-11 TRiLOGI Ladder Logic Reference Chapter 3 - Hands On between "Out2" and "Out4". You can then enter the label "Out3" into this newly created blank space using the normal procedure. Complete Circuit #5 and Circuit #6 and we are ready for some interesting simulation exercises later. When you have created all circuits, press <Enter> key or <ESC> key at the last blank circuit to end circuit-edit mode. Remember to save your circuit on disk by either pressing <F10> or select "Save" from the "File" pull-down menu. 26. We can make our program more comprehensible to other users by utilizing the "Comments" feature of TRiLOGI. At the "Browse" mode, move the blinking underscore cursor to Circuit #1 using the Up cursor key. Press the <Ins> key to open up the "Circuit" menu. Press <P> key to select the item "Put Comments" from the menu. A "Comment circuit" will be inserted before Circuit #1, (hence changing it to Circuit #2). Each "Comment circuit" may consist up to 4 lines (3 lines for Version 3.3) of 70 characters per line. Once you have created the "Comment circuit", you will be placed at the "comment-editor" immediately. Type in the following comment text: This is my first TRiLOGI program ================================= Copyright ABC, Inc. You can use the normal text editing keys such as left, right, up, down cursor keys, and <Ctrl-Left>, <Ctrl-Right>, <Del> and <Backspace> keys for editing. If you need more help, simply press <F1> while in the "commenteditor" and a help screen will appear describing to you the various keystrokes and their functions in the "comment-editor". II. Testing Your Program 1. Having completed the trial program, it is time to test if it works as intended using the built-in real-time programmable controller simulation engine. Open the "Simulate" pull-down menu and activate the command " Run (all i/o reset) Ctrl-F9 " . TRiLOGI will immediately compile the ladder program and if no error is detected, it will instantly proceed to open up the "Programmable Logic Simulator" screen, as shown in Figure 3.11. If you have followed closely all the instructions during the creation of the program "Trial1", you should not encounter any compilation error. However, if 3-12 TRiLOGI Ladder Logic Reference Chapter 3 - Hands On you do receive an error message, then check your circuit against Figure 3.1, make all necessary corrections and then try again. 2. The simulator screen comprises 7 columns: Input, Input, Timer, Counter/Sequencer, Relay, Relay, and Outputs, with each column containing up to 20 logic elements. A highlighted window frame indicates that the column has been selected for scrolling. A highlight bar also appears within the selected window to indicate that the particular i/o has been selected for action (such as force-setting/resetting). Programmable Logic Simulator IN Start Stop Auto Stop IN * . . . . . . . . . . . . . . . . #1 ESC-Abort 2 TIM 1 CTR/SEQ 1 RLY . MaxTime. - Seq1 . - Run . . . . . . . . . . . . . . . . . . . . . . . . . . . . . . . . . . . . . . . . . . . . . . . . - 1 . . . . . . . . . . . . . . . . . RLY 2 . . . . . . . . . . . . . . . . . OUT 1 . Out1 . Out2 . Out3 . Out4 . Out5 . Out6 . Out7 . Out8 . . . . . . . . . < →↓↑←>-Move <Ctrl-Ent>-Toggle <V>-View Variables <P>-Pause/Resume Figure 3.11 The label names for the inputs, outputs, relays, timers and counters defined earlier in the I/O tables automatically appear in their respective columns. To the right of each label name column is an "LED" column which indicates the ON/OFF state of respective i/os. An "*" represents the ON state of an i/o, while a "." represents an OFF state. 3. You may use the left/right cursor key to move the highlighted window frame between columns. <PgUp>/<PgDn> keys will scroll the selected window to the previous page or the following page, respectively. The selected window may be scrolled independently of the rest of the simulator screen. This very flexible windowing system allows you to select the parts of the simulation to be viewed. Note that the inputs and the relays are each displayed in two independent columns. This allows you to view two separate, non-consecutive pages of inputs and relays simultaneously. 3-13 TRiLOGI Ladder Logic Reference Chapter 3 - Hands On The logic elements are arranged into pages of 20 elements per page. The Input, Timer, Counter/Sequencer and Output columns have 7 pages (# 1 to #7) each. Altogether there are 128 inputs, 128 timers, 128 counters, 128 outputs and 256 relays. Relay columns have 13 pages (# 1 to #13). The page number for each window is displayed along the top border of the window. When a column is selected, a highlight bar appears within the column which highlights only the label name of the i/o. You may move the highlight bar within the page using the up/down cursor keys. A number appears along the bottom border of the selected window to indicate the I/O number of the highlighted logic element. 4. Move the highlight bar to the first input "Start". The "LED" for this input shows a dim grey ".", suggesting that it is in the OFF state. Our program requires the "Start" input to be momentarily turned on (such as pressing a push-button switch in real-life) in order to turn ON the "Run" relay and the "MaxTime" timer. Let's force the "Start" input ON by pressing either the <Enter> key or the <CtrlEnter> key once. You should notice its "LED" becomes a bright red "*" sign, indicating that "Start" input has been turned ON. At the same time, notice that the relay "Run" is also turned ON and also the timer "MaxTime" begins to count down from the value of 3000 every 0.1sec. 5. To simulate the action of pressing a button, we have to turn OFF the "Start" input immediately after turning it ON. This is achieved by pressing the <Enter> key again when the highlight bar remains at the "Start" input, i.e. pressing the <Enter> key actually toggles the logic state of an i/o during simulation. After turning off the "Start" input, notice that the "Run" relay remains ON and the timer "MaxTime" continues to count down. These two elements are not affected by the fact that "Start" is no longer ON. We can verify the logic by returning to the ladder diagram. Simply press <ESC> once and you will be put back to the editor immediately. Press <ESC> twice again to get to the circuit "Browse" mode if you are on the "Simulate" pull-down menu. You should notice that the "Run" labels in all circuits are highlighted as shown below: 3-14 TRiLOGI Ladder Logic Reference start Chapter 3 - Hands On stop Run ( RLY ) Maxtime ( TIM ) Run Run Step Auto Maxtime Seq1 [AVseq ] Clk:0.2s Auto Figure 3.12 i.e. the logic states of any i/o can be displayed on the ladder diagram directly. An input, output, relay, timer or counter contact that is turned ON will have its label name highlighted in the ladder diagram. This feature helps greatly in debugging and understanding the logical relationship between each i/o. For example, from Figure 3.12, we can see clearly that the "Selflatching" circuit for relay "Run" works as intended: when we first turn ON the "Start" input, "Run" will be energized and its contact which is parallel to "Start" will hold itself in the ON state, even if we subsequently turn OFF the "Start" input. The timer coil "MaxTime", being connected in parallel to "Run" relay, will also be energized. However, its contact will only be closed after 5 minutes (when its present value counted to 0). To break the latched On "Run" relay, we must energize the "Stop" input momentarily to break the "power" flow. 6. Let's continue with our simulation without resetting the i/os. Although we may still use the pull-down "Simulate" menu, it is far more convenient if you remember the hot key <F9>, which will bring you immediately to the simulator. Once in the simulator, move the highlight bar to the "Stop" input and press <Enter> to turn it ON and then OFF again. Notice that the "Run" relay is immediately turned OFF and the timer "MaxTime" is reset to inactive state. 7. Let's restart the system by turning ON the "Start" input momentarily again. Next turn ON the "Auto" input. You should see that the sequencer "Seq1" in the "Ctr/Seq" column begins to count upward from 1 to 3 and then overflows to 0 and repeats continuously. For each step of the sequencer, the corresponding output will be turned ON. Our trial program will show a running light pattern starting from Outputs 1 & 8, then 2 & 7, 3 & 6 and 4 & 5 and then back to 1 & 8, 2 & 7..... If you turn OFF the "Auto" input at any time, the sequencer will stop and the output stays at the current value. You can then step through the sequence 3-15 TRiLOGI Ladder Logic Reference Chapter 3 - Hands On manually by repeatedly toggling the "Step" input and observe how the outputs change. Switch back and forth between the ladder editor and simulator to convince yourself of the logic created by you. 8. Observe that the timer "MaxTime" continues to count down every 0.1 second, and when it reaches 0, all the normally-open "MaxTime" contacts will be closed, and all its normally-closed contacts will be opened. When this happens, the sequencer will be halted since there is a series-connected, normally-closed "MaxTime" contact to the [AVseq] function for "Seq1". If the timer has not timed out yet, you can speed it up during simulation by changing its Present Value (PV). To do this, use the left/right cursor keys to select the "TIM" window and up/down cursor keys to select the "MaxTime" timer. Press <Enter> once and a window for you to edit the present value will appear as shown in Figure 3.13. IN Start Stop Auto Stop 1 * . . . . . . . . . . . . . . . . #1 ESC-Abort IN Programmable Logic Simulator TIM CTR/SEQ 1 2 RLY 1 RLY . . MaxTime. 955 Seq1 . - Run . . . . . .Edit Present . Value. . . . Current P.V. : 955. . . . New P.V.:_ . . . . . Last. change :0 . . . Net .Total-change : 0 . . . (Ctrl-C . . to-Clr) . . Set Value :5 . . . . . . . . . . . . . . . . . . . . . . . . . . . . . . . . - 2 . . . . . . . . . . . . . . . . . OUT 1 . Out1 . Out2 . Out3 . Out4 . Out5 . Out6 . Out7 . Out8 . . . . . . . . . < →↓↑←>-Move <Ctrl-Ent>-Toggle <V>-View Variables <P>-Pause/Resume Figure 3.13 You can edit the present value by entering a new value at the cursor position. The amount you have changed will be recorded in the "Last change" field. The "Net Total Change" field, as its name suggests, records the net amount of change that you have made to the particular timer or counter. Each timer and counter has its own "Net Total Change" data kept in memory during the entire TRiLOGI session. These can only be cleared when you press 3-16 TRiLOGI Ladder Logic Reference Chapter 3 - Hands On the <Ctrl-C> key. Note that you may also edit the P.V. of a counter or sequencer in a similar manner. Note: Since the <Enter> key is used to bring up the P.V. editor for the timer and counter windows, you have to use the <Ctrl-Enter> key if you wish to force the timer's or counter's contact to change. Summary We have completed this hands-on session and have successfully created a simple ladder program. We have also performed real time simulation to test the program's functionality. By now you would probably have a good appreciation of TRiLOGI's superb capability and ease of use and are ready to include TRiLOGI as an integral part of your programming needs. The next two chapters will provide reference for all of TRiLOGI's Ladder Logic commands and you should refer to them if you need detailed explanation of specific commands. 3-17 Chapter 4 Main Menu Reference TRiLOGI is completely menu-driven. A menu comprises a list of commands appearing on the screen. Each command can be selectively executed by typing in the first letter of the command name or by moving a selection bar to it and pressing <Enter> key. To close or abandon a menu, simply hit the <ESC> key. I. The Main Menu File Edit Controller Simulate Simulate Print Option TRiLOGI Version 4.1 main menu bar The main menu occupies the top of the screen (except during simulation runs) and will stay there throughout your working session with TRiLOGI. It is a horizontally laid menu, serving as the base for a number of "pull-down" menus. When a main menu command is executed, a new menu appears directly below the executed command, giving the visual effect that it has been "pulled-down" from the main menu bar. Each "pull-down" menu has a number of additional commands for your selection. We shall describe all the commands of each pull-down menu in detail below. II. The File Menu The File menu provides commands for accessing your disk drive and the DOS file system as well as running another DOS program without leaving TRiLOGI. 1. LOAD This command is for loading a TRiLOGI file. When executed, a prompt box appears with a text string "∗.PC4" (“*.PC3” or “*.PE3” for version 3.3) being highlighted. If you press the <Del> key at this point, the whole text string will be deleted to enable you to key in an entirely different file name. If you press any other key, the text string "*.PC4" will no longer be highlighted and the <Del> key will then delete only the character where the cursor is situated. You can enter any combination of ASCII characters, including the full path name of the file if it is located in another directory. The left/right cursor keys, <Home>, <End>, <Del> and <Backspace> keys can be used in ways similar to most standard text editor. 4-1 TRiLOGI Ladder Logic Reference Chapter 4 - Main Menu Reference If you enter a file name without extension (e.g. "DEMO"), TRiLOGI automatically assumes that it has a default extension ".PC4" and searches for the filename "DEMO.PC4" in the current directory. If you are loading a file from another directory, you will need either to supply the full DOS path (e.g. "B:\TL4\DEMO"), or to change the current directory first before loading the file. If a file cannot be found, an error message will appear. A filename can contain a DOS-style wildcard characters (* and ?, see your DOS manual for their meanings and usage), in which case a directory window will appear listing all the files that match the file name masks. You can then conveniently load your file by selecting it from the directory window. 2. Save <F10> This command saves the whole ladder logic program as well as all I/O tables to the disk. From anywhere within TRiLOGI, you can also press the <F10> hotkey to save your file. 3. Change Dir Execute this command and the current drive and directory will be displayed in a prompt box. You can change it to another drive and/or directory by entering the desired path name in the prompt box. When you execute other commands in the file menu (e.g. "Load", "New" or "Write To"), the current drive and directory will automatically be used unless you specify an alternate DOS path name. 4. Write To Use this command if you have made changes to an existing program and yet wish to keep the original file, while saving your current work to a different name. It prompts you for the new file name and saves your current work to that name. The default name also changes to this new name, enabling you to save the file under the new name when you press the <F10> hotkey . If a file bearing the same name as your specified new file name already exists in the current directory, you will be prompted to confirm if you wish to overwrite it. 4-2 TRiLOGI Ladder Logic Reference Chapter 4 - Main Menu Reference 5. New Activate this command when you want to create a new ladder logic program. You need to supply a filename which becomes the default filename for your new program. 6. DOS Access This command allows you to perform some DOS commands (e.g. FORMAT, RENAME, COPY, etc.) or run another program without quitting from TRiLOGI. When executed, the screen will clear and you will be put at the DOS prompt. To return to TRiLOGI, type "EXIT". Note: You should not confuse the DOS Access command with the "Quit" command. TRiLOGI and your logic programs remain intact in the memory when you execute "DOS Access" and go to DOS prompt. Always return to TRiLOGI by typing "EXIT". A common mistake is to get back to TRiLOGI by typing "TL" again at the DOS prompt. If you do this, a new copy of TRiLOGI is loaded into the memory. Should you repeat this several times, the computer will exhaust its memory! 7. Run Utilities (Version 4.1 only) You can run a small DOS utility program without leaving TRiLOGI by executing the “Run Utilities” command under the “File” menu. All files within your current directory and with the “.EXE” extension will appear in a pop up menu. You can move the highlight bar to the desired file and press <Enter> key to run it. 8. Quit <Alt-X> Execute "Quit" to leave TRiLOGI and return to DOS. If you have edited a program and have not saved it, TRiLOGI will prompt you to confirm if you want to save the edited program. Most changes made to the "Option Menu" and printer setup strings will be saved automatically in the file or "TL4CONFI.TRI" when you quit. III. The Edit Menu Commands in this menu allow you to enter the ladder logic editor or open up any of the five I/O tables for entering I/O definitions. 1. Logic Use this command to enter the ladder logic editor window for creating, modifying or deleting circuits. The ladder logic editor window is the area 4-3 TRiLOGI Ladder Logic Reference Chapter 4 - Main Menu Reference between the Main Menu along the top of the screen and the Help message line at the bottom. More details on the logic editor are explained in Chapter 5. Note: It is much more convenient to enter the ladder logic editor window by simply pressing the <ESC> key when at the main menu. 2. Input <F2> Activate this command and an "Inputs" table should pop up on the screen as shown earlier in Figure 2.5. Up to 128 inputs can be defined in the "Inputs" table, but only 16 of them are visible at any one time. You can scroll the screen to view all 128 inputs using the up/down cursor keys, or by pressing <PgUp> and <PgDn> keys to scroll one page at a time. The bottom Help status line changes simultaneously to show you functions of keys pertinent to I/O table editing. You can also obtain on-line Help by with the <F1> key. The "Inputs" table consists of three columns: "I/O#", "Label" and "CH:Bit". The "I/O#" column shows 128 fixed numbers (#1 to #128) used by TRiLOGI for internal itemizing and error reporting purposes and cannot be changed. The "Label" column is where you enter to give meaningful names to your input points. Any alpha-numeric character (except "space" and underscore) can be used as an input name, subject to a maximum of 8character length only. The last column, "CH:Bit" displays the channel number and bit number of the particular I/O. The 128 inputs are organized into 8 channels (channel #1 to 8) of 16 bits (bit # 0 to F16) each. This column is for reference purpose only and is normally not needed for programming. Entering a label name into the Input table is simple: a) Move the highlight bar to the desired field. b) Type in the label name or directly. As you type, the highlight bar disappears and you are transported into the editing mode. Use left/right cursor keys to move cursor within the field and <Backspace>/<Del> keys to erase any wrong entry. To delete the whole field, press <CtrlBackspace>. c) Hit <Enter> when editing is complete and the highlight bar will reappear in the next row of the same column. This feature allows you to quickly enter all your input definitions one after another. 4-4 TRiLOGI Ladder Logic Reference Chapter 4 - Main Menu Reference d) If you wish to edit an existing label name, just move the highlight bar to it and press <Spacebar>. You will be put into the label editor for making amendments. 3. Output <F3> The output definition table is very similar to the "Inputs" table. Up to 128 output points can be defined and used to create ladder logic program. Press right cursor key to move on to the "Relays" table, or left cursor key to go to the "Inputs" table. 4. Relay <F4> This table allows up to 256 internal "relays" to be defined . Relays are generally used to keep the "state" of a particular working condition and has no physical output associated with it. Editing of "Relay" definitions is identical to editing done in the "Inputs" table. Press right cursor key to adjourn to the "Timers" table, or left cursor key to move to the "Outputs" table. 5. Timer <F5> Unlike the "Inputs", "Outputs" and "Relays" tables which contain three columns each, the "Timers" table has one additional column titled "Value". This column is for you to enter the timer's preset value. Up to 128 timers can be defined. A TRiLOGI timer is implemented as an ON-DELAY type timer and it has a time-base of 0.1 seconds when not defined as a “High High Speed Timer””. Timer If the timer have been defined as a “High Speed Timer” using the TBASIC HSTIMER command. it would then operate on a time base of 0.01s. Any one or all of the 128 timers may be defined as “High Speed Timers” (See Part TWO: Chapter 4 - TBASIC Language Reference for a description of this command), Each individual timer can be defined with preset values ranging from 0.1 to 999.9 seconds or from 0.01 to 99.99. The moment a timer coil is energized, it starts timing. Every timer has a Present Value (P.V.) register associated with it and when the timer coil is first energized, the P.V. register is loaded with the (Set Value -1) and countdown occurs every 0.1 or 0.01 seconds. Immediately after time-out (i.e. timer's P.V. = 0), the timer closes all its normally-open contact and opens all its normally-closed contacts. The instant the timer coil is de-energized, the timer and all its associated contacts will be reset. 4-5 TRiLOGI Ladder Logic Reference Chapter 4 - Main Menu Reference After entering the label name associated with a timer, hit <Enter> and the highlight bar will automatically move to the "Value" field of the same row for you to enter the preset value. The preset value must be entered as a multiple of the time-base, for example, a preset time of 10 seconds should be entered as 100 (equivalent to 10/0.1). 6. Counter <F6> The "Counter" table is identical in format to the "Timers" table, except, in this case, the "Value" column indicates the Set Value (SV) of the counter. Altogether, 128 counters can be defined. TRiLOGI supports several kinds of counters, depending on how the coil is being connected as described below: 6.1 Down Counter The most basic counter type is a down-counter which is used when the counter coil is connected using the normal coil symbol ( CTR ) , the latter can be created by selecting from the "Ins ( ) ( ) . Element" menu either 7: or 8: When the counter coil is energized the first time and then de-energized, the counter becomes active and its current value register is loaded with the preset value minus one, indicating that one cycle has occurred. Every subsequent energize/de-energize cycle applied to the counter coil will decrease the current value by one. The moment countdown is complete (i.e. current value = 0), the counter closes its normally-open contacts and opens its normally-closed contacts. A counter can be reset either before or after the completion of the countdown by the special function [ RSctr ] found in the special function menu. Please refer to Chapter 5 for description of this function. 6.2 Reversible Up/Down Counter [ U p C t r ] or If you use a counter with the special functions: [ DNctr ] , then the counter becomes a reversible Up/Down counter. Please refer to Chapter 5 for details on these two functions. 6.3 Counters as Sequencers A sequencer is a highly convenient feature for programming machines or processes which operate in fixed sequences. These machines operate in fixed, clearly distinguishable step-by-step order, starting from an initial step and progressing to the final step and then restart 4-6 TRiLOGI Ladder Logic Reference Chapter 4 - Main Menu Reference from the initial step again. TRiLOGI supports 8 sequencers of 32 steps each. Each sequencer requires a "Step counter" to keep track of the current step sequence. The first eight counters in the Counter table double as the step counters for the 8 sequencers. These sequencers must be named "Seq1" to "Seq8" if they are used. i.e. Counter #1 to be named as "Seq1", Counter #2 as "Seq2", etc. However, any counter not used as sequencer may assume any other names (up to a maximum of 8 characters) if they are used as ordinary counters. 7. Custom Function <F7> (Version 4.1 only) This command activates the built-in text editor to enable you to enter or display the TBASIC commands for the selected CusFn. You may be required to enter the Custom Function number to edit when this command is executed. Please refer to “PART TWO: Chapter 2 - Using TBASIC Editor & Simulator” for details on how to create/edit a CusFn. 8. Browse All CusFn” or <Ctrl-F7> (Version 4.1 only) This command opens up the text editor in “Read-Only” mode, which means that you may not change the content of the CusFn. This command only opens up CusFns that have been defined but skips those undefined functions. You can use the Up/Down cursor keys to scroll from one CusFn to another quickly, which offers you a quick way to examine all the CusFns that have been defined in your program. You can also activate this command during “Simulation” by pressing the <Ctrl-F7> keys. 9. Shifting an I/O Entry A label defined in an I/O, Timer or Counter table can be shifted when necessary. Sometimes it is desirable to re-arrange the labels in a more organized manner for ease of readability. You can easily do this by pressing the <Ins> key when any of the I/O tables is opened. A local menu will pop up as shown below: Shift I/O Entry Insert Entry (Shift Down) Remove Entry (Shift Up) This menu allows you to shift the I/O table downward to insert a new I/O label between existing ones, or remove a redundant I/O label and shift all the subsequent entries upward. However, care must be taken when performing shifting of "Inputs" and "Outputs" table as these may affect the actual physical wiring. Also, please bear in mind that the I/O tables can 4-7 TRiLOGI Ladder Logic Reference Chapter 4 - Main Menu Reference only accommodate a maximum of 128 inputs/outputs/timers /counters and 256 relays. If you insert an entry beyond the maximum allowable, the very last entry of the table will be lost. IV. The Controller Menu The "Controller" pull-down menu provides the interface to the target programmable controller for program transfer and the monitoring of the controller's I/O status. Before using any command in this menu, ensure that the PLC is connected to the host computer serial port. Default communication format is 8 data bits, 1 stop bit, no parity. Default baud rate is 9600 for Version 3.3 and 38,400 for Version 4.1. However, if the controller is set-up to communicate at any of the following baud rate: 1200, 2400, 4800, 9600, 19,200 or 38,400 bps (please refer to the controller's user manual), TRiLOGI can automatically detect the controller's baud rate and set the host PC to the same baud rate before communicating with the controller. 1. Communication Setup Check which of the PC's serial port (COM1: or COM2:) is the controller connected to and define it here. Specifying the wrong COM: port is the most common cause of communication problem encountered when using commands in the "Controller" menu. 2. Program Transfer <Ctrl-T> You may either press <Ctrl-T> on the keyboard or open the "Controller" pull-down menu and select the item "Program Transfer". TRiLOGI will query the target controller to obtain its maximum number of inputs, outputs, etc. TRiLOGI will then recompile the program to ensure that these limits are not violated. When compilation is successful, the compiled code will be transferred to the PLC in just a few seconds. After the program has been successfully transferred, you will be prompted to indicate if you wish to clear all outputs, relays, timers and counters to "OFF". If you encounter communication errors during program transfer, refer to your controller's User Manual for details. 3. On Line Mon/Control <Ctrl-M> TRiLOGI allows direct control of the PLC operation from within the program. You can enter this mode by selecting the "On-Line Mon/Control" command from the "Controller" main menu, or by pressing the "Ctrl-M" hotkey. A screen similar to the simulator (see "Simulate" menu in PART 4-8 TRiLOGI Ladder Logic Reference Chapter 4 - Main Menu Reference ONE: Chapter 5 for details) will appear with the flashing title "On-Line Monitoring & Control" along the top of the screen. The following are what may be done in this mode: 3.1 Monitoring TRiLOGI continuously monitors the I/O logic states and present values of the timers and counters of the controller and displays them on screen. You may scroll up and down any I/O window using the <PgUp>/<PgDn> keys to examine I/Os that are outside the present page. A highlight bar will appear when an I/O window is selected (its border is highlighted). The location of this highlight bar indicates the particular I/O bit selected. selected You may move the highlight bar using the < ↑↓ > key. 3.2 Force Setting/Resetting I/O Bits If you hit <Enter> key when in the “On-Line Monitoring/Control” screen, the selected I/O bit (of input, output and relay) of the controller will be forced to toggle (change state) by TRiLOGI using host link commands. If the selected bit is a physical input bit, it will be toggled for one scan time only, after which the PLC will change it back in accordance to the actual logic state of the physical input. You can thus emulate the action of closing a contact briefly using this capability. If you attempt to force an output or relay bit that has been assigned to an output coil controlled by the ladder program, it will only be toggled for one-scan time. After that it will be changed to the outcome determined by the ladder program. This is sometimes useful during program testing or debugging for temporarily overriding an I/O that does not respond as predicted. Although it is unlikely that you would ever want to force-toggle a timer's or counter's contact, it can be done by selecting the desired Timer or Counter label and pressing <Ctrl-Enter>. Pressing only <Enter> key while in the timer or counter window will bring up an editor for you to change the present value of the timer/counter P.V. as described below. 3.3 Changing Timer/Counter Present Values To change the Present Value registers of a timer or counter, move the highlight bar to select the timer or counter and hit <Enter>. An editing window will appear showing the present value (P.V.) as well as 4-9 TRiLOGI Ladder Logic Reference Chapter 4 - Main Menu Reference the set value (S.V.) of the timer or counter. You can edit the present value by entering a new value at the cursor position. The amount you have changed will be recorded in the "Last change" and "Net Total Change" field. The "Net Total Change" field, as its name suggests, records the net amount of changes you have made to the particular timer or counter. Each timer and counter has its own "Net Total Change" data kept in memory during the entire TRiLOGI session. These can only be cleared when you press the <Ctrl-C> key. This function is useful if you want to cut short a long timing process in order to carry out testing of the logic after the timer time-out, without having to actually wait for the long time-delay itself. 3.4 Viewing and Modifying PLC’s Internal Variables (Version 4.1 only) If you press the <V> key while you are within the “On-Line Monitoring & Control” screen, a “View Special Variables” window will be opened. You can examine the values of all the 26 integer variables A to Z, string variables A$ to Z$, Data Memory DM[1] to DM[4000] and other special internal variables such as ADC, DAC, PWM and the Real-TimeClock. The values displayed in this window reflects the actual values of these variables in real time. The numbers are displayed in decimal form but if you press the <H> key it will change into hexadecimal form. Pressing the <D> key will change it back into decimal mode. You can also examine the values of other system variables such the INPUT[ ], OUTPUT[ ], etc. by pressing the <S> key (as for “Show”) and entering the variable names. If you wish to modify the content of any variable, simply press the <E> key (as for “Edit”) and you can enter the variable name followed by the “=“ sign and the value. The entered value for the variable will be immediately updated into the PLC. 3.5 Suspending PLC's Ladder Program You can suspend the operation of the controller at any time by pressing the <P> key. A warning message will appear and a flashing sign "System Paused" will be displayed on the upper right hand corner. When the controller is suspended, its ladder program will not be executed until it is resumed by pressing the <P> key again. At this time you can force set or reset any relay or output bits. This is convenient during programming or debugging as you can control the 4-10 TRiLOGI Ladder Logic Reference Chapter 4 - Main Menu Reference output driver to bring any physical component to any desired locations effortlessly. 4. Ladder Monitoring <Ctrl-L> You can also monitor the logic states of the target PLC directly on the ladder diagram by selecting the "Ladder Monitoring" commands under "Controller" or by pressing <Ctrl-T> . When you enter the "Ladder Monitoring" mode, TRiLOGI will continuously monitor the controller's I/O logic states and display any "ON" I/O bit with highlighted label names in the ladder diagram. You can still scroll up/down the ladder programs while performing ladder monitoring, using the cursor keys, <PgUP> <PgDn> and <Ctrl-PgUp> and <Ctrl-PgDn> keys, etc. However, you may not use the left/right cursor keys to observe logic states of I/Os outside the current screen. 5. Get File Info This command can be used to obtain information on the filename of the TRiLOGI source file being downloaded, the date of the file created and the date the program was downloaded, as shown in Figure 4.1. 6. Retrieve Source File <Ctrl-S> This command first queries the controller for the name of the TRiLOGI source file stored in the controller's EEPROM and searches the current directory for a matching file name. If the file exists, the user will be prompted whether the source file is to be loaded. However, TRiLOGI does not check the contents of the file against the controller's program. Hence it is the user's responsibility to ensure that it was the actual source file that was downloaded to the controller previously. You may obtain more information about the source file that was downloaded into the controller by using the "Get File Info" command under the "Controller" menu. 4-11 TRiLOGI Ladder Logic Reference File Edit Controller Chapter 4 - Main Menu Reference Simulate Print Option Communication Setup Program Transfer Ctrl-T On-line Mon/Control Ctrl-M Ladder Monitoring Ctrl-L Get File Info Retrieve Source File Ctrl-S Ctrl-RDownloaded File Info All I/Os Reset Host-Link Command File Name: Demo1.PC4 Ctrl-R Target PLC Access 01 Nov 96 Created: 1: Host’s Timer/Ctr SVDate 2: PLC’s Timer/Ctr SV Date Downloaded: 29 Dec 97 Figure 4.1 7. All I/Os Reset <Ctrl-R> You can use this command to immediately reset all the target PLC’s outputs, relays, timers, counters and sequencers to OFF and clear the present values of all timers and counters to inactive. All latched relays will also be turned off by this command. All the internal variables and special peripherals will be reset to their power up initial values. The <Ctrl-R> hot key is available during on-line monitoring and control to perform this function. 8. Host-Link Commands This command lets you talk directly to the target controller using "Host-Link Commands". When selected, this command prompts you to enter the command string and it will send the command to the controller. The response received from the controller will be displayed immediately. Both point-to-point and multi-point commands can be accepted. For e.g. to inquire the logic states of all outputs using point-to-point command, enter the string "ROAL*". For multi-point command, enter "@01ROAL00*" (assuming that the controller has the ID=01 and we choose to ignore the FCS byte by entering "00" before the terminator "*", you can check your controller's ID using the "IR*" command). The host-link command automatically detects the baud rate of the target controller and sets the host PC to the same baud rate. If you have an RS232C-to-RS485 converter where the direction of the RS485 bus is controlled by the /RTS line of the RS232C, you may send multi-point hostlink commands to a network of controllers using this command. Please 4-12 TRiLOGI Ladder Logic Reference Chapter 4 - Main Menu Reference refer to your controller's user manual for description of available host-link commands. This command is useful for setting some parameters such as the device ID, the controller's baud rate, or for using special commands that are available only on some models of the controller. 9. Target PLC Access It is possible to retrieve the compiled codes from the PLC's EEPROM and re-construct them into ladder circuits. However, compiled TBASICbased custom functions cannot be retrieved in Version 4.1. To perform uploading, open the "Controller" pull down menu and select the new item "Target Access". A pop-up menu with three items: "Set Password" , "Retrieve PLC's Ladder" and “Delete Password & Clear Program” will appear. Select "Retrieve PLC's Ladder" item and you will be prompted to confirm your wish to obtain ladder from the PLC. Note that since the I/O label names and comments defined in the original program were never saved in the PLC, the re-constructed ladder diagram can only make use of the I/O labels defined in the currently opened file. Since the uploaded program replaces all the existing ladder circuits, make sure that you keep a backup copy if you do not wish to lose the content of the currently opened file. If an I/O used in the PLC's code is not defined in the current file, the program will prompt you to enter the label name. You can use the default name by pressing the <ESC> key. A default name define an input as "In1", "In2"..., output as "Out1","Out2"... etc. Set Password Security A password of between 1 to 6 characters may be defined by the users by selecting the "Set Password" item from the "Target Access" menu. Once defined, the target PLC program may not be uploaded unless the same password is entered by the user. If you wish to change the password, select the "Set Password" item and you will be prompted to enter the original password. If the correct password is entered, you will be prompted to enter the new password. If you simply press the <Enter> key without entering any character, the original password will be erased and the user may freely upload the PLC code. 4-13 TRiLOGI Ladder Logic Reference Chapter 4 - Main Menu Reference In TRiLOGI Version 4.1, the password is not erased after a program transfer. In this case, you only need to set the password once and the protection will be in place all the time, regardless of how many times you have subsequently transferred the program. The password can be deleted using the “Delete Password & Clear Program” item in the “Target PLC Access” menu. Note that the entire program will be erased when the password is deleted and you need to re-transfer the working software. This provides adequate protection against unauthorized deletion of password by others. In TRiLOGI Version 3.3, the password is erased if you transfer a new program to the PLC. Hence you have to remember to set the password after transferring a new program to prevent the program from being uploaded by others. 10. 1: Host Timer/Ctr SV -> PLC 2: PLC’s Tim/Ctr SV -> Host (Version 4.1 only) In TRiLOGI Version 4.1 you can modify the set value (SV) of any timer and counter on their respective definition tables and update their respective values stored within the PLC’s EEPROM without transferring the entire program. This is much faster and opens the possibility of modifying the S.V. of timers and counters without the need for the original source program. The command “1: Host Timer/Ctr SV -> PLC” transfers the Set Values stored in the Timer/Counter tables of the currently loaded ladder program file into the PLC. By the same token, you can also capture the SVs of the timers/counters within the PLC and update them on the host ladder program’s Timer/Counter tables using the command: “2: PLC’s Timer/Ctr SV -> Host”. Note that to update the SVs of a timer or a counter, you must give it a unique label name. V. Simulate Menu This menu provides commands for invoking TRiLOGI's ladder compiler and real time logic simulator to test your newly completed ladder program. We shall describe the features of the compiler and simulator before describing their various commands in this menu. 1. Compiler Before a ladder program can be executed it needs to be compiled into machine codes that the computer can understand. TRiLOGI 4-14 TRiLOGI Ladder Logic Reference Chapter 4 - Main Menu Reference automatically compiles the program before taking you to the simulator. A compilation message window will appear displaying the circuit number that TRiLOGI has compiled. Compilation always starts from Circuit #1 to the last circuit if no error is encountered. TRiLOGI's compilation speed is extremely fast so much so that compilation for most programs are completed almost instantaneously!! If an error is found in your program, compilation will halt at the circuit number where the error takes place. An error message will appear telling you the cause of the error. By pressing any key at this point, you will be moved directly to the specific circuit where the error occurs for correction to be made immediately. Because TRiLOGI's ladder logic editor is designed with the intelligence to prevent construction of most types of illegal circuit expressions, the number of possible errors that can occur during compilation are few. Some possible errors that may occur in the ladder program are : i) Duplicate Coil: xxxxxxxx is already energized A logic element cannot be energized (i.e. to appear as a coil symbol: ————( ) on the right end of the ladder) by more than one circuit in a ladder program. This is to prevent a situation where one circuit tries to turn it ON while another circuit tries to turn it OFF at the same time, resulting in "contention". For some special functions (such as [Upctr] and [DNctr]) which allow different functions to energize the same element, you will still get this error message if you energized the element more than once using the same function, e.g. using two [DNctr]s for one counter or even a [DNctr] and a ———(CTR) on one counter. ii) Incomplete circuit! Circuit does not energize anything Every ladder logic circuit must finally be connected either to a coil or a special function. A circuit that does not connect to anywhere serves no purpose and is not permitted by TRiLOGI. iii) Illegal circuit expression With the exception of Interlock Off function ———[ILoff], a coil or a special function is not allowed to connect directly to the power line (the vertical line on the left end of the ladder diagram). If you need to permanently enable a coil, consider using the "Normally-ON" bit from the "Special Bits" menu, as follow: 4-15 TRiLOGI Ladder Logic Reference Chapter 4 - Main Menu Reference Alarm ( OUT ) Norm.ON iv) Undefined label xxxxxxxx Normally, you write your ladder logic program by first entering the I/O label definitions into the I/O tables before retrieving them during circuit creation. This means no label would be undefined. However, if you amend or delete a label name in the I/O table after the circuit has been created, the changes are not automatically transferred to the ladder logic circuits. Similarly, if you edit the label in the circuit diagram, the changes will not be transferred back to the I/O tables. When you subsequently re-compile the circuit, the compiler would find a label in the ladder diagram that was not defined in the I/O tables and gives this error message. If you wish to re-name a label after it has been used in the ladder diagram, you need to do the following: a) Change the label in the I/O table. b) Select "Replace Label" command from the "Circuit" menu to replace the old label name used within the ladder diagram with the newly defined label. Syntax Error in Custom Functions Please refer to PART TWO: Chapter 2 - TBASIC Editor and Simulator for description on syntax errors which occur within the custom functions. 2. Simulator Programmable Logic Simulator IN Start Stop Auto Stop IN * . . . . . . . . . . . . . . . . #1 ESC-Abort 2 TIM 1 CTR/SEQ 1 RLY . MaxTime. - Seq1 . - Run . . . . . . . . . . . . . . . . . . . . . . . . . . . . . . . . . . . . . . . . . . . . . . . . - 1 . . . . . . . . . . . . . . . . . RLY 2 . . . . . . . . . . . . . . . . . OUT 1 . Out1 . Out2 . Out3 . Out4 . Out5 . Out6 . Out7 . Out8 . . . . . . . . . < →↓↑←>-Move <Ctrl-Ent>-Toggle <V>-View Variables <P>-Pause/Resume Figure 4.3 4-16 TRiLOGI Ladder Logic Reference Chapter 4 - Main Menu Reference When you invoke the simulator, your display will be occupied by the simulator screen as shown in Figure 4.3. 2.1 General Description The simulator screen comprises 7 columns: Input, Input, Timer, Counter/Sequencer, Relay, Relay, and Outputs, with each column containing up to 20 logic elements. A highlighted window frame indicates that the column has been selected for action (such as scrolling or I/O forcing). Use the left/right cursor key to move the highlighted window frame between columns. <PgUp>/<PgDn> keys will scroll the selected window to the previous page or the following page, respectively. The selected window may be scrolled independently of the rest of the simulator screen. This very flexible windowing system allows you to select the parts of the simulation to be viewed. Note that the inputs and the relays are each displayed in two independent columns. This allows you to view two separate, non-consecutive pages of inputs and relays simultaneously. The logic elements are arranged into pages of 20 elements per page. The Input, Timer, Counter/Sequencer and Output columns have 7 pages (# 1 to #7) each. Altogether there are 128 inputs, 128 timers, 128 counters, 128 outputs and 256 relays. Relay columns have 13 pages (# 1 to #13). The page number for each window is displayed along the top border of the window. When any column is selected, a highlight bar appears within the column which highlights only the label name of the I/O. You may move the highlight bar within the page using the up/down cursor keys. A number appears along the bottom border of the selected window to indicate the I/O number of the highlighted logic element. 2.2 Input, Relay and Output Columns The 2 Input, 2 Relay and 1 Output columns consist of 2 sub-columns each. The wider sub-columns display the label names of individual elements defined in the I/O tables. The narrower sub-columns are "LED" columns which display the ON/OFF states of these logic elements. A red "*" represents a logic element is ON while a gray " . " represents an OFF state. 4-17 TRiLOGI Ladder Logic Reference Chapter 4 - Main Menu Reference The ON/OFF state of each individual input can be controlled. Simply press <Enter> and the input highlighted by the selection bar will toggle its state (i.e. if it is OFF, it will be turned ON and if it ON, it will be turned OFF). Use the cursor key to move the highlight bar to the input whose state you wish to change. The ON/OFF state of an output and a relay is normally controlled by your ladder logic program. If an output or relay coil is energized, it will immediately display the LED ON symbol ("*"). Otherwise it means that the particular output or relay coil has not been energized. 2.3 Force Setting and Resetting an Output or Relay If an output or a relay is not controlled by the ladder program (i.e. it never appears as a coil or assigned to a special function) you can also force its logic state to change. Simply move the highlight bar to the output or relay and press the <Enter> key. If an output or relay is already controlled by the ladder program, pressing <Enter> will toggle the selected element for only one scan time. After this it will be changed to a new value determined by the ladder program. The ladder program will also include the change of state caused by the forced-toggling of the output or relay in the next logic scan. You can also suspend the execution of the program by pressing <P> key first before trying to force an output or relay to toggle. When you resume the execution of the ladder program, the affected output or relay will change immediately to the new value determined by the ladder program. Note that a warning beep can be heard if you force an I/O during program suspension. 2.4 Timer and Counter/Sequencer Columns Each Timer and Counter/Sequencer column comprises 3 subcolumns. The left sub-column displays the label names of the timers and counters/sequencers defined in the I/O definition tables. The middle sub-column is the LED column. The right sub-column displays the current value registers associated with each timer and counter/ sequencer. A " - " in this column indicates that the device is inactive. When a timer is energized, the LED will not be turned ON immediately. Instead, the present value register will display its preset value and begin counting downwards every 0.1 seconds. You can see this in real-time on your simulator screen. If you wish to temporarily cause the timer to pause, press the <P> key on your keyboard and the timer operation will be suspended. To resume the timer operation, press 4-18 TRiLOGI Ladder Logic Reference Chapter 4 - Main Menu Reference the <P> key again. When the timing operation is complete, the present value register will show a value of "0" and the corresponding LED will be turned ON. This means that the timer's contact is activated at this moment. Counter/Sequencer operates in the same way as Timer except that the current value register will be either decreased, increased or reset to inactive state, depending on the type of function that operates on it. If a counter register is used as a sequencer, the counter register will keep track of the current step number of the sequencer. 2.4 Changing Present Values (PV) of Timer and Counter You can also change the Present Value (PV) of a timer or counter. To do this, use the left/right cursor key to select the "TIM" or "CTR/SEQ" window and up/down cursor key to select the element to change. Press the <Enter> key once and a window for you to edit the present value will appear as shown in Figure 3.13 of Chapter 3. You can edit the present value by entering a new value at the cursor position. The amount you have changed will be recorded in the "Last change" field. The "Net Total Change" field, as its name suggests, records the net amount of changes you have made to the particular timer or counter. Each timer and counter has its own "Net Total Change" data kept in memory during the entire TRiLOGI session. These can only be cleared when you press the <Ctrl-C> key. Note that you may also edit the P.V. of a counter or sequencer in a similar manner. Since the <Enter> key is used to bring up the P.V. editor for the timer and counter windows, you can only use <Ctrl-Enter> key if you wish to force the timer's or counter's contact to change. To quit from the Simulator and return to the Editor, hit the <ESC> key. The ON/OFF states of all I/Os, Timers and Counters/ Sequencers will be preserved. Any on-going timing operation will be suspended. 3. Description of Command Items 3.1 Continue run <F9> Activate this command and the states of all I/Os as well as the current values for all timers and counters that resulted from previous runs will be retained and execution continues from there. 4-19 TRiLOGI Ladder Logic Reference Chapter 4 - Main Menu Reference 3.2 Run (all I/Os reset) <Ctrl-F9> This command resets all inputs, outputs, relays, timers and counters to logic '0' and refresh the screen to reflect their logic states in the ladder diagram. 3.3 Run (i/os reset except i/p) <Ctrl-F8> This command preserve the logic state of all inputs, but resets all outputs, relays, timers, counters and all internal variables to logic '0' and refresh the screen to reflect their logic states in the ladder diagram. This command is useful because many control systems often assume certain initial input states which must be set correctly before the simulation may start. 3.4 Only Compile Use this command to compile your program without executing it. The main purpose is to check the program syntax and the size of the compiled code. When TRiLOGI has successfully compiled your program, the number of program words used by the ladder program section and the custom functions (Version 4.1 only) are reported separately on screen. A blinking "Success" message will also be shown in the compilation window. If an error is found in your program, compilation will halt at the circuit number where the error took place. the user-program memories are expressed in terms of 16-bit “words”. Every ladder logic element, including timer, counter and special function coil occupies one word. Every TBASIC command occupies from 1 to multiple words, depending on the number of operands and the type of operands (16-bit or 32-bit) involved. The number of words occupied by the ladder logic and the CusFns are reported separately when you execute the “Only Compile” command. 3.5 All I/Os Reset <Ctrl-R> Use this command to reset the state of all I/Os and make all timers and counter inactive. All internal variables will be reset to zero. Note that this command shares the same hot-key “Ctrl-R” with that of the “All I/Os Reset” command in the “Controller” menu. What will happen is if the host computer is linked to the PLC using the on-line monitoring commands, the Ctrl-R key will reset the target PLC. If the host PC is offline, then only the simulator I/Os and internal variables will be reset. The PLC will not be affected. 4-20 TRiLOGI Ladder Logic Reference Chapter 4 - Main Menu Reference 3.6 Silent Operation (Version 4.1 only) Some TBASIC instructions such as PRINT, INPUT$, ADC, etc. always pop up a message window during simulation. These messages may appear repeatedly and interfere with normal simulation. If you wish to suppress the appearance of these windows, simply execute the “Silent Operation” command and select either to “Suppress All Messages” or “Allow Only ADC inputs”. This setting will not be saved in the configuration file. VI. The Print Menu Commands in this menu enable you to print out your work in many different ways. You can even direct the printing operation to a DOS file so that it can be printed later, or incorporated into your favorite word processor for comprehensive documentation of your design. If you are printing to the printer for the first time, activate the "Setup" command first to select your printer type. A list of the commonly used printers today will be shown. If your printer is not listed, you can manually enter the printer control codes. Always get the printer ready before executing any print command. After a printing job has commenced, you can still abort it by pressing the <Ctrl-Break> keys. 1. I/O Tables A selection menu will pop up on the screen allowing five options: a) Combined - b) Input c) Output d) Relay e) Timer f) Counter g) All - print all the five types of I/Os: inputs, outputs, relays, timers and counters on the same page. This is the most commonly used command for I/Os. You will be prompted to select the range. Pressing <Enter> at the prompt will print only first page. print all 128 inputs in one page. print all 128 outputs in one page. print all 256 relays in one page. print all 128 timers in two pages. print all 128 timers in two pages. Print all the 5 types of tables one after another. 2. Label-name Logic Execute this command to print out the ladder logic diagram with all contacts and coils marked by their label names. A message window prompts you for the range of the ladder circuits you wish to print. If you 4-21 TRiLOGI Ladder Logic Reference Chapter 4 - Main Menu Reference wish to print from the first to the last circuit, simply press <Enter> to respond to the Circuit # prompt. Press <ESC> key if you wish to abort this command anytime. 3. Custom Functions (Version 4.1 Only) This command allows selective printing of the range of Custom Functions from CusFn #1 to 256. CusFns that have not yet been defined will not be printed. 4. Destination You can choose to print your I/O tables or the ladder diagram on your printer or save the printed output as a DOS text file. This allows you to print them later (deferred printing) or load them into a word processor to generate design documentation. The first time you select any printing item before specifying the destination, a menu will pop up for you to choose the destination. The default is “DOS File” unless you change it to “Printer”. An "ON" sign to the right of the menu item indicates the selected destination. If the print destination is “DOS File”, you will be prompted to enter the name of the text file you wish to save as a print file before the printing starts. A default name is always the currently loaded TRiLOGI file name followed by an extension “.PRT” (Note: In Version 3.3 & 3.3E only the default name will be used, you will not be asked to enter the filename.) The selected destination will stay throughout the current TRiLOGI session unless you manually change it using the “Destination” command in the “Print menu”. 5. Printer Setup This command allows you to select your printer type and define printer control codes to be sent to your printer before and after printing. When activated, a pop-up menu with a list of some of the more commonly used printers in the market today is available for your selection. Future release of the TRiLOGI Version 4.x may carry more choices. If your printer is among the list, then select it with the cursor and the system will automatically configure the correct starting codes to the printer. If your printer is not among the list you still can configure the printer yourself by selecting the first item: “User-Defined”. When this option is selected, an additional menu pops up for you to manually enter the graphic font type and the printer control codes, as follow: 4-22 TRiLOGI Ladder Logic Reference Chapter 4 - Main Menu Reference a) Graphic Font When selected, you will be asked to select either "IBM Graphics Char" or "Generic Printers". Read the explanation which accompany the selection menu and choose the correct printer type. If your printer is unable to print the IBM graphics character set, then you must select the "Generic Printer" option to obtain a proper ladder logic printout. If configured properly, most printers today will most likely be able to print graphics characters such as: Ã, Å, Â, Á, Ù, ´, etc. which are needed to print out nice-looking ladder diagram. These characters are found in character sets with name such as: USA Code Page 437, PC-8, etc. Please refer to your printer manual for details. Generic Printers If you select “Generic Printers”, then TRiLOGI will substitute the graphic character with generic symbols such as -,|,+, etc. The resulting print-out will still be legible as ladder diagrams, just less appealing to the human eyes. If you have problems defining the starting codes and ending codes for your printer, and setting “Graphic Font” to “IBM Graphic char” gives you garbage print-out, then you have to select “Generic Printer” for a quick fix if you are in a hurry to print out your ladder diagram. Printing to DOS File: DOS and Windows Wordprocessor Printings which are saved as DOS text file are also affected by the definition of the “Graphic Font” type. If you have directed your printing to a DOS Text file with the “IBM Graphics Char” choice, you can read it into any DOS word processor that can read the IBM Extended ASCII character set. If you are using a Windows-based word processor, you have to select all the content of the file and change their font to: “MS Linedraw” for proper display of the graphic characters. b) Starting code As mentioned before, we want to configure the printers so that it can print out the ladder program in our desired format. There are two ways to achieve the correct printer setup: one is by manually 4-23 TRiLOGI Ladder Logic Reference Chapter 4 - Main Menu Reference pressing some selection button built-in on the printer front panel (check your printer manual); the other way is to send special characters to the printer to tell it to configure itself properly. These special characters are known as or “Escape codes” because they are typically pre-fixed with an ESCAPE character (ASCII 2710, or 1A16) ,followed by a string of normal ASCII characters. For ladder diagram to print properly on typical A4 or US Letter size paper, we should configure the printer as follow: i) Select a fixed-pitch character set which supports IBM graphic characters, the most commonly used character set is USA Code Page 437. ii) Select a pitch of 12 characters-per-inch (CPI). This allows us to set a left margin for the print out and still can fit the entire circuit (which occupies 80 characters) within the width of the A4 paper. iii) Set the left margin to 8 characters. This will center the print out. You can choose a larger margin if you want to offset the print out slightly to the right. When selected, you will be shown a prompt window with instructions on how to define the print control codes. To define a control string, enter them directly into the box area. For the ESCAPE character which cannot be entered directly from the keyboard, enter it as “\x1A” which instruct TRiLOGI to treat this as a special character which stands for hexadecimal 1A (decimal 27). c) Ending code Although seldom required, the "End code" command allows you to define printer control codes to set your printer back to its normal operating mode after printing. You define the ending control codes in exactly the same way as you define the start control codes. The starting and ending codes defined in the "Print" menu will be saved in TRiLOGI's configuration file, "TL4CONFI.TRI" when you quit and is retrieved automatically the next time you run TRiLOGI. Note that if you select another printer from the “Printer Select” menu, the “starting codes” and the “ending codes” will be changed to escape codes to control that particular printer. 4-24 TRiLOGI Ladder Logic Reference Chapter 4 - Main Menu Reference VI. The Option Menu This menu enables you to make some modifications to customize TRiLOGI to work better with your hardware. Most of the changes you make by executing various commands in this menu will be saved in TRiLOGI's configuration file "TL4CONFI.TRI" when you quit. The next time you start up TRiLOGI, it will automatically search for the file and restore your choices as default. 1. Video Display Activate this command and you can configure TRiLOGI to work with either colour or monochrome monitors. 2. Sound Whenever an illegal condition occurs, TRiLOGI will alert you by sending an audible "Beep" sound. You are at liberty to change the frequency and duration of the beep sound to a level you are comfortable with. You can even turn off the beeper altogether if you so wish. Execute the "Beep Test" command to hear the sound that you have selected. Your sound definition will be saved by TRiLOGI when you quit. 3. Logic Label When you activate this command, a selection menu appears. You can choose to display the ladder logic program using either the label names or the internal channel and bit number representation displayed as CH:Bit. E.g. Input #13 internally occupies Bit #12 of Input channel #1 and is represented as "i01:C". You can find the channel and bit number of any label by looking at the rightmost column marked "CH:Bit" in their respective I/O table. 4-25 Chapter 5 Ladder Editor Reference TRiLOGI's ladder logic editor window lies between the main menu bar along the top of the screen and the help message line along the bottom of the screen. The cursor will appear in the window whenever you are in the logic editor. I. The Browse Mode The ladder logic editor comprises two modes: the browse mode and the circuit editing mode. We shall detail the operation of both modes in this chapter. When you first enter the logic editor from the main menu, you will be placed immediately in the browse mode of the editor. The cursor becomes a blinking underscore ("_" ) and is always positioned along the extreme left end of the screen. The browse mode allows you to manipulate the whole logic circuit as a single entity: you can view any circuit, make copies of it, move it to another location or delete it entirely. The functions of various keys in the browse mode are explained below: 1. <ESC> Activate <ESC> to leave the logic editor to return to the main menu. 2. Up/Down cursor keys and <PgUp> and <PgDn> keys Use the up/down cursor keys to move the cursor to other circuits and the "Circuit #" display at the status line will simultaneously reflect the change. If you attempt to venture beyond the screen, the logic editor screen will scroll. The <PgUp> and <PgDn> keys can be used to scroll one page at a time. Press <Ctrl-PgUp> and <Ctrl-PgDn> to navigate respectively to the first and the last circuits of the entire program. 3. Left/Right cursor keys and <Home/End> keys. TRiLOGI permits a circuit to span beyond the horizontal width of the screen. The left and right cursor keys are for scrolling the circuit horizontally to view those parts of the circuit which are beyond the screen. The <Home/End> keys are quick ways of moving to the leftmost and rightmost ends of the circuit. 5-1 TRiLOGI Ladder Logic Reference Chapter 5 - Ladder Editor Reference 4. <Ins> From within the browse mode, hitting <Ins> key will open up the "Circuit" local menu. Functions of various commands in this menu will be discussed in detail in the next section. 5. <Spacebar> You only need to press the <Spacebar> on your keyboard to enter the circuit editing mode immediately. II. The "Circuit" Local Menu Open the "Circuit" menu by pressing the <Ins> key when you are in the browse mode. See Figure 6.1. Commands in this menu are designed for manipulating whole circuits and not the individual contacts or coils that make up a circuit. You are at liberty to insert, delete, move or duplicate a circuit. File start Edit Controller Simulate Circuit # Em 1 erstop Print Option Circuit C:DEMO.PC3 Edit Run Append (R L Y) G o t o Duration Run Insert (T I M ) Delete Seq1 Clk : 0 . 1 sR u n D u r a t i o n FwdRev Move [ AVseq ] Copy Clk : 0 . 1 sR u n D u r a t i o n FwdRev Seq1 K i l l A l l C[RSseq i r c u i t s] Kill All CusFn Hello, welcome to the comment feature of Replace Label Y o u aTRiLOGI re allowe ent to describe !!d t o e n t e r u p t o 3 l i n e s p e r c o m m Find Label f e a t u r e o r p u r p o s e o f t h e f o l l o w i n g any Put Comments i rtci o un its. D ucr a MaRST [M a R S T ] Select a circuit manipulation function 1. Edit Figure 5.1 Execute this command to go from browse mode to circuit editing mode. Experienced users will find it far more convenient to use the <Spacebar> to achieve this. 5-2 TRiLOGI Ladder Logic Reference Chapter 5 - Ladder Editor Reference 2. Append Execute this to add a new circuit to the ladder logic program. This new addition will be positioned immediately after the last circuit in the entire program. 3. Goto Use this command to move towards a specific circuit number. The "Goto" command is particularly useful if your program consists of many circuits, and it is inconvenient to search for a particular circuit using cursor keys or <PgUp>/<PgDn> keys. 4. Insert The "Insert" command enables you to insert a new circuit just before the current circuit. The current circuit number will be increased by one while the new circuit will assume the current circuit number. You will be placed in the circuit editing mode for immediate circuit creation. 5. Delete This command allows you to delete the entire current circuit. You will be prompted to confirm the deletion. 6. Move Execute "Move" if you need to rearrange the order of the circuits in your program to facilitate cross-referencing. You will be prompted to move the cursor to the destination circuit and press <Enter>. The current circuit will be transferred to a position just before the destination circuit. 7. Copy Should you require an exact replica of the current circuit to be placed anywhere in the program, activate the "Copy" command. Sometimes you might be designing a couple of circuits which, except for one or two elements, are almost identical. In this case, create only one circuit first. Then copy this circuit and position it at the desired destination. Subsequently, go into the circuit editing mode and execute the "Edit label" command from the "Ins Element" local menu, or simply press the <E> key to change the component label name. 8. Kill All Circuits If you wish to write a new ladder logic program using the i/os defined for the existing program, this command is a real life-saver! First, save the current program to a new name before executing the "kill" command. 5-3 TRiLOGI Ladder Logic Reference Chapter 5 - Ladder Editor Reference All the ladder logic circuits will be erased at once, but the I/O tables will remain intact in memory. You are then ready to create new circuits for your new program. 9. Kill All CusFn This function lets you clear all custom functions in memory without deleting the ladder circuits or the I/O label names. A quick way to clean up a messy project and restart again. 10. Replace Label Should you alter or delete a label name in an I/O table which has been used to create a ladder logic, and subsequently compile the program, you will receive the error message: "Label name undefined". To rectify the problem, use the "Replace Label" command. When executed, you will be prompted for the old label name and the replacement label name. All elements in the entire ladder logic program that use the old label name will instantly have their names replaced by the new one. You will be informed about the total number of replacements. 11. Find Label This useful command lets you quickly locate circuits which contain a particular label. Enter the label name that you wish to find and TRiLOGI will search for it starting from Circuit #1. Once a circuit containing the label is found, the cursor will be positioned at that circuit. If you wish to continue to search other circuits for the same label, just press any key and TRiLOGI will continue the search. If you have located the label that you are looking for, stop the search by pressing the <ESC> key. 12. Put Comments Comments are specific remarks used by a programmer to explain various characteristics of a program segment and are ignored by the compiler. TRiLOGI Version 3.1 allows comments to be freely inserted between circuits. Execute this command and you will be positioned in the Comment Editor. The comment editor allows you to enter up to 3 lines (up to 70 characters per line) of text description per comment. The functions of editing keys are as follow: <Home>,<End> - places cursor at beginning/end of line. <Enter> - moves cursor to the next line. <ESC> - quits comment editor. < ↑↓→ ← > - navigates within the comment-circuit. <Ctrl → > - jumps to the first char of next word. 5-4 TRiLOGI Ladder Logic Reference <Ctrl ← > Chapter 5 - Ladder Editor Reference - jumps to the first char of last word. Once a comment has been created, it is assigned a circuit number and is treated like any other circuits. You can edit it by pressing the <spacebar> when you are in Browse mode, alternatively, you can move it around, copy it to another destination or delete it entirely using commands in the "Circuit" menu. III. The Circuit Editing Mode TRiLOGI comes with a smart editor which allows you to insert or delete a single element within a circuit easily. The editor interprets your circuit immediately upon entry and prevents you from creating illegal circuit connections. The functions of various keys in circuit editing mode are detailed below. 1. Left/Right/Up/Down cursor keys The cursor keys are for manipulating the cursor and/or highlight bar from one component to another in their four respective directions. A beep will sound if you attempt to move in a direction that has no components. When you move a highlight bar away from a contact that is enclosed by a parallel branch and a circuit junction exists along its path, the highlight bar will temporarily disappear and the cursor will stop at the junction. You may treat the junction as a single terminal and connect a series contact to it. 2. <ESC> key Press <ESC> key to end the circuit editing mode and return to the browse mode of the logic editor. 3. <Enter> When you are done with editing the current circuit, hit <Enter> to proceed to the next circuit. 4. <Ins> key Press this key to open the "Ins Element" local menu for selecting the type of component to be added to the circuit while in the circuit editing mode. The functions of each component will be described in the next section. 5-5 TRiLOGI Ladder Logic Reference Chapter 5 - Ladder Editor Reference 5. <Tab> key The moment an element of a circuit is selected, it will be highlighted. If the element is a contact, the cursor will normally be stationed at its right arm. This cursor indicates the location where a series element can be connected. You may change the position of the cursor by pressing the <Tab> key. Each time you press the <Tab> key, the cursor switches its position between the left and the right ends of the highlighted element. Note: The position of the cursor has no effect when you connect a parallel contact to the highlighted element. The left terminal of the element will always be connected to the left side of the parallel branch. 6. <0> to <9> , </> & <E> keys Each of the numbers from 0-9 represents a specific element type contained in the "Ins Element" menu. If you remember each individual element and its corresponding number, you will be able to call up the element for insertion by pressing <0> to <9> keys. This saves you the step of having to activate the "Ins Element" menu in order to select the desired element type. The </> key is the quickest way of converting a normally-open contact to a normally-closed one (and vice versa). Simply move the highlight bar to the element to be changed and press the </> key. You can also achieve the same from the "Ins Element" menu. File start Edit Controller Simulate Circuit #E 1 merstop Print Ins Element Option C:DEMO.PC3 1: Run 2: (RLY ) Duration 3: Run (T I M ) 4: Seq1 Clk: 0 . 1 sR u n D u r a t i o n FwdRev 5: [ AVseq ] 6: Clk : 0 . 1 sR u n D u r a t i o n FwdRev Seq1 ( ]) 7: [RSseq 8: ( ) Hello, welcome to the comment feature of 9: [ Func] Y o u aTRiLOGI!! r e a l l o w e d t o e n t e r u p t o 3 l i n e s p e r c o m m e n0t : t o d e s[ Func] cribe af e na yture or purpose of the following E: Edit Label D ucircuits. ration /: NMaRST ot [ M (Invert)a R S T] Select an element to be connected Figure 5.2 5-6 TRiLOGI Ladder Logic Reference Chapter 5 - Ladder Editor Reference Pressing the <E> key when a contact or coil is selected allows you to edit the label name directly. Note that it is the user's responsibility to ensure that the label is valid. IV. The "Ins Element" Local Menu To open this local menu when you are in the circuit editing mode, simply press the <Ins> key. You will see a list of symbols as shown in Figure 5.2 1: A normally-open contact, to be connected in series to the current cursor position. 2: A normally-closed contact, to be connected in series to the current cursor position. 3: A normally-open contact, to be connected in parallel to a single, currently highlighted element. 4: A normally-closed contact, to be connected in parallel to a single, currently highlighted element. 5: A normally-open contact, to be connected in parallel to one or more series-connected elements. 6: 5-7 TRiLOGI Ladder Logic Reference Chapter 5 - Ladder Editor Reference A normally-closed contact, to be connected in parallel to one or more series-connected elements. 7: 8: ( ) This symbol is used to connect a coil to a ladder logic circuit, be it an output coil, relay coil, timer coil or counter coil. You may insert a series contact before but not after the coil. ( ) This symbol is used to connect a coil in parallel to an existing coil or special function. This symbol can only be selected if there is already an existing coil or special function. 9: [FUNC] This command is used to activate a special function described in Chapter 6. 0: [FUNC] This command is used to connect a special function in parallel to an existing coil or special function. The command can only be selected if there is already an existing coil or special function. E: Edit Label You can directly change the label of any contact or coil by executing this command. Note that it is the user's responsibility to ensure that the label is valid. /: NOT (Invert) Execute this command to change a normally-open contact to normally-closed and a normally-closed contact to a normally-open one. 5-8 Chapter 6 Special Bits & Functions I. Special Bits TRiLOGI contains a number of special purpose bits that are useful for certain applications. These include 8 clock pulses for TRiLOGI Version 4.1 (only 6 for Version 3.3 and 2 for Version 3.3E) ranging from periods of 0.01 second to 1 minute, a "Normally-ON" flag and a "First Scan Pulse", etc. To use any of these bits, enter the ladder editor and choose to create a "contact"; when the I/O table pops up, use the left/right cursor keys to change the window until a "Special Bits" menu pops up. This menu is located after the "Counter Table" and before the "Input" table. as shown in Figure 6.1. File Edit Controller Option start stop Simulate Step x Auto MaxTime x 1. Clock pulse bits Ins Element Special Bit 1: Sequencer 1 2: Sequencer 2 3: Sequencer 3 4: Sequencer 4 [AVseq] 5: Sequencer 5 6: Sequencer 6 7: Sequencer 7 8: Sequencer 8 9: Normally ON Flag 0: First Scan Pulse A: 0.01s Clock Pulse B: 0.02s Clock Pulse C: 0.05s Clock Pulse D: 0.1s Clock Pulse E: 0.2s Clock Pulse F: 0.5s Clock Pulse G: 1.0s Clock Pulse H: 1 min Clock Pulse I : Real Time Clk Err Run Run Print Run ( RLY ) Maxtime ( TIM ) Seq1 [AVseq ] Figure 6.1 The 6 clock pulses supported by TRiLOGI are: Clock Pulse Period Ladder Symbol 0.01 second 0.02 second 0.05 second * 0.1 second 0.2 second 0.5 second * 1.0 second 1 minute Clk:.01s Clk:.02s Clk:.05s Clk:0.1s Clk:0.2s Clk:0.5s Clk:1.0s Clk:1min * Available only in Version 4.1 6-1 TRiLOGI Ladder Logic Reference Chapter 6 - Special Bits & Functions A clock pulse bit is ON for the first half of the rated period, then OFF for the second half. Duty cycles for these clock pulse bits are therefore 50%, as follow: Clk:0.1s (0.1 second Clock Pulse) 0.05s 0.05s Figure 6.2 The clock pulse bits are often used with counter instructions to create timers. Additionally, they can be used as timing source for "Flasher" circuit. A reversible counter can also work with a clock pulse bit to create secondary clock pulses of periods that are multiples of the basic clock pulse rate. 2. Normally ON Flag - Norm.ON You can make use of this flag if you need to keep something permanently ON regardless of any input conditions. This is because with the exception of Interlock Off function ———[ILoff], a coil or a special function is not allowed to connect directly to the power line (the vertical line on the left end of the ladder diagram). If you need to permanently enable a coil, consider using the "Normally-ON" bit from the "Special Bits" menu, as follow: Light ( OUT ) Norm.ON Figure 6.3 3. First Scan Pulse - 1st.Scan This special bit will only be turned ON in the very first scan time of the ladder program. After that it will be permanently turned OFF. This is useful if you need to initialize certain conditions at the beginning. When the program is transferred to the PLC, this bit will only be ON when the PLC is first powered up or after it has been reset. 6-2 TRiLOGI Ladder Logic Reference Chapter 6 - Special Bits & Functions 4. Real Time Clock Error - RTC.Err This bit is turned ON if the M-series PLC does not have battery-backed MXRTC option and the clock has been reset due to power failure or watchdog timer reset. This gives warning to applications that require a correct real world time (such as scheduled ON/OFF operation) that the clock data is incorrect so that corrective action can be taken. II. Special Functions When you choose item "9" or "0" from the "Ins Element" menu, a special function menu will pop up as shown in the following figure: File Edit start Controller stop Run Run Step Auto Simulate Print Select a Function 1: Decrement Rev. Counter 2: Reset. Counter 3: Increment Rev. Counter 4: Advance Sequencer 5: Reset Sequencer 6: Set Sequencer to Step N Maxtime 7: Latching Relay 8: Clear Latching Relay 9: Interlock Begin A: Interlock End B: Differentiate Up C: Differentiate Down D: Custom created Function E: Diff. Up Custom Functn F: Master Reset Ins Element [DNctr] [Upctr] [RSctr] [AVseq] [RSseq] [StepN] [Latch] [Clear] [ILock] [ILoff] [ δ DIFU] [δ DIFD] [CusFn] [δ CusF] [MaRST] Run ( RLY ) Maxtime ( TIM ) Figure 6.4 1. Reversible Counter Function: [DNctr], [Upctr] and [RSctr] The [DNctr], [UPctr] and [RSctr] functions work together to implement reversible counter functions on any of the 128 counters supported by TRiLOGI. ( ) " under the "Ins The ordinary down-counter (created by the Item " 7: Element" menu) essentially decrements the counter value by 1 from the "Set Value" (SV) and will stop when its count becomes zero. Unlike the ordinary down-counter, a reversible counter is a circular counter which changes the counter present value (PV) between 0 and the SV. When you try to increment the counter pass the "Set Value", it will overflow to become '0'. Likewise if you try to decrement the counter beyond '0', it will underflow to become the "Set Value". 6-3 TRiLOGI Ladder Logic Reference Chapter 6 - Special Bits & Functions All three counter functions [DNctr], [UPctr] and [RSctr] can operate on the same counter (i.e. assigned to the same counter label) on different circuits. Although these circuits may be located anywhere within the ladder program, it is recommended that the two or three functions which operate on the same counter be grouped together in the following order: DNctr], [Upctr] and [RSctr]. Note that NOT all three functions need to be used to implement the reversible counter. Decrement Counter [DNctr] Execution condition of [DNctr] function ON OFF SV SV-1 Counter's Present Value(PV) 0002 SV-2 0001 0000 ON Counter's contact OFF Figure 6.5 Each time when the execution condition of a [DNctr] function changes from OFF to ON, the present value of the designated counter is changed as follow: a) If the counter's present value (PV) is inactive, load the counter register with the "Set Value" (SV, defined in the Counter table) minus 1. Note: Owing to historical reasons, the counters in TRiLOGI Version 3.3 and 3.3E are loaded with the SV when they are first activated instead of SV1 as described above, which is used by TRiLOGI Version 4.1. The latter method is more commonly implemented among other industrial PLCs and hence was adopted by Version 4.1. b) If the counter’s present value (PV) is already ‘0’, then load the counter’s PV with the SV defined in the counter table and turn on the counter's contact (also known as the completion flag). c) Otherwise, decrement the counter PV register by 1. 6-4 TRiLOGI Ladder Logic Reference Chapter 6 - Special Bits & Functions Increment Counter [Upctr] Each time when the execution condition of an [Upctr] function changes from OFF to ON, the present value of the designated counter is affected as follow: a) If the counter is inactive, load the counter register with the number '0001'. b) If the counter's present value (PV) is equal to the Set Value (SV, defined in the Counter table), load the counter register with number '0000' and turn on the counter's contact (also known as the completion flag). c) Otherwise, increment the counter PV register by 1. Execution condition ON of [Upctr] function OFF SV SV-1 Counter's Present Value(PV) 0002 SV-2 0001 0000 ON Counter's contact OFF Figure 6.6 Reset Counter [RSctr] When the execution condition of this function changes from OFF to ON, the counter will reset to inactive state. This function is used to reset both a reversible counter and an ordinary down-counter coil. 2. Sequencer A sequencer is a highly convenient feature for programming machines or processes which operate in fixed sequences. These machines operate in fixed, clearly distinguishable step-by-step order, starting from an initial step and progressing to the final step and then restart from the initial step again. At any moment, there must be a "step counter" to keep track of the current step number. Every step of the sequence must be accessible and can be used to trigger some actions, such as turning on a motor or solenoid valve, etc. 6-5 TRiLOGI Ladder Logic Reference Chapter 6 - Special Bits & Functions As an example, a simple Pick-and-Place machine that can pick up a component from point 'A' to point 'B' may operate as follow: Step # 0 1 2 3 4 5 6 7 8 Action Wait for "Start" signal Forward arm at point A Close gripper Retract arm at point A Move arm to point B Forward arm at point B Open gripper Retract arm at point B Move arm to point A TRiLOGI Version 3.3 and Version 4.1 supports eight sequencers of 32 steps each, whereas Version 3.3E supports only 1 sequencer. Each sequencer uses one of the first eight counters (Counter #1 to Counter #8) as its step counter. Any one or all of the first eight counters can be used as sequencers "Seq1" to "Seq8". To use a sequencer, first define the sequencer name in the Counter table by pressing the <F6> key. Any counter to be used as sequencer can only assume label names "Seq1" to "Seq8" corresponding to the counter numbers. For e.g. if Sequencer #5 is to be used, Counter #5 must be defined as "Seq5". Next enter the last step number for the program sequence in the "Value" column of the table. Construct a circuit that uses the special function "Advance Sequencer" [AVSeq]. The first time the execution condition for the [AVseq] function goes from OFF to ON, the designated sequencer will go from inactive to step 1. Subsequent change of the sequencer's execution condition from OFF to ON will advance (increment) the sequencer by one step. This operation is actually identical to the [UPctr] instruction. The upper limit of the step counter is determined by the "Set Value" (SV) defined in the Counter table. When the SV is reached, the next advancement of sequencer will cause it to overflow to step 0. At this time the sequencer's contact will turn ON until the next increment of the sequencer. This contact can be used to indicate that a program has completed one cycle and is ready for a new cycle. 6-6 TRiLOGI Ladder Logic Reference Chapter 6 - Special Bits & Functions Accessing individual steps of the sequencer is extremely simple when programming with TRiLOGI. Simply create a "contact" (NC or NO) using items under the "Ins Element" menu. When the I/O window pops up for you to pick a label, use the left/right cursor keys to change the window until a "Special Bit" menu pops up as shown in Figure 6.7 The "Special Bit" menu is located between the "Counters" table and the "Inputs" table. Select a sequencer from the menu. A "Select #" menu pops up to let you pick the step number (0 to 31) that you wish to use for this contact. File Edit Controller Simulate Print Option Clk.01s Clk.01s Inserting Type 1 ——| |—— Ins Element Special Bit 1: Sequencer 1 2: Sequencer 2 3: Sequencer 3 4: Sequencer 4 5: Sequencer 5 6: Sequencer 6 7: Sequencer 7 8: Sequencer 8 9: Normally ON Flag 0: First Scan Pulse A: 0.01s Clock Pulse B: 0.02s Clock Pulse C: 0.1s Clock Pulse D: 0.2s Clock Pulse E: 1.0s Clock Pulse F: 1min Clock Pulse Figure 6.7 Each step of the sequencer can be programmed as a contact on the ladder diagram as "SeqN:XX" where N = Sequencers # 1 to 8. XX = Steps # 0 - 31. e.g. Seq2:4 = Step #4 of Sequencer 2. Seq5:25 = Step #25 of Sequencer 5. Although a sequencer may go beyond Step 31 if you define a larger SV for it, only the first 32 steps can be used as contacts to the ladder logic. Hence it is necessary to limit the maximum step number to not more than 31. Resetting Sequencer - [RSseq] The sequencer can also be reset to become inactive by the [RSseq] function at any time. Note that a sequencer that is inactive is not the same as sequencer at Step 0, as the former does not activate the SeqN:0 contact. To set the sequencer to step 0, use the [StepN] function described next. 6-7 TRiLOGI Ladder Logic Reference Chapter 6 - Special Bits & Functions Setting Sequencer to Step N - [StepN] In certain applications it may be more convenient to be able to set the sequencer to a known step asynchronously. This function will set the selected sequencer to step #N, regardless of its current step number or logic state. The ability to jump steps is a very powerful features of the sequencers. Reversing Sequencer Although not available as a unique special function, a Sequencer may be stepped backward (by decrementing its step-counter) using the [DNctr] command on the counter that has been defined as a sequencer. This is useful for creating reversible sequencer or for replacing reversible "drum" controller. Other Applications a. Driving Stepper Motor A sequencer may be used to drive a stepper motor directly. A two-phase stepper motor can be driven by four transistor outputs of the controller directly (for small motors with phase current < 0.5A) or via solid-state relays. The stepper motor can be driven using a sequencer that cycles through Step#0 to Step#3 (full-step mode) or Step#0 through Step#7 (half-step mode). Each step of the sequencer is used to energize different phases of the stepper motor. A clock source is needed to drive the stepper motor through its stepping sequence. The stepping rate is determined by the frequency (which is equal to 1/period) of the clock source. Clock pulses with periods in multiples of 0.01 second can be generated easily using the "Clk:.01s" bit and an [Upctr] function. For e.g., to generate a clock source of period = 0.05s, use "Clk.01s" to feed to an [Upctr] counter with Set Value = 4. The counter's contact (completion flag) will be turned ON once every 5 counts (0,1,2,3,4), which is equivalent to a 0.05 sec. clock source. 6-8 TRiLOGI Ladder Logic Reference Chapter 6 - Special Bits & Functions b. Replacing a Drum Controller 0 1 2 3 4 5 6 7 0 1 2 3 OutputA OutputB Figure 6.8 A drum controller can be replaced easily by a sequencer if the timing of the drum's outputs can be divided into discrete steps. Assuming a drum controls two outputs with the timing diagram shown in Figure 6.8 This can be replaced by an 8-step sequencer. Step 1 (e.g "Seq1:1") turns ON and latch Output A using [Latch] function, Step 2 turns ON and latch Output B, Step 4 turns OFF Output A using the [Clear] function, and Step 6 turns OFF Output B. All other steps (3,5,7,0) have no connection. Program Example Assume that we wish to create a running light pattern which turns on the LED of Outputs 1 to 4 one at a time every second in the following order: LED1, LED2, LED3, LED4, LED4, LED3, LED2, LED1, all LED OFF and then restart the cycle again. This can be easily accomplished with the program shown in Figure 6.9. 6-9 TRiLOGI Ladder Logic Reference Chapter 6 - Special Bits & Functions Clk1.0s Seq2 [AVseq] Seq2:1 LED1 (OUT) Seq2:8 LED2 (OUT) Seq2:2 Seq2:7 LED3 (OUT) Seq2:3 Seq2:6 LED4 (OUT) Seq2:4 Seq2:5 Seq2 [RSseq] Stop Figure 6.9 The 1.0s clock pulse bit will advance (increment) Sequencer #2 by one step every second. Sequencer 2 should be defined with Set Value = 8. Each step of the sequencer is used as a normally open contact to turn on the desired LED for the step. A "Stop" input resets the sequencer asynchronously. When the sequencer counts to eight, it will become Step 0. Since none of the LED is turned ON by Step 0, all LEDs will be OFF. 3. Latch Relay Function [Latch] Latching relay is convenient for keeping the status of an execution condition even if the condition is subsequently removed. The program elements that are assigned as Latching Relays will remain ON once they are energized. Only Relays and Outputs may be assigned as Latching Relays. On selecting [Latch] function, you can use the left/right keys to move between the Relay and Output tables. Move the highlight to the desired program element and hit <Return>. The desired program element will now be assigned as a Latching Relay. You will be able to see the label name of the program element above the [Latch] symbol in the ladder diagram. 6-10 TRiLOGI Ladder Logic Reference Chapter 6 - Special Bits & Functions Although latch-relay can be used in place of self-latching (Seal) circuits, a latch-relay in an interlock section will not be cleared when the interlock occurs. Only a self-latching circuit as shown in the following will be cleared in an interlock section: Start Stop CR1 (RLY) CR1 Figure 6.10 Clearing a Latched Bit To de-energize a program element that has been latched by the [Latch] function, it is necessary to use [Clear] function. On selecting [Clear], choose the output or relay to be de-energized. When the execution condition for that circuit is ON, the designated output or relay will be reset. In the ladder diagram, the program element label name will be shown above the [Clear] symbol. If the execution condition for [Latch] and [Clear] functions are both ON at the same time, then the effect of the designated bit depends on the relative locations of these two functions. Remember that an output or relay bit energized by [Latch] will remain ON until it is turned OFF by [Clear]. It is recommended that [Clear] circuit be placed just after the [Latch] circuit for the same output or relay controlled by these two functions. This ensures that [Clear] function has higher priority over [Latch] function, which is normally so in hardware latch-relay or other industrial PLCs. 4. Interlock [ILock] The "Interlock" [ILock] and "Interlock Off" [ILoff] functions work together to control an entire section of ladder circuits. If the execution condition of an [ILock] function is ON, the program will be executed as normal. If the execution condition of [ILock] is OFF, the program elements between the [ILock] and [ILoff] will behave as follow: a) all output coils are turned OFF. b) all timers are reset to inactive. c) all counters retain their present values. d) Latched relays by [Latch] function are not affected. e) [δDIFU] and [δDIFD] functions are not executed. f) all other functions are not executed. 6-11 TRiLOGI Ladder Logic Reference Chapter 6 - Special Bits & Functions An Interlock section is equivalent to a master control relay controlling a number of sub-branches as follow: Master [ILock] LS1 LS2 overheat SW1 CR1 (RLY) 10min (TIM) Interlock Section Master LS1 LS2 CR1 (RLY) 10min (TIM) overheat SW1 Out1 (OUT) Out1 (OUT) [ILoff] Using Interlock Functions Equivalent Circuit Figure 6.11 Note that [ILoff] is the only function that does not need to be energized by other program elements. When you use one or more [ILock] functions, there must be at least one [ILoff] function before the end of the program. Otherwise the compiler will warn you for the missing [ILoff]. The logic simulator always clears the Interlock at the end of the scan if you omit the [ILoff] function. You can program a second or third level Interlock within an Interlock section using a few [ILock] functions. However, you only need to program one [ILoff] function for the outermost Interlock section, i.e. [ILoff] need not be a matching pair for an [ILock] function. 5. Differentiate Up and Down [δ δDIFU] and [δ δDIFD] When the execution condition for [δDIFU] goes from OFF to ON, the designated output or relay will be turned ON for one scan time only. After that it will be turned OFF. This means that the function generates a single pulse for one scan time in response to the rising-edge of its execution condition. When its execution condition goes from ON to OFF nothing happens to the output or relay that it controls. On the other hand, when the execution condition for [δDIFD] goes from ON to OFF, the designated output or relay will be turned ON for one scan time only. After that it will be turned OFF. This means that the function generates a single pulse for one scan time in response to the trailing-edge of its execution 6-12 TRiLOGI Ladder Logic Reference Chapter 6 - Special Bits & Functions condition. When its execution condition goes from ON to OFF nothing happens to the output or relay that it controls. Execution Condition ON OFF ON [DIFU] function output OFF [DIFD] function ON output OFF 1 scan time Figure 6.12 6. Custom Functions: [CusFn] and [δ δCusF] (Verison 4.1 Only) These two functions allow you to connect a user-defined custom function (CusFn) to the ladder logic as if it is a relay coil. Custom functions are created using the integrated editor provided by TRiLOGI Version 4.1. Please refer to Part Two: TBASIC Reference manual for detailed descriptions of custom function creation and deployment methods. 7. Master Reset An ON condition to this function clears all mailbox inputs, outputs, relays timers and counter bits to OFF, resets all timers counters/sequencers to inactive state, and clears all latched relay bits. 6-13