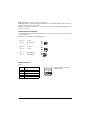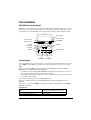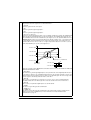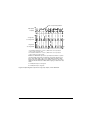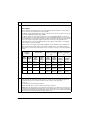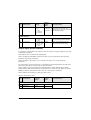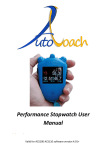
1
DriveIT Low Power AC Drives File Name: ABB_ACDrives_ACS400_user_D501 User’s Manual for type ACS 400 frequency converters from 2.2 to 37 kW ACS 400 Frequency Converter User’s Manual 3AFY 64036947 R0125 REV C EN Effective: 5.12. 2001 copyright 2001 ABB Oy. Safety Warning! Only a competent electrician may install the ACS 400. Warning! Dangerous voltages are present when mains supply is connected. Wait at least 5 minutes after disconnecting the supply before removing the cover. Measure the voltage at DC terminals (Uc+, Uc-) before servicing the unit. See E. Warning! Even when the motor is stopped there are dangerous voltages present at Power Circuit terminals U1, V1, W1 and U2, V2, W2 and Uc+, Uc-. Warning! Even when the ACS 400 is powered down, there may be dangerous external voltages at relay terminals RO1A, RO1B, RO1C, RO2A, RO2B, RO2C. Warning! Never attempt to repair a broken unit; contact the supplier. Warning! The ACS 400 will start up automatically after an input voltage interruption if the external run command is on. Warning! When the control terminals of two or more ACS100/140/400 units are connected in parallel, the auxiliary voltage for these control connections must be taken from a single source which can either be one of the units or an external supply. Warning! The heat sink may reach a high temperature (see S, Table 11). Note! For more technical information, contact the supplier. ACS 400 User’s Manual iii Note about compatibility: The supplied ACS 400 frequency converter and this manual are fully compatible with ACS-PAN-A Control Panel revision I and later. If you use a control panel with older revision code, certain new parameter names and alarms will not be displayed properly. In this case, refer to displayed numeric parameter values, parameter numbers and alarm codes instead. iv ACS 400 User’s Manual Table of Contents Safety. . . . . . . . . . . . . . . . . . . . . . . . . . . . . . . . . . . . . . . . . iii Installation . . . . . . . . . . . . . . . . . . . . . . . . . . . . . . . . . . . . . 1 Step by Step Instructions for Installing the ACS 400 . . . . . . . . . . 2 Reference Sections. . . . . . . . . . . . . . . . . . . . . . . . . . . . . . . . . . . . . . 3 Environment for Storage, Transportation and Stationary Use . . . . 3 Dimensions (mm) . . . . . . . . . . . . . . . . . . . . . . . . . . . . . . . . . . . . . . 4 Mounting the ACS 400 on the Wall . . . . . . . . . . . . . . . . . . . . . . . . 6 Removing the Cover . . . . . . . . . . . . . . . . . . . . . . . . . . . . . . . . . . . 7 Terminal Interface . . . . . . . . . . . . . . . . . . . . . . . . . . . . . . . . . . . . . 9 Attaching a Warning Sticker. . . . . . . . . . . . . . . . . . . . . . . . . . . . . . 9 Type Designation Label and Code Key . . . . . . . . . . . . . . . . . . . . 10 Motor . . . . . . . . . . . . . . . . . . . . . . . . . . . . . . . . . . . . . . . . . . . . . . 11 Floating Network . . . . . . . . . . . . . . . . . . . . . . . . . . . . . . . . . . . . . 11 Cable Connections. . . . . . . . . . . . . . . . . . . . . . . . . . . . . . . . . . . . 12 Control Terminals. . . . . . . . . . . . . . . . . . . . . . . . . . . . . . . . . . . . . 20 Connection Examples . . . . . . . . . . . . . . . . . . . . . . . . . . . . . . . . . 22 Replacing the Cover . . . . . . . . . . . . . . . . . . . . . . . . . . . . . . . . . . 23 Power On . . . . . . . . . . . . . . . . . . . . . . . . . . . . . . . . . . . . . . . . . . . 23 Environmental Information . . . . . . . . . . . . . . . . . . . . . . . . . . . . . . 23 Protection Features . . . . . . . . . . . . . . . . . . . . . . . . . . . . . . . . . . . 24 Motor Overload Protection . . . . . . . . . . . . . . . . . . . . . . . . . . . . . . 25 Loadability of ACS 400 . . . . . . . . . . . . . . . . . . . . . . . . . . . . . . . . 25 Type Series and Technical Data . . . . . . . . . . . . . . . . . . . . . . . . . 26 Product Conformity . . . . . . . . . . . . . . . . . . . . . . . . . . . . . . . . . . . 27 Accessories . . . . . . . . . . . . . . . . . . . . . . . . . . . . . . . . . . . . . . . . . 28 Programming . . . . . . . . . . . . . . . . . . . . . . . . . . . . . . . . . . 29 ACS-PAN-A Control Panel . . . . . . . . . . . . . . . . . . . . . . . . . . . . . . . 29 Control Modes . . . . . . . . . . . . . . . . . . . . . . . . . . . . . . . . . . . . . . . 29 Output Display . . . . . . . . . . . . . . . . . . . . . . . . . . . . . . . . . . . . . . 30 Menu Structure . . . . . . . . . . . . . . . . . . . . . . . . . . . . . . . . . . . . . . 30 Setting Parameter Value . . . . . . . . . . . . . . . . . . . . . . . . . . . . . . . 31 ACS 400 User’s Manual v Menu Functions . . . . . . . . . . . . . . . . . . . . . . . . . . . . . . . . . . . . . . 32 LED Indicators . . . . . . . . . . . . . . . . . . . . . . . . . . . . . . . . . . . . . . . 33 Diagnostic displays . . . . . . . . . . . . . . . . . . . . . . . . . . . . . . . . . . . 34 Resetting the Drive from the Control Panel . . . . . . . . . . . . . . . . . 34 Contrast Setting . . . . . . . . . . . . . . . . . . . . . . . . . . . . . . . . . . . . . . 34 ACS100-PAN Control Panel . . . . . . . . . . . . . . . . . . . . . . . . . . . . . 35 Control Modes . . . . . . . . . . . . . . . . . . . . . . . . . . . . . . . . . . . . . . . 35 Output Display . . . . . . . . . . . . . . . . . . . . . . . . . . . . . . . . . . . . . . . 36 Menu Structure . . . . . . . . . . . . . . . . . . . . . . . . . . . . . . . . . . . . . . . 36 Setting Parameter Value . . . . . . . . . . . . . . . . . . . . . . . . . . . . . . . 36 Menu Functions . . . . . . . . . . . . . . . . . . . . . . . . . . . . . . . . . . . . . . 37 Diagnostic Displays . . . . . . . . . . . . . . . . . . . . . . . . . . . . . . . . . . . 38 Resetting the Drive from the Control Panel . . . . . . . . . . . . . . . . . 38 ACS 400 Basic Parameters . . . . . . . . . . . . . . . . . . . . . . . . . . . . . . 39 Application Macros . . . . . . . . . . . . . . . . . . . . . . . . . . . . . . . . . . . . 43 Application Macro Factory (0) . . . . . . . . . . . . . . . . . . . . . . . . . . . 44 Application Macro Factory (1) . . . . . . . . . . . . . . . . . . . . . . . . . . . 45 Application Macro ABB Standard . . . . . . . . . . . . . . . . . . . . . . . . . 46 Application Macro 3-wire . . . . . . . . . . . . . . . . . . . . . . . . . . . . . . . 47 Application Macro Alternate . . . . . . . . . . . . . . . . . . . . . . . . . . . . . 48 Application Macro Motor Potentiometer . . . . . . . . . . . . . . . . . . . . 49 Application Macro Hand - Auto . . . . . . . . . . . . . . . . . . . . . . . . . . 50 Application Macro PID Control . . . . . . . . . . . . . . . . . . . . . . . . . . . 51 Application Macro Premagnetise . . . . . . . . . . . . . . . . . . . . . . . . . 52 Application Macro PFC Control . . . . . . . . . . . . . . . . . . . . . . . . . . 53 ACS 400 Complete Parameter List . . . . . . . . . . . . . . . . . . . . . . . . 55 Group 99: Start-up Data . . . . . . . . . . . . . . . . . . . . . . . . . . . . . . . . 63 Group 01: Operating Data . . . . . . . . . . . . . . . . . . . . . . . . . . . . . . 64 Group 10: Command Inputs . . . . . . . . . . . . . . . . . . . . . . . . . . . . 66 Group 11: Reference Select . . . . . . . . . . . . . . . . . . . . . . . . . . . . 68 Group 12: Constant Speeds . . . . . . . . . . . . . . . . . . . . . . . . . . . . 72 Group 13: Analogue Inputs . . . . . . . . . . . . . . . . . . . . . . . . . . . . . 73 Group 14: Relay Outputs . . . . . . . . . . . . . . . . . . . . . . . . . . . . . . 74 Group 15: Analogue Output . . . . . . . . . . . . . . . . . . . . . . . . . . . . 76 vi ACS 400 User’s Manual Group 16: System Controls . . . . . . . . . . . . . . . . . . . . . . . . . . . . . 77 Group 20: Limits. . . . . . . . . . . . . . . . . . . . . . . . . . . . . . . . . . . . . . 79 Group 21: Start/Stop . . . . . . . . . . . . . . . . . . . . . . . . . . . . . . . . . . 80 Group 22: Accel/Decel . . . . . . . . . . . . . . . . . . . . . . . . . . . . . . . . . 82 Group 25: Critical Freq. . . . . . . . . . . . . . . . . . . . . . . . . . . . . . . . . 83 Group 26: Motor Control . . . . . . . . . . . . . . . . . . . . . . . . . . . . . . . 84 Group 30: Fault Functions . . . . . . . . . . . . . . . . . . . . . . . . . . . . . . 85 Group 31: Automatic Reset . . . . . . . . . . . . . . . . . . . . . . . . . . . . . 90 Group 32: Supervision . . . . . . . . . . . . . . . . . . . . . . . . . . . . . . . . . 91 Group 33: Information . . . . . . . . . . . . . . . . . . . . . . . . . . . . . . . . . 94 Group 34: Process Variables . . . . . . . . . . . . . . . . . . . . . . . . . . . . 95 Group 40: PID Control . . . . . . . . . . . . . . . . . . . . . . . . . . . . . . . . . 97 Group 41: PID Control (2) . . . . . . . . . . . . . . . . . . . . . . . . . . . . . 104 Group 50: Communication . . . . . . . . . . . . . . . . . . . . . . . . . . . . . 105 Group 51: Ext Comm Module . . . . . . . . . . . . . . . . . . . . . . . . . . 107 Group 52: Standard Modbus . . . . . . . . . . . . . . . . . . . . . . . . . . . 108 Group 81: PFC Control . . . . . . . . . . . . . . . . . . . . . . . . . . . . . . . 110 Standard Serial Communication . . . . . . . . . . . . . . . . . . 121 Overview . . . . . . . . . . . . . . . . . . . . . . . . . . . . . . . . . . . . . . . . . . 121 Earthing and Termination . . . . . . . . . . . . . . . . . . . . . . . . . . . . . 123 Activating Modbus Protocol . . . . . . . . . . . . . . . . . . . . . . . . . . . 124 Communication settings . . . . . . . . . . . . . . . . . . . . . . . . . . . . . . 125 Control Locations . . . . . . . . . . . . . . . . . . . . . . . . . . . . . . . . . . . 126 Output signal source selection . . . . . . . . . . . . . . . . . . . . . . . . . 127 Diagnostic Counters . . . . . . . . . . . . . . . . . . . . . . . . . . . . . . . . . 129 Communication . . . . . . . . . . . . . . . . . . . . . . . . . . . . . . . . . . . . . . . 130 Introduction to Modbus . . . . . . . . . . . . . . . . . . . . . . . . . . . . . . . 130 Register Read and Write . . . . . . . . . . . . . . . . . . . . . . . . . . . . . . 130 Register Mapping . . . . . . . . . . . . . . . . . . . . . . . . . . . . . . . . . . . 131 Exception Codes . . . . . . . . . . . . . . . . . . . . . . . . . . . . . . . . . . . . 132 Function Codes . . . . . . . . . . . . . . . . . . . . . . . . . . . . . . . . . . . . . 132 The Control Word and the Status Word . . . . . . . . . . . . . . . . . . 133 References . . . . . . . . . . . . . . . . . . . . . . . . . . . . . . . . . . . . . . . . 136 Actual Values . . . . . . . . . . . . . . . . . . . . . . . . . . . . . . . . . . . . . . 138 ACS 400 User’s Manual vii Fault and Alarm Status . . . . . . . . . . . . . . . . . . . . . . . . . . . . . . . . 140 Diagnostics . . . . . . . . . . . . . . . . . . . . . . . . . . . . . . . . . . . 143 General . . . . . . . . . . . . . . . . . . . . . . . . . . . . . . . . . . . . . . . . . . . 143 Alarm and Fault displays. . . . . . . . . . . . . . . . . . . . . . . . . . . . . . 143 Fault Resetting . . . . . . . . . . . . . . . . . . . . . . . . . . . . . . . . . . . . . . 143 Appendix A . . . . . . . . . . . . . . . . . . . . . . . . . . . . . . . . . . . 149 Local Control vs. Remote Control . . . . . . . . . . . . . . . . . . . . . . . 149 Local Control . . . . . . . . . . . . . . . . . . . . . . . . . . . . . . . . . . . . . . . 149 Remote Control . . . . . . . . . . . . . . . . . . . . . . . . . . . . . . . . . . . . . 150 Internal Signal Connections for the Macros . . . . . . . . . . . . . . . . 151 Appendix B . . . . . . . . . . . . . . . . . . . . . . . . . . . . . . . . . . . 153 ACS 400 Pump and Fan Control (PFC) Macro. . . . . . . . . . . . . . 153 Introduction . . . . . . . . . . . . . . . . . . . . . . . . . . . . . . . . . . . . . . . . 153 PID Controller . . . . . . . . . . . . . . . . . . . . . . . . . . . . . . . . . . . . . . . 155 Relay Outputs . . . . . . . . . . . . . . . . . . . . . . . . . . . . . . . . . . . . . . 156 Adding More I/O to ACS 400 . . . . . . . . . . . . . . . . . . . . . . . . . . . 156 Setting up NDIO modules . . . . . . . . . . . . . . . . . . . . . . . . . . . . . 156 Alternation Switchgear . . . . . . . . . . . . . . . . . . . . . . . . . . . . . . . 156 Appendix C . . . . . . . . . . . . . . . . . . . . . . . . . . . . . . . . . . . 157 ACS 400 EMC Instructions . . . . . . . . . . . . . . . . . . . . . . . . . . . . . 157 viii ACS 400 User’s Manual Installation Study these installation instructions carefully before proceeding. Failure to observe the warnings and instructions given may cause a malfunction or personal hazard. Preparation before installation To install the ACS 400 you need the following: screwdrivers, wire stripper, tape measure, 4 pieces of ∅ 5 mm screws or nuts and bolts (depending on the mounting surface), drill. At this point it is a good idea to check the motor parameters and write them down: nominal voltage, nominal current, nominal frequency, cos phi, nominal power and nominal speed. Unpacking the unit The ACS 400 comes in a box that in addition to the unit itself and this User’s Manual contains Cable Gland Plates, Warning Stickers and a separate Installation Guide. The separate Installation Guide gives a summary of the installation instructions described here. To help you marking the fixing points for installation of your ACS 400 a Wall Mounting Template is drawn on the lid of the box. Remove the lid and save it. Step by step instructions The installation of the ACS 400 has been broken down into a number of steps that are listed in Figure 1 on page 2. The steps must be carried out in the order shown. To the right of each step reference is made to one or more Reference Sections on the following pages of this User’s Manual. These sections give detailed information needed for the correct installation of the unit. Warning! Before you begin read “Safety” on page iii. ACS 400 User’s Manual 1 Step by Step Instructions for Installing the ACS 400 1 CHECK the environment. See A 2 MOUNT the ACS 400 on the wall. See B, C 3 4 5 6 REMOVE the cover. ATTACH a warning sticker in the language of your choice. IDENTIFY power and control terminals. CHECK voltage supply and fuses. See D See E, F See E,H, I See G,S 7 CHECK the motor. 8 CHECK DIP switch. See E, J, L 9 CONNECT power terminals. See E, H, I 10 CONNECT control wires. See E, H, I, J, L 11 REPLACE the cover. See M 12 TURN the power on. See N See K, S Figure 1 The references after each step refer to one or more of the Reference Sections on the following pages in this User’s Manual. 2 ACS 400 User’s Manual Reference Sections A Environment for Storage, Transportation and Stationary Use Table 1 ACS 400 Stationary Use Storage and Transportation in the protective package Installation Site Altitude • 0…1000 m if PN and I2 100% • 1000…2000 m if PN and I2 derated 1% every 100 m above 1000 m Ambient Temperature • 0…40 °C • max. 50 °C if PN and I2 derated to 90% Relative Humidity < 95% (non-condensing) Contamination Levels (IEC 721-3-3) No conductive dust allowed. -40...+70 °C The ACS 400 should be installed in clean air according to IP classification. Cooling air must be clean, free from corrosive materials and electrically conductive dust. In UL installations the ACS 400 should be installed in clean and dry air, free from dripping water. • chemical gases: Class 3C2 • solid particles: Class 3S2 Storage • chemical gases: Class 1C2 • solid particles: Class 1S3 Transportation • chemical gases: Class 2C2 • solid particles: Class 2S2 Atmospheric Pressure Sinusoidal Vibration (IEC-60068-2-6) • 2-9 Hz 0.3 mm • 9-200 Hz 2 m/s2 Storage • 2-9 Hz 1.5 mm • 9-200 Hz 5 m/s2 Transportation • 2-9 Hz 3.5 mm • 9-200 Hz 10 m/s2 Shock (IEC 68-2-29) not allowed • max. 100 m/s2 (330 ft./s2), 11 ms Free Fall not allowed • • • • ACS 400 User’s Manual 76 cm (30 in.), frame size R1 61 cm (24 in.), frame size R2 46 cm (18 in.), frame size R3 31 cm (12 in.), frame size R4 3 B Dimensions (mm) Units with IP 21/NEMA1 Enclosures Figure 2 IP 21/NEMA1 enclosures. Table 2 Dimensions of units with IP 21/NEMA1 enclosures. Frame Size, IP 21/NEMA1 * Dimension Reference (mm) R1 R2 R3 R4 W 125 125 203 203 W1 98 98 98 98 W2 - - 98 98 W3 98 98 160 160 H 330 430 545 636 H1 318 417 528 619 H2 300 400 500 600 H3 373 473 586 686 D 209 221 248 282 D1 105 117 144 177 D2 147 159 200 233 a 5.5 5.5 6.5 6.5 b 10 10 13 13 c 5.5 6.0 8.0 8.0 d 5.5 5.5 6.5 6.5 Mass (kg) 5.5 8.5 19.0 28.6 * See paragraph S for frame size assignments for type codes. 4 ACS 400 User’s Manual Units with IP 54/NEMA12 Enclosures The IP 54 protection class has a different outer plastic cover compared to the IP 21. The IP 54 enclosure uses the same skeleton (inner plastic part) as the IP 21 enclosure, but an internal fan is added to improve the cooling of the unit. This kind of structure increases the dimensions compared to the IP 21 enclosure, but the loadability of the units with IP 54 enclosure is the same as that of the IP 21 units. Figure 3 IP 54/NEMA12 enclosures. Table 3 Dimensions of units with IP 54/NEMA12 enclosures. Frame Size, IP 54/NEMA12 * Dimension Reference (mm) R1 R2 R3 R4 W 215 215 257 257 W1 98 98 160 160 W2 98 98 H 453 551 642 742 H1 318 417 528 619 H2 330 430 545 636 D 240 253 280 312 D1 95 107 132 145 a 5.5 5.5 6.5 6.5 b 10 10 13 14 c 5.5 5.5 8.0 8.0 d 5.5 5.5 6.5 6.5 Mass (kg) 7.2 11.2 22.3 32.3 See paragraph S for frame size assignments for type codes. ACS 400 User’s Manual 5 C Mounting the ACS 400 on the Wall Warning! Before installing the ACS 400 ensure the mains supply to the installation is off. Note! ACS 400 can be mounted onto an air duct when flange mounting option set is used. 1 The lid of the packing-box shows the Wall Mounting Template. Remove the lid from the box. Figure 4 Removing the wall mounting template. 2 The ACS 400 should only be mounted vertically on a smooth, solid surface, free from heat, damp, and condensation. Ensure minimum air flow gaps of 200 mm above and below, and 30 mm on the sides of the unit. 1 Using the mounting template, mark the position of the fixing holes. 2 Drill the holes. 3 Screw in four screws or affix nuts and bolts (depending on the mounting surface). Figure 5 Marking and drilling the fixing holes. 3 IP 21 / NEMA1 Position the ACS 400 onto the fixings and securely tighten in all four corners. Note! Only lift the ACS 400 by its metal chassis. Figure 6 Affixing type IP 21 / NEMA1 frequency converters. IP 54 / NEMA12 1 2 3 4 Remove the front cover, see Figure 10. Remove the rubber plugs by pushing from outside. Screw in the screws. Replace the rubber plugs. Figure 7 Affixing type IP 54 / NEMA12 frequency converters. 6 ACS 400 User’s Manual D Removing the Cover IP 21 / NEMA1 Opening units frame size R1 and R2 (unit width 125 mm). 3 1 Remove the control panel. 2 In the control panel slot there is a little hole. Lift the retaining lever inside. 3 Remove the cover. 2 1 Figure 8 Opening the frame size R1 and R2 frequency converters of type IP 21 / NEMA1. Opening units frame size R3 and R4 (unit width 203 mm). 1 Remove the control panel if fitted. 5 Press the retaining lever and pull. 2 Lift the retaining lever and simultaneously 6 Remove the lower part of the front cover. pull the upper front cover slightly. 3 Lift the other retaining lever e.g. with a screwdriver. 4 Open the upper part of the front cover and remove it. 4 3 2 1 5 6 6 Figure 9 Opening the frame size R3 and R4 frequency converters of type IP 21 / NEMA1. ACS 400 User’s Manual 7 IP 54 / NEMA12 1 Take the screws off. 2 Remove the front cover. 3 Remove control panel if needed. 1 1 2 1 1 1 1 Figure 10 Opening type IP 54 / NEMA1 frequency converters. 8 ACS 400 User’s Manual E Terminal Interface Green LED, see P Red LED, see P RS485 termination DIP switch Not termin. ON ON AI1 U I U I ON AI2 ON 9 10 11 12 13 14 15 16 Analog ue inputs ON 1 2 3 4 5 6 7 8 ON X1 I/O connection, see J X2 Panel connector RS485 in terf. Termin. ON Analogue input DIP switch 1 2 3 4 5 ON X3 RS485 connector, see J Warning sticker Warning! Dangerous voltage Wait 5 minutes after disconnecting supply before proceeding. See User’s Manual. 17 18 19 20 21 22 X6 Connector for DDCS communication module Do not connect when unit is powered. U1 V1 W1 Uc+ Uc- U2 V2 W2 MAINS MOTOR Figure 11 Terminal interface. F Attaching a Warning Sticker The contents of the packing box includes warning stickers in different languages. Attach a warning sticker in the language of your choice to the place on the inside plastic skeleton as indicated above, in section E, ’Terminal Interface’. ACS 400 User’s Manual 9 G Type Designation Label and Code Key The Type Designation Label is attached on to the heat sink. MADE IN FINLAND ABB Industry Oy Type ACS401000432 Code 63996611 Serno U1 3~ 380...480 V U2 3~ 0 - 0...U1 V I1n / I1nsq 4.7 / 6.2 A I2n / I2nsq 4.9 / 6.6 A f1 48...63 Hz f2 0...250Hz *1982800001* For more information see ACS400 User's Manual N713 Figure 12 ACS 400 type designation label. The figure below shows the key for the type designation. AC S 4 0 1 x004 3 2 AC Drive Product Type S = Standard product x = OEM ACS 400 Product Family Input Bridge 0 = 6-pulse rectifier Enclosure Type 1 = Wall mounted Accessories 0 = Standard unit x = Filter, panel and manual options Rated Output Power in kVA See ACS 400 rating tables, section S, Table 11 Voltage Rating 1 = 200 ... 240 V AC 3 = 380 ... 480 V AC Enclosure Class 2 = IP 21 (NEMA1) 5 = IP 54 (NEMA12) Figure 13 The key to the type designation code. Serial number label is attached on the upper part of the back plate of the unit between fixing holes. Type Code ACS401000432 63996611 Ser.no. *1982800001* Figure 14 Serial number label. 10 ACS 400 User’s Manual H Motor Check the compatibility of the motor. By default, the motor must be a three-phase induction motor, with UN 400 V and fN 50 Hz. If the motor values differ from these, the group 99 parameter values must be changed. The motor nominal current, IN, must not exceed the nominal output current of the ACS 400, I2N in constant torque applications or I2NSQ in variable torque applications (See G and R). Warning! Ensure the motor is suitable for use with the ACS 400. The ACS 400 must be installed by a competent person. If in doubt, contact your supplier. I Floating Network If the supply network is floating (IT network) remove both grounding screws otherwise you may cause danger or damage the unit. Location of the grounding screws is shown in Figure 15 and Figure 16. GND 1 GND 2 Figure 15 Removing the grounding screws from frame size R1 and R2 frequency converters. GND 1 GND 2 Figure 16 Removing the grounding screws from frame size R3 and R4 frequency converters. In floating networks do not use RFI filter. The mains becomes connected to earth through the filter capacitors. In floating networks this may cause danger or damage the unit. Make sure that no excessive emission is propagated to neighbouring low voltage networks. In some cases, the natural suppression in transformers and cables is sufficient. If in doubt, the supply transformer with static screening between the primary and secondary windings can be used. ACS 400 User’s Manual 11 J Cable Connections IP 21 Units A package, containing three screws and two gland plates, is included with type IP 21 (NEMA1) ACS 400 frequency converters. A B Figure 17 Gland plate for power cables (A) and for control cables (B), type IP 21 / NEMA1 frequency converters. To open the front cover, see “Removing the Cover” on page 7. Connect the gland plate for power cables with one screw. The threaded hole for the screw is located in the middle of the heat sink, at the bottom end. A Figure 18 Fixing the gland plate for power cables (A), type IP 21 / NEMA1 frequency converters. 12 ACS 400 User’s Manual Table 4 Cable connections. Terminal Description Note U1, V1, W1 3~ power supply input Do not use in 1~ supply! PE Protective Earth Follow local rules for cable cross-sections. U2, V2, W2 Power output to motor See R. Uc+, Uc− DC bus For optional ACS-BRK braking unit. Motor cable shield Follow local rules for cable type and cross-sections. Use screened motor cable. Route the motor cable away from control wires and the power supply cable to avoid electromagnetic interference. U1 V1 MAIN S W1 Uc+ Uc- U2 V2 W2 M OT O R Figure 19 Motor cable connection for frame sizes R1 and R2 (IP 21 / NEMA1). Note! See “ACS 400 EMC Instructions” on page 157. Note! The output contactor can be used only as a safety device. Do not close the contactor when the ACS 400 is running. ACS 400 User’s Manual 13 Figure 20 Motor cable connection for frame sizes R3 and R4 (IP 21 / NEMA1). 14 ACS 400 User’s Manual The gland plate for control cables (B), see Figure 17. B A Figure 21 Fixing the gland plate for control cables (B), type IP 21 / NEMA1 frequency converters. Control cables Figure 22 Control cable connections (IP 21 / NEMA1). Note! See “ACS 400 EMC Instructions” on page 157. ACS 400 User’s Manual 15 IP 54 Units A package, containing five screws and two gland plates, is included with the type IP 54 (NEMA12) ACS 400 frequency converters. B A Figure 23 Gland plate for power cables (A) and for control cables (B), type IP 54 / NEMA 12 frequency converters. To open the front cover, see “Removing the Cover” on page 7. A Figure 24 Fixing the gland plate for power cables (A), type IP 54 / NEMA12 frequency converters. 16 ACS 400 User’s Manual Connect the power cables before installing the gland plate for control cables (IP 54 / NEMA12). Different diameters are marked on the grommet surface. Cut the grommets after checking the correct cable size. Table 5 Terminal Description Note U1, V1, W1 3~ power supply input PE Protective Earth Do not use in 1~ supply! Follow local rules for cable cross-sections. U2, V2, W2 Power output to motor See R. Uc+, Uc− DC bus For optional ACS-BRK braking unit. Motor cable shield Follow local rules for cable type and cross-sections. Use shielded motor cable. Route the motor cable away from control wires and the power supply cable to avoid electromagnetic interference. U1 V1 W1 Uc+ Uc- U2 V2 W2 MAI NS MOT OR Figure 25 Motor cable connection for frame sizes R1 and R2 (IP 54 / NEMA12). Note! See “ACS 400 EMC Instructions” on page 157. ACS 400 User’s Manual 17 Figure 26 Motor cable connection for frame sizes R3 and R4 (IP 54 / NEMA12). Note! See “ACS 400 EMC Instructions” on page 157. B Figure 27 Fixing the gland plate for control cables (B), type IP 54 / NEMA12 frequency converters. 18 ACS 400 User’s Manual Figure 28 Control cable connections (IP 54 / NEMA12). Note! See “ACS 400 EMC Instructions” on page 157. ACS 400 User’s Manual 19 K Control Terminals Main I/O terminal X1 Table 6 X1 Identification Description 1 SCR Terminal for signal cable screen. (Connected internally to frame earth.) 2 AI 1 Analogue input channel 1, programmable. Default: 0 - 10 V (Ri = 200 kΩ) (J1:AI1 open) <=> 0 - 50 Hz frequency reference 0 - 20 mA (Ri = 500 Ω) (J1:AI1 closed) <=> 0 - 50 Hz frequency reference Resolution 0.1 % accuracy ±1 %. 3 AGND Analogue input circuit common. (Connected internally to frame earth through 1 MΩ.) 4 10 V 10 V/10 mA reference voltage output for analogue input potentiometer, accuracy ±2 %. 5 AI 2 Analogue input channel 2, programmable. Default: 0 - 20 mA (Ri = 500 Ω) (J1:AI2 closed) 0 - 10 V (Ri = 200 kΩ) (J1:AI2 open) Resolution 0.1 % accuracy ±1 %. 6 AGND Analogue input circuit common. (Connected internally to frame earth through 1 MΩ.) 7 AO1 Analogue output, programmable. Default: 0 - 20 mA (load < 500 Ω) <=> 0 - 50 Hz output frequency. Accuracy: ±3 % typically. 8 AGND Common for DI return signals. (Connected internally to frame earth through 1 MΩ.) 9 24 V Auxiliary voltage output 24 V DC +20 %, -10 % / 250 mA (reference to AGND). Short circuit protected. 10 DCOM1 Digital input common 1 for DI1, DI2 and DI3. To activate a digital input, there must be ≥+10 V (or ≤-10 V) between that input and DCOM1. The 24 V may be provided by the ACS 400 (X1:9) as in the connection examples (see L) or by an external 12 - 24 V source of either polarity. DI Configuration Factory (0) 11 DI 1 Start. Activate to start. Motor will ramp up to Start. If DI 2 is activated, momentary frequency reference. Disconnect to stop. activation of DI 1 starts the ACS 400. Motor will coast to stop. 12 DI 2 Reverse. Activate to reverse rotation direction. Stop. Momentary inactivation always stops the ACS 400. 13 DI 3 Jog. Activate to set output frequency to jogging frequency (default: 5 Hz). Reverse. Activate to reverse rotation direction. 14 DI 4 Must be deactivated for Factory 0). Must to be activated for Factory (1). 15 DI 5 Ramp pair selection (ACC1/DEC1 or ACC2/DEC2). 16 DCOM2 DCOM2 digital input common 2 for DI4, DI5 17 RO1C 18 RO1A 19 RO1B 20 RO2C 21 RO2A 22 RO2B Factory (1) Relay output 1, programmable (default operation: fault => 17 connected to 18). 12 - 250 V AC / 30 V DC, 10 mA - 2 A Relay output 2, programmable (default operation: running => 20 connected to 22) 12 - 250 V AC / 30 V DC, 10 mA - 2 A Digital input impedance 1.5 kΩ. Use multi-strand 0.5-1.5 mm2 wire. Note! DI 4 is read only when powered-up (Factory macro 0 and 1). Note! For fail safe reasons the fault relay signals a “fault”, when the ACS 400 is powered down. 20 ACS 400 User’s Manual Note! Terminals 3, 6 and 8 are at the same potential. Note! DI4 and DI5 are galvanically isolated from DI1-DI3. To utilise DI4 and DI5 a jumper wire must be connected. See section L for details. Note! If control panel is available, also other macros can be selected. The digital input depends on the macro selected. Analogue input configuration The analogue input signal is selected with DIP switch: AI open = voltage input (U) and AI connected = current input (I). Examples on selecting the analogue input signal 1. AI1 = U AI2 = U 0 - 10 V AI2 = I 0(4) - 20 mA AI1: AI2: ON 0(4) - 20 mA ON 3. AI1 = I AI1: AI2: ON 0 - 10 V ON 2. AI1 = U AI1: AI2: ON 0(4) - 20 mA ON AI2 = I 0 - 10 V RS485 terminal X3 Table 7 X3 Description A 4 AGND 5 Screen ACS 400 User’s Manual Signal termination is selected with DIP switch. Not termin. ON 3 Termin. ON B ON Screen 2 ON 1 RS485 interf. 21 L Connection Examples ACS 400 X1 ACS 400 X1 1 +24V 9 +24V 10 DCOM1 10 DCOM1 11 11 15 DI1 DI2 DI3 DI4 DI5 15 DI1 DI2 DI3 DI4 DI5 16 DCOM2 16 DCOM2 7 12 13 14 DI configuration NPN connected (sink) 3 ON 6 ON 5 2 17 RO1C RO1A 19 RO1B 18 4 5 6 7 8 +24 V 12 DI configuration PNP connected (source) with external power supply ±0V 13 14 Analogue inputs 0-10 V AI1: AI2: 0-10 V ON 9 4 Analogue inputs AI1: 0-10V AI2: 0(4)-20mA ON 8 3 0...20 mA Ground the cable screen on the sourcing end. SCR AI1 AGND +10V AI2 AGND AO1 AGND 1 SCR AI1 AGND +10V AI2 AGND AO1 AGND 2 17 RO1C RO1A 19 RO1B 18 20 20 21 21 RO2C RO2A 22 RO2B RO2C RO2A 22 RO2B Figure 29 I/O examples. Other Modbus devices ACS 400 X3 SCR 2 B A 3 A GND 4 AGND B 5 SCR A GND SCR RS485 interf. Not termin. ON 1 B ON SCR Signal termination is selected with DIP switch, not terminated. Figure 30 RS485 Multidrop application. 22 ACS 400 User’s Manual M Replacing the Cover Do not turn the power on before replacing the front cover. IP 21 / NEMA1 Units: 1. First locate the bottom fixing clips. 2. Click the retaining lever to its place. 2 3 3. Replace the control panel. 1 Replacing the front cover to IP 21/ NEMA1 units from size ACS401-x016-3-x and up. 1. Hook the bottom end fingers of the lower part of the front cover. 2. Click the retaining lever to its place. 4 3. Hook the bottom end fingers. 4. Click the retaining levers into place. 5 2 5. Replace the control panel if available. 3 1 IP54 / NEMA12 Units: 1. Replace the control panel. 1 2. Replace the front cover. 3. Tighten the screws (max. torque 1.5 Nm). 3 2 N Power On When power is supplied to the ACS 400, the green LED comes on. Note! Only three power-ups in five minutes are allowed. Note! Before increasing motor speed, check that the motor is running in desired direction. O Environmental Information The package is made of corrugated cardboard and can be recycled. A product to be disposed of contains valuable raw material that should be recycled, thus preserving energy and natural resources. Instructions for disposal are available from ABB sales and service companies. ACS 400 User’s Manual 23 P Protection Features The ACS 400 has a number of protective features: • • • • • • Overcurrent Overvoltage Undervoltage Overtemperature Output earth fault Output short circuit • • • • • • Input phase loss (3~) I/O terminal short circuit protection Motor overload protection (see Q) Output overload protection (see R) Stall protection Underload The ACS 400 has the following LED alarm and fault indicators: • For location of LEDs, see section E or if ACS-PAN-A control panel is connected, see the instructions on page 29. Table 8 Red LED: off Green LED: blinking ABNORMAL CONDITION POSSIBLE CAUSES: • Acceleration or deceleration ramp is too fast in relation to load torque requirement • A short voltage interruption ABNORMAL CONDITION: • ACS 400 cannot fully follow control commands. • Blinking lasts 5 seconds. Table 9 Red LED: on Green LED: on FAULT POSSIBLE CAUSES: • Transient overcurrent • Over-/undervoltage • Overtemperature • Motor overload (see section Q) ACTION: • Give a stop signal to reset fault. • Give a start signal to restart the drive. CHECK: • the supply line for disturbances. • the drive for mechanical problems that might cause overcurrent. • that the heat sink is clean. NOTE: • If the drive fails to start, check that the input voltage is within the tolerance range. Table 10 Red LED: blinking Green LED: on FAULT POSSIBLE CAUSE: • Output earth fault • Short circuit • DC bus ripple too large ACTION: • Turn the power off. • Wait for the LEDs to turn off. • Turn the power back on. CHECK: • the insulation in the motor circuit. • Fuses and main phase. Caution! This action may start the drive. Note! Whenever the ACS 400 detects a fault condition, the fault relay activates. The motor stops and the ACS 400 will wait to be reset. If the fault still persists and no external cause has been identified, contact your ACS 400 supplier. 24 ACS 400 User’s Manual Q Motor Overload Protection If the motor current Iout exceeds nominal current IN of the motor for a prolonged period, the ACS 400 automatically protects the motor against overheating by tripping. The trip time depends on the extent of the overload (Iout / IN), the output frequency and fnom. Times given apply to a “cold start”. ACS 400 provides overload protection in accordance with the National Electric Code (US). The default setting for motor thermal protection is ON. For more information see Group 30 parameters, page 85 in this manual. Iout / IN Trip time 180 s 1.5 300 s 600 s ∞ 1.0 0.5 0 Output frequency 0 35 Hz Figure 31 R Loadability of ACS 400 In the event of an output overload, the ACS 400 will first show an alarm and then trip. Iout t Imax duty cycle = t/T I2 T < 10 min T time Imax / I2 Constant torque rating 1,5 Ambient temperature, 1.4 θamb max. is 40°C. 1.3 Squared torque rating 1.2 1.1 1.0 Duty cycle 0.1 0.2 0.3 0.4 0.5 50°C is permissible, if I2 and Imax are derated to 90 %. Imax = maximum output current in squared torque (I2NSQmax) and constant torque (I2Nmax) applications, see Table 11. Figure 32 ACS 400 User’s Manual 25 S Type Series and Technical Data Table 11 400 V series 3~ Input U1 380V - 480V ±10 % 48 - 63 Hz Frame size Nominal ratings (See G) 0043-X ACS401- 0053-X 0063-X R1 0093-X 0113-X R2 0163-X 0203-X R3 0253-X 0303-X 0413-X R4 Unit Nominal motor PN kW Squared torque 3.0 4.0 5.5 7.5 11 Input current I1NSQ A 6.2 8.3 11.1 14.8 21.5 29 35 41 56 68 A 6.6 8.8 11.6 15.3 23 30 38 44 59 72 Max. output current A I2NSQmax * 7.3 9.7 12.8 16.8 25.3 33 42 48 65 79 Nominal motor PN kW Constant torque and power 2.2 3.0 4.0 5.5 7.5 11 15 18.5 22 30 Continuous output current I2NSQ 15 18.5 22 30 37 Input current I1N A 4.7 6.2 8.3 11.1 14.8 21.5 29 35 41 56 Continuous output current I2N* A 4.9 6.6 8.8 11.6 15.3 23 30 38 44 59 Max. output current A I2Nmax 7.4 9.9 13.2 17.4 23 34 45 57 66 88 37 48 64 76 99 125 145 195 Output voltage U2 V 0 - U1 Switching frequency fSW kHz 4 (Standard) 8 (Low noise **) Protection limits (See O) Overcurrent (peak) A 20.3 Overvoltage: Trip limit V DC 842 (corresponds to 624 VAC input) Undervoltage: Trip limit V DC 333 (corresponds to 247 VAC input) Overtemperature °C 95 (heat sink) Max. cable length fSW = 4 kHz m fSW = 8 kHz 27.5 100 200 200 200 50 100 100 100 16, AWG4 (stranded) / Torque 1.5-1.8 Nm 35, AWG2 (stranded) / Torque 3.2-3.7 Nm Max. wire sizes and screw torque of connectors Power terminals *** mm2 10, AWG6 (stranded)/ Torque 1.3-1.5 Nm Control terminals mm2 0.5 - 1.5 (AWG22...AWG16) / Torque 0.4 Nm Line fuse 3~ **** ACS401- A 10 10 16 16 25 35 50 50 63 80 Power losses (at nominal point) Power circuit W 90 120 170 230 330 450 560 660 900 1100 Control circuit W 6 6 6 6 6 6 6 6 6 6 * Power stages are designed for the continuous I2NSQ current. These values are valid when the altitude is less than 1000 m ASL. See Q. ** Low noise setting only available with optional control panel. Derate PN and I2 to 80%. 26 ACS 400 User’s Manual *** Follow local rules for cable cross-sections, see H. Shielded motor cable is recommended. **** Fuse type: UL class CC or T. For non-UL installations IEC269 gG. Note! Use 60°C rated power cable (75°C if ambient temperature exceeds 45°C). Note! If an output isolator or contactor is used, supply either stop signal or RUN ENABLE (see parameter 1601) signal from an auxiliary contact of the isolator to the ACS 400, in order to make sure that the ACS 400 will coast to stop immediately when the isolator opens. Improper use of the isolator may damage the ACS 400 and the isolator. ACS 400 is suitable for use in a circuit capable of delivering not more than 65 kA rms symmetrical amperes, 480 V maximum. T Product Conformity CE Marking The ACS 400 complies with the requirements of the European • Low Voltage Directive 73/23/EEC with amendments • EMC Directive 89/336/EEC with amendments Corresponding declarations and a list of main standards are available on request. Note! See “ACS 400 EMC Instructions” on page 157. A frequency converter and a Complete Drive Module (CDM) or a Basic Drive Module (BDM), as defined in IEC 61800-2, is not considered as a safety related device mentioned in the Machinery Directive and related harmonised standards. The CDM/BDM/frequency converter can be considered as a part of safety device if the specific function of the CDM/BDM/frequency converter fulfils the requirements of the particular safety standard. The specific function of the CDM/BDM/ frequency converter and the related safety standard is mentioned in the documentation of the equipment. UL, cUL and C-Tick Markings The ACS 400 has UL, cUL and C-Tick markings for all power ranges and both IP 21 and IP 54 protection classes. ACS 400 User’s Manual 27 U Accessories ACS 400-PAN-A Control panel for use with the ACS 400. ACS 100-PAN Control panel for use with the ACS 100 / ACS 140 / ACS 400. PEC-98-0008 Panel Extension Cable kit for use with the ACS 100 / ACS 140 / ACS 400. ACS400-IFxx-3 RFI input filters. ACS-BRKBraking units. NOCHOutput chokes. RS485/232 Adapter DDCS Communication Module For using fieldbus adapters and I/O extension modules. ACS 400 is supported by DriveWare Contact your supplier. Flange Mounting Set For more information contact your local ABB supplier. 28 ACS 400 User’s Manual PROGRAMMING ACS-PAN-A Control Panel ACS-PAN-A is an alphanumeric control panel with LCD display and multiple languages. The control panel can be connected to and detached from the converter at any time. The panel can be used to copy parameters to other ACS 400 converters with the same software revision (parameter 3301). Run indicator Shaft direction Control modes UP/DOWN Display modes OUTPUT MENU LOC REM RUN ENTER MENU Green LED MENU ENTER Red LED RESET START/STOP LOC RESET REM LOC/REM REVERSE Control Modes The very first time the drive is powered up, it is controlled from the Control Terminal Block X1 (remote control, REM). The ACS 400 is controlled from the control panel when the drive is in local control (LOC). Switch to local control (LOC) by pressing and holding the LOC/REM button until first LOCAL CONTROL or later LOCAL, KEEP RUN is displayed: • • If the button is released while LOCAL CONTROL is displayed, the panel frequency reference is set to the current external reference and the drive is stopped. When LOCAL, KEEP RUN is displayed, the current run/stop status and the frequency reference are copied from the user I/O. Start and stop the drive by pressing the START/STOP button. Change the shaft direction by pressing the REVERSE button (parameter 1003 must be set to REQUEST). Switch back to remote control (REM) by pressing and holding the LOC/REM button until REMOTE CONTROL is displayed. Shaft Direction RUN > < RUN • Drive is running and at setpoint • Shaft direction is forward (>) or reverse (<) RUN > (or < RUN) Arrow head blinking rapidly Drive is running but not at setpoint. > (or <) Arrow head blinking slowly Drive is stopped. ACS 400 User’s Manual 29 Output Display When the control panel is powered up, the panel displays a selection of actual values, see Figure 33. Whenever the MENU button is pressed and held, the control panel resumes this OUTPUT display. Torque Output current 0.0A 0% Reference frequency 50.0 Hz Cursor is visible when reference can be modified 0.0 Hz Actual output frequency OUTPUT Figure 33 Output display variables. The frequency reference can be modified using UP/DOWN buttons when it is underlined. Pressing UP or DOWN buttons changes the reference immediately. The reference can be modified in local control mode, but also in remote control mode if the ACS 400 is parameterised in such a way. Menu Structure ACS 400 has a large number of parameters. Of these, only the so-called basic parameters are initially visible. See “Selecting Full Parameter Set” on page 32 for details on specifying the full parameter set. The menu consists of parameter groups and menu functions. OUTPUT display 0.0A 0% 50.0 Hz Menu MENU 99 START-UP DATA Parameters ENTER 0.0 Hz ENGLISH OUTPUT MENU MENU MENU 01 OPERATING DATA 10 COMMAND INPUTS ... 81 PFC CONTROL COPY TO DRIVE COPY TO PANEL LONG/SHORT MENU 30 9901 LANGUAGE 9902 APPLIC MACRO 9905 MOTOR NOM VOLT ... 8121 REG BYPASS CTRL 8122 REG START DELAY ... ACS 400 User’s Manual Setting Parameter Value Parameter set mode is entered by pressing ENTER. In set mode, value is underlined. Value is altered by using UP/DOWN buttons. Modified value is stored by pressing ENTER. Modifications can be cancelled and set mode inactivated by pressing MENU. 9901 LANGUAGE ENGLISH ENTER accept and store 9901 LANGUAGE ENGLISH alter ENTER value exit without saving MENU Note! In the parameter set mode the cursor blinks, when the parameter value is altered. Note! To view the parameter default value in the parameter set mode, press the UP/DOWN buttons simultaneously. ACS 400 User’s Manual 31 Menu Functions Scroll the Menu for desired menu function, then press and hold ENTER down until display blinks to start the operation. Note! Parameter copying does not affect all parameters. The excluded parameters are: 9901, 99059910, 1605, 1607, 5002, 5201 and all Group 51 parameters. See “ACS 400 Complete Parameter List” on page 55 for a description of these parameters. Copy Parameters from Drive to Panel (upload) Press & hold COPY TO PANEL MENU ENTER COPYING LOC Note! Drive must be stopped and in local control. Parameter 1602 PARAMETER LOCK must be set to 1 (OPEN). Copy Parameters from Panel to Drive (download) Press & hold COPY TO DRIVE MENU ENTER COPYING LOC Note! Drive must be stopped and in local control. Parameter 1602 PARAMETER LOCK must be set to 1 (OPEN). Selecting Full Parameter Set Initially only the basic parameters are visible. When full Menu is active, an asterisk appears on the second row of the panel display in Menu. Activate this function again to resume the short Menu. Press & hold FULL/SHORT MENU FULL/SHORT MENU ENTER MENU MENU * Visible if full menu is active. 32 ACS 400 User’s Manual LED Indicators Red LED Green LED OFF ON OFF BLINKS Power ON and drive is operating normally. Alarm is active. ON ON Fault is active. Drive can be reset from the control panel. BLINKS ON Fault is active. Turn power off to reset the drive. ACS 400 User’s Manual 33 Diagnostic displays When the red LED of the ACS-PAN-A is on or blinking, a fault is active. The relevant fault message flashes in the panel display. When the green LED of the ACS-PAN-A is blinking, an alarm is active. The relevant alarm message is shown in the panel display. Alarms 1-7 arise from button operation and green LED does not blink for them. The alarm and fault messages disappear when MENU, ENTER or the arrow buttons of control panel are pressed. The message will reappear after a few seconds if the keypad is not touched and alarm or fault is still active. Description DC OVERVOLTAGE OVERCURRENT FAULT 2 ALARM 10 Code Figure 34 Fault and alarm messages Refer to Diagnostics section for complete list of alarms and faults. Resetting the Drive from the Control Panel To reset a fault when the red LED is on, press the RESET button. Caution! Resetting the fault may start the drive when in remote control. To reset a fault when the red LED is blinking, turn the power off. Caution! Turning the power on again may start the drive immediately. Contrast Setting Display contrast can be adjusted any time. Increase contrast by pressing and holding ENTER and UP buttons. Decrease contrast by pressing and holding ENTER and DOWN buttons. The buttons must be pressed down simultaneously. 34 ACS 400 User’s Manual ACS100-PAN Control Panel The control panel can be connected to and detached from the converter at any time. Control modes Active fault indicator mAVs kHz % o LOC REM Crpm FAULT OUTPUTPAR SET MENU FWDREV Units Shaft direction Display modes START/STOP MENU MENU LOC REM REM LOC ENTER REVERSE ENTER UP/DOWN Control Modes The very first time the drive is powered up, it is controlled from the Control Terminals (remote control, REM). The ACS 400 is controlled from the control panel when the drive is in local control (LOC). Switch to local control (LOC) by pressing and holding the MENU and ENTER buttons down simultaneously until first Loc or later LCr is displayed: • • If the buttons are released while Loc is displayed, the panel frequency reference is set to the current external reference and the drive is stopped. When LCr is displayed, the current run/stop status and the frequency reference are copied from the user I/O. Start and stop the drive by pressing the START/STOP button. Change the shaft direction by pressing the REVERSE button (parameter 1003 must be set to REQUEST). Switch back to remote control (REM) by pressing and holding the MENU and ENTER buttons down simultaneously until rE is displayed. Shaft Direction FWD / REV Visible • Shaft direction is forward / reverse • Drive is running and at set point FWD / REV Blinking rapidly Drive is accelerating / decelerating. FWD / REV Blinking slowly Drive is stopped. ACS 400 User’s Manual 35 Output Display When the control panel is powered up, the panel displays the actual output frequency. Whenever the MENU button is pressed and held, the control panel resumes this OUTPUT display. To toggle between output frequency and output current, press the UP or DOWN button. To set the output frequency, press ENTER. Pressing the UP/DOWN buttons changes the reference immediately. Press ENTER again to return to OUTPUT display. LOC Hz OUTPUT ENTER ENTER A LOC LOC Hz OUTPUT SET ENTER OUTPUT Menu Structure ACS 400 has a large number of parameters. Of these, only the so-called basic parameters are initially visible. The menu function -LG- is used to make the full parameter set visible. OUTPUT display Parameter groups Parameters ... Setting Parameter Value Press ENTER to view the parameter value. To set a new value, press and hold ENTER until SET is displayed. . ENTER s PAR SET MENU ENTER Note! SET blinks, if the parameter value is altered. SET is not displayed, if the value cannot be altered. Note! To view the parameter default value, press the UP/DOWN buttons simultaneously. 36 ACS 400 User’s Manual Menu Functions Scroll the Parameter groups for the desired menu function. Press and hold ENTER until the display blinks to start the function. Note! Parameter copying does not affect all parameters. The excluded parameters are: 9901, 99059910, 1605, 1607, 5002, 5201 and all Group 51 parameters. See “ACS 400 Complete Parameter List” on page 55 for a description of these parameters. Select between basic and full menu Press and hold ENTER Visible if Full menu is active MENU Copy parameters from panel to drive (upload) Press & hold ENTER MENU Note! Drive must be stopped and in local control. Parameter 1602 PARAMETER LOCK must be set to 1 (OPEN). Copy parameters from drive to panel (download) Press & hold ENTER MENU Note! Drive must be stopped and in local control. Parameter 1602 PARAMETER LOCK must be set to 1 (OPEN). ACS 400 User’s Manual 37 Diagnostic Displays When the red LED of the ACS 400 is on or blinking, a fault is active. The relevant fault message flashes in the panel display. When the green LED of the ACS 400 is blinking, an alarm is active. The relevant alarm message is shown in the panel display. Alarms 1-7 arise from button operation and green LED does not blink for them. The alarm and fault messages disappear when MENU, ENTER or the arrow buttons of control panel are pressed. The message will reappear after a few seconds if the keypad is not touched and alarm or fault is still active. fault code alarm code Figure 35 Fault and alarm messages. Refer to Diagnostics section for complete list of alarms and faults. Resetting the Drive from the Control Panel To reset a fault when the red LED is on, press the START/STOP button. Caution! Resetting the fault may start the drive when in remote control. To reset a fault when the red LED is blinking, turn the power off. Caution! Turning the power on again may start the drive immediately. 38 ACS 400 User’s Manual ACS 400 Basic Parameters ACS 400 has a large number of parameters. Of these, only the so called basic parameters are initially visible. Setting up only a few basic parameters is sufficient in applications where the preprogrammed application macros of the ACS 400 can provide all desired functionality. For a full description of programmable features provided by the ACS 400, see “ACS 400 Complete Parameter List”, starting page 55. The following table lists the basic parameters. S = Parameters can be modified only when the drive is stopped. Code Name User S Group 99 START-UP DATA 9901 9902 LANGUAGE Language selection. 0 = ENGLISH 4 = SPANISH 8 = DANISH 1= ENGLISH (AM) 5 = PORTUGUESE 9 = FINNISH 2 = GERMAN 6 = DUTCH 10 = SWEDISH 3 = ITALIAN 7 = FRENCH 11 = RUSSIAN 12 = (reserved) APPLIC MACRO Selects application macro. Sets parameter values to their default values. Refer to “Application Macros”, starting page 43 for detailed description of each macro. ü 0 = FACTORY 1 = ABB STANDARD 2 = 3-WIRE 3 = ALTERNATE 4 = MOTOR POT 5 = HAND/AUTO 6 = PID CONTROL 7 = PREMAGN 8 = PFC CONTROL Default value: 0 (FACTORY MACRO) 9905 MOTOR NOM VOLT Nominal motor voltage from motor name plate. Range of this parameter depends on the type of the ACS 400. ü Default value: 400 V 9906 MOTOR NOM CURR Nominal motor current from motor name plate. Values for this parameter range from 0.5* IN - 1.5* IN, where IN is nominal current of the ACS 400. ü Default value: IN 9907 MOTOR NOM FREQ Nominal motor frequency from motor name plate. ü Range: 0 - 250 Hz Default value: 50 Hz ACS 400 User’s Manual 39 Code Name 9908 User S ü MOTOR NOM SPEED Nominal motor speed from motor name plate. Range 0 - 3600 rpm Default: 1440 rpm 9909 ü MOTOR NOM POWER Nominal motor power from name plate. Range: 0.1 - 100.0 kW Default: 2.0 - 30.0 kW depending on the type of the frequency converter 9910 ü MOTOR COS PHI Nominal motor cos phi from name plate. Range: 0.50 - 0.99 Default: 0.83 Group 01 OPERATING DATA 0128 LAST FAULT Last recorded fault (0 = no fault). See “Diagnostics”, starting page 143. Can be cleared with the control panel by pressing UP and DOWN buttons simultaneously when in parameter set mode. Group 10 COMMAND INPUTS 1003 ü DIRECTION Rotation direction lock. 1 = FORWARD 2 = REVERSE 3 = REQUEST If you select REQUEST, the direction is set according to the given direction command. Default: 3 (REQUEST) or 1 (FORWARD) depending on the selected application macro. Group 11 REFERENCE SELECT 1105 EXT REF1 MAX Maximum frequency reference in Hz. Range: 0 - 250 Hz Default value: 50 Hz or 52 Hz depending on the selected application macro. Group 12 CONSTANT SPEEDS 1202 CONST SPEED 1 Range for all constant speeds: 0 - 250.0 Hz Default value: 5.0 Hz 1203 CONST SPEED 2 Default value: 10.0 Hz 1204 CONST SPEED 3 Default value: 15.0 Hz 40 ACS 400 User’s Manual Code Name User S Group 13 ANALOGUE INPUTS 1301 MINIMUM AI1 Minimum value of AI1 in per cent. Defines relative analogue input value where frequency reference reaches minimum value. Range: 0 - 100 % Default value: 0 % Group 15 ANALOGUE OUTPUT 1503 AO CONTENT MAX Defines output frequency where analogue output reaches 20 mA. Default value: 50.0 Hz or 52 Hz depending on the selected application macro. Note! Analogue output content is programmable. Values given here are valid only if other analogue output configuration parameters have not been modified. Description of all parameters is given in “ACS 400 Complete Parameter List” starting on page 55. Group 20 LIMITS 2003 MAX CURRENT Maximum output current. Range: 0.5* IN - 1.5...1.7* IN **, where IN is nominal current of the ACS 400. Default value: 1.5 * IN 2008 ü MAXIMUM FREQ Maximum output frequency. Range: 0 - 250 Hz Default value: 50 Hz or 52 Hz depending on the selected application macro. ** The maximum factor depending on the type of the frequency converter at 4 kHz switching frequency. The table continues on the next page. ACS 400 User’s Manual 41 Code Name User S Group 21 START/STOP 2102 STOP FUNCTION Conditions during motor stopping. 1 = COAST Motor coasts to stop. 2 = RAMP Ramp deceleration as defined by the active deceleration time 2203 DECELER TIME 1 or 2205 DECELER TIME 2. Default value: 1 (COAST) Group 22 ACCELER/DECELER 2202 ACCELER TIME 1 Ramp 1: time from zero to maximum frequency (0 - MAXIMUM FREQ). Range for all ramp time parameters is 0.1 - 1800 s. Default value: 5.0 s 2203 DECELER TIME 1 Ramp 1: time from maximum to zero frequency (MAXIMUM FREQ - 0). Default value: 5.0 s 2204 ACCELER TIME 2 Ramp 2: time from zero to maximum frequency (0 - MAXIMUM FREQ). Default value: 60.0 s 2205 DECELER TIME 2 Ramp 2: time from maximum to zero frequency (MAXIMUM FREQ - 0). Default value: 60.0 s Group 26 MOTOR CONTROL 2606 ü U/f RATIO U/f below field weakening point. 1 = LINEAR 2 = SQUARE LINEAR is preferred for constant torque applications. SQUARE is preferred for centrifugal pump and fan applications to increase motor efficiency and to reduce motor noise. Default value: 1 (LINEAR) Group 33 INFORMATION 3301 SW VERSION Software version code. S = Parameters can be modified only when the drive is stopped. 42 ACS 400 User’s Manual Application Macros Application Macros are preprogrammed parameter sets. They minimise the number of different parameters to be set during start-up. The Factory Macro is the factory-set default macro. Note! The Factory Macro is intended for applications where there is NO control panel available. If using the Factory Macro with control panel note that the parameters whose value depend on the digital input DI4 cannot be modified from the panel. Parameter Values Selecting an application macro with parameter 9902 APPLIC MACRO will set all other parameters (except the group 99 Start-up Data parameters, the parameter lock 1602, the parameter save 1607 and groups 50 - 52 serial communication parameters) to their default values. Default values of certain parameters depend on the selected macro. These are listed with the description of each macro. Default values for other parameters are given in “ACS 400 Complete Parameter List” starting on page 55. Connection Examples In the following connection examples please note: • All the digital inputs are connected using negative (NPN) logic. ACS 400 User’s Manual 43 Application Macro Factory (0) This macro is intended for applications where there is NO control panel available. It provides a general purpose 2-wire I/O configuration. The value of parameter 9902 is 0 (FACTORY). DI4 is not connected. Input signals Output signals DIP switch AI1: • Analogue reference (AI1) • Relay output 1: Fault AI2: • Constant speed 1 (DI3) • Relay output 2: Running 0 - 10 V 0(4) - 20 mA ON • An. output AO: Frequency ON • Start, stop and direction (DI1,2) • Ramp pair 1/2 selection (DI5) 9 SCR AI1 AGND +10V AI2 AGND AO1 AGND +24V 10 DCOM1 11 DI1 DI2 DI3 DI4 DI5 1 2 3 4 5 6 mA 7 8 12 13 14 15 DCOM2 RO1C RO1A RO1B 16 17 18 19 20 RO2C 21 RO2A 22 RO2B External Reference 1: 0...10 V <=> 0...50 Hz Reference voltage 10 VDC Not used Output frequency 0...20 mA <=> 0...50 Hz +24 VDC Start/Stop: Activate to start ACS400 Fwd/Rev: Activate to reverse rotation direction Constant Speed 1: Default: 5 Hz Leave unconnected!* Ramp pair selection. Activate to select ramp pair 2. Relay output 1, programmable Default operation: Fault =>17 connected to 18 Relay output 2, programmable Default operation: Running =>20 connected to 22 *Note! DI 4 is used to configure ACS 400. It is read only once when power is connected. All parameters marked with * are determined by the DI4 input. Factory (0) parameter values: * * 44 1001 EXT 1 COMMANDS 2 (DI1,2) 1503 AO CONTENT MAX 50.0 Hz 1002 EXT 2 COMMANDS 0 (NOT SEL) 1601 RUN ENABLE 0 (NOT SEL) 1003 DIRECTION 3 (REQUEST) 1604 FAULT RESET SEL 6 (START/STOP) 1102 EXT1/EXT2 SEL 6 (EXT1) 2008 MAXIMUM FREQ 50 Hz 1103 EXT REF1 SELECT 1 (AI1) 2105 PREMAGN SEL 0 (NOT SEL) 1105 EXT REF1 MAX 50 Hz 2201 ACC/DEC 1/2 SEL 5 (DI5) 1106 EXT REF2 SELECT 0 (KEYPAD) 4001 PID GAIN 1.0 1201 CONST SPEED SEL 3 (DI3) 4002 PID INTEG TIME 60 s 1401 RELAY OUTPUT 1 3 (FAULT (-1)) 4101 PID GAIN 1.0 1402 RELAY OUTPUT 2 2 (RUN) 4102 PID INTEG TIME 60 s ACS 400 User’s Manual Application Macro Factory (1) This macro is intended for applications where there is NO control panel available. It provides a general purpose 3-wire I/O configuration. The value of parameter 9902 is 0 (FACTORY). DI 4 is connected. Input signals Output signals DIP switch AI1: • Analogue reference (AI1) • Relay output 1: Fault AI2: • Ramp pair 1/2 selection (DI5) • Relay output 2: Running 9 SCR AI1 AGND +10V AI2 AGND AO1 AGND +24V 10 DCOM1 11 DI1 DI2 DI3 DI4 DI5 Momentary activation with DI2 activated: Start Momentary deactivation: Stop Fwd/Rev: activate to reverse rotation direction Has to be connected!* Ramp pair selection. Activate to select ramp pair 2. DCOM2 RO1C RO1A RO1B Relay output 1, programmable Default operation: Fault => 17 connected to 18 RO2C RO2A RO2B Relay output 2, programmable Default operation: Running => 20 connected to 22 1 2 3 4 5 6 mA 0 - 10 V 0(4) - 20mA ON • An. output AO: Frequency ON • Start, stop and direction (DI1,2,3) 7 8 12 13 14 15 16 17 18 19 20 21 22 External Reference 1: 0...10 V <=> 0...50 Hz Reference voltage 10 VDC Not used Output frequency 0...20 mA <=> 0...50 Hz +24 VDC *Note! DI 4 is used to configure ACS 400. It is read only once when power is connected. All parameters marked with * are determined by the DI4 input. Note! Stop input (DI2) deactivated: panel START/STOP button interlocked (local). Factory (1) parameter values: * 1001 EXT 1 COMMANDS * 4 (DI1P,2P,P) 1503 AO CONTENT MAX 50 Hz 1002 EXT 2 COMMANDS 0 (NOT SEL) 1601 RUN ENABLE 0 (NOT SEL) 1003 DIRECTION 3 (REQUEST) 1604 FAULT RESET SEL 6 (START/STOP) 1102 EXT1/EXT2 SEL 6 (EXT1) 2008 MAXIMUM FREQ 50 Hz 1103 EXT REF1 SELECT 1 (AI1) 2105 PREMAGN SEL 0 (NOT SEL) 1105 EXT REF1 MAX 50 Hz 2201 ACC/DEC 1/2 SEL 5 (DI5) 1106 EXT REF2 SELECT 0 (KEYPAD) 4001 PID GAIN 1.0 1201 CONST SPEED SEL 0 (NOT SEL) 4002 PID INTEG TIME 60 s 1401 RELAY OUTPUT 1 3 (FAULT (-1)) 4101 PID GAIN 1.0 1402 RELAY OUTPUT 2 2 (RUN) 4102 PID INTEG TIME 60 s ACS 400 User’s Manual 45 Application Macro ABB Standard This general purpose macro is typical 2-wire I/O configuration. It gives two more preset speeds compared to Factory Macro (0). The value of parameter 9902 is 1 (ABB STANDARD). Input signals Output signals • Analogue reference (AI1) • Relay output 1: Fault • Preset speed selection (DI3,4) • Relay output 2: Running DIP switch AI1: AI2: ON • An. output AO: Frequency ON • Start, stop and direction (DI1,2) 0 - 10 V 0(4) -20mA • Ramp pair 1/2 selection (DI5) 9 SCR AI1 AGND +10V AI2 AGND AO1 AGND +24V 10 DCOM1 11 DI1 DI2 DI3 DI4 DI5 1 2 3 4 5 mA 6 7 8 12 13 14 15 External Reference 1: 0...10 V <=> 0...50 Hz Reference voltage 10 VDC Not used Output frequency 0...20 mA <=> 0...50 Hz +24 VDC DCOM2 RO1C RO1A RO1B 16 17 18 19 20 RO2C 21 RO2A 22 RO2B Start/Stop: Activate to start Fwd/Rev: Activate to reverse rotation direction Constant speed selection* Constant speed selection* Ramp pair selection. Activate to select ramp pair 2. Relay output 1, programmable Default operation: Fault => 17 connected to 18 Relay output 2, programmable Default operation: Running => 20 connected to 22 *Constant speed selection: 0 = open, 1 = connected DI3 DI4 0 0 Output Reference through AI1 1 0 Const speed 1 (1202) 0 1 Const speed 2 (1203) 1 1 Const speed 3 (1204) ABB Standard parameter values: 46 1001 EXT 1 COMMANDS 2 (DI1,2) 1503 AO CONTENT MAX 50 Hz 1002 EXT 2 COMMANDS 0 (NOT SEL) 1601 RUN ENABLE 0 (NOT SEL) 1003 DIRECTION 3 (REQUEST) 1604 FAULT RESET SEL 0 (KEYPAD) 1102 EXT1/EXT2 SEL 6 (EXT1) 2008 MAXIMUM FREQ 50 Hz 1103 EXT REF1 SELECT 1 (AI1) 2105 PREMAGN SEL 0 (NOT SEL) 1105 EXT REF1 MAX 50 Hz 2201 ACC/DEC 1/2 SEL 5 (DI5) 1106 EXT REF2 SELECT 0 (KEYPAD) 4001 PID GAIN 1.0 1201 CONST SPEED SEL 7 (DI3,4) 4002 PID INTEG TIME 60 s 1401 RELAY OUTPUT 1 3 (FAULT (-1)) 4101 PID GAIN 1.0 1402 RELAY OUTPUT 2 2 (RUN) 4102 PID INTEG TIME 60 s ACS 400 User’s Manual Application Macro 3-wire This macro is intended for those applications where the drive is controlled using momentary pushbuttons. It gives two more preset speeds compared to Factory Macro (1) by using DI4 and DI5. The value of parameter 9902 is 2 (3-WIRE). Input signals Output signals • Analogue reference (AI1) • Relay output 1: Fault • Preset speed selection (DI4,5) • Relay output 2: Running DIP switch AI1: 9 SCR AI1 AGND +10V AI2 AGND AO1 AGND +24V 10 DCOM1 11 DI1 DI2 DI3 DI4 DI5 1 2 3 4 5 6 mA 7 8 12 13 14 15 17 18 19 20 RO2C 21 RO2A 22 RO2B 0 - 10 V 0(4) -20mA External Reference 1: 0...10 V <=> 0...50 Hz Reference voltage 10 VDC Not used Output frequency 0...20 mA <=> 0...50 Hz +24 VDC Momentary activation with DI2 activated: Start Momentary deactivation: Stop Activate to reverse rotation: Fwd/Rev Constant speed selection* Constant speed selection* DCOM2 RO1C RO1A RO1B 16 AI2: ON • An. output AO: Frequency ON • Start, stop and direction (DI1,2,3) Relay output 1, programmable Default operation: fault => 17 connected to 18 Relay output 2, programmable Default operation: running => 20 connected to 22 *Constant speed selection: 0 = open, 1 = connected DI4 DI5 0 0 Output Reference through AI1 1 0 Constant speed 1 (1202) 0 1 Constant speed 2 (1203) 1 1 Constant speed 3 (1204) Note! Stop input (DI2) deactivated: panel START/STOP button interlocked (local). Application Macro 3-wire parameter values: 1001 EXT 1 COMMANDS 4 (DI1P,2P,3) 1503 AO CONTENT MAX 50 Hz 1002 EXT 2 COMMANDS 0 (NOT SEL) 1601 RUN ENABLE 0 (NOT SEL) 1003 DIRECTION 3 (REQUEST) 1604 FAULT RESET SEL 0 (KEYPAD) 1102 EXT1/EXT2 SEL 6 (EXT1) 2008 MAXIMUM FREQ 50 Hz 1103 EXT REF1 SELECT 1 (AI1) 2105 PREMAGN SEL 0 (NOT SEL) 1105 EXT REF1 MAX 50 Hz 2201 ACC/DEC 1/2 SEL 0 (NOT SEL) 1106 EXT REF2 SELECT 0 (KEYPAD) 4001 PID GAIN 1.0 1201 CONST SPEED SEL 8 (DI4,5) 4002 PID INTEG TIME 60 s 1401 RELAY OUTPUT 1 3 (FAULT (-1)) 4101 PID GAIN 1.0 1402 RELAY OUTPUT 2 2 (RUN) 4102 PID INTEG TIME 60 s ACS 400 User’s Manual 47 Application Macro Alternate This macro offers an I/O configuration that is adopted to a sequence of DI control signals used when alternating the direction of rotation of the drive. The value of parameter 9902 is 3 (ALTERNATE). Input signals Output signals • Analogue reference (AI1) • Relay output 1: Fault • Preset speed selection (DI3,4) • Relay output 2: Running DIP switch AI1: AI2: ON • An. output AO: Frequency ON • Start, stop and direction (DI1,2) 0 - 10 V 0(4) -20mA • Ramp pair 1/2 selection (DI5) 9 SCR AI1 AGND +10V AI2 AGND AO1 AGND +24V 10 DCOM1 11 DI1 DI2 DI3 DI4 DI5 1 2 3 4 5 6 mA 7 8 12 13 14 15 External Reference 1: 0...10 V <=> 0...50 Hz Reference voltage 10 VDC Not used Output frequency 0...20 mA <=> 0...50 Hz +24 VDC DCOM2 RO1C RO1A RO1B 16 17 18 19 20 RO2C 21 RO2A 22 RO2B Start fwd: If DI1 state is the same as DI2, drive stops Start reverse Constant Speed selection* Constant Speed selection* Ramp pair selection. Activate to select ramp pair 2. Relay output 1, programmable Default operation: Fault =>17 connected to 18 Relay output 2, programmable Default operation: Running =>20 connected to 22 *Constant speed selection: 0 = open, 1 = connected DI3 DI4 0 0 Output Reference through AI1 1 0 Constant speed 1 (1202) 0 1 Constant speed 2 (1203) 1 1 Constant speed 3 (1204) Application macro Alternate parameter values: 48 1001 EXT 1 COMMANDS 9 (DI1F,2R) 1503 AO CONTENT MAX 50 Hz 1002 EXT 2 COMMANDS 0 (NOT SEL) 1601 RUN ENABLE 0 (NOT SEL) 1003 DIRECTION 3 (REQUEST) 1604 FAULT RESET SEL 0 (KEYPAD) 1102 EXT1/EXT2 SEL 6 (EXT1) 2008 MAXIMUM FREQ 50 Hz 1103 EXT REF1 SELECT 1 (AI1) 2105 PREMAGN SEL 0 (NOT SEL) 1105 EXT REF1 MAX 50 Hz 2201 ACC/DEC 1/2 SEL 5 (DI5) 1106 EXT REF2 SELECT 0 (KEYPAD) 4001 PID GAIN 1.0 1201 CONST SPEED SEL 7 (DI3,4) 4002 PID INTEG TIME 60 s 1401 RELAY OUTPUT 1 3 (FAULT (-1)) 4101 PID GAIN 1.0 1402 RELAY OUTPUT 2 2 (RUN) 4102 PID INTEG TIME 60 s ACS 400 User’s Manual Application Macro Motor Potentiometer This macro provides a cost-effective interface for PLCs that vary the speed of the drive using only digital signals. The value of parameter 9902 is 4 (MOTOR POT). Input signals Output signals • Start, stop and direction (DI1,2) • An. output AO: Frequency • Reference up (DI3) • Relay output 1: Fault • Reference down (DI4) • Relay output 2: Running • Preset speed selection (DI5) 9 SCR AI1 AGND +10V AI2 AGND AO1 AGND +24V 10 DCOM1 11 DI1 DI2 DI3 DI4 DI5 Start/Stop: Activate to start. Forward/Reverse: Activate to reverse rotation direction Reference up: Activate to increase reference* Reference down: Activate to decrease reference* Constant speed 1 DCOM2 RO1C RO1A RO1B Relay output 1, programmable Default operation: Fault => 17 connected to 18 1 2 3 4 5 6 mA 7 8 12 13 14 15 16 17 18 19 20 RO2C 21 RO2A 22 RO2B Reference voltage 10 VDC Not used Output frequency 0...20 mA <=> 0...50 Hz +24 VDC Relay output 2, programmable Default operation: Running => 20 connected to 22 *Note! • If both DI 3 and DI 4 are active or inactive, reference is kept stable. • Reference is stored during stop or power down condition. • Analogue reference is not followed when motor potentiometer is selected. Motor potentiometer parameter values: 1001 EXT 1 COMMANDS 2 (DI1,2) 1503 AO CONTENT MAX 50 Hz 1002 EXT 2 COMMANDS 0 (NOT SEL) 1601 RUN ENABLE 0 (NOT SEL) 1003 DIRECTION 3 (REQUEST) 1604 FAULT RESET SEL 0 (KEYPAD) 1102 EXT1/EXT2 SEL 6 (EXT1) 2008 MAXIMUM FREQ 50 Hz 1103 EXT REF1 SELECT 6 (DI3U,4D) 2105 PREMAGN SEL 0 (NOT SEL) 1105 EXT REF1 MAX 50 Hz 2201 ACC/DEC 1/2 SEL 0 (NOT SEL) 1106 EXT REF2 SELECT 0 (KEYPAD) 4001 PID GAIN 1.0 1201 CONST SPEED SEL 5 (DI5) 4002 PID INTEG TIME 60 s 1401 RELAY OUTPUT 1 3 (FAULT (-1)) 4101 PID GAIN 1.0 1402 RELAY OUTPUT 2 2 (RUN) 4102 PID INTEG TIME 60 s ACS 400 User’s Manual 49 Application Macro Hand - Auto This macro offers an I/O configuration that is typically used in HVAC applications. The value of parameter 9902 is 5 (HAND/AUTO). Input signals Output signals • Two an. references (AI1,AI2) • Relay output 1: Fault • Control location selection (DI3) • Relay output 2: Running AI1: AI2: 0 - 10 V 0(4) -20mA 9 SCR AI1 AGND +10V AI2 AGND AO1 AGND +24V 10 DCOM1 11 DI1 DI2 DI3 DI4 DI5 Start/Stop: Activate to start ACS 400 (Hand). Forward/Reverse: Activate to reverse rotation direction (Hand) EXT1/EXT2 Selection: Activate to select auto control Forward/Reverse (Auto) Start/Stop: Activate to start ACS 400 (Auto) DCOM2 RO1C RO1A RO1B Relay output 1, programmable Default operation: Fault => 17 connected to 18 1 2 3 4 5 6 mA DIP switch ON • An. output AO: Frequency ON • Start/stop (DI1,5) and rev (DI2,4) 7 8 12 13 14 15 16 17 18 19 20 RO2C 21 RO2A 22 RO2B External Reference 1: 0...10 V <=> 0...50 Hz (Hand Control) Reference voltage 10 VDC External reference 2: 0...20 mA <=> 0...50 Hz (Auto Control) Output frequency 0...20 mA <=> 0...50 Hz +24 VDC Relay output 2, programmable Default operation: Running => 20 connected to 22 Note! Parameter 2107 START INHIBIT should be 0 (OFF). Hand-Auto parameter values: 50 1001 EXT 1 COMMANDS 2 (DI1,2) 1503 AO CONTENT MAX 50 Hz 1002 EXT 2 COMMANDS 7 (DI5,4) 1601 RUN ENABLE 0 (NOT SEL) 1003 DIRECTION 3 (REQUEST) 1604 FAULT RESET SEL 0 (KEYPAD) 1102 EXT1/EXT2 SEL 3 (DI3) 2008 MAXIMUM FREQ 50 Hz 1103 EXT REF1 SELECT 1 (AI1) 2105 PREMAGN SEL 0 (NOT SEL) 1105 EXT REF1 MAX 50 Hz 2201 ACC/DEC 1/2 SEL 0 (NOT SEL) 1106 EXT REF2 SELECT 2 (AI2) 4001 PID GAIN 1.0 1201 CONST SPEED SEL 0 (NOT SEL) 4002 PID INTEG TIME 60 s 1401 RELAY OUTPUT 1 3 (FAULT (-1)) 4101 PID GAIN 1.0 1402 RELAY OUTPUT 2 2 (RUN) 4102 PID INTEG TIME 60 s ACS 400 User’s Manual Application Macro PID Control This macro is intended for use with different closed-loop control systems such as pressure control, flow control, etc. The value of parameter 9902 is 6 (PID CTRL). Input signals Output signals DIP switch • Analogue reference (AI1) • Relay output 1: Fault AI1: • Actual value (AI2) • Relay output 2: Running AI2: 0 - 10 V 0(4) -20mA ON • An. output AO: Frequency ON • Start/stop (DI1,5) • Control location selection (DI2) • Constant speed (DI3) • Run enable (DI4) 9 SCR AI1 AGND +10V AI2 AGND AO1 AGND +24V 10 DCOM1 11 DI1 DI2 DI3 DI4 DI5 1 2 3 4 5 PT 6 mA 7 8 12 13 14 15 16 17 18 19 DCOM2 RO1C RO1A RO1B 20 RO2C 21 RO2A 22 RO2B EXT1 (Manual) or EXT2 (PID) reference: 0...10 V Reference voltage 10 VDC Actual signal; 0...20 mA (PID) Output frequency 0...20 mA <=> 0...50 Hz +24 VDC Start/Stop: Activate to start ACS 400 (Manual). EXT1/EXT2 Selection: Activate to select PID control Constant speed 1: not used if PID control* Run enable: deactivation always stops ACS 400 Start/Stop: Activate to start ACS 400 (PID) Relay output 1, programmable Default operation: Fault => 17 connected to 18 Relay output 2, programmable Default operation: Running => 20 connected to 22 Note! * Constant speed is not considered while in PID control (PID). Note! Parameter 2107 START INHIBIT should be 0 (OFF). PID control parameters (group 40) do not belong to the Basic parameter set. PID Control parameter values: 1001 EXT 1 COMMANDS 1 (DI1) 1503 AO CONTENT MAX 50 Hz 1002 EXT 2 COMMANDS 6 (DI5) 1601 RUN ENABLE 4 (DI4) 1003 DIRECTION 1 (FORWARD) 1604 FAULT RESET SEL 0 (KEYPAD) 1102 EXT1/EXT2 SEL 2 (DI2) 2008 MAXIMUM FREQ 50 Hz 1103 EXT REF1 SELECT 1 (AI1) 2105 PREMAGN SEL 0 (NOT SEL) 1105 EXT REF1 MAX 50 Hz 2201 ACC/DEC 1/2 SEL 0 (NOT SEL) 1106 EXT REF2 SELECT 1 (AI1) 4001 PID GAIN 1.0 1201 CONST SPEED SEL 3 (DI3) 4002 PID INTEG TIME 60 s 1401 RELAY OUTPUT 1 3 (FAULT(-1)) 4101 PID GAIN 1.0 1402 RELAY OUTPUT 2 2 (RUN) 4102 PID INTEG TIME 60 s ACS 400 User’s Manual 51 Application Macro Premagnetise This macro is intended for those applications where the drive must start very quickly. Building up the flux in the motor always takes time. With the Premagnetise Macro, this delay can be eliminated. The value of parameter 9902 is 7 (PREMAGN). Input signals Output signals DIP switch • Analogue reference (AI1) • Relay output 1: Fault • Preset speed selection (DI3,4) • Relay output 2: Running AI1: AI2: ON • An. output AO: Frequency ON • Start, stop and direction (DI1,2) 0 - 10 V 0(4) -20mA • Premagnetise (DI5) 9 SCR AI1 AGND +10V AI2 AGND AO1 AGND +24V 10 DCOM1 11 DI1 DI2 DI3 DI4 DI5 Start/Stop: Active to start ACS 400 Fwd/Rev: Activate to reverse rotation Constant Speed selection* Constant Speed selection* Premagnetise: Activate to start premagnetising DCOM2 RO1C RO1A RO1B Relay output 1, programmable Default operation: Fault => 17 connected to 18 1 2 3 4 5 6 mA 7 8 12 13 14 15 16 17 18 19 20 RO2C 21 RO2A 22 RO2B External Reference 1: 0...10 V <=> 0...50 Hz Reference voltage 10 VDC Not used Output frequency 0...20 mA <=> 0...50 Hz +24 VDC Relay output 2, programmable Default operation: Running => 20 connected to 22 *Constant speed selection: 0 = open, 1 = connected DI3 DI4 0 0 Output Reference through AI1 1 0 Constant speed 1 (1202) 0 1 Constant speed 2 (1203) 1 1 Constant speed 3 (1204) Premagnetise parameter values: 52 1001 EXT 1 COMMANDS 2 (DI1,2) 1503 AO CONTENT MAX 50 Hz 1002 EXT 2 COMMANDS 0 (NOT SEL) 1601 RUN ENABLE 0 (NOT SEL) 1003 DIRECTION 3 (REQUEST) 1604 FAULT RESET SEL 0 (KEYPAD) 1102 EXT1/EXT2 SEL 6 (EXT1) 2008 MAXIMUM FREQ 50 Hz 1103 EXT REF1 SELECT 1 (AI1) 2105 PREMAGN SEL 5 (DI5) 1105 EXT REF1 MAX 50 Hz 2201 ACC/DEC 1/2 SEL 0 (NOT SEL) 1106 EXT REF2 SELECT 0 (KEYPAD) 4001 PID GAIN 1.0 1201 CONST SPEED SEL 7 (DI3,4) 4002 PID INTEG TIME 60 s 1401 RELAY OUTPUT 1 3 (FAULT (-1)) 4101 PID GAIN 1.0 1402 RELAY OUTPUT 2 2 (RUN) 4102 PID INTEG TIME 60 s ACS 400 User’s Manual Application Macro PFC Control This macro is intended for pump and fan control applications. For more information see Appendix B. The value of parameter 9902 is 8 (PFC CONTROL). Input signals Output signals • Analogue reference (AI1) • Relay output 1: Speed regulated motor • Actual value (AI2) DIP switch AI1: AI2: ON • An. output AO: Frequency ON • Start and stop (DI1) 0 - 10 V 0(4) -20mA • Relay output 2: Auxiliary motor • Control location selection (DI3) • Run enable (DI2) 9 SCR AI1 AGND +10V AI2 AGND AO1 AGND +24V 10 DCOM1 11 DI1 DI2 DI3 DI4 DI5 1 2 3 4 PT 5 mA 6 7 8 12 13 14 15 16 17 18 19 DCOM2 RO1C RO1A RO1B 20 RO2C 21 RO2A 22 RO2B EXT1 (Manual) or EXT2 (PID/PFC) reference: 0...10 V Reference voltage 10 VDC Actual signal; 0...20 mA (PID) Output frequency 0...20 mA <=> 0...52 Hz +24 VDC Start/Stop: Activate to start ACS 400. Run enable: Deactivation always stops ACS 400 EXT1/EXT2 Selection: Activate to select PFC control Interlock: Deactivation stops ACS 400 Interlock: Deactivation stops constant speed motor Relay output 1, programmable Default operation: Speed regulated motor switched on => 17 connected to 19 Relay output 2, programmable Default operation: Auxiliary motor switched on => 20 connected to 22 Note! Parameter 2107 START INHIBIT should be 0 (OFF). PFC parameter values: 1001 EXT 1 COMMANDS 1 (DI1) 1503 AO CONTENT MAX 52 Hz 1002 EXT 2 COMMANDS 1 (DI1) 1601 RUN ENABLE 2 (DI2) 1003 DIRECTION 1 (FORWARD) 1604 FAULT RESET SEL 0 (KEYPAD) 1102 EXT1/EXT2 SEL 3 (DI3) 2008 MAXIMUM FREQ 52 Hz 1103 EXT REF1 SELECT 1 (AI1) 2105 PREMAGN SEL 0 (NOT SEL) 1105 EXT REF1 MAX 52 Hz 2201 ACC/DEC 1/2 SEL 0 (NOT SEL) 1106 EXT REF2 SELECT 1 (AI1) 4001 PID GAIN 2,5 1201 CONST SPEED SEL 0 (NOT SEL) 4002 PID INTEG TIME 3s 1401 RELAY OUTPUT 1 29 (PFC) 4101 PID GAIN 2,5 1402 RELAY OUTPUT 2 29 (PFC) 4102 PID INTEG TIME 3s ACS 400 User’s Manual 53 54 ACS 400 User’s Manual ACS 400 Complete Parameter List Initially, only the so called basic parameters (shaded grey in Table 12) are visible. Use the appropriate menu function of the control panel to make the full parameter set visible. S = Parameters can be modified only when the drive is stopped. M = Default value depends on the selected macro (*). Table 12 Full parameter set. Code Name Range Resolution Default User S M Group 99 START-UP DATA 9901 LANGUAGE 0 - 11 1 0 (ENGLISH) 9902 APPLIC MACRO 0-8 1 0 (FACTORY) ü 9905 MOTOR NOM VOLT 380, 400, 415, 440, 460, 480 V 400 V ü 9906 MOTOR NOM CURR 0.5*IN - 1.5*IN 0.1 A 1.0*IN ü 9907 MOTOR NOM FREQ 0 - 250 Hz 1 Hz 50 Hz ü 9908 MOTOR NOM SPEED 0 - 3600 rpm 1 rpm 1440 rpm ü 9909 MOTOR NOM POWER 0.1 - 100 kW 0.1 kW * ü 9910 MOTOR COS PHI 0.50 - 0.99 0.01 0.83 ü Group 01 OPERATING DATA 0102 SPEED 0 - 9999 rpm 1 rpm - 0103 OUTPUT FREQ 0 - 250 Hz 0.1 Hz - 0104 CURRENT - 0.1 A - 0105 TORQUE -100...100 % 0.1 % 0106 POWER - 0.1 kW - 0107 DC BUS VOLTAGE 0 - 999.9 V 0.1 V - 0109 OUTPUT VOLTAGE 0 - 480 V 0.1 V - 0110 ACS400 TEMP 0 - 150 °C 0.1 °C - 0111 EXTERNAL REF 1 0 - 250 Hz 0.1 Hz 0112 EXTERNAL REF 2 0 - 100 % 0.1 % - 0113 CTRL LOCATION 0-2 1 - 0114 RUN TIME (R) 0 - 9999 h 1h - 0115 kWh COUNTER (R) 0 - 9999 kWh 1 kWh - 0116 APPL BLK OUTPUT 0 - 100 % 0.1 % - 0117 DI1-DI4 STATUS 0000 - 1111 (0 - 15 decimal) 1 - 0118 AI1 0 - 100 % 0.1 % 0119 AI2 0 - 100 % 0.1 % - 0121 DI5 0000 - 0111 (0 - 7 decimal) 1 - & RELAYS 0122 AO 0 - 20 mA 0.1 mA - 0124 ACTUAL VALUE 1 0 - 100 % 0.1 % - 0125 ACTUAL VALUE 2 0 - 100 % 0.1 % - 0126 CONTROL DEV -100 - 100 % 0.1 % - 0127 PID ACT VALUE -100 - 100 % 0.1 % ACS 400 User’s Manual 55 Code Name Range Resolution Default 0128 LAST FAULT 0 - 26 1 0129 PREVIOUS FAULT 0 - 26 1 0130 OLDEST FAULT 0 - 26 1 0131 SER LINK DATA 1 0 - 255 1 0132 SER LINK DATA 2 0 - 255 1 0133 SER LINK DATA 3 0 - 255 1 0134 PROCESS VAR 1 - - 0135 PROCESS VAR 2 - - 0136 RUN TIME 0.00 - 99.99 kh 0.01 kh 0137 MWh COUNTER 0 - 9999 MWh 1 MWh User S M Group 10 COMMAND INPUTS 1001 EXT1 COMMANDS 0 - 10 1 2/4 ü ü 1002 EXT2 COMMANDS 0 - 10 1 0 ü ü 1003 DIRECTION 1-3 1 3 ü ü Group 11 REFERENCE SELECT 1101 KEYPAD REF SEL 1-2 1 1 (REF1 (Hz)) 1102 EXT1/EXT2 SEL 1-8 1 6 ü ü 1103 EXT REF1 SELECT 0 - 13 1 1 ü ü 1104 EXT REF1 MIN 0 - 250 Hz 1 Hz 0 Hz 1105 EXT REF1 MAX 0 - 250 Hz 1 Hz 50 Hz 1106 EXT REF2 SELECT 0 - 13 1 0 1107 EXT REF2 MIN 0 - 100 % 1% 0% 1108 EXT REF2 MAX 0 - 500 % 1% 100 % ü ü ü ü ü Group 12 CONSTANT SPEEDS 1201 CONST SPEED SEL 0 - 10 1 3/0 1202 CONST SPEED 1 0 - 250 Hz 0.1 Hz 5 Hz 1203 CONST SPEED 2 0 - 250 Hz 0.1 Hz 10 Hz 1204 CONST SPEED 3 0 - 250 Hz 0.1 Hz 15 Hz 1205 CONST SPEED 4 0 - 250 Hz 0.1 Hz 20 Hz 1206 CONST SPEED 5 0 - 250 Hz 0.1 Hz 25 Hz 1207 CONST SPEED 6 0 - 250 Hz 0.1 Hz 40 Hz 1208 CONST SPEED 7 0 - 250 Hz 0.1 Hz 50 Hz Group 13 ANALOGUE INPUTS 1301 MINIMUM AI1 0 - 100 % 1% 0% 1302 MAXIMUM AI1 0 - 100 % 1% 100 % 1303 FILTER AI1 0 - 10 s 0.1 s 0.1 s 1304 MINIMUM AI2 0 - 100 % 1% 0% 1305 MAXIMUM AI2 0 - 100 % 1% 100 % 1306 FILTER AI2 0 - 10 s 0.1 s 0.1 s 56 ACS 400 User’s Manual Code Name Range Resolution Default User S M Group 14 RELAY OUTPUTS 1401 RELAY OUTPUT 1 0 - 31 1 3 ü 1402 RELAY OUTPUT 2 0 - 31 1 2 ü 1403 RELAY 1 ON DELAY 0 - 3600 s 0.1 s; 1 s 0s 1404 RELAY 1 OFF DELAY 0 - 3600 s 0.1 s; 1 s 0s 1405 RELAY 2 ON DELAY 0 - 3600 s 0.1 s; 1 s 0s 1406 RELAY 2 OFF DELAY 0 - 3600 s 0.1 s; 1 s 0s Group 15 ANALOGUE OUTPUT 1501 AO CONTENT 102 - 137 1 103 1502 AO CONTENT MIN - * 0.0 Hz 1503 AO CONTENT MAX - * 50 Hz 1504 MINIMUM AO 0.0 - 20.0 mA 0.1 mA 0 mA 1505 MAXIMUM AO 0.0 - 20.0 mA 0.1 mA 20.0 mA 1506 FILTER AO 0 - 10 s 0.1 s 0.1 s ü Group 16 SYSTEM CONTROLS 1601 RUN ENABLE 0-6 1 0 1602 PARAMETER LOCK 0-2 1 1 (OPEN) 1604 FAULT RESET SEL 0-7 1 6 1605 LOCAL LOCK 0-1 1 0 (OPEN) 1607 PARAM. SAVE 0-1 1 0 (DONE) 1608 DISPLAY ALARMS 0-1 1 0 (NO) ü ü ü ü ü Group 20 LIMITS 2003 MAX CURRENT 0.5*IN - 1.5...1.7*IN ** 0.1 A 1.5*IN ** 2005 OVERVOLT CTRL 0-1 1 1 (ENABLE) 2006 UNDERVOLT CTRL 0-2 1 1 (ENABLE TIME) 2007 MINIMUM FREQ 0 - 250 Hz 1 Hz 0 Hz 2008 MAXIMUM FREQ 0 - 250 Hz 1 Hz 50 Hz ü ü Group 21 START/STOP 2101 START FUNCTION 1-4 1 1 (RAMP) 2102 STOP FUNCTION 1-2 1 1 (COAST) 2103 TORQ BOOST CURR 0.5*IN - 1.5...1.7*IN ** 0.1 A 1.2*IN ** 2104 STOP DC INJ TIME 0 - 250 s 0.1 s 0s 2105 PREMAGN SEL 0-6 1 0 2106 PREMAGN MAX TIME 0.0 - 130.0 s 0.1 s 2.0 s 2107 START INHIBIT 0-1 1 1 (ON) ACS 400 User’s Manual ü ü ü 57 Code Name Range Resolution Default User S M Group 22 ACCEL/DECEL 2201 ACC/DEC 0-5 1 5 2202 ACCELER TIME 1/2 SEL 1 0.1 - 1800 s 0.1; 1 s 5s 2203 DECELER TIME 1 0.1 - 1800 s 0.1; 1 s 5s 2204 ACCELER TIME 2 0.1 - 1800 s 0.1; 1 s 60 s 2205 DECELER TIME 2 0.1 - 1800 s 0.1; 1 s 60 s 2206 RAMP SHAPE 0-3 1 0 (LINEAR) ü ü Group 25 CRITICAL FREQ 2501 CRIT FREQ SEL 0-1 1 0 (OFF) 2502 CRIT FREQ 1 LO 0 - 250 Hz 1 Hz 0 Hz 2503 CRIT FREQ 1 HI 0 - 250 Hz 1 Hz 0 Hz 2504 CRIT FREQ 2 LO 0 - 250 Hz 1 Hz 0 Hz 2505 CRIT FREQ 2 HI 0 - 250 Hz 1 Hz 0 Hz Group 26 MOTOR CONTROL 2603 IR COMPENSATION 0 - 60 V 1V 10 V 2604 IR COMP RANGE 0 - 250 Hz 1 Hz 50 Hz 2605 LOW NOISE 0-1 1 0 (OFF) ü 2606 U/f RATIO 1-2 1 1 (LINEAR) ü 2607 SLIP COMP RATIO 0 - 250 % 1% 0% ü Group 30 FAULT FUNCTIONS 3001 AI<MIN FUNCTION 0-3 1 1 (FAULT) 3002 PANEL LOSS 1-3 1 1 (FAULT) 3003 EXTERNAL FAULT 0-5 1 0 (NOT SEL) 3004 MOT THERM PROT 0-2 1 1 (FAULT) 3005 MOT THERM TIME 256 - 9999 s 1s 500 s 3006 MOT LOAD CURVE 50 - 150 % 1% 100 % 3007 ZERO SPEED LOAD 25 - 150 % 1% 70 % 3008 BREAK POINT 1 - 250 Hz 1 Hz 35 Hz 3009 STALL FUNCTION 0-2 1 0 (NOT SEL) 3010 STALL CURRENT 0.5*IN - 1.5...1.7*IN ** 0.1 A 1.2* IN ** 3011 STALL FREQ HI 0.5 - 50 Hz 0.1 Hz 20 Hz 3012 STALL TIME 10...400 s 1s 20 s 3013 UNDERLOAD FUNC 0-2 1 0 (NOT SEL) 3014 UNDERLOAD TIME 10...400 s 1s 20 s 3015 UNDERLOAD CURVE 1-5 1 1 3022 AI1 FLT LIMIT 0 - 100 % 1% 0% 3023 AI2 FLT LIMIT 0 - 100 % 1% 0% 58 ACS 400 User’s Manual Code Name Range Resolution Default User S M Group 31 AUTOMATIC RESET 3101 NR OF TRIALS 0-5 1 0 3102 TRIAL TIME 1 - 600 s 0.1 s 30 s 3103 DELAY TIME 0 - 120 s 0.1 s 0s 3104 AR OVERCURRENT 0-1 1 0 (DISABLE) 3105 AR OVERVOLTAGE 0-1 1 0 (DISABLE) 3106 AR UNDERVOLTAGE 0-1 1 0 (DISABLE) 3107 AR AI<MIN 0-1 1 0 (DISABLE) Group 32 SUPERVISION 3201 SUPERV 1 PARAM 102 - 137 1 103 3202 SUPERV 1 LIM LO - - 0 3203 SUPERV 1 LIM HI - - 0 3204 SUPERV 2 PARAM 102 - 137 1 103 3205 SUPERV 2 LIM LO - - 0 3206 SUPERV 2 LIM HI - - 0 Group 33 INFORMATION 3301 SW VERSION 0.0.0.0 - f.f.f.f - - 3302 TEST DATE yy.ww - - 1(STANDARD) Group 34 PROCESS VARIABLES 3401 DISPLAY SEL 1-2 1 3402 P VAR 1 SEL 102 - 137 1 104 3403 P VAR 1 MULTIP 1 - 9999 1 1 3404 P VAR 1 DIVISOR 1 - 9999 1 1 3405 P VAR 1 SCALING 0-3 1 1 3406 P VAR 1 UNIT 0 - 31 1 1 ( A) 3407 P VAR 2 SEL 102 - 137 1 103 3408 P VAR 2 MULTIP 1 - 9999 1 1 3409 P VAR 2 DIVISOR 1 - 9999 1 1 3410 P VAR 2 SCALING 0-3 1 1 3411 P VAR 2 UNIT 0 - 31 1 3 (Hz) ACS 400 User’s Manual 59 Code Name Range Resolution Default User S M Group 40 PID CONTROL 4001 PID GAIN 0.1 - 100 0.1 1.0 ü 4002 PID INTEG TIME 0 - 600 s 0.1 s 60 s ü 4003 PID DERIV TIME 0 - 60 s 0.1 s 0s 4004 PID DERIV FILTER 0 - 10 s 0.1 s 1s 4005 ERROR VALUE INV 0-1 1 0 (NO) 4006 ACTUAL VAL SEL 1-9 1 1 (ACT1) ü 4007 ACT1 INPUT SEL 1-2 1 2 (AI2) ü 4008 ACT2 INPUT SEL 1-2 1 2 (AI2) ü 4009 ACT1 MINIMUM 0 - 1000 % 1% 0% 4010 ACT1 MAXIMUM 0 - 1000 % 1% 100 % 4011 ACT2 MINIMUM 0 - 1000 % 1% 0% 4012 ACT2 MAXIMUM 0 - 1000 % 1% 100 % 4013 PID SLEEP DELAY 0.0 - 3600 s 0.1; 1 s 60 s 4014 PID SLEEP LEVEL 0.0 - 120 Hz 0.1 Hz 0 Hz 4015 WAKE-UP LEVEL 0.0 - 100 % 0.1 % 0% 4016 PID PARAM SET 1-7 1 6 (SET 1) 4017 WAKE-UP DELAY 0 - 60 s 0.01 s 0.50 s 4018 SLEEP SELECTION 0-5 1 0 (INTERNAL) 4019 SET POINT SEL 1-2 1 2 (EXTERNAL) 4020 INTERNAL SETPNT 0.0 - 100.0 % 0.1 % 40 % ü Group 41 PID CONTROL (2) 4101 PID GAIN 0.1 - 100 0.1 1.0 ü 4102 PID INTEG TIME 0 - 600 s 0.1 s 60 s ü 4103 PID DERIV TIME 0 - 60 s 0.1s 0s 4104 PID DERIV FILTER 0 - 10 s 0.1 s 1s 4105 ERROR VALUE INV 0-1 1 0 (NO) 4106 ACTUAL VAL SEL 1-9 1 1 (ACT1) ü 4107 ACT1 INPUT SEL 1-2 1 2 (AI2) ü 4108 ACT2 INPUT SEL 1-2 1 2 (AI2) ü 4109 ACT1 MINIMUM 0 - 1000 % 1% 0% 4110 ACT1 MAXIMUM 0 - 1000 % 1% 100 % 4111 ACT2 MINIMUM 0 - 1000 % 1% 0% 4112 ACT2 MAXIMUM 0 - 1000 % 1% 100 % 4119 SET POINT SEL 1-2 1 2 (EXTERNAL) 4120 INTERNAL SETPNT 0.0 - 100.0 % 0.1 % 40.0 % 60 ACS 400 User’s Manual Code Name Range Resolution Default User S M Group 50 COMMUNICATION 5001 DDCS BIT RATE 1, 2, 4, 8 - 1 (1 Mbits/s) ü 5002 DDCS NODE NR 1 - 254 1 1 ü 5003 COMM FAULT TIME 0.1 - 60 s 0.1 s 1s 5004 COMM FAULT FUNC 0-3 1 0 (NOT SEL) 5005 PROTOCOL SEL 0-3 1 0 (NOT SEL) ü 5006 COMM COMMANDS 0-2 1 0 (NOT SEL) ü 5007 DDCS BUS MODE 1-2 1 1 (FIELDBUS) ü 5008 DDCS LINK CTRL 0 - 15 1 8 ü 5009 DDCS HW CONFIG 0-1 1 1 (STAR) ü - - - 1 Group 51 EXT COMM MODULE 51015115 FIELDBUSPAR1 - 15 Group 52 STANDARD MODBUS 5201 STATION NUMBER 1 - 247 5202 COMM SPEED 3, 6, 12, 24,48, 96, 192 - 96 (9600 bits/s) 1 5203 PARITY 0-2 1 0 (NONE) 5206 BAD MESSAGES 0 - FFFF 1 - 5207 GOOD MESSAGES 0 - FFFF 1 - 5208 BUFFER OVERRUNS 0 - FFFF 1 - 5209 FRAME ERRORS 0 - FFFF 1 - 5210 PARITY ERRORS 0 - FFFF 1 - 5211 CRC ERRORS 0 - FFFF 1 - 5212 BUSY ERRORS 0 - FFFF 1 - 5213 SER FAULT MEM 1 0 - 255 1 - 5214 SER FAULT MEM 2 0 - 255 1 - 5215 SER FAULT MEM 3 0 - 255 1 - Group 81 PFC CONTROL 8103 REFERENCE STEP 1 0.0 - 100 % 0.1 % 0% 8104 REFERENCE STEP 2 0.0 - 100 % 0.1 % 0% 8105 REFERENCE STEP 3 0.0 - 100 % 0.1 % 0% 8109 START FREQ 1 0.0 - 250 Hz 0.1 Hz 50Hz 8110 START FREQ 2 0.0 - 250 Hz 0.1 Hz 50 Hz 8111 START FREQ 3 0.0 - 250 Hz 0.1 Hz 50 Hz 8112 LOW FREQ 1 0.0 - 250 Hz 0.1 Hz 25 Hz 8113 LOW FREQ 2 0.0 - 250 Hz 0.1 Hz 25 Hz 8114 LOW FREQ 3 0.0 - 250 Hz 0.1 Hz 25 Hz 8115 AUX MOT START D 0.0 - 3600 s 0.1 s; 1 s 5s 8116 AUX MOT STOP D. 0.0 - 3600 s 0.1 s; 1 s 3s 8117 NR OF AUX MOT 0-3 1 1 ACS 400 User’s Manual ü 61 Code Name Range Resolution Default 8118 AUTOCHNG INTERV 0.0 - 336 h 0.1 h User S M 0.0 h (NOT SEL) 8119 AUTOCHNG LEVEL 0.0 - 100.0 % 0.1 % 50 % 8120 INTERLOCKS 0-6 1 4 (DI4) 8121 REG BYPASS CTRL 0-1 1 0 (NO) 8122 PFC START DELAY 0 - 10 s 0.01 s 0.5 s ü * The maximum factor depending on the type of the frequency converter at 4 kHz switching frequency. ** Range and default value depend on drive type and parameter 2605 LOW NOISE setting. 62 ACS 400 User’s Manual Group 99: Start-up Data The Start-up Data parameters are a special set of parameters for setting up the ACS 400 and for entering motor information. Code Description 9901 9902 LANGUAGE Language selection for the ACS-PAN-A control panel. 0 = ENGLISH 3 = ITALIAN 6 = DUTCH 9 = FINNISH 1 = ENGLISH (AM) 4 = SPANISH 7 = FRENCH 10 = SWEDISH 2 = GERMAN 5 = PORTUGUESE 8 = DANISH 11 = RUSSIAN 12 = (reserved) APPLIC MACRO Application macro selection. This parameter is used to select the Application Macro which will configure the ACS 400 for a particular application. Refer to “Application Macros”, starting page 43, for a list and description of available Application Macros. 0 = FACTORY 2 = 3-WIRE 4 = MOTOR POT 6 = PID CONTROL 1 = ABB STANDARD 3 = ALTERNATE 5 = HAND/AUTO 7 = PREMAGN 8 = PFC CONTROL 9905 MOTOR NOM VOLT Nominal motor voltage from motor rating plate. This parameter sets the maximum output voltage supplied to motor by ACS 400. MOTOR NOM FREQ sets the frequency at which output voltage is equal to the MOTOR NOM VOLT. The ACS 400 cannot supply the motor with a voltage greater than the mains voltage. See Figure 36. 9906 MOTOR NOM CURR Nominal motor current from rating plate. The allowed range is 0.5 · IN ... 1.5 · IN of ACS 400. 9907 MOTOR NOM FREQ Nominal motor frequency from rating plate (field weakening point). See Figure 36. 9908 MOTOR NOM SPEED Nominal motor speed from rating plate. 9909 MOTOR NOM POWER Nominal motor power from rating plate. 9910 MOTOR COS PHI Nominal motor cos phi from rating plate. Output voltage MOTOR NOM VOLT Output frequency MOTOR NOM FREQ Figure 36 Output voltage as a function of output frequency. ACS 400 User’s Manual 63 Group 01: Operating Data This group contains drive operating data, including actual signals and fault memories. Actual Signal values are measured or calculated by the drive and they cannot be set by the user. Fault memories can be cleared by the user from the control panel. Code Description 0102 SPEED Displays the calculated speed of the motor (rpm). 0103 OUTPUT FREQ Displays the frequency (Hz) applied to the motor. (Also shown in OUTPUT display.) 0104 CURRENT Displays the motor current, as measured by the ACS 400. (Also shown in OUTPUT display.) 0105 TORQUE Output torque. Calculated value of torque on motor shaft in % of motor nominal torque. 0106 POWER Displays the measured motor power in kW. 0107 DC BUS VOLTAGE Displays the DC bus voltage, as measured by the ACS 400. The voltage is displayed in Volts DC. 0109 OUTPUT VOLTAGE Displays the voltage applied to the motor. 0110 ACS 400 TEMP Displays the temperature of the ACS 400 heatsink in Centigrade. 0111 EXTERNAL REF 1 The value of external reference 1 in Hz. 0112 EXTERNAL REF 2 The value of external reference 2 in %. 0113 CTRL LOCATION Displays the active control location. Alternatives are: Note! ACS100-PAN will not display the unit (“kW”). 0 = LOCAL 1 = EXT1 2 = EXT2 See “Appendix A”, starting page 149, for description of different control locations. 0114 RUN TIME (R) Shows the total running time of the ACS 400 in hours (h). Can be reset by pressing UP and DOWN buttons simultaneously when in parameter set mode. 0115 kWh COUNTER (R) Shows the counted kilowatt hours of the ACS 400 in operation. Can be reset by pressing UP and DOWN buttons simultaneously when in parameter set mode. 0116 APPL BLK OUTPUT The reference value in per cent received from the application block. The value is from PID control or PFC control, depending on the selected macro. Otherwise the value is from 0112 EXT REF 2. 0117 DI1-DI4 STATUS Status of the four digital inputs. Status is displayed as a binary number. If the input is activated, the display will indicate 1. If the input is deactivated, the display will be 0. ACS100-PAN ACS-PAN 000001101BIN DI 4 64 DI 3 DI 2 DI 1 ACS 400 User’s Manual Code Description 0118 AI1 Relative value of analogue input 1 displayed in %. 0119 AI2 Relative value of analogue input 2 displayed in %. 0121 DI5 & RELAYS Status of digital input 5 and relay outputs. 1 indicates that the relay is energised and 0 indicates that the relay is de-energised. ACS100-PAN ACS-PAN 000000101BIN DI 5 Relay 2 status Relay 1 status 0122 AO Value of analogue output signal in milliamperes. 0124 ACTUAL VALUE 1 PID/PFC controller actual value 1 (ACT1), displayed in per cent. 0125 ACTUAL VALUE 2 PID/PFC controller actual value 2 (ACT2), displayed in per cent. 0126 CONTROL DEV Displays the difference between the reference value and the actual value of the PID/PFC controller. 0127 PID ACT VALUE Feedback signal (actual value) for PID/PFC controller. 0128 LAST FAULT Last recorded fault (0=no fault). See “Diagnostics”, starting page 143. Can be cleared with the control panel by pressing UP and DOWN buttons simultaneously when in parameter set mode. 0129 PREVIOUS FAULT Previous recorded fault. See “Diagnostics”, starting page 143. Can be cleared with the control panel by pressing UP and DOWN buttons simultaneously when in parameter set mode. 0130 OLDEST FAULT Oldest recorded fault. See “Diagnostics”, starting page 143. Can be cleared with the control panel by pressing UP and DOWN buttons simultaneously when in parameter set mode. 0131 SER LINK DATA 1 Free data location that can be written from serial link. 0132 SER LINK DATA 2 Free data location that can be written from serial link. 0133 SER LINK DATA 3 Free data location that can be written from serial link. 0134 PROCESS VAR 1 Process variable 1, as selected by the parameters in group 34. 0135 PROCESS VAR 2 Process variable 2, as selected by the parameters in group 34. 0136 RUN TIME Shows the total running time of ACS 400 in thousands of hours (kh). 0137 MWh COUNTER Counts the megawatt hours of ACS 400 in operation. ACS 400 User’s Manual 65 Group 10: Command Inputs Start, Stop and Direction commands can be given from the control panel or from two external locations (EXT1, EXT2). The selection between the two external locations is made with parameter 1102 EXT1/EXT2 SEL. For more information on control locations refer to “Appendix A”, starting page 149. Code Description 1001 EXT1 COMMANDS Defines the connections and the source of Start/Stop/Direction commands for External control location 1 (EXT1). 0 = NOT SEL No Start/Stop/Direction command source for EXT1 is selected. 1 = DI1 Two-wire Start/Stop connected to digital input DI1. DI1 deactivated = Stop; DI1 activated = Start. * 2 = DI1,2 Two-wire Start/Stop, Direction. Start/Stop is connected to digital input DI1 as above. Direction is connected to digital input DI2. DI2 deactivated = Forward; DI2 activated = Reverse. To control direction, value of parameter 1003 DIRECTION should be REQUEST. 3 = DI1P,2P Three-wire Start/Stop. Start/Stop commands are given by means of momentary push-buttons (the P stands for “pulse”). The Start push-button is normally open, and connected to digital input DI1. The Stop pushbutton is normally closed, and connected to digital input DI2. Multiple Start push-buttons are connected in parallel; multiple Stop push-buttons are connected in series. *,** 4 = DI1P,2P,3 Three-wire Start/Stop, Direction. Start/Stop connected as with DI1P,2P. Direction is connected to digital input DI3. DI3 deactivated = Forward; DI3 activated = Reverse. To control Direction, value of parameter 1003 DIRECTION should be REQUEST. ** 5 = DI1P,2P,3P Start Forward, Start Reverse, and Stop. Start and Direction commands are given simultaneously with two separate momentary push-buttons (the P stands for “pulse”). The Stop push-button is normally closed, and connected to digital input DI3. The Start Forward and Start Reverse push-buttons are normally open, and connected to digital inputs DI1 and DI2 respectively. Multiple Start push-buttons are connected in parallel, and multiple Stop push-buttons are connected in series. To control direction, value of parameter 1003 DIRECTION should be REQUEST. ** 6 = DI5 Two-wire Start/Stop, connected to digital input DI5. DI5 deactivated = Stop and DI5 activated = Start. * 7 = DI5,4 Two-wire Start/Stop/Direction. Start/Stop is connected to digital input DI5. Direction is connected to digital input DI4. DI4 deactivated = Forward and DI4 activated = Reverse. To control direction, value of parameter 1003 DIRECTION should be REQUEST. 8 = KEYPAD The Start/Stop and Direction commands are given from the control panel when External control location 1 is active. To control direction, value of parameter 1003 DIRECTION should be REQUEST. 9 = DI1F,2R Start forward command is given when DI1= activated and DI2= deactivated. Start reverse command is given if DI1 is deactivated and DI2 is activated. In other cases Stop command is given. 10 = COMM The Start/Stop and Direction commands are given through serial communication. *Note! In cases 1, 3, 6 direction is set with parameter 1003 DIRECTION. Selecting value 3 (REQUEST) fixes direction to Forward. **Note! Stop signal must be activated before Start command can be given. 66 ACS 400 User’s Manual 1002 EXT2 COMMANDS Defines the connections and the source of Start, Stop and Direction commands for external control location 2 (EXT2). Refer to parameter 1001 EXT1 COMMANDS above. 1003 DIRECTION 1 = FORWARD 2 = REVERSE 3 = REQUEST Rotation direction lock. This parameter allows you to fix the direction of rotation of the motor to forward or reverse. If you select 3 (REQUEST), the direction is set according to the given direction command. ACS 400 User’s Manual 67 Group 11: Reference Select Reference commands can be given from the control panel or from two external locations. The selection between the two external locations is made with parameter 1102 EXT1/EXT2 SEL. For more information on control locations, refer to “Appendix A”, starting page 149. Code Description 1101 KEYPAD REF SEL Selection of active control panel reference in local control mode. 1 = REF1 (Hz) Control panel reference is given in Hz. 2 = REF2 (%) Control panel reference is given as a percentage (%). 1102 EXT1/EXT2 SEL Sets the input used for selecting the external control location, or fixes it to EXT1 or EXT2. The external control location of both Start/Stop/Direction commands and reference is determined by this parameter. 1...5 = DI1...DI5 External control location 1 or 2 is selected according to the state of the selected digital input (DI1 ... DI5), where deactivated = EXT1 and activated = EXT2. 6 = EXT1 External control location 1 (EXT1) is selected. The control signal sources for EXT1 are defined with parameter 1001 (Start/Stop/Direction commands) and parameter 1103 (reference). 7 = EXT2 External control location 2 (EXT2) is selected. The control signal sources for EXT2 are defined with parameter 1002 (Start/Stop/Direction commands) and parameter 1106 (reference). 8 = COMM External control location 1 or 2 is chosen through serial communication. 68 ACS 400 User’s Manual 1103 EXT REF1 SELECT This parameter selects the signal source of external reference 1. 0 = KEYPAD Reference is given from the control panel. 1 = AI 1 Reference is given through analogue input 1. 2 = AI 2 Reference is given through analogue input 2. 3 = AI1/JOYST; 4 = AI2/JOYST Reference is given through analogue input 1 (or 2 accordingly) configured for a joystick. The minimum input signal runs the drive at maximum reference in the reverse direction. The maximum input signal runs the drive at maximum reference in the forward direction (See Figure 37). See also parameter 1003 DIRECTION. Caution: Minimum reference for joystick should be 0.3 V (0.6 mA) or higher. If a 0 ... 10 V signal is used, the ACS 400 will operate at maximum reference in the reverse direction if the control signal is lost. Set parameter 3022 AI1 FAULT LIMIT to a value 3 % or higher, and parameter 3023 AI2 FAULT LIMIT to 1 (FAULT), and the ACS 400 will stop in case the control signal is lost. EXT REF EXT REF 1 MAX 1 MIN - EXT REF 1 MIN 10 V / 20 mA Hysteresis 4 % of Full Scale - EXT REF 1 MAX 2 V / 4 mA 0 V / 0 mA EXT REF 1 MIN -2 % +2 % - EXT REF 1 MIN Figure 37 Joystick control. Maximum for external reference 1 is set with Parameter 1105 and minimum with Parameter 1104. 5 = DI3U,4D(R) Speed reference is given through digital inputs as motor potentiometer control. Digital input DI3 increases the speed (the U stands for “up”), and digital input DI4 decreases the speed (the D stands for “down”). (R) indicates that the reference will be reset to zero when a Stop command is given. The rate of change of the reference signal is controlled by parameter 2204 ACCELER TIME 2. 6 = DI3U,4D Same as above, except that the speed reference is not reset to zero on a Stop command. When the ACS 400 is started, the motor will ramp up at the selected acceleration rate to the stored reference. 7 = DI4U,5D Same as above, except that the digital inputs in use are DI4 and DI5. 8 = COMM The reference is given through serial communication. 9 = COMM + AI1 10 = COMM * AI1 The reference is given through serial communication. The analogue input 1 signal is combined to the fieldbus reference (sum or multiplication). For more information, see chapter “Standard Serial Communication” on page 121. ACS 400 User’s Manual 69 11 = DI3U,4D(R,NC) 12 = DI3U,4D(NC) 13 = DI4U,5D(NC) Selections 11,12,13 are the same as selections 5, 6, 7 respectively, with the exception that the reference value is not copied when: • moving from EXT1 to EXT 2, • or moving from EXT2 to EXT1, or • moving from local to remote. 1104 EXT REF1 MIN Sets the minimum frequency reference for external reference 1 in Hz. When analogue input signal is at minimum, external reference 1 equals to EXT REF1 MIN. See Figure 38 on page 71. 1105 EXT REF1 MAX Sets the maximum frequency reference for external reference 1 in Hz. When analogue input signal is at maximum, external reference 1 equals to EXT REF1 MAX. See Figure 38 on page 71. 1106 EXT REF2 SELECT This parameter selects the signal source for external reference 2. The alternatives are the same as with external reference 1, see 1103 EXT REF1 SELECT. 1107 EXT REF2 MIN Sets the minimum reference in %. When analogue input signal is at minimum, external reference 2 equals to EXT REF2 MIN. See Figure 38. • If the PID Control or PFC macro is selected, this parameter sets the minimum process reference. • If any other macro than PID is selected, this parameter sets the minimum frequency reference. This value is given as a percentage of the maximum frequency. 1108 EXT REF2 MAX Sets the maximum reference in %. When analogue input signal is at maximum, external reference 2 equals to EXT REF2 MAX. See Figure 38. • If the PID Control or PFC macro is selected, this parameter sets the maximum process reference. • If any other macro than PID Control is selected, this parameter sets the maximum frequency reference. This value is given as percentage of maximum frequency. 70 ACS 400 User’s Manual EXT REF EXT REF MAX EXT REF MIN Analogue input signal AI min AI max EXT REF EXT REF MIN EXT REF MAX Analogue input signal AI min AI max Figure 38 Setting EXT REF MINIMUM and EXT REF MAXIMUM. The range of the analogue input signal is set by parameters 1301 and 1302 or parameters 1304 and 1305, depending on the analogue input used. ACS 400 User’s Manual 71 Group 12: Constant Speeds The ACS 400 has 7 programmable constant speeds, ranging from 0 to 250 Hz. Negative speed values cannot be given for constant speeds. Constant speed selections are ignored if the process PID reference is followed, the drive is in local control mode or PFC (Pump-Fan Control) is active. Note! Parameter 1208 CONST SPEED 7 acts also as a so-called fault speed which may be activated if the control signal is lost. Refer to parameter 3001 AI<MIN FUNCTION and parameter 3002 PANEL LOSS. Code Description 1201 CONST SPEED SEL This parameter defines which digital inputs are used to select Constant Speeds. 0 = NOT SEL Constant speed function disabled. 1...5 = DI1...DI5 Constant Speed 1 is selected with digital inputs DI1-DI5. Digital input activated = Constant Speed 1 activated. 6 = DI1,2 Three Constant Speeds (1 ... 3) are selected with two digital inputs. Constant Speed selection with digital inputs DI1,2. Table 13 Constant Speed selection with digital inputs DI1,2. DI 1 DI 2 0 0 No constant speed Function 1 0 Constant speed 1 (1202) 0 1 Constant speed 2 (1203) 1 1 Constant speed 3 (1204) 0 = DI deactivated, 1 = DI activated 7 = DI3,4 Three Constant Speeds (1 ... 3) are selected with two digital inputs as in DI1,2. 8 = DI4,5 Three Constant Speeds (1 ... 3) are selected with two digital inputs as in DI1,2. 9 = DI1,2,3 Seven Constant Speeds (1 ... 7) are selected with three digital inputs. Table 14 Constant Speed selection with digital inputs DI1,2,3. DI 1 DI 2 DI 3 0 0 0 No constant speed Function 1 0 0 Constant speed 1 (1202) 0 1 0 Constant speed 2 (1203) 1 1 0 Constant speed 3 (1204) 0 0 1 Constant speed 4 (1205) 1 0 1 Constant speed 5 (1206) 0 1 1 Constant speed 6 (1207) 1 1 1 Constant speed 7 (1208) 0 = DI deactivated, 1 = DI activated 10 = DI3,4,5 Seven Constant Speeds (1 ... 7) are selected with three digital inputs as in DI1,2,3. 1202 CONST SPEED 1... CONST SPEED 7 -1208 Constant speeds 1-7. 72 ACS 400 User’s Manual Group 13: Analogue Inputs Code Description 1301 MINIMUM AI1 Relative minimum value of AI1 (%). Value corresponds to minimum reference set by parameter 1104 EXT REF1 MIN or 1107 EXT REF2 MIN. Minimum AI cannot be greater than maximum AI. See Figure 38 on page 71. 1302 MAXIMUM AI1 Maximum value of AI1 (%). Value corresponds to maximum reference set by parameter 1105 EXT REF1 MAX or 1108 EXT REF2 MAX. See Figure 38 on page 71. 1303 FILTER AI1 Filter time constant for analogue input AI1. As the analogue input value changes, 63 % of the change takes place within the time specified by this parameter. Note! Even if you select 0 s for the filter time constant, the signal is still filtered with a time constant of 25 ms due to the signal interface hardware. This cannot be changed by any parameters. [%] Unfiltered signal 100 63 Filtered signal t Time constant Figure 39 Filter time constant for analogue input AI1. 1304 MINIMUM AI2 Minimum value of AI2 (%). Value corresponds to minimum reference set by parameter 1104 EXT REF1 MIN or 1107 EXT REF2 MIN. Minimum AI cannot be greater than maximum AI. 1305 MAXIMUM AI2 Maximum value of AI2 (%). Value corresponds to maximum reference set by parameter 1105 EXT REF1 MAX or 1108 EXT REF2 MAX. 1306 FILTER AI2 Filter time constant for AI2. Refer to parameter 1303 FILTER AI1. Example. To set the minimum allowed analogue input value to 4 mA, value for parameter 1301 MINIMUM AI1 (1304 MINIMUM AI2) is calculated as follows: Value (%) = Desired minimum value / Full range of the analogue input * 100% = 4 mA / 20 mA * 100% = 20%. Note! In addition to this parameter setting, the analog input must be configured for 0-20 mA current signal. Refer to section “Connection Examples” on page 22. ACS 400 User’s Manual 73 Group 14: Relay Outputs Code Description 1401 RELAY OUTPUT 1 Relay output 1 content. Selects which information is indicated with relay output 1. 0 = NOT SEL Relay is not used and is de-energised. 1 = READY The ACS 400 is ready to function. The relay is energised unless no run enable signal is present or a fault exists and supply voltage is within range. 2 = RUN Relay energised when the ACS 400 is running. 3 = FAULT (-1) Relay energised when power is applied, and de-energised upon a fault trip. 4 = FAULT Relay energised when a fault is active. 5 = ALARM Relay energised when an alarm is active. To see which alarms cause the relay to energise, refer to section “Diagnostics” on page 143. 6 = REVERSED Relay energised when motor rotates in reverse direction. 7 = SUPRV1 OVER Relay energised when first supervised parameter (3201) exceeds the limit (3203). See “Group 32: Supervision”, starting page 91. 8 = SUPRV1 UNDER Relay energised when first supervised parameter (3201) drops below the limit (3202). See “Group 32: Supervision”, starting page 91. 9 = SUPRV2 OVER Relay energised when second supervised parameter (3204) exceeds the limit (3206). See “Group 32: Supervision”, starting page 91. 10 = SUPRV2 UNDER Relay energised when second supervised parameter (3204) drops below the limit (3205). See “Group 32: Supervision”, starting page 91. 11 = AT SET POINT Relay energised when output frequency is equal to reference frequency. 12 = FAULT (RST) Relay energised when the ACS 400 is in a fault condition and will reset after the programmed autoreset delay (refer to parameter 3103 DELAY TIME). 13 = FLT/ALARM Relay is energised when fault or alarm occurs. To see which alarms and faults cause the relay to energise, refer to section “Diagnostics” on page 143. 14 = EXT CONTROL Relay is energised if external control is selected. 15 = REF 2 SEL Relay is energised if EXT2 is selected. 16 = CONST FREQ Relay is energised when a constant speed is selected. 17 = REF LOSS Relay is energised when reference or active control place is lost. 18 = OVERCURRENT Relay is energised when overcurrent alarm or fault appears. 19 = OVERVOLTAGE Relay is energised when overvoltage alarm or fault appears. 20 = ACS400 TEMP Relay is energised when ACS 400 overtemperature alarm or fault exists. 74 ACS 400 User’s Manual Code Description 21 = ACS OVERLOAD Relay is energised when ACS 400 overload alarm or fault exists. 22 = UNDERVOLTAGE Relay is energised when undervoltage alarm or fault exists. 23 = AI1 LOSS Relay is energised when AI1 signal is lost. 24 = AI2 LOSS Relays energised when AI2 signal is lost. 25 = MOT OVR TEMP Relay is energised when motor overtemperature alarm or fault exists. 26 = STALL Relay is energised when stall alarm or fault exists. 27 = UNDERLOAD Relay is energised when underload alarm or fault exists. 28 = PID SLEEP Relay is energised when PID sleep function is active. 29 = PFC Relay output is reserved for PFC control (Pump-Fan Control). This option should be selected only when PFC control macro is used. Note! This value can be selected only when the drive is stopped. 30 = AUTOCHANGE Relay is energised when PFC autochange operation is performed. This option should be selected only when PFC control macro is used. 31 = STARTED Relay is energised when drive receives start command (even if Run Enable signal is not present). Relay is de-energised when stop command is received or fault occurs. 1402 RELAY OUTPUT 2 Relay output 2 content. Refer to parameter 1401 RELAY OUTPUT 1. 1403 RO 1 ON DELAY Switch-on delay for relay 1. Selected controlling signal 1404 RO 1 OFF DELAY Switch-off delay for relay 1 1405 RO 2 ON DELAY Switch-on delay for relay 2. Relay status 1406 RO 2 OFF DELAY Switch-off delay for relay 2. 1403 ON DELAY 1404 OFF DELAY Figure 40 ACS 400 User’s Manual 75 Group 15: Analogue Output Analogue output is used to output the value of any parameter of the Operating Data group (Group 1) as a current signal. Output current minimum and maximum values are configurable, as are the allowed minimum and maximum values for the observed parameter. If analogue output content maximum value (parameter 1503) is set to less than minimum value (parameter 1502), output current is inversely proportional to the value of the observed parameter. Code Description 1501 AO CONTENT Content for analogue output. Number of any parameter of the Operating Data group (Group 01). 1502 AO CONTENT MIN Analogue output content minimum. Display depends on parameter 1501. 1503 AO CONTENT MAX Analogue output content maximum. Display depends on parameter 1501. 1504 MINIMUM AO Minimum output current. 1505 MAXIMUM AO Maximum output current. 1506 AO FILTER Filter time constant for AO. AO (mA) 1505 1504 AO content 1502 1503 AO (mA) 1505 1504 AO content 1503 1502 Figure 41 Analogue output scaling. 76 ACS 400 User’s Manual Group 16: System Controls Code Description 1601 RUN ENABLE Selects the source of the run enable signal. 0 = NOT SEL The ACS 400 is ready to start without an external run enable signal. 1...5 = DI1 ... DI5 To activate the run enable signal, the selected digital input must be activated. If the voltage drops and deactivates the selected digital input, the ACS 400 will coast to stop and not start until the run enable signal resumes. 6 = COMM The run enable signal is given through serial communication (Command Word bit #3). 1602 PARAMETER LOCK Parameter lock for control panel. 0 = LOCKED Parameter modification disabled. 1 = OPEN Panel operations are allowed and parameter modification is enabled. 2 = NOT SAVED Parameter values can be changed, but they are not stored in permanent memory. Note! This parameter is not affected by macro selection. Note! Parameter writes through Standard Modbus or DDCS channels are not affected by this parameter. 1604 FAULT RESET SEL Fault reset source. Note! Fault reset is always possible with control panel. Note! Option 6 (START/STOP) should not be selected when start, stop and direction commands are given through serial communication. 0 = KEYPAD Fault reset is executed from the control panel keypad. 1...5 = DI1 ... DI5 Fault reset is executed from a digital input. Reset is activated by deactivating the input. 6 = START/STOP Fault reset is activated by Stop command. 7 = COMM Fault reset is executed through serial communication. 1605 LOCAL LOCK Local lock. When LOCAL LOCK is active (1=LOCKED), panel cannot change to local mode. 0 = OPEN Control location can be changed from control panel. 1 = LOCKED Panel cannot change to local mode. Note! Option 1 LOCKED can be selected only in remote mode. ACS 400 User’s Manual 77 Code Description 1607 PARAM. SAVE Parameter save function. Selection 1 (SAVE...) saves all altered parameters to permanent memory. Value 0 (DONE) is displayed when all parameter are saved. When parameters are altered through Standard Modbus or DDCS channels, altered values are not automatically saved to permanent memory. Instead, this parameter must be used. 0 = DONE 1 = SAVE… Note! Parameter modifications done from the control panel are normally stored immediately to permanent memory. However, if 1602 PARAMETER LOCK is set to 2 (NOT SAVED), modifications done from the control panel are saved only if this parameter 1607 is used. 1608 DISPLAY ALARMS Controls the visibility of some of the alarms, see “Diagnostics” on page 143. 1 = NO Some of the alarms are suppressed. 2 = YES All of the alarms are enabled. 78 ACS 400 User’s Manual Group 20: Limits Code Description 2003 MAX CURRENT Maximum output current. The maximum output current that the ACS 400 will supply to the motor. 2005 OVERVOLT CTRL DC overvoltage controller enable. Fast braking of a high inertia load causes the DC bus voltage to rise to the overvoltage control limit. To prevent the DC voltage from exceeding the trip limit, the overvoltage controller automatically decreases the braking torque by increasing output frequency. Caution! If a braking chopper and a braking resistor are connected to the ACS 400, this parameter value must be set to 0 to ensure proper operation of the chopper. 0 = DISABLE 1 = ENABLE 2006 UNDERVOLT CTRL DC undervoltage controller enable. If the DC bus voltage drops due to loss of input power, the undervoltage controller will decrease the motor speed in order to keep the DC bus voltage above the lower limit. By decreasing the output frequency, the inertia of the load will cause regeneration back into the ACS 400, thus keeping the DC bus charged, and preventing an undervoltage trip. This will increase power loss ride-through on systems with a high inertia, such as a centrifuge or a fan. 0 = DISABLE 1 = ENABLE (TIME) Enable with 500 ms time limit for operation. 2 = ENABLE Enable without time limit for operation. 2007 MINIMUM FREQ Operating range minimum output frequency. Note! Keep MINIMUM FREQ ≤ MAXIMUM FREQ. 2008 MAXIMUM FREQ Operating range maximum output frequency. ACS 400 User’s Manual 79 Group 21: Start/Stop ACS 400 supports several start and stop modes, including flying start and torque boosting at start. DC current can be injected either before the start command (premagnetising) or automatically right after the start command (starting with DC hold). DC hold can be used when stopping the drive with ramp. If drive is stopping by coasting, DC brake can be used. Note! Too long a DC injection time or premagn max time causes the motor to heat up. Code Description 2101 START FUNCTION Conditions during motor acceleration. 1 = RAMP Ramp acceleration as set. 2 = FLYING Flying start. Use this setting if the motor is already rotating and the drive will start smoothly at the current frequency. The drive will automatically search the correct output frequency. 3 = TORQUE BOOST Automatic torque boost might be necessary in drives with high starting torque. Torque boost is only applied at start. Boosting is stopped when output frequency exceeds 20 Hz or when output frequency is equal to reference. See also parameter 2103 TORQ BOOST CURR. 4 = FLY + BOOST Activates both the flying start and torque boost. Note! If torque boost is used the switching frequency is always 4 kHz. In this case parameter 2605 NOISE is ignored. LOW 2102 STOP FUNCTION Conditions during motor deceleration. 1 = COAST Motor coasts to stop. 2 = RAMP Ramp deceleration as defined by the active deceleration time 2203 DECELER TIME 1 or 2205 DECELER TIME 2. 2103 TORQ BOOST CURR Maximum supplied current during torque boost. See also parameter 2101 START FUNCTION. 2104 STOP DC INJ TIME DC injection time after modulation has stopped. If 2102 STOP FUNCTION is 1 (COAST), ACS 400 uses DC braking. If 2102 STOP FUNCTION is 2 (RAMP), ACS 400 uses DC hold after ramp. 2105 PREMAGN SEL Options 1- 5 select source for premagnetising command. Option 6 selects start with DC hold. 0 = NOT SEL Premagnetising not used. 1...5 = DI1...DI5 Premagnetising command is received through a digital input. 6 = CONST Constant premagnetising time after start command. Time is defined by parameter 2106 PREMAGN MAX TIME. 2106 PREMAGN MAX TIME Maximum premagnetising time. 80 ACS 400 User’s Manual Code Description 2107 START INHIBIT Start inhibit control. Start inhibit means that a pending start command is ignored when: • fault is reset, or • Run Enable activates while start command is active, or • mode change from local to remote takes place, or • mode change from remote to local takes place, or • when switching from EXT1 to EXT2 takes place, or • when switching from EXT2 to EXT1 takes place 0 = OFF Start inhibit control disabled. Drive will start after fault is reset, Run Enable is activated or mode is changed while there is a pending start command. 1 = ON Start inhibit control enabled. Drive will not start after fault is reset, Run Enable is activated or mode is changed. In order to start the drive again, give start command anew. ACS 400 User’s Manual 81 Group 22: Accel/Decel Two acceleration/deceleration ramp pairs can be used. If both ramp pairs are used, selection can be made between these in run time through a digital input. The S curve of the ramps is adjustable. Code Description 2201 ACC/DEC 1/2 SEL Selects the source for the ramp pair selection signal. 0 = NOT SEL The first ramp pair is used (ACCELER TIME 1/DECELER TIME 1). 1...5 = DI1...DI5 Ramp pair selection is done through a digital input (DI1 to DI5). Digital input deactivated = Ramp pair 1 (ACCELER TIME 1/DECELER TIME 1) is used. Digital input activated = Ramp pair 2 (ACCELER TIME 2/DECELER TIME 2) is used. 2202 ACCELER TIME 1 Ramp 1: time from zero to maximum frequency (0 - MAXIMUM FREQ). 2203 DECELER TIME 1 Ramp 1: time from maximum frequency to zero (MAXIMUM FREQ - 0). 2204 ACCELER TIME 2 Ramp 2: time from zero to maximum frequency (0 - MAXIMUM FREQ). 2205 DECELER TIME 2 Ramp 2: time from maximum frequency to zero (MAXIMUM FREQ - 0). 2206 RAMP SHAPE Acceleration/deceleration ramp shape selection 0 = LINEAR 1 = FAST S CURVE 2 = MEDIUM S CRV 3 = SLOW S CURVE Output frequency MAXIMUM FREQ Linear S curve Time Ramp time Figure 42 Definition of acceleration/deceleration ramp time. 82 ACS 400 User’s Manual Group 25: Critical Freq In some mechanical systems, certain speed ranges can cause resonance problems. With this parameter group, it is possible to set up to two different speed ranges that the ACS 400 will skip over. Code Description 2501 CRIT FREQ SEL Critical frequencies activation. 0 = OFF 1 = ON 2502 CRIT FREQ 1 LO Critical frequency 1 start. Note! If LOW > HI, no critical frequency lock-out will happen. 2503 CRIT FREQ 1 HI Critical frequency 1 end. 2504 CRIT FREQ 2 LO Critical frequency 2 start. 2505 CRIT FREQ 2 HI Critical frequency 2 end. Note! If LOW > HI, no critical frequency lock-out will happen. Example: A fan system vibrates badly from 18 Hz to 23 Hz and from 46 Hz to 52 Hz. Set the parameters as follows: CRIT FREQ 1 LO = 18 Hz and CRIT FREQ 1 HI = 23 Hz CRIT FREQ 2 LO = 46 Hz and CRIT FREQ 2 HI = 52 Hz foutput 52 46 23 18 f1L f1H f2L f2H 18 23 46 52 fREF (Hz) Figure 43 Example of critical frequencies setting in a fan system with bad vibrations at frequency ranges 18 Hz to 23 Hz and 46 Hz to 52 Hz. ACS 400 User’s Manual 83 Group 26: Motor Control Code Description 2603 IR COMPENSATION IR compensation voltage at 0 Hz. Note! IR compensation should be kept as low as possible to prevent overheating. Refer to Table 15. Table 15 Typical IR compensation values. 400 V Units PN / kW 3 7.5 15 22 37 IR comp / V 21 18 15 12 10 2604 IR COMP RANGE IR compensation range. Defines frequency after which IR compensation is 0 V. 2605 LOW NOISE Motor acoustical noise option. 0 = OFF Standard (switching frequency 4 kHz). 1 = ON(1) Low noise (switching frequency 8 kHz). Note! When the low noise setting is used, the maximum loadability of the ACS 400 is I2 at 30 °C ambient temperature or 0.8 * I2 at 40 °C. 2606 U/f RATIO U/f ratio below field weakening point. 1 = LINEAR 2 = SQUARE Linear is preferred for constant torque applications, Square for centrifugal pump and fan applications. (Square is more silent for most operating frequencies.) 2607 SLIP COMP RATIO A squirrel-cage motor will slip under load. The slip can be compensated by increasing the frequency as the motor torque increases. This parameter defines the gain for the slip. 100 % means full slip compensation; 0 % means no slip compensation. U (%) UN IR compensation IR compensation range No compensation f (Hz) Field weakening point Figure 44 Operation of IR compensation 84 ACS 400 User’s Manual Group 30: Fault Functions ACS 400 can be configured to respond as desired to certain abnormal external conditions: analogue input fault, external fault signal and panel loss. In these cases, the drive can either continue operation at current speed or at a set constant speed while showing an alarm, ignore the condition, or trip on a fault and stop. Motor thermal protection parameters 3004 - 3008 provide a means of adjusting the motor load curve. For example, limiting the load near zero speed might be necessary if the motor does not have a cooling fan. Stall protection (parameters 3009 - 3012) includes parameters for stall frequency, stall time and current. Code Description 3001 AI<MIN FUNCTION Operation in case of AI signal drops below fault limit 3022 AI1 FLT LIMIT or 3023 AI2 FLT LIMIT. 0 = NOT SEL No operation. 1 = FAULT A fault indication is displayed and the ACS 400 coasts to stop. 2 = CONST SP 7 A warning indication is displayed and the speed is set according to parameter 1208 CONST SPEED7. 3 = LAST SPEED A warning indication is displayed and the speed is set to the level the ACS 400 was last operating at. This value is determined by the average speed over the last 10 seconds. Caution: If you select CONST SPEED 7 or LAST SPEED, make sure that it is safe to continue operation in case analogue input signal is lost. 3002 PANEL LOSS Operation in case of control panel loss fault. 1 = FAULT A fault indication is displayed and the ACS 400 coasts to stop. 2 = CONST SP 7 A warning indication is displayed and the speed is set according to parameter 1208 CONST SPEED7. 3 = LAST SPEED A warning indication is displayed and the speed is set to the level the ACS 400 was last operating at. This value is determined by the average speed over the last 10 seconds. Caution: If you select CONST SPEED 7 or LAST SPEED, make sure that it is safe to continue operation in case panel is lost. 3003 EXTERNAL FAULT External fault input selection. 0 = NOT SEL External fault signal is not used. 1...5 = DI1...DI5 This selection defines the digital input used for an external fault signal. If an external fault occurs, i.e. digital input is deactivated, the ACS 400 is stopped and the motor coasts to stop and fault indication is displayed. ACS 400 User’s Manual 85 Code Description 3004 MOT THERM PROT Motor overtemperature function. This parameter defines the operation of the motor thermal protection function which protects the motor from overheating. 0 = NOT SEL 1 = FAULT Displays a warning indication at the warning level (97.5 % of the nominal value). Displays a fault indication when the motor temperature reaches the 100 % level. The ACS 400 coasts to stop. 2 = WARNING A warning indication is displayed when the motor temperature reaches the warning level (95 % of the nominal value). 3005 MOT THERM TIME Time for 63 % temperature rise. This is the time within which the motor temperature reaches 63 % of the final temperature rise. Figure 45 shows motor thermal time definition. Motor load t Temp. Rise 100 % 63 % } t Mot therm time Figure 45 Motor thermal time. 3006 MOT LOAD CURVE Motor current maximum limit. MOTOR LOAD CURVE sets the maximum allowable operating load of the motor. When set to 100 %, the maximum allowable load is equal to the value of Start-up Data parameter 9906 MOTOR NOM CURRENT. The load curve level should be adjusted if the ambient temperature differs from the nominal value. Output current (%) relative to 9906 MOTOR NOM CURR 150 3006 MOT LOAD CURVE 100 3007 ZERO SPEED LOAD 50 Frequency 3008 BREAK POINT Figure 46 Motor load curve. 3007 ZERO SPEED LOAD This parameter defines the maximum allowable current at zero speed relative to 9906 MOTOR NOM CURR. Refer to Figure 46. 86 ACS 400 User’s Manual Code Description 3008 BREAK POINT Break point of motor load curve. Refer to Figure 46 for an example of a motor load curve. See Figure 48. 3009 STALL FUNCTION This parameter defines the operation of the stall protection. The protection is activated if the output current becomes too high compared to output frequency, refer to Figure 47. 0 = NOT SEL Stall protection is not used. 1 = FAULT When the protection is activated the ACS 400 coasts to stop. Fault indication is displayed. 2 = WARNING A warning indication is displayed. The indication disappears in half the time set by parameter 3012 STALL TIME. IOUT Stall region 3010 STALL CURRENT Frequency 3011 STALL FREQ HI Figure 47 Motor stall protection. 3010 STALL CURRENT Current limit for stall protection. Refer to Figure 47. 3011 STALL FREQ HI This parameter sets the frequency value for the stall function. Refer to Figure 47. 3012 STALL TIME This parameter sets the time value for the stall function. 3013 UNDERLOAD FUNCTION Removal of motor load may indicate a process malfunction. The protection is activated if: • The motor torque drops below the load curve selected by parameter 3015 UNDERLOAD CURVE. • This condition has lasted longer than the time set by parameter 3014 UNDERLOAD TIME. • Output frequency is higher than 10 % of the nominal frequency of the motor and higher than 5 Hz. 0 = NOT SEL Underload protection is not used. 1 = FAULT When the protection is activated the ACS 400 coasts to stop. Fault indication is displayed. 2 = WARNING A warning indication is displayed. 3014 UNDERLOAD TIME Time limit for underload protection. 3015 UNDERLOAD CURVE This parameter provides five selectable curves shown in Figure 49. If the load drops below the set curve for longer than the time set by parameter 3014, the underload protection is activated. Curves 1...3 reach maximum at the motor rated frequency set by parameter 9907 MOTOR NOM FREQ. ACS 400 User’s Manual 87 Code Description 3022 AI1 FLT LIMIT Fault level for analogue input 1 supervision. See parameter 3001 AI<MIN FUNCTION. 3023 AI2 FLT LIMIT Fault level for analogue input 2 supervision. See parameter 3001 AI<MIN FUNCTION. IO / IN Trip time 3.5 3.0 60 s 2.5 90 s 2.0 180 s 300 s 600 s 1.5 ∞ 1.0 0.5 fO / fBRK 0 0 0.2 0.4 0.6 0.8 1.0 1.2 IO = output current IN = nominal current of the motor fO = output frequency fBRK = break point frequency (parameter 3008 BREAK POINT) Figure 48 Thermal protection trip times when parameters 3005 MOT THERM TIME, 3006 MOT LOAD CURVE and 3007 ZERO SPEED LOAD have default values. 88 ACS 400 User’s Manual TM (%) 100 3 80 70 % 60 2 50 % 40 1 5 30 % 20 4 0 ƒN 2.4 * ƒN Figure 49 Underload curve types. TM nominal torque of the motor, ƒN nominal frequency of the motor. ACS 400 User’s Manual 89 Group 31: Automatic Reset The automatic reset system can be used for resetting overcurrent, overvoltage, undervoltage and analogue input loss faults automatically. Number of allowed automatic reset operations within a certain time is selectable. Warning! If parameter 3107 AR AI<MIN is enabled, the drive may restart even after a long stop when the analogue input signal is restored. Ensure that the use of this feature will not cause physical injury and/or damage equipment. Code Description 3101 NR OF TRIALS Sets the number of allowed autoresets within a certain time. The time is defined with parameter 3102 TRIAL TIME. The ACS 400 prevents additional autoresets and remains stopped until a successful reset is performed from the control panel or from a place selected by parameter 1604 FAULT RESET SEL. 3102 TRIAL TIME The time within which a limited number of fault autoresets is allowed. The allowed number of faults per this time period is given with parameter 3101 NR OF TRIALS. 3103 DELAY TIME This parameter sets the time that the ACS 400 will wait after a fault occurs before attempting to reset. If set to zero, the ACS 400 will reset immediately. 3104 AR OVERCURRENT 0 = DISABLE 1 = ENABLE If 1 is selected, the fault (motor overcurrent) is reset automatically after the delay set by parameter 3103, and the ACS 400 resumes normal operation. 3105 AR OVERVOLTAGE 0 = DISABLE 1 = ENABLE If 1 is selected, the fault (DC bus overvoltage) is reset automatically after the delay set by parameter 3103, and the ACS 400 resumes normal operation. 3106 AR UNDERVOLTAGE 0 = DISABLE 1 = ENABLE If 1 is selected, the fault (DC bus undervoltage) is reset automatically after the delay set by parameter 3103 DELAY TIME, and the ACS 400 resumes normal operation. 3107 AR AI<MIN 0 = DISABLE 1 = ENABLE If 1 is selected, the fault (analogue input signal under minimum level) is reset automatically after the delay set by parameter 3103 DELAY TIME. Trial time X x = Automatic reset Time X X Now Figure 50 Operation of automatic reset function. In this example, if the fault occurs at the moment “Now”, it is automatically reset if parameter 3101 NR OF TRIALS value is greater than or equal to 4. 90 ACS 400 User’s Manual Group 32: Supervision Parameters of this group are used together with relay output parameters 1401 RELAY OUTPUT 1 and 1402 RELAY OUTPUT 2. Any two parameters of the Operating Data group (Group 1) can be supervised. Relays can be configured to be energised when the values of supervised parameters are either too low or too high. Code Description 3201 SUPERV 1 PARAM First supervised parameter number of the Operating Data group (Group 01). 3202 SUPERV 1 LIM LO First supervision limit low. Display of this parameter depends on selected supervised parameter (3201). 3203 SUPERV 1 LIM HI First supervision limit high. Display of this parameter depends on selected supervised parameter (3201). 3204 SUPERV 2 PARAM Second supervised parameter number of the Operating Data group (Group 01). 3205 SUPERV 2 LIM LO Second supervision limit low. Display of this parameter depends on selected supervised parameter (3204). 3206 SUPERV 2 LIM HI Second supervision limit high. Display of this parameter depends on selected supervised parameter (3204). ACS 400 User’s Manual 91 Value of supervised parameter hi (3203) lo (3202) A Energised = 1 De-energised = 0 B Energised = 1 De-energised = 0 A = Parameter 1401 RELAY OUTPUT 1 (1402 RELAY OUTPUT 2) value is or SUPRV2 OVER SUPRV1 OVER B = Parameter 1401 RELAY OUTPUT 1 (1402 RELAY OUTPUT 2) value is SUPRV1 UNDER or SUPRV2 UNDER Note! Case LOW ≤ HIGH represents a normal hysteresis. Case A: Is for monitoring when/if the supervised signal exceeds a given limit. Case B: Is for monitoring when/if the supervised signal falls below a given limit. Figure 51 Operating data supervision using relay outputs, when LOW ≤ HIGH. 92 ACS 400 User’s Manual Value of supervised parameter LOW (3202) HI (3203) t energised=1 de-energised=0 A energised=1 de-energised=0 B A = Parameter 1401 RELAY OUTPUT 1 (1402 RELAY OUTPUT 2) value is SUPRV1 OVER or SUPRV2 OVER. B = Parameter 1402 RELAY OUTPUT 1 (1402 RELAY OUTPUT 2) value is or SUPRV2 UNDER. SUPRV1 UNDER Note! Case LOW>HIGH represents a special hysteresis with two separate supervision limits. Depending on whether the supervised signal has gone below value HIGH (3203) or above value LOW (3202), determines which limit is being used. Initially HIGH is used, until the signal goes above value LOW. After this the limit used is LOW, until the signal goes back below value HIGH. A = Initially the relay is de-energised. B = Initially the relay is energised. Figure 52 Operating data supervision using relay outputs, when LOW>HIGH. ACS 400 User’s Manual 93 Group 33: Information Code Description 3301 SW VERSION Software version. 3302 TEST DATE Displays the test date of the ACS 400 (yy.ww). 94 ACS 400 User’s Manual Group 34: Process Variables Parameters of this group can be used to create custom process variables. Values of process variables can be seen in parameters 0134 PROCESS VAR 1 and 0135 PROCESS VAR 2 AND optionally in the ACS-PAN output display. Value is calculated by taking given parameter from the operating data group (Group 1), and multiplying and dividing it with given coefficients. The unit and number of decimal digits is configurable. See example below. Code Description 3401 DISPLAY SEL Selects displayed variables for the output display of the ACS-PAN control panel. Process variable 1 Frequency reference 1 = STANDARD Panel displays standard variables. 0.0A 2 = PROCESS VAR Panel displays process variables. See Figure 53. 50.0 Hz 0.0 Hz OUTPUT Process variable 2 Figure 53 ACS-PAN output display when process variable display is selected. 3402 P VAR 1 SEL Selection of process variable 1. Number of any parameter of the group 1 OPERATING DATA. 3403 P VAR 1 MULTIP Process variable 1 multiplier. 3404 P VAR 1 DIVISOR Process variable 1 divider. 3405 P VAR 1 SCALING Decimal point location of process variable 1, when displayed. Refer to Figure 54. Value Display 0 125 1 12.5 2 1.25 3 0.125 Figure 54 Display with different decimal point locations when calculated value is 125. 3406 P VAR 1 UNIT Process variable unit. 0 = NOT SEL 4 = % 8 = kh 12 = mV 16 = °F 20 = m3/h 1=A 9 = °C 13 = kW 17 = hp 21 = dm3/s 25 = PSI 5=s 24 = GPM 28 = MGD 29 = inHg 2=V 6=h 10 = lb ft 14 = W 18 = MWh 22 = bar 26 = CFM 30 = FPM 3 = Hz 7 = rpm 11 = mA 15 = kWh 19 = m/s 23 = kPa 27 = ft 31 = Cst ACS 400 User’s Manual 95 Code Description 3407 P VAR 2 SEL Selection of process variable 2. Number of any parameter of the group 1 OPERATING DATA. 3408 P VAR 2 MULTIP Process variable 2 multiplier. 3409 P VAR 2 DIVISOR Process variable 2 divider. 3410 P VAR 2 SCALING Decimal point location of process variable 2, when displayed. 3411 P VAR 2 UNIT Process variable 2 unit. See parameter 3406. Example. Assume that a two pole motor is directly connected to a roll 0.1 m in diameter and the line speed is to be displayed in m/s. The following settings are then needed: 3401 DISPLAY SEL = 2 (PROCESS VAR) 3402 P VAR 1 SEL = 0103 (OUTPUT FREQ) 3406 P VAR 1 UNIT = 19 (m/s) Since 1 Hz output equals 1 rev/s, equals PI * 0.1 m/s line speed, or approximately 0.314 m/s, is: line speed = output freq * 314 1000 m/s Select: 3403 P VAR 1 MULTIP = 314 3404 P VAR 1 DIVISOR = 1000 Since variable 0103 OUTPUT FREQ is displayed with 0.1 Hz resolution, it is internally scaled so that value 10 represents 1 Hz. Therefore 3405 P VAR 1 SCALING = 1 must be selected. 96 ACS 400 User’s Manual Group 40: PID Control The PID Control Macro allows the ACS 400 to take a reference signal (setpoint) and an actual signal (feedback), and automatically adjust the speed of the drive to match the actual signal to the reference. There exist two PID parameter sets (group 40 for set 1 parameters and group 41 for set 2 parameters). Normally only set 1 parameters are used. Set 2 parameters can be taken in use by parameter 4016 PID PARAM SET. Selection between parameter sets can be done eg. through a digital input. PID sleep function can be used to stop the regulation when the output of the PID controller falls below preset limit. Regulation is resumed when the process actual value falls below preset limit. Alternatively, sleep function can be activated and deactivated through a digital input. Figure 73 on page 152 (Appendix A) shows the connections of internal signals when the PID Control macro is selected. Code Description 4001 PID GAIN This parameter defines the gain of the PID Controller. The setting range is 0.1... 100. If you select 1, a 10 % change in error value causes the PID Controller output to change by 10 %. 4002 PID INTEG TIME PID controller integration time. Defined as the time in which the maximum output is achieved if a constant error value exists and the gain is 1. Integration time 1 s denotes that a 100 % change is achieved in 1 s. Gain Gain t PID integration time 0 = NOT SEL Integrator is off (the controller is P or PD controller). 0.1 - 600 s Integrator is on (the controller is PI or PID controller). ACS 400 User’s Manual 97 Code Description 4003 PID DERIV TIME PID controller derivation time. If the process error value changes linearly, D part adds a constant value into the PID controller output. The derivative is filtered with a 1-pole filter. The time constant of the filter is defined by parameter 4004 PID DERIV FILTER. Process Error Value 100 % Gain t PID derivation time 4004 PID DERIV FILTER Time constant for the filter of D part. By increasing the filter time constant it is possible to smooth the effect of the D part and suppress noise. 4005 ERROR VALUE INV Process error value inversion. Normally, a decrease in feedback signal causes an increase in drive speed. If a decrease in feedback signal is desired to cause a decrease in speed, set ERROR VALUE INV to 1 (YES). 0 = NO 1 = YES 4006 ACTUAL VAL SEL PID controller feedback (actual) signal selection. Feedback signal can be a combination of two actual values ACT1 and ACT2. Source for actual value 1 is selected by parameter 4007 and source for actual value 2 is selected by parameter 4008. 1 = ACT1 Actual value 1 is used as the feedback signal. 2 = ACT1-ACT2 Difference of actual values 1 and 2 is used as the feedback signal. 3 = ACT1+ACT2 Sum of actual values 1 and 2. 4 = ACT1*ACT2 Product of actual values 1 and 2. 5 = ACT1/ACT2 Quotient of actual values 1 and 2. 6 = MIN (A1, A2) Smaller of actual values 1 and 2. 7 = MAX (A1, A2) Greater of actual values 1 and 2. 8 = sqrt (A1-A2) Square root of difference of actual values 1 and 2. 9 = sqA1 + sqA2 Sum of square roots of actual values 1 and 2. 98 ACS 400 User’s Manual Code Description 4007 ACT1 INPUT SEL Source for actual value 1 (ACT1). 1 = AI 1 Analogue input 1 is used as actual value 1. 2 = AI 2 Analogue input 2 is used as actual value 1. 4008 ACT2 INPUT SEL Source for actual value 2 (ACT2). 1 = AI 1 Analogue input 1 is used as actual value 2. 2 = AI 2 Analogue input 2 is used as actual value 2. 4009 ACT1 MINIMUM Minimum value for actual value 1 (ACT1). Refer to Figure 55 and to Group 13 parameters for analogue input minimum and maximum settings. 4010 ACT1 MAXIMUM Maximum value for actual value 1 (ACT1). Refer to Figure 55 and to Group 13 parameters for analogue input minimum and maximum settings. 4011 ACT2 MINIMUM Minimum value for actual value 2 (ACT2). Refer to parameter 4009. 4012 ACT2 MAXIMUM Maximum value for actual value 2 (ACT2). Refer to parameter 4010. ACT1 (%) ACT1 MAXIMUM ACT1 MINIMUM Analogue input signal AI min AI max ACT1 (%) ACT1 MINIMUM ACT1 MAXIMUM Analogue input signal AI min AI max Figure 55 Actual value scaling. The range of the analogue input signal is set by parameters 1301 and 1302 or parameters 1304 and 1305, depending on the analogue input used. ACS 400 User’s Manual 99 Code Description 4013 PID SLEEP DELAY Time delay for the sleep function, see Figure 56. If the ACS 400 output frequency is below a set level (parameter 4014 SLEEP LEVEL) longer than PID SLEEP DELAY, ACS 400 is stopped. Alarm 28 is displayed when PID sleep is active. 4014 PID SLEEP LEVEL Level for activation of sleep function, see Figure 56. When the ACS 400 output frequency falls below the sleep level, the sleep delay counter is started. When the ACS 400 output frequency rises above the sleep level, the sleep delay counter is reset. 4015 WAKE-UP LEVEL Level for deactivation of sleep function. This parameter sets a process actual value limit for the sleep function (see Figure 56). The limit floats with the process reference. Non-inverted error value (parameter 4005 = 0) Applied wake-up level is according to the following formula: Limit = parameter 1107 + parameter 4015 * (set point - parameter 1107) / (parameter 1108 - parameter 1107) When the actual value is less than or equal to this value, the sleep function is de-activated. See Figure 57 and Figure 59. Inverted error value (parameter 4005 = 1) Applied wake-up level is according to the following formula: Limit = parameter 1108 + parameter 4015 * (parameter 1108 - setpoint) / (parameter 1108 - parameter 1107) When the actual value is higher than or equal to this value, the sleep function is de-activated. See Figure 58 and Figure 60. 4016 PID PARAM SET PID parameter set selection. When set 1 is selected, parameters 4001-4012 and 4019-4020 are used. When set 2 is selected, parameters 4101-4112 and 4119-4120 are used. 1...5 = DI1...DI5 PID parameter set is selected through a digital input (DI1...DI5). Parameter set 1 is used when the digital input is not active. Parameter set 2 is used when the digital input is active. 6 = SET 1 PID parameter set 1 is active. 7 = SET 2 PID parameter set 2 is active. 4017 WAKE-UP DELAY Delay for deactivation of PID sleep function. Refer to parameter 4015 WAKE-UP LEVEL and Figure 56. 4018 SLEEP SELECTION PID sleep function control. 0 = INTERNAL When INTERNAL is selected, the sleep state is controlled by the output frequency, process reference and process actual value. Refer to parameters 4015 WAKE-UP LEVEL and 4014 PID SLEEP LEVEL. 1...5 = DI1...DI5 Sleep state is activated and deactivated using a digital input. 100 ACS 400 User’s Manual Code Description 4019 SET POINT SEL Set point selection. Defines the reference signal source for the PID controller. Note! When PID regulator is by-passed (parameter 8121 REG BYPASS CTRL), this parameter has no significance. 1 = INTERNAL Process reference is a constant value set with parameter 4020 INTERNAL SETPNT. 2 = EXTERNAL Process reference is read from a source defined with parameter 1106 EXT REF2 SELECT. The ACS 400 must be in remote mode (REM is shown on control panel display).* * Process reference to PID controller can also be given from the control panel in local mode (LOC is shown on control panel display) if the panel reference is given as percentage, i.e. value of parameter 1101 KEYPAD REF SEL = 2 (REF2 (%)). 4020 INTERNAL SETPNT Sets a constant process reference (%) for the PID controller. PID controller follows this reference if parameter 4019 SET POINT SEL is set to 1 (INTERNAL). PID input (Process actual value) WAKE-UP DELAY parameter 4017 Wake-up level Time PID Output (Output frequency) td = SLEEP DELAY, parameter 4013 t < td td SLEEP LEVEL parameter 4014 Time STOP START Figure 56 Sleep function operation. ACS 400 User’s Manual 101 NON INVERTED ERROR VALUE 4015 WAKE-UP LEVEL 1108 EXT REF2 MAX 100 % SETPOINT 75 % 0% APPLIED WAKE UP LEVEL 1107 EXT REF2 MIN Figure 57 Example of how the applied wake-up level floats with the set point, here parameter 4015 WAKE-UP LEVEL equals to 75 %, PID control non-inverted case. INVERTED ERROR VALUE 4015 WAKE-UP LEVEL 0% 1108 EXT REF2 MAX 60 % 100 % APPLIED WAKE-UP LEVEL SETPOINT 1107 EXT REF 2 MIN Figure 58 Example of how applied wake-up level floats with the set point, here parameter 4015 equals to 60 %, PID control inverted case. WAKE-UP LEVEL 102 ACS 400 User’s Manual APPLIED WAKEUP LEVEL ACT VALUE SLEEP DEACTIVATED TIME EXPIRES TIME Figure 59 Wake-up level operation with non-inverted error value. TIME EXPIRES APPLIED WAKEUP LEVEL SLEEP DEACTIVATED ACT VALUE Figure 60 Wake-up level operation with inverted error value. ACS 400 User’s Manual 103 Group 41: PID Control (2) Parameters of this group belong to PID parameter set 2. The operation of parameters 4101 - 4112, 4119 - 4120 is analogous with set 1 parameters 4001 - 4012, 4019 - 4020. PID parameter set 2 can be selected by parameter 4016 PID PARAM SET. 104 ACS 400 User’s Manual Group 50: Communication Parameters of this group define some general communication settings. Parameters 5001-5002 and 5007-5009 are used only if DDCS option module is installed. Code Description 5001 DDCS BIT RATE DDCS link baud rate in Mbits/s. 5002 DDCS NODE NR DDCS link node number. 5003 COMM FAULT TIME Communication time out delay. This applies both to standard Modbus and DDCS link. When communication loss supervision is activated by parameter 5004 COMM FAULT FUNC, the bus master must write Control Word, Reference 1 or Reference 2 periodically. The maximum period is set by this parameter. 5004 COMM FAULT FUNC Communication fault function. This applies both to standard Modbus and DDCS link. 0 = NOT SEL No operation. 1 = FAULT A fault indication is displayed and the ACS 400 coasts to stop. 2 = CONST SP 7 A warning indication is displayed and the speed is set according to parameter 1208 CONST SPEED7. 3 = LAST SPEED A warning indication is displayed and the speed is set to the level the ACS 400 was last operating at. This value is determined by the average speed over the last 10 seconds. Caution: If you select CONST SPEED 7 or LAST SPEED, make sure that it is safe to continue operation in case communication is lost. 5005 PROTOCOL SEL Defines what communication protocols are used. Options 1 (DDCS) and 3 (STD MDB+DDCS) should be selected only if DDCS communication module is installed. 0 = NOT SEL No serial communication is active. 1 = DDCS DDCS serial communication is active. 2 = STD MODBUS Standard Modbus protocol is active. 3 = STD MDB+DDCS Both standard Modbus and DDCS are active. 5006 COMM COMMANDS The commands source protocol selection. Although the ACS 400 can communicate simultaneously via several serial communication channels, the controlling commands - start, stop, direction and reference - can be received only from a single communication channel, selectable by this parameter. 0 = NOT SEL Controlling commands are not received via serial communication. 1 = STD MODBUS Controlling commands can be received through Channel 1 standard Modbus protocol. 2 = DDCS Controlling commands can be received through the DDCS link. ACS 400 User’s Manual 105 Code Description 5007 DDCS BUS MODE Sets the operation mode of the DDCS link. 1=FIELDBUS Fieldbus adapter is used in DDCS link. (The ACS 400 acts as the slave station on the DDCS link). 2=IO EXTENSION Input/output extension module (type name NDIO) is used on DDCS link. The ACS 400 acts as the master station on the DDCS link, and is capable to control the digital inputs and outputs of the extension module. Note! Value 2 (IO EXTENSION) should be used only when PFC (Pump-Fan Control) macro is selected. 5008 DDCS LINK CTRL Controls the light intensity in the DDCS link. The higher the value the higher the intensity. 5009 DDCS HW CONFIG HW configuration of the DDCS link. 0 = STAR Star configuration, DDCS regeneration is off. 1 = RING DDCS link forms an optical ring, DDCS regeneration is on. 106 ACS 400 User’s Manual Group 51: Ext Comm Module Parameters of this group need to be adjusted only when an external fieldbus communication module is installed. Refer to communication module documentation for more information on these parameters. Code Description 5101 FIELDBUSPAR 1 Parameter 1 of communication module on the DDCS link. Value reflects the type of the connected communication module. Table 16 List of module types. Value Module type 0 No module connected. 1 NPBA Profibus 2 NMBA Modbus 3 NIBA Interbus-S 4 NCSA CS31 bus 5 NCAN CANopen 6 NDNA DeviceNet 7 NLON LONWORKS 8 NMBP Modbus+ 9 Others 5102 - FIELDBUSPAR 2 - FIELDBUSPAR 15 5115 Refer to communication module documentation for more information on these parameters. ACS 400 User’s Manual 107 Group 52: Standard Modbus The ACS 400 can be connected to Modbus fieldbus system. Parameters of this group are used to set up station number, communication speed and parity. Parameters 5206 - 5215 are diagnostic counters that can be used to debug the fieldbus system. Refer to “Standard Serial Communication” on page 121 for more information. Modifications of parameters in this group take effect on the next power-up. Code Description 5201 STATION NUMBER Sets the slave number for the ACS 400 in Modbus network. Range: 1 - 247 5202 COMM SPEED Defines the communication speed of the ACS 400 in bits per second (bits/s). 3 = 300 bits/s 48 = 4800 bits/s 6 = 600 bits/s 96 = 9600 bits/s 12 = 1200 bits/s 192 = 19200 bits/s 24 = 2400 bits/s 5203 PARITY Defines the parity to be used with the Modbus communication. Parameter also defines the number of stop bits. With Modbus communication, the number of stop bits is 2 with no parity bit, and 1 with even or odd parity. 0 = NONE 1 = EVEN 2 = ODD 5206 BAD MESSAGES This diagnostics counter increases by one every time the ACS 400 finds any kind of communication error. During normal operation, this counter hardly ever increases. 5207 GOOD MESSAGES This diagnostics counter increases by one every time a valid Modbus message has been received by the ACS 400. During normal operation, this counter is increasing constantly. 5208 BUFFER OVERRUNS Longest possible message length for the ACS 400 is 32 bytes. If a message exceeding 32 bytes is received, this diagnostic counter increases by one every time a character which cannot be placed in the buffer is received. 5209 FRAME ERRORS This diagnostic counter increases by one every time when a character with a framing error is received from the bus. • Communication speed settings of the devices connected in the bus differ. • Ambient noise levels may be too high. 5210 PARITY ERRORS This diagnostic counter increases by one every time when a character with a parity error is received from the bus. • Parity settings of the devices connected on the bus differ. • Ambient noise levels may be too high. 108 ACS 400 User’s Manual Code Description 5211 CRC ERRORS This diagnostic counter increases by one every time when a message with a CRC error is received. • Ambient noise levels may be too high. • CRC calculation is not performed correctly. 5212 BUSY ERRORS This diagnostic counter increases by one every time the ACS 400 receives a character from the bus while it is still processing the previous message. • There might be two stations with the same station number. • Ambient noise levels may be too high. 5213 SER FAULT MEM 1 Last Modbus exception code sent. 5214 SER FAULT MEM 2 Previous Modbus exception code sent. 5215 SER FAULT MEM 3 Oldest Modbus exception code sent. ACS 400 User’s Manual 109 Group 81: PFC Control Parameters for Pump-Fan Control (PFC). Appendix B gives detailed information on PFC. Chapter Application Macros describes the default signal connections. Code Description 8103 REFERENCE STEP 1 Sets a percentage value that is added to the process reference when at least one auxiliary (constant speed) motor is running. Default value is 0 %. Example: An ACS 400 operates three parallel pumps that pump water to a pipe. The pressure in the pipe is controlled. The constant pressure reference is set by parameter 4020 INTERNAL SETPNT. At low water consumption level only the speed regulated pump is run. When water consumption increases, constant speed pumps are started; first one pump, and if the demand is still growing, also the other pump. When water flow increases, the pressure loss increases between the beginning (measurement site) and the end of the pipe. By setting suitable reference steps (parameters 8103 REFERENCE STEP1 and 8104 REFERENCE STEP2) the process reference is increased along the increasing pumping capacity. The reference steps compensate the growing pressure loss and prevent the pressure fall at the end of the pipe. 8104 REFERENCE STEP 2 Sets a percentage value that is added to the process reference when at least two auxiliary (constant speed) motors are running. Default value is 0 %. See parameter 8103 REFERENCE STEP1 8105 REFERENCE STEP 3 Sets a percentage value that is added to the process reference when at least three auxiliary (constant speed) motors are running. Default value is 0 %. See parameter 8103 REFERENCE STEP1. 8109 START FREQ 1 Sets a frequency limit. See Figure 61 on page 111. When ACS 400 output frequency exceeds value (8109 START FREQ 1 + 1 Hz) and no auxiliary motors are running, the Start Delay counter is started. When the time set with parameter 8115 AUX MOT START D is elapsed and if the output frequency is still above value (8109 START FREQ 1 - 1 Hz), the first auxiliary motor is started. After the first auxiliary motor is started, ACS 400 output frequency is decreased by value (8109 START FREQ 1 - 8112 LOW FREQ 1). Note! Start Frequency 1 should be within limits 8112 LOW FREQ 1 and 2008 MAXIMUM FREQ -1. 8110 START FREQ 2 Sets a frequency limit (see Figure 61). When ACS 400 output frequency exceeds value (8110 START FREQ 2 + 1 Hz) and one auxiliary motor is running, the Start Delay counter is started. When the time set with parameter 8115 AUX MOT START D is elapsed and if the output frequency is still above value (8110 START FREQ 2 - 1 Hz), the second auxiliary motor is started. After the second auxiliary motor is started, ACS 400 output frequency is decreased by value (8110 START FREQ 2 - 8113 LOW FREQ 2). Note! Start Frequency 2 should be within limits 8112 LOW FREQ 2 and 2008 MAXIMUM FREQ -1. 8111 START FREQ 3 Sets a frequency limit (see Figure 61). When ACS 400 output frequency exceeds value (8111 START FREQ 3 + 1 Hz) and two auxiliary motors are running, the Start Delay counter is started. When the time set with parameter 8115 AUX MOT START D is elapsed and if the output frequency is still above value (8111 START FREQ 3 - 1 Hz), the third auxiliary motor is started. After the third auxiliary motor is started, ACS 400 output frequency is decreased by value (8111 START FREQ 3 - 8114 LOW FREQ 3). Note! Start Frequency 3 should be within limits 8112 LOW FREQ 3 and 2008 MAXIMUM FREQ -1. 8112 LOW FREQ 1 Sets a frequency limit (see Figure 61). When ACS 400 output frequency falls below value (8112 LOW FREQ 1 - 1 Hz) and one auxiliary motor is running, the Stop Delay counter is started. When the time set with parameter 8116 AUX MOT STOP D. is elapsed and if the output frequency is still below value (8112 LOW FREQ 1 + 1 Hz), the first auxiliary motor is stopped. After the auxiliary motor is stopped, ACS 400 output frequency is increased by value (8109 START FREQ 1 8112 LOW FREQ 1). Note! Low Frequency 1 should be within limits 2007 MINIMUM FREQ +1 and 8109 START FREQ 1. 110 ACS 400 User’s Manual Code Description 8113 LOW FREQ 2 Sets a frequency limit (see Figure 61). When ACS 400 output frequency falls below value (8113 LOW FREQ 2 - 1 Hz) and two auxiliary motors are running, the Stop Delay counter is started. When the time set with parameter 8116 AUX MOT STOP D. is elapsed and if the output frequency is still below value (8113 LOW FREQ 2 + 1 Hz), the second auxiliary motor is stopped. After the auxiliary motor is stopped, ACS 400 output frequency is increased by a value (8110 START FREQ 2 - 8113 LOW FREQ 2). Note! Low Frequency 2 should be within limits 2007 MINIMUM FREQ +1 and 8109 START FREQ 2 8114 LOW FREQ 3 Sets a frequency limit (see Figure 61). When ACS 400 output frequency falls below value (8114 LOW FREQ 3 - 1 Hz) and three auxiliary motors are running a Stop Delay counter is started. When the time set with parameter 8116 AUX MOT STOP D. is elapsed and if the output frequency is still below value (8114 LOW FREQ 3 + 1 Hz), the third auxiliary motor is stopped. After the auxiliary motor is stopped, ACS 400 output frequency is increased by value (8111 START FREQ 3 8114 LOW FREQ 3). Note! Low Frequency 3 should be within limits 2007 MINIMUM FREQ +1 and 8109 START FREQ 3. 8115 AUX MOT START D Sets the Start Delay for the auxiliary motors. See parameter 8112 LOW FREQ 1 and Figure 61 for more information. 8116 AUX MOT STOP D. Sets the Stop Delay for the auxiliary motors. See parameter 8112 LOW FREQ 1 for more information. Frequency 8115 AUX MOT START D fmax 8109 START FREQ 1 + 1 Hz Frequency increase during the Start Delay 8112 LOW FREQ 1 - 1 Hz Frequency decrease during the Stop Delay fmin Time 8116 AUX MOT STOP D. Start Aux Motor 1 Stop/Start Increasing flow Decreasing flow Stop Figure 61 Start Frequency, Low Frequency, Start Delay and Stop Delay. ACS 400 User’s Manual 111 Code Description 8117 NR OF AUX MOT Sets the number of auxiliary motors. Relay outputs Start/stop signals for the auxiliary motors are given through relay outputs. In addition, one relay output is used to connect the speed regulated motor to the ACS 400. ACS 400 relay outputs RO1 and RO2 can be used to control the motors. It is also possible to use up to two optional external digital input/output modules (NDIO). ACS 400 relay output 1 is used for Pump and Fan motor control if 1401 RELAY OUTPUT 1 value is 29 (PFC). Relay output 2 is used for Pump and Fan motor control if 1402 RELAY OUTPUT 2 value is 29 (PFC). Table 17 depicts the use of relay outputs for different settings of parameters 1401 and 1402. If Autochange function is not used, first relay output configured for PFC use controls the speed regulated motor. If Autochange function is used, the ACS 400 Autochange logic assigns the relay outputs to corresponding motors (of which one is speed controlled). Table 17 Usage of relay outputs. Relay output configuration is set by parameters 1401, 1402 and 8117. Number of relay outputs needed depends on the number of auxiliary motors. For example, if number of auxiliary motors is 2, total of three relay outputs (motors 1,2 and 3) are needed. x = Any other setting than 29 (PFC). Parameter setting ACS 400 relays Relay output RO1 function Relay output RO2 function NDIO module 1 (Module node number = 5) 1401 RELAY OUTPUT 1 1402 RELAY OUTPUT 2 NDIO relay output 1 function 29 (PFC) 29 (PFC) Motor 1 start/stop Motor 2 start/stop Motor 3 start/stop 29 (PFC) x Motor 1 start/stop e.g. Fault x 29 (PFC) e.g. Fault x x e.g. Run NDIO relay output 2 function NDIO module 2 (Module node number = 6) NDIO relay output 1 function NDIO relay output 2 function Motor 4 start/stop Not used Not used Motor 2 start/stop Motor 3 start/stop Motor 4 start/stop Not used Motor 1 start/stop Motor 2 start/stop Motor 3 start/stop Motor 4 start/stop Not used e.g. Fault Motor 1 start/stop Motor 2 start/stop Motor 3 start/stop Motor 4 start/stop 8118 AUTOCHNG INTERV Sets the interval for the Autochange function. The time is counted only when ACS 400 Start signal is on. See parameter 8119 AUTOCHNG LEVEL for information on the operation of the Autochange. 0.0 = NOT SEL This setting switches off the Autochange function. Note! The ACS 400 always coasts to stop when autochange is performed. Warning! If the Autochange function is used, the Interlocks must be in use. In Autochange system there is a contactor between ACS 400 output terminals and the speed controlled motor. The contactor is damaged if opened without first interrupting the ACS 400 inverter bridge switching. The inverter switching is interrupted when the Interlock is switched off and the ACS 400 coasts to stop. 112 ACS 400 User’s Manual Code Description 8119 AUTOCHNG LEVEL Sets the operation limit for the Autochange logic. This parameter can be used to deny Autochange when the Pump-Fan system is operating near maximum capacity. When the output from PID/PFC control block exceeds the level set by this parameter, Autochange operation is not possible. Output frequency fMAX No aux motors 1 aux motor 2 aux motors Allowed autochange area PID output 8119 AUTOCHNG LEVEL 100 % Figure 62 Autochange level. Autochange operation The purpose of the Autochange operation is to ensure equal duty time for all the motors. Each motor in the system will in its turn be connected to the ACS 400 as well as direct on line. Starting order of the motors is changed when Autochange is done. To use the Autochange function, an external alternation switchgear is needed. Refer to Appendix B for more information. When Autochange is used, the interlocks (parameter 8120) must also be taken into use. The Autochange is performed when the Autochange Interval (parameter 8118) is elapsed from the previous autochange and the output from PFC is below the level set by this parameter. Autochange operation is as follows: 1. The speed controlled motor stops. The contactor of the speed controlled motor is switched off. 2. The starting order is changed (the starting order counter steps onward). 3. The contactor of the motor that will be the new speed controlled motor is switched off (if the motor is running). If other motors are running, they will not be interrupted. 4. The contactor of the new speed controlled motor is switched on. The autochange switchgear connects this motor to the ACS 400. 5. Time set with parameter 8122 PFC START DELAY is waited. 6. Speed controlled motor starts. If a constant speed motor was stopped in Step 3, one more motor is connected direct on-line by switching on the contactor of that motor. After this step the same number of motors is running than before the Autochange. 7. Normal PFC operation continues. As an example, in a three motor system the starting order is changed as follows: First start: Motor no. 1, motor no. 2, motor no. 3. Second start: Motor no. 2, motor no. 3, motor no. 1. Third start: Motor no. 3, motor no. 1, motor no. 2. (etc...) If some motors in the system are interlocked, the Autochange logic skips them. If all interlocks are active and no motor can be started, interlock alarm (Alarm 30) is displayed. Note! The ACS 400 always coasts to stop when autochange is performed. Note! Autochange can also occur during PID sleep. Note! When ACS 400 power supply is switched off, the values of the starting order counter and Autochange Interval counter are stored in the permanent memory. The counters continue from the stored values after the power supply is switched on again. ACS 400 User’s Manual 113 Code Description 8120 INTERLOCKS Controls the use of the Interlock function. Warning! If the Autochange function is used, also the Interlocks must be taken into use (see parameter 8118 AUTOCHNG INTERV). 0 = NOT SEL No Interlocks function is in use. All digital inputs are available for other purposes. 1 = DI1 Interlocks function is in use. Depending on the number of motors, the digital inputs are reserved for the interlock signals according to following table. Interlock signals No of aux. motors (param. 8117) ACS 400 digital inputs 0 DI1: Motor 1 DI2-DI5 free 1 DI1: Motor 1 DI2: Motor 2 DI3-DI5 free 2 DI1: Motor 1 DI2: Motor 2 DI3: Motor 3 DI4-DI5 free 3 DI1: Motor 1 DI2: Motor 2 DI3: Motor 3 DI4: Motor 4 DI5 free NDIO module 1 NDIO module 2 Not used Not used 2 = DI2 Interlocks function is in use. Depending on the number of motors, the digital inputs are reserved for the interlock signals according to following table. Interlock signals No of aux. motors (param. 8117) 114 ACS 400 digital inputs 0 DI1: free DI2: Motor 1 DI3-DI5 free 1 DI1: free DI2: Motor 1 DI3: Motor 2 DI4-DI5 free 2 DI1: free DI2: Motor 1 DI3: Motor 2 DI4: Motor 3 DI5: free 3 DI1: free DI2: Motor 1 DI3: Motor 2 DI4: Motor 3 DI5: Motor 4 NDIO module 1 Not used NDIO module 2 Not used ACS 400 User’s Manual Code Description 3 = DI3 Interlocks function is in use. Depending on the number of motors, the digital inputs are reserved for the interlock signals according to following table. Interlock signals No of aux. motors (param. 8117) ACS 400 digital inputs 0 DI1-DI2: free DI3: Motor 1 DI4-DI5 free 1 DI1-DI2: free DI3: Motor 1 DI4: Motor 2 DI5: free 2 DI1-DI2: free DI3: Motor 1 DI4: Motor 2 DI5: Motor 3 3 DI1-DI2: free DI3: Motor 1 DI4: Motor 2 DI5: Motor 3 NDIO module 1 NDIO module 2 Not used Not used DI1: Motor 4 DI2: Unused Not used 4 = DI4 Interlocks function is in use. Depending on the number of motors, the digital inputs are reserved for the interlock signals according to following table. Interlock signals No of aux. motors (param. 8117) ACS 400 digital inputs NDIO module 1 0 DI1-DI3: free DI4: Motor 1 DI5 free 1 DI1-DI3: free DI4: Motor 1 DI5: Motor 2 2 DI1-DI3: free DI4: Motor 1 DI5: Motor 2 DI1: Motor 3 DI2: unused 3 DI1-DI3: free DI4: Motor 1 DI5: Motor 2 DI1: Motor 3 DI2: Motor 4 ACS 400 User’s Manual Not used NDIO module 2 Not used Not used 115 Code Description 5 = DI5 Interlocks function is in use. Depending on the number of motors, the digital inputs are reserved for the interlock signals according to following table. Interlock signals No of aux. motors (param. 8117) ACS 400 digital inputs NDIO module 1 NDIO module 2 0 DI1-DI4: free DI5: Motor 1 Not used Not used 1 DI1-DI4: free DI5: Motor 1 DI1: Motor 2 DI2: Unused Not used 2 DI1-DI4: free DI5: Motor 1 DI1: Motor 2 DI2: Motor 3 Not used 3 DI1-DI4: free DI5: Motor 1 DI1: Motor 2 DI2: Motor 3 DI1: Motor 4 DI2: Unused 6 = EXTERNAL IO Interlocks function is in use. All interlock signals are taken through external I/O modules. Depending on the number of motors, the digital inputs are reserved for the interlock signals according to following table. Interlock signals No of aux. Motors (param. 8117) ACS 400 digital inputs NDIO module 1 NDIO module 2 0 DI1-DI5: free DI1: Motor 1 DI2: Unused Not used 1 DI1-DI5: free DI1: Motor 1 DI2: Motor 2 Not used 2 DI1-DI5: free DI1: Motor 1 DI2: Motor 2 DI1: Motor 3 DI2: Unused 3 DI1-DI5: free DI1: Motor 1 DI2: Motor 2 DI1: Motor 3 DI2: Motor 4 Interlock signals are active low, i.e. interlock is active when corresponding interlock signal is absent. If start command is given when the interlock signal of the speed regulated motor is active, the ACS 400 will not start, and will show alarm 30 (INTERLOCK) on the control panel. Each Interlock circuit should be wired as follows: 1. A contact of the On/Off switch of the motor must be wired to the Interlock circuit. PFC logic detects if a motor is switched off. The logic does not try to start the switched-off motor; the next available motor is started instead. 2. A contact of the motor thermal relay (or another protective device in the motor circuit) must be wired to the Interlock input. PFC logic detects if the thermal relay is activated. The motor is stopped. 116 ACS 400 User’s Manual RO2C RO2A RO2B RO1C RO1A RO1B +24 V DI5 DI4 DCOM2 AGND Code Description ACS 400 ~230 V a.c. ~230 V a.c. On/Off 3 K1 On/Off 3 K2.1 M 3~ M 3~ M1 M2 Figure 63 Wiring the interlocks of a PFC system with two motors. There is a thermal relay in the supply circuit of M2. ACS 400 User’s Manual 117 Code Description 8121 REG BYPASS CTRL Regulator by-pass control provides a simple control mechanism without a PID regulator. By-pass control is needed in special applications only. Example is given in Figure 64 and Figure 65. 0 = NO Process PID regulator is in use. 1 = YES The process PID regulator is bypassed. The signal connected to the PID Controller actual value pin (parameter 4006 ACTUAL VAL SEL) is used as the PFC frequency reference. The automatic start and stop of constant speed motors is referred to this actual value signal instead of the output of the PID regulator. Measured Inlet Flow = Reference for the Pumping Station 3 M 3~ P1 Outlet Pipe 1 3 M 3~ P2 Outlet Pipe 2 3 P1 P2 ACS 400 P3 Mains 3 ~ Figure 64 inlet flow. 3 Outlet Pipe 3 Inlet Pipe Sewage Tank M 3~ P3 Contactors 3 3 Regulator bypass control. The capacity of the pumping station (outlet flow) follows the measured Output Frequency Maximum frequency Start freq 2 Start freq 1 Low freq 2 Low freq 1 Control Signal % Minimum frequency a b c a: No auxiliary motors running b: One auxiliary motor running c: Two auxiliary motors running Figure 65 The relation between the control signal and the frequency of the controlled motor in a threemotor system. 118 ACS 400 User’s Manual Code Description 8122 PFC START DELAY Sets the start delay for all the motors in the system. The delay works as follows: 1. The contactor that connects the speed regulated motor to ACS 400 is switched on (by a ACS 400 relay output). 2. PFC Start Delay is waited. 3. Speed regulated motor is energised and normal PFC operation starts. Auxiliary motors are started. Caution! There should always be PFC Start Delay set if the motors are equipped with star-delta starters. The PFC Start Delay must be set longer than the time setting of the star-delta starter: After the motor is switched on by the relay output of the ACS 400 there must be enough time for the star-delta starter to first switch to star-connection and then back to delta-connection before the ACS 400 inverter starts switching. ACS 400 User’s Manual 119 120 ACS 400 User’s Manual Standard Serial Communication Overview The ACS 400 can be connected to an external control system using the standard Modbus fieldbus connection. The ACS 400 can receive all of its control information either from the Modbus fieldbus, or the control can be distributed between the fieldbus and other available control locations, e.g. digital/ analogue inputs and the drive control panel. The ACS 400 has two serial communication channels (or ports), Channel 0 and Channel 1. Channel 1 is the standard Modbus fieldbus connection. Communication settings of Channel 1 can be configured by the user. To control the ACS 400 via Modbus, ACS 400 must be parameterised to accept control commands and/or frequency references from Channel 1. Channel 0 is reserved for drive control panels ACS-PAN and ACS100-PAN, and for the DriveWindow PC tool. Optional serial communication features ACS 400 can also be connected to number of other fieldbuses using special fieldbus adapter modules. These adapters are connected using an optical DDCS link (DDCS=Distributed Drives Control System). For more information on these options, contact your supplier. ACS 400 Channel 1 Connector X3 Channel 0 LOC REM FAULT Modbus fieldbus (RS485) mAVs kHz % o Crpm OUTPUTPAR SET MENU FWDREV MENU LOC RE REM LOC M ENTER ACS100-PAN ACS-PAN DriveWindow Connector for optional DDCS communication module Figure 66 Standard serial communication features of ACS 400. ACS 400 User’s Manual 121 Parameter R/W Requests Actual Values (ACT) Status Word (SW) References (REF) Control Word (CW) Data Flow Fieldbus Master (PLC) Fieldbus Figure 67 Structure of a fieldbus system. 122 ACS 400 User’s Manual Earthing and Termination RS485 Bus The RS485 network should not be directly earthed at any point. All the devices on the network should be well earthed using their corresponding earthing terminals. As always, the earthing wires should not form any closed loops, and all the devices should be earthed to a common earth. The RS485 network must be terminated using 120 Ω resistors at both ends of the network. Use DIP switch to connect or disconnect the termination resistors. The termination should not be done on the intermediate stations on the network as shown in Figure 68. Terminated Terminated Figure 68 Termination for the RS485 link. The connections may only be made with the drive disconnected from the power source. ACS 400 User’s Manual 123 Activating Modbus Protocol As a factory setting, Channel 1 is not operational. To activate standard Modbus protocol for Channel 1, set parameter 5005 PROTOCOL SEL to 2 (STD MODBUS). After this single modification, the ACS 400 is ready to communicate via Channel 1 using the default communication settings (given in Table 18), making parameter read and write possible. Following sections describe how to configure the ACS 400 for more sophisticated communication and control. Table 18 Default communication settings of Channel 1. Station number Communication speed Parity bit Stop bits Number of data bits 1 9600 bps none two 8 Note! Protocol must be reactivated after the communication settings are changed. 124 ACS 400 User’s Manual Communication settings Communication settings define the communication speed, parity checking, number of stop bits and fault functions. These settings for Channel 1 are defined using parameters in groups 50 COMMUNICATION and 52 STANDARD MODBUS. Default communication settings for Channel 1 are listed in Table 18. To be able to communicate with the master device, the ACS 400 must use the same communication speed and parity settings as the master. Further information on all the parameters and their alternative settings is given in chapter “ACS 400 Complete Parameter List” on page 55. Table 19 Communication parameters. Code Parameter Name Alternative Settings Default Setting Function/Information Group 52 STANDARD MODBUS 5201 STATION NUMBER 1 - 247 1 5202 COMM SPEED 3 = 300 bps ... 192 = 19200 bps 96 (9600 bits/s) Communication speed. 5203 PARITY 0 = NONE 1 = EVEN 2 = ODD 0 (NONE) Parity and stop bit setting. Slave number for ACS 400 in Modbus network. Group 50 COMMUNICATION 5003 COMM FAULT TIME 0.1 - 60.0 s 1.0 s Time limit for communication loss detection. 5004 COMM FAULT FUNC 0 = NOT SEL 1 = FAULT 2 = CONST SP 7 3 = LAST SPEED 0 (NOT SEL) Operation in case communication with the master device is lost. 5005 PROTOCOL SEL 0 = NOT SEL 0 (NOT SEL) 1 = DDCS 2 = STD MODBUS 3 = STD MDB+DDCS ACS 400 User’s Manual Communication protocol selection. Normally must be set to STD MODBUS. 125 Control Locations The ACS 400 drive can receive control information from multiple sources, including digital I/O, analogue I/O, keypad, and Modbus fieldbus. To control the ACS 400 via the serial communication channel 1 (Modbus fieldbus), it must be parameterised to accept control commands and/or frequency references from this channel. In addition, ACS 400 must be in remote control. The necessary parameters and their usage are listed in Table 20. Note especially, that before any control commands can be given through serial communication channel 1, parameter 5006 COMM COMMANDS value must be set to STD MODBUS. Further information on all the parameters and their alternative settings is given in chapter “ACS 400 Complete Parameter List” starting page 55. Table 20 Parameters for control command source selection. Code Parameter Name Alternative Settings Setting for Standard Modbus Function/Information Group 50 COMMUNICATION 5006 COMM COMMAND 0 = NOT SEL 1 (STD MODBUS) Defines the serial communication channel 1 = STD MODBUS, for the controlling commands (start, stop, 2 = DDCS direction and reference). Must be set to 1 (STD MODBUS). Group 10 COMMAND INPUTS 1001 EXT1 COMMANDS 0 = NOT SEL 1 = DI1 ... 10 = COMM 10 (COMM) Enables the Control Word (except bit 11) when EXT1 is selected as control location. 1002 EXT2 COMMANDS 0 = NOT SEL 1 = DI1 ... 10 = COMM 10 (COMM) Enables the Control Word (except bit 11) when EXT2 is selected as control location. 1003 DIRECTION 1 = FORWARD 2 = REVERSE 3 = REQUEST 3 (REQUEST) Enables rotation direction control as defined by parameters 1001 and 1002. Group 11 REFERENCE SELECT 1102 EXT1/EXT2 SEL 1 = DI1 ... 8 = COMM 8 (COMM) Enables external control location EXT1/ EXT2 selection by Control Word bit 11. 1103 EXT REF1 SELECT 0 = KEYPAD 1 = AI1 ... 8 = COMM 9 = COMM+AI1 10 = COMM*AI1 ... 8 (COMM), 9 (COMM+AI1) or 10 (COMM*AI1) Fieldbus reference 1 is used when EXT1 is selected as control location. See section References below for information on the alternative settings. 126 ACS 400 User’s Manual Alternative Settings Code Parameter Name 1106 EXT REF2 SELECT 0 = KEYPAD 1 = AI1 ... 8 = COMM 9 = COMM+AI1 10 = COMM*AI1 ... Setting for Standard Modbus Function/Information 8 (COMM), 9 (COMM+AI1) or 10 (COMM*AI1) Fieldbus reference 2 is used when EXT2 is selected as control location. See section References below for information on the alternative settings. Group 16 SYSTEM CONTROLS 1601 RUN ENABLE 0 = NOT SEL 6 (COMM) 1...5 = DI1 ... DI5 6 = COMM The run enable signal is given through serial communication (Control Word bit 3). 1604 FAULT RESET SEL 0 = KEYPAD ONLY 7 (COMM) 1...5 = DI1 ... DI5 6 = START/STOP 7 = COMM Fault reset is executed through serial communication (Control Word bit 7). Output signal source selection It is possible to control both the relay outputs 1 and 2, as well as the analogue output from the serial communication channel 1. Relay outputs can be controlled in the following way: Step 1: Configure the ACS 400 to supervise the value of any of the parameters 131-133 using parameters in group 32 SUPERVISION. Step 2: Configure a relay output 1 or 2 to respond to the status of one of the supervised parameters. The selected relay can now be turned on or off by writing to supervised parameter (131-133) some value that is either above or below the given supervision limits. Refer to Table 21 for more information on required parameter settings. With the given settings, writing any value 100 - 255 to parameter 131 SER LINK DATA 1 causes the relay output 1 to activate. Writing any value 0 - 99 to parameter 131 causes the relay output 1 to deactivate. Refer to Table 22 for information on analogue output control. Table 21 Relay output control. Code Parameter Name Alternative Settings Setting for Standard Modbus Function/Information Controlling data for the relay outputs. Group 01 OPERATING DATA 0131 SER LINK DATA 1 0 - 255 - 0132 SER LINK DATA 2 0 - 255 - ACS 400 User’s Manual 127 Code Parameter Name Alternative Settings Setting for Standard Modbus Function/Information Group 14 RELAY OUTPUTS 1401 RELAY OUTPUT 1 0 = NOT SEL e.g. 7 (SUPERV1 ... OVER) 7 = SUPRV1 OVER 8 = SUPRV1 UNDER 9 = SUPRV2 OVER 10 = SUPRV2 UNDER ... 31 = STARTED 1402 RELAY OUTPUT 2 As above 1 PARAM 102 - 137 Relay output 1 function. With the given setting, the relay 1 is activated when supervised parameter 1 (given by parameter 3201) is above the limit given by parameter 3203. e.g. 7 (SUPERV1 Relay output 2 function. OVER) See above. Group 32 SUPERVISION 3201 SUPERV e.g. 131 (SERIAL Number of supervised parameter 1. Any 1) parameter of the group 1 OPERATING DATA. LINK DATA 3202 SUPERV 1 LIM LO 0 - 255 e.g. 100 Lower supervision limit for supervised parameter 1. 3203 SUPERV 1 LIM HI 0 - 255 e.g. 100 Upper supervision limit for supervised parameter 1. 3204 SUPERV 2 PARAM 102 - 137 e.g. 132 (SERIAL Number of supervised parameter 1. Any 2) parameter of the group 1 OPERATING DATA. LINK DATA 3205 SUPERV 2 LIM LO 0 - 255 e.g. 100 Lower supervision limit for supervised parameter 2. 3206 SUPERV 2 LIM HI 0 - 255 e.g. 100 Upper supervision limit for supervised parameter 2. Table 22 Analogue output control. Code Parameter Name Alternative Settings Setting for Standard Modbus Function/Information 0 - 255 - Controlling data for the analogue output. 102 - 137 e.g. 133 Directs the contents of parameter 133 to the analogue output. 255 Analogue output scaling: upper limit (20 mA) reached when value 255 written to parameter 133. Group 01 OPERATING DATA 0133 SER LINK DATA 3 Group 15 ANALOGUE OUTPUT 1501 AO CONTENT 1503 AO CONTENT MAX 128 ACS 400 User’s Manual Diagnostic Counters Diagnostic counters can be used for debugging the Modbus system. Counters will roll over from 65535 to 0. The counter values are stored to permanent memory when power is disconnected. Counters can be reset from the control panel by pressing the UP and DOWN buttons simultaneously when in parameter set mode, or by writing a zero from the serial communication channel 1. Note! Parameters 5206 - 5212 are displayed in hexadecimal format by the control panel. Table 23 Code Name Range User Group 52 STANDARD MODBUS 5206 BAD MESSAGES 0 - 65535 5207 GOOD MESSAGES 0 - 65535 5208 BUFFER OVERRUNS 0 - 65535 5209 FRAME ERRORS 0 - 65535 5210 PARITY ERRORS 0 - 65535 5211 CRC ERRORS 0 - 65535 5212 BUSY ERRORS 5213 SER FAULT MEM 1 0-3 5214 SER FAULT MEM 1 0-3 5215 SER FAULT MEM 3 0-3 0 - 65535 ACS 400 User’s Manual 129 Communication This chapter describes the Modbus communication on ACS 400 drives. Introduction to Modbus Modbus is a serial, asynchronous protocol. The Modbus protocol does not specify the physical interface. Typical physical interface is RS485. Modbus is designed for integration with Modicon PLCs or other automation devices, and the services closely correspond to the PLC architecture. The ACS 400 drive ‘looks like’ a Modicon PLC on the network. If detailed information regarding the Modicon Modbus protocol is required, contact your ABB supplier for a copy of Modbus Protocol Guide. Register Read and Write The ACS 400 has all drive parameter, control and status information mapped into a 4xxxx register area. This holding register area can be read from an external device, and an external device can modify the register values by writing to them. There are no setup parameters for mapping the data to the 4xxxx register. The mapping is predefined and corresponds directly to the ACS 400 parameter grouping. All parameters are available for both reading and writing. The parameter writes are verified for correct value, and for valid register addresses. Some parameters never allow writes (including Group 1 actual values), some allow only zero write (including Group 1 fault memories), some parameters allow write only when the drive is stopped (including Group 99 setup variables), and some can be modified at any time (including e.g. Group 22 acceleration and deceleration ramp times). Note! Parameter writes through Channel 1 (Standard Modbus) are always volatile i.e. modified values are not automatically stored to permanent memory. Parameter 1607 PARAM. SAVE can be used to save all altered values. 130 ACS 400 User’s Manual Register Mapping The drive parameters are mapped to the 4xxxx area so that: • 40001 – 40099 are reserved for drive control registers • 40101 – 40199 is reserved for the actual values (parameter group 1) • 40201 – 40299 is reserved for parameter group 2 • 40301 – 40399 is reserved for fault and alarm information • … other parameter groups • 49901 – 49999 is reserved for the start-up data Register addresses 4GGPP are shown in Table 24. In this table GG is the group number, and PP is the parameter number within the group. Table 24 Parameter mapping. 4GGPP GG PP 40001 – 40006 00 Drive control registers 01 Control word 02 Reference 1 03 Reference 2 04 Status word 05 Actual value 1 06 Actual value 2 40102 – 40130 01 OPERATING DATA 02 SPEED … 30 OLDEST FAULT 41001 – 41003 10 COMMAND INPUTS 01 EXT1 COMMANDS 02 EXT2 COMMANDS 03 DIRECTION 41101 – 41108 11 REFERENCE SELECT 01 KEYPAD REF SEL … 08 CONST SPEED 7 … … … 49901 – 49908 99 START-UP DATA 02 APPLIC MACRO … 08 MOTOR NOM SPEED The register addresses between the groups are invalid. No reads or writes are allowed for these addresses. If there is an attempt to read or write outside the parameter addresses, the Modbus interface will return an exception code to the controller. ACS 400 User’s Manual 131 Exception Codes The ACS 400 supports the standard Modbus exception codes. These are shown in Table 25. Table 25 Exception codes. Code Name Meaning 01 ILLEGAL FUNCTION The function code received in the query is not an allowable action for the slave. ACS 400: Unsupported Command 02 ILLEGAL DATA ADDRESS The data address received in the query is not an allowable address for the slave. ACS 400: Address outside groups 03 ILLEGAL DATA VALUE A value contained in the query data field is not an allowable value for the slave. ACS 400: Value outside min.-tax limits ACS 400: Parameter is read-only ACS 400: Message is too long ACS 400: Parameter write not allowed when start is active ACS 400: Parameter write not allowed when factory macro is selected Function Codes The ACS 400 supports the Modbus function codes given in Table 26. If any other function codes are used ACS 400 returns an exception response with error code 01 (illegal function). Table 26 Function codes. Code Description 03 Read holding registers 06 Preset single register 16 (10 Hex) Preset multiple registers 132 ACS 400 User’s Manual The Control Word and the Status Word Holding registers: 40001 (Control Word), 40004 (Status Word) The Control Word (CW) is the principal means for controlling the drive from a fieldbus system. It is effective when • The drive is in external (remote) control and the controlling commands are received through serial communication channel (set by parameters 1001 EXT1 COMMANDS, 1002 EXT2 COMMANDS and 1102 EXT1/EXT2 SEL), and • Serial communication channel that is used for the controlling is Standard Modbus (parameter 5006 COMM COMMANDS is set to 1 (STD MODBUS). The Control Word (detailed in Table 27) is sent by the fieldbus master station to the drive. The drive switches between its states according to the bit-coded instructions of the Control Word. See also state machine on page 139. The Status Word (SW) is a word containing status information, sent by the drive to the master station. The composition of the Status Word is explained in Table 29. Note! Operation of Control Word and Status Word conforms to ABB Drives Profile with the exception of Control Word bit #10 (REMOTE_CMD), which is not used by the ACS 400. Table 27 The Control Word. See also the state machine on page 139. Bit Value 0 1 Enter READY TO OPERATE 0 Emergency OFF. Ramp to stop according to parameter 2203 DECELER TIME 1. Enter OFF1 ACTIVE; proceed to READY TO SWITCH ON unless other interlocks (OFF2, OFF3) are active. 1 Continue operation (OFF2 inactive) 0 Emergency OFF, coast to stop. Enter OFF2 ACTIVE; proceed to SWITCH-ON INHIBITED. 1 2 3 1 Continue operation (OFF3 inactive) 0 Emergency stop. Drive ramps to stop according to parameter 2205 DECELER TIME 2. Enter OFF3 ACTIVE; proceed to SWITCH-ON INHIBITED. 0 -1 0 4 5 Description Enter OPERATION ENABLED (Note that also the Run enable signal must be present on a digital input – see parameter 1601 RUN ENABLE. Inhibit operation. Enter OPERATION INHIBITED Unused. 1 Normal operation. Enter RAMP FUNCTION GENERATOR: ACCELERATOR ENABLED 0 Halt ramping (Ramp Function Generator output held) 6 1 Normal operation. Enter OPERATING 0 Force Ramp Function Generator input to zero. 7 0-1 (Continue normal operation) 1 Select external control location 2 (EXT2) 0 Select external control location 1 (EXT1) 8 to 10 11 12 to 15 Fault reset (enter SWITCH-ON INHIBITED) 0 Unused Unused ACS 400 User’s Manual 133 Example on Using the Control Word The following example shows how to use the Control Word to start the drive. When the power is connected for the first time, the state of the drive (see the state machine in Figure 69) is NOT READY TO SWITCH ON. Control Word is used to step through the state machine states until OPERATING state is reached, meaning that the drive is running and follows the given reference. Table 28 Using the Control Word. Control Word Value Step 1 CW = 0000 0000 0000 0110 bit 15 Description When this value is written, drive state changes to READY TO SWITCH ON. bit 0 Step 2 Wait at least 100 ms before proceeding. Step 3 CW = 0000 0000 0000 0111 When this value is written, drive state changes to READY TO OPERATE. Step 4 CW = 0000 0000 0000 1111 When this value is written, the drive starts, but will not accelerate. Drive state changes to OPERATION ENABLED. Step 5 CW = 0000 0000 0010 1111 When this value is written, the ramp function generator (RFG) output is released. Drive state changes to RFG: ACCELERATOR ENABLED. Step 6 CW = 0000 0000 0110 1111 When this value is written, the ramp function generator (RFG) input is released. Drive state changes to OPERATING. Drive will accelerate to the given reference and will follow the reference. This example assumes that the ACS 400 is in remote control, that external control place 1 (EXT1) is the active control place (as selected by parameter 1102), and that EXT1 start and stop commands are received through serial communication (parameter 1001). 134 ACS 400 User’s Manual Table 29 The Status Word. Bit Value 0 1 READY TO SWITCH ON 0 NOT READY TO SWITCH ON 1 READY TO OPERATE 0 OFF1 ACTIVE 1 OPERATION ENABLED 1 2 0 3 4 5 6 0-1 Description Not ready (OPERATION INHIBITED) FAULT 0 No fault 1 OFF2 0 OFF2 ACTIVE 1 OFF3 0 OFF3 ACTIVE 1 SWITCH-ON INHIBITED inactive inactive 0 7 8 9 10 11 12 13 to 15 1 Alarm is active. See the Diagnostics section for a list of relevant alarms. 0 No alarm 1 OPERATING. 0 Actual value differs from reference value (= is outside tolerance limits) Actual value equals reference value (= is within tolerance limits). 1 Drive control location: REMOTE 0 Drive control location: LOCAL 1 The value of first supervised parameter equals to or is greater than supervision limit. Refer to Group 32 Supervision. 0 The value of first supervised parameter is below supervision limit 1 External control location 2 (EXT2) selected 0 External control location 1 (EXT1) selected 1 Run Enable signal received 0 No Run Enable signal received Unused ACS 400 User’s Manual 135 References References are 16-bit words comprising a sign bit and a 15-bit integer. A negative reference (indicating reversed direction of rotation) is formed by calculating the two’s complement from the corresponding positive reference value. Reference 1 Holding Register: 40002 Reference 1 can be used as the frequency reference REF1 for the ACS 400. The signal source of external reference 1 (REF1) must be set to COMM and external control location 1 (EXT1) must be activated. Refer to parameters 1103 EXT REF 1 SELECT and 1102 EXT1/EXT2 SEL. Reference 2 Holding Register: 40003 Reference 2 can be used as the frequency reference REF2 for the ACS 400. The signal source of external reference 2 REF2 must be set to COMM and External control location 2 (EXT2) must be activated. Refer to parameters 1106 EXT REF 2 SELECT and 1102 EXT1/EXT2 SEL. Fieldbus Reference Scaling Fieldbus references are scaled as follows: Reference 1: 20000 MIN is not used. EXT REF1 MAX (Hz, parameter 1105). Scaling Parameter 1104 EXT REF1 Reference 2: 10000 MIN is not used. EXT REF2 MAX (%, parameter 1108). Scaling Parameter 1107 EXT REF2 Fieldbus Reference Fieldbus reference is selected by setting a reference selection parameter – 1103 EXT REF1 SELECT or 1106 EXT REF2 SELECT – to COMM, COMM+AI1 or COMM*AI1. The latter two enable correction of the fieldbus reference using analogue input AI1. The following table explains these selections. Note that the analogue input value is a percentage value (0-100 %) which can be seen in parameter 0118 AI1. When the analogue input is 50 %, the correction is 0. When the input is <50 % (>50 %), the correction reduces (respectively increases) the reference used. Table 30 Correcting the fieldbus reference through analogue input. Parameter Setting Effect of AI1 Value on Fieldbus Reference COMM None COMM+AI1 Corrected fieldbus reference = given fieldbus reference + analogue input AI1 value COMM*AI1 Corrected fieldbus reference = given fieldbus reference * analogue input AI1 value / 50 % 136 ACS 400 User’s Manual Example of the effect of AI1 value on fieldbus reference. Assume that 2008 MAXIMUM FREQ = 50 Hz Assume that fieldbus reference 1 is 5000 (corresponding to 25 % of full scale) and voltage at AI1 is 3 V (corresponding to 30 % of full scale). 1. If setting COMM+AI1 is used, then corrected fieldbus reference is 25 % + 30 % - 50 % = 5 % or 2.5 Hz. 2. If setting COMM*AI1 is used, then corrected fieldbus reference is 25 % * 30 % / 50 % = 15 % or 7.5 Hz. REF co m m + AI 100 % m co m 50 % *A I FIELDBUS REFERENCE . 2 .1 50 % ACS 400 User’s Manual 100 % AI1 137 Actual Values Actual values are read-only values containing information on the operation of the drive. Actual values are 16-bit words containing sign bit and a 15-bit integer. A negative value is given as two’s complement of the corresponding positive value. Actual Value 1 Holding Register: 40005 Actual output frequency. Scaling: 5000 50 Hz. Actual Value 2 Holding Register: 40006 Actual output current. Scaling: 10 138 1 A. ACS 400 User’s Manual From any state From any state Emergency Stop OFF3 (CW Bit2=0) Emergency Off OFF2 (CW Bit1=0) OFF2 ACTIVE OFF3 ACTIVE (SW Bit5=0) From any state Fault (SW Bit4=0) (SW Bit3=1) FAULT (CW Bit7=1)* f=0 / I=0 From any state OFF1 (CW Bit0=0) SWITCH-ON INHIBITED MAINS OFF Power ON f=0 / I=0 (CW Bit0=0) A C D NOT READY TO SWITCH ON (SW Bit0=0) (CW xxxx xxxx xxxx x110) (CW Bit3=0) (SW Bit2=0) (SW Bit6=1) OPERATION INHIBITED READY TO SWITCH ON (SW Bit0=1) (CW xxxx xxxx xxxx x111) C D READY TO OPERATE (SW Bit1=1) (CW Bit3=1 and SW Bit12=1) (CW Bit5=0) D OPERATION ENABLED (CW Bit6=0) A (SW Bit2=1) (CW Bit5=1) RFG: ACCELERATOR ENABLED C (CW Bit6=1) OPERATING *This state transition occurs also if the fault is reset from any other source (e.g. digital input). State (SW Bit8=1) D I = Output current CW = Control Word f = Output frequency SW = Status Word RFG = Ramp Function Generator Figure 69 The state machine for evaluation of start and stop signals. ACS 400 User’s Manual 139 Fault and Alarm Status The ACS 400 provides fault and alarm status words for the external control system. These data words are accessible only through the serial communication link but not from the control panel. Fault and alarm status words are located in parameter group 3. The group also contains copies of the Control Word and Status Word. Group 3 parameters are of read-only type; however, both alarm words can be reset by writing a zero to them. Table 31 Fault and alarm status words. Code Name Description 301 MAIN COMMAND WORD Read-only copy of the Control Word. See page 133. 302 MAIN STATUS WORD 305 FAULT WORD 1 Fault information. When a fault is active, the corresponding bit is set. Bit descriptions are given in Table 32. 306 FAULT WORD 2 Fault information. When a fault is active, the corresponding bit is set. Bit descriptions are given in Table 32. 308 ALARM WORD 1 Alarm information. When an alarm is active, the corresponding bit is set. Bits remain set until whole alarm word is reset by writing 0 to it. See Table 33. 309 ALARM WORD 2 Alarm information. When an alarm is active, the corresponding bit is set. Bits remain set until whole alarm word is reset by writing 0 to it. See Table 33. Read-only copy of the Status Word. See page 135. Table 32 Bit descriptions for fault words 1 and 2. See also the Diagnostics section for more information about faults and fault codes. 140 Bit # Fault Word 1 Fault Word 2 0 Overcurrent Underload 1 DC overvoltage Reserved 2 ACS 400 overtemperature DDCS link 3 Fault current Reserved 4 Output overload 5 DC undervoltage 6 Analogue input 1 fault 7 Analogue input 2 fault 8 Motor overtemperature 9 Panel loss 10 Parameters inconsistent 11 DC bus ripple too large 12 Motor stall 13 Serial communication loss 14 External fault 15 Output earth fault Hardware error ACS 400 User’s Manual Table 33 Bit descriptions for ALARM WORD 1 and ALARM WORD 2. See also the Diagnostics section for more information about alarms and alarm codes. Bit # Alarm Word 1 Alarm Word 2 0 Overcurrent controller alarm Overload alarm 1 Overvoltage controller alarm Autoreset alarm 2 Undervoltage controller alarm PID sleep alarm 3 Direction lock alarm PFC autochange alarm 4 Serial communication loss PFC interlock alarm 5 Modbus exception Reserved 6 Analogue input 1 loss 7 Analogue input 2 loss 8 Panel loss 9 ACS 400 overtemperature 10 Motor overtemperature 11 Underload 12 Motor stall alarm 13 DDCS link 14 Reserved 15 Reserved ACS 400 User’s Manual 141 142 ACS 400 User’s Manual Diagnostics General This chapter describes the various diagnostic displays of the ACS-PAN and ACS100-PAN control panels and lists the most common causes for the particular display. If the fault cannot be cured by the given instructions, contact an ABB service representative. Caution! Do not attempt any measurement, parts replacement or other service procedure not described in this manual. Such action will void guarantee, endanger correct operation, and increase downtime and expense. Alarm and Fault displays The seven-segment display unit of ACS100-PAN indicates alarms and faults using codes “ALxx” or “FLxx”, where xx is the corresponding alarm or fault code. The alphanumeric display of ACS-PAN control panel shows the alarm and fault codes together with a short message. Alarms 1-7 arise from button operation. Green LED blinks for codes greater than or equal to 10. The faults are indicated by red LED. The alarm and fault messages disappear when MENU, ENTER or the arrow buttons of control panel are pressed. The message will reappear after a few seconds if the keypad is not touched and the alarm or fault is still active. Last three fault codes are stored into parameters 0128 - 0130. These fault memories can be cleared from the control panel by pressing UP and DOWN buttons simultaneously in parameter set mode. Fault Resetting Faults that are indicated by a red blinking LED are reset by turning the power off for a while. Other faults (indicated by red static LED) can be reset either from the control panel, by digital input or serial communication, or switching the supply voltage off for a while. When the fault has been removed, the motor can be started. The ACS 400 can be configured to automatically reset certain faults. Refer to parameter group 31 AUTOMATIC RESET. Warning! If an external source for start command is selected and it is active, the ACS 400 may start immediately after fault reset. Warning! All electrical installation and maintenance work described in this chapter should only be undertaken by a qualified electrician. The Safety Instructions on the first pages of this manual must be followed. ACS 400 User’s Manual 143 Table 34 Alarms Alarm Code Display Description 1* OPERATION FAILED Parameter upload or download failed. The software versions of the drives may not be compatible. Software version can be seen from parameter 3301 SOFTWARE VERSION. 2* START ACTIVE Control panel function is not allowed while start is active. 3* LOCAL/REMOTE Control panel function is not allowed in current control mode (local or remote). Control mode is local when LOC is displayed and remote mode when REM is displayed on the control panel. 5* BUTTON DISABLED Control panel function is denied for any of the following reasons: • START/STOP button is interlocked from digital input. This can happen with certain digital input configurations. Refer to chapter Application Macros. • REVERSE button is locked because shaft direction is fixed by parameter 1003 DIRECTION. • The drive is in remote control mode and START/STOP and REVERSE buttons are not followed. 6* PARAM/LOCAL LOCK Control panel function is not allowed: • Parameter 1602 PARAMETER LOCK denies parameter editing • Parameter 1605 LOCAL LOCK denies local control mode. 7* FACTORY MACRO Control panel function is not allowed: Factory macro is selected and denies the parameter modifications. Factory macro is intended for applications where there is no control panel available. 10 ** OVERCURRENT Overcurrent controller is active. 11 ** OVERVOLTAGE Overvoltage controller is active. 12 ** DC UNDERVOLTAGE Undervoltage controller is active. 13 DIRECTION LOCK Rotation direction if fixed by parameter 1003 DIRECTION. 14 SERIAL COMM LOSS Serial communication through Standard Modbus Channel is lost. • Check connections between external control system and the ACS 400. • Refer to parameters 5003 COMM FAULT TIME and 5004 COMM FAULT FUNC. 15 *, ** MODBUS EXCEPTION Exception response is sent through Standard Modbus channel. The bus master may be sending queries which cannot be processed by the ACS 400. Refer to “Standard Serial Communication” section. Last three exception response codes are stored into parameters 5213 - 5215. 16 AI1 LOSS Analogue input 1 loss. Analogue input 1 value is less than MINIMUM AI1 (3022). See also parameter 3001 AI<MIN FUNCTION. 17 AI2 LOSS Analogue input 2 loss. Analogue input 2 value is less than MINIMUM AI2 (3023). See also parameter 3001 AI<MIN FUNCTION. 18 PANEL LOSS Panel communication loss. Control panel is disconnected when - Drive is in local control mode (LOC is shown in the control panel display), or - Drive is in remote control mode (REM) and is parameterised to accept start/ stop, direction or reference from the panel. Refer to parameters in groups 10 COMMAND INPUTS and 11 REFERENCE SELECT. See also parameter 3002 PANEL LOSS. 19 ** ACS400 OVERTEMP ACS 400 overtemperature condition. This alarm is given when the temperature reaches 95% of the trip limit. 20 MOTOR OVERTEMP Motor overtemperature condition as estimated by the ACS 400. Refer to parameters 3004 – 3008. 21 UNDERLOAD Motor load is too low. Check for a problem in the driven equipment. Refer to parameters 3013 – 3015. 22 MOTOR STALL Motor is operating in the stall region. This may be caused by excessive load or insufficient motor power. Refer to parameters 3009 – 3012. 144 ACS 400 User’s Manual Alarm Code 23 Display DDCS COMM LOSS 24 Description DDCS communication loss has been detected. • Check the status of the fieldbus adapter. Refer to appropriate fieldbus adapter manual. • Check the DDCS option module and optical fibres. • Check connections between external control system and fieldbus adapter. Refer to “DDCS Option module manual” and parameters 5003 – 5006. Reserved. 25 Reserved. 26 ** OUTPUT OVERLOAD Inverter overload condition. The ACS 400 output current exceeds the ratings given on page 25 of this manual. 27 * AUTOMATIC RESET ACS 400 is about to perform automatic fault reset operation. As a result, the drive may start after the reset operation. Refer to parameter group 31 AUTOMATIC RESET. 28 * PID SLEEP PID sleep function is active. The drive may accelerate when PID sleep function is deactivated. Refer to parameters 4018 SLEEP SELECTION, 4013 PID SLEEP DELAY, 4014 PID SLEEP LEVEL and 4015 WAKE-UP LEVEL. 29 * AUTOCHANGE The autochange function of Pump-Fan Control block is active. Refer to parameter group 81 PFC CONTROL and the appendix for more information. INTERLOCK Pump-Fan Control interlocks are active. The ACS 400 cannot start any motor (when Autochange is used), or the ACS 400 cannot start the speed regulated motor (when Autochange is not used). 30 Note! Alarms (*) will not cause relay output RO1 (RO2) to activate when the relay output is configured to indicate alarm condition in general. (Parameter 1401 RELAY OUTPUT 1 (1402 RELAY OUTPUT 2) has value 5 (ALARM) or 13 (FLT/ALARM)). Note! Alarms (**) will be shown only if parameter 1608 DISPLAY ALARMS is set to 1 (YES) ACS 400 User’s Manual 145 Table 35 Faults. Fault Code Display Description 1 OVERCURRENT Output current is excessive. • Motor load may be too high • Acceleration time may be too short (parameters 2201 ACCELER TIME 1 and 2203 ACCELER TIME 2). • Motor or motor cable is faulty or connected wrong. 2 DC OVERVOLTAGE Intermediate circuit DC voltage is excessive. • Check mains for static or transient overvoltages • Deceleration time may be too short (parameters 2202 DECELER TIME 1 and 2204 DECELER TIME 2) • Brake chopper (if present) may be underdimensioned 3 ACS400 OVERTEMP ACS 400 heat sink temperature is excessive. Temperature trip limit is 95 °C. • Check air flow and fan operation. • Check motor power against unit power. SHORT CIRCUIT Fault current. Possible reasons for this fault are: • There is a short-circuit in the motor cable(s) or motor • Supply disturbances 5 OUTPUT OVERLOAD Inverter overload condition. The ACS 400 output current exceeds the ratings given on page 25 of this manual. 6 DC UNDERVOLTAGE Intermediate circuit DC voltage is not sufficient. • Mains phase may be missing • Fuse may be blown 7 ANALOGUE INPUT 1 Analogue input 1 loss. Analogue input value is less than MINIMUM AI1 (3022). See also parameter 3001 AI<MIN FUNCTION. 8 ANALOGUE INPUT 2 Analogue input 2 loss. Analogue input value is less than MINIMUM AI2 (3023). See also parameter 3001 AI<MIN FUNCTION. 9 MOTOR OVERTEMP Motor overtemperature condition as estimated by the ACS 400. Refer to parameters 3004 – 3008. 10 PANEL LOSS Panel communication loss. Control panel is disconnected when the drive is receiving start, stop and direction commands from the panel. - Drive is in local control mode (LOC is shown in the control panel display), or - Drive is in remote control mode (REM is shown) and is parameterised to accept start/stop, direction or reference from the panel. Refer to parameters in groups 10 COMMAND INPUTS and 11 REFERENCE SELECT. 11 PARAMETERING Parameter values are inconsistent: MINIMUM AI1 > MAXIMUM AI1 (parameters 1301, 1302) • • MINIMUM AI2 > MAXIMUM AI2 (parameters 1304, 1305) MINIMUM FREQ > MAXIMUM FREQ (parameters 2007, 2008) • • PFC block tries to use IO extension module (NDIO) but the DDCS link is not parameterised properly 12 MOTOR STALL Motor stall. This may be caused by excessive load or insufficient motor power. Refer to parameters 3009 – 3012. 13 SERIAL COMM LOSS Serial communication through Standard Modbus Channel is lost. • Check connections between external control system and the ACS 400. • Refer to parameters 5003 COMM FAULT TIME and 5004 COMM FAULT FUNC. 14 EXTERNAL FAULT SIGNAL External fault is active. See parameter 3003 EXTERNAL OUTPUT EARTH FAULT Earth fault. The load on the incoming mains system is out of balance. • There may be a fault in the motor or motor cable. • Motor cable may be too long. 4 ** See also parameter 3002 PANEL LOSS. 15 ** 146 FAULT. ACS 400 User’s Manual 16 ** 17 DC BUS RIPPLE • • • UNDERLOAD Motor load is too low. Check for a problem in the driven equipment. Refer to parameters 3013 – 3015. DDCS LINK Problem with DDCS link. • Check the DDCS option module and the optic fibres. • Check the status of the fieldbus adapter. Refer to appropriate fieldbus adapter manual. • Check connections between external control system and fieldbus adapter. • Alternatively, check the status of the IO extension modules (NDIO), required by PFC block. Refer also to “DDCS Option Module Manual” and parameters 5004 – 5007. AI OUT OF RANGE Analogue input out of range. Check AI level. HARDWARE ERROR Hardware error. Contact supplier. 18 19 20 * 21 - 26 ** Ripple voltages on the DC bus are too large. Mains phase may be missing Fuse may be blown Reserved Full display blinking (ACS100-PAN) “COMM LOSS” (ACS-PAN) Serial link failure. Bad connection between the control panel and the ACS 400. Note! These faults (**) are indicated by a red blinking LED and are reset by turning the power off for a while. ACS 400 User’s Manual 147 148 ACS 400 User’s Manual Appendix A Local Control vs. Remote Control The ACS 400 can be controlled from two remote control locations or from the control panel. Figure 70 below shows the ACS 400 control locations. The selection between local control (LOC) and remote control (REM) can be done by pushing the MENU and ENTER buttons simultaneously when ACS100-PAN is used, and by pushing the LOC/ REM button when ACS-PAN is used. LOC REM mAVs kHz% o Crpm OUTPUTPAR SET MENU FWDREV Start/Stop/Direction, Keypad Reference 1 (REF1, Hz) or Keypad Reference 2 (REF2, %) MEN U LOC REM REM LOC ENTER EXT1 Start/Stop/Direction, External Reference 1 (Hz) EXT2 Start/Stop/Direction, External Reference 2 (%) Figure 70 Control locations. Local Control The control commands are given explicitly from the control panel when the ACS 400 is in local control. Parameter 1101 KEYPAD REF SEL is used to select keypad reference, which can be either REF1 (Hz) or REF2 (%). If REF1 (Hz) is selected, the type of reference is frequency and it is given to the ACS 400 in Hz. If REF2 (%) is selected, the reference is given in per cent. If PID Control macro or PCF macro is used, reference REF2 is fed directly to the PID controller as percentage. Otherwise, reference REF2 (%) is converted to frequency so that 100 % corresponds to MAXIMUM FREQ (parameter 2008). ACS 400 User’s Manual 149 Remote Control When the ACS 400 is in remote control (REM), the commands are given primarily through digital and analogue inputs, although commands can be given also through the control panel or serial communication. Parameter 1102 EXT1/EXT2 SELECT selects between the two external control locations EXT1 and EXT2. For EXT1, the source of the Start/Stop/Direction commands is defined by parameter 1001 EXT1 and the reference source is defined by parameter 1103 EXT REF1 SELECT. External reference 1 is always a frequency reference. COMMANDS, For EXT2, the source of the Start/Stop/Direction commands is defined by parameter 1002 EXT2 and the reference source is defined by parameter 1106 EXT REF2 SELECT. External reference 2 can be a frequency reference, or a process reference, depending on the application macro selected. COMMANDS, In remote control, constant speed operation can be programmed by parameter 1201 CONST SPEED Digital inputs can be used to select between the external frequency reference and seven configurable constant speeds (1202 CONST SPEED 1... 1208 CONST SPEED 7). SEL. Control Terminals EXT REF2 SELECT EXT REF1 SELECT EXT1/EXT2 CONST SP SELECT SELECT KEYPAD REF SEL 1106 1103 1102 1101 EXT1 EXT2 AI1-2, DI1-5 Analogue inputs AI1, AI2 KEYPAD Remote AI1-2, DI1-5 Min freq Max freq DI1-DI5 Remote Digital inputs DI1- DI5 1201 Applic (PID) KEYPAD Local Local Const. Speeds Crit. speed Acc/Dec REF2 (%) REF1 (Hz) Keypad Ref Loc / Rem Start/Stop Local NOT SEL REQUEST EXT1 DI1-DI5 Remote KEYPAD NOT SEL DI1-DI5 EXT2 Direction FORWARD REVERSE KEYPAD EXT1 COMMANDS EXT2 COMMANDS 1001 1002 Enabled, DI1-DI5 DIRECTION RUN ENABLE 1003 1601 Figure 71 Selecting control location and control source. 150 ACS 400 User’s Manual Internal Signal Connections for the Macros EXT REF2 SELECT EXT REF1 SELECT 1106 Control Terminals 1103 EXT1/EXT2 CONST SP SELECT SELECT 1102 REF SEL EXT1 AI1 KEYPAD Analogue inputs AI1, AI2 AI1-2,DI1-5 EXT2 Remote Min freq Max freq DI3,4 Remote Digital inputs DI1-DI5 KEYPAD 1201 1101 EXT1 DI3,4 KEYPAD Local Local Crit. sp. Acc/Dec Const. speeds REF2 (%) REF1 (Hz) Keypad Ref Loc/Rem Start/Stop, Direction DI1-DI5 KEYPAD Start/Stop Local NOT SEL EXT1 NOT SEL DI1-DI5 EXT2 REQUEST Remote Direction FORWARD REVERSE Enabled, DI1-DI5 KEYPAD EXT1 COMMANDS 1001 EXT2 COMMANDS 1002 DIRECTION RUN ENABLE 1003 1601 Figure 72 The control signal connections of the ABB Standard, Alternate and Premagnetise macros. ACS 400 User’s Manual 151 EXT REF2 SELECT Control 1106 Terminals 1102 1201 DI2 DI3 EXT1 1103 AI1 Analogue inputs KEYPAD AI1 Digital inputs DI1-DI5 EXT1/EXT2 CONST SEL SPEED SEL EXT REF1 SELECT KEYPAD REF SEL 1101 EXT2 Remote Min freq Max freq Remote KEYPAD Local PID Applic Local ACT1 AI1 AI2 Crit. sp. Const. speeds Acc/Dec AI1 ACT2 AI2 ACTUAL1 INPUT SEL 4007 ACTUAL VAL SEL 2 ACTUAL 4006 INPUT SEL Keypad 4008 REF2 (%) REF1 (Hz) Ref Loc/Rem Start/Stop, Direction NOT SEL Start/Stop Local DI1 EXT1 KEYPAD NOT SEL DI5 EXT2 REQUEST Remote Direction FORWARD REVERSE KEYPAD DI4 EXT1 COMMANDS 1001 EXT2 COMMANDS 1002 DIRECTION RUN ENABLE 1003 1601 Figure 73 The control signal connections of the PID Control macro. 152 ACS 400 User’s Manual Appendix B ACS 400 Pump and Fan Control (PFC) Macro Introduction The Pump and Fan Control (PFC) macro can operate a pump (or fan or compressor) station with one to four parallel pumps. The control principle of a two-pump station is as follows: • • • • • The motor of the pump no. 1 is connected to the ACS 400. The capacity of the pump is controlled by varying the motor speed. The motor of the pump no. 2 is connected direct on-line. The pump can be switched on and off by the ACS 400 when necessary. The process reference and actual value are fed to the ACS 400 PID controller. The PID controller adjusts the speed (frequency) of the first pump such that the process actual value follows the reference. When the frequency reference of the process PID controller exceeds the limit set by the user, the PFC macro automatically starts the second pump. When the frequency falls below the limit set by the user, the PFC macro automatically stops the second pump. Using the digital inputs of the ACS 400, an interlocking function can be implemented; the PFC macro detects if a pump is switched off and starts the other pump instead. The PFC macro makes automatic pump alternation possible. Thus each pump can be run with an equal duty time. For more information on the alternation system and the other useful features such as Sleep function, Constant reference value, Reference steps and Regulator bypass, see parameter group 40, 41 and 81 parameter descriptions. As default when PFC macro is selected, ACS 400 receives process reference (setpoint) through analogue input 1, process actual value through analogue input 2 and Start/Stop commands through digital input 1. The interlocks are connected to digital input 4 (speed regulated motor) and digital input 5 (constant speed motor). Run Enable signal is received through the digital input 2 and PFC control is activated/deactivated through the digital input 3. The default output signal is given through the analogue output (frequency). Normally the automatic Pump and Fan Control is bypassed when the ACS 400 is in local control (LOC is shown on the control panel display). In this case, process PID controller is not in use and the constant speed motors are not started. However, by selecting value 2 (REF2 (%)) for parameter 1101 KEYPAD REF SEL PFC reference can be given from the control panel in local control. ACS 400 User’s Manual 153 Mains Supply 3~ Input Power ACS 400 ~ ~ Process Act. Value PI Process Ref. Value +24 V supply DI5 (Interlock 2) ~~ DI4 (Interlock 1) RO2 RO1 Pump 1 On/Off Pump 1 Regulated speed Pump 2 On/Off M 3~ Pump 2 Constant speed M 3~ +24 V d.c. ~230 V a.c. Figure 74 Operation Diagram for the Pump and Fan Control (PFC) Macro. With the default settings, automatic pump alternation is not in use. Mains Supply 3~ Input Power ACS 400 ~ ~ Process Act. Value PI Process Ref. Value +24 V supply DI5 (Interlock 2) ~~ DI4 (Interlock 1) RO1 RO2 ~230VAC ~230VAC Pump 1 On/Off Pump 2 On/Off Alternation Switchgear M 3~ M 3~ Figure 75 In this example the automatic pump alternation is in use. 154 ACS 400 User’s Manual EXT REF2 SELECT 1106 EXT REF1 SELECT EXT1/EXT2 SEL CONST SPEED SEL KEYPAD REF SEL 1103 1102 1201 1101 NOT SEL Control Terminals EXT1 AI1 Analogue inputs KEYPAD EXT2 Remote AI1 Digital inputs DI1-DI5 Min freq Max freq Remote KEYPAD Local ACT1 AI1 AI2 Local PID + PFC Crit. sp. Const. speeds Acc/Dec AI1 ACT2 AI2 ACTUAL1 INPUT SEL 4007 ACTUAL VAL SEL ACTUAL 2 INPUT SEL (%) REF1 (Hz) 4006 4008 Keypad REF2 Ref Loc/Rem Start/Stop, Direction NOT SEL Start/Stop Local EXT1 DI1 KEYPAD NOT SEL DI1...5 EXT2 KEYPAD REQUEST Remote Direction FORWARD REVERSE DI4 EXT1 COMMANDS EXT2 COMMANDS 1001 1002 DIRECTION RUN ENABLE 1003 1601 Figure 76 The control signal connections of the Pump and Fan Control (PFC) macro. PID Controller The ACS 400 has an internal PID controller which is in use when PFC control macro is selected. Key features of the PID controller are: • • • • PID sleep function to stop the regulation when the output of PID controller falls below preset limit; recovery when the process actual value falls below preset limit. Programmable sleep and wake-up delays. Sleep mode can also be activated through a digital input. Two PID parameter sets, selectable through a digital input. PID controller parameters are in groups 40 and 41. ACS 400 User’s Manual 155 Relay Outputs The ACS 400 has two programmable relay outputs. Relay output 1 and 2 operation is configured by parameters 1401 RELAY OUTPUT 1 and 1402 RELAY OUTPUT 2. Value 29 (PFC) allocates the relay output for Pump and Fan Control block. This is the default setting for both relay outputs when PFC macro is selected. Adding More I/O to ACS 400 When Pump and Fan control is used, the ACS 400 is capable of using optional I/O extension modules (NDIO). These modules provide additional relay outputs and digital inputs. I/O extensioning is needed • • When the standard relay outputs of the ACS 400 (RO1 and RO2) are needed for other purposes and/or number of auxiliary motors is large, and When the standard digital inputs of the ACS 400 (DI1 - DI5) are needed for other purposes and/ or number of interlock signals (auxiliary motors) is large. I/O extension modules are connected to the ACS 400 via a DDCS fibre optic link. An optional DDCS communication module is needed to use DDCS. There can be either one or two NDIO modules on the DDCS link. Each NDIO module contains two digital inputs and two relay outputs. Setting up NDIO modules Refer to the Installation and Start-up Guide of the NDIO module for installation instructions. After installation, the communication between the ACS 400 and NDIO modules is set up as follows: • • • • Set the module node numbers using the DIP switches located inside the modules. Refer to NDIO module manual for details. Module node number must be 5 if only one NDIO module is used. Node numbers must be 5 and 6 if two NDIO modules are used. Connect power to NDIO modules. Activate DDCS protocol by setting parameter 5005 PROTOCOL SEL to 1 (DDCS). Tell the ACS 400 that extended I/O is used by setting parameter 5007 DDCS BUS MODE to 2 (EXTENDED IO). Communication between the ACS 400 and the NDIO module(s) is now operating. Alternation Switchgear PFC autochange operation (set by parameters 8118 AUTOCHNG INTERV and 8119 AUTOCHNG LEVEL) requires dedicated alternation switchgear which is controlled through the relay outputs of the ACS 400. Contact your nearest ABB supplier for more information. 156 ACS 400 User’s Manual Appendix C ACS 400 EMC Instructions Mandatory Installation Instruction According to the EMC Directive for type ACS 400 frequency converters Follow the instructions given in the ACS 400 User´s Manual and the instructions delivered with different accessories. CE Marking A CE mark is attached to ACS 400 frequency converters to verify that the unit follows the provisions of the European Low Voltage and EMC Directives (Directive 73/23/EEC, as amended by 93/68/ EEC and Directive 89/336/EEC, as amended by 93/68/EEC). The EMC Directive defines the requirements for immunity and emissions of electrical equipment used in European Economic Area. The EMC product standard EN 61800-3 covers the requirements stated for frequency converters. ACS 400 frequency converters comply with the requirements stated in EN 61800-3 for Second Environment and First Environment, restricted distribution. Product standard EN 61800-3 (Adjustable speed electrical power drive systems - Part 3: EMC product standard including specific test methods) defines First Environment as environment that includes domestic premises. It also includes establishments directly connected without intermediate transformers to a low voltage power supply network which supplies buildings used for domestic purposes. Second Environment includes establishments other than those directly connected to a low voltage power supply network which supplies buildings used for domestic purposes. With ACS 400, no RFI filter is needed in Second Environment. Note! This is a product of the restricted sales distribution class according to IEC 61800-3. In a domestic environment this product may cause radio interference in which case the user may be required to take adequate measures. C-Tick Marking A C-tick mark is attached to the ACS 400 frequency converters to verify that the unit follows the provisions of the Australian Statuary Rules No 294, 1996, Radiocommunication (Compliance Labelling - Incidental Emissions) Notice and the Radiocommunication Act, 1989, and the Radiocommunication Regulations, 1993, of New Zealand. The statutory rules defines the essential requirements for emissions of electrical equipment used in Australia and New Zealand. The standard IEC 61800-3 (1996) Adjustable speed electrical power drive systems - Part 3: EMC product standard including specific test methods, covers the detailed requirements for frequency converter. The frequency converter ACS 400 comply with the IEC 61800-3 limits for first environment, restricted distribution and second environment. The compliance for first environment is valid with the following provisions: • • • The frequency converter is equipped with RFI-filter. The motor and control cables are chosen as specified in this manual. The installation rules of this manual are followed. With ACS 400, no RFI filter is needed in Second Environment. ACS 400 User’s Manual 157 Cabling Instructions Keep individual unscreened wires between the cable clamps and the screw terminals as short as possible. Route control cables away from power cables. Mains Cable A four conductor cable (three phase with protective earth) is recommended for the mains cabling. Shielding is not necessary. Dimension the cables and fuses in accordance with the input current. Always pay attention to local legislation when sizing the cables and fuses. The mains input connectors are at the bottom of the converter unit. Mains cable routing must be done so that the distance from the sides of the converter is at least 20 cm to avoid excessive radiation to the mains cable. In the case of shielded cable, twist the cable screen wires together into a bundle not longer than five times its width and connect to the PE terminal of the converter. (Or PE terminal of input filter, if present.) Motor Cable The motor cable must be a symmetrical three conductor cable with a concentric PE conductor or a four conductor cable with a concentric shield, however, a symmetrical constructed PE conductor is always recommended. Minimum requirement for the motor cable screen is presented in Figure 77. Insulation jacket Copper wire screen Helix of copper tape Inner insulation Cable core Figure 77 Minimum requirement for motor cable screen (e.g. MCMK, NK Cables). 158 ACS 400 User’s Manual Recommended Allowed Symmetrical shielded cable: three phase conductors and a concentric or otherwise symmetrically constructed PE conductor, and a shield PE conductor and shield A separate PE conductor is required if the conductivity of the cable shield is < 50 % of the conductivity of the phase conductor. Shield Shield PE PE Not allowed for motor cables. Shield A four -conductor system: three phase conductors and a protective conductor. Allowed for motor cables with phase PE conductor cross section up to 10 mm2. Figure 78 Cable recommendations and restrictions. The general rule for cable screen effectiveness is: the better and tighter the screen of the cable, the lower the radiated emission level. Example of an effective construction is presented in Figure 79. Braided metallic screen Insulation jacket Inner insulator L2 L1 L3 Figure 79 Effective motor cable screen (e.g. Ölflex-Servo-FD 780 CP, Lappkabel or MCCMK, NK Cables). Clamp the cable shield into the gland plate at the converter end and twist the cable screen wires together into a bundle not longer than five times its width and connect it to the terminal marked (at the bottom right-hand corner of the converter), if you are using cable without a separate PE conductor. At the motor end the motor cable screen must be earthed 360 degrees with an EMC cable gland (e.g. ZEMREX SCG Screened cable glands) or the screen wires must be twisted together into a bundle not longer than five times its width and connected to the PE terminal of the motor. ACS 400 User’s Manual 159 Control Cables Control cables must be multi-core cables with a braided copper wire screen. The screen must be twisted together into a bundle not longer than five times its width and connected to terminal X1:1 (digital and analogue I/O) or X3.1 or X3.5 (RS485). Route the control cables as far away as possible from the mains and motor cables (at least 20 cm). Where control cables must cross power cables make sure they are at an angle as near 90 degrees as possible. Also the cable routing must be done so that the distance from the sides of the converter is at least 20 cm to avoid excessive radiation to the cable. A double shielded twisted pair cable is recommended for the analogue signals. Employ one individually shielded pair for each signal. Do not use common return for different analogue signals. A double shielded cable is the best alternative for low voltage digital signals but single shielded twisted multipair cable is also usable (see Figure 80). Figure 80 A double shielded twisted pair cable on the left and a single shielded twisted multipair cable on the right. The analogue and digital input signals should be run in separate, screened cables. Relay-controlled signals, providing their voltage does not exceed 48 V, can be run in the same cables as digital input signals. It is recommended that the relay-controlled signals be run as twisted pairs. Never mix 24 VDC and 115/230 VAC signals in the same cable. Note! When the overriding control equipment and the ACS 400 are installed inside the same cabinet, these recommendations might be overly cautious. If the customer plans to test the entire installation, there is an opportunity to save some costs by relaxing these recommendations, for example by using unshielded cable for the digital inputs. But the customer must verify this. Control Panel Cable If the control panel is connected to the converter with a cable, use only the panel extension cable provided with the option package PEC-98-0008. Follow the instructions delivered with the option package. Route the control panel cable as far away as possible from the mains and motor cables (at least 20 cm). Also the cable routing must be done so that the distance from the sides of the converter is at least 20 cm to avoid excessive radiation to the cable. 160 ACS 400 User’s Manual Additional Instructions to Comply with EN61800-3, First Environment, Restricted Distribution, and AS/NZS 2064, 1997, Class A Always use an optional RFI filter as specified in Table 36 and follow the instructions in the filter package for all cable screen connections. The motor cable lengths have to be limited as specified in Table 36 and the cable must have effective screen according to Figure 79. At the motor end, the cable screen must be earthed 360 degrees with an EMC cable gland (e.g. Zemrex SCG screened cable glands). Table 36 Maximum motor cable lengths with input filters ACS400-IF11-3... ACS400-IF41-3 and switching frequency 4 kHz or 8 kHz . Switching Frequency Converter Type ACS/ACH 401-x004-3-x ACS/ACH 401-x005-3-x ACS/ACH 401-x006-3-x ACS/ACH 401-x009-3-x ACS/ACH 401-x011-3-x Filter 4 kHz 8 kHz 100 m - ACS400-IF22-3 10 m 10 m ACS400-IF11-3 100 m - ACS400-IF22-3 10 m 10 m ACS400-IF11-3 100 m - ACS400-IF11-3 ACS400-IF22-3 10 m 10 m ACS400-IF21-3 100 m 100 m ACS400-IF22-3 10 m 10 m ACS400-IF21-3 100 m 100 m ACS400-IF22-3 10 m 10 m ACS/ACH 401-x016-3-x ACS400-IF31-3 100 m 100 m ACS/ACH 401-x020-3-x ACS400-IF31-3 100 m 100 m ACS/ACH 401-x025-3-x ACS400-IF41-3 100 m 100 m ACS/ACH 401-x030-3-x ACS400-IF41-3 100 m 100 m ACS/ACH 401-x041-3-x ACS400-IF41-3 100 m 100 m Conducted emission with input filters ACS400-IF11-3 and ACS400-IF21-3 complies with the limits for unrestricted distribution class in First Environment as specified in EN61800-3 (EN50081-1) provided that maximum motor cable length is 30 m and switching frequency 4 kHz. Line Current Harmonics The current harmonic levels under rated load conditions are available on request. Distribution Networks Isolated from Earth Input filters designed for ACS 400 cannot be used in an isolated, or high impedance earthed industrial distribution networks. ACS 400 User’s Manual 161 Additional Instructions to Comply with EN61800-3, Second Environment, Restricted Distribution. Always follow the instructions for all cable screen connections. The motor cable lengths have to be limited as specified in Table 37 and the minimum requirement for motor cable screen according to Figure 77. At the motor end, the cable screen must be earthed 360 degrees with an EMC cable gland (e.g. Zemrex SCG screened cable glands). Table 37 Maximum motor cable lengths with switching frequency 4 kHz or 8 kHz . Switching Frequency Converter Type 4 kHz 8 kHz ACS/ACH 401-x004-3-x 100 m - ACS/ACH 401-x005-3-x 100 m - ACS/ACH 401-x006-3-x 100 m - ACS/ACH 401-x009-3-x 100 m 100 m ACS/ACH 401-x011-3-x 100 m 100 m ACS/ACH 401-x016-3-x 100 m 100 m ACS/ACH 401-x020-3-x 100 m 100 m ACS/ACH 401-x025-3-x 100 m 100 m ACS/ACH 401-x030-3-x 100 m 100 m ACS/ACH 401-x041-3-x 100 m 100 m Line Current Harmonics The current harmonic levels under rated load conditions are available on request. Distribution Networks Isolated from Earth Refer to section I Floating Network. 162 ACS 400 User’s Manual ABB Oy AC Drives P.O. Box 184 00381 Helsinki FINLAND Telephone +358-10-2211 Telefax +358-10-222 2681 3AFY 64036947 R0125 REV C EN Effective: 5.12.2001 © 2001 ABB Oy Subject to change without prior notice.