1
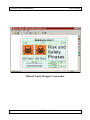
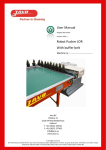
Hibsoft Label DesignerPro
User Manual
Hibsoft Label Designer
Version 1.0
Copyright Hibiscus PLC - 2003
Page : 1
Hibsoft Label DesignerPro
User Manual
Hibsoft Label Designer Screenshot
Page : 2
Hibsoft Label DesignerPro
User Manual
1.1 Table of Contents
1.1
1.2
Contents
Description
Page
Table of Contents
Terms and
Conditions
This page.
Terms and Conditions of
Licencing
3
5
Introduction to Label Designer.
Introducting the main toolbar.
Introducing the design palette.
7
8
9
Creating a new label template.
Opening an existing label
template.
Saving a label template
Printing a label template.
Switching design grid on/off.
Defining the page size of your
label stock.
Defining your label printable
area.
10
11
Creating database fields.
Drawing IOD symbols.
Creating R&S phrases fields.
Drawing warning diamonds.
Creating fixed text fields.
Creating variable test fields.
Importing logos and images.
Setting-up date and time fields.
17
21
23
26
29
31
33
36
Getting Started
2.1
2.2
2.3
Introduction
The Main Toolbar
The Design Palette
Basic Operations
3.1
3.2
New Label
Open Label
3.3
3.4
3.5
3.6
Save Label
Print Label
Show Grid
Page Setup
3.7
Print Layout
11
11
11
12
14
Label Objects
4.1
4.2
4.3
4.4
4.5
4.6
4.7
4.8
Database Fields
IOD Symbols
R&S Phrases
Warning Diamonds
Fixed Text Fields
Variable Text Fields
Bitmap Logos
Date/Time Fields
Page : 3
Hibsoft Label DesignerPro
4.9
4.10
Batch Number
Fields
Barcode Fields
User Manual
Setting-up batch number fields.
39
Drawing barcode fields.
42
Modifying and rearranging label
objects
Setting the appearance of text.
Drawing borders around objects.
Some other useful options
45
Some common questions
answered.
Just a space for you to add your
own notes.
53
Advanced Features
5.1
5.2
5.3
5.4
Moving, Sizing &
Deleting
The Font Tab
The Borders Tab
Other Features
47
49
51
Appendices
6.1
How do I….?
6.2
Notes
Page : 4
55
Hibsoft Label DesignerPro
User Manual
1.2 Terms and Conditions
1.2.1 Glossary
'Hibiscus PLC' means Hibiscus PLC, Leeds, England - the vendor of
the software.
'Software' means any computer software program which has been
originated and/or developed by Hibiscus PLC and supplied to its client
under licence.
‘License’ means the grant by Hibiscus PLC, in return for a fee, of the
right to operate a single copy and/or instance of the software.
‘Licence Holder’ means the original party to whom a licence has been
granted by Hibiscus PLC, and as recorded by Hibiscus PLC.
‘Documentation’ means this manual and any other documents supplied
by Hibiscus PLC as an aid to operating the software.
1.2.2 Copyright
The software and its accompanying documentation in their entirety are
copyright of Hibiscus PLC and are supplied under the terms and
conditions indicated herein. Sale of the software does not imply any
transfer of intellectual rights vested in the software and its
accompanying documentation which shall remain exclusively the
property of Hibiscus PLC.
1.2.3 Conditions as to Use
•
•
•
•
•
•
•
Use and/or operation of the software without a valid licence is strictly
prohibited.
The purchase of a single licence bestows the right to operate a single copy
and/or instance of the software on a single computer. A site licence may be
granted upon application at the discretion of Hibiscus PLC (site licence
MUST be applied for before installing multiple copies of the software).
The licence is valid to the original Licence Holder only and is not
transferable to any other party except at the discretion of Hibiscus PLC.
The possession of a licence does not bestow any automatic rights to
revisions and/or corrections to the software, or to any level of technical
support*, although these may be provided at the discretion of Hibiscus PLC.
*Except where a separate maintenance contract is purchased and then
within the terms of that contract.
Duplication of the software (except for backup) beyond the number of
licences purchased is strictly prohibited. Copies retained for backup may not
be used operationally except when replacing a licenced original which has
been lost or is otherwise unavailable for use.
Distribution of the program and/or accompanying documentation to any
other party not registered as the licence holder is strictly prohibited.
Hibiscus PLC provides no warranty nor guarantee that the software is error
free or that it will perform and/or accomplish the particular functions
Page : 5
Hibsoft Label DesignerPro
•
•
•
•
User Manual
required by the Licence Holder. It shall be the responsibility of the Licence
Holder to satisfy itself before purchase that the software is suitable to its
requirements.
Hibiscus PLC shall not be deemed nor held to be responsible for any loss
and/or damage arising from the use of the software, or resulting from any
inability to use or operate the software, howsoever caused. This notice does
not affect your statutory rights.
It is the duty of the licence holder to protect and preserve the rights of
Hibiscus PLC in relation to the software and/or accompanying
documentation.
Any breach of these conditions shall, at the discretion of Hibiscus PLC,
invalidate the licence and revoke all rights as to usage and operation of the
software (wherein the Licence Holder shall remove from its systems all
copies of the software).
Operation of the software implies acceptance of these terms.
Page : 6
Hibsoft Label DesignerPro
User Manual
1.3 Minimum Requirements
:
ÿ
;
<
4
8
650 Mhz processor or above.
Microsoft Windows 2000 or XP.
128Mb recommended.
20Mb of free hard disk space
A windows compatible printer
Mouse recommended
Page : 7
Hibsoft Label DesignerPro
User Manual
2.1 Introduction
The Hibsoft Label DesignerPro is a companion program to Hibsoft
LabelPro and allows you to design your own unlimited range of label
templates. You can design labels utilising a comprehensive range of label
objects including database fields, warning diamonds, IOD symbols, fixed
and variable text fields, logos and barcodes.
The core functionality of Hibsoft Label Designer is accessible from two
simple toolbars making it extremely easy to use and allowing you to
create new templates in a very short period of time.
Page : 8
Hibsoft Label DesignerPro
2.2
User Manual
The Main Toolbar
The Main Toolbar provides basic functions such as loading or saving a
label design, printing a label, selecting label size etc.
Page : 9
Hibsoft Label DesignerPro
User Manual
2.2 The Design Palette
The Design Palette contains a veriety of label objects that you can call
upon to construct your label templates.
The purpose and function of the
various options included in these
toolbars is described in detail on
the following pages.
Page : 10
Hibsoft Label DesignerPro
User Manual
3.1 New Label ( File / New )
Click this button to start creating a new label template. This clears the
design area and loads a default sized design grid. To create your new
label:
1.
Set-up the page size characteristics for your label stock (Page Setup
button).
2.
Set-up the label size characteristics for your label stock (Page Layout
button).
The design grid is adjusted to reflect the available working area for
the specified label size. The red outline represents the actual edge of
the label, there is no automatic border. This allows you to use the
entire label area. If you want a border around your finished label do
not place objects against the edge of the design area.
3.
Draw your label objects (Database Fields, IOD Symbols, RS Phrases
etc.) onto the label design grid and set their respective properties.
Do not worry initially about getting the size and positioning of your
label objects exactly right. These features are very easy to adjust
later and you will probably want to move things around once you
have created all your objects to get the best fit.
4.
Test print your rough initial design (Print Button).
This is important to test the positioning of your objects in relation to
pre-printed areas (if any) on your label stock. For example, your
label stock may be pre-printed with an orange block to provide a
regulation background for your IOD symbols. These are the first
objects you need to get correctly sized and positioned to best fit that
area on your label stock. Other label objects can then be rearranged around them.
5.
Test print and adjust your label objects until you are happy with the
appearance of the printed label.
Page : 11
Hibsoft Label DesignerPro
6.
User Manual
Save your label template (use meaningful filenames that will allow
you to easily recognise your labels templates when you want to begin
using them).
3.2 Open Label ( File / Open )
Click this button to open an existing label template for further
amendment. This opens a standard windows navigation box which you
can use to locate your desired template.
3.3 Save Label
( File / Save )
Click this button to save your new label or any changes you have made to
an existing label.
3.4 Print Label ( File / Print )
Click this button to test print your label design. This will open the
standard windows printer control box. Select your printer from the dropdown list and click the Properties button to open your printers control
panel. Depending on your printer and label design, you may need to set
various options such as label size and orientation.
3.5 Show Grid ( View / Show Grid )
Switch design grid on/off.
Page : 12
Hibsoft Label DesignerPro
User Manual
3.6 Page Setup ( File / Page Setup )
Use page setup to define your label stock, ie. the dimensions (height /
width) of the backing sheets on which your labels are mounted. When
using continuous stationery, set paper height to the height of one label.
Click on the Page Setup button on the toolbar (or select File / Page Setup
from the menu bar).
Paper Size:
A4 – Sets the page size to standard A4 (210mm x
297mm).
A5 – Sets the page size to standard A5 (148mm x
210mm).
Custom – Allows you to select the page size (width
and height) of non-standard stationery.
Width:
Enter the width in millimetres of your stationery (this
will have been correctly set for you if you selected
standard A4 or A5 as your paper size).
Height:
Enter the height in millimetres of your stationery (this
will have been correctly set for you if you selected
standard A4 or A5 as your paper size).
Orientation:
Select Portrait if the vertical length of your label is
greater than the horizontal (ie. the label prints along its
short axis).
Select Landscape if the horizontal length of your
Page : 13
Hibsoft Label DesignerPro
User Manual
label is greater than the vertical (ie. the label prints
along its long axis).
When you have entered the parameters correctly click on OK to accept
the settings and exit the dialog box.
NB: When using continuous Stationery – set Page Height equal to the
height of one label.
Page : 14
Hibsoft Label DesignerPro
User Manual
3.7 Page Layout ( File / Page Layout )
Page : 15
Hibsoft Label DesignerPro
User Manual
Use Page Layout to define the dimensions of the label on which you are
going to print and how they are mounted on the backing sheet(s).
Click on the Page Layout button in the tool bar (or select File / Page
Layout from the menu bar).
Label
Dimensions:
Label Width – the width (in mm.) of the actual
label on which you are going to print.
Label Height – the height (in mm.) of the actual
label on which you are going to print.
Margins:
Left Margin - If your labels do not extend to the
left edge of the backing you will need to set a left
margin equivalent to distance (in mm.) between the
left edge of the labels and the left edge of the
backing.
Top Margin - If your labels do not extend to the
Page : 16
Hibsoft Label DesignerPro
User Manual
top edge of the backing you will need to set a top
margin equivalent to distance (in mm.) between the
top edge of the labels and the top edge of the
backing.
Layout:
Labels Across - number of labels mounted side by
side across the width of the backing.
Labels Down - number of labels mounted one
below the other down the length of the backing
(single sheet stationery only – for continuous
stationery always set to 1).
Horizontal Gap - distance (if any) between labels
mounted across the width of your stationery (set to
0 if your labels are touching or mounted one wide).
Vertical Gap - distance (if any) between labels
mounted down the length of your stationery (set to 0
if labels are touching).
When you have entered the parameters correctly click on OK to accept
the settings and exit the dialog box.
Page : 17
Hibsoft Label DesignerPro
User Manual
4.1 Database Fields ( Fields / Add / Database Text )
Use database fields to import data from your hazard database into your
label design.
1.
Click the Database Fields button (the mouse pointer changes to
include the ‘DB Fields’ icon).
2.
Position the pointer where you wish the top/left corner of the data
field to appear, then hold down the left mouse button and drag the
mouse to the right and down to draw a box on the screen, release the
mouse button when you are happy with the size and shape of the box.
3.
You can adjust the size of the box you have drawn using the resizing
nodes.
4.
Double-click on the box you have just drawn to set its properties.
Page : 18
Hibsoft Label DesignerPro
User Manual
Field Properties (Database Fields)
The Data tab of the field properties box contains options which allow you
to control the content of the Database Field. The Font and Borders tabs
are common tabs which contain options for controlling the appearance of
an object and are dealt with later in this manual.
Data Item to
Display:
Lists the available database fields from which data
may be drawn, eg. select ‘UN Number’ if you wish
to import the UN Number into this field. Available
fields from which data can be imported into your
label design are as follows:
Substance Line 1
Substance description
Substance Line 2
Additional substance information
Page : 19
Hibsoft Label DesignerPro
User Manual
Substance Line 3
Additional substance information
UN Number
Substance UN number
EC Number
Substance EC number
EC Label
EC label indicator
Index Number
Index number
CAS Number
CAS number
Address
Depot address
Barcode
Text for barcode
IOD Text 1
Text for IOD symbol 1
IOD Text 2
Text for IOD symbol 2
IOD Text 3
Text for IOD symbol 3
IOD Text 4
Text for IOD symbol 4
Depot Code
Code for depot
Page : 20
Hibsoft Label DesignerPro
User Manual
Proper Shipping Name
Not included in standard field set. Refer to section
5.5 How Do I… for information on importing PSN.
At print time, the database information relating to
your selected substance will be imported into your
database fields.
Language:
As HibSoft LabelPro takes its Label infromation
directly from SDS Professional (your Safety
Datasheet Software) you will have the same choice
of languages available for printing a label as you
have for your datasheets*.
NB: You can create multiple database fields for the
same database item and assign different languages
to each to create multi-lingual labels.
Prefix:
Type in any fixed text that you want to appear in
front of the data drawn from the database.
Postfix:
Type in any fixed text that you want to appear
following the data drawn from the database.
NB: Addresses
Use the database address field for addresses that change at print time
(eg. a customer address). A fixed address (eg. your own company
address) should be set up as a fixed text field - this eliminates the need to
select the address to be used at print time
* Some requiring special fonts (ie. chinese) are not supported in version
1.0..
Page : 21
Hibsoft Label DesignerPro
User Manual
4.2 IOD Symbol Fields ( Fields / Add / IOD Symbol )
Use IOD symbol fields to import Identification of Danger symbols from
your hazard database into your label design.
1.
Click the IOD Symbol Fields button (the mouse pointer changes to
include the ‘IOD Fields’ icon).
2.
Position the pointer where you wish the top/left corner of the symbol
to appear, then hold down the left mouse button and drag the mouse
to the right and down to draw a box on the screen, release the mouse
button when you are happy with the size and shape of the box.
3.
You can adjust the size of the box you have drawn using the resizing
nodes.
4.
Double-click on the box you have just drawn to set its properties.
Page : 22
Hibsoft Label DesignerPro
User Manual
Field Properties (IOD Symbols)
The Symbol tab of the field properties box contains options which allow
you to control the content of the Database Field. The Borders tab is a
which contain options for controlling the appearance of an object and is
dealt with later in this manual.
Symbol:
Click on the IOD Symbol database entry that you
wish to appear in the current location.
NB:
1. IOD symbols should always be printed with their associated IOD
Text. To do this, create a Database Field under the symbol and set
its ‘Data Item’ property to ‘IOD Text n’ (where n is the symbol field
number).
2. IOD symbols are normally printed on an orange background and
will need to be carefully positioned to overlay a printed orange block
on your label stock.
Page : 23
Hibsoft Label DesignerPro
User Manual
4.3 Risk & Safety Phrases ( Fields / Add / R+S Text )
Use Risk and Safety phrase fields to import risk and safety information
from your hazard database into your label design.
1.
Click the Risk & Safety Fields button (the mouse pointer changes to
include the ‘R&S Fields’ icon).
2.
Position the pointer where you wish the top/left corner of the field to
appear, then hold down the left mouse button and drag the mouse to
the right and down to draw a box on the screen, release the mouse
button when you are happy with the size and shape of the box.
3.
You can adjust the size of the box you have drawn using the resizing
nodes.
4.
Double-click on the box you have just drawn to set its properties.
Page : 24
Hibsoft Label DesignerPro
User Manual
Field Properties (Risk & Safety phrases)
The R+S Info tab of the field properties box contains options which allow
you to control the content and appearance of the Risk and Safety
information to be included in your label. The Font and Borders tabs are
common tabs which contain options for controlling the appearance of an
object and are dealt with later in this manual.
If you have a multi-language version of Hibsoft Label, select the
language in which you want the R&S phrases to appear. Note that you
can create multiple R&S Data fields on the same label and assign
different languages to each.
Only display
phrases with
codes beginning
with:
Tick this box if you wish to filter R&S phrases so
that only those phrases beginning with a specified
code are included. Enter the code to select in the
extra box which will then be enabled to the right –
ie. to display only Risk phrases enter ‘R’.
Page : 25
Hibsoft Label DesignerPro
User Manual
Prefix Codes:
Tick this box if you wish to display each R&S
phrase to be displayed complete with its relevant
R&S code (otherwise only the phrase itself is
displayed).
Bullet Points:
Tick this box if you wish each R&S phrase to be
highlighted with a bullet mark (s).
No Line Breaks
Between
Phrases:
Tick this box if you wish the R&S phrases to be
displayed as one continuous paragraph rather than a
separate phrase on each line.
Page : 26
Hibsoft Label DesignerPro
User Manual
4.4 Warning Diamonds ( Fields / Add / Warning Diamond )
Use Warning Diamond fields to import warning diamonds from your
hazard database into your label design.
1.
Click the Warning Diamond Fields button (the mouse pointer
changes to include the ‘WD Fields’ icon).
2.
Position the pointer where you wish the top/left corner of the symbol
to appear, then hold down the left mouse button and drag the mouse
to the right and down to draw a box on the screen, release the mouse
button when you are happy with the size and shape of the box.
3.
You can adjust the size of the box you have drawn using the resizing
nodes.
4.
Double-click on the box you have just drawn to set its properties.
Page : 27
Hibsoft Label DesignerPro
User Manual
Field Properties (Warning Diamonds)
The Diamond tab of the field properties box contains options which allow
you to control the appearance of the warning diamond. The Borders tab
is a common tab which contains options for controlling the appearance of
an object and is dealt with later in this manual.
Diamond:
Select the diamond from the database (1, 2 or 3) to
display at this location.
Language:
The Language required for the diamond text.
Show Dashed
Border:
Tick this box if you wish the Warning Diamond to
be printed with an extra Dashed Outline (mandatory
for printing on a white background).
Show Class
Number:
Tick this box if you wish the Warning Diamond to
be printed overlayed with its class number.
Page : 28
Hibsoft Label DesignerPro
User Manual
Text Size:
Move the slider bar up/down to select the size of
any text included in the warning diamond.
Number Size:
Move the slider bar up/down to select the size of the
Warning Diamond class number (no effect if ‘Show
Class Number’ is not ticked.
NB: A warning diamond will only be printed on your label at print time
if it is required by your selected substance.
Page : 29
Hibsoft Label DesignerPro
User Manual
4.5 Fixed Text Fields ( Fields / Add / Fixed Text )
Use Fixed Text fields to add any unchanging text to your label design, eg.
captions and headings.
1.
Click the Fixed Text Fields button (the mouse pointer changes to
include the ‘FT Fields’ icon).
2.
Position the pointer where you wish the top/left corner of the field to
appear, then hold down the left mouse button and drag the mouse to
the right and down to draw a box on the screen, release the mouse
button when you are happy with the size and shape of the box.
3.
You can adjust the size of the box you have drawn using the resizing
nodes.
4.
Double-click on the box you have just drawn to set its properties.
Page : 30
Hibsoft Label DesignerPro
User Manual
Field Properties (Fixed Text Fields)
The Text tab of the field properties box contains the fixed text phrase
which you wish to appear in your label design. The Font and Borders
tabs are common tabs which contain options for controlling the
appearance of an object and are dealt with later in this manual.
Text:
Type in the text you wish to appear in the box.
Page : 31
Hibsoft Label DesignerPro
User Manual
4.6 Variable Text Fields ( Fields / Add / Variable Text )
Use Variable Text fields where you wish to include text in your label
design which is only determined at the start of a print run.
1.
Click the Variable Text Fields button (the mouse pointer changes to
include the ‘VT Fields’ icon).
2.
Position the pointer where you wish the top/left corner of the field to
appear, then hold down the left mouse button and drag the mouse to
the right and down to draw a box on the screen, release the mouse
button when you are happy with the size and shape of the box.
3.
You can adjust the size of the box you have drawn using the resizing
nodes.
4.
Double-click on the box you have just drawn to set its properties.
Page : 32
Hibsoft Label DesignerPro
User Manual
Field Properties (Variable Text Fields)
The Variable Field tab of the field properties box contains options which
allow you to control the usage the Variable Field. The Font and Borders
tabs are common tabs which contain options for controlling the
appearance of an object and are dealt with later in this manual.
Name:
The name by which you wish to refer to this text
item. This should be a meaningful description of the
information that will be entered into the box before
starting a print run and will be used as the prompt if
you select ‘Ask for text at print time’.
Ask for text at
print time:
Tick this box if you wish to be prompted to input
text for this field at the start of a print run.
Page : 33
Hibsoft Label DesignerPro
User Manual
4.7 Bitmap Logo Fields ( Fields / Add / Bitmap Logo )
Use Bitmap Logo fields to include your own company logos or other
images in your label design. Image files must be stored as Windows
Bitmap (.BMP) or Enhanced Meta File (.EMF) format.
1.
Click the Bitmap Logo Fields button (the mouse pointer changes to
include the ‘BL Fields’ icon).
2.
Position the pointer where you wish the top/left corner of the logo or
image to appear, then hold down the left mouse button and drag the
mouse to the right and down to draw a box on the screen, release the
mouse button when you are happy with the size and shape of the box.
3.
You can adjust the size of the box you have drawn using the resizing
nodes.
4.
Double-click on the box you have just drawn to set its properties.
Page : 34
Hibsoft Label DesignerPro
User Manual
Field Properties (Bitmap Fields)
The Logo tab of the field properties box contains options which allow you
to select and control the appearance of the bitmap image you wish to add
to your label design. The Borders tab is a common tab which contains
options for controlling the appearance of an object and is dealt with later
in this manual.
Bitmap File:
Type in the name and path (location) of the image
file you wish to include in your label design (or
click on Select File).
Select File:
Click this button to open a standard windows
navigation box to locate the image file on your
system.
Maintain
Aspect Ratio:
Tick this box to force the image to stay
proportionally correct whilst resizing.
Page : 35
Hibsoft Label DesignerPro
User Manual
When you close the properties box your chosen image should now appear
in the logo field.
Page : 36
Hibsoft Label DesignerPro
User Manual
4.8 Date/Time Fields ( Fields / Add / Date/Time )
Use Date/Time fields where you wish to include date and/or time stamps
in your label design. The date/time will be set automatically at the start of
a print run (provided your computers clock is set correctly).
1.
Click the Date/time Fields button (the mouse pointer changes to
include the ‘DT Fields’ icon).
2.
Position the pointer where you wish the top/left corner of the field to
appear, then hold down the left mouse button and drag the mouse to
the right and down to draw a box on the screen, release the mouse
button when you are happy with the size and shape of the box.
3. You can adjust the size of the box you have drawn using the resizing
nodes.
4.
Double-click on the box you have just drawn to set its properties.
Page : 37
Hibsoft Label DesignerPro
User Manual
Field Properties (Date/Time Fields)
The Date/Time tab of the field properties box contains options which
allow you to configure the usage and appearance of Date/Time fields.
The Font and Borders tabs are common tabs which contain options for
controlling the appearance of an object and are dealt with later in this
manual.
Date/Time:
You can add a date and/or time in the display format
of your choice by combining format codes. When
the label is printed, the data that each code
represents will be substituted from the system clock.
eg. %A %d %B %Y would appear on a label as
Monday 17 February 2003’.
You can also add a short text string to be printed
with the date, eg. Shipped on %A %d %B %Y.
Offset:
Offset allows you to print labels with a date
calculated as an interval from the current date.
Page : 38
Hibsoft Label DesignerPro
User Manual
This could be used for example to print labels with a
product expiry date based on an interval from the
date of despatch. Offsets can be adjusted at print
time.
Day – Number of days to offset from current.
Month – Number of whole months to offset from
current.
Year – Number of whole years to offset from
current.
Format Codes:
This box lists the format codes you can choose from
to construct your date/time stamp. Enter your
chosen codes in the Date/Time field and the
corresponding data will be substituted in the label
design.
Page : 39
Hibsoft Label DesignerPro
User Manual
4.9 Batch Number Fields ( Fields / Add / Batch Number )
Use batch number fields when you wish to print labels with an
incremental reference number, eg. first label numbered 1, second label
numbered 2 etc.
1.
Select Fields / Add / Batch Number from the menu bar (the mouse
pointer changes to include the BN Fields icon).
2.
Position the pointer where you wish the top/left corner of the field to
appear, then hold down the left mouse button and drag the mouse to
the right and down to draw a box on the screen, release the mouse
button when you are happy with the size and shape of the box.
3.
You can adjust the size of the box you have drawn using the resizing
nodes.
4.
Double-click on the box you have just drawn to set its properties.
Page : 40
Hibsoft Label DesignerPro
User Manual
Field Properties (Batch Number Fields)
The Batch tab of the field properties box contains options which allow
you to control the usage of Batch Numbers. The Font and Borders tabs
are common tabs which contain options for controlling the appearance of
an object and are dealt with later in this manual.
Name:
A descriptive field name.
Start at:
The starting number that will be printed on the first
label (ie. start at 1000).
Increment by:
The numeric increment between labels (eg: 1 =
0,1,2,3 | 2 = 0,2,4,6 etc).
Until:
The highest number to increment to. When
exceeded, the number is reset to the starting value.
Ask at Print
Time:
Prompt the user to input this information when
sending a print batch.
Page : 41
Hibsoft Label DesignerPro
User Manual
Prefix:
Any text required to appear before the batch number.
Postfix:
Any text required to appear following the batch
number.
Page : 42
Hibsoft Label DesignerPro
User Manual
4.10 Barcode Fields ( Fields / Add / Barcodes )
Use Barcode fields where you wish to include a barcode in your label
design. The Barcode may be based or fixed data, variable data, or the
contents of a database field.
1.
Select Fields / Add / Barcodes from the menu bar (the mouse
pointer changes to include the ‘BC Fields’ icon).
2.
Position the pointer where you wish the top/left corner of the field to
appear, then hold down the left mouse button and drag the mouse to
the right and down to draw a box on the screen, release the mouse
button when you are happy with the size and shape of the box.
3.
You can adjust the size of the box you have drawn using the resizing
nodes.
4.
Double-click on the box you have just drawn to set its properties.
Page : 43
Hibsoft Label DesignerPro
User Manual
Field Properties (Barcode Fields)
The Barcode tab of the field properties box contains options which allow
you to control the style and appearance of Baarcodes in your label
design. The Borders tab is a common tab which contains options for
controlling the appearance of an object and is dealt with later in this
manual.
Barcode Style:
The barcoding standard that you wish to print
barcodes in.
If you are printing barcodes to be read by another
organisation you will need to check with them which
standard they require.
Rotate 90 deg.:
Rotate the barcode 90 degrees, ie. print vertically.
Data Source:
The source of the data to be barcoded.
Substance DB - Use data from the barcode field
in the substance database.
Page : 44
Hibsoft Label DesignerPro
User Manual
Fixed - Use a fixed text string entered below.
Variable – Use a variable text string entered at
print time.
Data:
A fixed data string to be represented as a barcode
(ignored if source not set to Fixed).
Narrow Bar
Width:
Wide Bar
Width:
Interchar Gap:
If you have problems reading the barcodes you
have printed you can use these options to enhance
the clarity of the barcodes.
Page : 45
Hibsoft Label DesignerPro
User Manual
5.1 Moving, Resizing and Deleting Objects
5.1.1 Selecting Objects
Click on any label object to select it. When selected, a label
object gains an extra dashed outline and a set of resizing nodes
(small black squares in each corner and the middle of each face).
5.1.2 De-Selecting Objects
To de-select an object, click on the next object or anywhere
outside of the design grid.
5.1.3 Moving Objects
When you move the cursor over a selected object the cursor
changes to a four pointed arrow. This is the Movement Cursor.
To move the object simply hold down the left mouse button and
drag the mouse left/right/up/down to move the object. Release
the mouse button when you have moved the object to its
required location.
5.1.4 Resizing Objects
When you move the cursor over one of the resizing nodes in an
objects outline the cursor changes to a two headed arrow. This
is the Resize Cursor.
• To resize an object horizontally, move the cursor over the
middle resize node at either side. Be sure the cursor has
changed to the resize cursor and press down the left mouse
button whilst dragging ther mouse left/right to move the
Page : 46
Hibsoft Label DesignerPro
•
•
User Manual
objects side-wall in/out. Release left mouse button when
you are happy with the new site.
To resize an object vertically, repeat as above using the
node at top center or bottom centre.
To resize an object in both dimensions simultaneously,
repeat as above selecting any corner node.
5.1.5 Deleting Objects
Make sure the object you wish to delete is selected then hit the
delete key on the keyoard.
Page : 47
Hibsoft Label DesignerPro
User Manual
5.2 The Font Tab
The font tab provides options for controlling the appearance of text on
your label designs. It applies to all text objects (ie. Database Fields,
Fixed Text Fields and Variable Text Fields) and is contained in the field
properties box for those object types.
To access the Font Tab, double-click on a label text obect to open the
Field Properties box, then click on Font.
Rotation:
0 Degrees - Normal Upright text.
90 Degrees - Vertical Text (right facing)
180 Degrees - Inverted Text
270 Degrees - Vertical Text (left facing)
Alignment:
Click the button which represents how you wish to
align the text within the box, eg. Top-Left, MiddleLeft, Top-Centered etc.
Page : 48
Hibsoft Label DesignerPro
User Manual
Size to Fit:
Tick this box to automatically adjust the size of the
text to best fit within the box.
Invert Colour:
Tick this box to switch to white text on a black
background.
Allow Line
Breaks:
Tick this box to permit the text to be broken into
multiple lines (if appropriate) to best fit within the
box.
Setup Font:
Click this button to open the Windows Font selector
- allows you to select Font (shape of characters),
Style (Bold, Italics etc), and Size.
NB: Colour is irrelevant in this application.
Page : 49
Hibsoft Label DesignerPro
User Manual
5.3 Borders Tab
The borders tab allows you to define and configure borders around label
objects and applies to all object types.
To access the Borders Tab, double-click on a label obect to open the
Field Properties box, then click on Borders.
Active Borders:
Top - Click to add a top border to your text box.
Left - Click to add a left border to your text box.
Right - Click to add a right border to your text box.
Bottom - Click to add a bottom border to your text
box.
NB: To remove a border click the appropriate
button again.
Border Width:
Select the width of the required border.
Page : 50
Hibsoft Label DesignerPro
Curved
Borders:
User Manual
Use these settings when you require a border with
rounded corners.
Horizontal - horizontal distance from corner to
begin curve.
Vertical - vetical distance from corner to begin
curve.
Page : 51
Hibsoft Label DesignerPro
User Manual
5.4 Other Useful Features
These features are all accessible from the menu bar.
File / Save As
Save a copy of the current template under a
different name
Fields / Move
When you draw objects they are stacked in the
order in which you create them. This allows
you to create overlapping objects but can lead to
difficulties accessing an object which has been
covered over by others. The move option allows
you to move an object up or down the stacking
order.
/ Up - Move the selected object up one level in
the stack.
/ Down - Move the selected object down one
level in the stack.
/ To Top - Move the selected object to the top of
the stack.
/ To Bottom - Move the selected object to the
bottom of the stack.
Fields / Delete
Delete the selected object
View / Show Grid
Switch the design grid on/off.
View / Set Grid
Set spacing options on the design grid.
View / Zoom
50% - Zoom out to 50% of normal view size.
100% - Zoom the design grid view to normal
view size.
150% - Zoom the design grid view to 150% of
normal view size.
200% - Zoom the design grid view to 200% of
normal view size.
View / Toolbar
Show/Hide the toolbar.
Page : 52
Hibsoft Label DesignerPro
User Manual
View / Palette
Show/Hide the design palette.
View / Status Bar
Show/Hide the status bar (bottom of screen).
Page : 53
Hibsoft Label DesignerPro
User Manual
5.5 How do I…
.. add Proper Shipping Name to my label
Proper Shipping Name is not included in the standard database fields
brought forward from SDS Professional, however you can add it to
your label designs (assuming you have set it up in SDS Professional)
as follows:
Create a VARIABLE field on your label. Double click on the new
variable field and against ‘Name:’ enter:
$114014:44
$ indicates that this is an additional SDS data item, 114014 is the
internal SDS field reference, and :44 indicates English language.
You can substitute other languages by replacing the last two digits
with the code for the language required (usually the relevant county’s
international dialling code.
Now print a label from the template in HibSoft LabelPro. The
variable field should be filled out with the Proper Shipping Name for
your selected product.
.. add SDS Professional custom fields to my label
You will need to find out the internal SDS field references for the
data items in question, then proceed as above (substituting the field
reference for PSN with that for your required data item).
.. separate R&S phrases so that I can display Risk phrases and Safety
phrases seperately?
Draw two R&S fields. Select the first R&S field and double-click to
open the properties box. Tick the box titled ‘Only display phrases
with codes beginning with’. In the extra box that is then enabled to
the right enter ‘R’ to display only Risk phrases or ‘S’ to display only
Safety phrases. Repeat for the second R&S field (selecting the other
phrase type).
.. draw a box around a group of fields?
Page : 54
Hibsoft Label DesignerPro
User Manual
Draw a Fixed Text field over the top of your group of fields.
Double-click on the Fixed Text field to access its properties then
delete the default text and switch on all borders. You now have a
box drawn around your group of fields. However you will find that
the original fields are now inaccessible for amendment because they
are covered over by the empty text box. Overcome this by sending
the new field to the bottom of the stack – from the menu bar select
Fields / Move / To Bottom.
.. make a copy of a label design to easily create a new variant?
Open the label template that you wish to use as the basis of your new
variant. From the menu bar select File / Save As. Enter a new name
for the copy template and click save. The title bar of label designer
should now show the name you have just assigned to the copied
template (indicating you are now working on the copy). Make your
amendments and resave (Save buton).
.. adjust the level of magnification?
When working with large labels it is advantageous to be able to
‘Zoom Out’ (decrease magnification) to enable the whole label to be
viewed at once to get a better appreciation of the overall design.
Alternatively, when working with small objects it is advantageous to
be able to ‘Zoom In’ (increase magnification) to make those objects
easier to work with. For these reasons, Label Designer has four zoom
levels (50%, 100%, 150%, 200%), all accessible from the menu bar (
View /Zoom ).
Page : 55
Hibsoft Label DesignerPro
User Manual
Notes
Page : 56